All Activity
- Past hour
-
Thanks for the reply - Good to hear!
-
Never heard of the brand. Never seen this brand in an Oliver, though we don’t get much input from owners with brand new hulls. It’s odd that during delivery OTT made no mention of your electrical hardware. Please share pics!
- Today
-
I have 2 RichSolar mppt controllers in my barn which is off grid. They have been charging my lithium batteries for 6 years now and have operated flawlessly.
-
No, I am referring to Oliver TTs, and specifically the one we picked up on the 8th of September (hull 1735). I do not think Oliver has used RichSolar in the past, but all of the controllers are RichSolar in our build. I am wondering about the relative quality, why the switch from the past, and why RichSolar is apparently not be installed in all recent builds.
-
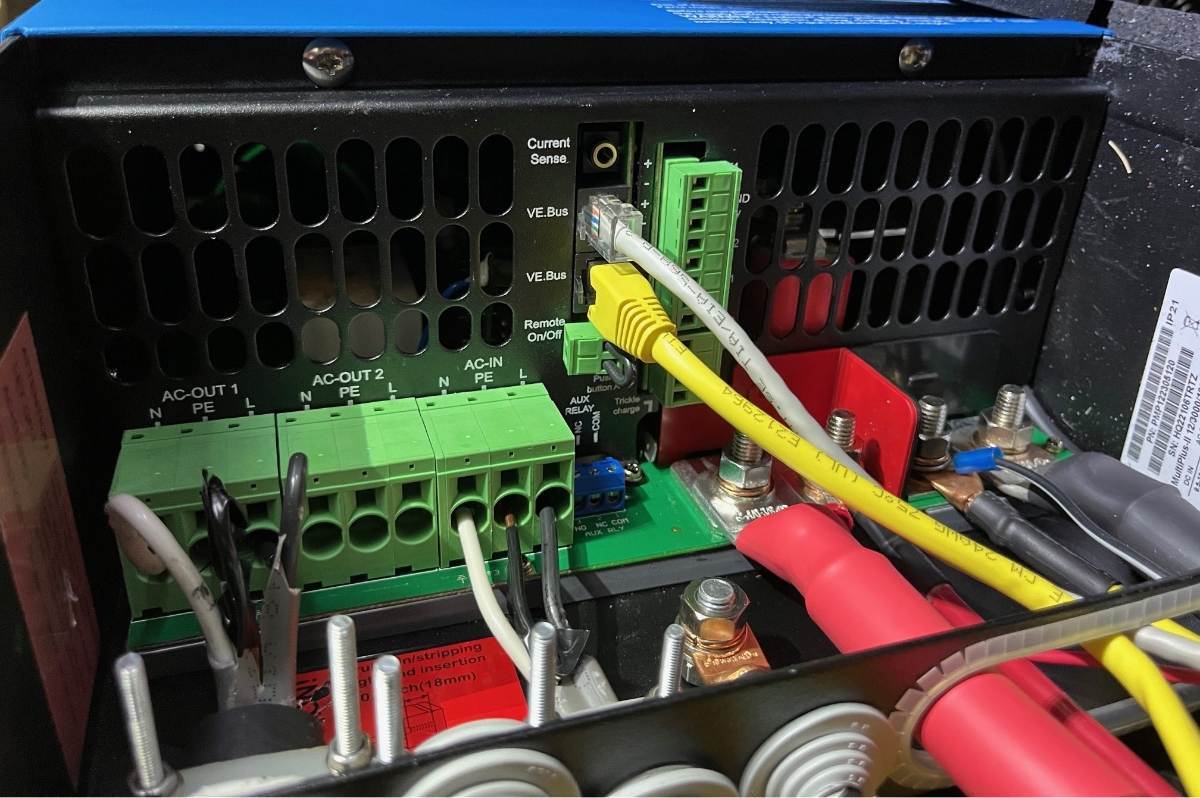
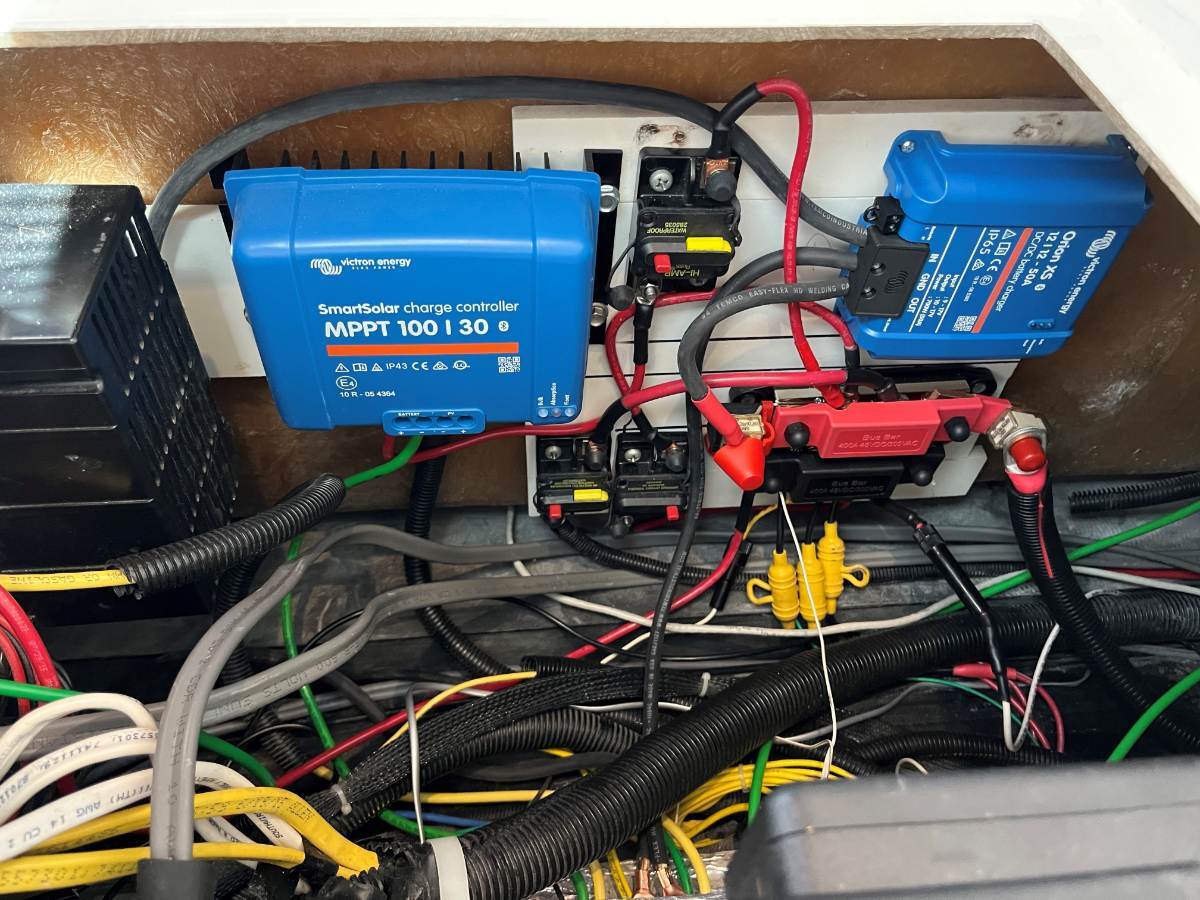
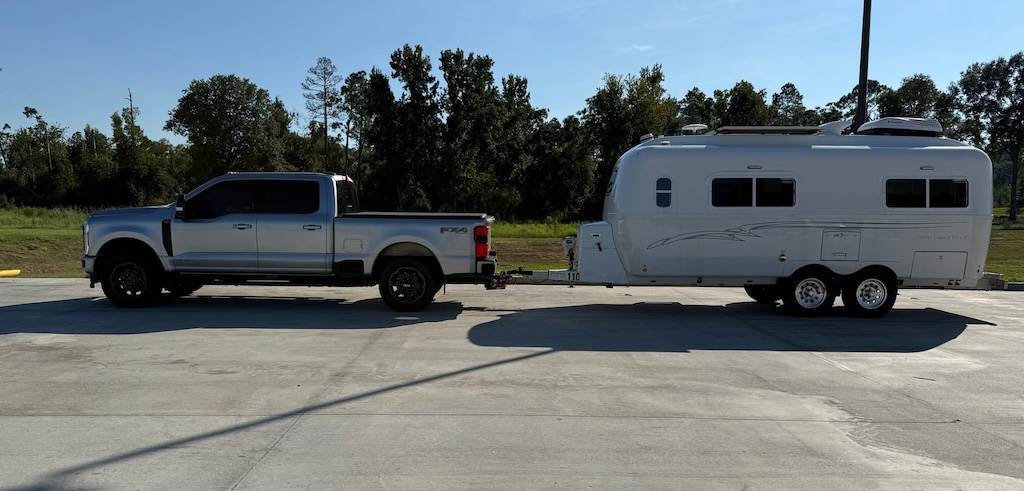
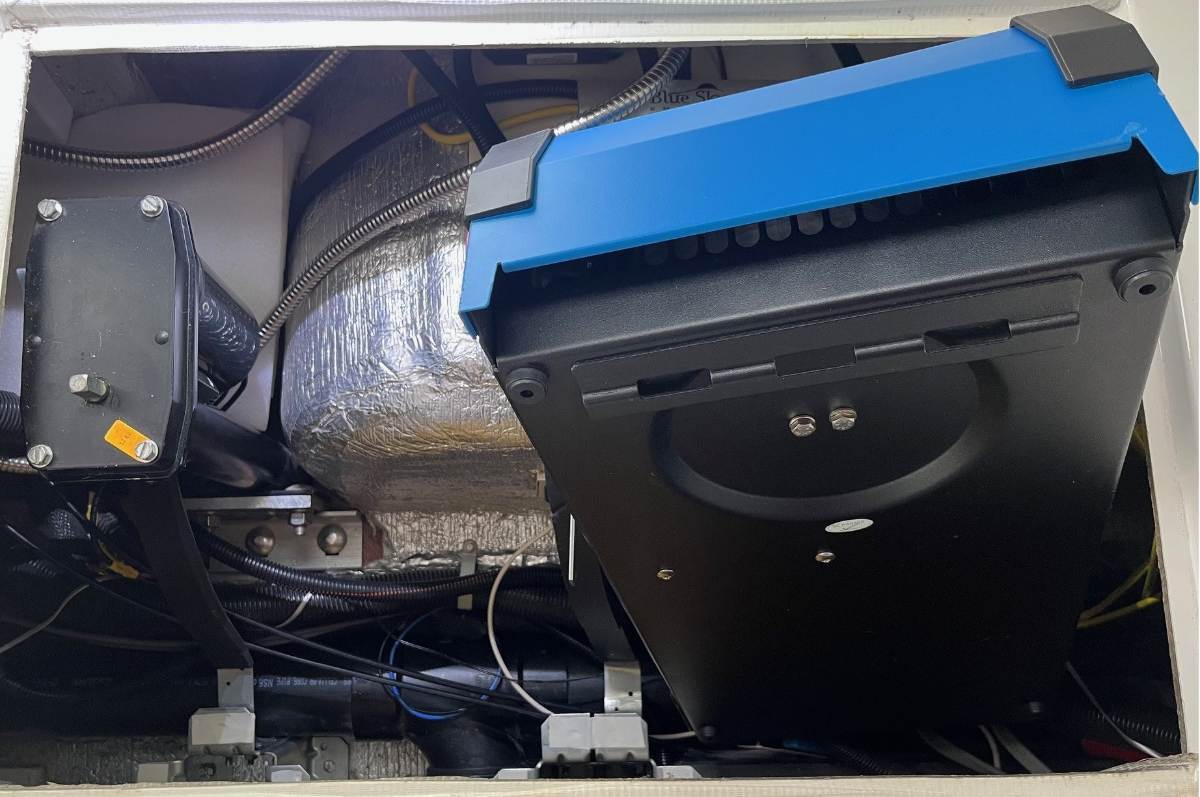
 Glue! I knew this would happen! In my 48 years of auto repair, I only used glue once to replace the cloth on a convertible. The "rag-top" must be glued to the frame. OTT had our 2KW inverter screwed into a glued-on board. They glued a board on for the water pump and valves. My inverter, new motorized water valves and everything else I've installed is bolted into place using metal brackets. I'm not fond of Wago connectors either, less is better. Our MP2 is not quite "removable." It just has enough slack in the wires to slide it about 10" back and forth and pull it halfway out as pictured above, but it's certainly hard-wired. Removeable would be difficult as I used the MP2 dual DC buses for many connections, then AC connections in and out, plus 2 Ethernet connections (pic1). I wired most of the MP2 while it was sitting on the streetside bed platform, then fed the wires through to the EMS and AC panel, the DC ground bus and new DC +bus all under the rear dinette seat where the new charge controllers are also installed (pic2). Our Bigfoot was their Class-C model that they no longer produce. I did as much work on the Bigfoot, as I have on our Oliver and tow vehicle combined (yeah engine stuff, like change fluids, hoses and belts, suspension and steering rebuild, besides RV stuff and major electrical). I installed everything on the roof (pic3, except the skylight). I also don't like mounting hardware into fiberglass with metal or wood screws. Everything on this rooftop was mounted with 3M 4950 VHB tape, no holes drilled except for four 1/4" holes hidden under the left side panel for the solar +/- and dish cables adding just a dab of Dicor on each 1/4" hole. The "Professional Installer" would have added some big junction box, drilled some 30 screw holes and emptied the whole tube of Dicor all over everything! 🤣 Times sure have changed. Six years ago I installed a new Dish. Last year I removed the Dish from our Oliver! Six years ago, I purchased 3 new AGM batteries, now we have 3 new LiFePO4 batteries. You can also see I have experience installing Furrion A/C units twice, but they didn't have the amazing Chill Cube back then! I love that the Oliver doesn't need oil changes and other work that RVs need and trailers do not. Trailer maintenance is easy-peasy! 😎
-
Our LE2 came equipped with a xantrex inverter, and Victron solar charge controller. No DC-DC. Maybe I am not understanding the question , maybe you are referring to SOB trailers and not prior Oliver model years. I haven’t heard of Rich components, but I also haven’t been in the market for a trailer for the last several years.
-
I too made the migration from a 1/2 ton truck to 3/4 ton for the reasons of more power and payload. What's the saying, "Buy the right tool once, buy the wrong tool twice". The Oliver is very obedient behind anything (within reason) you tow with. You just might be finding that you want more. However, I may be the contrarian when it comes to hating on the Anderson hitch. It made hooking up easier. I would place the ball about two inches behind the bulldog coupler, attach the whale tale (with chains attached) then lower the coupler onto the ball. Pull forward and the chains would pull the ball and coupler into alignment and the ball would drop in with a reassuring clunk. These days without the Anderson, I seem to spend much more time maneuvering the ball under the coupler to get it to drop in. And I have a camera looking right down on it! 🫤
-
I too just upgraded from a 2020 RAM 1500 Limited with RAM airbags to a 2024 Ford F-250 FX4 Lariat with stock springs. I'm not in love with the comfort level for the F-250, that's for sure, compared to having RAM Air, but I needed the payload. We really can't have both TOTAL comfort and payload. For those who have never driven a RAM 1500 Limited with RAM Airbags, it really is comfort. I also no longer run with the Andersen Weight Distribution Hitch (WDH) and I don't miss it at all. I switched over to the Shocker Hitch with the riser ball mount option to ensure trailer is completely level while towing. It does make a huge difference on both truck and trailer when hitting bumps, having the Shocker hitch. I also like doing really tight U-turns when needed, can't quite do that safely with the Andersen WDT nor with a storage box on the front of the trailer. I'll never have one of those either. I will also be adding a cap to the truck soon adding even more weight to my truck since I also have a DECKED drawer system full of tools and goodies. With the cap I will be carrying more common parts I seem to need on the road to help folks.
-
Just curious, does anyone know if any trailers other than our 2027 Elite II Platinum, Hull# 1735 was built with all Rich Solar controllers (Inverter/Charger, Solar Charger, and Dc-Dc Charger). It seems Xantrex Inverters were installed in the past and may also be what is installed now in most builds. I am not sure about the other components.
- Yesterday
-
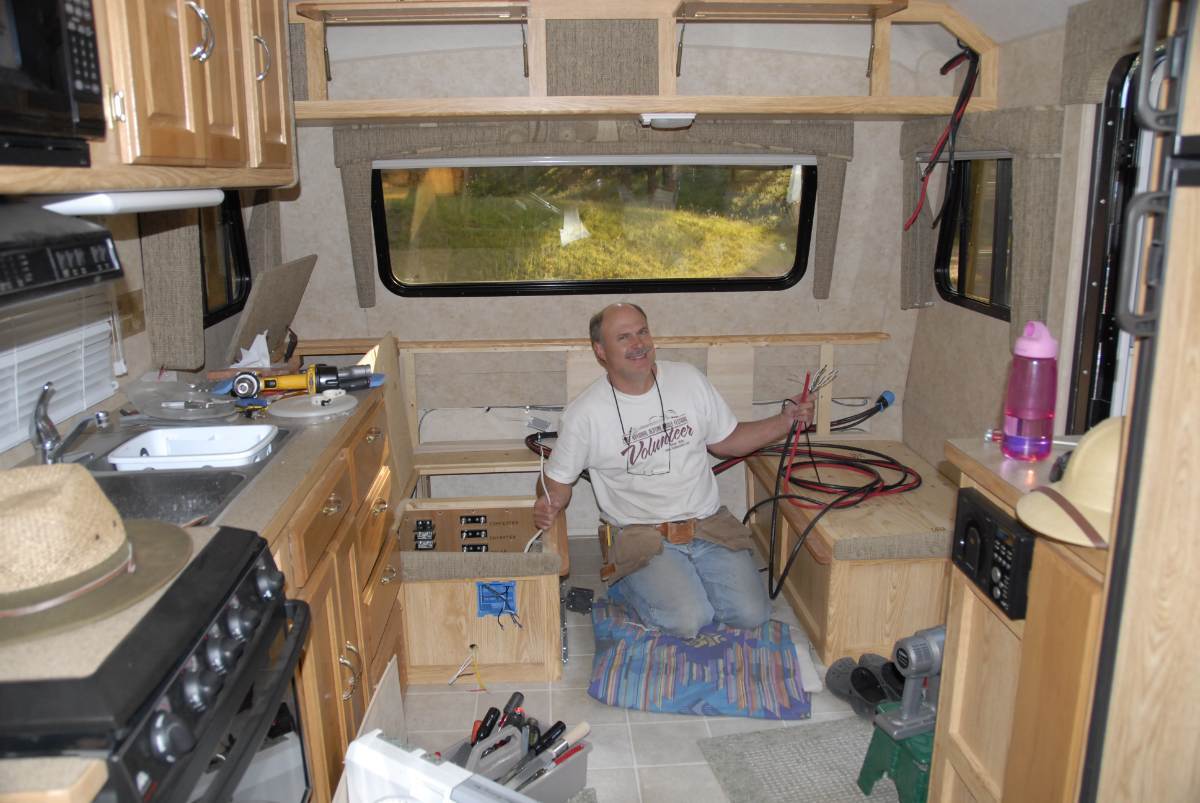
 Thanks for sharing your Bigfoot camper information. We owned a 2006 Bigfoot 21RB for 18 years and sold it a few months ago. I installed solar panels, an inverter, and a battery upgrade back in 2008 after buying it used—photo of me working on that install is below. We purchased this Oliver used in June of this year, so RV solar isn’t new territory for me. Right now, the biggest challenge is simply the physical layout and mounting of all the components. Fortunately, I’ve been a woodworking hobbyist since I was a kid, and HDPE Boat Board machines just like wood, so all my shop tools are perfect for this project. After learning from nearly every mounting‑related post on this forum, I will definitely be installing the inverter on a pedestal. Below is a photo of the original Xantrex mounting board, which looks similar to what others have posted. Oliver’s glue works when the board is pressed firmly into the fiberglass, but like many have experienced, mine wasn’t—and it had broken loose by the time I bought the trailer. Initially, I wasn’t planning to upgrade my Xantrex 3000‑watt inverter, but since it needed a complete remount, it made sense to upgrade to the MP2 now. I’ll make the inverter removable (very good suggestion) so the gray‑tank waste valve can still be replaced if needed. I also purchased Wago pluggable connectors for the two AC lines, which will make disconnecting the inverter much easier. I’ll be installing components under the dinette seat as well. Oliver glued a panel there to hold the surge‑protection hardware. That board is solid and can’t realistically be removed, so I had to come up with a clever way to integrate it into a larger mounting panel. Much more to come in a new thread once the project is complete.
-

Shower pan drain line coupling disconnected p-trap
topgun2 replied to Gorby's topic in Welcome to the Oliver Forums
Gorby - Are you asking a question? or making a statement? or something else? Bill -
 How to reconnect with limited access
 -
Again Dean, you're welcome and I truly appreciate your kind words! 😂 I dove in without having much experience from others to learn from. A couple of years ago there were only a couple of prior Victron installations, now there are many. I had help in a prior installation from a capable and practical EE on the Bigfoot Forum where I had worked an entire solar/inverter/battery installation from scratch. So, our Oliver MP2 was my second attempt. Seven years ago, I did not know what an inverter was, nor a shunt or battery monitor! We learn as we build and you'll learn a lot in the doing. I went with installing the fan first only because fan and parts were <$100 and it's easy work before installing the MP2, not so afterwards. I thought it to be a useful addition, but we haven't really needed it. There's about 6 things I've done to our Oliver that we no longer use! 🤣 I did have to replace the Grey Tank Waste Valve afterwards, not fun, and to do so I had to remove the MP2. I had planned enough slack in the wiring to pull the MP2 up, half out of the basement and prop it up to work on the waste valve (see pic, disconnect battery ground before moving the MP2). The platform also had to come out. But it all went back in quickly. Another thing is how you mount the MP2. Many have glued a plastic mounting board to the hull. I built a structural platform with its two-footed base on the hull floor just above the aluminum frame. The MP2 is heavy, the new 4K model weighs 58 lbs!
-
We've been camping at Stone Mountain State Park NC. The weather was fantastic allowing great views on the Blue Ridge Parkway and we got plenty of hiking in at Doughton Park on the BRP. There was also a Carolina Casita Rally happening here too, we met many nice fellow fiberglass RVers. Woolly Worm Weather Outlook: https://www.thoughtco.com/woolly-bears-and-winter-outlook-3444522
-
Yep, no fun, it's quite a push. Just installed the 3rd tube in my 1st-ever power grease gun! Though once ya get er loaded, it’s a dream! 🤣 And thank you, Dan. You reminded me to do the grease/torque job, after a bit of travel and conveniently when our Oliver was sitting in the driveway hitched. It's my "first annual maintenance" since our suspension upgrade. Took me an hour each side. I lift the tires using the one leveler jack and remove the 2 wheels first, always. She's in my driveway, I have the air tools, so zip-zip off. If you don't have the HD compressor and pneumatic impact get the HD Dewalt 1/2" impact (compare torque ratings before purchase). Don't worry about installing wet bolts outside-in like some do, or using 45-degree Zerks as I had. The standard installation is just fine when you take the wheels off first. Inspect the tires too while removing gravel from the treads. Test brake amperage. Don't I have a thread on this? (linked below) I don't use dust caps on the Zerks anymore. They just collect dirt. I steel brush all the old grease & dirt off first. Then wipe with paper towels and after greasing use a screwdriver and my fingers to get ALL the grease that oozed out of every opening. It is a messy job. Grease first, torque second and YES with wheels off a lot of weight is off the suspension and it's lightly hanging. This time all wet bolts took grease without fiddlin' with them! Last time I had to loosen 2 wet bolts to get them to accept grease. I only needed a second wrench on one wet bolt to keep it from spinning while torquing; the others held on their own meaning they held in place since last maintenance. Only two U-bolt nuts, 2 out of 16, needed tightening at 95 ft-lbs and the two only moved an 1/8th turn each. The others were set, slightly rusted into place. All the parts including the Alcan shackles are like new, with no observable wear. I’d say that after one full year with an estimated 5,600 miles towing, our new Alcan-D52 axle suspension has broken in well. 😎
-
Shower drain pan backup while towing
topgun2 replied to DBL-R's topic in Mechanical & Technical Tips
Bosker - Wow - that surely is tight in there. No way your Dad could have gotten that thing in there. Thank goodness he had Larry around to help him.😇 -
Thank you Peter, I took all of the drawers out and removed the sink faucet and sure enough the clog was due to calcium deposits. I cleaned it all up and everything is working great again. Little by little, we are resolving all the little bugs that come with a new camper. I am hopeful that if I fully drain the gray tank, close the valve and seal the shower pop-up, we may mitigate future shower backups, fingers crossed. Ron
-
JD, Thanks for the quick reply and for sharing your additional thoughts. You’re a tremendous resource for this forum. The details you provided helped confirm the direction I’m taking with my Victron electrical upgrade, and the information about the supplemental fans was especially valuable. I had planned to install a single 140×140×38 fan, since it delivers a little more than twice the airflow of two 120×120×25 fans, and control it through the Cerbo GX. However, based on what you shared, I’m going to take a wait‑and‑test approach and add it later only if needed. Maybe others will chime in with their experience managing temperatures after installing everything in that tight space. Thanks, Dean
-

Shower drain pan backup while towing
bugeyedriver replied to DBL-R's topic in Mechanical & Technical Tips
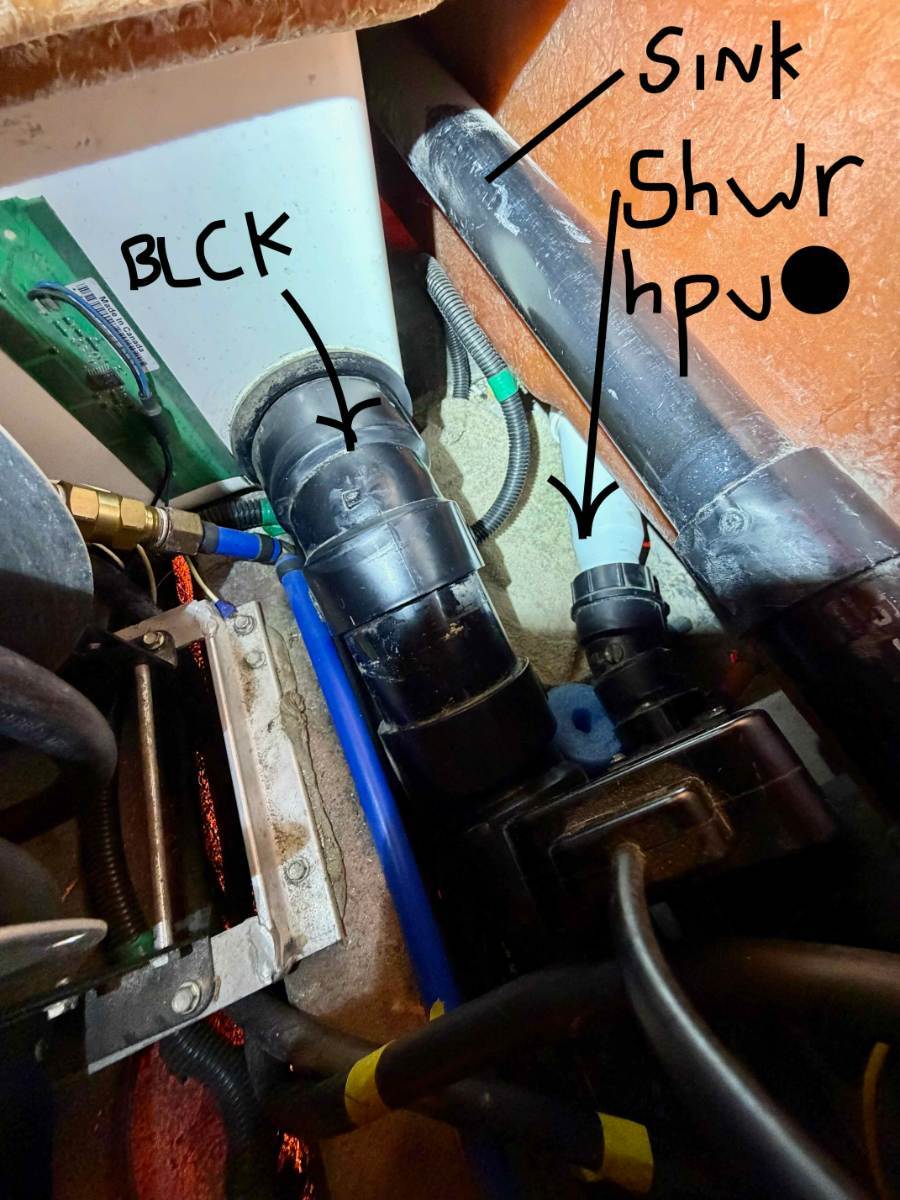
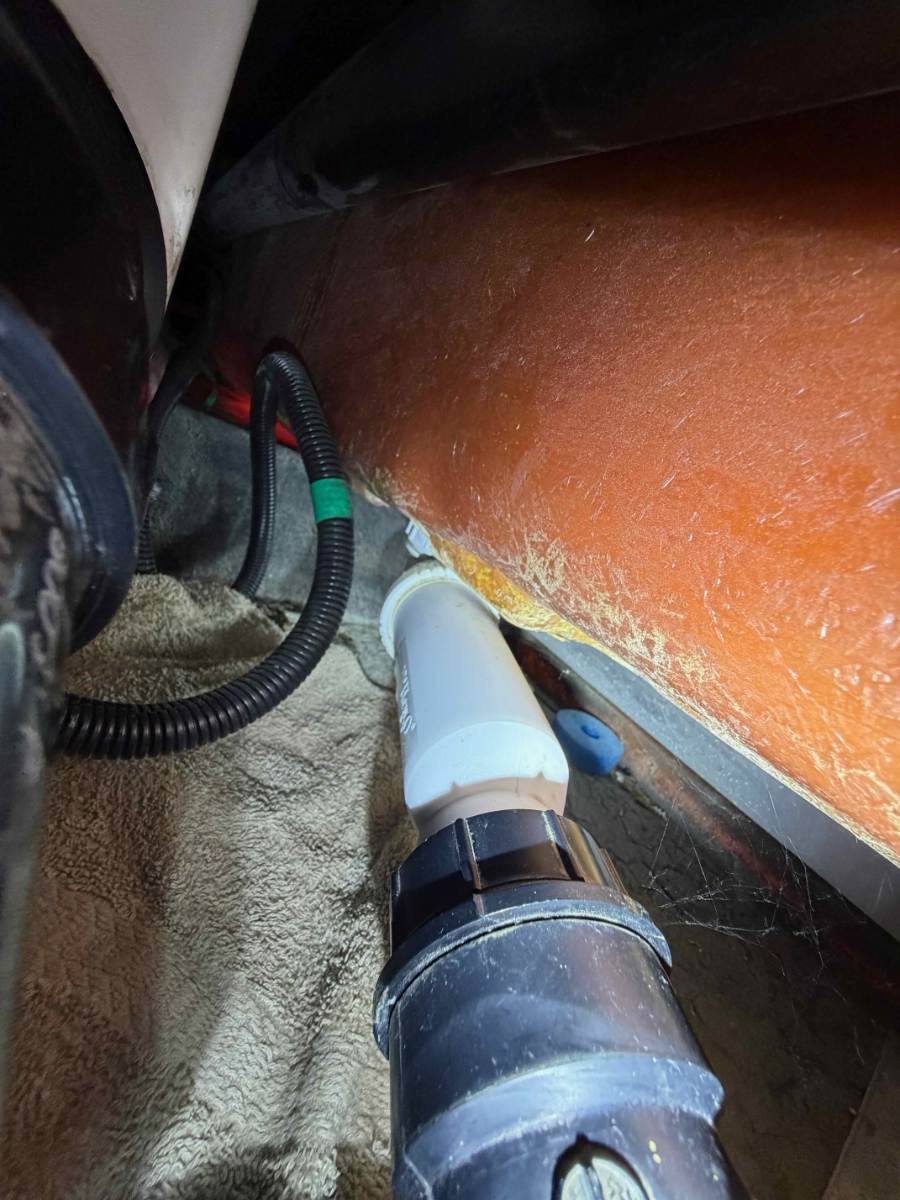
The configuration beneath my front dinette seat differs from yours a lot. While you have a furnace in that area, I have one of my favorite things about The Wonder Egg, a 45 ft 30Amp extension cord on an electric windup spool! My furnace is in the galley area, resulting in a loss of some kitchen drawers from your configuration. Here are two pictures which will show the white HEPvO valve which Larry inserted into the PVC line from the shower to the grey tank. Good luck and let us know if you manage to have a HEPvO valve installed in your trailer.
-
First re-torque of the D-bolts, surprised at how much they stretched, And looked what I noticed, check the marks on bottom of the frame this isn’t Alcan which has only done 30 and barely moved by the trail cam, it’s Dexter. In only 4k miles that flabby old suspension banged (HARD) against the frame, bottoming out. Might as well hit your trailer with a huge sledge hammer. I suspected it was bottoming out, that seems like they’re practically inverting. No wonder those springs break 🙄
-
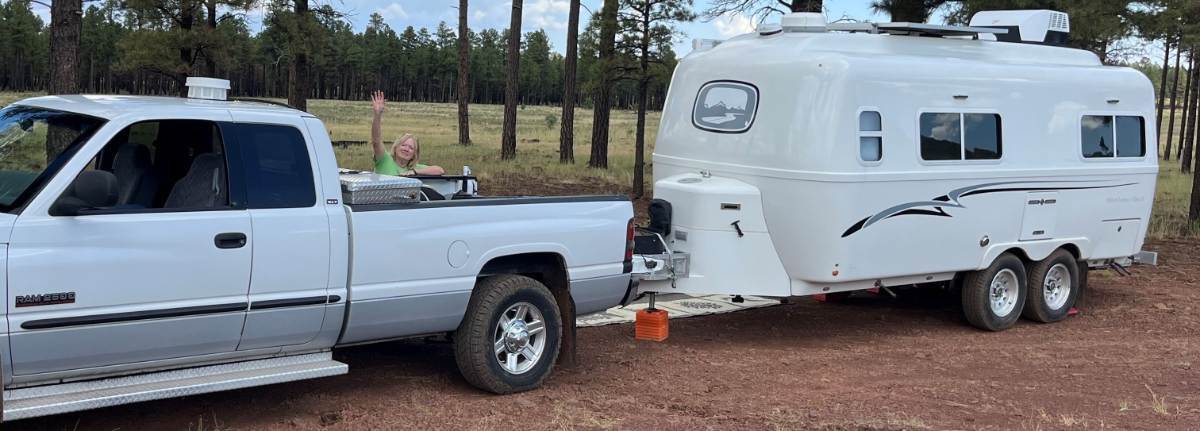
GJ, you make a good point and it is a wonderful world! I need a fully adequate TV for the Oliver and for me that's the 3/4-ton truck with exhaust brake. The 1/2-ton means less payload and Andersen WDH and maybe airbags or Timbrens, etc. Once you're up in 3500-land, might as well get a dually and a 40' fifth-wheel trailer! 🤣 Like Mike, I'm fine with driving our 3/4-ton truck around town. It's also fun to drive at times, but we have two "daily drivers" that are better around town. My '92 Lexus SC400 get's me to pickleball 3 times a week, more quickly with less fuel costs. The 1/2-ton truck gets a little better MPG than the 3/4-ton. The 3/4-ton will be safer. I buy older vehicles in good condition, fix them up myself so we could afford them. For the last many years, a new truck costs a small fortune, so we're often in this same discussion, "Can I tow more with less?" 🤠 I've read here about towing an OE2 with so many odd choices, OMG! This thread started re the GMC Sierra 1500 which can be a fine TV for some. Maybe for those who pack light and tow more worry-free. Having the 2500 is reassuring, exhaust brake better yet! You have to do what's right for you and there's more than just the basics. For example, I've learned that we must have a long-bed truck with 1500 LBS capacity just for stuff in the bed, including 35 gallons extra water. It's a must, for us. I drove a Quad-Cab Ram for 18 years. It was great when our son was young and we had two labs, but I will not own another 4-door truck. There's just two of us and I love the extended cab with the half-size suicide door. It's quick and easy and Charley loves his narrow bench seat back there! It was also very important to us to have the rig, the truck & trailer that look good together, a matched set! 😎 Our truck fits us and our needs. Make the right choices for yourselves, with a lot here to think about.
-
Saw someone headed up to curt gowdy state park this evening. Hope your trip is going well. Im down the road a piece on a friend's land.
-
- 2
-

- Last week
-
I am trying to plan itinerary to go Alaska through British Columbia (BC). I was looking at trying to go on the Sea to Sky highway going North and then pick an alternate route coming back. We are looking to start our trip in July. Has any one traveled the Sea to Sky highway with our Oliver, and what was your tow vehicle?
-
I hesitate jumping into vehicle discussion and what is best. I will say our half tons were good TV’s and good daily drivers. Our 3/4 ton is a great TV and a good daily driver. It’s fine around town, hauling grandkids, and is our preferred vehicle for trips without the trailer. So, it’s really just a matter of personal preference. Mike
-
Hello Dean, you're welcome and thank you! Our upgrade was completed 2 years ago and I purchased the best Victron products available at the time. I didn't do our DC-DC upgrade 'til later which was a good thing as the Orion 50A had just come out which was far superior to the 30A model. This year Victron released a 70A Orion which like the larger inverter could be overkill. I would also consider the 4KVA Victron if upgrading today (unless I could find a good closeout sale price on the 3K model). The 3K model is all we need and 1 or 2 fans doesn't matter as I'm certain each model has adequate cooling for its design. The higher CFM would be noisier. It's close to the same size and weight so why not have the newest most capable model? Since we also upgraded our A/C to a variable-speed highly efficient A/C, I have not found the need where 3KVA has not handled our needs where we will run A/C and anything else at the same time without worry. When first installed, I had started our old Dometic P2, forgetting we already had the hot water heater running on inverter. That was the only time the 3K Victron struggled and BTW it outputted 3.5KW for a few minutes until I realized what happened. In answer to your specific question, re the additional Beech Lane fan I installed, I'd now say it's unnecessary. I've only used it a couple of times. The only time the MP2 gets somewhat hot is when battery SOC is low and we connect to shore power at a new campsite, heat of the afternoon, and the charger is set to full charge. Continuous charging is more of a heat issue than inverting and the MP2 will run fine up to 104F. The 3K MP2 can charge at 120A max. I believe max on the 4K unit is 160A. What I do instead is recharge more slowly. You can adjust charge amperage using the programming interface. Though it's easier to use the Victron Connect app. Just tell the app your shore power is less. Set allowed input to 30A, given you have that at the pedestal, the MP2 will charge at the full rate. Set input amps to less than 10A (10A on 120VAC = 100A on 12VDC) and the charge rate will be lower according to max amps specified. Love to see your installation. I installed a simple VE.Bus dongle to provide Bluetooth interface to the MP2 since I did not want a display. Your interface is via the Cerbo GX. The VE.Bus allows for adjusting input amps and can switch the MP2 (ON. OFF, Charger Only, Inverter Only). It also has a temp reading. I installed it on the wheel well above the MP2 to provide a reliable temp reading. If the MP2 is still charging when I'm going to sleep, I just reach for the phone and turn it off and back on when we wake. We're unplugged most of the time anyway. Charging is solar or DC2DC.