Leaderboard


Popular Content
Showing content with the highest reputation on 07/22/2017 in Posts
-
Excited like you're 10 years old again and it's a month till Christmas. I know exactly how you feel. The good thing about that feeling is that it doesn't go away after delivery. It still feels the same every time you go out to the trailer. Even before we get home from a trip we're already saying "where are we going next?"2 points
-
I was disappointed when I tried taking a BATH, turns out it was too shallow for me. :(2 points
-
Does anybody know more about this rig? I saw it at this thread, which covers the recent 2017 Northwest Overland Rally in western WA. Which I did not attend, though I would have loved to inspect this closer..... https://expeditionportal.com/the-vehicles-of-nw-overland-rally-2017/ John Davies Spokane WA1 point
-
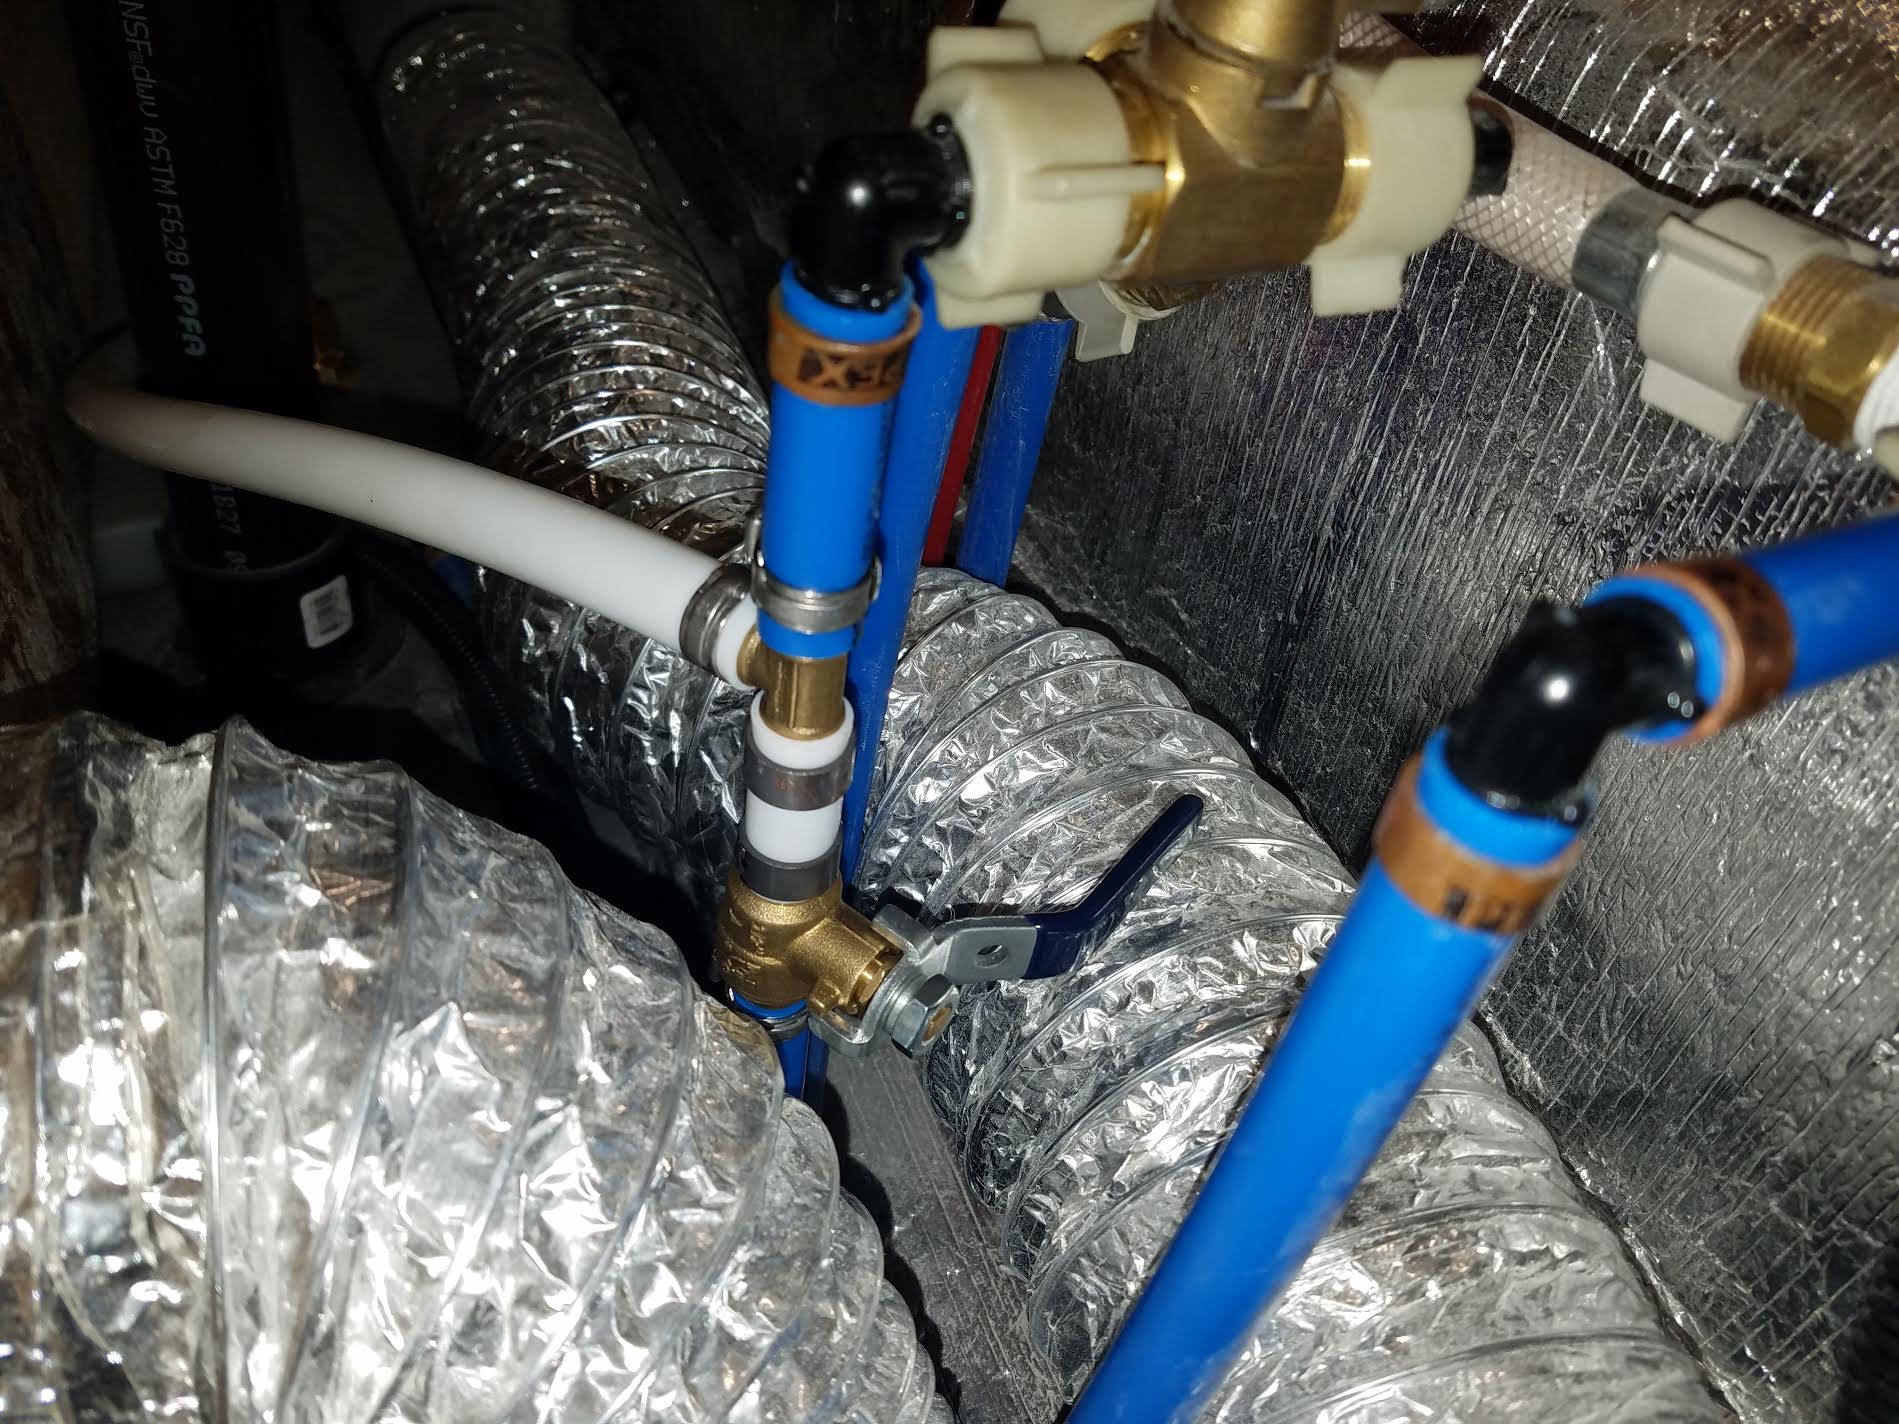
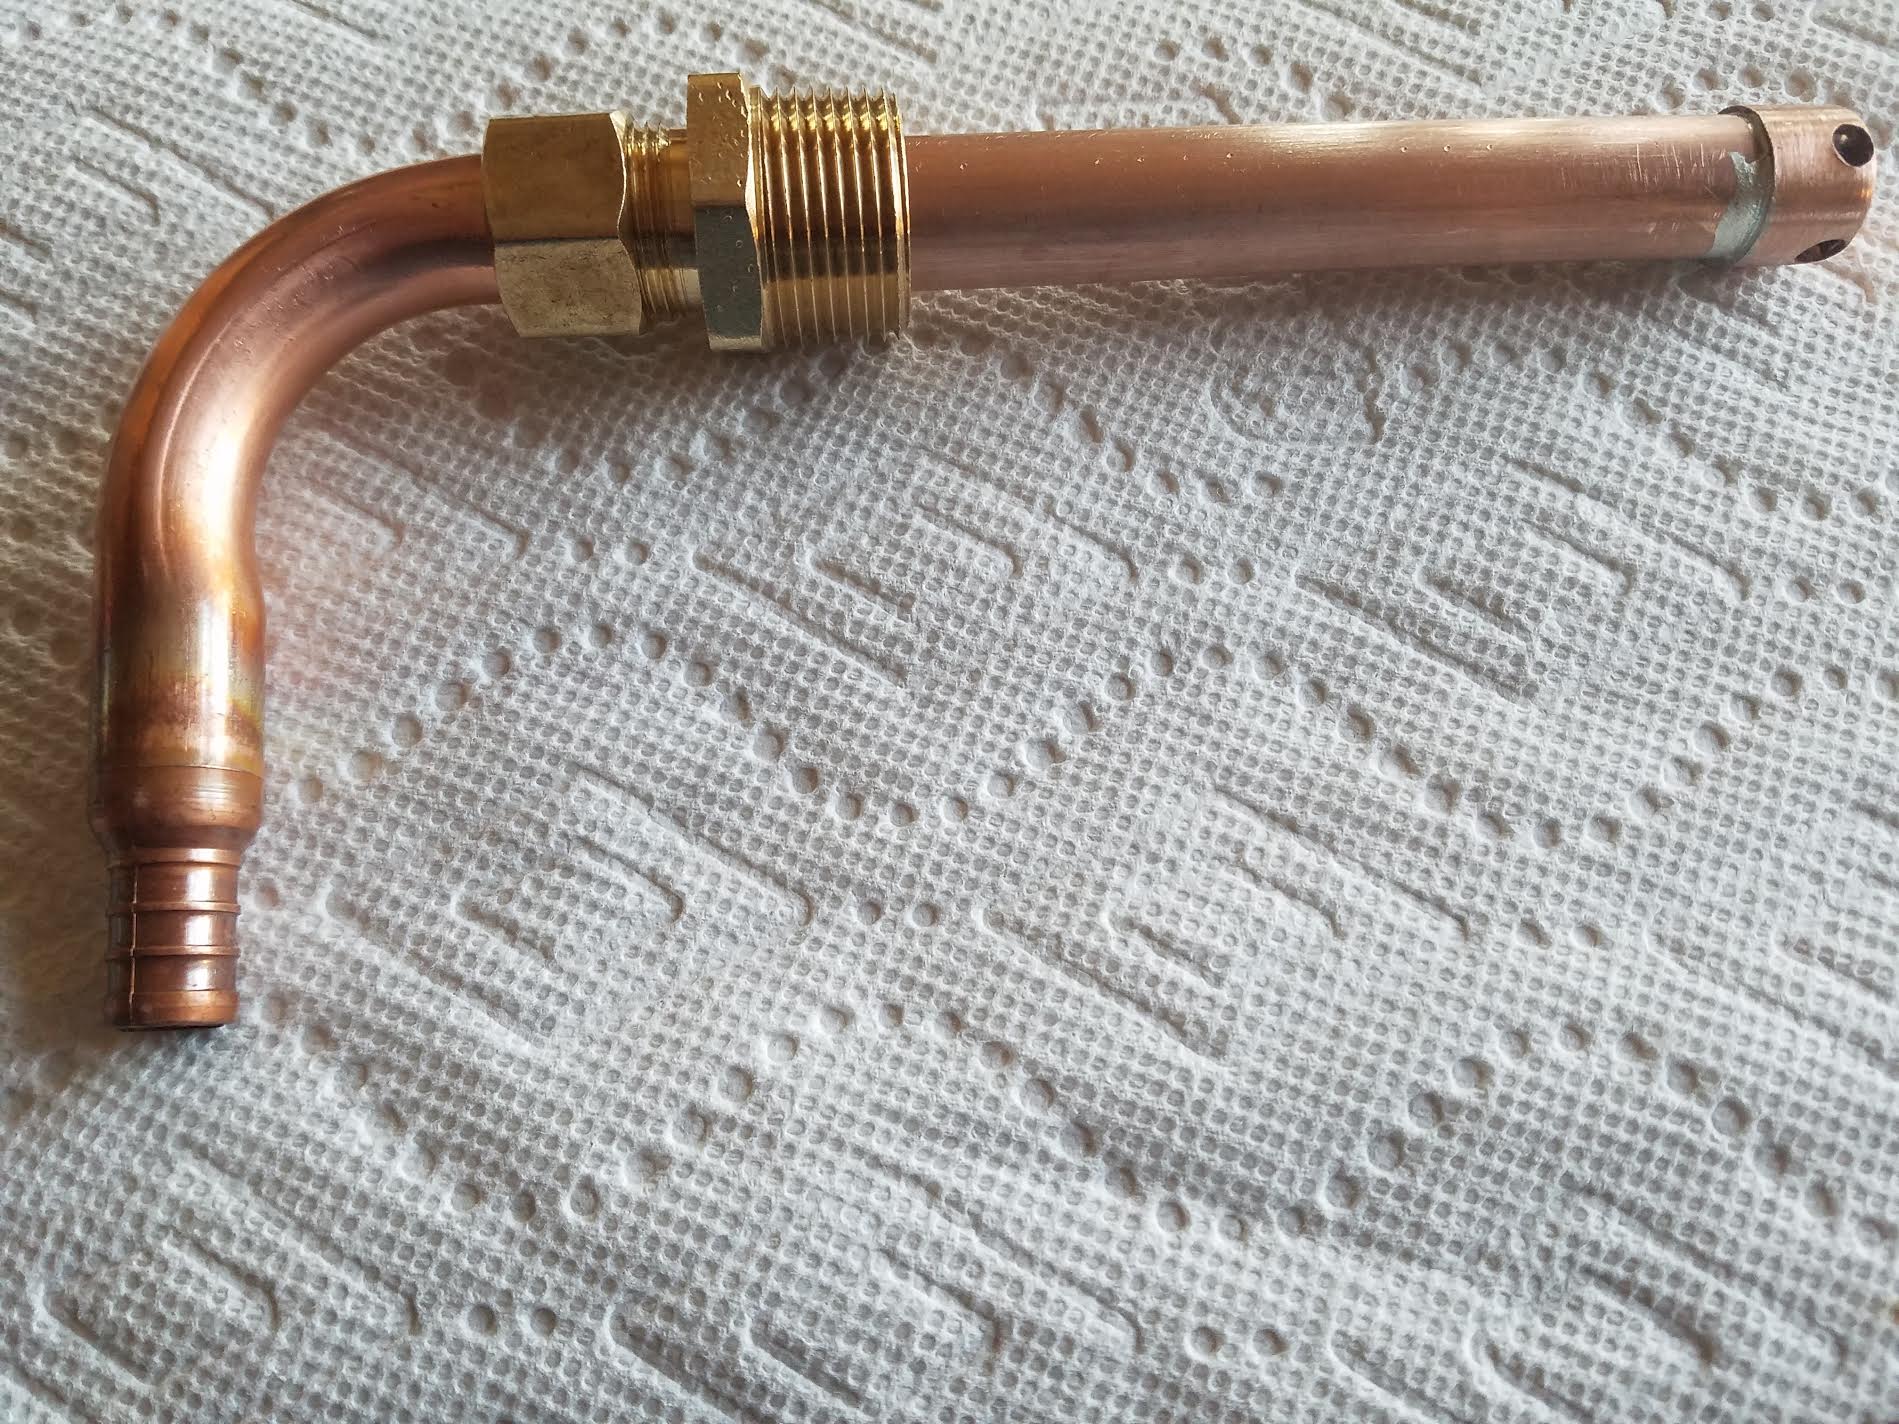
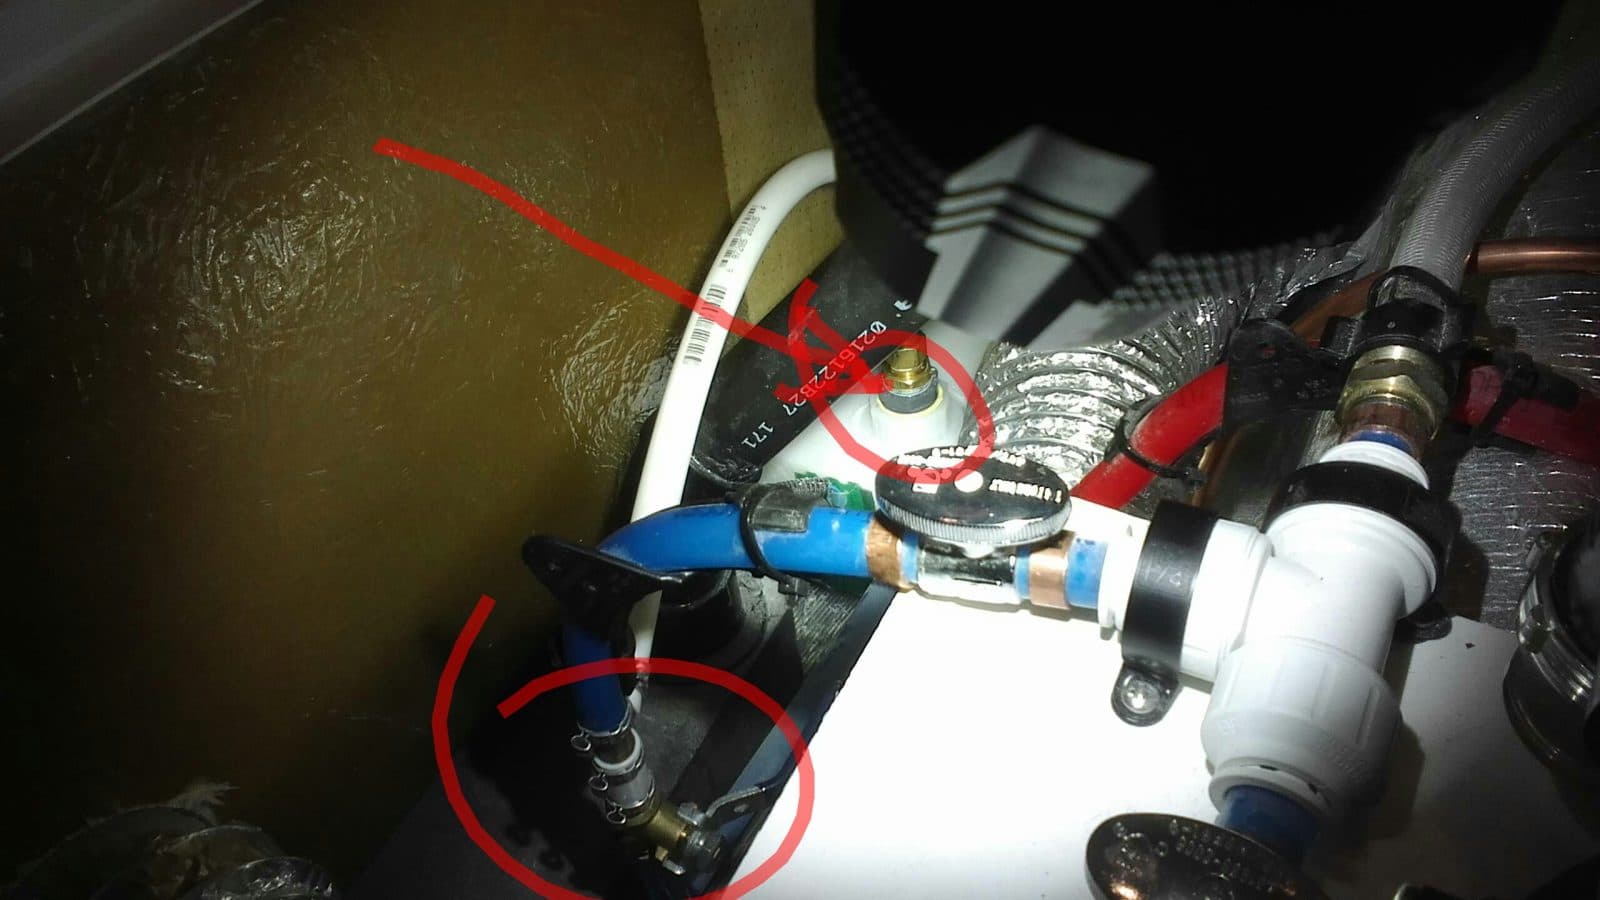
With all the talk lately about not being able to access all of the fresh water in the tank, I decided to make a new suction line and improve the situation. The stock line on mine will only draw water down to about 1 1/2" deep before it begins to suck air. In a 35 gallon tank that is only about 4" deep, this means about 1/3 of the water is not available, or about 11 or more gallons left in the tank. The stock pickup is on the side of the tank and cannot get all the water. So I made a top fitting that goes down and picks up the water at or below 1/4" from the bottom. When I started the installation I leveled the trailer and ran the water until it began to suck air. Mine did that at a reading of 25% on the gauge. If the front of the trailer is raised some, which I did not do, the reading would still be the same when the pump sucked air because the gauge reads right next to the pickup. You could get more water out of the tank with a raised tongue, but the gauge reading would be the same when it sucked air. After I installed the new dip tube, I continued to draw water and it began to suck some air at 6%. So, mine went from 25% (approx. 8 gallons left) down to 6% (approx 2 gallons left) when it began to get some air. Others have reported as much as 38% remaining which would be over 12 gallons. At a 6% reading I began getting aerated water, but a steady flow. Finally, the gauge went to 0% left. At that point is was about 1/2 water and 1/2 air at the faucet, but still flowing, or spitting. But even with a zero on the gauge it continued to pump out another gallon or so before I shut it off. All of this with cold only, not water drawn from the water heater. So, the volume from 6% to 0% was totally useable, probably not for a shower, but certainly for drinking. This is a prototype that works well, but it might still improve a bit with the next one. The pickup touches the bottom of the tank, but draws radially from below 1/4". It adjusts to any small differences in various tanks. It can be pulled out and cleaned easily if debris ever clogs it. All plumbing connections, where the new line ties in, are easily accessible and the existing tank fittings are not touched. The stock tank drain is retained. The area of the tank where the new fitting is installed is easily reached and the tools to do it all fit in the available space. After clearing all of this with Oliver to make sure there is no conflict with forum rules or warrantee issues with them, I can send anyone that wants to do this, a kit with the following: the pre-made dip tube fitting, a Polyethylene tank fitting, the special spin weld fitting driver, a 1 1/2" hole saw (if needed), the pinch ring tool and a PEX cutter. I'll also provide step by step directions for anyone who is interested. You'll have to have a powerful router with a 1/2" collet and a drill to drive the hole saw. Or, I can help you with a set of directions here on-line and you can assemble the parts yourself. The parts required are: (1) dip tube assembly, (1) 3/4" spin weld fitting, (6) 1/2" PEX pinch rings, 24" 1/2" PEX, (1) 1/2" PEX ball valve, (1) 1/2" PEX tee, a small container of Rectorseal 5. The only real tricky part is the spin weld. Besides the special procedure for spin welding itself, you have to make a new hole in the tank and vacuum out the chips. Here are some pictures:
 1 point
 -
They will set it up for city water access until we can get back home to work on properly. She should be able to get by without the pump for 3 days. All good suggestions and comments, much appreciated. rob1 point
-
Welcome. Which way you heading after your " shakedown cruise"? Just be aware that most places start closing down north of the Mason/Dixon line by Nov. 1 rst. However, you are good to go in your Oliver. Any question at all feel free to ask here. You might get several different answers, and they all might be right..1 point
-
To an Off the Grid trailer camper... Boondocking could be parked at a WalMart or Costco parking lot over night. Or an established campsite without hookups is Boondocking to most, but not all. The term is very evasive for a firm definition. It is the experience of YOUR travels that will eventually define What is Boondocking. Some, as ourselves, use 'Off the Grid Boondocking' to indicate being camped where there are no facilities and only what your check list provided for this trip... put into your Oliver! Period and... someone else may even dispute this! You need a bandaid and did not pack one... next time. No pen or pencil... next time. Flashlight... next time. By your first year of camping in your Oliver... your list will be completed... tweezers? Get it on the computerized check list... you will need tweezers sooner than later! My wife has a FOOD LIST, a CLOTHES LIST and how much dog food will be needed for two weeks on the road. Each of us will have different needs and different lists. Tools for minor repairs. Batteries. A good book or... dozen. You get it. Enjoy your individual Adventures... and be sure to post your Oliver in locations that only the gopher or humming birds may know where you camped. Caveat: WEIGHT is not your friend when towing. Do not overload your Oliver or your tow vehicle. Your two vehicle will have its limitations posted on the doors side wall. Tire pressure is important. Avoid too much JUNK. Paper plates can be disposed and light. Plastic cups, versus glass that can break. Just... THINK Boondocking and you will do, just... fine.1 point
-
You won't see a spark unless current is actually flowing. Even in a functioning circuit, if the pump switch was turned off, there would be no spark. It's best just to check voltage at the water pump connector, and if there is none, go to the switch and figure out where the open circuit is. If you have voltage and a good ground at the pump, check the resistance through the motor. If that is open, the pump is bad. If everything checks, whack the pump with a mallet.... Good luck, and please post a followup about the fix. John Davies Spojane WA1 point
-
Reading this makes me so happy!1 point
-
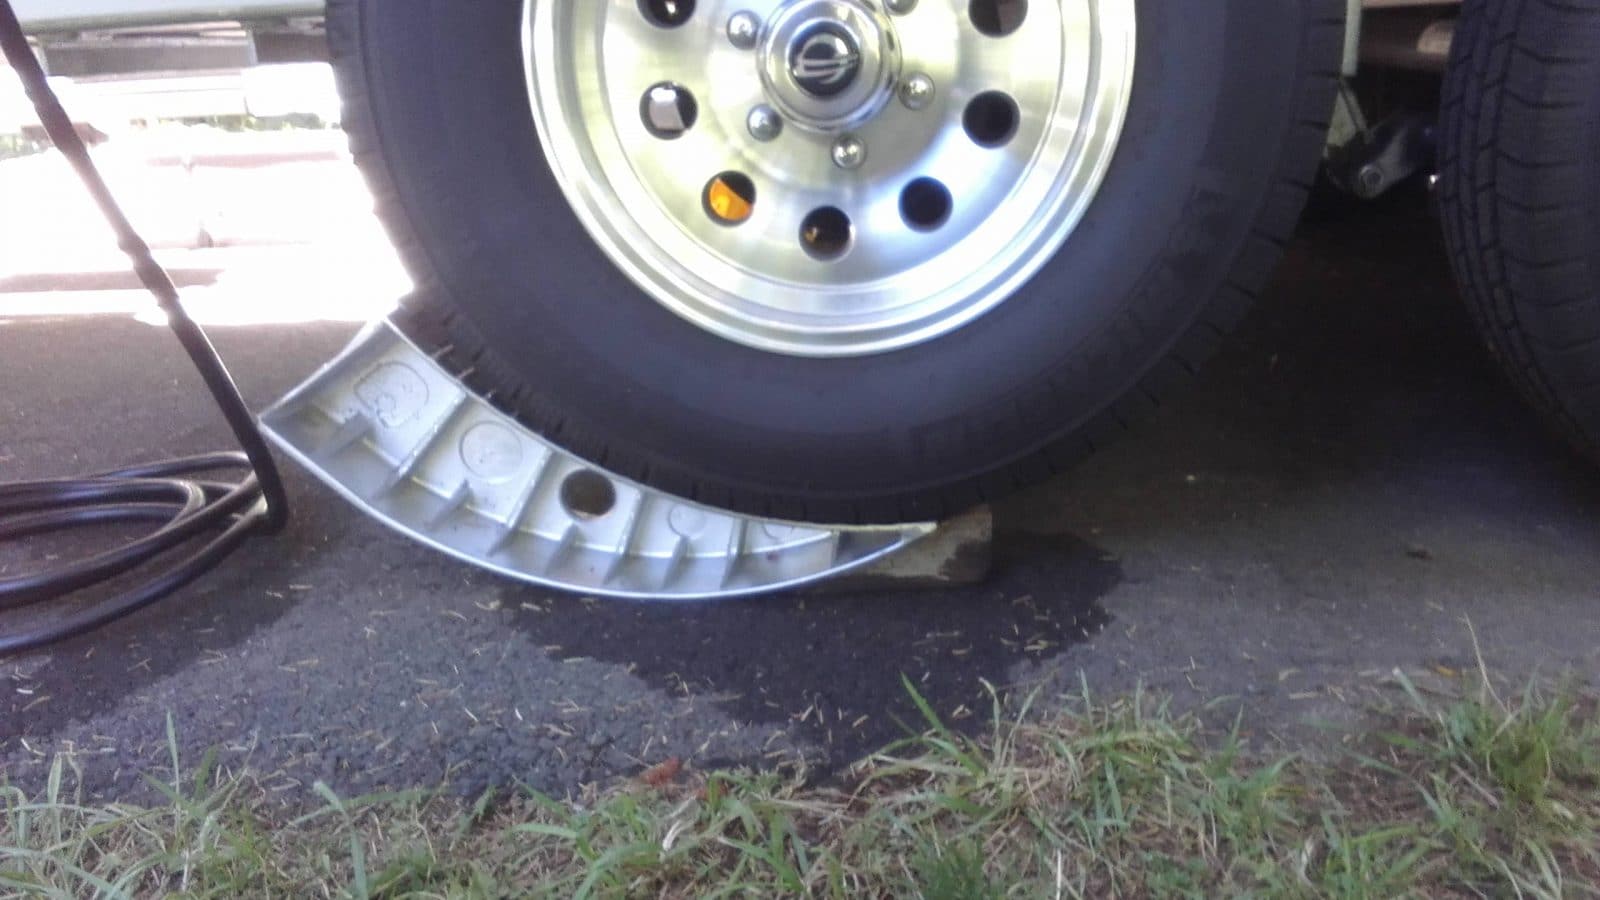
9 weeks later.... And we are plugged in at Bullards Beach Campground in Oregon for the first time since May 26th at the annual Bandon Fiberglass RV Rally. So we boondocked for 9 weeks and all is well :) We used the Blaylock leveler that we bought from John Davies for the first time and it works fine just like our Anderson Leveler did. I always carry a couple of wedges that I cut out of a 4x4 and I drove one in with my rubber mallet under the Blaylock to hold everything in place and it's incredibly stable. It stores behind my seat easy enough just like the Anderson, but personally, I like it a lot better because it's not plastic... Our Anderson chipped when we drove off of it one time and this one fits just right under the tire. I've never tried it without blocking the other side because, the Anderson rolled a bit and this one is no different, so... I'm still using my wedges like always :) Tomorrow is another big day at the Rally, the day everyone comes to see the trailers. And we have 2 Ollie's here, Raspy's Twin bed Legacy Elite II and our King bed. We've both had a ton of people asking questions already... As usual with the Oliver's :) Today, Karen gave a Cobb grill presentation to about 20 people and then she had an adult coloring class in the afternoon, while John came over an installed his water tank fix for us. The spin welding was incredibly easy and everything went perfect. So now we have that fixed, Jason sent out another box of parts for some other fixes, and now we are ready to call Scott Oliver :) They called us today but we were right in the middle of the spin weld so the phone stayed across the room and we've all been leaving messages for each other with the time difference having its usual affect... You can see the new fitting along with the new valve, and I videoed the whole thing, so that should be up in a few days :) Reed
1 point
-
Hello! And welcome to the community Angela & Kyle :)1 point
-
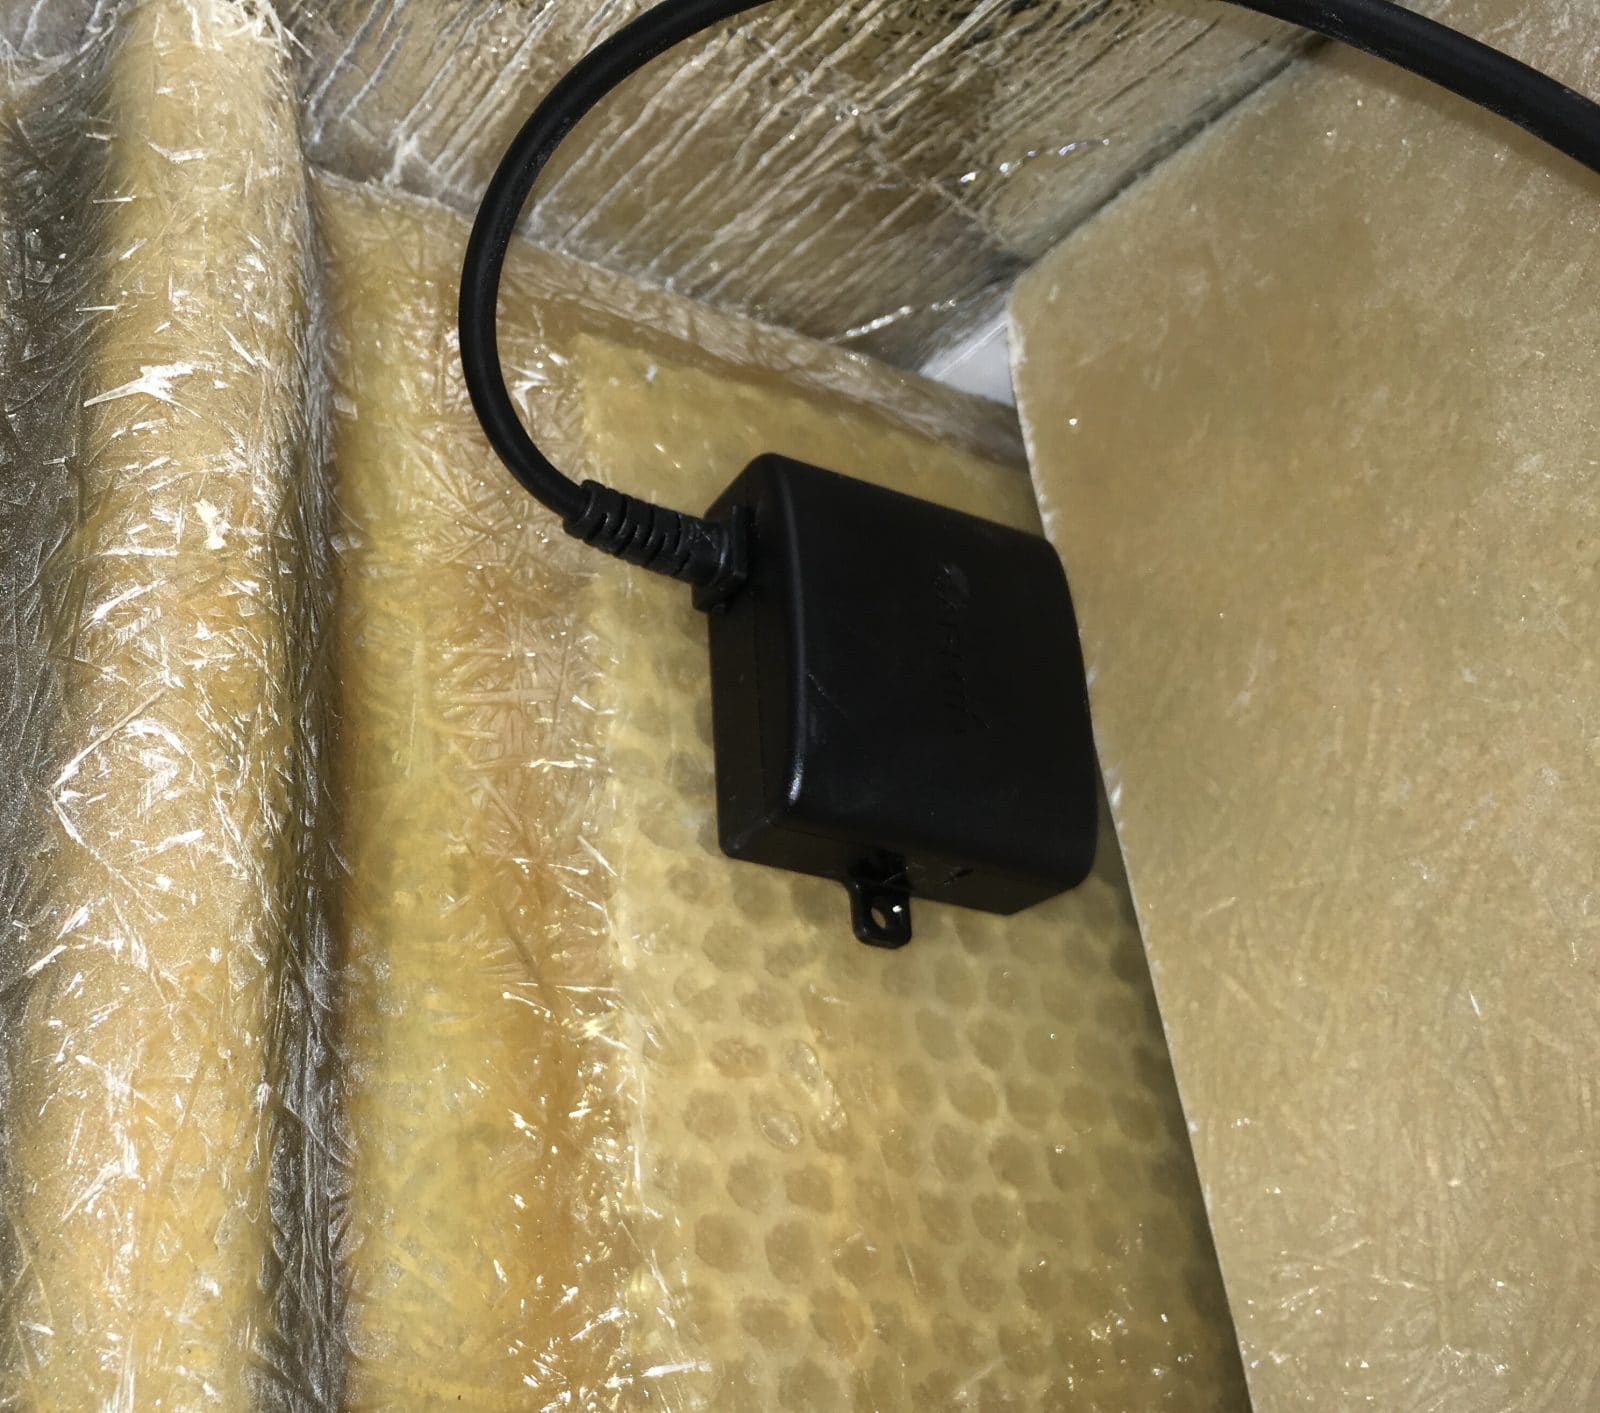
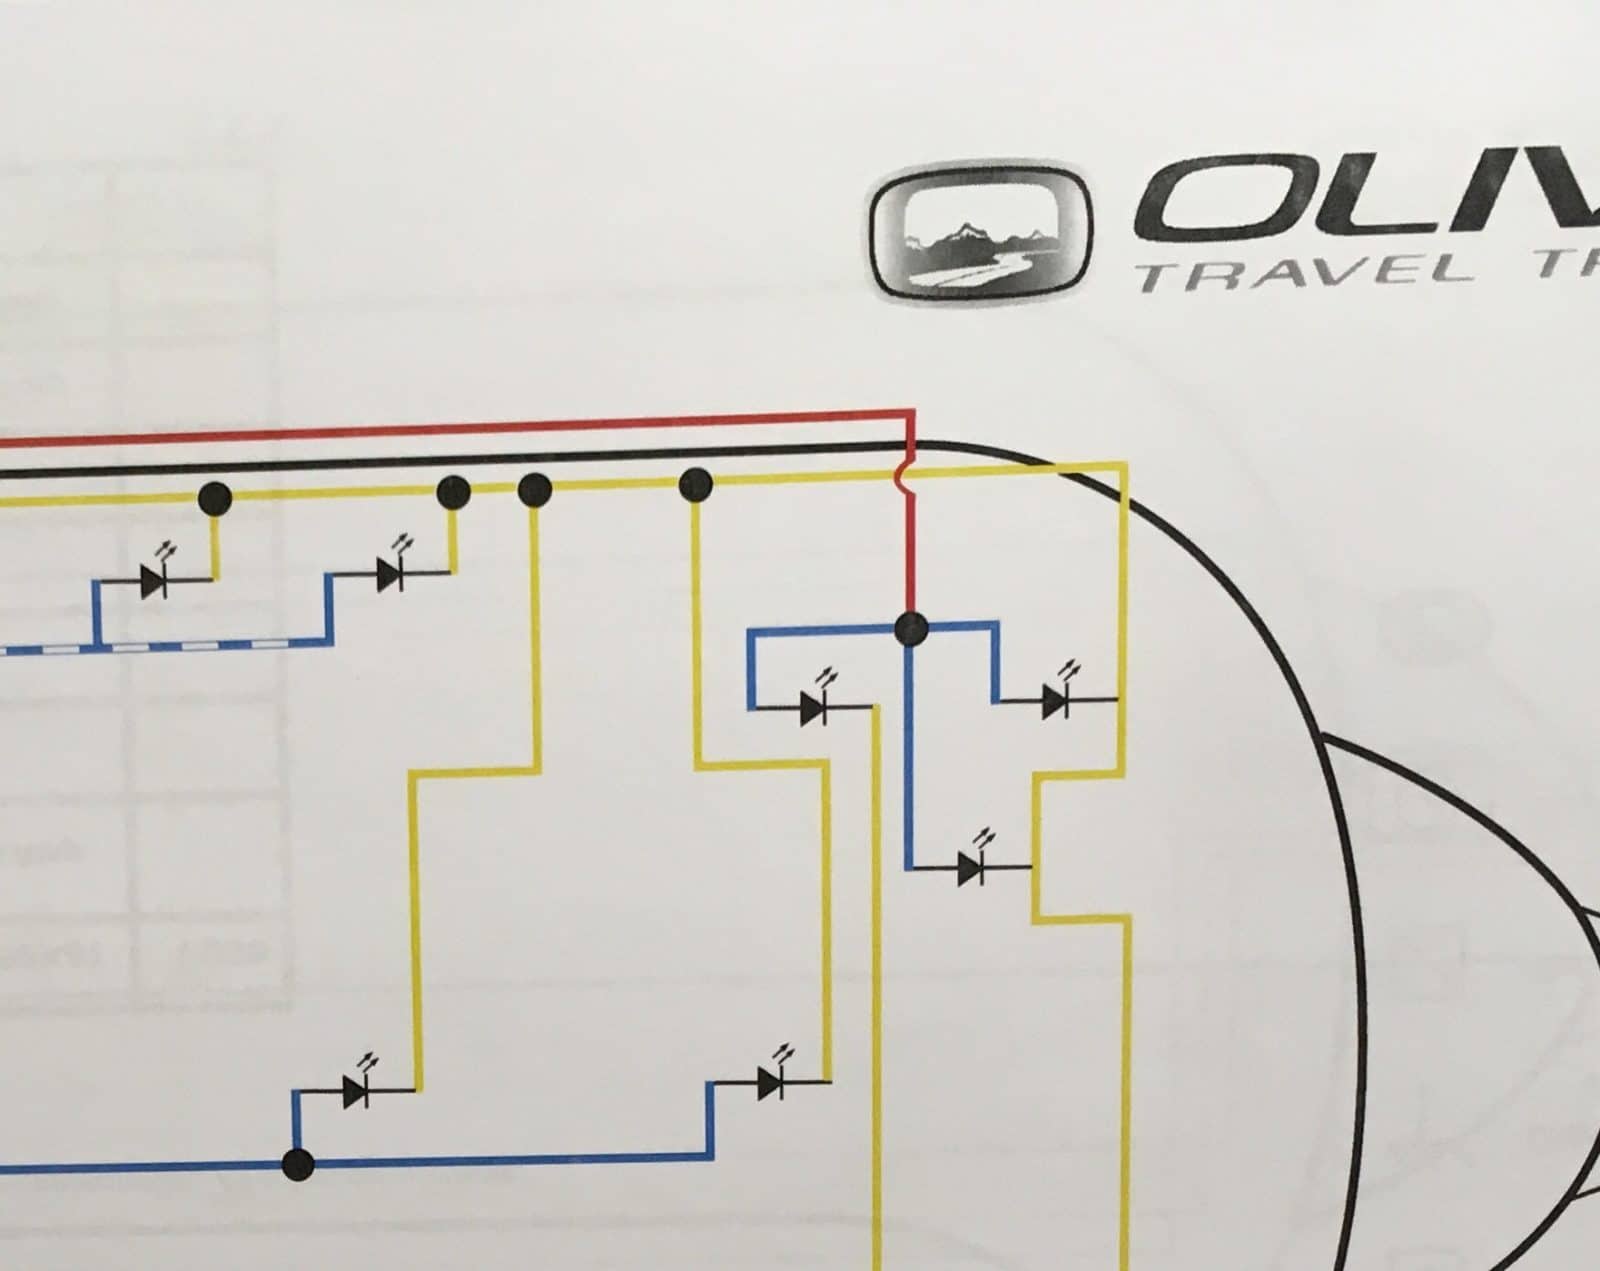
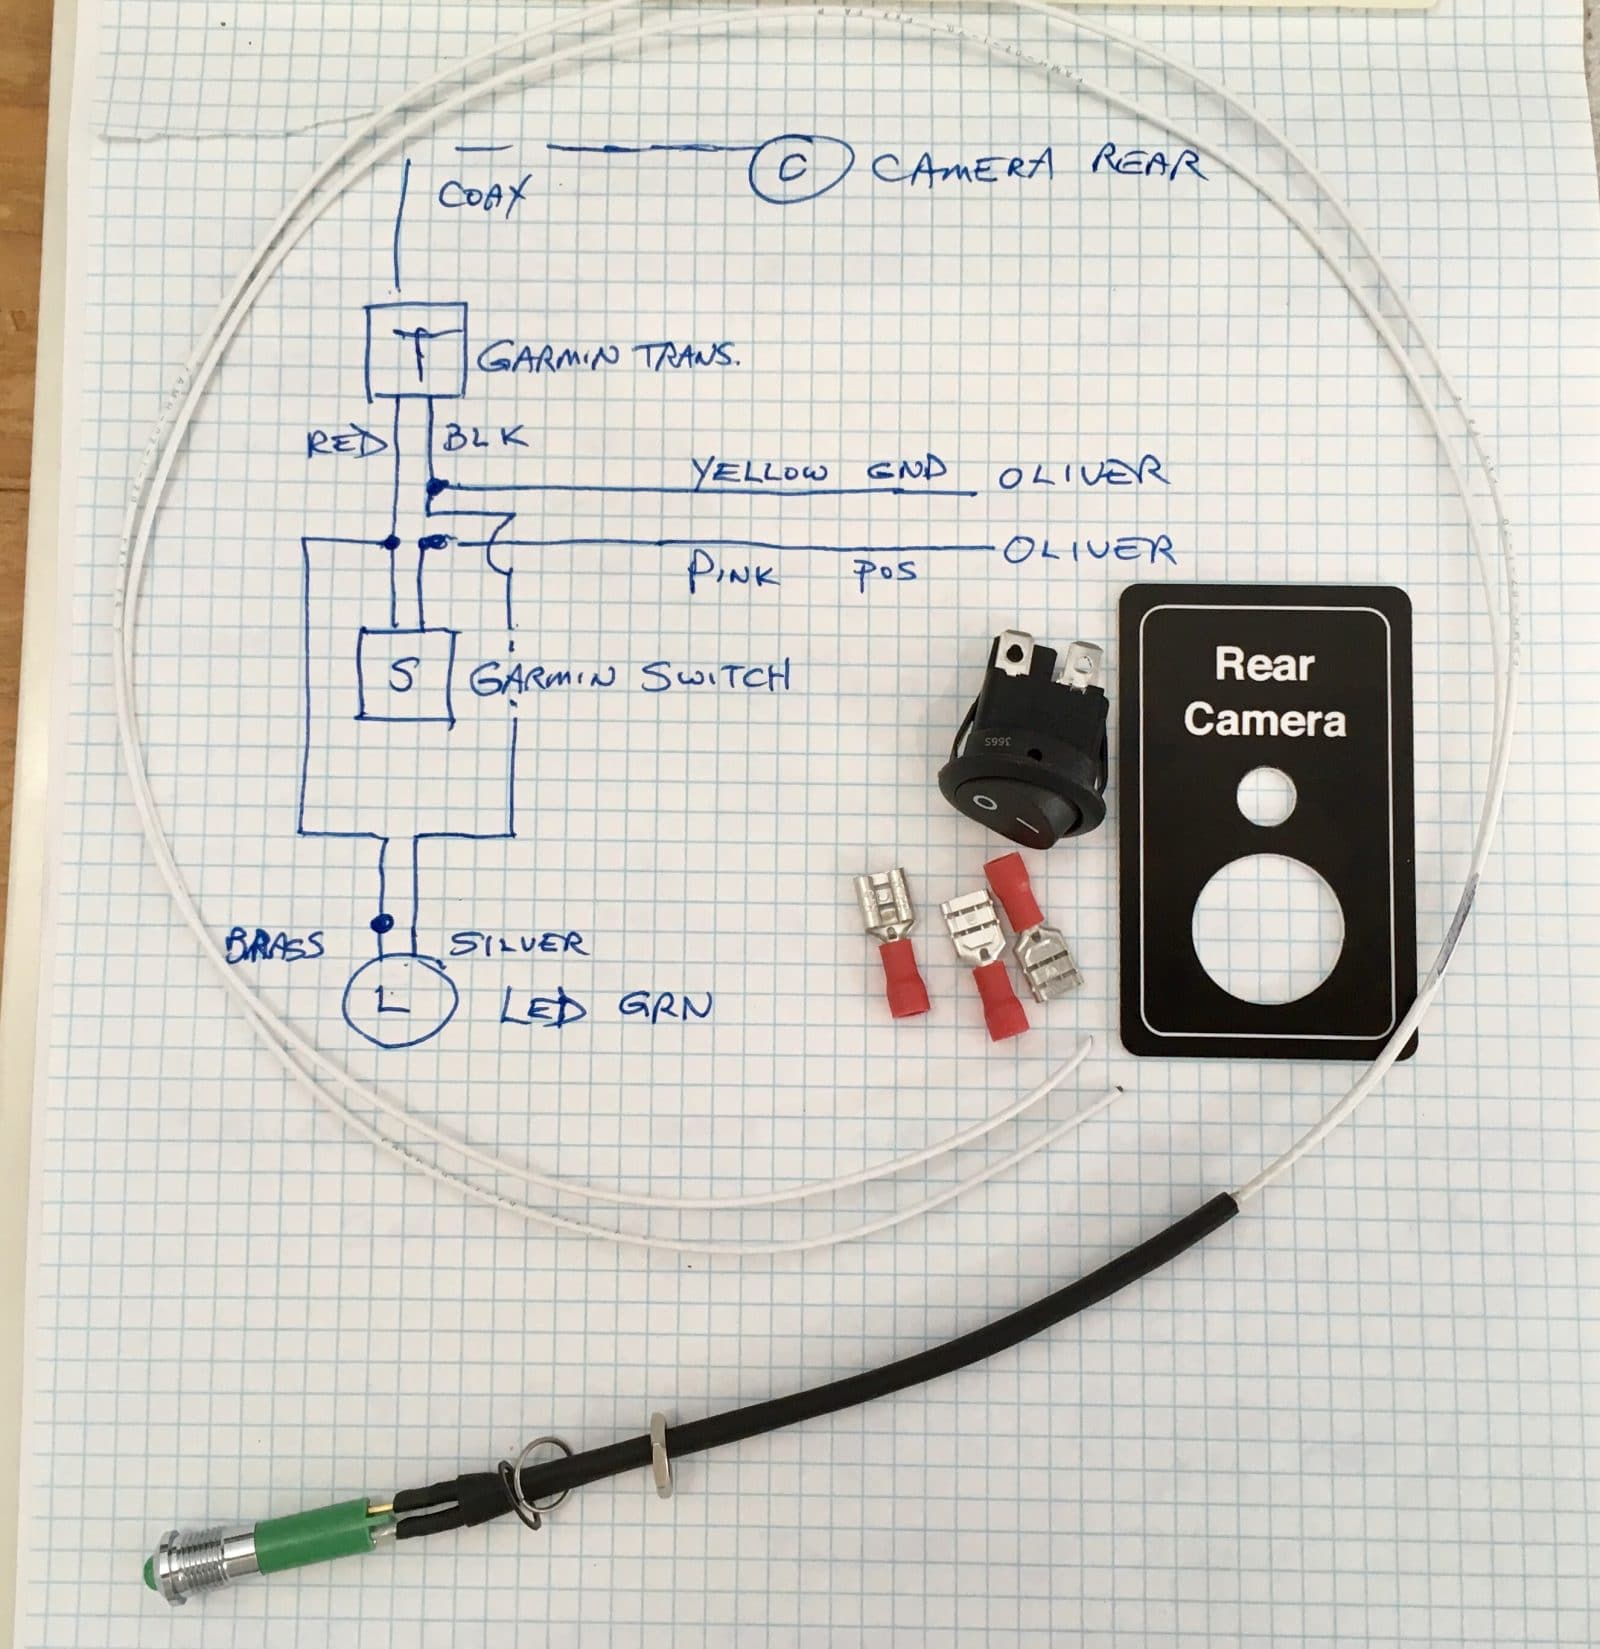
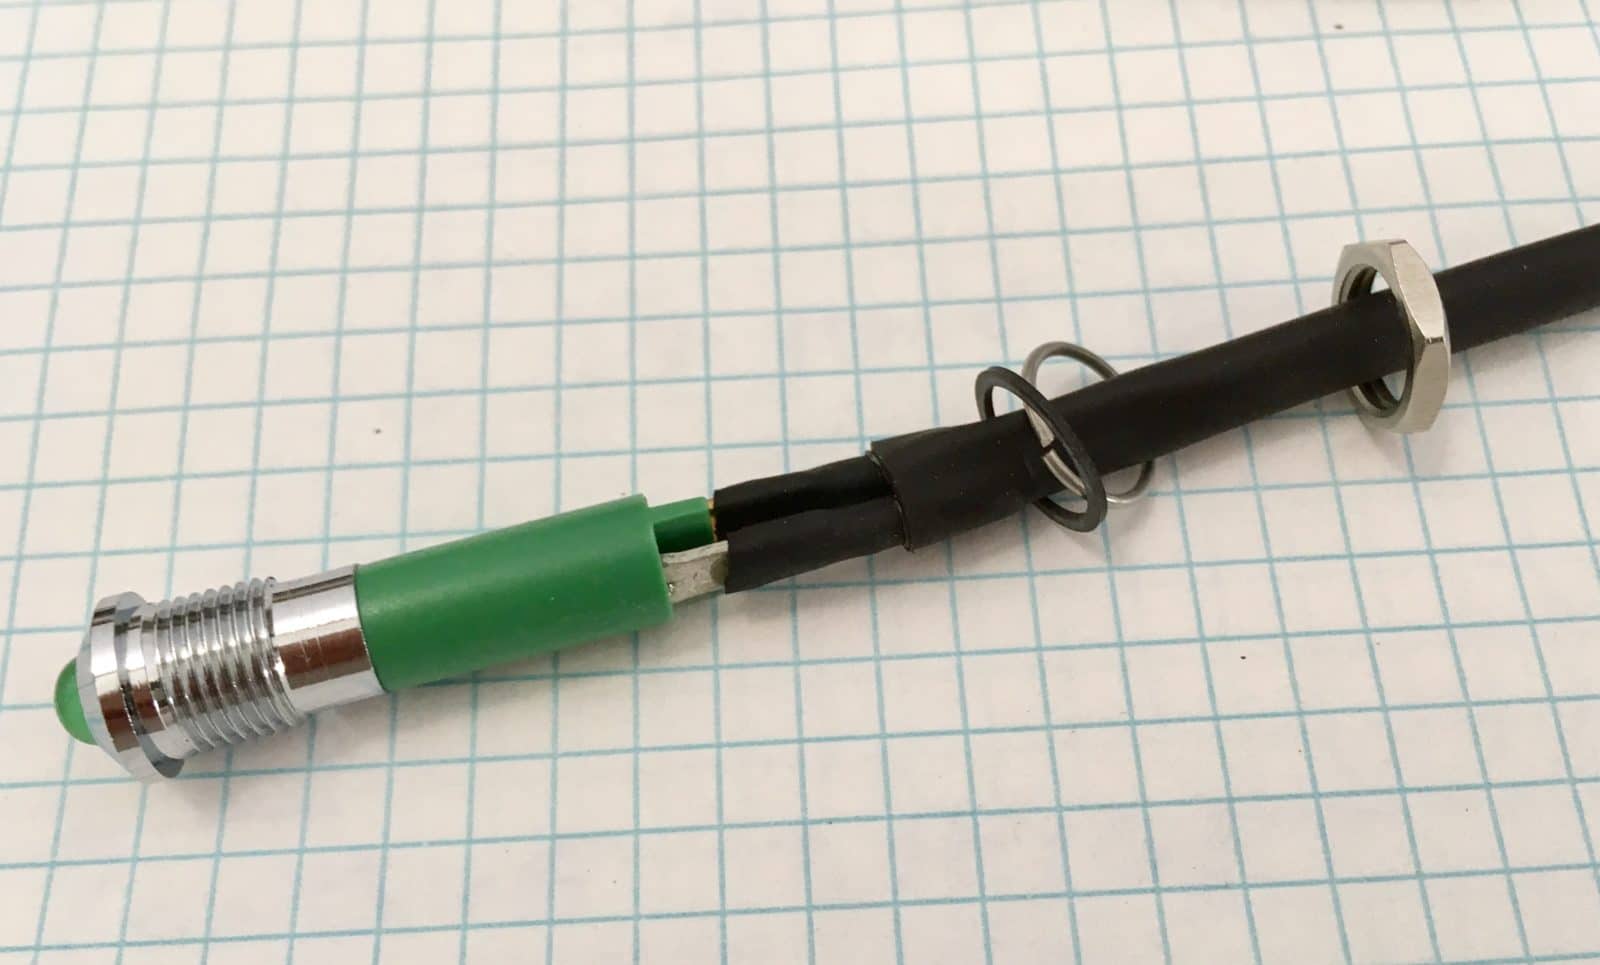
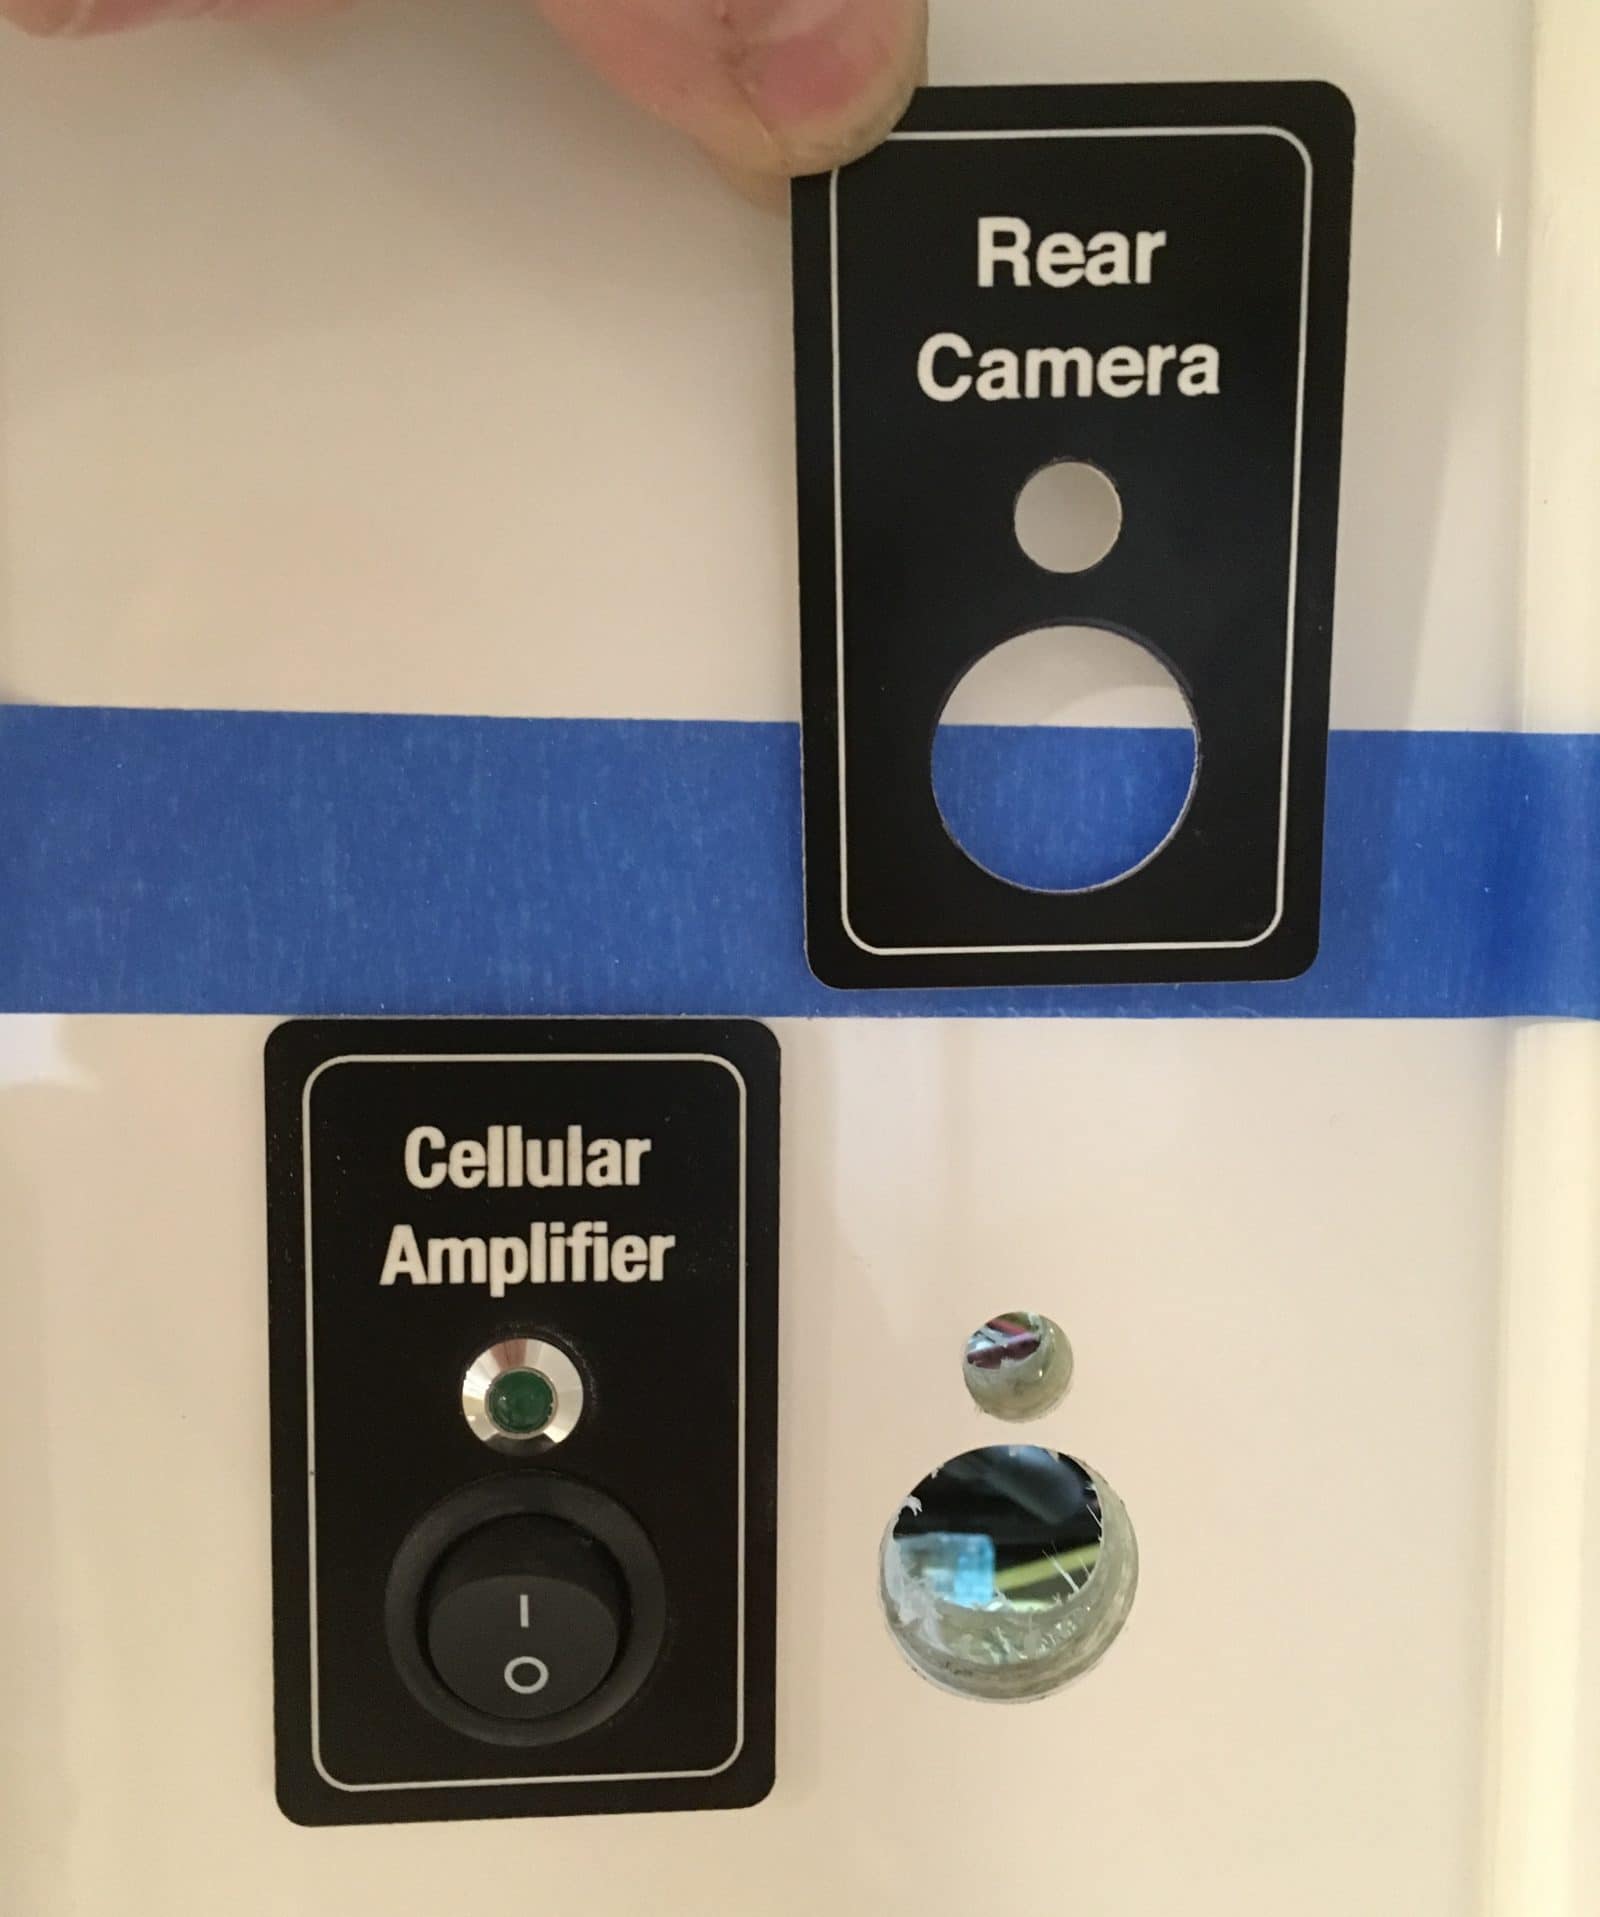
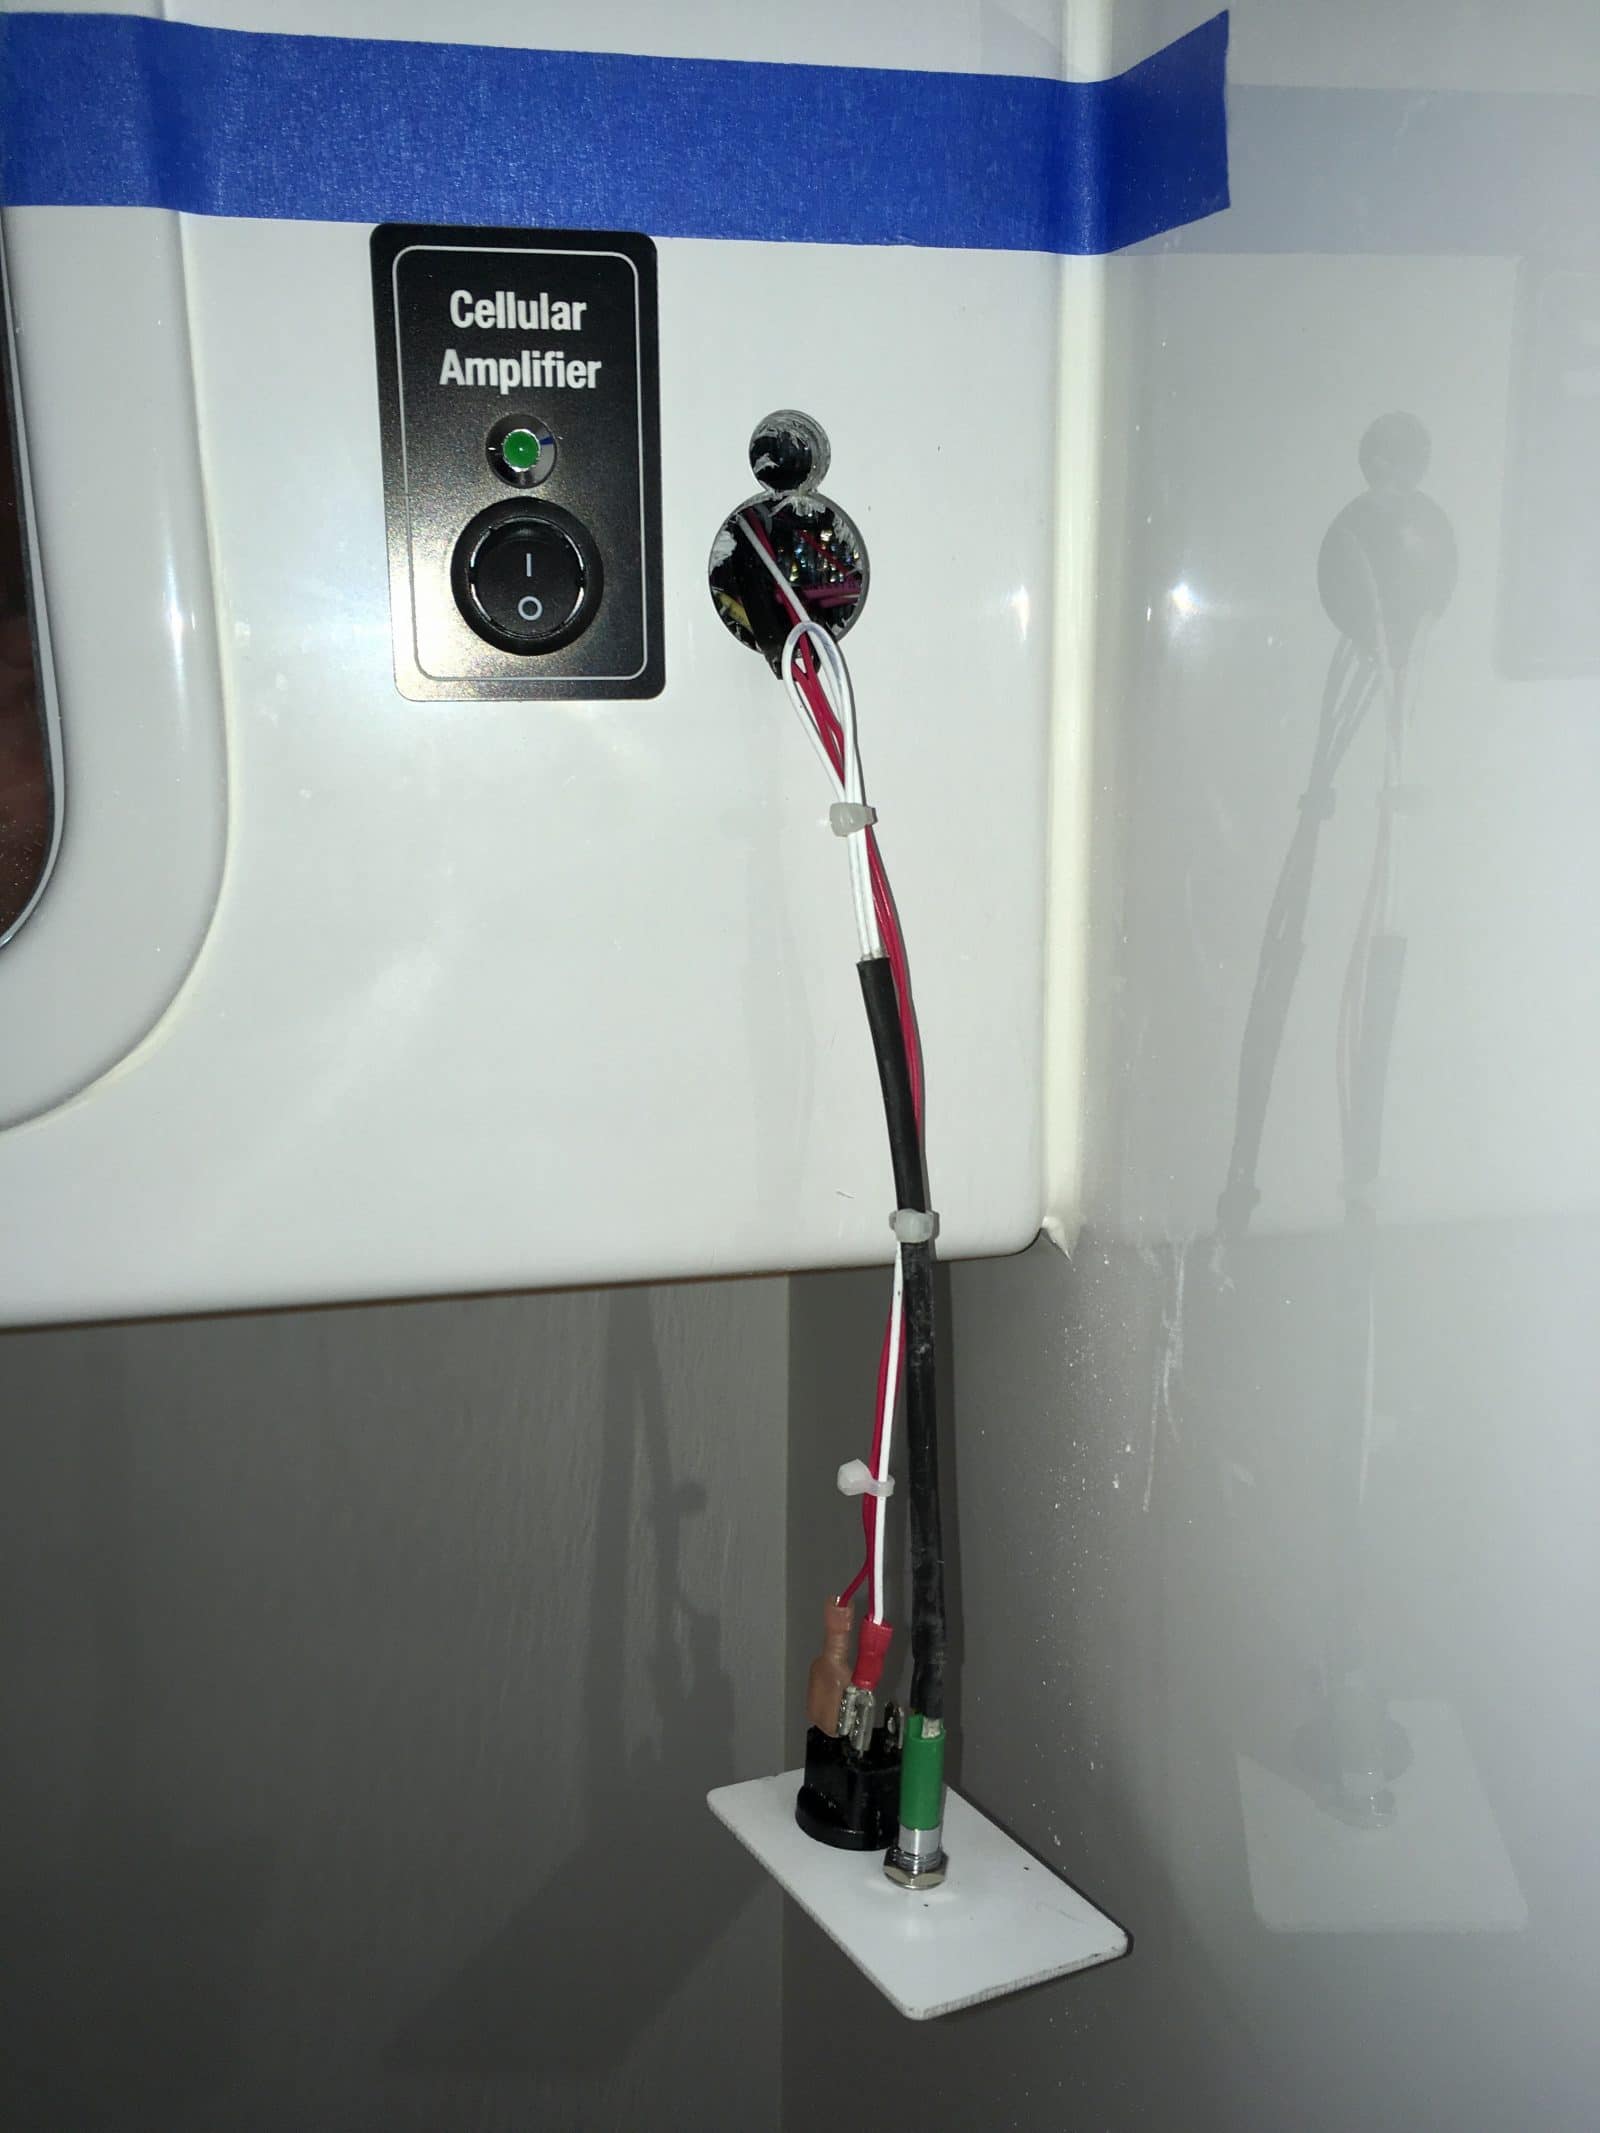
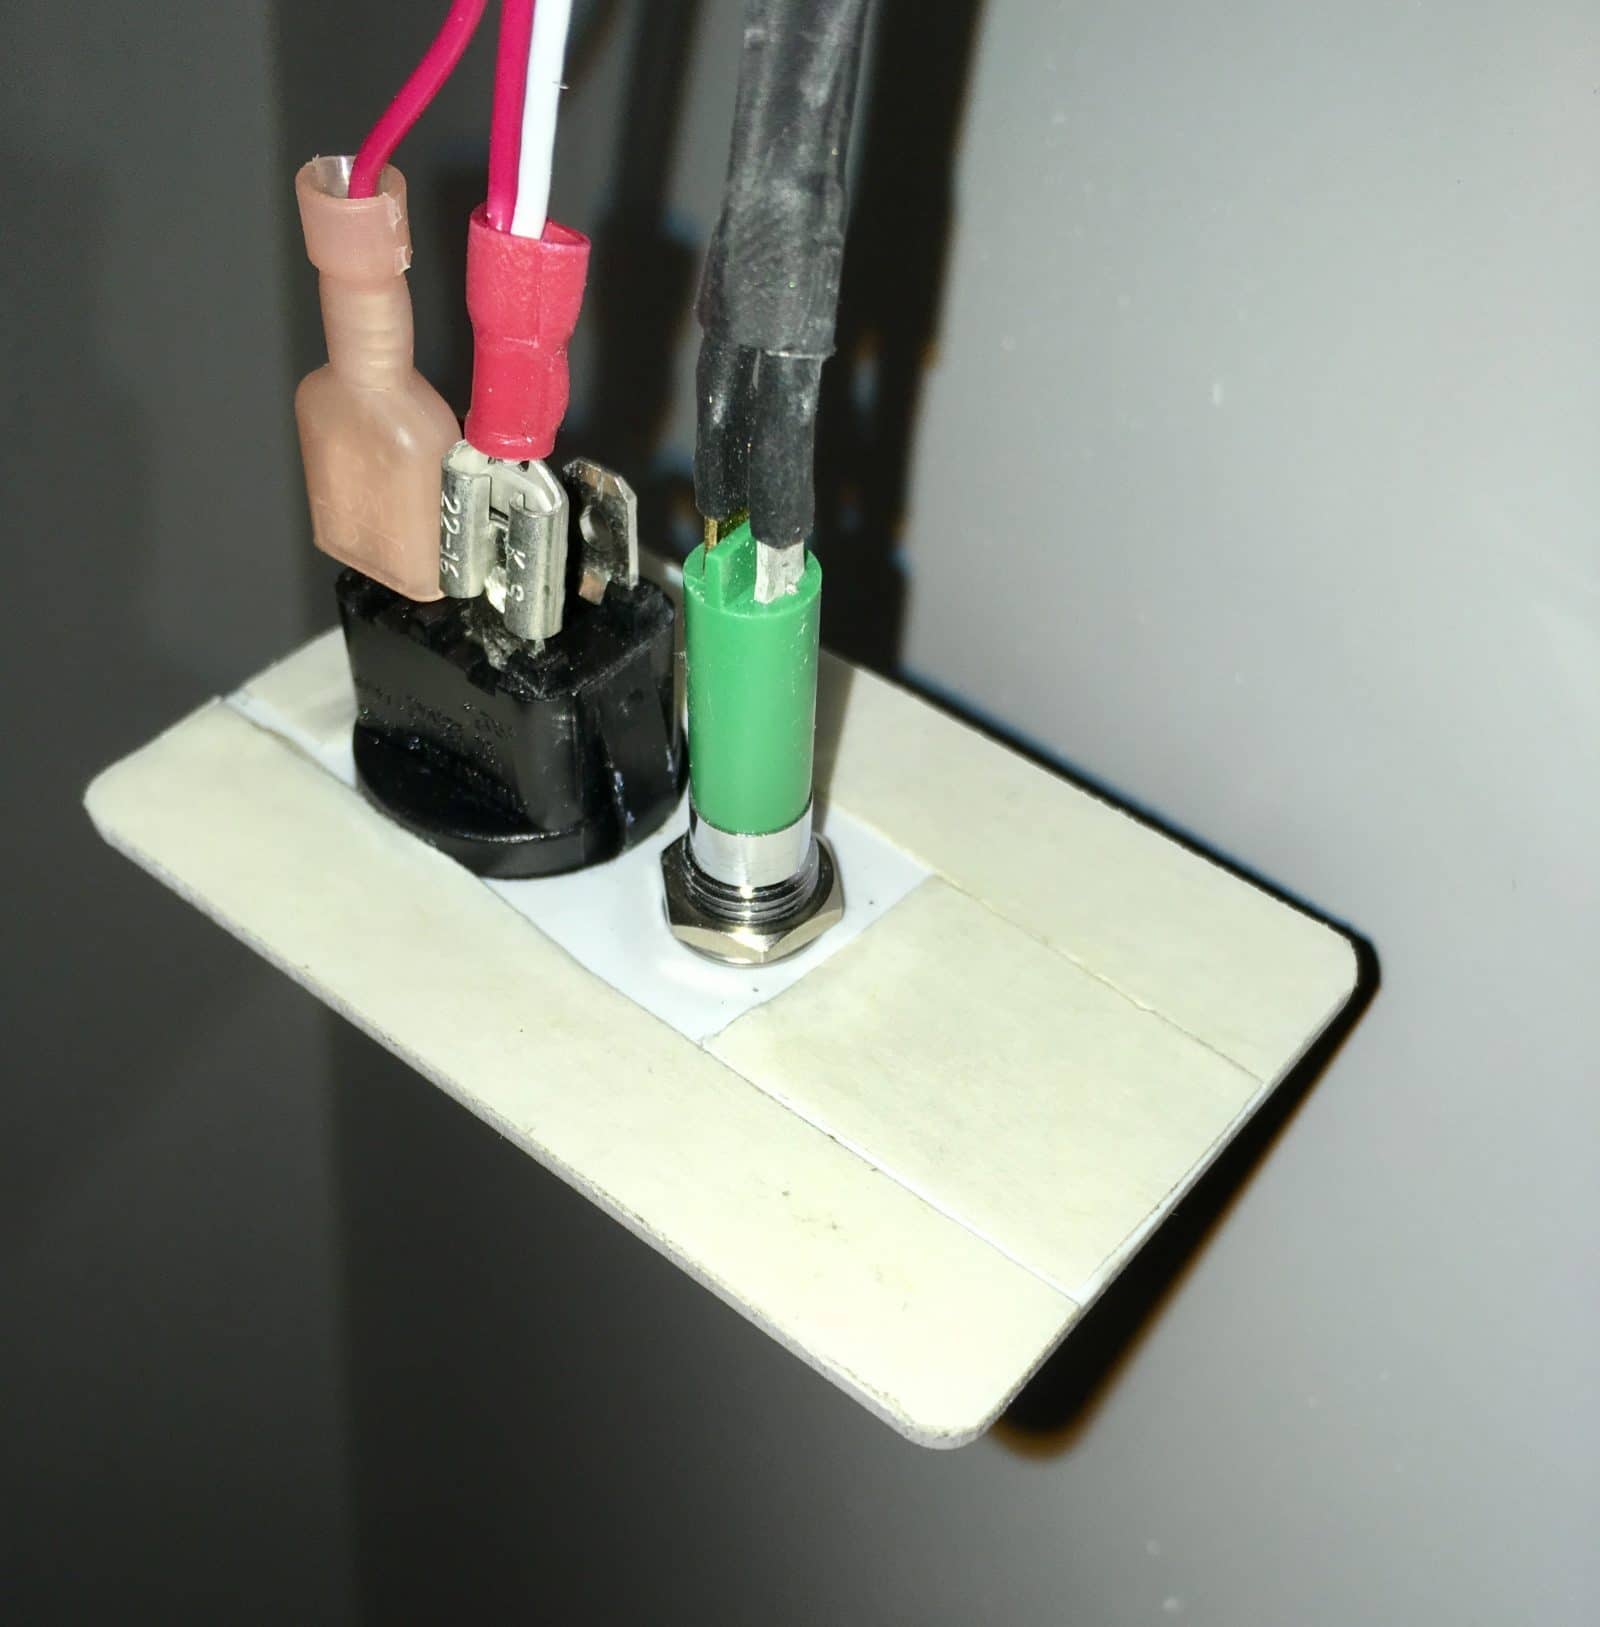
The Garmin transmitter is stuck with the supplied double stick tape to the inside of the cabin wall, above the factory mounted Cell Amplifier switch, in Mouse. This is the cubby immediately to the rear of the bathroom wall. One of the two flat sides should face to the front, as shown. You can't see this surface without a mirror - I stuck my phone inside the opening and fired off a dozen shots until I got a good one: I picked up power for the transmitter from the rats nest of cabinet lighting wires inside the cubby, accessible by removing the round hatch in the overhead cabinet in the bathroom. Oliver diagram - Yellow is Ground, Red (Pink actually) is 12 V DC: Here are the parts I got from Oliver: placard, switch and green LED. I supplied the standard spade connectors. Note that the brass colored terminal on the LED is positive, the silver one is grounded: I soldered 24AWG wire to the LED, and covered the connections with heat shrink tubing. The factory uses crimped mini spade connectors but I did not have any of those. This method allows you to slide the wires through the placard hole and install the nut and washer from the back side: I added a guide line using tape, and drilled the holes. They need to be bigger than the 3/4" switch and the LED, to clear the nut and prongs. I opened the holes to 1 inch and 1/2 inch using a step drill bit. Drilling fiberglass is always messy. I used a shop vac to collect dust as I drilled, to keep it from going everywhere: I made splices inside the cubby to Pink and Yellow, and fed my new wires out through the holes to the switch and light: Because the holes in the fiberglass are oversized, I used tape like the factory does. I used carpet tape, after cleaning the two areas with alcohol: Then I placed the new panel into position, being careful to get it square with the other one, It works! It's always nice when that happens: The light is bright enough to easily see from the cabin doorway: Finally, I added a note on the access panel: Almost done, More to come. John Davies Spokane WA
1 point
-
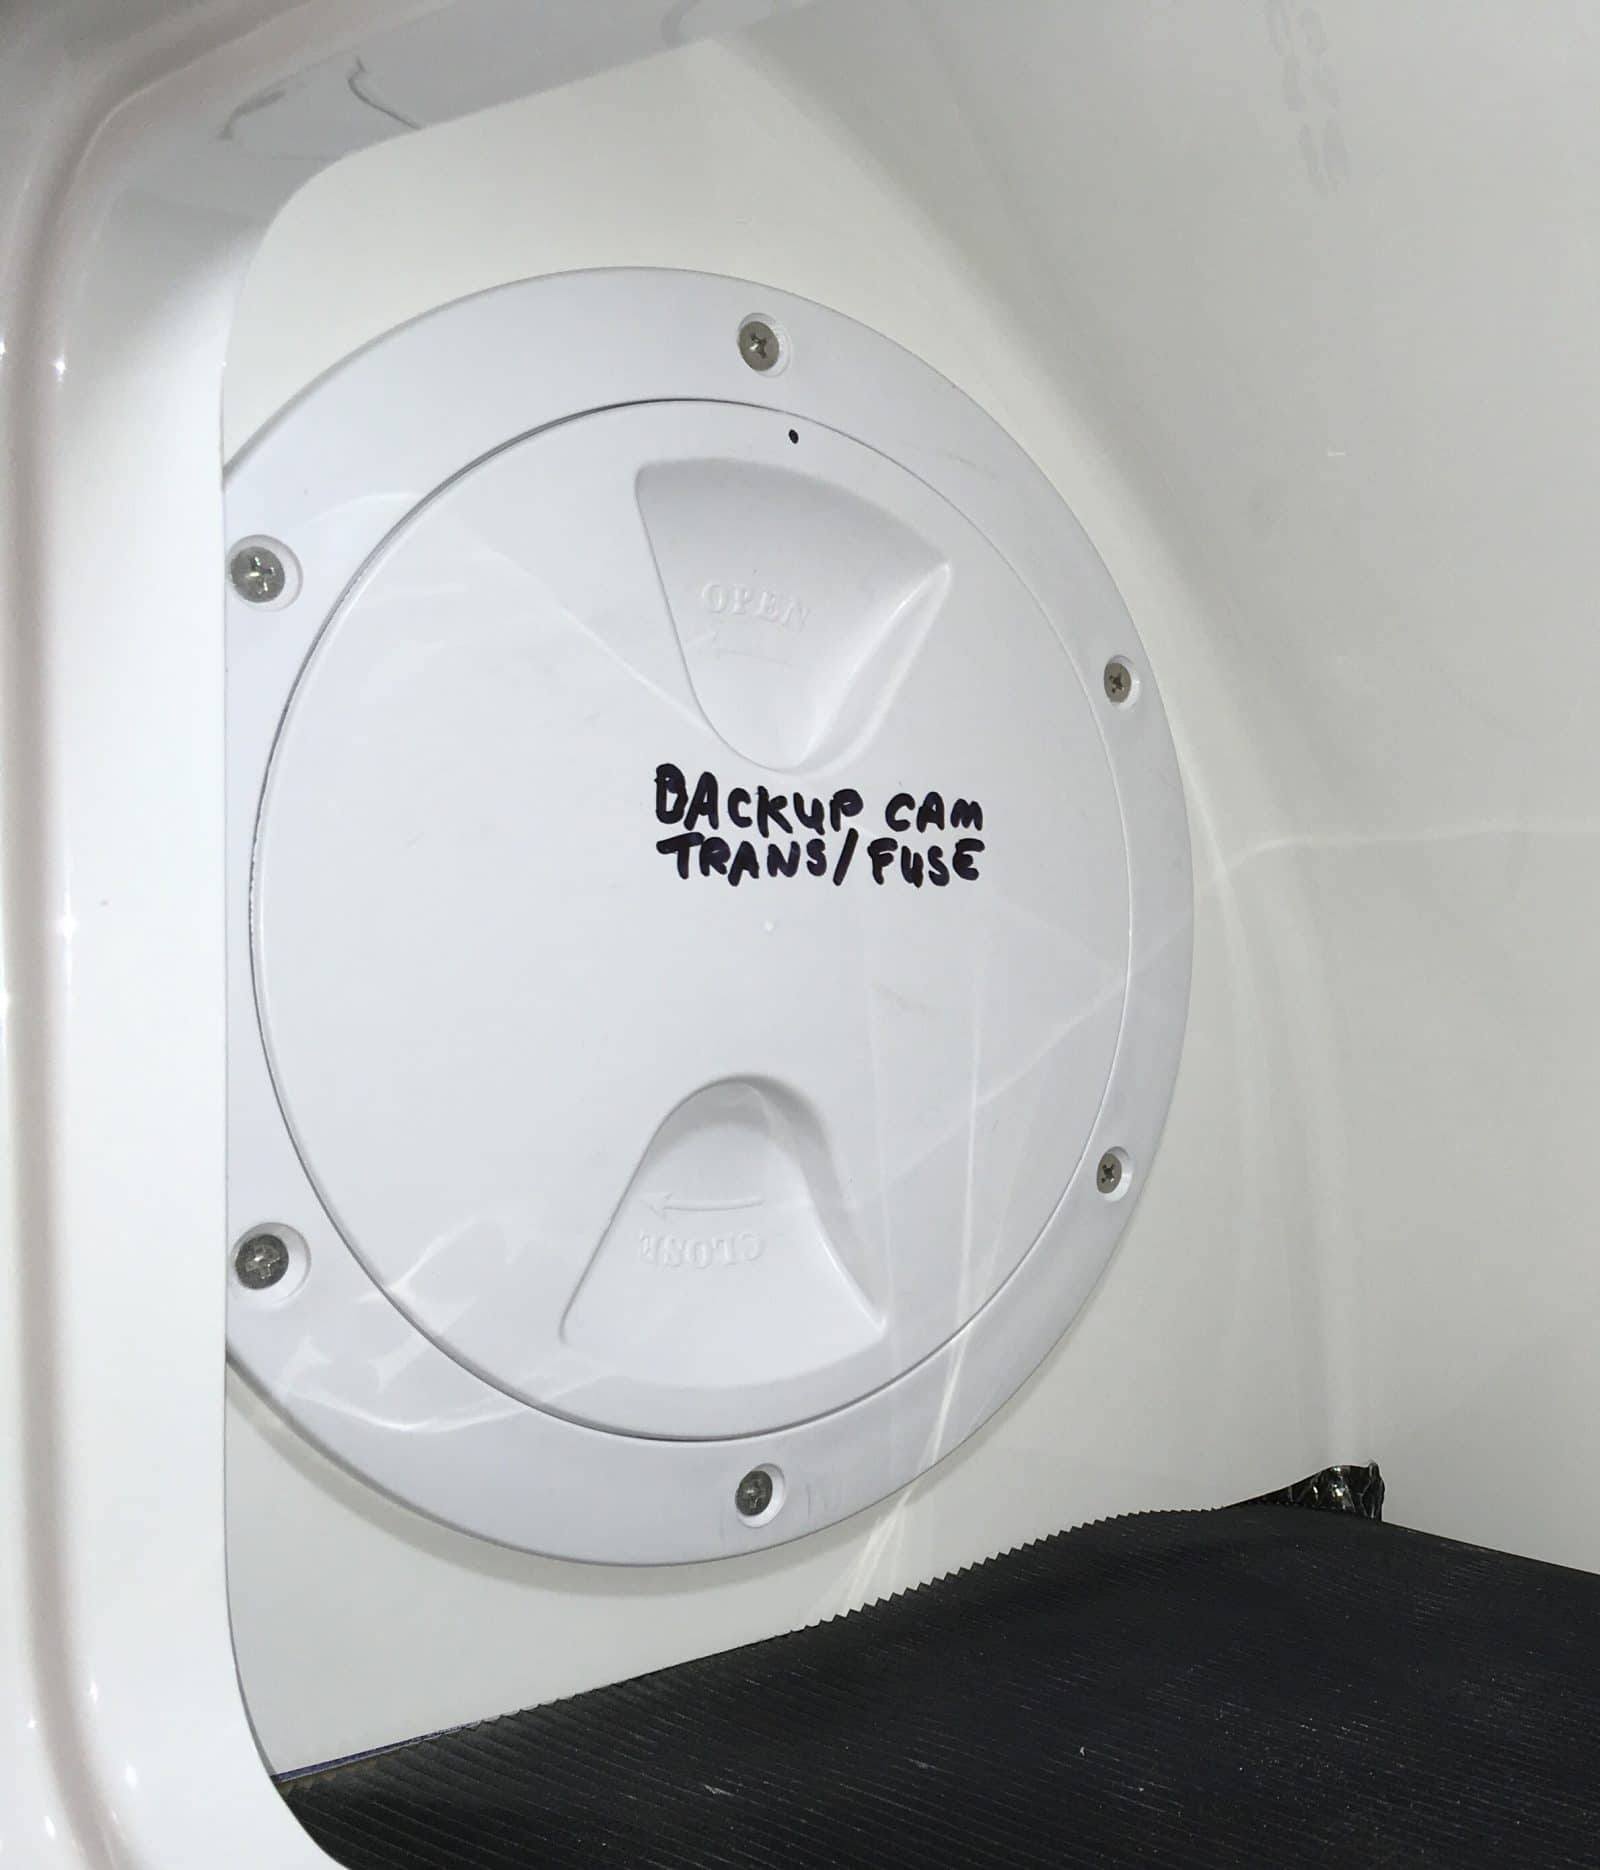
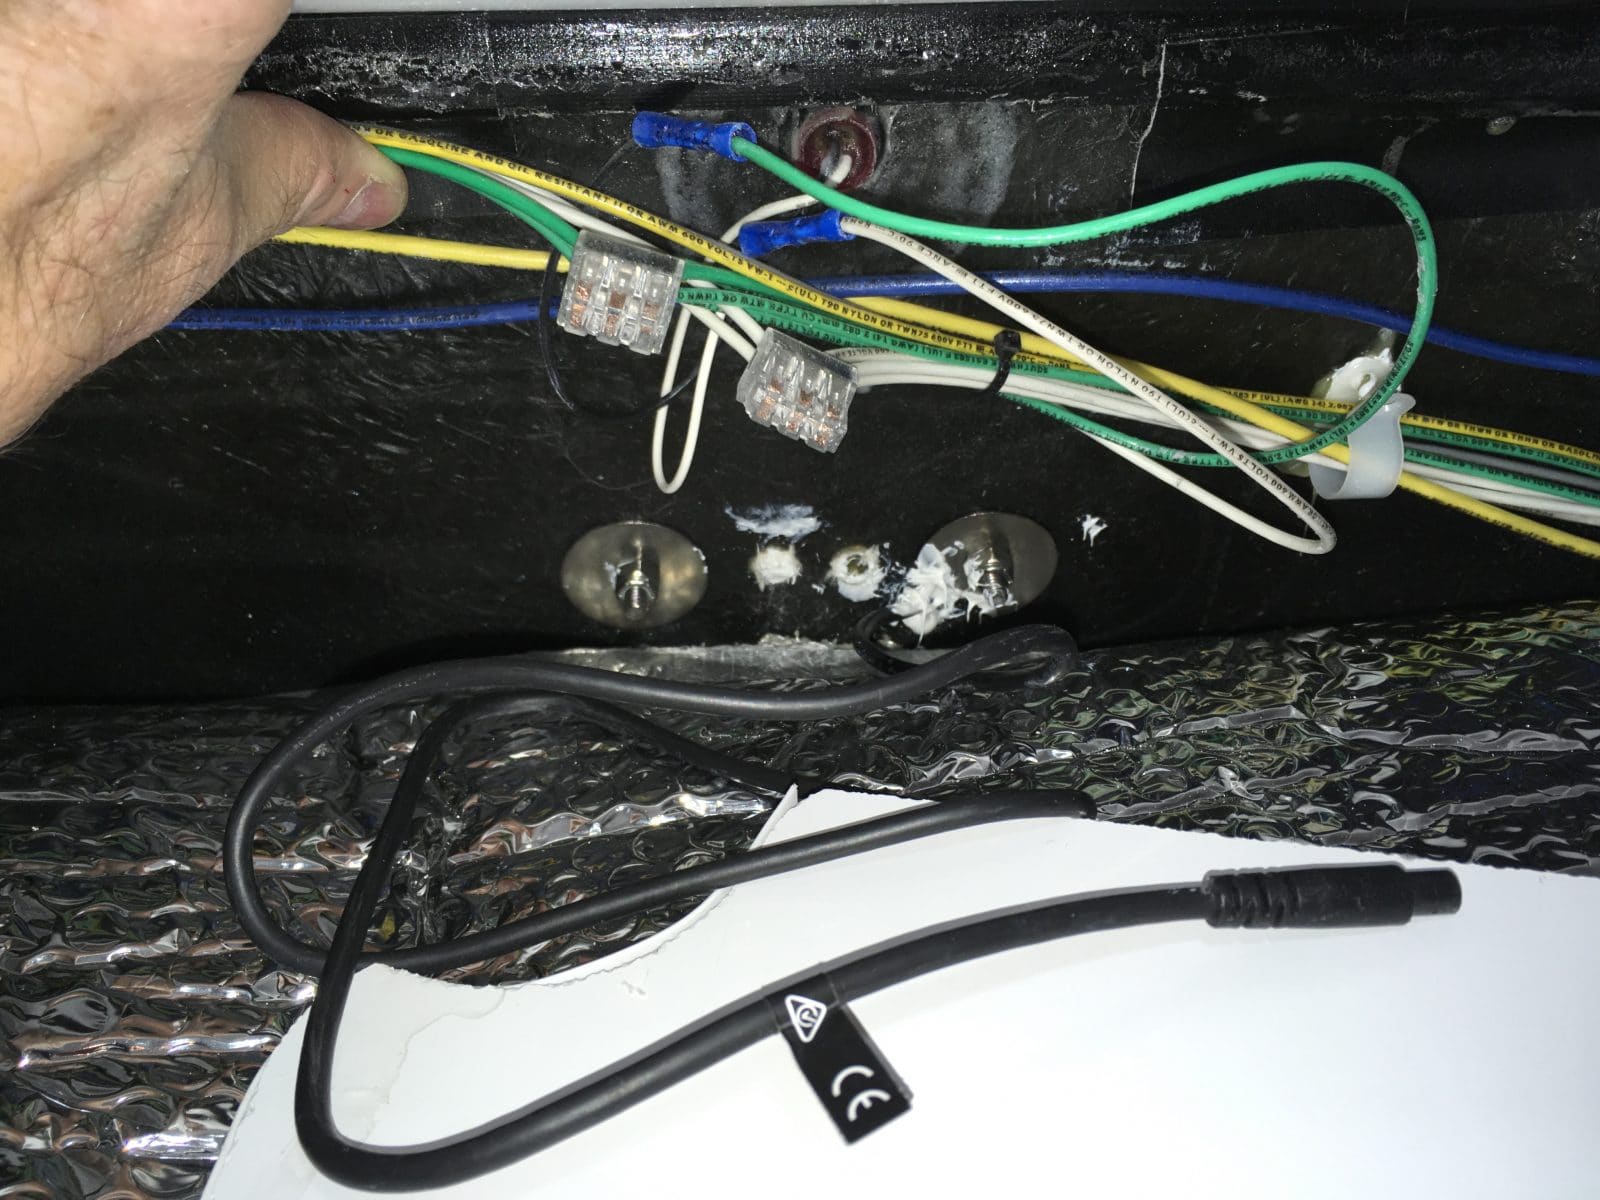
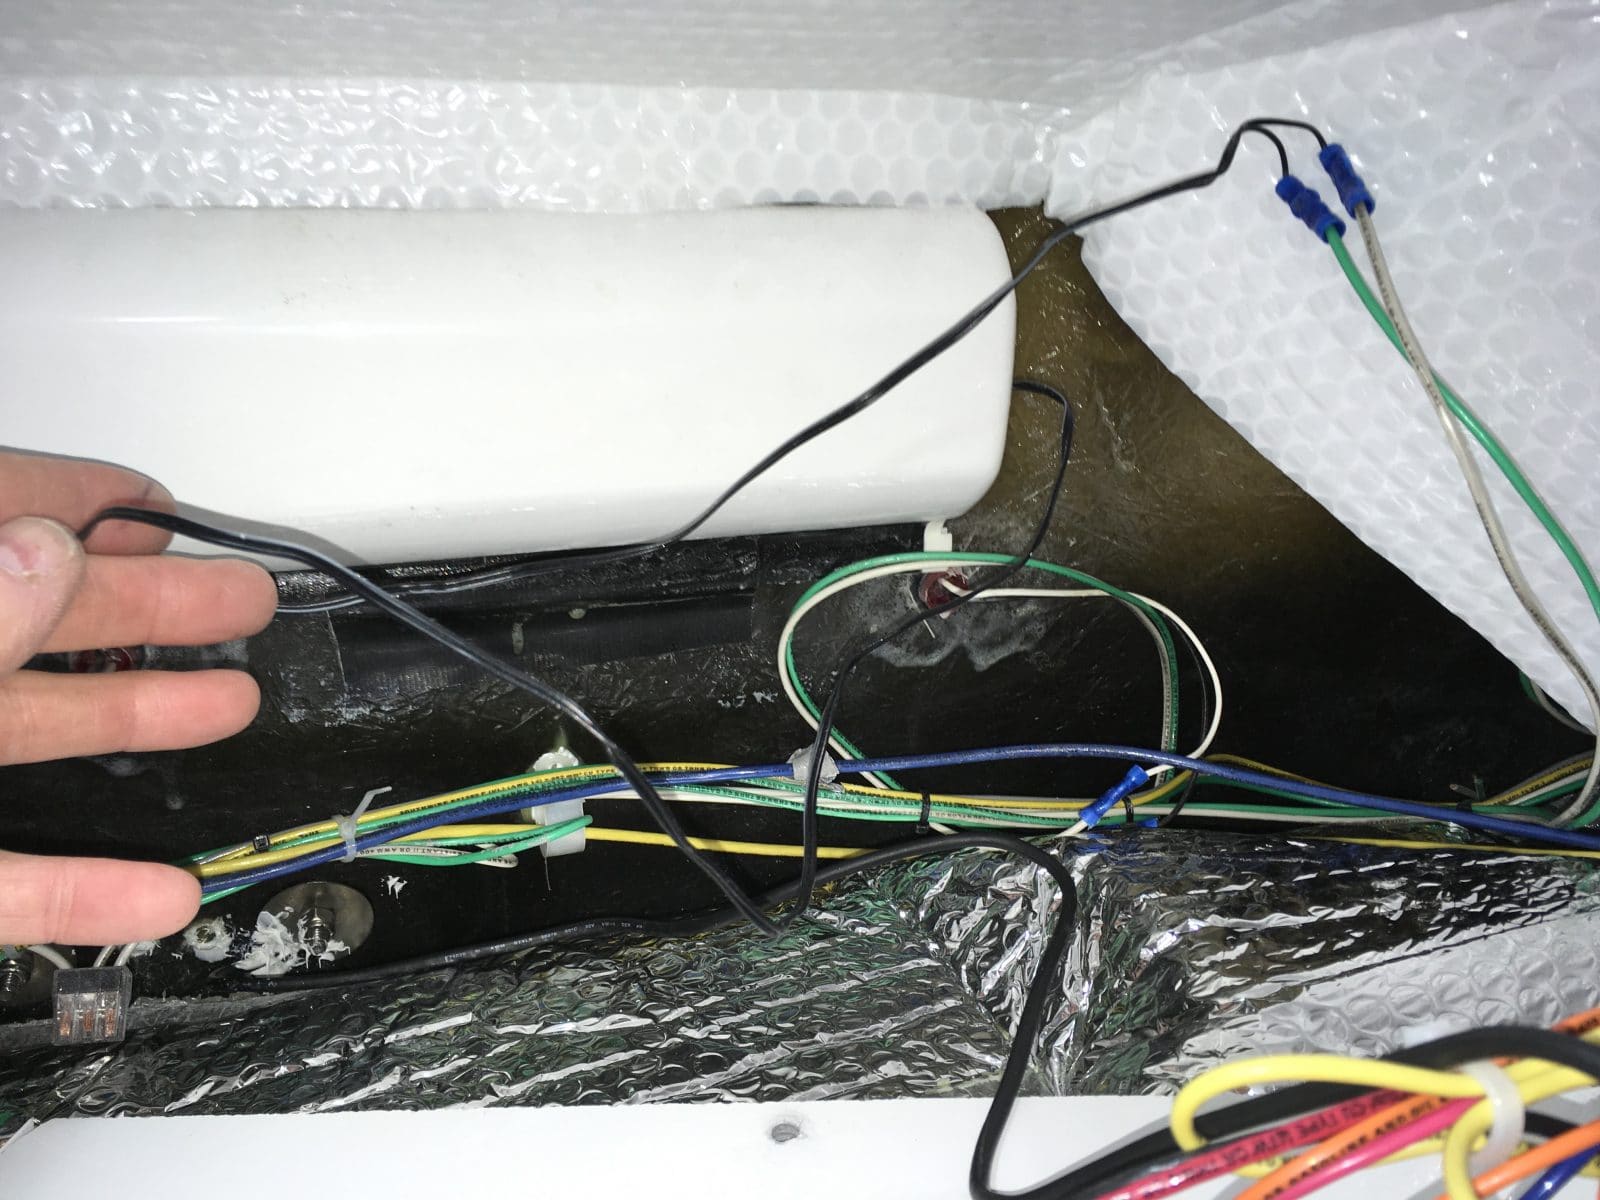
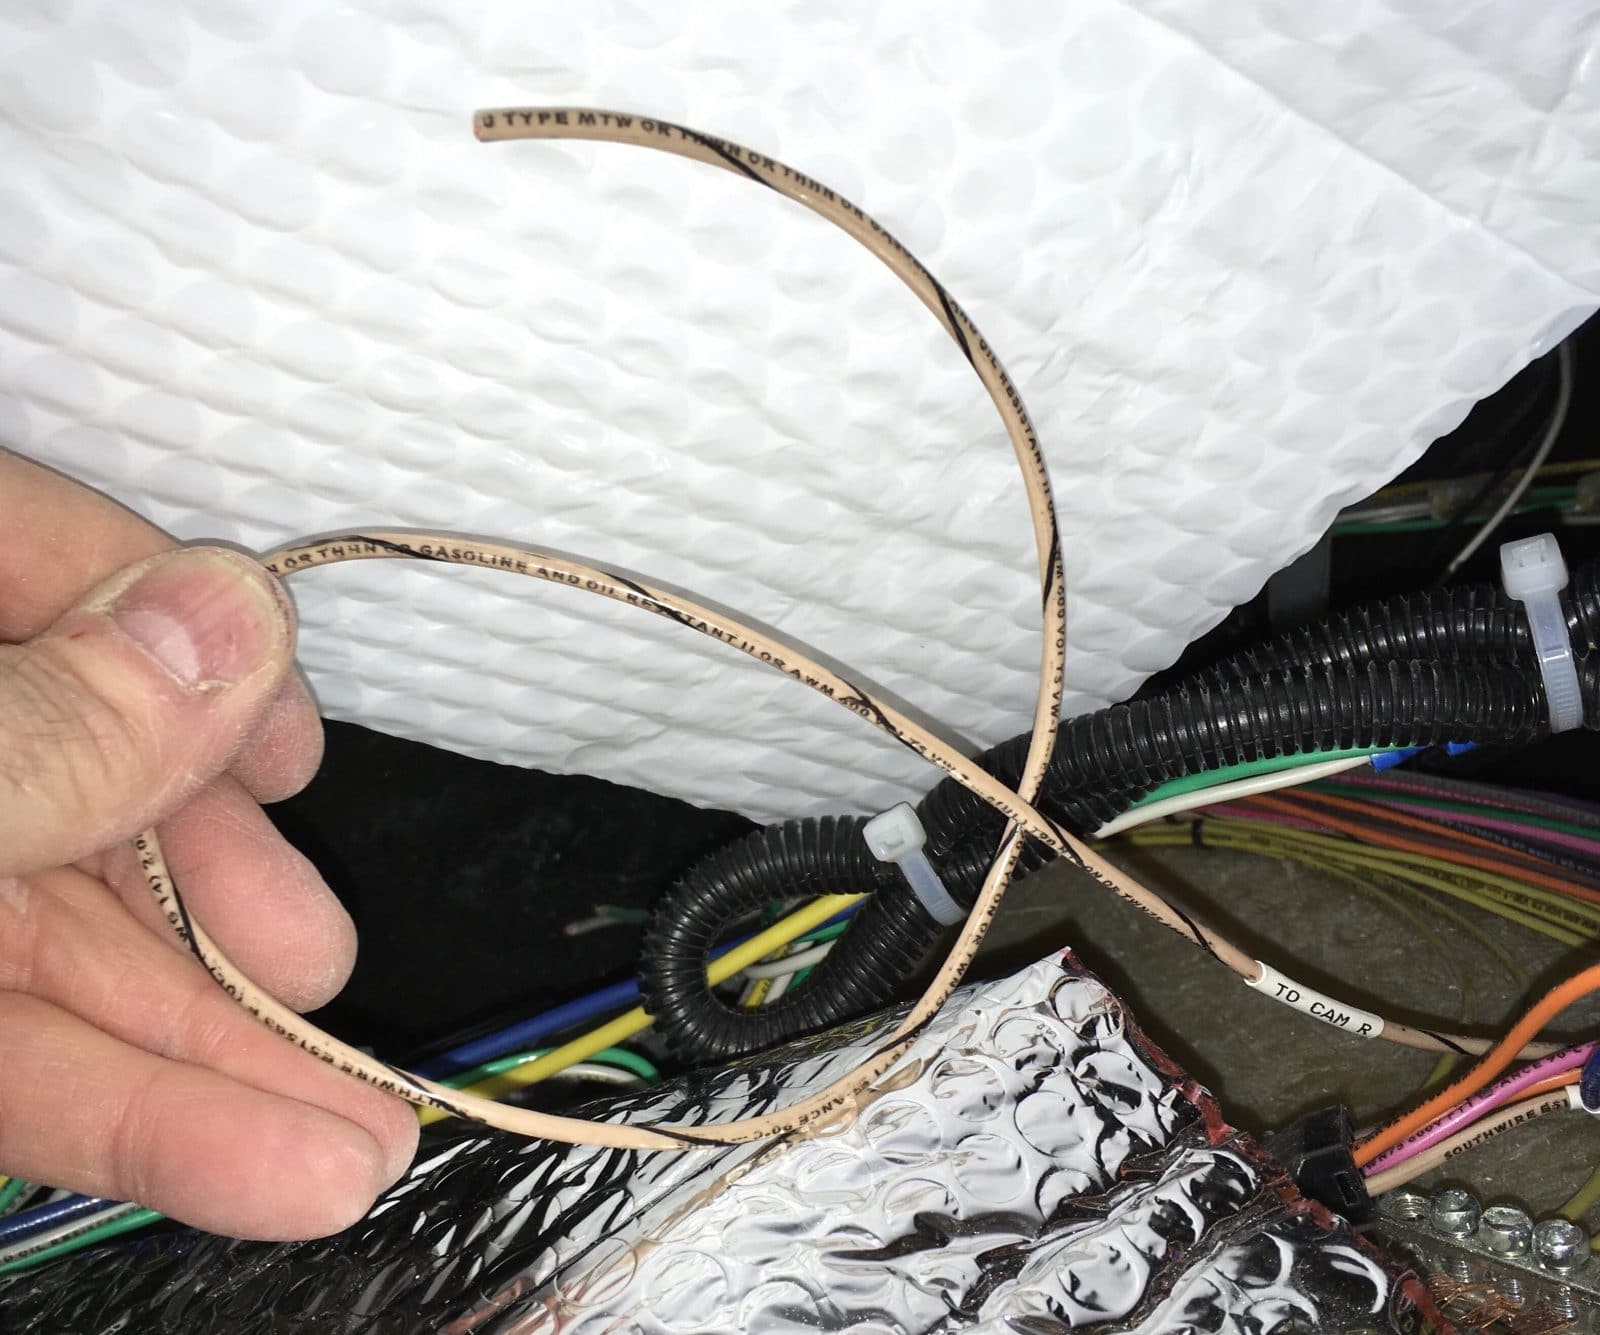
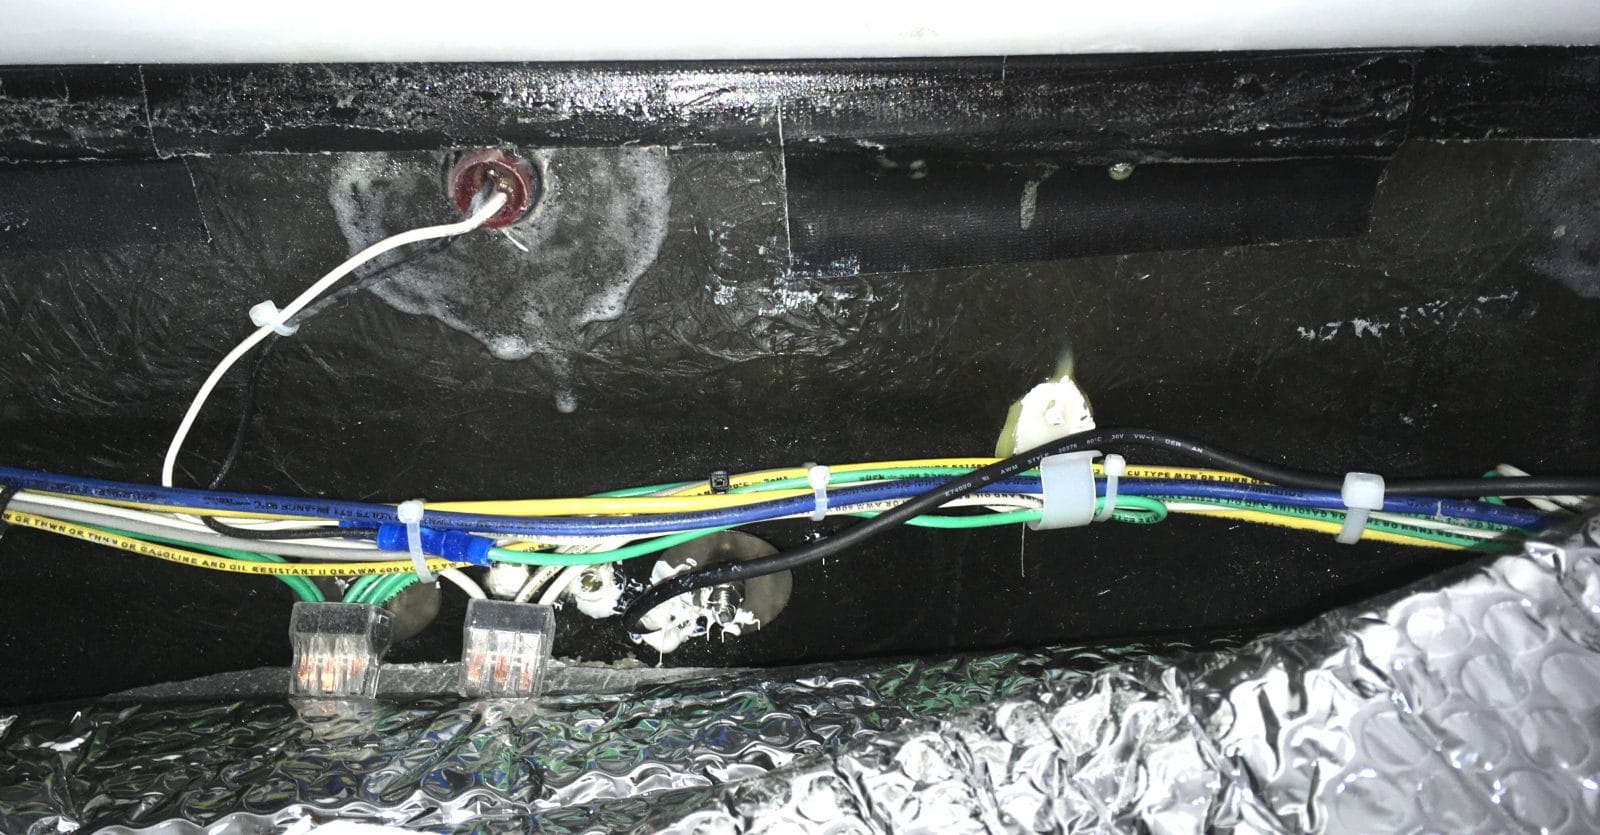
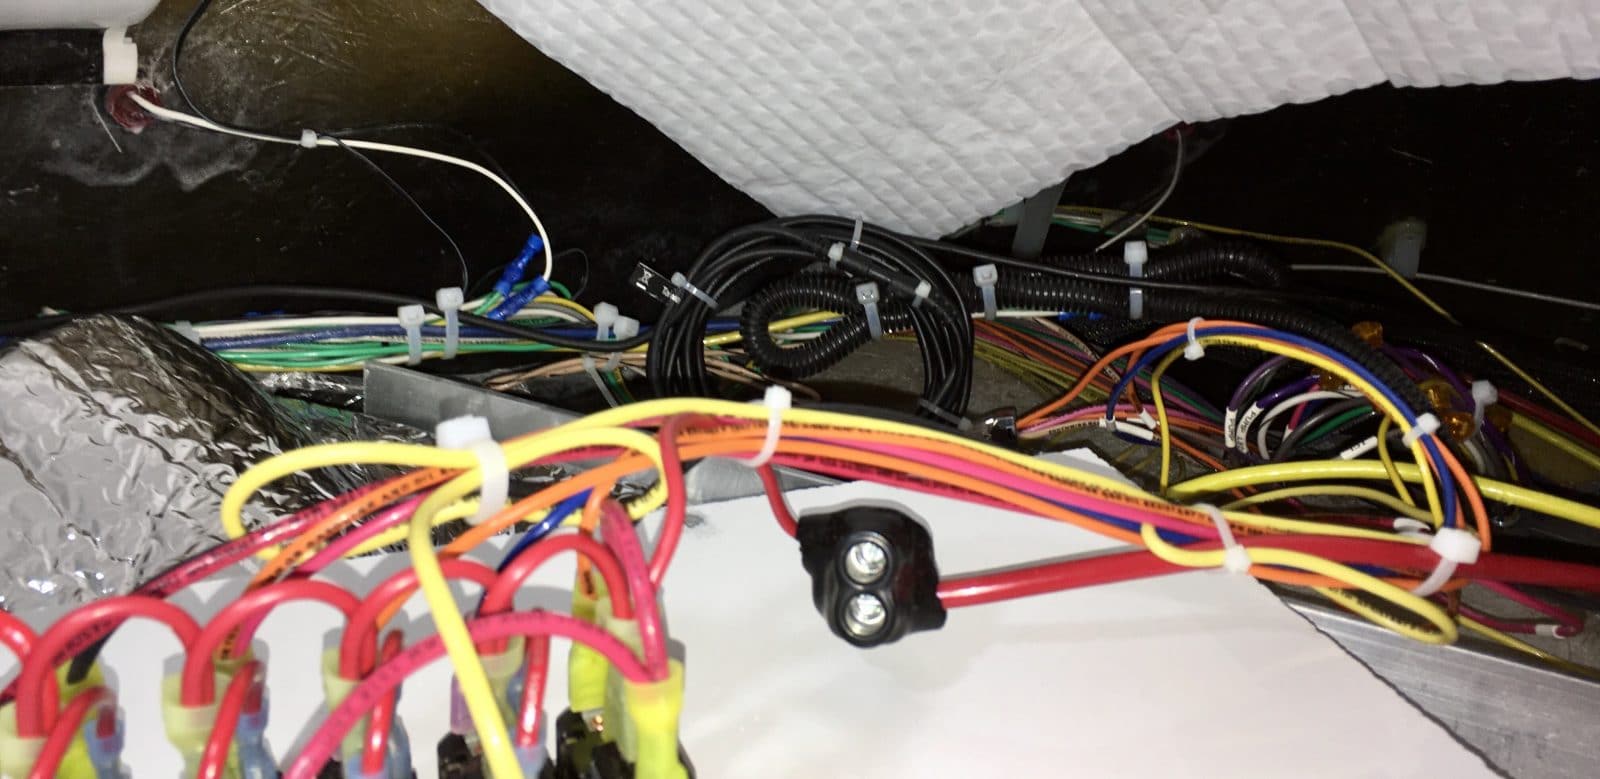
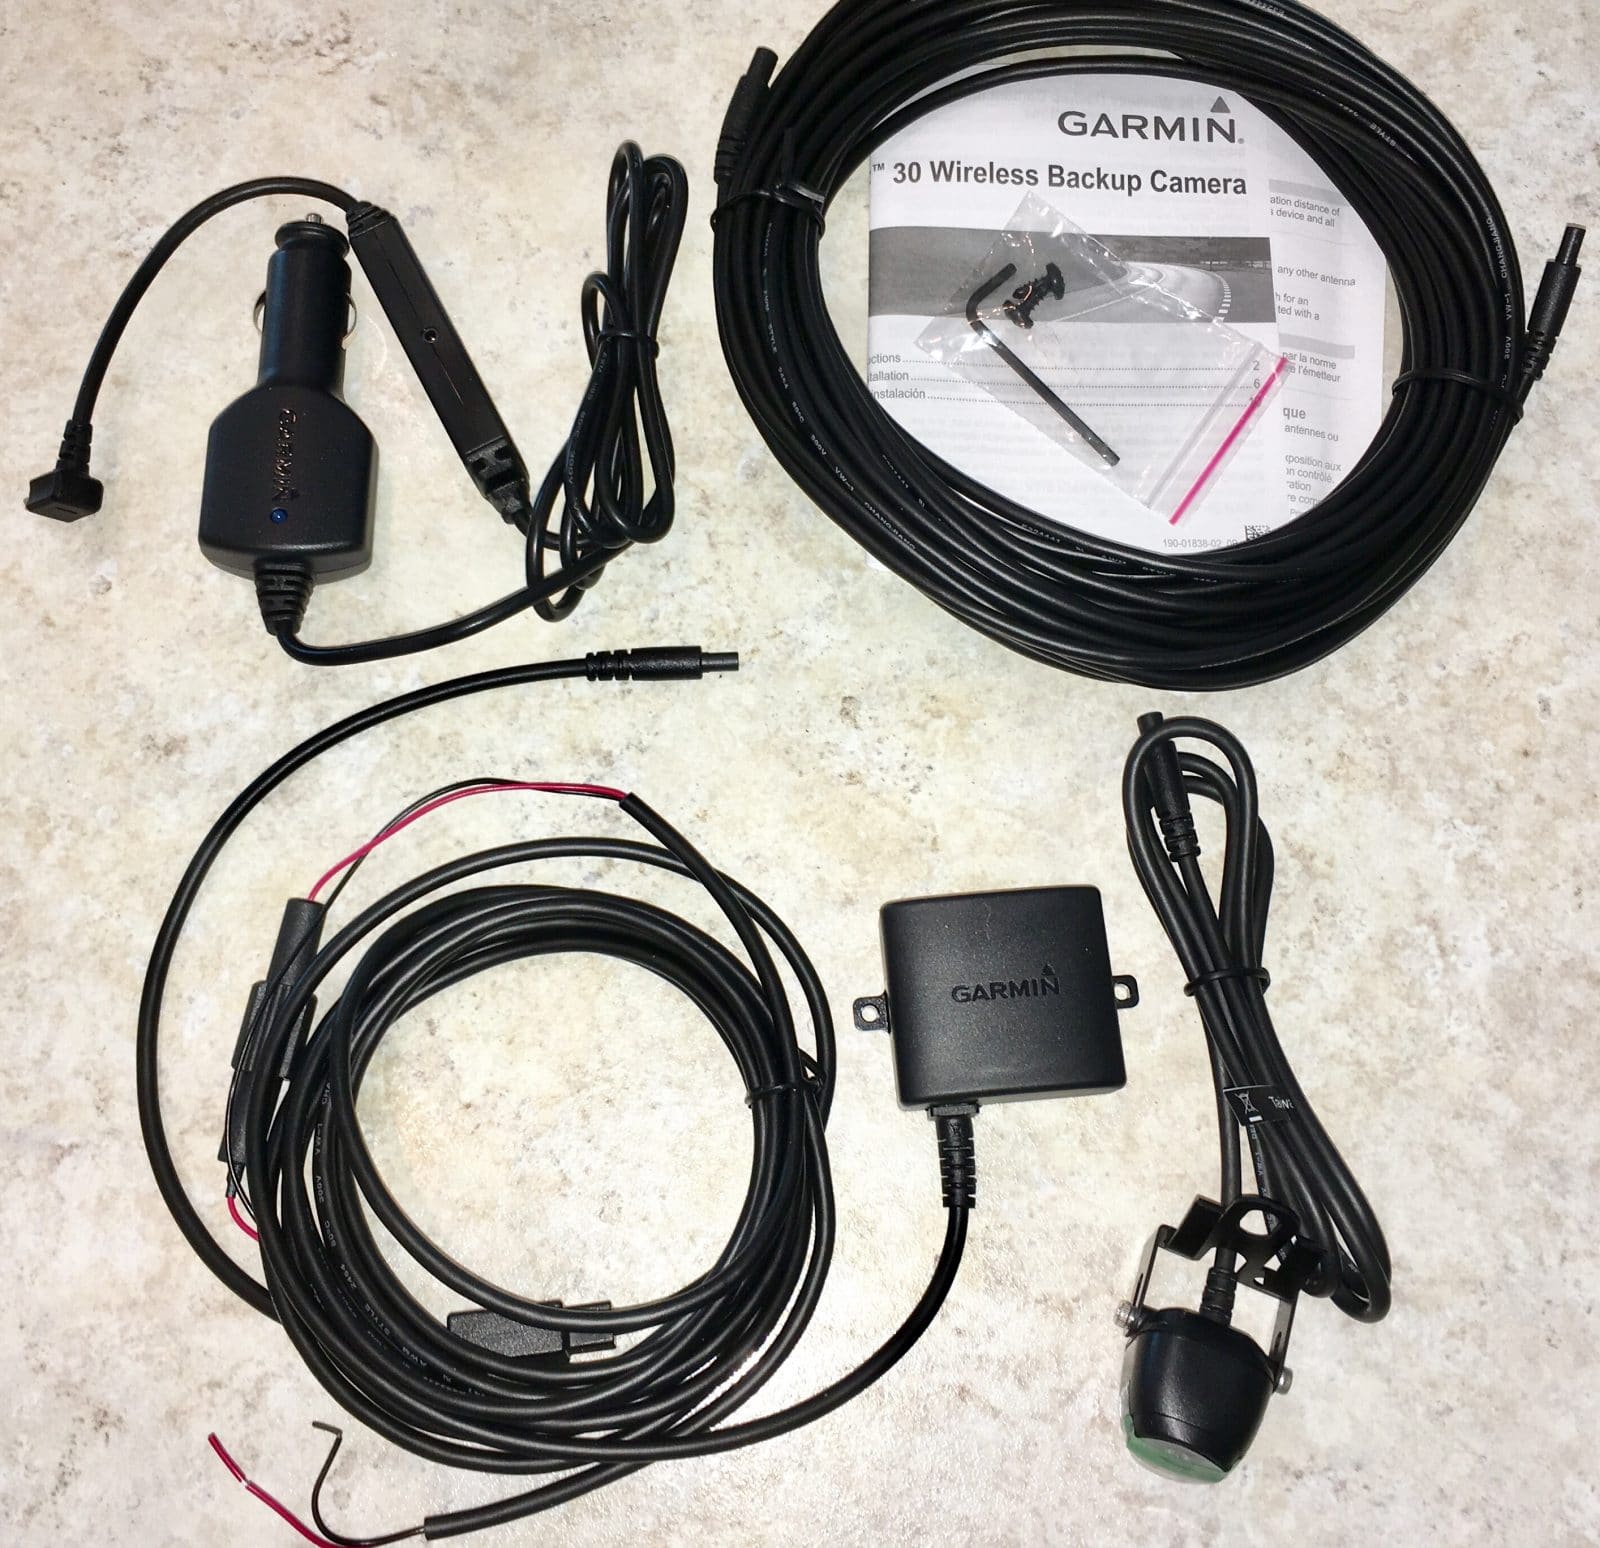
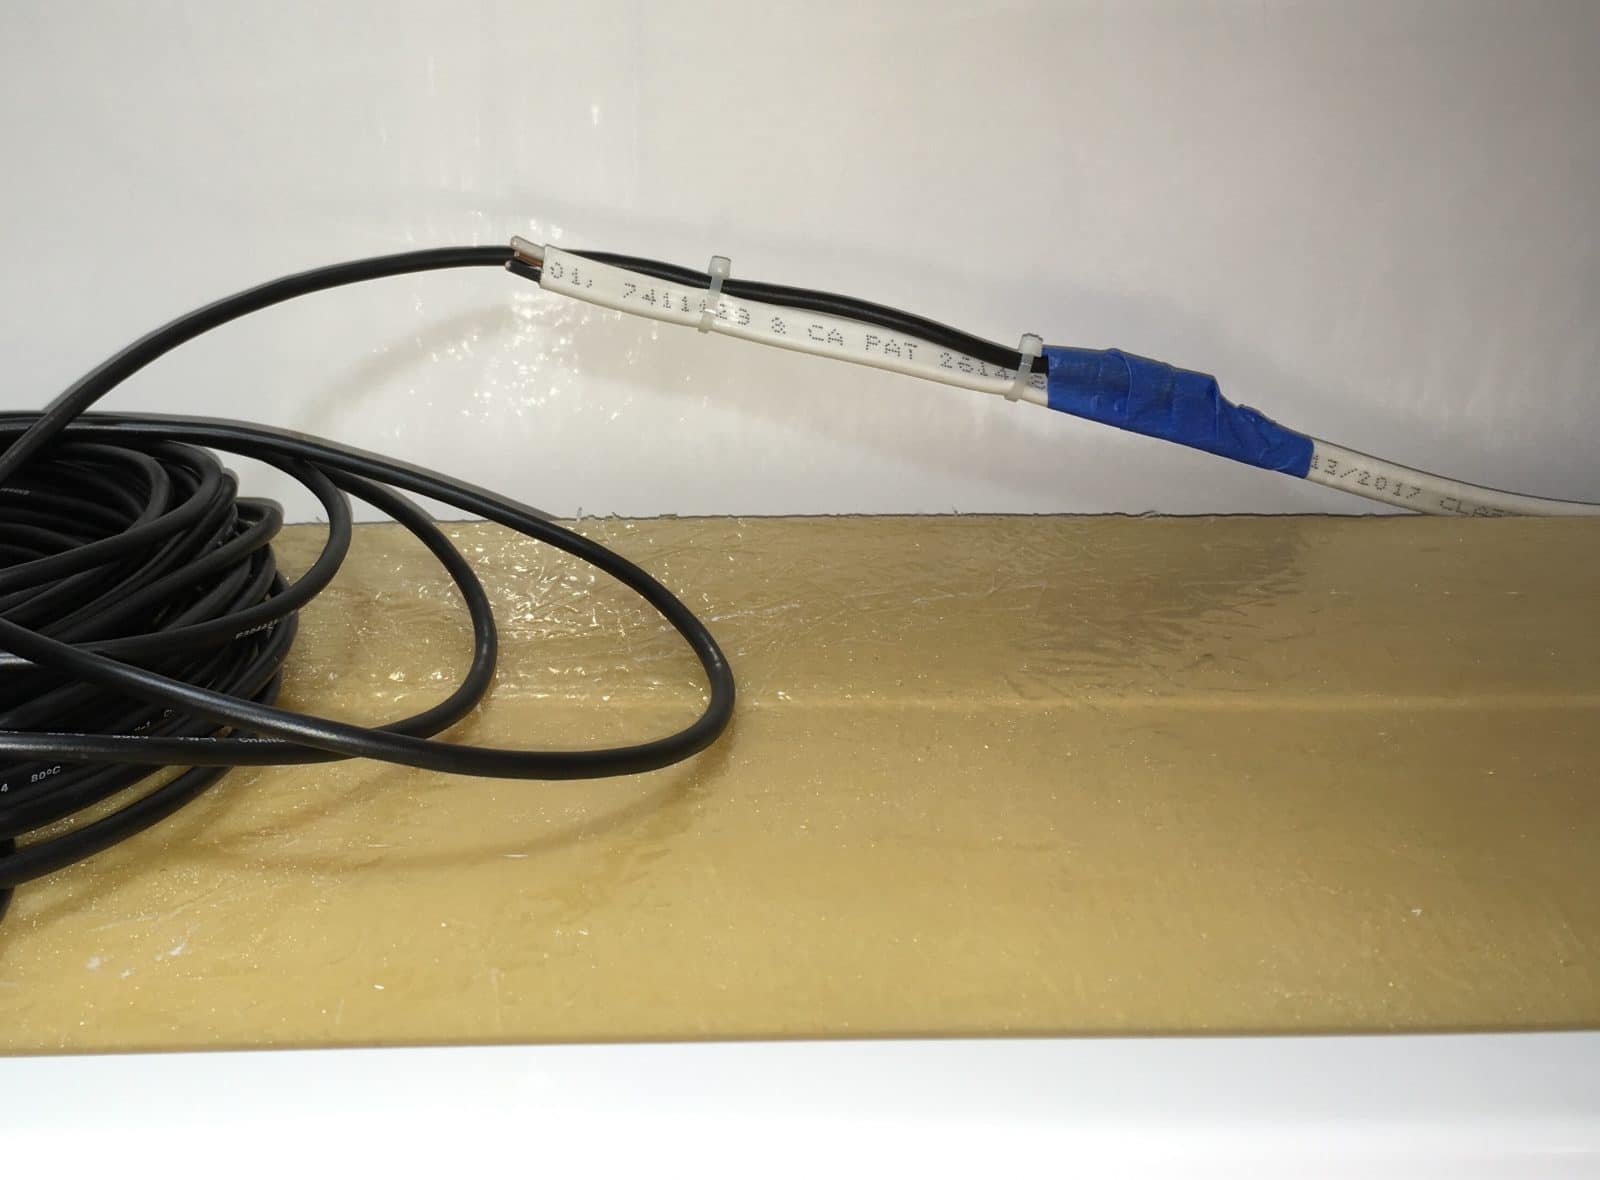
FINALLY, I finished this project. I have been using it by hot wiring the camera every time I tow, which is probably not a prudent long term solution. Heres most of the electrical stuff, reposted: The inside look at the camera wire coming through the rear outer wall. I reglued the two white plastic harness supports that fell off...: The wires for the Oliver Sign, about 5 feet (!) too long: The unsecured and un-capped wire for the factory Backup Camera: Wiring secured: The Garmin video extension cable is 50 feet long, about 30 feet too much, so the excess is coiled and secured in back. It is not good to secure coax in anything but a loop, you can damage the inside, so I have heard: I ran the cable along the outside of the street side overhead cabinets. Access is very easy when the rubber mats are removed. The only problem was the pantry, which blocks a few feet, so I used a piece of stiff 14/3 house wire to act as a snake. I fed it through from the cabinet over the dinette, and taped the Garmin cable to it to pull it back forward: More to come. John Davies Spokane WA
1 point
-
We've had our Oliver (Roamy) for a month and last week we took our second trip to the Sarasota, Florida to enjoy the beaches. We camped at Oscar Scherer State Park, which was quiet and clean. Campsite all setup, I put out the awning to keep the sun off our picnic table for our return meal. We headed to the beach and as is the case, late afternoon thunderstorms are the norm in Florida. As a storm came in, we packed up and head back to our site, but the storm beat us there. A good inch of rain fell in about 15 minutes and by the time we returned the storm had moved pass our site. However our awning did not make it. The left leg broke off at the bracket on the trailer and it then bent into an L-shape. Yes, I can still hear Rich Carroll telling me to angle the awning for water runoff! So a quick search of the Internet for Fiamma and find that they are in Orlando, FL. Then this all turns very sad and tragic. Fiamma is close indefinitely do to a workplace shooting that took 5 people's lives. Fixing my awning seems unimportant, our thoughts and prayers to everyone involved.1 point
-
That unit is one of the original 2008 models. Since there were only 49 built, we could probably figure out which one it is.1 point
-
I don't have any complaint at all with the size of the two twin beds. I didn't run to the dictionary to get the legal measurements of traditional twin beds and it doesn't bother me at all that there are other beds called "twins" that are a different size. I certainly don't think they have been mis-represented. No problem here. There are two beds, each sized for one person to sleep comfortably with easy access in between. And since there are two of them next to each other, and the same size, they are twins. Not twin beds from some bed store somewhere, but two small beds that match each other. Twins. I haven't seen any Oliver literature that claims they are a size different than they actually are, or claiming they are some standard "twin" household size. BTW, household "twin" beds don't have a rounded corner on one end either. And "normal" twin beds at home have thicker mattresses. And household twins are in houses not in small trailers. I just don't see what the problem is. But I'll contemplate it, maybe, while resting peacefully in my twin bed while out in the forest somewhere, as I listen to a babbling brook and a crackling campfire. I'll decide if I'm mad that this bed is a bit smaller than the one I slept in at home as a kid. Meanwhile, it is certainly much better than many I've camped with over the years in tents, the back of pickup trucks and on the ground. It's even better than the ones in my boat. While on the subject though, I was just deciding if I was mad about Oliver calling my trailer "white". I've seen a brighter, whiter snow white before, and this may not actually be as white as I expected! I've seen other whites, and I'm not sure this is actually white. Hmmmm. I wonder if they misrepresented it?1 point
-
I don't think it was ever Oliver's intention to represent the trailers with "twin beds" as anything further than meaning it was equipped with two individual beds rather than one.1 point
-
Overland, The dip tube that is in the picture is designed to go all the way to the bottom of the tank and sit against the bottom. It is designed with a bit of extra length to accommodate tanks that may be slightly different from the normal overall depth by dropping all the way to the bottom in any of them. If you look closely, you'll see the end is capped. This particular style sweat cap was picked because it is flat on the end and has rounded smooth corners. In other words, it is very kind and won't dig into the bottom of the tank. All of the water enters around the perimeter of the cap, not the end of the pipe. The cross-drilled pickup holes were drilled tangent to the inside surface of the cap. If you add the diameter of the pickup holes to the thickness of the cap wall, it comes to just under 1/4". The top of the holes are 1/4" or less, from the inside surface of the tank. This arrangement will pick up water down to about 1/4" deep and do it consistantly in any tank it is installed in. As mentioned earlier, mine began to get some air at 6% tank level, but ran until the gauge read 0%. At that point it was sputtering, but still drawing enough water to drink, but not to shower. There are four holes. The surface area of all four holes added together equals about 1.7 times the surface area of the inside of a PEX fitting. Allowing for the vena contracta of the flow through those four holes, the restriction is still less than each PEX fitting used in the rest of the system. I also chose to install brass fittings and a brass PEX ball valve. These have slightly larger holes through them than the factory plastic fittings. So, the pickup holes have no affect on the flow rate compared to the stock pickup. But if the holes were bigger, we could not get as much water out of the tank. This was the only way I could think of that had a consistent pickup depth, could be installed in any tank and always end up with that same depth (with no measuring or possible installation error). It is totally accessible and serviceable, even with the water tank full. It does not affect the original pickup fitting, or the original tank drain piping. And it ties into the existing piping at locations that are accessible, which makes the work much easier than it might have been. If debris enters the tank at some point and clogs one of the pickup holes, it will still work well. If more than one hole gets clogged and a restriction is noticed, the dip tube assembly can easily be removed, without draining the tank, cleaned and re-installed. You cannot do this with the stock pickup tube as originally built. BTW, any restriction that reduced the flow would put no extra load on the pump. They are designed to run fine with a wide range of suction head pressures and they are just diaphragm pumps, which are very tolerant of flow restrictions. These pumps can run dry or at full pressure constantly without damage. They can draw from full or nearly empty tanks without damage. The first thing you might notice with a clog is a reduced flow at the faucet with the pump running. This is the same thing you might notice with a clogged aerator in the faucet, it's the same effect as when the faucet is only partially open. Until my system started drawing air at about 6%, I could not detect a difference in the pump sound or the flow rate compared to before the modification. Then it pumped the air and the water to varying ratios until the tank was pretty much empty. This kind of tank, with wide and shallow dimensions, requires a non standard kind of pickup. It won't get every last drop, but I think it's the best we can do. Having tanks of this shape is a real advantage because they take up so little room, are protected from freezing and are not outside where they could get damaged. Fortunately, the corner of the tank and its piping are right there below the cover under the bed. In the past, I wanted to do some work on the water tank in my Fleetwood, but found it was nearly impossible. This is relatively easy and I was inside instead of underneath. The biggest problem here is making the emotional leap of deciding you are going to make a hole in the tank and then spin welding on a fitting. Once that hurdle is over it is just a matter of doing some PEX and fittings. I think the future ones will have a larger tank fitting bushed down to the 3/4" dip tube assembly. This will help with screwing the fittings together and give a larger hole to vacuum out the tank if needed.1 point


-
Recent Achievements
-


")


")


")
