Leaderboard


Popular Content
Showing content with the highest reputation on 05/02/2018 in Posts
-
They're looking at 200-250 per year as a good level to get to. This would mean a full-time speacialized workforce and improvements in buying power and efficiency. It would mean more profit through lower per-unit cost with greater quality and more profit by producing more units. At the same time, they want to avoid hurrying the employees which would mean more stress and more mistakes. The low-stress atmosphere at the factory is impressive. They are making steady improvements in the trailers and it's pleasure to see it. They have recently made improvements in the galvanized truck under the frame, have made the EZ Flex standard, new faucets and bigger sinks, all have full size spare tires and better wheels, they have tongue and groove drawers and the wiring is all the same regardless of options ordered. So you can go back and add things easily. They are also watching the molds very carefully to keep them producing perfect shells and re-vamping them after only half the industry standard of shells produced. They have a "mold shop" with talented workers that are continuously fine tuning the shells whenever a minor flaw is found in the finished product. Check this month's, (June 2018) Trailer Life for an article on Oliver. I have only seen the magazine, but haven't read the article. Oliver is here to stay and they are setting a new standard. Watch for bigger news before long.5 points
-
Was talking with Jason at OTT today, and it looks like hull #369 is headed for the floor. When we picked up hull #211 last year at the end of April they were on their way to building 100 units per year. Looks they have kicked it into high gear and the demand hasn't slacked off ...2 points
-
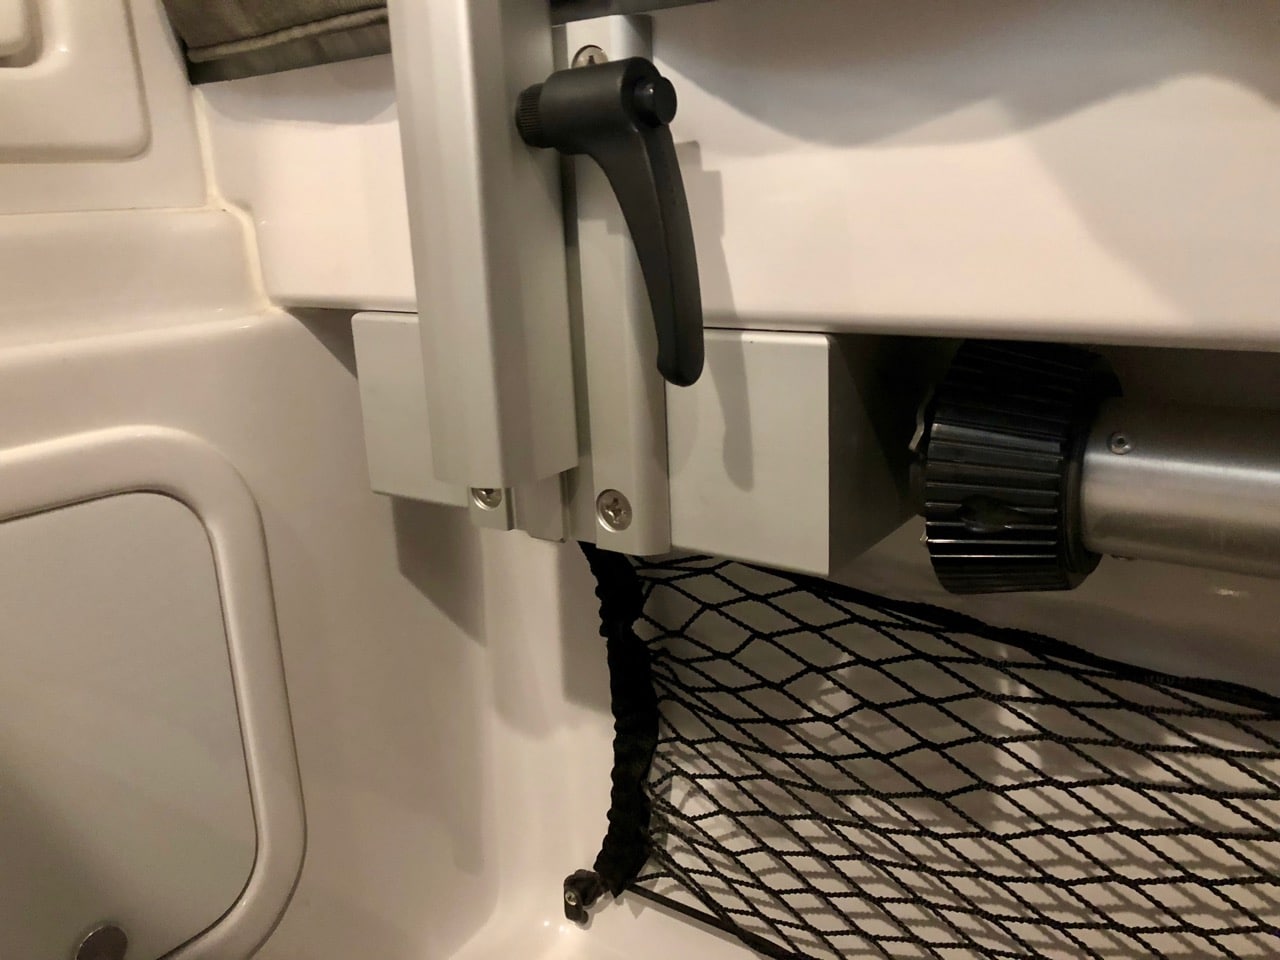
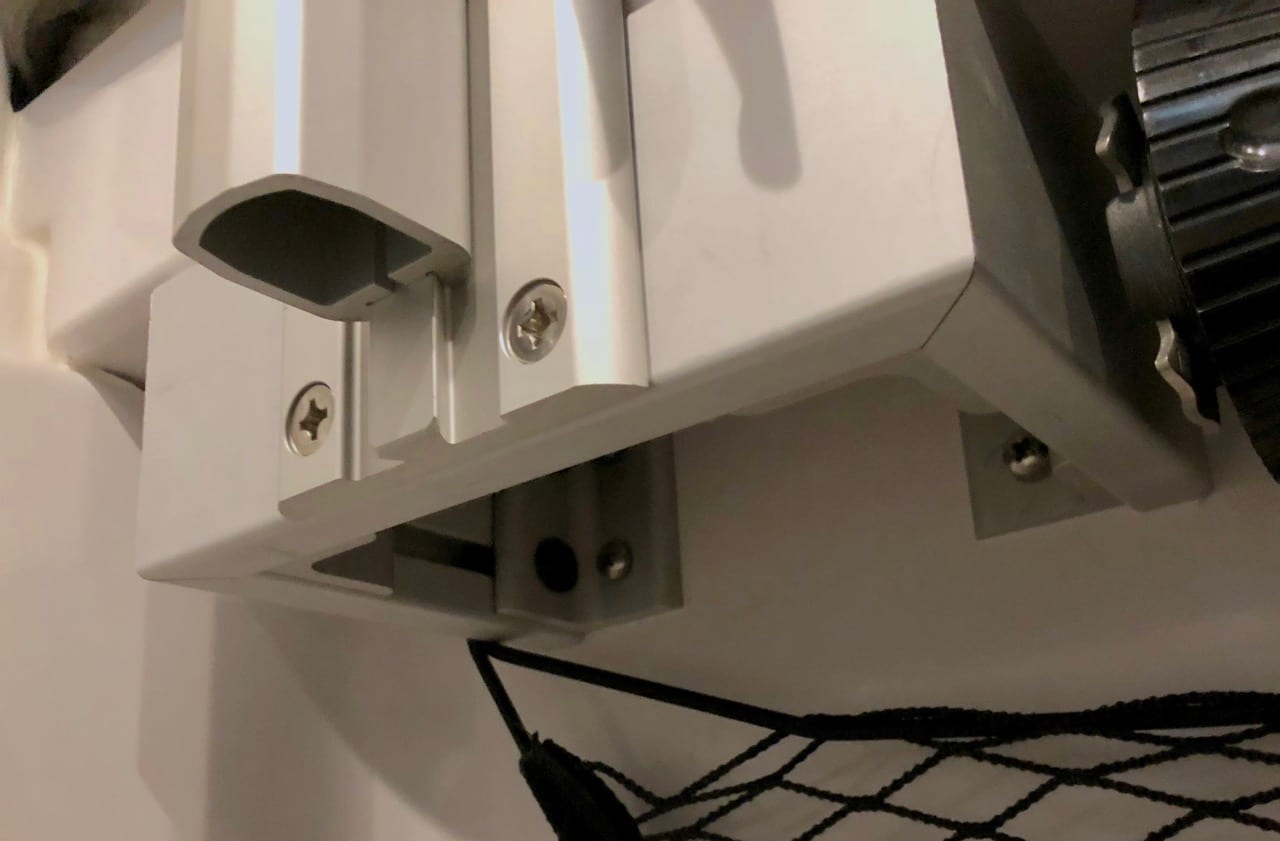
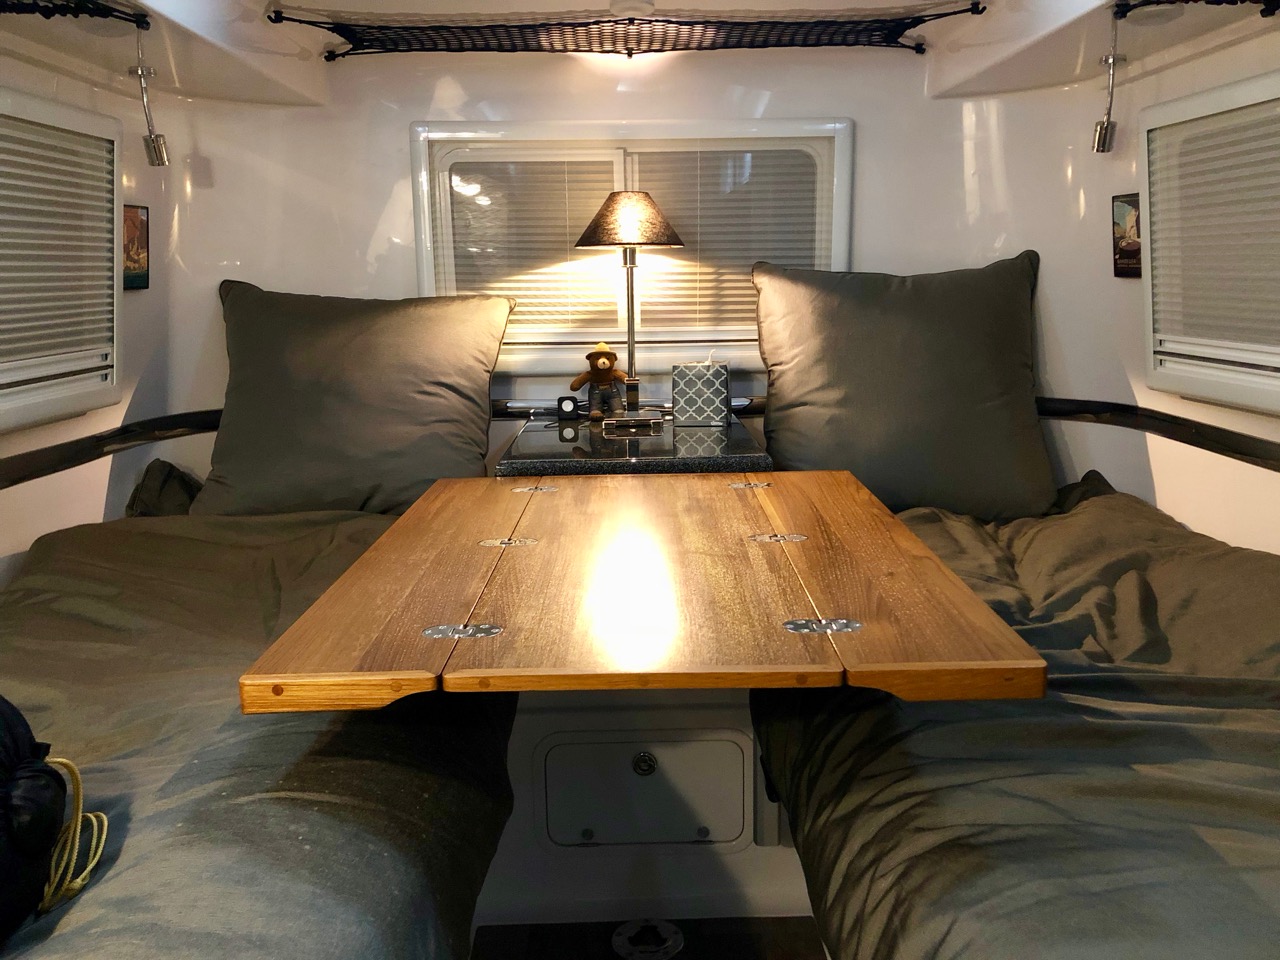
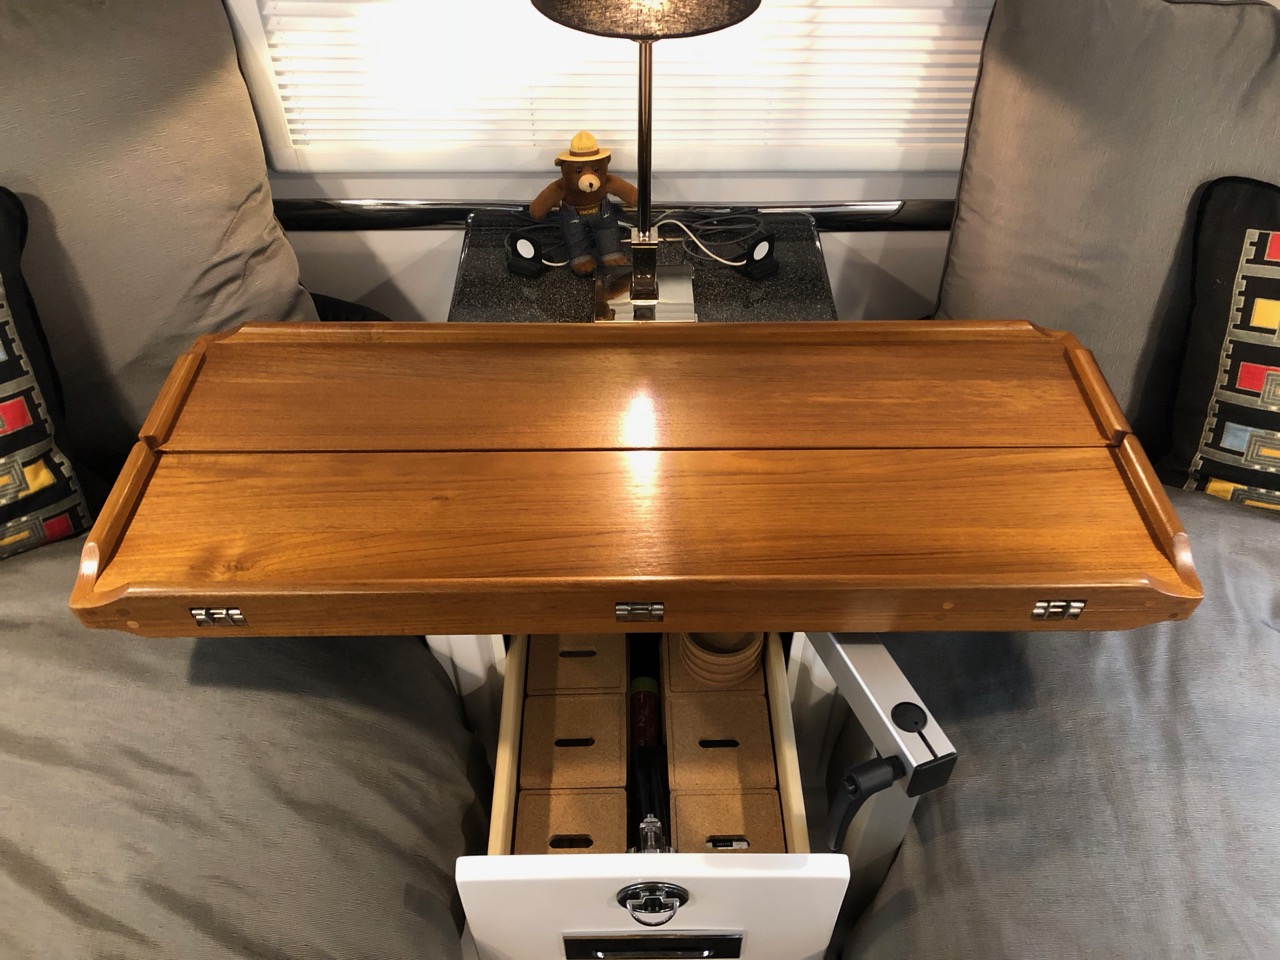
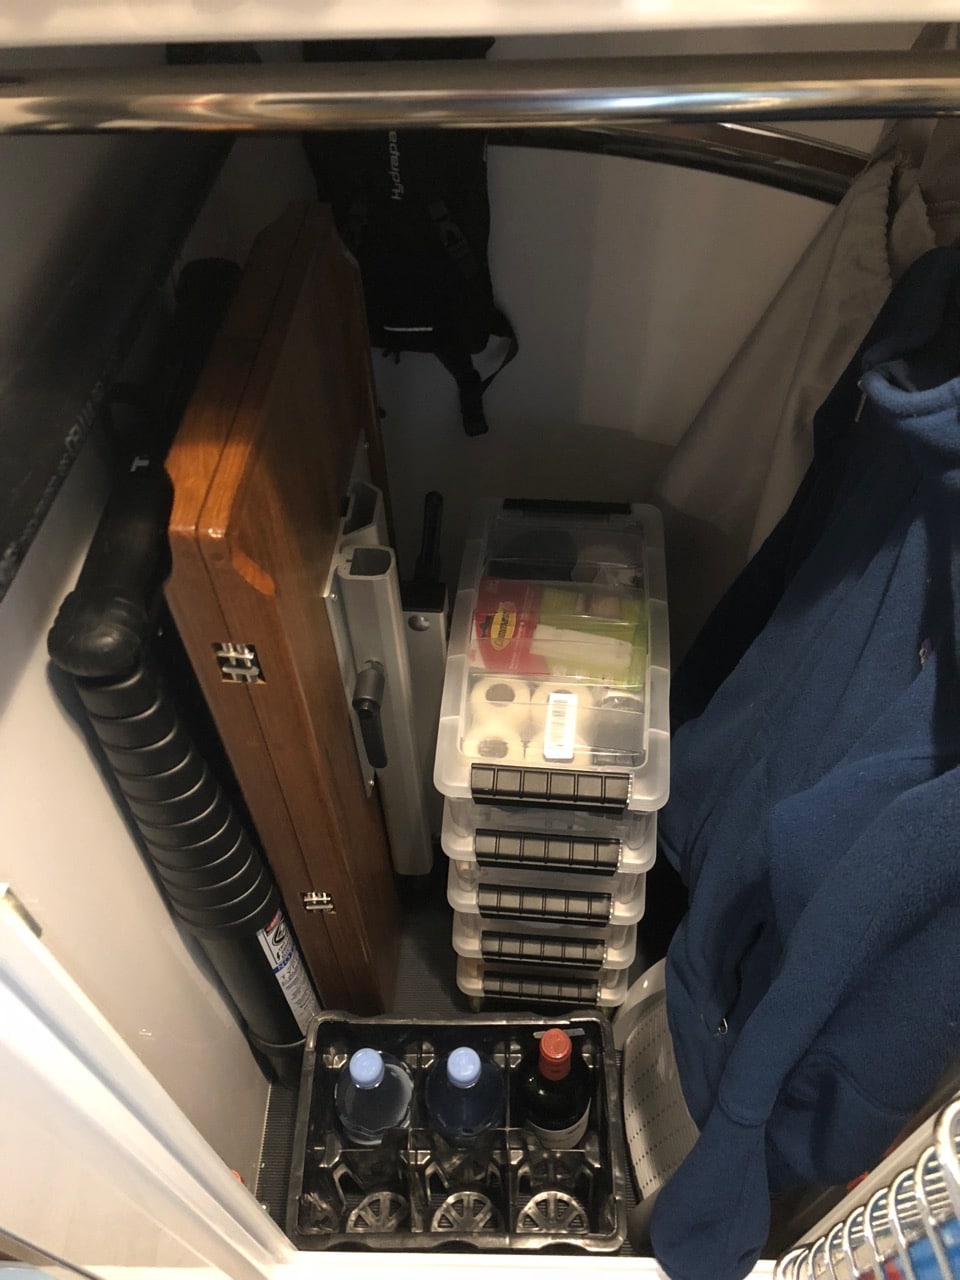
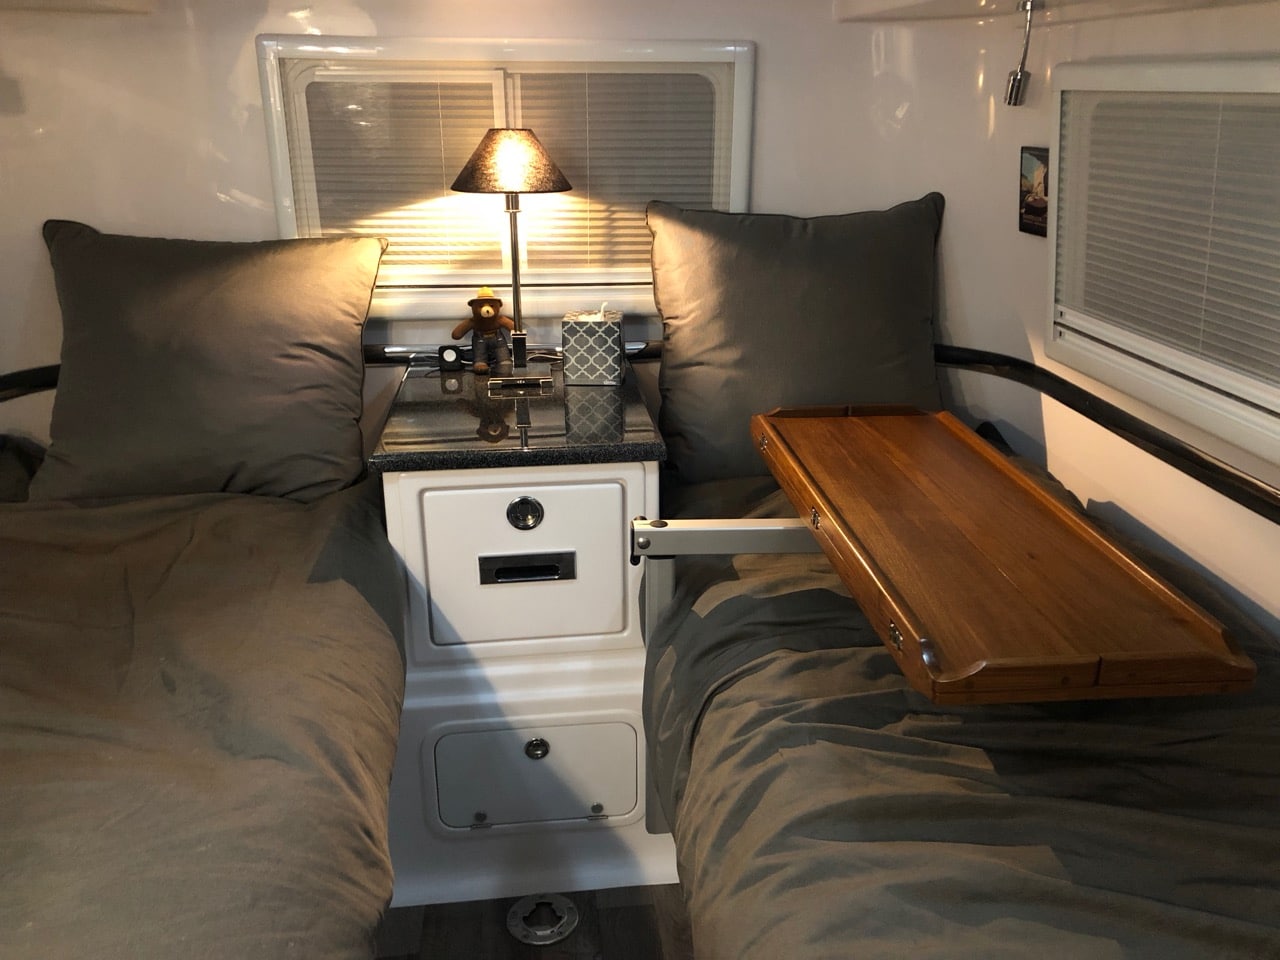
I think like a lot of Elite II buyers, we were torn between the twin beds vs the king. We chose the twin, but not so much for the size or comfort of the beds as it was the utility of nightstand and easy access to the overhead compartments. But we liked the idea of having a table and a large lounging area in the back, and so I set my mind on the idea of trying to have both. At first I designed a custom table for the back that would latch into the nightstand in the back with a pole in front, similar to how the dinette table works. I showed it to Oliver and they thought they'd give it a try, but as time went on and things got delayed or forgotten, I sort of gave up on that idea and asked if they would just sell me the standard table top and legs and I would figure it out. They did, and it was a big mistake since I could never figure it out. The table was just too heavy and bulky to put up and take down, and there was absolutely no place to store it. Plus the height with the standard legs was too short for the mattresses we had (another poor decision on my part). So on our first trip it was labeled the Albatross Table and it was just in the way the whole time. It didn't make another trip, just the two mounts screwed to the floor to remind me that not every problem has a solution. But the solution does exist in the Lagun table. I'd seen them before in the king bed model but I had sort of dismissed them as being too small to be of use. But that was before @rideadeuce started this topic about their upgraded table top. Their top was much larger, foldable, and just generally nicer looking than what I'd seen before; and so it clicked with me that with the Lagun mount, we could have a foldable table that could easily be stored or moved out of the way for access to the upper storage. Also the height could be whatever we wanted and unlike the table we had, could be quickly locked for travel. There were just two problems for us - the mount in it's normal location would block the nightstand drawer; and on top of that, we had opted for an access hatch to the basement right in that same spot where the Lagun is usually bolted to the hull. I needed a way to mount the table to the side somehow. So I made one of these - This contraption is made out of 15 Series extrusion from 80/20. I cut, mitered, and erector setted this little block and associated connectors to go beneath the bed overhang. The Lagun mounting plate (the vertical piece) bolts to the mount and then the whole thing gets bolted to the side wall under the bed in four places and to the bed overhang in four places. It looks complicated but if you have a miter saw and can play with Legos, you can build it. Here are some pics of the block in place so you can see how it mounts. The top two bolts on the Lagun plate bolt into the side of the bed extension, then there are two bolts on the block that secure vertically into the base of the extension, then another four bolts that go into the side wall of the base of the bed, opposite the basement. I marked and drilled for the two vertical holes first, then temporarily bolted it in place to mark all the other holes. You need to do this since not all of the surfaces are perpendicular to the trailer or one another. But the flat bottom of the bed extension runs parallel to the floor so if you use that as your starting point then the table top will end up parallel to the floor as well. The end result is extremely solid - The table top I chose is the 35" Nautic Sail top from Marine Teak. Look around on their site and you'll find a number of styles and sizes, any of which would be a great choice. (This is the same company as this one, btw, but they have more choices in table tops on their UK site.) I debated oiling it, but came to my senses and coated it in a couple layers of low gloss poly. Taking it apart to seal is no problem, but you do have to keep track of a number of shims that go under the hinges to make them flush to the wood. So here's the final result. I really like the versatility of the top. Use it folded, unfolded, bar height, table height, sideways, lengthways, stick it over the bed for travel or to get it out of the way, or...however. With the mounting plate where it is, we can raise the table hight enough to clear the nightstand and lower it enough that it sits on the bed locked in place for travel. As you can see, the drawer clears just fine. The table will work best once we have our cushions made to replace the mattresses, but we just did a quick weekend trip with it and it works well even as it is. And best of all, it fits in the closet -
 1 point
 -
The best thing might be to cruise over to Guntersville, Alabama and attend the Oliver rally May 3-7. You'll see lots of them and talk to lots of owners. Oliver offers a measure of quality, efficiency and practcality that I've never seen before. But your needs must fit what they offer or they might not work for you. They are well insulated, very strong construction, easy to tow, lots of battery power and good off-road. They have high quality suspension and heavy duty tires. The factory builds them with care and stands behind them. Some trailers, like Airstream, are more flashy and some trailers, like Scamp are cheaper. But Oliver is quality for the long run and excellent for boondocking or venturing into bad weather. I've been around boats for a long time. I finished out and rigged my 42' fiberglass Ketch, then lived on it for about 18 years. Sailed it thousands of miles around San Francisco Bay and then a trip to Mexico and back. Then I had a Morgan 33T and lived on it part time. I have also had a number of stick built trailers and got fed up with the poor quality. Then I discovered Oliver. Now, I'm a landlubber and have built a house. But we are currently in Alabama with our Oliver, on an extended trip from Nevada. Couldn't be happier. Come to the rally and see them!1 point
-
While I have not been to the Dakotas, my notes include this forum thread: http://olivertraveltrailers.com/topic/camping-in-august-and-september-in-dakotas-and-minnesota/#post-63427, and this one about Glacier: http://olivertraveltrailers.com/topic/a-big-boondocking-opps/ Also an Airforum thread: http://www.airforums.com/forums/f42/glacier-national-park-177358.html A colleague at work recommended Hegben Lake, near West Yellowstone.1 point
-
Just imagine what the wait time would be if they were still building less than 50 per year! Congratulations to all that recognized an exceptional camper well ahead of the curve and/or (like me) just happened to discover Oliver at a relative early stage. Bill1 point
-
Prof57 - Welcome! There is a ton of information contained within this Forum and I encourage you to research, research, research. If you want the best and want to have a camper that will last you and your heirs then you have found it here. However, Olivers are not for everyone. Thus, research. Certainly seeing an Oliver in person is the best way to truly appreciate what most of us here try to convey and it is the best way to make sure that it is the camper for you. Good luck with your journey! Bill1 point
-
Welcome to the forum! I know there is at least one Oliver in LA because it passed me with its LA plates on I-10 as we were driving through the state. Call the sales office to check if there is an owner close by that you could visit. We show ours all the time. Mike1 point
-
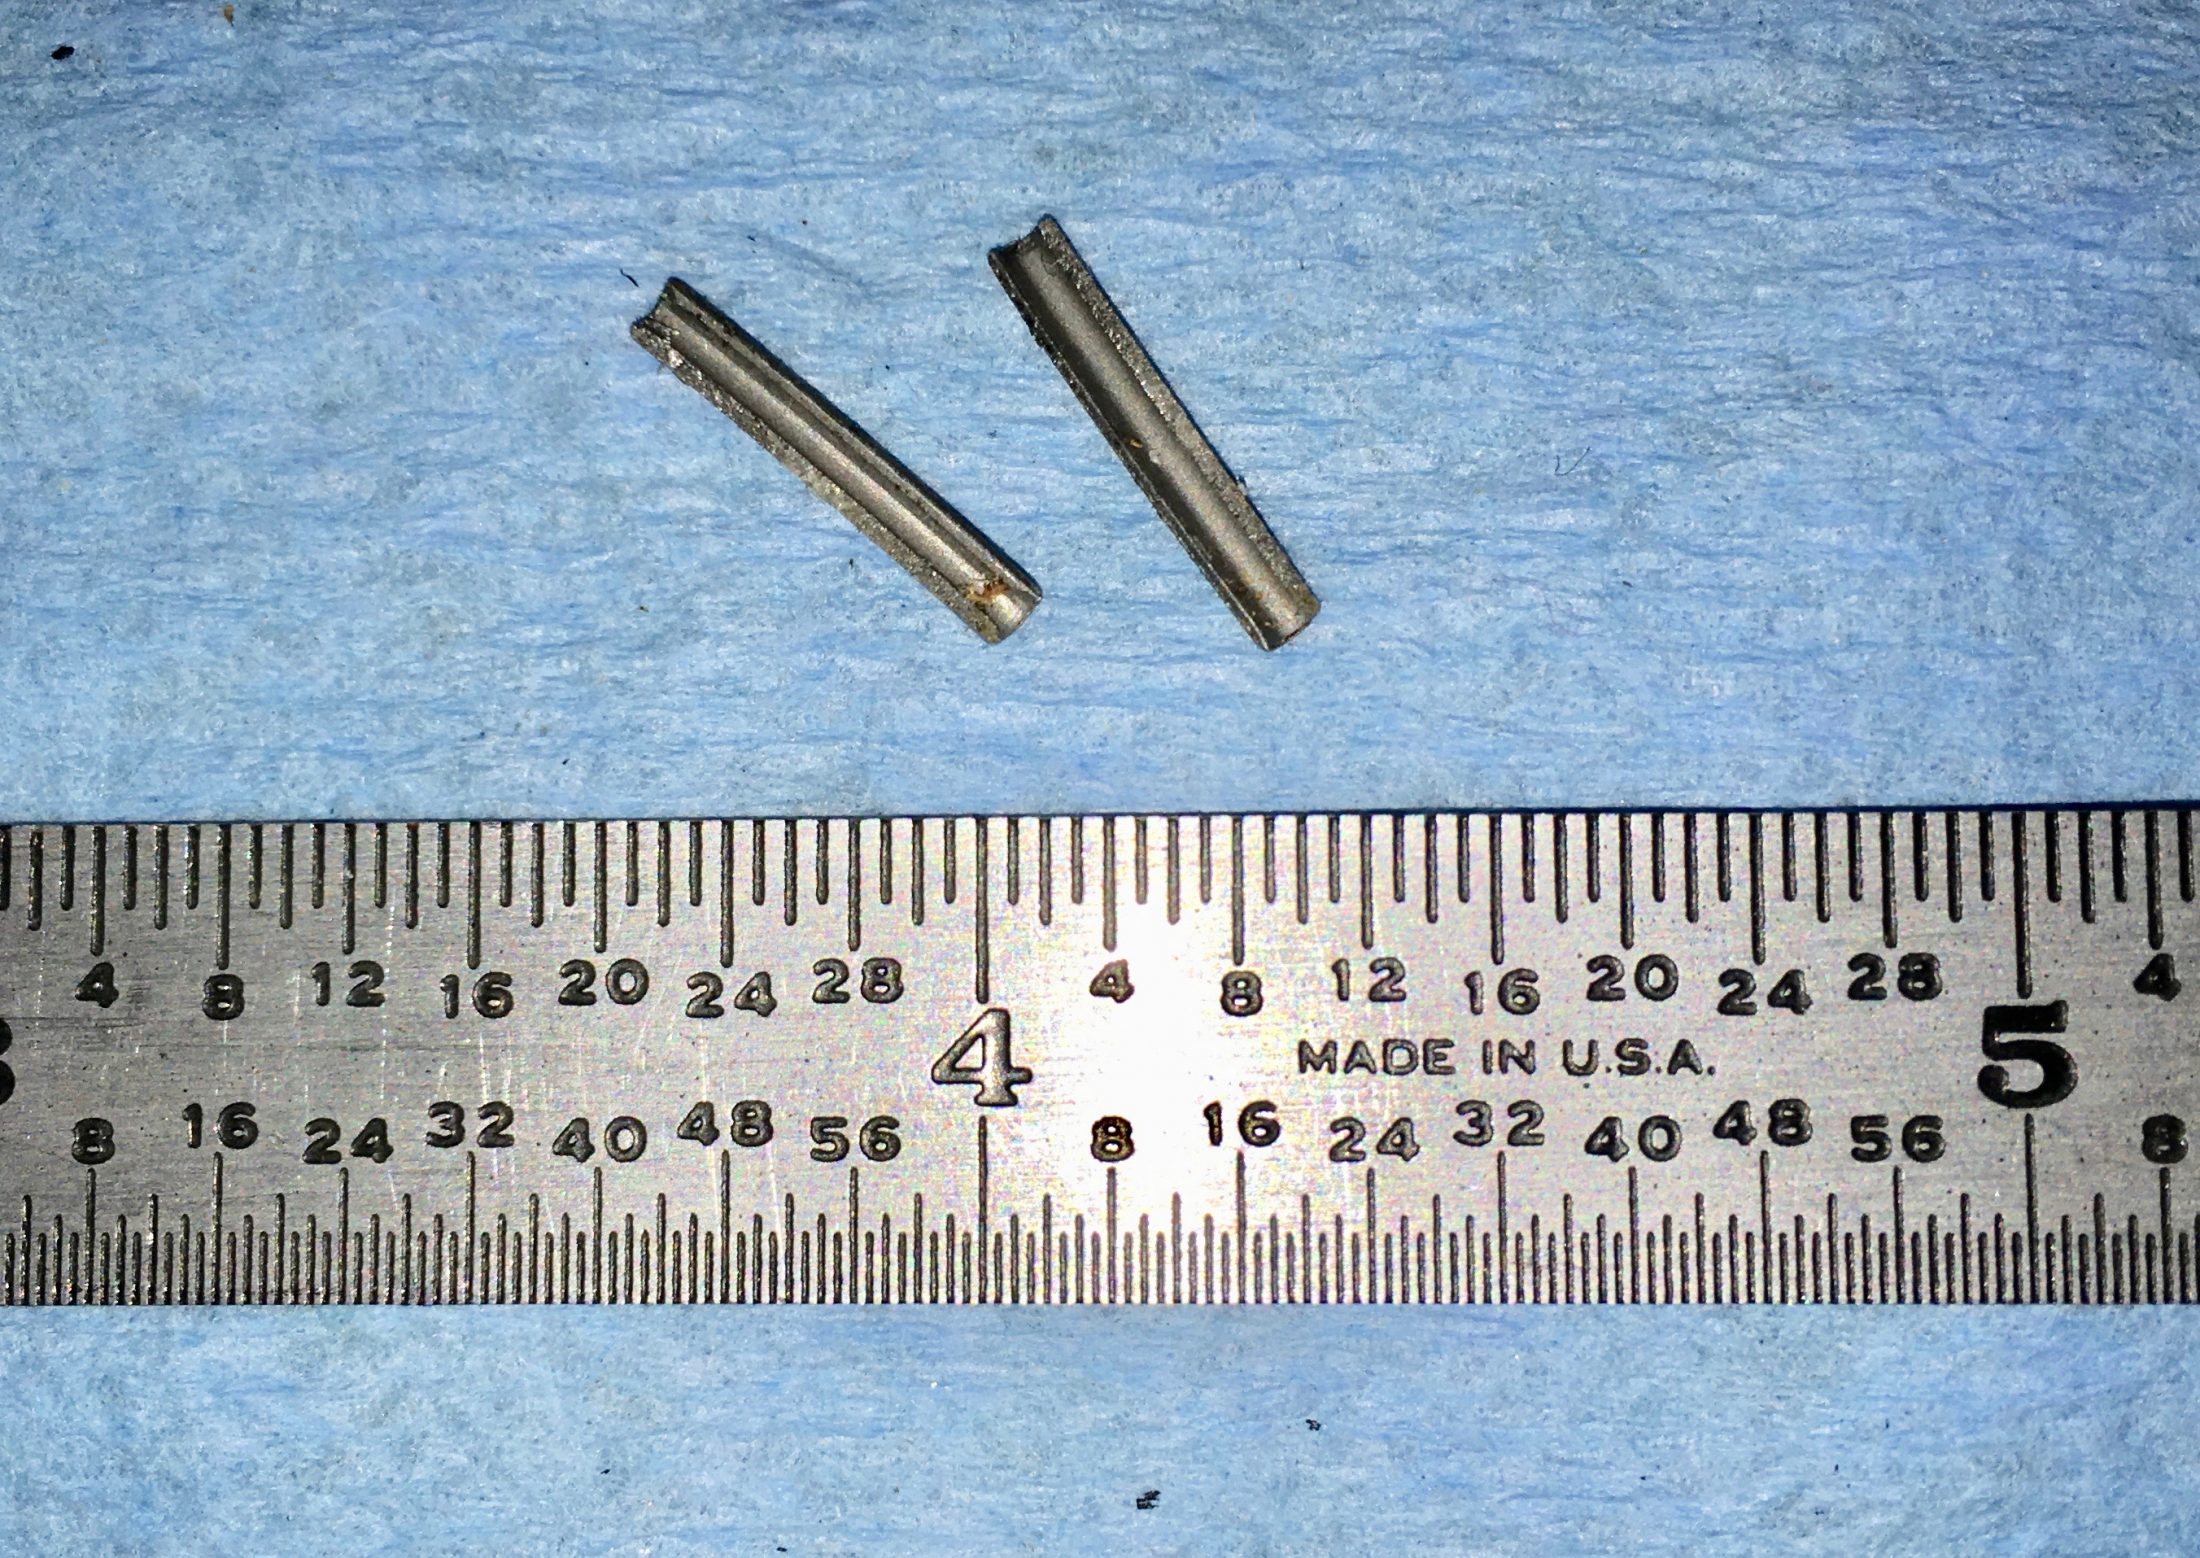
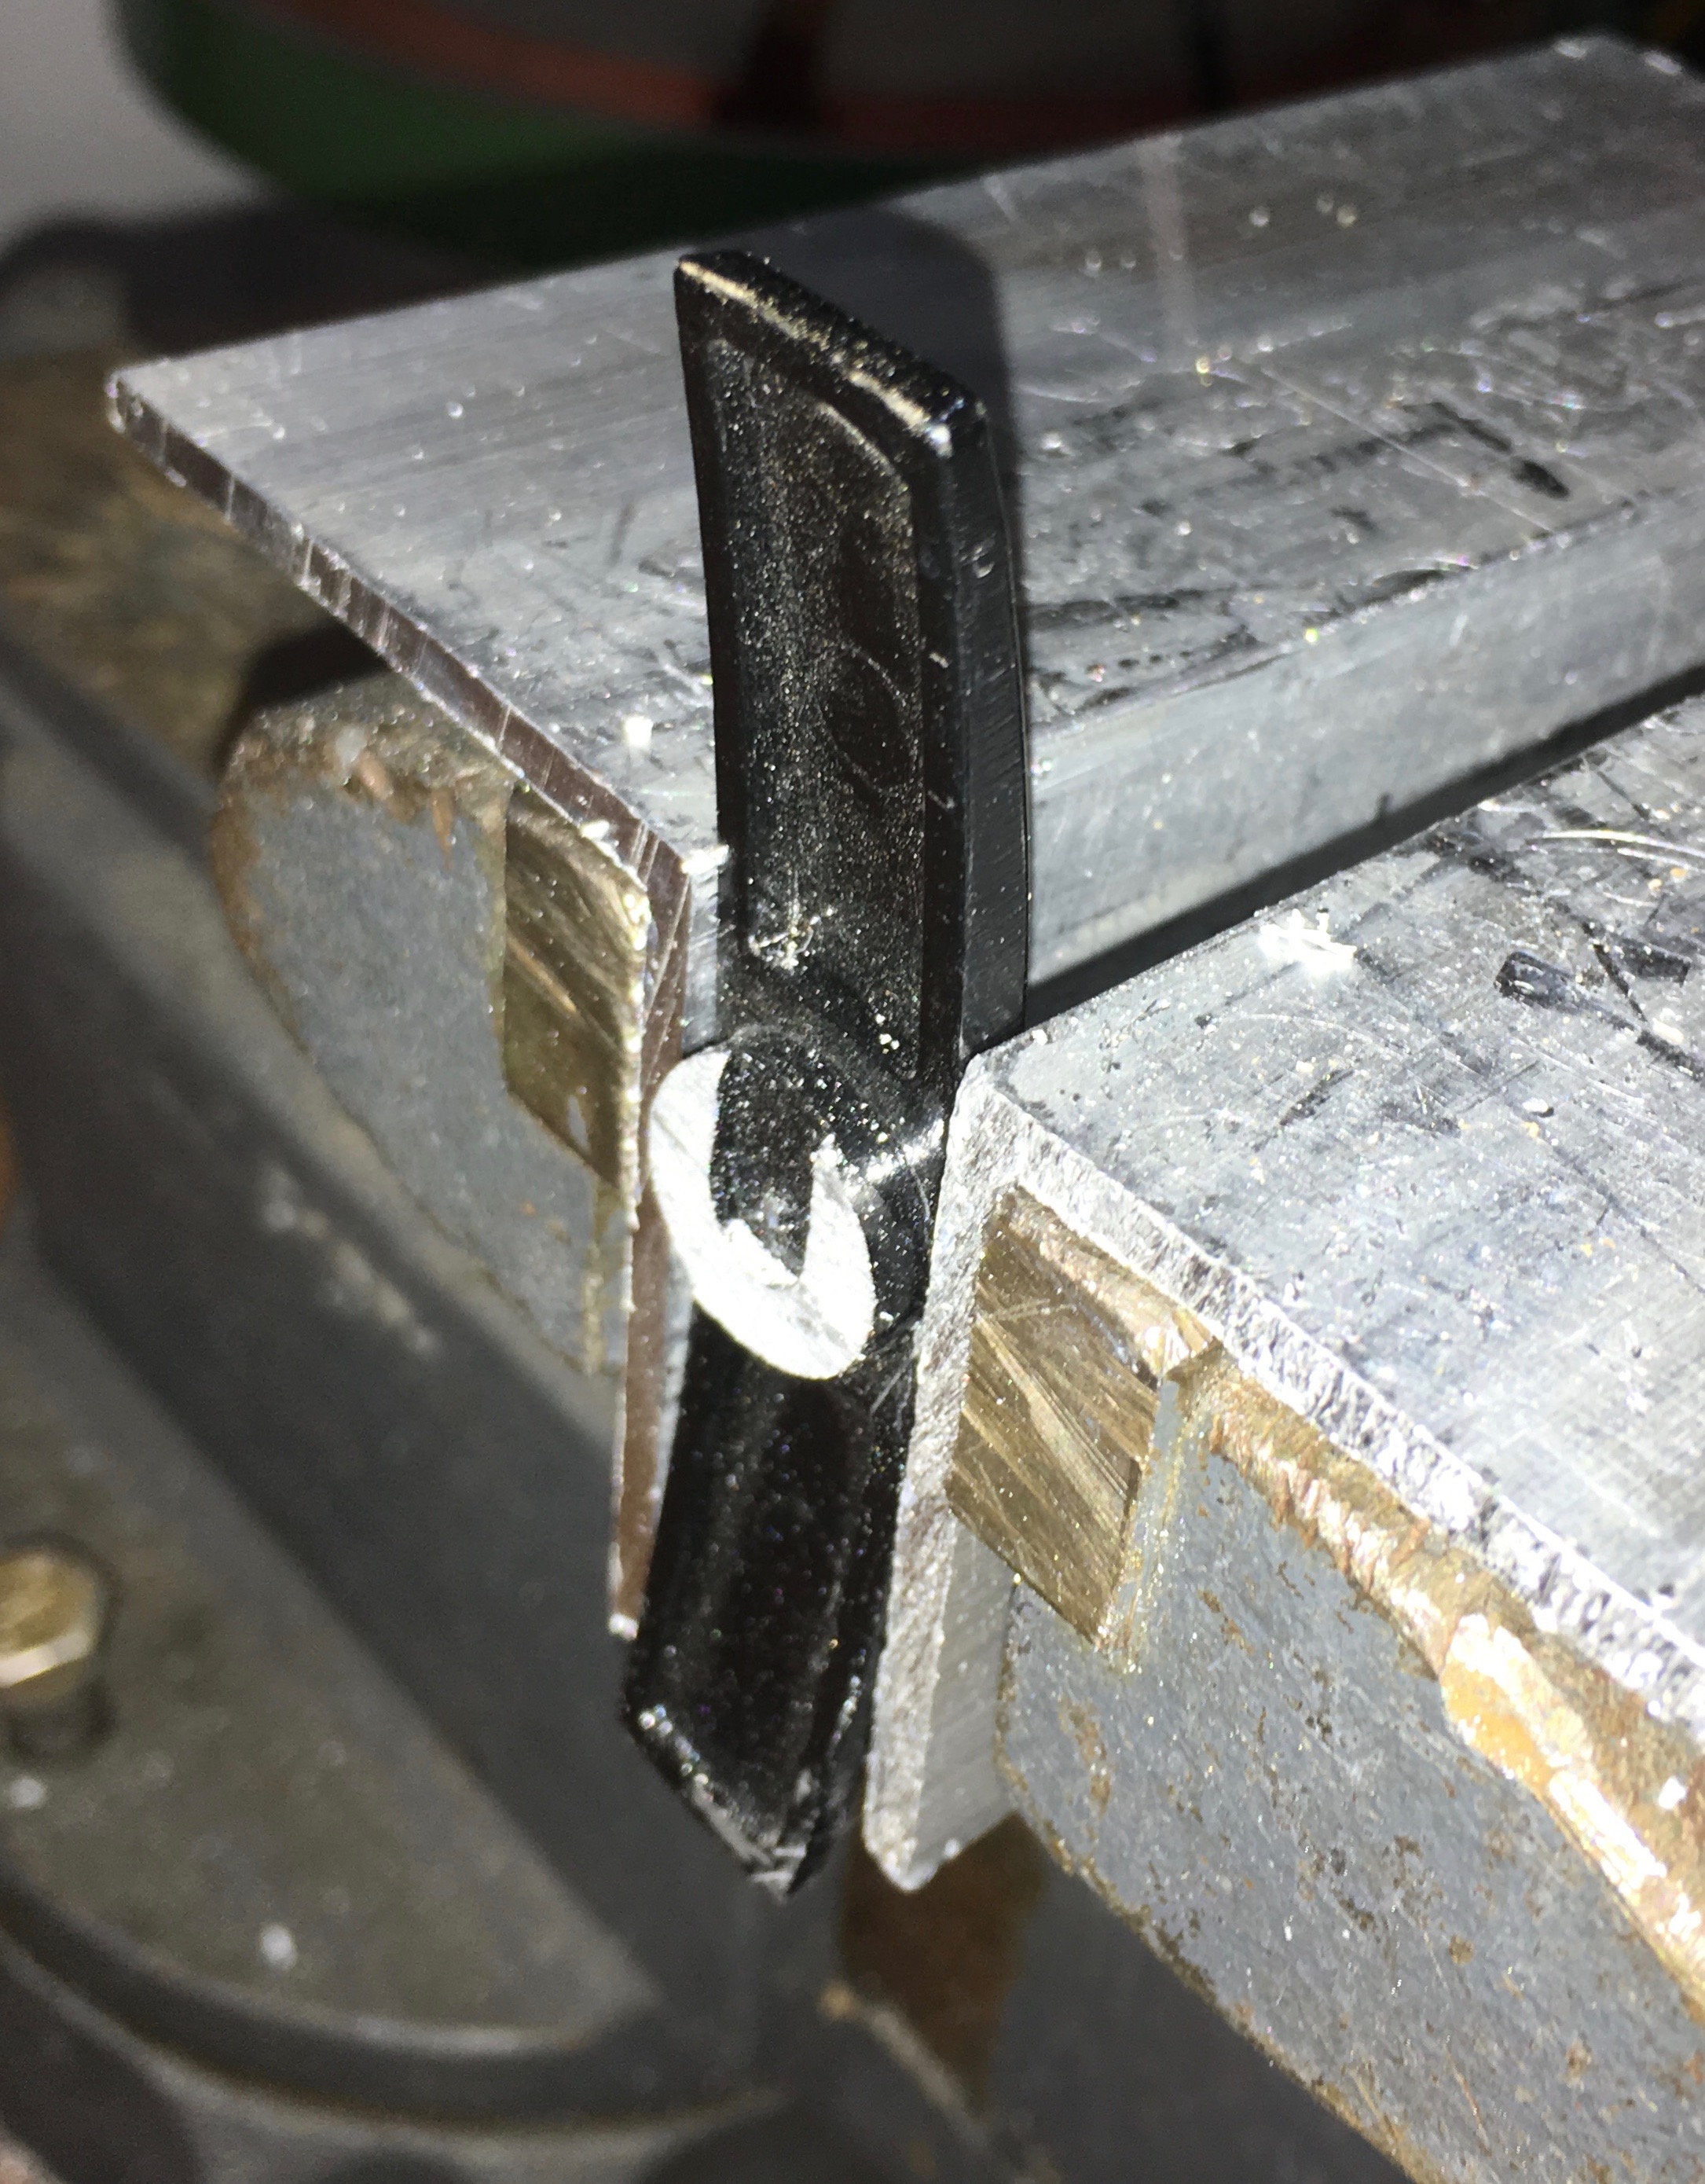
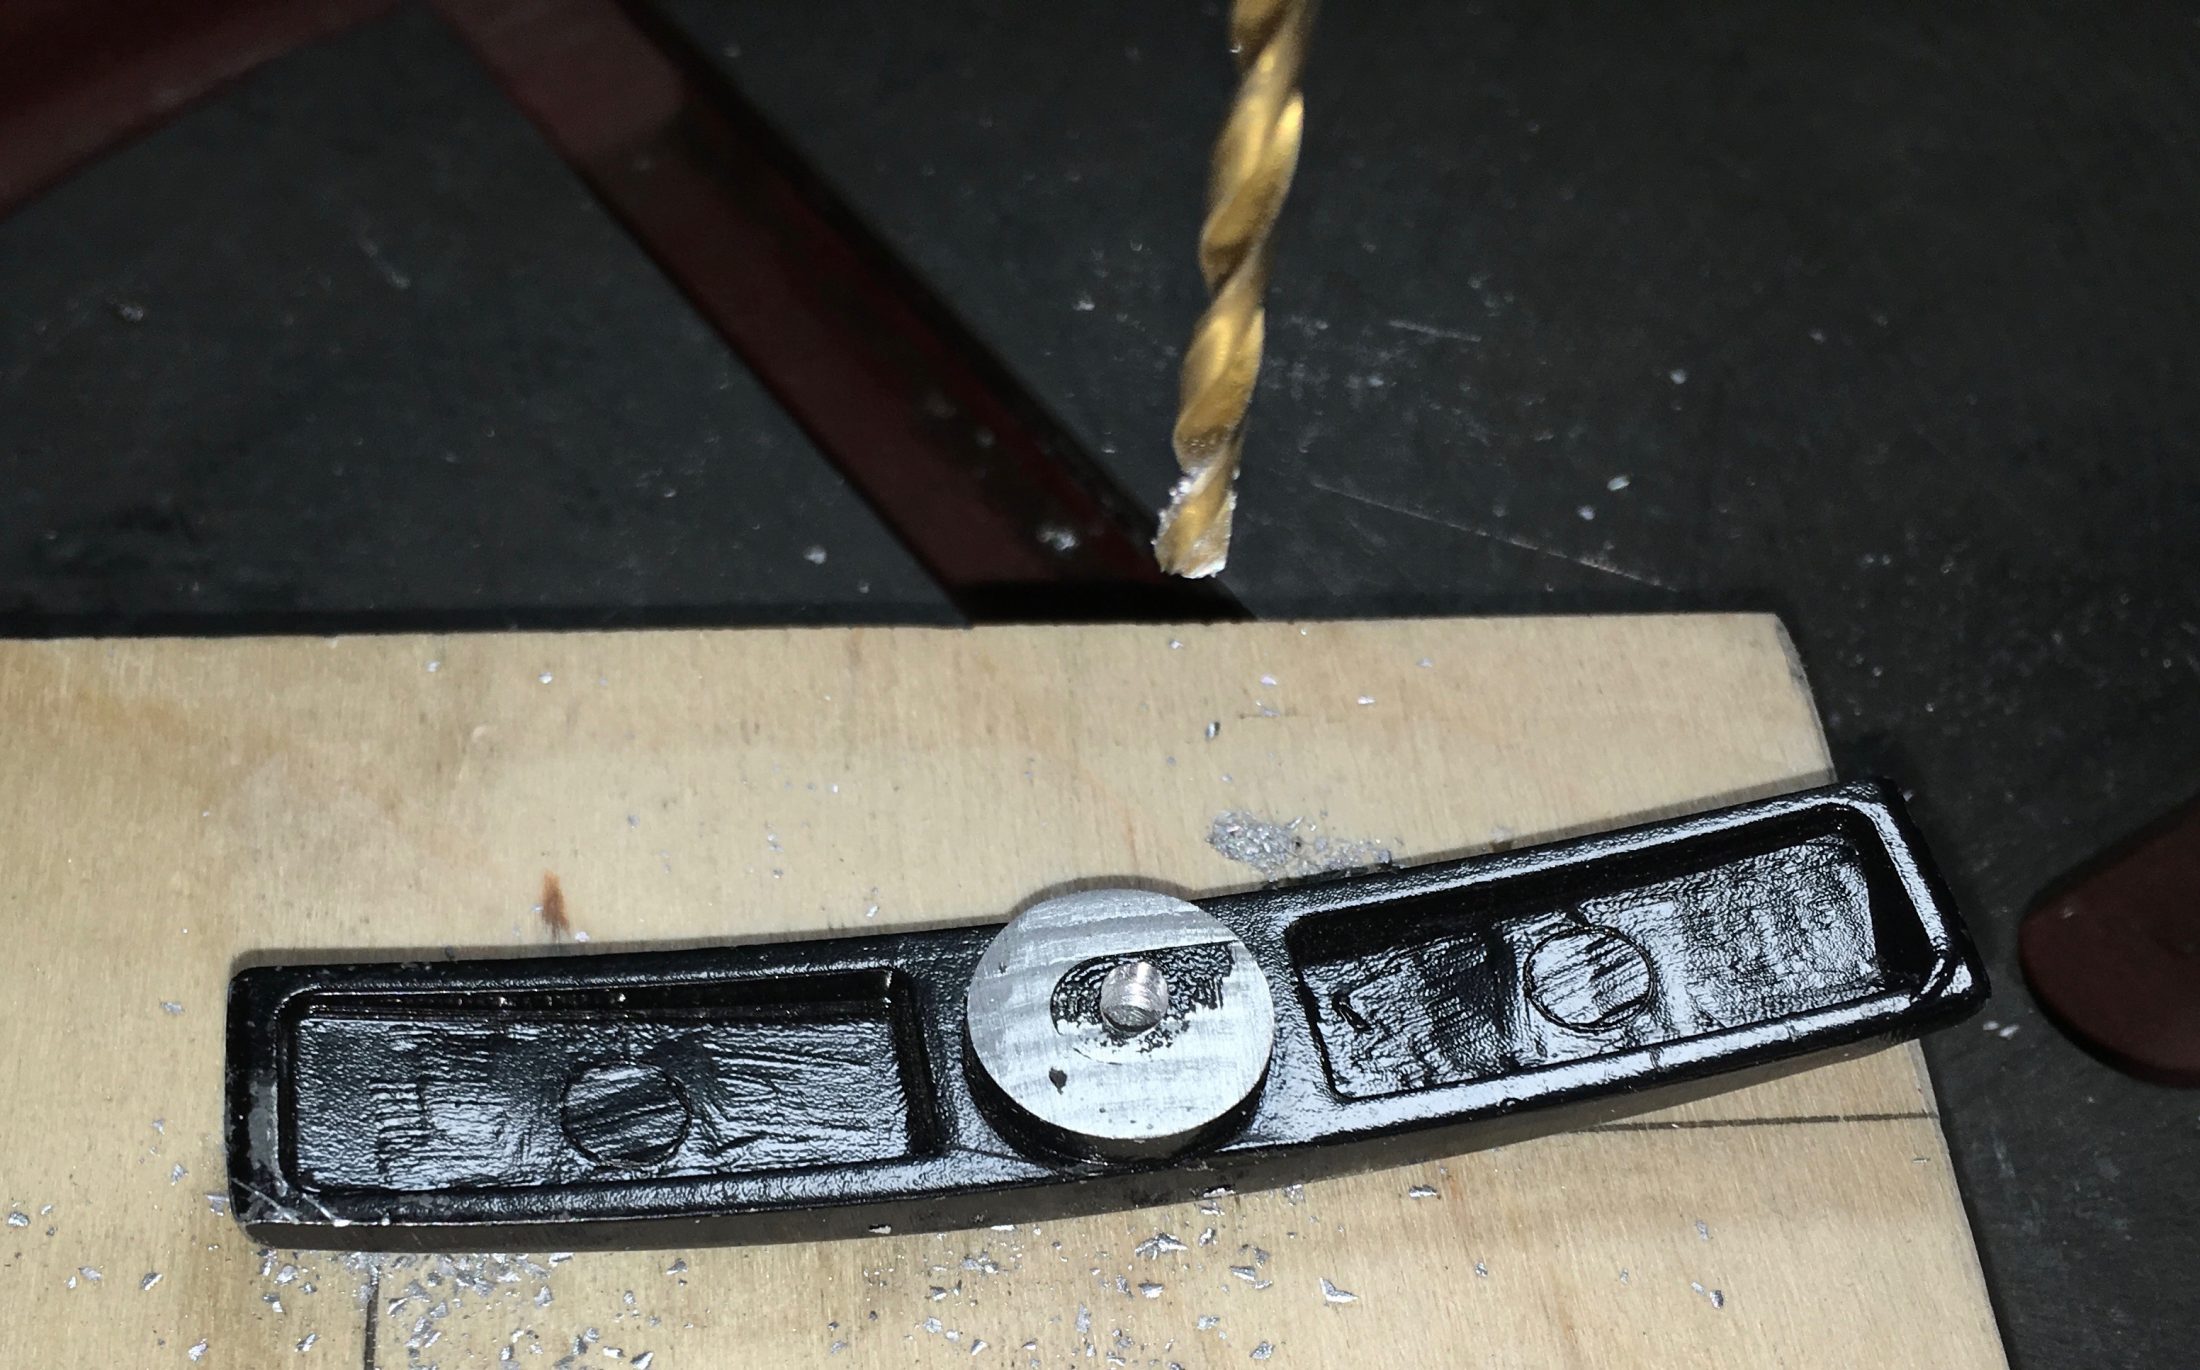
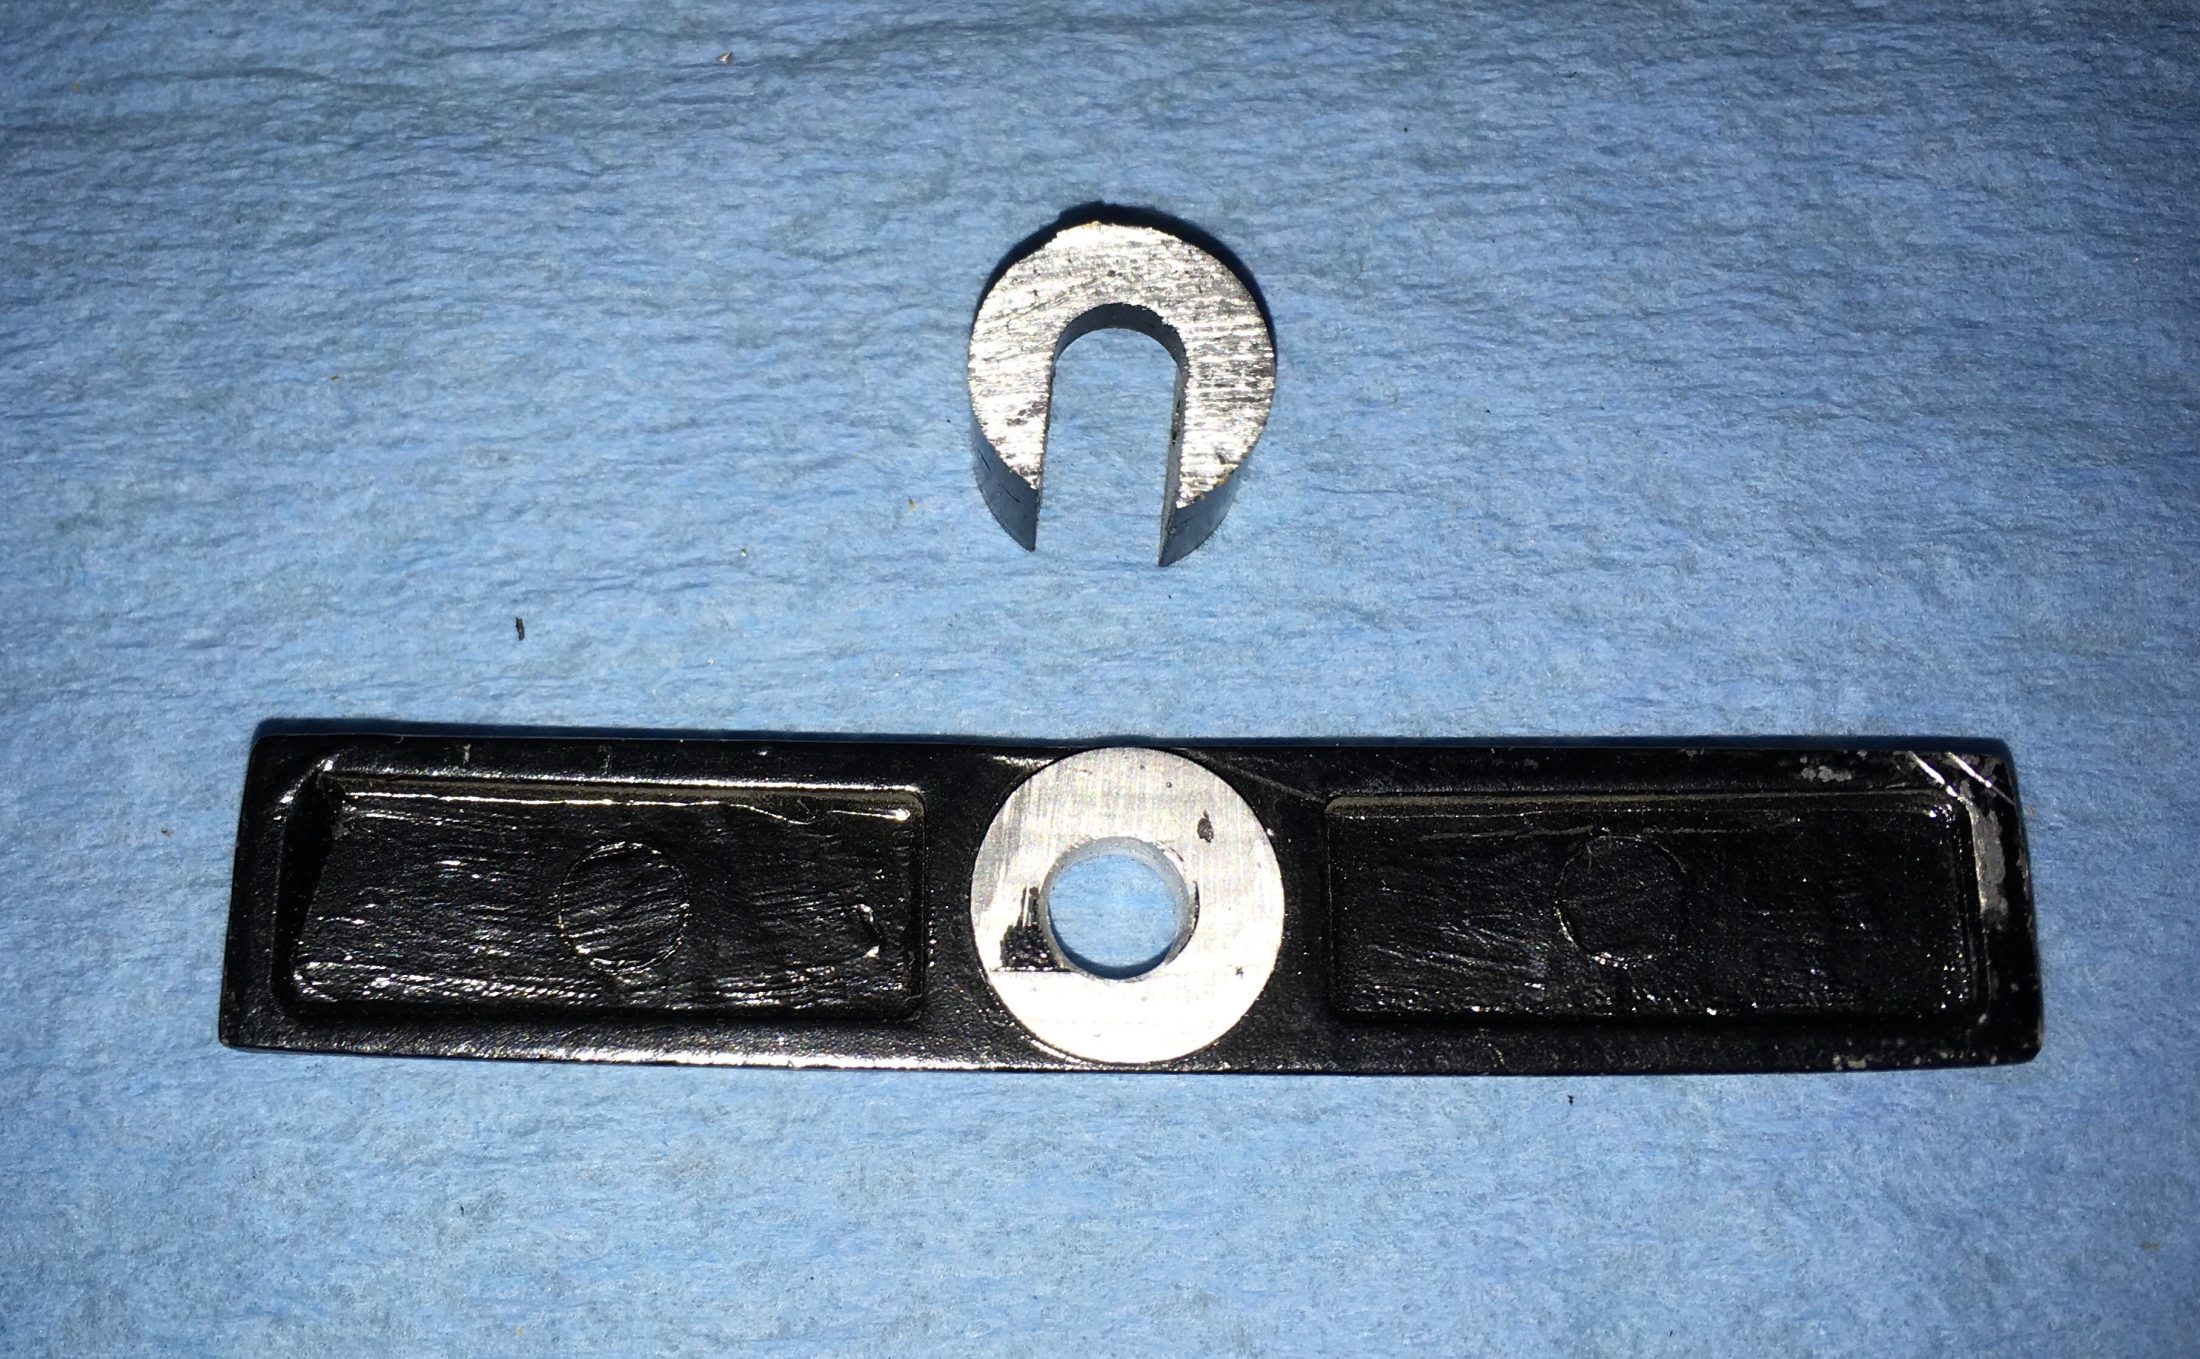
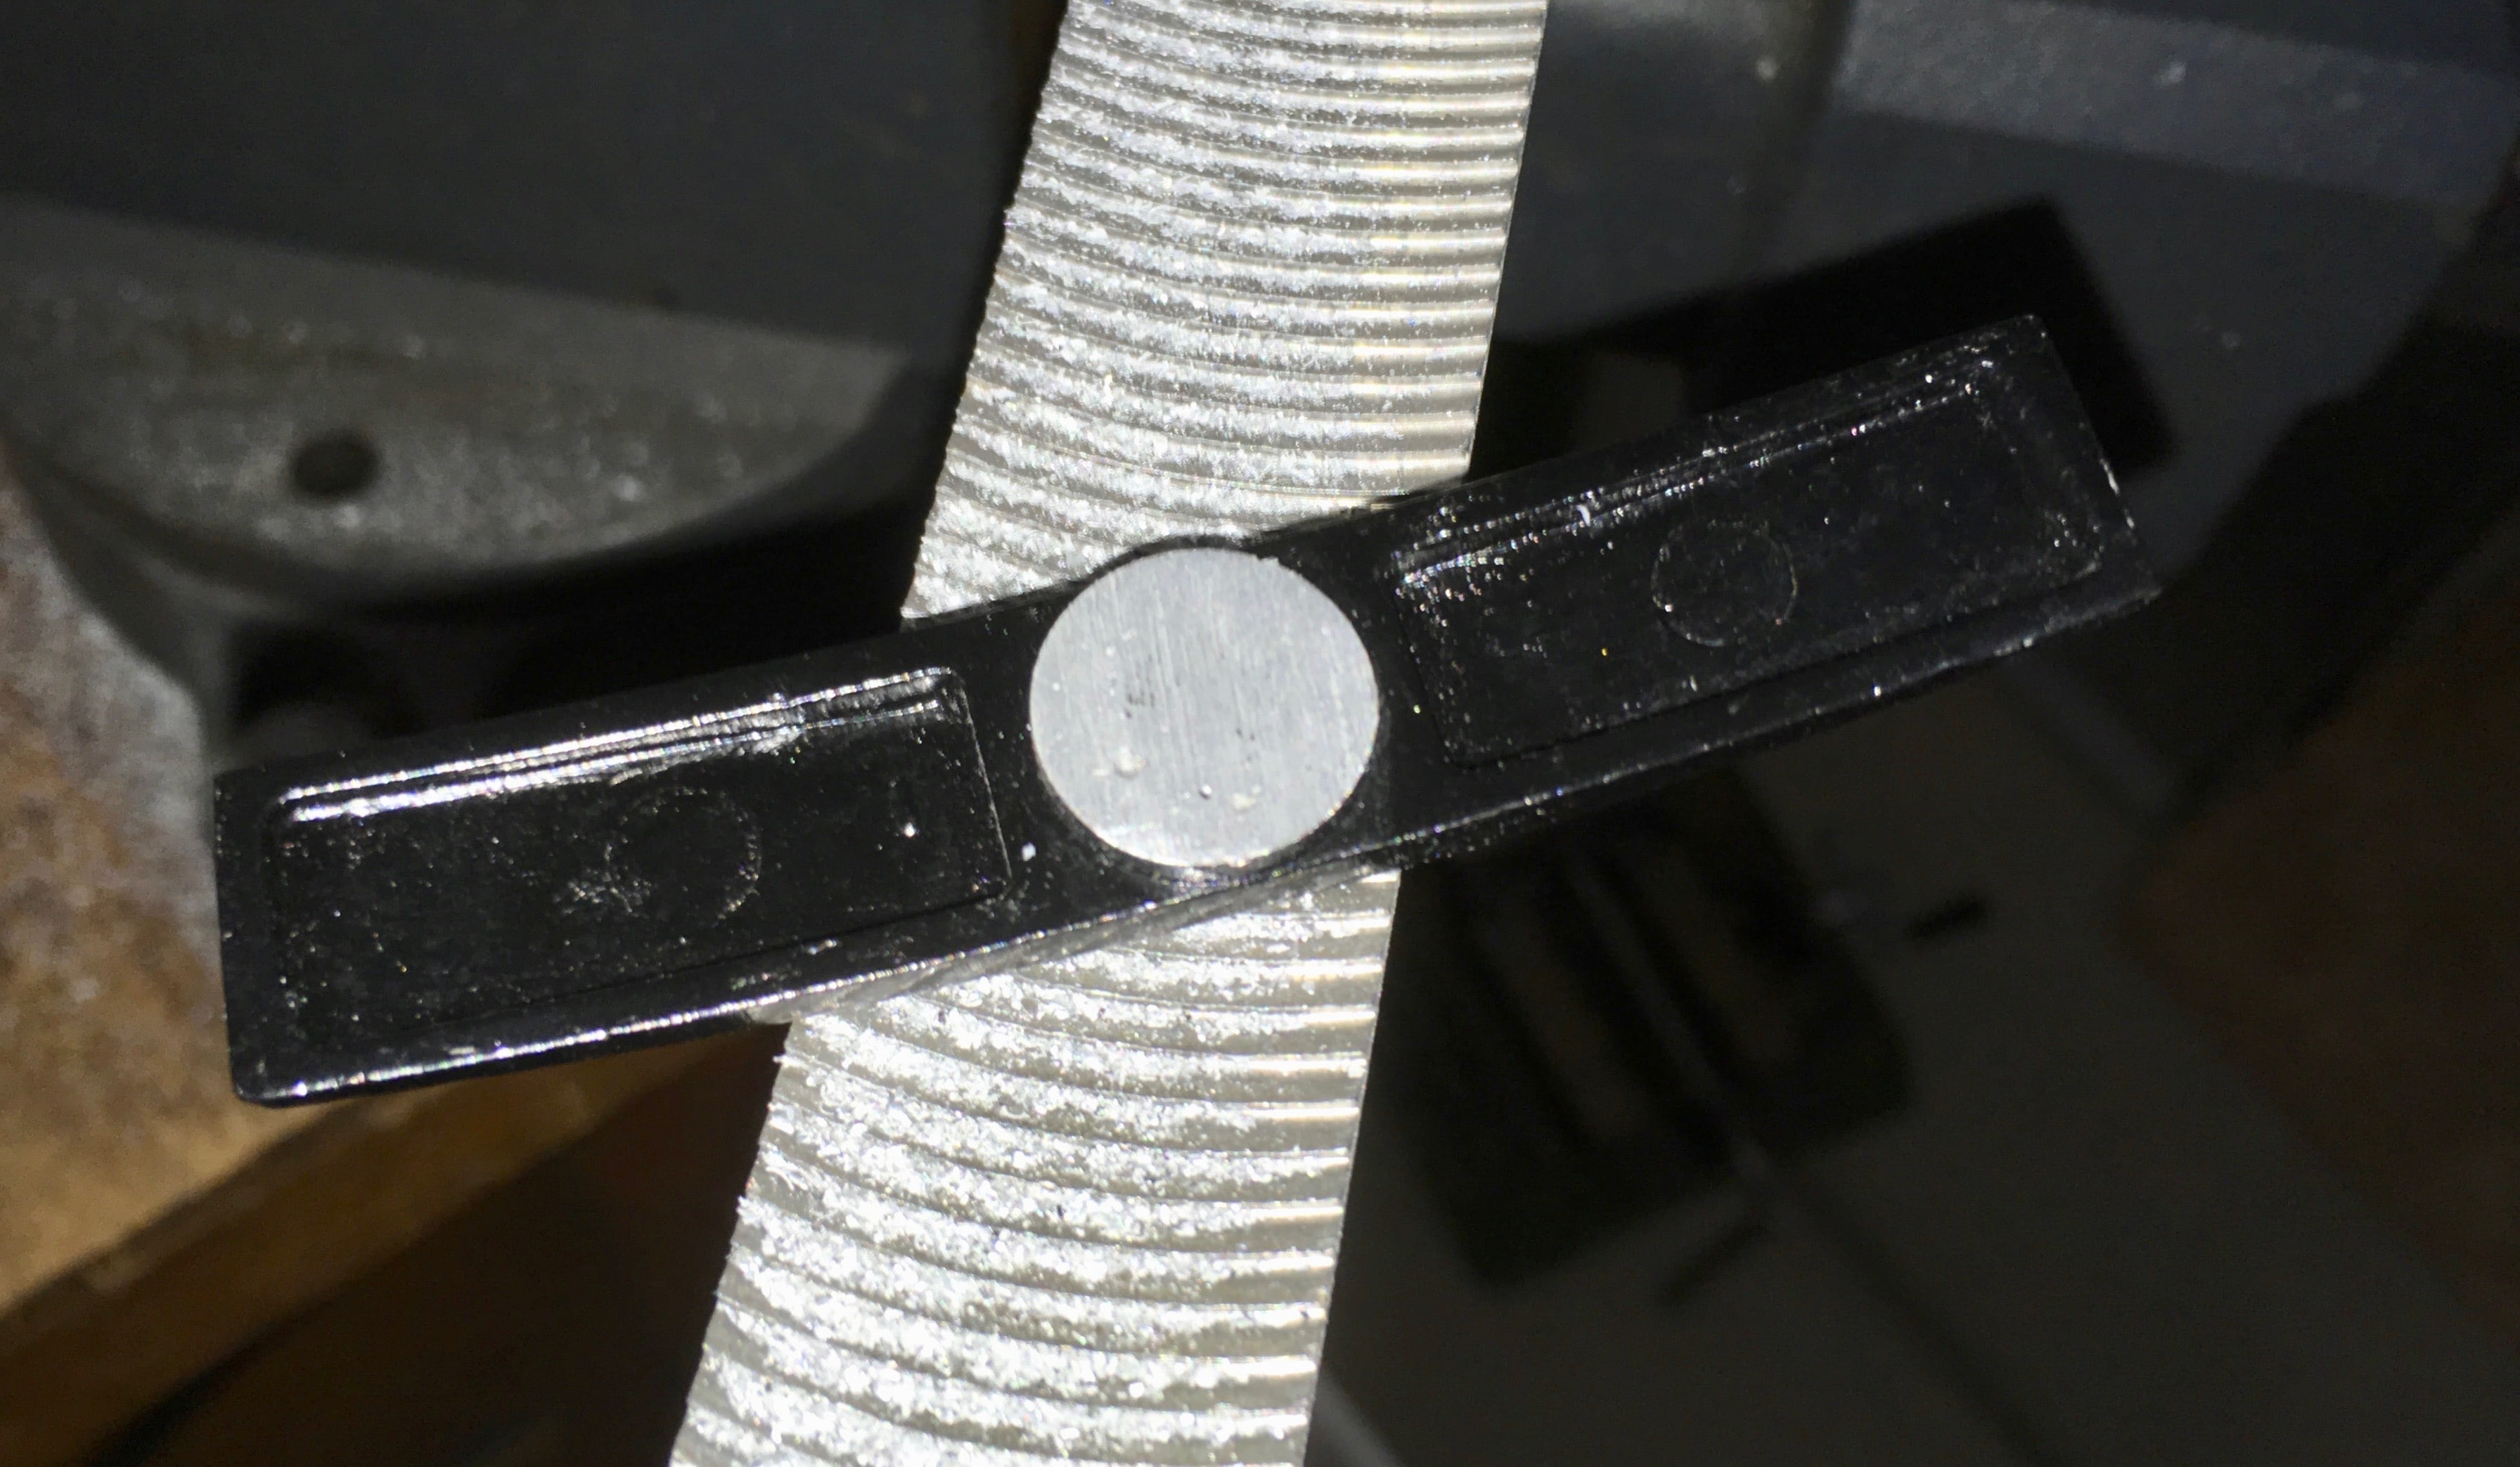
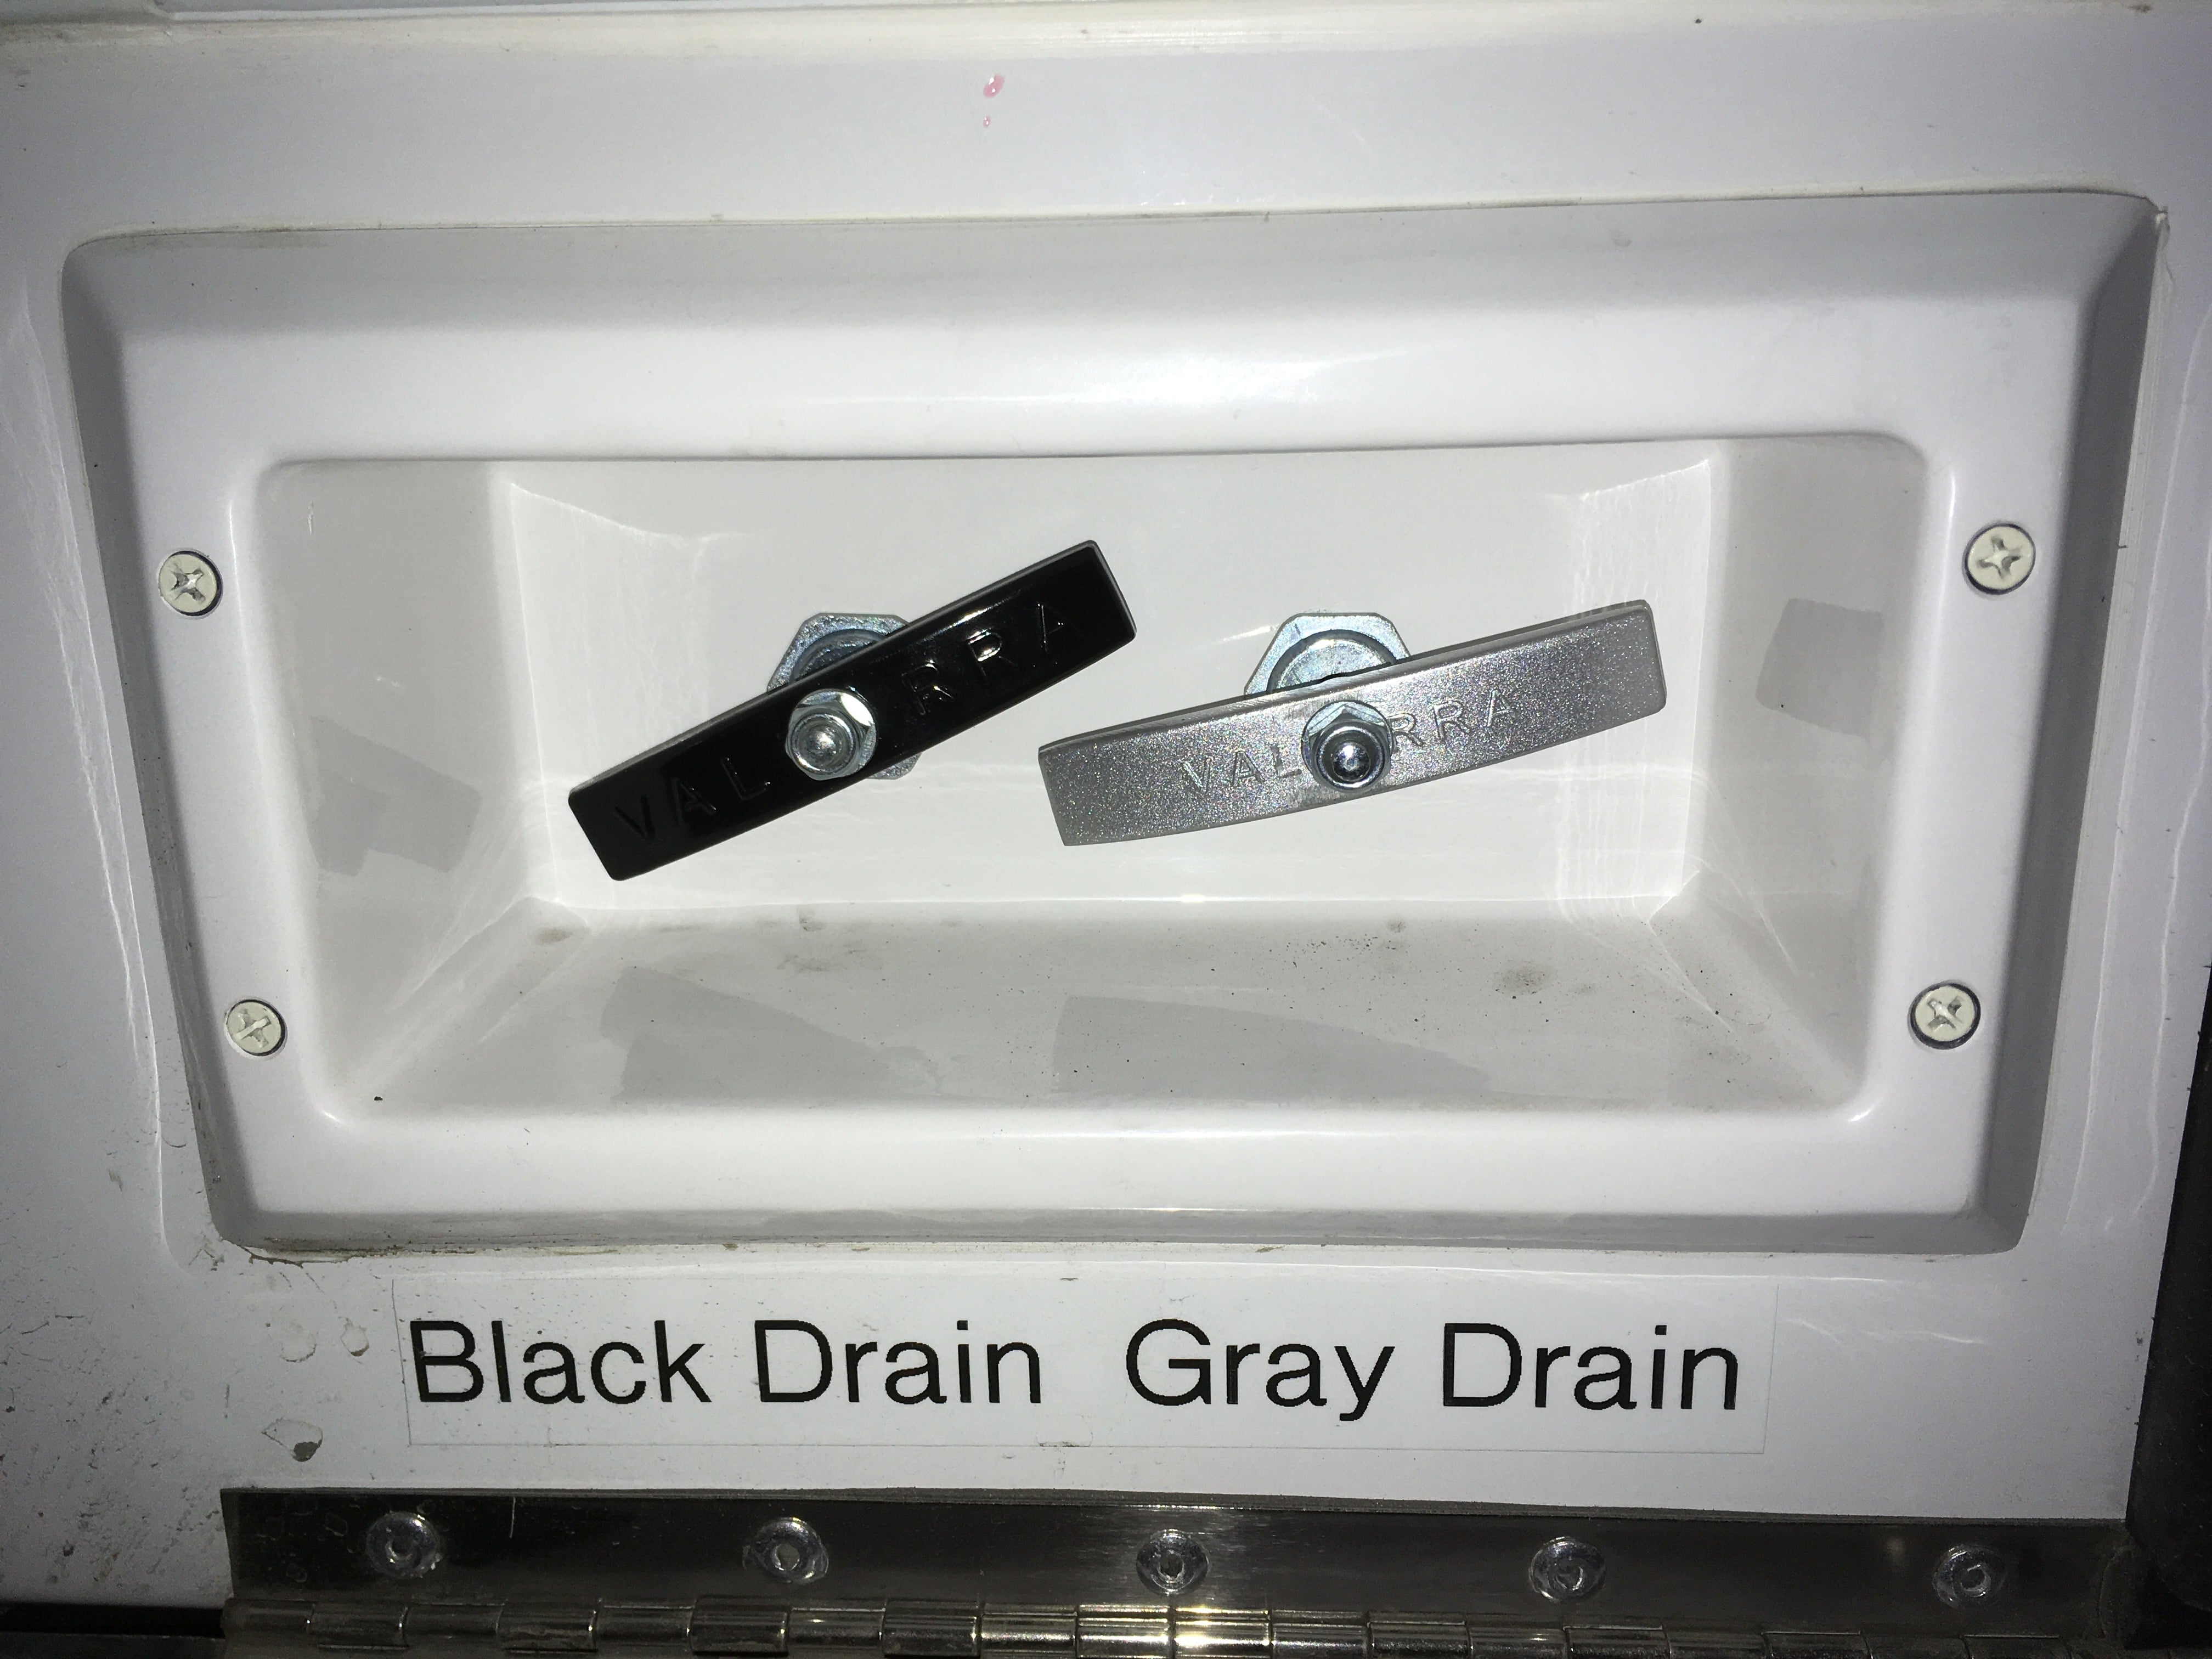
This is related to this thread, read more info here if you want to: ...http://olivertraveltrailers.com/topic/looking-for-a-threaded-waste-tee-handle-metric-6mm/ I never did locate a 6 mm threaded handle, so I modified the 1/4-20 threaded one I bought to make a silver colored Gray Water handle, and modded the other black handles to match. Here is the big reason to do this mod before one of your handles breaks off ... the dinky hollow roll pin through the handle is simply inadequate for the job. This one split into two long halves during removal: If your tanks are completely empty, it will make this job much easier. Don't accidentally dump anything nasty on the ground or get black water in your gray tank.... you will have to pull the rear handles out all the way to do this. Remove your old handles with a 1/6" pin punch and a helper (to hold a heavy block of wood underneath), after some really bad words. These handles are a pain to remove by yourself, and would be more so while camping. With a helper it doesn't take very long. Here are the threaded aftermarket and unthreaded Oliver handles for comparison. Secure a handle in a padded vise and cut off the excess shank with a coarse hacksaw blade. The finished handle needs to be 1/4 inch thick or less where the threaded rod goes through. File the cut side flat and true (90 degrees all around) and also take a little off the other side to provide a flat in the center. I used a large curved tooth mill file held in the vice and it worked well. Drill a pilot hole and then a larger one straight and centered, I used a 15/64",(just under 1/4"). I used a drill press just because it was there, but you could use a hand drill if you are careful to keep it aligned: Here is the finished handle with the cut off piece: And the other side after painting. I used DupliColor (brake) Caliper Paint - it sticks very well without primer, is really hard (contains ceramic) and it dries fast. I use it for all small paint jobs and am always happy with the results. Run the rear nut all the way down the threads, insert the handle, add a flat washer and a 6 mm Nylock nut. Clamp the shaft carefully with a small vice grip pliers to keep it from turning. Align the handle as desired, secure nuts. Done: Don't forget the one in the bathroom. This is one of those silly little things that takes a little time but virtually no money, as long as you have access to the tools, but it will save major headaches when your handle snaps off in your hand at the dump station, with a line of anxious campers behind you. John Davies Spokane WA
1 point
-
Thanks to Dean for his podcast reviews. We just camped at Piney Campground in Land Between the Lakes NRA. It was really lovely!
1 point


-
Recent Achievements
-


")


")


")


