DavidS
-
Posts
407 -
Joined
-
Last visited
-
Days Won
52
Everything posted by DavidS
-
GJ, They sure look like the same item. I got mine at Costco. Periodically they go on special for $7. David
-
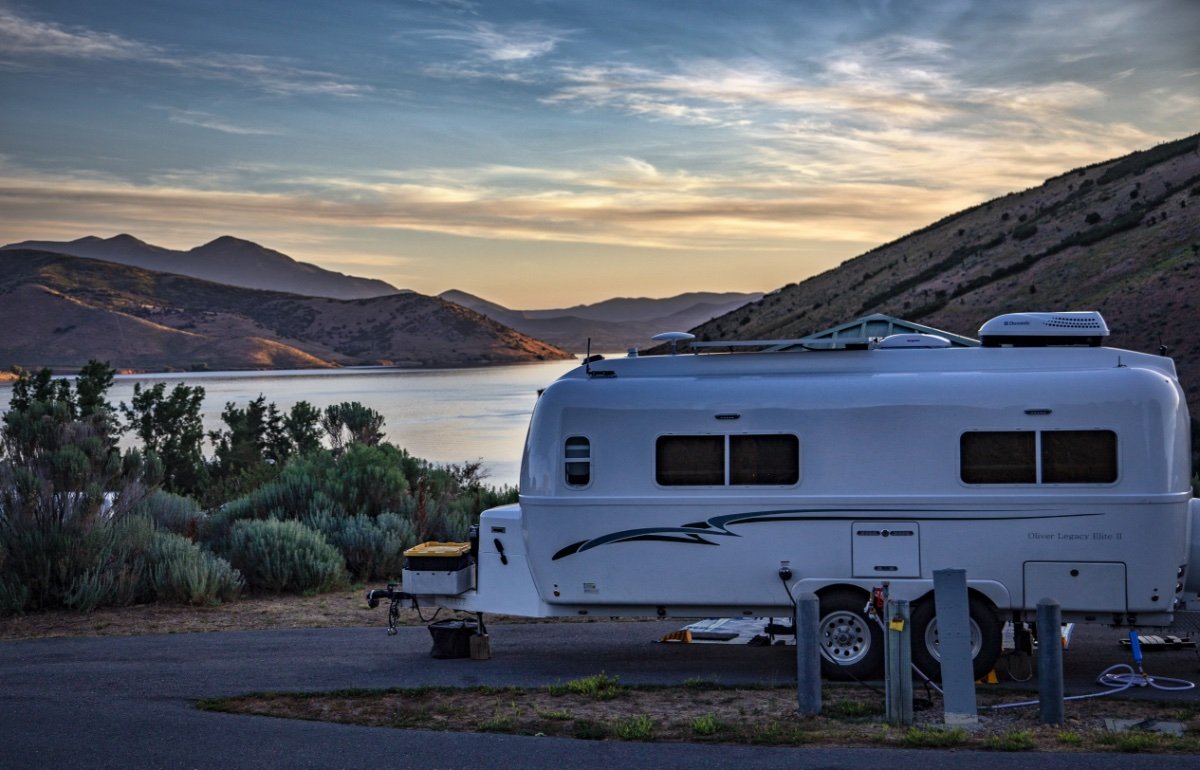
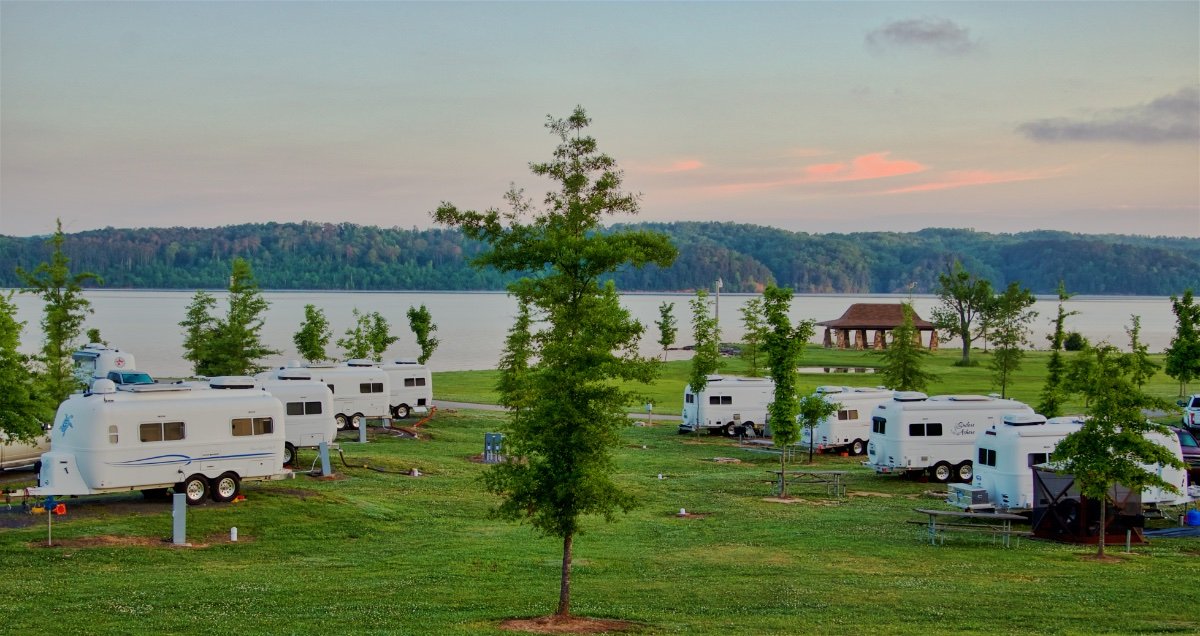
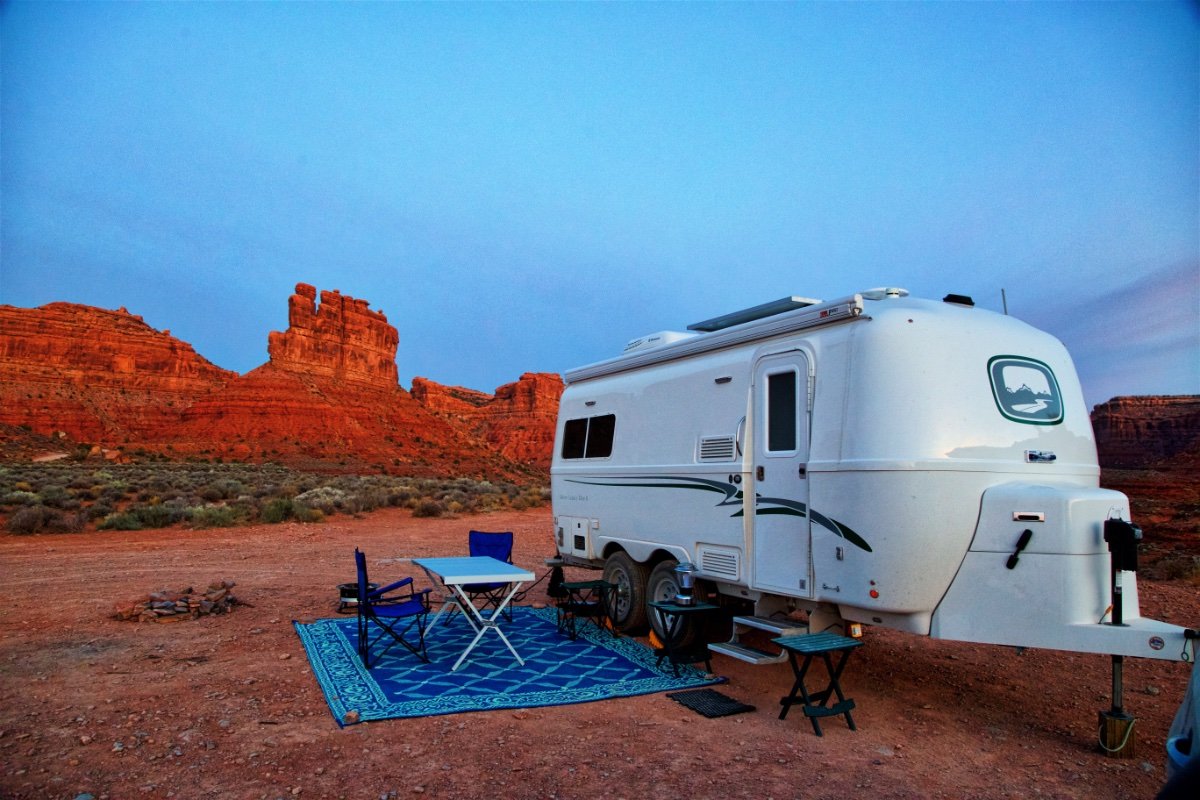
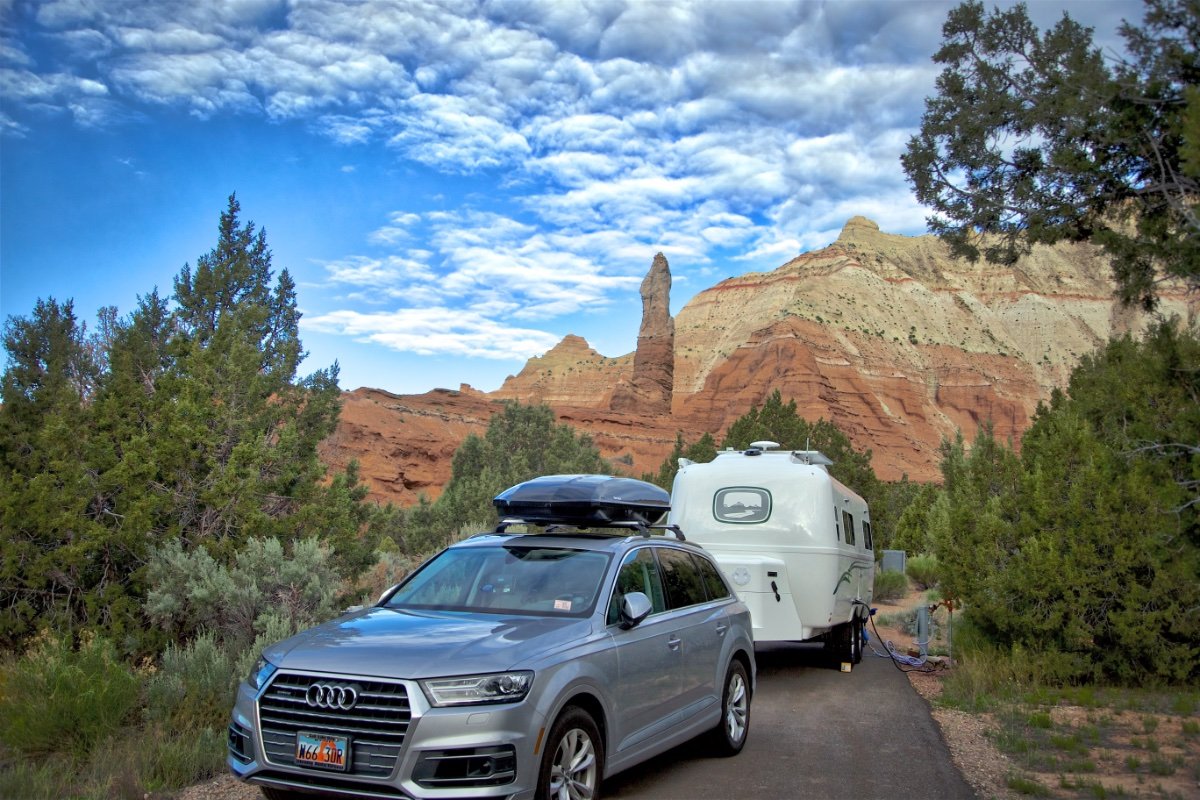
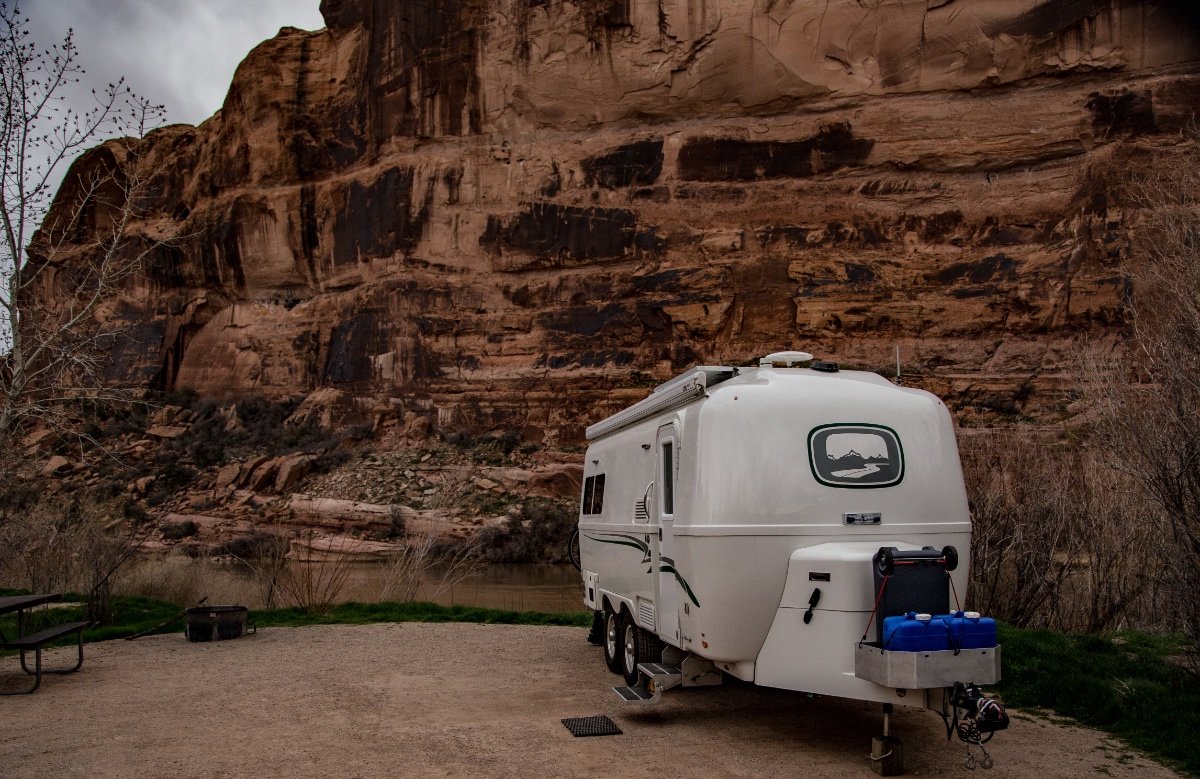
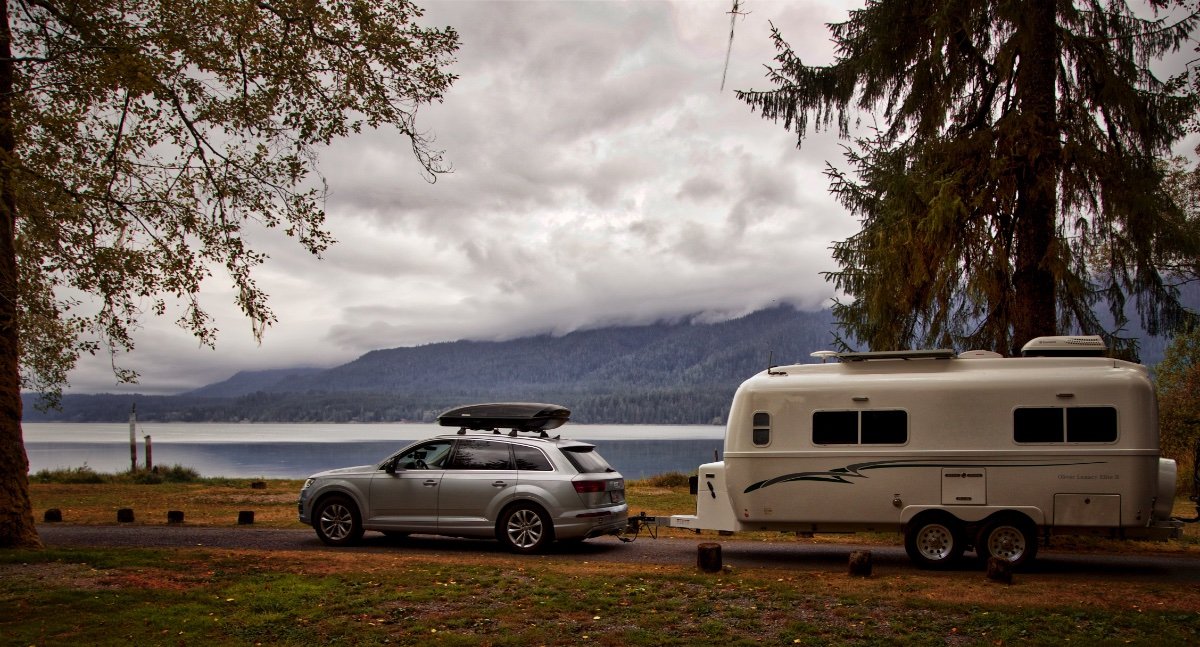
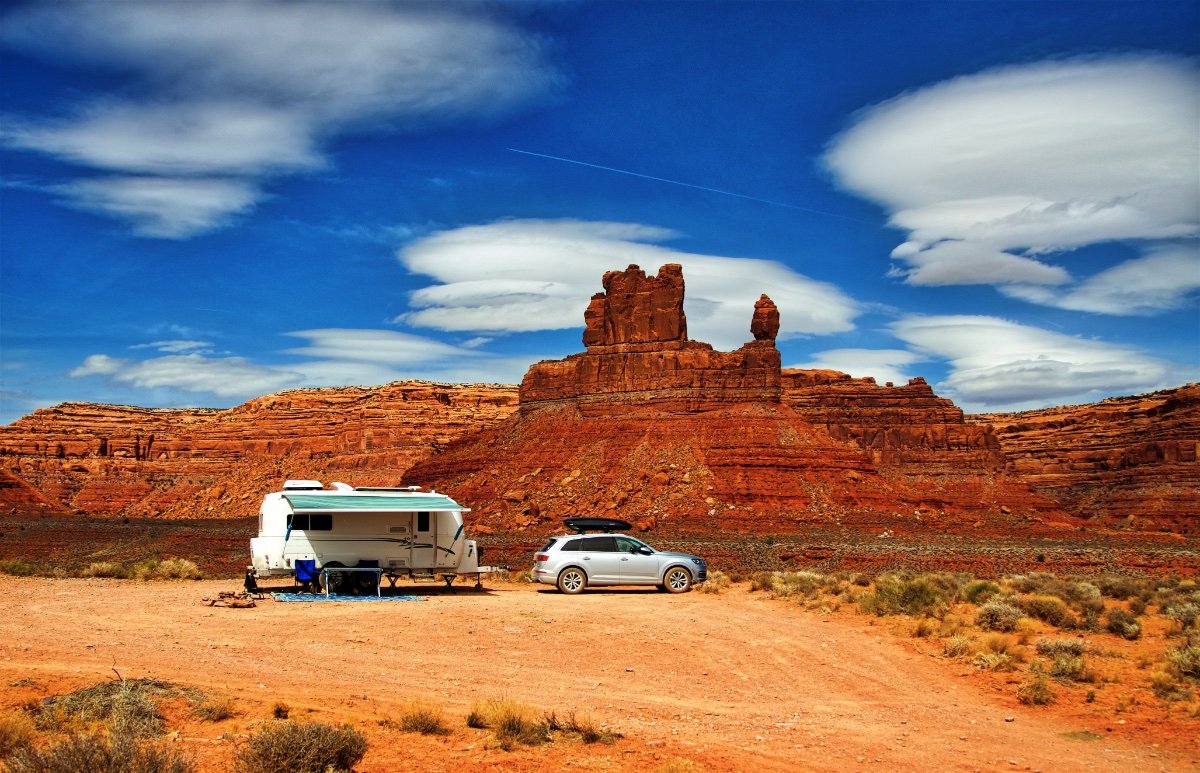
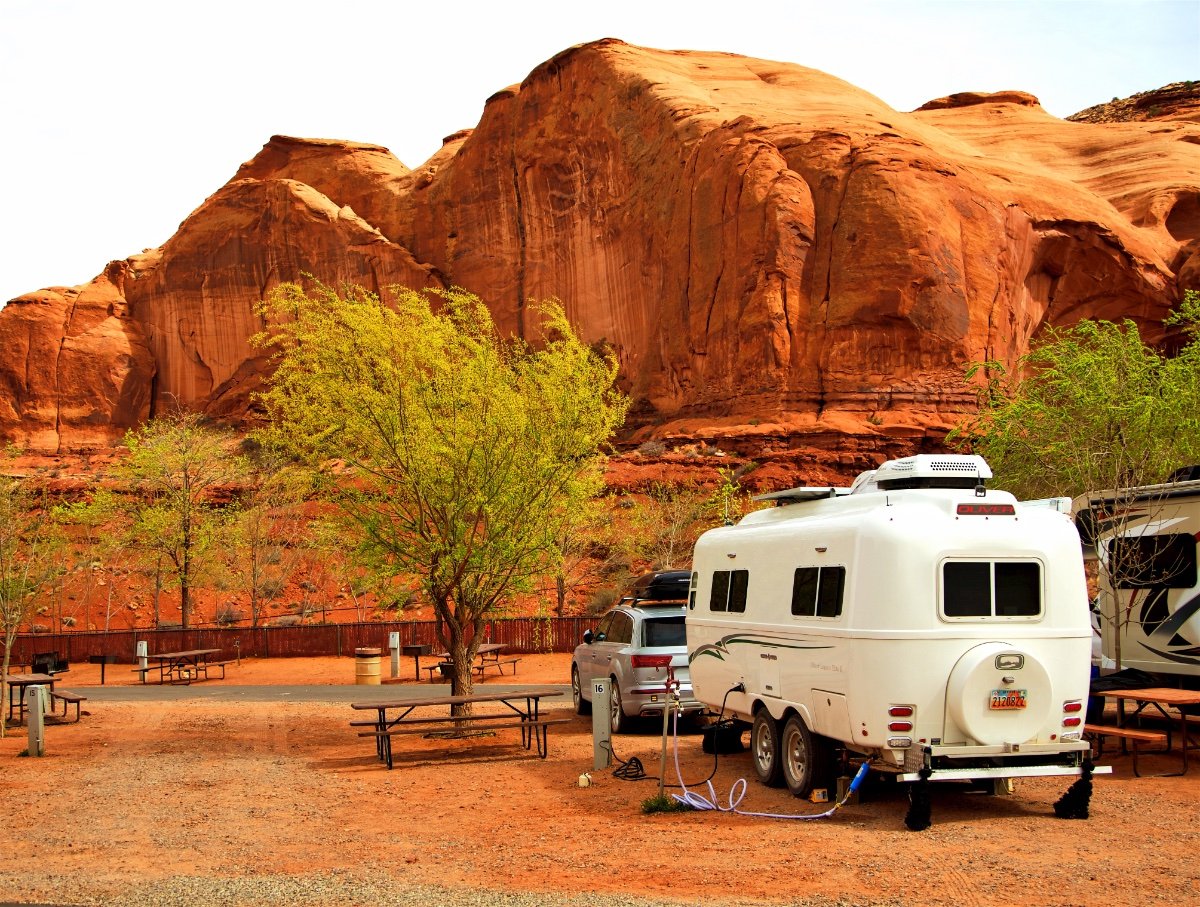
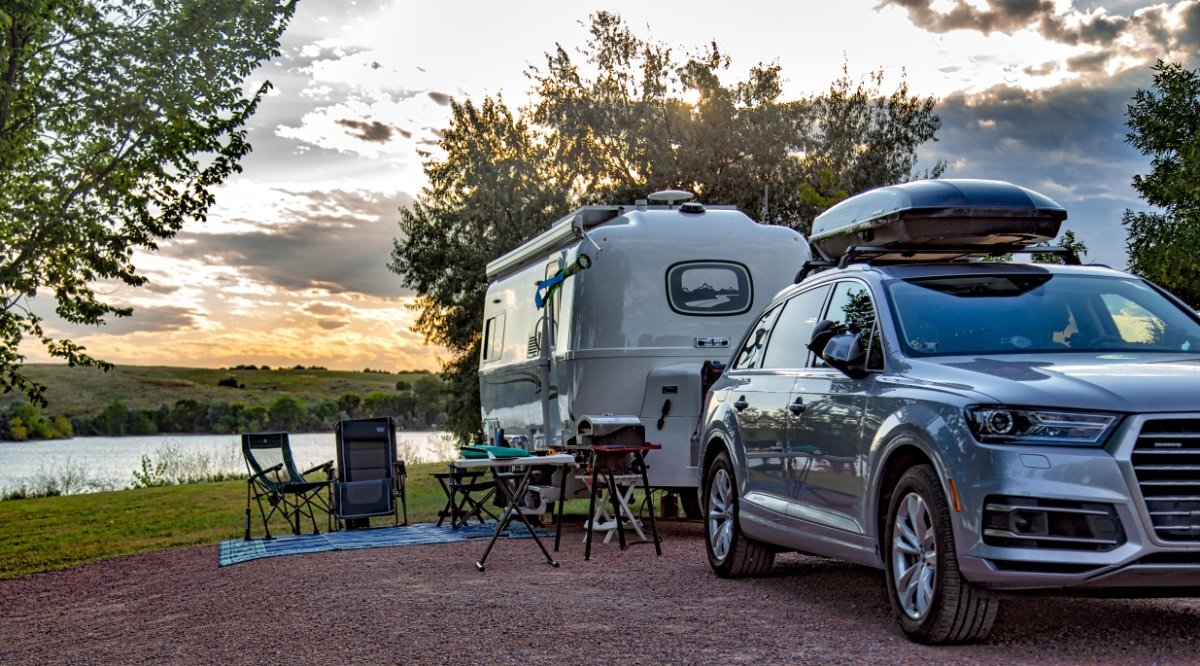
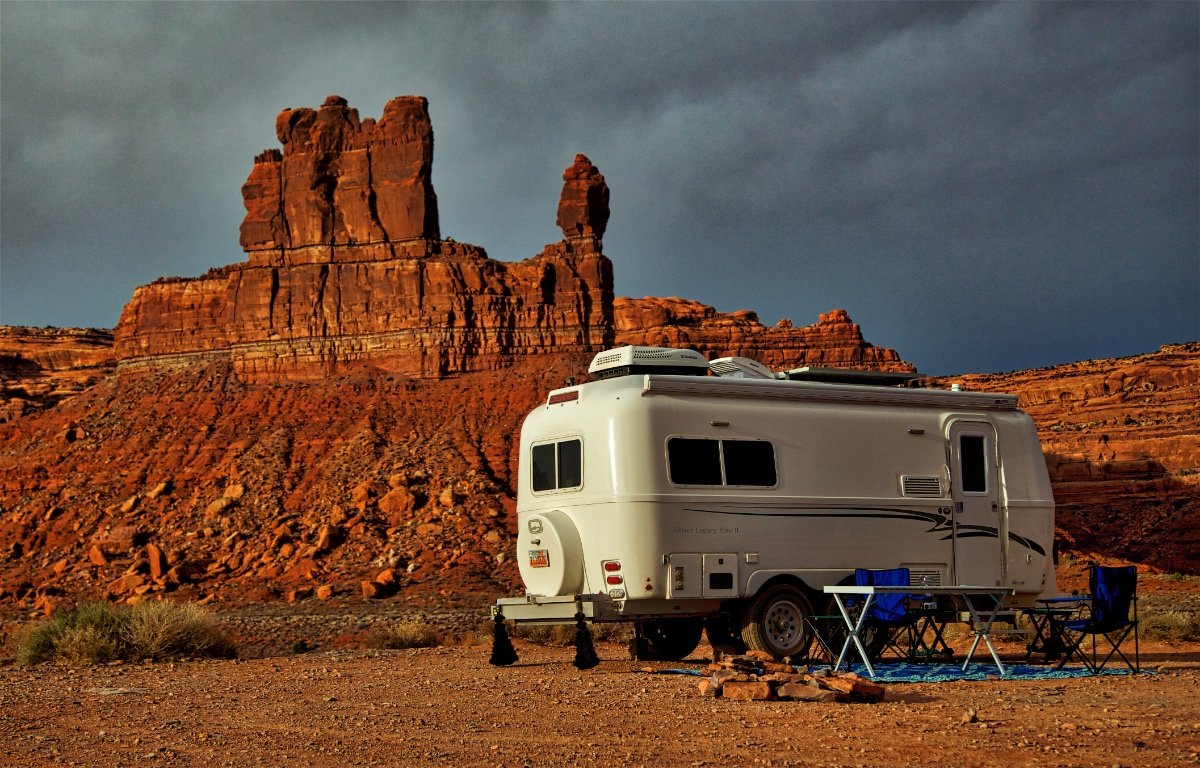
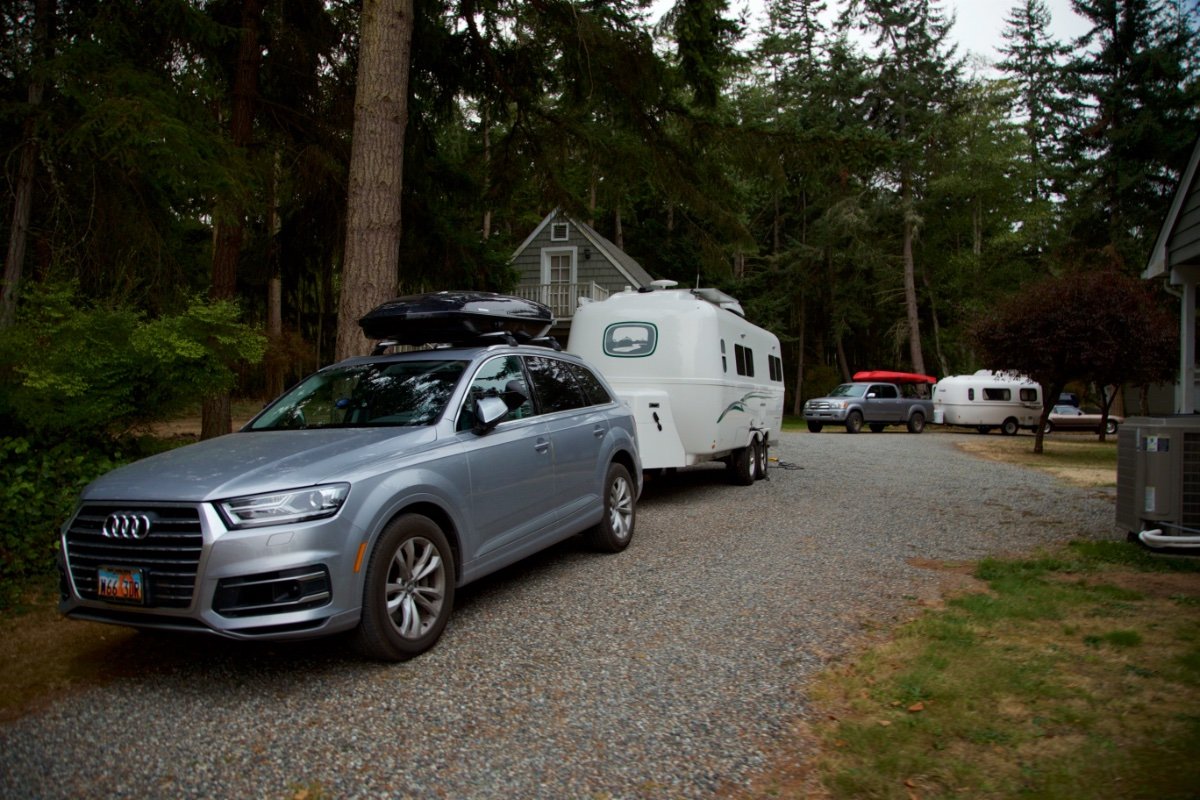
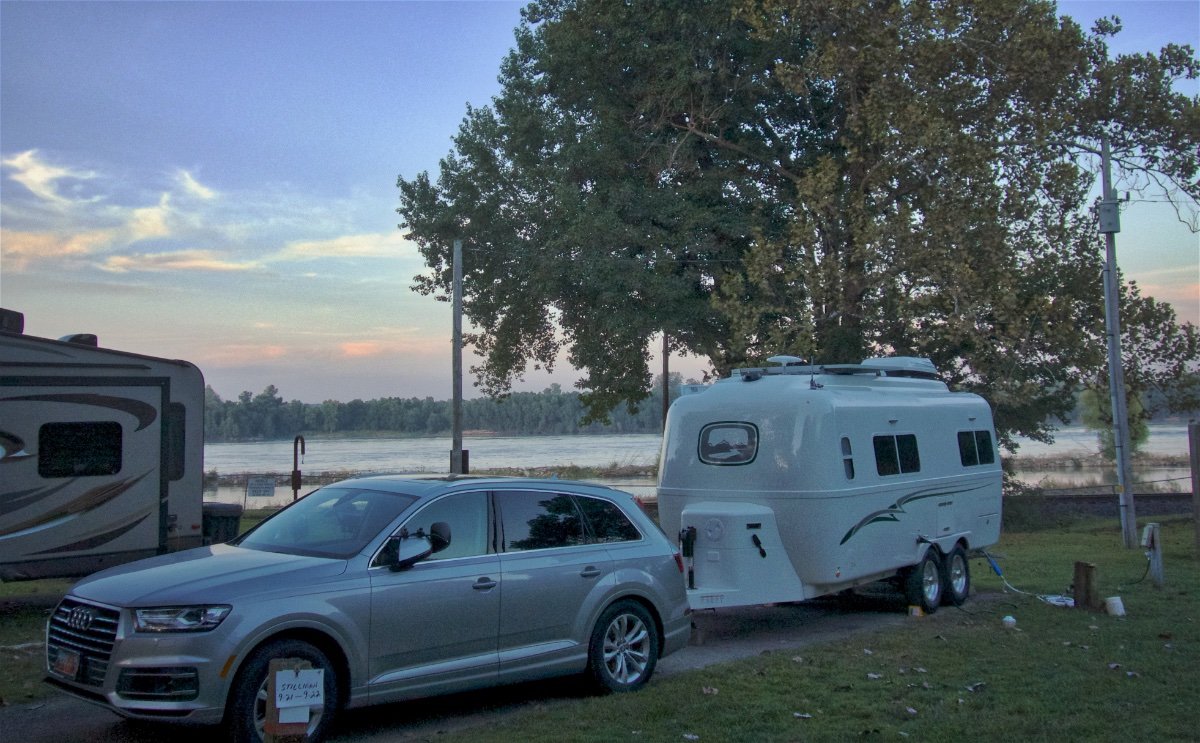
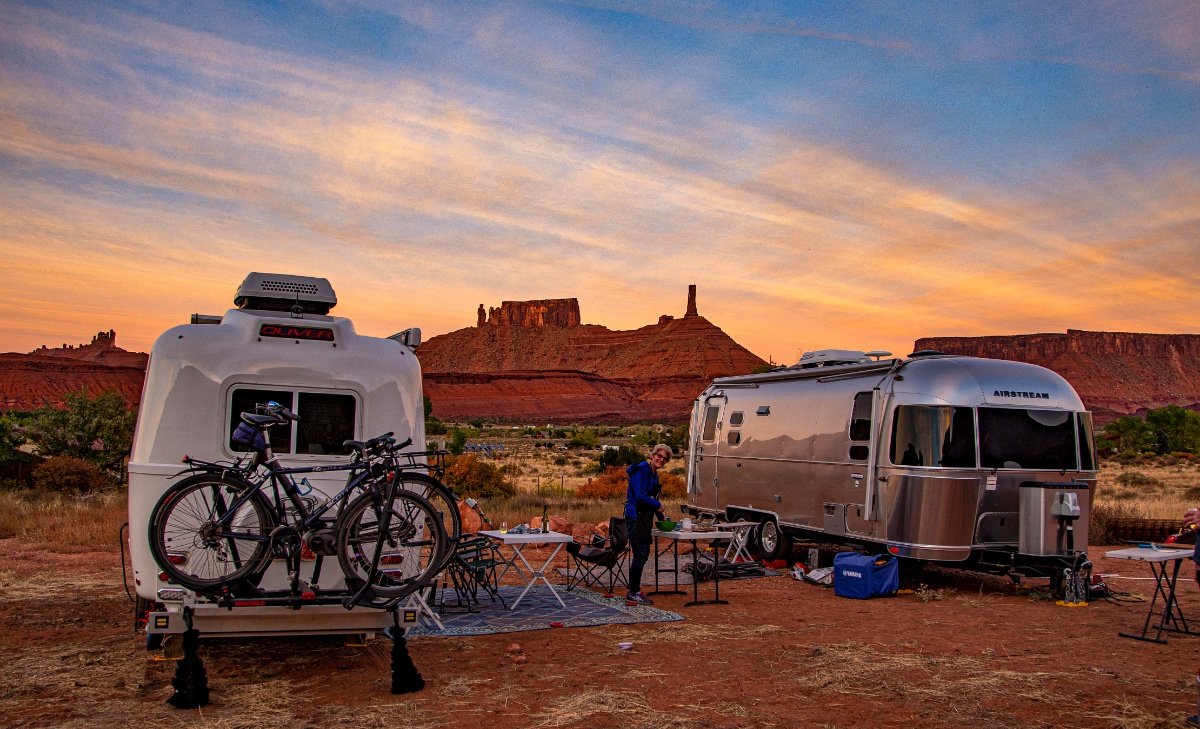
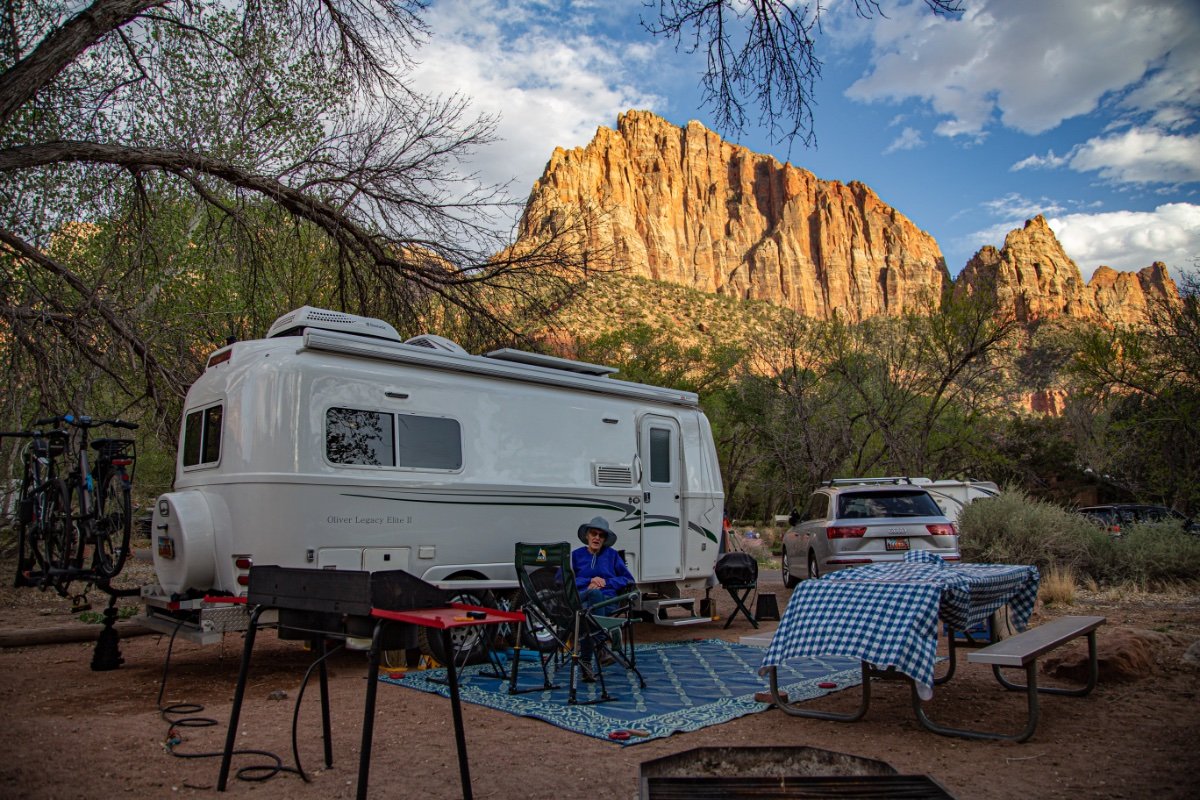
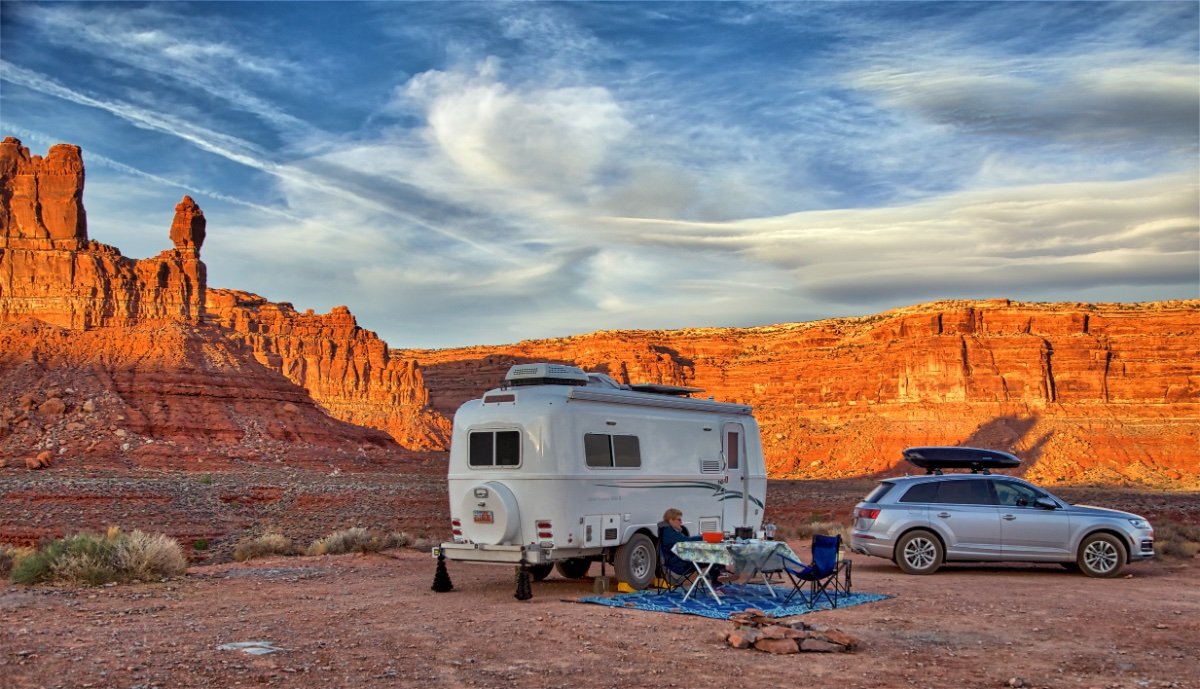
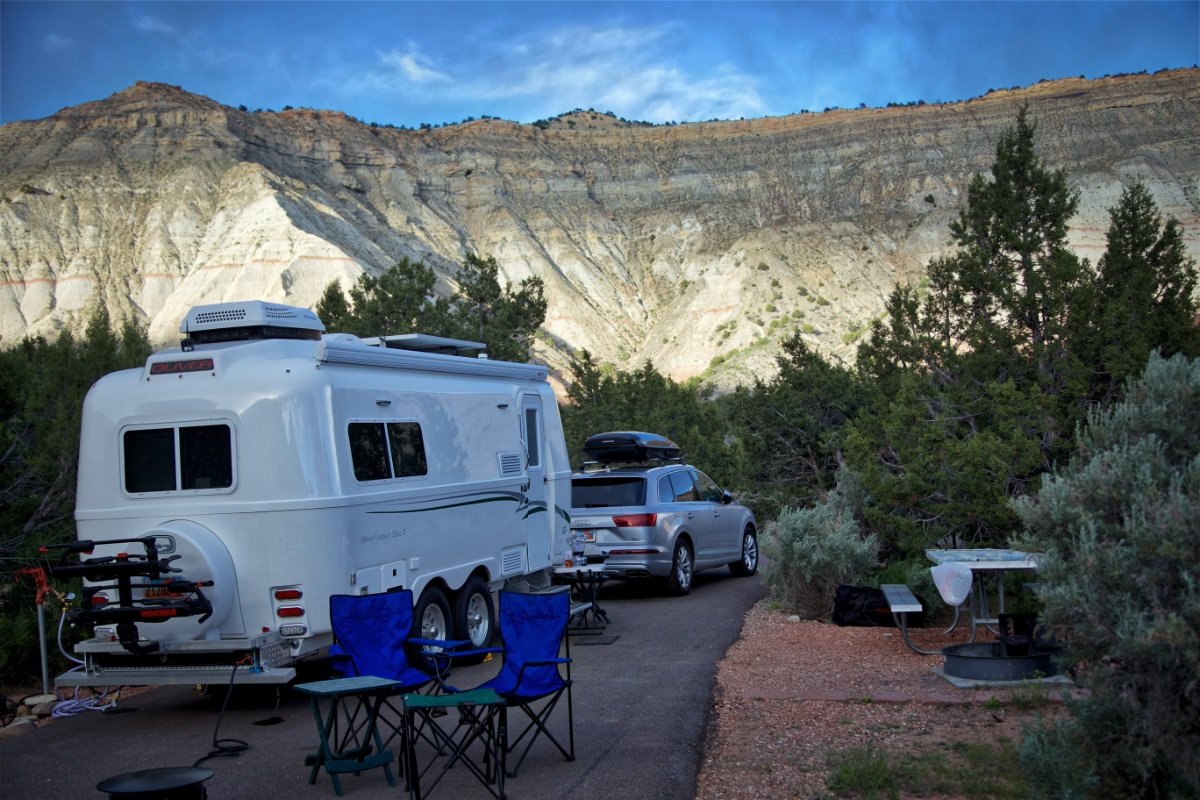
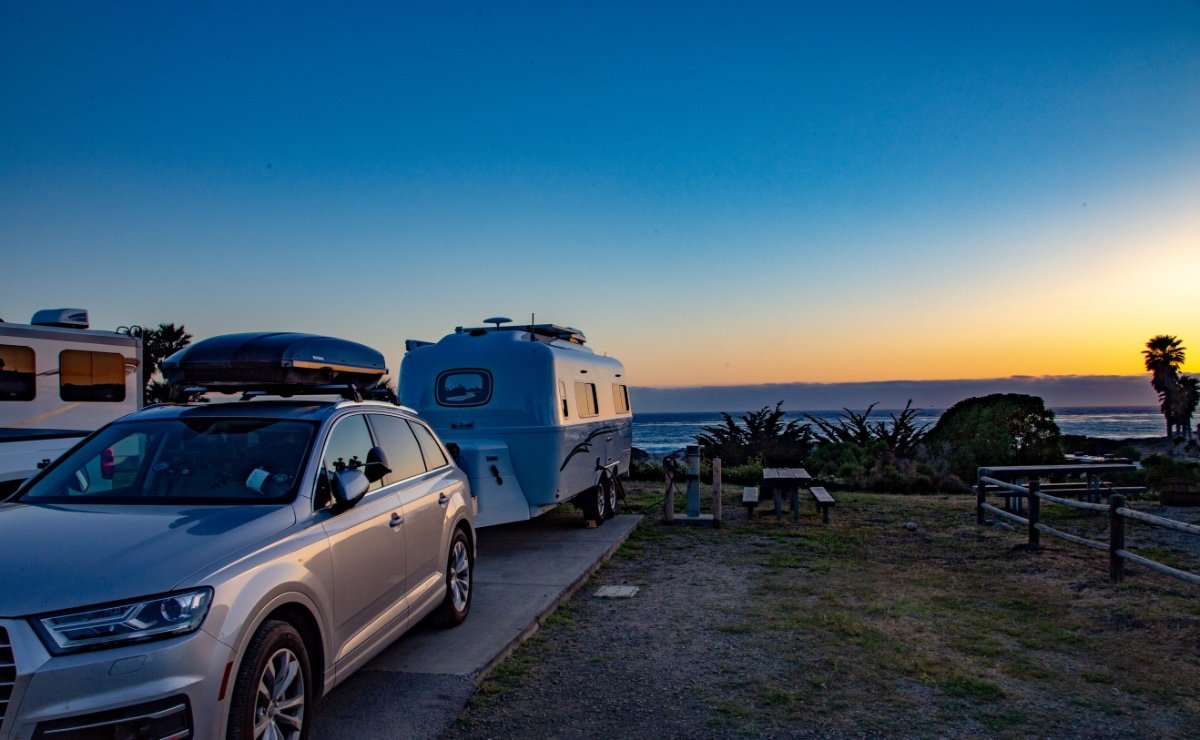
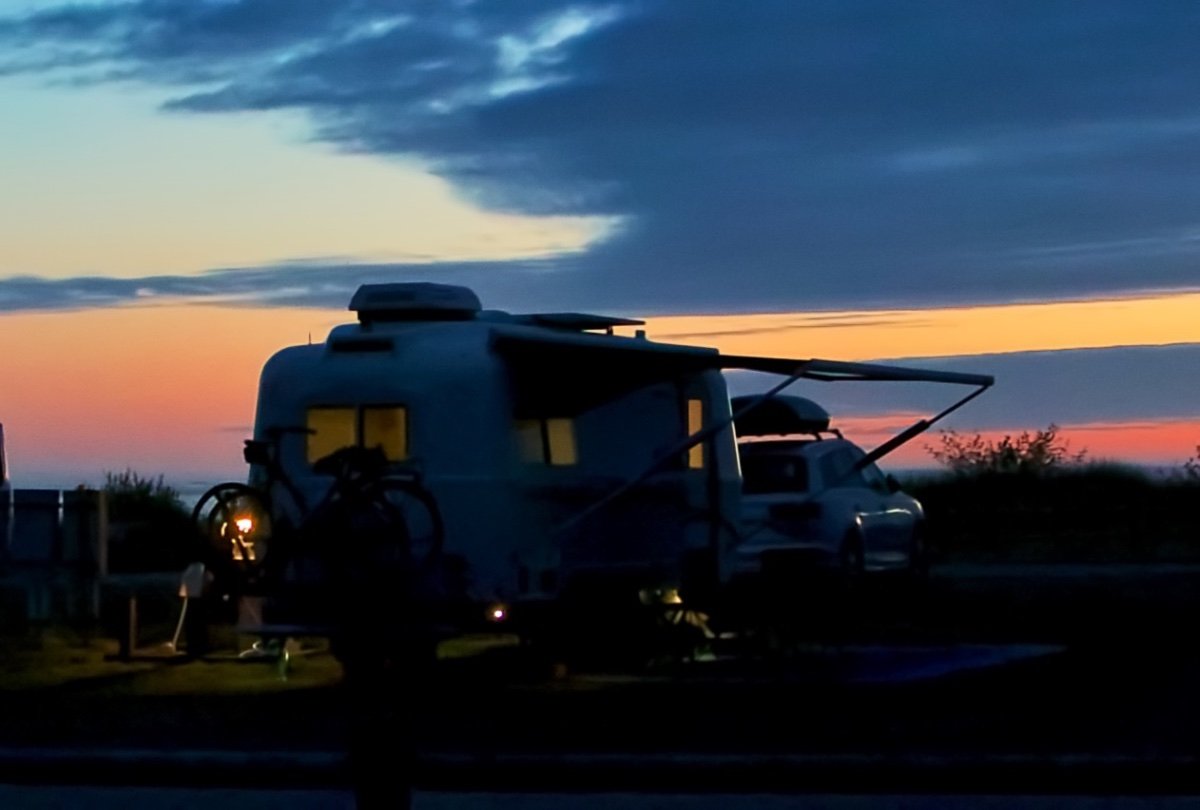
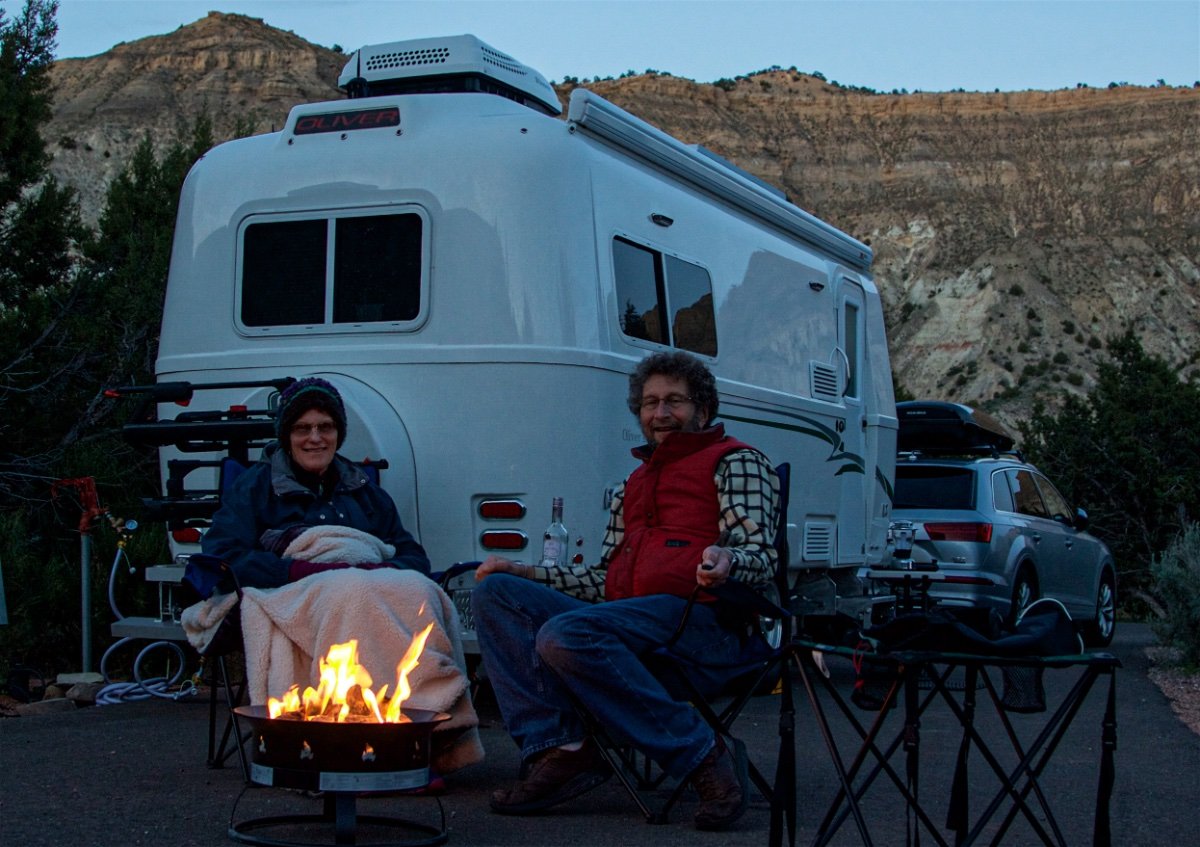
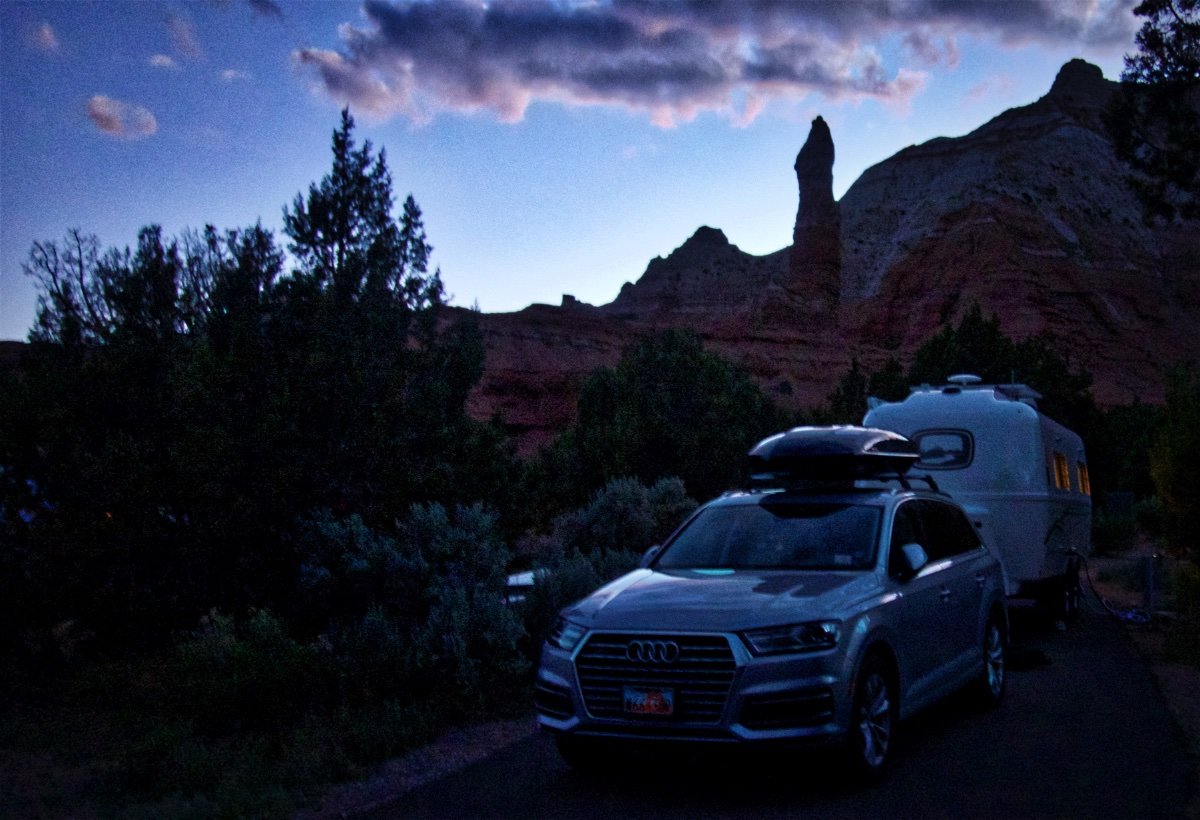
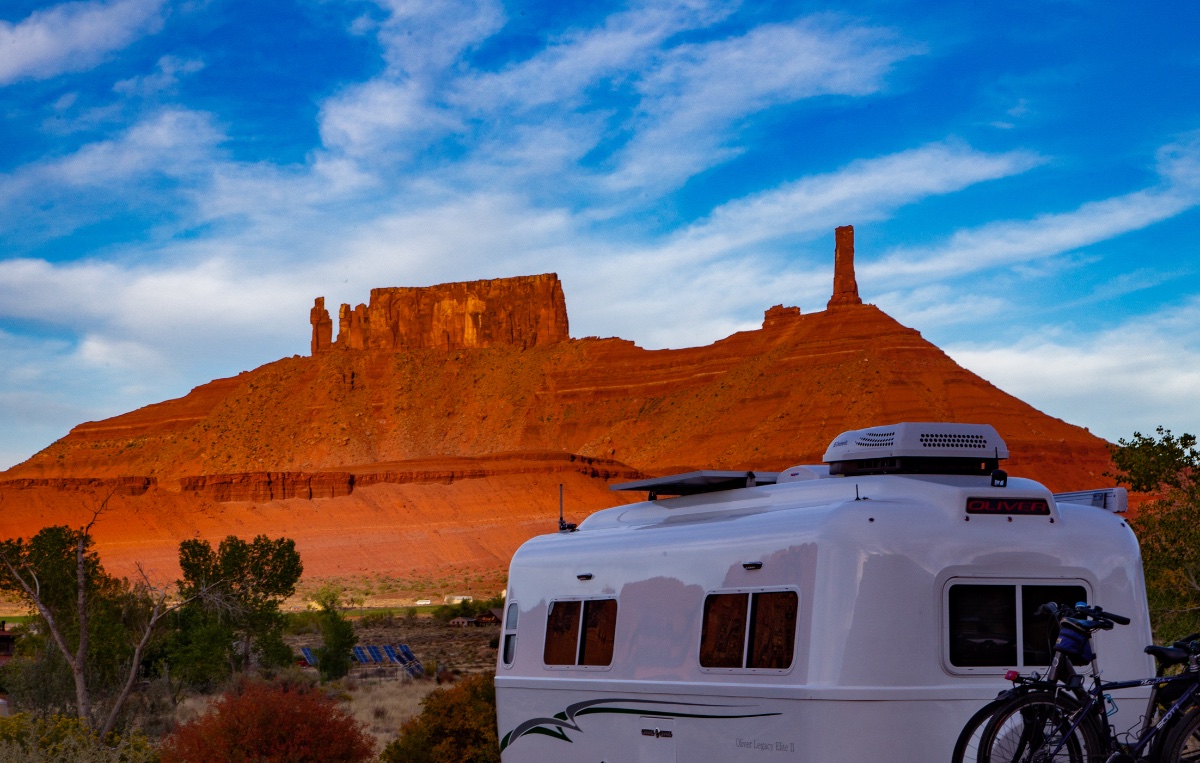
Selling our beloved Oliver recently was a bittersweet experience. We had six wonderful years of great camping experiences with our cherished Ollie. I enjoy photography, and I have taken a lot of pictures of our Ollie in beautiful locations. I went through my photos and selected the best to share here. I then asked myself how to present these photos. By chronological order, or maybe by geographical location? I looked through the EXIF data for the photos and looked at the time when the photos were taken. I noticed that nearly all of the photos were taken in the early morning, late afternoon, or early evening, the Golden Hour of photography. So I decided to present these photos based on the time of day. In the Best Possible Light. Morning photos 6:31 AM July 19, 2019 Deer Creek State Park, near Midway, UT 6:32 AM May 7, 2018 Oliver Rally Lake Guntersville State Park, Guntersville, AL 6:43 AM May 4, 2019 Jalama Beach County Park, near Lompoc, CA 6:53 AM April 5, 2018 Valley of the Gods BLM land, near Bluff, UT This is not a campground, but open BLM land and camping is free. No water, no toilets no picnic tables. Just gorgeous country, and lots of privacy. This is the most spectacular campsite we had in our travels. 6:54 AM June 3, 2020 Lake Jordanelle State Park, near Park City, UT 7:18 AM May 19, 2017 Kodachrome Basin State Park, near Cannonville, UT I distinctly remember taking this photo. It was very cold the night before, and hard to get out of my bed to take this picture. I had sized up the location the previous night and knew that this would look good in the morning light. 7:49 AM March 20, 2019 Goose Island BLM Campground, near Moab, UT We had a great campsite right on the Colorado River. BLM campgrounds are primitive, with a fire pit, a picnic table, and pit toilets. 8:21 AM Sept 17, 2017 Rain Forest Campground, Lake Quinault, WA Afternoon 3:04 PM April 5, 2018 Valley of the Gods BLM land, near Bluff, UT 3:21 AM April 6, 2018 Gouldings Campground, near Monument Valley, UT 5:34 PM August 30, 2019 Rush No More Campground, near Sturgis, SD This was part of the Inyan Fiberglass Rally. 5:44 PM August 25, 2019 Horsehead Campground Angostura Recreation Area, near Hot Springs, SD This was part of the Inyan Fiberglass Rally. Evening 6:09 PM April 15, 2017 Upper Big Bend BLM Campground, near Moab, UT This was a small campground, with a really small spot to put the trailer. I was still new to maneuvering the trailer, but I was able to back Ollie into place. A bigger trailer would not have worked. 6:29 PM April 4, 2018 Valley of the Gods BLM land, near Bluff, UT 6:31 PM April 28, 2018 Piney Campground, Land Between the Lakes National Recreation Area, near Dover, TN 6:37 PM September 7, 2017 Whitby Island, WA We were on our way to Olympic National Park with my sister and her husband and their Casita, when we “driveway camped” at a family friend’s place. 6:38 PM September 21, 2016 Rivers Trail of Tears State Park, near Cape Girardeau, MO We picked up our trailer on September 20, 2016, and spent that night near Hohenwald, TN. This was our first night on our own, at a campsite overlooking the Mississippi River. 6:42 PM October 15, 2020 Castle Valley, UT We were camped with our friends and their Airstream on their land near Castle Valley, UT. 7:04 PM April 9, 2022 Watchman Campground, Zion National Park, UT This is special to us, as this was our last trip with Ollie. 7:17 PM April 4, 2018 Valley of the Gods BLM land, near Bluff, UT My favorite Ollie picture. 7:34 PM May 18, 2017 Kodachrome Basin State Park, near Cannonville, UT 7:40 PM April 13, 2017 Upper Big Bend BLM Campground, near Moab, UT 7:42 PM May 3, 2019 Jalama Beach County Park, near Lompoc, CA 7:58 PM March 28, 2019 Goose Island BLM Campground, near Moab, UT Our propane firepit right on the Colorado River. 8:07 PM September 10, 2017 Hobuck Beach Park Campground, Neah Bay, WA 8:40 PM May 18, 2017 Kodachrome Basin State Park, near Cannonville, UT This was our first time using our propane firepit. 9:09 PM May 20, 2017 Kodachrome Basin State Park, near Cannonville, UT I hope you enjoy these photos, and that you enjoy camping in your Oliver. -- David

- 13 replies
-
- 20
-

-

-

-
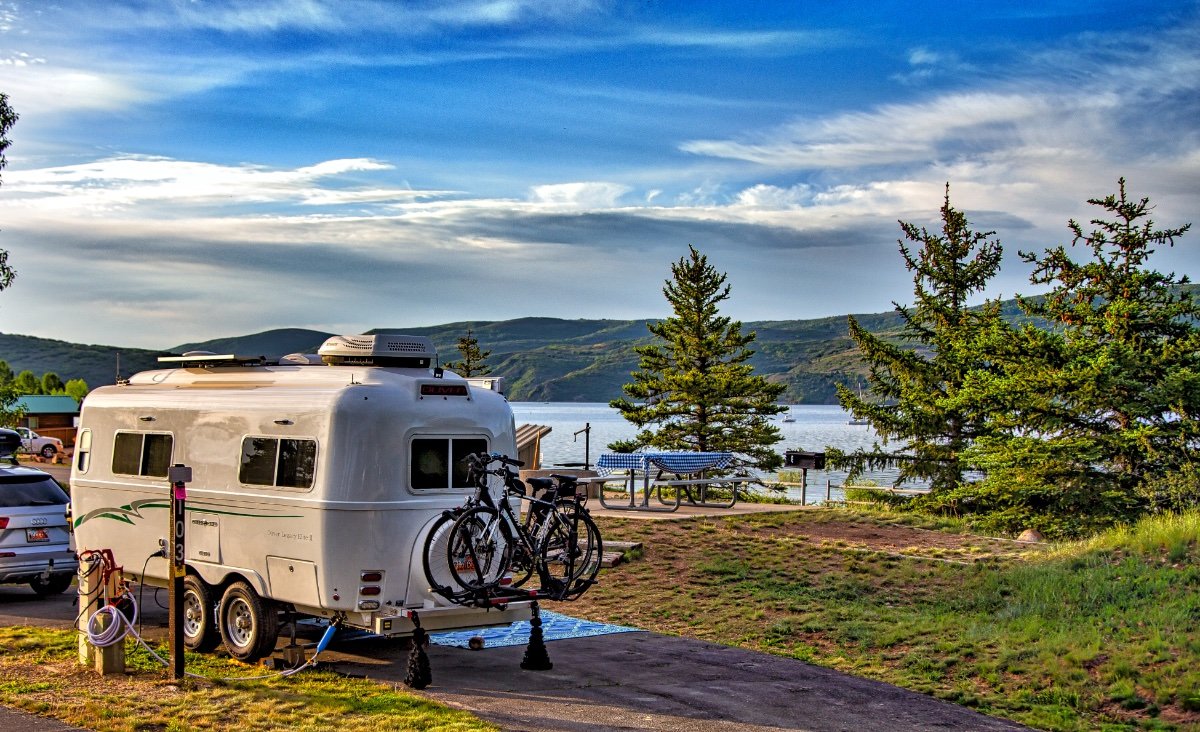
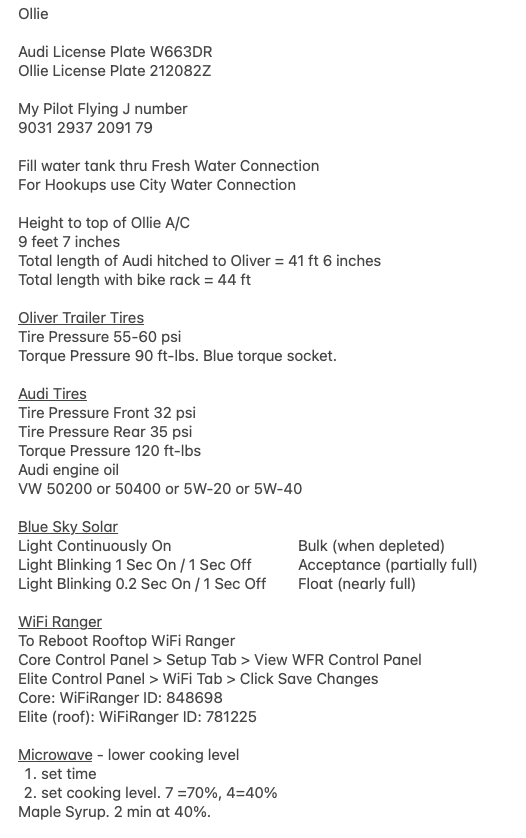
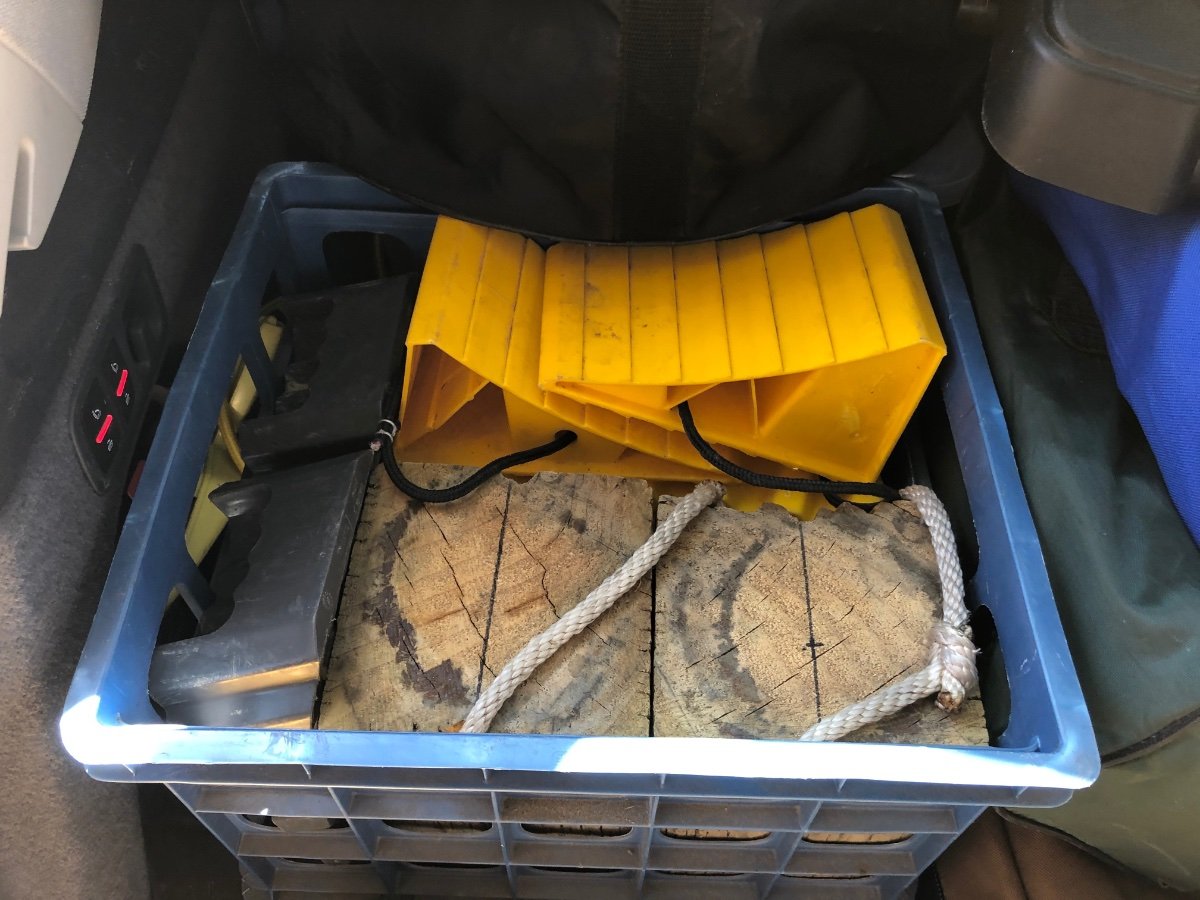
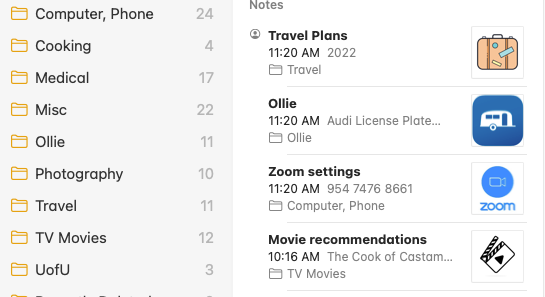
I want to tell you about a number of ways you can use the Apple Notes App for travel. The Apple Notes App is free. One of the nice things about Notes is that it uses iCloud to seamlessly sync between an iPhone, an iPad, and a Mac. I typically use the Mac to copy/paste information into the file but then use the notes on my other devices. (I am more comfortable with the laptop keyboard than the phone.) Importantly, you can share a note with your partner. This is particularly useful if I am driving; I can ask my wife to open her notes app and find some info or dial a phone number listed there. What is it useful for? I will start with a simple example. I have a Note called Current Trip. If it is a camping trip I will list each of our campsites in chronological order. For each campground, I copy/paste the Address, Phone Number, Website, etc, into the Note. For non-camping trips, I put in hotel or Airbnb information. If I book a restaurant, I put the info into the Notes file. Ditto for Car Rental information. The Address, Phone Number, and Website in the Notes file become links. If I touch the Address on my phone, it opens up the Address in the Maps app, and I can now click on directions. If I click on the Phone Number it offers to dial the number. If I click on the Website it opens in a web browser. These links can be incredibly useful. Again, having the notes file shared with your spouse or other traveling companions means they can access this info. This Notes File can be wonderful for Wi-Fi Passwords. Suppose you check into a place and they give an awful random character password, such as t?Uc'C&Ds9Ye;v. Now you have to enter this into each of your devices, under conditions where what you have already typed is obscured! Instead, I enter the password into my Current Trip file and verify that I typed it correctly. I can then copy the password, go to Settings > Wi-Fi, select the network, and paste in the complex password. Since my Current Trip file syncs with my wife’s devices, I can copy the password from her Notes and get her Wi-Fi set up. You can put nearly anything into a Notes file, including images (jpg, heic, png, tif, or pdf). On our trip to Zion NP last month, I pasted maps for the Zion Park shuttle system and the campground map. I have also pasted driving directions for the trailhead for a hike into the Notes file, or the mile makers for Rest Areas along the route. Another Notes file I use is called Travel Plans, and this I also share with my wife. It helps us both know what upcoming trips we had or when visitors were expected. I started this in 2018, when we had a lot of travel planned. I discovered that this Travel Plans file turned out to be very useful for examining our travels retrospectively. I found it so useful that I used my photo files to add dates and destinations for all of our past foreign trips. Another Notes file is called Ollie. I started this file soon after we started camping with Ollie. We pull into a commercial campground and walk into the office to register, and the first thing they want is the vehicle license plate number. So I put this info in the Ollie file. When we first started camping with Ollie, I had to look up in the Owner’s Manual which water inlet I wanted to use, Fresh Water Connection vs City Water Connection, so I put that in the Ollie file. Height to the top of Ollie, tire pressure and torque info, details on the Solar controller or the WiFi Ranger. We like to make pancakes when camping, and we heat up the real maple syrup in the microwave. If we heat at full power the syrup boils, so we needed to use a lower cooking level. After looking up how to do this several times in the instruction manual, I decided to put the info into the Notes Ollie file. (Note, our microwave is a Summit OTR24, and yours may be different. Basically, anything I had to lookup more than once went into the Notes Ollie file. I also put pictures into the Notes Ollie file. I use a milk crate to store my chocks and wooden blocks. I had worked out a nice way to fit them all in neatly, but then at the next stop, I couldn’t remember. So once I figured it out, I took sequential pictures of the packing steps and put them into the Notes Ollie file. I posted about how we lock our bikes on the rack on the back of the trailer, using a 6-foot heavy-duty chain that just barely fits. A picture of the bike lock on the bike rack that is stored in the Notes Ollie file helps me remember the strategy for attaching the lock and chain. The last Notes file I want to mention is the After camping list. While on a camping trip I think of things I want to repair or want to research/purchase to make camping more enjoyable. I always have my phone with me, so I can add to this list while barbequing. I recommend all Ollie owners use a file like this. A couple of final points about the Notes app. Pin. The default is to sort by Date Edited (which can be changed), but sometimes the Note you use the most has not been edited in a while and is far down the list. In that case, you can Pin the most important Notes to the top of the list. Folders. If you have a lot of Notes, you can put them into Folders, so that you can look in a particular folder. I have a number of folders, including Computer & Phone, Cooking, Medical, Ollie, Photography, Travel, and TV & Movies. Icons. If you have a lot of Notes, a picture or an icon can make it easier to find the Note you want. When I first started pasting photos into Notes files, I discovered that the photo would be visible in the list of notes. If there are multiple photos, only the first one appears in the list. I later decided to search for icons to mark Notes files. Suitcase icon for Travel, trailer icon for Ollie, etc. If I have pictures in the Note, then I put the Icon image earlier in the Note. These icon images can be tiff, png, jpg or heic files. While you can put pdf files into notes, the pdf images do not appear in the list of Notes files. Perhaps a PC / Android phone user can provide info about similar apps for the PC and android devices? I did find an article explaining how iPhone owners can edit their Notes on Windows.
-
Your pictures are fine at the size they are! But if you want to change the size, here is how. Upload the picture and insert it into the message field. Then double click on the picture, which brings up this dialog box shown below. (Note I am using a web browser on a laptop. It might be different on a phone or a tablet.) The default is 1000 pixels in width for high resolution images, but this will be a lower number for low resolution images. If you enter 500 pixels into the width box your picture will be one-half the size. You should keep the box checked for Keep Oriinal Aspect Ratio, unless you want to squish your picture in funny ways. Then click on the Update button Note you can also add a Title for the image, and set the alignment if desired.
-
Hi Claudia, and Welcome to the Oliver family. Obsessive Casita Disorder! I love it! Before we bought the Oliver I spent so much time researching trailers that my wife the psychotherapist diagnosed me with OTD, Obsessive Trailer Disorder. I am now trying to think of a new acronym, maybe Oliver Captivation Disorder. I recognize those rocks! That is Castleton Tower on the right, and The Rectory on the left, in Castle Valley UT!
-
Mr Clean, You gotta update your profile picture. This one is from Wikipedia.
-
Welcome to the Oliver Family, Mr J! I loved your description of watching your neighbors get new trailers every few years, primarily because SOB trailers (Some Other Brand) are built poorly and don't last very long. You will be happy with your decision to go with an Oliver!
-
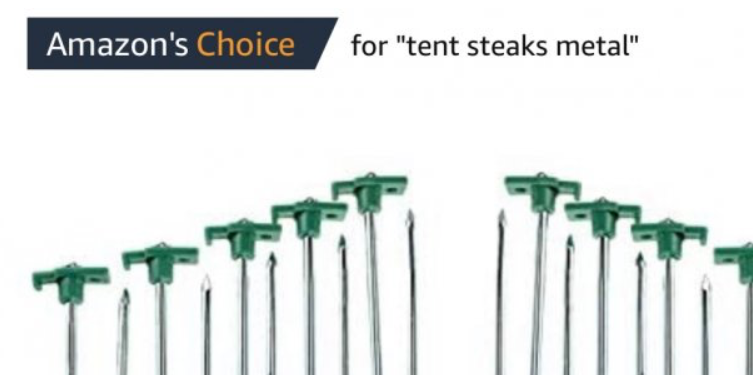
 Uh, I could understand wanting Metal Tent Stakes, but Tent Steaks Metal might be a little hard to chew.
-
We initially attached a simple white plastic paper towel holder above the sink with double-sided tape, because at that time I was afraid of drilling through the fiberglass. After several years it started to come loose. I then put up the wonderful Kamenstein paper towel holder holder above the sink, using screws, following @mossemi's instructions, including "the holy grail, stainless t-nuts." With the stainless t-nuts, the nut does not disturb the surface of the rubber mat in the cabinet above.
-
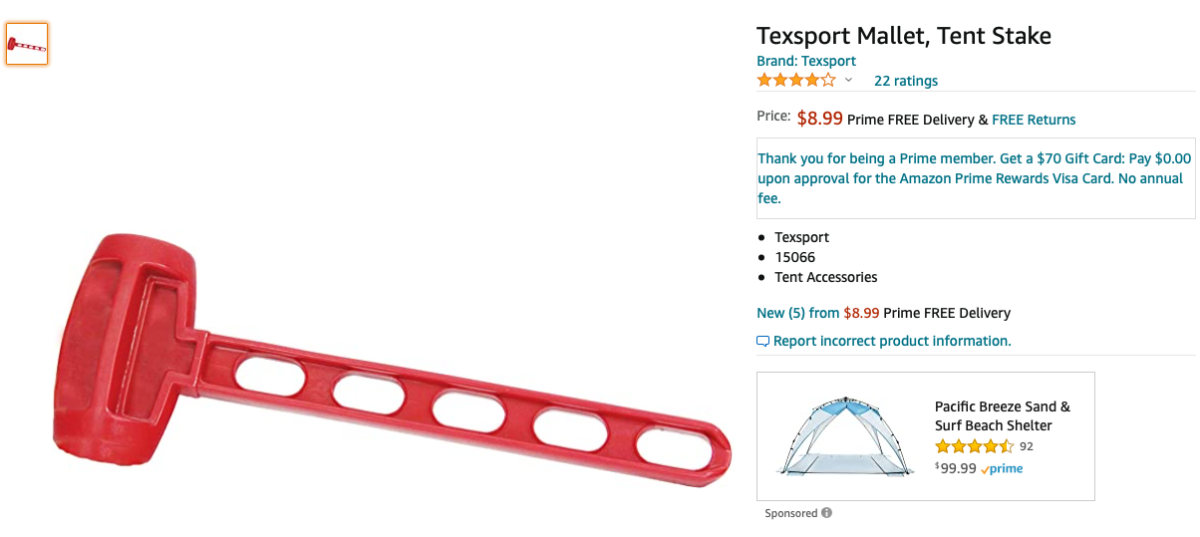
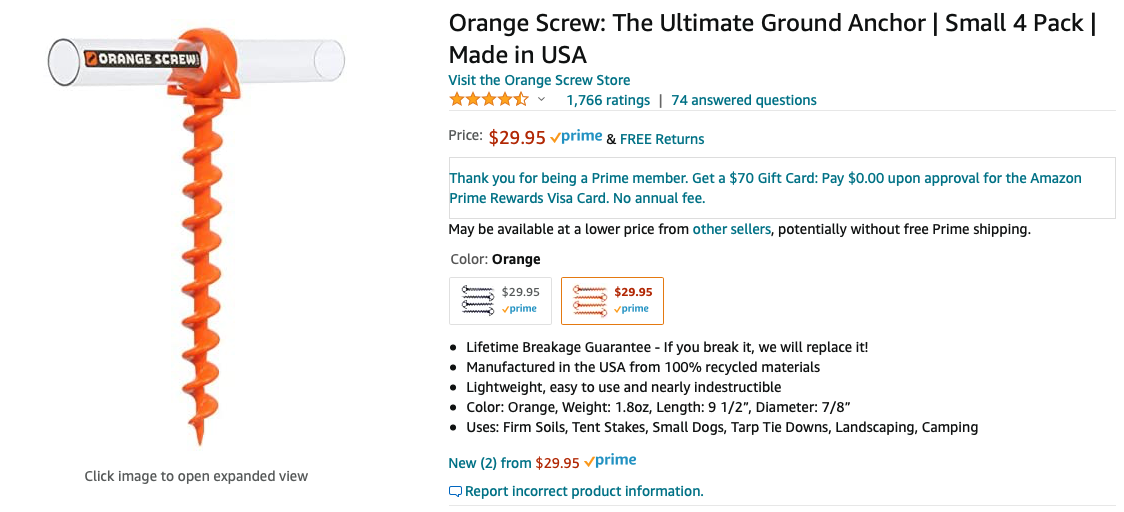
I have both plastic and steel tent stakes left from our tent camping days. Sorry, I do not have a fancy Snow Peak Peg Hammer. 🥺 Instead I have a hard plastic mallet, which I got for $5. Currently $9 on Amazon. It works quite well, with the bottom end working either as a lever or a pulling device for removing the stakes. After we got a shade screen, we had campgrounds where the tent pegs did not stay in the ground very well. Maybe the 15 inch Snow Peak pegs that @Overland mentioned would have done the job. I had read about spiral stakes, and I considered the ones from Valterra, Camco, as well as pet leash stakes. I ended up buying the Orange Screw Ground Anchors that @mossemi is drooling over for $22. So far they have worked well. I see that the Orange Screw design has been copied by others, and available for less money, here and here.
-
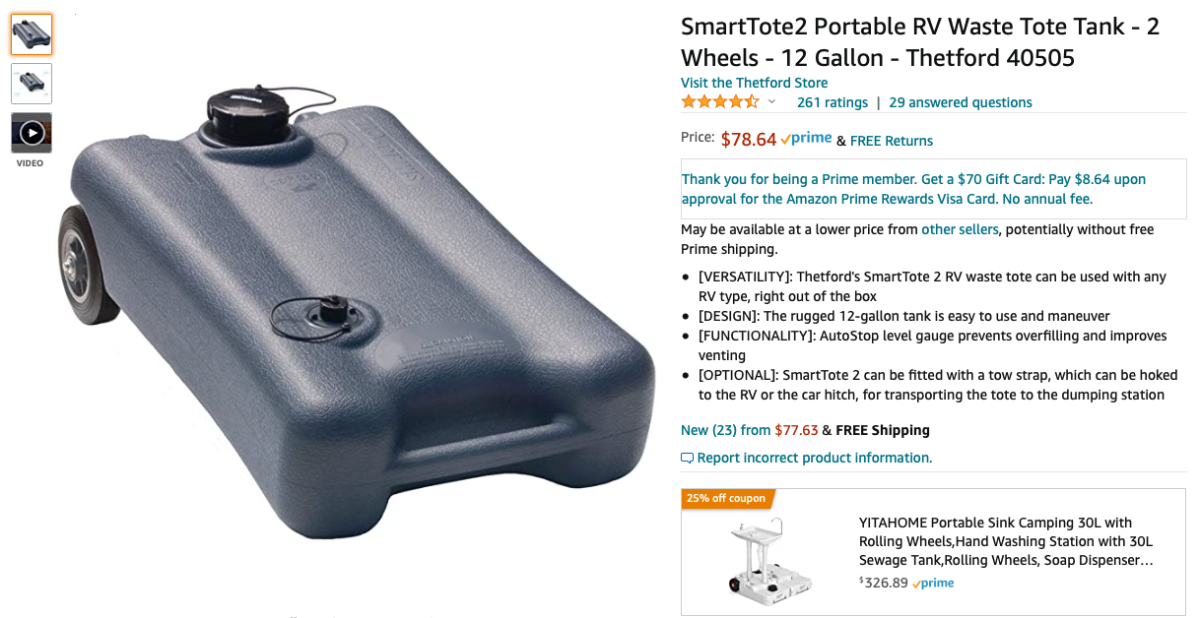
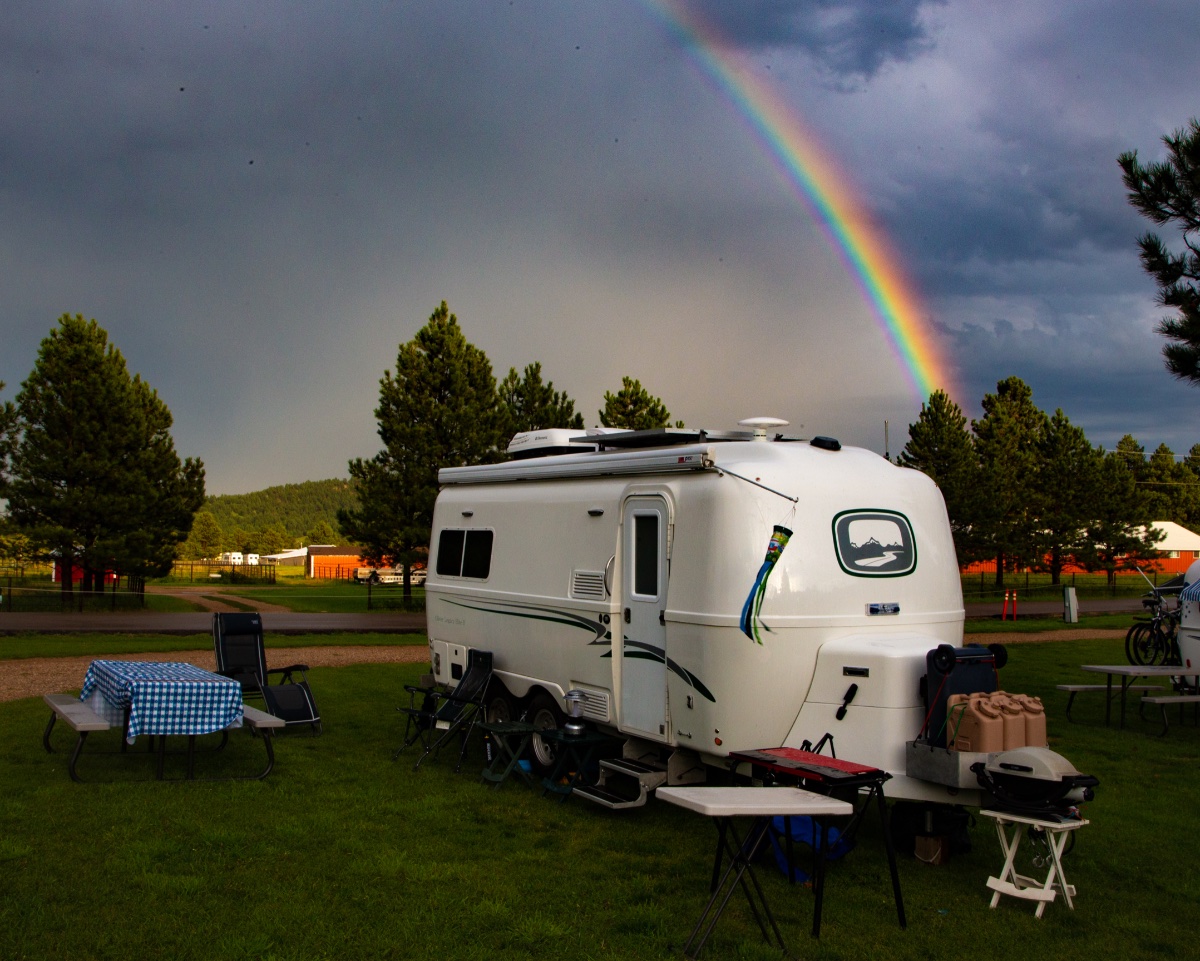
I recently posted on a thread about storage boxes that fit into the basket on the Ollie tongue. One photo showed a grey water waste tote that I sometimes carry on top of the storage tote. I got a PM from @stlipa asking what kind of tote I bought, and why I chose that one. I decided to post my answer here on the forum. I started researching totes and discovered that they come in various sizes, 6 gallon, 10 gallon, 11 gallon, 12 gallon, 15 gallon, 18 gallon. I just looked on Amazon and I even find 25 gallon and 38 gallon models. One gallon of water weighs 8.34 lbs, so you can do the math. The smallest ones have no wheels, some have two wheels, and the larger ones have four wheels. The larger models allow you to off-load more grey water at any one time, but the weight increases proportionally. The higher volume models are also proportionally larger in their dimensions, taking up more room in the tow vehicle. I did not want to carry the tote in my tow vehicle, an SUV, and I wanted to get a tote model that would conveniently fit into the storage basket. I made a list of all the models, with their volume, the weight when full of water, and the length, width and depth dimensions for each. I decided on the 12 gallon Thetford 40505 SmartTote, which I purchased a local RV supply store. Amazon has it for $79. I chose the 12 gallon Thetford 40505 SmartTote primarily because it would conveniently fit into the Ollie storage basket along with three of these five-gallon water jugs. BTW, the jugs have “Property of US Government” stamped into them. As you can see from these photos, the waste tote and the three water jugs all fit into the storage basket. When we are boondocking, we can go and get 15 gallons of fresh water, and we can offload up to 12 gallons of grey water. I leave the water jugs at home when we are going to a campground with water hookups, and put the yellow storage box and the tote on the tongue as shown in the earlier post. I had wanted to get the largest tote that could fit in the basket, but I soon learned that bigger is not always better. A better aphorism is that bigger is always heavier! My 12 gallon tote weighs 100 lbs when full. While I can walk it short distances when full on its two wheels, the weight becomes prohibitive if going a long distance. Imagine wheeling a 100 pound suitcase through an airport! My guess is that the larger totes with four wheels are easier to pull by hand. I do find that I can pull the tote fairly easily when it is 2/3 full (approx. 65 lbs), so I will often make two trips with 6-8 gallons each to dump the grey water, rather than one trip with 12 gallons. I bought one of the recommended accessories, a tow strap, that allows me attach the tote to the ball hitch on the tow vehicle. I have done that when the dump is more distant, with the tote filled to capacity, and it works fine. Just drive slowly. But if possible I prefer walking the tote over. At one campground the dump was too far for me to feel comfortable pulling the tote behind the car, and I was able to heft the partially filled tote (65 lbs?) into the tow vehicle. A larger tote would not be of greater benefit in this situation. A couple of other points for those considering getting a waste tote. The stuff I read online suggested getting hoses and connectors. (Some of the larger four wheeled totes have hoses that store in a built-in compartment.) I got a five foot sewer hose, and a sewer fitting. With these, it is easy to dump my grey water into a standard sewer fitting, moving the tote from horizontal to vertical and letting gravity do the rest. I later discovered that some campgrounds have a different type grey water disposal sites, and my sewer connection hose did not work well. These disposal sites look like they are designed for campers to pour in a dishpan of soapy water; these can be elevated off the ground, and thus difficult to lift a heavy tote. To circumvent this problem I bought a bayonet hook waste cap with a garden hose thread connector, and I got a short length of garden hose with the female end intact. Starting with the tote in a horizontal position, I open the air entry valve, hold the hose end above the sink for grey water, and then raise the tote into a vertical position. Water pressure forces the grey water though the hose into the waste water receptacle. When the tote is mostly empty, I can lift it off the ground and get the remaining water to drain out. I use this tote only for grey water. No black water in the tote for this camper! Finally, the pictures of the tote and the three five gallon water jugs in the Oliver basket were taken from other pictures, below. One is a picture of Ollie at Devil’s Tower, and the other is Ollie in front of a rainbow in South Dakota.
-
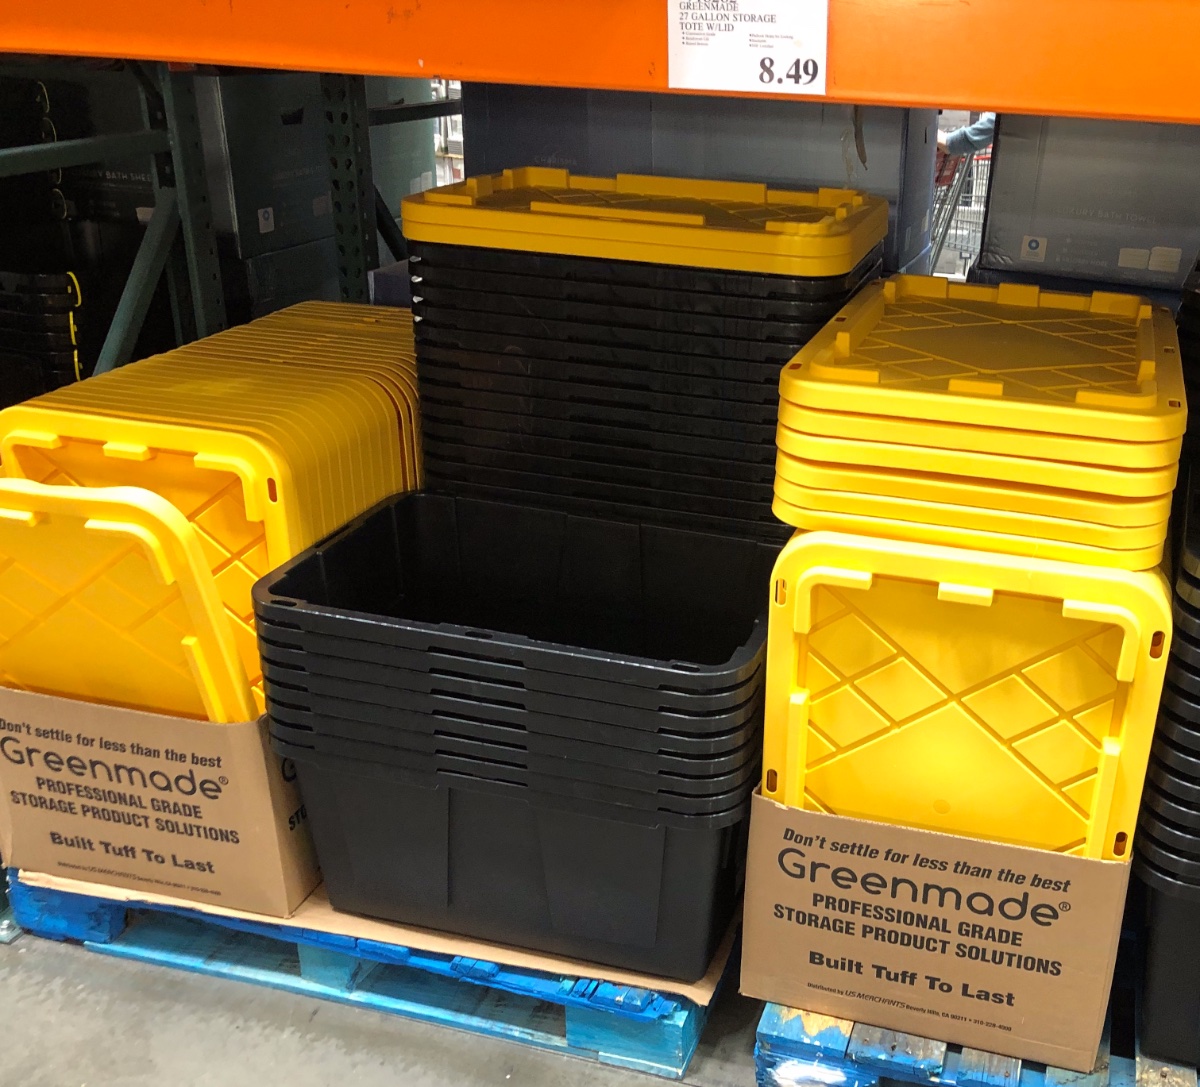
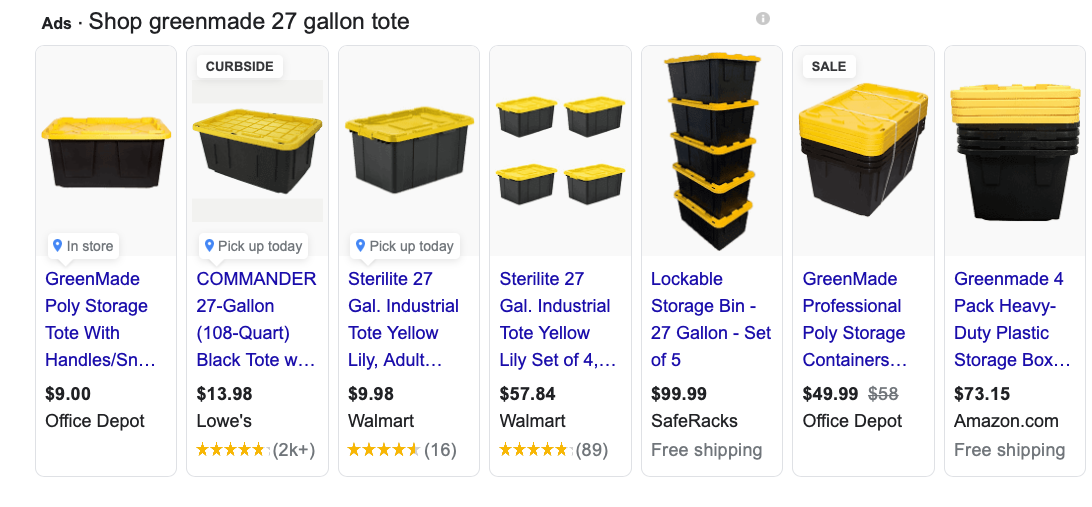
I would like to suggest an alternative to the 24 gallon ActionPacker, the 27 gallon Greenmade Tote. It is available at Costco for $8.50, much less than the ActionPacker 24. It is also available at other stores for $9-$14. It is lockable, although a determined thief could easily overcome the lock. I have driven through rainstorms with it, and in my hands it is waterproof. It fits perfectly in the Ollie storage basket. I carry my empty grey water waste tote on top of it.
-
How Long Did Your Oliver Duralast Battery Last?
DavidS replied to Geronimo John's topic in Mechanical & Technical Tips
Since several people are commenting on how long their batteries last, I will add another data point. Our AGMs are doing just fine, thank you very much. (Knock on wood, bangs fist against head.) We picked up our Ollie in Sept 2016, which was four and a half years ago. We store our trailer under cover, where the solar will not charge them, so I disconnect the batteries when I put the trailer in storage. I wonder whether disconnecting them contributes to their apparent longevity. -
Awesome Newer Ram Truck Feature. A Review of Sorts.
DavidS replied to Moonlight Mile's topic in Towing an Oliver
We ordered our Ollie in 2016, and at that time I was also researching tow vehicles. We decided on the Audi Q7 SUV, and it has been a wonderful tow vehicle. At that time there were a bunch of videos online about the Trailer Assist features for the Audi and VW . However, when we got the car, the Trailer Assist was not there. It turns out that the US Dept of Transportation would not allow it. But now they do allow it, much to @Moonlight Mile's delight. You should watch this video from VW on their Trailer Assist. It is very funny. And watch this one if you want to see how they did it. -
Shower track, Micro-Air Easy Start & Microwave - Choosing options
DavidS replied to CanyonWren's topic in General Discussion
I think it does apply. The Electronics Pro Package listed on the Oliver website includes both a 4G Cell Phone Booster and a WiFi Booster. My 2016 trailer (Elite II) has two on/off switches; I think they are labeled "Cellular Booster" and "WiFi Booster." My trailer has the WiFi Ranger Sky Pack model for the WiFi Booster, and I learned about the wired connection from their instruction manual. I expect the technology has improved since I got my trailer, and Oliver may currently be using different models. -
Shower track, Micro-Air Easy Start & Microwave - Choosing options
DavidS replied to CanyonWren's topic in General Discussion
We find the Cellular Booster works well, with a boost of 1-2 signal bars if used properly. This signal increase is great when camped in areas of poor cellular signal. However, there are details that matter. The interior antenna for the Cellular Booster is mounted under the cabinet above the dinette, and a cell phone must be within 18-36 inches of that antenna. Thus, the Cellular Booster only works at the dinette. There is an additional important step to get the Cellular Booster to work properly. After you turn on the Cellular Booster you should briefly put the phone in airplane mode, and then turn off airplane mode. This forces the phone to let go of the distant cell tower with the weak signal, and to now look for the closest “cell tower,” which is your Cellular Booster. If you have been out hiking all day, your phone will remain connected to the distant cell tower, and you can get it to connect to the Cellular Booster by cycling into and out of airplane mode when at the dinette. If you also have the WiFi Ranger router system, there are additional possibilities. If you have a MiFi device, it can be placed on the dinette and be connected to the WiFi Ranger, either by WiFi or a wired direct connection. This allows all of your devices to connect to the WiFi Ranger, and gain the speed boost from the Cellular Booster via the MiFi device. Your devices can then take advantage of the speed boost not just at the dinette, but throughout the trailer and outside as well. Finally, if you set your phone to use Calling Over WiFi you can similarly use the signal boost for phone calls throughout the trailer and outside as well. -
Trailer storage while on a trip and feedback on Harvest host.
DavidS replied to Mattnan's topic in General Discussion
We had a similar situation two years ago. We were traveling to Jalama Beach County Park campground (Nice Park!) in California for a family reunion. After that we planned to stay with friends who live in downtown San Luis Obispo. Although SLO is a small city, there are parking meters in front of their townhouse, making it impossible to park there with our trailer. We also wanted to disconnect the trailer so that we could take a day trip to Cambria, CA where my father-in-law grew up to visit some cousins there. I looked online and found one RV and Boat Storage place; however, they did not respond to any of my phone messages or emails. At that point I posted a message on the Fiberglass RV Forum explaining our problem and asking for suggestions. (I used the FGRV Forum because it has a much larger audience than the Oliver Forum.) In addition to a couple of suggestions on where to park, one kind person offered to allow us to store our Oliver for three nights at their house near Pismo Beach, which is about 12 miles from SLO. The Pismo Beach storage worked out well, and we were quite happy to provide a thank you gift to our hosts. -
I have bookmarked this link, https://olivertraveltrailers.com/forums/discover/, which I use to get to the All Activity page.
-
Self Install: Front & Rear Propane Quick Connects
DavidS replied to jordanv's topic in Ollie Modifications
Steve, Your plan to add another regulator is feasible, but it seems clumsy to me. I have three propane items that each came with their own regulators: A Camp Chef stove, a Weber Q1000 grill, and an Outback Firebowl firepit. For each I was able to replace the connecting hose with a regulator with a hose with a propane quick connect. For the stove I used an 8 foot hose (currently $61; I paid $26), and for the firepit I used a 4 foot hose. Converting the Weber grill was more complicated, and covered in this post. The quick connects are really convenient, and it might be worthwhile to see if you can make them work. -
Home Depot says they have them. https://www.homedepot.com/p/Camco-10-ft-L-Propane-Quick-Connect-Hose-57282/206813633
-
@mossemi posted about using the Lippert Jack-It bike rack in this thread.
-
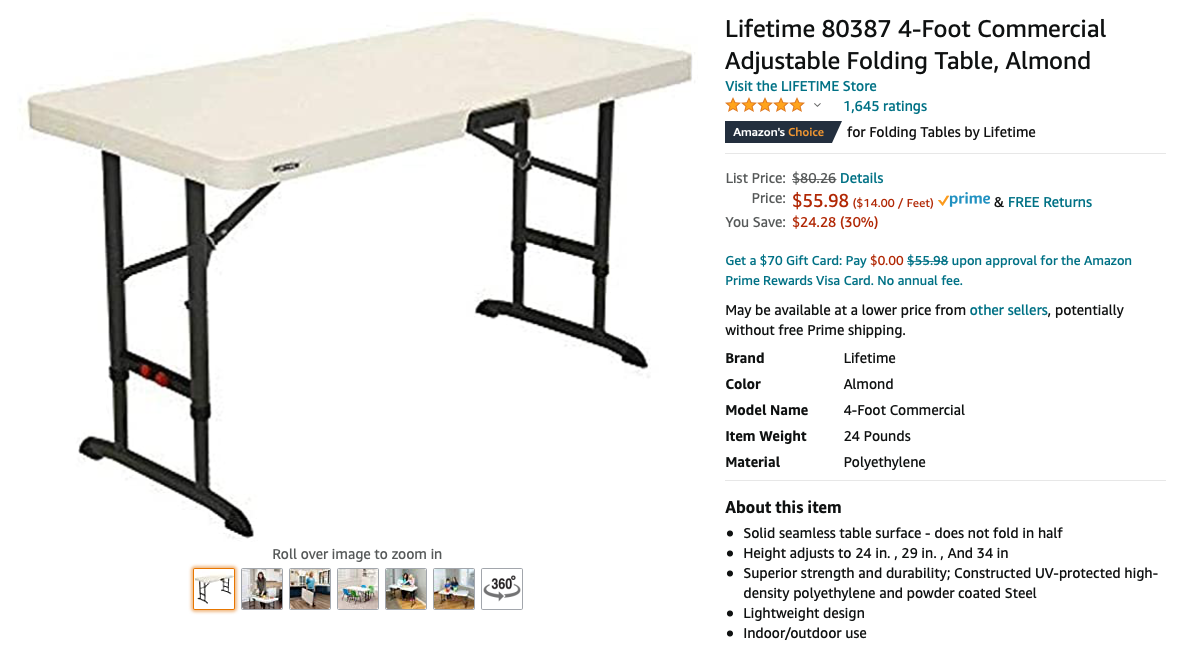
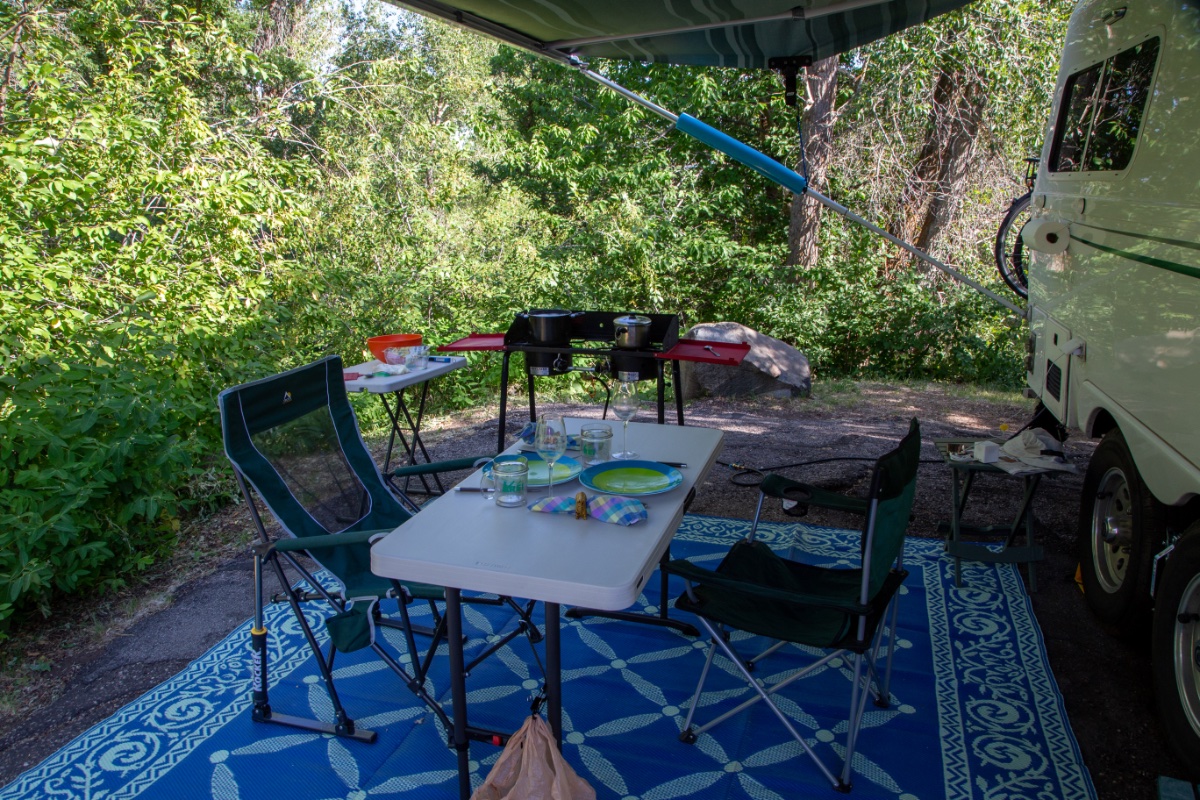
We like to cook outside, and we wanted a small table as prep space for cooking. We bought this Lifetime table at Costco for about $25. Amazon has it for $47, and Lifetime has it for $50. The table is 30 in. x 20 in., and weighs 10 lbs. It is adjustable in height, at 21 in., 24 in., 26 in., or 28 in. It also fits between the twin beds in our unit. We found this out when camping with family and a major rainstorm hit during dinner time. We sat two at the dinette and two on the beds, using this table for eating. We had an ALPS Mountaineering Dining Table left from our tent camping days. It is probably identical to the one Russell posted a link for up above. We used the ALPS table as a dining table on a couple of trips were we were boondocking at a location lacking a provided picnic table. We found it a little bit rickety for our tastes. We decided to buy another Lifetime table, this one 48 in. x 24 in, weighing 24 lbs. This table has three adjustable height settings (24 in., 29 in., and 36 in.). We bought it at Costco for $40. Amazon has it for $56, and Lifetime has it for $85. While the Costco website lists other Lifetime tables, these two tables are not on the website. But they are available at our local Costco. In addition to boondocking, this 48 in. x 24 in table has been really nice when our campsite picnic table is in the hot sun, and we put this dining table under our awning. The two tables fold flat and store easily in the tow vehicle. I think the Lifetime primarily sells its larger tables to institutions; their website prices the 48 in. x 24 in. table at $85, but if you by 20 or more it is only $52. I note that because these tables are incredibly sturdy and well built, suitable for regular use by institutions; think tables in a hotel ballroom. Oliver says they called the trailer the Legacy because it is well built and you can pass it on to your children. These tables are made the same way.
-
Legacy Elite 2 buyer has questions about upgrades
DavidS replied to Fargoman's topic in General Discussion
I love the LP quick connect!!. We use it for our Camp Chef stove, our Weber BBQ, and for our Outland firebowl. We have a couple of 10-foot extension hoses, so we can easily place these devices at a desired location within the campsite. We have two 30-lb LP tanks, so we have never run out on a trip. We also have a Honda EU2000i generator modified for propane, so that we do not need to carry gasoline. It also runs of the LP quick connects. Decide on the quick connect option based on your anticipated camping needs. -
Progressive EMS display relocation?
DavidS replied to nrvale0's topic in Mechanical & Technical Tips
HERE and HERE are threads with various options for relocating the surge suppressor display. I followed @mountainoliver's suggestion HERE to move it under the dinette where it is visible from the door during campsite setup. As @topgun2 noted, in my trailer the surge suppressor display was under the streetside bed. You can snake the cable out through the electrical box, and no drilling is needed if you use command strips to attach the display to the trailer wall. -
Fans for the assurance of domestic tranquility
DavidS replied to MovingVistas's topic in Ollie Modifications
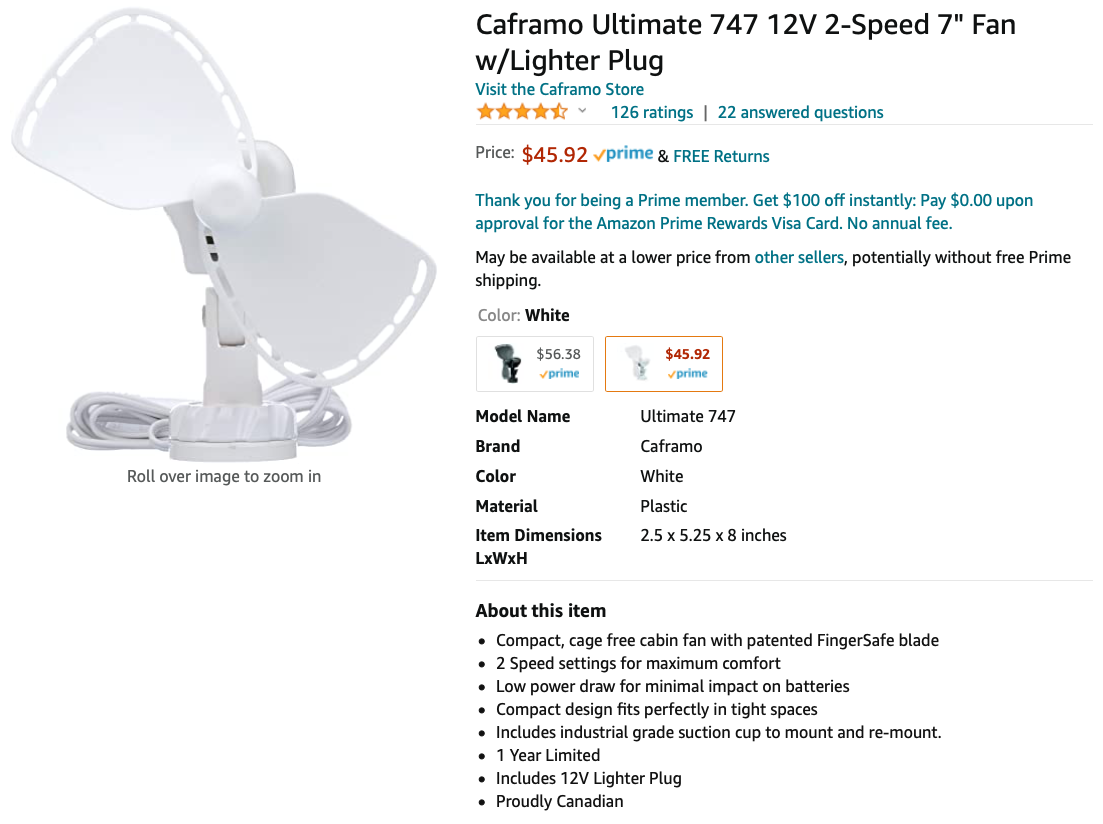
I agree wholeheartedly! My wife is quite sensitive to the temperature, and I wanted to try a fan to make her more comfortable. We sleep with our heads at the rear, and I thought @John E Davies's fan was too large for our needs. I found the Caframo Ultimate 747 12V 2-Speed 7" Fan w/Lighter Plug for $46. It has two mounting options. One mount is a suction cup. The other is a permanent mount that can be screwed into the underside of the overhead cabinet. The mount is about 3 inches tall, and the fan is easily removed from and reattached to the mount. My initial plan was to use the permanent mount, and I had plans to either tie it into the 12 V system, or to install a 12 V cigarette plug receptacle into the overhead cabinet using some of the guidance John Davies provided in this post. (Our trailer has only two cigarette lighter receptacles, one under the dinette and one above the kitchen. Susan sleeps on the street side bed, so they would not be closeby.) I decided to first use the suction cup mount to decide on an optimal location to place the fan. The fan power cord was not long enough to reach the dinette, so I used a 120 V plug--transformer--cigarette plug receptacle adaptor that we have for a 12V ice chest, as an extension cord. This fan worked really quite well, and Susan was pleased. She decided that she did not want the permanent mount, but preferred the suction cup option. The suction cup was plenty strong, and we even drove with the fan attached, without problems. So in the interest of domestic tranquility, we are not using the permanent mount. We also have much greater flexibility in where to place the fan using the suction cup. When removed from the underside of the cabinet, the fan is quite small and stores easily. In future we will use the suction cup mount, along with either the 120 V plug--transformer--cigarette plug receptacle adaptor. The extension cord traveled nicely behind the dinette cushions and below the pantry door. I have found extension cords on Amazon with cigarette plug and cigarette plug receptacle receptacle at each end, and we might try that instead.