
Leaderboard



Popular Content
Showing content with the highest reputation on 08/24/2019 in all areas
-
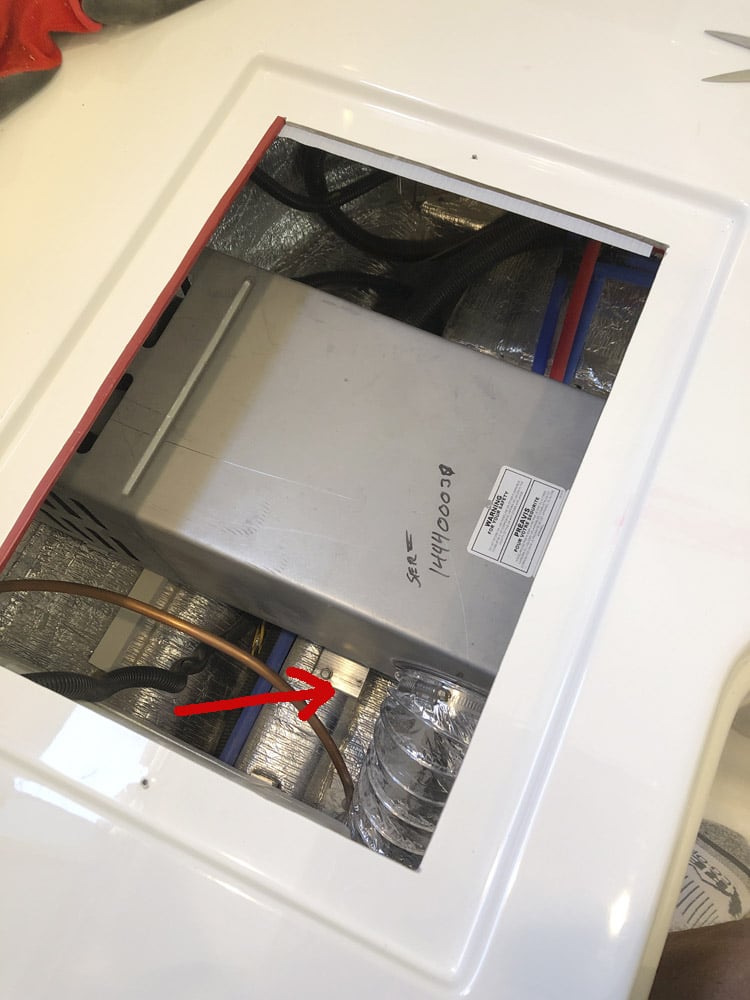
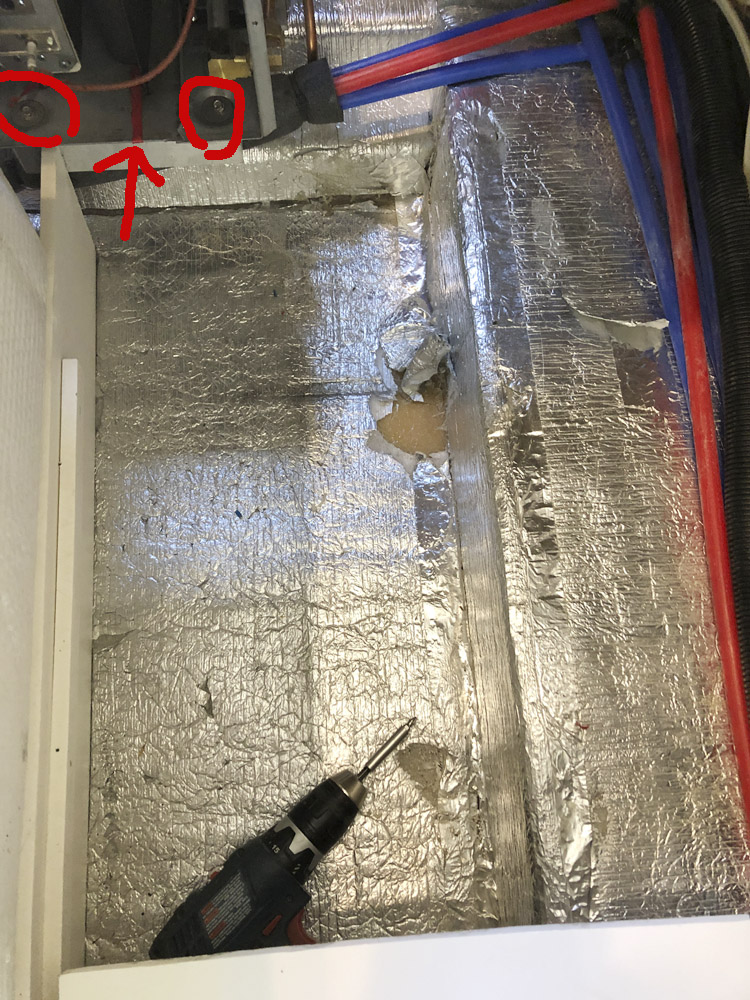
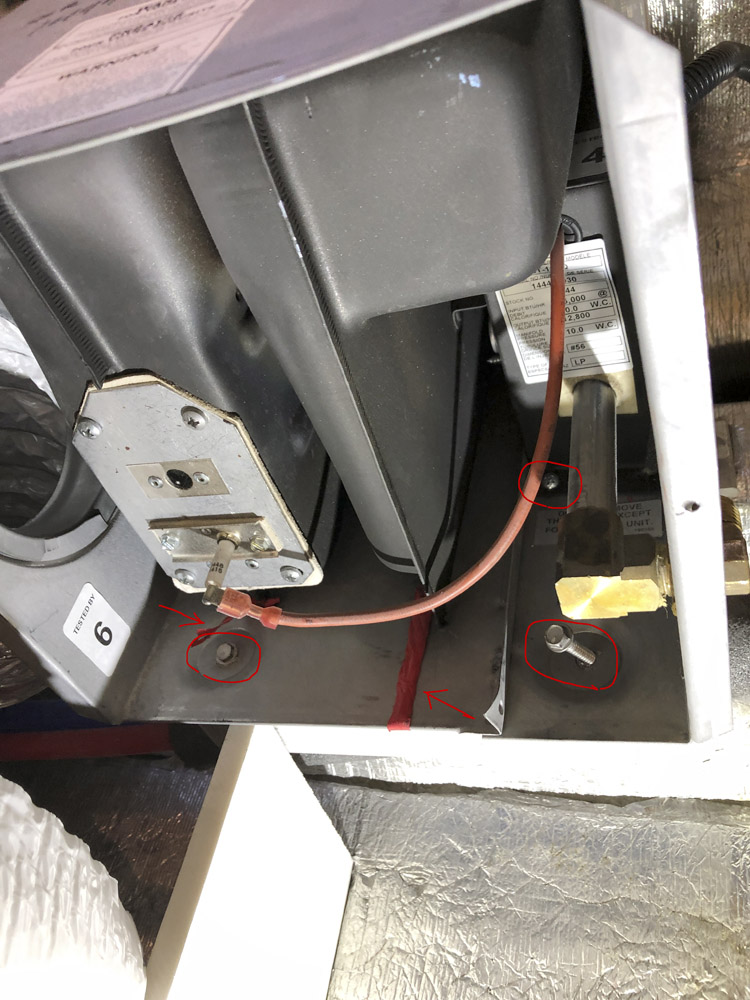
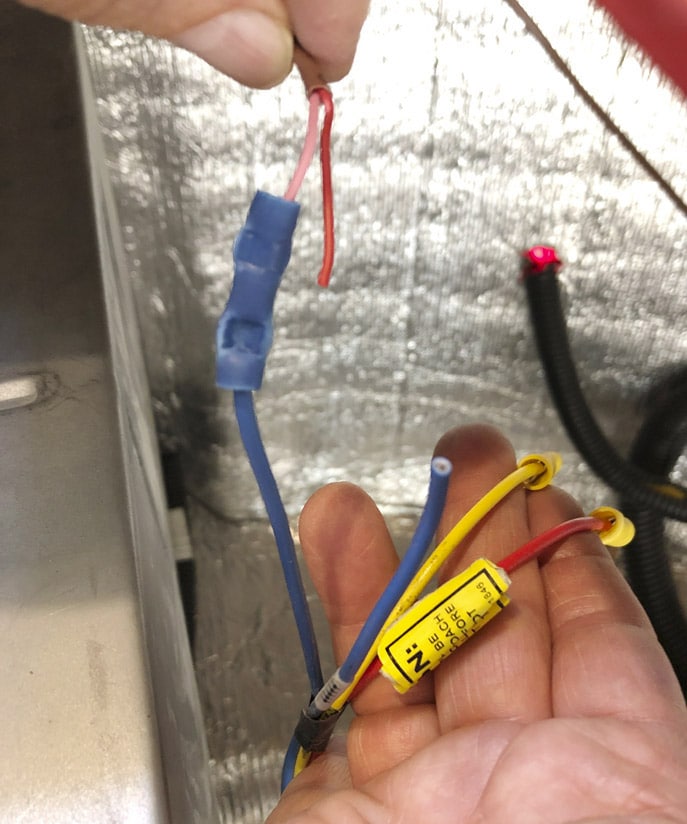
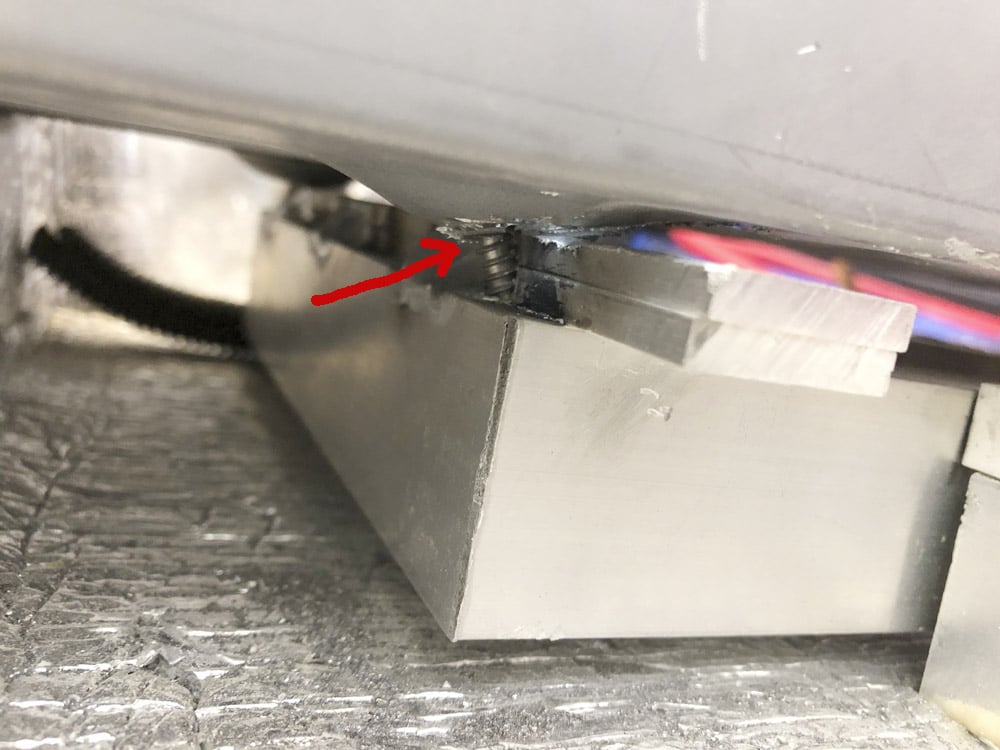
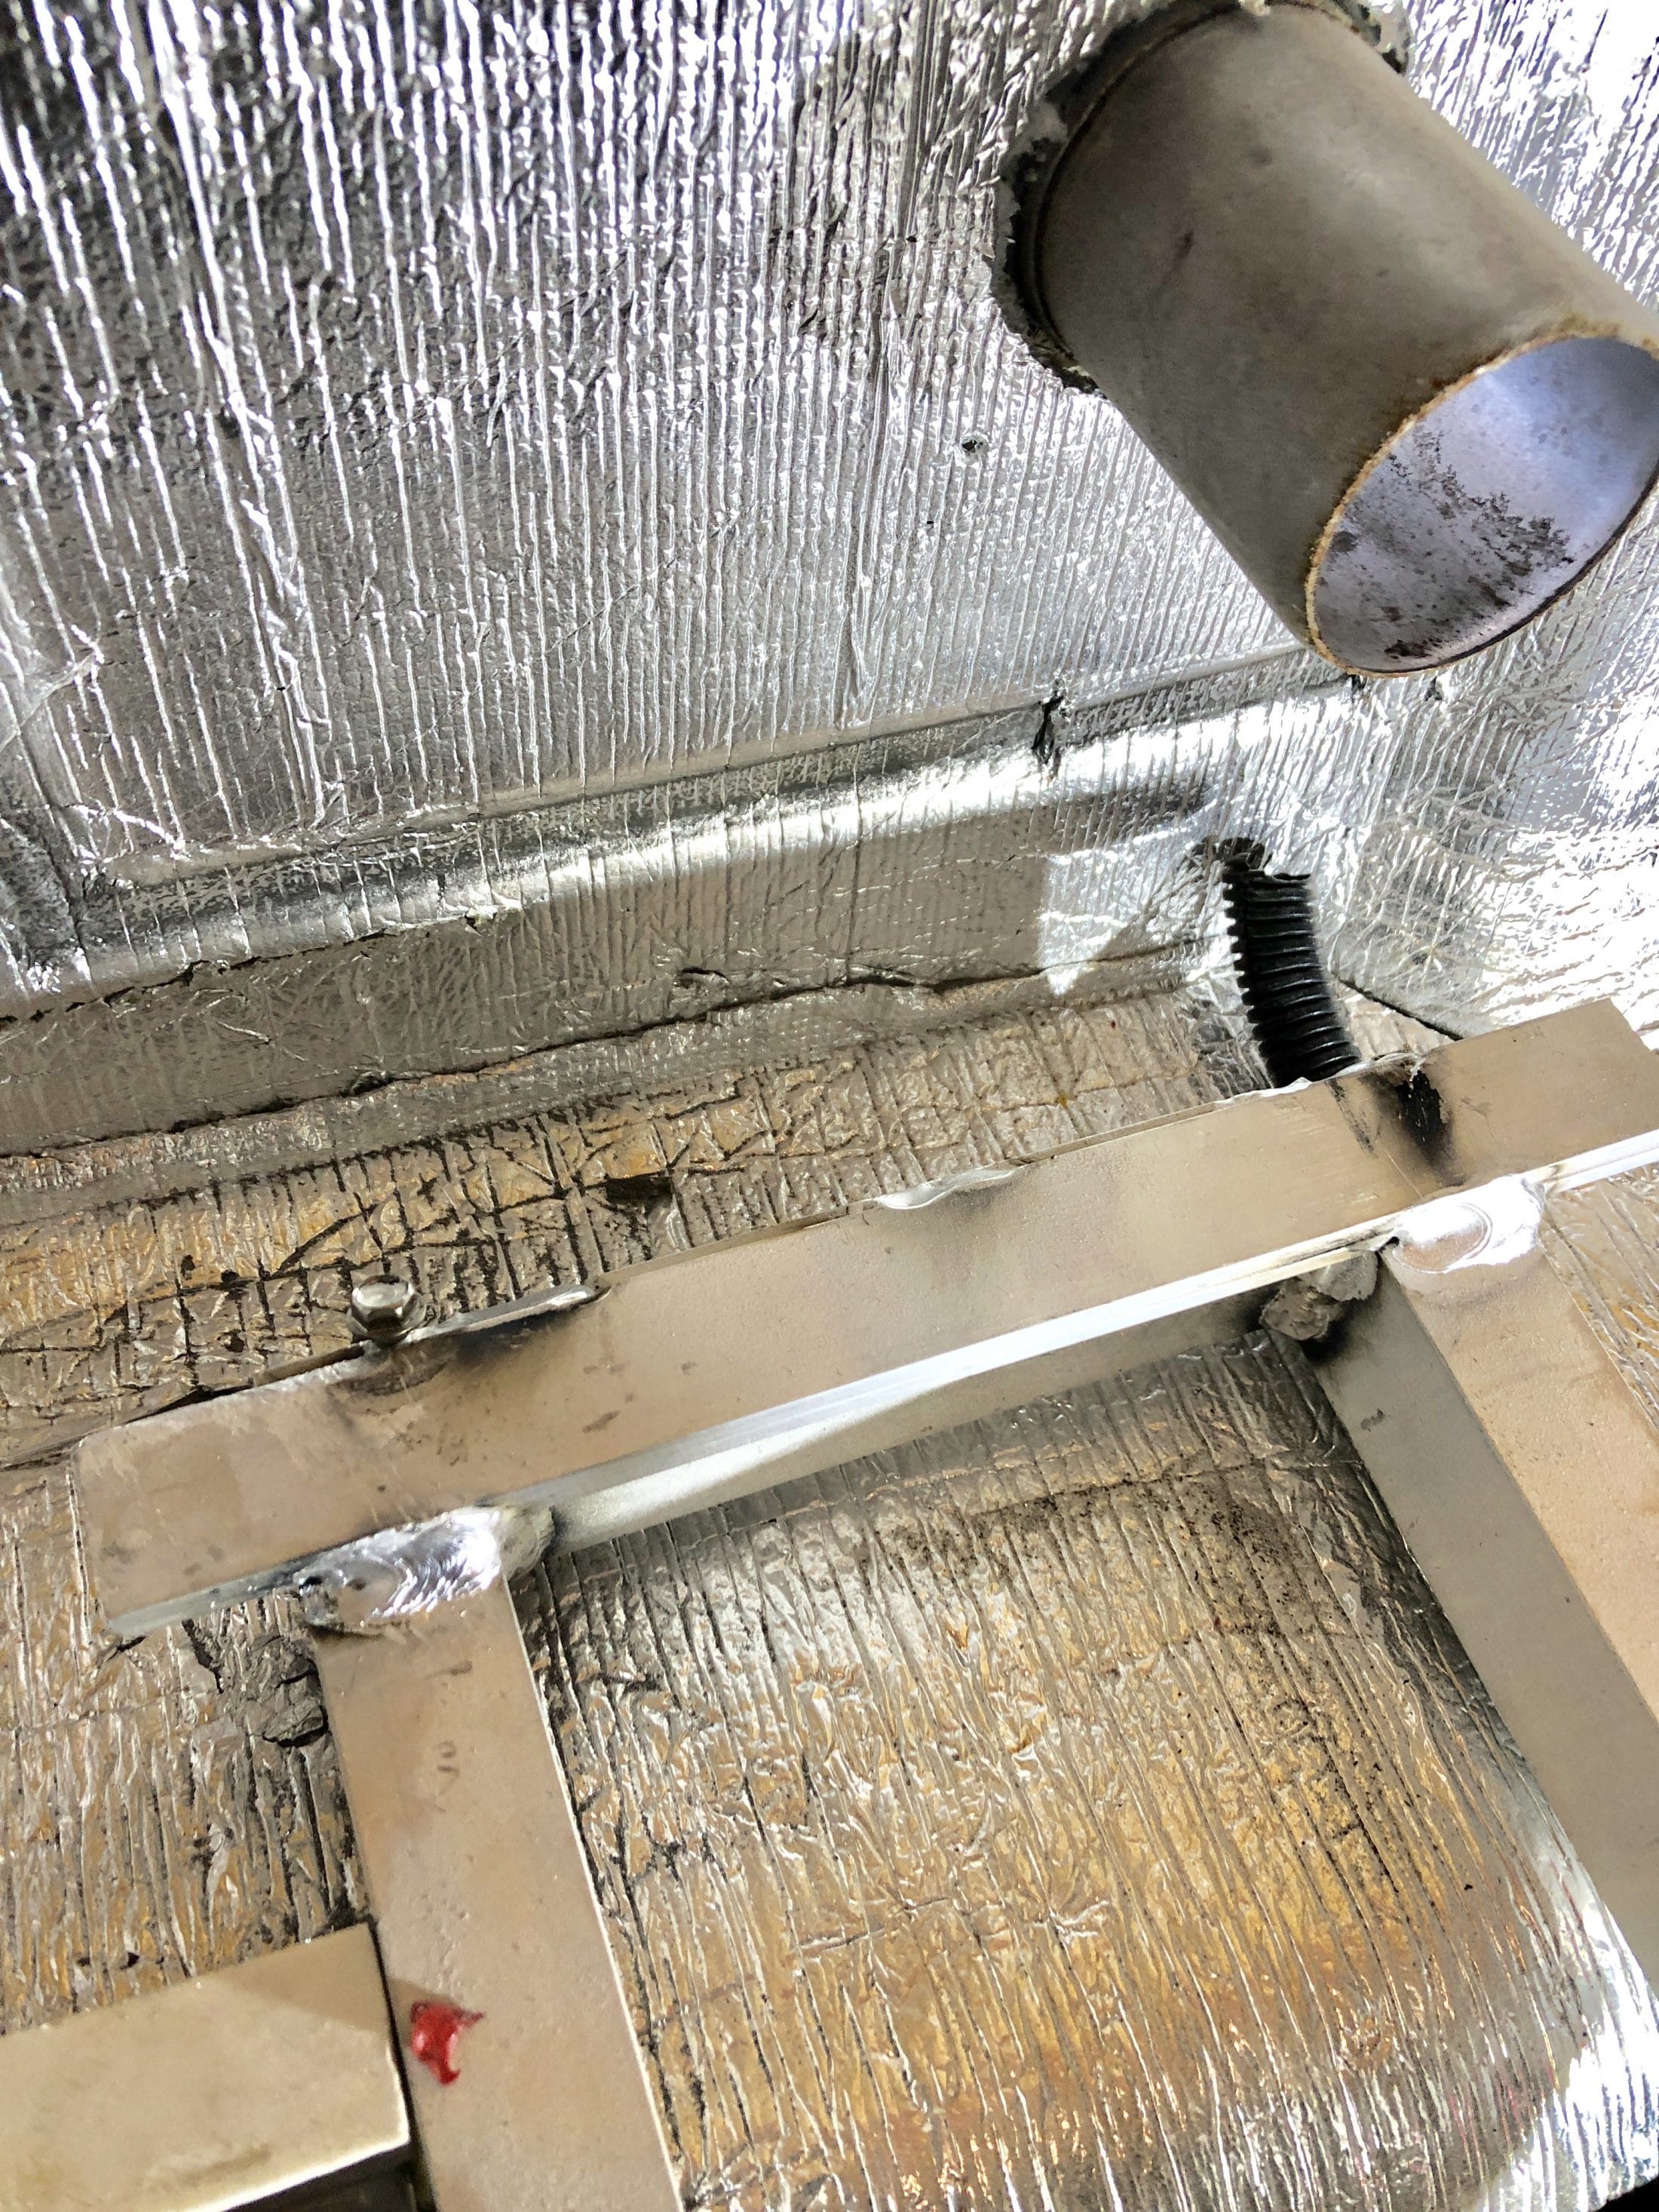
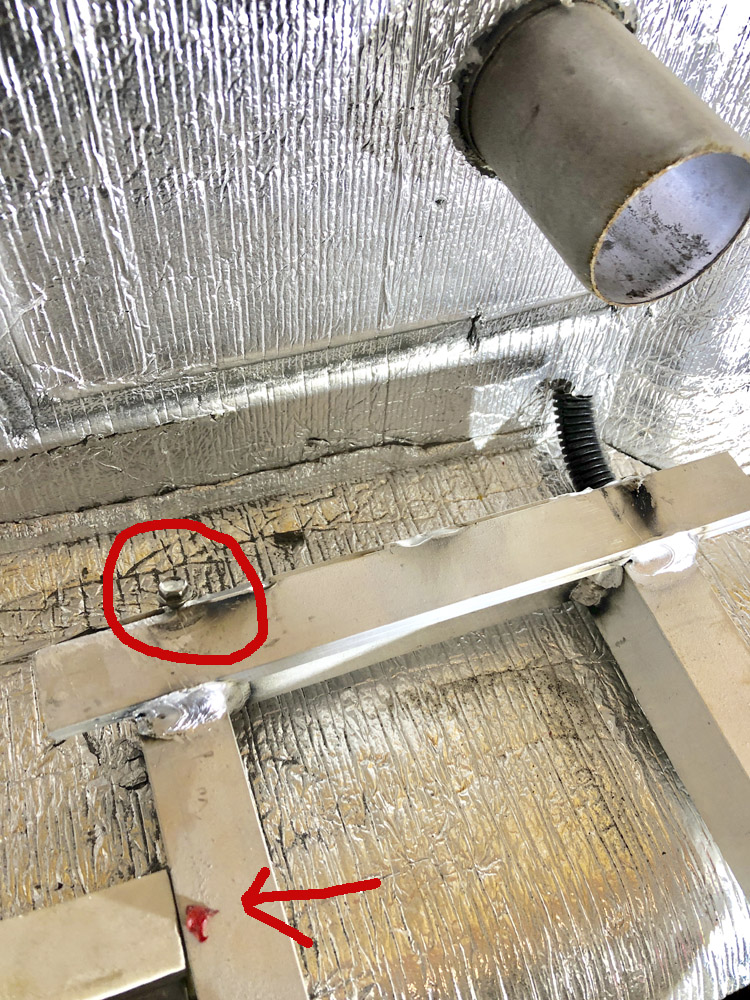
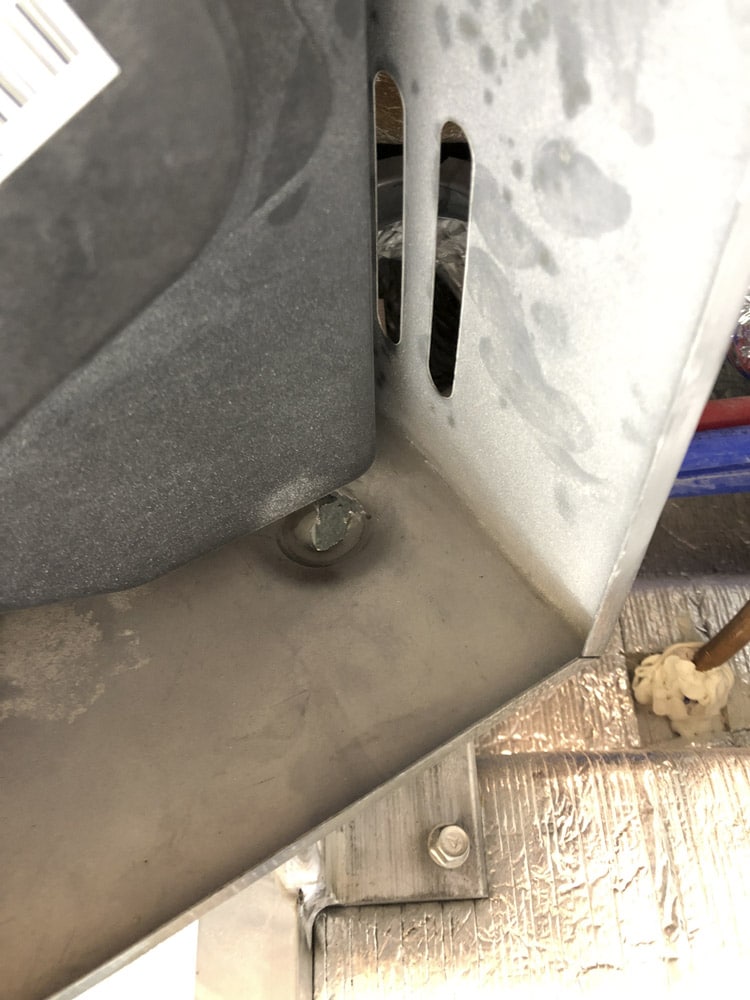
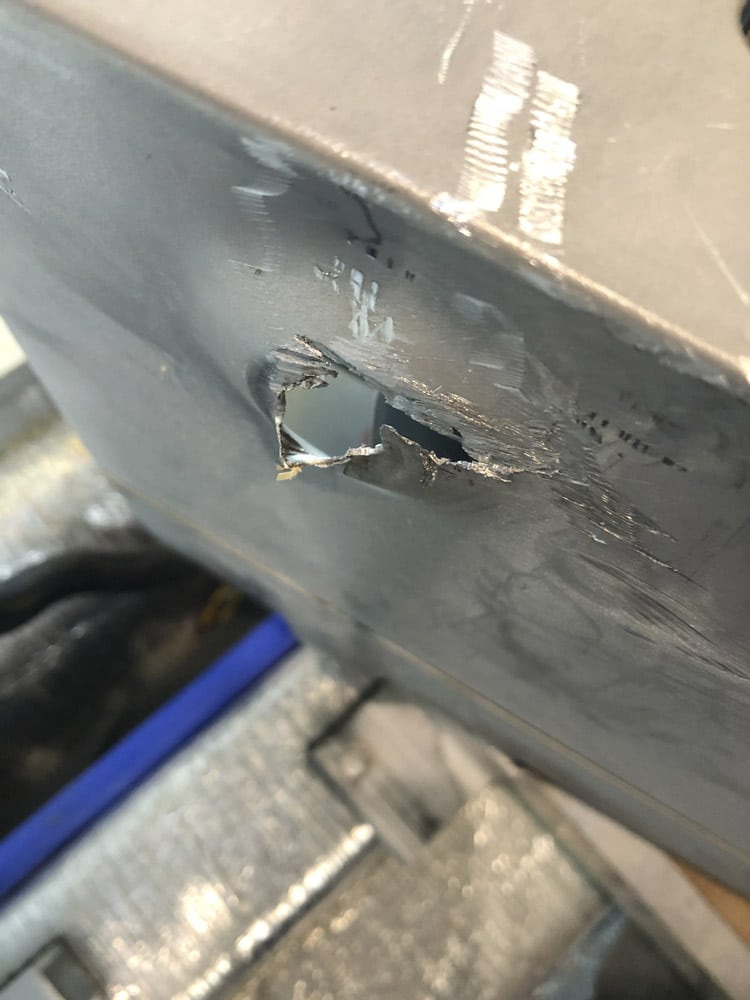
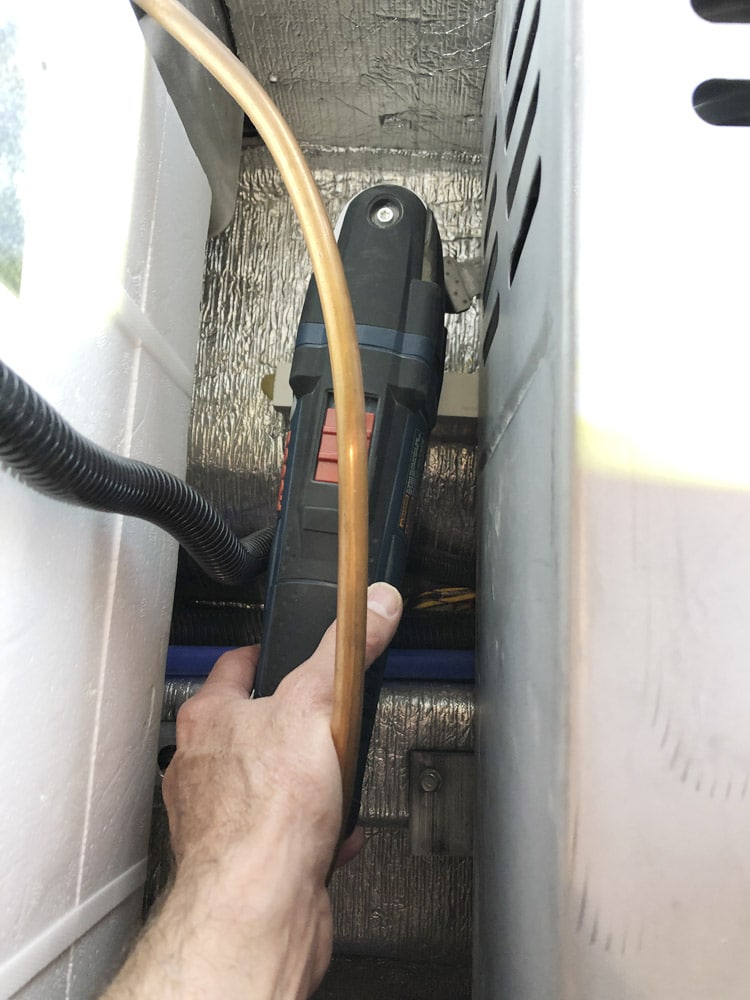
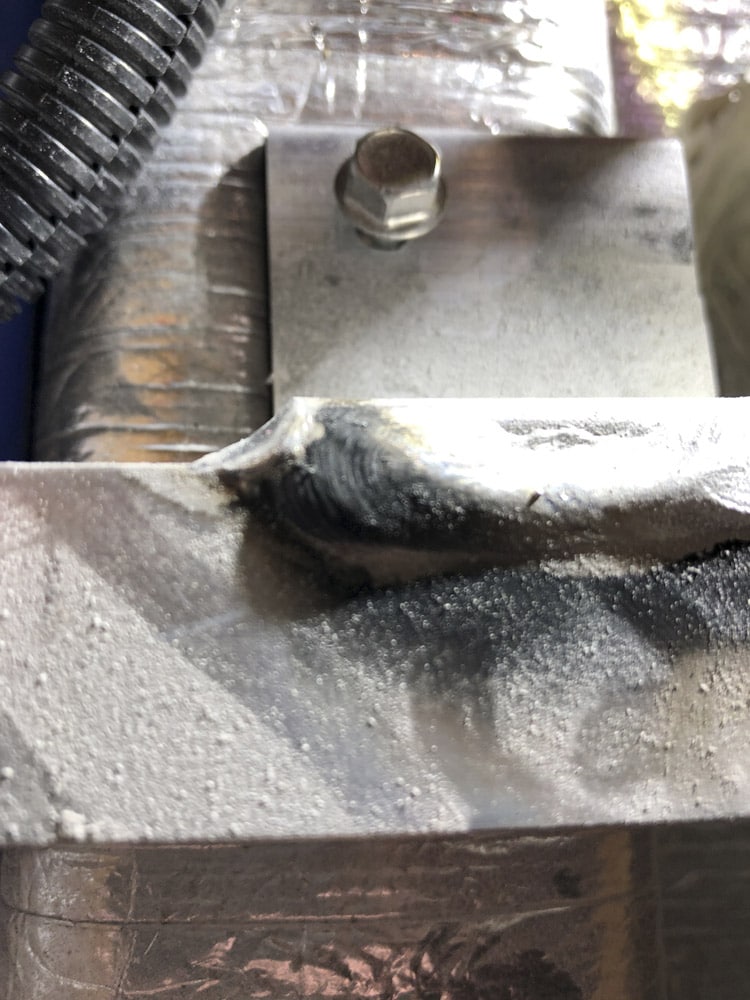
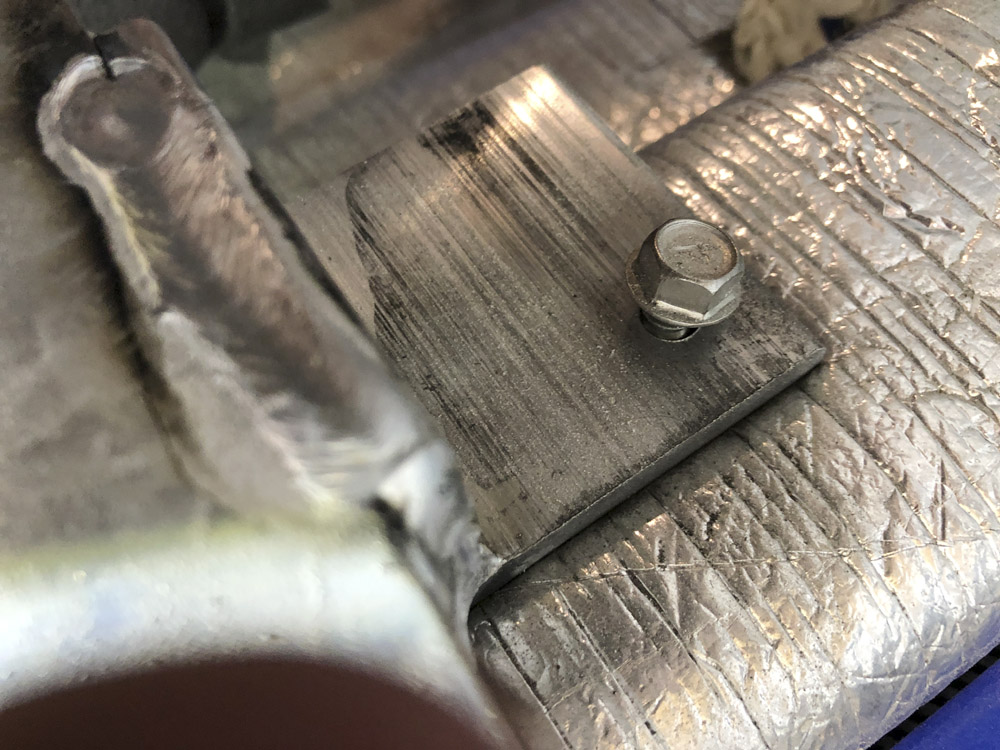
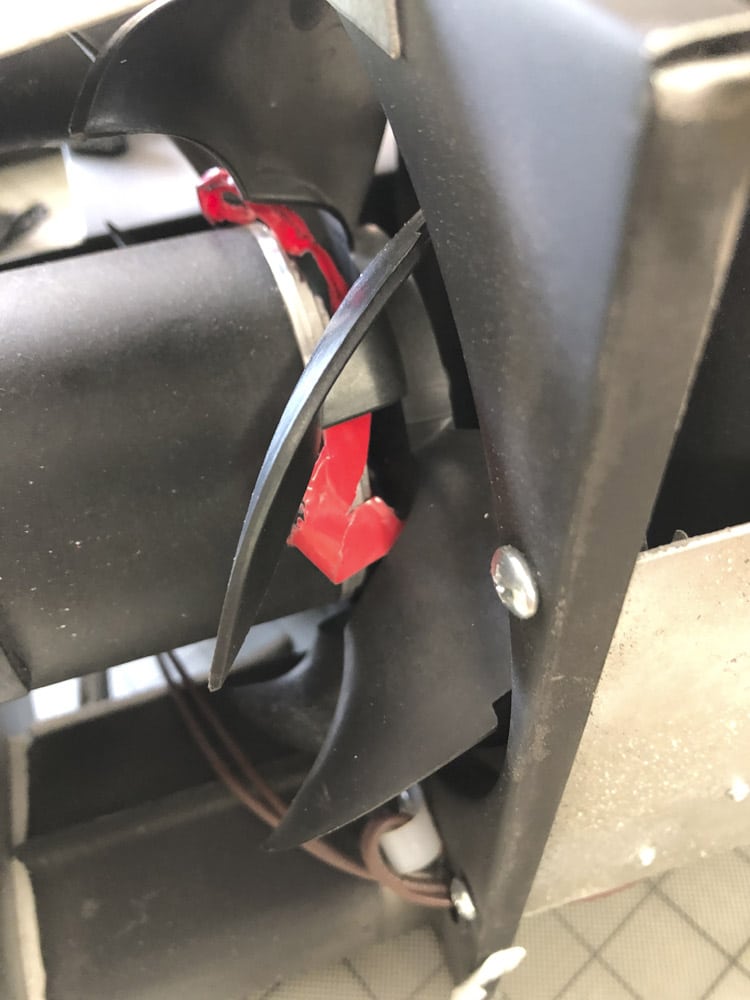
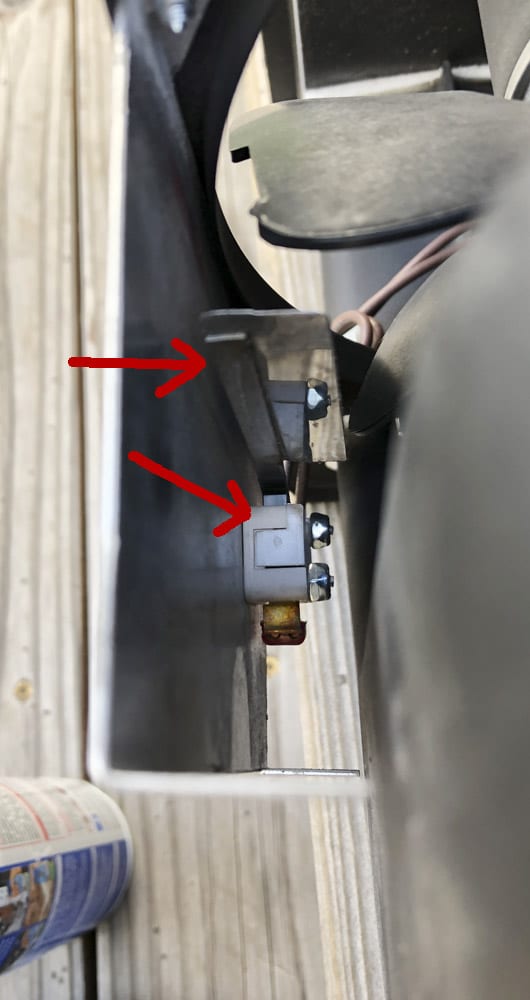
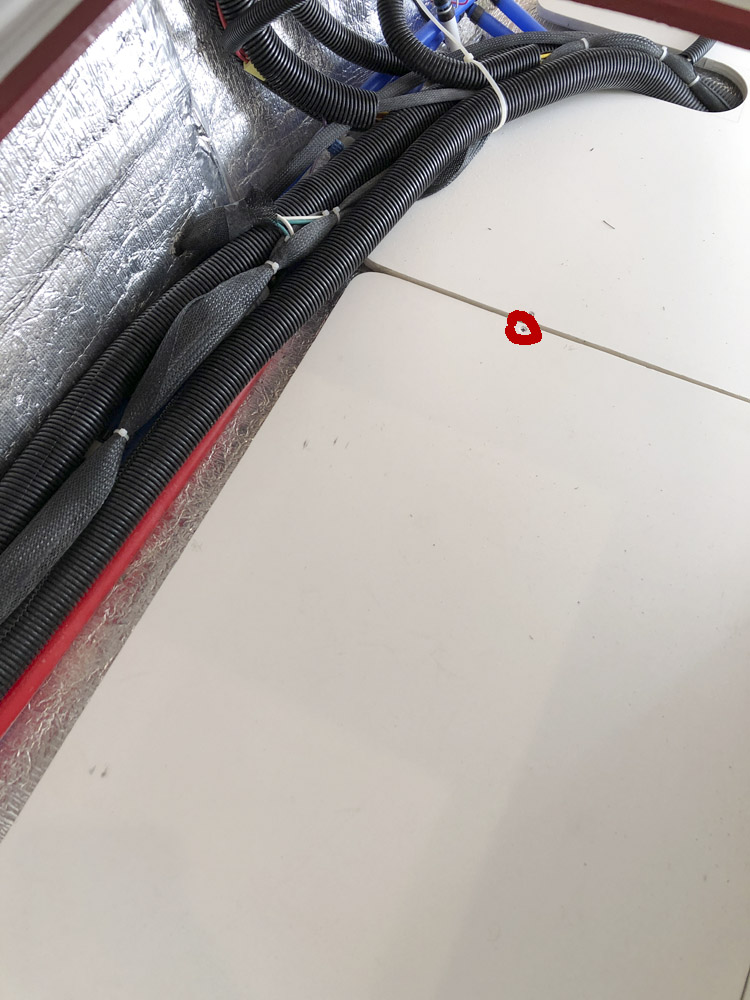
A week or so ago I posted issues I was having with our Suburban furnace and its erratic behavior, and had many helpful suggestions. John Davies requested I post a followup to benefit others who have this furnace should I take it upon myself to repair the thing which I did. It appears to be working fine now. Hopefully other members who still have this furnace will benefit from my experience. Be forewarned though removing and repairing this furnace is nothing short of a major PITA, so much so its hard not to recommend changing over to the Atwood which is now being used in both the Elite II and Elite. Even so you have to get the darn thing out of its compartment, no easy task in itself. So let the fun begin. 1. The basics: remove cover hatch under the curb side bed, remove everything stored in the basement rear, then the black rubber mats. At this point you will see several white plastic panels that make up a sub floor and partition to the heater compartment. The floor panel closest to the vertical partition will need to be removed, then the vertical portion will need to be moved out of the way. Its size prevents it from being completely removed from the basement area. There are several, 10 or so, phillip's head screws holding these two panels in place. Tape applied to the edges of all hatches due to abrasive fiberglass. This access looks down onto the furnace casing This second photo shows the compartment after the plastic boards are removed at the rear of the trailer in the basement. The two circled marks represent the two casing mounting bolts that have to be removed. The red arrow represents yet more melted red tape. 2. Once those panels are removed, you will have much better access to the furnace itself. Turn the gas valve off at the front of the trailer, then burn out the remainder of gas in the line at the stove top. At this point it should be safe to disconnect the gas line as you can see in photos provided. Remove the sheathing on the wiring harness that goes into the side of the casing to the furnace. This will enter from the right side of the casing, facing the rear of the camper. Take a phone picture of the harness making special note of the connections. The two blue wires are for the thermostat, but notice the ++++ will be unconnected, while the neutral is connected to a pink 18 AWG thermo wire. The other red thermo wire is also not connected. Do NOT connect the red to the ++++ blue wire during reassembly. The other two of the 4 wire harness will be red and yellow to the furnace and yellow striped and brown for the Oliver wiring. Yellow to yellow, red to brown when reassembling. At this point after photos are taken cut all wires, but you should shut off all power to the camper before doing so. I was careless and blew a 10 amp fuse to the furnace when stripping the wires again for re-connection a couple of days later. I would encourage anyone who has gotten this far to reassemble the wiring using insulated fast tab connectors so that you don't have to continue cutting these wires in the future, thereby shortening them during another service visit, which hopefully you'll never have to do. From the factory mine came connected with crimped connectors. Clear view of gas line disconnected from brass nipple, note red arrow pointing to wiring harness Removing one of the casing mounting bolts, red arrow points to the 90 degree brass nipple that will need to be removed Mounting bolt on right side unscrewed, circle around left mounting bolt, also notice yet more red tape, circle in the upper right is the one to dislodge the heat exchanger system from the casing. Wiring harness as attached to the Oliver. 3. Remove the two set screws at the rear of the furnace casing. John Davies pointed this out in a previous thread. At this point you will have a decision to make. Try to remove the furnace from the casing while allowing the casing to stay in place, or remove the entire enchilada at once. Neither choice has a happy outcome. Should you try to remove the furnace from the casing, the brass 90 degree nipple will also have to be removed first to clear the casing. Red arrow points to this in photos. There is one set screw that holds the heat exchanger within the casing and can be found at the bottom of a small sheet metal panel that holds the circuit board in place. The gas line runs through this panel which has some info regarding the specs of the furnace. If this doesn't work, then the entire casing assembly has to come out which is what I had to do. This presented another almost overwhelming conundrum as you will see in the photos. At the rear base of the casing there are two medium size set screws or self taping bolts. Remove those, and if you are lucky the whole thing should just slide out. I wasn't because who ever assembled and installed this furnace on our Oliver also installed one of those self taping bolts to the front of the casing bottom completely out of sight and completely inaccessible. I'm not making this up. Suburban only requires two bolts to be mounted at the back, where the access panel is located. Close up of bolt attaching casing to the outside edge. This is the one which was totally inaccessible and had to cut. Furnace mounting frame made by Oliver that attaches to the carriage frame of trailer. Its obvious I was not able to cut the bolt but rather the sheet metal casing and then pried the casing away from the bolt. Arrow points to yet more tape debris. Looking down into the torn mounting bolt hole of the casing. Another view of the cut casing from below 4. Assuming you have a front mounted casing bolt, it gets ugly here. You will either have to cut the bolt from underneath or cut into the casing and pry the thing off which is what I did. So with rear bolts and front bolt removed, gas lines disconnected and wiring harness cut it should be fairly easy to slide the assembly out of the compartment, but it is a tight fit and will need to be shifted sideways while pulling backwards to clear the Oliver compartment area. Using my multi tool saw to cut bolt/casing. This was extremely difficult access with very little room to move let alone apply force. 5. After removal there were a few disturbing factors I had to deal with. One the frame work the furnace is mounted to was extremely loose and wobbled back and forth like a seesaw because the installer was too lazy to finishing driving the bolts completely down snug to the Oliver carriage frame. No they did not vibrate loose, the bolts were way too tight to ratchet down. As you can see in the photos those bolts were 1/4 inch to 3/8 of an inch above the mounting frame. But thats not all. Once I had the assembly out of the camper, and pulled the heat exchanger from the casing I found significant amounts of some sort of red tape all over the inside of the casing. The tape was similar to electrical tape only red but most of it had been completely burned onto the heat exchanger and other parts or was wrapped up around the fan assembly and the shaft going into the motor. Again I'm to making this up. At this point I started noticing shreds of this red tape debris laying around parts of the furnace compartment area as well. Thankfully there was no damage to the sail switch to the best of my knowledge. The next two shots are the loose mounting bolts that attach the furnace frame to the actual Oliver frame. This illustrates the extent of unfinished work. The next two shots show red tape bound up on the fan and shaft to the motor. 6. At this point I figured I better inspect the ignitor and unscrewed it from the rear of the heat exchanger it looked ok other than some carbon deposits but I started noticing the center pin rotated about 15 or so degrees which would change the tolerance. Called the local RV dealer and luckily they had replacements, but didn't realize until back home and reinstalling the gasket was disintegrating. Back to the RV dealer to buy a gasket kit for the ignitor and furnace door. At this point reassembly was pretty much academic. But before installing the casing assembly I ratcheted down those bolts that hold the furnace frame onto the Oliver carriage frame so the entire assembly was rock solid once complete. 7. The brass 90 nipple should be reinstalled with gas pipe dope, but the fitting to the gas line does not require this as its a compression fitting. Make sure all fast tabs connectors for the wiring harness are crimped like a cold weld. Note: not all crimpers have the ability. Once everything is properly hooked up, turn the gas valve back on. Wait awhile and look or smell for leaks, better yet use a propane sniffer if you have one. I don't. My gas line connections appeared to be good so at this point it was time to fire things up, but it was 90 degrees outside. I would have to wait until the next morning for cooler weather. Thus far its been working fine since reassembly. View of the sail switch from above, which is mounted in the upper left corner of the casing assembly so that the fan blows on it. Igniter removed Attaching screws to the basement subfloor made of plastic sheeting, red circles represent the screws. Let me know if you have questions, be glad to answer what I can.
 3 points
 -
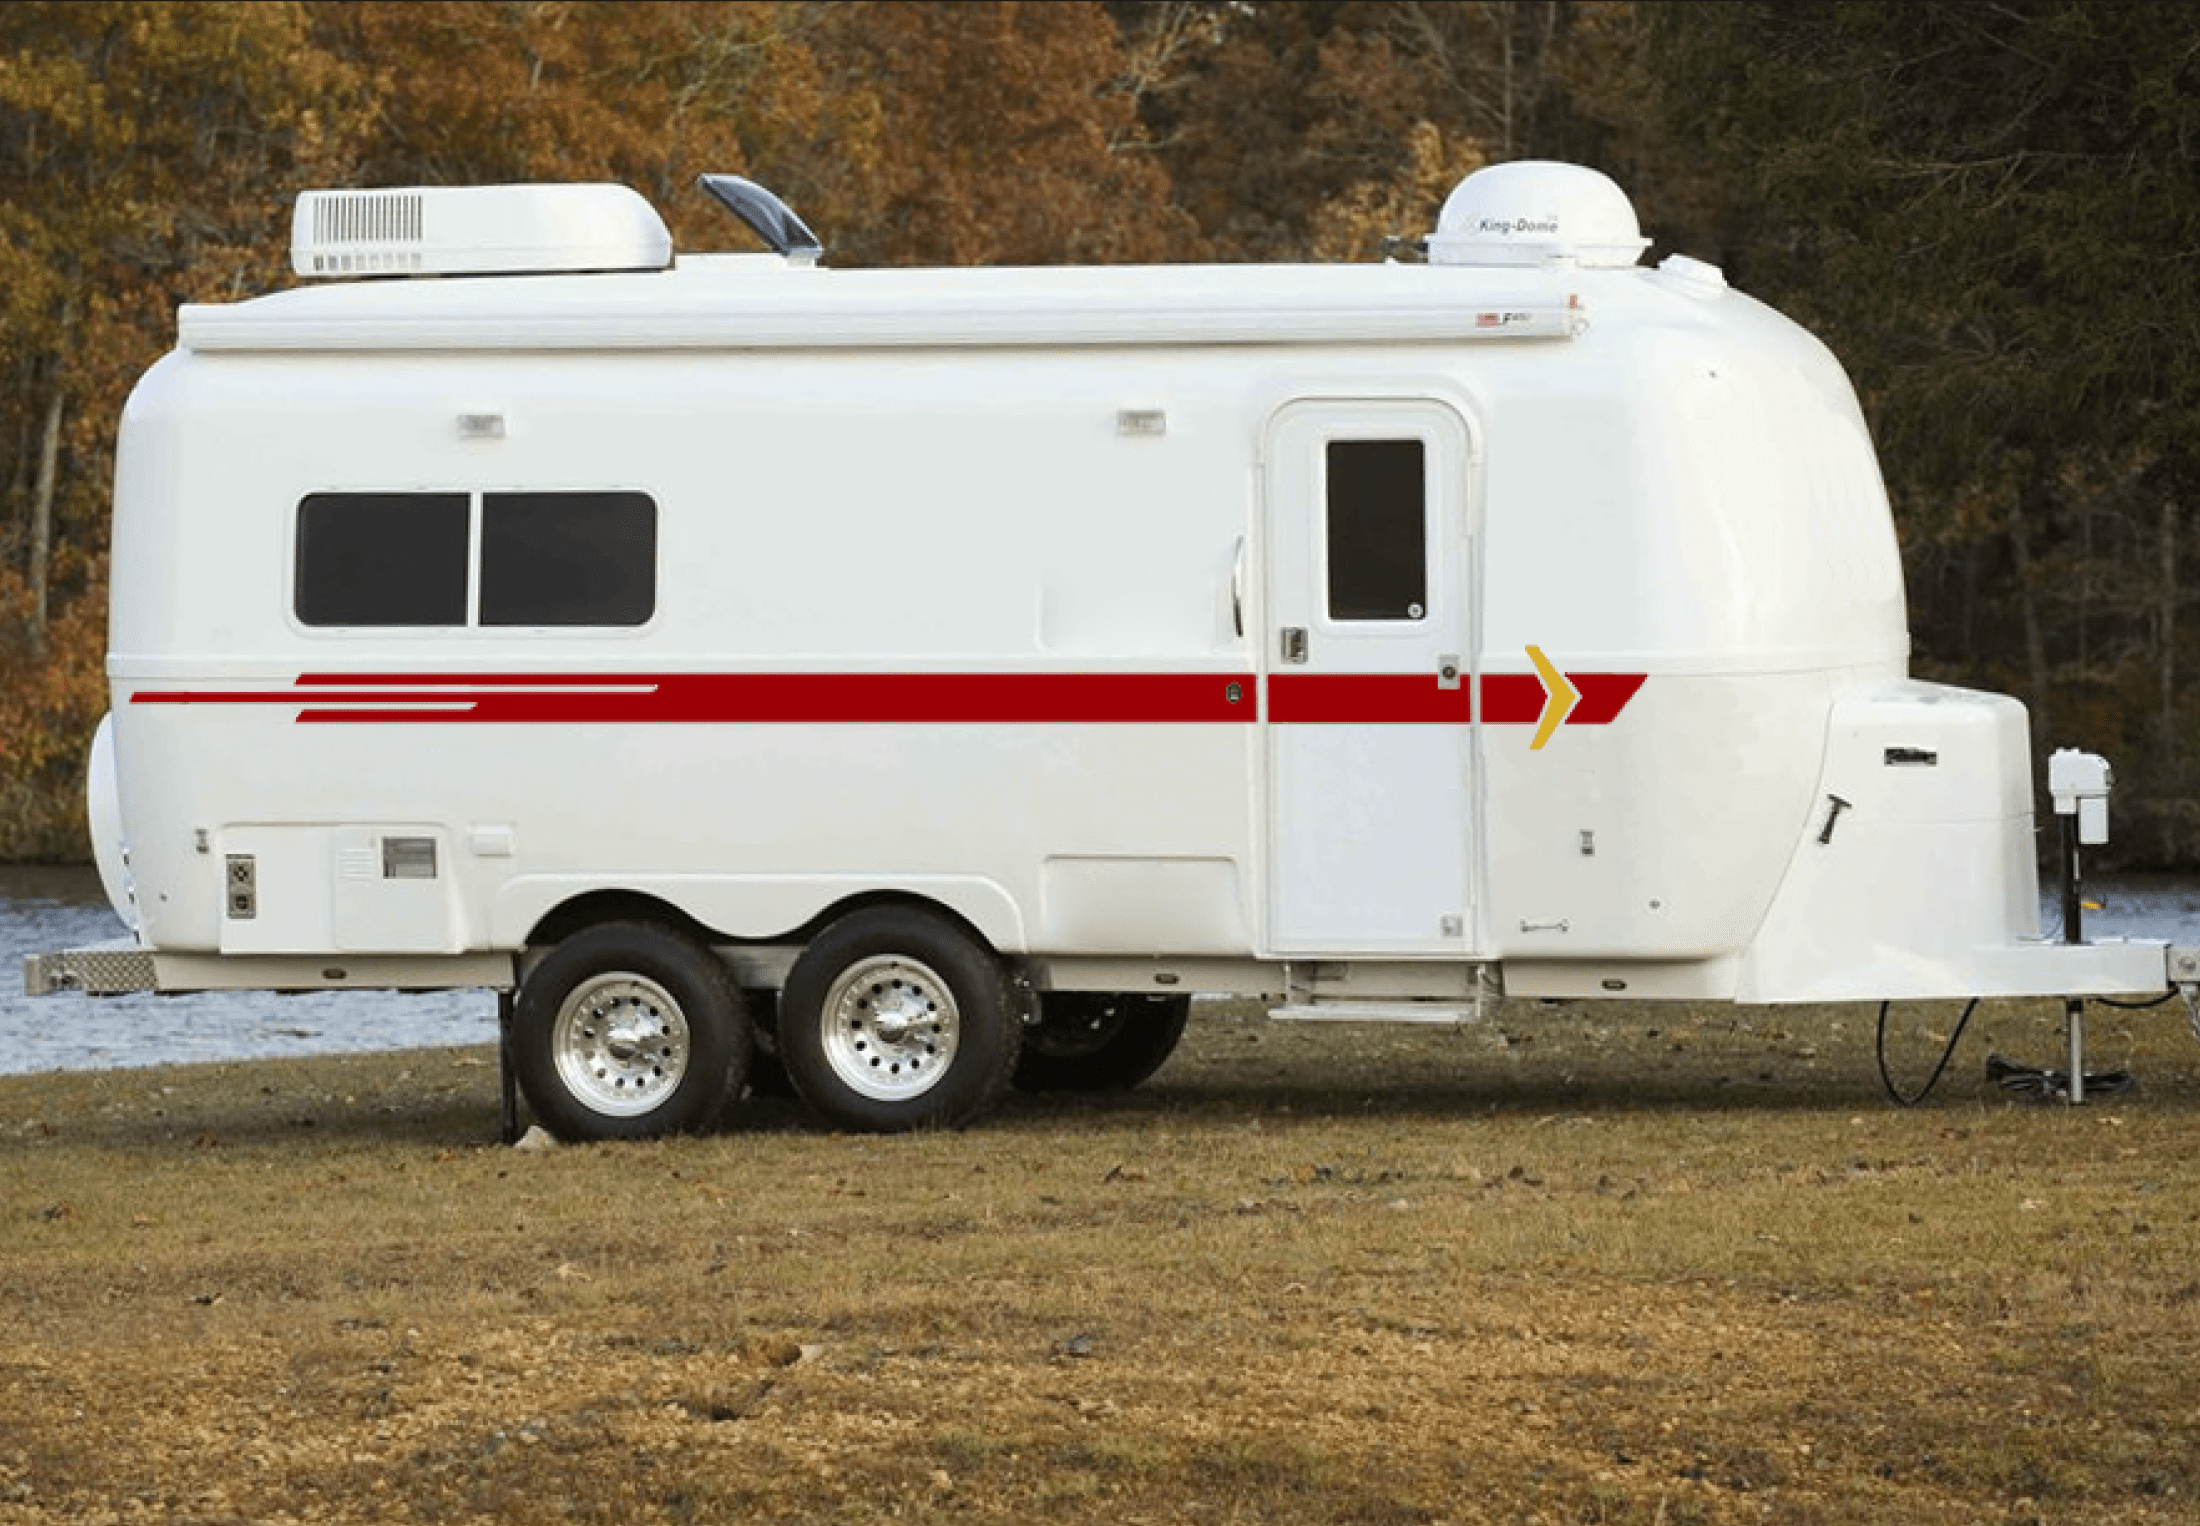
LOL, apparently, the RV industry thinks that “snowballs” are the, uh, polar opposite of the standard ugly RV - (pardon the f-bombs in the article - if you’re sensitive to such things then don’t click.) https://jezebel.com/jezebel-investigates-why-are-rvs-so-fucking-hideous-1836824623 Frankly, I’d love for Oliver to trash their “swoop”. It the least attractive, and least creative thing about the trailer. I’ve actually considered removing the custom graphics from ours. I kind of miss our pure white snowball. But to answer the author’s question, the reason most RVs are so ugly isn’t because of the graphics. They’re ugly because without those graphics it’s obvious exactly what they are - cheaply built tin boxes on wheels. Olivers (and Airstrams, Scamps, Escapes, Casitas, etc.) can be snowballs and still be beautiful, because their beauty is more than skin deep.
2 points
-
Nah, Mike - the solution is obviously to add more graphics...
2 points
-
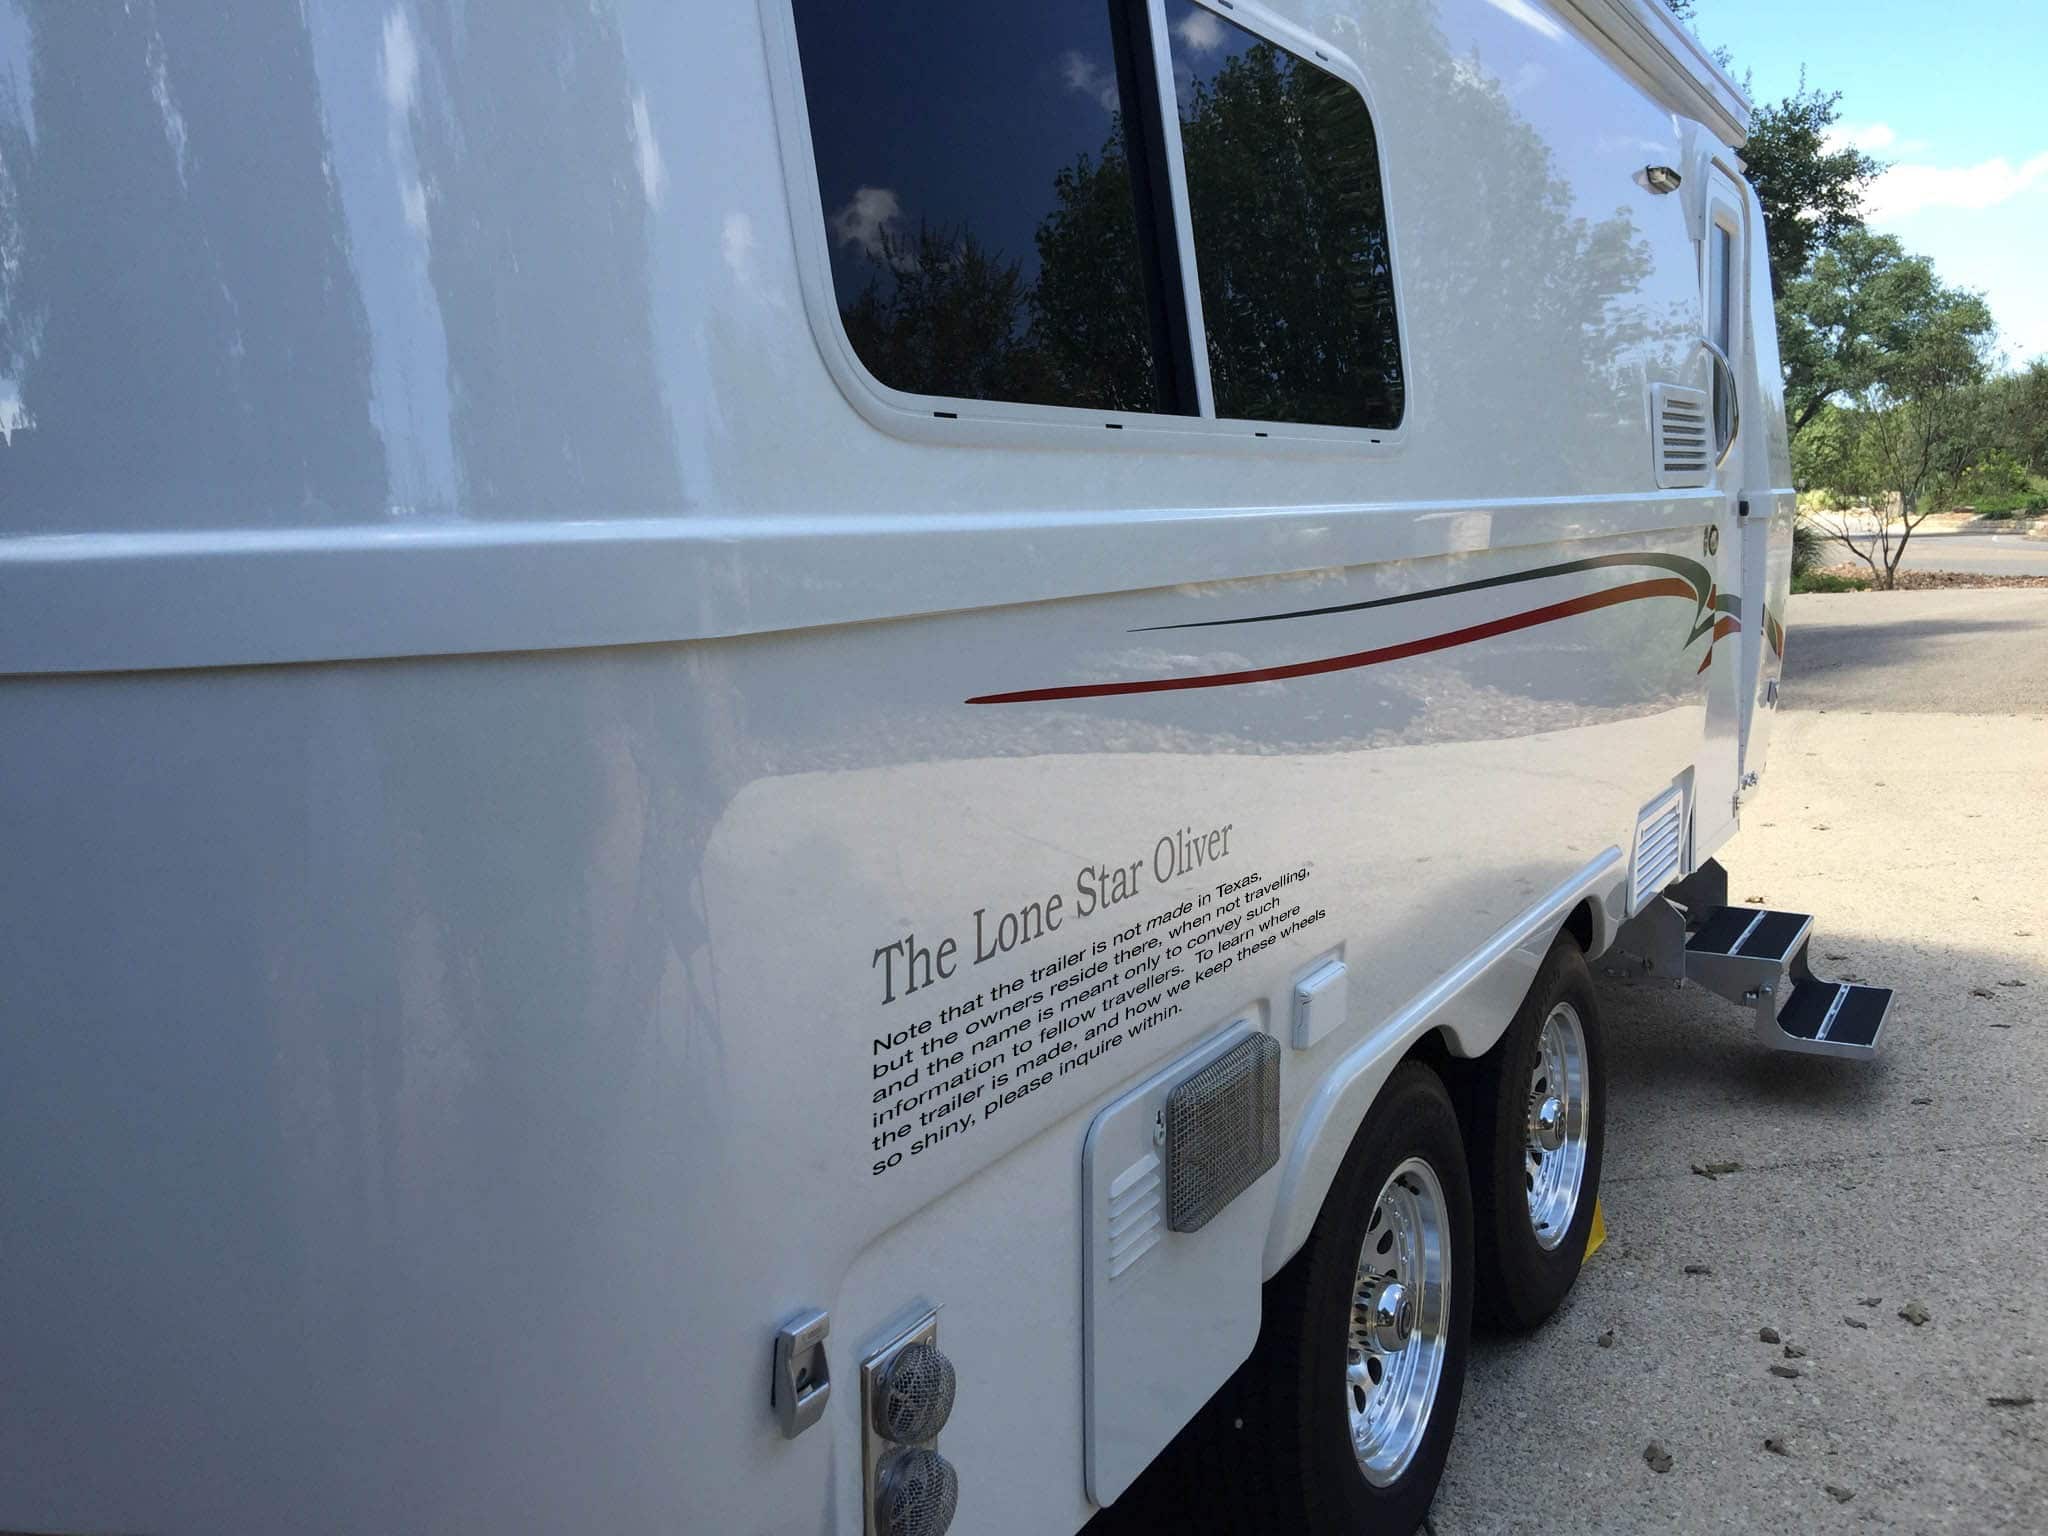
I ordered our new Oliver without the front and rear logos, have since put on our new logo design in those spots. I wanted the side stripes to be the thin style and not the double color thick ones, just because it's too much for a luxury trailer in my opinion, there are reasons why you don't see stripes and logos on the Lexus. I do plan someday to remove the side stripes, but will leave the OLIVER and Elite II logos on the rear sides, I think they do say luxury looks. Since our trailer theme is the "Lone Star Travelers" and I have our logos on the front and rear of the trailer I'm not wanting to overdue the side with something that goes with that, it would be too much and the trailer would start to look like a side show attraction vehicle. I have some ideas that I'm working on, both using the existing side stripes, or removing one of then and using just one, but this still remains in my head for the time being. Designing and building things has always been a hobby for me, so I really enjoy doing things like this, it passes the time when needing something to do. Remember everyone has what they like on there trailers and not any of them are wrong, it's a personal thing with each and everyone of us. trainman
2 points
-
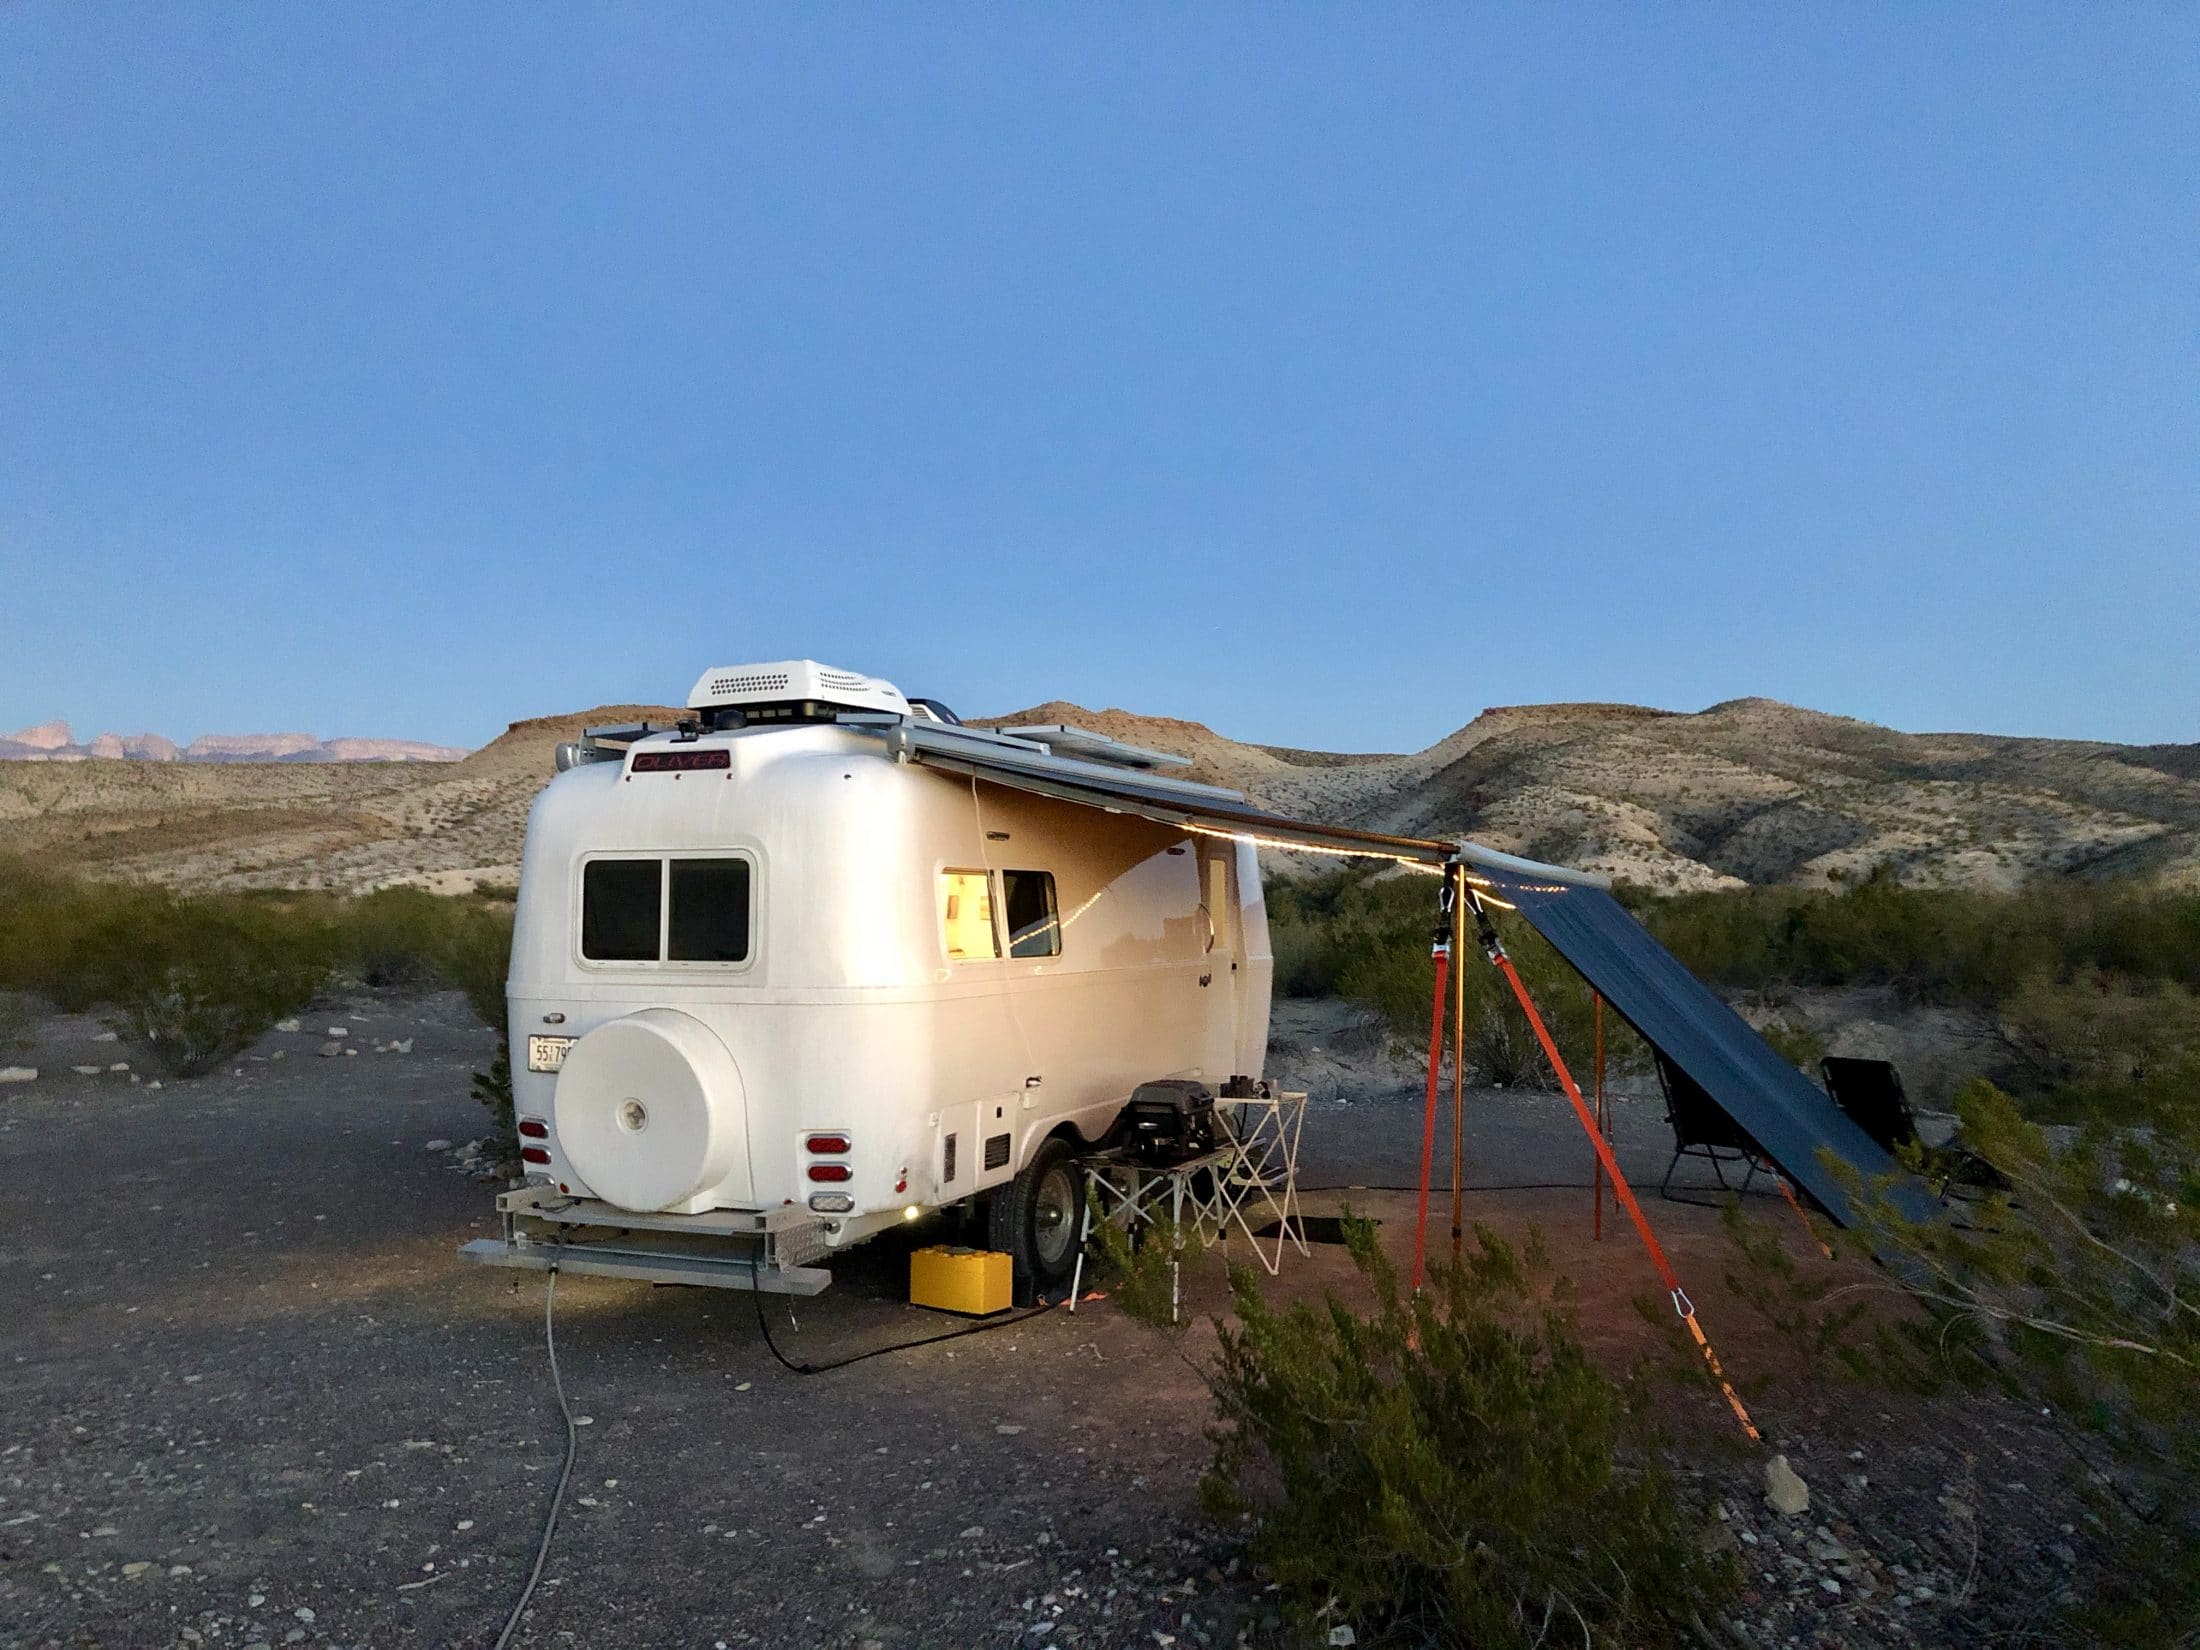
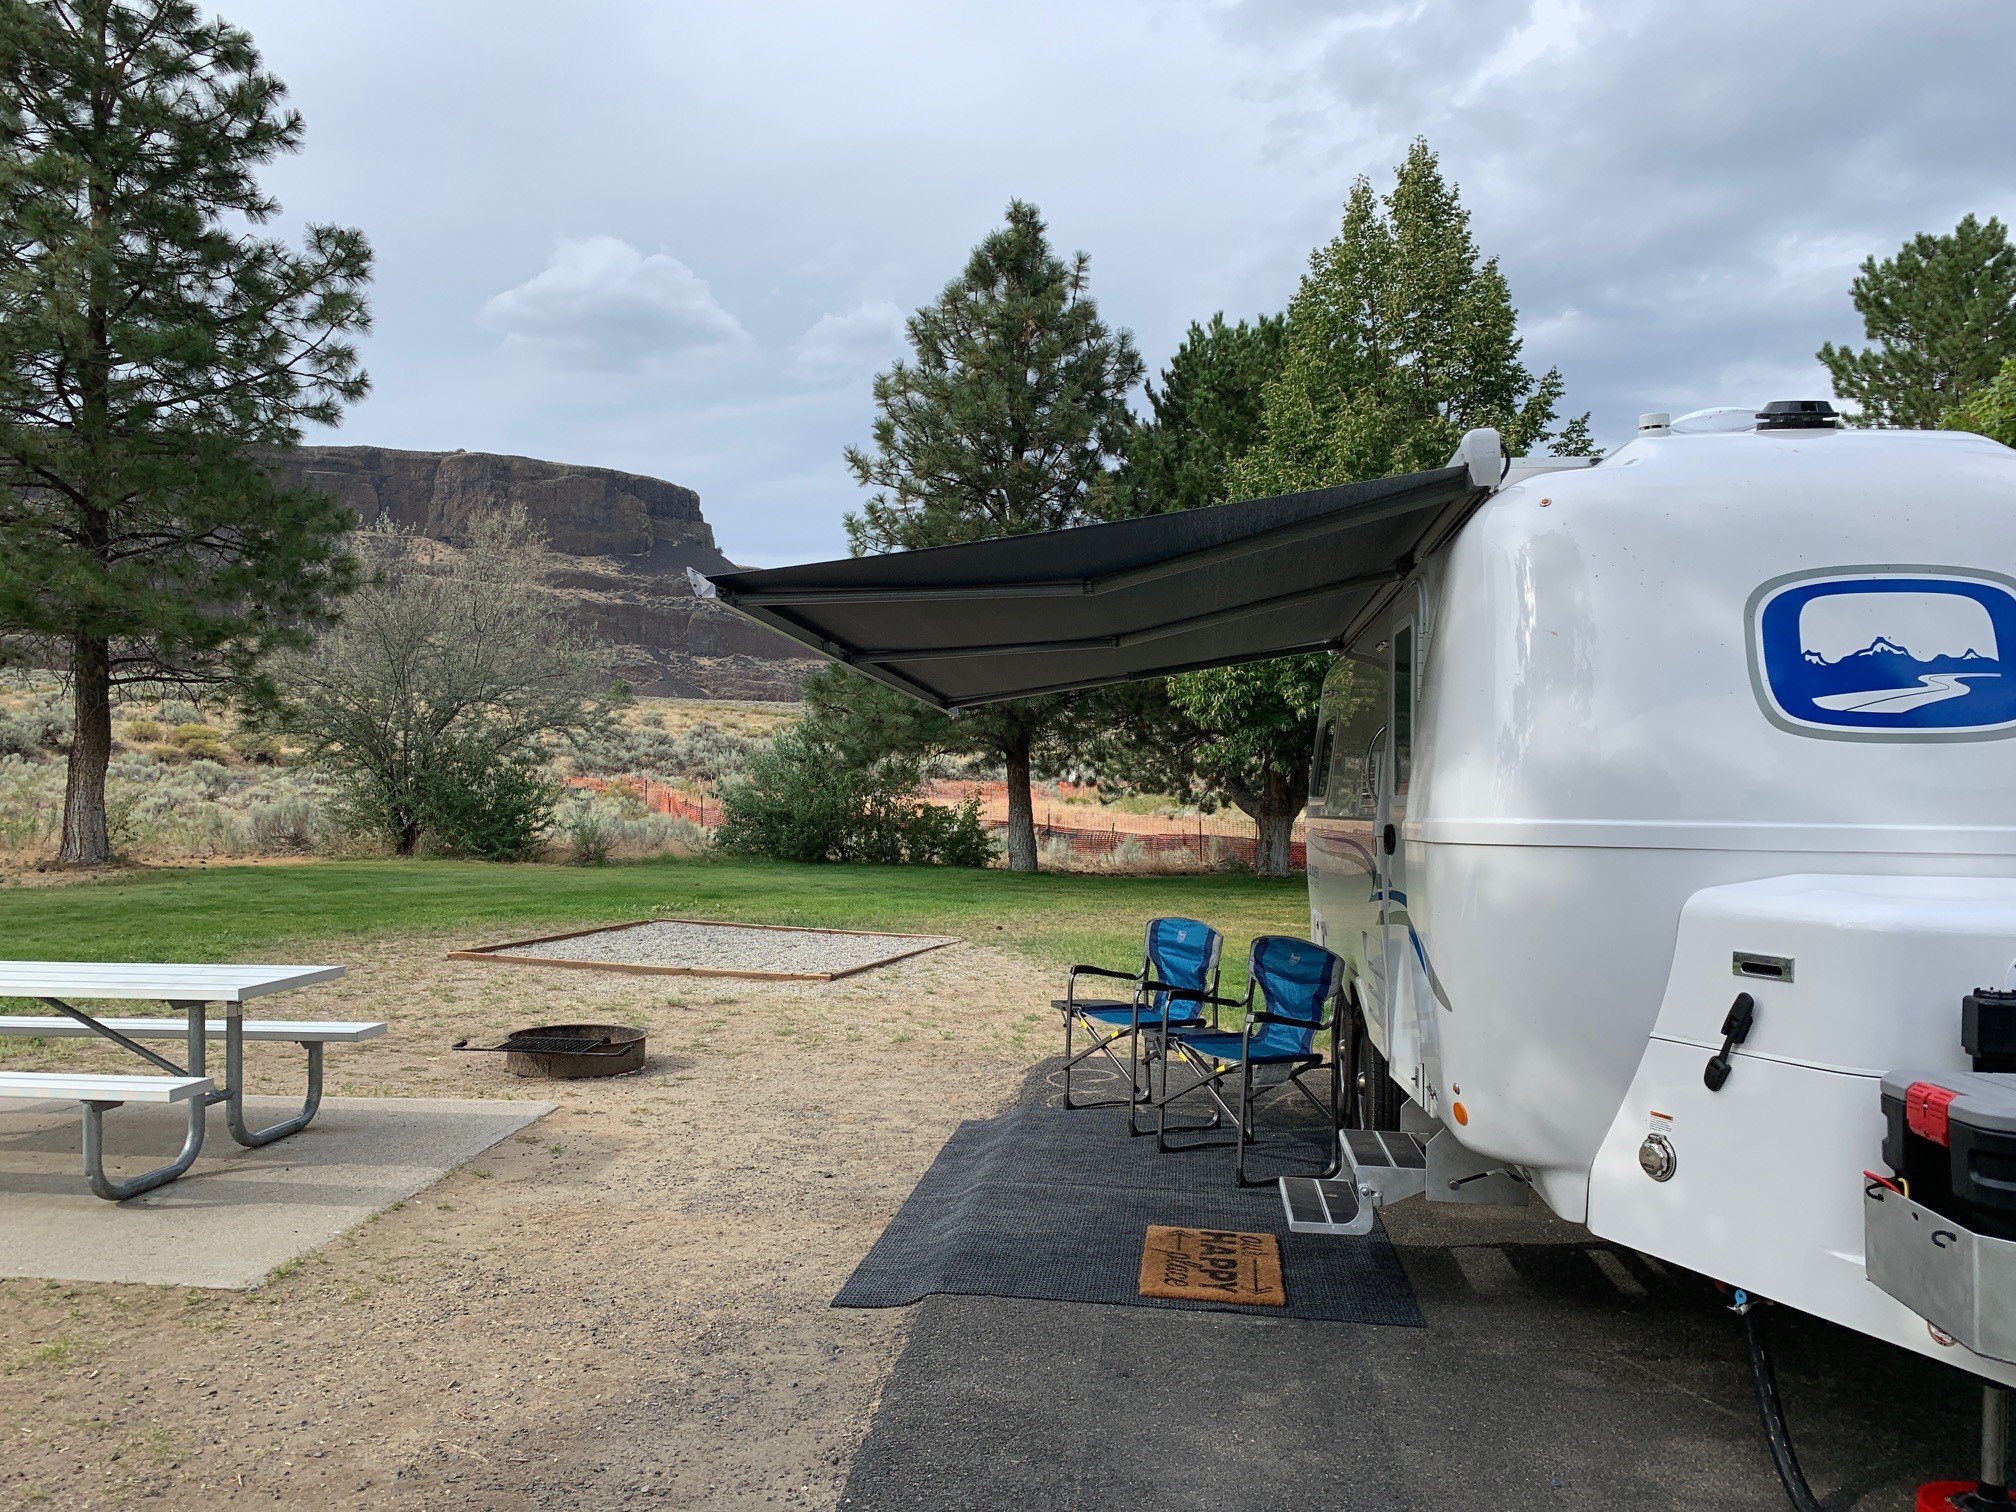
Hull 505 made the trip from it's birthplace to it's new home Washington State this week. First Campsite and Last Campsite Attached.
1 point
-
Rebecca and I (Walter) are very excited to join of the Oliver family and feel fortunate to have purchased "SoGo" (Hull #104) from very caring original owners Kenny and Kay Alligood. We took our maiden voyage from VA back to TN (Knoxville Area) in June. In July we headed out to the Upper Peninsula (UP) of Michigan by way of Kentucky and Ohio. Our three and a half week trip (2,700 miles) was great and the Oliver pulled and operated like a dream. One highlight was dry camping at Twelvemile Beach at Pictured Rocks National Lakeshore on Lake Superior. We even had to use the heater in July! We visited the Oliver Plant earlier this year and were impressed with the high quality workmanship and customer service. That, plus owner reviews sold us on the Oliver. BTW - We have already signed up and reserved a spot for the 2020 Oliver Rally at Guntersville State Park and look forward to meeting our fellow Ollie owners in person. WandR | Hull #104| Oliver Legacy Elite II 2015 | TV 2012 Nissan Titan w/tow package1 point
-
Just for sake of clarification, general knowledge and to be "fair" - it should be noted that the production line for Oliver campers has changed drastically over the past couple of years. Much more attention is being paid to quality control and there is much more standardization in these units than there was in the past. Of course, for those that want more things customized this approach to production presents a problem. However, quality control and standardization allows for the campers now coming off the line to have far fewer problems than was seen in the past. Bill1 point
-
Bill that is correct regarding the igniter, easily removable without removing the entire enchilada out of the compartment. At the time though for what ever reason I was convinced the issue was most likely with the sail switch, rather than igniter. At least in my case, there were other extraneous and very good reasons for removing and repairing some issues due to some very poor installation methods. It is worth noting the entire casing due to the wobbly mounting frame below did not provide for a stable installation which might have created more shock and rattle to the internal parts than was necessary or desired. Also worth pointing out, with two calls to the Suburban tech support for clarification on certain issues I found them to be extremely helpful. The people went to great lengths to explain the wiring, installation and other things regarding the furnace. Also if you notice in the photos I have applied some heavy duty red tape, (not to be confused with the tape inside the furnace) to the cutout hatches. Those openings have some raw exposed fiberglass rough edges and after cutting my arms and hands a few times I finally resorted to taping the edges each of those access hatches. Made a huge difference and would encourage anyone else to do the same. Thanks1 point
-
For simple stripes, I was very close to doing this before switching to our mountain snowflake on the side. I think it's much more elegant than what we ended up with, though obviously I like what we have, too - And before we had the snowball scheme, I liked this (which ironically later became Oliver's official color scheme). But my wife thought it was too boring for us - And being a Star Trek fan, I also threatened her with this, but apart from being over the top, in the end I thought it looked too much like the Scamp stripe anyway -
1 point
-
On legacy I shorty trailers, I think the battery vents still share the outdoor shower door. If you have regular lead acid batteries, you'll need to be careful to not block the battety ventilation with insulation. We have agm batteries, so not really a big concern. Back in the day, we froze an outdoor showerhead, leaving the trailer in cold country storage, without winterizing. We're more careful, now. One of our friends added a piece of soft foam, probably mattress pad, to the door of that cavity. Works for him. But, he also lives in the south. And has agm batteries. Sherry1 point
-
Obviously you'd have to check the size of each unit, but, there are a bunch of different ones available on Amazon https://www.amazon.com/s?k=rv+propane+gas+detector&crid=2ZWURTI7LGPOH&sprefix=rv+propane+%2Caps%2C157&ref=nb_sb_ss_i_4_11 Bill1 point
-
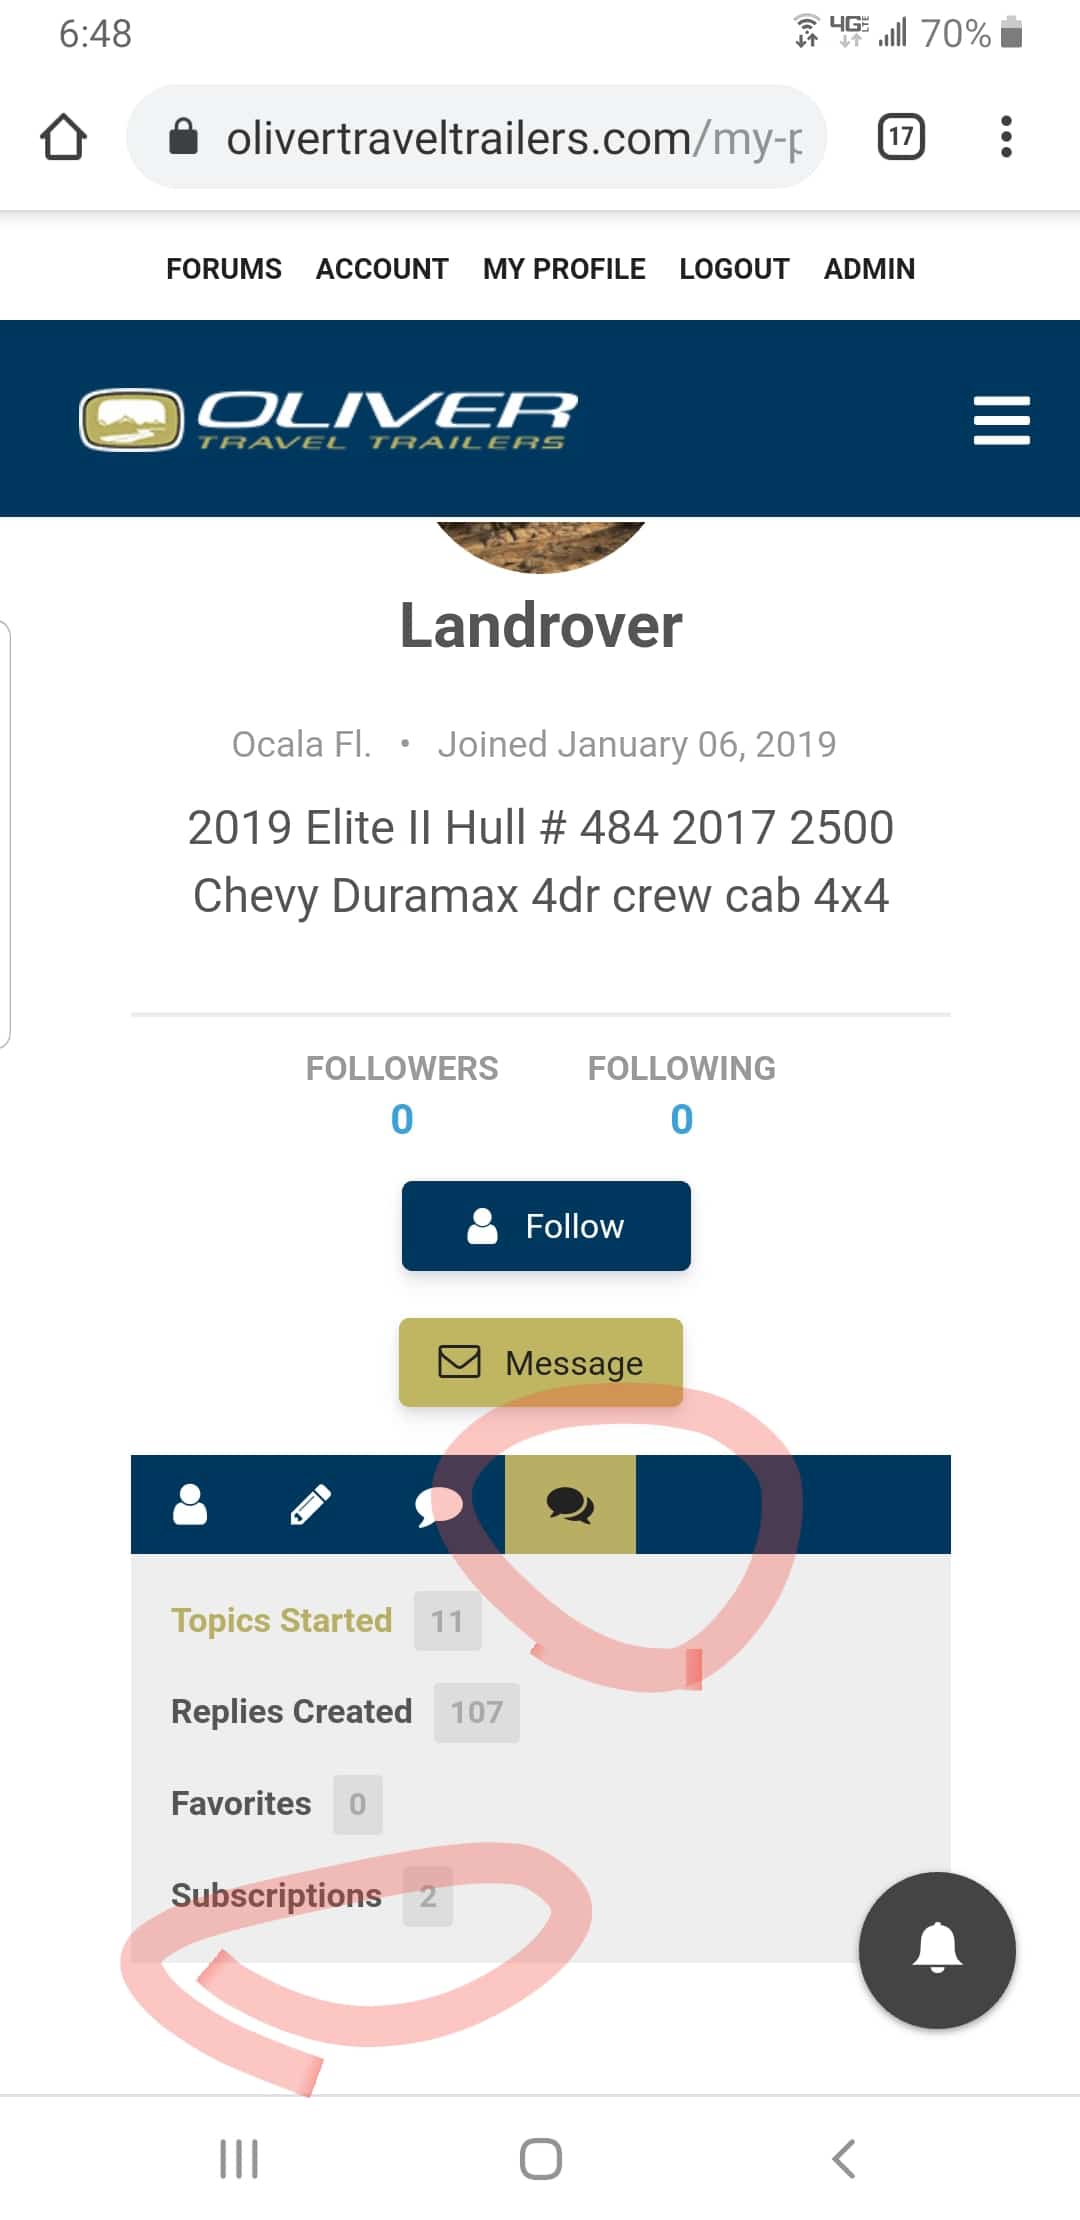
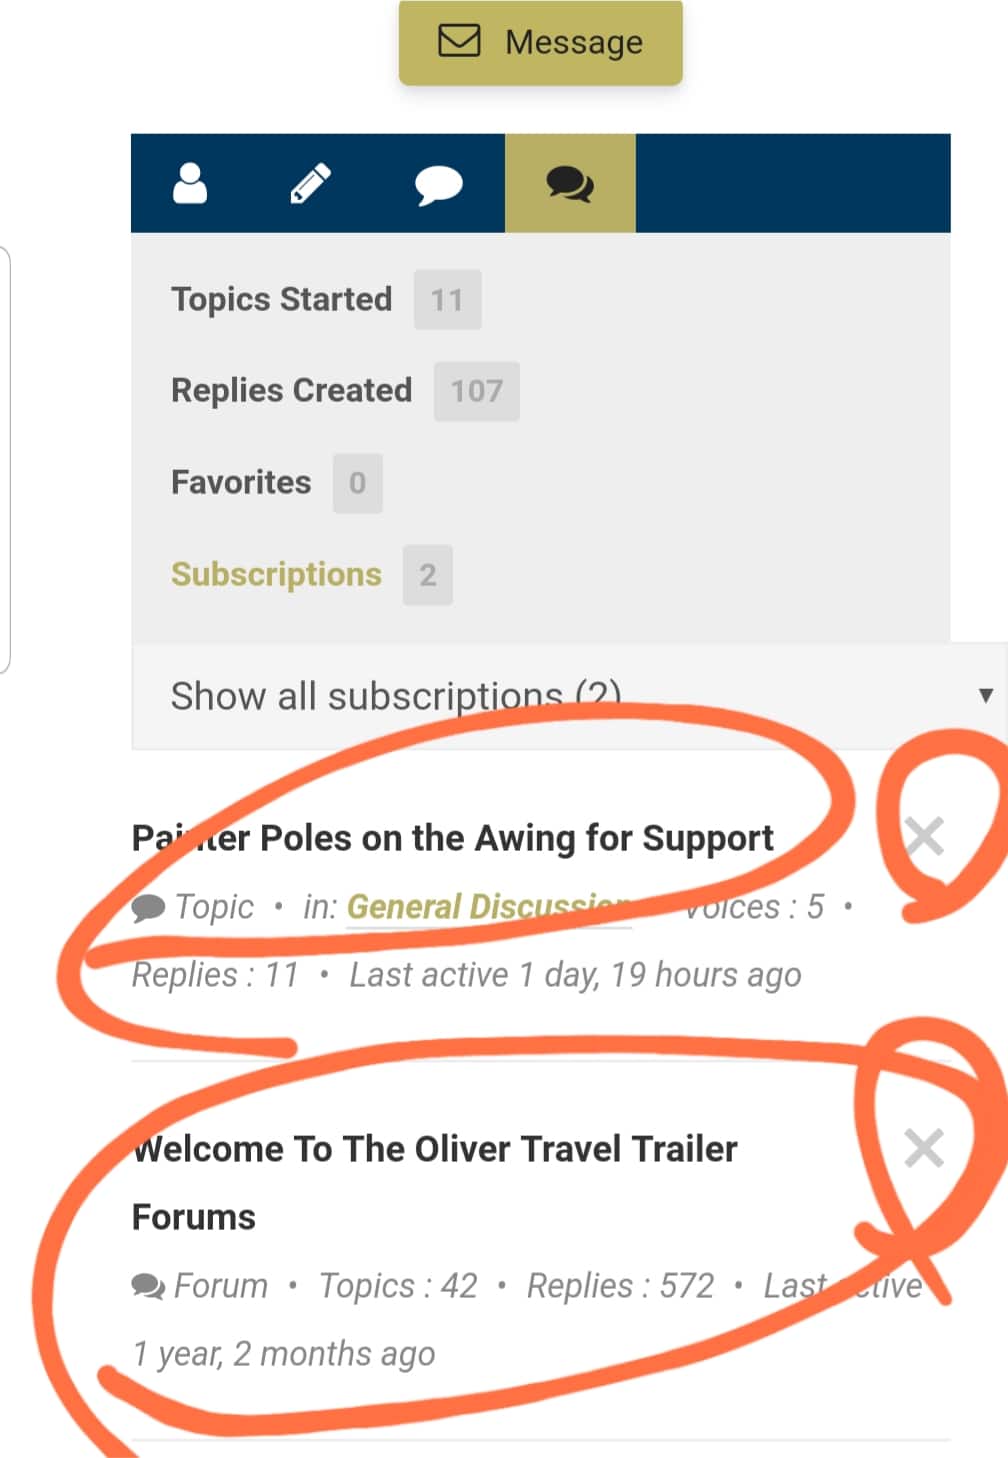
Overland is not online now, so, I'll show you where to go in your profile to see forums that you have subscribed to. Go to your profile, click on the double bubbles, x out the one(s) you no linger want to be subscribed to. Or, log in, go to that forum, look at the top, and see "unsubscribe", and click there. Hope this helps you and others. It's easy to subscribe accidentally. I've done it myself, a number of times. Then I get emails... Please, DON'T delete your account. All your previous posts will then say "anonymous." There's nothing wrong with your account, nor has the board been " hacked." Thanks for bringing up this important topic. We appreciate it. Sherry [attachment file=193338]
1 point
-
I've lived from Massachusetts to South Carolina, and my folks live in the White Mountains of New Hampshire, but I've never camped to see the leaves. The biggest piece of advice I have is to keep your eye on the fall color forecast. I know this may sound a little crazy, but there are actually people who give forecasts based on the year's weather, current color, and forecast weather, guessing when "peak" color will be. Some also just give you forecasts based on historical record...those can be WAY off the actual, so look for someone who is using current year data. These historical ones can be helpful during your planning stages so that you get an idea of the progression through the area. For instance: https://smokymountains.com/fall-foliage-map/ You can often enjoy an area even if it is before or after "peak" (and note that different species of trees change at different times, so its really hard to define "peak" in mixed forests). However, if your destinations are somewhat flexible, you can try to move toward the places where there is better color. I would also recommend that if you're in an area that is past peak, consider going towards the coast if you don't want to head south. The coastal areas are warmer, so they peak later and some are quite stunning. I highly recommend Acadia National Park if you've never been there. I couldn't agree more with GraniteState about trying to do your driving/peeping during the week, and save laundry and down time for the weekend when the hordes are out on the roads! I also concur on the Kancamagus highway (make sure you have fuel - there are limited services on it and if there's lots of traffic, you don't want to run out!) In fact, I recommend fueling up any time you leave a highway because some of these areas are surprisingly rural and you burn a lot of fuel going up and down and up and down as you pass through ranges. It doesn't help that the only East-West interstate is the Massachusetts Turnpike. Be especially aware of traffic conditions if you want to pass through North Conway, NH, just north of the east end of the Kancamagus, as the congestion through town can be brutal. Assuming you already visited the Finger Lakes region on your way to Cooperstown (Watkins Glen, Ithaca and the lakes themselves), you'll be relatively near Saratoga Springs, which is a lovely college/spa/horse town. One other thought I had...while Olivers generally don't have to worry so much about height restrictions, New England has some VERY old roads, bridges and trestles. It would probably be worth running any routes through a trip router that takes height into account just to make sure you won't have a problem. I'm sorry I don't have more camping info, but we're total newbies and don't pick up our Oliver for a few weeks! Hope this added a little more food for thought. -Kathryn1 point
-
It was truly a joy to watch #512 leave the nest. Seeing the excitement and joy re-kindled those same feeling that I had when first picking up Twist four and a half years ago. Having just spent two months in Montana and never once being attached to shore power, I must admit that I had become all too comfortable with my Oliver. These campers really are in a class by themselves and it is always a joy to see others join the family. Bill1 point
-
And now there are precisely twice as many Ollies on the road as when I received mine. How did the mattresses work out for you?1 point
-
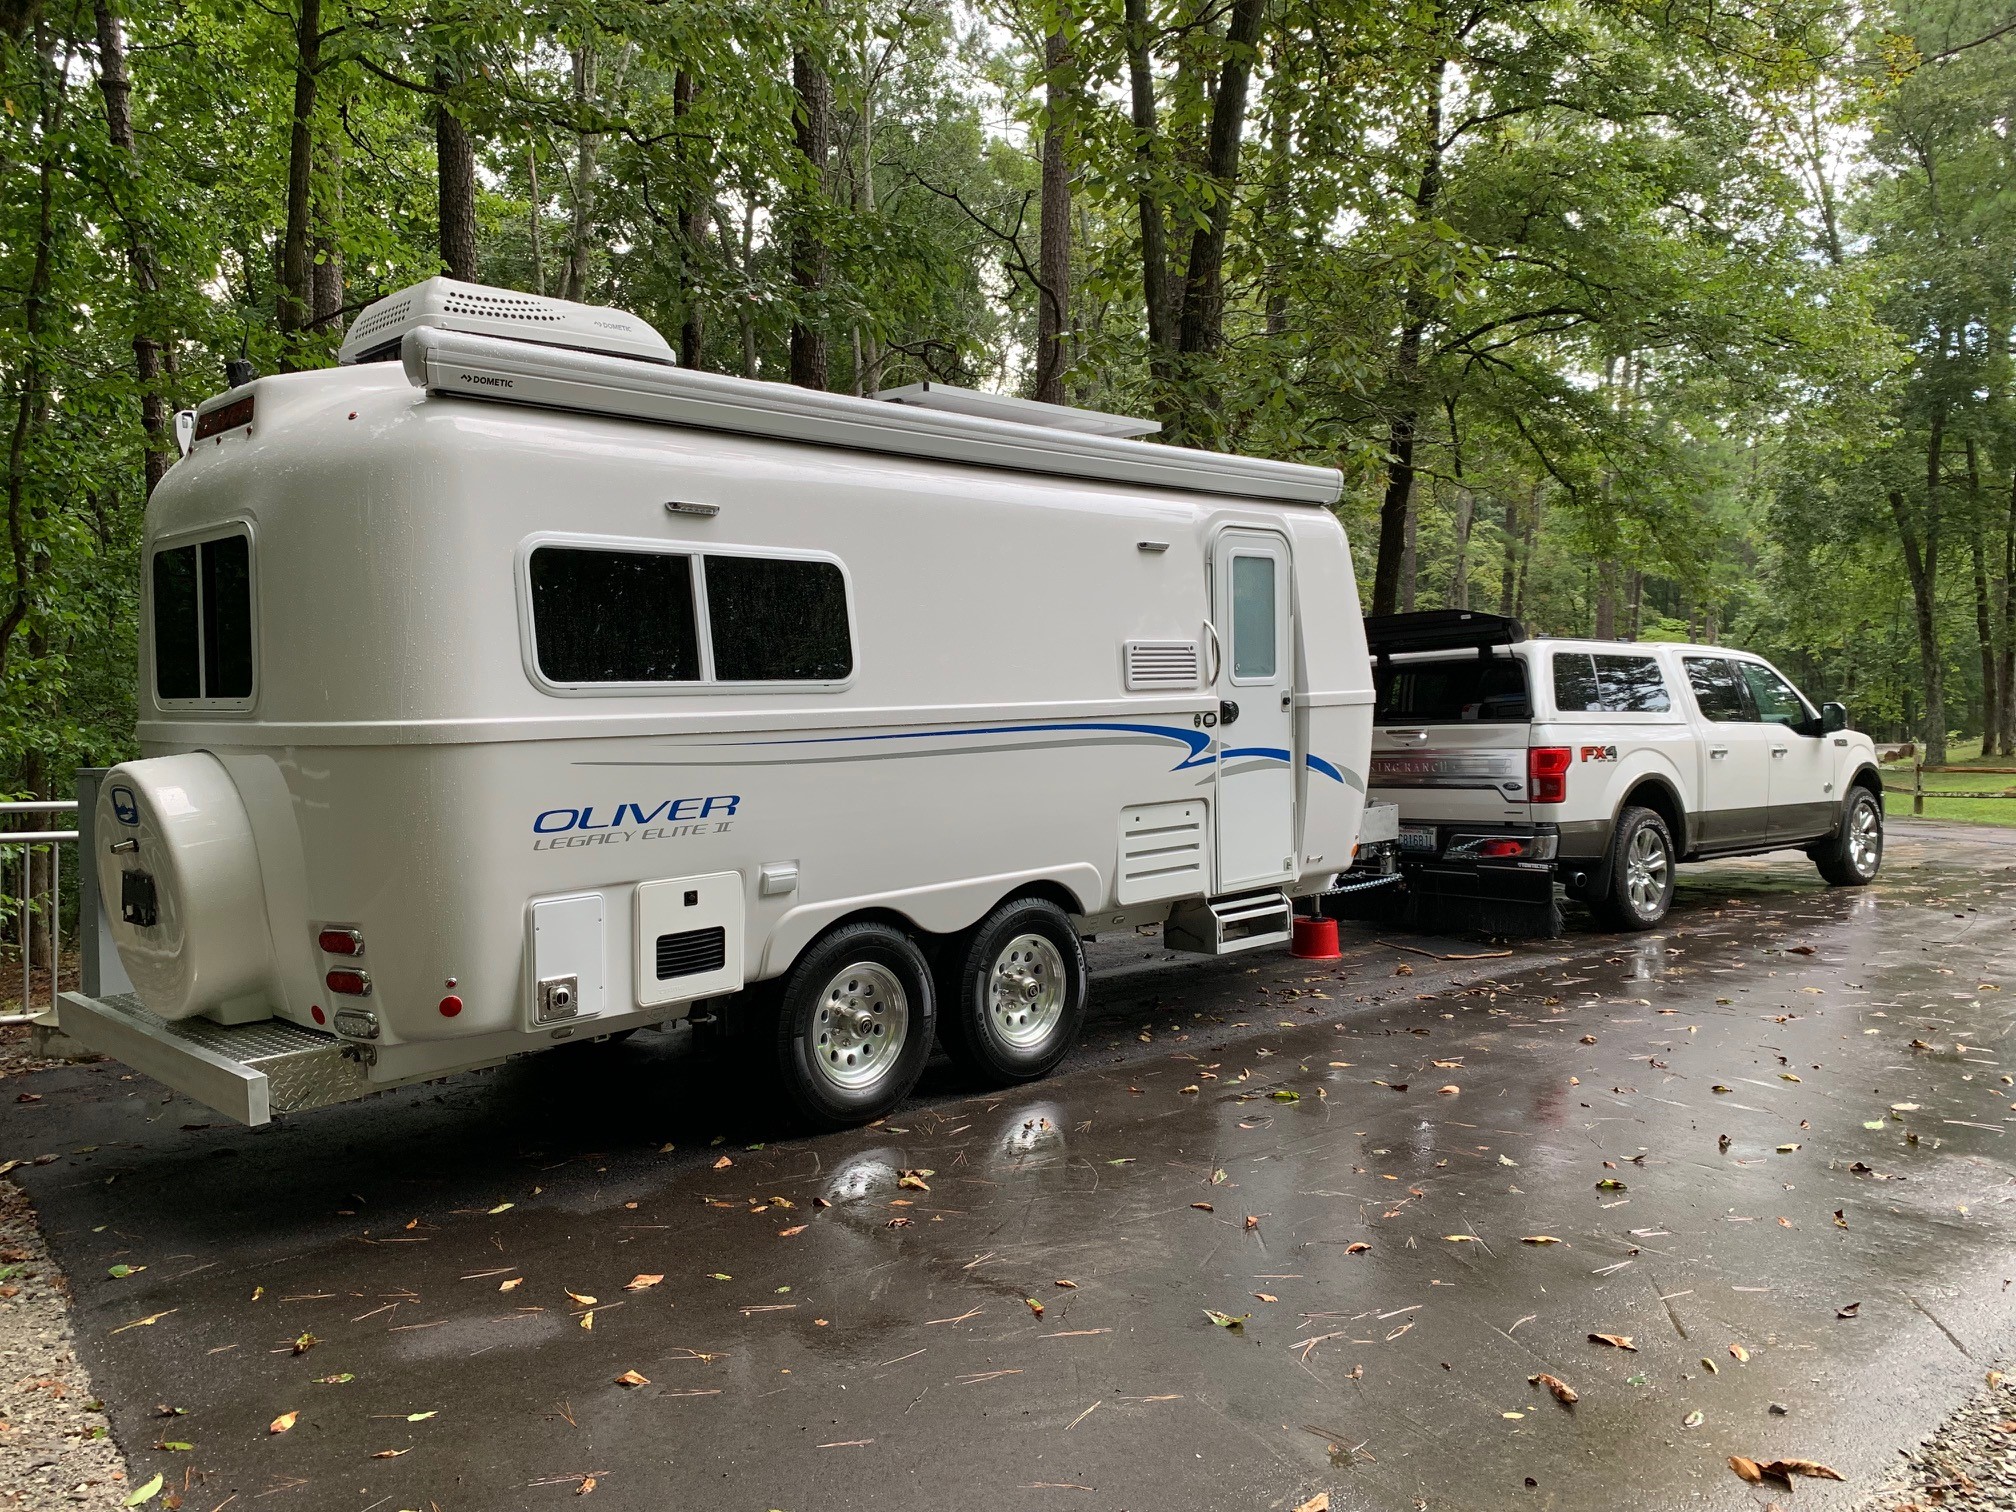
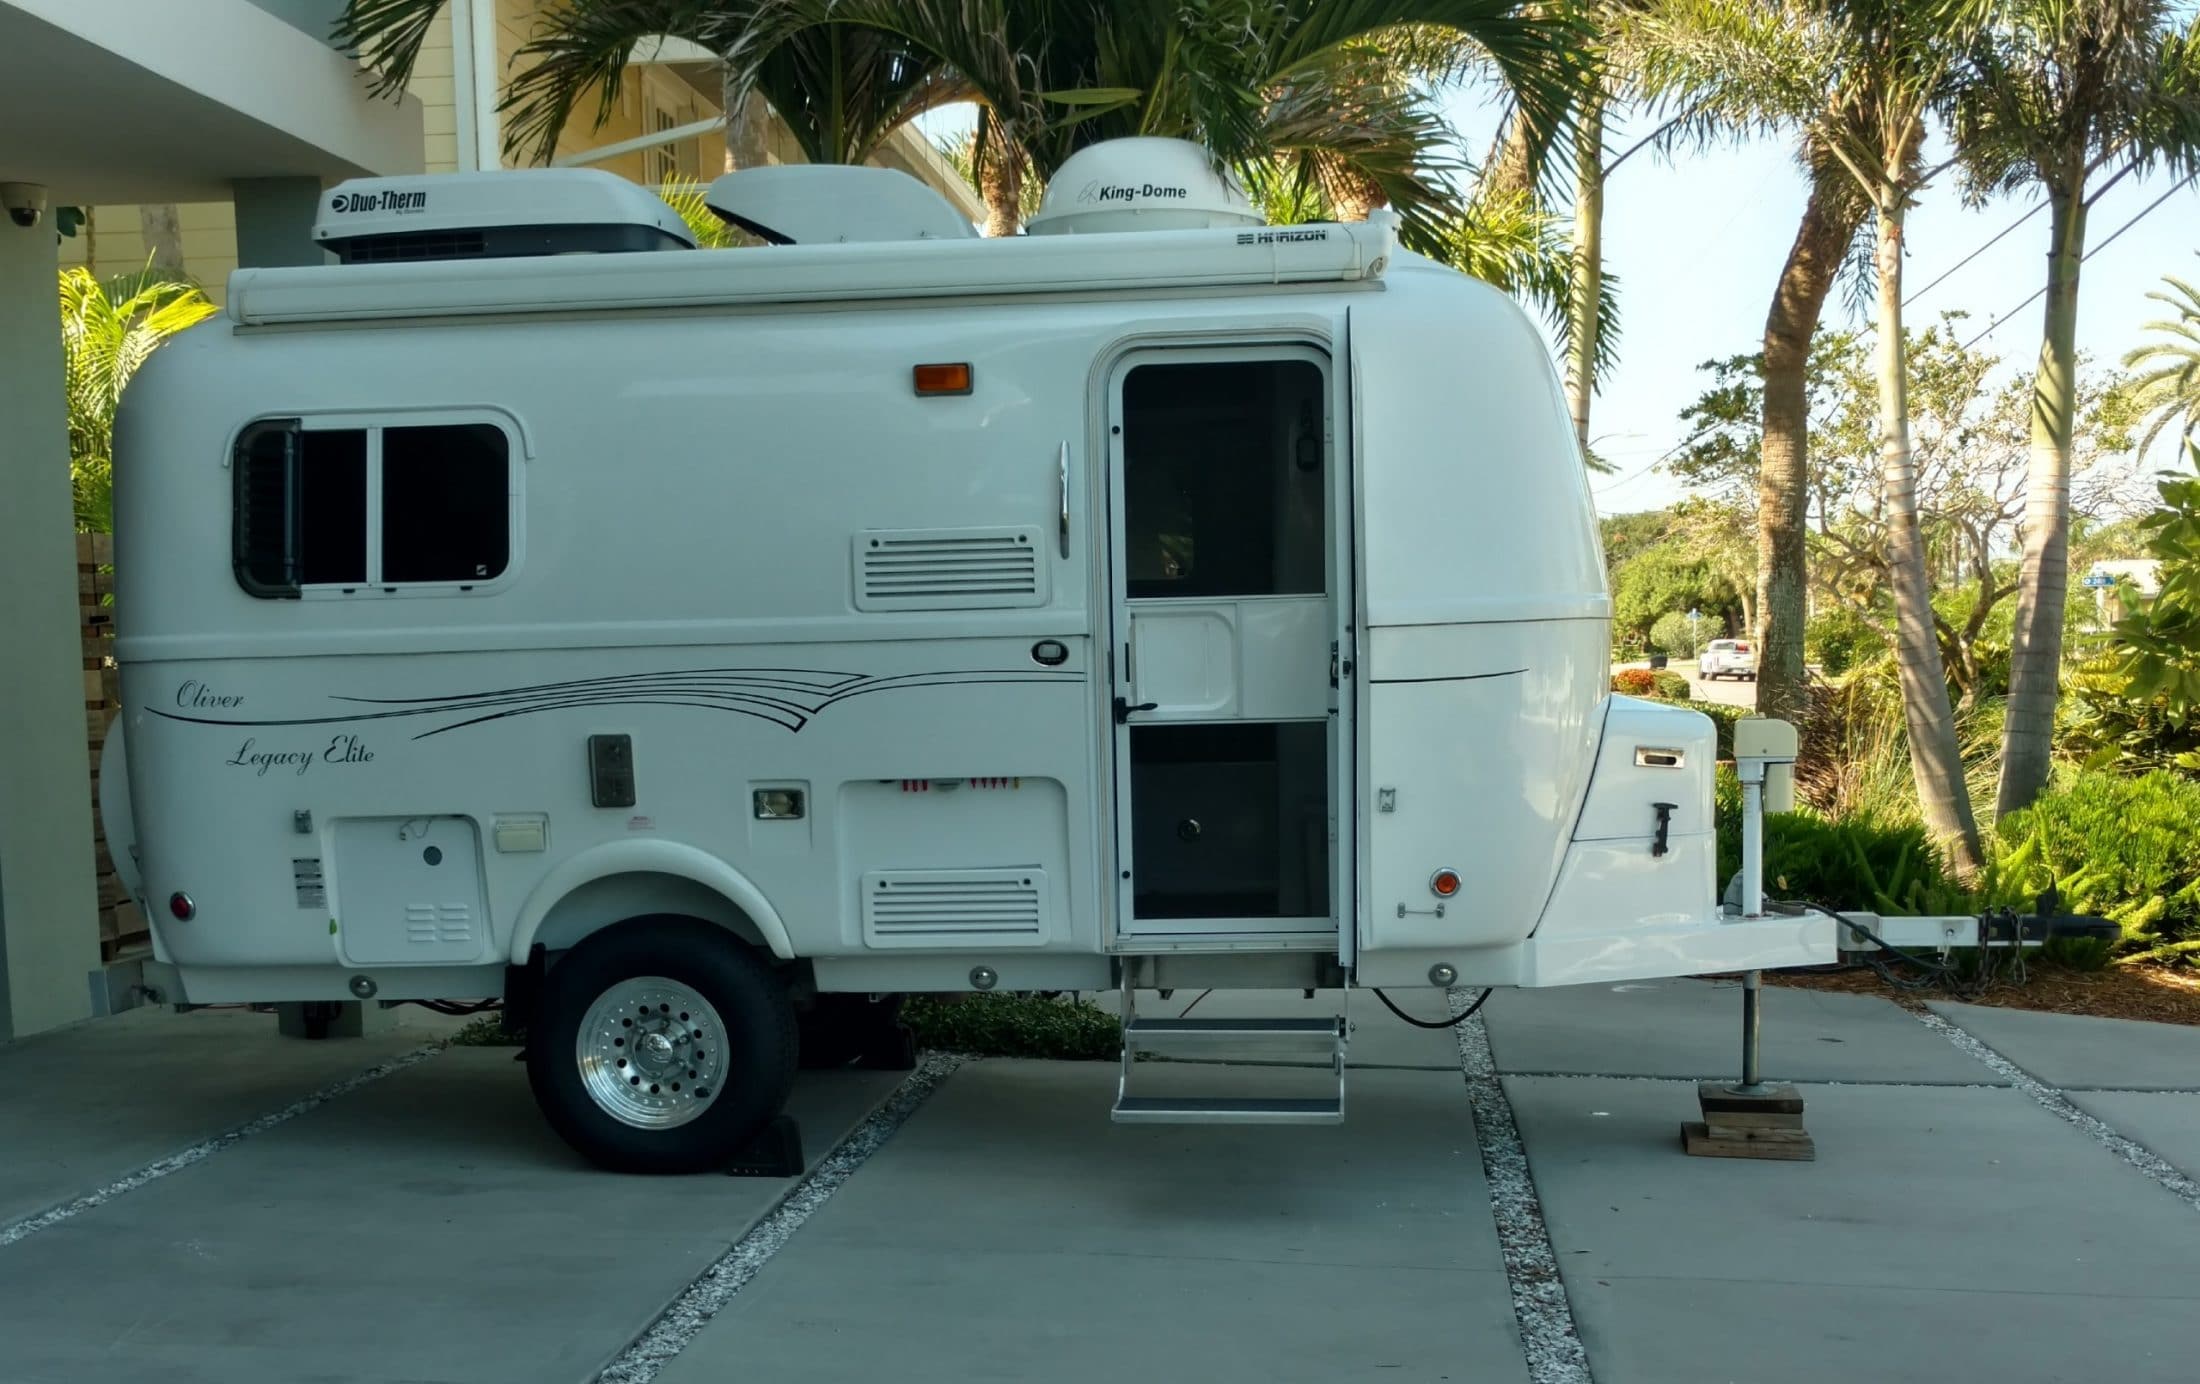
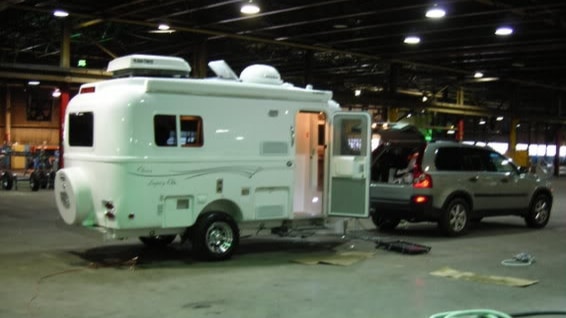
#12 here, picked up in February, 2008. First photo is from April of this year. 2nd is at pickup at the factory. We had the trailer in to a local shop for service in April. There was a line up to see an 11 year old trailer that still looked brand new. We get that comment all the time at gas stops and campgrounds. Yes, we take care of it, wax it twice a year, and regular maintenance. But we don't "baby" it, and it's stored outside. Thats over 4200 days in the weather. We've towed our camper less than Pete, but more than many. Over 100,000 miles . We have in the last few years replaced the water pump, the refrigerator, and removed the microwave. Also replaced the water heater. Added solar in 2008, as 99 per cent if our camping is without electrical hookups. On the third set of tires and batteries. 2nd set of electric brakes. We're confident the trailer will be enjoyed by the next generation when we're gone, or no longer able to go camping. Sherry
1 point












-
Recent Achievements
-


















