Leaderboard


Popular Content
Showing content with the highest reputation on 02/07/2026 in all areas
-
We are in the process of locating qualified and reputable RV maintenance facilities across the country. The goal is to provide our owner's with outstanding service within reasonable distance. If you have had a good experience with a third-party maintenance shop, please let us know here so we can do additional research and add them to our database. Thanks!1 point
-
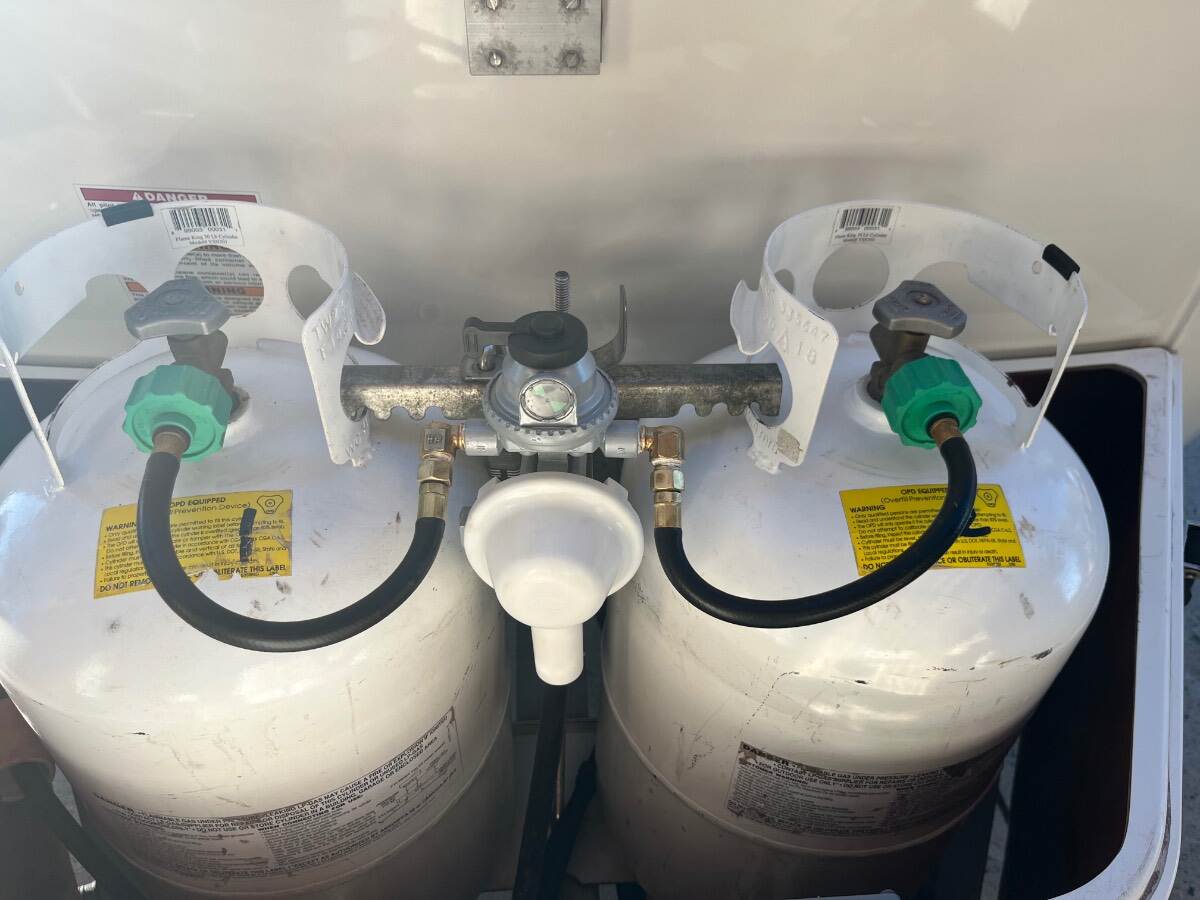
FYI - I wrote Marshall Excelsior today to ask them whether going to the MEGR-253H (H for high output) was the right decision. I've got to say their customer service is RESPONSIVE from a webform request! I've had companies, related to Oliver, Eley Hose Reels company for example, that never answered a webform query or direct email on a 2nd try at all, no reply (and I paced 2 orders totaling $250)! Marshall Excelsior replied within the hour, forwarding my question to the Product Manager. Then an hour later he replied. My question was this: Trying to decide between your MEGR-253 and the MEGR-253H. We have a travel trailer, use a fire-ring always, dual burner Napoleon grill, and inside the furnace, HWH, and fridge. Our trailer came with the MEGR-253 which is now 10 years old. I want to renew and keep the old, still working as a back-up. The MEGR-253 has been fine. The MEGR-253H is the same cost. Is there an issue with more BTU capability? Stick with the MEGR-253 or upgrade to the MEGR-253H? Thanks, JD His reply was this: Hi JD, The MEGR-253H will work just fine. There are no issues with more BTU/H capacity. Just means you can run more appliances at the same time. Cold weather can affect capacity for generating vapor in the tank. Thank You, Wes My experience with corporate CS is that if I ask on a Friday, a Monday reply would be more-so expected. Maybe the Fairview regulator I got was a knock-off, but if not then this Fairview regulator failed in <30 days (sure looks real). I've heard others complain of regulators failing quickly. I'm not absolutely certain our Marshall Excelsior MEGR-253 was OEM installed, but it sure looks 10 years of age! Up to 10 years without failure, and the outstanding CS of Marshall Excelsior, I'm preferring this product over the equivalent Fairview model! 😎 https://www.marshallexcelsior.com/products/pressure_regulators_and_accessories/two_stage_automatic_changeover/megr_253_series.html1 point
-
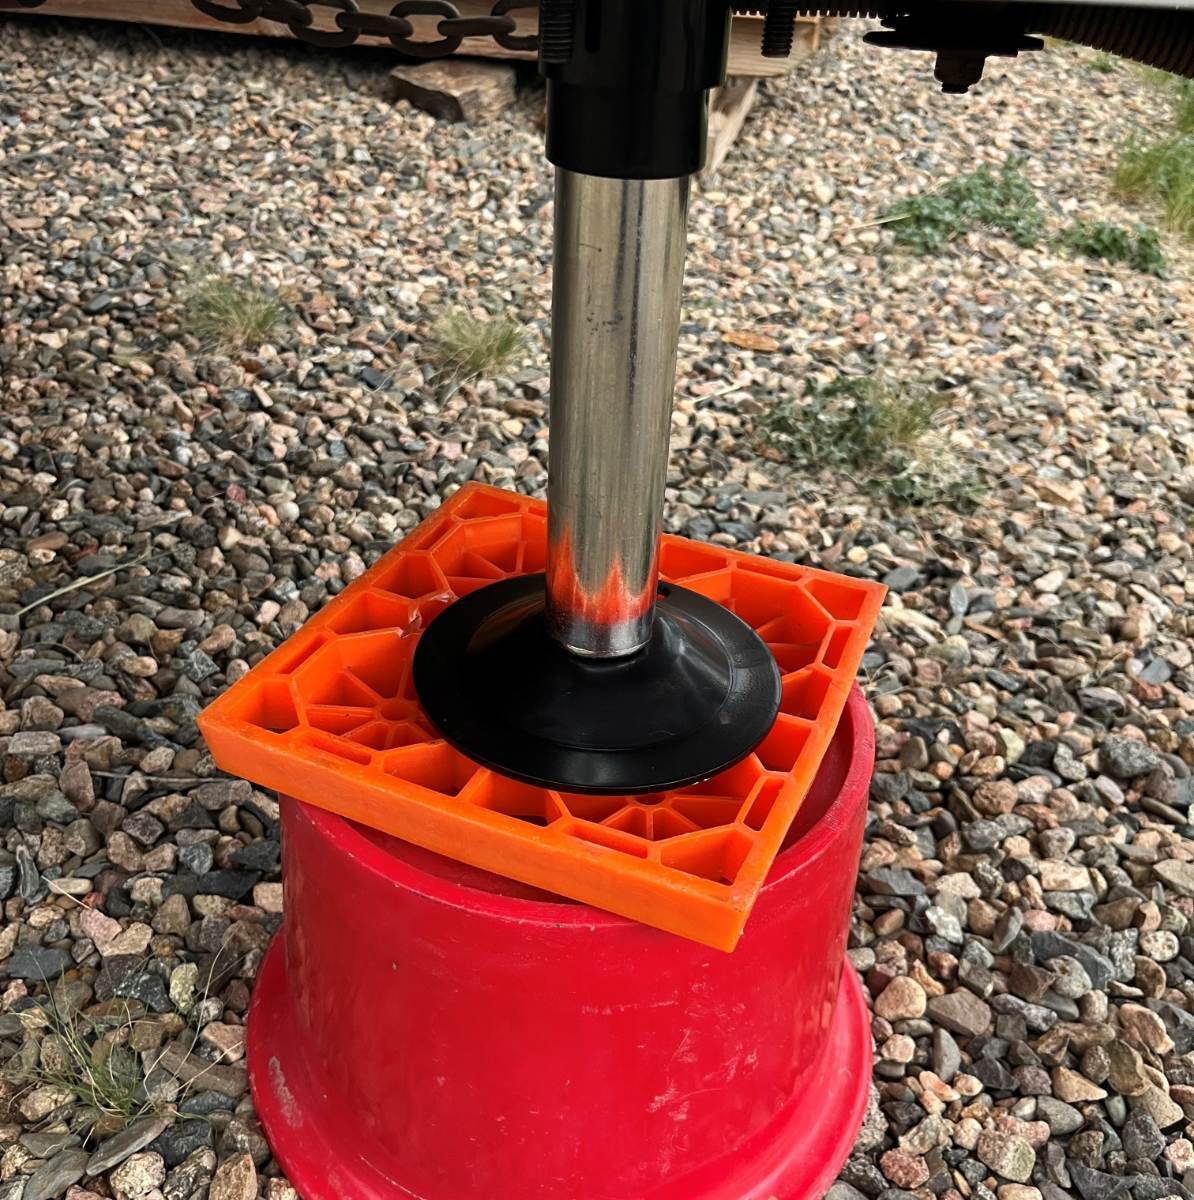
Time to upgrade to a F-250 and a long bed! 🤣 I carry 2 vs. 3 and I do not stack them when stored (easier after packed up to stick one here and the other one there, being the last items to stow). The picture I shared was actually the one time I stacked them! Ron @Ronbrink you sure have enough room in that 2500 van! Hang them from the ceiling, LOL! When I read the word "collapsible" in any marketing copy, I stop looking at that item immediately. The collapsible crate for example; I want a milk crate, steel preferred, but if plastic it must be heavy enough for me to turn it upside-down and stand on it, hold my weight safely! The collapsible crate would surely collapse at just the wrong time! Try to find a crate on Amazon that is NOT collapsible and you'll have to look long and hard. Collapsible is for kids driving compact cars, still living in apartments! 🤣 If I had a set of Flap Jacks, they would sit in the back of my truck ALWAYS in working position. The fact that you use these almost everyday while traveling, twice a day when dumping, I'm not taking the time to erect them and then fold them back to save a few cubic inches of storage space. I'll stick with two 8" Andersen Blocks and 16 of the 1"Legos. This combination works well for us. When you use both in combination you get the slip plane some of you worry about and can tailor the right height (more height up front, or more height needed on one side). I ALWAYS walk a full 360 after everything else is done. Even though I KNOW the 3 jacks are up, because I just removed them, habit is do the 360 inspection, eyeballing all 8 tires for correct shape and making sure there is nothing (not just blocks) under truck or trailer. 😎
 1 point
 -
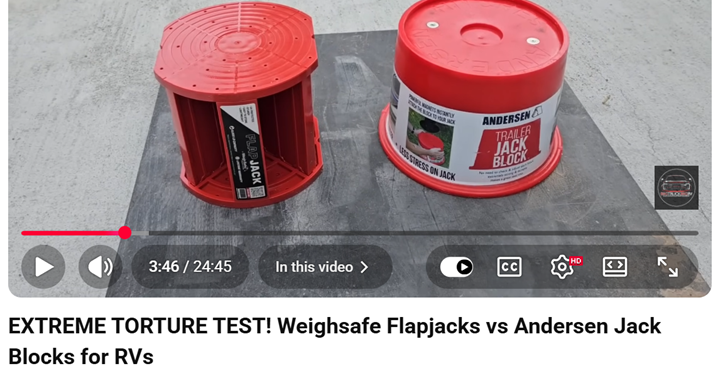
I was sort of leaning towards the Flap Jacks for those reasons. Then I saw this video: Well, both tested exceptionally well. Basically it appears that only a nuclear inferno would damage them. That test is an order of magnitude or two more severe than even Crazy Horse could abuse them. The attributes of extreme durablity, light weight, 1/4 of the storage space, and now superior slip planes of the Flap Jacks works for us. Thanks to Ron and Chris for highlighting this amazing product. We'll be using them this season! GJ
1 point
-
ditto on this front. Of course we could leave it the way it is and then we'd know when we have two empty tanks?🙃1 point
-
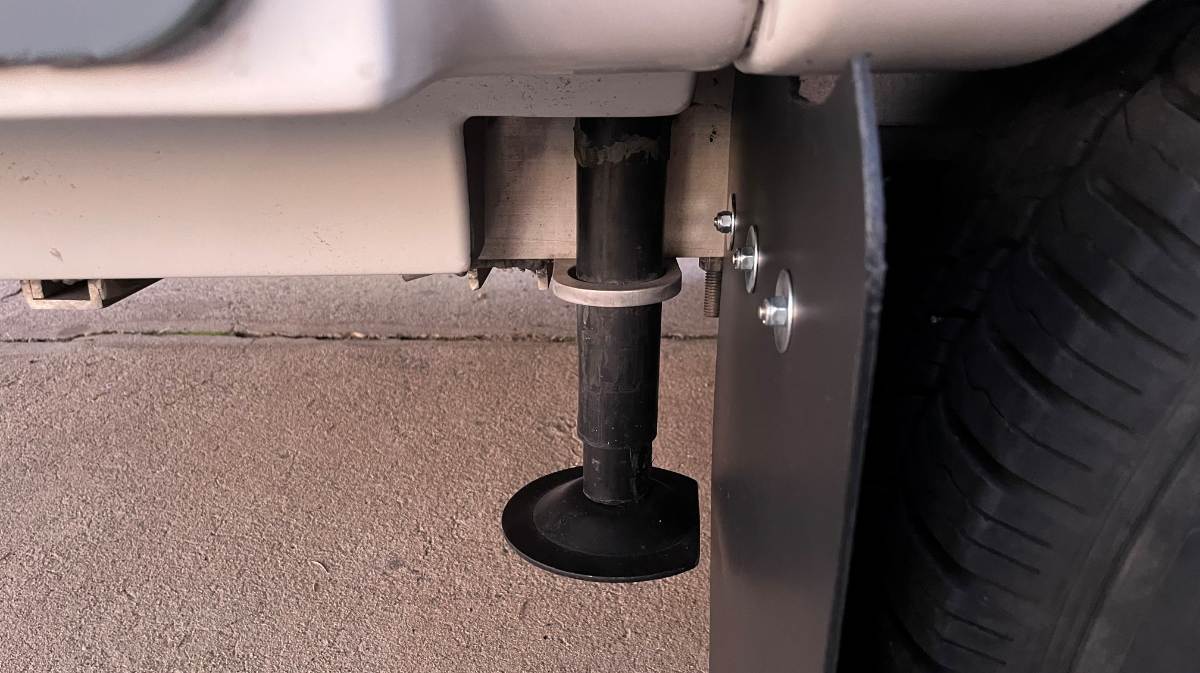
I believe it’s designed to sit above. Works for me. It drops down when detached/filling tanks and lift up and it sits nice and close when mounted and locked. I renewed the regulator and lines a couple months ago. 😎 I used your idea of using street elbows so 12” lines would fit nicely! Also, the new regulator came with a mounting bracket exactly like Ron’s (single mount). I reused the original bracket that mounts to the threaded post above and below for better support (can’t be seen in photo).
1 point
-
It took a couple days labor, but I take my time and enjoy the work! $50 in parts for both truck and trailer, you can't beat it. 😎
1 point
-
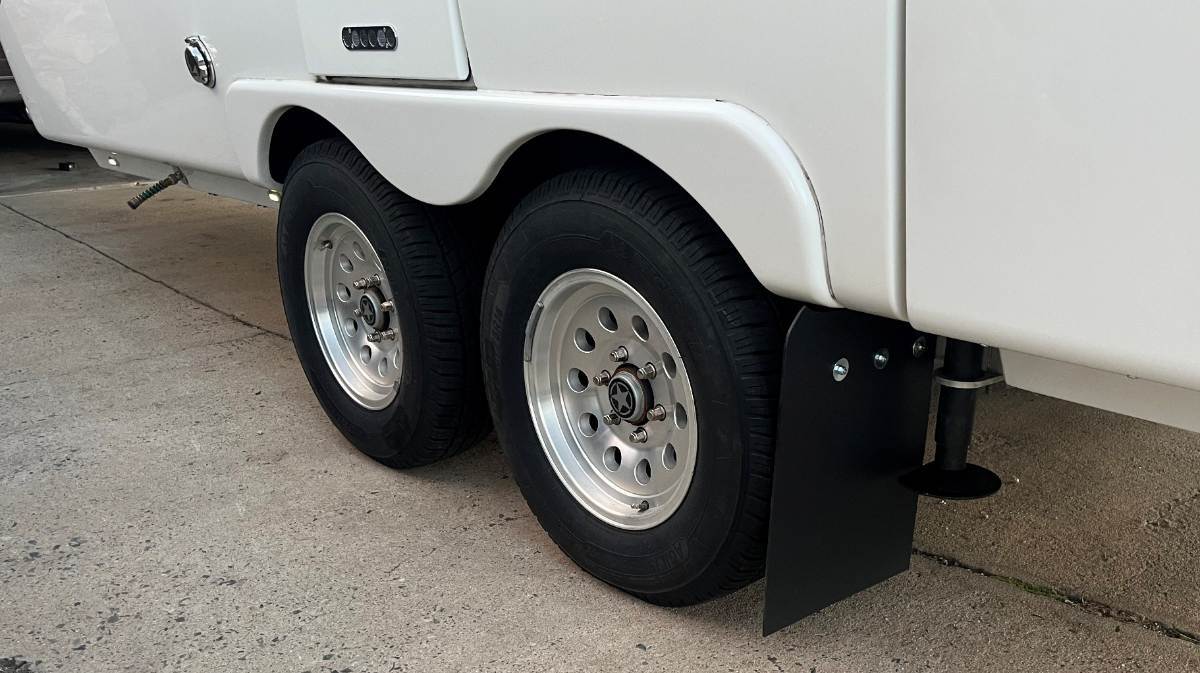
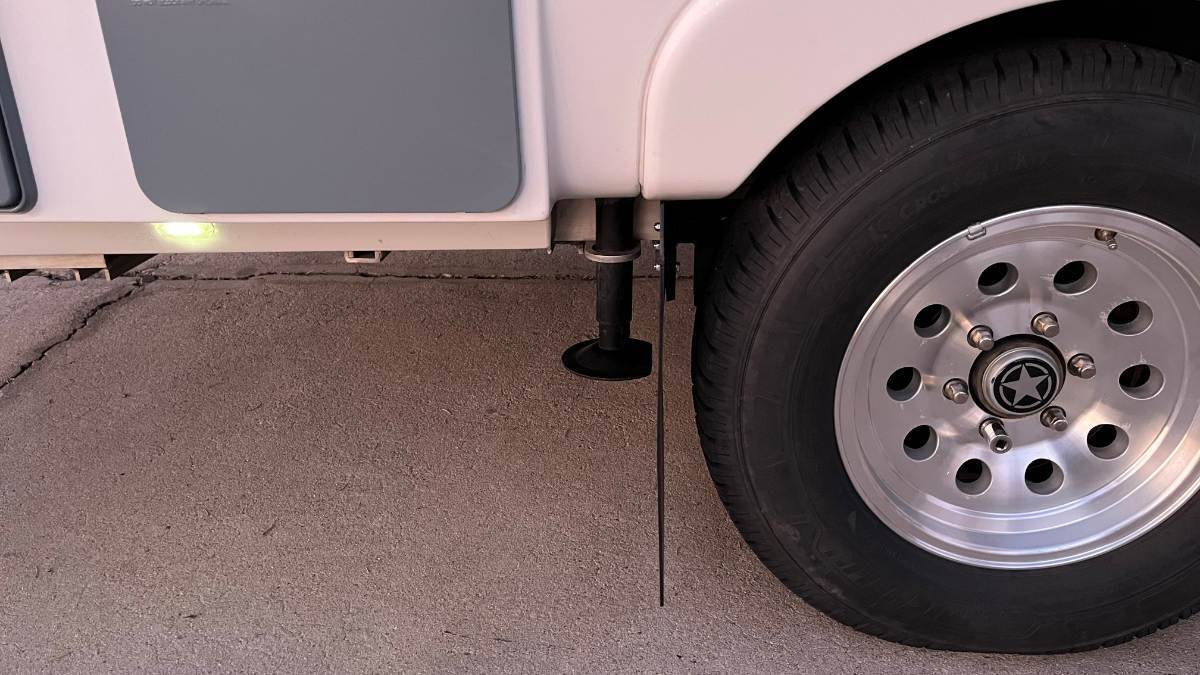
I cut the base of each rear stabilizer jack to have one flat edge. This allows more room for the flap to arc rearward while towing and so the flap material is not always hitting the same point on the arced edge. I don't believe the strength of the part was reduced much and these parts are readily available. I already have one spare! Use a 10" steel cutting blade on a chop saw and this is quite a strong piece of metal. By the time it cut through it had melted a ring into the plastic plate below. Filed the edges smooth on my bench grinder and steel brush. I may hit the open edge with spray paint later. So, the right side is done and I'm very happy with it! 😎 Several views to follow...
1 point
-
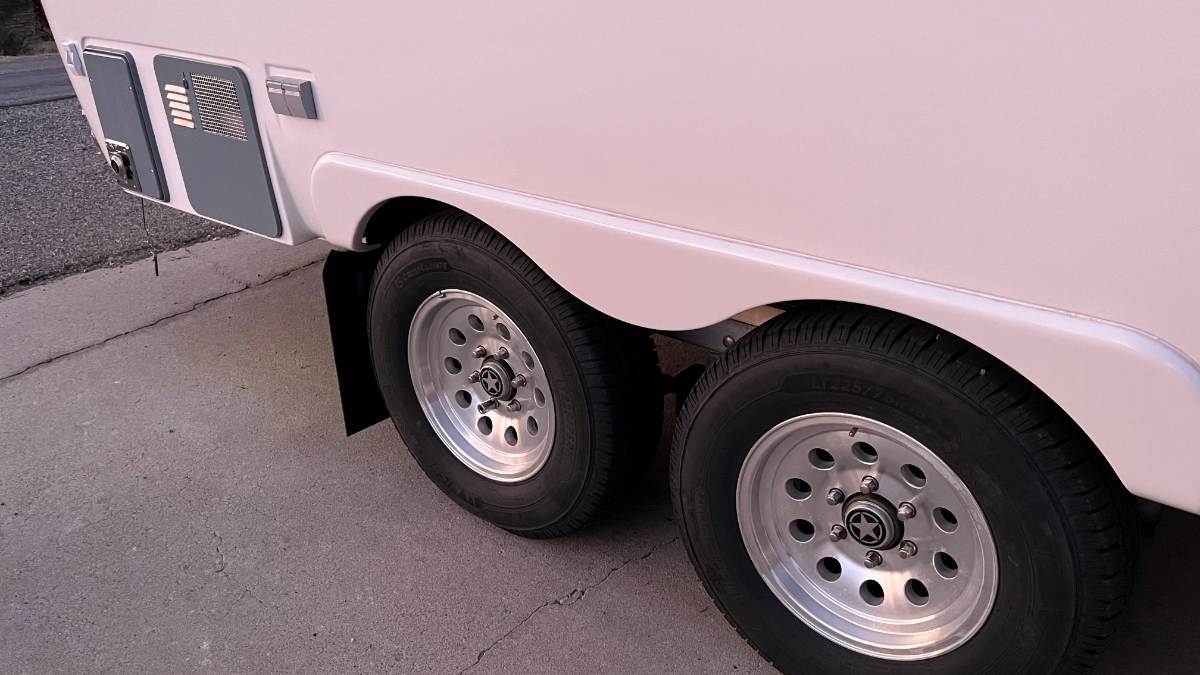
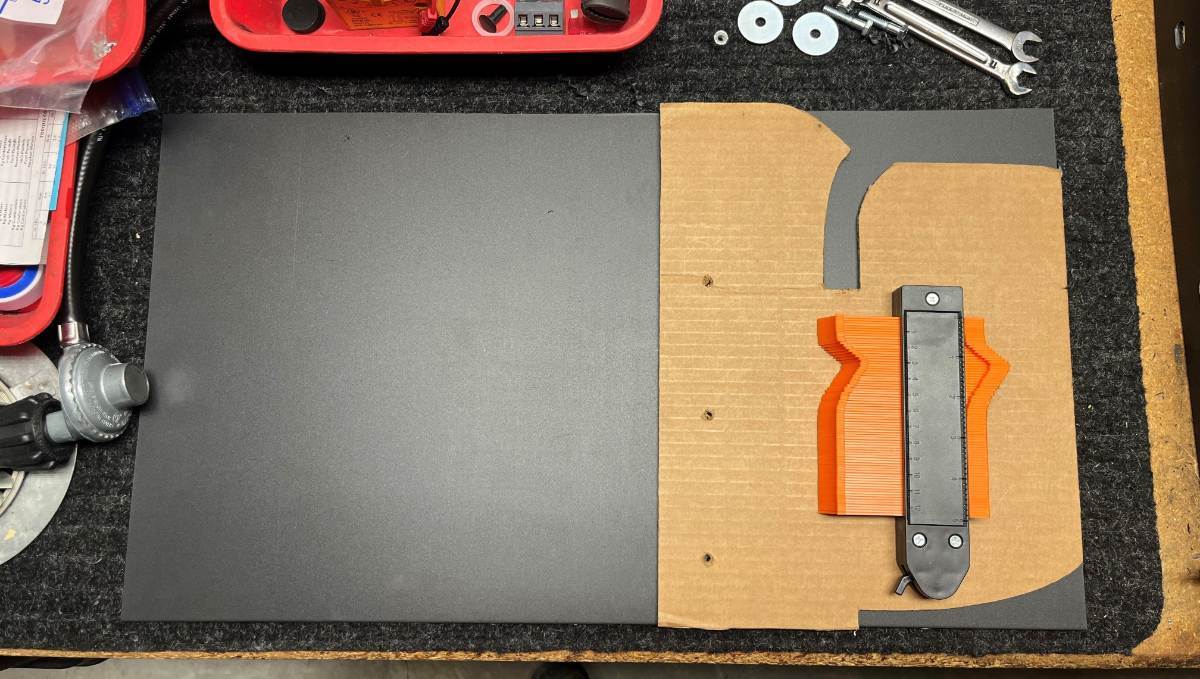
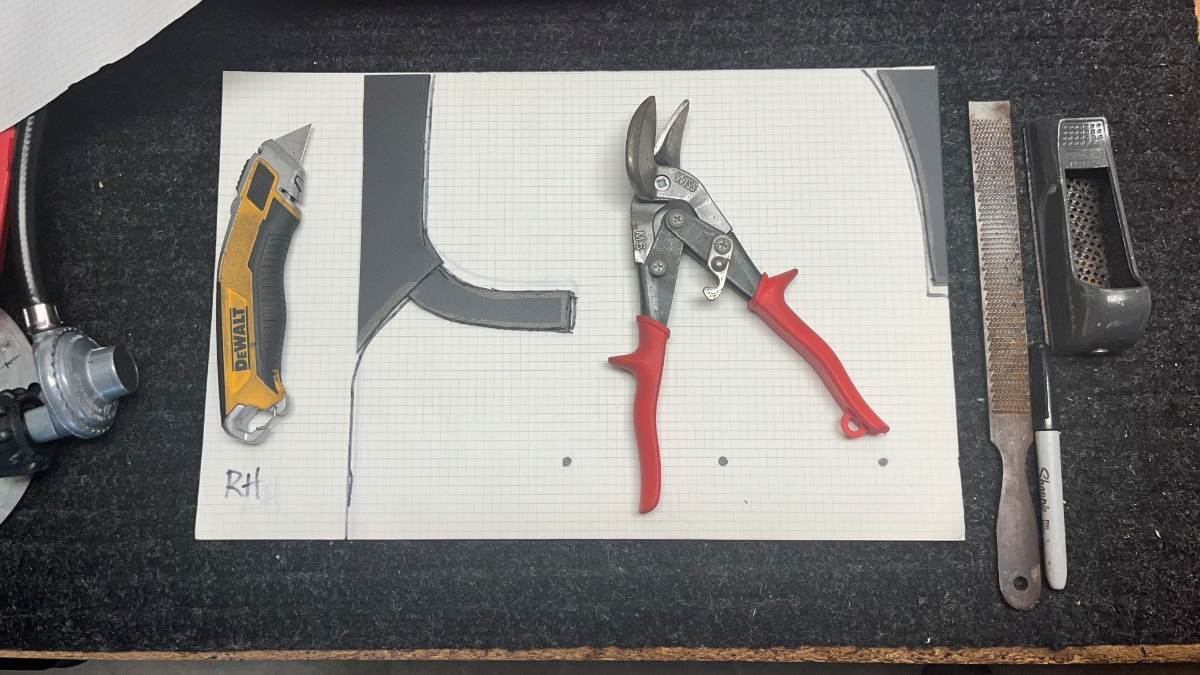
Next step; cut stock for the Oliver flaps. The stock was 24x36" so I cut every flap sideways making them all 24" long to start. I cut the Oliver 13 1/2" wide to stick out 1" beyond the tires and I made the area under the mounting bracket a 13 1/2" square which made the mud flaps sit 4" off the ground. It's too difficult to work with the full length of stock when cutting a pattern to fit around the curved body of the Oliver. So I cut a piece of cardboard 13 1/2" wide like the flap and 10 1/2" tall, the measurement from bottom of bracket to the top. I drilled the 3 mounting holes into the cardboard for alignment. I used the little curvy tool (stocking stuffer from Chris a few years back), took a few measurements and started to cut away at the cardboard making the opening longer and wider. I wanted at least 1/4" clearance above the fender and 1/2" below, so not to touch and to allow for cleaning the fiberglass. Another cut to follow the pattern of the inside wall until the cardboard was perfect. Then traced it onto the poly stock and cut some with a razor-knife and the sideways tin snips worked very well. Used razor blades, a grater block and files to clean up the edges, and voila! 😎 Afterwards, I traced the finished mud flap onto graph paper so I can share my template with our Oliver friends who would like to copy the design!
1 point
-
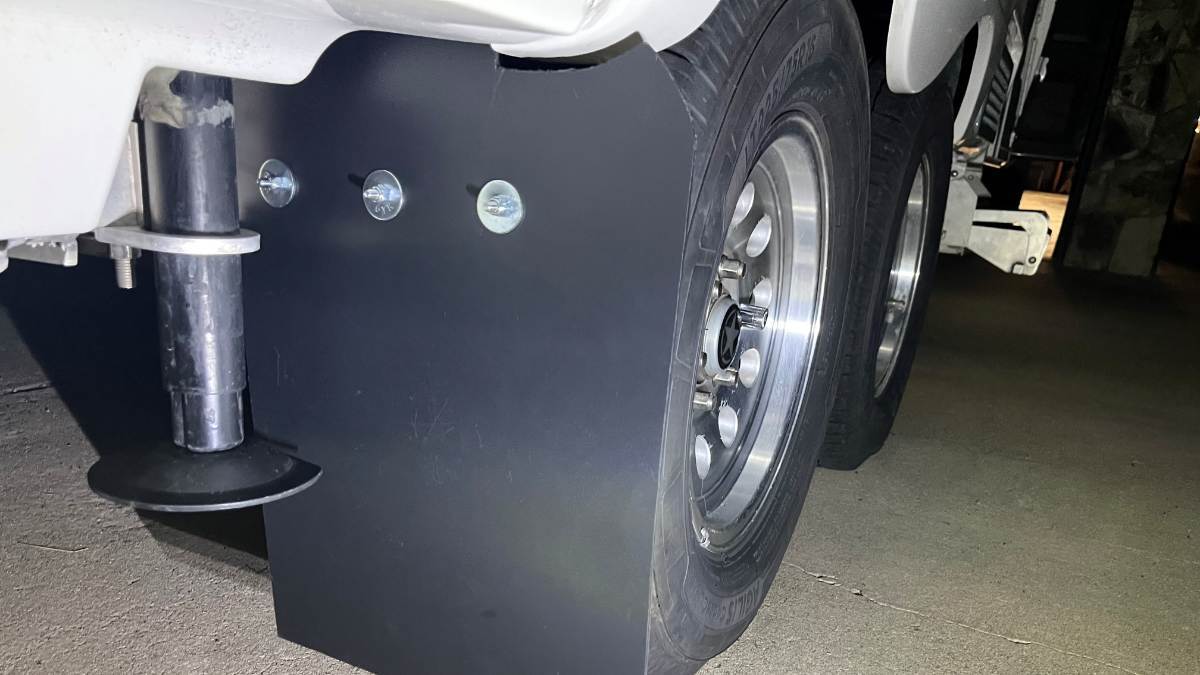
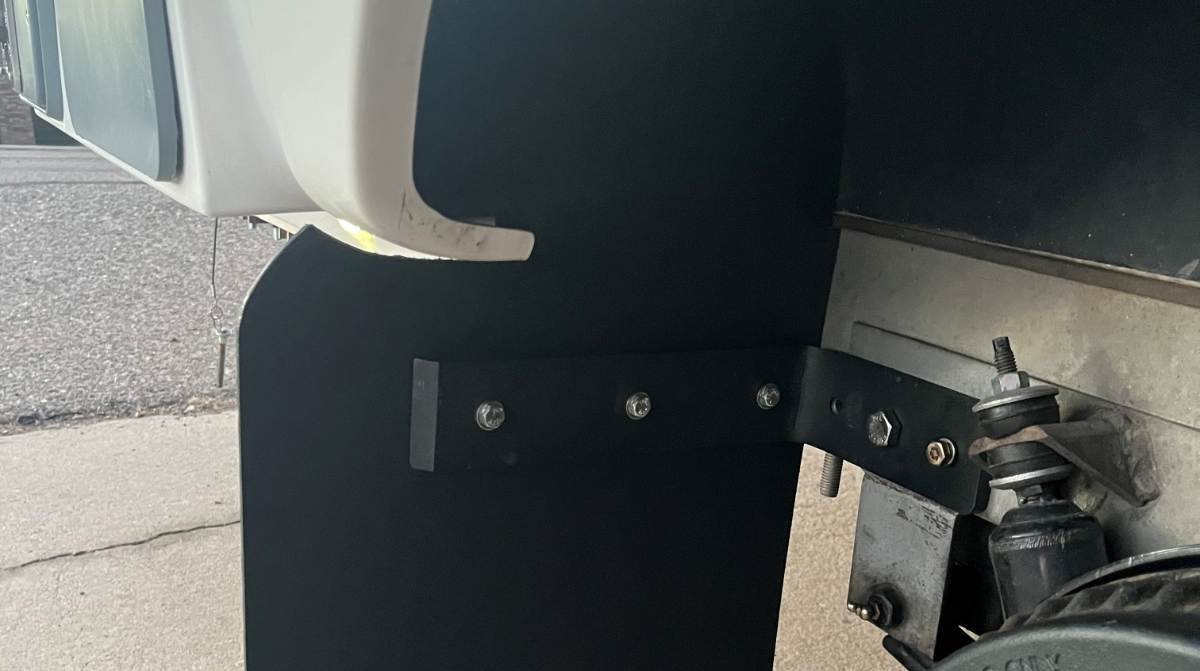
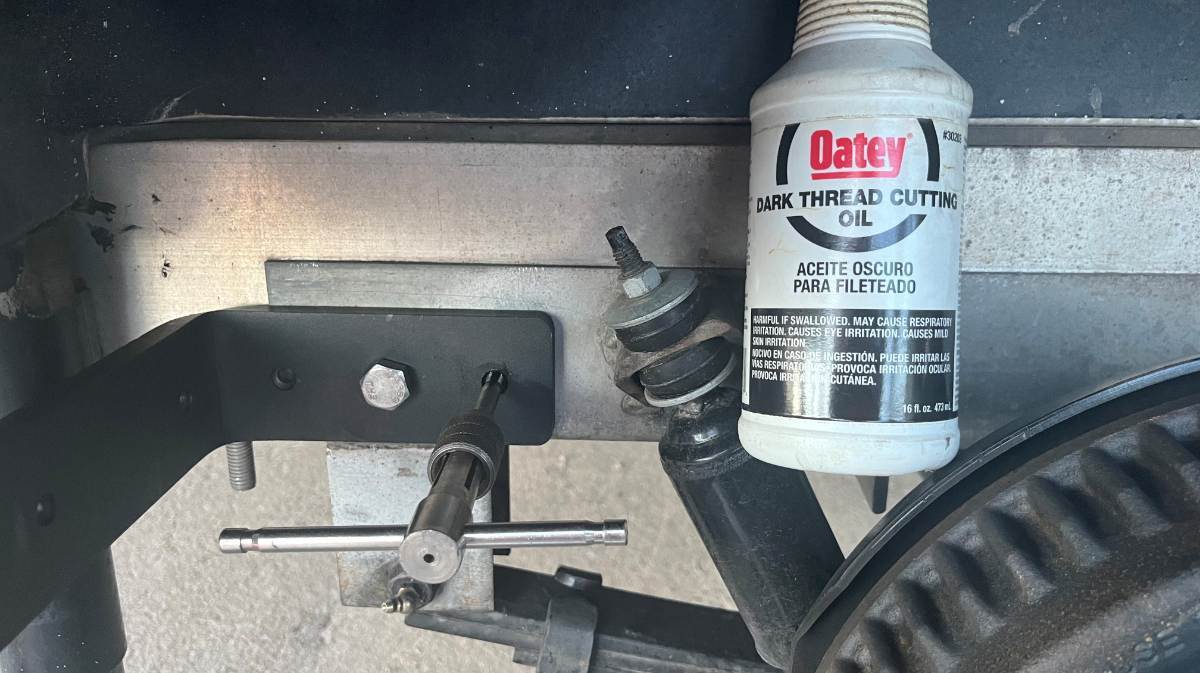
I understand most of you have good mud flaps on your TV, but on your Oliver? @John E Davies installed some on his Mouse back in 2018! Craig @Galway Girl did a similar installation more recently and maybe there are others. In the designs I've seen, the mud flaps were mounted behind stabilizer jacks where there is a frame cross-member, an easy place to bolt a horizontal mount. I was not happy with this design as it does not protect the full underbody behind the wheel, nor does it protect the stabilizer jacks from taking mud. My goal was to install a mud flap between the rear tire and the jack, but there’s only about 3-4" or space! I realized that with a fitting 90 bracket I could use a frame bolt for support. I removed the 3” carriage bolt that holds the rear of the steel suspension subassembly to the main aluminum frame. I purchased #5 ½” bolts, 3 ½” long to be a ½” longer allowing for the 0.4” depth the the HD counter bracket. After an hour and a half searching Amazon, I found these which turned out to be perfect! I got the 6x10” brackets, where the 10” length ends just inside the width of the wheels. https://www.amazon.com/dp/B095NRB6N4/?th=1 I used the stabilizer jack to get the rear axle up on a jack stand (placed under the plate centered between the leaf spring U-bolts). Then I removed the wheel and the base of the jack stand to allow for ample work space. Each side of the brackets has 3 predrilled bolt holes. On the 10” length, they’re perfect to mount the flap. On the 6” length, I got lucky! The center hole is just in the right spot to mount to the frame bolt. I drilled the center hole wider to ½” and bolted it in place tight enough to hold the angle. Then I used a digital caliper to get the bracket perfectly level to the frame. I used a 5/16” drill bit, the size of the existing holes, to scare a center, then switched to a ¼” drill bit which is the correct size for a 5/16”-18 tap. Drill through both the steel sub-assembly and the aluminum frame. I used a little cutting oil to make the drilling and tapping go easier. Then added Grade-8 5/16” bolts which I had on hand with blue thread-locker. The ½” bolt has a Nyloc nut. Torqued them down by feel with ratcheting wrenches and this HD bracket ain't going nowhere!
1 point

-
Recent Achievements
-


")


")


