-
Posts
413 -
Joined
-
Last visited
-
Days Won
17
Everything posted by mountainoliver
-
To remove the old fridge I removed the fridge door and the refrigeration unit from the back. As you get into it you’ll see what needs to be removed. Just keep the unit upright and be careful with the heat transfer putty and it can be reassembled with no issues. The NovaKool install, I removed the trailer screen door from the hinges and taped the lower hinge in the closed position. I also removed the NovaKool door and hinges and it went in sideways with 1/4 inch clearance. I also added a strip of painters tape on the entry door frame to prevent scratches. I would highly recommend that you make your own measurements before you even buy a new fridge as I think but don’t know for absolute certainty that Oliver has used slightly different door designs and maybe sizes as well. The NovaKool fit my trailer perfectly with two inch top and bottom openings. You’ll see the stages of the installation in the forums. I did however have to make two sets of upper and lower grills for the two openings. The first set I made at home out of aluminum but I didn’t like the difference in color between the aluminum grills and the stainless steel bezel around the fridge. I later had two more grills laser cut out of stainless steel.
-
I used the NovaKool R5810 AC/DC a couple of us have used these.
-
Toby, private message me. I have some further information that may be of interest
-
Toby, I’m sorry to hear about your issues with your Dometic fridge. My Oliver is hull #208 built in 2017 and I experienced the exact same issues. Oliver went above and beyond trying to help me fix my fridge with minimal to no luck in doing so. I contacted Dinosaur and at the time they had just built a Dometic control board which I tried with no success as well. Being now several years later, Dinosaur may have a working set of boards. I know that they have great replacement boards for furnaces and water heaters and other fridges so they may be a source. Talking with the folks at Dometic, they didn’t even know how to fix the issue. In fact, they didn’t even know the correct part numbers for the main board or the eyebrow board and the fact that often they would have their boards made in many different Chinese factories didn’t help matters. Supposedly the two boards had to match each other in software design and update as well which further complicated things. I ended up with a new fridge under warranty which also didn’t work. The absolute weirdest part is that the replacement Dometic fridge would not work in my trailer but once I removed it would operate perfectly in my shop! I used to have the six months old fridge and several extra boards but recently sold it all. Maybe someone with extra boards/parts will chime in and supply you with a set of boards that will work for you. In 2019 I installed a compressor fridge and have been absolutely happy with the result. Others have also done this upgrade as well and I think that Oliver is now using a compressor fridge in new builds. You can find our installation process on the forums with photos and detailed write ups.
-
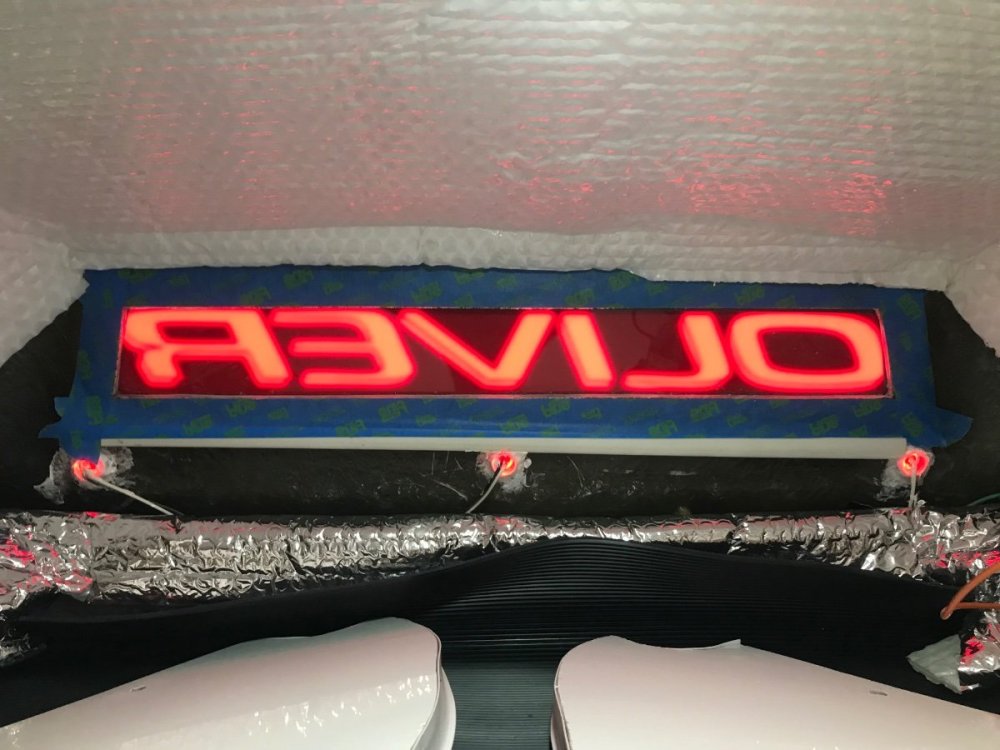
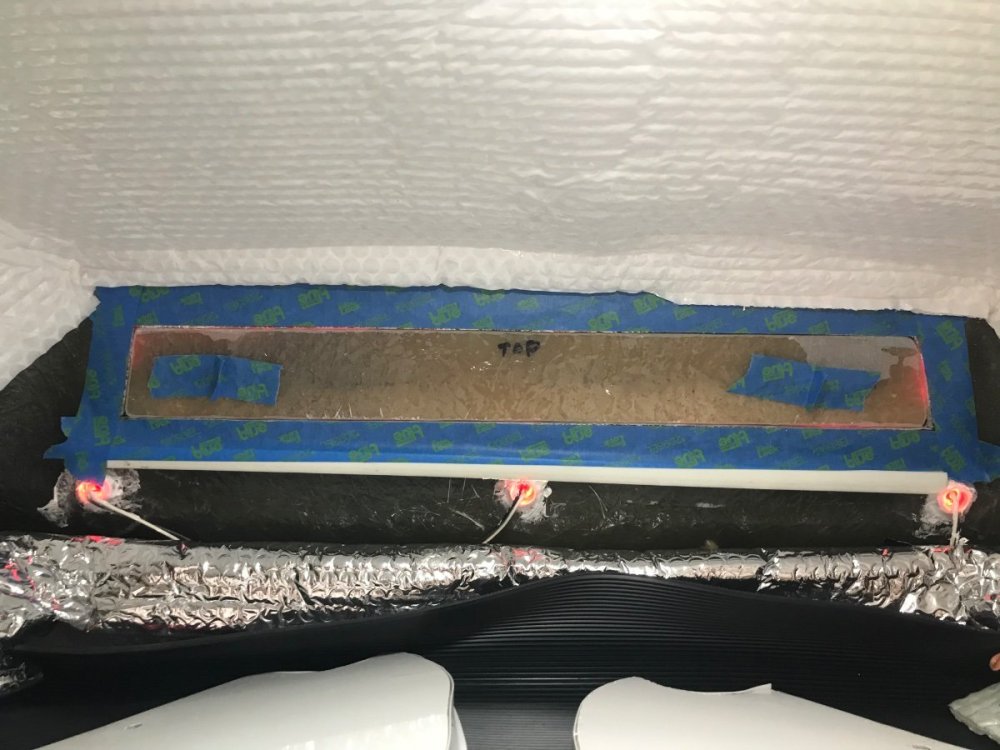
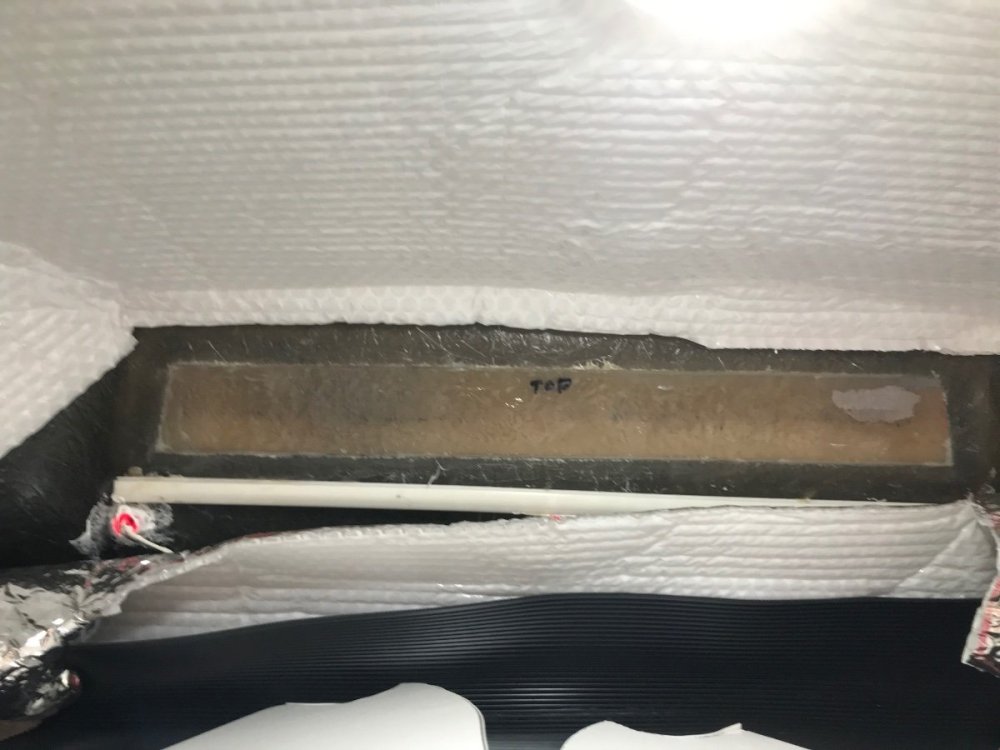
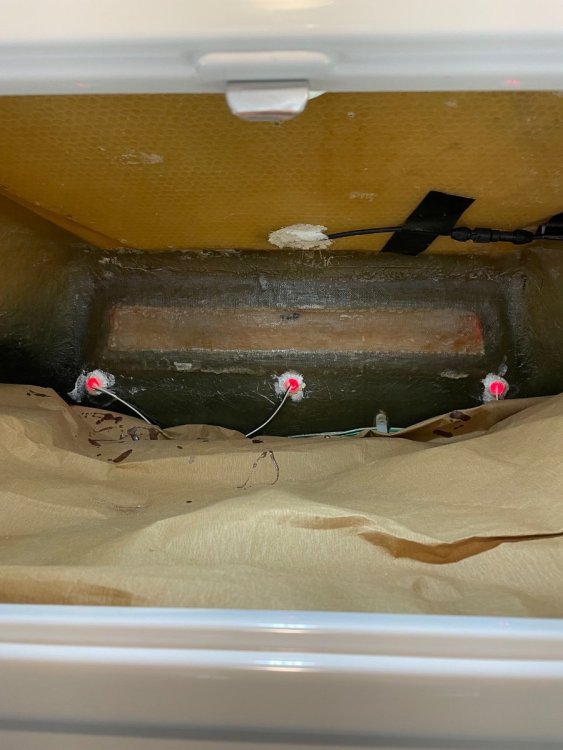
Nan, if you look at the upper rear of your camper from the outside, the marker lights are the five little round red lights. Three towards the middle are just under the Oliver sign. You can see them from inside the attic area in the last two of my photos. They each have two wires attached. The marker lights in the front upper and lower area are amber (yellowish/orange).
-
The rear LED marker lights are below the Oliver sign but still an excellent point to note that they should be checked as well. Several of my marker lights have leaked. Your post also reminded me that one of the first leaks that I experienced was from the backup camera cable entrance point. That dumped a lot of water into the attic area. Thanks for mentioning the marker lights!
-
You are absolutely correct, the Oliver sign is a PITN! When my trailer was new the sign leaked four times in the first three years. I took the light assembly out threw it away and patched the inside hole. When we picked up our trailer I asked for several pieces of scrap fiberglass. I got this scrap because I wanted some patch material for just in case and I wanted the gelcoat color to match. I cut out a plug from one of the fiberglass pieces and heavily epoxied the plug in the hole. I later fiberglassed over the patch as well. So for the past four years I haven’t worried about the sign leaking.
-
DEtails on a "new" 2016 Oliver Elite II
mountainoliver replied to topgun2's topic in General Discussion
Wow, thanks for reposting that video! It sure brings back memories. We had been “shopping” for campers off and on for years but a long story short, one evening I googled “large molded fiberglass camper” and this video popped up. I looked at it and called my wife in to look at the video and we both said this is the trailer, this is it! We called Oliver and set up an appointment to go see one and to come to the factory for a tour. The rest is history. One of the best decisions we’ve ever made. -

Simple AGM to Lithium Conversion question(s)
mountainoliver replied to Danno and Donna's topic in Mechanical & Technical Tips
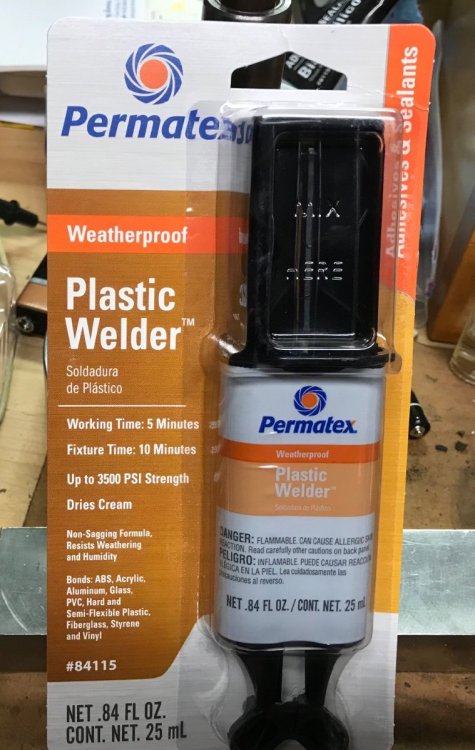
Yes, insulation is removed and I thoroughly wipe down the fiberglass to remove any old glue or release agent that may be on the fiberglass. I have typically used a Permatex brand epoxy material that has a very high solvent content so that it actually melts into both the fiberglass and the vinyl mounting material somewhat. Unfortunately in our little town I can no longer find this brand, so I’ve tried other brands with extremely dissatisfying results. The Permatex brand appears to make a very strong bond between the fiberglass and the vinyl board material. -

Simple AGM to Lithium Conversion question(s)
mountainoliver replied to Danno and Donna's topic in Mechanical & Technical Tips
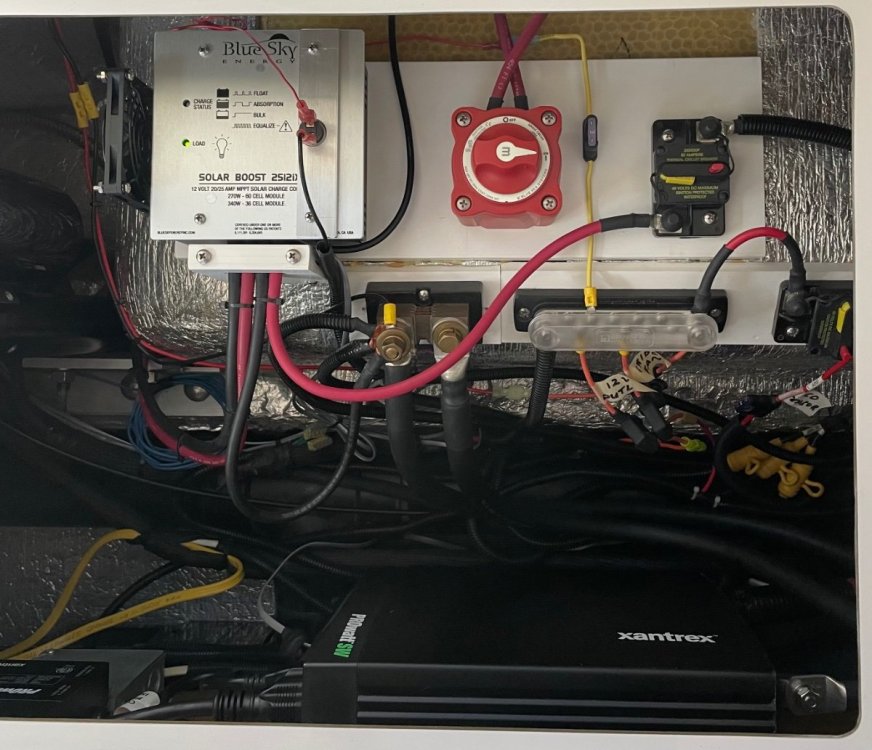
The material on top of the wheel well is fiberglass reinforced with the honeycomb material that Oliver typically uses. The honeycomb material is saturated with resin. The white plastic material is the typical Starboard marine material that Oliver uses everywhere for mounting purposes. The white material that I use is vinyl trim board material available at Lowe’s or Home Depot. I believe that Oliver, at least everything that I have seen, is glued (epoxied) in place. All of the mounting boards that I have installed are epoxied in place. I originally used plywood to mount the solar equipment to but later changed to the vinyl boards. I personally wouldn’t use plywood or other wood for mounting in the Oliver. Keep in mind that any condensation that forms in the walls (and it does in the winter) will run down into the basement area and eventually either will evaporate or run out of the scuppers underneath. You can see the honeycomb material in the upper part of the picture. My solar installation probably looks different than other 2017 or earlier models. During the 2017 model year Oliver was in the process of changing the solar equipment from Blue Sky to Zamp. I ordered my trailer without any solar equipment and added it later. Scubarx (Steve) spec’d out the previously used Blue Sky equipment which I ordered and we installed/wired it all in his driveway. I wanted the Blue Sky equipment because the controller is fully programmable whereas the Zamp controller is not, and the Blue Sky controller is MPPT vs RMS technology of the Zamp system. I then took the trailer to the Oliver factory and they installed the panels. I later remounted the controller, master switch, and circuit breaker on the vinyl board. The entire system has worked absolutely flawlessly for seven years. -

Simple AGM to Lithium Conversion question(s)
mountainoliver replied to Danno and Donna's topic in Mechanical & Technical Tips
If you checked continuity at the plug and that changed after you removed the wire shown in your picture, then you must have removed the correct wire. I believe that the automatic circuit breaker is shown on my Oliver supplied wiring diagram for 2017. My trailer is a 2017 model, hull 208. -

Simple AGM to Lithium Conversion question(s)
mountainoliver replied to Danno and Donna's topic in Mechanical & Technical Tips
The tow vehicle charge wire (the black wire) is attached to an automatic reset circuit breaker. This circuit breaker is located under the pantry side bed close to the battery box. At least that’s where it’s located on my 2017 hull 208. Just remove the black wire and insulate the ring terminal. I used heat shrink to insulate it. Double check that this is correct by checking for voltage at the trailer plug. Checking the correct terminal on the plug there should not be any voltage after you have disconnected the wire from the circuit breaker. Caution: do not remove the lavender or purple wire from the circuit breaker. That wire supplies voltage to the brakes through the emergency disconnect switch located at the tongue. Don’t be tempted to move the purple wire to the other terminal, you don’t want emergency brake power going through a circuit breaker! -

Simple AGM to Lithium Conversion question(s)
mountainoliver replied to Danno and Donna's topic in Mechanical & Technical Tips
The Battle Born batteries can also be purchased with an integrated heater. Not at all trying to sell Battle Born batteries but just as a point of reference. Of course all batteries with an integrated heater depend on the battery itself for the power necessary to run the heater. We were in the Texas blizzard three years ago (5 degrees overnight mid 20’s during the day with constant 10-15 mph winds) the battery compartment never got below 40. Of course if the camper is not occupied it will eventually get to ambient temperature. -

Winter Boondocking on BLM LTVAs near Quartzsite...
mountainoliver replied to MAX Burner's topic in Ollie Boondocking
This is the first time in seven years that we haven’t been to Quartzsite in the winter. Health issues this winter have prevented us from going. It’s fun reading about this year’s group in Quartzsite and the fun y’all are having! This reminds me of our first time there in our brand new Oliver (our first ever camper). Steve and Tali graciously invited us to follow them out there and back that first time. We had a blast on that trip meeting other Oliver owners. Steve and Tali have always reached out to others and made them immediately welcome to the Oliver family. We hope that all of the Oliver folks have a great time together! -

Simple AGM to Lithium Conversion question(s)
mountainoliver replied to Danno and Donna's topic in Mechanical & Technical Tips
Keep in mind that if one big battery fails you’ll be out of luck. If one or even two batteries in a three battery system fails, you can still camp with a single battery, something to consider. Also, I disconnected the charge line from my tow vehicle so have never charged the batteries while driving. Another thing I didn’t mention before is that lithium batteries like to be in a comfortable temperature range. The Battle Born batteries will work down to the low 30’s or upper 20’s degrees F and into something around 100 or so. Check out their specs. However at the extremes they will not charge. Again check out their specifications. I insulated the battery compartment door with 1/2 inch closed cell foam. Typically the battery compartment temperature is very close to the basement temperature. -

Simple AGM to Lithium Conversion question(s)
mountainoliver replied to Danno and Donna's topic in Mechanical & Technical Tips
My original battery setup was four 6 volt batteries. When I changed my batteries to 3 Battle Born 12 volt batteries several years ago, I basically connected the batteries in parallel in order to maintain 12 volts and provide 300 amps. I did have to make two new jumper cables between batteries using 4/0 welding cable. I also used the existing 4/0 Oliver installed cable that runs between the batteries and inside the camper. I also moved the #6 cables from the batteries to inside the camper to clean up the battery box, but this is not at all necessary for changing from lead acid batteries to lithium batteries. The only other change required (besides the previously mentioned Blue Sky setup) is to make sure the PD 4045 (shore power) charger is either switched to the lithium setting or as I had to do, replaced with a charger module that is lithium capable. My setup has been working flawlessly for about four years. I almost never turn on the PD4045 charger and depend on the solar setup to keep the batteries charged. We have a compressor type fridge which is used 24/7 and the batteries are able to keep up just fine. We are careful with power consumption but use what we need. Typically when boondocking we still make coffee every morning, cook breakfast in an electric frying pan, my wife dries her hair in the morning, we watch tv at night, occasionally use the microwave, charge cell phones and laptops occasionally, and in the winter the furnace is used. Again, we are careful with our power consumption so the above list of appliances used varies greatly based on current conditions and predicted conditions. Typically while traveling in the winter in the south west the batteries are fully charged by between noon and one o’clock. I carry a 100 watt folding solar panel and a small propane powered generator just in case and have used these once or twice due to extended overcast days. -

Simple AGM to Lithium Conversion question(s)
mountainoliver replied to Danno and Donna's topic in Mechanical & Technical Tips
These are the settings that Battle Born sent me to be used for the Blue Sky IPN Pro. The settings are based on my installation which consists of 3 batteries and are directly based on the Blue Sky setup procedure in the Blue Sky manual. Note the per battery settings. -
I agree with “dewdev” on the grill dampers. I removed the damper from behind the grill at the kitchen and the one from behind the grill in the bath. I typically have the one under the bed mostly closed allowing the heat to flow mostly towards the front of the camper so that the furnace return will draw the warm air back towards the rear. Seems that the rear stays pretty warm compared to the front so hopefully this helps balance out the heat distribution some. Remember that the outer hull is insulated so even if the basement is heated, the floor will be warm.
-

Winter Boondocking on BLM LTVAs near Quartzsite...
mountainoliver replied to MAX Burner's topic in Ollie Boondocking
I imagine that the “old adage “ still applies far from the ocean since it originated more or less in a desert region a long time ago. Matthew 16:2-3! -
I have similar wear on one of my trailer tires as well. Mine are the original Michelin tires and I have never rotated them with 56,000 miles on them. Like mine it’s interesting that only one is wearing on the inside. Check with a level (if the tire is worn inside all the way around) to see if that one tire is tilted in at the top compared to the others. Could be the axle got tweaked a little on that end sometime when the trailer was jacked up. If it’s just in a few spots could be as simple as balance. Maybe threw a weight off at some point. There isn’t any adjustments on the frame or axle for alignment like would be on a car front end. I think that if you hit a curb or something hard enough to bend an axle mount you’d know it. I agree, check the wheel bearings just to eliminate them as being an issue as well as the other measurements as a sanity check just to make sure nothing is loose or out of place. Let us know what you find out.
-
We sleep with our heads toward the kitchen. We always setup the trailer with the front a little higher than the rear and we like our heads a little higher than our feet. We also lean against the kitchen cabinets and pantry while watching television.
-

Book Storage bins beneath twin bed “Wing”
mountainoliver replied to Mountainman198's topic in Ollie Modifications
Steph and Dud B, I originally used a 4x4 vinyl fence post (may have been a vinyl cover for a 4x4 post). Just make one cut on opposite sides so that there is a short section and a long section on the opposite sides. That makes two shelves. Cut to length to suit and I used maybe four Command strips to attach it to the wall. Mine have been attached for about six years. Others have copied the idea and made a great improvement by using a vinyl cover for a 6x6 post. A much better choice as they can hold shoes better. Others have also added a small bar type of drawer pull at each end which keeps shoes from falling off the shelf. -
I experienced an issue with the factory installed surge protector that damaged my compressor fridge control board. A couple of years ago we were in a campground which was experiencing extreme voltage spikes. The voltage was spiking to nearly 200 volts then dropping back to a normal 120ish then several minutes later spiking back to near 200. We were not at the camper during much of this and as soon as I realized what was happening I disconnected from shore power and operated on 12 volts for the rest of our stay. The problem is that the surge protector interrupts the incoming power but then reconnects the power. This situation is both good and bad. It’s good because it automatically reconnects the power somewhat seamlessly. The bad is because it reconnects power somewhat seamlessly. By the power turning off and on fairly rapidly the compressor control board was rapidly and repeatedly switching between DC and AC supply. Be aware that some electrical or electronic equipment can be damaged by repeated on/off cycles. So, based on this one probably rare occurrence I might be inclined to search for an additional layer of protection. I am leaning towards a boost transformer based product like the 30 amp Hughes surge protector. The boost transformer will increase the voltage if it sags and will absorb the voltage if it increases too much along with the normal surge absorbing solid state devices. I’m still looking into this option as there may be other alternatives out there that are better. Anyway, just a thought. As a side note: I contacted the Progressive Industries folks with a question about the large difference between the amp reading on the remote readout and my clamp meter. They didn’t know the answer nor did they really care to try to figure it out but, they sent me both of the internal circuit boards and the sensor coil. Basically all of the internals of the surge protector free no questions asked. I did tell them that the unit is seven years old but that didn’t seem to matter. So even after seven years they still sent out free parts to rebuild the surge protector……not bad.
-

12v only vs 12/120 compressor fridge
mountainoliver replied to C&MCurrie's topic in Mechanical & Technical Tips
I installed a NovaKool fridge about five years ago and went with the 12/120 volt option. I figured that while boondocking and traveling I would use the 12 volt option and while connected to shore power I would use the 120 volt option. The fridge chooses either 12 volts or 120 volts automatically whichever one is available. The 12/120 fridge was over $200 more expensive than the 12 volt option. Some time ago we were at a campground that experienced several extreme power surges and even with the Oliver installed surge protector, the compressor control unit was still damaged. Fortunately I was able to use the 12 volt option until I could buy a replacement controller. About a week later we were on the coast and could easily get a new control unit (these fridges are used on many larger boats and probably can get a replacement controller at a semi truck repair shop) and it only took about a half hour to replace the controller. I still bought the 12/120 control unit but now typically only use the 12 volt option by turning the 120 volt breaker off in the trailer power distribution panel. I haven’t had any issues with using 12 volts only all of the time. Having said that, having the option of using either 12 volts or 120 volts gives you more flexibility. Especially if you have lithium batteries I think you would be fine either way. -

Oliver Dealership Network Expands
mountainoliver replied to ScubaRx's topic in General Announcements
Very exciting! All the best, Oliver!

