Galway Girl
-
Posts
750 -
Joined
-
Last visited
-
Days Won
24
Everything posted by Galway Girl
-
Thanks for the updates. We’re planning Nova Scotia and it wasn’t clear when those reservable sites will be online. Looks like checking back often will be required in Feb24.
-
Here’s our blog from a similar trip in 2023 (summer) We stayed at a mix of commercial and public camping sites on the trip. https://4-ever-hitched.com/alaska-2023 if you want to do direct message we can share a bit more detail. Enjoy the trip planning! Craig Hull 505
-
Frank, Sounds like you are about 2 years ahead of us. Thanks for your past posts Please consider posting some of your new adventures here! Good luck! Craig & Rose
-
2019-Elite-II-Augmented-Plumbing-Diagrams.pdf455.61 kB · 20 downloads Repost: I had been trying to figure out the same thing as both Cedar Forks and GeronimoJohn...so I combined together the works from GeronimoJohn and Cedar Forks along with the original 2019 Elite II Factory Plumbing Diagrams into a complete PDF.
-
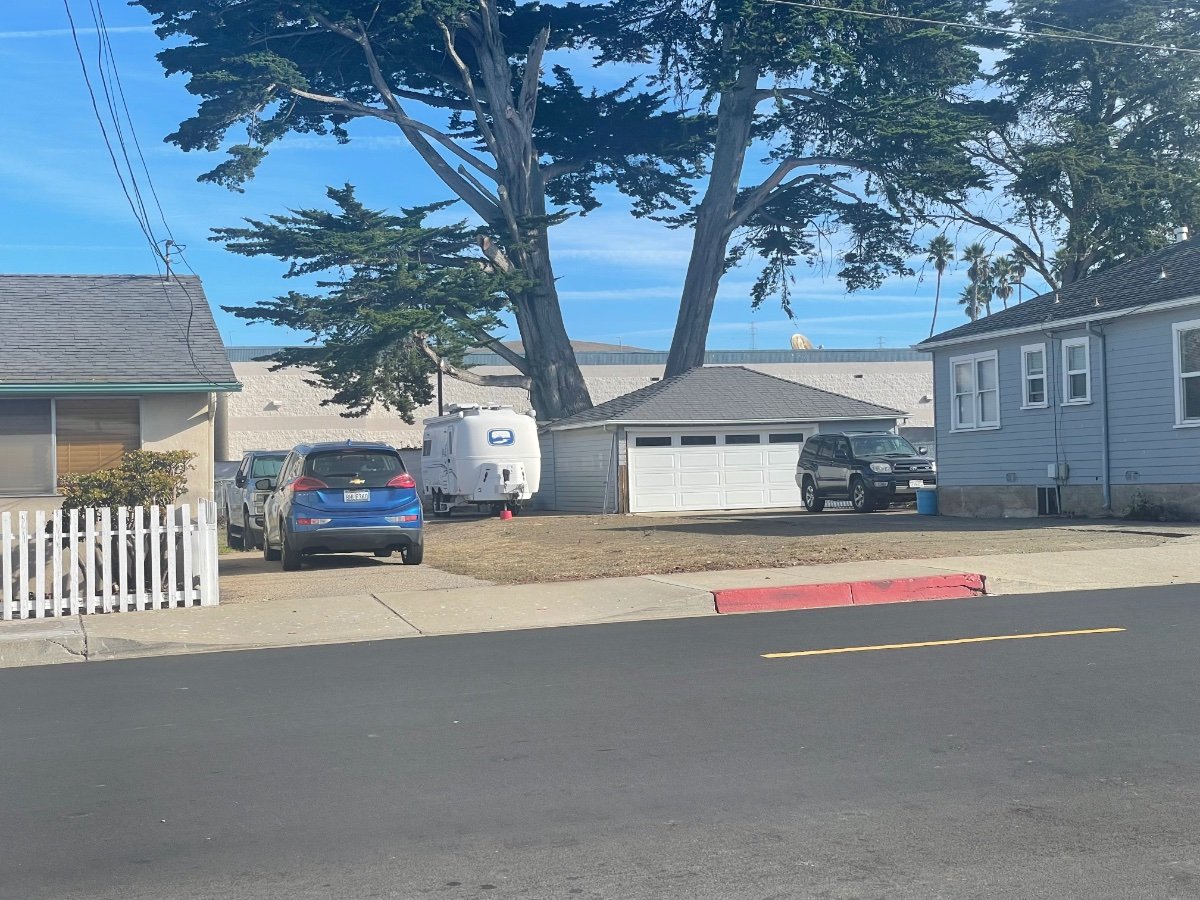
Z My daughter was waiting for a bus near a friend’s home in Morro Bay and saw this Oliie across from the stop. She should now buy a lottery ticket!

- 1 reply
-
- 9
-

-

-
 See 8:32 mark for mention of change to distribution
 -
While you are In Wilcox Also try Bodega Pierce Winery & Tasting Room
-
Since our trailer is Hull 505 Galway Girl we love Irish Coffee made with a melitta #4 pour over system.
-
The extra items like bulldog coupler upgrade are considered a service dept upgrade and on a separate price list.
-
Custer state park SD is a beautiful park with several campgrounds and on the highway loop to Mt Rushmore. see pix of it in our blog here: https://4-ever-hitched.com/epic-adventure-2021
-
Newbies taking the plunge - Are we missing anything
Galway Girl replied to Dennis and Melissa's topic in General Discussion
The larger batteries 2 instead of 3) are also within a UL Approved aluminum case. -
We’ve been traveling for 2 years now and this is the first time for us…a full size , 2 axle tiny home. Not sure how it fit through the entry gate at the start of the loop. (Height restriction) We’re at Lake Pleasant Regional County Park (Nw of Pheonix) A bigger truck pulled through the campground and dropped off a tiny home…then left. The owners showed up soon after in a car and are setting up. Quite a nice view for them out back.
-
Add a Device to the Rear Camera Switch
Galway Girl replied to GeoffChapman's topic in Ollie Modifications
I added the TST transmitter to the power head of the front jack. I leave mine on all the time as the draw is very low. ( Others may choose to add a switch to the back side of the case. For the + power to the transmitter it’s easy to tap a fuse line into the black + wire between the raise/lower toggle switch and light switch. Negative connects to any of the the metal case hex head screws. We use a cover on the jack head so I don’t worry about water incursion. Just for good measure I sealed the wire going through the case with 3m 4200 black sealant.
-
Most boat parts/supply shops carry the material. You can also find it on Amazon. Marine Board HDPE (High Density Polyethylene) Marine Board is known under many different monikers, such as Marine Grade HDPE, Sea Board, Star Board, Marine Plywood, and Marine Lumber. Despite having numerous names, all forms of Marine Board are made of specially treated high density polyethylene, or HDPE.
-
I’m turning in a service ticket on this issue of short cycling and extreme temps in belly.
-
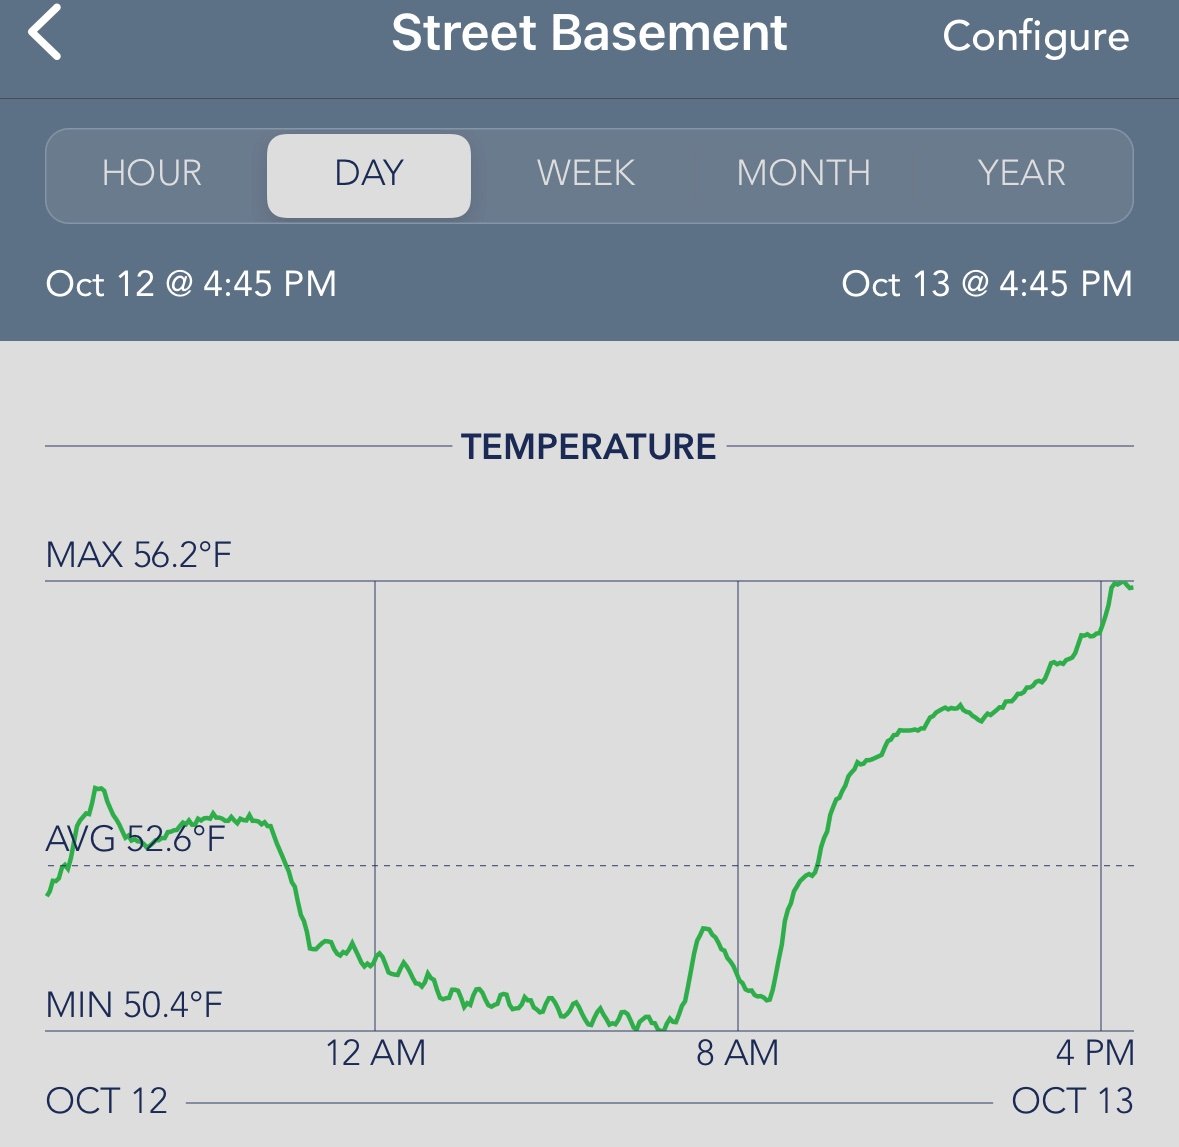
The data shown is from our twin bed model.
-
Old thread but new data for chewing on: I installed a sensor hanging next to the water pump under the curb side bed and one at the furnace thermostat. The data below is taken across a full day while outside night temps are in the low 30f range and we set the furnace to heat living space to 62F at night. I set a threshold at 100F for the water pump belly sensor and you see the time between 12am and 8am that belly temps hit > 100F as the heater cycles on and off while maintaining 58-62f in the cabin. (Thermostat sensor). I’m curious if this is normal for that the space under the bed is 40F hotter than the main cabin? Craig
-
N Rim CG closing water and seasons operation on Sunday. In 30’s at night and 55 today. 75% of food and ice cream! Store is almost bare.
-
I carry a spare pump as they do sometimes fail. I have it stored in a case and setup so it can be used to fill fresh water through the fill port. (An alternative to using the house pump.) Project here: https://4-ever-hitched.com/ggs-blog/f/transfer-pump-project Craig - Hull 505
-
Welcome to the forum. My wife and I retired a couple years back and bought an Oliver. We created a blog to help our family see various campgrounds, trip logs and provide tips for them and other Oliver owners. Here’s the link to Galway Girls (Hull 505) Blog: https://4-ever-hitched.com At the top and bottom of the blog are links an Amazon "Oliver Outfitters Guide". That guide is a list that’s been made for great Oliver gear along with comments from Oliver owners that describe how it fits or works in and Oliver. Oliver Outfitters Guide on Amazon Craig & Rose Hull 505 - Galway Girl
-
Our original hoses from Oliver cracked after a year , and we bought much better quality thicker walled Rhino flex replacement hoses. Listed them in the Oliver Outfitters Guide on Amazon https://4-ever-hitched.com
-
Here you go…a 2023 trip to Alaska. https://4-ever-hitched.com/alaska-2023 If you have specific questions, we will reply. Sent from the North Rim of the Grand Canyon.
-
Is the external Zamp solar plug controlled by a controller?
Galway Girl replied to johnwen's topic in General Discussion
Zamp connector compatible solar panel suitcase build here: https://4-ever-hitched.com/ggs-blog/f/here-comes-the-sun -
Fuses can partially blow under load and then not be fully open. Between fuse and ground should be ~12v. Try replacing the pump fuse in your panel with a fresh one as a first step.
-
Dometic Toilet -broken flush mechanism
Galway Girl replied to Galway Girl's topic in General Discussion
I assume the shaft snapped due to our letting the pedal snap back every so often. I’m no longer doing that with the new one. The slow close lid can be ordered separately on Amazon or from various trailer parts stores. The 310 series of toilets includes the model 311 which was what we replaced. The Oliver Outfitters Guide has both the lid and the whole toilet listed now. Oliver Outfitters Guide