John E Davies
-
Posts
5,759 -
Joined
-
Last visited
-
Days Won
243
Everything posted by John E Davies
-

HOW TO: Lithium Battery Powered Vent System
John E Davies replied to John E Davies's topic in Ollie Modifications
RB, I am done, pretty much. I have been delaying posting some more threads because I do not want to look too eager 😬, plus it is very time consuming. If there is a particular subject you would like to see, let me know. I subdivided them - battery installation and straps, cable installation, Victron solar controller installation, etc. They are too complicated to do in one thread. John Davies Spokane WA -
HOW TO: Lithium Battery Powered Vent System
John E Davies replied to John E Davies's topic in Ollie Modifications
NCeagle, I think your design would work fine, though I would personally be really really reluctant to rely solely on a powered fan. I think it is important to have at least a little natural convective flow - warm air rises out the top, cooler air flows in down low. The space above the battery box is pretty much a dead end cave, while there may be a trickle of air going up between the hull walls, there is no place for escape for it up high, unless you drilled vents in the overhead cabinets. So you need those openings into the cabin where the pantry box joins the battery box. You don’t necessarily need forced air. John Davies Spokane WA -
“Witnesses said the truck appeared to lose control before the crash, first swerving to hit the right shoulder barrier before sliding over the left-side guardrail. The truck then tipped over the bridge, with the camper blocking both lanes of the bridge.” https://www.foxnews.com/us/rescuers-pickup-deep-idaho-gorge I would like to hear the details about what happened before they jack knifed.... John Davies Spokane WA

-
Dissimilar metal question
John E Davies replied to Jim and Chris Neuman's topic in General Discussion
One more comment, if you do bolt on an aluminum part to the Ollie steel subframe, use a good bedding/ barrier sealer. While it may not be 100% necessary, it could help a lot. John Davies Spokane WA
-
Dissimilar metal question
John E Davies replied to Jim and Chris Neuman's topic in General Discussion
Where would aluminum 6061T6 fall on that chart? I think this could be a real problem if you tow in winter over salt or mag chloride treated roads. Oliver uses plenty of 304 stainless fasteners like self tapping screws all over the frame and I have never seen any issues. I also haven’t seen any degradation of the anodes. OTH I neither tow on wet roads (except when it is unavoidable) nor in winter. I think it would be a good topic for long term monitoring from those owners who use their rigs year round, for skiing especially. But IMHO those units will be suffering from far more extensive damage to the frame, running gear and exterior steel fittings than a little localized dissimilar metal corrosion. I have only seen underneath one such (admittedly neglected) Ollie, and frankly it was a disgusting mess. I don’t think the factory would offer a five year frame warranty if they felt it was not durable, but maybe they would consider prolonged caustic chemical exposure to be abuse... John Davies Spokane WA -
Another reason to move your wires outside the axle tubes..... Common Reason for Shorting Trailer Brakes - Electric Trailer Brakes - Check Your Axle Wires John Davies Spokane WA
-
Timbren Independent Rubber Suspension
John E Davies replied to John E Davies's topic in Ollie Modifications
Updating an older thread - here is a great install video from etrailer.com. Install Timbren Axle-less Trailer Suspension The more I read and watch, the more I think that this would be a great low maintenance option for an Ollie, for lumpy forest and ranch roads. The thing that worries me most is that I haven’t read any reviews for tandem trailers. How does this system perform, are there any sway concerns, or tire overloading issues? A standard tandem spring setup equalizes the tire loads, this would not. I think this would be a great winter project, along with electric over hydraulic disk brakes, but I still am not ready to assume all the R&D risks. That is something for the Hohenwald team to do..... please! John Davies Spokane WA -
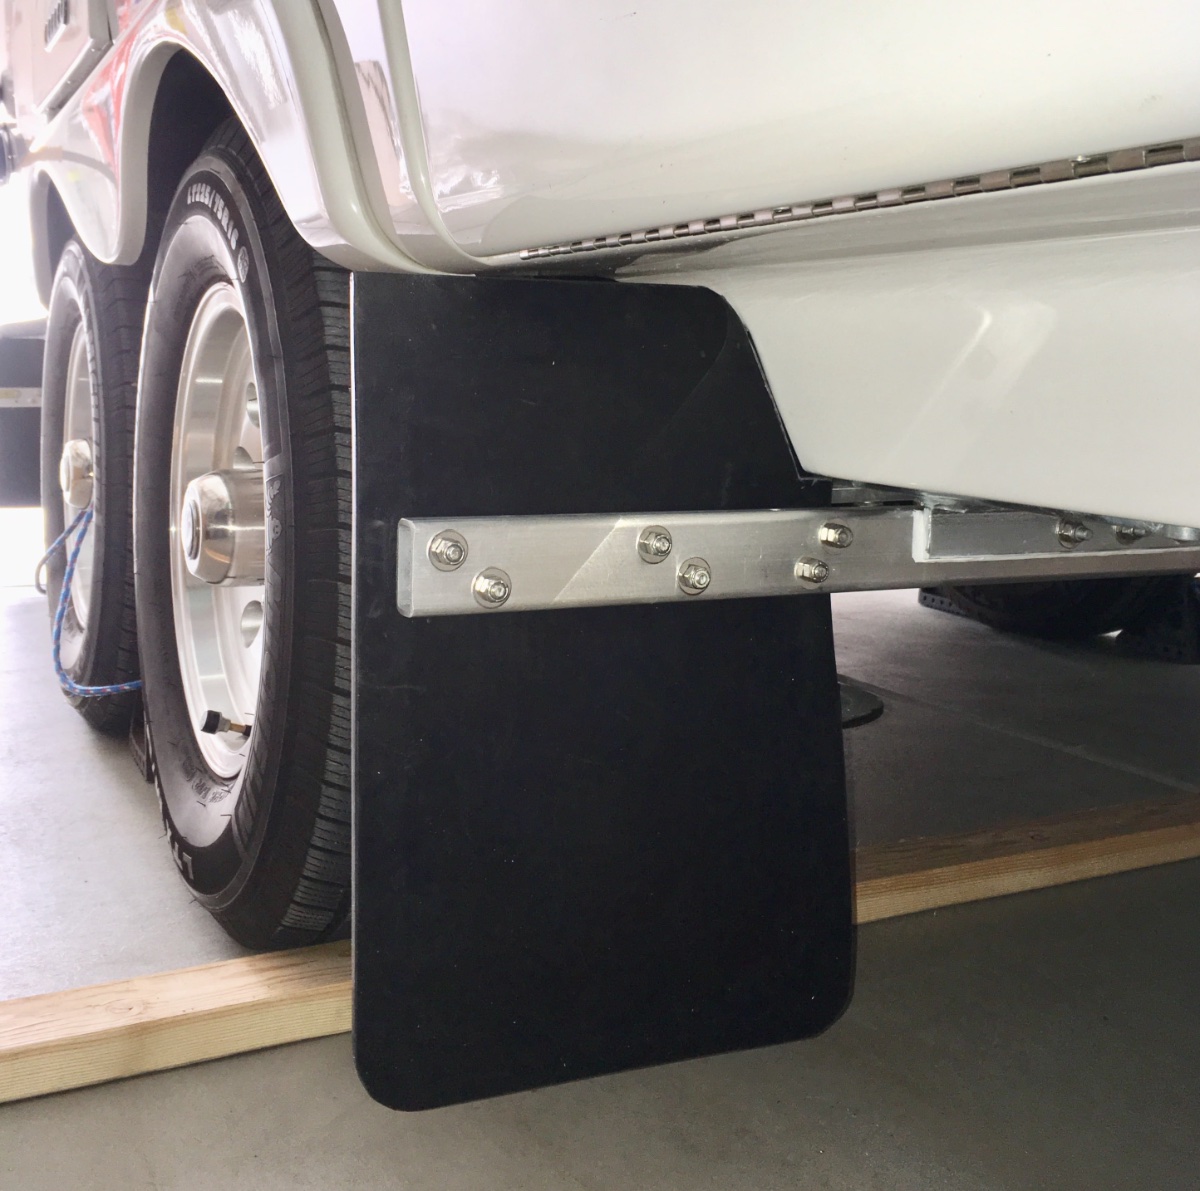
That does seem low, it is worse than my LE2. I wonder if simply installing longer custom shackles would help the LE? (They would make it worse on an LE2.) I just do not understand why these are made with so little clearance there.... whacking an unseen pothole at speed will really wake you up inside the truck, it makes a horrible bang. John Davies Spokane WA
-
Jim, I installed a master battery shutoff switch, it is not factory issue. I thought about a simple plug in power supply like that one you provided a link for, but that particular one is crazy overpirced. It is worth about $10. Thanks, John Davies Spokane WA
-
LOL, “infamous” thank you very much, now I feel like a bank robber. That is the rear circuit breaker panel installed in the street side of the rear overhead compartment AKA “the attic”. If you don’t have that particular unit (it is extremely high quality and about $220) then there is probably something very similar. Take a look and let us know, maybe post a pic..... John Davies Spokane WA
-
Rising fuel prices and your next trip
John E Davies replied to BackofBeyond's topic in General Discussion
Cool, I have not seen those. I don’t think the price is at all out of line, mainly because an owner could install one in his driveway with just a hand drill and some basic tools. Plus move it to a new truck later, without any hassles except for the holes in the old bed floor. If I had a Ford SD 3500 7.3 gas engine I would get one, but not for a 2500 or 1500..... but you would need to travel with a doberman in the bed to prevent theft. And I am not sure how well that would play with a canopy, it would need active vents. John Davies Spokane WS -
Rising fuel prices and your next trip
John E Davies replied to BackofBeyond's topic in General Discussion
Have you actually seen bed tanks that are rated for gasoline? I never have, and even the under bed models are few and far between for gas trucks, due to our harsh emissions laws. There are three auxiliary tanks for my Land Cruiser 200 - a 12 gal over the spare, and a 24 gal and 40 gal which replace the spare tire. All of those are Australian imports, and they start at $2000 plus a full days labor. The bigger tanks require a new rear bumper to carry the spare tire, plus suspension and tire upgrade to carry the extra weight. As much as I would love to increase my capacity by 163%, I won’t be buying one any time soon. I have been down that “Overland vehicle prep” rabbit hole before. It is a great way to lose a whole lot of money, at resale, or if the vehicle gets totaled and the insurance company baulks at paying for all the extra accessories, even if you declared them. https://longrangeamerica.com/prod/tlc200ra-40g/ This is why I carry 10 gallons of gas on the back of the Ollie...... Only once have I come reeeeealy close to running dry - “Cruising Range 2 Miles” - and it was comforting to know I could syphon a can into the truck to get me to a station. John Davies Spokane WA
-
You need another tow vehicle, yours is unsuitable for even the small Elite (5000 pounds). It would pull even the biggest Casita (2500 pounds), but the serious reliability and servicing issues (while traveling) would remain a constant hassle. It’s just too small and too weak for an Ollie. John Davies Spokane WA
-
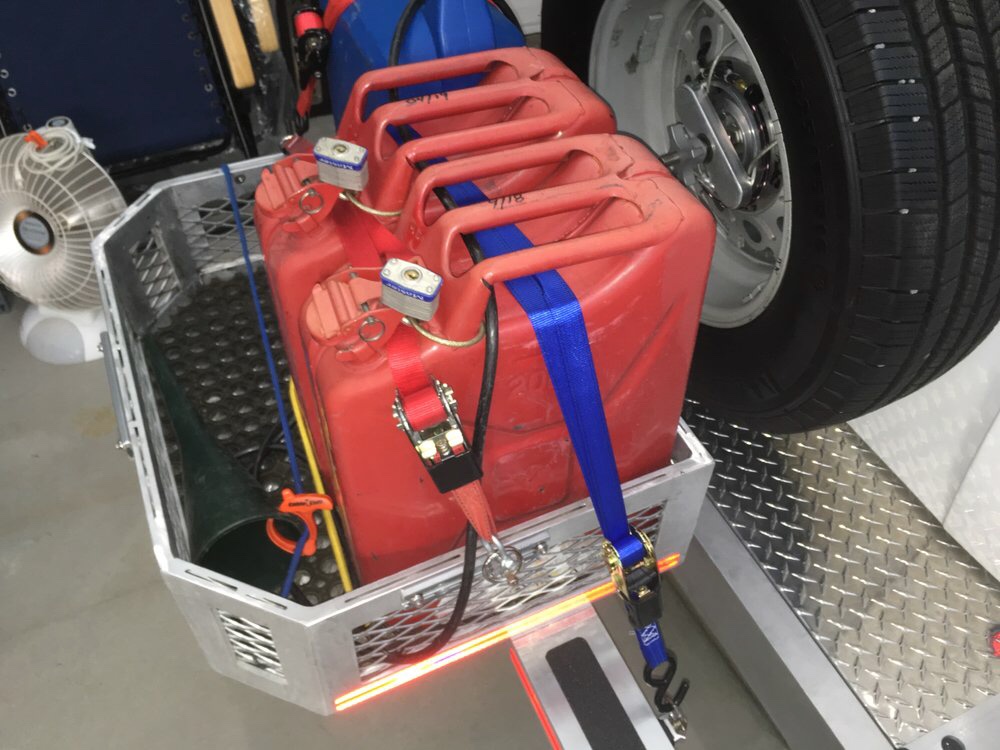
I have two thoughts..... and you will be upset. Every time you want to adjust the pressure, you will have to empty out the gear in front of that access opening. I carry my generator on that side, secured with a cable lock to the seat bracket. With my extended lines, I let them lie on top of it, along with the pump and gauges. (I don’t even have to drop the lower gate to get to them.) So your valve location is going to be either a very minor hassle or else a really big inconvenience, depending on what you normally have stored there. Next, and this is important, the bags ride inside the coil springs, unlike with a leaf spring setup, so Firestone recommends keeping air in them at all times to prevent damage from pinching. It is an unfortunate risk with this design. If one of my lines leaks and I do not catch it right away, I may have one wrecked bag to replace. But I would notice the truck leaning to that side, so hopefully I could repair the leak ASAP before any damage occurs. With both lines teed together, both bags will deflate and you will have no visual way of knowing it. Then you will have to fix two trashed bags, because you will have driven on them too long. You might not even know they have failed until your next trip, when you try to increase the pressure. The first problem might make you mutter bad words every single time you have to struggle to get access. The second problem will really make you swear, if you experience a leak and have to have them both changed. My recommendation is to take it back, and get it corrected. At the very least have an extension added at the current valve location, but ideally it would have two hoses from two bags with no added joints anywhere. If he does add splices they MUST be located where they are easy to access and to troubleshoot (spray with soapy water to look for leaks). For a pickup truck, a single valve located in the rear bumper would be just OK, but not if there was a heavy camper installed, because you could not level it side to side.... IMHO a good tech should have known that this would be a bad installation for an SUV with coil springs, but at the very least he should have asked you. So he failed twice. Darn it.... I am really sorry that I did not make these comments earlier.😢 John Davies Spokane WA
-
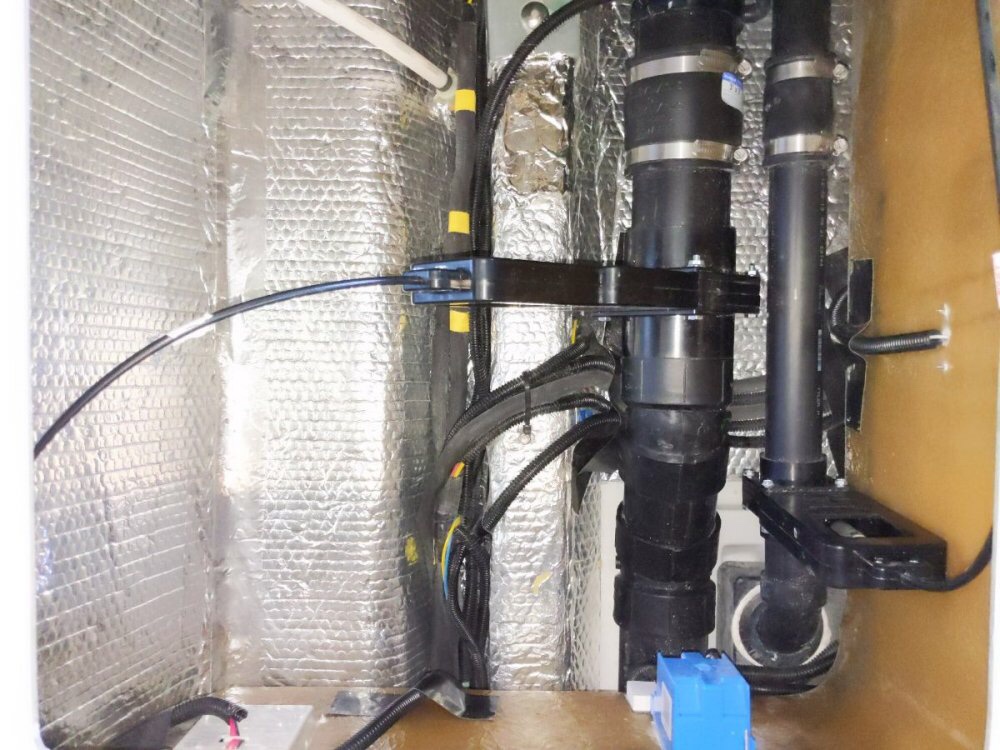
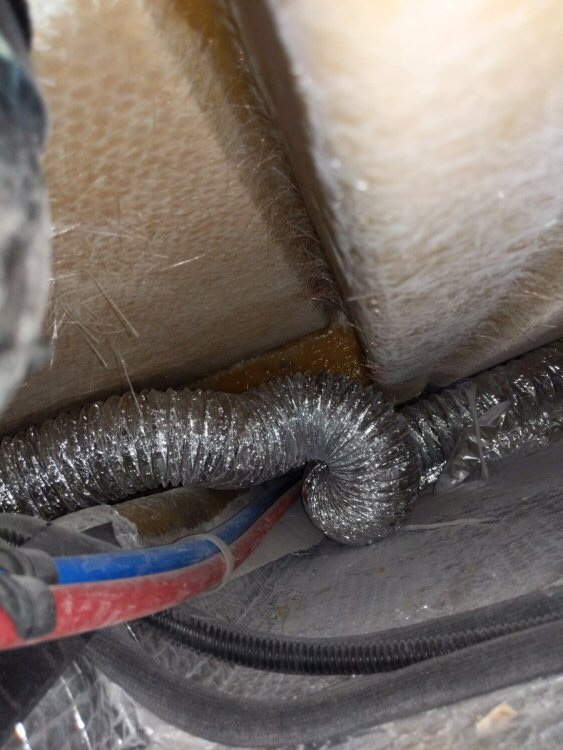
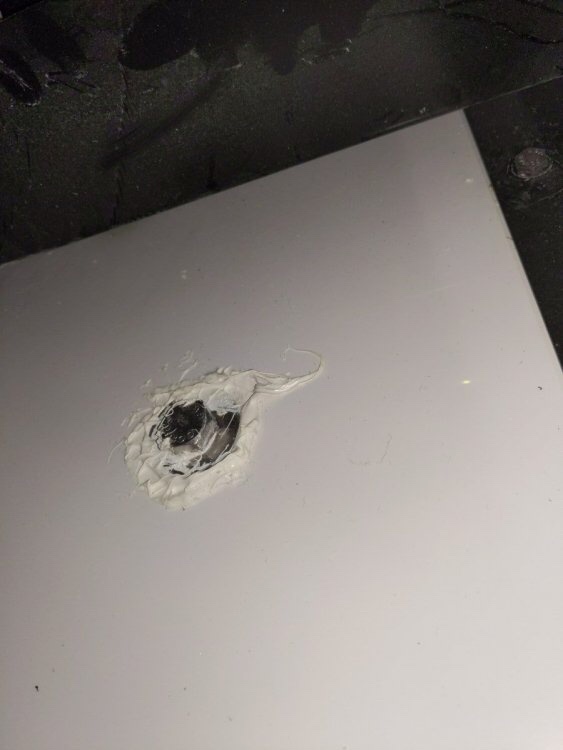
Thanks for posting, some of the locations are a complete mystery to me. It is helpful to add an “annotation” text description in those cases. This is disheartening, I would have expected better than this Rat’s Nest. That looks just how mine did in 2017.... including way too long cables. And this? Does installing the black dump valve angled across the middle of the ONLY decent storage area in the front of the trailer make any sense at all? This is what mine looks like, the valve is hard up against the rear wall. And mine came with smily faces everywhere (inspection marks)... If I had a new trailer with that black valve location and a Natures Head, removing the thing would be my very first mod. Kinked duct means a cold bathroom: And WTH? This is just sad - the sealant should go on the bolt shank and underneath the washer, not globbed on top after installation. Oh well, if wishes were fishes we would all cast nets. At least there are still things to complain about, if these trailers were perfect, what would we talk about except tow vehicles, grills and campsites?😬 John Davies Spokane WA
-
Looking for source for short 30A power cord
John E Davies replied to hobo's topic in General Discussion
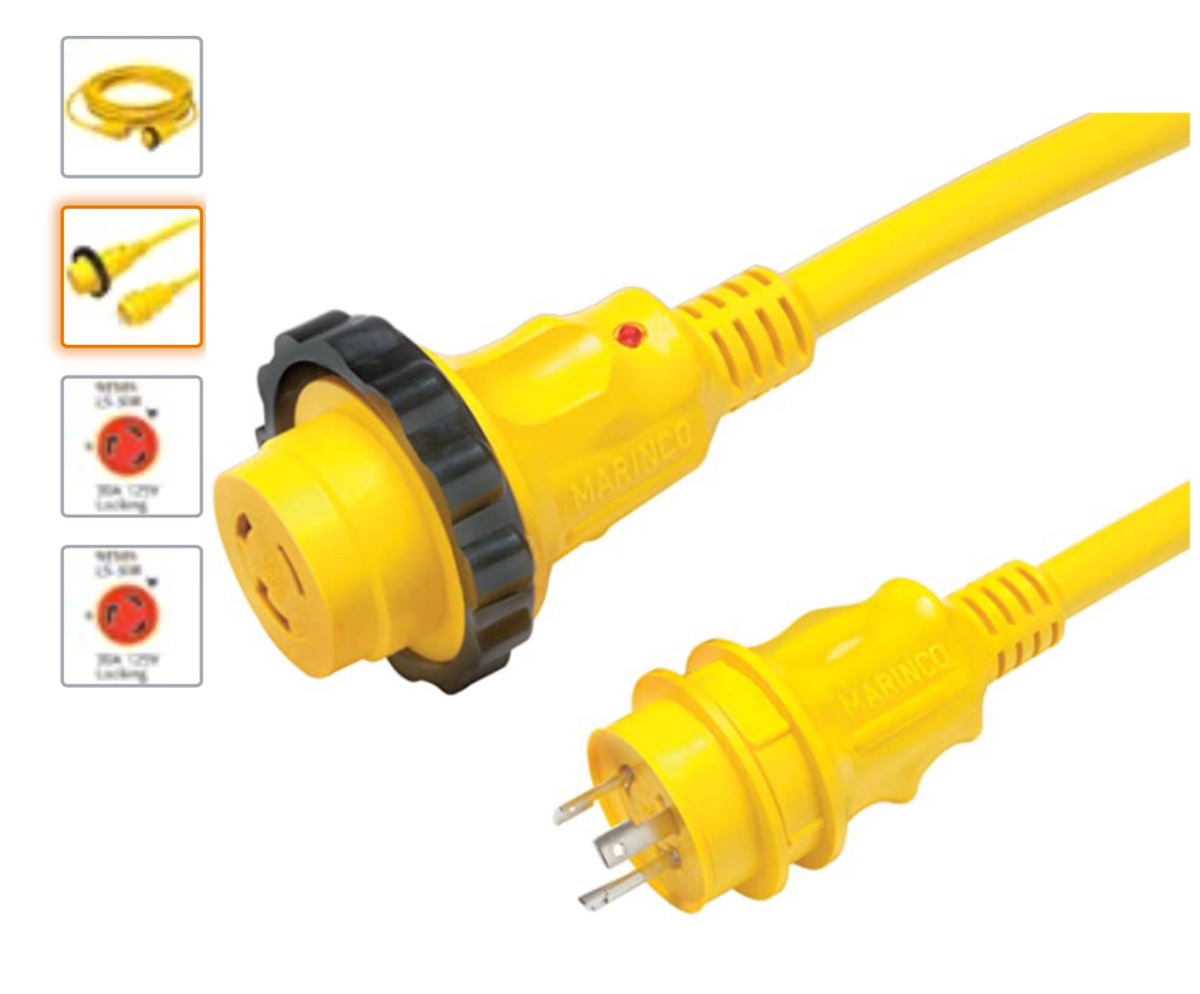
The problem with a regular RV male plug is that it doesn’t have a lock ring, so all the stress is on those weak, soft plastic and brass inside parts. So traveling with one of those connected is not at all good for it, nor is it good for the generator connection! I found a good marine cord, 12 feet long. I doubt that anybody makes one shorter with the correct marine plug. Marinco 30A 12 feet John Davies Spokane WA
-
Looking for source for short 30A power cord
John E Davies replied to hobo's topic in General Discussion
It would work, but I think it would be not be prudent for many safety reasons. Plus portable generators are not designed to be running while in motion. You could possibly damage the engine, but some folks do get away with it. https://campergrid.com/running-rv-generator-while-driving/ In your shoes, I would try to stop nearby before arrival, and run the generator and AC while stationary, then shut it down and proceed. There is no reason you couldn’t do it during the day at rest stops too. That will give you a head start on getting rid of the thermal load. Traveling with a couple of windows cracked open helps, but not if it is dusty! I won’t tow at highway speed with any roof vents open. John Davies Spokane WA -
Welcome, I agree about TN parks, they are nice, but it is too bad about your retirement... you could have moved here and fixed ours. 😬 John Davies Spokane WA
-
New related threads started here: https://olivertraveltrailers.com/forums/topic/5270-how-to-redarc-dc-to-dc-11-amp-output-trailer-charger-installation/ and here: https://olivertraveltrailers.com/forums/topic/5301-how-to-lithium-battery-powered-vent-system/ Thanks, John Davies Spokane WA
-
HOW TO: Lithium Battery Powered Vent System
John E Davies replied to John E Davies's topic in Ollie Modifications
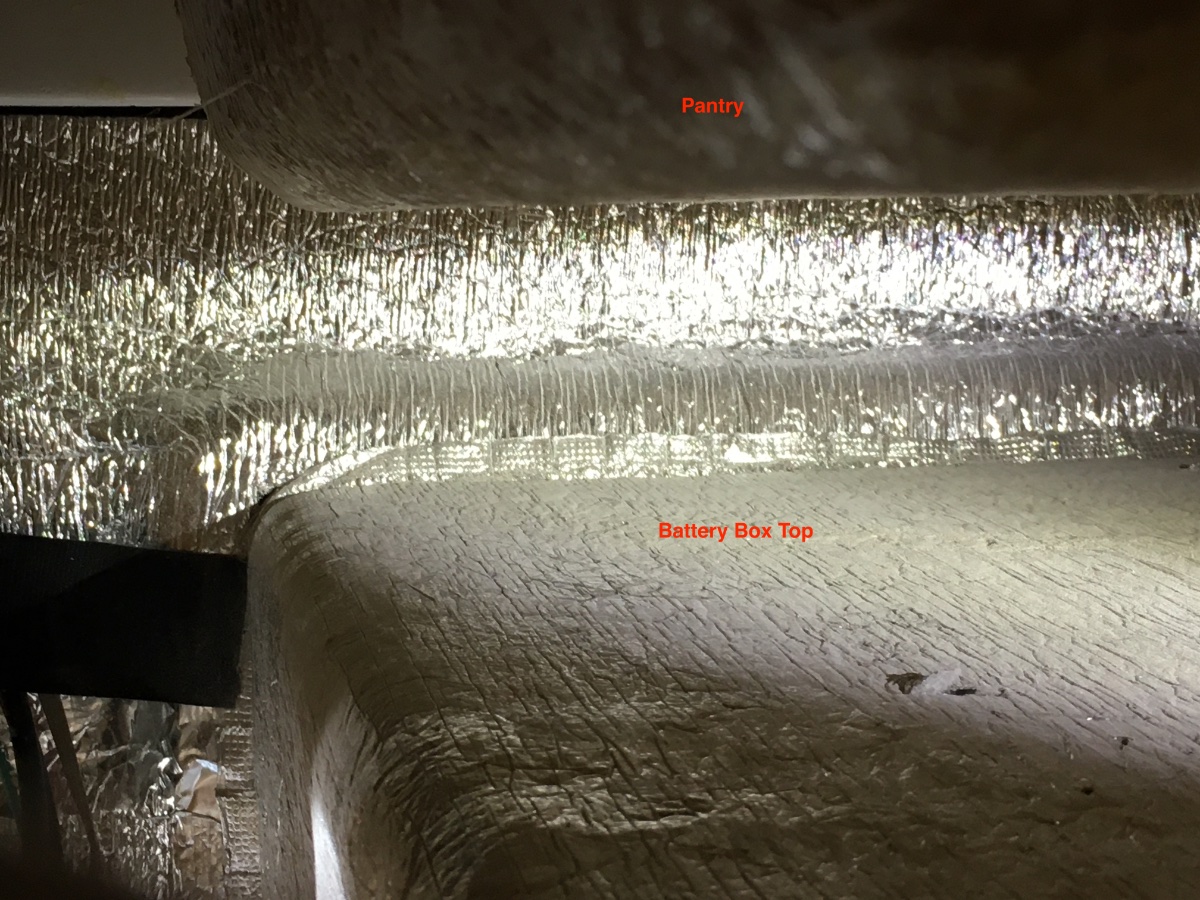
John, thanks for the kind words, the pink stuff just looks dorky and crude, I suppose it could be covered completely in heavy aluminum tape. but it would be tricky and time consuming to completely cover all the openings and cutouts. Plus it is soft, and susceptible to dents. I don’t know of an affordable material that would function better. Of course, I will probably be the only person to see it, and the next owner can take it out if it is too pink.... It should work very well at blocking heat transfer from direct sunlight. It will be interesting to see what kind of temps are shown on my monitor, and what effect the fan will have when turned on in inclement weather. John Davies Spokane WA -
HOW TO: Lithium Battery Powered Vent System
John E Davies replied to John E Davies's topic in Ollie Modifications
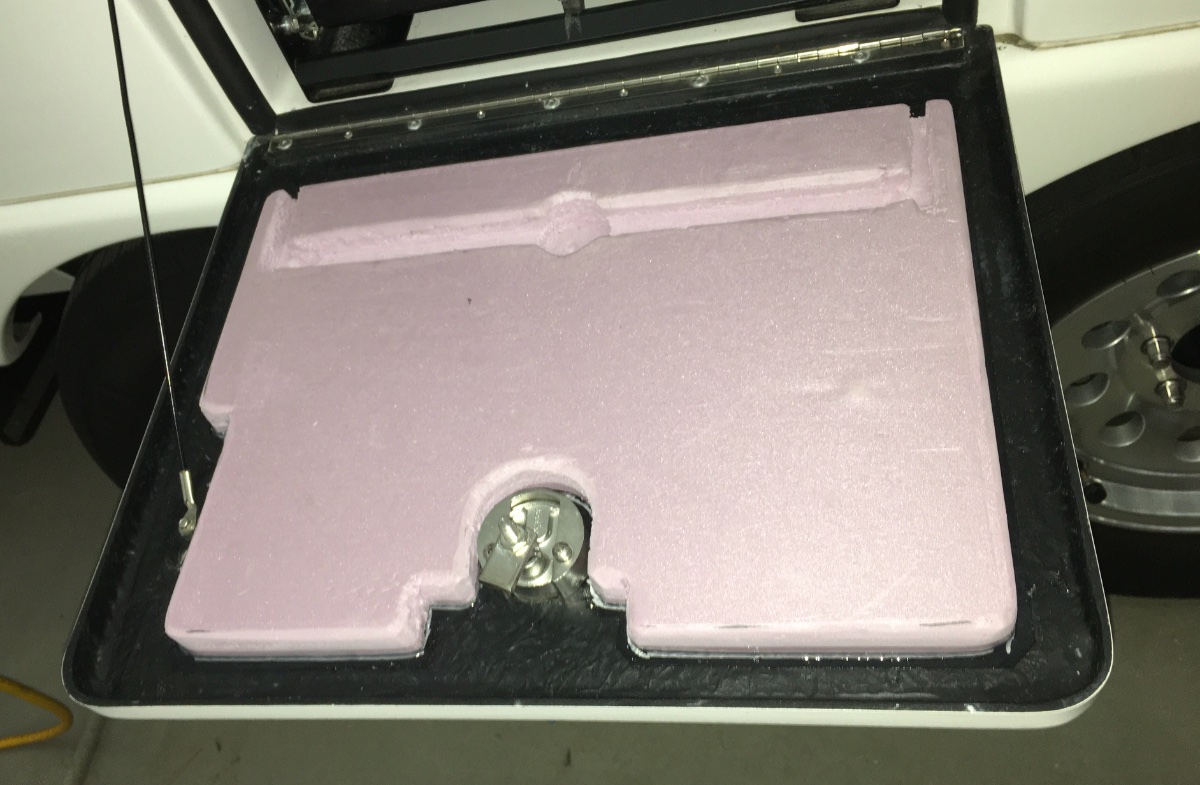
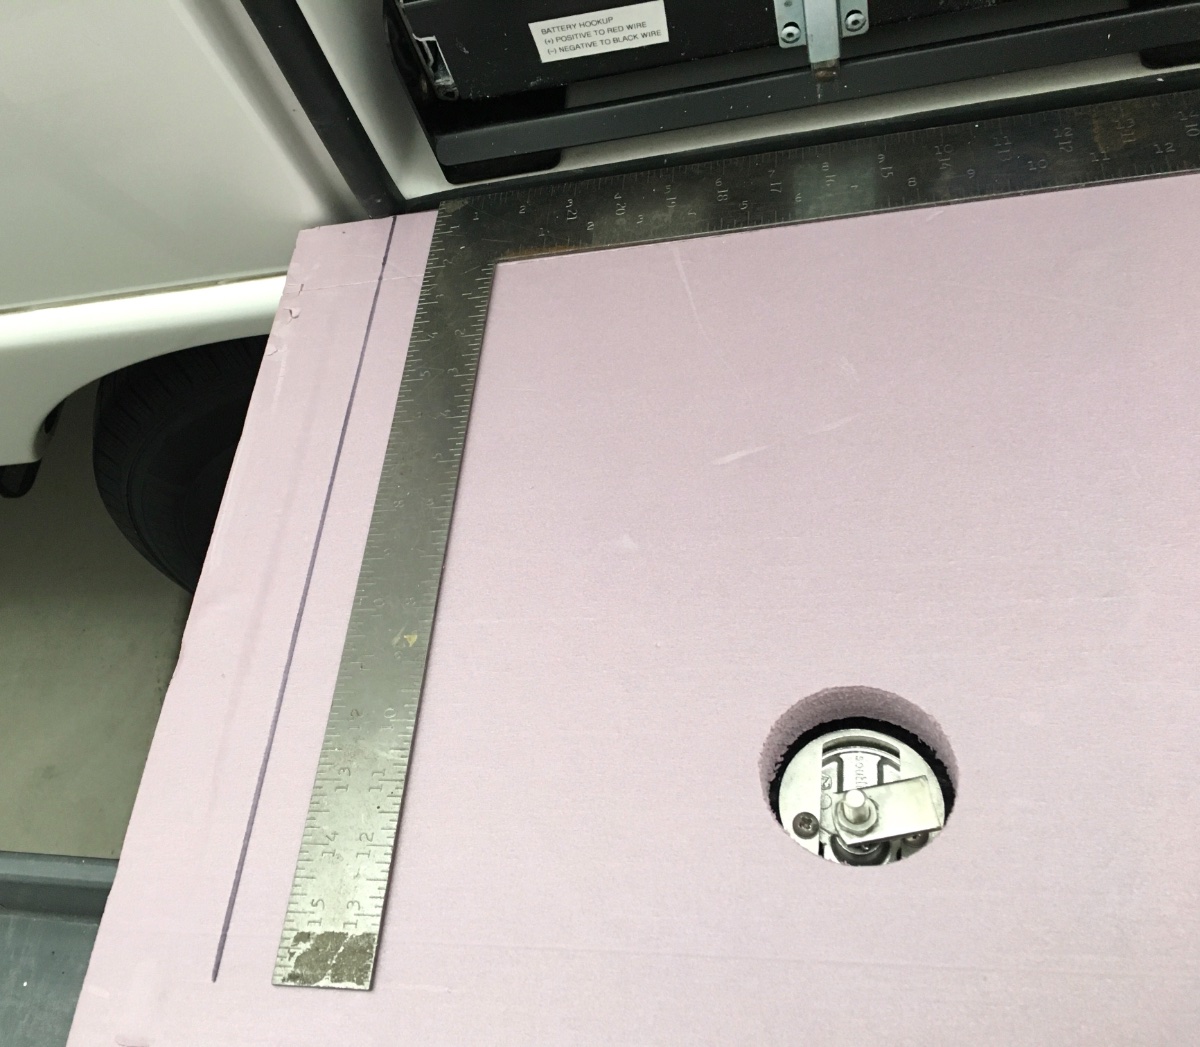
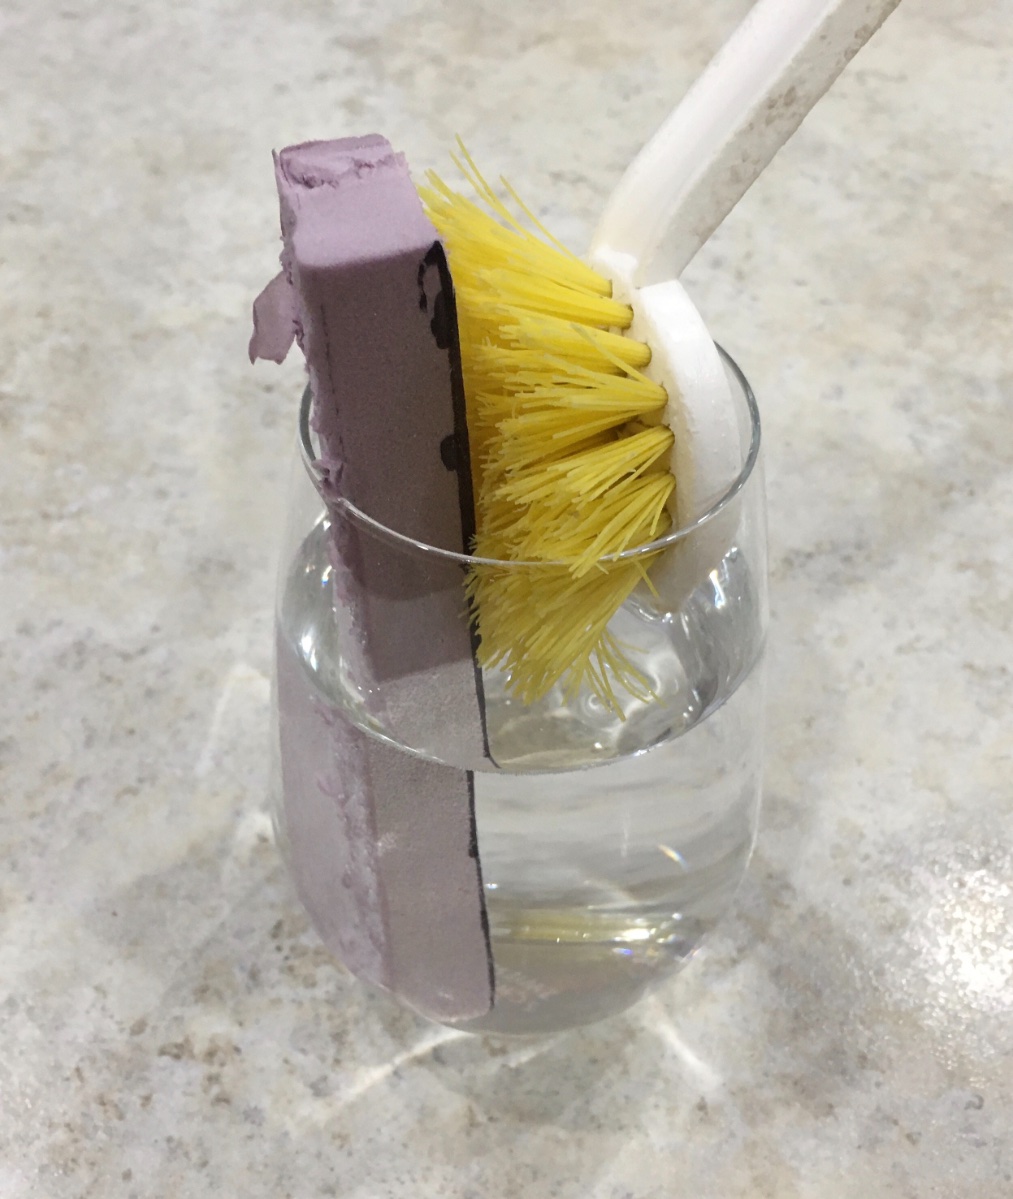
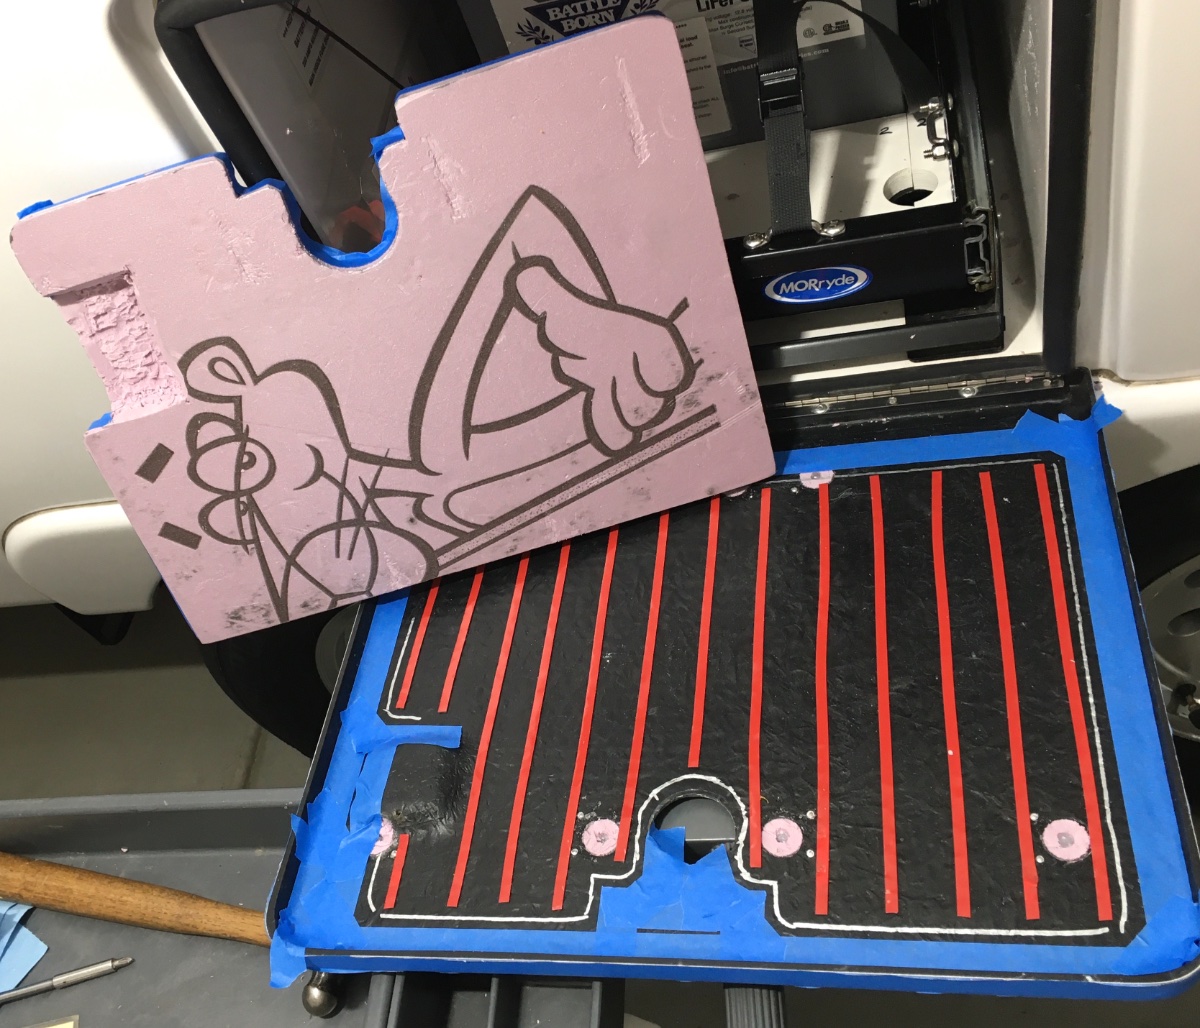
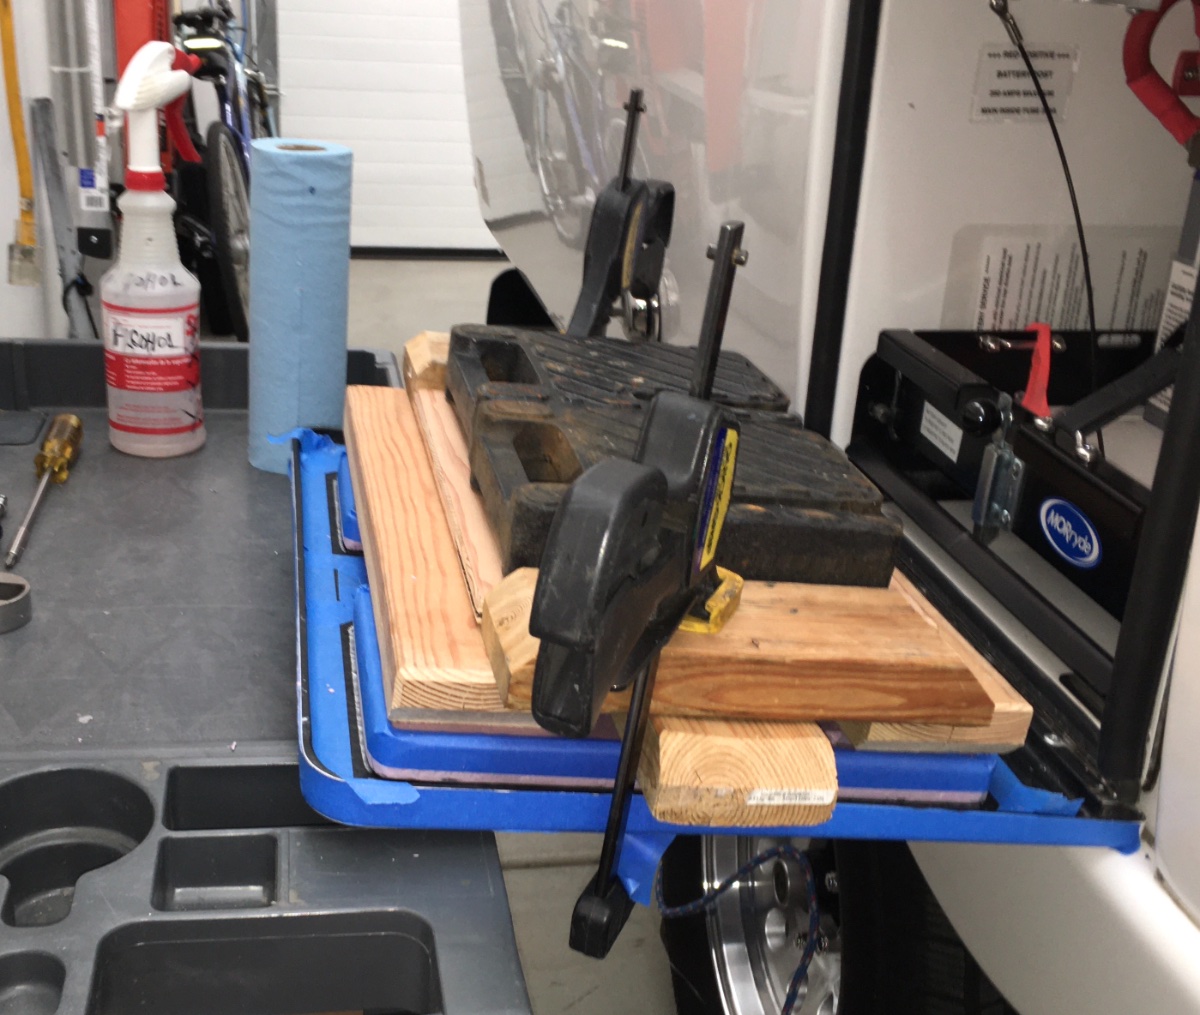
Battery door - plug holes and add insulation. This did not work out well, I am not very satisfied with the results, but I will post pics anyway. Maybe somebody can suggest a better solution. 1/2" foam board would be much easier to fit, but the insulation value is not so good. The material is Dow Corning rigid foam board, 1 inch thick, which weighs essentially zero pounds. This stuff is incredibly light. $20 for a 4' x 8 ' sheet at Home Depot. It is fire retardant, which is important. For comparison, this is R-5 (insulating value) whereas a typical foil/ air bubble sheet, which is used extensively in an Ollie, is R-1. https://www.homedepot.com/p/Owens-Corning-FOAMULAR-150-1-in-x-4-ft-x-8-ft-R-5-Scored-Square-Edge-Rigid-Foam-Board-Insulation-Sheathing-20WE/207179253 It can be cut easily with a VERY sharp razor knife, and rough edges can be rapidly sanded smooth and contoured with a bench top belt sander and coarse 80 gr belt. WEAR A MASK. BTW it is indeed completely waterproof, I soaked a piece for 12 hours to make sure. I had to wedge it in place, it pops out like a cork otherwise: Cut four hole plugs to seal off the existing openings. (My door has 8 holes, yours may vary.) Cut them in half: Glue them into the holes with clear RTV sealant, some will squirt out through the front Perko vents. Remove that excess with alcohol and paper towels: Wait at least a full day and then trim off the excess foam and sealant flush with a razor blade: SUPPORT the door with something, a 30 inch high rolling work table fit perfectly, and it gave me a nice place to put tools and materials... Remove the support cable. Cut the foam. This is pure trial and error, because it has to fit past the rubber seals, and also have extra material removed to clear the battery tray and knob, and the support cable, and the lumps and bumps on the door itself. Take your time, trim a little, test the fit, trim some more. It should fit as closely as possible, for maximum insulation value, yet allow the door to close easily without stressing it. I used a router bit in a drill press to carefully carve out areas that needed clearance. Be sure to allow some room for rivet tails! When you are satisfied with the fit, clean and smooth the parts and use 3 M VHB tape to secure it to the door. I used 1/4" wide tape placed vertically, so any water leaking past the rubber seal will drain straight down. Add some weight and go take a long break: Remove any weights or clamps. Seal the edges with clear RTV sealant. Use tape as shown to leave clean lines. Reattach the support cable. BTW when trimmed as shown in the top pic, the airflow from the fan underneath the tray is not blocked. EDIT: Leave several small gaps in the sealant at the inside (bottom edge when closed) so moisture can drain out. John Davies Spokane WA
-
HOW TO: Lithium Battery Powered Vent System
John E Davies replied to John E Davies's topic in Ollie Modifications
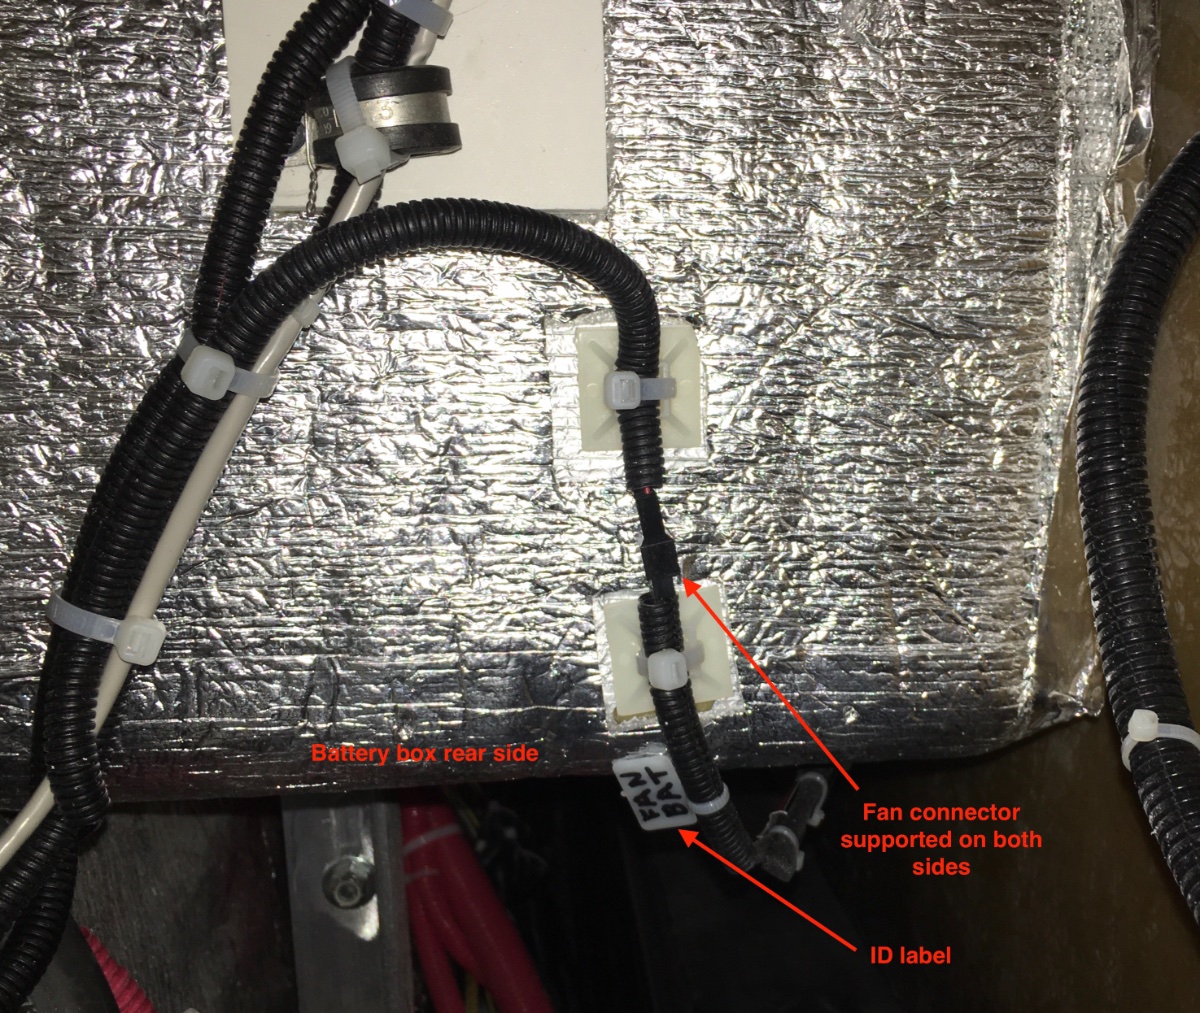
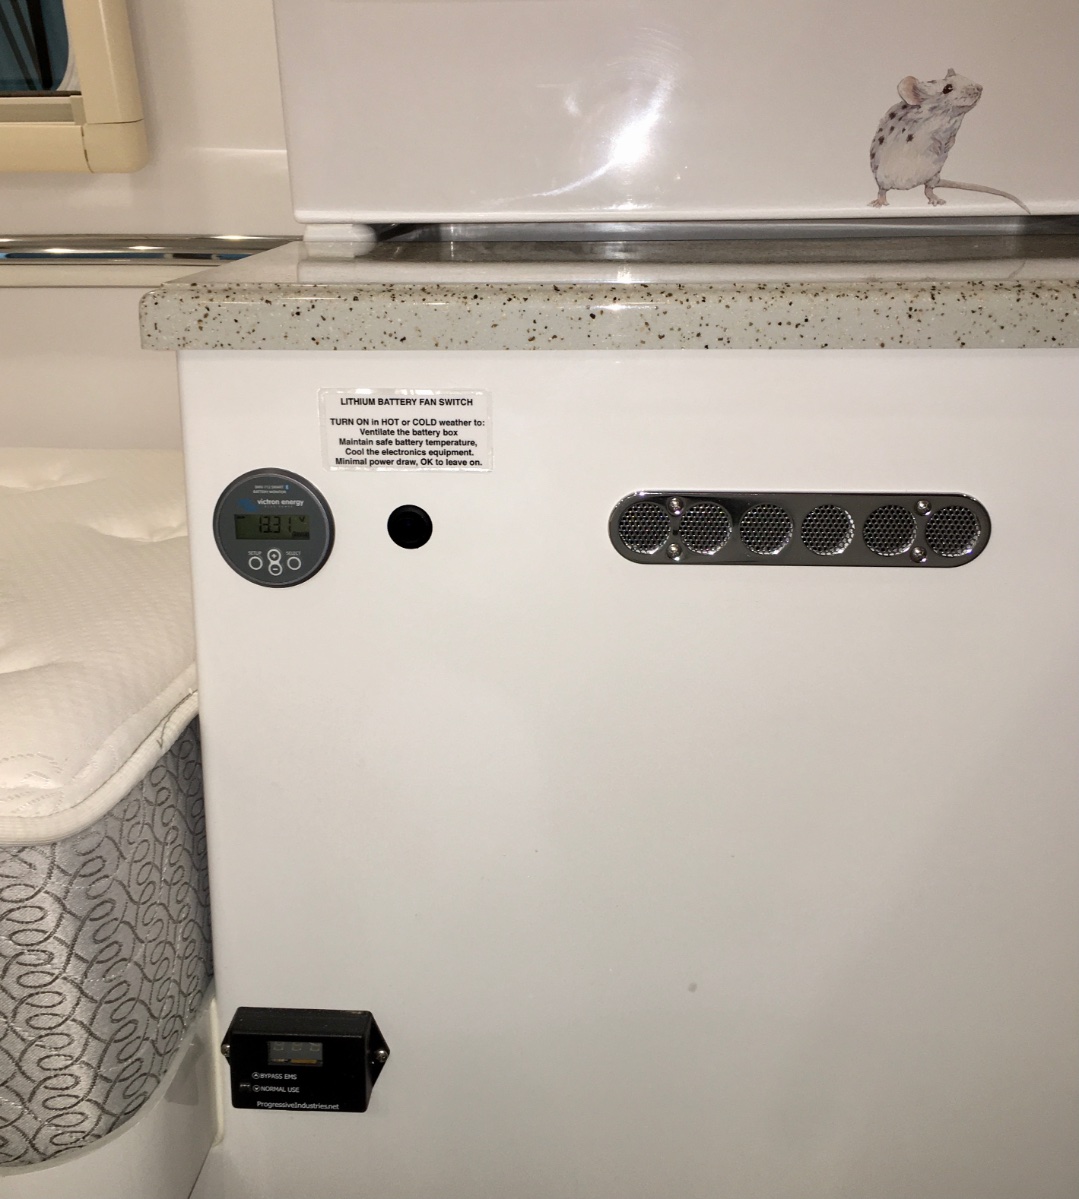
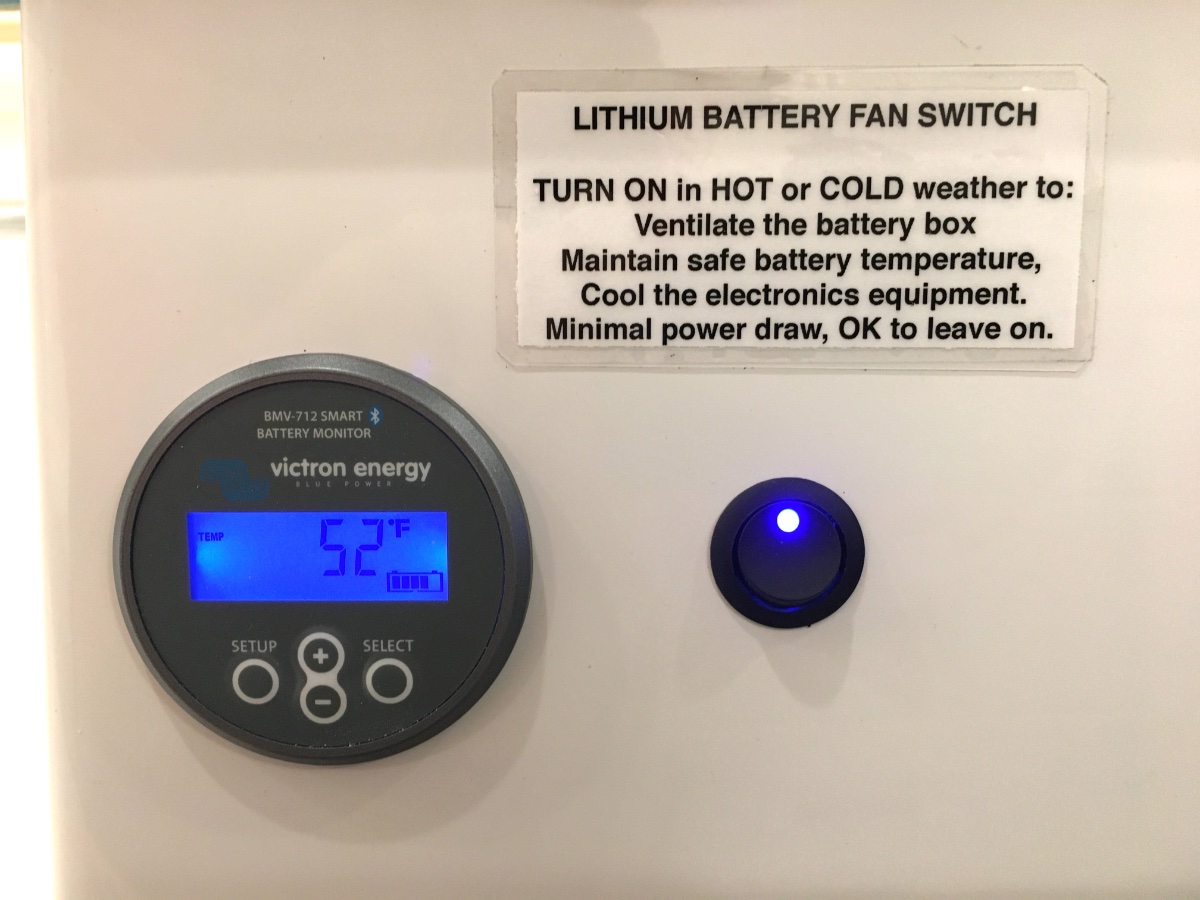
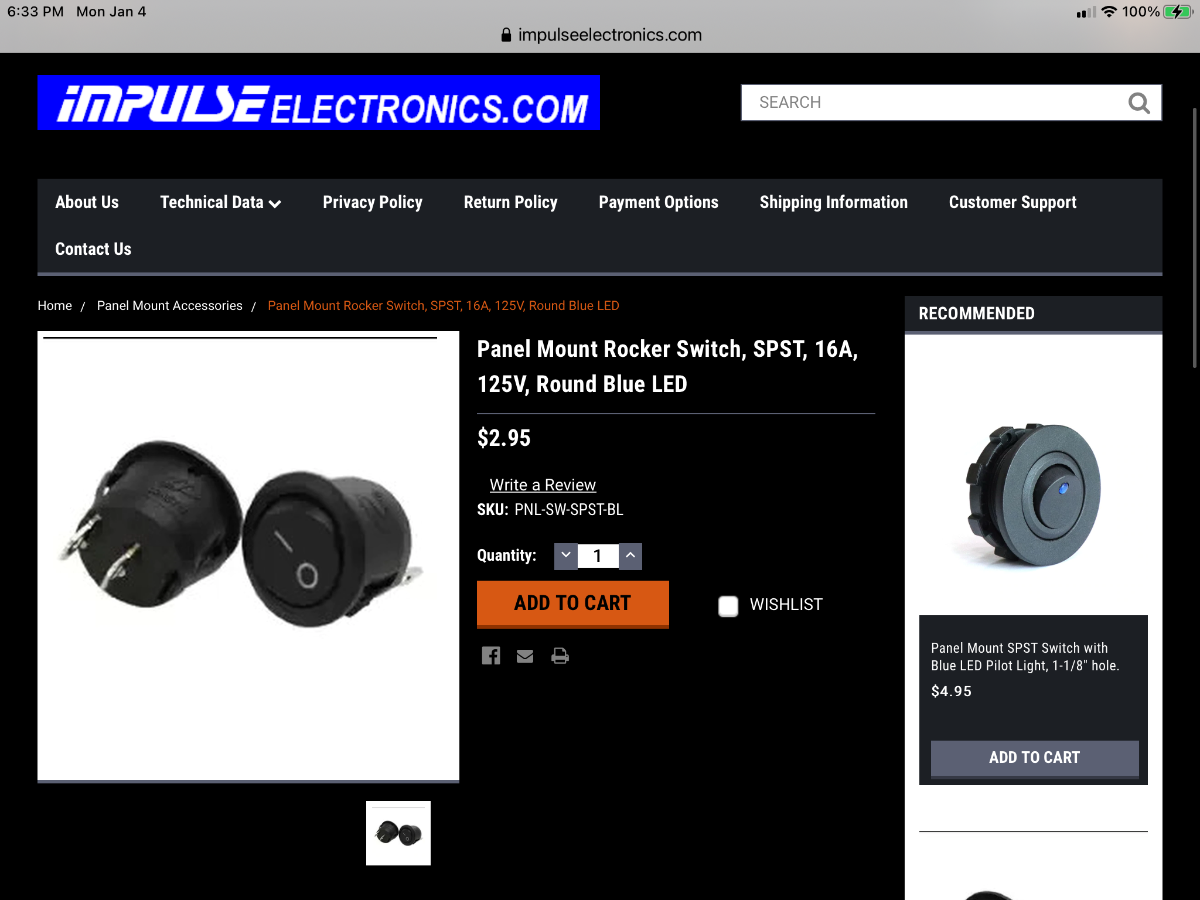
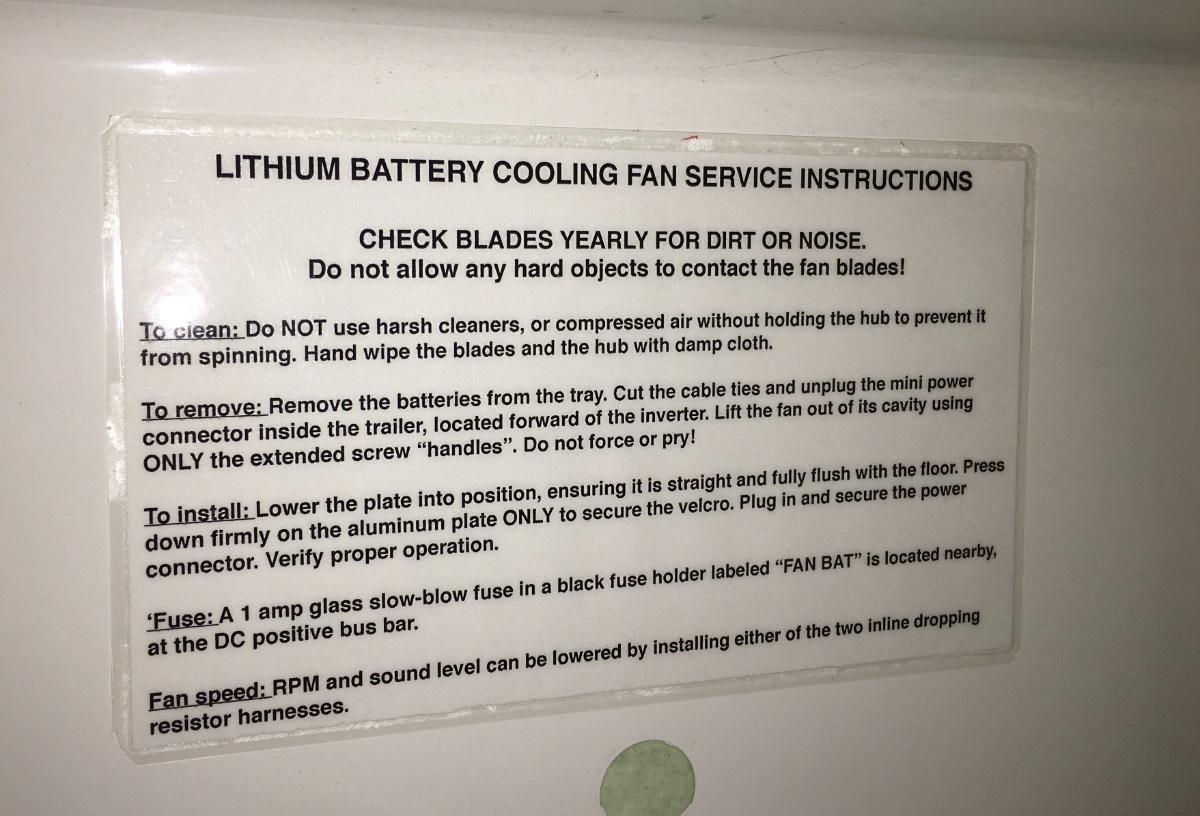
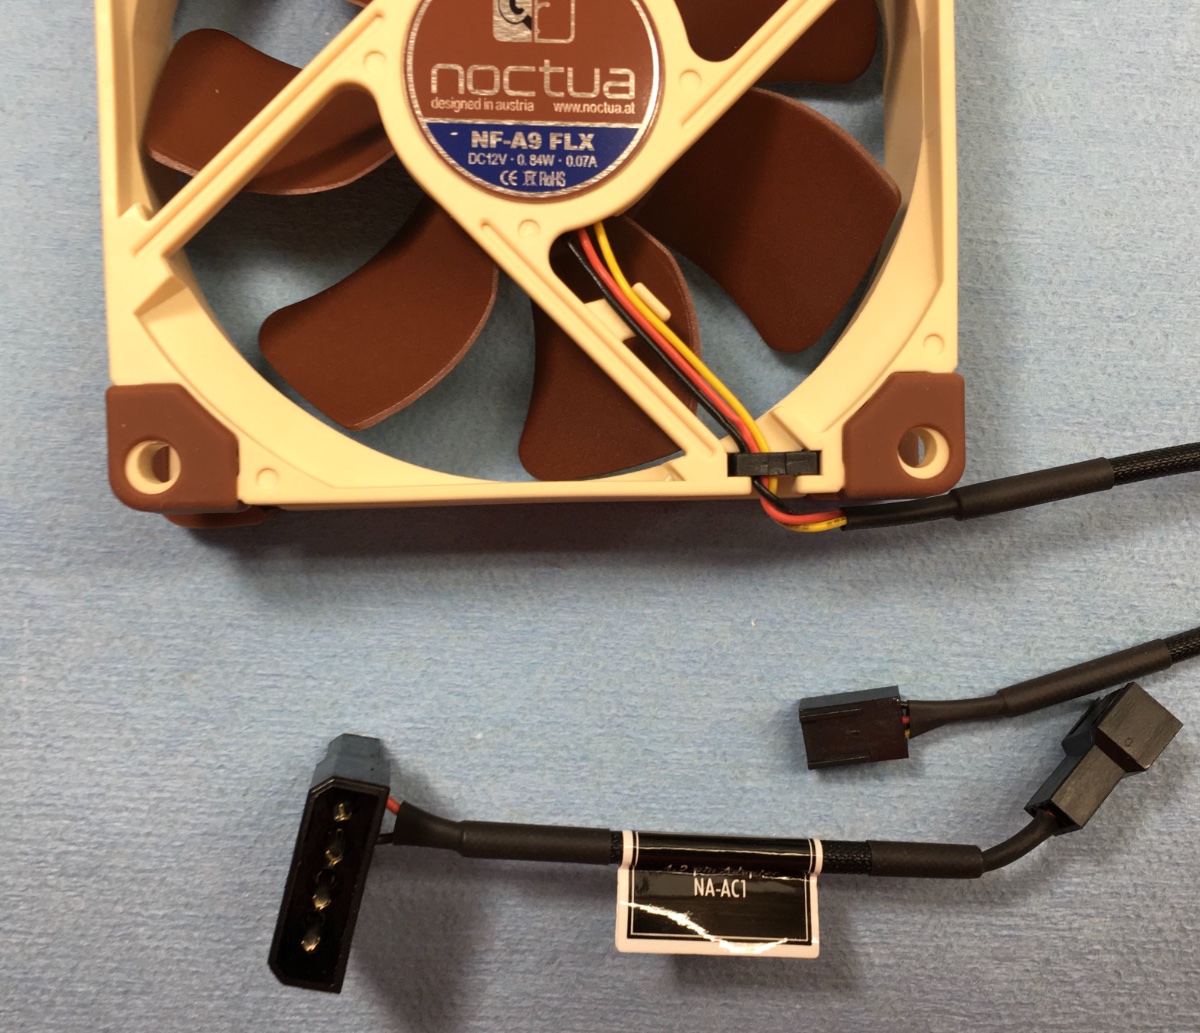
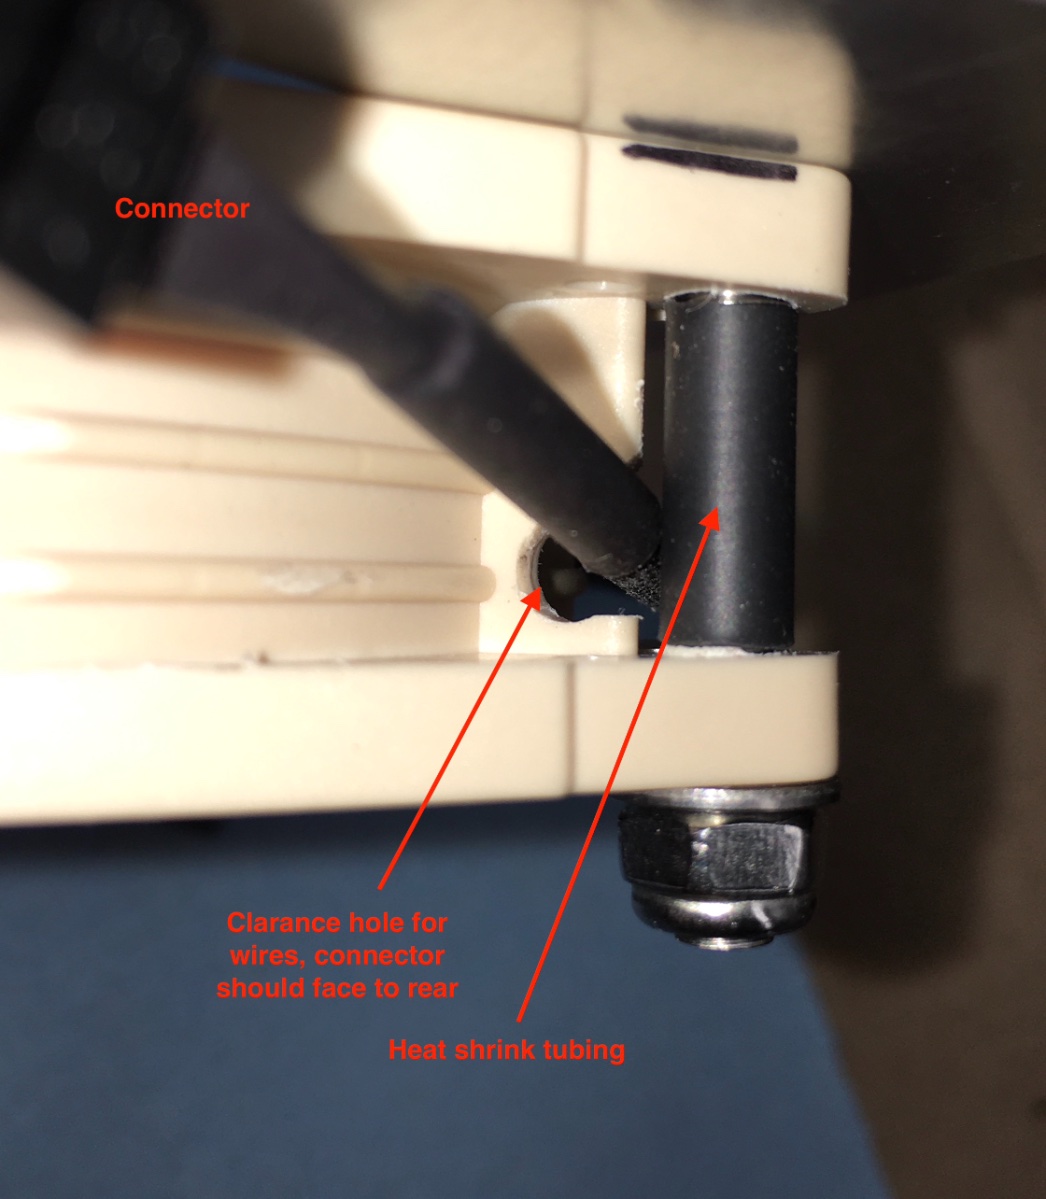
Battery fan wiring and switch. I used the supplied adapter cable and simply cut its 3 pin connector off and butt spliced the wires to a new 18 AWG red/ black wire pair. I secured the connector at the bottom of the battery compartment wall, forward of the inverter: Power comes via a 1 amp inline fuse connected to the rear DC bus. I mounted a switch next to my Victron BMV-712 Smart battery monitor display, below the pantry counter top. An additional ground wire is needed if the switch has an LED (this one is blue, to match the Victron backlighting): Finally, an instruction placard for a future owner or an RV service tech. This is laminated and taped on the rear wall of the battery compartment, and a copy is in the Owners Manual: John Davies Spokane WA
-
HOW TO: Lithium Battery Powered Vent System
John E Davies replied to John E Davies's topic in Ollie Modifications
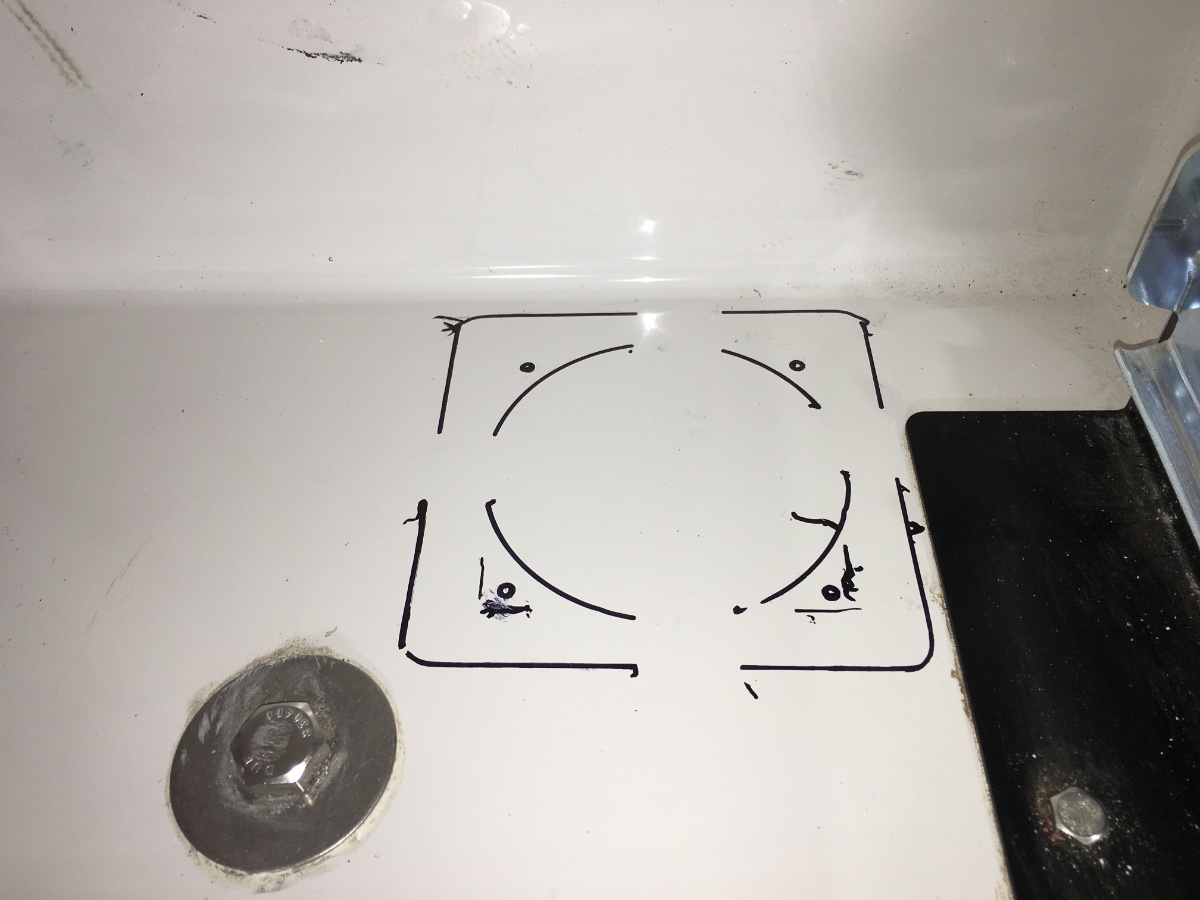
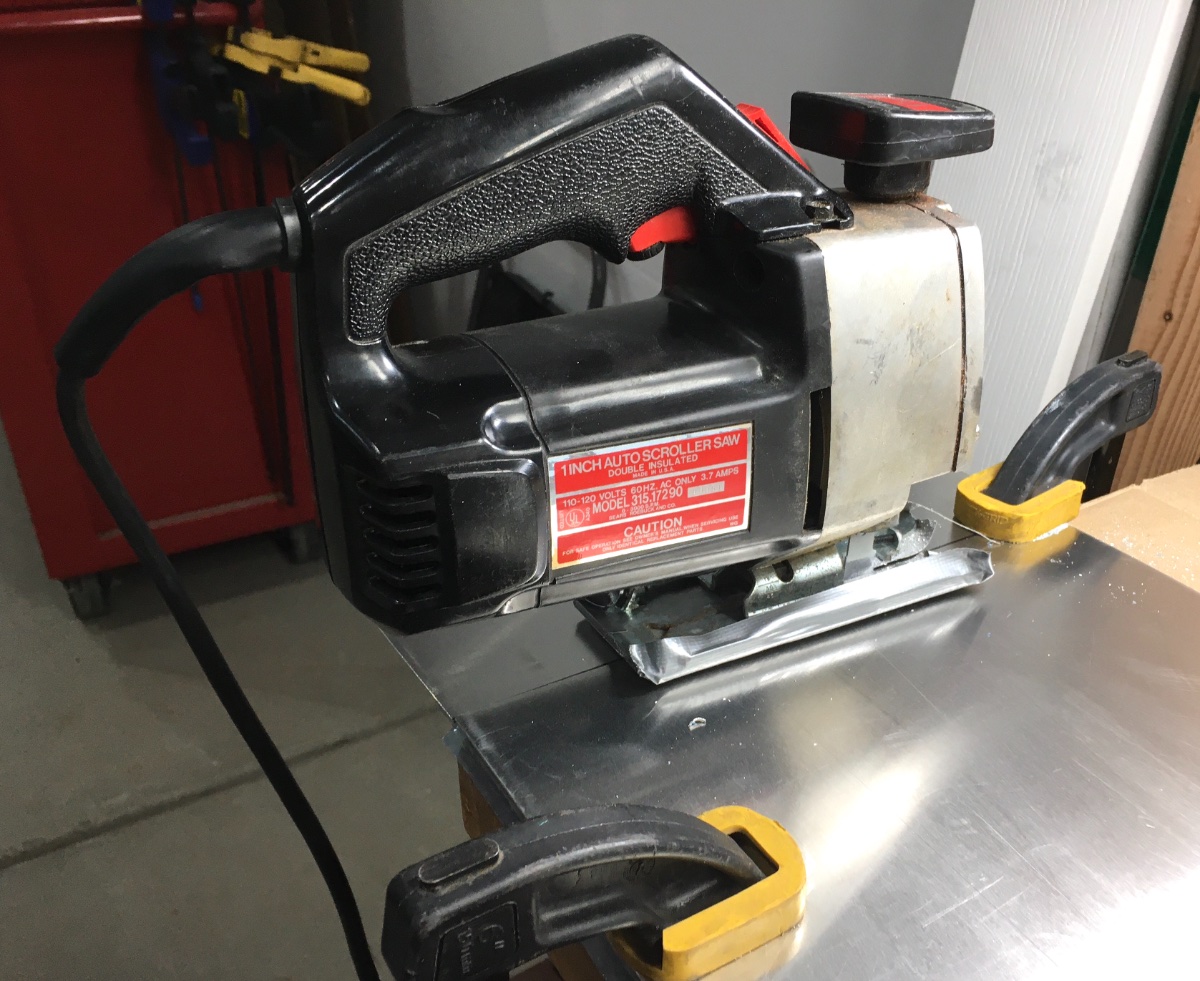
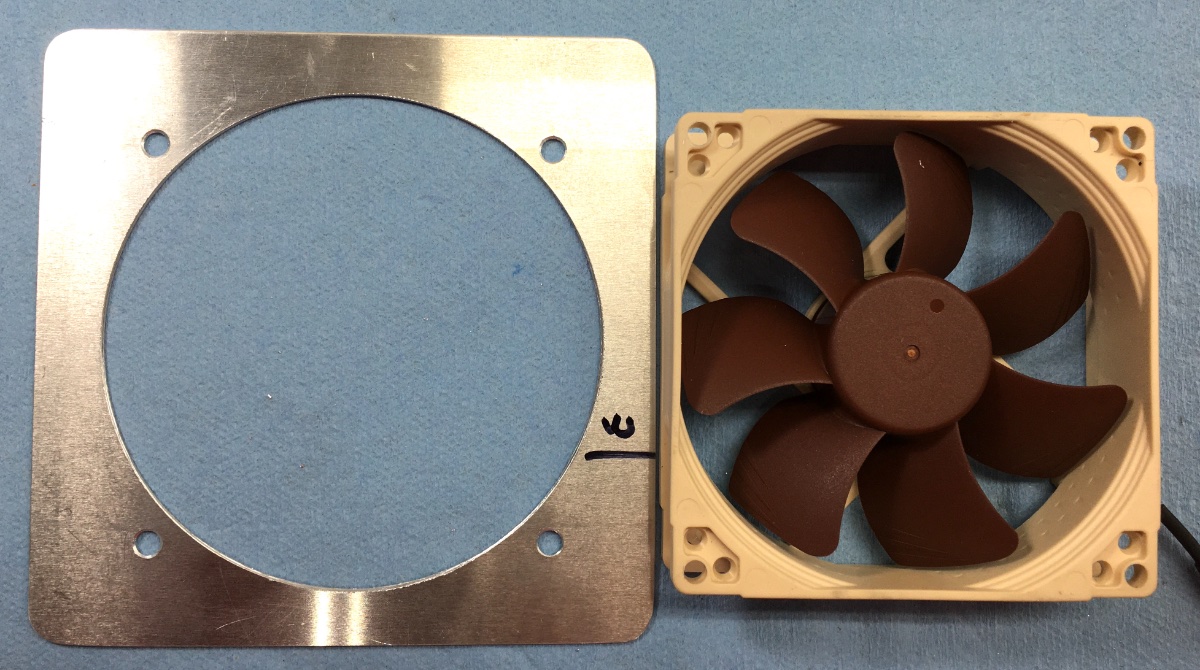
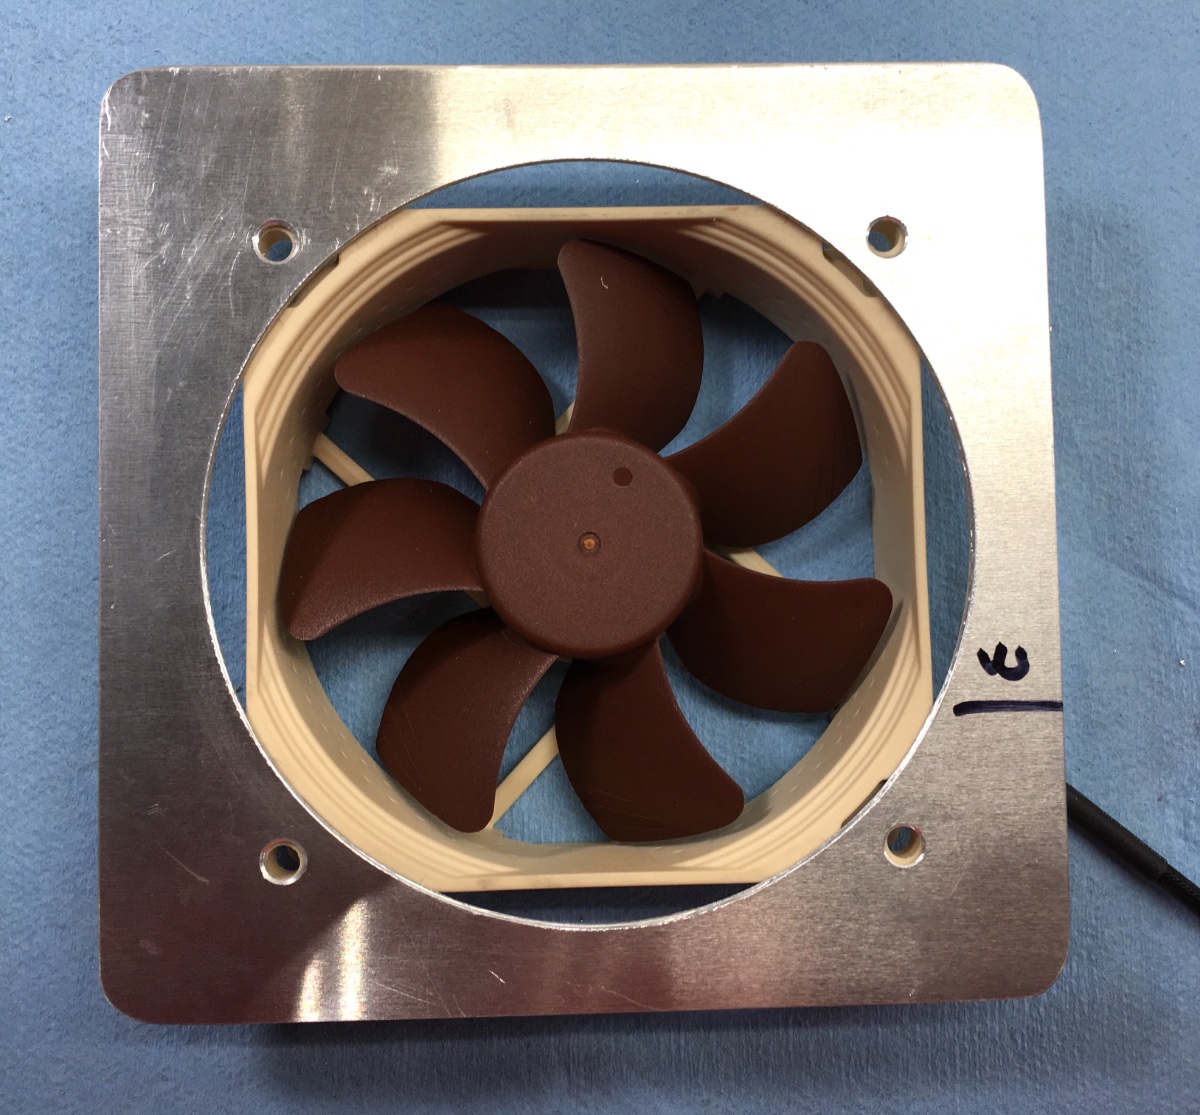
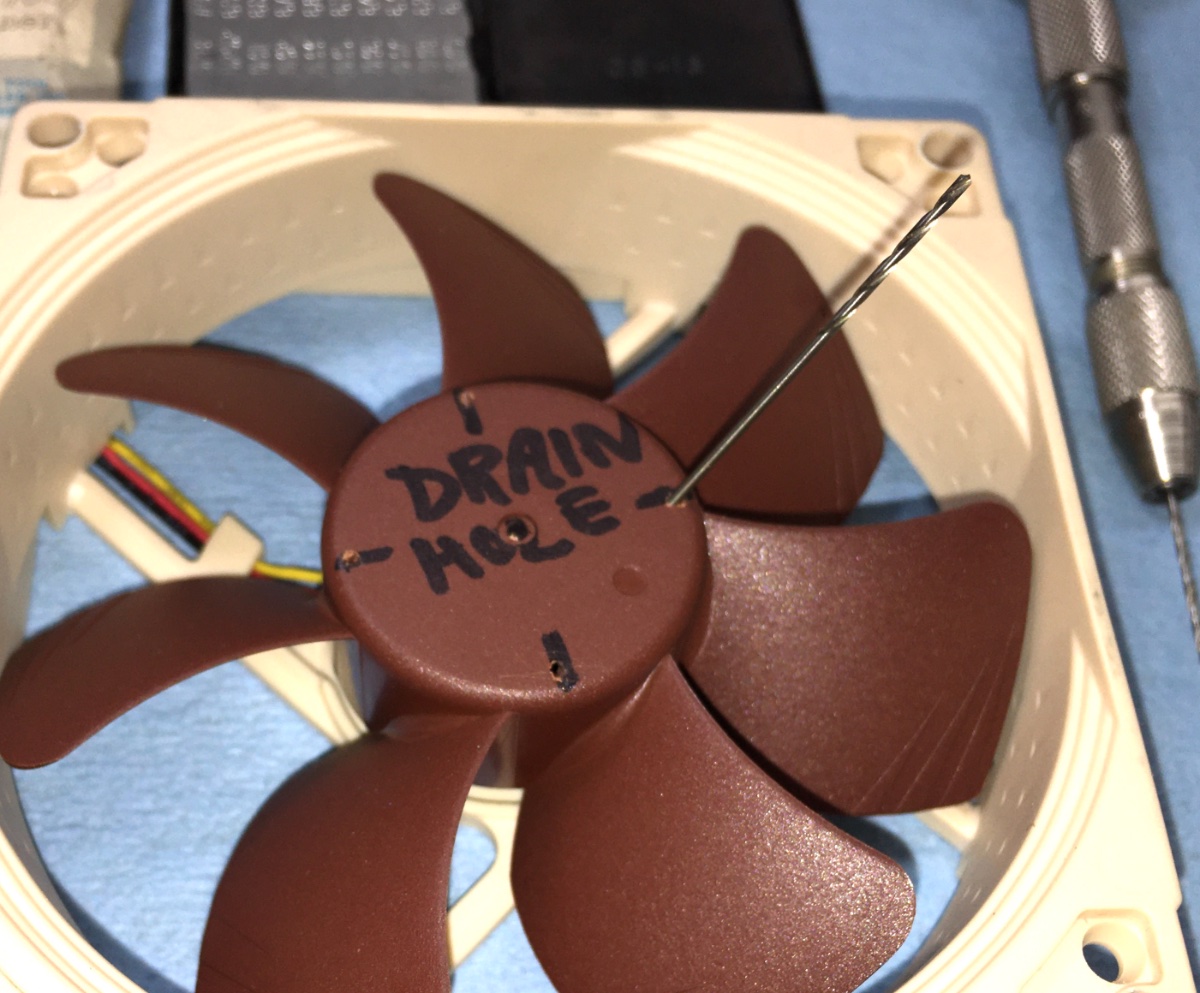
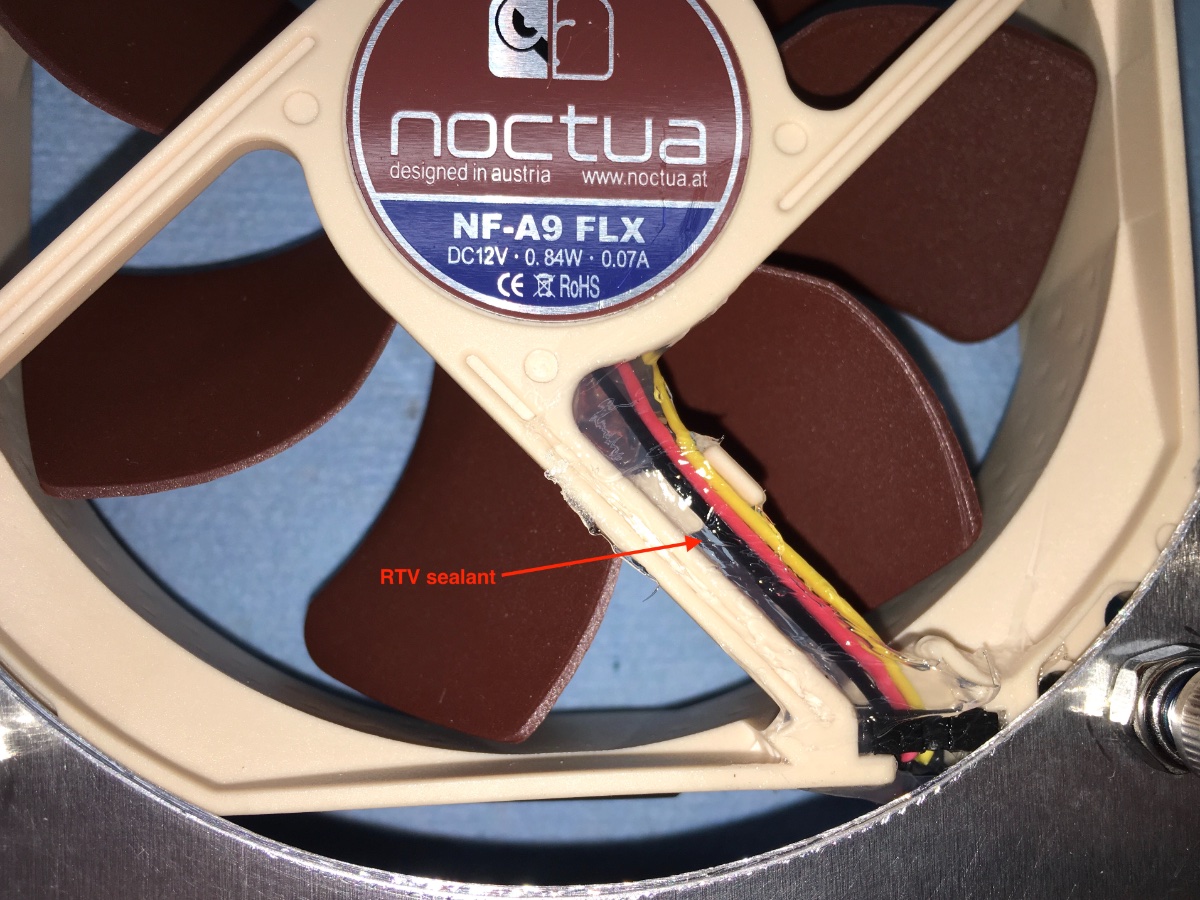
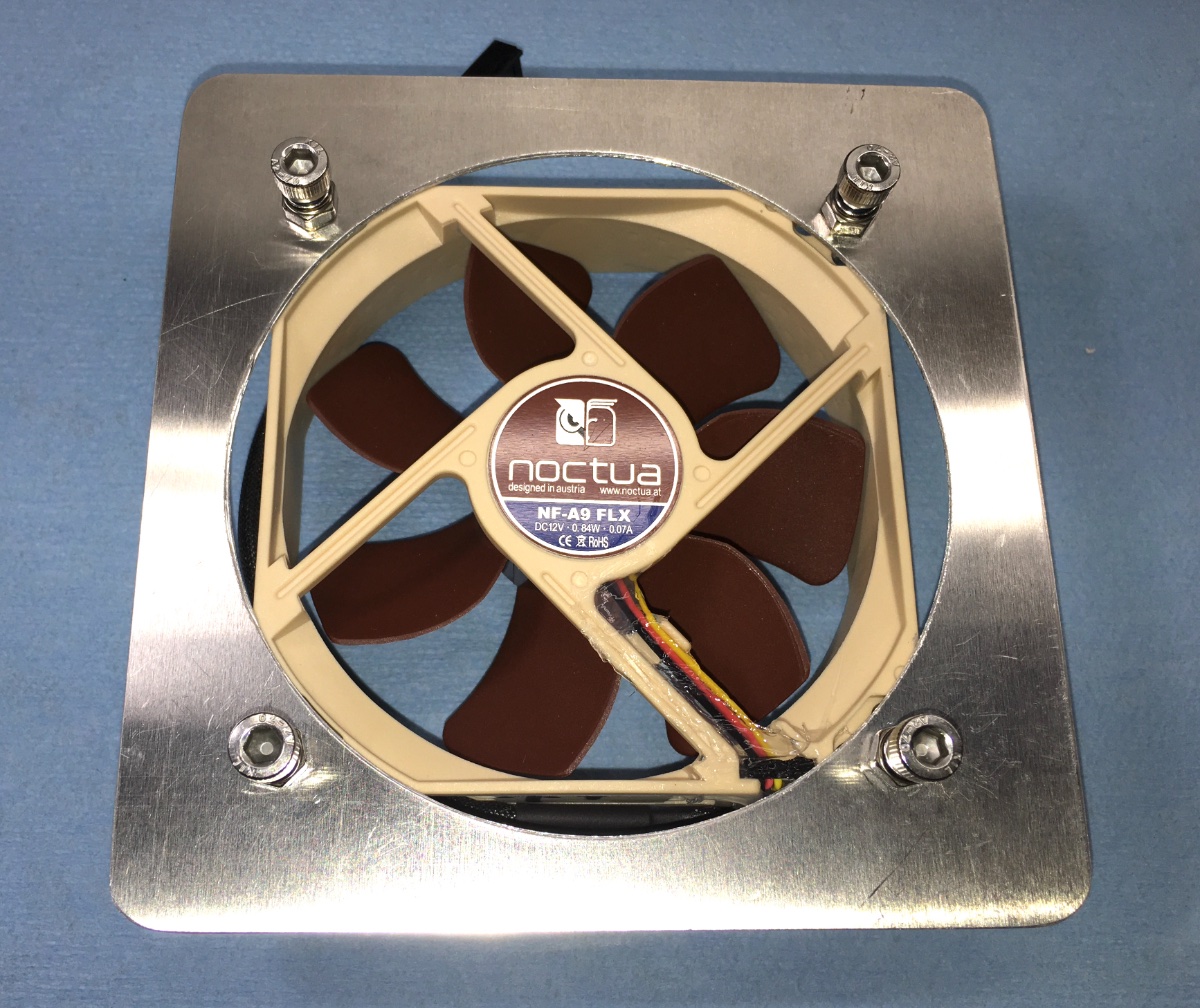
Battery box cooling fan. This one is high quality and well regarded. It has sealed ball bearings and uses just 70 milliamps (0.07 amps), so it can run as long as needed. Flow rate is 38 cfm on high, they supply two dropping resistor harnesses if you want to slow it down to reduce the sound level. It is pretty quiet, though a light sleeper on that side of the trailer might want to turn it off at night. But it is “white noise” which sometimes you do want..... Noctua Fan I really wanted the fan to go in the bottom at the rear wall, so it was centered between the two electronics compartments. The problem is that the floor of the box is not fiberglass honeycomb as I thought, rather it has a hard (6061?) 1/8" aluminum diamond plate bonded in the center! So cutting a large opening was a challenge. If you have access to a scroll saw (pivoting head) it is easy enough. Otherwise, choose to locate the fan at the bottom edge of the rear wall instead! That is thin (1/'8") fiberglass. Screws are 5mm, and are double nutted so that the heads will stick up enough to use as "grab handles", for servicing: John Davies Spokane WA
-
HOW TO: Lithium Battery Powered Vent System
John E Davies replied to John E Davies's topic in Ollie Modifications
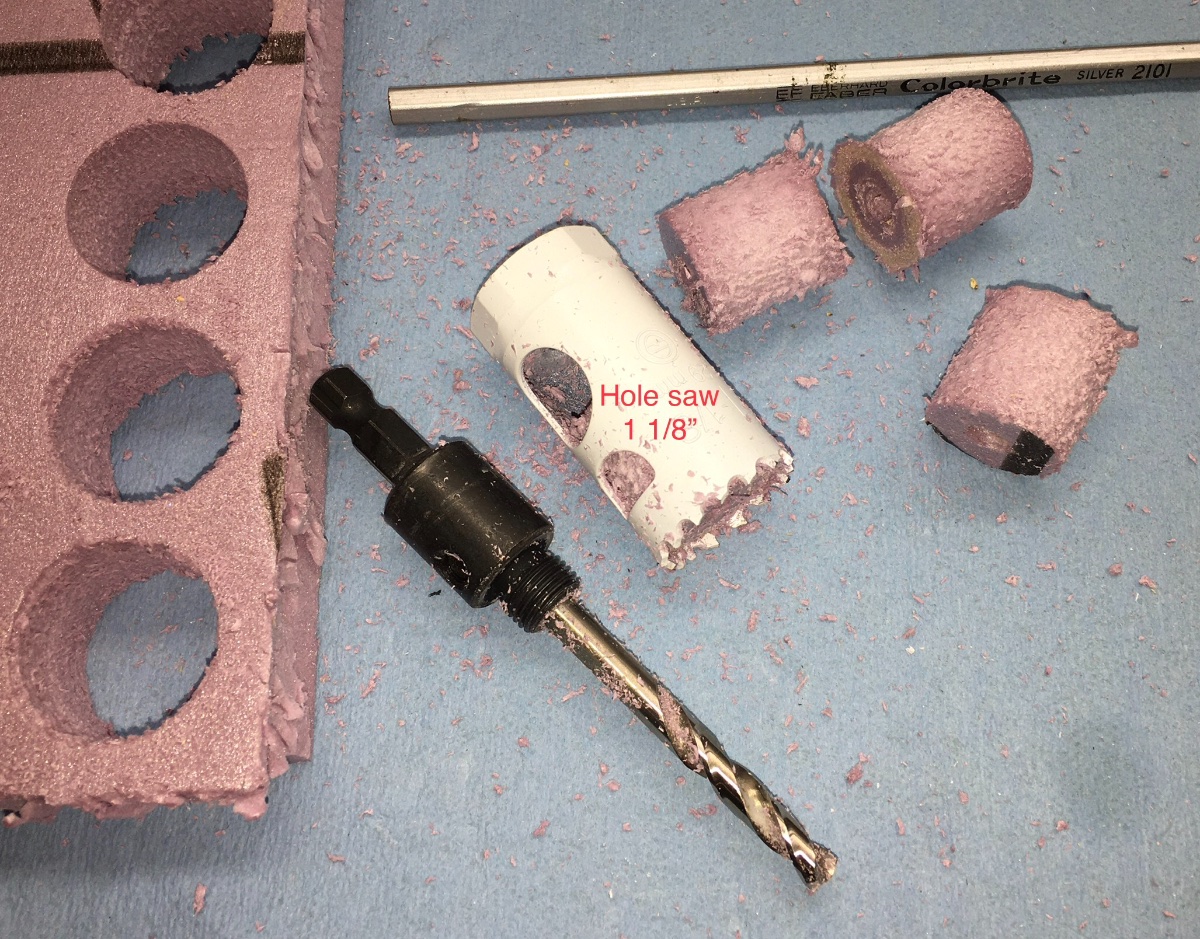
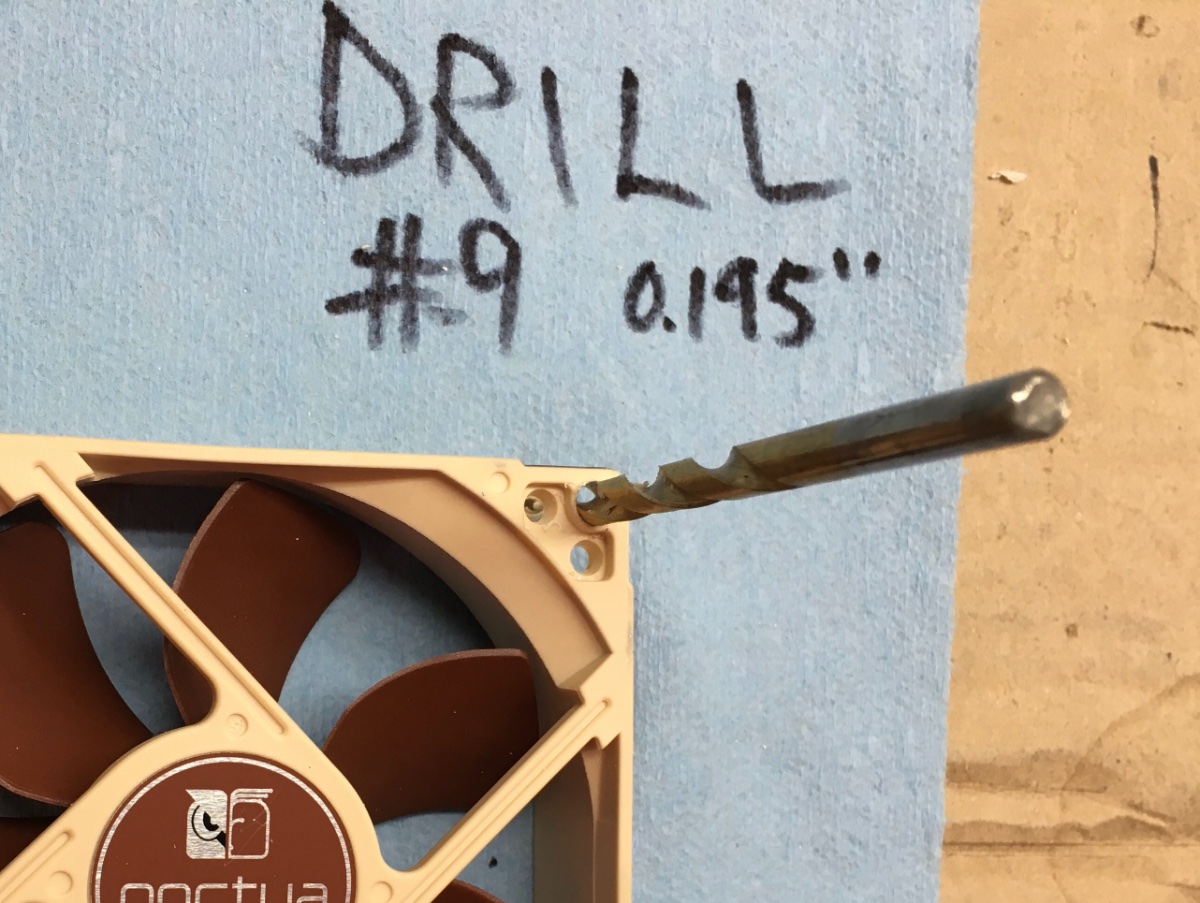
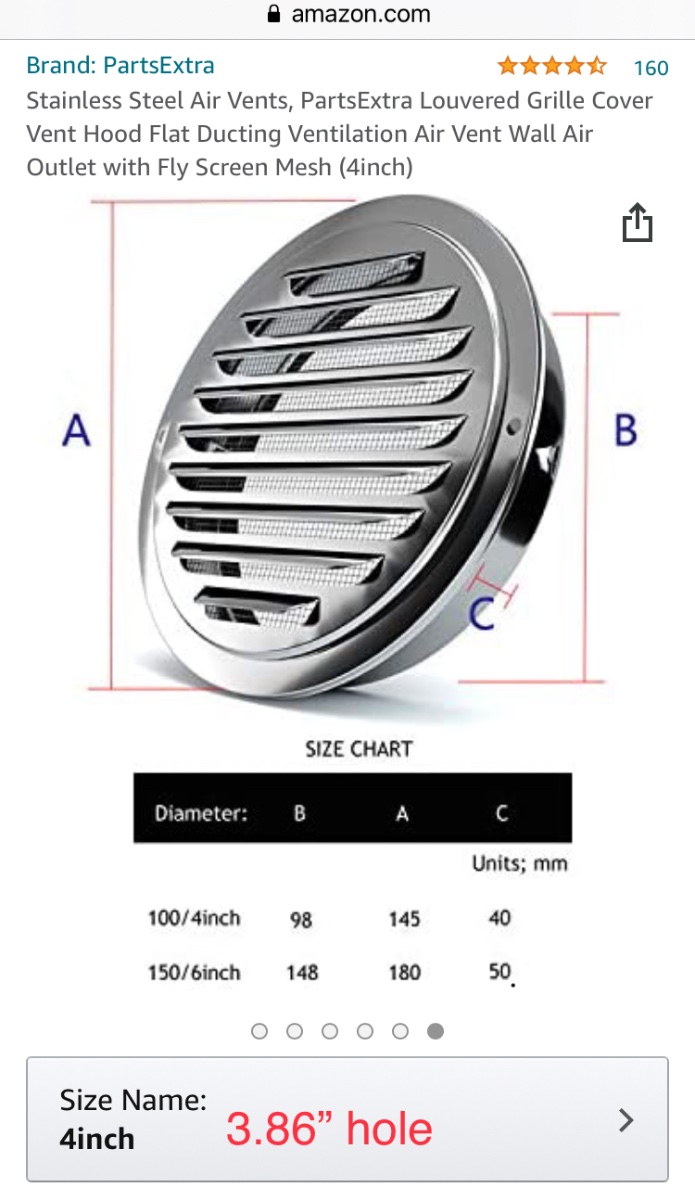
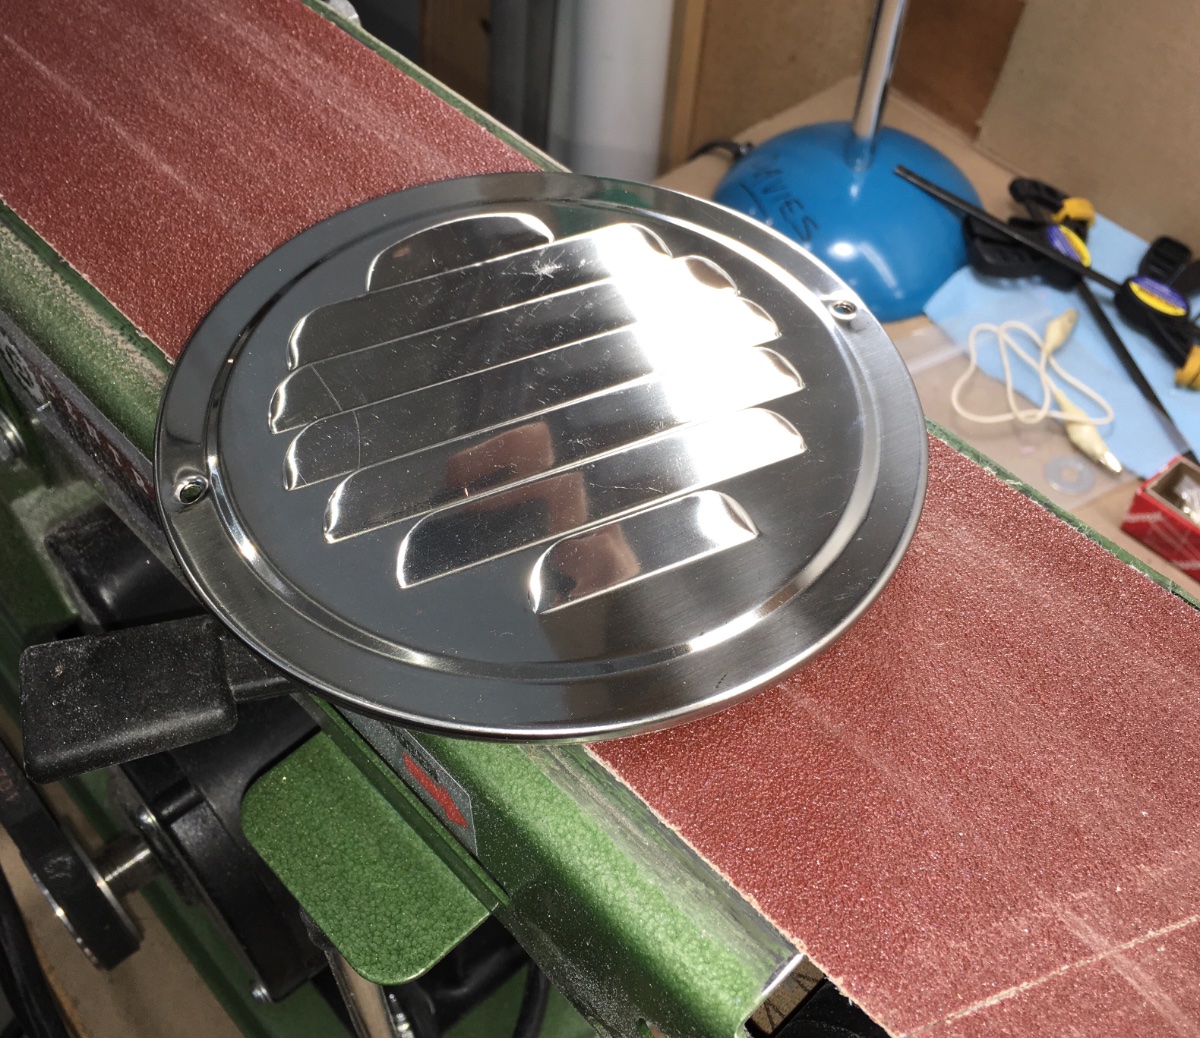
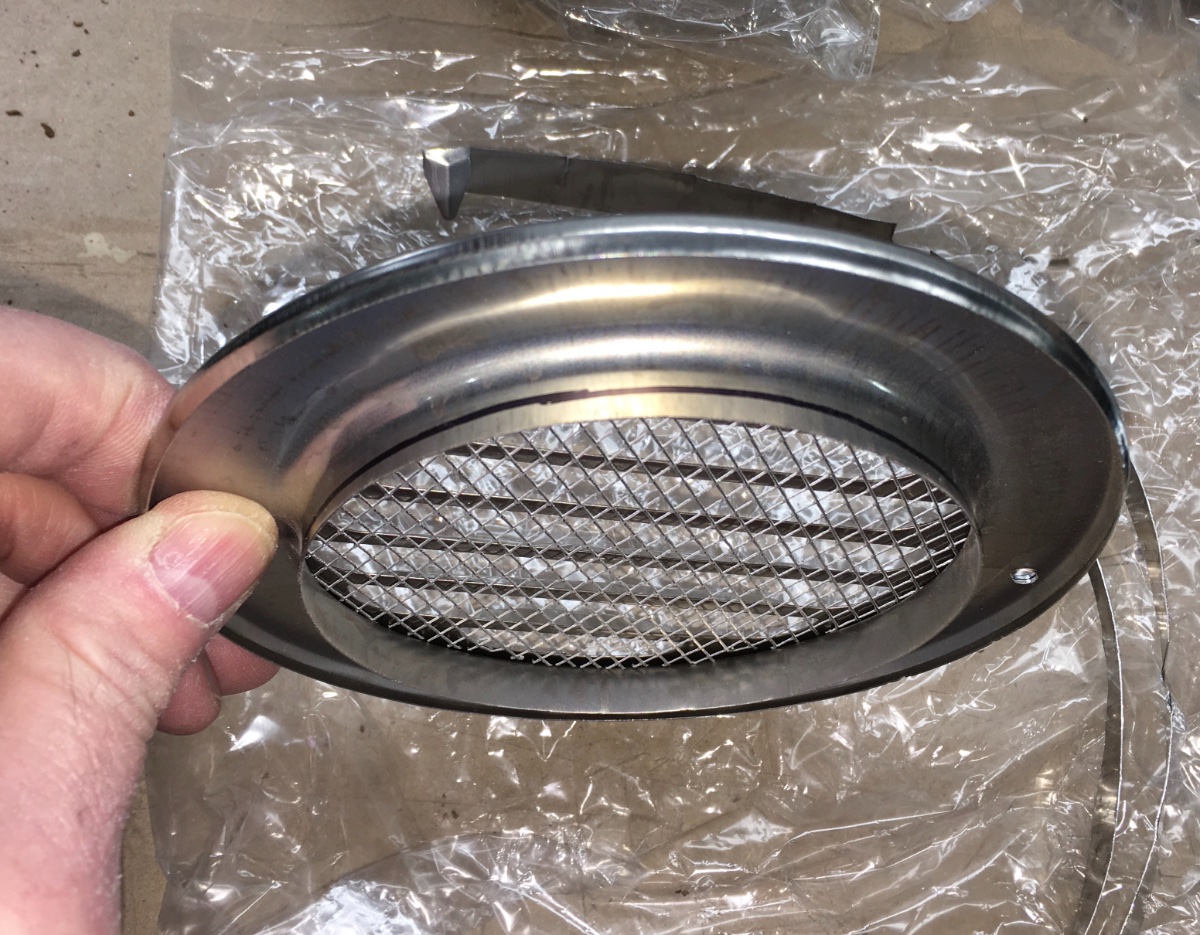
Battery box intake vents. Originally I wanted aluminum louvered vents, so I could paint them white to blend in, but the ones I bought turned out to be way too flimsy. They would have been destroyed by a wayward kick. I ended up with these and am fairly satisfied. They are sturdy and very pretty. Unfortunately they need trimming and the addition of two more mounting holes, so they would pull down tight and flat. Drilling stainless is possible, a drill press makes it less frustrating. It requires a lot of pressure on the bit. Use a 4" hole saw or a jigsaw to cut the holes in the fiberglass. I placed one under the rear bed and one under the rear dinette seat, centered front to back and up/ down. The center is approximately 9 " off the floor. Even though sanded smooth, the edge was pretty dangerous, so I used 1/4" split loom to protect fingers. I added a blob of silicone on each protruding screw tip. In the future I plan to add third vent at the bottom of the closet door opening. John Davies Spokane WA
-
HOW TO: Lithium Battery Powered Vent System
John E Davies replied to John E Davies's topic in Ollie Modifications
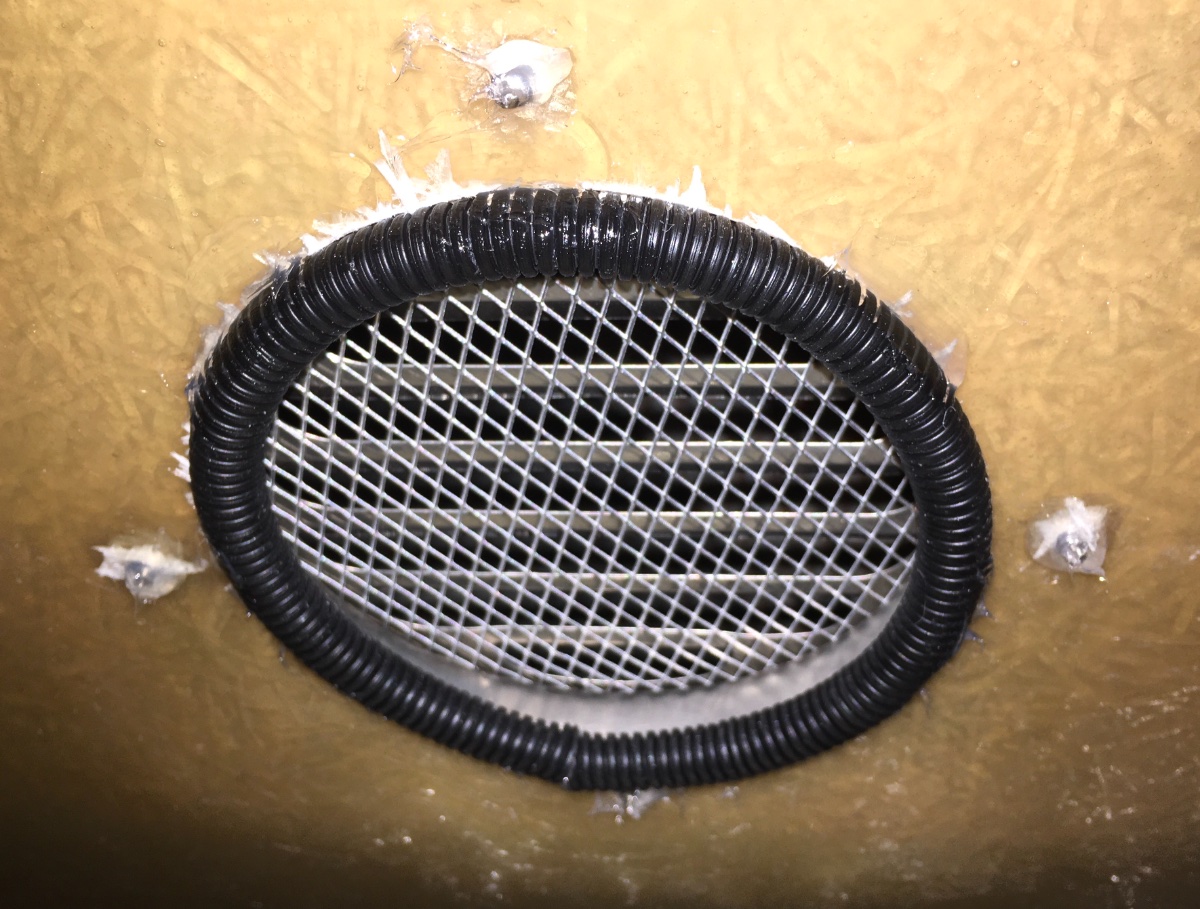
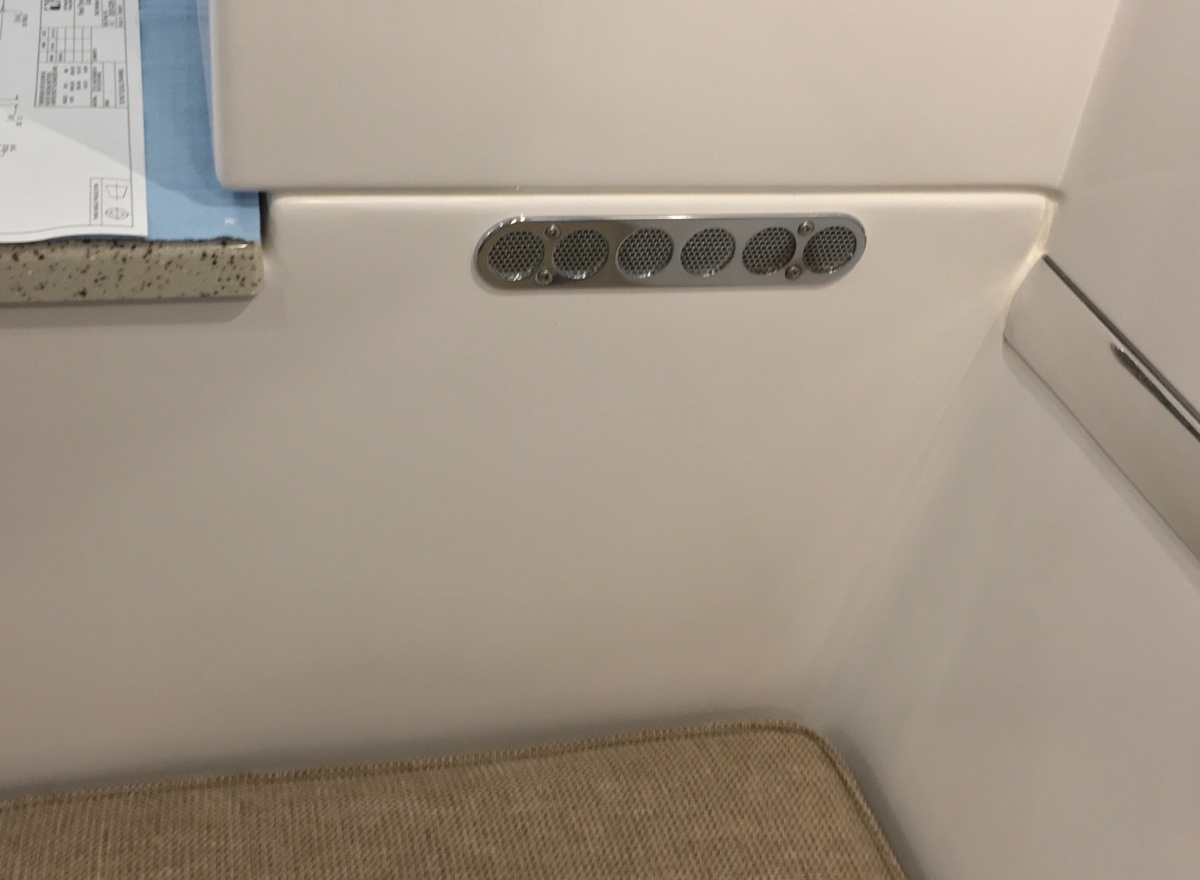
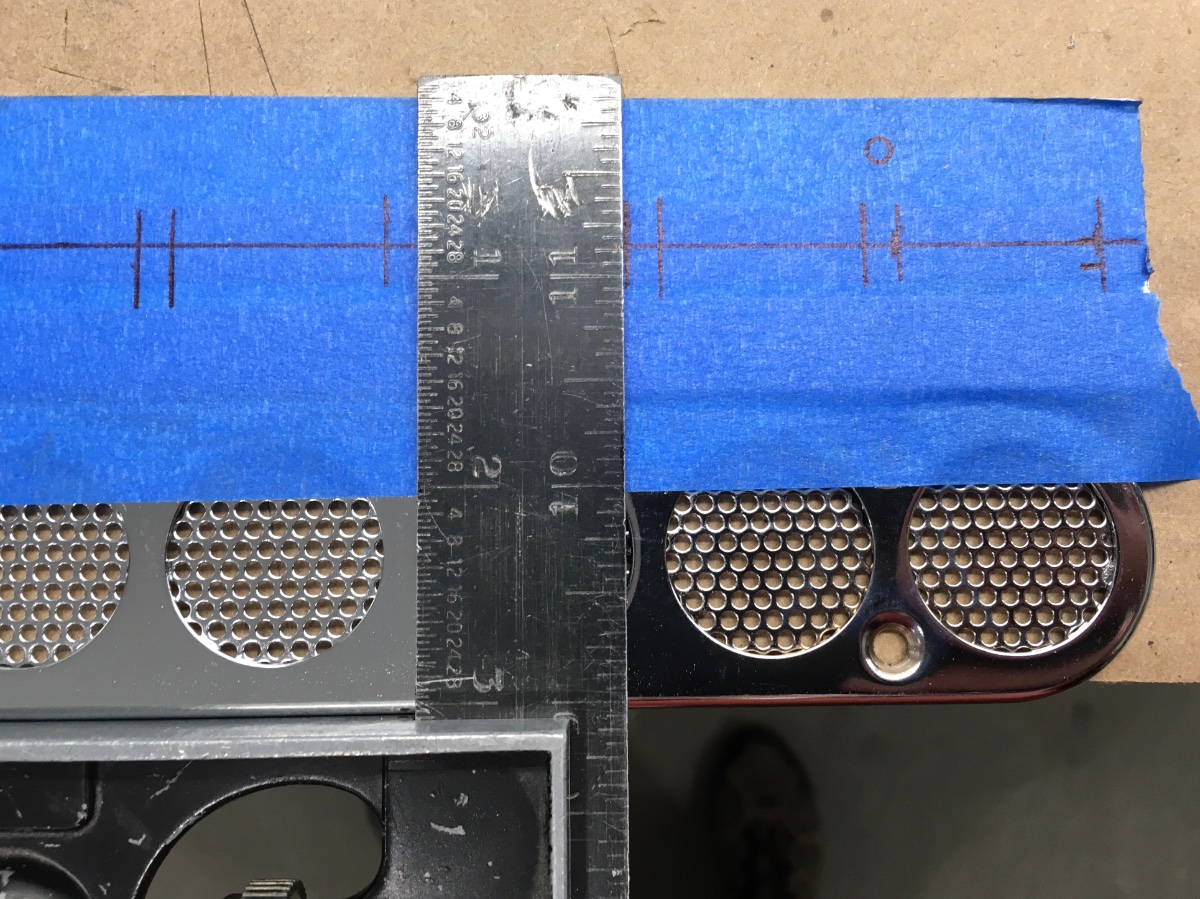
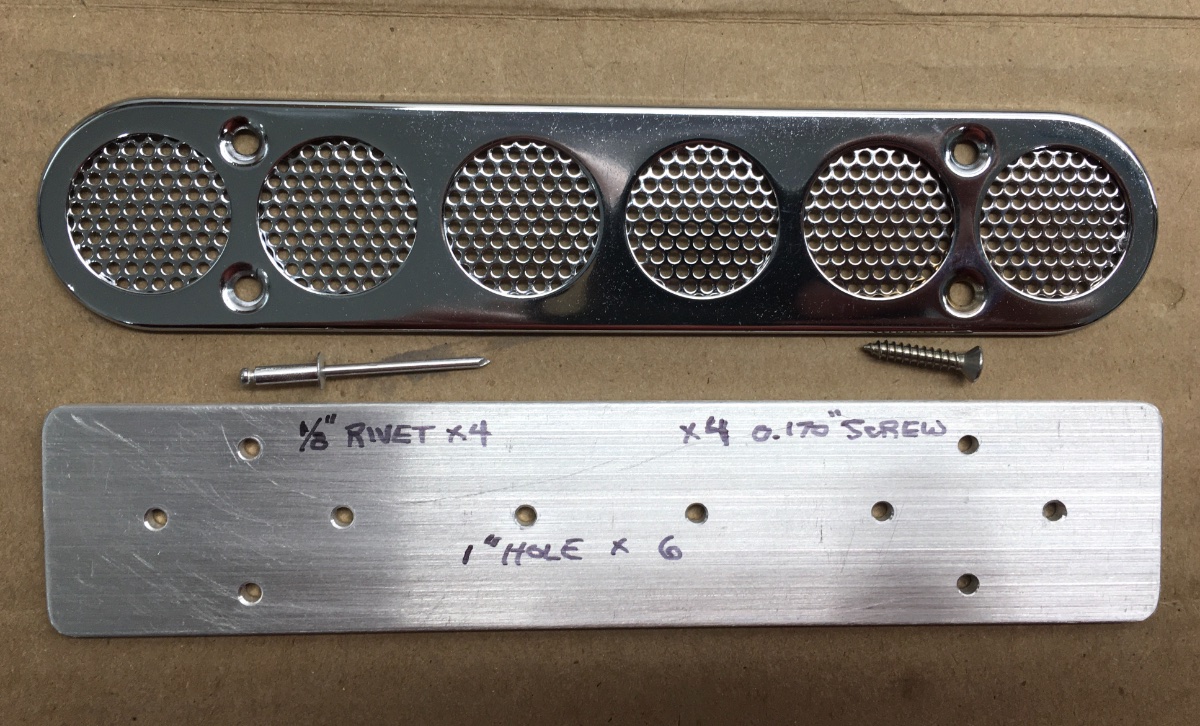
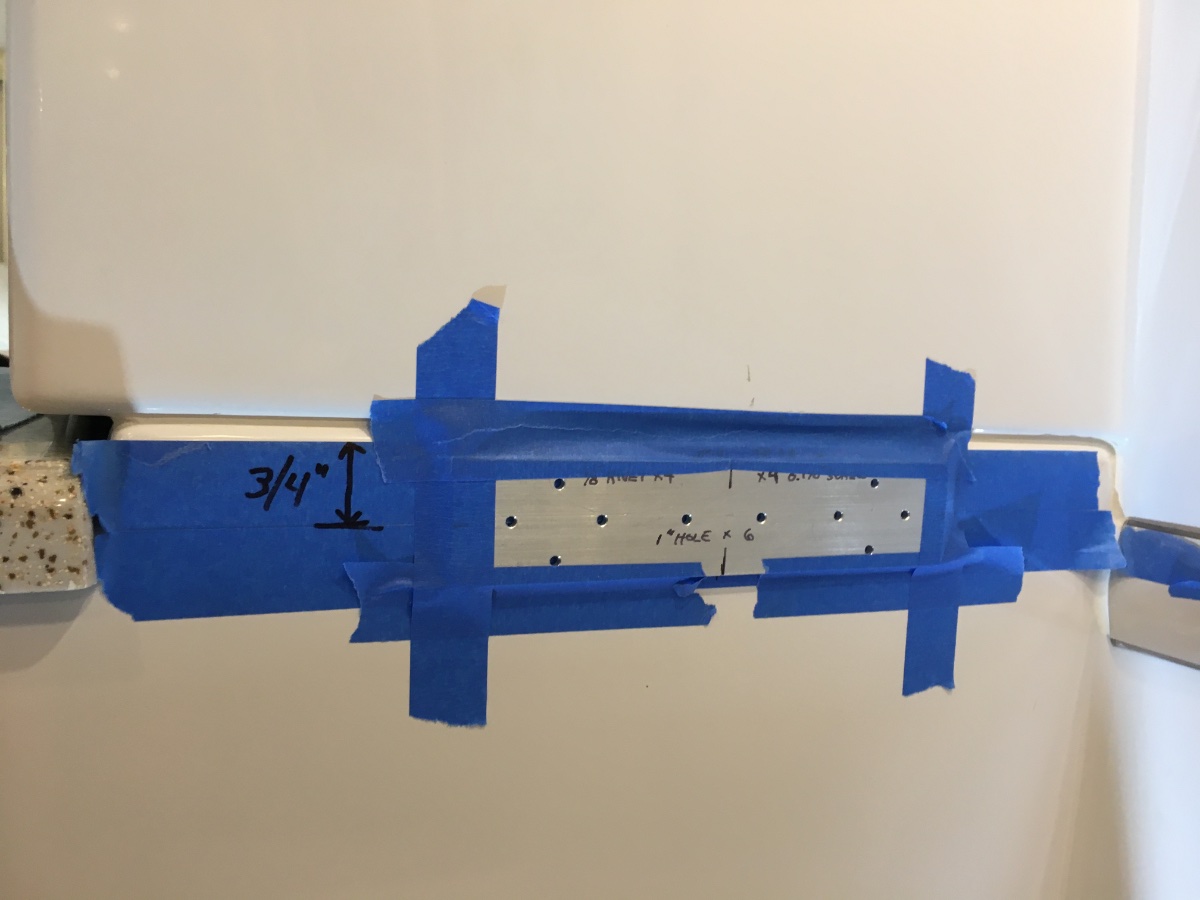
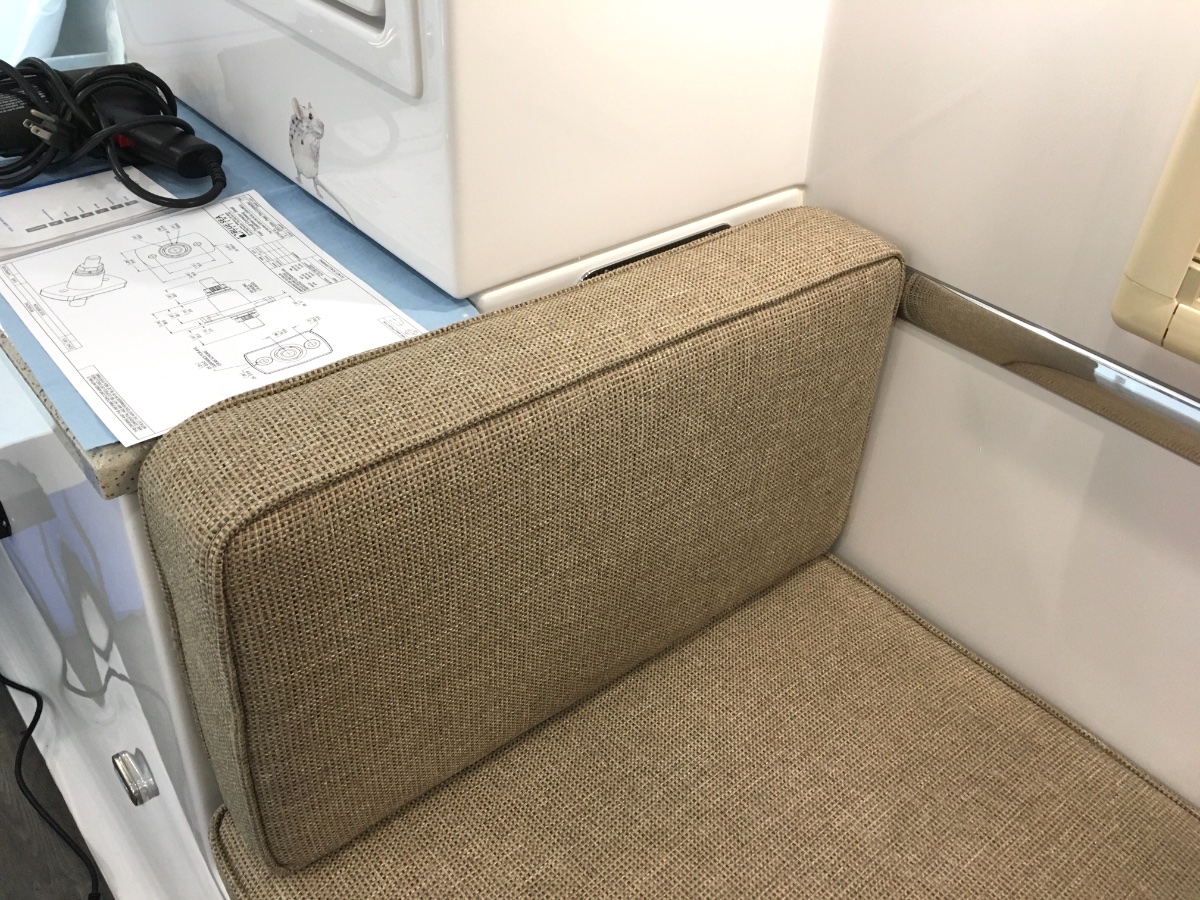
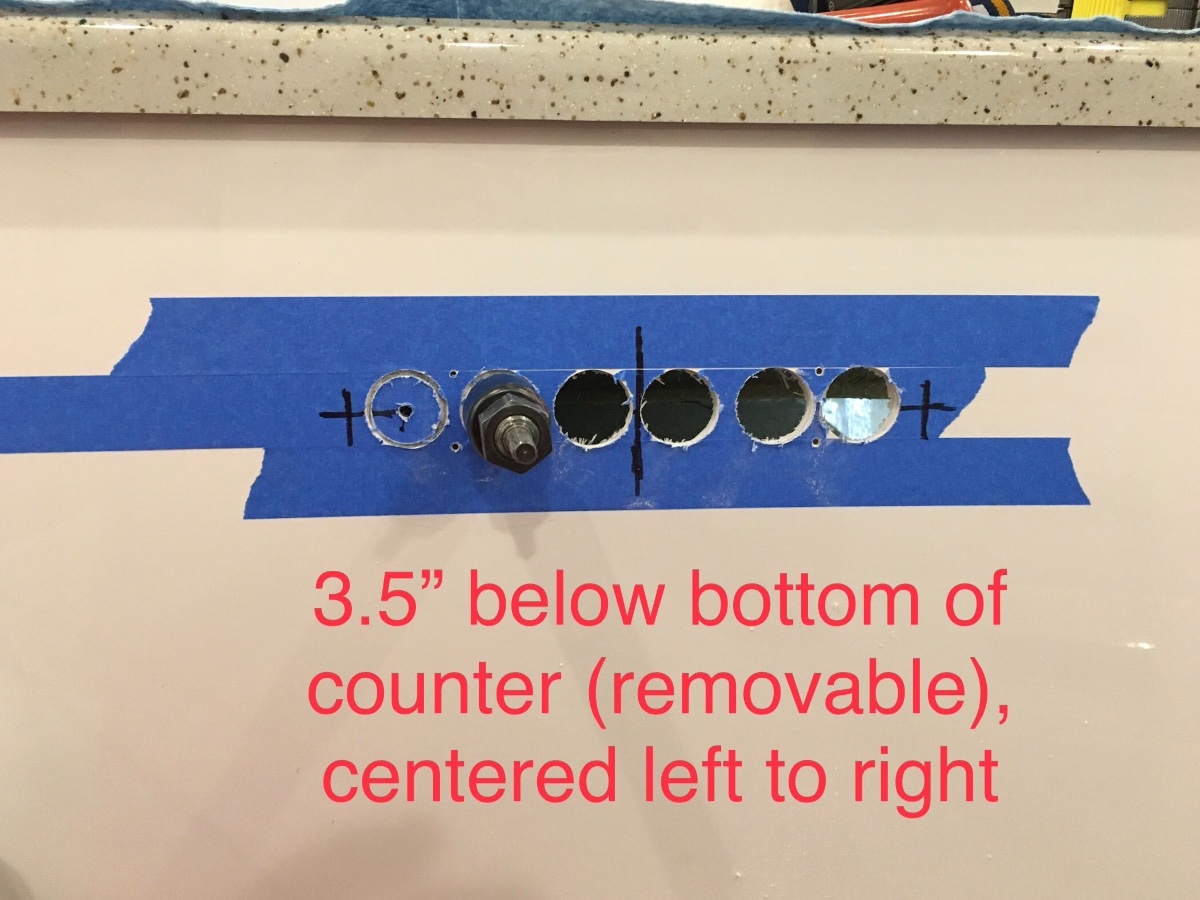
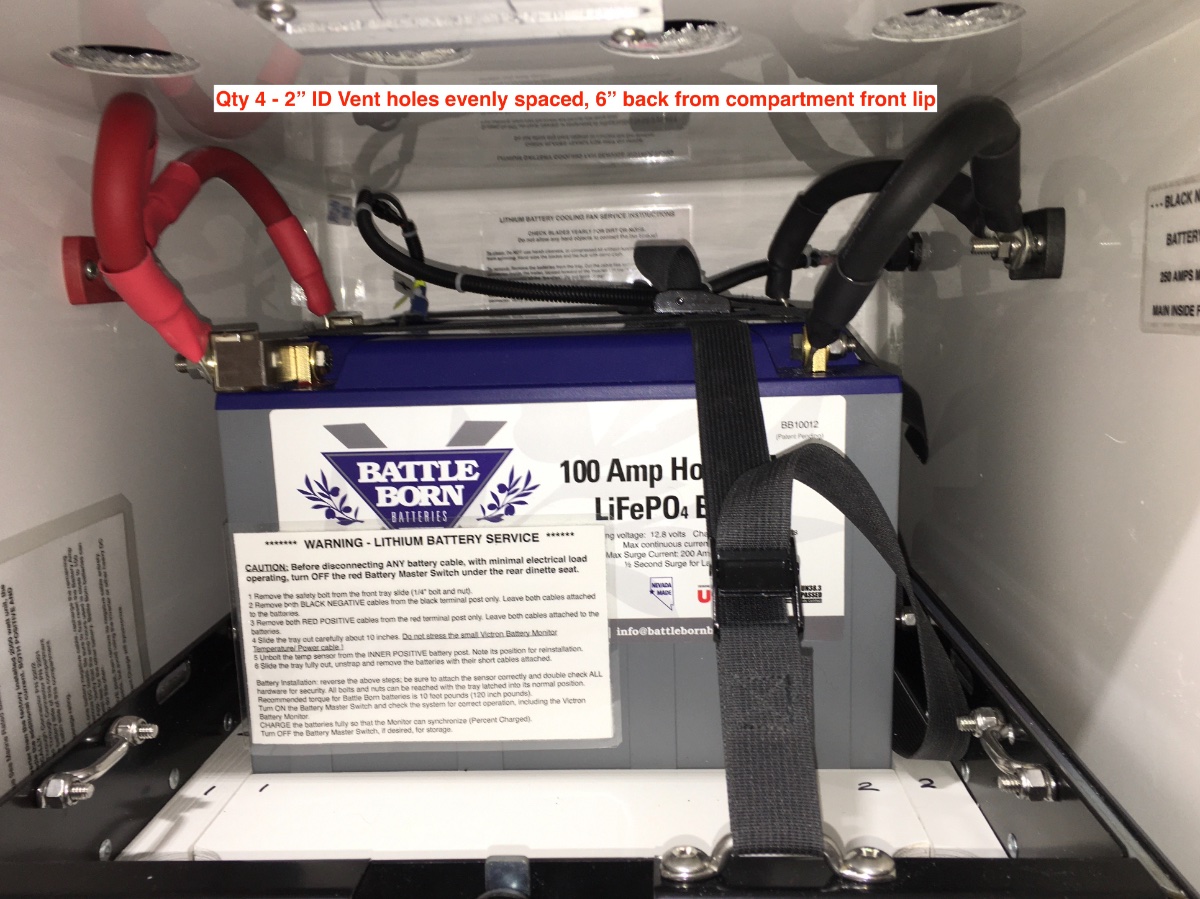
Battery box exhaust vents. Qty 3 - Perko 51840 Chrome plated brass (same part used on the battery door factory vents) ... https://www.go2marine.com/perko-ventilator-vent Make a template - there are a lot of holes to drill: The 4 mounting holes can be sized for 1/8" rivets (not recommended) or number 6 sheet metal screws. Choose the correct size for your fasteners! I chose screws. The front and back vents go here: You will be staring at these for a long time, so be very sure the holes are perfectly straight, measure thrice, cut once. Don't use a bubble level, measure up to the joining line. Here is the reason you can't position it higher: Deburr the holes CAREFULLY with 80 grit sandpaper (wear gloves or you will drive glass shards into your fingers), do not scratch the surrounding gelcoat!!!! Install the Perko cover. Repeat these steps for the rear wall. The optional factory granite countertop keeps the seat cushion slightly away from the wall in this position. If yours does not have the optional ones, the front vent will be blocked with the cushion as shown here.. Here is a view inside the compartment, looking back at the INSIDE of the rear vent. Notice you cannot position it higher or the screws will not clear the top: The third vent goes in the center of the inside wall, directly below the pantry shelf. Having three vents means that one blocked vent (a pillow for example) will not significantly affect the airflow. Finally, there need to be holes in the TOP of the battery box, to let air out from that space. Since I mounted a fan in the bottom, at the very back, I chose to place them in front, so air would move below and across the batteries, leaving no "still air" pockets. All other openings in the box should be sealed with heavy aluminum tape or a similar product. There is plenty of space on top of the box for air movement: John Davies Spokane WA