jd1923
-
Posts
3,646 -
Joined
-
Last visited
-
Days Won
281
Everything posted by jd1923
-

Seeking New Air Conditioner for Hull # 145
jd1923 replied to ScottyGS's topic in Ollie Modifications
Why does this come up as an issue? Was something mentioned in the Morton's YouTube? @Geronimo John made a comment about this 6 months ago. I've had 5 different RV A/C models. To clean the condenser coils you always remove the cover and hose it clean. This one should be the same or easier because it's taller. -
Custom Mud Flaps for the Tow Vehicle and Oliver
jd1923 replied to jd1923's topic in Ollie Modifications
Taylor, I just measured it to answer your question. At the closest point, bottom of the L-bracket, the clearance measures 1 1/2". When you see 3-4" of caked mud, how much is actually above the tread? Most of it is in the treads and caked around the side. I've had my truck wheels caked up but not so much on the trailer. This doesn't worry me. And below the rubber/plastic flap material bends outwards while towing and no big deal if it got damaged. It's so easy and cheap to replace if need be. John E. Davies did an amazing amount of work to his "Mouse!" I studied most of his work 3 years ago when I first joined The Forum! In the case of mud flaps, I believe my design is superior for a couple reasons. The mud flap in his design is a full 6" further back. The 6" of open fiberglass will be hit extra hard since dirt and stones will hit the mud flap and bounce upwards due to the rotation of the tire. The open area will get chipped and be doubly hard to clean. And next mud episode; do you want your stabilizer jacks packed with mud or protected behind the mud flaps? We've had 49 overnights since this upgrade, on a bunch of short trips this year. They still look like new. I wouldn't change anything. Anybody who wants to copy my installation, send me a PM with your mailing address and I'll mail you a paper template to make cutting the mud flap material easy. Everything else you need is explained above in this thread! -
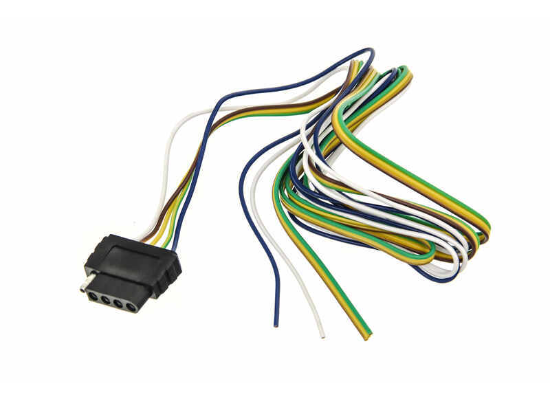
This is an excellent idea! If the truck has both 4-pin and 7-blade connections, as shown in your picture, all you need is a 30 ft 4-wire harness, male plug on one end, female on the other, zip-tie it under along the length of the trailer. The only downside is having to connect one more thing each time you hitch the trailer but a much easier installation vs connecting to the Oliver wiring as I had previously suggested. But another plus is your wiring can be deleted easily, if in the future you stop using a bike rack.
-
Seeking New Air Conditioner for Hull # 145
jd1923 replied to ScottyGS's topic in Ollie Modifications
I listed my take of Pros & Cons on page 1 of the link I posted above. Most of it came from Tom Morton's YouTube review of the Chill Cube: Testing the Furrion Chill Cube 18k Variable-Speed AC: The Future of RV Air Conditioning? -
Seeking New Air Conditioner for Hull # 145
jd1923 replied to ScottyGS's topic in Ollie Modifications
Yeah, and then you have altitude. Our trip was mainly in June, not July-August! I expected heat in Kansas or Iowa but was not expecting it in the Dakotas and Wyoming. Finally, Colorado camping at 9K ft was cool! 😎 Drove down to Phoenix on Thursday to pick up Chris from Sky Harbor Airport. High temp on the truck trip computer was 112F on Phoenix highways. The high in Prescott was 85F (low 58F). Our home is at 5400 FT. That's a 27-degree difference with 4300 ft change in elevation. In Arizona you can drive a couple hours and change your weather which doesn't work in the Midwest! -
Furrion Chill Cube – Product Review and Installation
jd1923 replied to jd1923's topic in Ollie Modifications
Did you do this trip yet? Any feedback on the Chill Cube in hot humid weather? Does it keep up with the heat. Is power consumption doable on your batteries? 😎 If your trip is still on the horizon, let us know afterwards. Thanks! -
Seeking New Air Conditioner for Hull # 145
jd1923 replied to ScottyGS's topic in Ollie Modifications
That's what I thought. Living in Arizona we do not travel in the summer months. Then a couple experiences changed my thinking! Over two years ago we did a SW Utah trip, from Apr 21 to May 7, 2024. You wouldn't think it would get hot, springtime at high elevation, and most of the trip was fine. The day we left, we dropped down about 3K ft to US-93 and we boondocked in Wikieup, AZ. It was 93F when we got there and fortunately by 9PM it was cool enough to be in the cabin again. Back then we still had lead acid and the Dometic P2 so all we had tp remove cabin heat was the Maxxfan. Our next stop was to be Valley of Fire SP, NV where we had booked a dry camping spot. Quite a fitting name, given the forecast showed 99F highs for the next 2 days of our reservation. We wasted that money, instead having to book an electric site at the north end of Lake Meade. Plugged in to run the G-awful Dometic A/C. I had to wear noise-cancelling headphones to watch TV and to fall asleep! Thank goodness it was only 2 of 16 nights on that trip. Last year we did a 5-week trip to Minnesota, from May 29 to July 4th. We headed out east and swung north and took a northern route back. I believe it was 12 of 36 nights where we needed A/C. I had thought being so far north we wouldn't need A/C, bad assumption. We even had to book campsites in SD and WY where we would have much preferred to boondock in the woods but were forced into a campsite to plug in. After that trip, I vowed never to hear that awful Dometic P2 again! And also, my goal was to gear up in Inverter and Ahs and replace the A/C with a unit that would sip vs. gulp Ahs. For you, the freight-train NOISE of the P2 should be enough of a driver. You plug in so yeah power consumption does not matter (though we run ours for lunch breaks on the road too). Easiest DIY out there given size and weight. The only A/C model I've heard of that needs a custom platform was the Truma. The Chill Cube has a 29x29" footprint, making it a full foot shorter to the rear. It's also the lightest unit out there. Here is my DIY thread. This link will take you down page 2 to where my installation starts. I have installed 3 RV A/C models in the last 6 years, and this one by far was the easiest. You will need to add a furnace thermostat control which I also show here: -
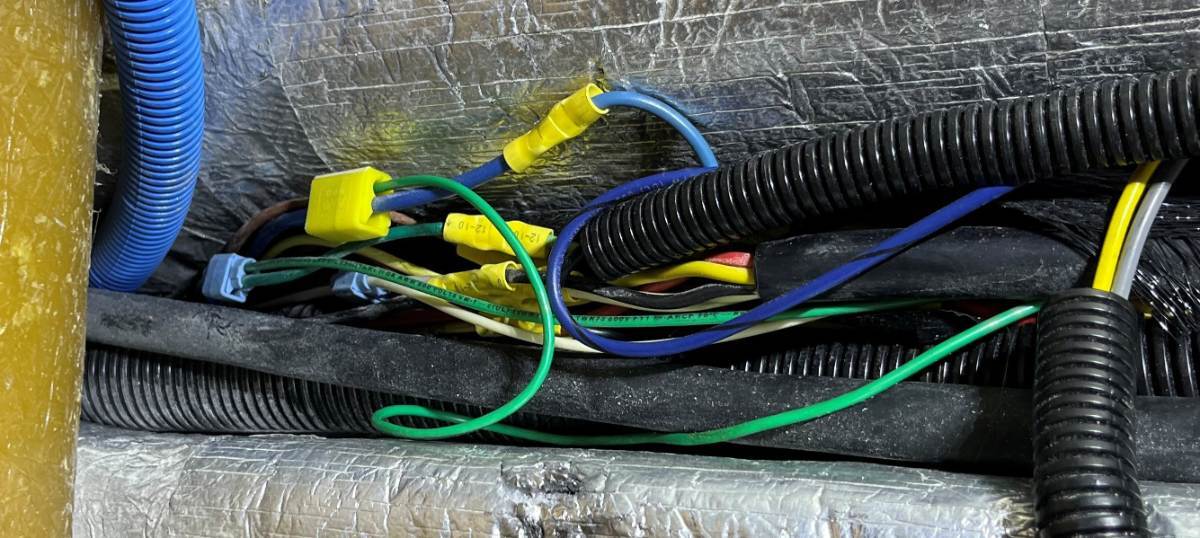
It would help if you showed a picture of the "flat plug" on your new bike rack. Without seeing that, I might guess it could be the 4-pin trailer connection (for small trailers without brakes). Here is an example: Curt Vehicle Wiring Harness with 5-Pole Flat Trailer Connector - 60" Wire Lead CURT Custom Fit Vehicle Wiring C58531 What you're attempting is not an easy job! Most trucks that have the 7-blade connector also have a 4-pin connection zip-tied somewhere above the bumper. But the Oliver doesn't have one! 🤣 You can pick connections for brake lights, turn signals, reverse and running lights in one of two locations. 1) tap into the lights at the rear of the Oliver, or 2) at the junction box where OTT splices the 7-blade harness into the Oliver trailer wiring. I believe this junction box in newer Olivers is inside the bathroom vanity, but who knows on a 2026. In our hull it's easily accessed under the front dinette seat (see picture). If I was doing this for our hull, I would pick option #2 since you can see these wires are easily accessible (likely not so in your Oliver). The link I supplied shows a 60" wire which is fine for rear wiring. If you are going up to the front harness, you want something like this that has longer wires. It's actually rather easy to run wiring from the rear, along the streetside basement, all the way up to front junction box. 35 Ft 4-Way Trailer Wiring Harness - Wishbone Style - 42" Ground Optronics Trailer Wiring A35W42B The hard part front or rear is to tap into the existing wiring. I rarely recommend using 3M Scotchlok™ connectors, but I would in this case since secondary rear wiring on a bike rack is not exactly "mission critical." Hope this helps! 😎

-
Yeah, at a minimum you gotta remove the basket to spray Vortex. As you can see in my picture, it gets rather dirty under there! I removed all this just for ceramic coating, to do the job right. Removed the doghouse handles and latches, the outlet plates, anything screwed down or riveted. Whatever doesn't come off has to be masked for Vortex application. Can't stand warning labels either! You can see where a couple were removed and the one showing was removed next. With the basket off, it can be cleaned thoroughly with a degreaser that you wouldn't want to use if the basket was still above fiberglass. I'm not interested in PPF or Vortex. Now that we have a good ceramic coating shine we prefer to enjoy the clean look. Don't forget mud flaps, regardless of other protection, and not just on the TV. I found the dirtiest part of the Oliver was always the fiberglass underneath behind the Oliver wheels all the way to the rear bumper, grease, road tar, etc. It was bad, but not anymore! Either way, the result is in the prep work! 😎
-
Cleaning the gap around the linoleum floor
jd1923 replied to Ken Root's topic in Mechanical & Technical Tips
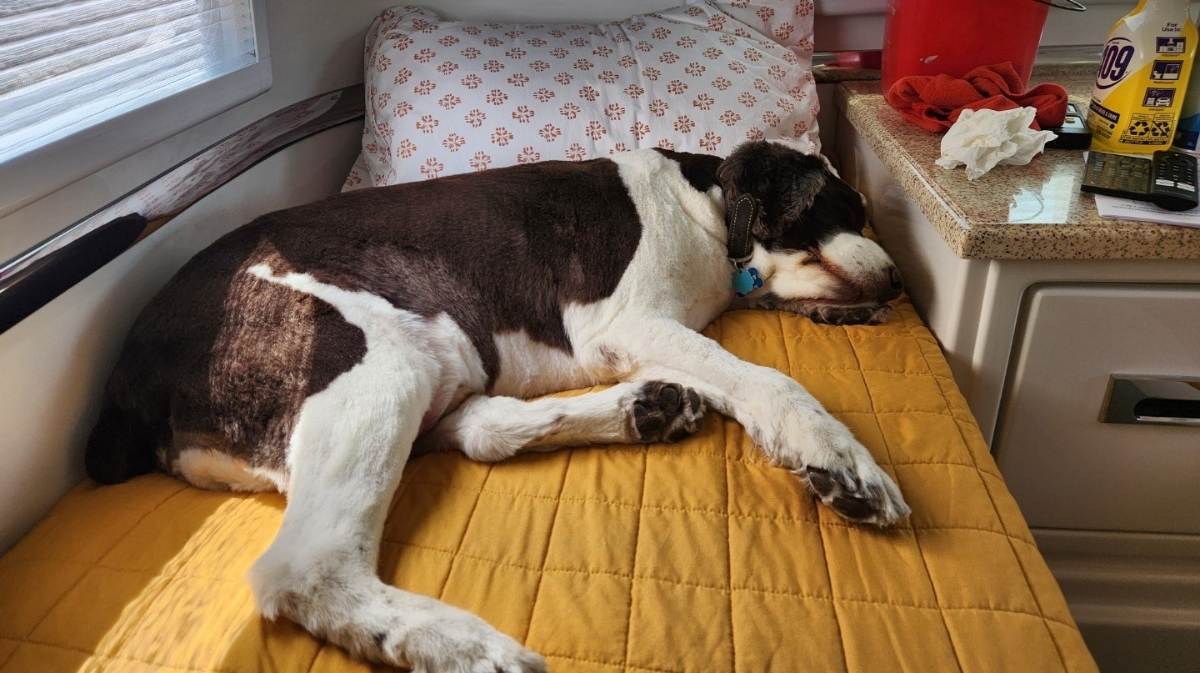
Yep, me too on slippers. So much dirt, we know why! His bed is at the end of the aisle! Picture of Charley when we first got our Oliver, first cleaning too. Now with some age and TALL mattresses, he can't get up on the beds anymore! I hadn't noticed the edges being bad, but I guess the older floors were different. We use carpet runners which collect most of the dust. Chris uses our Dewalt vacuum around the edges and under the dinette, takes her 2-3 minutes. I remove the short runner at the entrance every 2-3 days and give it a whip on both ends which removes most of the dirt. Roll up the long one between trips to wash. We put them in the washing machine at home which has worked well. Recently one edge started fraying on the long one and Chris hemmed that edge. We have 151 overnights on these runners according to my Oliver Travels spreadsheet. Not bad. They're 26" wide which is a perfect fit, and you can order by the foot in length. One 10' and 4' fills everything perfectly except under the dinette. He has learned to sleep on his mat by the nightstand. 😎 Amazon.com: ORFA HOME Custom Size Hallway Runner Rug, Slip/Skid Resistant, 26 Inch Wide X Your Choice of Lenght, Solid Blue, 26 Inch Width X 10 Feet Length, Sold and Priced Per Foot : Home & Kitchen
-
Seeking New Air Conditioner for Hull # 145
jd1923 replied to ScottyGS's topic in Ollie Modifications
You're welcome! And you will not be sorry. If you're waiting to later in the year, we won't get real feedback from you until the following summer. Looking forward to seeing results from somebody who lives east where humidity is certainly a climate factor in A/C performance, I've tried running a couple studies and each time I failed to capture full data every 24 hours, but I have some preliminary findings. With highs in the low 90s for a full week, lows high 60s, I set temp on the Chill Cube at 80F (cabin temp on Ruuvi showed 79F consistently) which is a good set temp for parking the Oliver outdoors in the summer. I got good data for three 24-hr periods which averaged at 108 Ah used per 24 hours, A/C running 24x7. I know I I took snapshots every day for a week but don't get me started on iCloud because sometimes pics just disappear off my phone! Beyond the 3 days of verified data, I know for a fact that I ran the Chill Cube for ONE (1) FULL WEEK on our 900 Ahs! After a week SOC was down to a low 18%. This translates to 105 Ah per day. Keep in mind, when low 90s outside, and if there was no A/C running, the Oliver Cabin would get up to 99F min or low 100s! Then I tried another test, A/C set temp at 74F which is a comfortable temp for camping. I was able to run our A/C for four (4) full days, 4x 24x7, again highs low 90s. Daily Ah used was 135, 209, 270, 136. I have no idea why yhe numbers varied in this way as the weather was rather consistent. Average over 4 days is 188 Ah per day. I cannot believe how efficient this runs. One additional factor: these numbers are net of the fact we have 320W rooftop solar which produces 10-20A per hour half the day. Next test I should account for this or just turn off the SC so everything is pulling from the 900 Ah Epoch batteries. Did you know the Dometic P2 once it gets past the Soft Start procedures draws 150A or higher? In this short test, the Furrion Chill Cube on average took as much power cooling for 24 hours as the Dometic P2 would use in one hour and fifteen minutes. Scotty, I'm seeing much better savings than "about half the power!" But camping in hot humid times in the east, you should half the power, or perhaps 40%. Can't wait to see! I'll run a better test in a few weeks when we get daily highs in the high 90s. It just cooled off here and thankfully for the next week or two we're back to spring-like temps in the low 80s. 😎 -
True Induction Stove Top will not turn on
jd1923 replied to Lamar's topic in Mechanical & Technical Tips
Lamar, keep fighting the good fight! Certainly, Bill has good advice in contacting OTT management directly. You're not asking for too much, so I hope you stick to your position. OTT can reuse the 2KW inverter in another installation. Wholesale costs between a 2KW vs. 3KW Xantrex is likely about +$200 or not much more. Labor to replace the inverter and rewire all 120VAC circuits through the new 3KW inverter should be 2 shop hours. I know I could do this work in one afternoon and I'm older/slower than the younger contract electrician billing flat-rate shop hours! 😎 -
RVLock company stands behind its product
jd1923 replied to Snackchaser's topic in Mechanical & Technical Tips
We're in agreement on this one! Ours might have been a Wi-Fi Ranger. I do remember testing it and it actually made the signal weaker! We went with a Pepwave router to stream on cell and a Starlink Mini for when there is no cell coverage. I removed the Wi-Fi antenna, both cameras, gave away the (yes clunky) screen and the Sat Dish from our roof and patched all the fiberglass. We have the manual door lock, now for 10+ years. After reading that the rubber contact pads were fading on these auto-locks, most of you with this feature were carrying keys just in case, and the deadbolt issue as Tom fully explained above, like @routlaw noted, I/we decided to pass on this upgrade. Good Customer Service is great, but if the product continues to fail it becomes nuisance, or worse if you truly get locked out! I purchased a backup manual lock to have on the road if needed. I found a cool white powder coat model on sale vs. the original chrome latch. If you get tired of dealing with your auto-latch, you could go manual: Amazon.com: Lippert Global Entry Door Latch Kit with Deadbolt, Keyed Lock, Two FIC Keys, Edge Cover Plate, Strike Plate, Mounting Screws for Travel Trailers - 239632, White : Automotive Honestly, this clean white door latch looks better too! The only thing that has failed on our entrance door is the screen door latch, so I replaced it with one of these: Amazon.com: WanDwel Aluminum RV Screen Door Latch Handle Replacement Kit (Right Hand) Metal Camper Travel Trailer Motorhome Entry Parts for Passenger Side : Automotive -
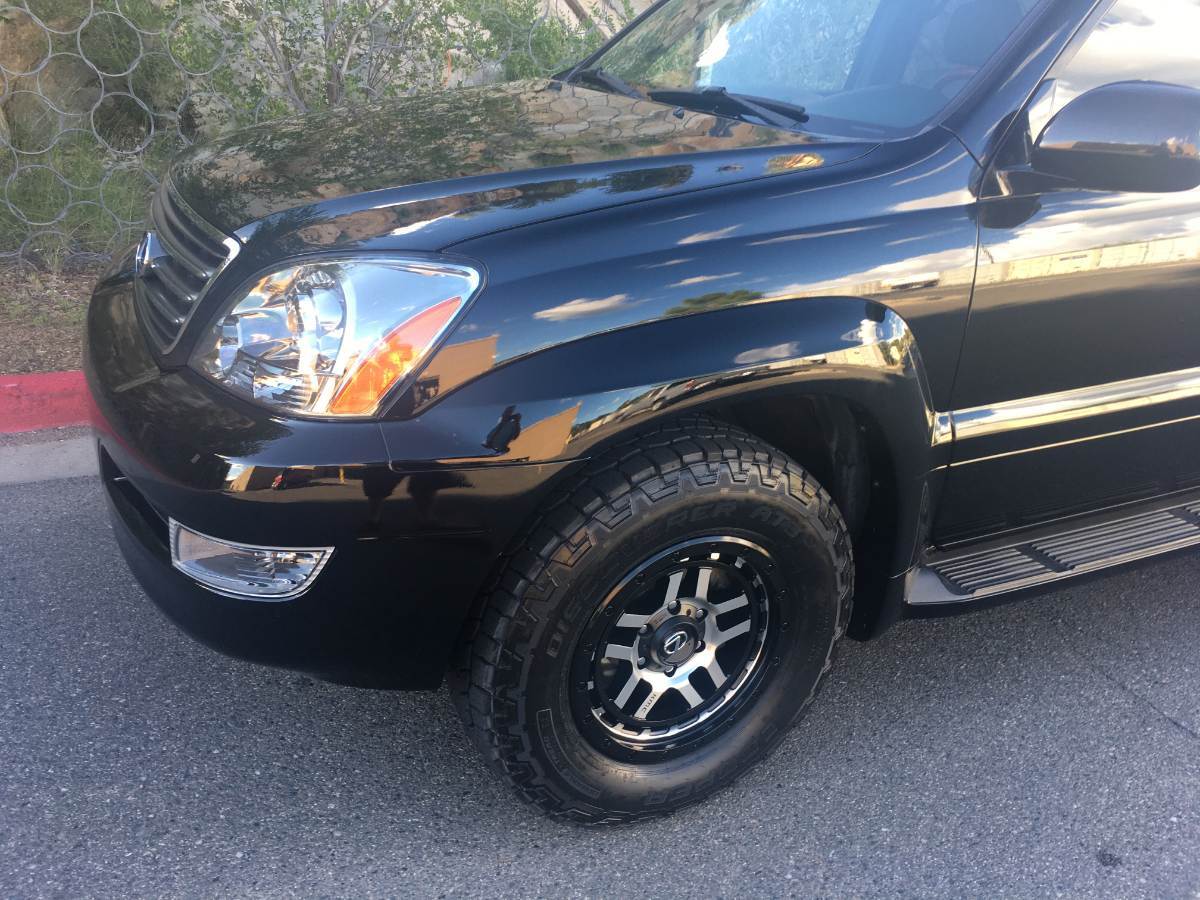
As with most things, I'm sure this is true. However, I believe in the acronym "Anything But China" (ABC) whenever possible. Often, China is the only choice. Current management is changing that now, if you know what I mean! 😎 For 30 years, I've purchased a lot of tires from Tire Rack. I can understand the draw to Discount Tire because they are everywhere you may need them on the road, but I find them over-priced and difficult customer service. Tire Rack includes a 2-year Road Hazard and include installation in your purchase and choose a local shop, ship them there and get a contracted installation rate. The other thing I like about Tire Rack is they are the only company that lists "Country of Origin" at the bottom of the Specs tab for every tire they sell. @John Dorrer if your friend with the new Oliver is still in the market for tires, I strongly suggest these at this price! (EDIT: these do not come in 15" so will only work for older Olivers with 16" wheels.) Michelin Agilis CrossClimate LT225/75R16 These had MSRP of $260 each but are discontinued for the new version, on closeout for $189. I have these tires on our Oliver because it came that way. These are great tires for the Oliver, designed as a high mileage commercial van tire. I've towed our trailer about 300 miles on rocky Arizona dirt roads. The rocks on our roads are sharp. I know this because once I got a 4" cut into a rear dirt bike tire. We have about 18K miles in the last 2 years, and I have no idea how many miles prior owner(s) towed and the tread and sidewalls look like new with DOT codes 2420 (6 years old). They are Michelin, and according to Tire Rack, Made in the USA! Anybody need new Oliver tires?
-
Maybe the fronts being the leading tire take more abuse, first to hit bumps and bridge seams and potholes, etc. I've not noticed this before, though most of my experience is in auto applications that only have front-end wheel bearings. Given your hub temps traveling were good, I would not worry too much. Do your best to reassemble correctly. I don't use torque wrenches, but what you wrote looks good. I tighten and spin (and repeat) and try to place the cotter pin at or near the tightest point while hand-tightening with a medium length ratchet. Clean the bearings thoroughly. I rinse with old gasoline and then wash with Dawn detergent, using compressed air to blow clean and dry. Repack again using your packing tool and fill both inner and outer seams of each bearing with grease removing any air bubbles. I believe it's very important to fill grease between the new inner seal and inner bearing. Same for the outer bearing and the washer and I grease on and around the races. This way grease should not spin out of the bearings with use. Your grease looks a little odd, but it could just be the picture. The many brands of high-temp CV2 wheel bearing grease I've used always looks a very dark red or maroon in color and in your picture, it looks more orange. I did the same Timken replacement, but a year later upgraded to D52 axles and never did the follow-up repacking you are working. Wonder what the bearings look like on my old axles? (Still trying to sell them!)
-
2022 Lexus GX 460 pulling an Oliver Elite 2?
jd1923 replied to Douglas-Stickler's topic in General Discussion
Welcome @Douglas-Stickler to The OTT Forum and we wish for you a new Oliver in your future! This is correct and what @Steve Morris with his favorite Land Cruiser wrote "with the 5.7 V8, and it is just adequate" is also correct. The 200 platform, an LX or the Tundra would work, but sorry not the GX. We have a wonderful '08 GX470. Three years ago, after purchase of our Oliver, I setup our GX with a REDARC brake controller thinking I could use it as our tow vehicle. When I got home after a test tow, first thing I said to my wife is "We need to buy a truck." She nodded in agreement. Besides payload capacity or 4.6 vs. 5.7 towing power, there is another major issue. The wheelbase on the GX/4Runner 120 platform is just too short! Any porpoising movement in Oliver creates a BAD pendulum effect on the short wheelbase of the GX. The Andersen WDH helps a little, but using it strains the suspension front to rear. It feels awkward and uncomfortable. After driving just a few miles on an in-town highway, I returned home and detached. There is no way in the world I would tow down the mountain where we live in our GX pulling an Oliver. Chris drives our GX every day. After I restored it, she lets me drive it on occasion. 🤣 Hope you can keep your GX and purchase a 2500 series truck like we did!
-
I concur! @Ollie-Haus showed me this product last year and we bought two, one for home and one for the Oliver. We use the one at home every day and the other on every trip. They are usually $130, so this New price is very good. I purchased both of ours Amazon Used Like New for $80 each on Amazon. They both came in new condition.
-
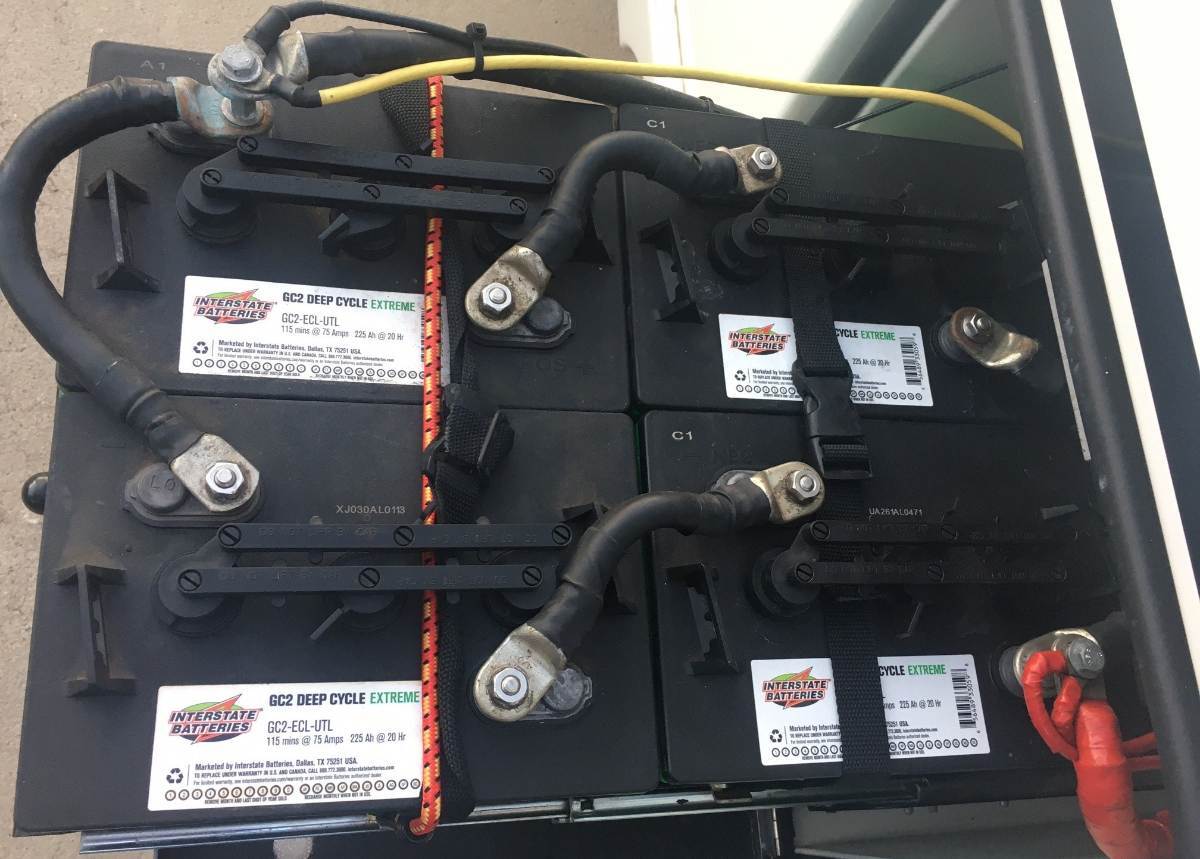
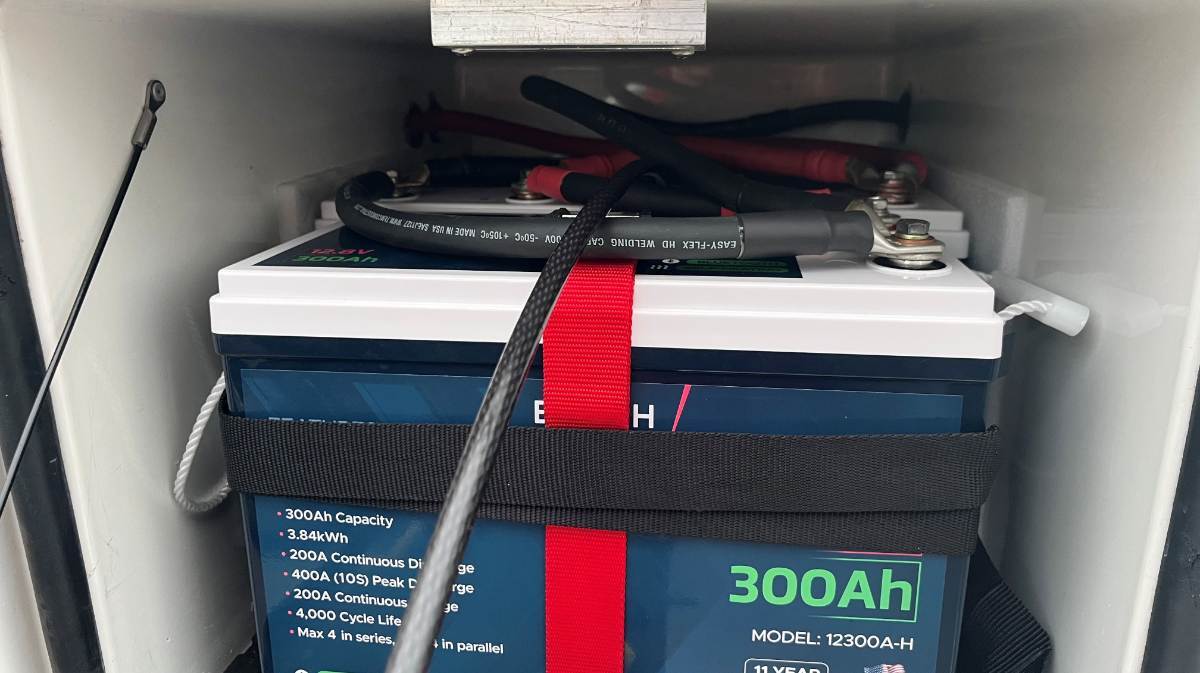
Good example Ron! Most of us want more capacity but I wasn't even trying to upsell. My point was to spend the same dollar for the same low Ah capacity but choose modern lithium technology because it makes good sense to do so! Lose 200 LBS weight, take half the space, get twice the life in charge cycles, 3 times the warranty. And btw, LA batteries are somewhat dangerous, towing with sulfuric acid! But I'm with you, Ron! We cool our Oliver while towing, so the cabin is cool during fuel and lunch stops, no hook-ups there. I'm also not trying to convince anybody to change their camping style, but for us, we don't use public bathrooms anymore, because we have all the comforts of home in our Oliver. We travel batteries and fresh tanks full. With 900 Ah in battery capacity, we can run our A/C for 3-5 days weather depending, and with and an extra 35-gal fresh water in the TV we can last over a week including water for showers. But that's us, not trying to sell. Even if you spend every night at a campground with hookups, what if you run into weather or a roadside breakdown? Having extra water and battery capacity sure would help. And my friend @johnwen had his LA batteries fail when he unknowingly ran out of LP and the fridge had switched to DC. If he had made his 600 Ah Lithium upgrade prior to this issue, their fridge would have run another 3-4 days on battery keeping the food cold. I tried, but the OP is determined. What would you choose?
-
Yep, you wrote "6V batteries" and most still have the fill caps! AGM is "maintenance free" yet glorified LA. You know in the early 50s and before, every American automobile used a 6V battery. 🤣 I guess you missed my point, but I'll give it one more try... In 2019, I upgraded a Class C with solar, inverter and three 100 Ah AGM batteries. AGM (LA) was the right choice then. I paid about $800 for 300 Ah (150 usable). The alternative was two 100 Ah Battleborn batteries which many Oliver Owners in the day purchased. This would have been about $2,400 which came to 3x the cost. This is not true anymore. You can buy cheaper LiFePO4 brands, but two of these Epoch 105s come to $1000, Four quality AGM batteries will cost about the same. LiFePO4 is warrantied for 11 years while the Gold model on any LA battery is warrantied for 3 years. Epoch Batteries 12V 105Ah Essential Series LiFePO4 Battery — Renewable Outdoors Two of these have very close to the same usable Ahs as 4 LA. These weigh 22 LBS each so you could also lose 200 LBS in the battery bay and have enough room besides for a good size toolbox! 😎 You'll have trouble finding another Oliver owner who would be the defense of a future purchase of lead-acid house batteries. But it's certainly OK if you want to be the one. Just trying to help. 😎
-
Sorry for being so negative. We truly love our Oliver. China tires on an Oliver really got me.
-
I watched the OTT video on the 2027 model. It turned my stomach in disappointment. Can't stand the BLACK framed windows that look like eyesores to the interior. But worse than that... What educated buyer cares about fancy options when the basics are substandard? OTT is making design changes in their Hohenwald bubble when all they need to do is read a few threads on the forum they provide! It is a lot of reading, but OTT Management please start by reading the 37-page thread "Made in USA Leaf Springs." Dexter 1750 LB springs have been failing forever and they still mount them? Ten years ago, they mounted Michelin LT Agilis tires on 16" HD rims, now you get ST tires on 15" rims, and more recently some China Cr@p tires? 🤣 They should lose OPTIFUSE breakers and source something with quality. Lose Xantrex over the much-preferred Victron products. I'll give them one good choice in dropping Truma! All Jason talked about was the solar awning, made by another manufacturer, just bolted on by OTT. He said it works better in the morning, facing the sun, but then I'd have to get my tired butt up and out to erect it. You'd also have to think about sun direction when parking in addition to leveling! What if the level spot has no sun exposure in that direction? We've only used our awning 5-6 times in 3 years. They could put 600W solar on the roof with a directional mechanism. Now that would be useful! Why after 10+ years are they still mounting switches, fuses, breakers and water valves under the beds. I fixed all that after the fact, but it would be better if they would do the right things from the start! 😎 Why are there over 40K posts in the Mechanical & Technical Tips and Ollie Modifications forums alone? Better design would lead to less need for maintenance and modification of our hulls.
-
This was sensible on a cost basis 5 years ago and before. LiFePO4 batteries used to be expensive. Today you get far more usable Ah/$ going with LiFePO4 batteries over 4 "golf cart batteries!" Watering batteries doesn't have to be a thing anymore, OMG! 🤣 But what do I know? I really dislike connecting to shore power. With our recent upgrades, we travel for weeks without the need to plug in! Our DC-DC charger alone allows us to produce more Ahs in 5 hours towing than you have in your entire system after being plugged in all night, and that's if your batteries were brand new. Really, take a good look at LiFePO4 today! You'll save money outright on an Ah/$ basis. When you figure 10-year vs. 5-year life, the savings truly double! Lead acid only belongs in the tow vehicle as a starter battery, not anymore for deep-cycle storage.
-
Wow! Really? Can this be true? Six years ago, I purchased an old 12’ flatbed trailer to haul our dirt bikes and SxS. Dexter tandem axle 7K, same suspension as OEM Oliver. I planned to restore it, new wiring, lights, paint frame, new flooring, add brakes to the rear axle, etc. OMG, It had China tires! I quickly purchased a set of the US made Goodyear Endurance ST tires. Listed the old tires on Craig’s. Sold the set for $100 because I didn’t want to take any more money from anybody. I explained twice to the new owner, these are not safe for highway use! He was OK in using them for a landscape trailer. John, please explain to your friend he needs to buy new tires! Anybody taking possession of a new Oliver, let OTT know you’ll not accept delivery with those cheap tires! 🙃 Glad most of us have 16” rims with LT tires mounted!
-
Not replace, but repair the connection so it cannot come off again. Is it for the inverter/charger? So a 110V plug like the fridge? If so, it’s not the plug but a cheap outlet receptacle. That could be replaced with a Leviton or a quality outlet not Made in you know where! Cheesy, yes! OTT wired the outputs on our inverter using a residential junction box and wire nuts! 🤣 Hardwire? I’d do that in a heartbeat! 😎
-
I'd say, this is not such a good idea. Go back to your post from last year and review Geoff's suggestion @Snackchaser. Time to fix the issue vs. adding a checklist item. Not sure re the Norcold fridge controls, but on our Dometic when in LP mode it will stay there by design. When you select "Auto" it will switch to AC if available, or DC when not plugged in.