jd1923
-
Posts
3,646 -
Joined
-
Last visited
-
Days Won
281
Everything posted by jd1923
-

RM 2454 Problem Heading into SE Colorado Boondocking
jd1923 replied to Geronimo John's topic in Mechanical & Technical Tips
Good work Bill, and you made GJ's day! I have this as part of our "2016 Elite II Owners Manual" PDF, but every time a fellow forum member posts an electronic PDF file, a manual or schematic, that relates to our hull, I download it and save electronic copy. I prefer using PDF files. Not just for the absence of carrying the big basket of paper, but for ease and speed of search. When GJ wrote his model # in the title of this post, I search my 557-page PDF copy of the Oliver manual for keyword "2454" and in 2 seconds it jumped to page 151 where the Dometic fridge manual starts in this long file. I use the Ctrl-F hotkeys, type a keyword, and there it is. No time taken to review the Table of Contents, search an index in the back pages or thumb through paper. This search capability and other tools we have today are so useful! I show my Project Management Professional (PMP) students this, in every class I teach, as they must navigate through multiple PMI standards, 1000s of pages of content they could see on their PMP Exam. I use the Ctrl-F search function several times a day for anything I'm looking for, searching the content of web pages, doing Oliver research and searching the shop manuals for the many cars, trucks, bikes and appliances we own. It's so handy! 😎 You sure have your files well-organized though, and most people still prefer paper copy. The young professionals in my classes are strongly against printing long files for sustainability concerns, like the 290-page slide deck we use, at 2 slides per page, OMG it's a lot! 🤣 -
RM 2454 Problem Heading into SE Colorado Boondocking
jd1923 replied to Geronimo John's topic in Mechanical & Technical Tips
@Geronimo John and of course, you have the tank diverter valve pointing at the full tank. When these crossover valves switch from the empty side to the full side its secondary pressure is lower. -
RM 2454 Problem Heading into SE Colorado Boondocking
jd1923 replied to Geronimo John's topic in Mechanical & Technical Tips
I believe we have the same model Dometic fridge. Ours has worked fine several times camping in CO outside of Telluride and on the White Mountains in AZ, both above 9K ft. Also, it reads like GJ is still in Denver just over 5K ft. GJ, you're getting the 3 clicks, so all electrical controls are fine. You certainly have a gas issue. I have no experience there but believe your "analysis and investigate" lists are right on. Best wishes, JD -
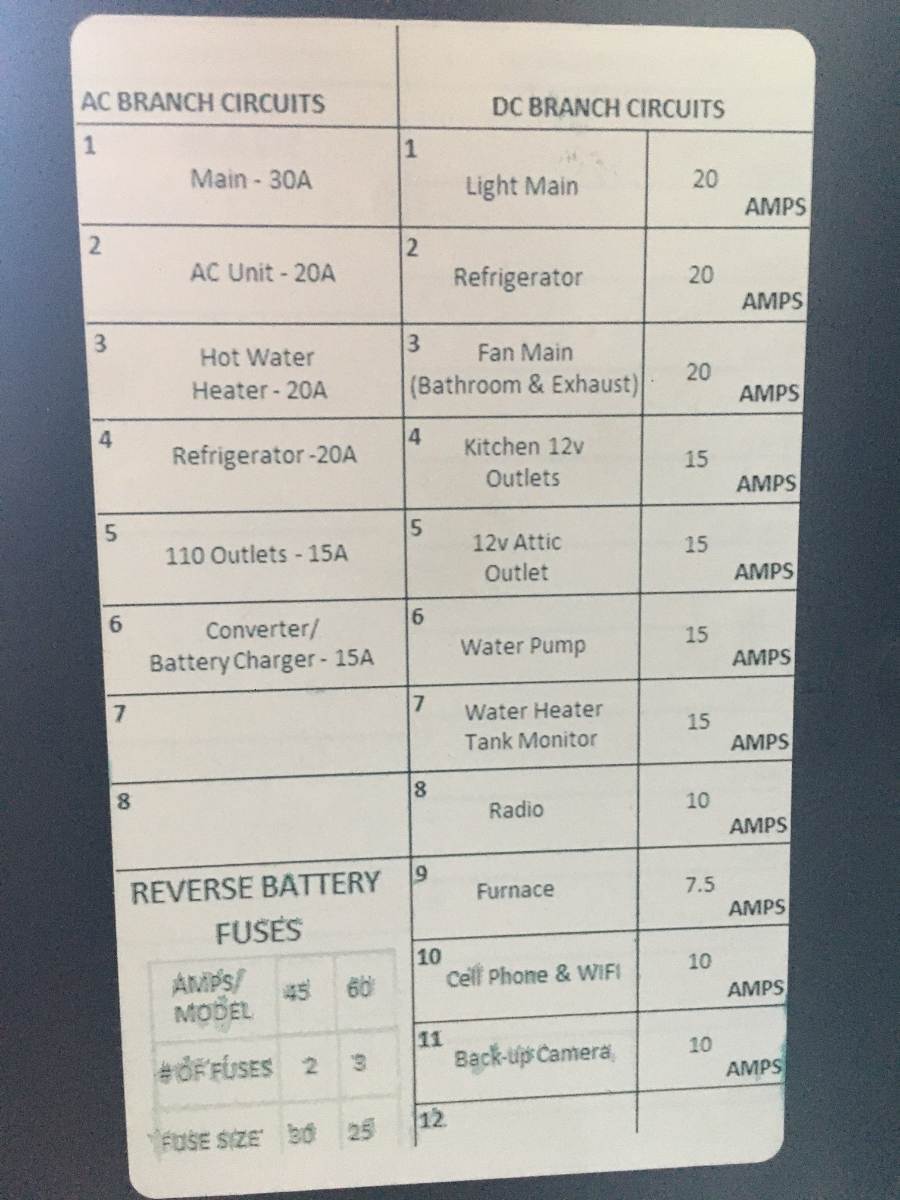
I believe you hit on it here! New issue often comes from last service. I can't believe you were there and OTT Service would not fix an issue they likely created in your scheduled service one business day before! They tried a "new monitor panel." Did they first check the fuse? You have a hull a little older than ours but maybe this circuit is wired the same. Our DC panel has a fuse titled "Water Heater Tank Monitor" (see pic DC fuse #7). Perhaps we're getting closer now! 😎 This 15A fuse might be blown. If so, your HWH would not have 12V to fire up on LP. If you have hot water, I'll bet they pick up 12V from the HWH wiring and if so, there would be an inline fuse between there and the SeeLevel system. It's really bad electrical practice to wire inline fuses at random locations in the basement! RV manufacturers do this often and when I find fuses around the Oliver basement, I move them to a new +bus I wired under the rear dinette seat, so I know where they are, have easy access and never have to reach down under again! Look around for an inline fuse, starting at the HWH then going towards the tank readers or the SeeLevel panel. Hope you find it quickly!

-
Wow, that's a 100A breaker! It must power the entire 12VDC panel and your jacks. You have to think, how did it blow? Unless a major appliance fried or you did something notable, like arc a heavy gauge hot wire to ground, something you'd remember, the 100A OPTIFUSE just tripped for no reason. There have been several defective OPTIFUSE breakers noted on our forum. I also read OTT has stopped using them. I suggest you replace this breaker with a 100A ANL fuse. 😎
-
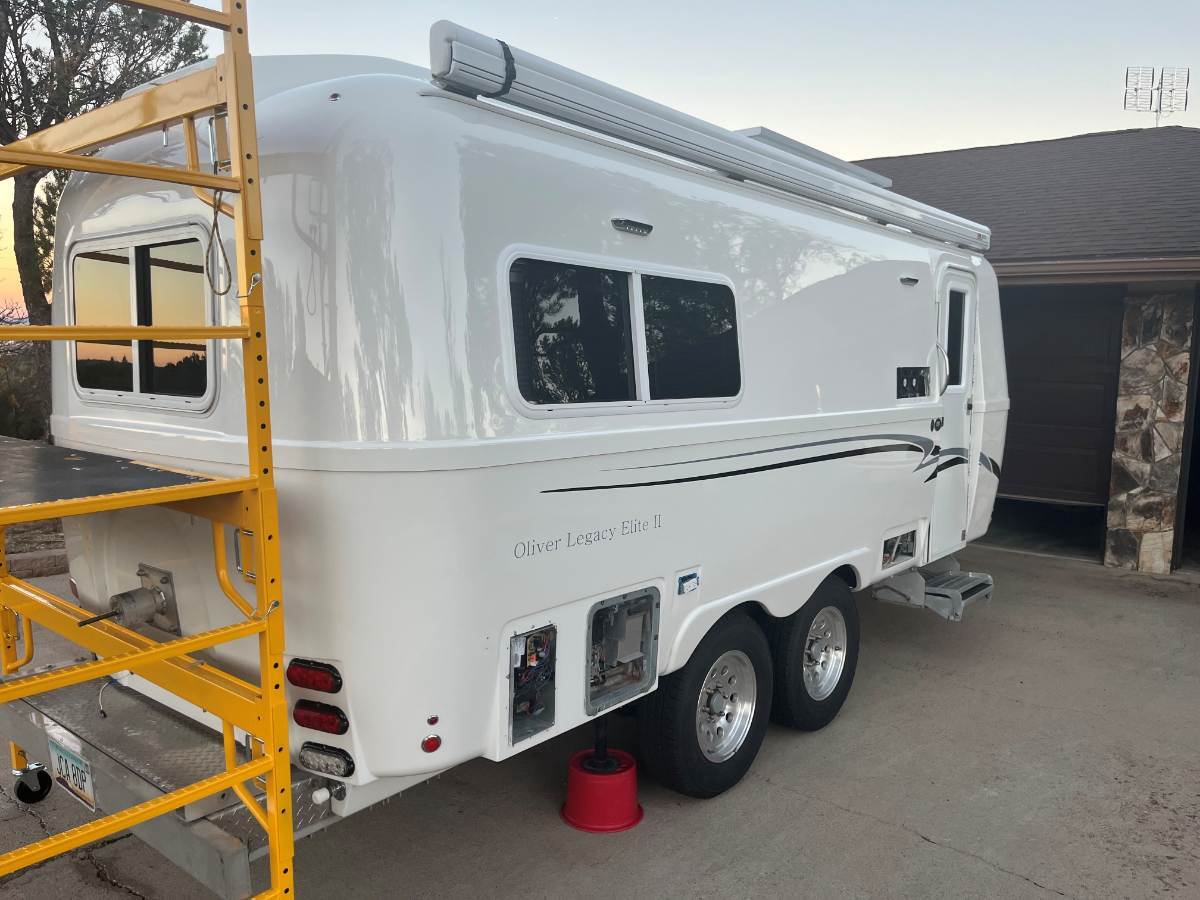
The Ugly Duckling – the Restoration of our 2016 Oliver Hull #113
jd1923 replied to jd1923's topic in Ollie Modifications
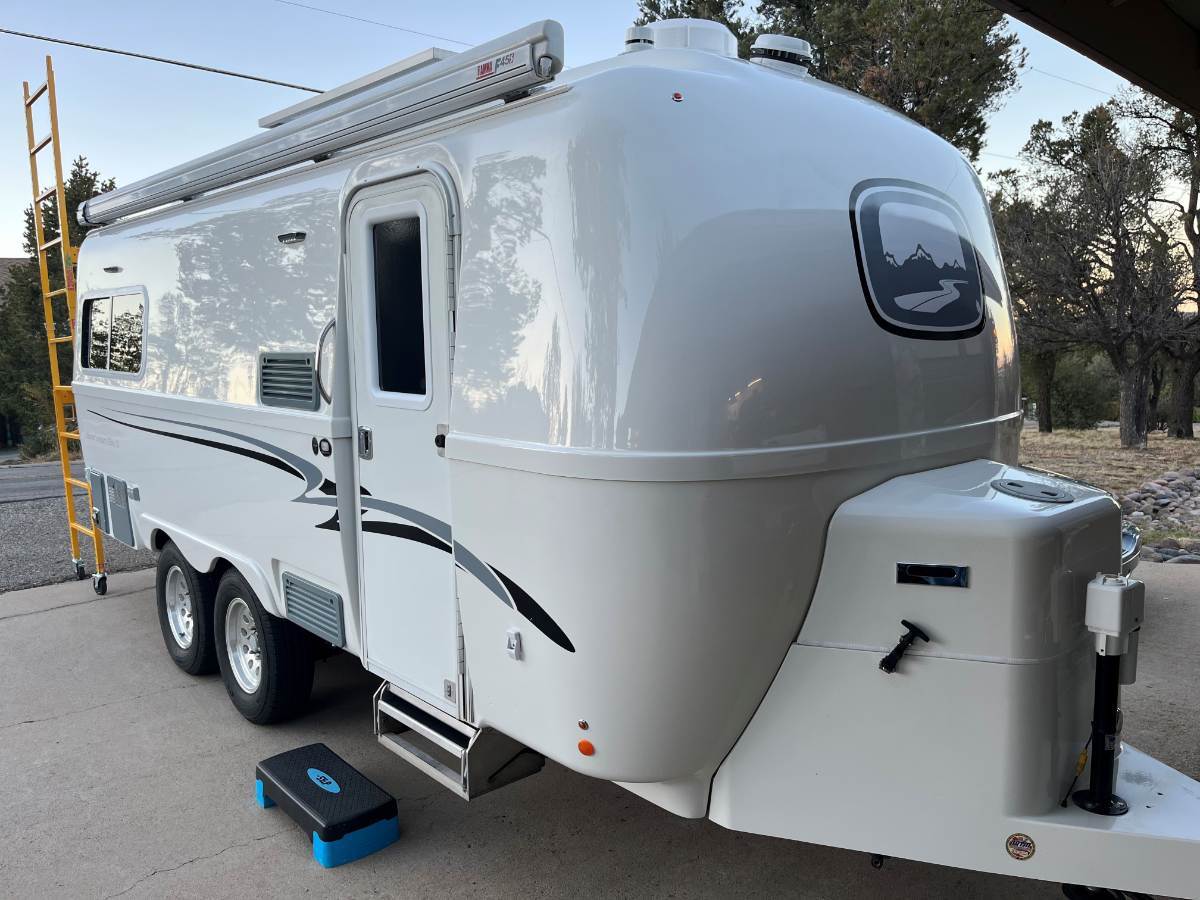
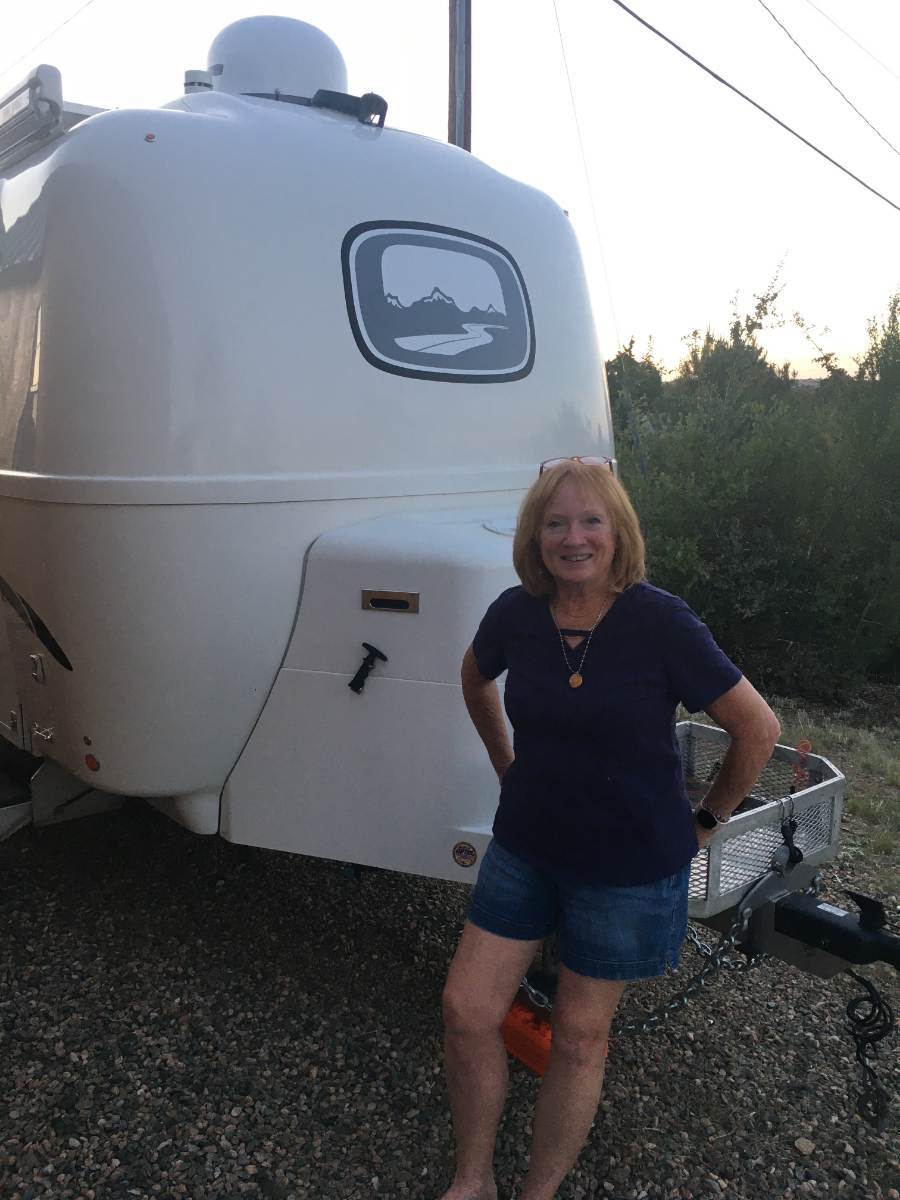
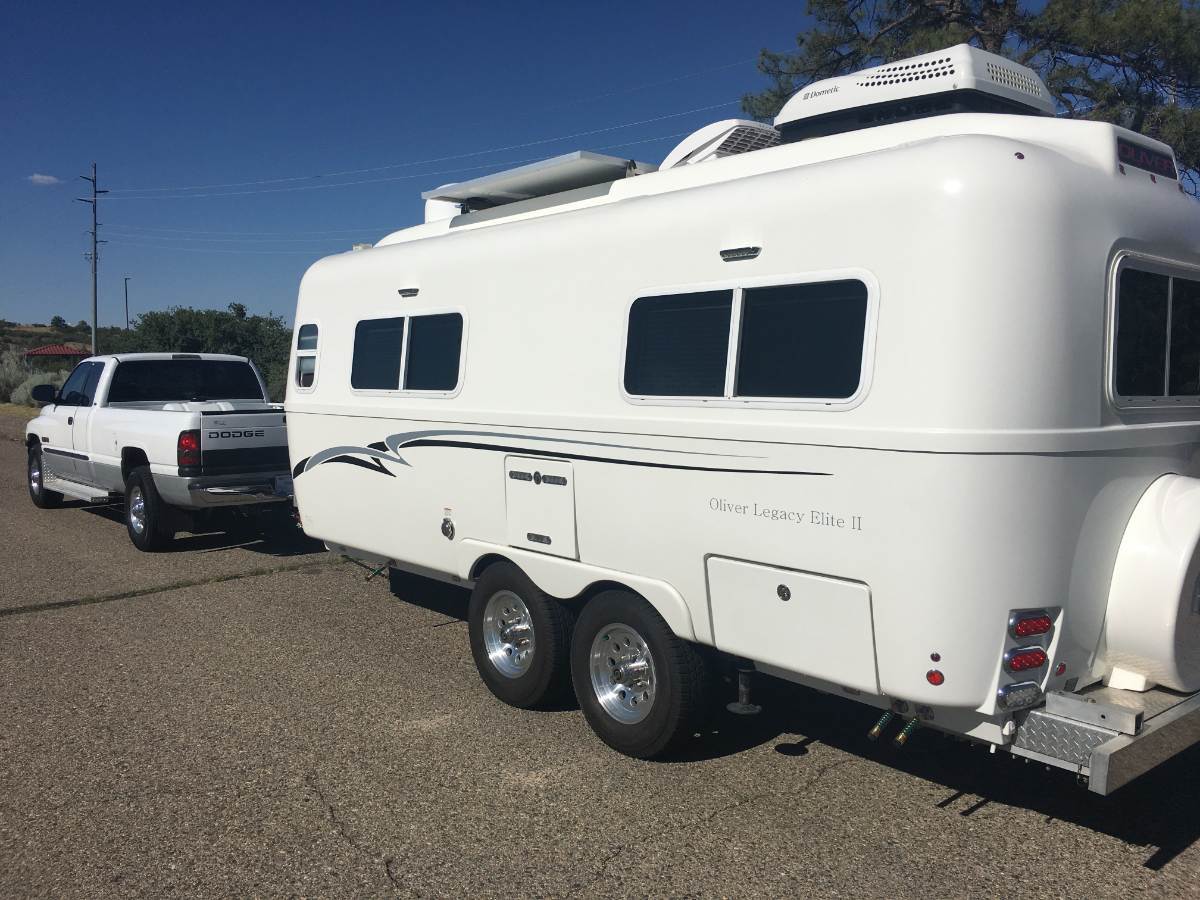
Just 4 days after our Oliver was delivered, I joined our great OTT Forum. My two favorite sections are "Where's Ollie" and "Ollie Modifications" where I frequent often! Early on, Bill @topgun2 referred to our hulls as "cousins" (our #113 and his #117). There are a lot of us with 2016 and older Olivers. These 10+ year-old Olivers have had nothing but special care through the years. I hear Scotty is just starting a renewal project of his own! You wrote "cost of ownership" vs. purchase price." As written above, I had budgeted 15,000 for upgrades (plus 1000 +/- hours in sweat equity) in addition to a very good used price for the hull. My detailed spreadsheet has documented a total of $16,120, so I'm a little over budget. This includes new D52 axles with Alcan Springs, 5 Victron devices, 900 Ah Epoch Essentials, new Chill Cube A/C and so many other documented upgrades. It includes an Emeril Air Fryer, new luxury bedding, new custom upholstered dinette seat cushions, additional shelving, multiple exhaust fans, etc. It includes every bracket, roll of tape, every nut and bolt I used in the last 3 years. I figure our cost of ownership, everything included, is 70% of the cost of a fully optioned new Oliver. Wouldn't trade her for a new Oliver, no way! I've made better choices in our upgrades, and I do better work than the contract installers OTT hires. Then there's the little things like this for example: Yeah, couldn't wait to ditch the dish! That thing was HUGE! I put a Winegard RZ-7500 TV antenna in its place (using 3M VHB tape, NO screw holes). It still appears to be large, but it's actually less than half the size of the Dish! As far as Starlink, I have that and our Pepwave cellular router built into the tow vehicle instead, so it's always with us while camping and on day trips. Picture shows the front roof completed, but before the detailing work. I hate caulking and I'm not good at it. I made a mess with Dicor caulk, not using that product again! But it looks great from the ground! 🤣 And no more useless Wi-Fi Ranger and cameras up top. Yes, the older hulls have some bonuses, some you mentioned, and the little things like separate switches for Entry and Side Porch lights (ours now have lights fore and aft too). Oliver Hull #113 is a family member. Our son Adam got to know her, camping the month of April around the Prescott NF. She will always be with us. 😎
-
The Ugly Duckling – the Restoration of our 2016 Oliver Hull #113
jd1923 replied to jd1923's topic in Ollie Modifications
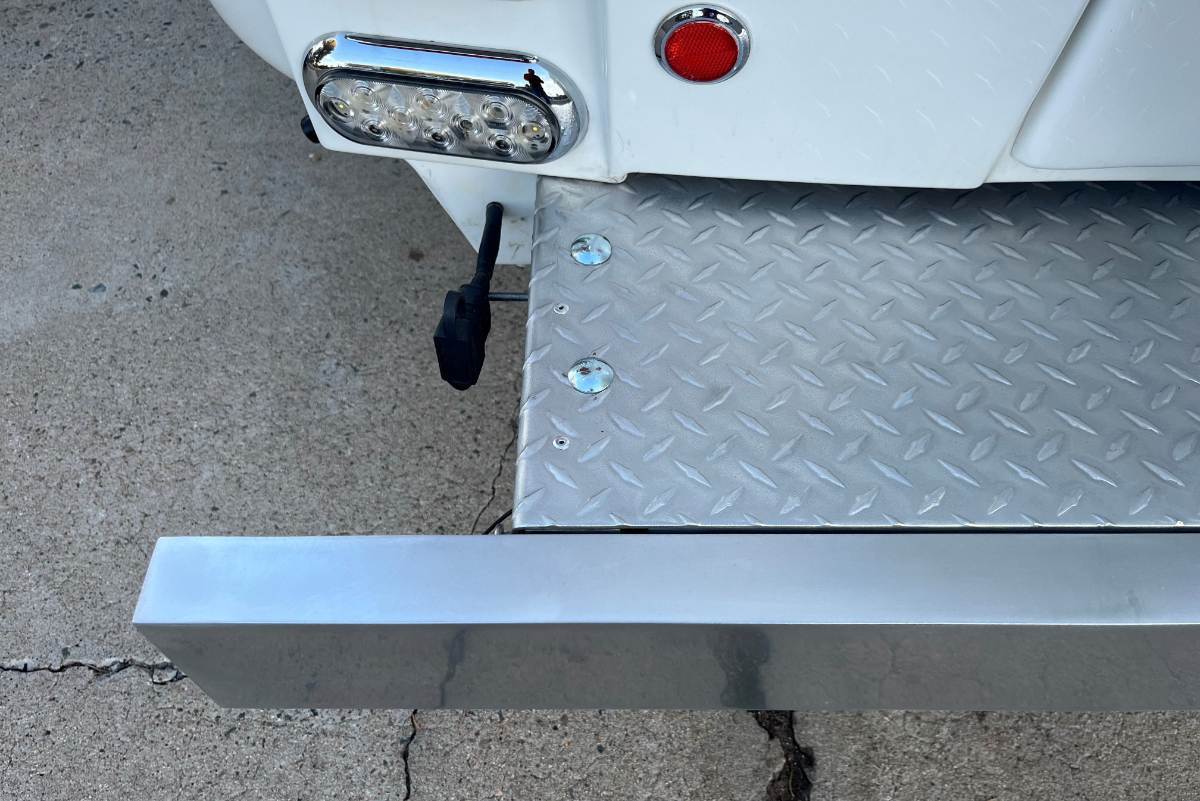
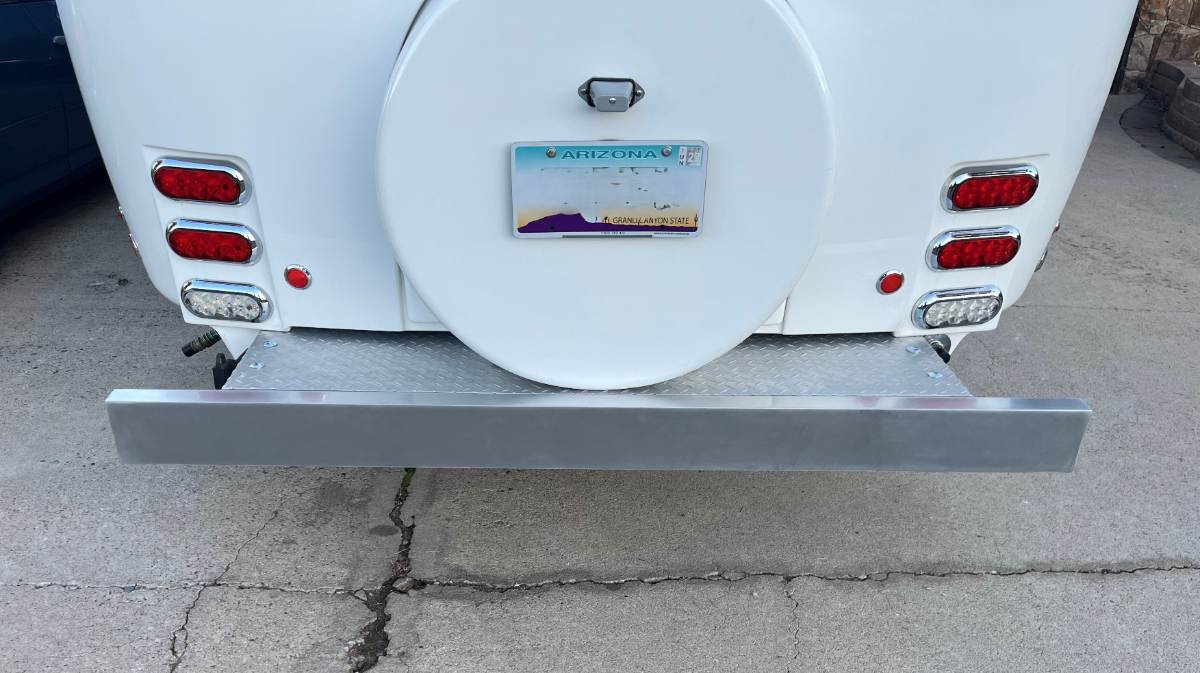
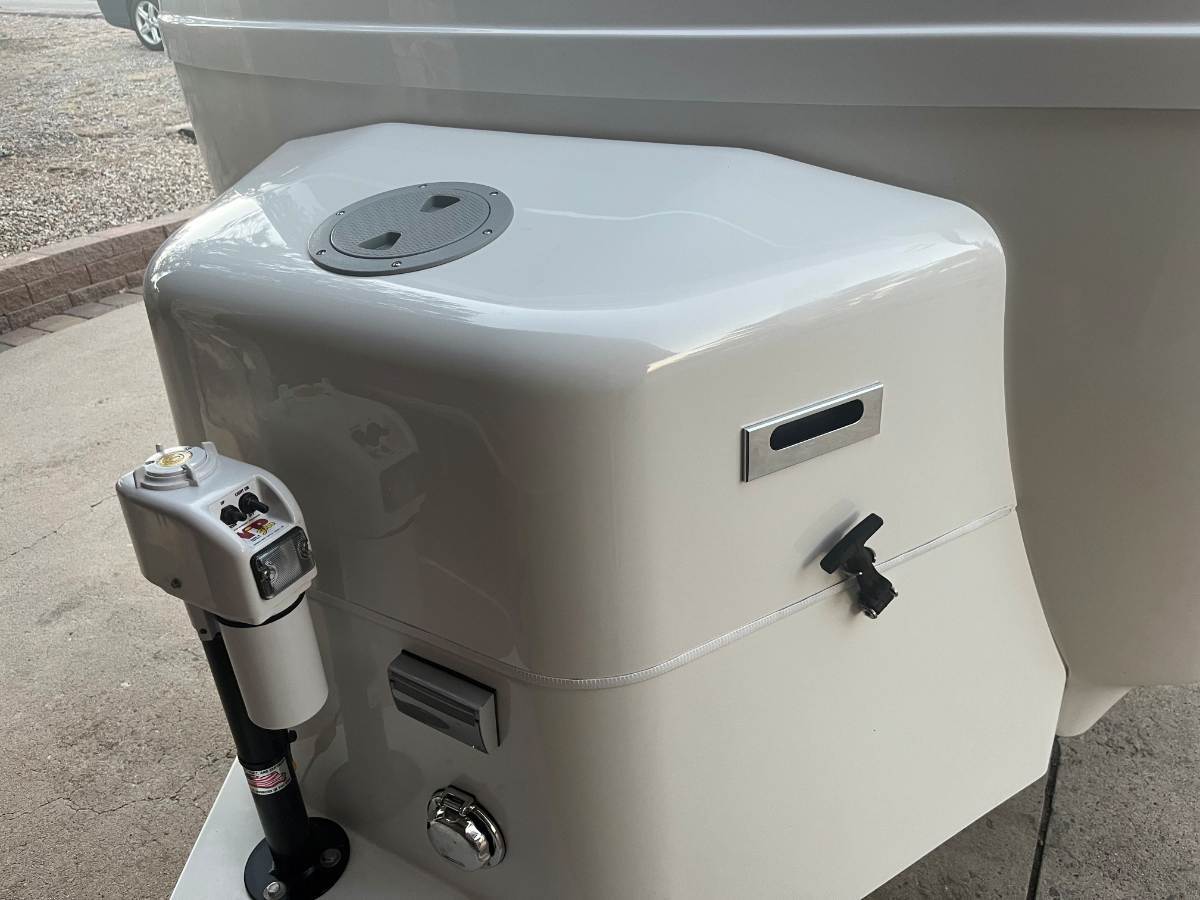
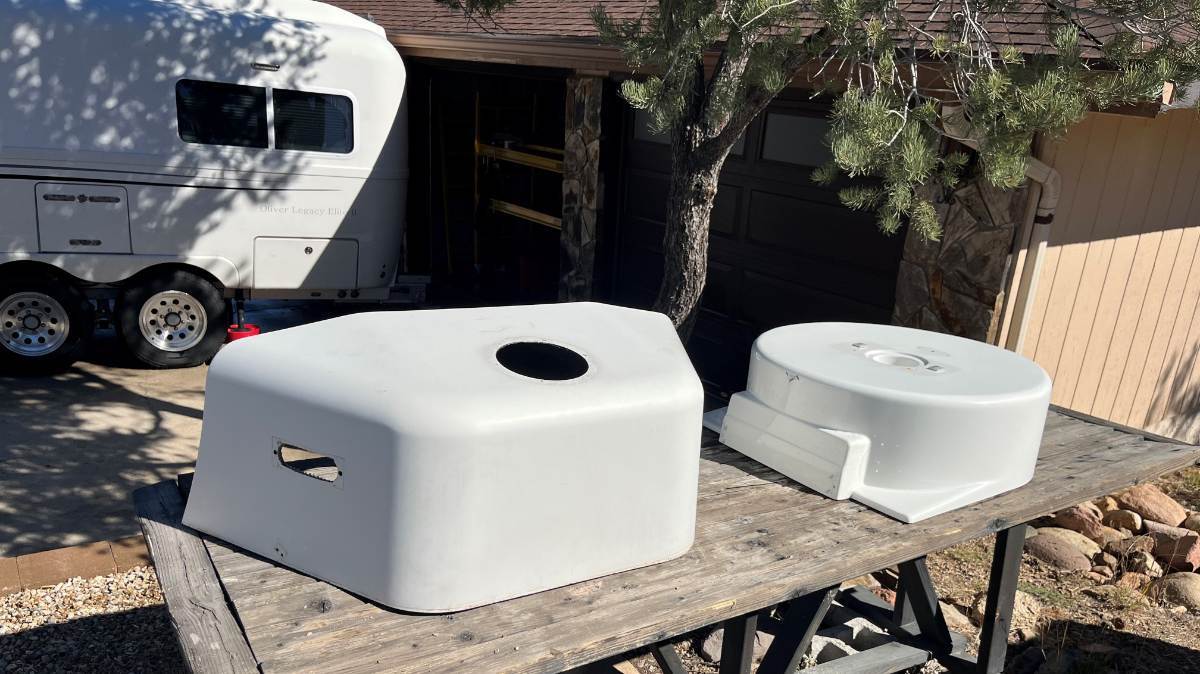
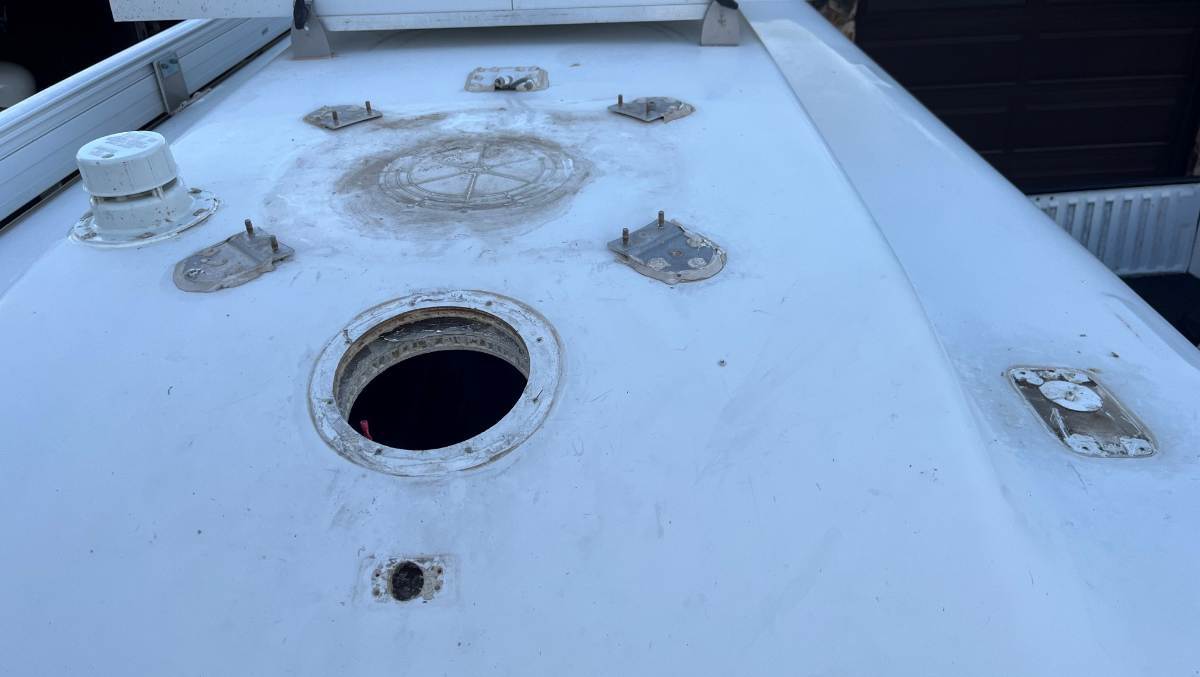
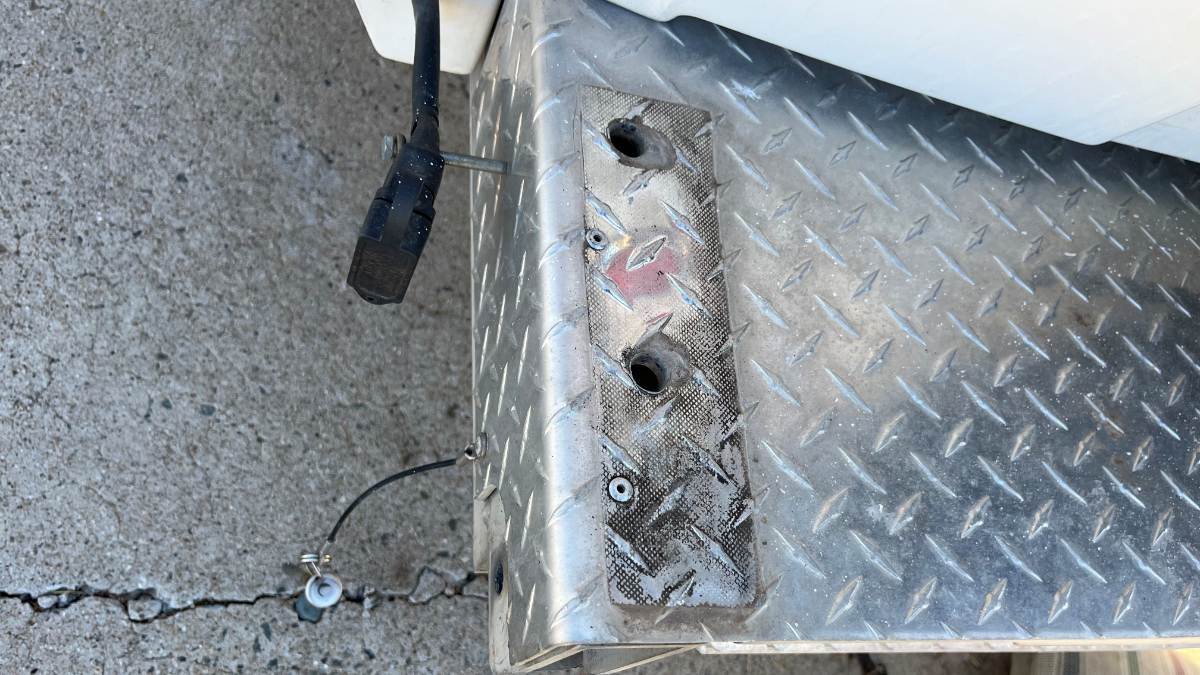
I had removed the Dometic Penguin A/C prior to this work. I temporarily filled the 14x14” opening with a piece of plywood to keep dust out while allowing Cameron the room above to make the entire rear roof shine! It’s always a mess under an old A/C. Good thing we did because the new Chill Cube is a foot shorter to the rear. With my son’s help, we installed the new Furrion Chill Cube A/C. One last task was to restore the rear bumper area. I removed the mounts for the bicycle rack we don’t use, drilled out more rivets and removed the deck plate and folding bumper. I cleaned the inside waste hose area, and steel brushed, sanded and ceramic coated all parts. I've been wanting to write this up for a few months now. Chris is out of town on her annual "Sisters Trip." Adam's been working overtime and it's boring being home alone. That’s it – she’s all done! 😎 When it's time for some love again, I'll drop her off with Cameron for a renewal! No more Ugly Duckling, but quite the Beautiful Swan she is now!
- 15 replies
-
- 12
-

-

-

-
The Ugly Duckling – the Restoration of our 2016 Oliver Hull #113
jd1923 replied to jd1923's topic in Ollie Modifications
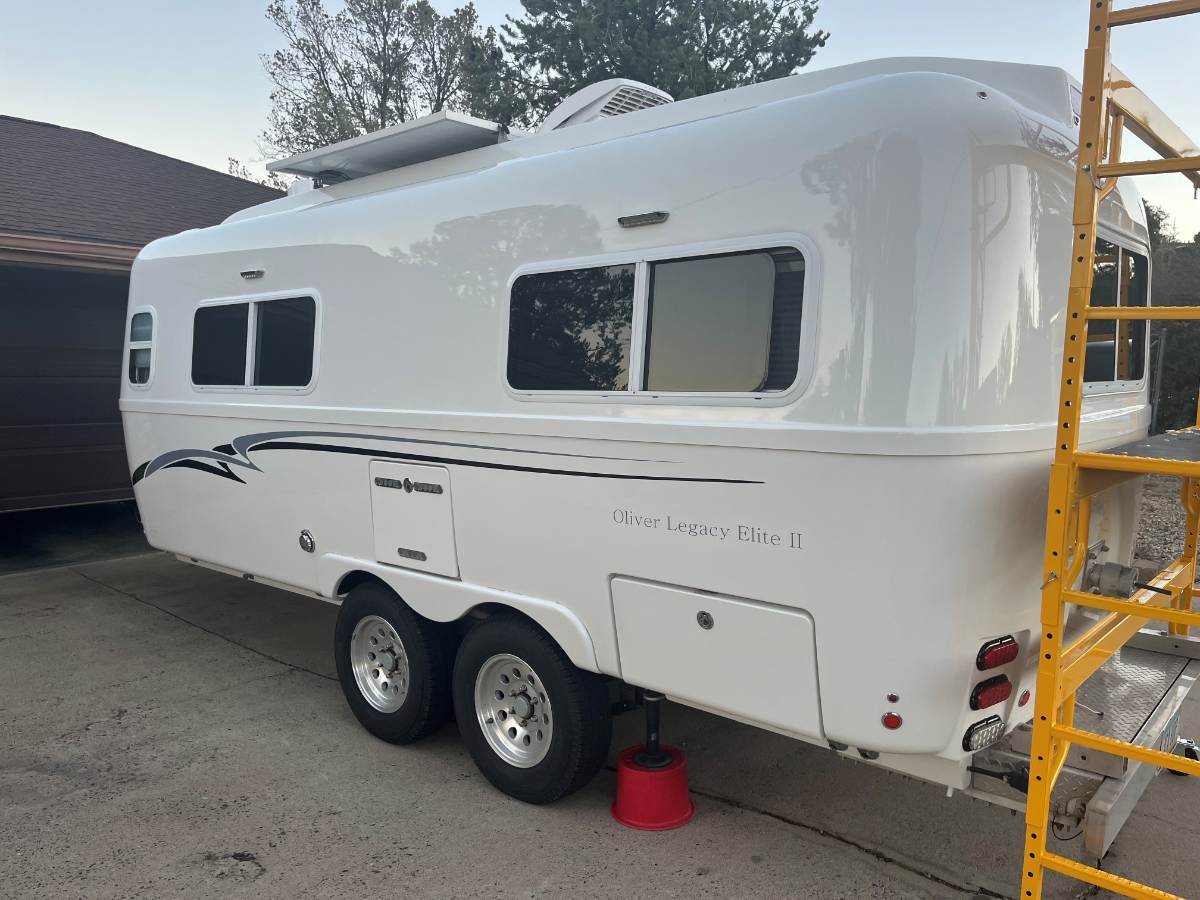
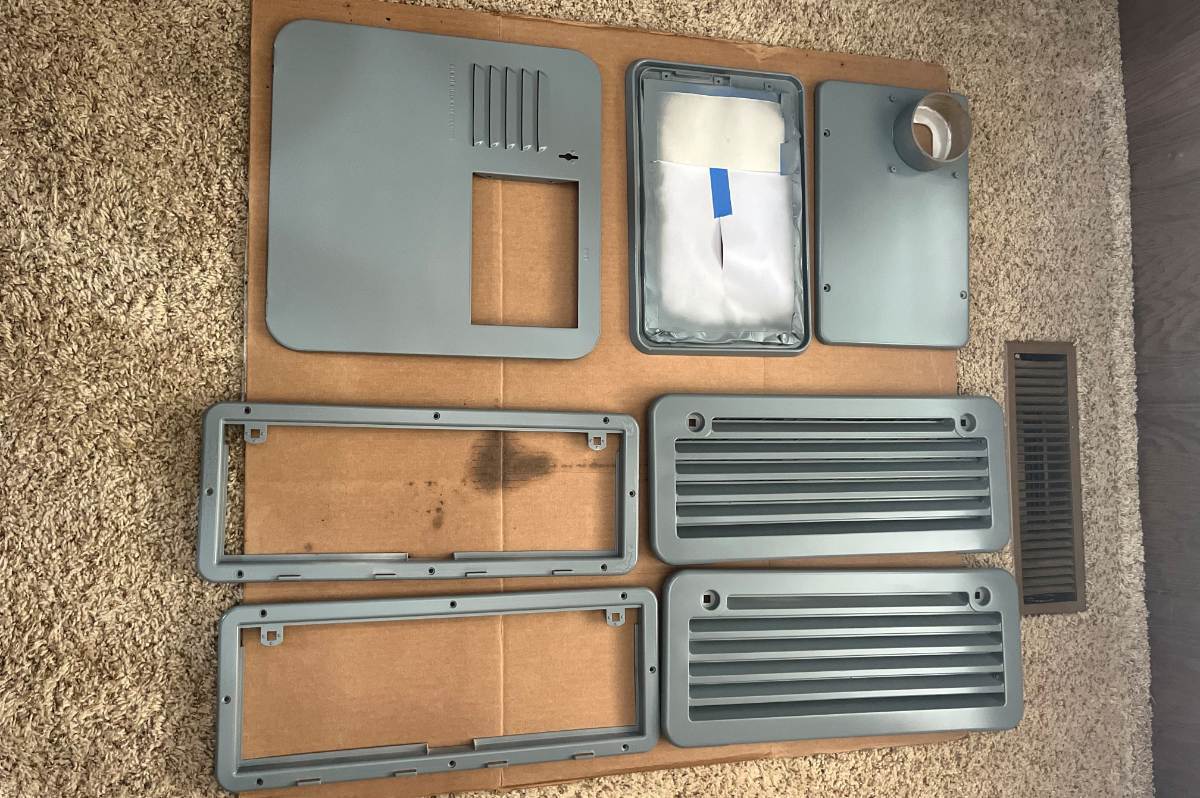
An autobody professional I’ve used before suggested a local guy who runs a detailing shop at the far end of Chino Valley, the town north of Prescott. Cameron came by our home, looked over the Oliver carefully, at every angle. He explained what he would do and gave me a reasonable quote. We picked a start date and shook hands. He asked for 2 weeks, so he could work on our Oliver along with other scheduled work. When 2 weeks had come, he asked another two days to “to really get her right!” She was a thing of beauty, in that every square inch of the hull was shining so brightly! We have never seen our hull in this amazing condition. While Cameron was working on the shine, I was working on restoring or replacing all the trim parts. I painted the fridge vents, the furnace and HWH covers a medium gray to match the Oliver graphics and the gray on our truck.
-
The Ugly Duckling – the Restoration of our 2016 Oliver Hull #113
jd1923 replied to jd1923's topic in Ollie Modifications
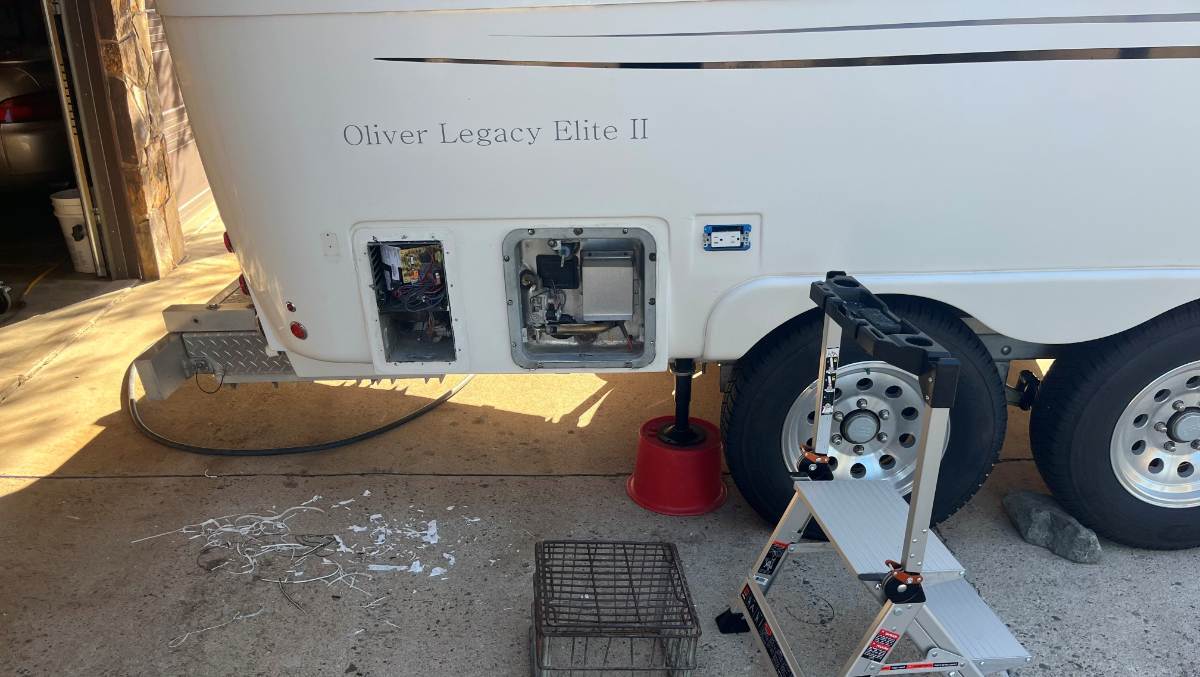
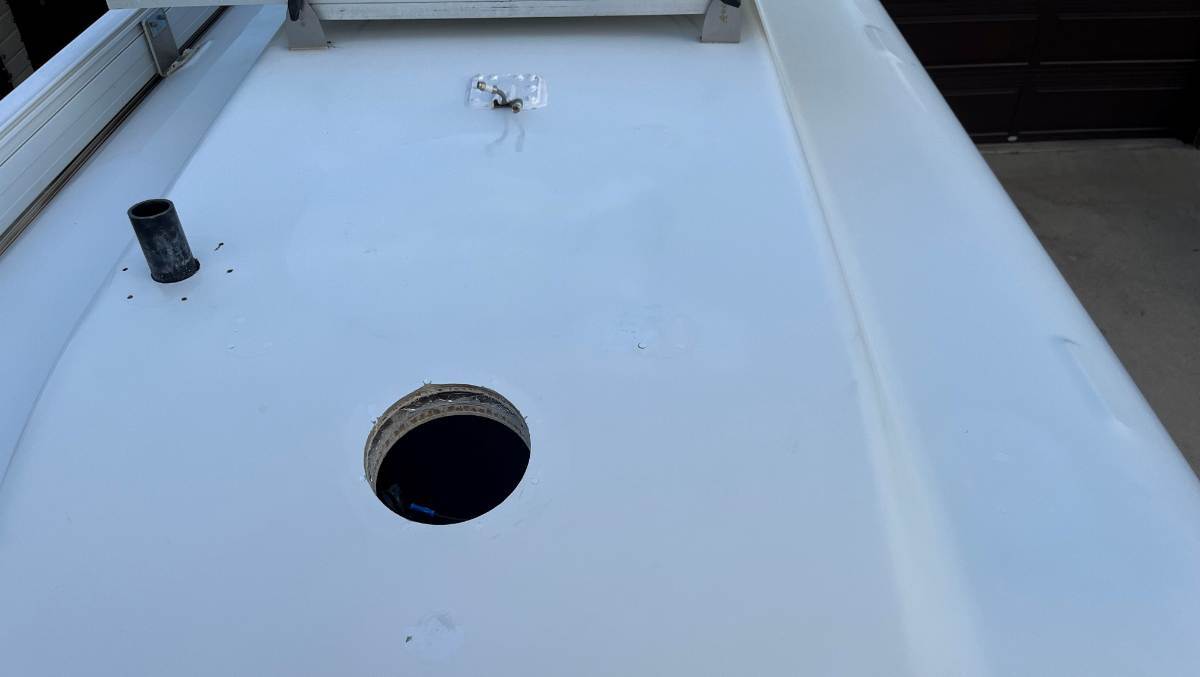
I wanted the final outcome to far surpass the large investment in stripping, cleaning, buffing and ceramic coating. This meant a whole lot of extra work. I’m not the guy who hires the guy, drop it off and they will handle everything. Shops only do what they’re paid to do. I wanted to do everything I could do to make the final result far better. My first step was to remove all the awful silicone caulk. What mess as you can see in the first picture. Then I went around the entire hull leaving piles of old caulk along the driveway. This extra work was truly worth the effort. I also removed every trim part, outlet covers, awning mounts, the covers to the furnace and HWH, the handles, latches and hatch on the doghouse, the door hook (no longer needed with Lippert friction hinges), the cameras fore and aft I’ve never used and all the old-tech like the WiFi Ranger and the monster rooftop satellite dish! This way, my detailer had a wide-open canvas to focus on stripping, cleaning, buffing, polishing and ceramic coating without a lot of stuff being in the way!
-
The Ugly Duckling – the Restoration of our 2016 Oliver Hull #113
jd1923 replied to jd1923's topic in Ollie Modifications
It didn’t take long, parked outdoors in the Arizona sun, to become a dull pasty white! She started with four 6V lead acid batteries, an old 2KW Xantrex inverter only with PD converter in the power panel. She had wires all over the battery bay and everywhere else for that matter, fuses and breakers under beds, manual water valves and the mess it was born with spread out into every corner of the basement. And it had old-tech accessories; the cameras fore and aft, a WiFi Ranger, Dish satellite and that awful Dometic P2! All that has been corrected and improved with a lot of Marine-Tex used to fill nearly 100 holes! And what a silicone mess that OTT started at the factory and some owners believe caulk on top of old caulk is proper maintenance! In the two years from 2024 to 2025 I rebuilt almost every electrical, mechanical and plumbing system in our 10-year-old Oliver Travel Trailer. It’s been a lot of work, but our Oliver is worth it! I plan to enter another post to chronical all my repair and modification work but here we’ll focus on its cosmetic restoration. The finale was to dress up our Ugly Duckling. Not merely gelcoat buffing and ceramic coating, but a complete exterior body restoration!
-
"The Ugly Duckling is a fairy tale by Hans Christian Andersen about a duckling who is rejected by his siblings due to his unusual appearance. After enduring hardship and loneliness, he matures into a beautiful swan, illustrating the theme that true beauty comes from within and that one should not be judged by outward appearances.” We were fortunate to find our Oliver three years ago for sale right in our neighborhood! And at the time, we had no idea what an Oliver is and what makes it special! It didn’t take long though, since just 5 days after we first viewed our Oliver was paid in full, so the prior owner delivered it to our home on June 7th 2023. This day is also Chris’ birthday and what a special surprise it was. Chris loves every time we get away in our Oliver, and me too! I generally buy used vehicles in good condition, letting the original owner absorb the new-price depreciation. I enjoy fixin’ them up, making them as good as new and better, making them mine! From the start, I had planned on making repairs, mods and upgrades with a budget an additional $15,000, just for parts. With good patience, ample time and craftsmanship she could become something special! Hull #113 was well cared for; prior owners kept her clean and often kept her covered. She returned to the factory in 2018 and 2021 for maintenance and other services; new white blinds, new Atwood furnace and much more. Also in 2021, she moved from Florida to Las Vegas and was ceramic coated at the time. Always from the South and SW has kept corrosion at bay. Good records were kept and we are now the 4th owners. She looked good when we first got her and everything was in working order.
-
Spare Tire wobbles inside the fiberglass cover
jd1923 replied to Dirt Duff's topic in Mechanical & Technical Tips
Don't get too comfortable! 🤣 I see two things that are wrong... First the wire harness should not be fed through the wheel. When you do get your spare tight the tire will be jamming the wire harness against the hull making the spare sit on a tilt. The wire harness should sit outside of the tire but make sure you push it inside the fiberglass cover in the end. Secondly, your lock nut is keeping the large circular "wingnut" from tightening your tire against the hull, hence the wobble. I just checked and mine does not have a locknut. If I had one, it would certainly be in the way of tightening down the spare. The nut is greater than 1/2" tall and there is about 3/8" of space on ours. It's likely one of those things where OTT did not stick to a standard hull to hull. I believe @rideandfly's spare is new, not original so perhaps his fits. IT does really depend on the tire width. I also have a large concave washer not seen in anybody else's picture. This supports the fiberglass on the spare cover when tightening the outer locknut. In my picture, the fiberglass cover fits in where I created a space on the threaded shaft, all hardware is mounted in the order shown. @Dirt Duff, I suggest you remove your locknut, feed the wire harness correctly, crank 'er down and you should be fine! 😎
-
These Optifuse breakers are known to fail. There are a few posts here about that. I do not know what the common failed position is, but could be open when it looks closed. I would test for continuity between the two posts on the breaker. Be careful though, these are HOT, or at least the battery side is if the breaker is defective (open when appears to be closed). Hope you get your DC power up soon but put it on your mod list to replace this breaker with a 60A ANL fuse and holder. I do not believe anybody has found a quality 60A breaker. They're all cheap junk made in you know where. Fuses are dependable. Always have an extra fuse.
-
Bob, if you also feel this way, then you do not need to do all the following work (quoted below). They possibly have an LP-only model that could cost less too!
-
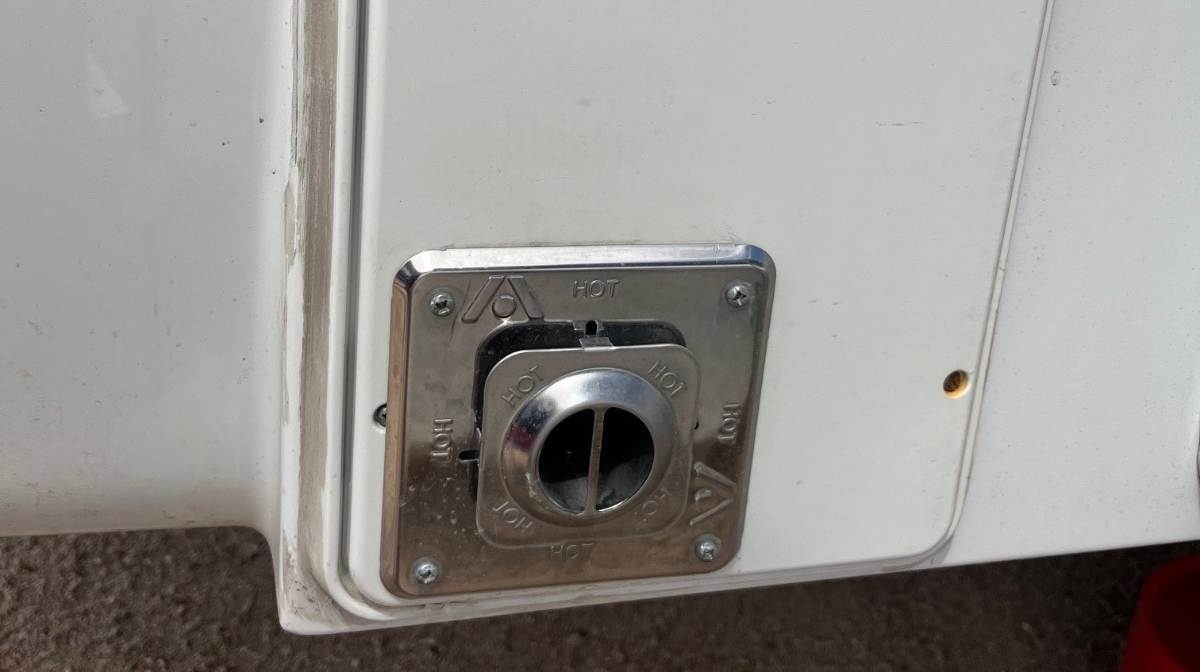
Bob, I haven't heard of anybody going this direction, but why not? It's usually moving from the 6-gal Suburban to an on-demand/tankless model. Given your experience and reading many other posts re the Aquago model, I would not want one and I agree that I would certainly replace yours asap with something else. As you know, this model is not reliable, and my understanding is anything Truma is not serviceable! This is based on their policy of "authorized service" only. They work OEM installations only, no aftermarket sales, hence NOT serviceable except in waiting forever for OTT or Truma to service months later. Those who DIY cannot even purchase repair/replacement parts, so certainly Truma products are not for me! Rob @routlaw very recently removed a Suburban for a Fogatti tankless. He could chime in on his reasons. I would also read some blogs on tank vs. tankless to fully understand the pros and cons. Lastly, I and others with 2015-16 models, hull #s up to 150, have run the Suburban 6-gal HWH for 10+ years. This includes @topgun2, @Mike and Carol, @rideandfly, @ScottyGS, @Wayfinder and others. I would say this defines Reliability. Others can chime in on Serviceability but in 3 years of ownership, all I have done is drain it, rinse the tank annually, did the vinegar treatment once (on all plumbing). Purchased 2 anodes, installed a new one and have another for backup. I've read something about blowing the dust out of the burn chamber, but I've not experienced any real service needs which speaks again to reliability! You'll always carry 6 gallons in the tank that can't be used. I really like the option to run on propane or electric. Use electric when plugged in and it runs quieter than hearing the LP burning. I often run it on electric when towing to a campsite, powered by our inverter of course, and the +40A we get from our DC-DC charger makes it a breakeven in power, arriving at the campsite with 6-gal hot water (unless we instead run the A/C, weather depending). LP tanks always OFF when towing. There is an AC switch under the cover that is awkward to get to, so we always leave that switch ON and turn electric ON/OFF using the circuit breaker inside. There is a separate switch to fire it up by LP. For this model feature you'll have to run new 10-12 (?) AWG 120VAC wiring and add a breaker in the 120VAC power panel. You'll also need an LP ON/OFF control switch if your tankless model does not have one. That's my take. Hope it helps! 😎
-
Thanks Scotty! I found their website and I ordered a FREE Sample Kit. Then found it on Amazon (links below). I'm wonder, what products have others used? I remember our friend @rich.dev ordered one product that would not straighten from a circular role, so wavy it was unusable. Prior owner of our hull installed a drip rail on the entire curbside up near the awning. We get no streaks on this side but a lot of streaks from frost melting or morning dew, condensate dripping on the other side. Request a Sample Kit | Trim-Lok Amazon.com: Trim-Lok Drip Rail, White – 1/2” Height, 25’ Length – PVC Plastic Rain Gutter for Cars, Vans, and RVs, Easy to Install Flexible Drip Rail Molding to Control Water Runoff, Durable 3M Tape Included : Automotive
-
Thanks Craig. I just checked my panel label picture, and we have similar labeling. I guess these only protect the circuits connected to the various fused circuits in the 12VDC panel. For a reverse polarity condition to occur, you'd have to connect your battery cables in reverse or rewire AND reverse the internal OEM 12VDC wiring to the panel. This could be cause here if the batteries were removed for charging and then connected backwards! 🤣 The 4/0 cables from the battery connect to the inverter first (when present), these reverse polarity fuses would not protect the inverter from reversed wiring. Inverters must have their own internal reverse polarity protection. More guessing until questions are answered...
-
Reset the GFCI outlet under the dinette when the other 120VAC outlets are not working. They are wired in series so the GFCI (Ground-Fault Circuit Interrupter) in the first position protects the entire circuit. @Buddhabelly has the opposite issue, "no power for 12 volts items." Do we actually have said fuse in the Oliver? Maybe on the charger circuit board? (I'm not generally AI trusting.) I guess he could have disconnected the batteries to charge them and then wired them in reverse polarity? (The only way this fuse would blow.) Because you're on shore power, or because your inverter is working? It always gets me when a request seems really important, "WE HAVE NO POWER!" Then the person asking for help doesn't login for the next 17 hours... We can only help those who help themselves! So much we do not know without follow-up questions answered! @Buddhabelly, your answer to @Steph and Dud B's question? And is your inverter working? (if you have one) And re another 12VDC item, are your stabilizer jacks working?
-
Wow! Select the 48x22" window on the Lippert website link I copied above, click Add to Cart, it comes to $230. This number seems very reasonable and what you were quoted for a custom 14x18" size seems outrageous! I wrote above "over $1000 to replace them all" when I was looking at the $230 number. $987 each would not be a direction worth going. BTW, ours are mounted in mirrored directions, left to right, moveable window to the rear, vents/weep holes always down. The outer frame must disconnect from the window assembly somehow to allow for this. Our windows are different from the time of hulls 70-75, to late 2015 when our 2016 model was built.
-
Better loosen up that bolt and asks the wasps back!🤣 (Now, I'm not touching mine!)
-
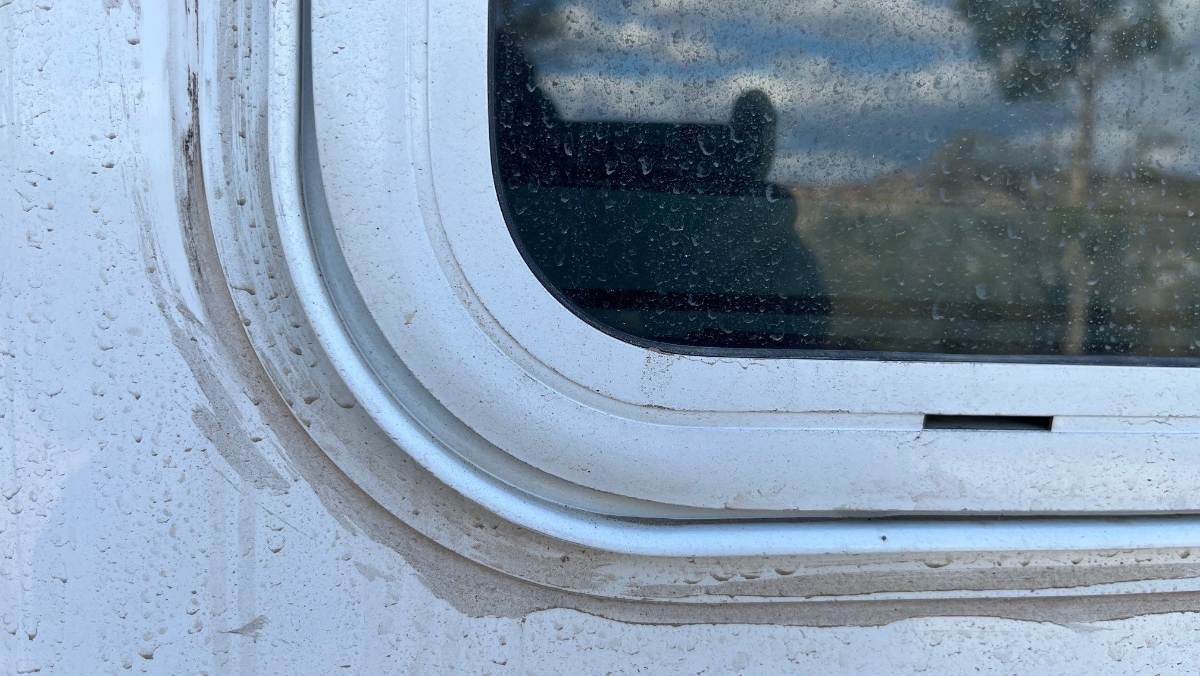
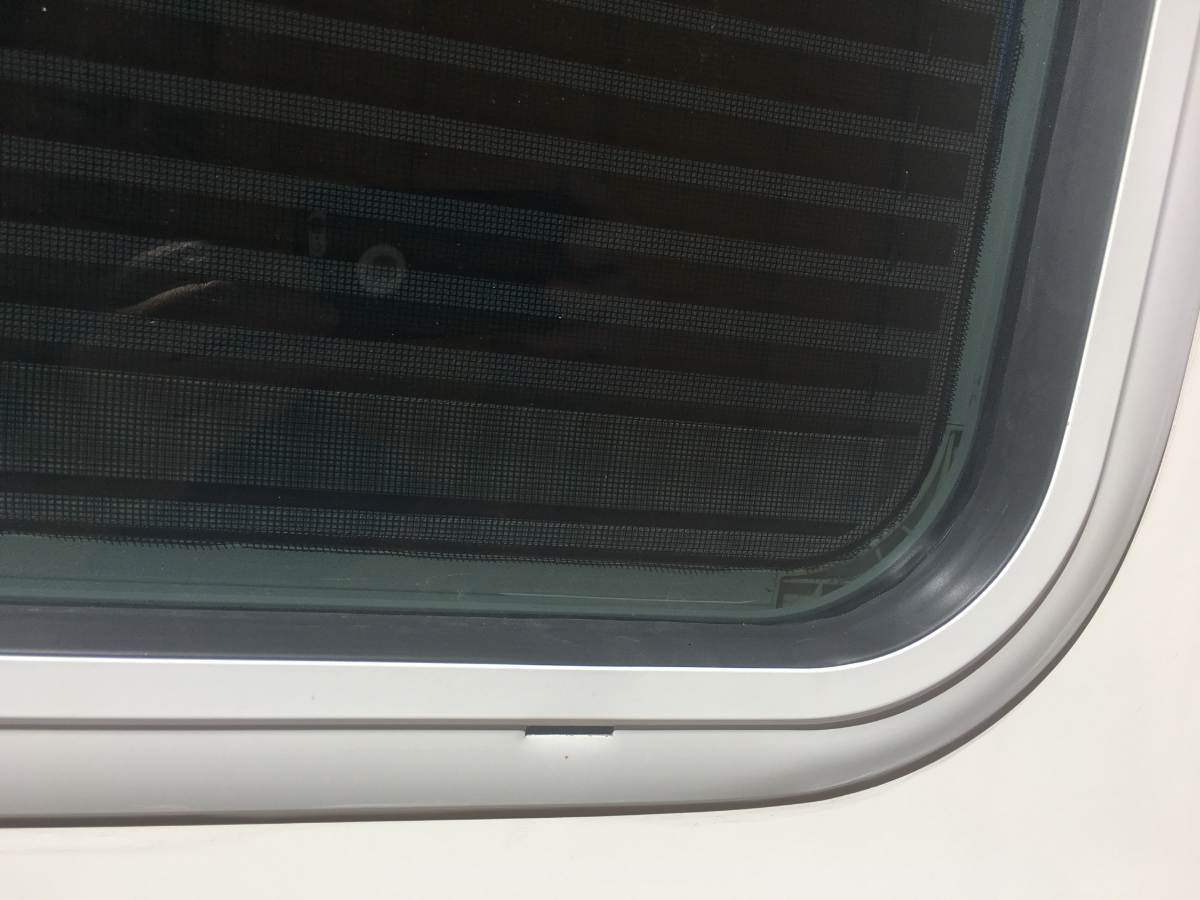
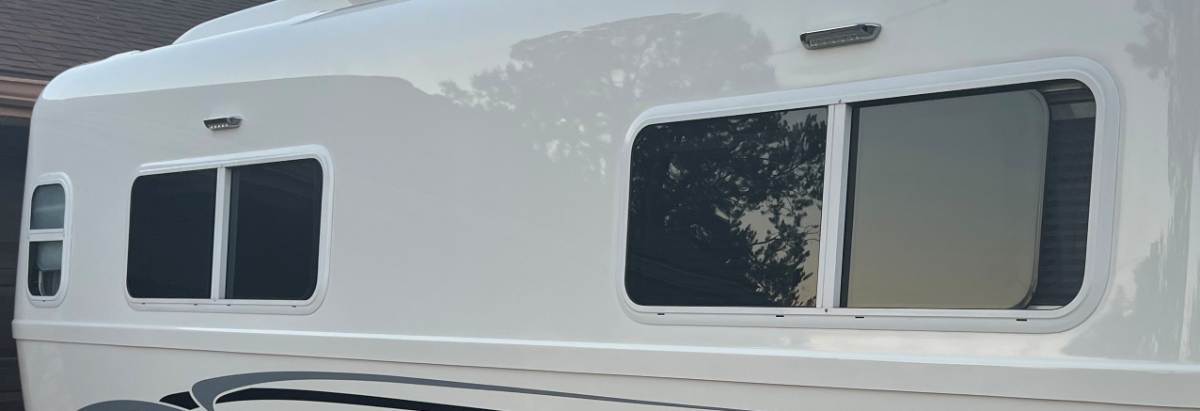
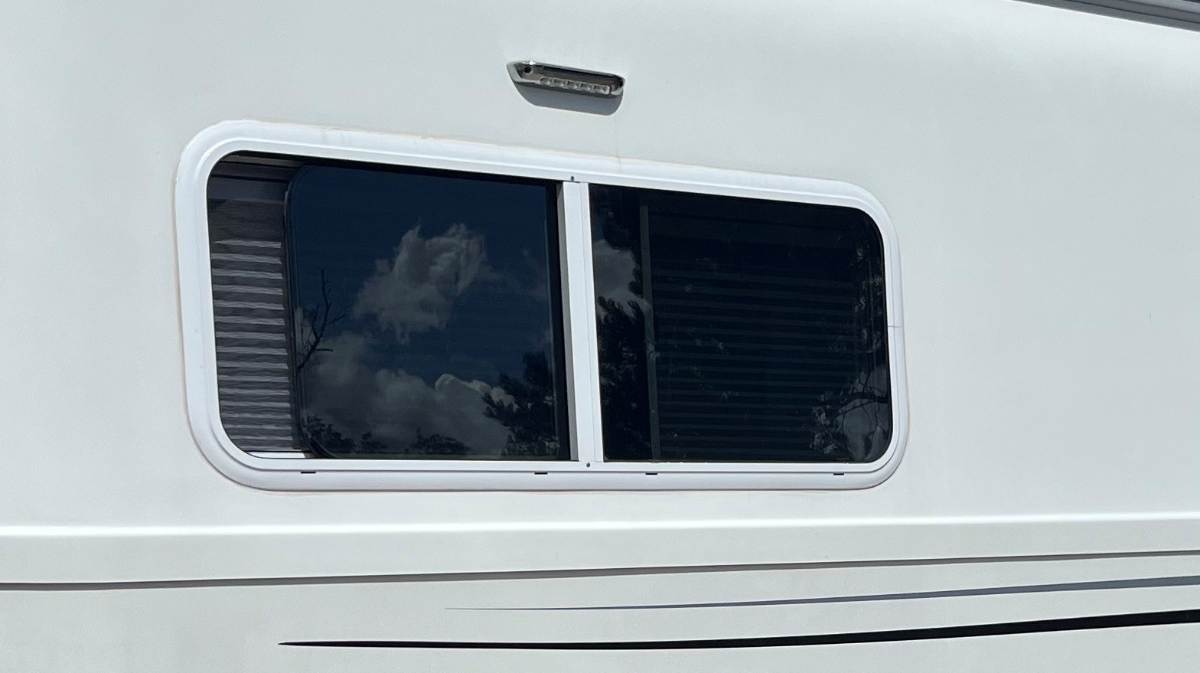
Wondering did Lippert 8800 windows change through the years? The windows installed on hulls #70, #75 vs. our hull #113 and much newer hulls? I posted a couple pictures of ours for reference. I do see top vents on Rob's and Bill's windows that are not on mine! Rob has leakage issues. Others do as well, but we do not. I'm thankful ours do not need repair, but just wondering what's different? Is it the top vents allowing water into the interior channels? I replaced the outer rubber (only). Replaced the white surround with black, sourced from Pelland, if I remember correctly. There was a 1" gap on the old rubber, likely from shrinkage. I cut the replacement rubber to fill the gap and made it 1" longer, cramming the rubber into place on a warm day, knowing it will shrink again in time. This rubber seal protects the moving half of the window from rainwater. I don't have time to handwash the Oliver except to pressure-wash when we return a dirty mess from boondocking. I'll hit the glass straight-on with 3000 PSI water and our pressure-washer is not a toy! Some dirt followed by a fast stream of water will pour out of the window lower weep holes. No water inside the hull ever in doing this a half dozen times. The first couple of times, I asked Chris to be inside, towel in hand, just in case. After twice taking this precaution, I don't bother anymore. If ours were leaking, I would replace the entire window assembly if available. I took a look here and our sizes are not listed. Wonder if they make the 8800 windows to size. Nominal measurements on our hull are 48x18" on the three cabin windows, 36x20" on the rear and I did not measure the bathroom window. I understand it would be over $1000 to replace them all vs. the cost of seals but you'd have a new window with warranty. Or time to get an awning window if you prefer that style! Lippert 8800 Series RV Window - Horizontal Slider | Lippert
-
Thanks Bill, good fix and repair tutorial. Your tabletop is quite secure now. This will get me to take a peek under ours. We've just left our table in place, knowing we wouldn't use the dinette as a bed. Maybe it hasn't been moved for 10 years, and I've never felt it move. But as I get older, I'm often leaning on things to get up! 🤣 And it's not safe if it can move. Tom, this sounds like a painful routine! Certainly, time to execute Bill's simple fix if you don't find a latch that will work.
-
Yep, it does. I believe we're in sync now. Thanks, JD
-
True Induction Stove Top will not turn on
jd1923 replied to Lamar's topic in Mechanical & Technical Tips
This should be @Lamar’s goal in negotiating. And for OTT it’s the right thing to do! -
Geoff, from what I've observed over the last couple years, you know more about electronics than most of us who posts on our Forum. There is electronics in brake controllers but NONE at all on the Oliver side brake wiring. I do not mean to offend either, but is there such a beast as an "Auto Electric Specialist?" Some believe in Bigfoot! 🤣 We don't have this kind of service in our area, so are you offering a solution? So, how does this point to a trailer wiring issue? Why not a bad ground or faulty controller on the truck side? Aren't you just guessing without at least touching the Oliver, running the most basic tests with multimeter or clamp ammeter in hand? The U-Haul rental idea was a simple binary test to see if the error would occur towing another trailer. If the error could be reproduced it would eliminate the Oliver wiring as cause. Of course, the rental trailer must have brakes and 7-blade connection. Only one U-Haul counter person thought the 7-to-4-pin adapter would fit the need! 🤣 Also, in trailer wiring the white wire is ground, the black is 12V+ which is why in the picture the black is fused in the junction box. Am I wrong on this? If there is a ground issue on the Oliver side and there very well could be but we just don't know that. If it was my issue, I certainly wouldn't spend more money on specialists, just replace the ground. Attach a new ground wire at the junction box, test for continuity to the ground on the 7-blade plug, then run the new wire directly to the main ground bus under the rear dinette seat. This would eliminate trailer ground as cause in an hour with 10 ft of new wire, a simple solution. There are only 3 places where a connections, positive or ground, could be bad on the Oliver: 1) the 7-blade plug and wire harness back to the junction box, 2) the connections in the junction box and Oliver brake (blue+) and ground (white-) wiring from the junction box back, and 3) the wiring to the streetside brakes and through the axles to the curbside brakes. I would do some current and ground testing in these 3 areas and replace the most likely culprit. The entire trailer brake wiring, on the Oliver side, could be replaced in a day with $200 in parts. However, simple current and ground testing would determine one of these 3 areas to be at fault. It could be determined the factory brake controller is defective or has wiring issues. Four (4) GM dealers already struck out in finding a solution here, too much money spent. If true, I would bypass the factory system and install a reliable Tekonsha P3. There are only 4 wires in this controller harness, install new wire with +/- connected directly to the battery. Yeah, it's "piece-meal" but simple. But I can hardwire all of this at home (or any trailer shop) with hand tools and when done count on its reliability for many miles to come! 😎 I don't expect we'll agree on this one and that's cool. When I do yardwork, the weed-whacker is my tool of choice. I'm not planting a new flower bed. It's just not me. I know you like electronic switching systems, and you have demonstrated some great ones! Very cool, but some are a bit too complex for my liking. When I restore a used vehicle, like our Oliver, with factory or prior-owner aftermarket additions, once again I reach for the weed-whacker! Love your work, Geoff. 🤗