jd1923
-
Posts
3,649 -
Joined
-
Last visited
-
Days Won
281
Everything posted by jd1923
-

Victron Multiplus II 3000 - Installation Xantrax Removal
jd1923 replied to Ty J's topic in Ollie Modifications
Test it on a 15A household circuit. -
Happy 50th to Oliver friends John & Susan! 😂
-
Well we just hit 26 pages. I remember asking the Mods to close this thread after 12 pages, but it was not my thread to close. Most of the additions I've read here in the last 10-15 pages are slight variations of the comments and questions made in the many pages before. I just reviewed pages 1-2. And yep, that's all you need to know on this subject. Except that a few pages later we learned that the Alcan springs are actually rated at 2750 vs. 2000 lbs. There was the same concern on page 2 about this rating being too much. I had that concern early but no anymore. We're on a long road trip where we have not before towed so many highway miles. Our OEM springs are in very good condition, no sag, still nicely arced and perhaps Dexter used better steel in 2015 than more recently. Who knows but htey're in excellent shape and no rust given where we live. When the other day, I crossed railroad tracks that were on about a 30 degree angle to the road, I watched our Oliver in the side view mirror. The Oliver waddled like a duck going over those tracks, side-to-side, the top of the Oliver swayed a good 1 1/2 ft like a pendulum both ways! These springs are under-rated, as the Alcan rep stated. It's crazy that this is our 2nd longest thread, just behind "Where's Ollie" at 28 pages! This truly means not enough of you are posting travel pics! 🤣
-
As Bill @topgun2 mentioned, “right where you connect your hose into the boondocking port” the rear hose bib itself. If it wobbles, it needs tightening. There is a hex opening inside, maybe a 1/2” (13mm) hex? Not certain of size. When we bought our Oliver used 3 of 4 were loose, and since I have the correct Allen key in our tool bag for when needed again.
-
So our 31st anniversary was spent a few nights ago. Nice to spend it in the Oliver! Today is Chris' birthday and our 2nd year Oliver Anniversary to the day! 'Twas 2 years ago today when I surprised Chris with the Oliver in our driveway! See the first picture of this thread for our Day 1 picture. Two years going strong and so far 92 overnights in our Oliver (will hit 100 soon on this trip)! We are camping near Mason City, north central Iowa. Was hoping for some pickleball today then dinner out. Pickleball will likely have to wait unless it clears out this afternoon, but we'll have a nice dinner out either way. Thinking of the Blue Heron Bar & Grill. Hard to imagine a place that has 5-Stars on Yelp with 89 reviews. Wow, it should be good! One more night here and tomorrow we will be with Chris' sister in Farmington MN, just a 2-hour drive from here. Charley's birthday is next week too, when he will turn 11. He sleeps a lot, is a bit hard of hearing, but still our great family dog! Isn't he pretty? Proudly protecting his Oliver!

-
Spent the night NE of Omaha, just into Iowa at Arrowhead Park. It was an OK overnight, very nice host. He kept things very clean and neat but somehow too many flies everywhere. Thankfully they stayed out of the Oliver somehow. So as we're driving down the road, Chris is on her phone searching for local farms stores, for farm fresh eggs and meats. After a 5-mile dirt road detour we found Wild Rose Pastures in Madison County IA. A knock on the door and only a 12-year-old boy was home. Chris talked him into calling his Dad, saying tell him I'm a "safe old lady." After Dad talked him through the transaction, we left with 2 dozen farm fresh eggs at $5 per. There were big beautiful healthy hens running all over the place, a little nervous that we were there, ducking in and out of the barn! We also purchased 2 small T-bone steaks for only $15, a herd of cows beyond the farmhouse. I tipped the young man Zane $5 for his help in the transaction. You can eat well in Iowa on a budget!
-
So we headed north out of Kansas. NE Kansas has some great countryside. We drove through the cute town of Marysville, cobblestone or brick streets throughout the downtown area and it appears they area is known for black squirrels. They must have 100 of these squirrel statues, on every block! We got to Lincoln Nebraska by late morning and played pickleball at Peterson Park. There were 10 courts and a lot of local players. None at our level though, so Chris and I played Skinny Singles. as the locals were thinking, who is this old couple! We started playing tennis together 34 years ago and are usually pretty even in competition. It was Chris' day (and her birthday week) so she won 2 of 3 very close games.
-
My how-to video for cleaning the weep holes and tracks
jd1923 replied to Wayfinder's topic in Mechanical & Technical Tips
Amazing product to remove these mildew stains! Yes, water pressure is all you need to clean the internal dirt out of the weep holes. Still happy with the $100 upgrade to switch to black rubber and have them fit tightly end to end without the 1” gap we had on each piece with the OEM installation. -
Victron Multiplus II 3000 - Installation Xantrax Removal
jd1923 replied to Ty J's topic in Ollie Modifications
I thought to find an old thread I had remembered reading, just after I had joined the OTT Forum. At first, I did not understand the value of this feature. How would Victron Power Assist be of value in a real-world use case? Thank you @Ty J and others who had contributed here (now over 2 years ago). We love our Victron Multiplus II, OMG! Camping in south central Kansas, a muggy day that was going get hot, mid-to-high 80s over the afternoon, and we wanted to go for the day... Leaving our older pup Charley to rest in the Oliver while we were gone. The Dometic with SoftStart would not run on this public "20A circuit" alone, without blowing the breaker. I set the MP2 limit setting for incoming amps to 15A to be very safe 75% of the 20A commercial circuit (to lower the probability of blowing the breaker). We ran the Dometic Pengiun 2 A/C, set to 69F. The 600 Ah batteries were high 90s SOC due to our Orion DC-DC charger running as we drove in the day before. The Victron app showed -40A on startup, so I was thinking we would lose 30-40% SOC while gone for 4-5 hours. We were gone a full 5 hours. The SOC on 600 Ah, in Power Assist mode, dropped only 20% (compressor only running 60% of total time). All was good, A/C running, the Oliver interior nicely cooled down and all systems running as programmed. These are the results. Notice AC OUT at 1684W - 1226W AC IN = 458W supplied by batteries (at 96% efficiency: 458W / 13V x 36.7A). I've never before seen this screen on the Victron Connect app for the MP2. There truly is a working Power Assist mode, not only in how the MP2 Inverter/Charger functions, but as a listed display mode as shown. This feature works well and as advertised. 😂
-
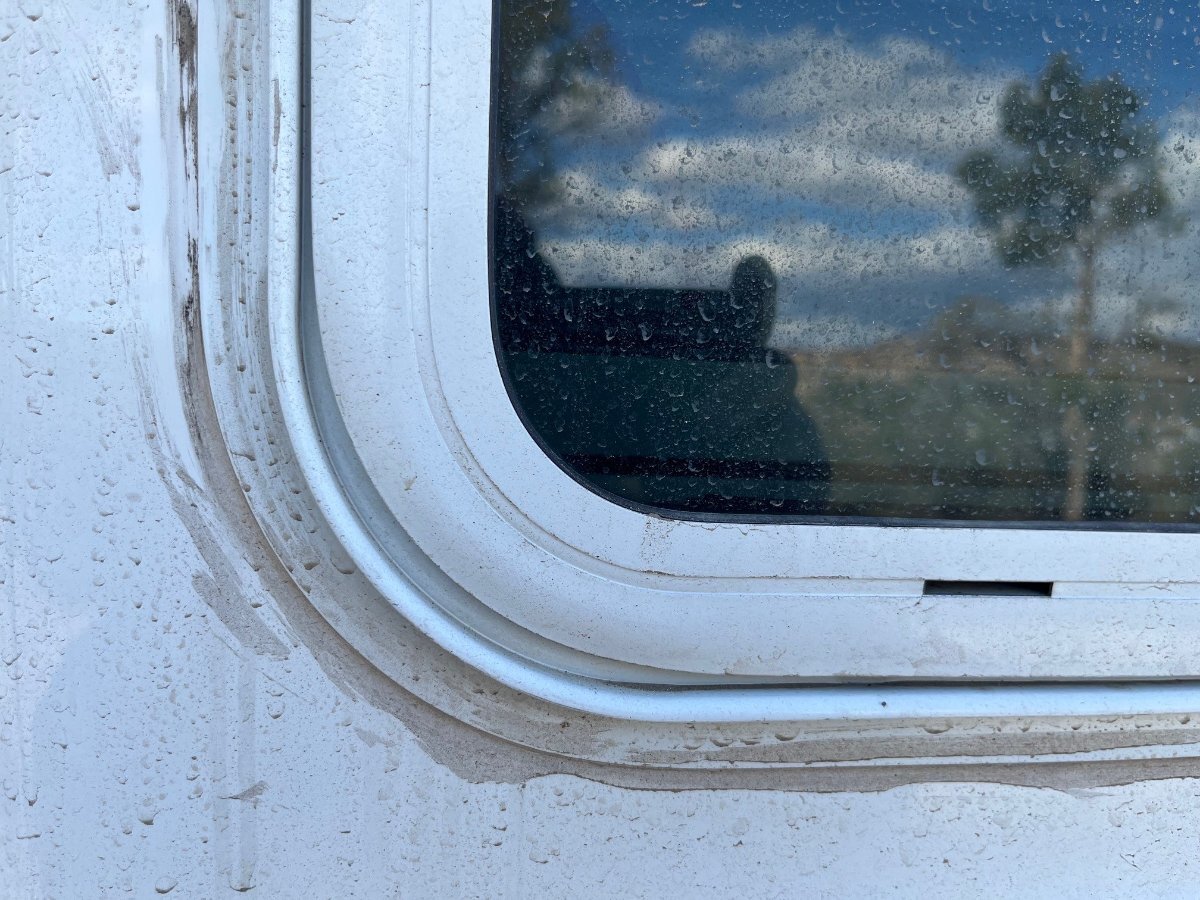
I hate that! I still have it on my list to remove all the old caulk on our 10-year-old hull. Our hull went for OTT service in 2018 and 2020 according to receipts I have. They must have done all the messy caulk on top of caulk work, yes sloppy to say the least. What a shame on your only 1-year-old hull! There is no reason in the world they should have gone over yours. Caulk should last YEARS and caulk over caulk is never a good idea! Here is an example of the handywork of such an over-zealous artist! 😞 Picture is after travel on a dirt road which makes it show fully --
-
After 25 pages of comments, it's been jacked a few times. All anybody needs regarding the Alcan Leaf Spring mod is the read the first couple of pages. 🤣
-
I didn't like the TV mount OTT installed or the newer versions. I do not trust the latch mechanism and the TV should fold back, so when viewing it is near the back window vs. on the front side of the night stand.
-
It appears Mike may have one for you. I have the whole setup, not using it, but will not be back home 'til July.
-
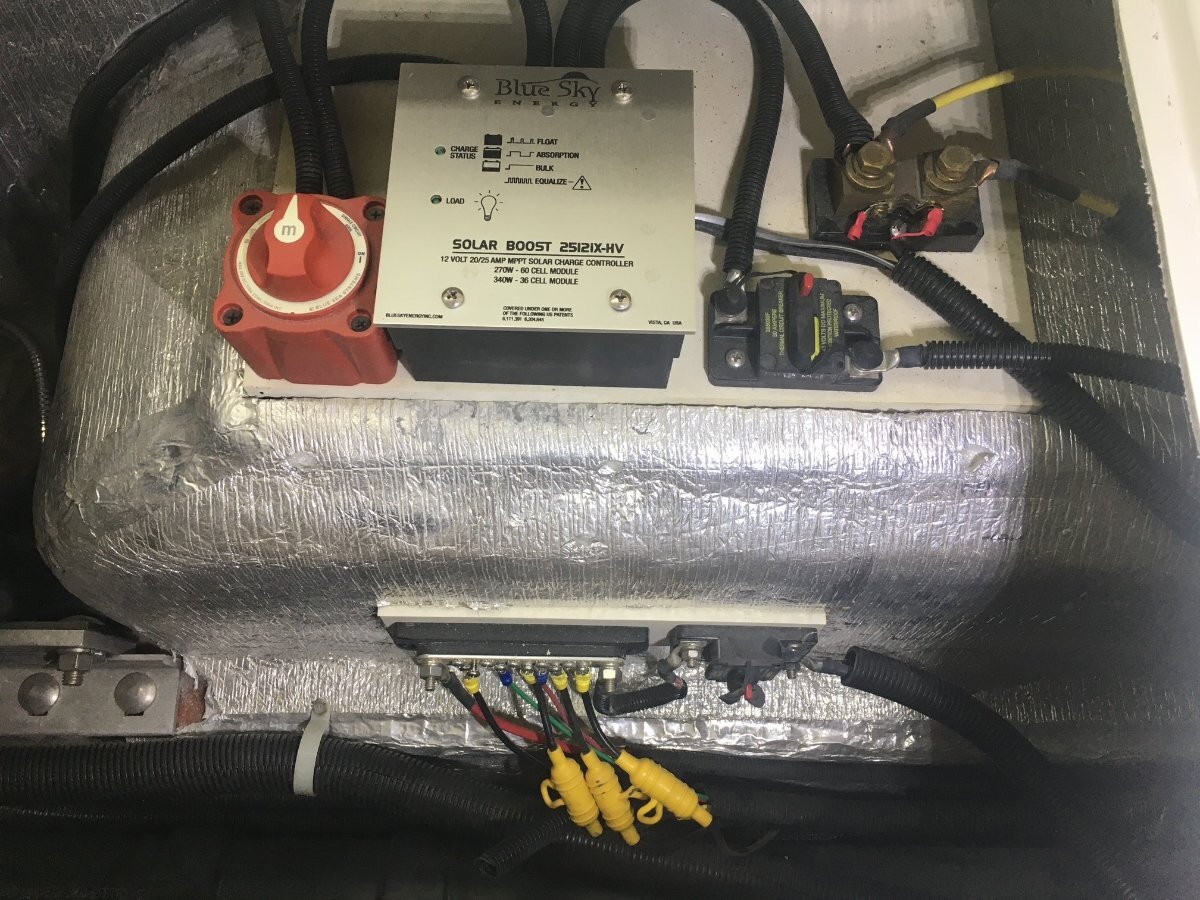
Like Bill @topgun2 mentioned, look under streetside bed where you should see the big red Blue Sea switch shown left in the picture. You likely have the same Blue Sky solar controller too. Our screen door has a 1/4" gap all the way around it, but it does touch the fuzzy edges and seals OK.
-
Mine, I call the "old man's bike!" It's an '03 CRF230, much detuned from the Motorcross CRF250s. The seat is also lower, so you can straddle the bike, both feet on the ground. And of course, it has electric start. I rebuilt everything on it 5-6 years ago; new tires, brake fluid and fork oil, HD springs for the 200+ LB rider, new seals, cleaned the carb, etc. It rides great and right in Prescott we have a state OHV recreation site called Alto Pit. It was a granite quarry and they have 30-40 groomed and banked trails. Adam and I have been riding there for 20 years. It's a blast! 🤣 I really want to travel with this bike, my 1970 Yamaha R5! Though it needs everything done. I have all the parts it needs including new seat foam and cover, NOS taillights, carb kits, etc. Somehow I just found this picture online and it is the exact bike I own, same seat tears, America Flag Peace sticker on the side cover, bought in Florida 9 years ago for $900. I'd put some enduro tires on it for trail riding. This is a 350cc 2-stroke that can get up to highway speeds in just a couple of heartbeats! Second pic is an example of restored R5!
-
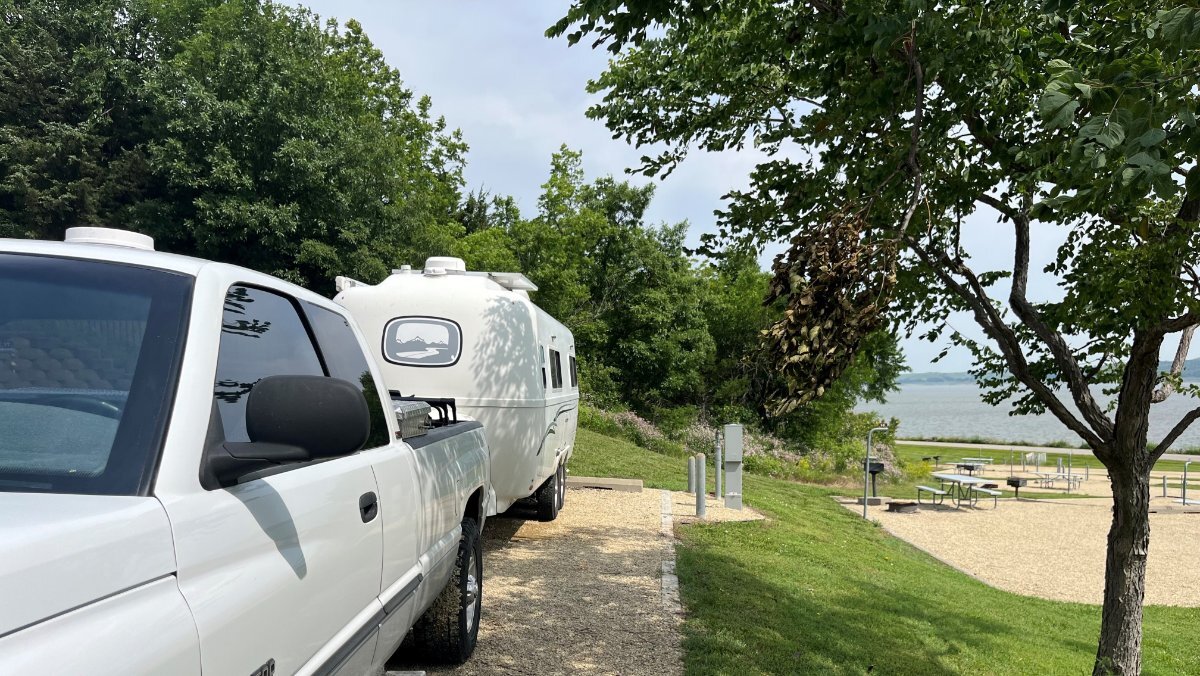
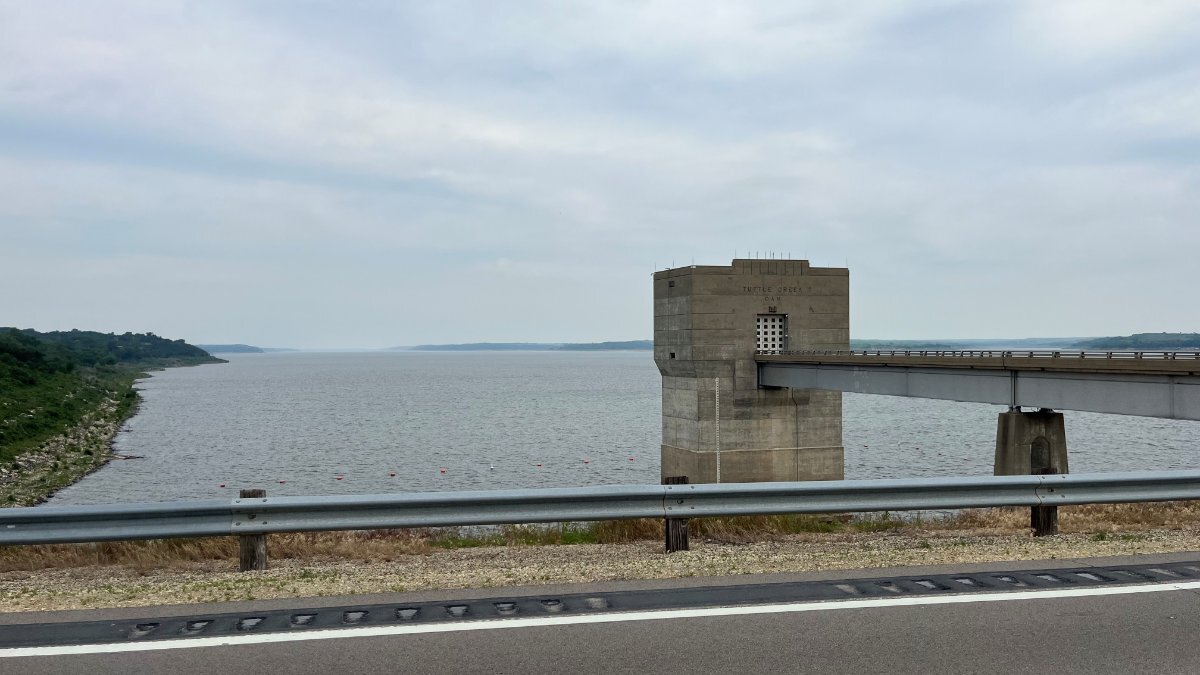
The highways in Kansas are nearly perfect, everywhere we drove! I had not driven on highways so smooth since what I remember of I-64 in VA during the 70s when that Interstate was a new road (moved to VA from the pothole city known as Chicago). The roads in AZ and NM are terrible, and even worse where Fed funds are needed as in US highways and Interstates! We headed to Manhattan Kansas, picked the location for some pickleball courts we found on the PicklePlay app. We made an inquiry on Harvests Hosts but after the courts listed were not to be found and the host site looked like a construction co lot, we drove north of town to stay the night a Tuttle Cove a ACOE campsite. $12 with the senior pass. Windy when we got there and perfectly calm the next morning, a very nice spot and what an amazing dam!
-
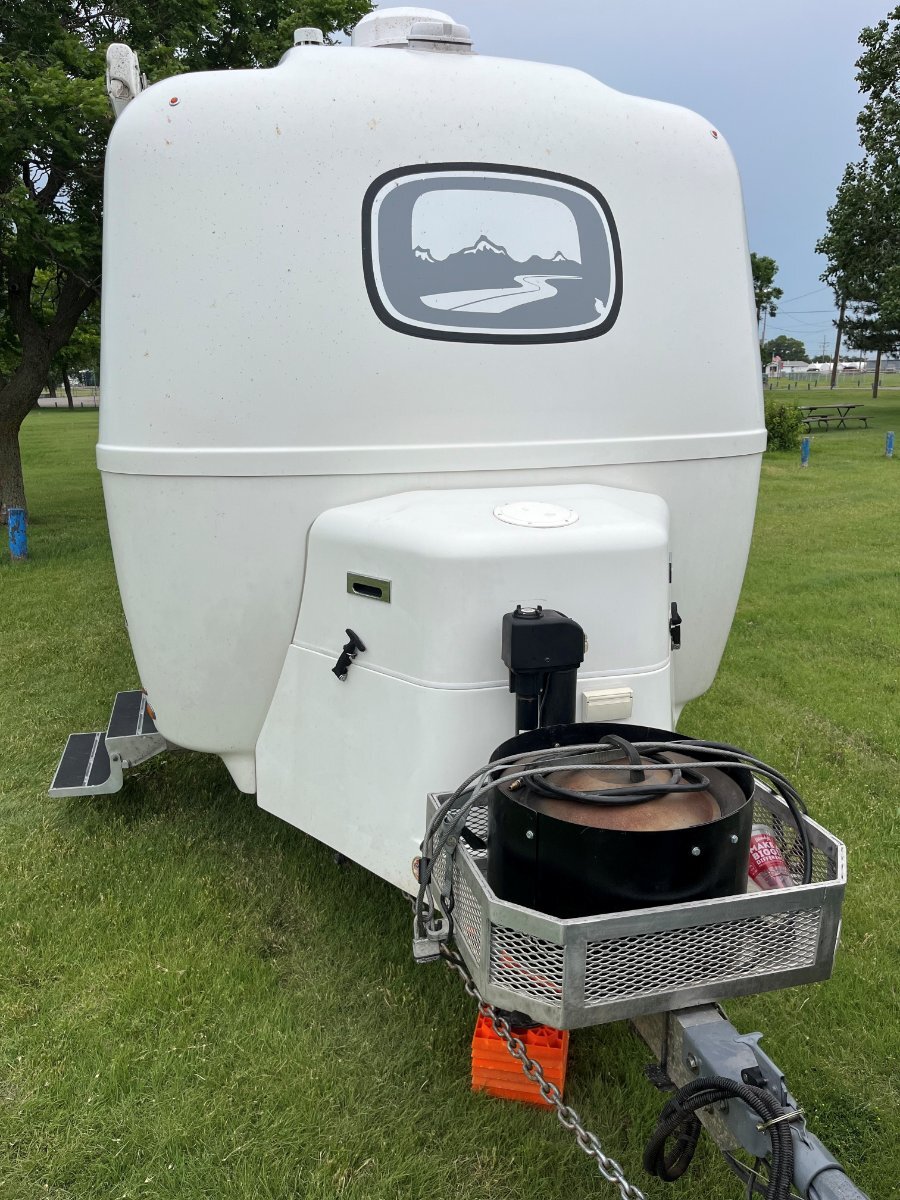
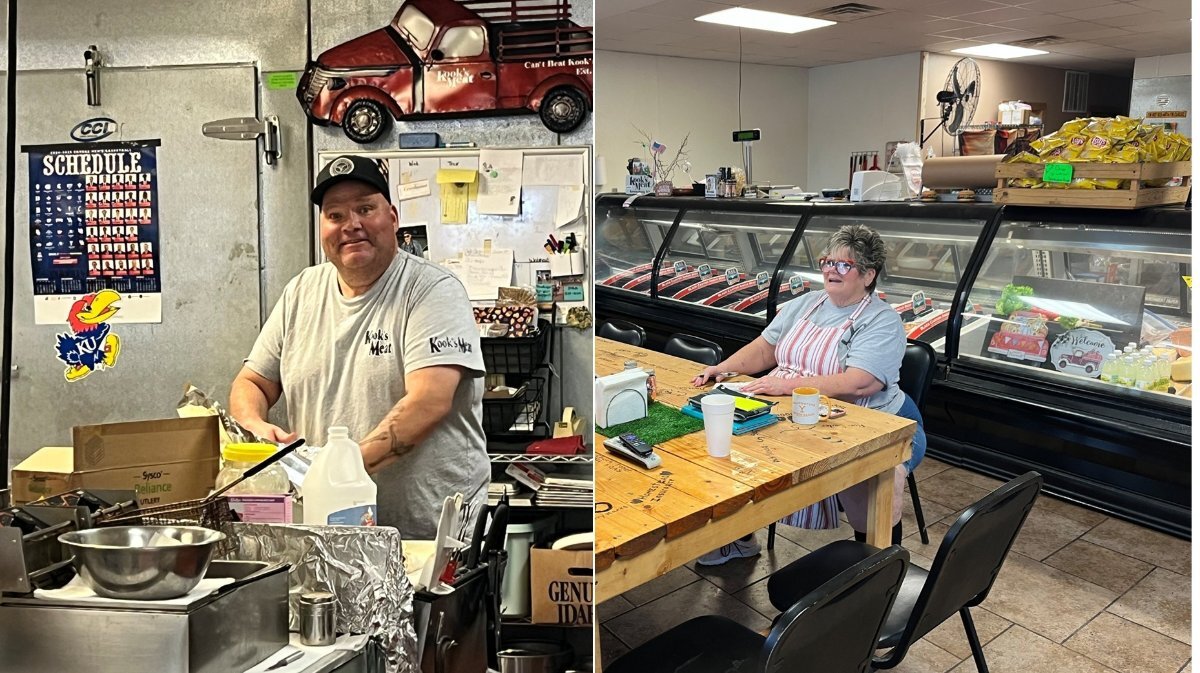
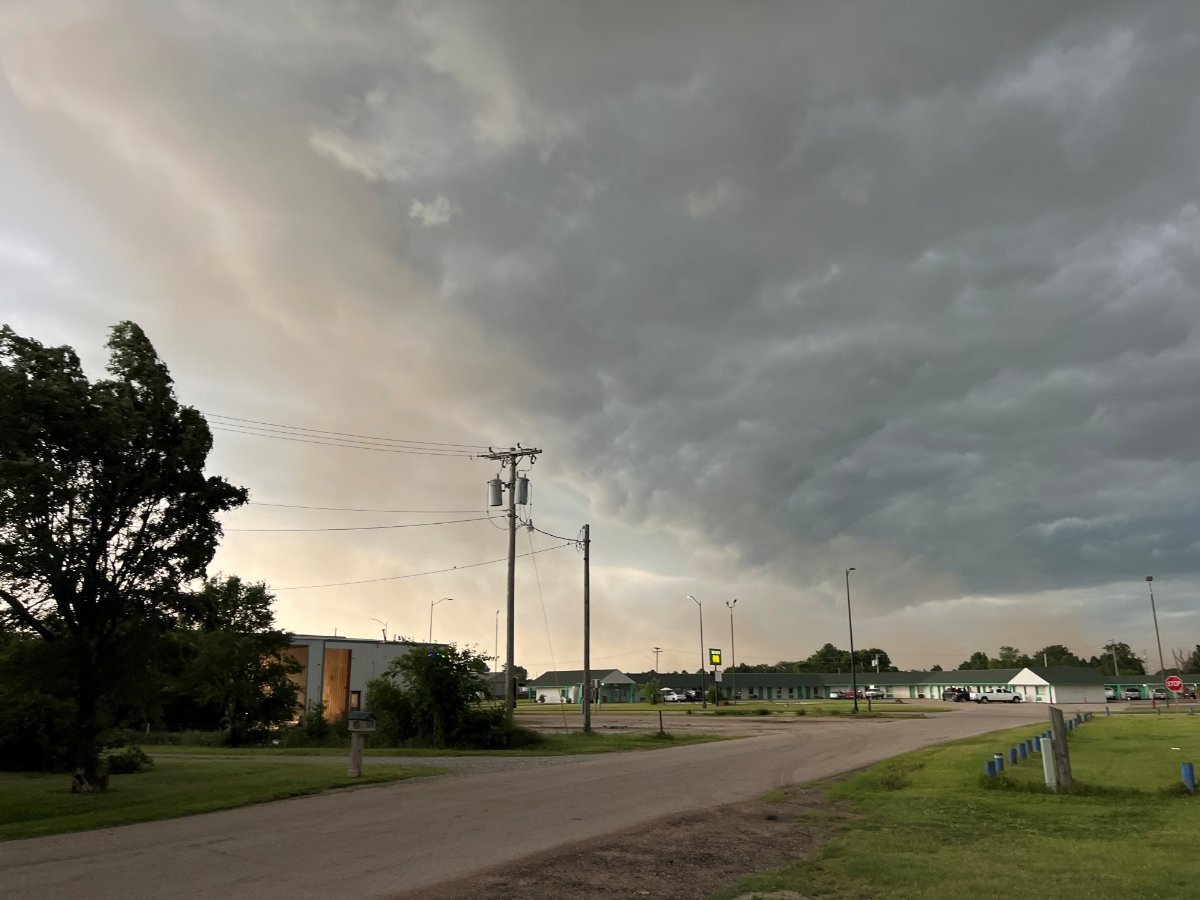
Next we were heading to Dodge City Kansas. Being lifelong fans of Gunsmoke we had to see the town, even though the TV show was recorded outside of Kanab Utah! We found a city park with good reviews on Campendium, Davis Park in the nearby town of Greensburg KS. There was no charge to stay and 20A electrical hookups, fresh water adjacent to the baseball field. We stayed a couple nights so we could do a day trip to Dodge. We're generally not museum-goers but made an exception to visit the Boot Hill Museum, where they presented the real history of Dodge all the guns of the day and had the Gunsmoke city-scape with a walk-in Long Branch where you could order a whiskey and set a spell! We visited Dodge and then got the heck "outta Dodge." A bit too much in feed lots and meat processing plants for our taste. We thought not to eat a steak or even a burger in this town! What a shame. The real treasure was Kook's Meats in Greensburg, run by Andy and Georgina Kook (for short)! They cut us a few ribeye steaks to go and you got to get the blueberry cream cake! Had breakfast there the next morning too and what a huge muffin sandwich or breakfast burrito for only $5.25! The first night was perfect! The air was calm, perfect jeans and T-shirt weather and not a bug to bother us, bare feet in the soft trimmed grass. The second night a major plains thunderstorm came through. We were packed and hitched in case we had to get cover which was in a truck wash building just across the street (see last pic), but all that happened were heavy rains (a first for us in our Oliver). Next time I'll close my window, woke up to some wet bedding the next morning but all was good!
-
Andersen WD Hitch Periodic Maintenance?
jd1923 replied to Galileo's topic in Mechanical & Technical Tips
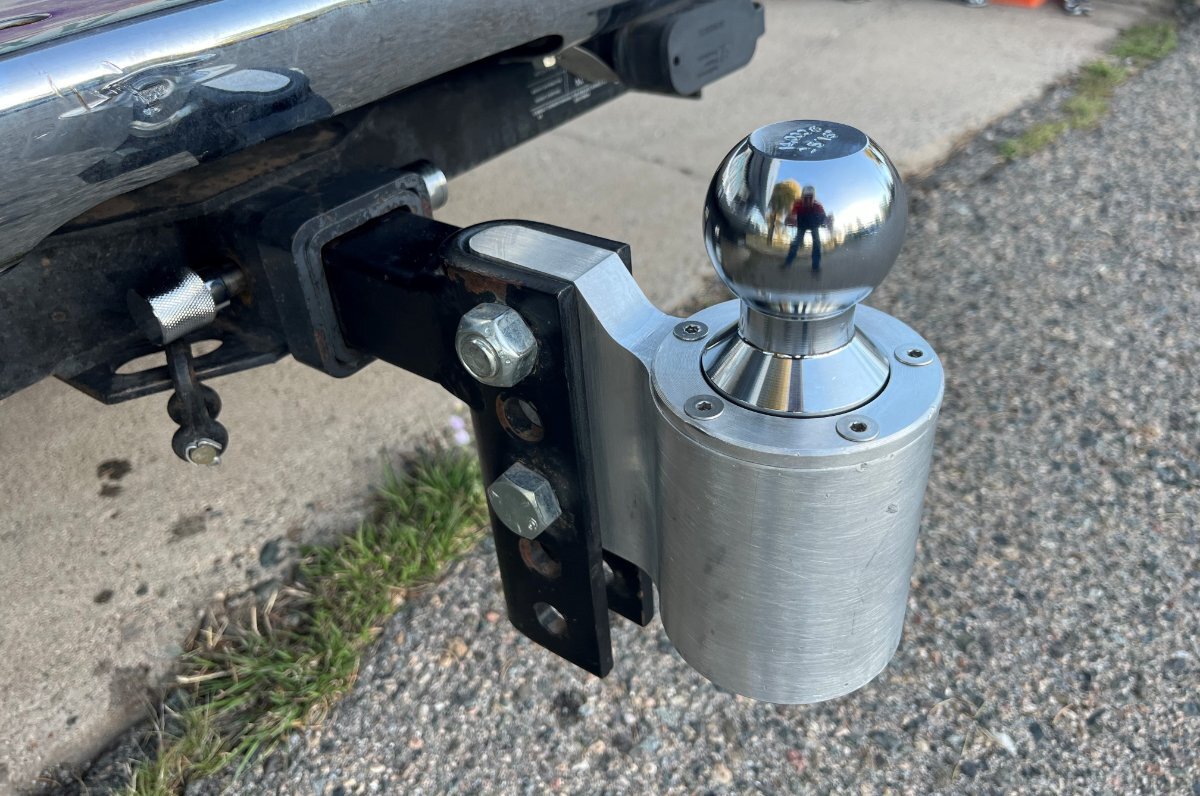
That's certainly excessive! That doesn't look like our Andersen hitch which has a long 2" square shaft that can be bolted in one of two positions. The angle of movement shown in this movie clip would not be possible in ours. I always push ours in deep and use the second bolt hole. It has minimal movement in any direction. Also notice, your trailer hitch receiver is a very light class. Compare to my picture where the receiver has 2 layers of 1/4" steel welded. I do not believe I would tow with what you have shown in your movie clip!
-
3500 pound versus 5200 pound axles on a LE2
jd1923 replied to John and Debbie's topic in General Discussion
Maybe all you need is to adjust the shoes out. Something you can do quickly on the road vs. a full brake job. Lift one side at a time using the Oliver jacks. If the wheels spin freely without hearing or feeling any brake drag, then they need adjusting. I was able to rock the wheels backwards first and then forward, while Chris was lightly on the brake pedal (or using the actuating lever on the brake controller), and the self-adjusters would click tighter each time. If this does not work, or if you're working alone, first place a jack stand for safety, and get under on the back side of each wheel, remove the rubber plugs and adjust each by turning the gear through the opening. The wheels should spin of course, but when the shoes are close, adjusted correctly, the wheels should slow down and stop spinning soon enough. -
Installing Pioneer Inverter AC
jd1923 replied to Treasure Coast Vault's topic in Ollie Modifications
Awesome! Keep us posted. Welcome to our community! -
Love the switch install, excellent work! 😂
-
OK, we love you guys. Our old 10-year-old hull #113 looks better, pasty white only when cleaned, rarely every washed, let alone waxed, LOL (get a pressure washer)! 🤣
-
3500 pound versus 5200 pound axles on a LE2
jd1923 replied to John and Debbie's topic in General Discussion
As always, my friend GJ... You ask the hard questions! ❤️ Q1) There was an earlier post re the 5200 LB axles being just under $1K each. Q2) I would go with OEM bearings and consider the Timken upgrade 10K miles later. Q3) Yes, the Oliver with 6-bolt rims which from the start are spec'd to match 5200 axles, 3500 axles are usually mated to 5-bolt wheels with made in China tires. Q4) Factory upgrade! 🤣 Are you kiddin' me?! Let's say for example, I wanted to pay $1500 for my DC-to-DC charger installation after driving 2K miles to a sleepy town in TN and have the older Victron model installed (closeout special) instead of the Orion XS 50A and afterwards have somebody off the street wire my truck, the TV side of the install? Not, you get my meaning? Many members here have on their way to an amazing Rocky Mountain trip, stopped by Alcan to have their suspension upgraded. Our friend Ken and Mary Kay will be there next week. I will build mine at home, I'm thinking summer of 2026! Lastly, GJ! Given your OEM Ford brake controller is numbering up at the end of the gain setting, please consider replacing it! We do not have a factory option brake controller, though I just replaced a failing aftermarket component with new, it's a light-n-day difference! Your brake controller is failing and needs replacing. Two weeks ago I did not understand this, v\but true. -
Detail-Cleaning the MaxxFan Ventilator
jd1923 replied to Galileo's topic in Mechanical & Technical Tips
Just search the forum for "MaxxFan ." If memory serves me correctly, @Mike and Carol has a post on replacing the drive motor, I've read before. Others have replaced the board, several posts on this site through the years re this fan. BTW, on my post re hitting the fan with the pressure washer... Remove the screen first. Then use an Allen key and remove the fan. Clean these with good ol' Dawn dish detergent and then blast the opening. Start your hose at the base of the vent door, at the hinges where it has strongest connection and work you way out, forcing the dirt to expel out the natural opening. When I did mine, we barely had a damp towel below. 🤣 -
Andersen WD Hitch Periodic Maintenance?
jd1923 replied to Galileo's topic in Mechanical & Technical Tips
The only way this occurs if your Andersen chains are loose! When tight enough the ball of the hitch is pushed forward to the point of being tight. We get absolutely NO noise from the hitch at all when the Andersen is dialed in to the right tension. When coupled and adjusted. Push your foot down on both chains. They should flex a little and nothing else. We took our flatbed trailer out a few weeks ago. Simple hitch, no WDH. I opened the windows thinking, what os all that noise back there?