jd1923
-
Posts
3,574 -
Joined
-
Last visited
-
Days Won
271
Everything posted by jd1923
-
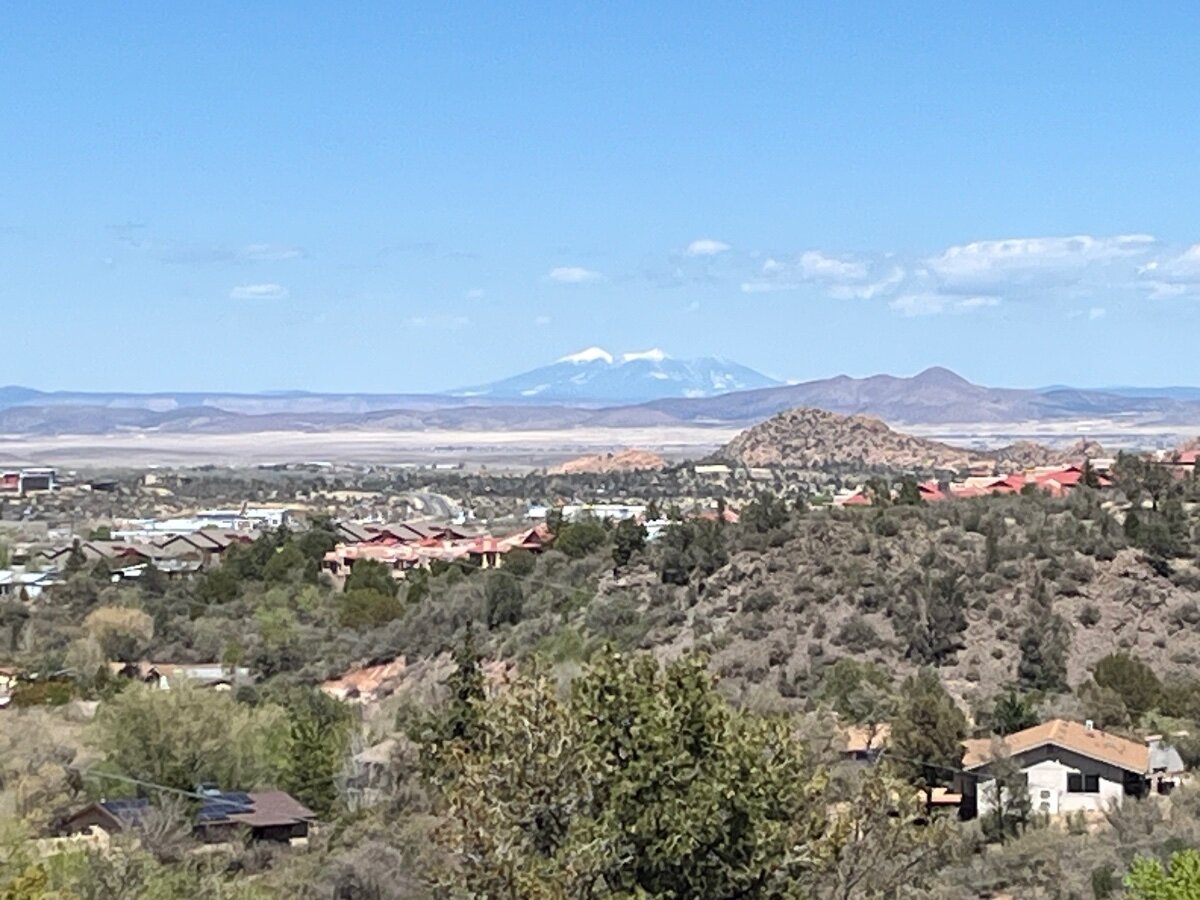
It’s been a wonderful Christian holiday weekend! 😂 Down here we had the usual gloom of Good Friday, woke up to clouds and rain, by evening it dropped 25 points, down to 32F and it snowed an inch or so, with more at the higher altitudes. It like never snows here in late April. On the beautiful Saturday, we played pickleball in the afternoon, currently 68F with a light breeze on this Easter Sunday! Picture from our deck. The closest mound is a portion of Point of Rocks in Prescott. Behind that, the hills of Perkinsville and in the far distance the San Francisco Peaks just NW of Flagstaff, “100-mile view!” Please share your Easter weekend and pics if you like…

-
Yeah @Patriot, I guess if you don’t own an Oliver, you can’t measure it! Double 🤣!
-

Swap LED lights to color controllable, or just a sunset red
jd1923 replied to DanielBoondock's topic in Ollie Modifications
Bad Scuba! 🤣 -
Swap LED lights to color controllable, or just a sunset red
jd1923 replied to DanielBoondock's topic in Ollie Modifications
Good point Bill. We both commented to the hitch question and now this one. I found that @DanielBoondock has been an OTT Forum for 3 years and his profile states “don't own a RV or Travel Trailer.” First, I would suggest first buying an Oliver, new or used, and until then you’re overthinking details that may not matter when you actually get into Oliver ownership. We found ours in local Craig’s, had NO idea what one was and 5 days later it was paid for and delivered home! Also, viable points from Bill is first add a signature and that different hulls have different standard and optional equipment. Re the Courtesy Lights, one thing I noted at the Texas Rally, new hulls have extremely bright exterior courtesy lights! Without any actual lumen meter, I would say that ours are less than half the brightness! We love ours as-is but I would certainly have to replace them if we had the newer bright ones, no like! To answer your question directly, yes these are 12v LED lights, mounted by 2 screws with a center hole for the wiring. You’d truly need to buy your Oliver first and measure the distance between the screw holes prior to shopping for new ones, since the mounting pattern could have also changed through the years. -
Do it the old-fashioned way (lay on the ground face up and measure). 🤣 Seriously, I would never take another’s opinion on measurements. What I’m sure of is you would have to cut into the fiberglass fascia as Bill already mentioned. You would also be shortening the tongue length, which may have adverse affects when turning and backing up! I love that as hard as I can turn my truck, the Oliver follows w/o incident, turn radius the same towing or not. Since you have no forum signature, we have no idea regarding your tow vehicle, so I’m wondering if the Anderson WDH is issue or not? Experienced trailer hitch installers would ask, why replace the reliable cast-iron Bulldog with a lesser coupler made with stamped steel? Not a good idea. I’m making a few suspension tweaks so we can loose the annoying Anderson finally. I have this coupler in my eTrailer shopping cart so to have the larger hitch ball and our coupler does not open and close easily after 10 years of use. However, what OTT installed to your hull is perfectly fine unless it has been damaged https://www.etrailer.com/s.aspx?qry=Bulldog+12,500&furl=-pg-Straight_Tongue_Trailer_Coupler
-
Propane Tank Storage Cover Seal Replacement
jd1923 replied to Gliddenwoods's topic in General Discussion
That must be something OTT added on newer hulls that our older hulls do not have. You got to ask, why in less than 3 years has yours gone bad, when our hull now 10 years old, finally needs some work? My answer is having the seal up on the doghouse made for the better installation. It looks awful in your picture and being on the lower section it just collects dirt. Ours and yours have the same recess, but ours looks clean never having rubber glued to it. i just ordered what @CRM suggested, thanks again. I suggest you remove that rubber, use a solvent to remove all the crude and old sealant. The rubber edging suggested will be a far better insulator! Problem solved. 😂 -
New Mexico State Parks - Fee increase
jd1923 replied to Mountainman198's topic in Campgrounds & Parks
We recently booked two nights at Manzano Mountain NM SP. Cost was $15/night. I think it comes with electric but not sure. We don't care about hook-ups. I just want a site that allows for the trailer, not a tent site of course. At checkout, there was an extra $5/night charge which I believe was for out-of-state residents. Then of course the $3.50 online booking fee, for a total of $23.50/night. We're leaving next weekend. I also booked one night at OK RV Park in Holbrook AZ, for a halfway point, so we can take our time and break the 7 hour drive in half. I'm on the phone with the girl at the park. She tells me with a "senior discount" it will come to $55! I asked, really, are all your sites at this rate. She said they have electric only sites for less, but was not sure one was available. Then I asked about overflow or dry-camping. Thank goodness, she said, "Yes, that will be $25/night." I always ask this question. No BLM in this area since you have the Petrified Forest NF nearby (with no camping there) and the Navajo Nation 100 miles in every direction. Some special BLM sites do charge usually a small/fair amount. If you know where, the states of New Mexico and Arizona have endless free BLM and NF campsites. Though when traveling through it's hard to know where the good sites are and there's always that fear of having to back up a mile more if you drive down the wrong road! 🤣 -
I didn't look until 3 days! was also cloudy one day.
-
So, what I'm about to suggest may return insults from the purists here... Of course, get your Blue Sky SC setup properly for LiFePO4 at the voltage settings spec'd by the battery manufacturer. The dozens of menus and buttons you have to push in this setup is truly tedious. I went through it all following the training video below. It took me 3 tries to get it right without making a mistake! 🤣 Given you're "not often plugged into shore power" you could forgo purchase of the PD charger upgrade, at least for a while (or longer). We got home from camping last week and I only plug in at home when over 90F and I need A/C. Batteries were 55% SOC and by the 3rd day they're back to 100% on the Blue Sky charger alone. The only true harm to LiFePO4 batteries by charging in lead acid mode on shore power is over-charging. So when you need to charge occasionally using the onboard PD charger, just turn it off when you get to 90% or so. Even 100% is OK if you turn it off just in time. Personally, I NEVER leave a charger on continuously (except a MPPT SC) or for more than 48 hours, "smart charger" configured correctly or not. I just don't trust algorithms nor programmers. If you're one that would forget it's connected, that's another thing! Learning Center – Sunforge LLC
-
Dang, I should have bought a 3rd one at $999 with 15% off! I'll stay with 600Ah then. Good to hear you're all set. Best wishes, JD
-
I'm home working, leading virtual class 10AM - 2:30PM on May 12-13. You end up with some extra time, we are about 1 1/4 hours past Sedona with Jerome on the way (Hwy 89A south).
-
I tried Epoch CS a year ago when I was trying to figure out if two of the 460AH batteries would fit in the Oliver without the tray. They have the dimensions listed two ways on their site vs. the use manual. After finally getting to a person, he said he would "look for a tape measure!" 🤣 He never came back to the phone. The reseller I purchased from helped me with my question. Their CS is certainly questionable. I use the basic app, had not heard of a Pro version. The issues I have with their app is that it lists every Bluetooth device in our Oliver and nearby and it does not know which Bluetooth signal is its own batteries! I have to click on each battery, some cryptic string of letters and numbers and once it registers I go to the second page to see the battery stats. Once there everything works well. The Epoch app numbers are always a bit off from the Victron numbers, more conservative meaning lower SOCs, but I believe them to be more true than what Victron calculates as SOC. It's not user-friendly but good enough for my use.
-
Interesting how Will Prowse pronounces "Epoch" batteries. Take another look at his video. He is NOT reviewing the less-expensive Epoch Essentials battery that most of us have purchased. He has issues with the software (only) of the high-end model with "Victron Comms" (don't remember the name of that model). From what I've read here, only @rideadeuce has purchased this model. He also is only talking about the recent firmware update. So perhaps Mike should not update the firmware on his batteries. Our Epoch Essentials batteries are perfect in every way I can see. I have used them for 9 months, have brought them under 20% SOC charge twice on the road, all without issue. I love them! 😂
-
Sorry Gary, when y'all are at the OTT Annual National Rally, I will be working, teaching my PMP class during that particular week in Albuquerque NM! Maybe one year, I'll make it that far east. It's not on our short list however since we lived 10 years in VA and 4 in FL and 40 years in Chicagoland where almost every year we drove SE to Florida! There are so many travel opportunities that are new to us out west. We made the Texas Rally last year and it was so great to meet so many Oliver owners! Can't make Texas this year either since I have 4 weeks off ending the week before that event. When you travel with your new Oliver out west at some point, please come to Prescott. I have an RV parking spot for you and we can drink and break bread together! You're welcome! 😂
-
You will remove 3 components; the 2KW Xantrex inverter, the Xantrex PROwatt SW and the crazy junction box, full of wire nuts, OTT installs in this setup. We had the same setup. The Xantrex PROwatt SW (pictured below) is an Automatic Transfer Switch (ATS) that connects shore power when hooked-up and uses inverter power when not. Inside the standard residential junction box (shown in your pic2) there should be pairs of white 14 AWG cables (they might be yellow #12 cables since your hull is newer than ours). One set of cables is the source wiring to your 110V outlets and microwave which must be rewired directly to the circuit breaker labeled "110 outlets - 15A." You will also remove and not reuse the short jumper cable currently connected to this breaker. You recently purchased a new PD converter that you do not truly need once upgraded to the Victron which has a built-in charger which your old Xantrex did not have. I'm not sure what would happen when you connect to shore power with your new Victron in the ON position. As-is you would have two chargers running. I disconnected the original PD converter that is internal to the power panel. I reused the breaker labeled "Converter / Battery Charger - 15A" to power our microwave circuit separately. We replaced our microwave with an Emeril Air Fryer and I did not want it on the same circuit with anything that may be plugged into an outlet (e.g. a blow dryer)! I left our PD converter where it was, so if the Victron was to fail I could open the panel, re wire the black wire (the hot) and the charger would then again work. I doubt I will ever use it but I did not want it on. You could do as I did, or remove it completely (return it if uninstalled) or merely trip the breaker so you do not have 2 chargers working in parallel. This could confuse the Victron charging algorithms and perhaps over-charge your new batteries. The Progressive Industries Electrical Management System (EMS) is shown in your first picture. Your installer will need to reroute the output of the EMS to the 120VAC input to your new Victron and then wire the Victron output to the panel exactly where it is wired currently from the EMS. I used residential 10-2 cable for this, however there are some here who believe you must have stranded cable which is expensive. You'll need 12-15 ft of 10-2 cable either way. Read my installation thread again and ask your installer to do so. He (/she) will have their own way but I did not start on mine until studying the good work Mike had done@rideadeuce and there are 1-2 other Oliver Forum members who also posted some insight. Best wishes, JD
-
Thank you, John. Please allow me to correct my above statement, by not including OTT. I remember reading this with your reminder. That's two strikes for Truma, on just one hull.
-
No way it could bounce to the point of bending an internal copper pipe. Sorry, but there’s no physics that would explain that. Call it Truma manufacturing defect #2, and counting, having read 5 pages of this thread. So sorry Craig, that this has disrupted your travel plans. That s#cks! Your last thought is likely the way to go. Personally, if neither OTT nor Truma would correct this situation after all these demonstrated issues, neither company would get another dollar from me. And it’s easier to swap the unit than to rebuild it on your own, with expensive parts, and then what? I’d like to think there is a viable brand of tankless HWH in the marketplace! Until so, we’ll keep carrying an extra 6 gallons of water…
-
Agreed, the Blackstone is a popular flat grill and not what you want. Heed Steve's advice @ScubaRx in the post above. They do not regularly sell low pressure. They all or almost all come with regulators to reduce the high pressure. It is easy to remove them, add a HW fitting or change the hose and add a quick disconnect that mates with the Oliver fitting. I modified our Weber grill and our LP fire ring. Added a 12' extension with a 'Y' so we can connect them simultaneously. There are hundreds of choices. Here are a few... https://www.amazon.com/ONLYFIRE-Adjustable-Removable-Tailgating-GS301/dp/B0DF71PPC7/ https://www.amazon.com/Concord-Stainless-Roadster-Propane-Burner/dp/B0BGMGLGTM/ https://www.amazon.com/ARC-Adjustable-Pressure-Portable-Regulator/dp/B07TWZ1H2T/
-
Remind me to keep my old tow vehicle 4-ever! 🤣 Good work Ron, as always.
-
This is as clean an installation as I've seen! 😂 Excellent work. I didn't bother with a temp sensor wire. As per the Epoch manual: Wide Temperature Range Engineered to perform reliably across a broad temperature spectrum, it operates effectively from -20°C to 60°C (-4°F to 140°F). Integrated Heating System The built-in heating system enables charging in cold conditions, safeguarding the cells and ensuring battery efficiency in freezing temperatures. But then again, we do not live in Minnesota (nor would plan a winter visit). 🤣 We will be traveling through your area this June though. Where we live and travel, we could never possibly be outside of this very wide temperature range. You go Epoch!
-
I didn’t need one and you shouldn’t either. I think that’s for people that run 12V systems with 24V batteries. Those with marine experience herd would know more.
-
Wow Bill, this looks great! I'm not a woodworker so this would take me a bit of time! Two 1" squares of 3M 4950 VHB tape on the lower back sides would keep it there nicely. BTW, if you save your photos as .jpg vs .heic files, they will show on the page and not have to be downloaded.
-
Looks good to me! I moved our 6 AWG cables inside, but I do like the extra terminals you added. Only detail it's better to connect the + cables first and lastly connect the final ground. This way you cannot accidentally short the + while connecting. Not a change in wiring, just your order or assembly. You should add a heat shrink and optional wire loom to the main positive cable like you did the others. Ours is very similar. Both arrangements work fine since the main positive is connected to one battery and the main negative is on the other.
-
Thank goodness, our 10-year-old OEM Dometic “absorption” fridge is still working like a champ! God bless one past forum member, @John E Davies, argued emphatically that we all must replace these or likely when the trailer was not perfectly leveled, it would blow the side of our trailer clean off! (he showed pics of 100 occurrences). 🤣 Please notice the picture of our Ruuvi sensors last week while camping not far from home. We get better numbers most of the time (was near zero before we refilled an ice cube tray). I installed the Beech Lane dual fan system for when it’s hot and the numbers are equally as good when hot out! When anybody finds a modern compressor fridge with a full, left-to-right freezer, let me know! This freezer holds 2 full ice cube trays, 2 steaks, 2 chops, some vacuum-sealed veggies and a half gallon of ice cream, that it keeps frozen!
-
Replacing the 6" Marine Hatch Access to the LP tanks
jd1923 replied to jd1923's topic in Ollie Modifications
For sure Bill, and you and I are good ol' school restorers! If you were to paint this part, I would suggest removing the lid to paint and just mask the surround and paint it attached. Removing it and remounting was truly a pain! In this case, paint would not help. The threads were bad and would stick. Also, check out my cropped pic. There were chips and scrapes in the plastic and a 1" x 1/4" gash in the top opening, just left of the word "close!" 🤣 This part had seen its better days!