
Galileo
-
Posts
315 -
Joined
-
Last visited
-
Days Won
8
Everything posted by Galileo
-
This one looks pretty close if not the exact one. ITC -is- one of the suppliers Oliver uses. I purchased table pedestal caps from them, as well as two additional pedestal mounts. I figured I could use them to make a base for the table to use it outside. (Never did) Since people are talking about the porch lights - those things are DAMN bright! I’d like to dim them or even install additional switches to enable me to turn on just one or two of them to avoid ruining everyone’s night vision. (Same with the killer-bright courtesy lights.) guess I’ll check that link to see if it says they’re dimmable or not. (Listing says they are dimmable. Guess that’s a new project.)
-
OK folks, (TLDR - Stained window seals? Soak overnight in Dawn & Bleach water.) Now that I’ve got that whiny rant out of my system, I’ve come up with a solution that saves $100 and gives me some satisfaction. I had pulled the window seals out of all four windows last season or so, scrubbed them with a toothbrush and Comet, gave them an hour soak in bleach water, and got them somewhat clean. I even moved two of them to opposite side of the trailer so I could install them “upside down” so that the more visible part was clean. They hadn’t come completely clean, but were a lot less unsightly. As I mentioned before, because I scrubbed (abraded) them, I figured they wouldn’t come as clean a second time. I’m thrilled to report that I was wrong! I pulled them off again yesterday. Coiled them up in the bottom of a plastic bucket. I put a cup of household bleach and a generous squirt of Dawn dishwashing liquid, and sprayed about a gallon of water in the bucket. I let them soak overnight. This morning I was pleasantly surprised to find that they came even cleaner than the first time! There’s just a mere hind of a shadow of the old stain on just one small part of one seal. I would pronounce (nearly) “as good as new”! I plan to coat/seal them with the same treatment I’ve used in the nose of the trailer to make bugs release easier. So - for little more sweat equity than it would take to cut and install new ones - and $100 less - I have window seals I’m quite happy with.

-
Yes - finger slipped and spellcheck liked cooking. I just noticed that while-installing them the last time, that it’s pretty easy to stretch it as you install it. That could probably be enough to cause the gap as the material ages.
-
Yes, black seems to be the way to avoid the unsightly black mildew - or whatever it is. They’ll still get dirty of course, it just won’t be so obvious. I hadn’t thought about cooling (previously “cooking” oops!) the new seal material first. I was figuring that the stuff doesn’t really shrink all that much, it more likely gets stretched as it’s being installed. I was planning on kinda “compressing” it as I install it. Mine had those 3/4”-1” gaps, but I just made sure they were at the top when I cleaned and reinstalled them. I don’t think they really do anything at the top. They just keep most dirt and junk out of the bottom of the track.
-
(TLDR: this entry is a rant that’s not worth the time to read. Just me whining. You have been warned!) I knew I’d find the source for this material here! I’m more than a bit disappointed that the stuff costs $5.17 per foot plus shipping - especially when the material is clearly not very good at resisting stains - and apparently shrinks - though that could be an installation error. Kind of “our product is terrible, but we have you over a barrel. Hah!” It’s not that $100 is a big deal in the grand scheme of things - just that it’s - for lack of a better phrase - a cheap cash-grab. It’s like they’re thumbing their nose at folks who have their windows having to spend $100 every couple of years to keep their windows looking nice. Last year, I removed the seals, scrubbed them with a couple of different cleaners and a toothbrush. That got off most of the stains. Then I took them for a little soak in a strong bleach water solution for about an hour. That got them virtually new-looking again. Of course, that may well have been more than $100 worth of my time and labor. That, and I’ll bet that the seals won’t come that clean a second time. So - now that I’ve ranted and whined about having to fork over $100 - every couple of years - I’m gonna go out, pull the seals off the windows - again, throw them in a bucket of bleach water, and scrub them in the morning. Then, I’ll look for some way to coat or seal them so they don’t do this again.
-
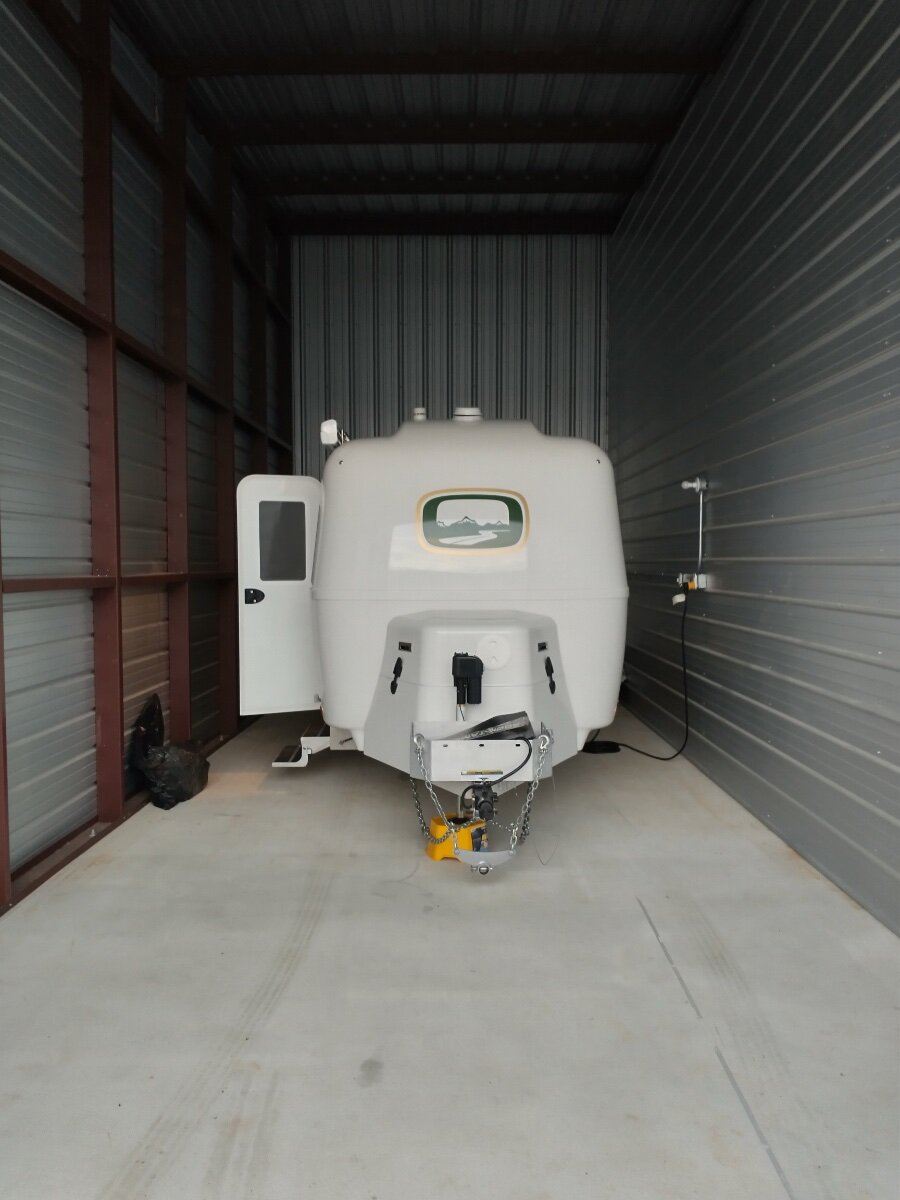
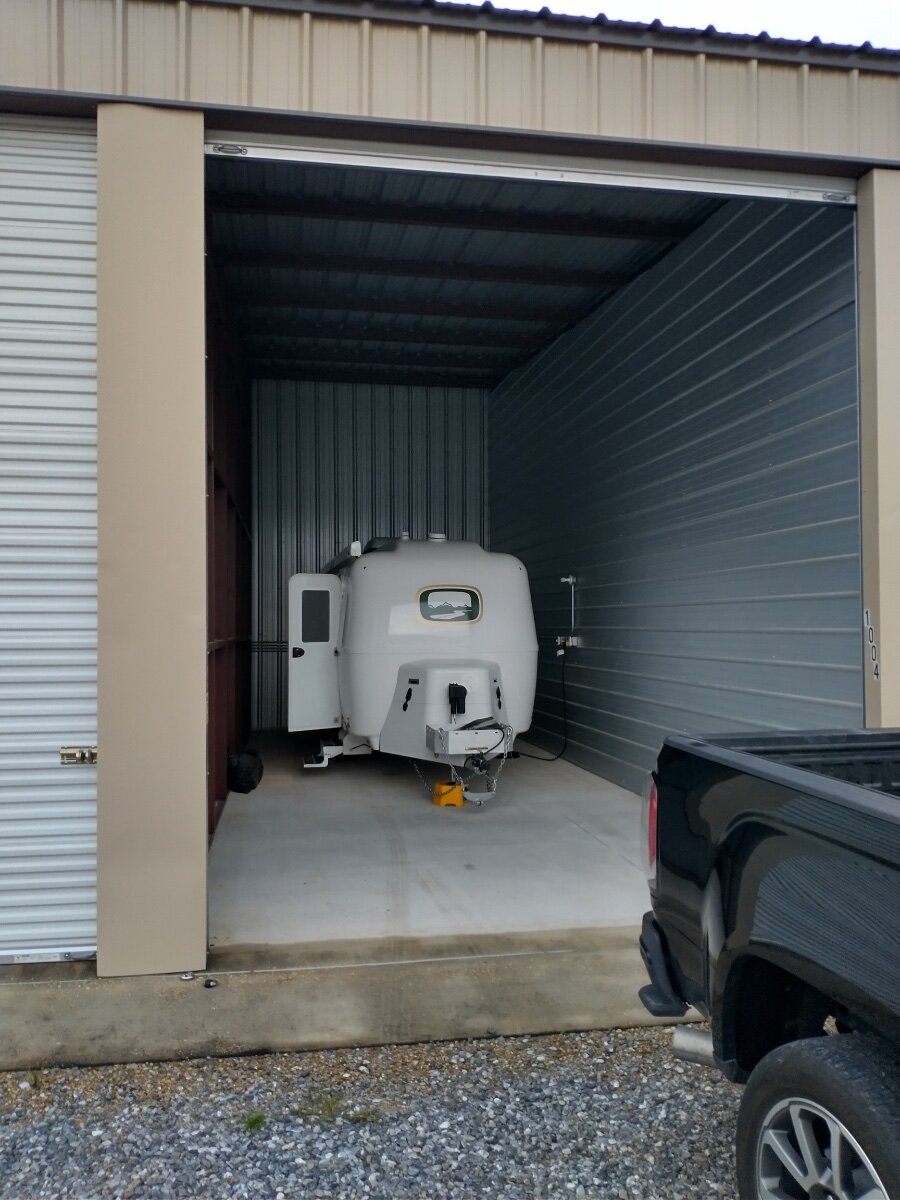
If you have the property, that’s a great option. Since we’re all but full-time, we have no property. We opted for indoor storage to keep not only the sun and birds, but the millions of mud-home-building insects out of every nook and cranny. Pricey - but worth the cost!
-
Looking good! Aside from the dirty back end, it looks great. We have an older (much older) sailboat that has been sitting in the Louisiana sun for 25+ years and the deck is very pasty/chalky. The gelcoat has worn completely away in a few places, but when it’s aggressively cleaned it regains a good bit of gloss. No idea how thick (or consistent) the gelcoat is on the Ollie, but I would imagine it could take several years of chalking and cutting before you’d run out of surface that would polish out. I’ve had several pressure washers. Judiciously used, they can be real time-savers. That said, they just plain don’t get ALL the dirt off. You need a sponge or rag or washing mitt to get down to the actual surface - even if you’re not trying to remove tree sap, bugs, or bird droppings. That’s takes good old, US made elbow grease!
-
Andersen WD Hitch Periodic Maintenance?
Galileo replied to Galileo's topic in Mechanical & Technical Tips
Could be. The forces I’m talking about would - I imagine - prevent much up-and-down movement, but might only make side-to-side movement a little less easy to make because of the greatly increased friction between the ball carrier and receiver. I would also guess that it has a lot to do with how much play or “slop” there is between the receiver and ball mount/carrier. With an older truck/receiver that’s seen a lot of towing - likely with non WD hitches that would move around more and create wear - I guess that clearance could open up. Though it’s really kinda hard to tell with a newer, well-insulated truck like our 2025 Sierra Denali (even with the radio off) the only sound I’ve ever heard from the hitch is an occasional, one-time “clunk” as the freshly tensioned WD system “settles in” when I first move the TV/RV combination. Like the ball and coupler figure out “OK - here’s where I’m gonna be for the next 300 miles. Carry on!” Once - before I had figured out how tight to make those Andersen WD chains, I would get a clunk when braking to a hard stop. That hasn’t happened since I ate my Wheaties and got those chains tight. If anything, I with there was a way to adjust the “pitch” of the Andersen WD assembly. Looking at it when coupled and adjusted, it seems the whale tail is higher at the rear edge than the front. But, lacking such a pitch adjustment, the only way to change that would be to lower the rear of the receiver - or the whole rear of the truck. Next time I hitch it up I’ll take a picture and post it to see if others see the same thing. -
Andersen WD Hitch Periodic Maintenance?
Galileo replied to Galileo's topic in Mechanical & Technical Tips
If I’m picturing it correctly, you’d have upward force at the aft end of the receiver, and downward force at the forward end of the “ball carrier” (ball mount) well inside the receiver. It’s more of a “torque” than just an upward force. The WD hitch “lifts” the back of the vehicle as its trying to force the front of the vehicle down. That’s quite a bit of force and I would think that between those contact points - and the pin holding those two parts together - it would immobilize movement in all but the sloppiest fits between receiver and ball carrier. I guess if you’re going over some horrendous bumps it could unload that assembly enough to move - but I think all the other noises you’d hear (stuff flying around your truck cab, passengers screaming, etc) you’d hardly notice noise from your hitch. -
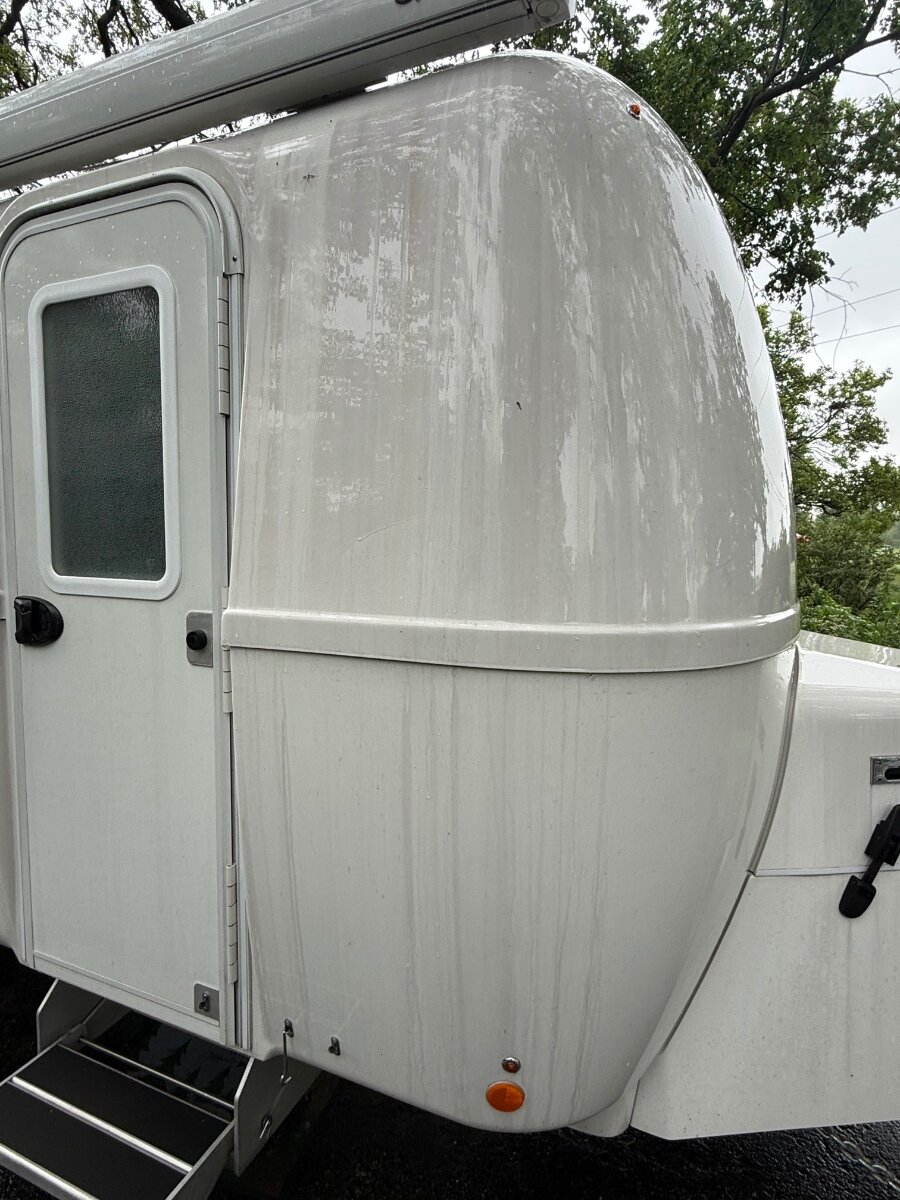
I’m guessing that a ceramic coating would have either prevented the streaks, or made them easy to wipe away. Guessing also that my waxing job or wax product isn’t cutting the mustard.
-
I cleaned the top of the trailer just this past weekend, so not sure what would be running down onto the side. The street side of the trailer actually looks quite a bit better. Not pristine, but not as dramatic as this. The marks aren’t coming off with just “soap” so I guess I’m gonna have to use something with some polishing capabilities. It’s strange that it looks worse after it’s been cleaned. That makes zero sense.
-
Well Ollie folks, I got tired of the brown trickles that were coming down over the fridge vent panels and rearward edge of the door from where the rubber seal had detached from the camper body and leaked the brown water from behind the awning. I purchased a new 20’ seal through Amazon - looks like the same exact thing. Pulled the old one off yesterday. Peeled and “rolled” off 99.5% of the old double-sided tape that held it on. (Got a blister on my fingertip from the technique I found to be effective. And then, took my soapy water and assorted brushes to clean the residue an dirt from the former dam created. It came cleaner than I expected. No staining from crud that had built up. All that remains are a few small traces of adhesive that I planned to attack with 79% isopropyl alcohol today. ”Today” decides it’s gonna be a rain day. Bummer. Went outside to do some unrelated chores and was surprised/horrified by what I saw. Multicolor streaks down the side of the trailer! Really surprising as there was really nothing left to run down the side. That, and I had rinsed the whole area and whole side of the camper yesterday. This sucker was CLEAN yesterday and there was no crud left to drip down the side. There was a speck or two of leaf/tree litter, but no streaks of stains or anything. The masks don’t easily wipe or rub off. I am under some trees right now. I’m probably gonna have to use something with a little polishing ability to get it off. Anybody else seen this appear on an otherwise clean camper during/after a rain? I typically use blue Coral cad wash to do regular washing. Though I haven’t used it on the rest of the trailer, I’m using a product on the bug-prone “nose” of the trailer (and front of my TV) that is recommended to make bugs less likely to stick. That stuff seems to work. Im gonna try some StarBrite and Maguires wash and cleaner/wax products to attack these new stripes. Any other suggestions? BTW - I had decided to pass on installing the new rubber seal - but if this is what I have to look forward to - I’ll likely reverse that decision.
-
Looks like what’s in my basket as of yesterday afternoon!
-
Detail-Cleaning the MaxxFan Ventilator
Galileo replied to Galileo's topic in Mechanical & Technical Tips
The factory is pretty good at walking you through troubleshooting. (The fan mfg - not OTT). They gave me direction to troubleshoot my fan motor - and then sent me one gratis even though it was out of warranty. I -think- the control board should be a pretty easy R&R. Keyed connectors for both motors, pigtails for power. I imaginare that the circuit board and the membrane keypad are one piece - but don’t quote me. There’s also a temperature sensor. You can get up the circuit board by just removing the manual open/close knob (one screw) and the whole faceplate comes off with 4 more screws. Probably best to pull the bezel off as well so you can get to the power wires. Also 4 screws, but I found mine was helpfully (not) also glued on either white RTV and some butyl tape underneath. Just use a credit card to run around the perimeter to defeat the RTV. -
Detail-Cleaning the MaxxFan Ventilator
Galileo replied to Galileo's topic in Mechanical & Technical Tips
That’s fine for cleaning the fan blade & screen. Unfortunately, the rest of the fan collects just as much grime and dirt. Aside from @jd1923’s pressure washer trick, the rest of the unit needs cleaning just as much. -
Detail-Cleaning the MaxxFan Ventilator
Galileo replied to Galileo's topic in Mechanical & Technical Tips
I was with you 100% until this statement. Walked through an Ikea ONCE in Austin TX. Could not wait to get out of their maze of cheap kits, ASAP leaving EMPTY-HANDED! 🤣 My son who has been an Angie's List contractor, on and off, has installed these kits for the mechanically-impaired for big bucks! Hey - I generally don’t care for IKEA “furniture” either. (Though I used to have my share of “O’Sullivan” pressboard bookshelves and entertainment centers.) I just used IKEA as a reference gif people who are remotely familiar with common hand tools and putting together adult Lincoln Logs. -
Detail-Cleaning the MaxxFan Ventilator
Galileo replied to Galileo's topic in Mechanical & Technical Tips
I occasionally do some pretty daring things - including flying single engine aircraft and climbing on ladders. This ^^^ is something that increases my pucker factor to an unacceptable level. Then again, I might opt for this method if I was drinking hard with a buddy and he dared me. Even if I wasn’t worried about the circuit board (which I would definitely be!) how much dirty soapy water ended up -inside- the trailer would be a concern. Another concern would be damaging the hood with the power of a pressure washer. That said - if it’s working for you - who am I to say not to do it?! -
Detail-Cleaning the MaxxFan Ventilator
Galileo replied to Galileo's topic in Mechanical & Technical Tips
I kinda dove into it feeling confident that once I saw how it came apart, I’d be able to put it back together. Had I needed to drill out rivets or the like, I would have hesitated to take it further apart. It’s really not as complicated as it looks. I did feel the need to take it apart not only because it was disgusting inside, but because one of the operating arms looked like it was about to pop out of the slot in the hood. Next time (another three years or less I’m guessing) I’ll try to do a video or step-by-step photo essay. I’d say it’s in the comfort zone of anybody who has rebuilt a carburetor (remember those?) installed a ceiling fan, or shops regularly at IKEA. Aside from being a little dirty - it actually was kinda fun! Always nice to see something grimy and needing a bit of TLC look shiny and new again! -
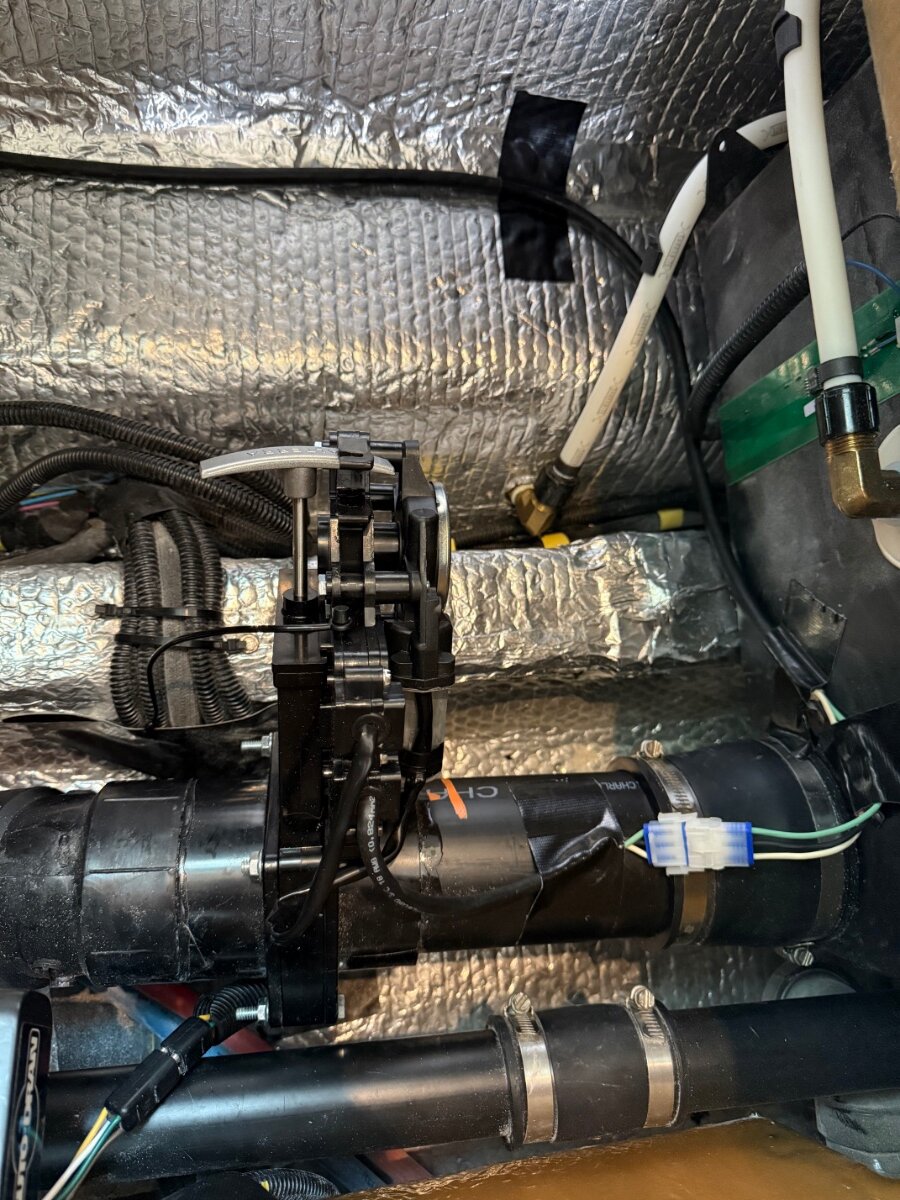
Finally finished! I admit to being quite lazy and uninspired - and yes - busy traveling and not in one spot long enough to get to it. But, the rest of the Valterra electric black tank dump valve installation is complete! The 18-3 wiring harness that came with the valve was far too short. Since I was going with a longer run, I upgraded to 16-3. I used the existing manual valve cable to pull the electric cable through. It was certainly easier than if I had to pull a harness with terminals on both ends. Only snag (literally) was where the original cable was taped to the insulation. I had to duplicate the control end of the cable. Basically 5 crimp-on 1/4” female disconnects and two jumpers. The valve end of the harness has a special connector which I couldn’t find the terminals or removal tool for - do I just butt-spliced it onto the end of my harness. Not my preference, but it was either that or cut out the connectors entirely and just butt-splice the harness right onto the valve. Six of one, half a dozen of the other. First picture shows where I installed the control. I contemplated putting it where the manual pull handle was - but it’s a tight fit, and I’d have to scrap the switch plate and open/closed legend. That, and it looked much easier to make the cutout in the place I put it than the manual dump handle location. I’m not super thrilled with this location - and having visions of it being actuated by accident - by an elbow or something I toss back there. (I don't wanna go full Dave Matthews on anybody!) I debated adding another switch, but for now, I can always swing the valve handle out of engagement with the actuator until I’m ready to dump. The “board” here - between the basement area and the location of the outdoor shower and other goodies is easily cut with a spade bit and a utility knife. Second picture shows the valve in position. Pretty straightforward. The electric physical valve swaps out with the manual one. Route your wires, use OTT official black gorilla tape to hold cable in place. Snap the connectors together and - Bob’s your uncle.
-
Andersen WD Hitch Periodic Maintenance?
Galileo replied to Galileo's topic in Mechanical & Technical Tips
Is that raise the TV up 2” from its normal, un-hitched ride height, or up 2” after lowering the trailer into the hitch with no tension on the chains? Either way sounds like it will give you minimal WD from the chains. I guess it depends upon how stiff your suspension is. Our previous TV seemed to have a stiffer suspension, and it would depress less than our new TV seems to. So I find myself going tighter on the chains than I did previously to maintain a level TV. As touchy-feely as they are, I try to follow the Andersen instructions as written (both from their site and as reprinted in the OTT manual) and I seem to get the indications right. We switched to a “higher” truck around the first of the year, so the hood pretty much always seems “high” these days - and this seems to be the lowest-slung Sierra GMC builds unless you do some aftermarket stuff to lower it. This truck (supposedly) also has some “active suspension”, but I don’t know what real effect that has or if it’s even active when a trailer is attached. (And it -knows- when a trailer is attached!) -
Gorilla compact 25’ hose for marine and RV use
Galileo replied to Patriot's topic in Mechanical & Technical Tips
I’ve been down the route with the quick connects before. Generally I like them. I had a bunch of “Gardena” (high-end German made) ones when I did a lot of outdoor stuff. I’d have to find one I thought was really great before I invest in as many as I’d like. I do find that they’d tend to leak after a while. Some you could get replacement O-rings for. For now, I’ll stick with the GHT and spend an extra minute hooking/unhooking. I do the same thing - but without the flow meter. Once I have the black valve open I unleash the Sann-T-Flush water and close an open the valve a couple of times. I just “guess” when I’ve got a couple of gallons into the tank. -
Andersen WD Hitch Periodic Maintenance?
Galileo replied to Galileo's topic in Mechanical & Technical Tips
Seems odd that after three years, my friction material was toast (literally) and yours showed little wear after ten. Perhaps I’m cranking on the chains too much? The instructions are kinda vague - elastomers should show a “bulge” - which, being strictly visual, is subjective. I generally find that trying to get as many threads showing as they suggest after the hand tightening of the nuts seems like it takes quite a bit of force. But, to do any meaningful “weight distribution” it would seem like a high amount of force -would- be required. The only time I’ve heard any noise or seen any significant wear on the (old) ball is if I don’t make the chains tight -enough- allowing some play in the system. The experiment continues! -
Gorilla compact 25’ hose for marine and RV use
Galileo replied to Patriot's topic in Mechanical & Technical Tips
After getting disgusted with the white Camco hoses (stiff, bulky, kinks easily, can’t take prolonged pressure) I snagged a Zero-G hose on impulse at Camping World. (One of the very few things I didn’t buy from Amazon.) It’s lightweight, flexible, and very flexible even when cold. I have two minor gripes: the connectors seem to be zinc or some alloy that corrodes. Not to the point of crumbling, but it does make it hard to thread. I’ll try a little plumbers grease and see if that helps. Also, as the hose material is quite soft, you could probably twist or damage it if you’re not careful about tightening/loosening it. It could use an extended “grip” just behind the coupler. I have a dedicated Zero-G hose for city water or fresh water fill, two old Camco hoses for added length if needed, and a cheapo green hardware store hose for black tank flushing or grey water drain. Though storage IS at a premium on the LE2, the above hoses, electric cable, water pressure regulator, and a few other things fit easily in the “basement” accessible from outside. -
Andersen WD Hitch Periodic Maintenance?
Galileo replied to Galileo's topic in Mechanical & Technical Tips
Seems like an unlikely part to be covered under warranty - unless it fails prematurely. Surely it’s a “consumable” part - like a brake lining. At any rate, I didn’t know it would have been covered under warranty and wouldn’t expect it to be, so I bought one soon after we purchased the trailer to keep as a spare. For that matter, I also bought two of the elastomer bushings, extra tensioning nuts Acme threads) and washers since I figured these are all parts that will wear (a lot of force, friction, and dirt). That said, my original ones are still there and looking much better than I’d expect. Then again, I’ve used “NeverSeize” on the threads and thrust surfaces of the washers and nuts since early on. It really reduces the torque need to load the WD system. It also hasn’t seemed to make the nuts loosen or back off. (Blushing: I also bought spare chains with the treaded studs as I figured they would wear as the nuts would….) Anyway, I found very little service or maintenance information available in either the Andersen hitch instructions or online. So I did the “belt and suspenders” approach to having spares in hand. -
Andersen WD Hitch Periodic Maintenance?
Galileo replied to Galileo's topic in Mechanical & Technical Tips
I’ve ordered two friction cones directly from Andersen. The latest ones supplied are red, but they’ve shipped me a light blue one previously. They’ve changed the material at least once. Why? Dunno.