Search the Community
Showing results for 'Generator box'.
-

New Epoch 300AH Essential Battery, all going well except…
routlaw replied to routlaw's topic in Mechanical & Technical Tips
Good info Steve. Curious I currently have two red wires coming into the battery box and one yellow. I assume one of the red wires goes to the Power Dynamics Charger/breaker panel while the other goes to the Solar Charger. Note one red wire is 6 AWG while the other is probably 10 AWG (can't tell yet for sure. However at least in my case upon further examining I do have a yellow wire going into my shunt but need to chase it back to make sure it's the going directly into the battery compartment. Lots of distractions this morning. -

New Epoch 300AH Essential Battery, all going well except…
ScubaRx replied to routlaw's topic in Mechanical & Technical Tips
Back when your trailer was built, they didn’t understand all the nuances of the solar system that I designed for them. The then “service manager” just couldn’t grasp the notion that all the negative wires had to go through the shunt first or the IPN Pro would not calculate the SOC properly. Most likely, the negatives from the solar controller and possibly the charger also, go directly to the negative terminal on the battery. There really should only be two wires coming out of the battery box. I moved everything else out of the box and onto some massive buss bars. -
Finally took the plunge and ordered a LiPO battery from Epoch. For now only going with one given what little DC we have consumed in the past. Install was fairly easy except for the massive clean up of rust, battery acid deposits on tray and battery cabinet. Half the screws mounting the slide out tray were rusted past re-use. No big deal on that. Still using the Blue Sky Solar Controller 3024iL with IPN Pro Remote. Made sure to set proper parameters before installing the battery and based on a phone conversation with Epoch they stated 14.2 bulk, 14.2 absorption, and 13.6 float. The system has been charging all day, however at only 13.6 volts although the IPN Remote says its in bulk mode. The day has been very sunny, with a few puffy white clouds floating by periodically. In the past with lead acid batteries I have easily been able to get well into 15+ amps for a long equalization charge. Have double checked all my settings a couple of times throughout the day and they are correct but still no 14.2 volts on the charge. Suffice it to say it's going slow. Battery was at 46% out of the box and half an hour ago now at 70%. Is this normal? Probably not, but anyone have any ideas on what might be going on? Thanks in advance
-
I ordered the Mini 2 and it was on sale at Amazon for just $300, all the same things 'in the box' as if ordered direct from Garmin. This will give my friends and family some peace of mind (me too) when I'm out hiking and fishing solo. Thanks for all the info! https://www.amazon.com/dp/B09PSKG7C3?ref_=ppx_hzod_title_dt_b_fed_asin_title_0_0&th=1
-
I have 2 of the Eley hose reels with every thing has the Eley quick connects for the house. I have the male quick connect that I take off and on the 2 stage water filter for filling the fresh water at home. Never thought of fitting the Oliver and changing every thing to quick connects. so all I need is a pigtail to use at the camp site. The Eley products are pricey, but quality is top notch. I have almost 2 acres to water by hand in the summer, and have tried other reels, the Eley has out lasted the others, The hoses also have lasted longer than the big box stores. I dislike having to reach down under the edge of the trailer to hook the water up, especially when it is raining and the ground is filthy, and I have to work to get a nice tight connection. I think I will put a parts list together to upgrade filter/pressure regulator/hoses to Eley. i like the looks of the McKillans better than the Eleys but since I'm already intrenched with Eley at home, I will stay with Eley.
-

Fast question about meals at the April Rally
Steve Morris replied to Teaney Hull 292's topic in Events & Rallies
The last two years some of the vendors have provided box lunches or light breakfast, but that's not shown on the schedule this year. Last year there was a potluck dinner that's also not listed this year. We find planned dinners don't go as planned due to lots of gabbing, so be flexible. -
With our previous RV we kept loading the fire ring and LP tank when camping and when we got home we carried up to our deck (son Adam always did that task for me). After our first Oliver camping trip, having our fire ring in the front generator basket, I decided to leave it there, replace the regulator with a new line to the quick connect. We bought a second fire ring for the deck and left the extra tank up there. I also upgraded the lava rock. I can't stand the cheap/light stuff they include. These are heavier, but all I do is move it a few feet down and plug it in. They conduct the heat and make the fire ring warmer, always on the low fuel setting, and they look far better. https://www.amazon.com/dp/B07F2C7WVN?th=1
-
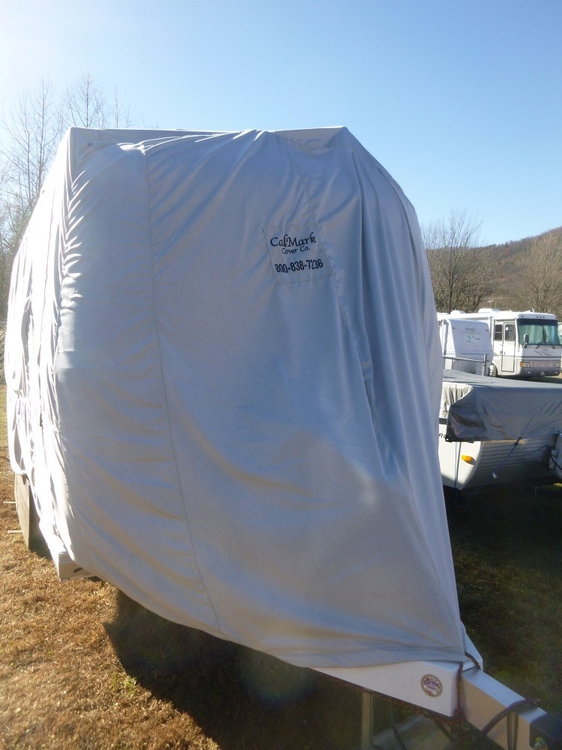
I am posting this for my friend Coy Gayle... I owned a 2014 Elite and decided to upgrade to a new 2024 Elite. I have always kept my trailer housed in a heated and cooled garage. There was not room in the garage for both trailers so I bought a new Calmark cover so that one trailer could be housed and the second protected under the Calmark cover. During this process, I had a friend contact me about buying the 2014 Elite and we made the deal. I had not anticipated the trailer would sell so fast and my friend came to my house picked up the trailer and took it home. I now have the Calmark cover in my garage, still in the original box, never opened or used. I have no need for it so I am offering it for sale at a considerable savings. The retail price of a Calmark cover with a zipper door is $1,152.00 plus shipping and handling S&H. I will sell the one I have for $700. I will be attending the Oliver Travel Trailer Owners Rally at Lake Guntersville, Alabama next week and will have it with me. If interested, you can purchase it from me at the rally or I can ship it to you for $700.00 plus shipping and handling. This is a savings of $452.00 for a brand new high quality Calmark cover for an Oliver Elite. I guarantee that this is an original Calmark cover, never used, and box never opened. If you have questions, please e mail me at Coy.gayle@gmail.com. I will reply or if you want to chat, send me your phone # and I will return your call. Coy Gayle
- 1 reply
-
- 2
-

-
Do you mean like - THIS or THIS or THIS or ???????? Simply type in the "Search" box at the top of the page the words "quick connect" and start looking. Bill
-
After replacing the Xantrex ProWatt SW 2000 with the Victron Multiplus, what are the Xantrex and AGMs worth? Thinking of posting the Xantrex and 4 AGMs on Craigs List and FB Marketplace. Also have the old Progressive Dynamics original power board I replaced before I decided to get the MultiPlus. Any suggestions on what I should price it at? Oh, and I have the battery tray I took out to get the 3 Lithiums in the battery box. Also would be Happy to haul them to the Rally if anyone would like to buy them. I’ll be at site F27 and like it for someone who has been there and done it to take a look at my set up and give me suggestions. Thanks. Gary Gary.Teaney@ConsultantsTCB.com 727-224-2754
-
The new technology of the 2025 Ramcharger could be a game changer… ChatGPT: Does the 2025 Ramcharger need to recharge when the battery and gas has been depleted? Answer: “ No, the 2025 Ram 1500 Ramcharger does not require a public charger when both the battery and gas run out. It's designed as a plug-in hybrid with a 3.6-liter V6 engine acting as a generator to recharge the battery. This allows it to operate on electricity for a significant range and then transition to gas-powered operation when the battery runs low. Here's a more detailed explanation: Plug-in Hybrid System: The Ramcharger is a plug-in hybrid, meaning it has a large EV battery pack and a gas engine that acts as a generator. Generator Function: When the battery depletes, the gas engine starts a generator that produces electricity to recharge the battery, effectively eliminating the need for public charging stations. Electric Range: The truck has an estimated 145 miles of pure electric range. Combined Range: With a full battery and gas tank, the Ramcharger targets a combined range of up to 690 miles. Charging Options: While it can be plugged in to a DC fast-charger or use its onboard generator, it doesn't require frequent or long public charging sessions. “ The short answer is it is a powerful new technology that has quite the range even while towing. It is not reduced by 50% like the Tesla Cybertruck, etc. SO don’t count out EV trucks as tow vehicles. It only needs a refill of petrol just like any other gas or diesel truck but it is to power the generator to charge the batteries not the drivetrain. From the RAM-TRX forum: The Ramcharger combines a 92 kilowatt-hour battery pack with an onboard 130 kilowatt generator powered by a 3.6-liter Pentastar V6, according to the company. The upshot is a targeted 690 miles of range in a truck that promises 663 horsepower and 615 pound-feet of torque while it manages a 0-60 mph time of 4.4 seconds and towing of up 14,000 pounds. This is the way to go with an EV. All the benefits of the electric motor torque, power and daily convenience without the disadvantages of range limits and charging headaches on long trips.
-
I believe previously they used foil bubble wrap, but more recently (as of five years ago it seems) they're using Protex AD10 10mm 1/5” R22 insulation. This was taken from the following long video playlist with nerdy construction details. The bottom outer is wrapped, and the upper inner. Additionally for (all - some?) of the trailer there is an internal honeycomb material that is spray and fabric fiberglassed. This will have some R value due to those dead air pockets. As an engineer type I've thought about this design, it's interesting. Conventionally in a structure you want a single vaporbarrier with two climate zones. But having the double hull they have three, in trailer, in wall, and outside. This means that the between hull space is it's own climate and can potentially have condensation issues of it's own. This is why they added the drain holes along both sides. Normally that would be a poor design, but if you think about it, it's not much different from your attic or crawlspace. Both need air vents (ridge/soffet vents and foundation vents) to prevent humidity buildup, but also provide an insulation 'barrier zone'. In summer my roof will get to 100+ degrees, but I measure less than that in the attic. If I had a Protex barrier glued between the rafters, it should be roughly air temperature, which in a sense buffers the temperature from the roof which acts like a heat sink. For comparison consider, of all things, the James Webb Telescope design with it's five layers sun shield Now the inner space is heat conducting air and not insulation vacuum, but I'd think at least that should provide some buffering of the temperature gradient. Additionally, since the ducted heating runs along the water pipes below, during the winter at least that waste head isn't wasted - it goes into warming up the inner wall. And during the summer months, the outer takes the brutal heating from the sun which should be a lot of radiative, and the double foil deals with that. tl/dr ... basically I think it's possible it comes to some pretty high insulation R value given all these factors, maybe even R22. A test would be something like putting a trailer in some hot desert and seeing how long it takes to warm up an insulated box which is pressed/taped against the wall. It would give you a rough idea at least, should be pretty good I'd think.
-
yes, the good news is Lithiums are a LOT lighter than the AGMs. But, at 57 pounds each, that’s 171 pounds for the 3. After reading about someone saying they felt like a “German Mechanic working on car” I came up with a Rube Goldberg solution. The original 4 AGMs were wired with no bus bars and no cut off switch. After seeing some sweet forum posts I decided to add the Blue Sea bus bars for Neg and POS, the 400 amp Blue Sea Fuse, and the Blue Sea Switch. (FYI, Blue Sea is very proud of their equipment and price it accordingly.) Using 4/0 welding cable, not the 4AWG from BatteryCablesUSAA.com that I ordered by accident, I realized it would be really hard to do this in the box. (By the way, BatteryCablesUSA not only refunded me for the wrong size cables I ordered, but helped me get the right ones, and 2 day shipped them in time to get them installed before putting the new Victron Multiplus in Monday.) See the pics below where I used the Loews what ever board, not the expensive board Oliver uses. thanks Forum. I wired the 3 Watt Cycle 280Ah, (not 300Ah, like it says on the label) on the table and made sure I had all the spacing right. Then disconcerted and put them on the board with the PVC pipe as rollers and hooked them up, Worked pretty well, except for the Blue Sea On/Off switch. It was almost too tall with the board and pvc rollers. (If you try this, use smaller pvc or a 1/2 inch board.) Good news is it’s all hooked up and good to go. Will update when the new Victron MP gets installed. I could not have even considered doing this if it had not been for the wonderful detailed posts other owner have posted and great responses to my questions. Oliver is a Great Trailer, and even better, because of the wonderful owners on the forum that support newbies like me. Thanks Gary
-
You will remove 3 components; the 2KW Xantrex inverter, the Xantrex PROwatt SW and the crazy junction box, full of wire nuts, OTT installs in this setup. We had the same setup. The Xantrex PROwatt SW (pictured below) is an Automatic Transfer Switch (ATS) that connects shore power when hooked-up and uses inverter power when not. Inside the standard residential junction box (shown in your pic2) there should be pairs of white 14 AWG cables (they might be yellow #12 cables since your hull is newer than ours). One set of cables is the source wiring to your 110V outlets and microwave which must be rewired directly to the circuit breaker labeled "110 outlets - 15A." You will also remove and not reuse the short jumper cable currently connected to this breaker. You recently purchased a new PD converter that you do not truly need once upgraded to the Victron which has a built-in charger which your old Xantrex did not have. I'm not sure what would happen when you connect to shore power with your new Victron in the ON position. As-is you would have two chargers running. I disconnected the original PD converter that is internal to the power panel. I reused the breaker labeled "Converter / Battery Charger - 15A" to power our microwave circuit separately. We replaced our microwave with an Emeril Air Fryer and I did not want it on the same circuit with anything that may be plugged into an outlet (e.g. a blow dryer)! I left our PD converter where it was, so if the Victron was to fail I could open the panel, re wire the black wire (the hot) and the charger would then again work. I doubt I will ever use it but I did not want it on. You could do as I did, or remove it completely (return it if uninstalled) or merely trip the breaker so you do not have 2 chargers working in parallel. This could confuse the Victron charging algorithms and perhaps over-charge your new batteries. The Progressive Industries Electrical Management System (EMS) is shown in your first picture. Your installer will need to reroute the output of the EMS to the 120VAC input to your new Victron and then wire the Victron output to the panel exactly where it is wired currently from the EMS. I used residential 10-2 cable for this, however there are some here who believe you must have stranded cable which is expensive. You'll need 12-15 ft of 10-2 cable either way. Read my installation thread again and ask your installer to do so. He (/she) will have their own way but I did not start on mine until studying the good work Mike had done@rideadeuce and there are 1-2 other Oliver Forum members who also posted some insight. Best wishes, JD
-
What all can be removed when replacing Xantrex ProWatt SW with Victron Multiplex. I have a Mobile RV Repair guy coming Monday the 21st to put in the Victron Multiplex. In addition to the Xantrex ProWatt and the SW unit what else can be removed? Can the Transfer switch in the dinette seat basement go? Does the aluminum junction box, under the SW unit stay or go into the new MP? Any and all suggestions are appreciated. Thanks Gary
-
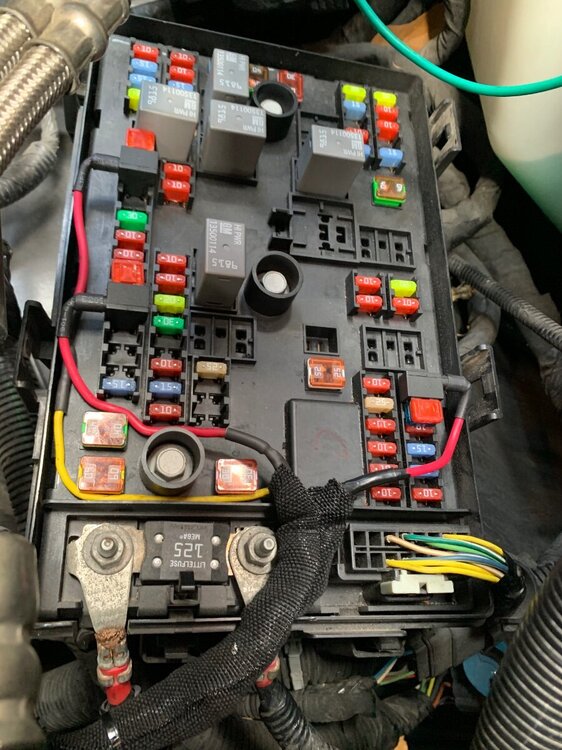
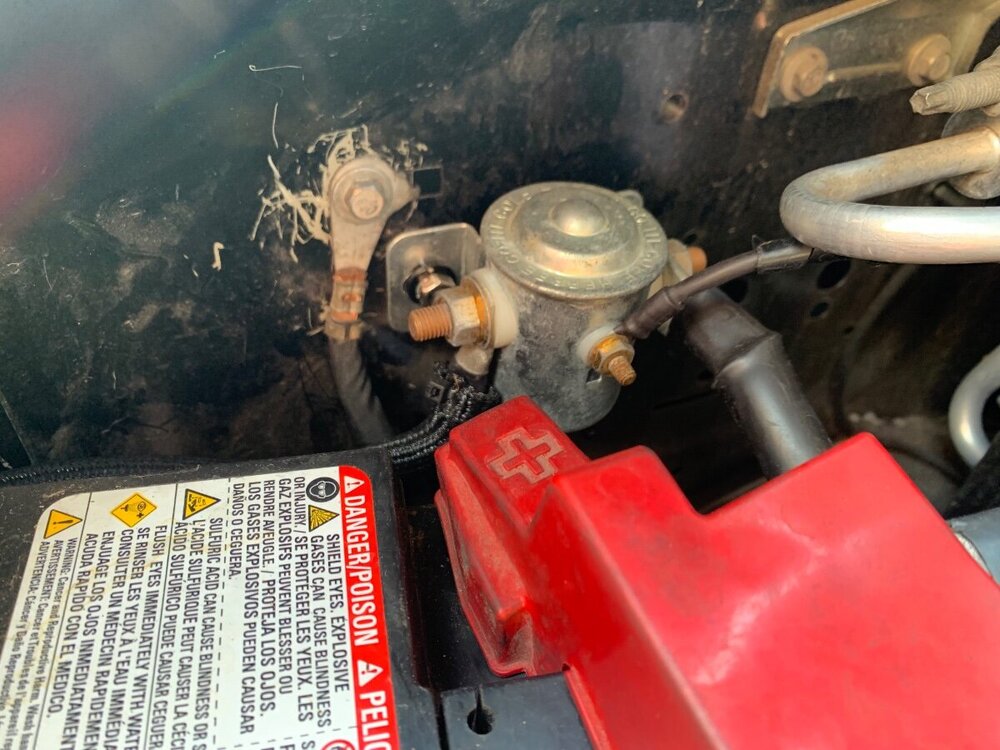
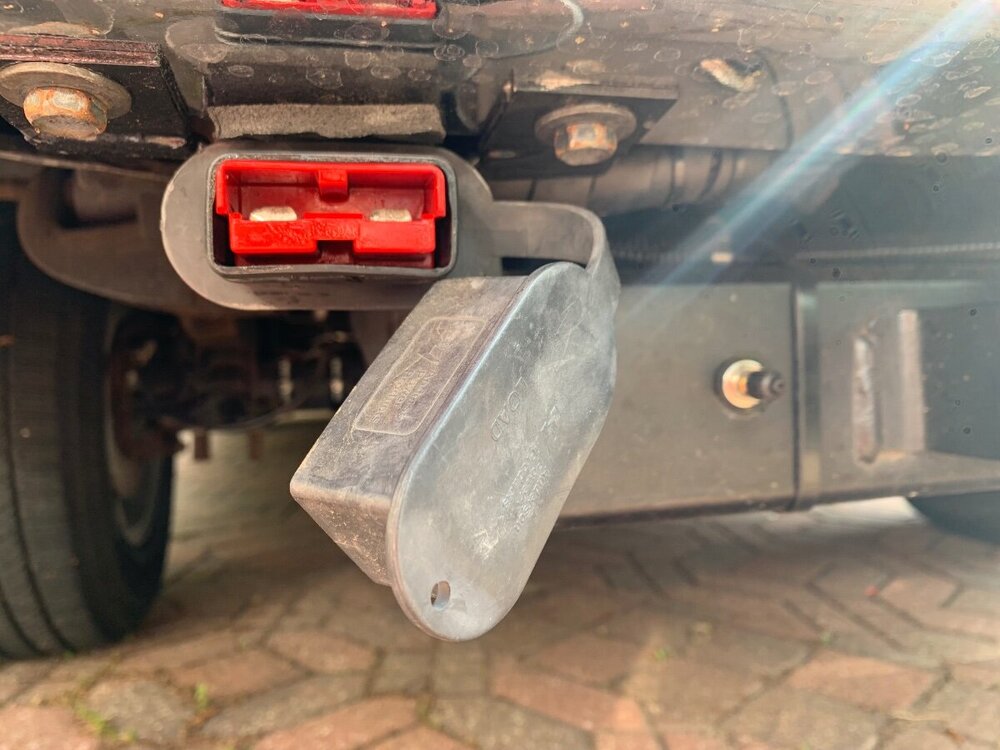
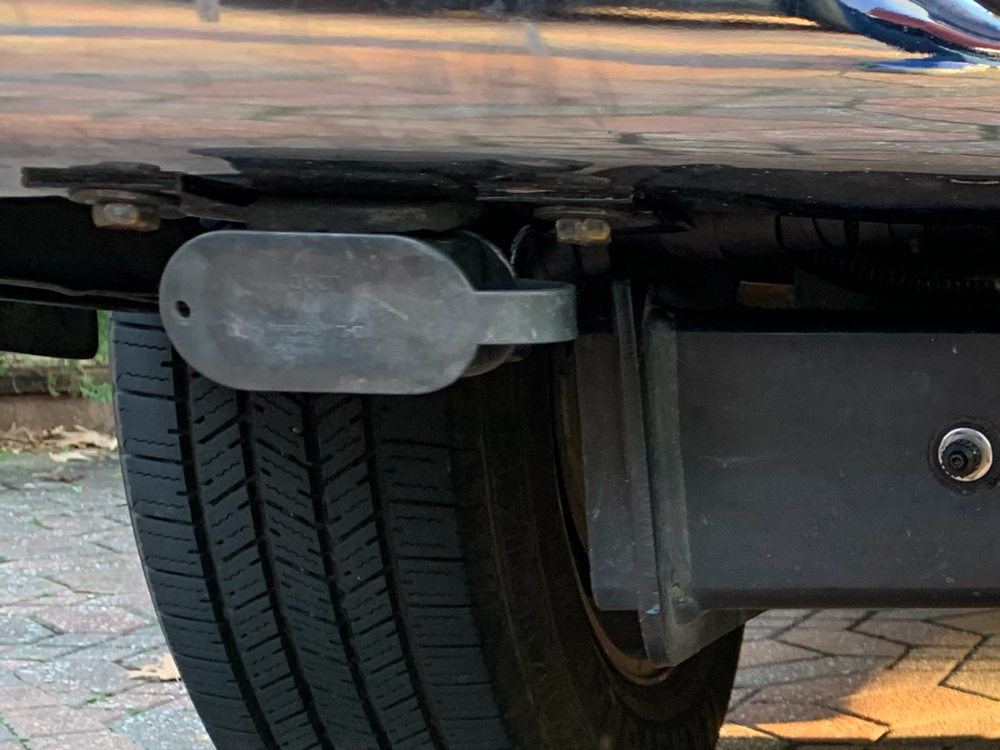
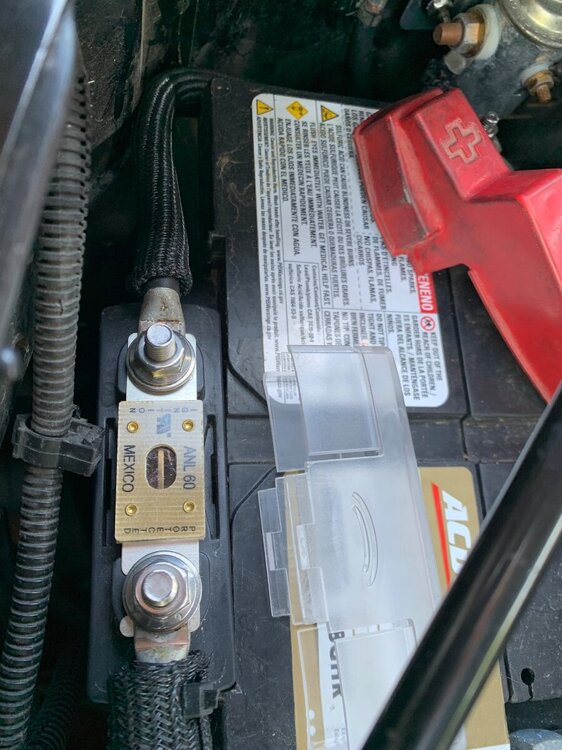
One of the last ‘must have’ transitions from the former TV to the Savana is the DC-DC charging cable setup and rear-mounted Anderson connection. The full length 4 AWG dedicated cables running from battery to rear bumper off the Silverado required no alteration with this retrofit. Admittedly said cables, rear bumper connection, a solenoid and ANL 60/fuse box were installed a few months ago, but activation was delayed pending install of the Mechman 320A alternator. The solenoid serves to energize the cable connection via a fuse tap trigger wire from the under hood fuse box and thus, requiring keyed power ignition for use as a precautionary measure. Current fuse taps include the solenoid trigger wire, as well as one for the alternator and Air Lift power. Solenoid and ANL fuse locations. Rear bumper-mounted Anderson connection with Environmental Boot. Now that the Savana is readied for towing and other operational needs, there are a couple of other ‘wants’ in sight; van rooftop solar for the portable power station that runs my Dometic CFX3 75DZ, and custom swing away racks for my two Wavian Jerry Cans and spare 30# propane tank. Stayed tuned!
-

Norcold refrigerator problem
Galway Girl replied to Copycat Carlton's topic in Mechanical & Technical Tips
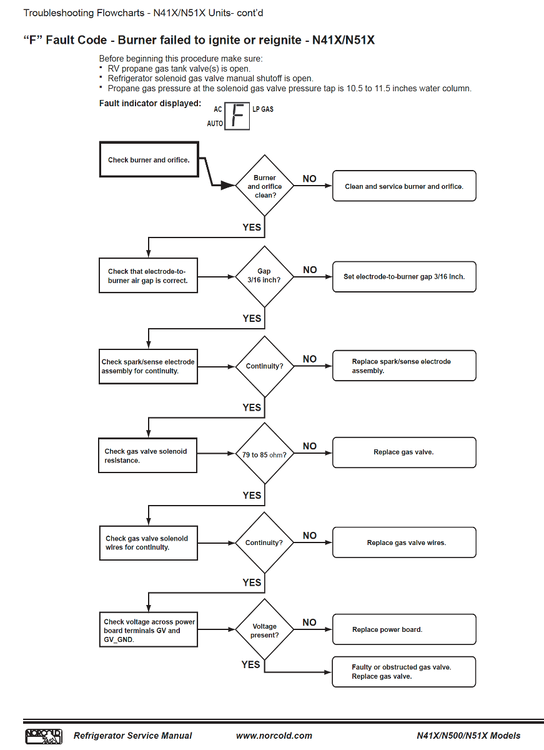
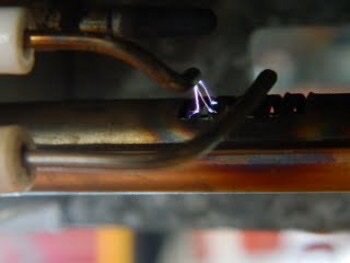
That manual is an amazing resource @Ray Kimsey. Thanks for posting. I was starting up my Norcold after winter today and it was throwing an F code. Symptom: On GAS the Norcold would ignite, but the igniter circuit kept clicking and clicking until the unit shut down and threw an F code. I was concerned that it would be one of the harder to find parts like the igniter board etc. I downloaded the manual you posted and followed the F Code troubleshooting flow chart. Upon opening up the burner box, I spotted that my burner area was very clean but the sensor was practically touching the burner, and needed to be adjusted out to 3/16". I did that adjustment by sliding a 3/16 hex key along the burner and squeezed it into the igniter so it was set for 3/16" Re-tried the fridge and it started with no codes and is still running. The gap between the igniter was fine but the sensor was too close. The PIX below are from a service posting showing how the parts are supposed to be aligned....and what a proper flame looks like. https://www.arprv.com/norcold-gas-valve.php -
Wondering why you're thinking Xantrex now vs. you had an earlier interest in Victron. Why? Oliver owners that have the 3KW Xantrex have them because OTT installs them exclusively. I know of 5 Oliver owners on the forum who have replaced the 2KW Xantrex inverter with the 3KVA Victron Multiplus II. I have never read of any Oliver owners who have upgraded from the 2KW to 3KW Xantrex. I'm not sure of all the reasons why, but Victron has a Power Assist option that allows those on less powerful generators or mooch-docking power less than 15A to still run A/C by combing some battery amperage. So, there are a lot of Oliver owners and forum members that can help you with configuration of the 3KW Xantrex, but I do not know of any with actual Xantrex installation experience. I'm glad that I went with Victron since we now have 6 Victron devices! 🤣 This includes Victron 30A MPPT solar chargers, an Orion 50A DC-DC chargers, SmartShunt and more devices all integrated on one network, viewable on the Victron Connect app. Now to answer your question: When moving up to any 3KW inverter the KISEA 20 Automatic Transfer Switch (ATS) will NOT be needed. This ATS is used as a work-around allowing the 2KW inverter to add a separate 20A circuit to run Air Conditioning (A/C). The 3KW inverters have a built-in 30A ATS that can run your entire 120VAC power panel so that the inverter supplies AC power to all 120V breakers including A/C. When you remove the old Xantrex, you will also remove the attached 15A Xantrex external ATS and a funky residential junction box, with a maze of wires and wire nuts inside. OTT rigs this instead of the preferred route of installing a split-bus AC panel, allowing them to install the same panel in Olivers with or without an inverter.
-
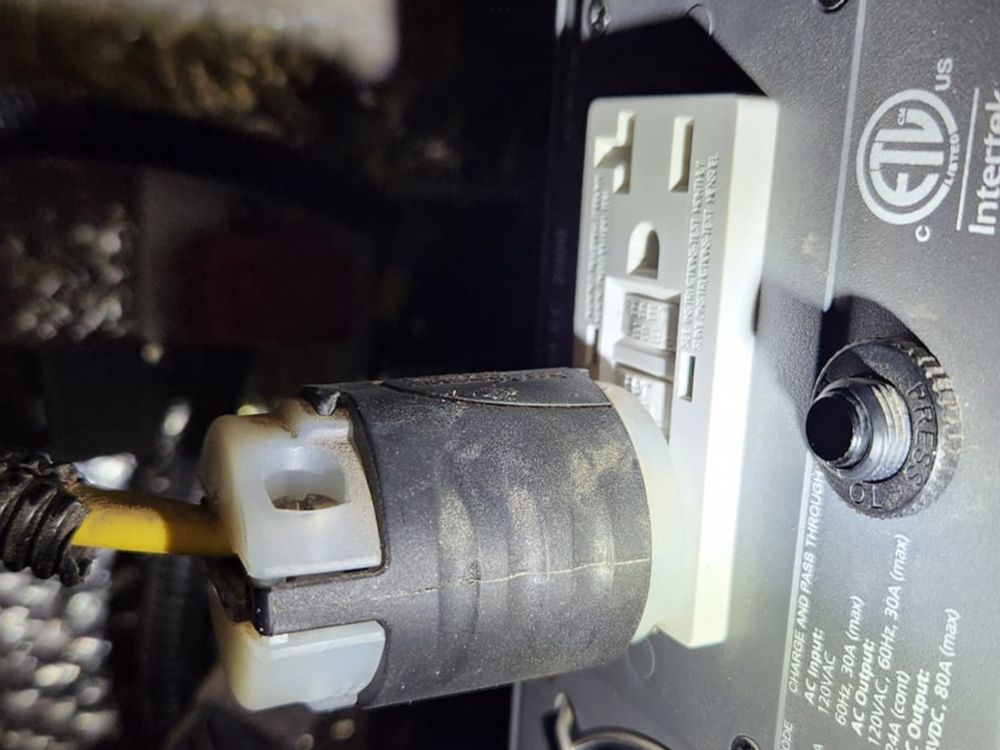
I have read where you recently stated this TS is not suited for use with the Xantrex 3000. I would think it could as long as you don’t exceed 20A. I read a review on Amazon wherein one was used when on 30/50 amp shore power for three auxiliary outlets without issue, and subsequently when on inverter; however, the size of inverter was not disclosed. The following pic was provided me upon request by another owner prior to my install; the installation is very straightforward. Since the plug cable on the TS20A is very short, I made an extension from the formerly unused outlet on the Xantrax-mounted GFCI receptacle to a remote duplex receptacle for purpose of creating additional outlets for said TS. Here are pics of the inverter’s GFCI with a plugged cable leading to the microwave, and the added duplex receptacle box installed.
-
My portable solar will only help a little. Have an inverter generator and if way off the grid can use it to charge if need be. While compounding and waxing the roof of the Ollie, I wondered, how hard would it be to use the awning plates on curb side and street side to build a solar rack??? Do you know if anyone has done that? Has anyone used the flexible solar panels on their Ollie? Every thought like this, takes me deeper into the Rabbit Hole. As always, thanks for the input. Gary
-
I see now in the pix that your trailer doesn't have solar on the roof. Sorry I forgot to look closely. Yes...you'll be good to go with new batteries that are being charged with 45A when plugged into shore power as a first step. Future: Rewiring for new Xantrex 3000 to run your A/C When you upgrade in the future to a Xantrex 3000 Inverter/Charger that you'll also likely be wanting to have some of the wiring swapped around to enable you to run the Air Conditioner off of the inverter and battery. In older units (Pre 2021) the Xantrex 2000W Inverter only unit, the AC inverter outputs are routed only to the Outlets of the trailer plus the Microwave outlet. The older units inverter is not wired to a breaker to feed the Air Conditioner circuit. In the day of AGM's it wasn't really a viable option to run AC off the inverter. Those wiring swaps will happen on installation of your new Inverter/Charger, and most changes happen on the back side of the PD4000 breaker box under the dinette. You'll also be needing to find a location for the new Xantrex 3000 display panel once the new Inv/Charger is in place. For future reference, here's a picture of the area under the street side bed where our Old Xantrex inverter was and the new Inverter/Charger was placed. It's the exact location of our hulls original Xantrex 2000 Inverter. We had to remove the old inverter and install a new carrier board for the new - larger size inverter. I could have gone with an Xantrex 3000 but did my design as a drop in replacement as opposed to a full upgrade for running the A/C off battery. Battery Box: You may or may not need to take out the battery tray. It depends on the height/size of the new batteries. In our upgrade we put in 2 - 315AH Lithionics and they fit in the tray with some spacers to take up extra space. Other folks that have upgraded to the larger form factor >400AH batteries have needed to remove the tray because the new batteries wouldn't fit the tray. Final Cable Cleanup: At the time that you do the upgrade of the Xantrex, you may want to consider cleaning up all the various wires that come into the battery box. This is what our 4 AGM cabling looked like at the factory. After cleaning up and adding buss bars you'll only have big battery connection cables left in the box. THIS is completely optional and not necessary but clearing out clutter makes troubleshooting on the road much easier. To clean up the mess of cables you would have all the grounds run to a single buss bar (under the street side bed) and then just one ground cable to the battery box. Likewise for the + 12V cables (red) that run out to the battery box. Good luck on your journey to Lithium. CS
-
I've been amplifying the hi-jack but I imagine @Teaney Hull 292 got what they needed in 2 pages and we're all here for more questions from any and all members! I would not worry about the 104F heat issue unless you plan to exterior mount your inverter in the sun! 🤣 Ours is under the streetside bed. It did get up to 104 during testing August afternoons where we get pretty hot, when sitting in the sun. I installed the dual Beech Lane fan, like the one I installed in the fridge cavity. It pulls air from the streetside basement, all the way from vents I added in the bath, closet, etc. With the fan on 104F drops to about 88F, with A/C on and the interior about 74F. Reason you want the Victron is you can run your A/C on generator with the Victron supplementing extra power from your batteries when the compressor is running and when the compressor shuts off your generator would be back to charging batteries. You likely know this already. Victron calls the feature Power-Assist. Re your other comments, she may learn to like boondocking. We love where we can go where there are paved roads and campgrounds. More opportunities west than east. Oct we plan to park the Oliver on the edge of the North Rim! If at a point where we truly want to run A/C on batteries, after we replace the Dometic with something efficient, a third 300AH could be in our future. Given you have the Honda, I do NOT suggest the suitcase addition. We rarely use ours and wish I had saved the $800+ for the suitcase, the Victron 30A MPPT, cabling, connectors, etc. I would certainly suggest adding 400W or as much as you can get on your rooftop. Our 2x 160W panels are now 10 years old. I wonder how efficient they could be. Given that and the flat mounting we usually only get +10 to 12A net charging rates (winter afternoon sun). The 400W Renogy suitcase will double those numbers, from a combination of newer panels and being angled towards the sun. I'm looking forward to reading about your upgrade when you get to it! 😂
-
Didn't I read @Patriot write something like this? Also, @Ronbrink or @MAX Burner might have commented the same. Who else is still carrying RV technology of yesteryear and rarely to never using it? With 600AH LiFePO4 and 720W solar we're good for emergencies. I get it if you have no solar, but do get solar so you can loose the generator! We also carry 35 gal extra water in the TV for boondocking and emergencies. We can get stuck somewhere for days but TG this had not occurred! Chris loves boondocking, and we much prefer it to campgrounds and truly dislike RV parks (or worse "RV resorts" 🤣). More often than not, when we have hook-ups, we don't use them, and if we need to we charge up, fill water and dump tanks prior to leaving so we're good for another week or so. I preferred adding a 400W solar suitcase vs. a generator, since we live SW, have mostly sunny days and rarely ever need A/C. We have only used the suitcase twice, so it is near the category of the rarely used generator, but no need for fuel and takes less space standing up in the TV. I can have it position the night before so it starts charging before we get up in the morning and it's on all day without bothering neighbors. WE move it to face the sun occasionally but not anal about doing so. Just other ideas to consider...
-
Personally, I won't go anywhere without my little Honda generator. Haven't had to use it yet but it's nice to know it's there in case of emergency. Can run the AC on it for 6-8 hours on just a gallon of gas. Not having solar installed yet is another reason I carry it, so I can top off the batteries in the unlikely event we're ever boondocking (wife hates it 😂). Also, I get that lower charge amps might extend battery life, but in your setup you're only charging each battery at 25 amps, not 50. To get to the recommended 50amps you'll have to set your charger to 100.
-
We stopped using a generator after we sold our Class-C. As you know, we have the Victron Multiplus II 12/3000/120-50. The numbers translate to 12VDC output / 3000 KVA inverter capacity / 120A max charge output / 50A max AC input (shore power/generator). I've had our charge output on the MP2 set to 50A ever since we installed ours last summer, and in our case we do not have a reason for faster charging. Specs for the 300AH Epoch Essentials show "recommended charge current" at 50A. Max charge current is 200A, so they could certainly take every bit of the 120A, but why is 50A recommended? Perhaps the lower charge is better for the life of the batteries. With 600AH we can go for days, a week or more off grid, assuming no use of A/C. Given the SW skies cloud up for awhile (rarely except when caused by chem-trails🙁), we can eventually get low on SOC. Under 50% is rare, but I do remember one trip it got down to 20% and the red warning light was on the Victron Connect app! (I set this to 20%.) What we did that time, and would do again whenever needed, is merely to stay one night somewhere with electric hook-ups. Plug into shore power and the MP2 is giving a full 50A to the batteries. At 20% SOC, down 80% on 600AH is 480AH to charge. Let's round up to 500AH (worse-case scenario). To re-coop this would take 10 hours to charge at a 50AH rate. We are going to check-in late afternoon say about 4PM, and even if you're the type to leave before the sun rises (not us!), you're going to be connected for 12-14 hours minimum. SOC is back to 100% HOURS before we would leave and we're good for another week. I much prefer this to carrying a generator and extra fuel. You like to camp summers in the SE, God bless ya, get hook-ups because if you're running your generator all day you will get ugly looks from me and many others! Generators rules at campgrounds are generally no use after 10PM and boondocking in the SE is rare where you could be far enough away from neighbors to run a noisy generator and even worse, the awfully noisy Dometic Penguin II! 🤣









.thumb.jpg.e34bf01ef7f7d5e99ad31856d45afbeb.jpg)