All Activity
- Past hour
-
@pfin3 We did not want to deal with using toppers. Just another item to move. We bought KTT mattresses in 2020 and still love them. More comfortable then the mattresses at home. I used Hypervent matting under the mattresses, which we strongly recommend to be installed. They are a little on the heavy side but are manageable. We chedked out the KTT mattresses and the Southern Mattress company mattresses. The KTT mattresses are made in Connecuit and we drove there to pick them up and saved shipping costs. Richard, the owner, was very nice and easy to deal with and he made them a slight bit stiffer, at our request, then his usual mattresses which at the time Oliver used. I am not sure if Oliver still buys from them if mattresses are requested instead of the standard cushions.
-
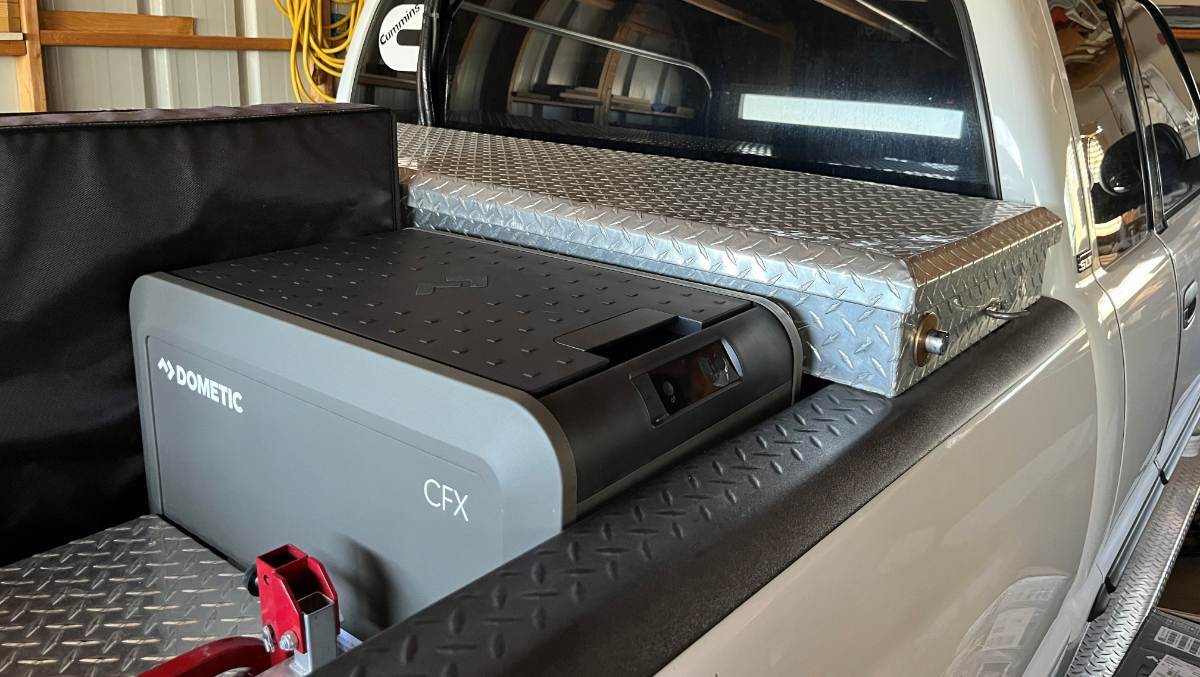
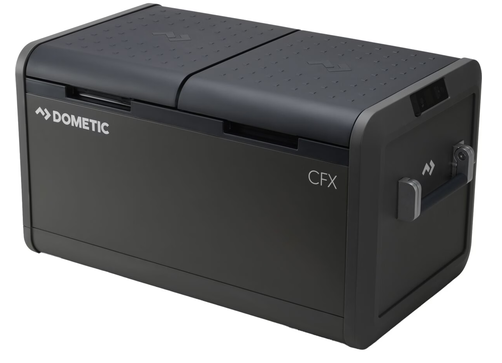
Better stay with a 3-way fridge, unless you're plugged in. Running on DC overnight takes too much power for AGM batteries. We do, and it must stay below 10F to keep my Qt of ice cream cold! Glampin' right?! 😎 We also make ice! Two of these fit in one corner of the Dometic freezer, taking very little room. I refill one each night so we always have ice available for those adult beverages! https://www.amazon.com/Molds-Silicone-Trays-Large-Square/dp/B0771YDNCY/ @Ronbrink was first to have one of these in his TV. Like you, he has the dual-zone CFX which is great! At first, I didn't want to use the space, but I went with the single compartment CFX5 45L which just fits in this space by the passenger door. It's so nice always having cold water with us, and not only in the cabin. Often when traveling, we buy a load of meat from a local farm or butcher shop. I'll remove the drinking water, set the CFX5 down to freezer temps to carry the box full of frozen meats, yum! Some people go to museums. That's not us. We shop the great local food markets. Leaving to SW Colorado this Wednesday! With both fridges half empty, our first stop is always the Delores Market! 😍

- Today
-
Thank you
-
I posted elsewhere about my debate of Cal-Mark cover versus Graphene coating. Coating all the way is what I determined. A cover traps moisture when its wet, and turns the trailer into a greenhouse when it’s sunny. On a cool day I had just a plastic tarp on the roof and couldn’t believe how much heat that ceiling radiated inside. Plus you need/want the trailer to be clean before putting the cover on. Whereas coating protects on and off the road, eliminates UV damage, makes it trivial to wash off and the trailer looks spiffy out and about. Covers are more meant for conventional trailers which have leaky seams, the Oliver doesn’t need it, storage conditions depending
-

Amazing ceramic coat job near Lake Norman NC
DanielBoondock replied to Omward Bound's topic in General Discussion
He works by himself? How long did he take to do it, what coating did he use (Glidecoat?), and did he double coat? Also did he do all the externals too like the awnings, plastics etc. Just curious to compare notes -

Cleaning/Washing Cushion Fabric
Tony and Rhonda replied to Tony and Rhonda's topic in General Discussion
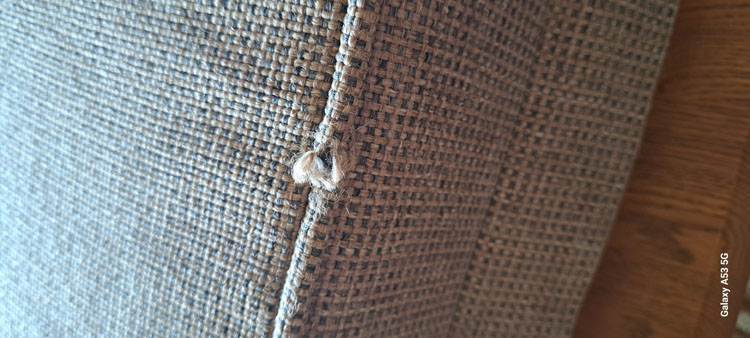
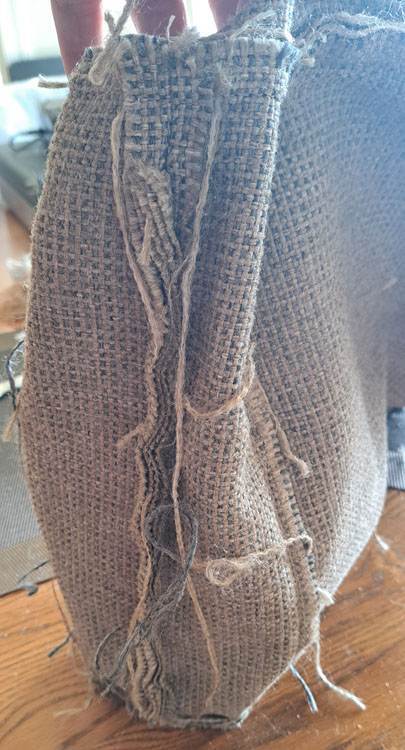
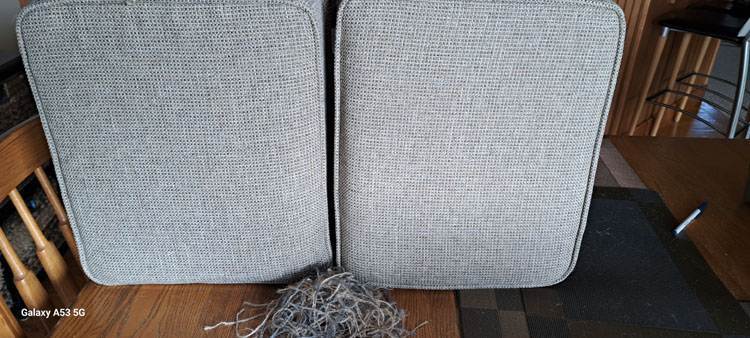
We decided to wash the cushion covers. Unfortunately there are no care instructions in any of the covers we've checked. Oliver didn't have any guidance either. We started machine washing our cushion upholstery covers. Washing in a front loader on delicate/cold with second rinse. Adding regular laundry detergent and oxiclean. The upholstery fabric is synthetic and comes out of the washer almost dry. A few hours in the sun (air drying) finishes them. We also turn them inside out at some point to make sure they dry completely. We would not attempt machine drying. The washed cushion covers look the same (no discoloration) as before washing but they smell better. Not sure if the upholstery had some type of stain treatment but the washed covers feel better too. The edge piping also had a little fraying after washing but we clipped or melted the frays. (Nylon or polyester fabric so you have to be very careful if you try to melt the frays.) Freshly washed on left with a pile of removed frays at bottom. Piping fray after washing, before repair. The most difficult part is removing and reinstalling the foam from the covers. The covers are a very tight fit and the zipper opening is smaller still. The smaller the cushion, the more difficult. We have a standard bed and the small cushions used in the corners were a challenge. Strong hands are useful. We found when removing the covers, our foam had stuck to the seams of the covers in some places. Not sure why this happens. We found it's best to run my hand along the fabric seams to separate the foam from the fabric. There are also a lot of fabric strings on the inside of the cover from the fraying seal allowance so we have to be careful not to pull on those when removing the foam. After drying, we cut off a lot the frayed fabric strings to make it easier to reinstall the foam. Getting the foam past the zipper can be difficult. We found that squeezing the corner of the foam with one hand and pulling the fabric end over the foam worked best for us. Strong hands are very helpful here. Once the foam is inside to cover we had to stick an arm between the cover and the foam to help position the foam, especially in the corners. We're working through the cushions a washer load at a time. The covers take up a lot of space in the washer when dry but not nearly as much when we so we started with four small covers by themselves and we're working up the number and size of the covers we wash at one time. We also plan each wash so there's no confusion on which cover goes on which block of foam.
-
Welcome! We bought a lightly used 2019 Elite 1, had it a few years. We never used the rear table and kept the bed made. It had a custom made mattress from Southern Mattress the previous owner had installed. It was OK, but it was heavy and tall. I reluctantly sold the Elite I and bought a new Elite II with twin beds (my wife won that battle:) Before we took delivery we ordered custom fit memory foam mattresses from Tochta, we really like them. They can probably make one for the E1 if you want. We prefer the single piece foam mattress over the multiple layers. . As you know, there is a large space under the bed in the center. This is where our dog bed was, our large Labrador liked sleeping under there. It can also be used with a storage bin, or a 12V auxiliary refrigerator. We carry one of those in our truck, fill it with frozen food. https://southernmattressnc.com/ https://www.tochta.com/
-
Can I ask what brand your topper is and did you have to modify. Thank you.
-
the dog house get's a new refrigerator
DanielBoondock replied to mossemi's topic in Ollie Modifications
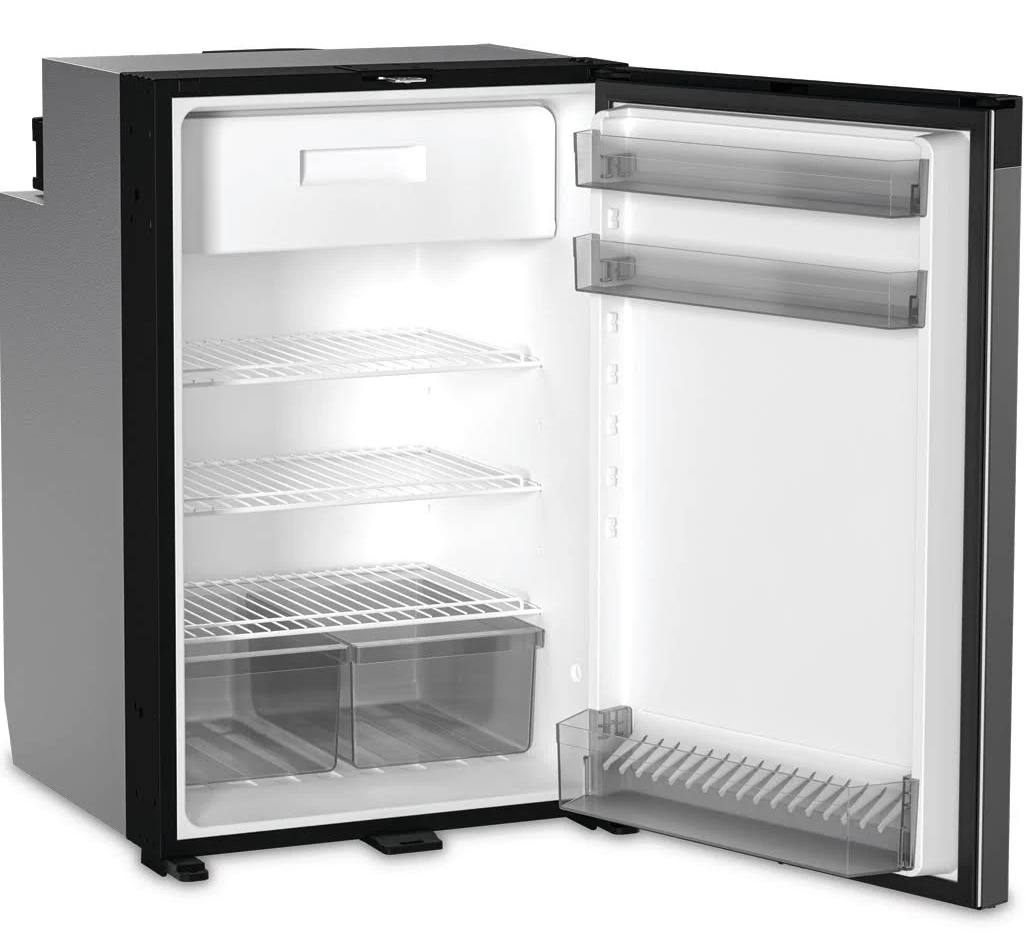
Do you actually use a freezer compartment? The Dometic they're installing now (or the '26's at least) have a removable one, and its much better as now I have room for taller stuff. Annoying that jams, pasta sauce and the like doesn't fit anywhere except on their side otherwise. I also have a Dometic CFX5 75 in the truck for when we need more stuff. The compartments are individually settable via Bluetooth or front panel, to freezer/fridge. Being an EV there's lots of power in the bed, I have a portable battery plugged into that which tops off when we drive, and powers the cooler otherwise. I got this on sale but there's equivalent cheaper ones Anyhow the other advantage is no more ice buildup since its just a fridge now. On the downside, their design is for moisture to collect on the top area (former freezer) and it drips down which is annoying. This is actually their design ... anyhow easy to 3D print a collection tray and funnel it to the drain hose which I'll do at some point. I believe (can check if you're interested) a Dometic NRX 130C with dark stainless front. Freezer compartment is removeable as mentioned, it has a latch which props it open when unpowered to keep airflow going through it. Really a nice fridge I like it
-
Welcome to the significantly smaller subset of Elite 1 owners! We also keep the rear dinette down it its bed configuration, and continue to use the original cushions. At the bottom, 1” of pink foamboard insulation, covered by a layer of Hypervent. Then the cushions, topped by 2” of memory foam, icy cool mattress pad and a sheepswool topper and a fitted sheet to help hold it together. Happy travels!
-
Forgot to add, in 4k miles the only non superficial damage I found is the lower half street has three pin pricks in the lower part. On the curb side there's a single bigger rock strike near the propane housing, again in the lower 1/4 section. Even with the graphene I'll put a wrap on it for the bigger ones. I don't want to go with mud guards because one, it'll disrupt the underbody airflow and two, there's no way to attach them. The whole underbody is one smooth surface for aerodynamics. Applying it is easy, just use a little soapy water to position, main problem is cutting it to lay over the area well. Exaggerated but I think this would work. If anybody has any ideas on this one ...
-
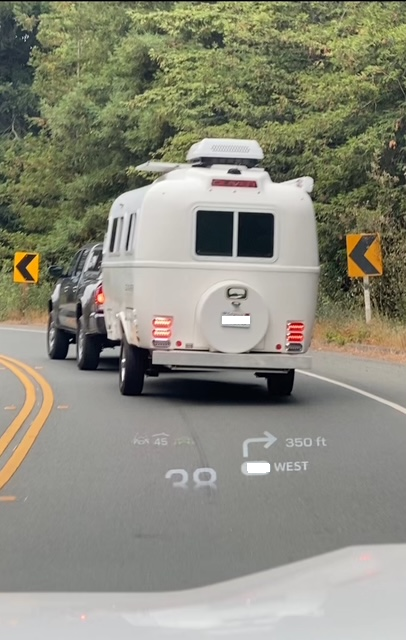
Pretty rare out here on the West Coast, I'm the only one (registered) North of SF. Though I did see this rare bird in nearby camping hotspot while mine was being built last year. I bought sight unseen and was really impressed with how beautiful it looks on the road. I took it as a good omen
-
-
Congrats! Pics or it isn't real 😄
-
Fresh Water Tank Overflow Condition
DanielBoondock replied to Wayfinder's topic in Mechanical & Technical Tips
Agree, I need to retire so I have the time to keep up on the forum 😅 I've been debating whether to ceramic coat the plastic bits - this tells me yes definitely worth it. Even if you don't coat the trailer, the smaller parts are super easy. Glidecoat is multi-surface, you can do fiberglass, metal, glass, plastic, and for these parts you don't need much. Just clean, you can do some light compounding/polishing with a microfiber towel if you want, or just don't bother, and apply two coats. Just get a small bottle of Glidecoat which isn't expensive, there's a 15% Labor Day sale going on. Anyhow if anybody wants to do this feel free to ping me for help -
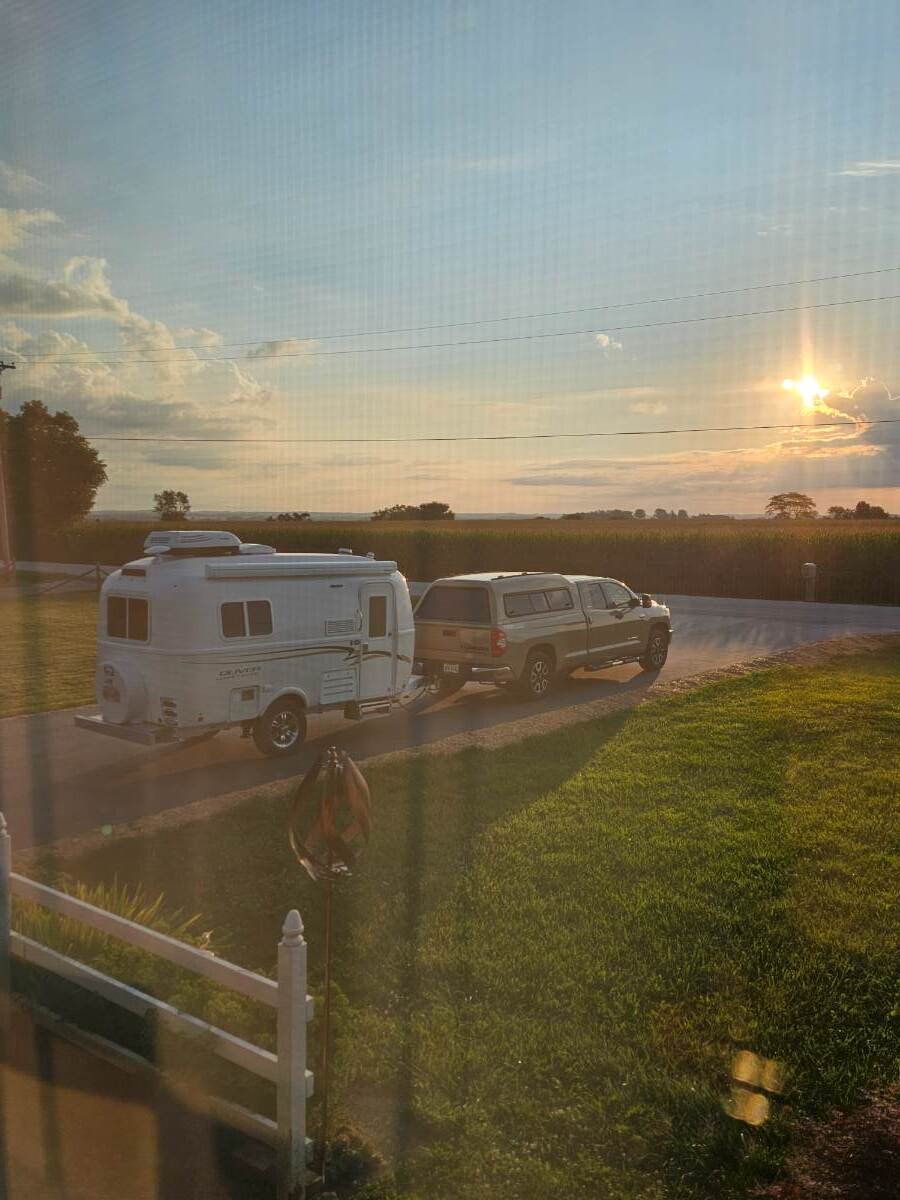
Lurked in the halls for a few years and finally found an elite 1, hull #939. Tow with a 2017 Toyota Tundra and don't even realize it's back there, lol. We plan on just leaving the rear table down as a bed and sleep on the cushions, but feel it could use a little more luxury. Ou question is, what toppers would be suggested from those that'd have them? Can't wait to hear some suggestions and really can't wait to get the Oliver out for more trips.
-
The Cabela’s campground in Sidney is a convenient stopping spot! Easy walk over to Cabela’s too.
-
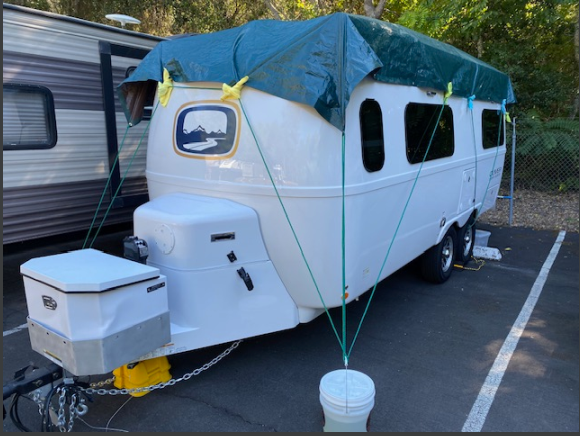
Top half is done (plus the roof from the previous week). That was brutal, don't attempt unless you're fit. Once you start coating it goes fast on a schedule, ideally you'd have two people working it, but I pulled it off. Just three mistakes, small spots where the coating wasn't properly wiped off, I'll adjust those later. I'd recommend the following approach, do the roof in one go, the top half including the midline belt, then the bottom half in either two steps (e.g. curb/street) or all at once. Splitting at the midline belt is an ideal seam. The top half should be done at once ideally - tough but its the most visible and takes a lot of wear. So you want to apply the coating and second coat overlapping before it's cured so it can form a seamless matrix. The bottom half has a natural split with the spare and propane housing so can be done in two parts, I'll do that next weekend. So the worst is behind me ... We get coastal fog rolling in and keeping morning dew off the first 24 hours at least is really important. Fortunately with our trailers its easy, I got a 20'x10' tarp which covers it and overlaps the side by about a foot. stitch each side with some good hold down rope, and I tied microfiber cloths at the grommets to prevent wear if there's any breeze. The AC/solar/etc and awnings act as standoffs, ideally you also have the streetside. With this you don't need to have a garage to cure, as long as you can work in the shade with little wind. Fortunately my parking spot at the lot fits the bill. Anyhow, I bought the 30' new RV kit but the 25' or 20' would have worked, I'll have at least a full bottle left over to do the truck. I'll also do the works on this trailer, awnings, solar, AC, frame and underbody, why not? btw ... this graphene coating is like having armor. It's unbelievable stuff, I tried buffing a mistake out and it was not easy. It creates this incredibly hard and smooth coating, it ain't foolin around ...
-

Hardwire your LevelMate Pro for under a buck!
Todd B replied to Snackchaser's topic in Ollie Modifications
I am surprised so many have had issues with the battery going dead. I have had the same battery for 2 years. There is a setting in the app to tell it to sleep if left on. Maybe that is off for most people? I often forget to turn mine back off after leveling but it always shuts off. There is also a setting to turn on when it detects motion. Make sure that is set to off or it will be one for hours while driving! -
About noon today on Interstate 80 I was headed East and a white truck towing a white LE 2 was headed West near Laramie, WY. And, a wonderful couple paid for dinner tonight as both of us are overnighting at Cabela's, Sidney, NB. 2 in less than 12 hours!
-

Low water pressure on city water
Mike and Carol replied to Steph and Dud B's topic in Mechanical & Technical Tips
Your picture is exactly what we’ve got. I’ve replaced both the back flow and the pressure restrictor. I’ve thought about removing the restrictor, too. It’s not causing low pressure now, but if it does…. -

Hardwire your LevelMate Pro for under a buck!
BillnIvy replied to Snackchaser's topic in Ollie Modifications
Sounds like this mod is the way to go - as with so many others, I'm frustrated our Levelmate pro battery being dead when we go to use it. If you still have extra converters I'd love to take you up on your offer. -
BillnIvy joined the community
- Yesterday
-

Low water pressure on city water
jd1923 replied to Steph and Dud B's topic in Mechanical & Technical Tips
Thermodynamics PVT (pressure-volume-temperature) was my worse subject of the engineering core! 🤣 They are dependent variables within a system. Most of the time, I just fill our Fresh Tank anyway. I've also upgraded to a REMCO US-made variable speed water pump, bumped up slightly to 65 PSI and 3.4 GPM ratings (OEM Mexico Shurflo was 55 PSI and 3.0 GPM). PEX is rated at 100 PSI for hot water, 160 PSI cold. I don't worry so much given these numbers, but want decent pressure and flow on request. When you get a chance, see if you have what's shown in my picture, both back-flow and restrictors on the two incoming water lines. -

Low water pressure on city water
Steph and Dud B replied to Steph and Dud B's topic in Mechanical & Technical Tips
Doesn't a restrictor just reduce flow? It wouldn't prevent a pressure buildup in the system when water isn't flowing. If that's the case, it won't protect your plumbing if connected to a high pressure source (unless you left a faucet open). But that does describe the behavior perfectly. When we open a faucet, we initially get normal flow (from accumulated pressure), then the flow drops significantly. Also explains why we get normal pump pressure. -
Good idea, Dennis! It irks me that Truma doesn't support sales of repair parts for DIY, only OEM installations. "They don't sell a listed part in the US market!" This is just not right. I'm very happy after reading 100+ posts re Truma issues (mostly their HWH) that we have no Truma products in or on our hull. It would be good to have a planned upgrade path vs. waiting until you get stuck. There are posts here on replacing the Truma hot water heater but I do not recall any re the furnace. Based on a quick look, their furnace design is not standard to Dometic and other RV furnaces so installation could be tricky. And from what I've read here, the ducting may also be different. Our hull came with a Dometic furnace and after two complaints of it "being noisy" on a second 2020 visit to OTT service, the work order stated, "Replace Dometic furnace with Atwood." After replacing some worn flexible duct work with rigid, deleting the underbed duct, adding an return duct filter and basement vents, our furnace is relatively quiet and has always run well (knock on forehead)! 🤣