Leaderboard


Popular Content
Showing content with the highest reputation on 01/16/2017 in all areas
-
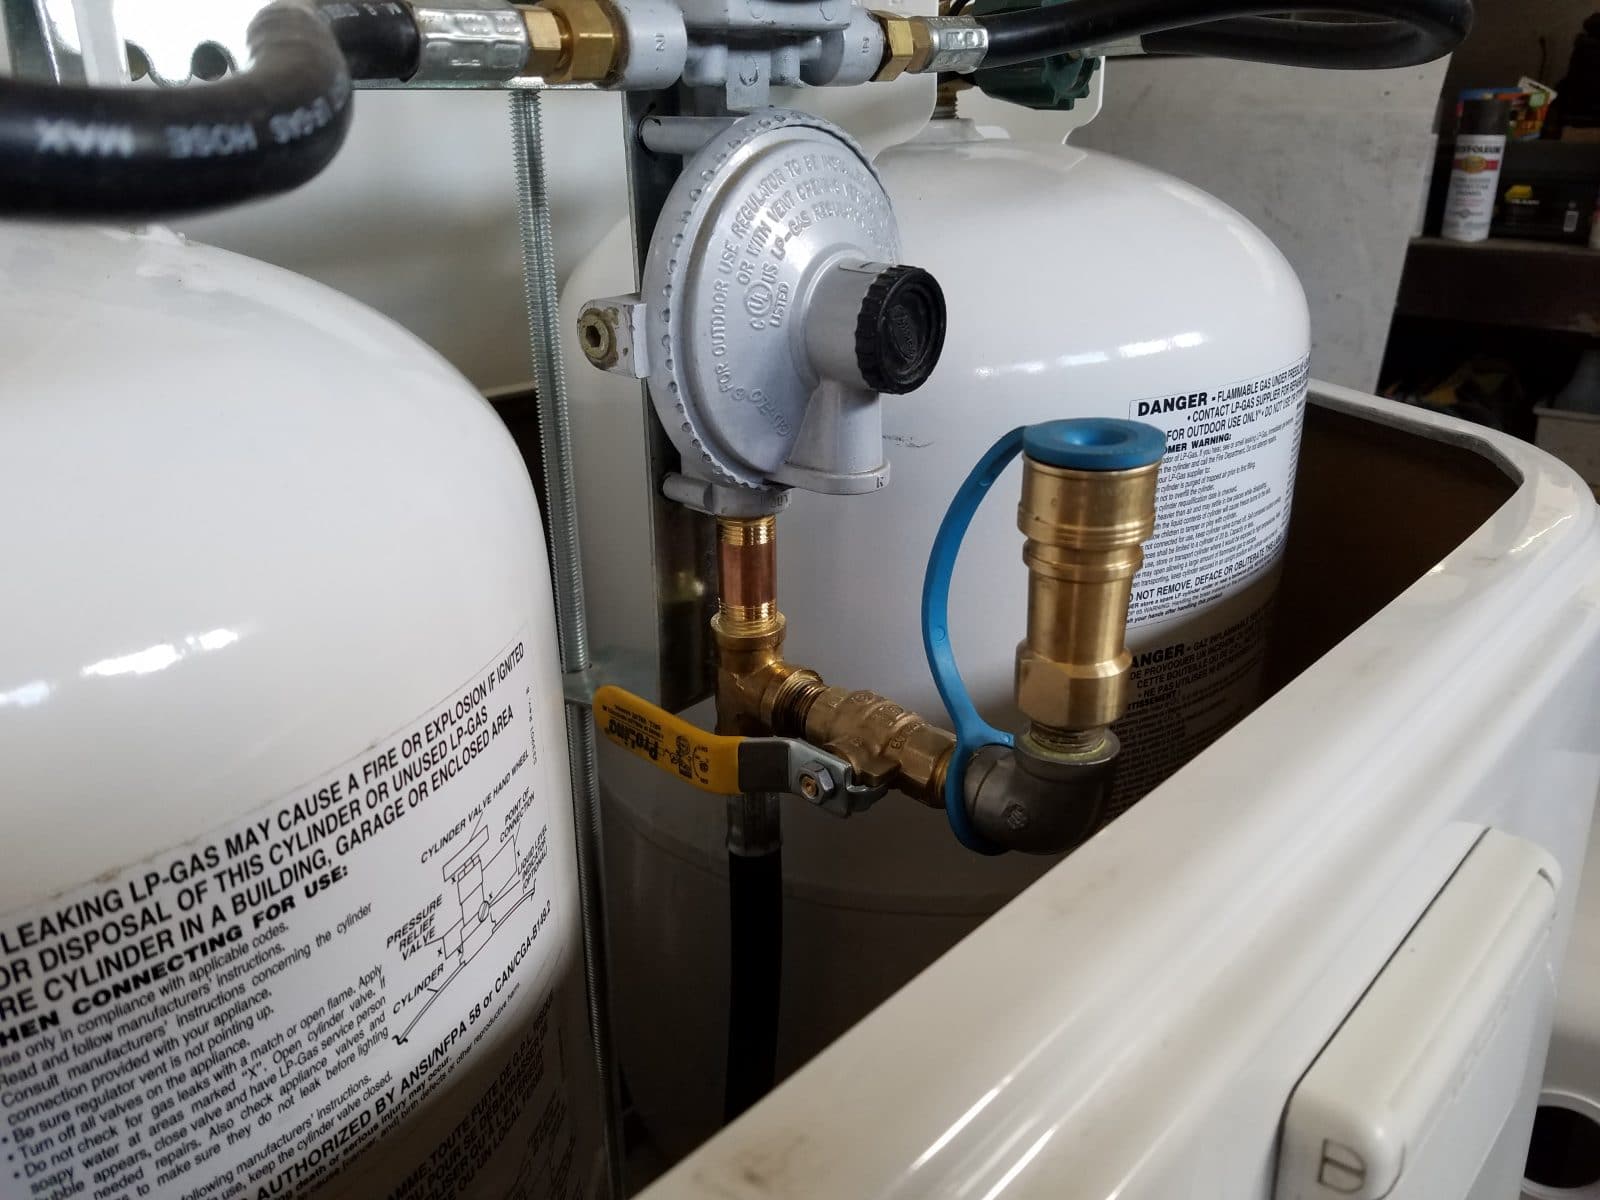
Thanks to those who have asked about the extra storage space that I created under the nose cone and behind the propane tanks. For anyone interested please see a new post I created in my Mods of the Outlaw Oliver thread here.2 points
-
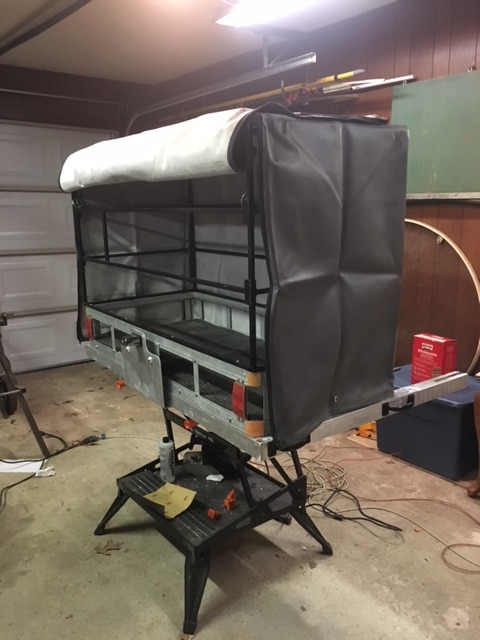
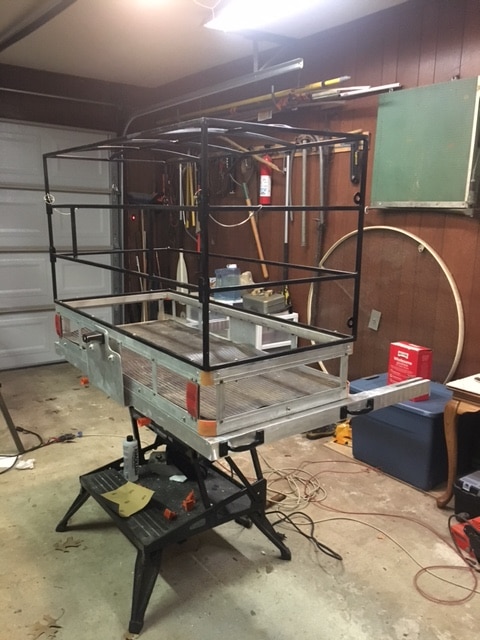
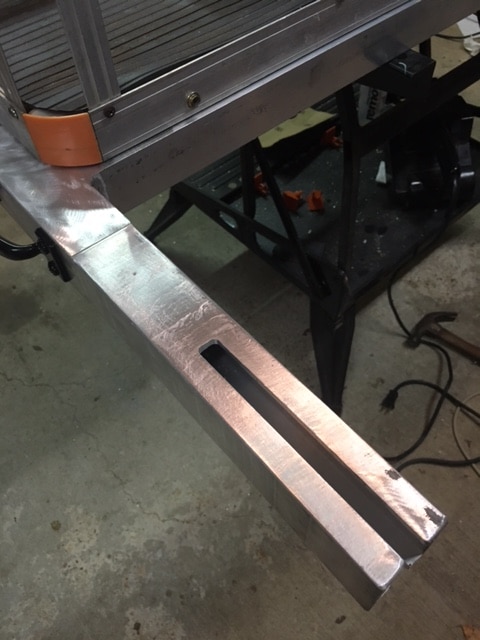
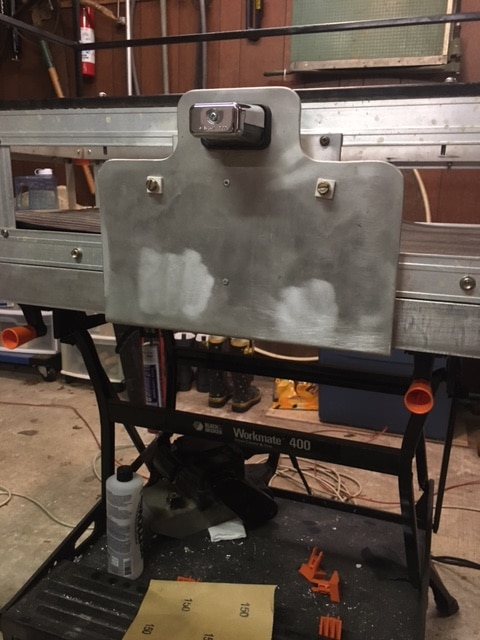
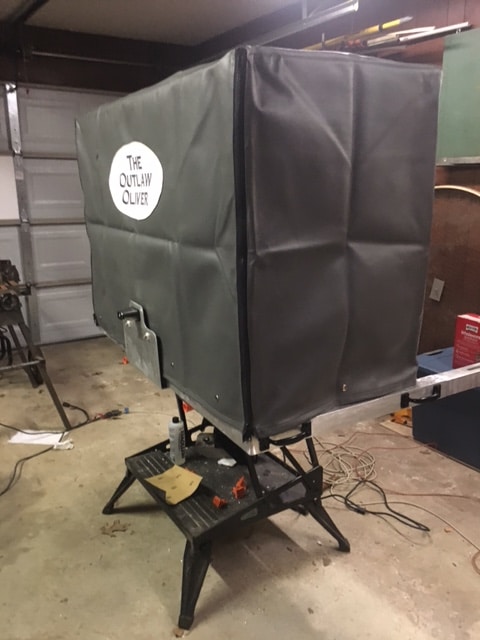
It seems that I just can't leave the Outlaw Oliver alone. This is a mod I did last summer. It is a rear basket to carry some of our stuff, two of the folding Zero Gravity we got at Sam's Club and two of the folding Sports Chairs we got at Harbor Freight and two of the little folding Camp Tables we got at Walmart. The mod was born from the need to get the above mentioned items out of the back of the truck. The are relatively light weight but, due to their bulk, they took up a LOT of room. The basket started life as a Aluminum Cargo Carrier from Harbor Freight that I bought (but never used) for the original Outlaw Oliver many years ago. I removed the single receiver that was attached to the bottom and built a custom frame to set the carrier on. Then I fashioned a steel cage to attach to the top of the carrier. It required moving the tag to the the carrier and I designed a new mount for it. The items are placed inside through a removable "door" in the rear. We had a custom cover made to match to one on the front that covers the generator. Zippers on the rear allow access to the door. The whole affair mounts to two receivers on the rear bumper like the ones that Oliver supplies for their bicycle mount. Empty, the basket and cover weigh 78 pounds. [caption id=attachment_42881" align="alignnone" width="225] Completed cage, basket and custom carrier.[/caption] [caption id=attachment_42882" align="alignnone" width="225] Latch for the "Door"[/caption] [caption id=attachment_42883" align="alignnone" width="225] Milled leg on the custom carrier.[/caption] [caption id=attachment_42884" align="alignnone" width="225] Redesigned tag mount.[/caption] [caption id=attachment_42885" align="alignnone" width="225] Cover closed.[/caption] [caption id=attachment_42880" align="alignnone" width="225] Cover open.[/caption]
 1 point
 -
A short while ago a question arose regarding the proper size of bearings for the Oliver Elite II. I had posted that I purchased a "kit" from Redneck Trailer Supply and carried these with me - just in case. Another Forum member questioned the size of the bearings/seals in this kit. So, finally, today I called Redneck Trailer Supply to reconfirm some information. It appears that the original confusion centers around which axle is on your individual Oliver. If you have the twin 3,500 pound axles then the "kit" number that you want is - BK2-100. If your Oliver has the 5,200 pound axles then you would need the BK3-100 kit. Bill1 point
-
Look on the axle tube near the center. It will have a white sticker that tells you what axle it is. Oliver uses standard Dexter 3500 lb axles unless you have the 12" brakes. With the 12" brakes they are the 5200 lb Dexter axles. Verify this by looking at the sticker1 point
-
A. That information should be on your "build sheet" B. Ask Jason in the sales office C. Get you serial numbers directly off your axles and ask Dexter. D. I'm out of ideas....1 point
-
The caching of the forum has been an issue since the switchover. You can log in, but if you go to a page you went do just prior, you'll still show up as logged out. You'll find that recent changes of any sort don't update across the site very timely - often hours after the fact.1 point
-
Not in this neck of the woods. The Oliver crew will be hard at it.1 point
-
You should find the info you need here.1 point
-
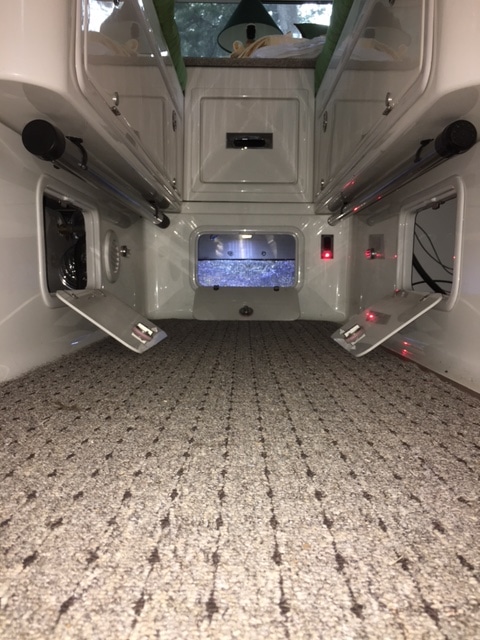
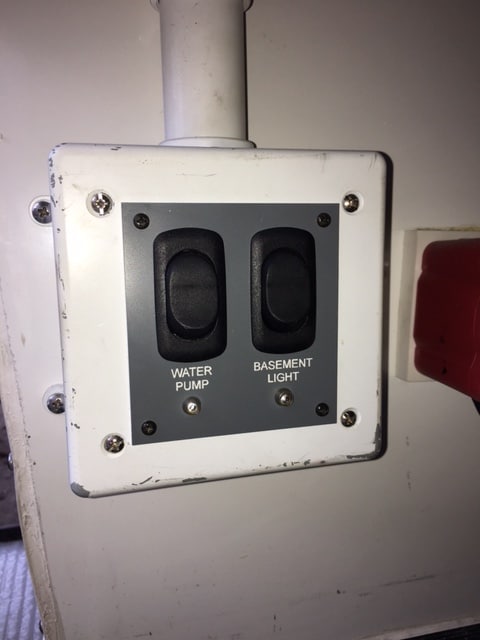
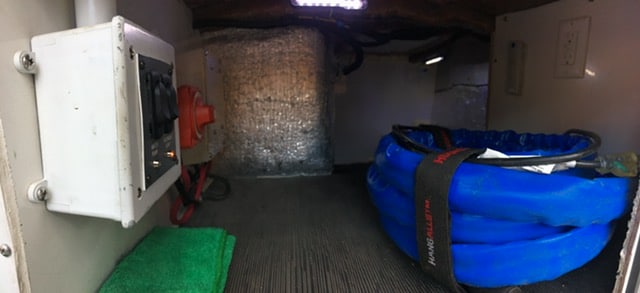
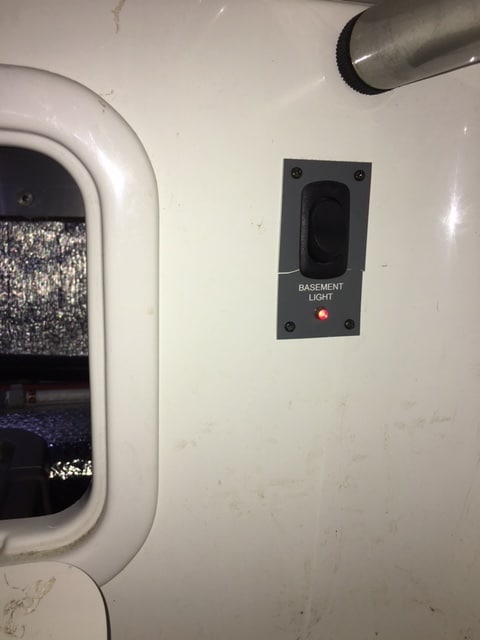
Buzzy, thanks for the inquiry and the interest. I did these mods to the basement a long time ago. Some were actually started during construction: Here you can see where we cut holes in the inside bottom shell to receive hatches (again, these are the same as that one in the bathroom.) The one in the rear under the nightstand is to access the basement. The one on the starboard side is to access the valves at the pump that control the alternate tank fill system and the valves at the floor that drain the water lines. The one on the port side is only to satisfy my OCD Libra need for everything to be symmetrical and balanced. I added two lights to the basement area. They are controlled by a set of 3-way switches, one located right inside the basement door: and the other located to the right of the interior hatch on the inside under the nightstand:
1 point
-
I am thinking more of a quick release or debris cage. like is used to keep debris out of scuppers or other drains. I am thinking a pair of 6X6 blocks 11" long bouncing around would damage a plug/socket protected only by a releasable zip tie. Will have to wait and see all we have to work with.1 point
-
Wecome, when is your start date? Ours is schedule to start tomorrow, but that is a holiday(?). But I think they had "snowdays" built in, or at least we hope. We have booked and paid for a Oliver Rally first weekend of May...1 point
-
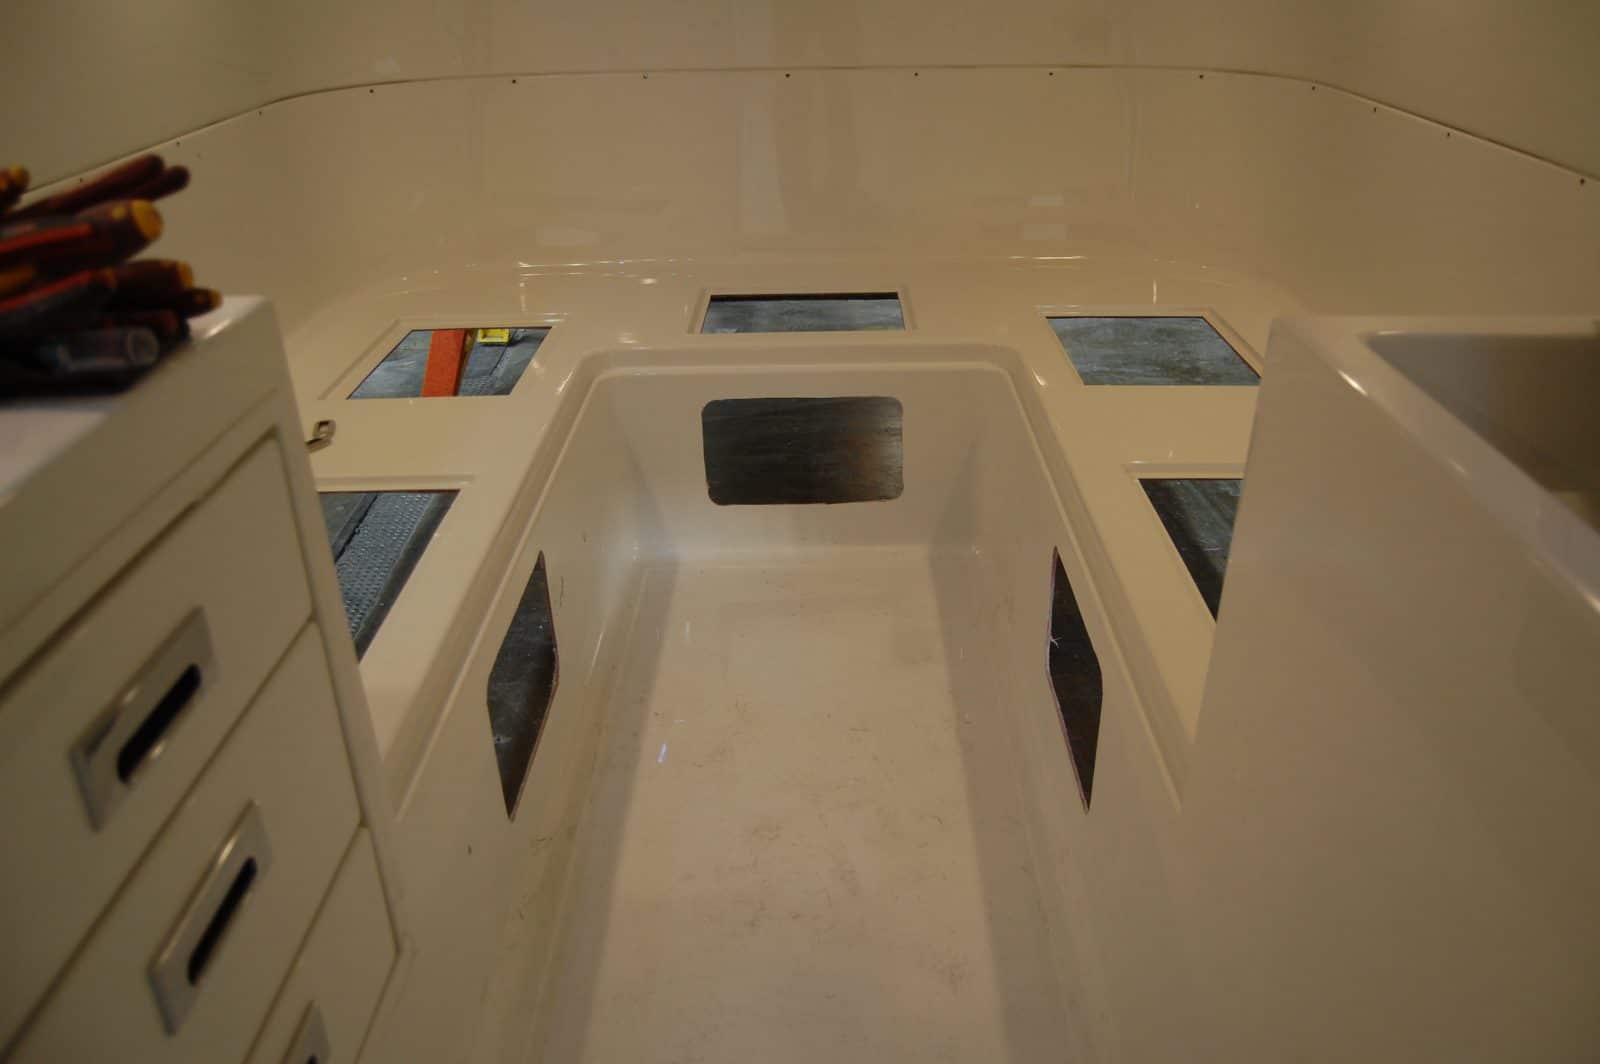
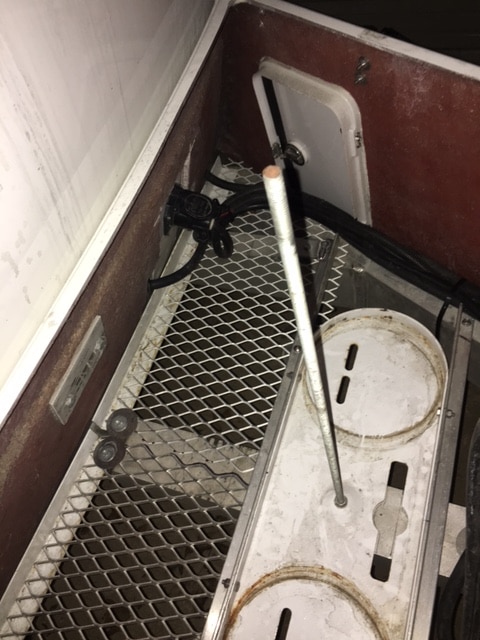
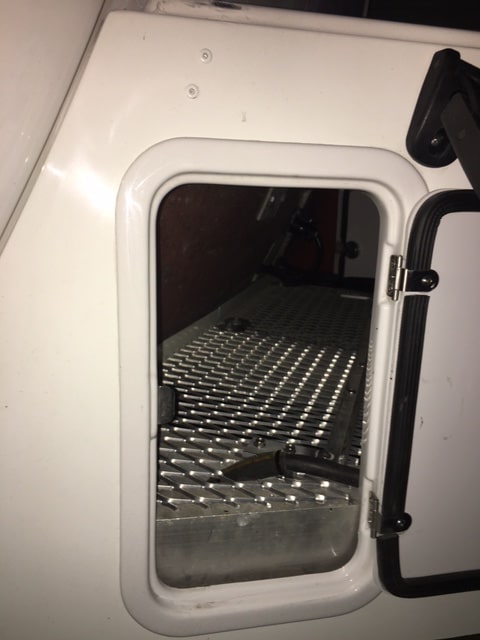
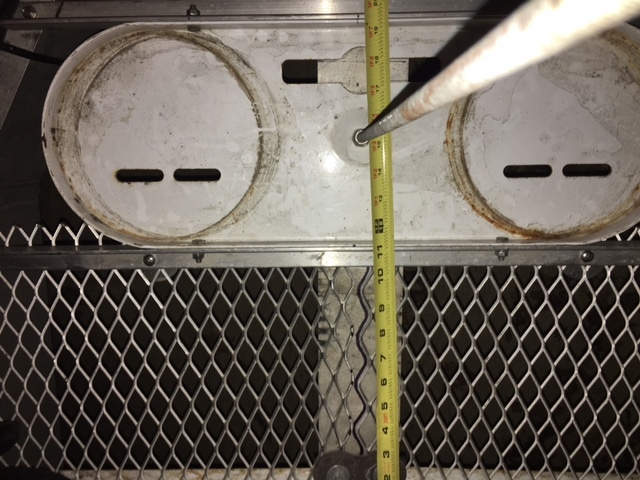
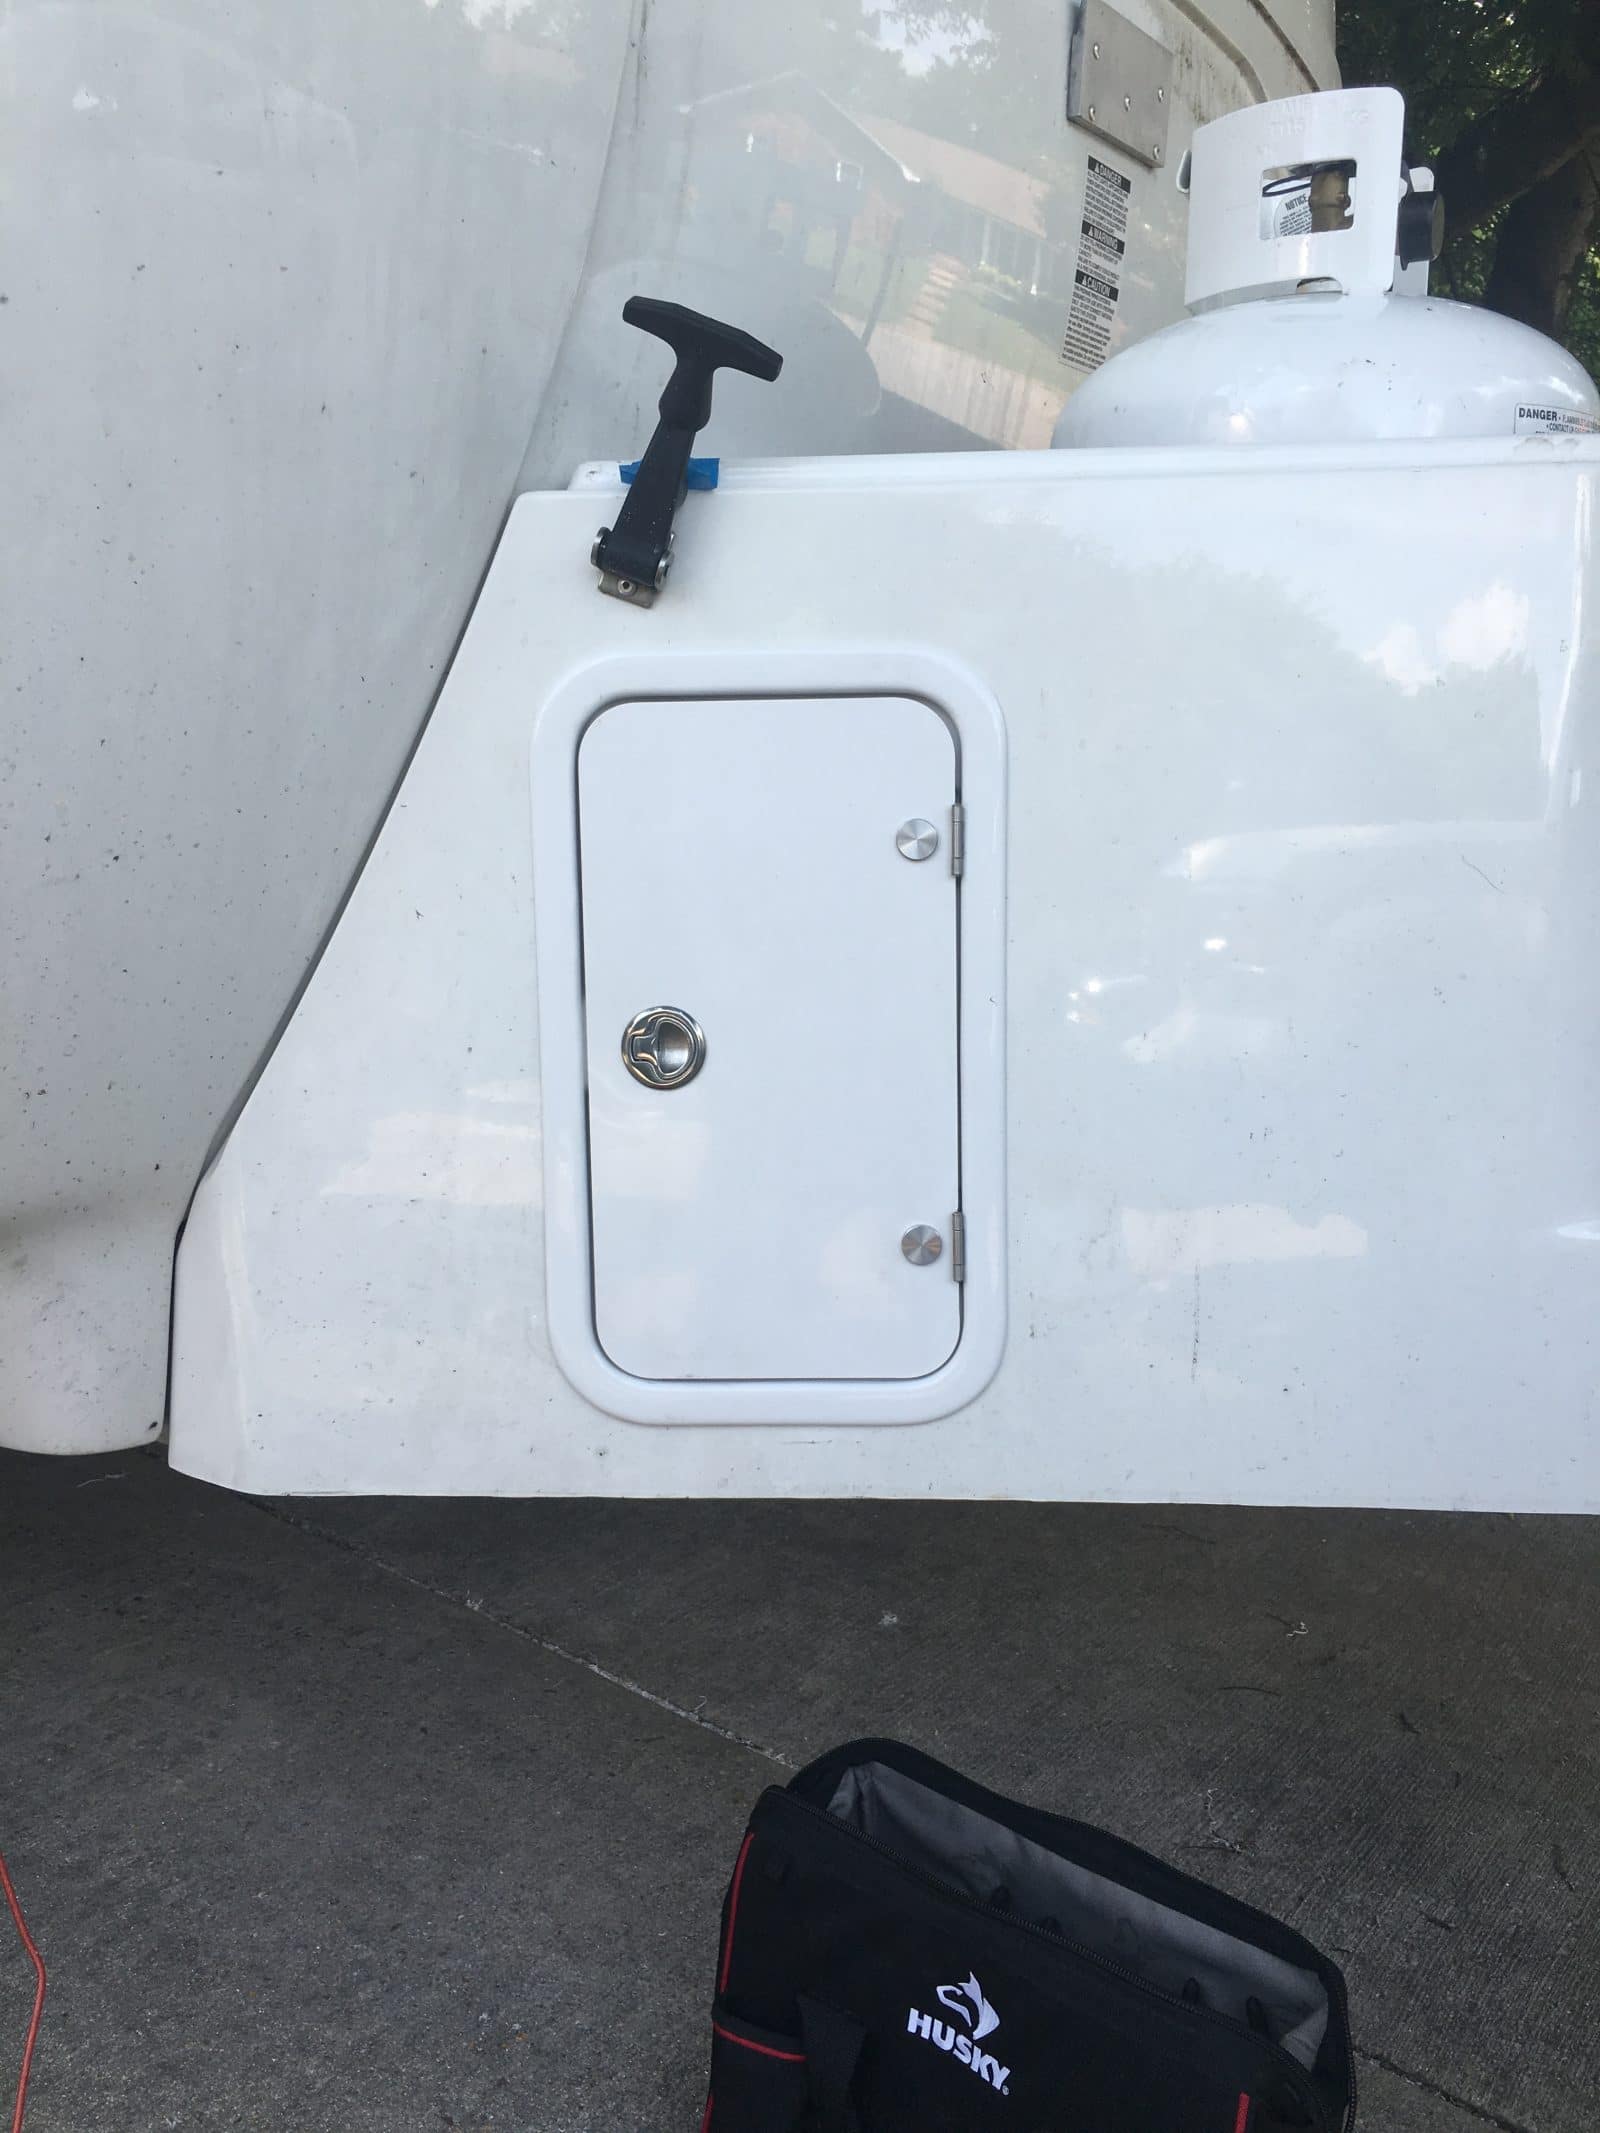
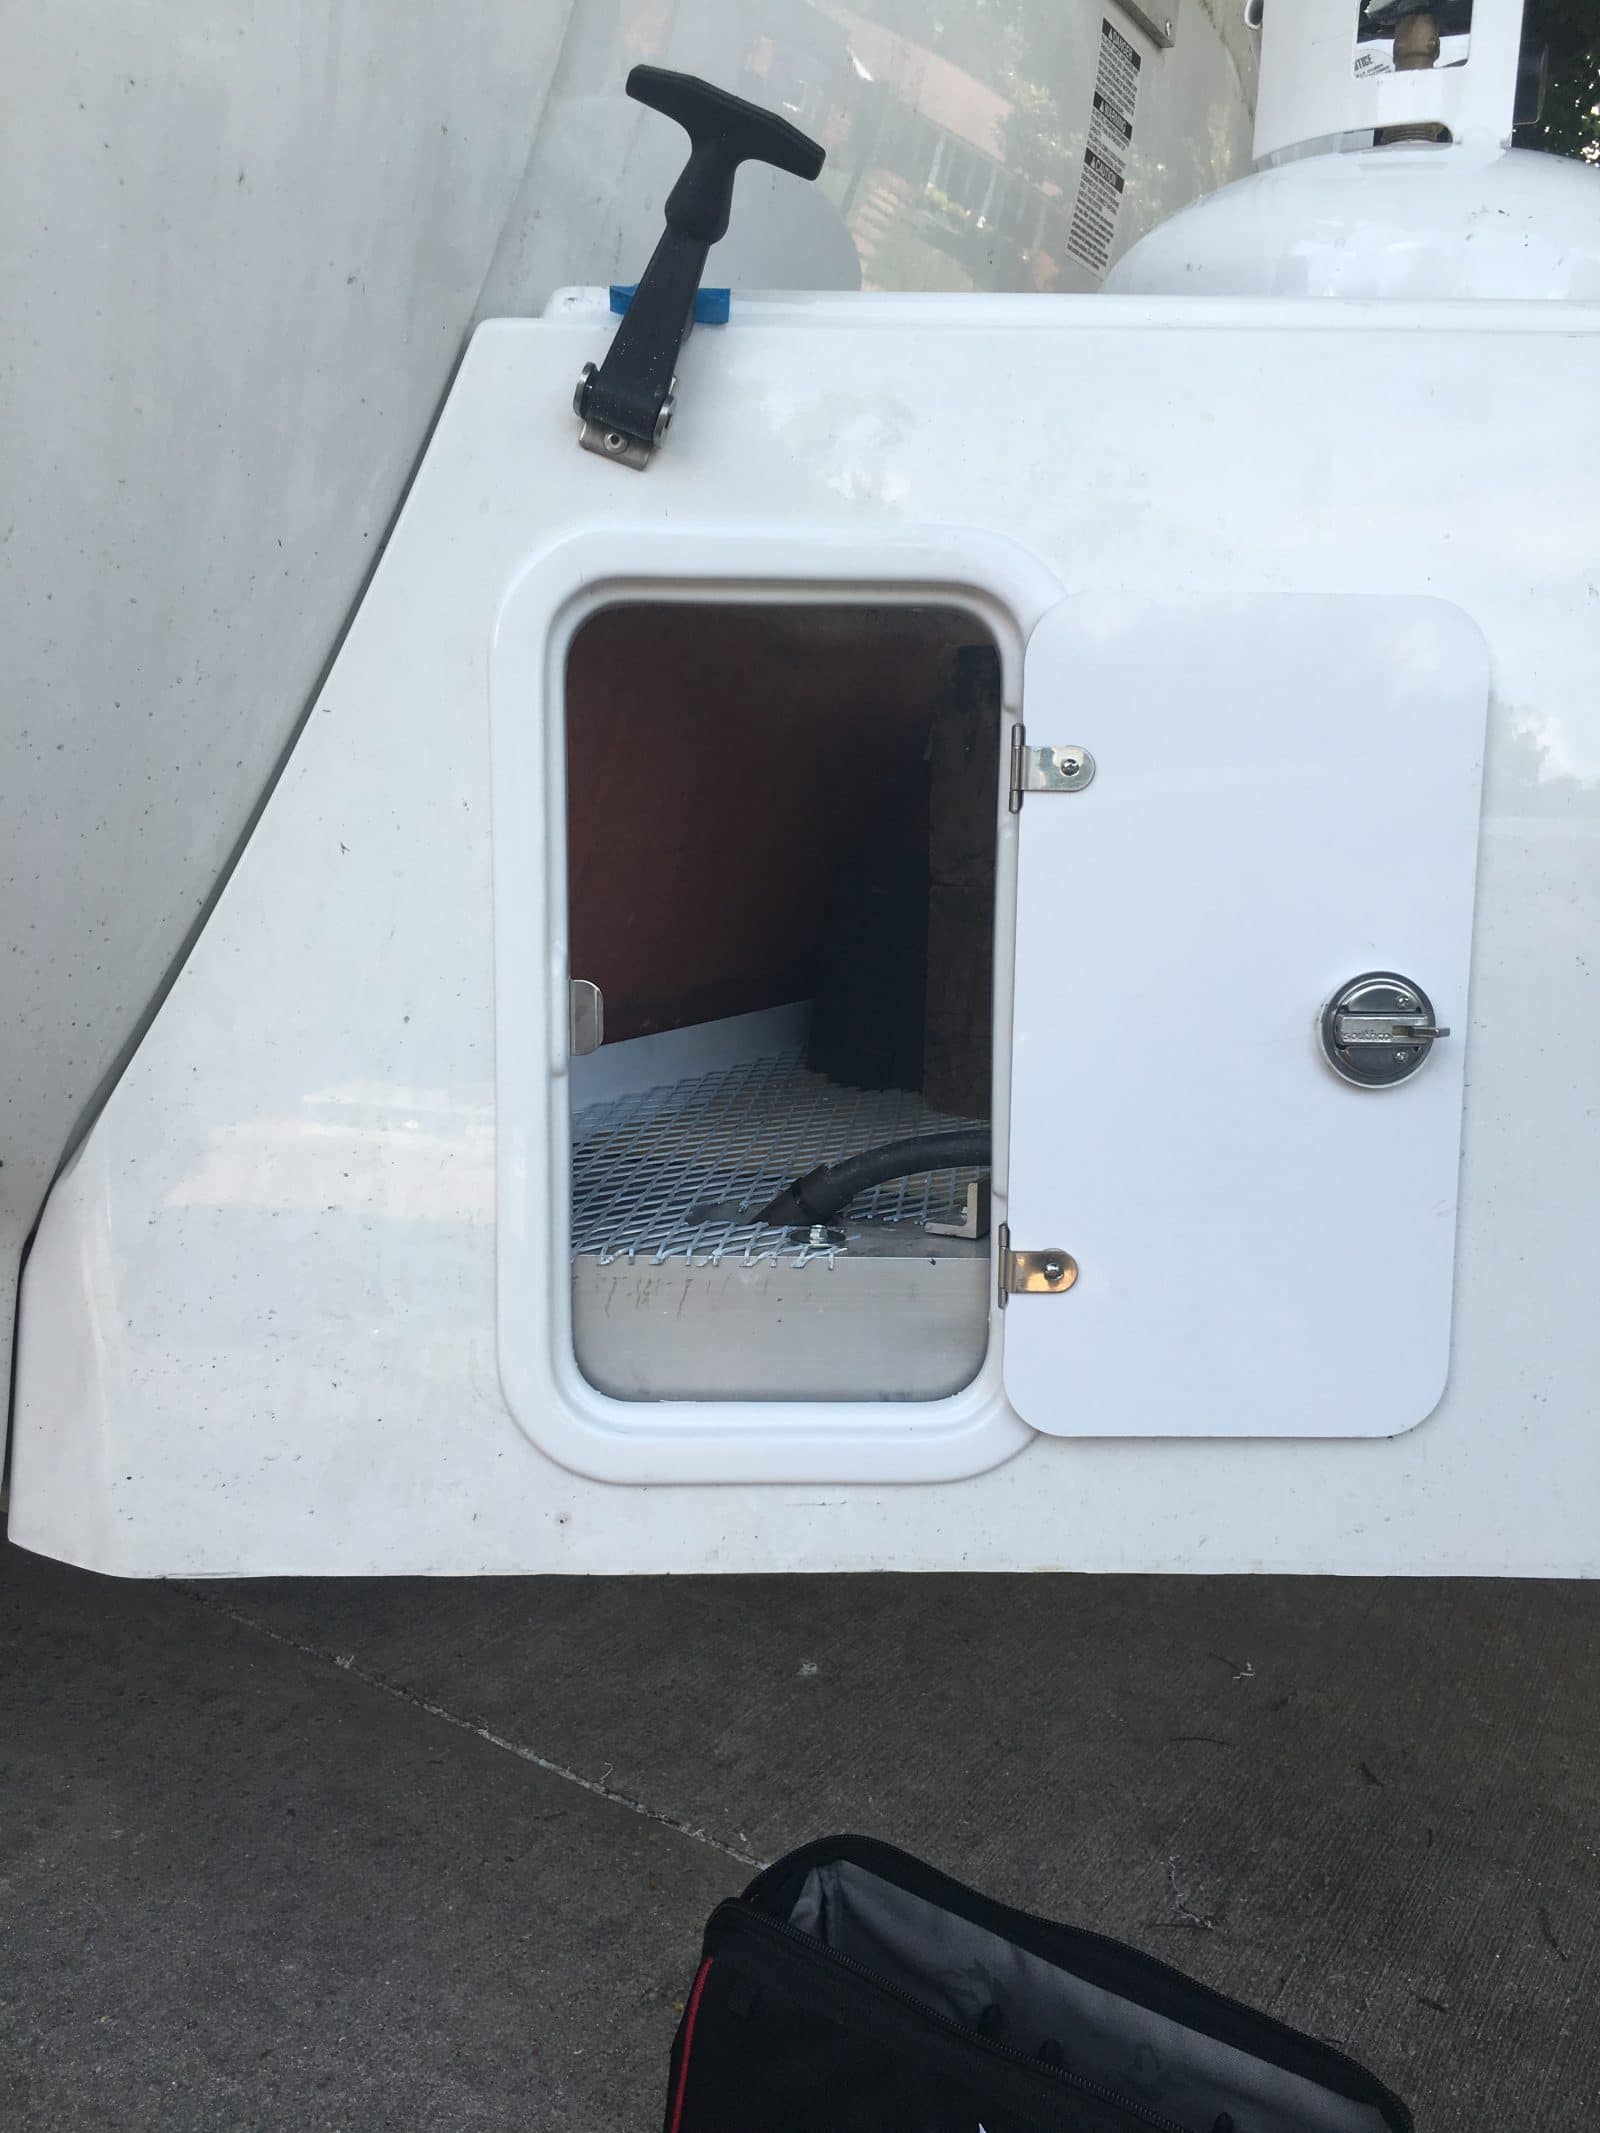
For those who have asked about the extra storage space that I created under the nose cone and behind the propane tanks. The first thing that I did was to remove the propane tanks and the tray that they sit in. I found that the rear screws into the frame that hold the tray down were both broken off from (I assume) the inertia and weight of the tanks leaning forward during braking. The tanks really could not go anywhere because they were obviously hitting the front of the cover, but they idea of them just rattling around in there was a little disconcerting. I re-drilled the holes and replaced the screws only to find them broken again after our next trip. You can see what I did to rectify that matter in the pictures. I’ve had no trouble with them since. I recommend that everyone check these screws to see if you’ve incurred the same problem. The mesh in the floor is aluminum and it is the second one that I've installed. The first was steel and, even though I painted it, it rusted - badly and it looked terrible. Don't waste your time with the steel. I included some measurements that will show how much room was gained. The outside doors are from Oliver and are the same doors as is on the cabinet in the bathroom. I will be happy to share how these were mounted for anyone that has that interest. I am currently in the process of putting lights in this area and one that will illuminate the foot of the front jack.
1 point
-
1 point
-
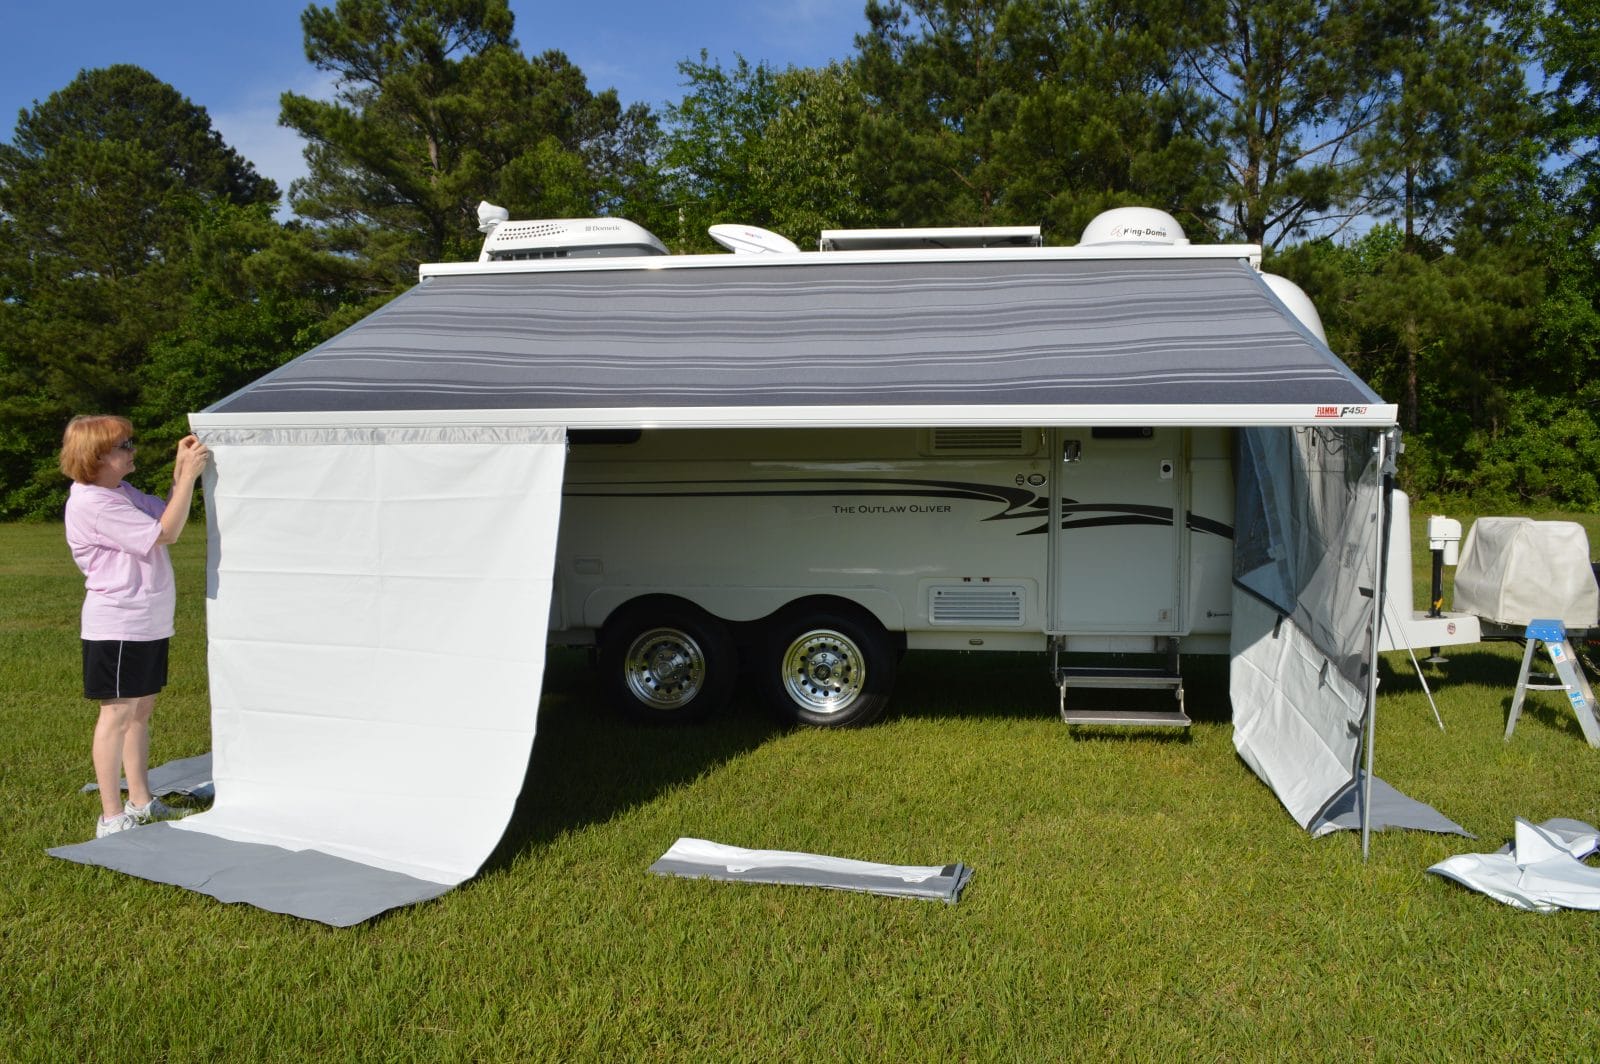
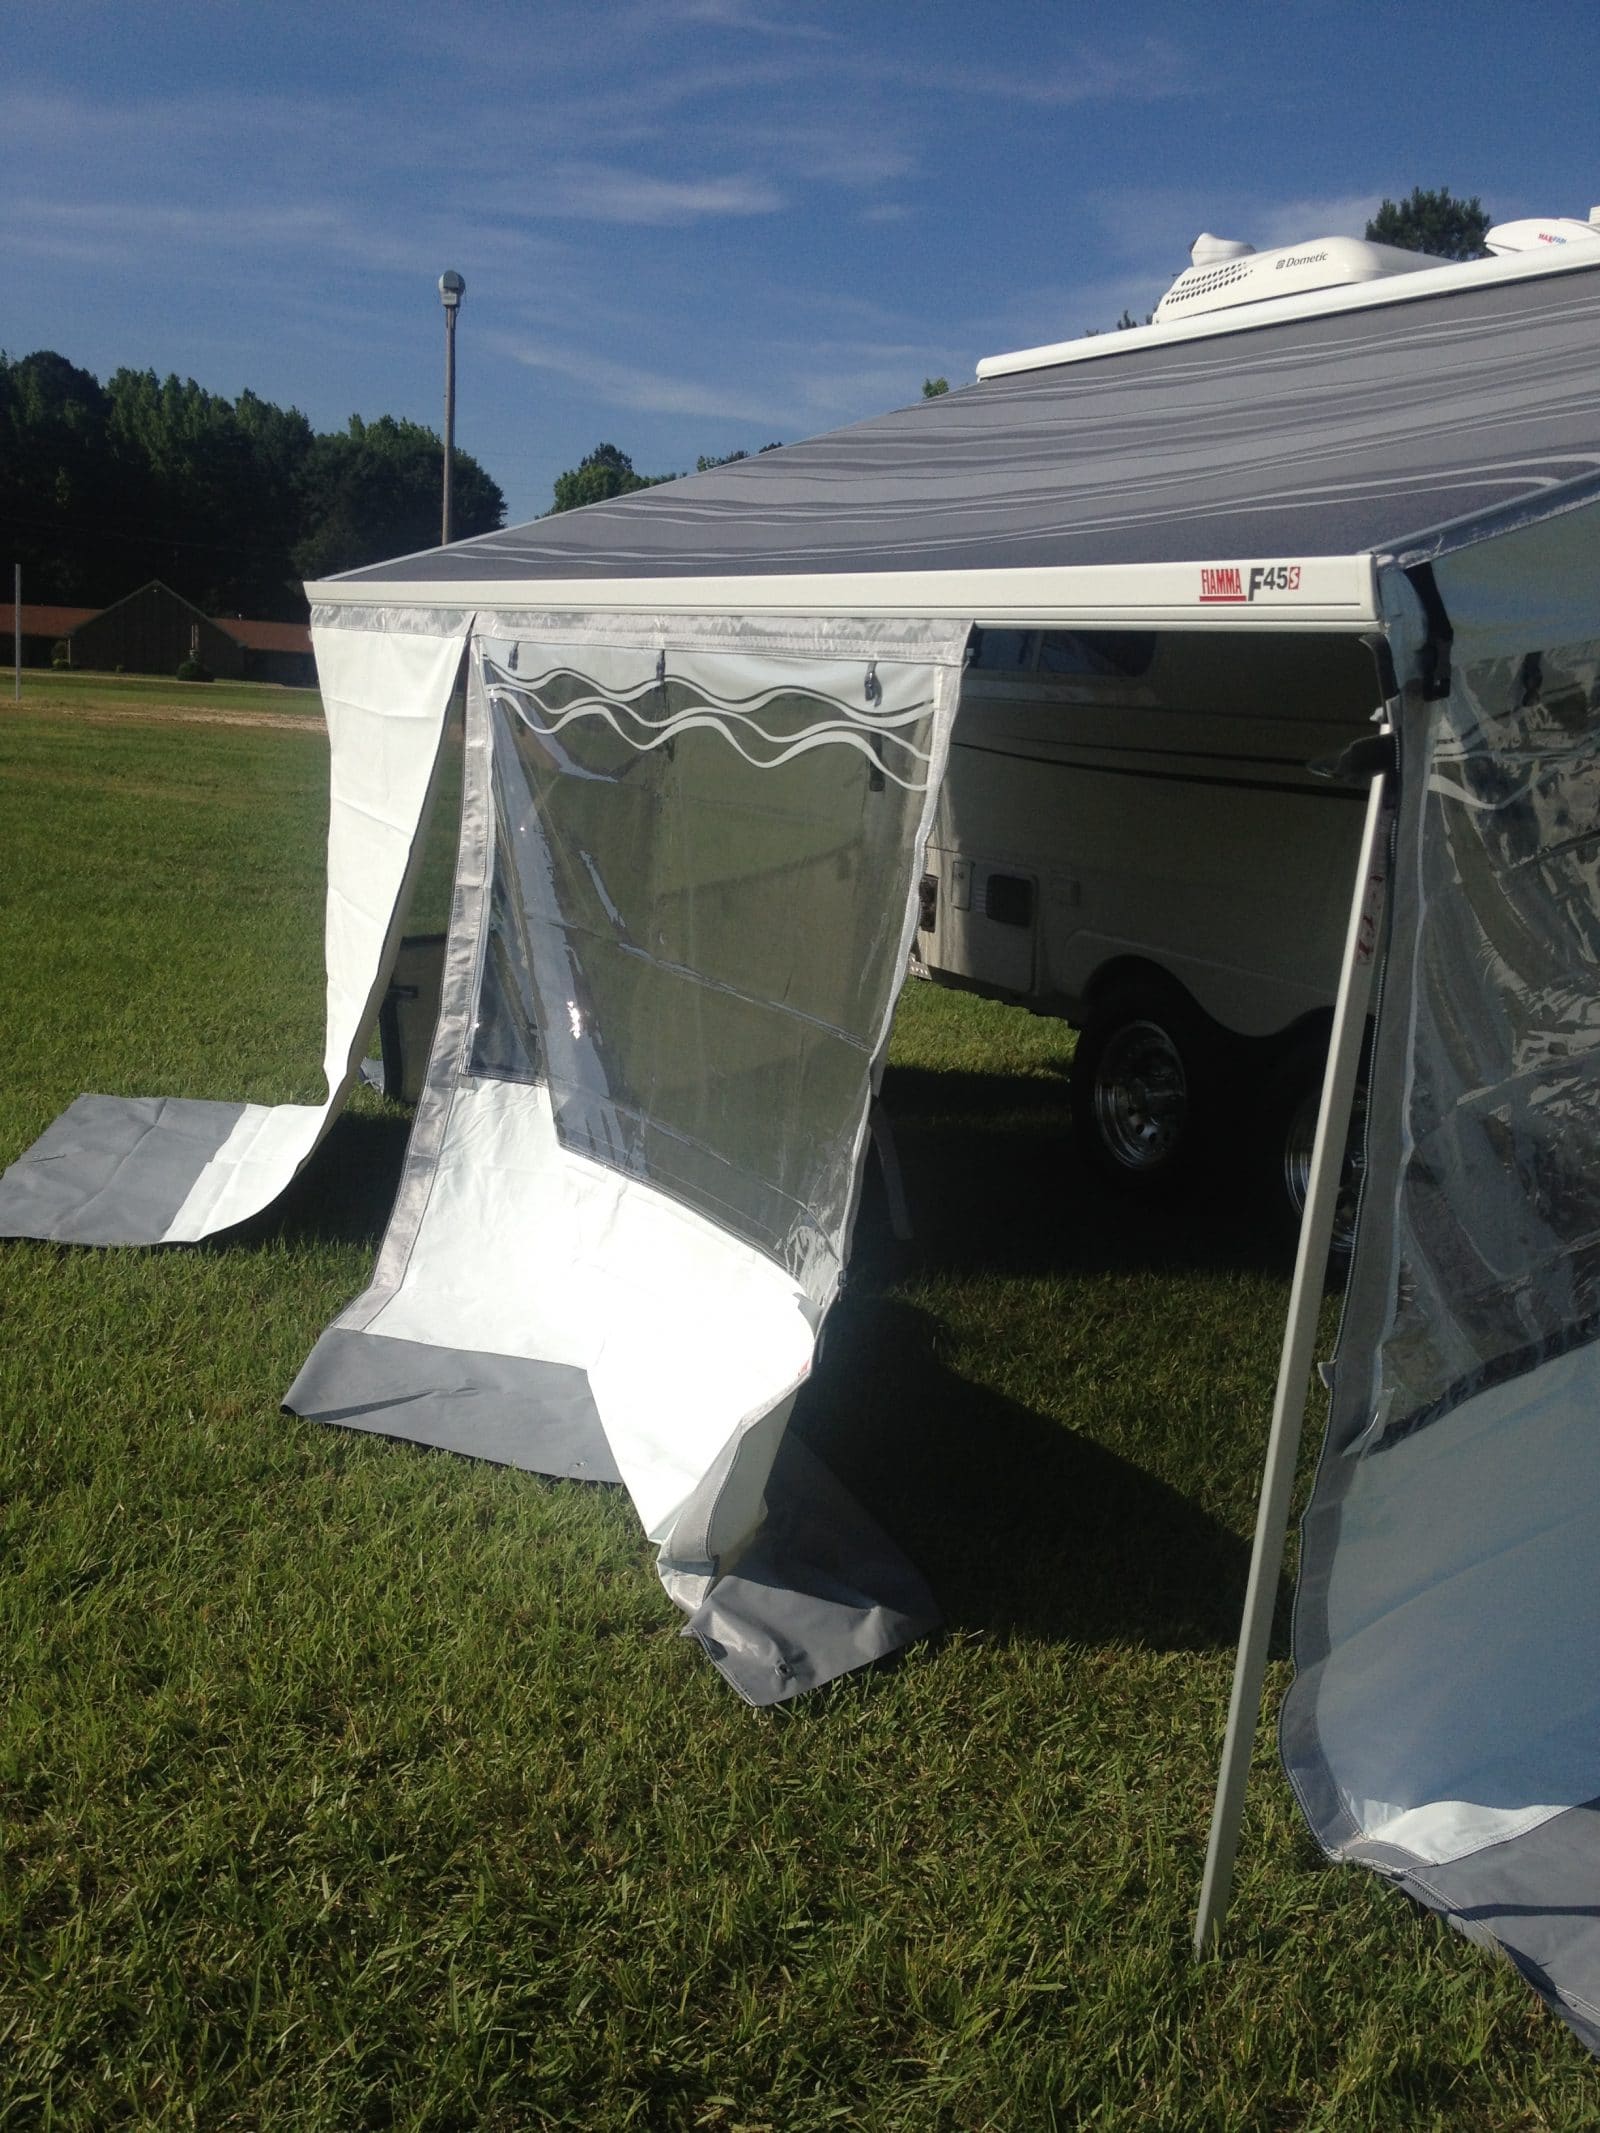
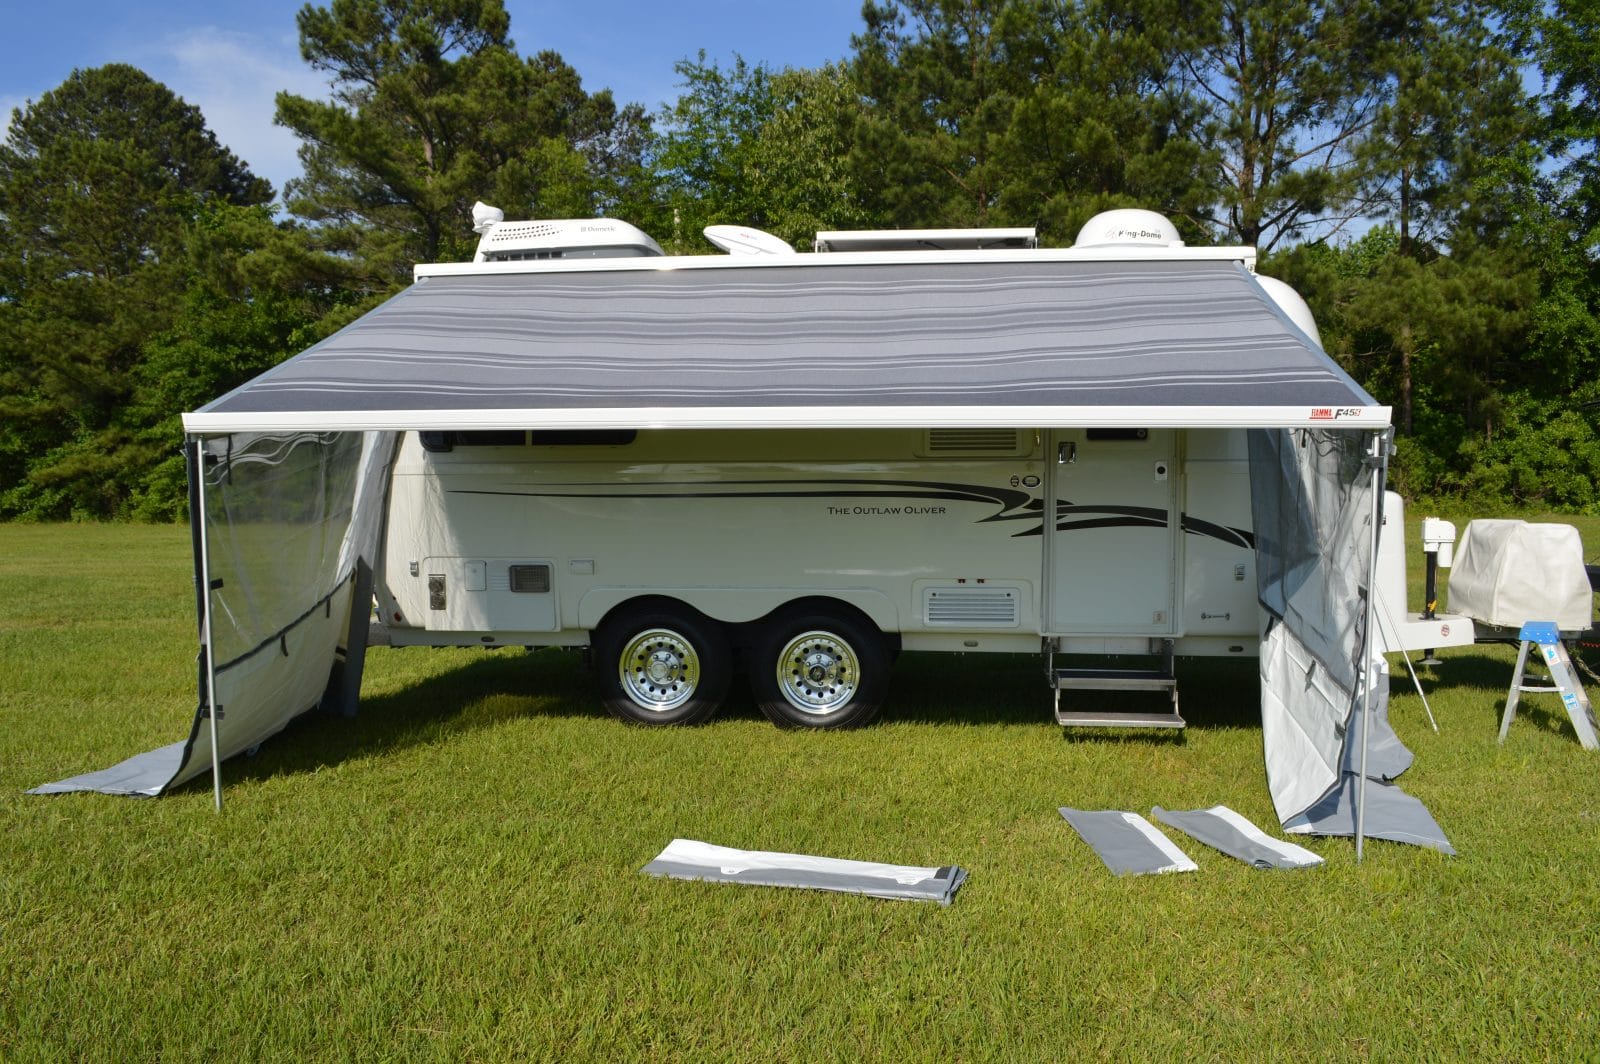
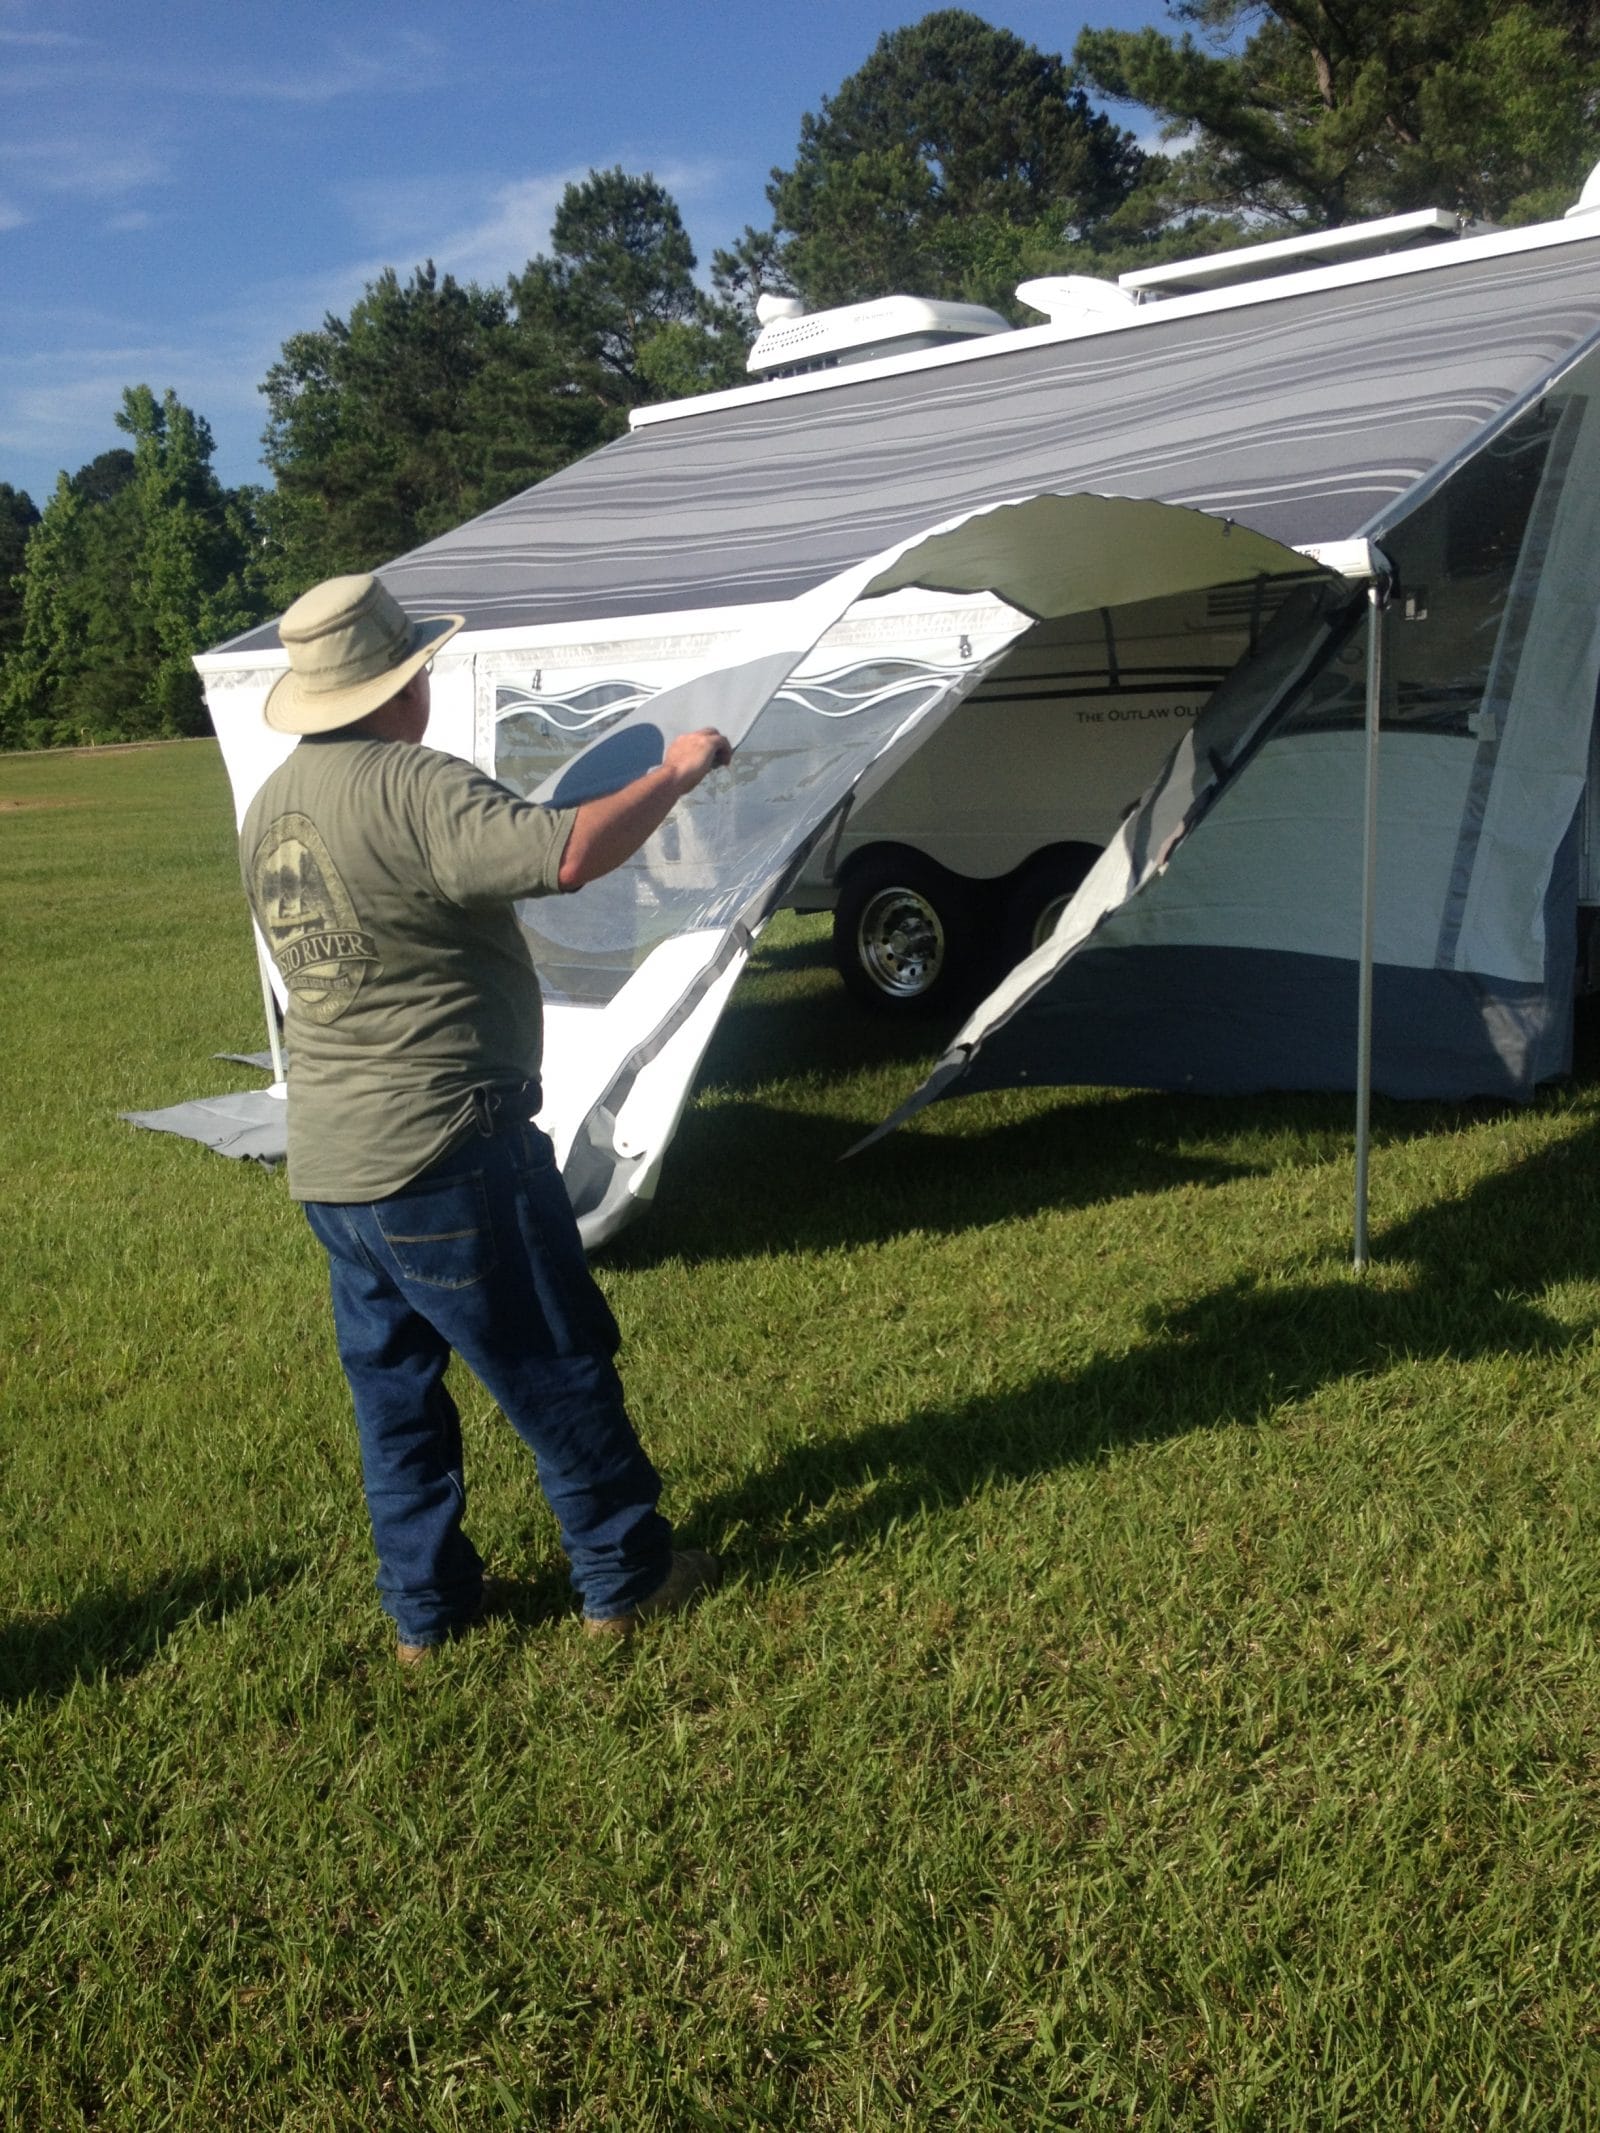
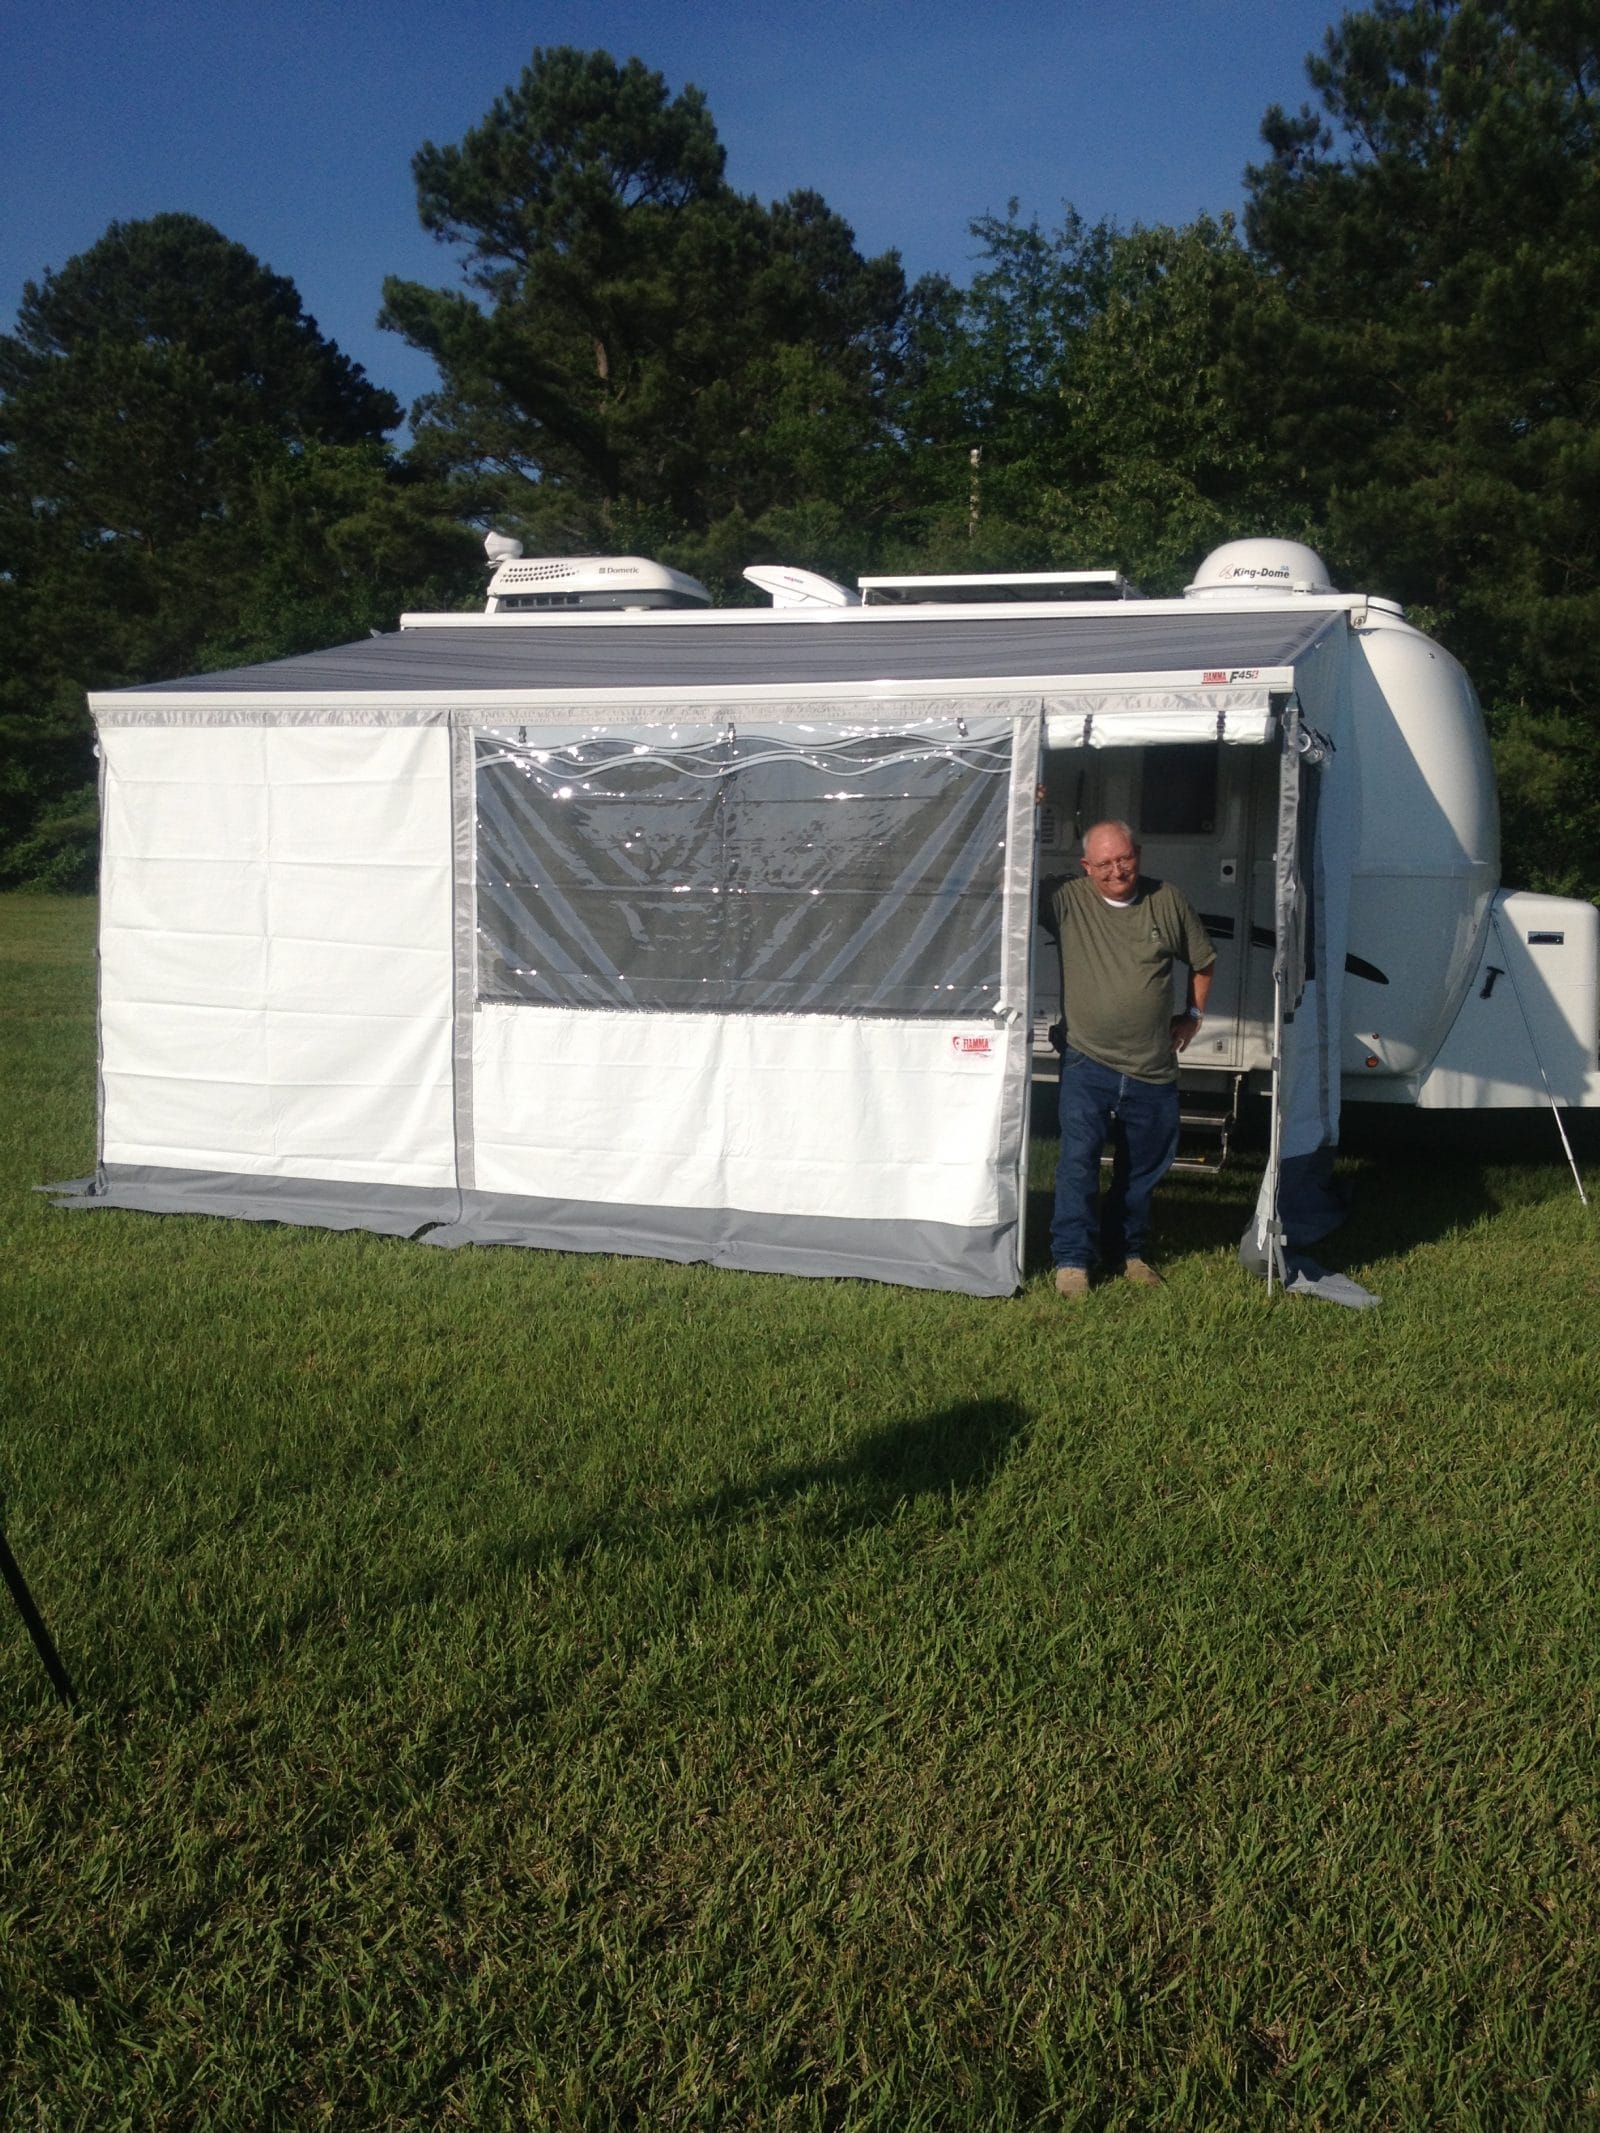
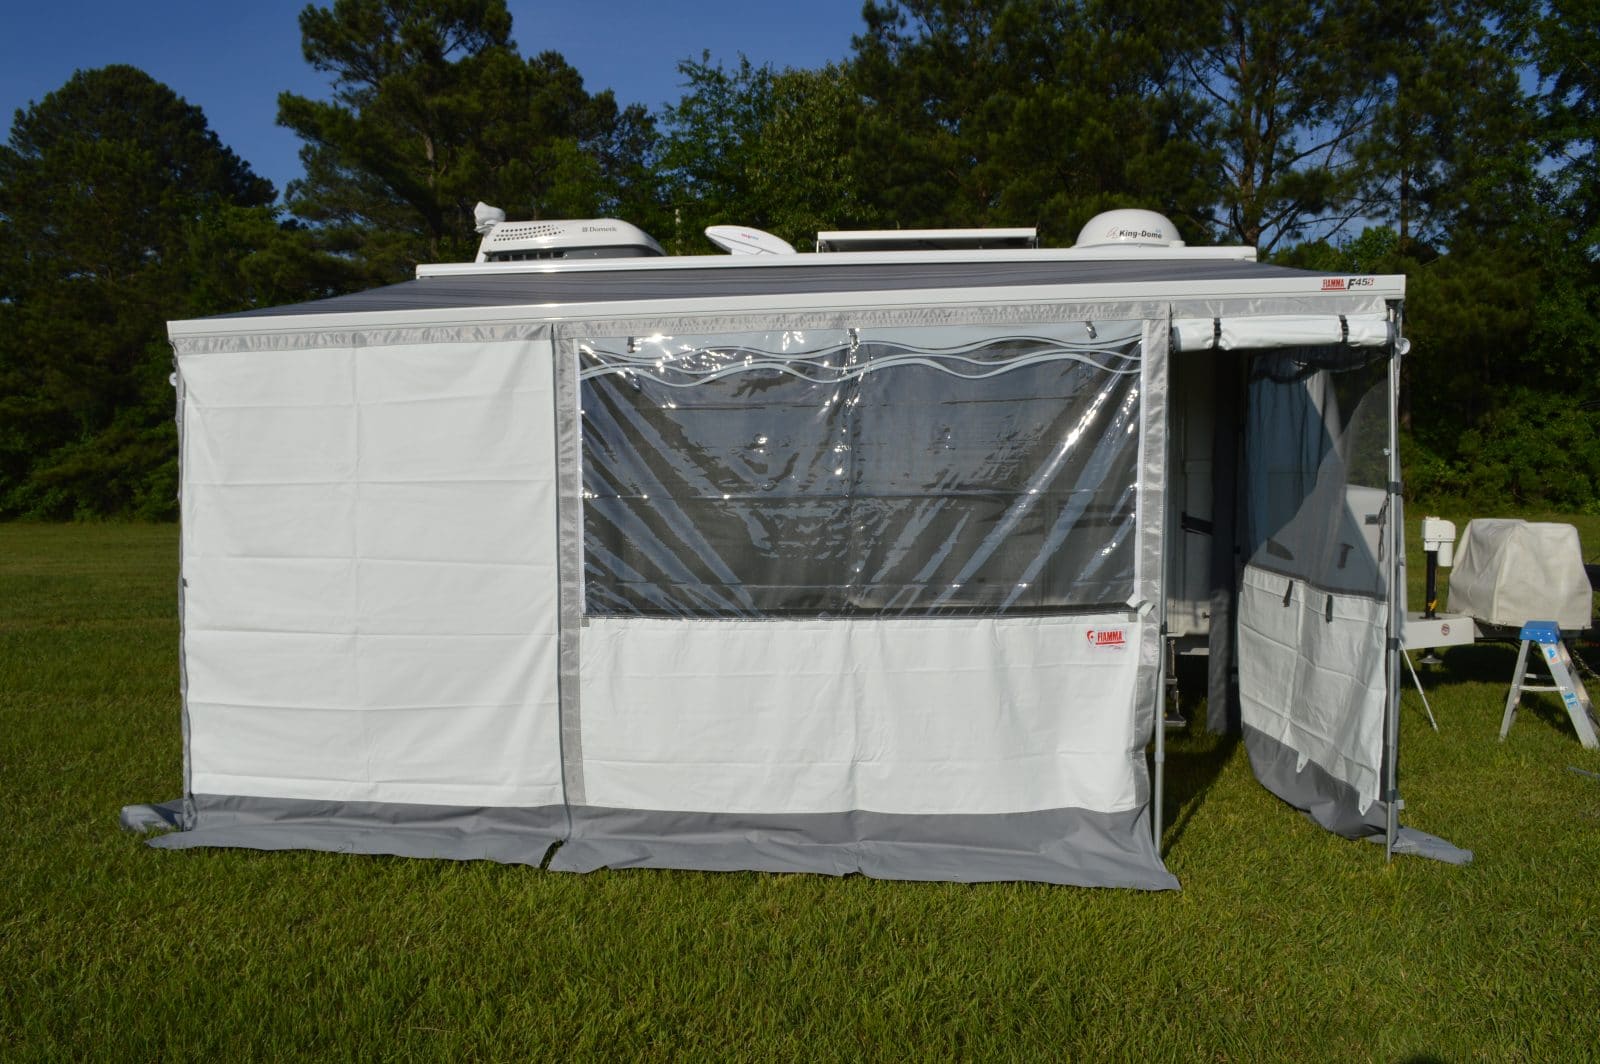
Reed & Karen: I hope you don't mind that I created a new thread for this and moved your post. This is what we have and it is made to fit the F45S awning that is installed on the Elite II. Setting it up takes about 15 minutes after you have done it the first time. There are a couple of accessories that have to be screwed into the awning and some assembling of other parts that only require being done once during the initial set up. The room's construction is top notch and it packs neatly away in its own (included) carrying case. It is heavy, weighing in at about 65 pounds. You do need to secure it to the ground in case of wind. I've included some pics of our initial set up and a couple taken during a recent trip to Maine.
1 point


-
Recent Achievements
-


")


")


