Leaderboard


Popular Content
Showing content with the highest reputation on 09/22/2017 in all areas
-
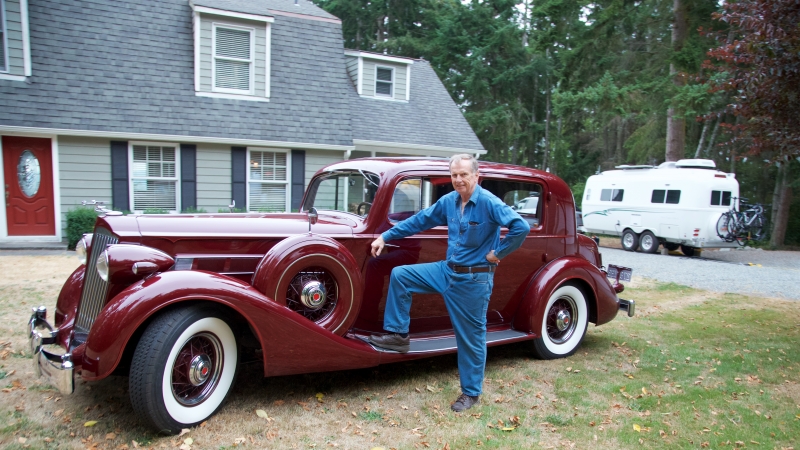
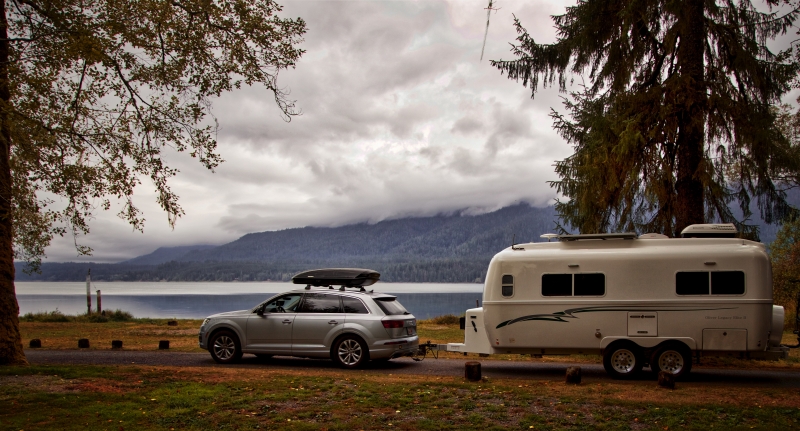
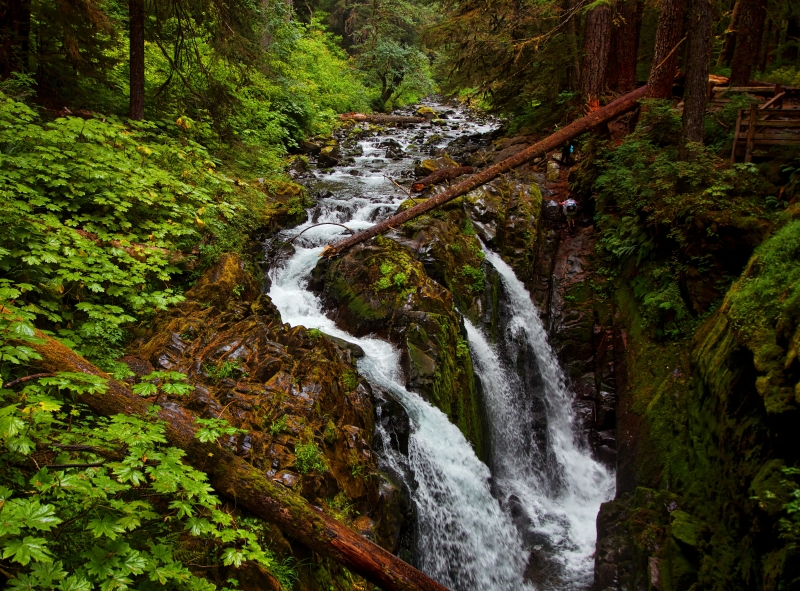
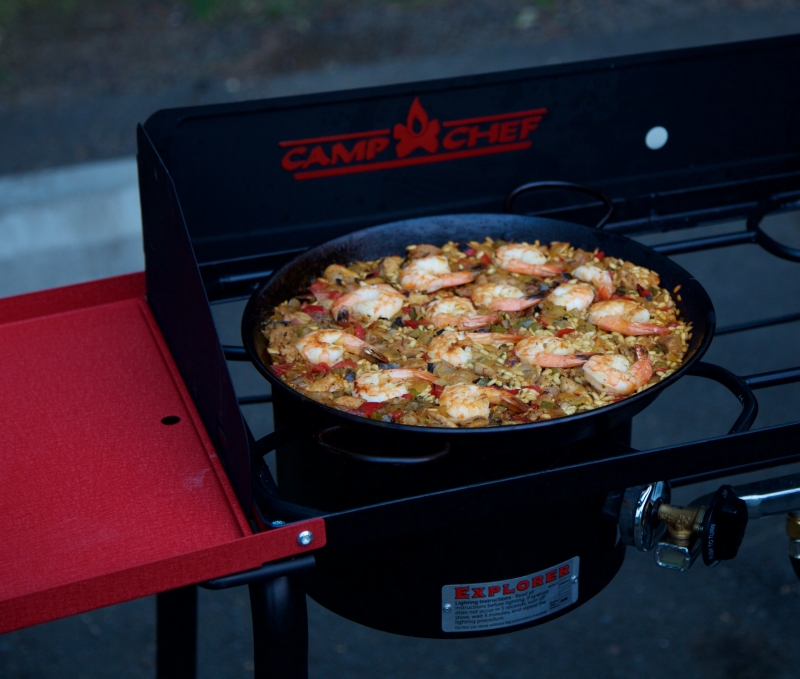
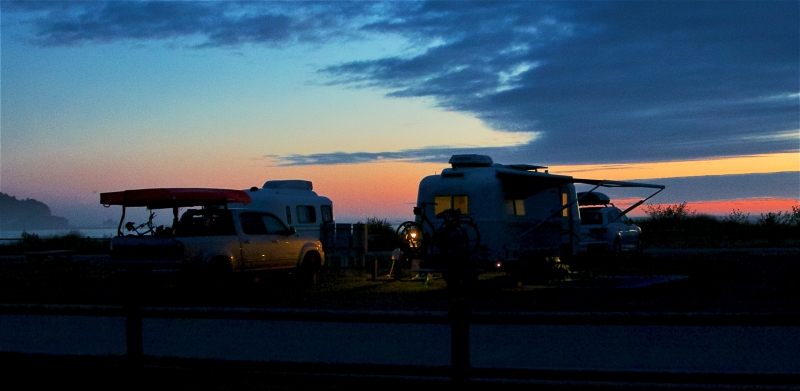
Where’s Ollie? Ollie went on a trailer caravan trip to Olympic National Park with his cousin Casita! This was a long trip, two weeks. I now define a trip as a long trip if you need to plan a laundromat stop in your itinerary. My sister and her husband live near Bend, OR, and they have a Casita. We met up in Yakima, WA, where we spent a day wine tasting before heading to Coupeville on Whidby Island, where we driveway camped at my other sister’s college roommate's home. I sense that there are a lot of automotive aficionados on this forum. Our hosts are fans of Packard cars, and they have a number of old Packards that they have restored. Ollie and Casita then rode the ferry across Puget Sound to begin their adventure on the Olympic Peninsula. Ollie had to pay the 40-to-50 foot fee for the ferry, while economical Casita got away with the under-40-foot fee. Size does matter! Olympic National Park is truly spectacular! Mountains, rivers, waterfalls, lakes, oceans, rivers, and rain forests! We camped at Lake Crescent, Neah Bay, Hoh Rainforest, Kalaloch Beach, and Lake Quinault. Two nights camping at each location, mostly in National Park campgrounds without hookups. These are rain forests, with a lot of downed trees, and I enjoyed photographing the fungi. I even got black slugs lounging on mushrooms. We ate very well. We bought fresh salmon and black cod from a fisher on the dock at Neah Bay. Susan acceded to my wishes and we tried our authentic Paella recipe on our camp stove. Really delicious! Neah Bay was particularly enjoyable. The Makah tribe has an amazing museum there. The hike out to Cape Flattery is definitely worth doing. Cape Flattery is the northwest-most point in the continental US. It was fun travelling with others, and we each learned a lot from each other’s camping tools and tricks. I think Amazon is going to be busy with deliveries to my sister’s house… We had one major plumbing problem, which I will post in an appropriate thread. I have some questions which I will post later, and I already posted my trick for Cellular Boosters. I will end with some sunset photos: Happy Trails, David
 5 points
 -
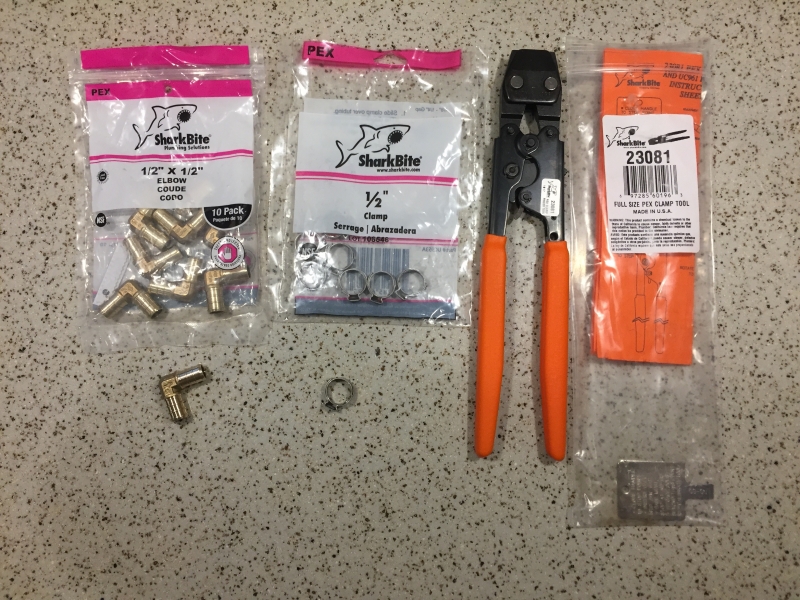
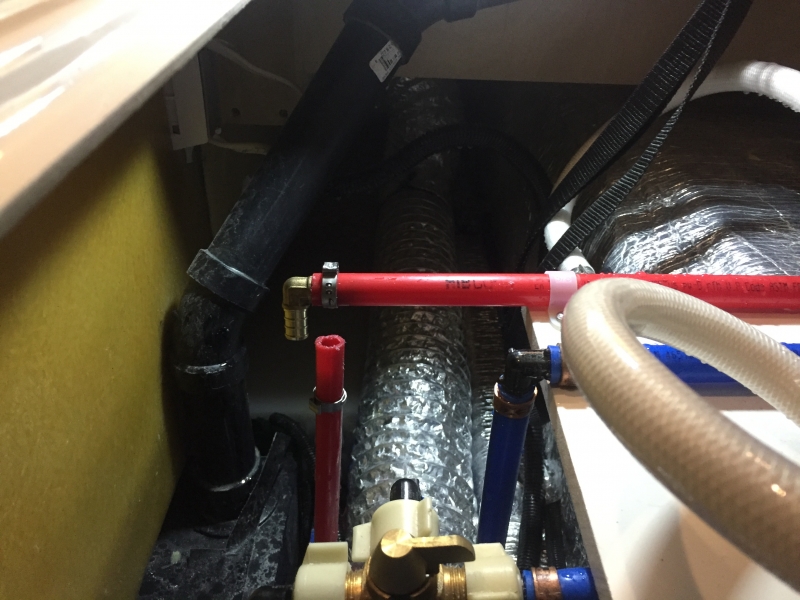
We had a major plumbing problem on our trip to Olympic National Park. We were setting up camp in the Hoh Rainforest campground, where we were boondocking without a water supply. I turned on the water pump and I heard a gushing sound. I checked the faucets, but they were off. I turned off the water pump and the sound went away. Not good! I looked in the curb side under bed compartment where the water pump lives. When I turned the water pump on I could see water gushing out of a pipe. One of the plastic elbows had broken. I have tried to assemble a good tool kit for the Oliver; I even have spares for all of the fuses. I had seen this post from Mountainborn about PEX repair, and getting these PEX repair parts was on my ToDo list. In retrospect, I think I did not get the parts and tools before this trip because I needed to do some research to figure out what parts and tools I needed to get. I remembered this post while in the campground, and I pulled it up on my phone and read about Sharkbite and PEX. I then drove one hour (each way) from the campground to Forks, WA. Fortunately there are two hardware stores in Forks (one was useless in regards to Sharkbite and PEX), and both were open late in the day. The second hardware store also had a very knowledgeable salesperson. John Davies may be correct that PEX parts and crimp pliers are not that expensive, but the hardware store did not have them. But they did have a Sharkbite crimping tool, but ONLY ONE, for the outrageous price of $68.99. I also bought a bag of Sharkbite clamps ($5.79) and a bag of brass 90° elbows ($16.99). Fortunately, I have a hacksaw in my tool kit. I used the saw to cut off the brass PEX crimps, inserted the brass elbows, and crimped the Sharkbite clamps. Fortunately there was enough play in the existing pipes to make the connection. I spent $99.48 on the crimping tool, the clamps, and the brass elbows, but the camping trip was saved!! When I got home, I looked at what I could have saved if I had bought them in advance. I suggest you buy a crimping tool with clamps ($29.88) and some brass elbows ($7.65) from Amazon. (Please correct me if I have the wrong items listed!) I would have saved money if I had bought these items from Amazon in advance; more importantly I would have saved time. The job itself took five minutes, but the time spent driving and researching made it a three hour job. Also, if you don't have one, get a hacksaw for your tool kit. BTW, my brother in law, who is much more mechanically experienced than I am, was surprised that Oliver uses plastic elbows instead of brass ones.
2 points
-
The new battery tray including shipping cost $183.81.1 point
-
One note on boarding the dogs at the vet just down the road... they do require they have their shots ahead of time (including Kennel Cough). You can see their contact info here: http://greenviewvet.com/locations/main-location/ You can see their requirements here: http://greenviewvet.com/boarding-service I believe they require proof of shots. Most of the time you can call your vet and they will send that info to Greenview as needed. If you are planning on boarding a pet, please call Greenview in advance.1 point
-
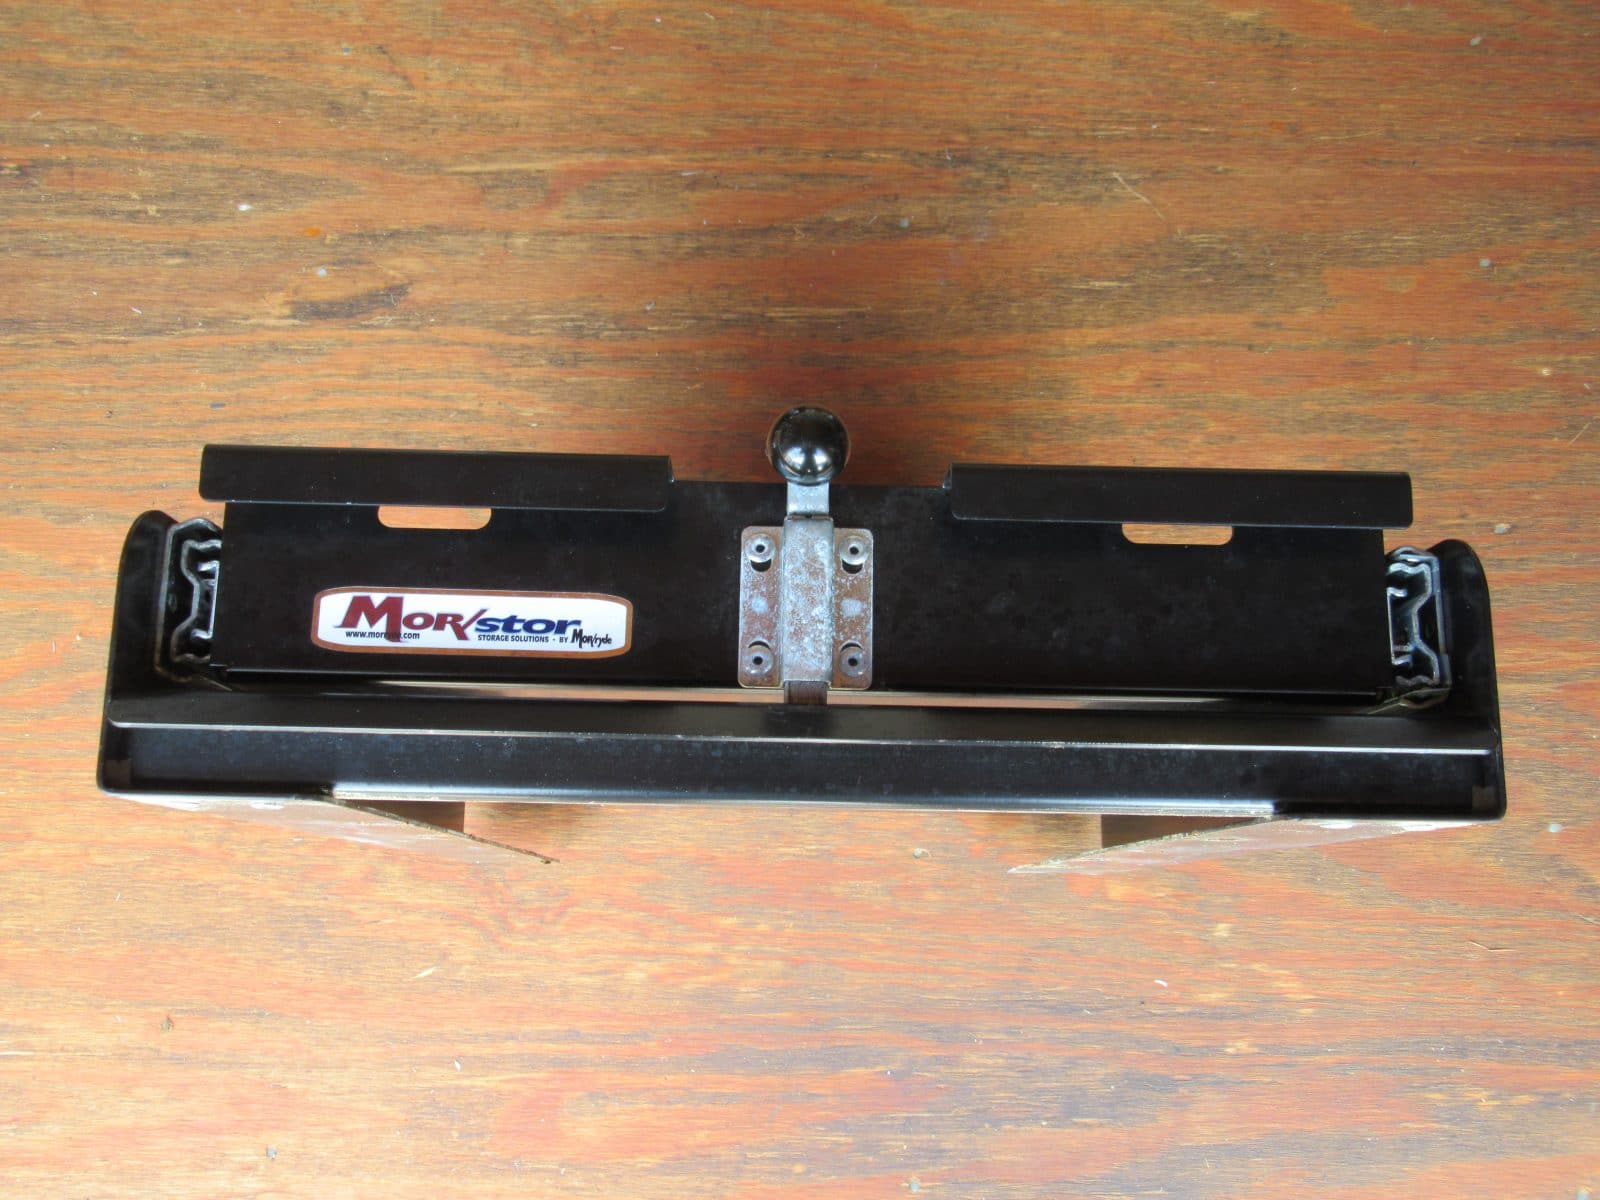
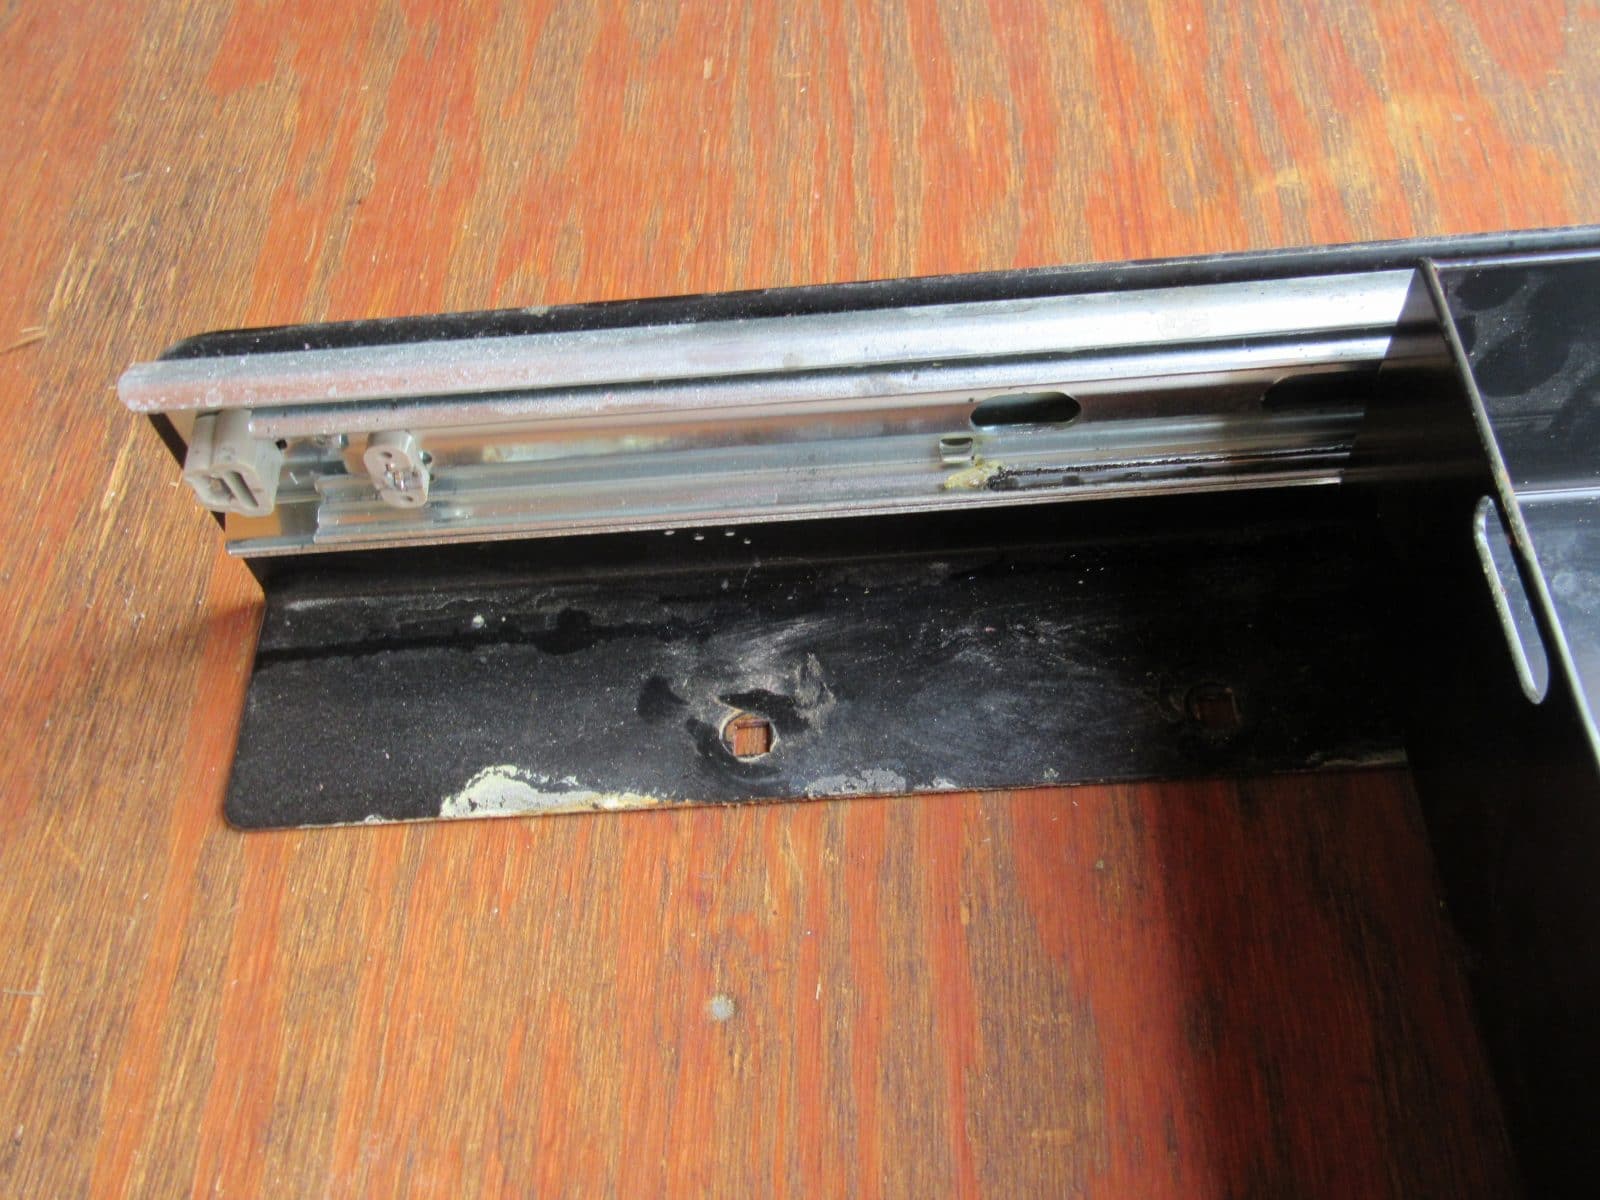
Yesterday I replaced the defective battery tray, after obtaining all new mounting hardware. The original battery tray was mounted with four 1 ½ inch x ¼ inch self drilling/tap screws which were stainless steel. And four ¾ inch x ¼ inch self drilling/tap screws which were not stainless steel. The replacement hardware was four 1 ¼ inch x ¼ 20 with flat washers and nuts with nylon locking. These can be reached from the inside of the trailer which allowed me to use washers and lock nuts. However on the four that can not be accessed from the inside of the trailer, I used #14 x ¾ inch screws with flat washers. All hardware is stainless steel. The failure occurred because of the sliding rails on the rear had plastic rail stops that just came apart. The new sliding rails have metal end stops; also the sliding rails have more rivets holding them to the battery tray. The new tray is a direct fit for the old tray but much better built. I have attached several pictures that you can see the sliding rail rear end stops on both the original battery tray and the replacement tray. Also I replaced the battery stiff wire with a much more flexible wire while I had the battery tray out of the trailer.
1 point
-
While I do not disagree with any of the above, here is a product that will help keep dirt and rain/snow out of the plug: At about $8.50 it is way expensive for what it is, but it does work. https://www.amazon.com/gp/product/B01AMON6HM/ref=oh_aui_detailpage_o05_s00?ie=UTF8&psc=1 I attached a fairly short length of thin elastic cord to mine and when I disconnect from the TV I cap the cord and then place the elastic cord around the front jack. Bill1 point


-
Recent Achievements
-


")


")


")
