Leaderboard


Popular Content
Showing content with the highest reputation on 11/12/2017 in all areas
-
Happy Veterans Day to all the vets out there. If you are an honorably discharched veteran, starting today you can shop at AAFES (PX/BX/Exchange) online. Just go to vetverify.org for information. The background story is at: https://www.defense.gov/News/News-Releases/News-Release-View/Article/1049503/department-of-defense-extends-online-military-exchange-shopping-privileges-to-v/ We do most of our online shopping at Amazon, but do some shopping at AAFES Online. More than half the profits from PX sales go back into programs for soldiers and airmen. Mike1 point
-
I would definitely be interested in a meet-up of Oliver owners. I will be having an article in the January Oliver Newsletter, entitled Lost Coast - Mattole River Campground where I ask if there is any interest of California/Oregon Oliver owners for a get together. To my mind, one of the objectives for a get together, after fellowship and friendship, would be the sharing of our respective knowledge about good places to camp. I am unfamiliar with Emma State Beach but would be open to the experience. My thinking was that a late spring or early summer event would be nice, provided that weather and other exigencies allow. This past year was difficult for winter and spring camping because of the heavy rains and then the triple digit summer followed by extensive fires are examples of what I mean about exigencies; my area (Mendocino and Sonoma counties) lost over 8,000 structures and nearly a hundred people. As you asked, I will think about possible locations, however my general thought would be to see who would be interested, where they are located and then see if a camp place could be found that is central to most for traveling. If we meet at Quartzite maybe more extensive planning could be accomplished. Mendofrank - Hull 101 frank@frankcamp.net1 point
-
John - I've had a black on with 4 tabs for over five years now (two of which have been on the Oliver) and no problems at all. However, I rarely take it off. Sorry, but I do not remember the brand - I think I got it at WalMark and if that was the case it is more than likely a Camco product. Bill1 point
-
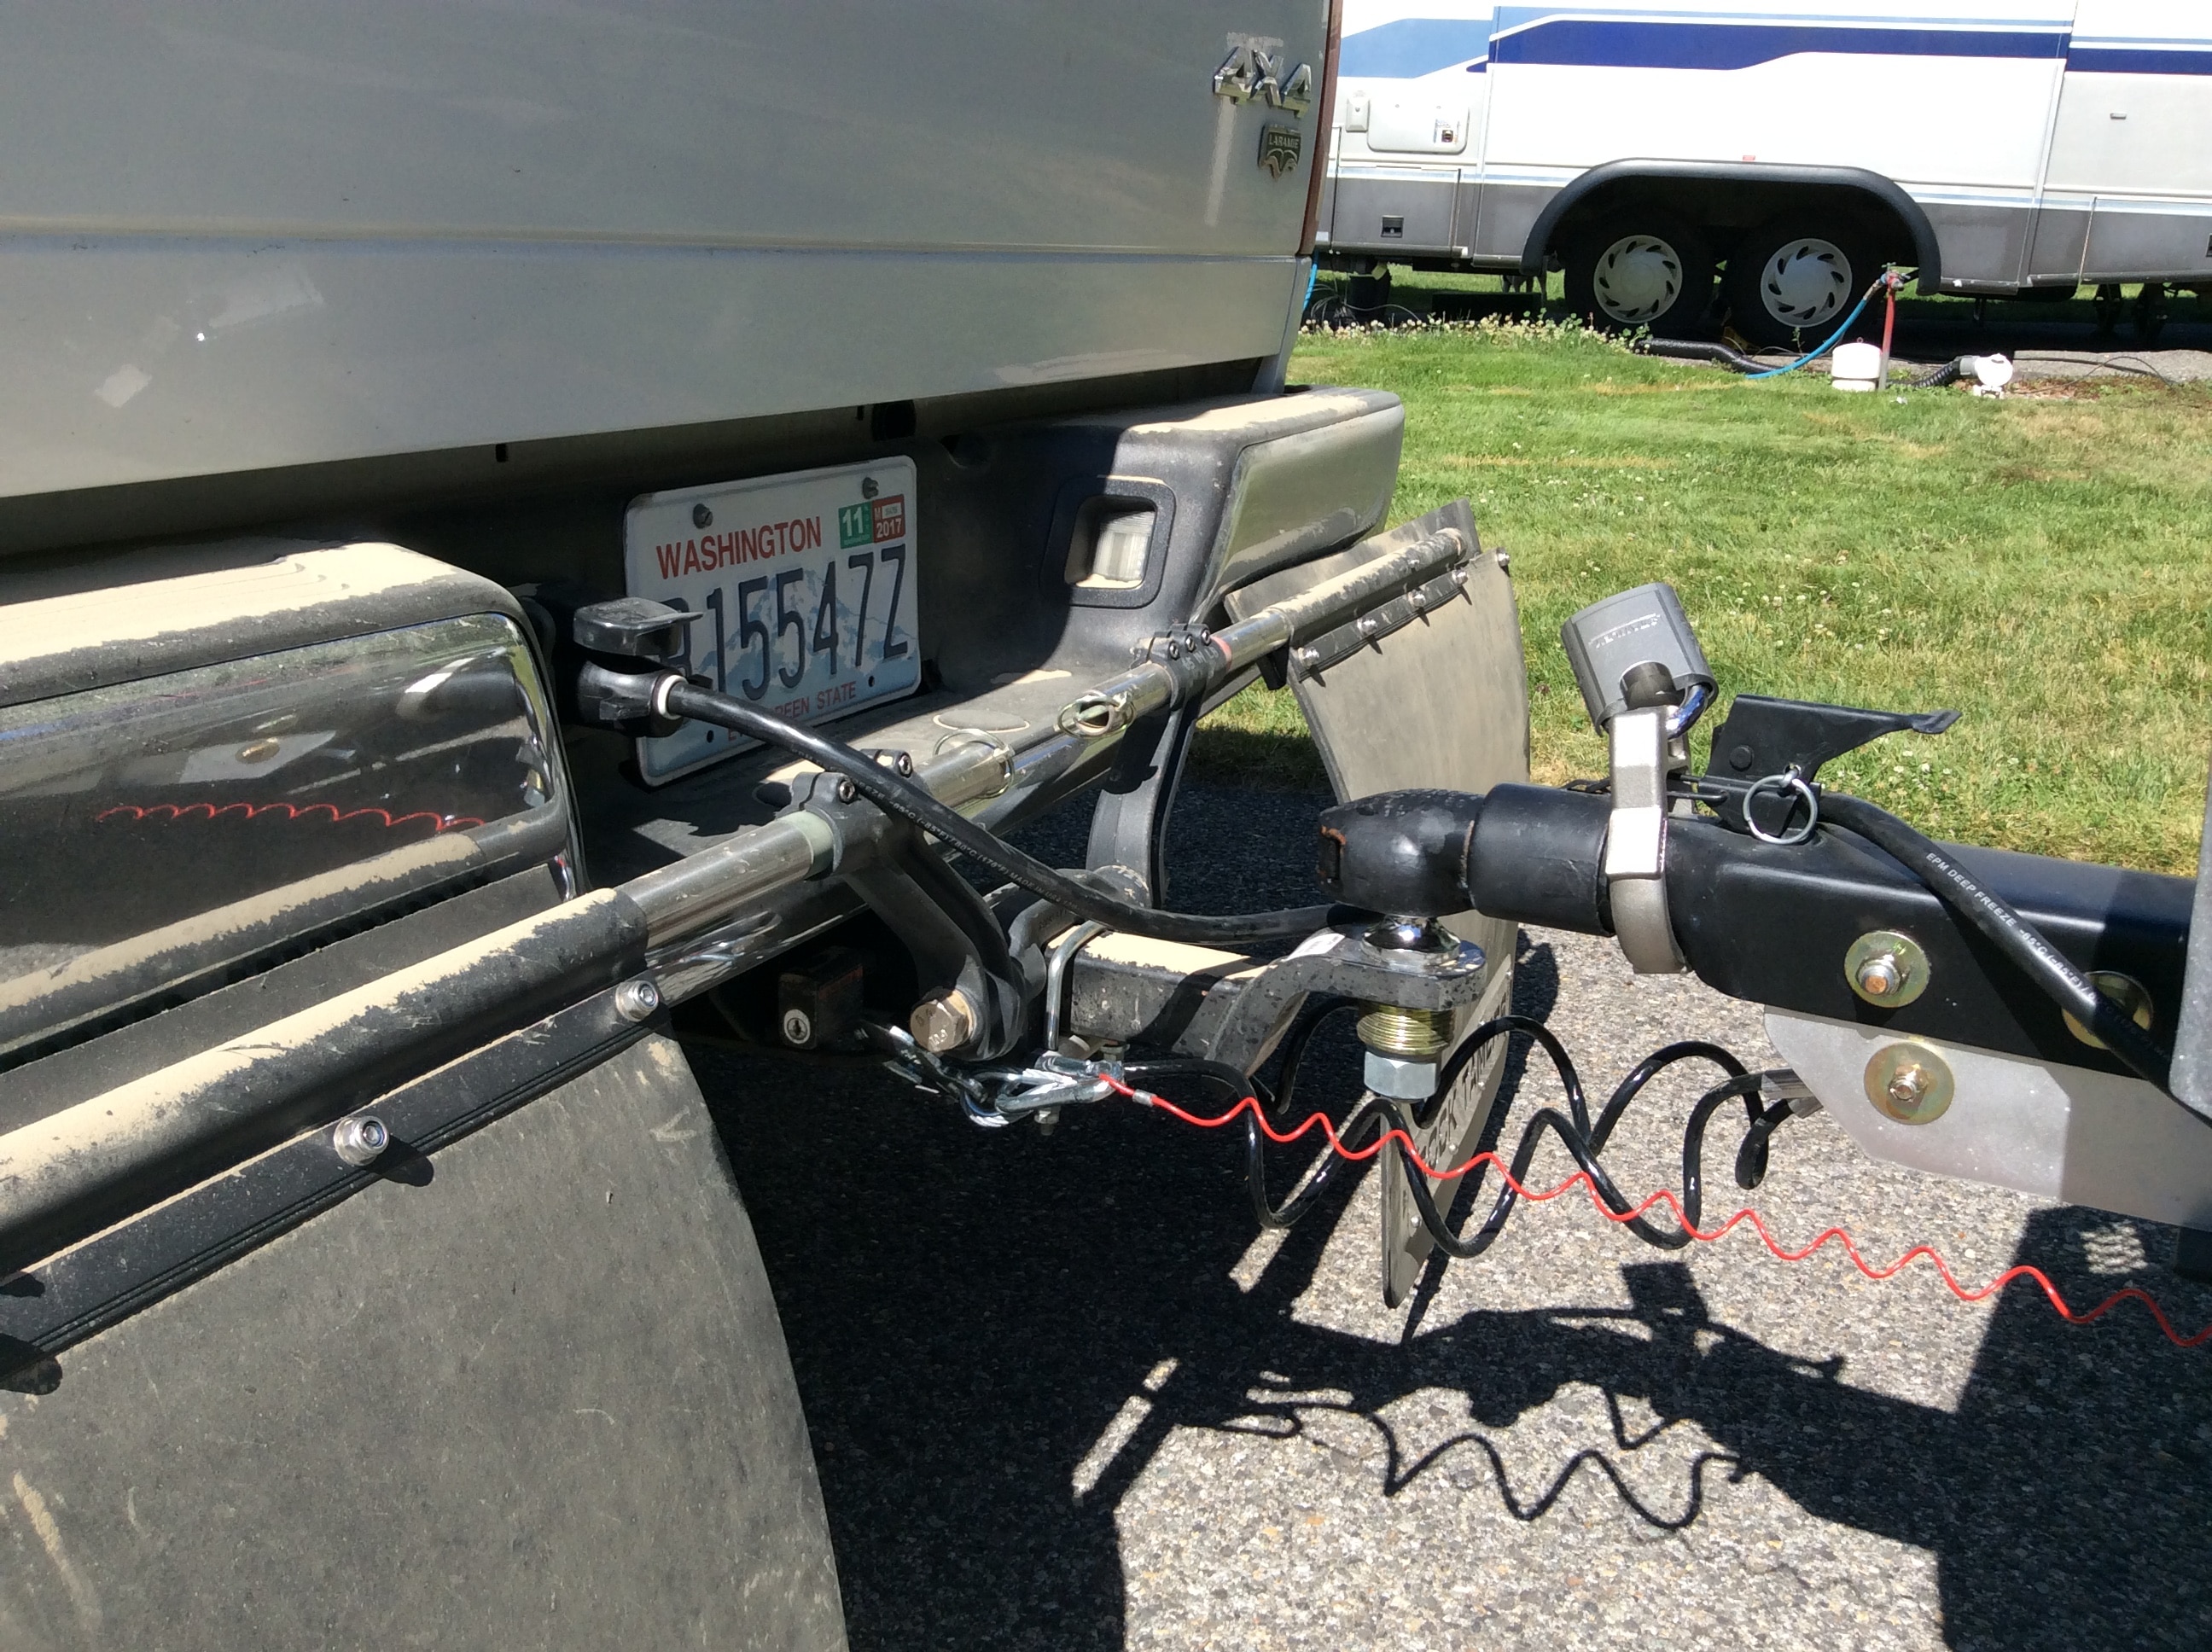
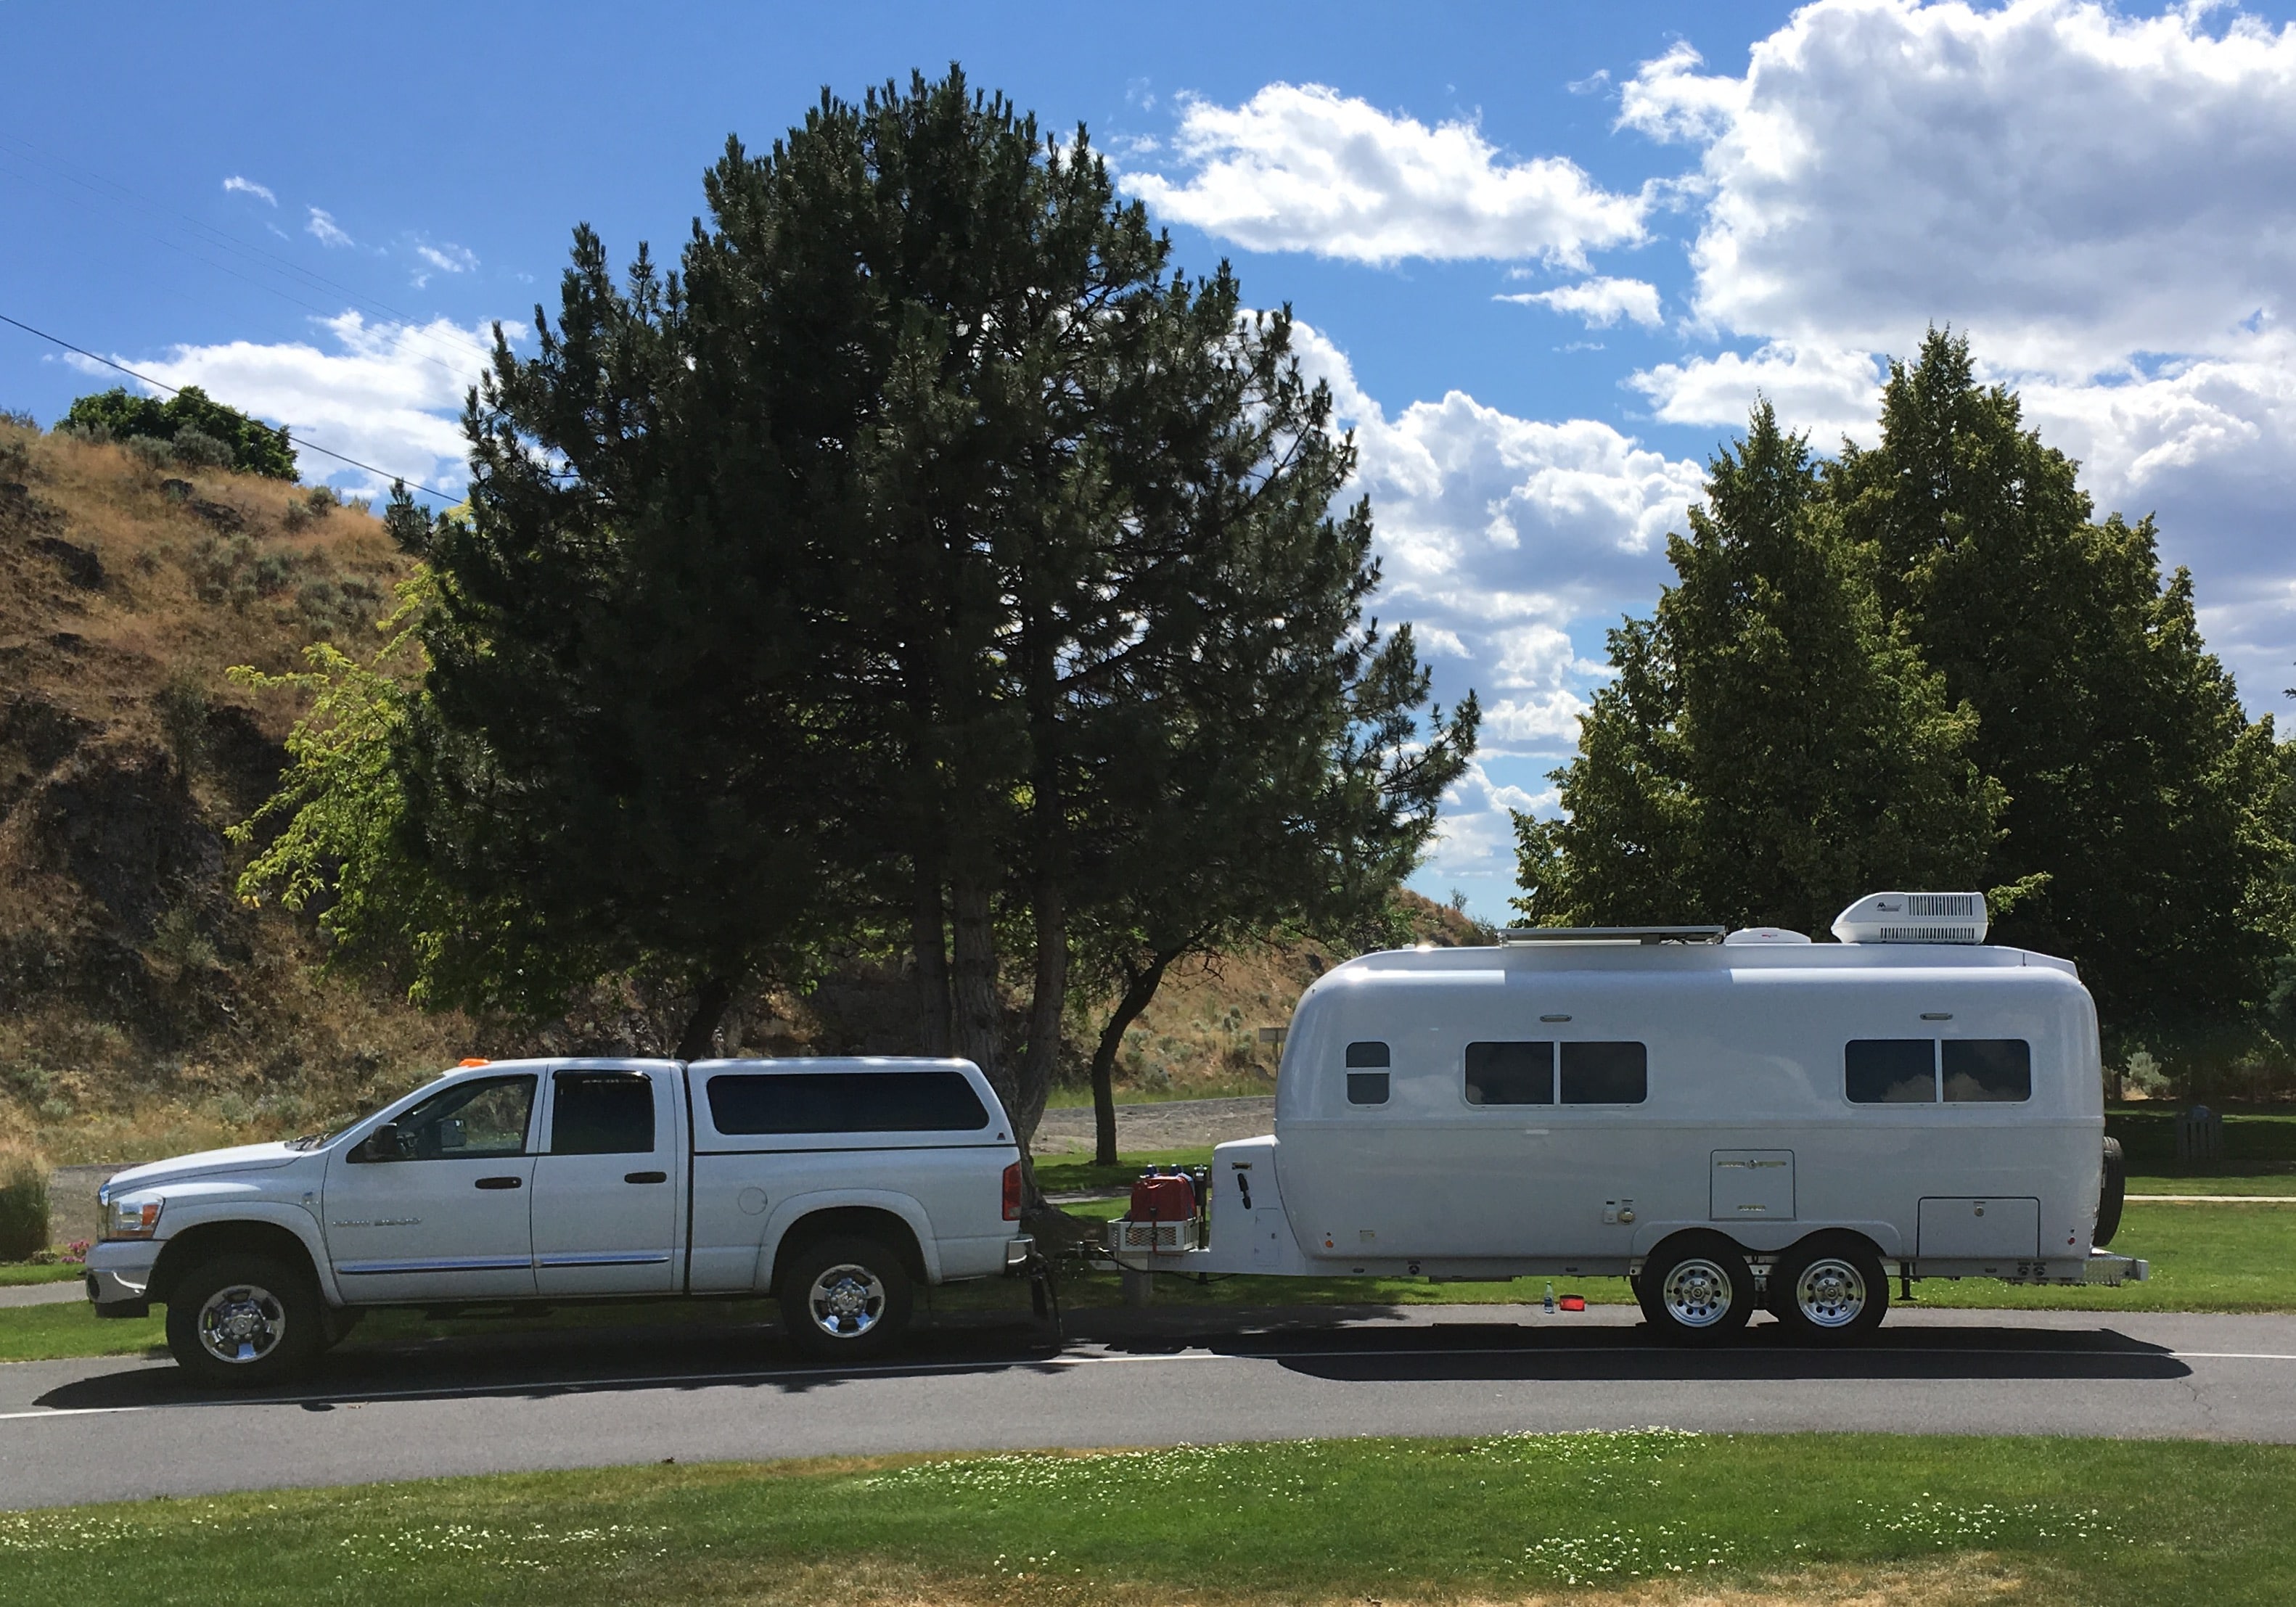
With the cargo basket, you may possibly have some interference if the trailer is at a severe angle to the truck, if it is straight, no problem. Your HD truck is tall enough to clear the Bulldog coupler. My Ram 3500 had many inches of clearance, my Land Cruiser 200, not so good. The latch on the tailgate would hit the top of the coupler. I added larger LT rated tires (33 inches, 2 inches larger) to the Cruiser, which raised the ball over an inch, which allowed me to adjust the height of my Anderson hitch down one hole. Land Cruiser: You do not need the Anderson hitch. A standard (dead weight) ball mount extends about six inches out from the receiver, you can order a longer one that measures nine inches if you feel you need more room. The longer mount does make it a little easier to maneuver while backing, the risk of bumper or tray damage due to colliding with the tray is reduced a little. Normally you want to keep the ball as close to the axle as possible, but with your stiff truck you will never feel any difference. Here is the Ram setup with a nine inch (extended) bar.... you can see how much room there is: If you don’t need the tray, don’t buy it, and you will have tons of clearance. I think the tray looks cool as heck, and I use it for lots of stuff, but not for a generator. That is a horrible place to locate an expensive piece of power equipment. IMHO. John Davies Spokane WA
 1 point
 -
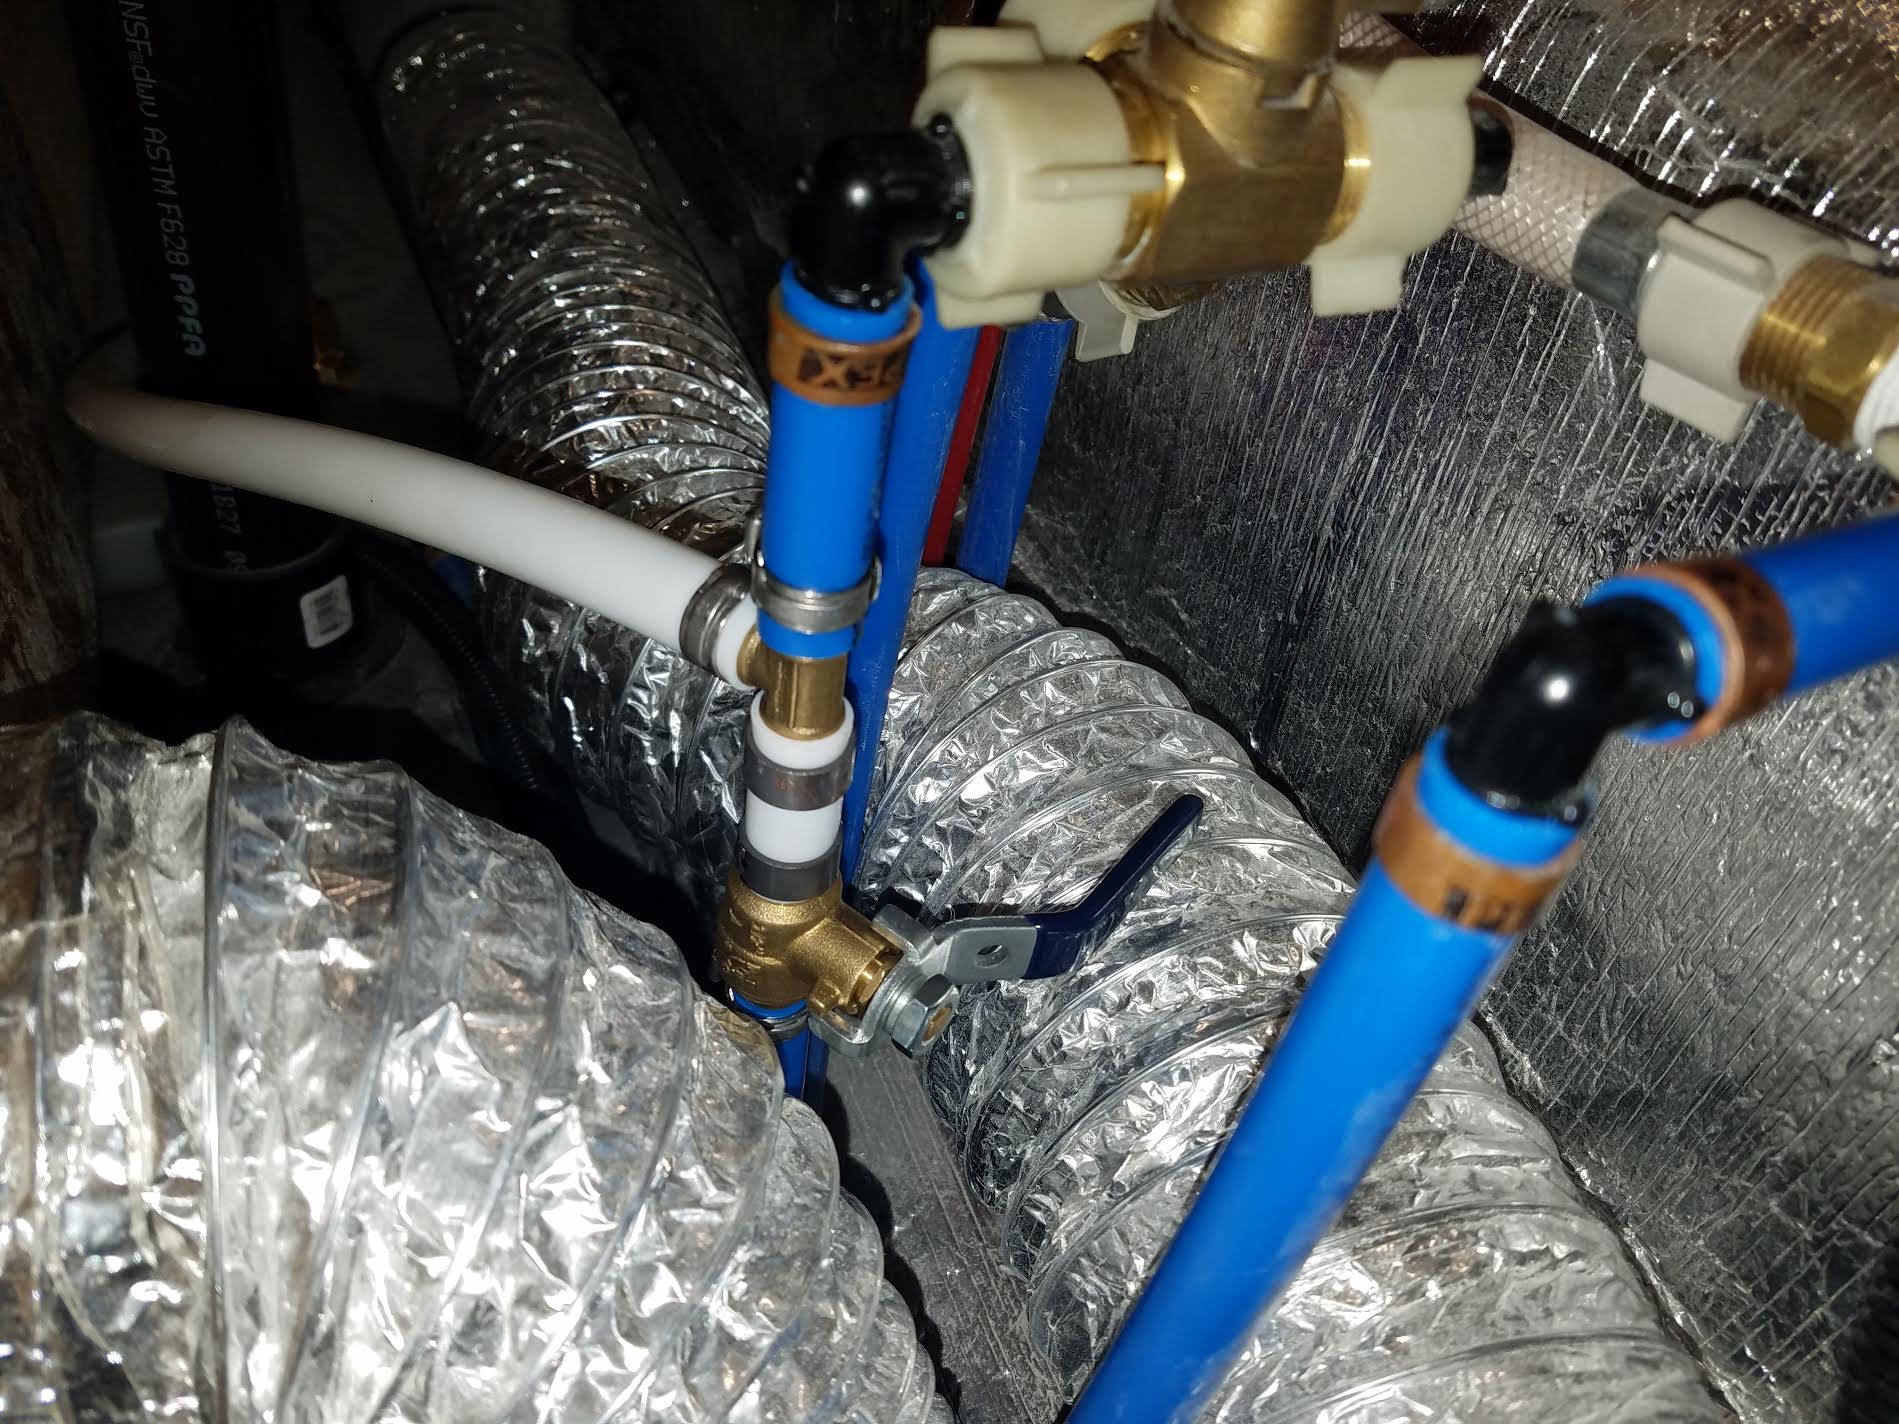
With all the talk lately about not being able to access all of the fresh water in the tank, I decided to make a new suction line and improve the situation. The stock line on mine will only draw water down to about 1 1/2" deep before it begins to suck air. In a 35 gallon tank that is only about 4" deep, this means about 1/3 of the water is not available, or about 11 or more gallons left in the tank. The stock pickup is on the side of the tank and cannot get all the water. So I made a top fitting that goes down and picks up the water at or below 1/4" from the bottom. When I started the installation I leveled the trailer and ran the water until it began to suck air. Mine did that at a reading of 25% on the gauge. If the front of the trailer is raised some, which I did not do, the reading would still be the same when the pump sucked air because the gauge reads right next to the pickup. You could get more water out of the tank with a raised tongue, but the gauge reading would be the same when it sucked air. After I installed the new dip tube, I continued to draw water and it began to suck some air at 6%. So, mine went from 25% (approx. 8 gallons left) down to 6% (approx 2 gallons left) when it began to get some air. Others have reported as much as 38% remaining which would be over 12 gallons. At a 6% reading I began getting aerated water, but a steady flow. Finally, the gauge went to 0% left. At that point is was about 1/2 water and 1/2 air at the faucet, but still flowing, or spitting. But even with a zero on the gauge it continued to pump out another gallon or so before I shut it off. All of this with cold only, not water drawn from the water heater. So, the volume from 6% to 0% was totally useable, probably not for a shower, but certainly for drinking. This is a prototype that works well, but it might still improve a bit with the next one. The pickup touches the bottom of the tank, but draws radially from below 1/4". It adjusts to any small differences in various tanks. It can be pulled out and cleaned easily if debris ever clogs it. All plumbing connections, where the new line ties in, are easily accessible and the existing tank fittings are not touched. The stock tank drain is retained. The area of the tank where the new fitting is installed is easily reached and the tools to do it all fit in the available space. After clearing all of this with Oliver to make sure there is no conflict with forum rules or warrantee issues with them, I can send anyone that wants to do this, a kit with the following: the pre-made dip tube fitting, a Polyethylene tank fitting, the special spin weld fitting driver, a 1 1/2" hole saw (if needed), the pinch ring tool and a PEX cutter. I'll also provide step by step directions for anyone who is interested. You'll have to have a powerful router with a 1/2" collet and a drill to drive the hole saw. Or, I can help you with a set of directions here on-line and you can assemble the parts yourself. The parts required are: (1) dip tube assembly, (1) 3/4" spin weld fitting, (6) 1/2" PEX pinch rings, 24" 1/2" PEX, (1) 1/2" PEX ball valve, (1) 1/2" PEX tee, a small container of Rectorseal 5. The only real tricky part is the spin weld. Besides the special procedure for spin welding itself, you have to make a new hole in the tank and vacuum out the chips. Here are some pictures:
1 point
-
Here's the installation videos Part 1 - Part 2 -1 point
-
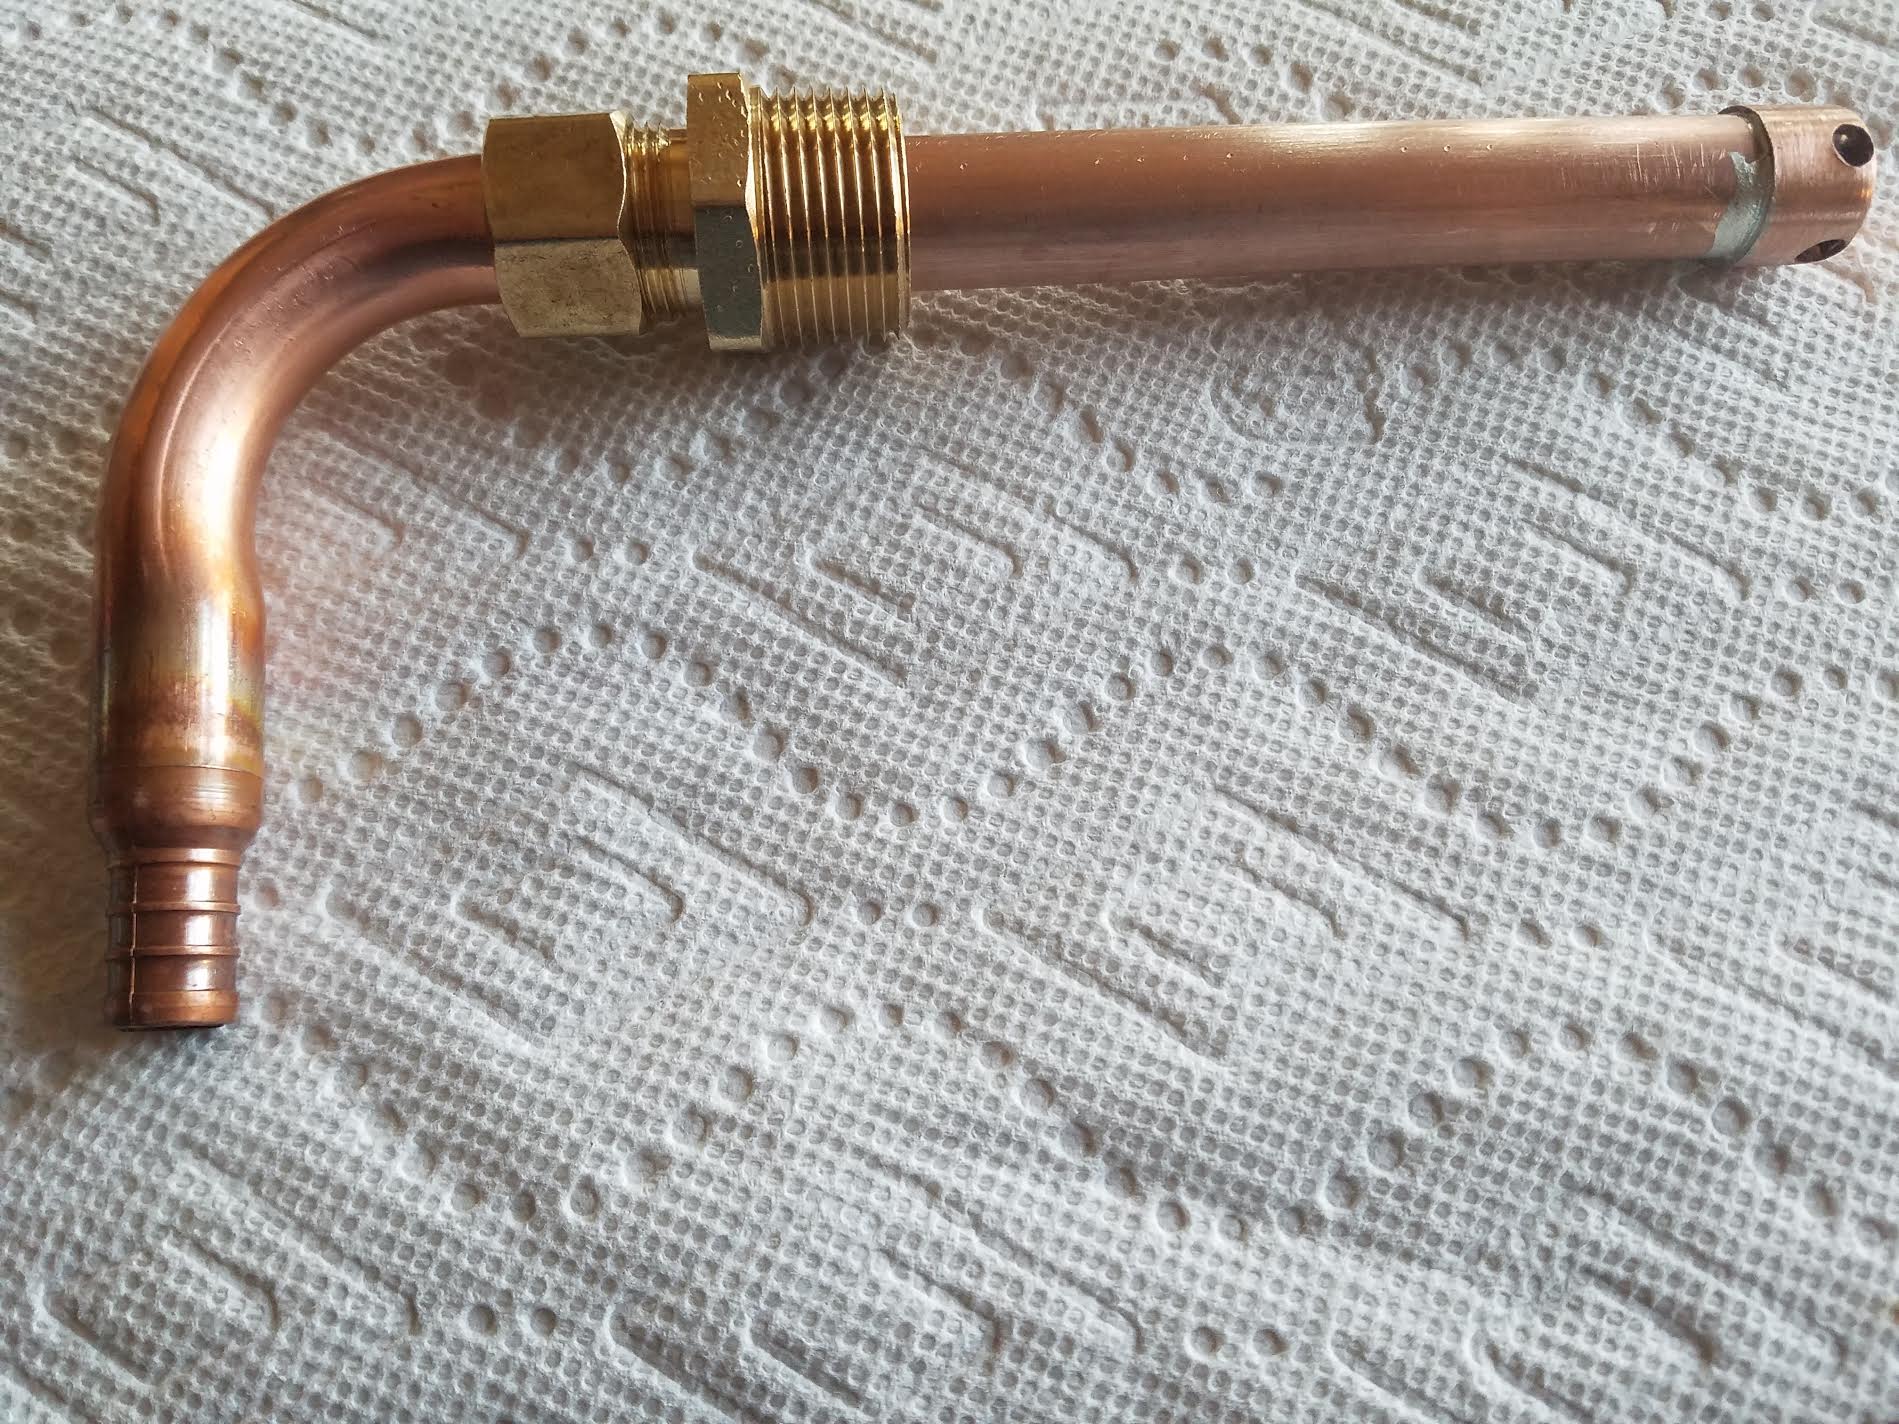
Overland, The dip tube that is in the picture is designed to go all the way to the bottom of the tank and sit against the bottom. It is designed with a bit of extra length to accommodate tanks that may be slightly different from the normal overall depth by dropping all the way to the bottom in any of them. If you look closely, you'll see the end is capped. This particular style sweat cap was picked because it is flat on the end and has rounded smooth corners. In other words, it is very kind and won't dig into the bottom of the tank. All of the water enters around the perimeter of the cap, not the end of the pipe. The cross-drilled pickup holes were drilled tangent to the inside surface of the cap. If you add the diameter of the pickup holes to the thickness of the cap wall, it comes to just under 1/4". The top of the holes are 1/4" or less, from the inside surface of the tank. This arrangement will pick up water down to about 1/4" deep and do it consistantly in any tank it is installed in. As mentioned earlier, mine began to get some air at 6% tank level, but ran until the gauge read 0%. At that point it was sputtering, but still drawing enough water to drink, but not to shower. There are four holes. The surface area of all four holes added together equals about 1.7 times the surface area of the inside of a PEX fitting. Allowing for the vena contracta of the flow through those four holes, the restriction is still less than each PEX fitting used in the rest of the system. I also chose to install brass fittings and a brass PEX ball valve. These have slightly larger holes through them than the factory plastic fittings. So, the pickup holes have no affect on the flow rate compared to the stock pickup. But if the holes were bigger, we could not get as much water out of the tank. This was the only way I could think of that had a consistent pickup depth, could be installed in any tank and always end up with that same depth (with no measuring or possible installation error). It is totally accessible and serviceable, even with the water tank full. It does not affect the original pickup fitting, or the original tank drain piping. And it ties into the existing piping at locations that are accessible, which makes the work much easier than it might have been. If debris enters the tank at some point and clogs one of the pickup holes, it will still work well. If more than one hole gets clogged and a restriction is noticed, the dip tube assembly can easily be removed, without draining the tank, cleaned and re-installed. You cannot do this with the stock pickup tube as originally built. BTW, any restriction that reduced the flow would put no extra load on the pump. They are designed to run fine with a wide range of suction head pressures and they are just diaphragm pumps, which are very tolerant of flow restrictions. These pumps can run dry or at full pressure constantly without damage. They can draw from full or nearly empty tanks without damage. The first thing you might notice with a clog is a reduced flow at the faucet with the pump running. This is the same thing you might notice with a clogged aerator in the faucet, it's the same effect as when the faucet is only partially open. Until my system started drawing air at about 6%, I could not detect a difference in the pump sound or the flow rate compared to before the modification. Then it pumped the air and the water to varying ratios until the tank was pretty much empty. This kind of tank, with wide and shallow dimensions, requires a non standard kind of pickup. It won't get every last drop, but I think it's the best we can do. Having tanks of this shape is a real advantage because they take up so little room, are protected from freezing and are not outside where they could get damaged. Fortunately, the corner of the tank and its piping are right there below the cover under the bed. In the past, I wanted to do some work on the water tank in my Fleetwood, but found it was nearly impossible. This is relatively easy and I was inside instead of underneath. The biggest problem here is making the emotional leap of deciding you are going to make a hole in the tank and then spin welding on a fitting. Once that hurdle is over it is just a matter of doing some PEX and fittings. I think the future ones will have a larger tank fitting bushed down to the 3/4" dip tube assembly. This will help with screwing the fittings together and give a larger hole to vacuum out the tank if needed.1 point


-
Recent Achievements
-


")


")


")
