Leaderboard


Popular Content
Showing content with the highest reputation on 02/20/2026 in Posts
-
Hi. Go to Google and search for "Oliver trailers lithium upgrade." Several relevant threads pop up, including this one: Lead Acid to Lithium - Ollie Modifications - Oliver Owner Forums https://share.google/oayGb76nRTfLxwQnx Lots of good information in those threads that can help you.5 points
-
If for any reason you are not satisfied with the color match, I'd guess that you could lightly sand out some of the Marine-Tek and coat over it with the appropriate color gelcoat. Note - Oliver can tell you what type and color gelcoat is on your Ollie.4 points
-
I've just sent Mike Sharpe an email asking for this information. Hopefully he will have a chance to reply soon. Bill3 points
-
Trailerjohngo - Welcome to the Forum! There is simply a ton of "stuff" here on the Forum to include the Oliver University with videos concerning many of the aspects of the Oliver trailers (as Steph and Dud B point out above). With regards to your Elite II visit - be sure to take a camera and a notebook. If the current owner doesn't know an answer to any of your questions, either an Oliver Salesperson can answer it or come on back to the Forum and give us a shot at answering it. Many of the questions you might have are already answered here but you never know until you ask. Enjoy your visit and we all hope that you too will soon become "family". Bill3 points
-
I too had a battery box separation and repaired it 3 days ago. Unfortunately I badly damaged the door gasket. So far I haven’t been able to get a call back from anyone in Oliver parts. Does anyone have a source or make & model for the battery door gasket material?3 points
-
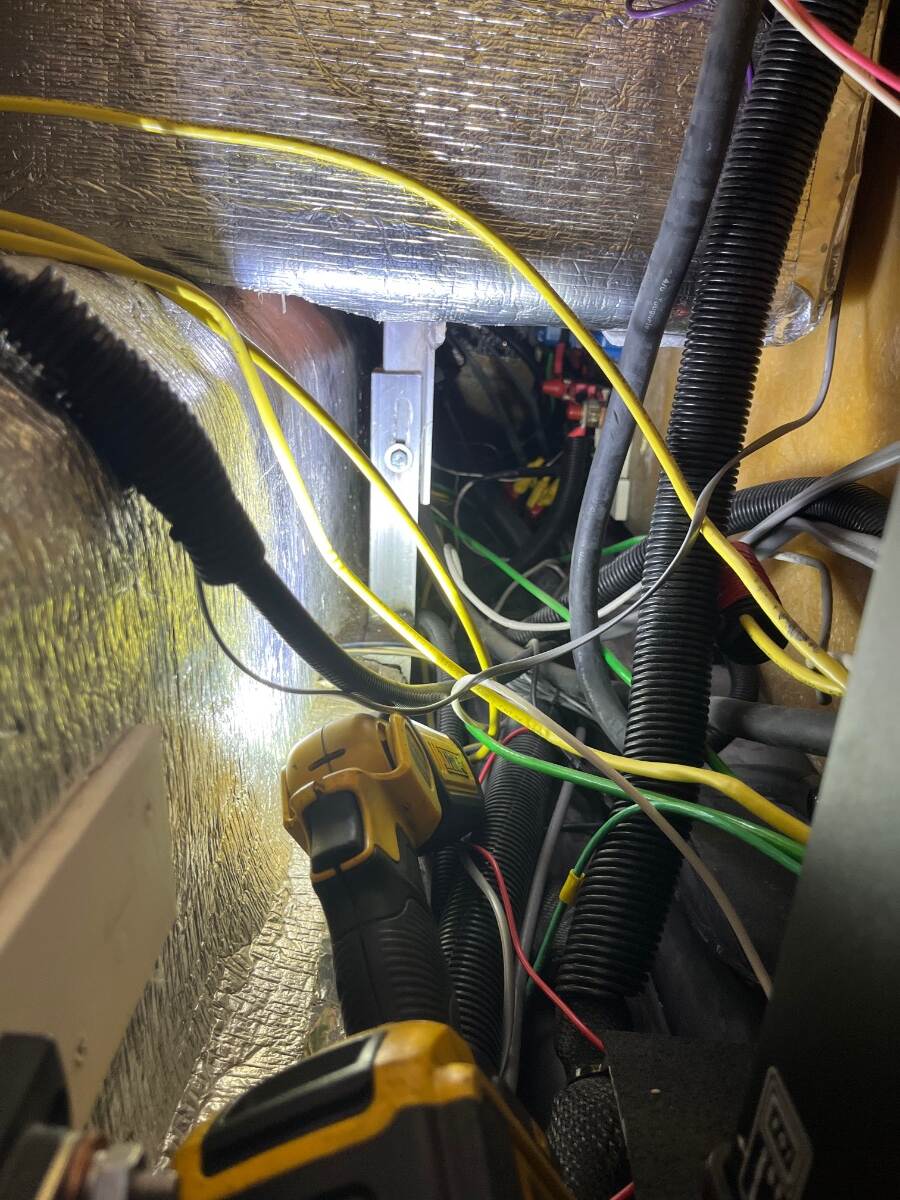
This thread show an excellent inverter/battery upgrade installed by a local service company. If you are going to DIY, I've documented installation posts that show these installations step-by-step. You asked, "I assume the Xantax 2kw was the inverter or?" Yes, in my case you can see that on page 1. No more Xantrex 2KW inverter (only) with the small PD charger in the power panel (kept it there for back-up). No more lead acid... Now the Victron MP2 and 900 Ah (3x 300) Epoch LiFePO4. You will find mine is a simpler installation. Did not spend on Lynx products and I did not want a cabin screen (we seek battery info 98% of the time outdoors, while towing or from the living room of our home). IMO, Bluetooth apps are all you need, but many like having screens. When doing so, I also removed all fuses and breakers from under the streetside bed so they can be conveniently accessed under the rear dinette seal. The best addition that several Oliver owners have added is the DC-to-DC Charger! Every time we tow we add at least 40 Ah for every hour towing. This is about 4x what we get from 320W in rooftop solar. See this for the complete installation. => Hope this helps! 😎2 points
-
Wow, that turned out great. That is the product I was considering using. Seems very popular with boat owners. Seems a lot simpler than mixing resin and catalyst. I was wondering how well it would match. I’ll give it a shot. Thanks2 points
-
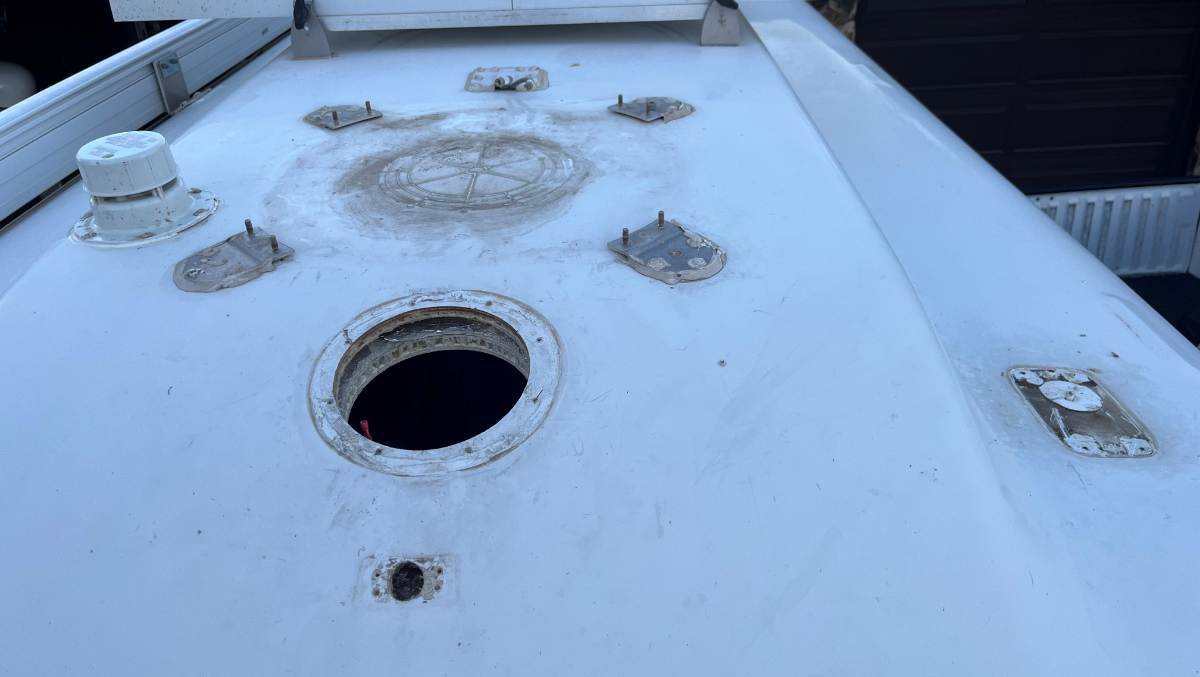
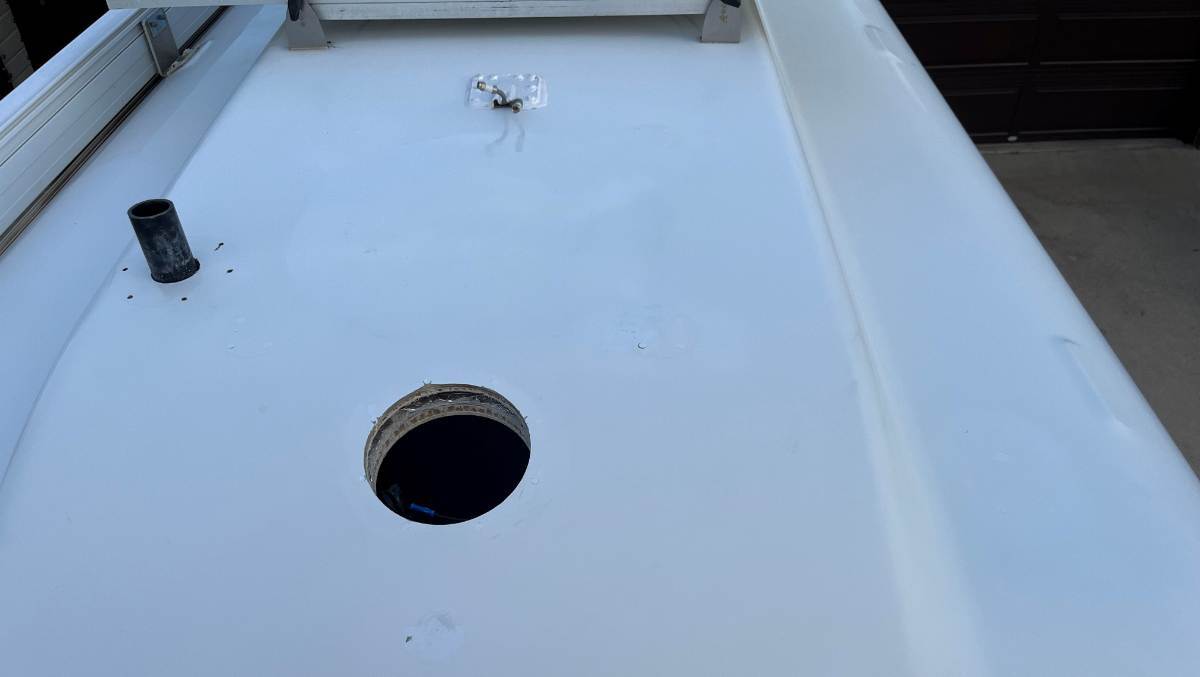
Hello @Mroth, this is not truly my area of expertise, but given how many holes are drilled in OTT installation processes, and that I have removed many of the old-tech products on our Oliver, I've filled way too many holes! I've used this epoxy based product and the color match is good. It's just a touch whiter than our older hull and I've read somewhere that the newer hulls are a tone brighter. I would say this product may work well for your purpose in the shower. It's simple and inexpensive. https://www.amazon.com/Marine-Tex-RM305K-White-oz/dp/B0014419V0/ I have also plugged the holes made for the TV mount, the drain pull handle in the bathroom, the door hook outside, both cameras and everything in these pics (see before and after).
 2 points
 -
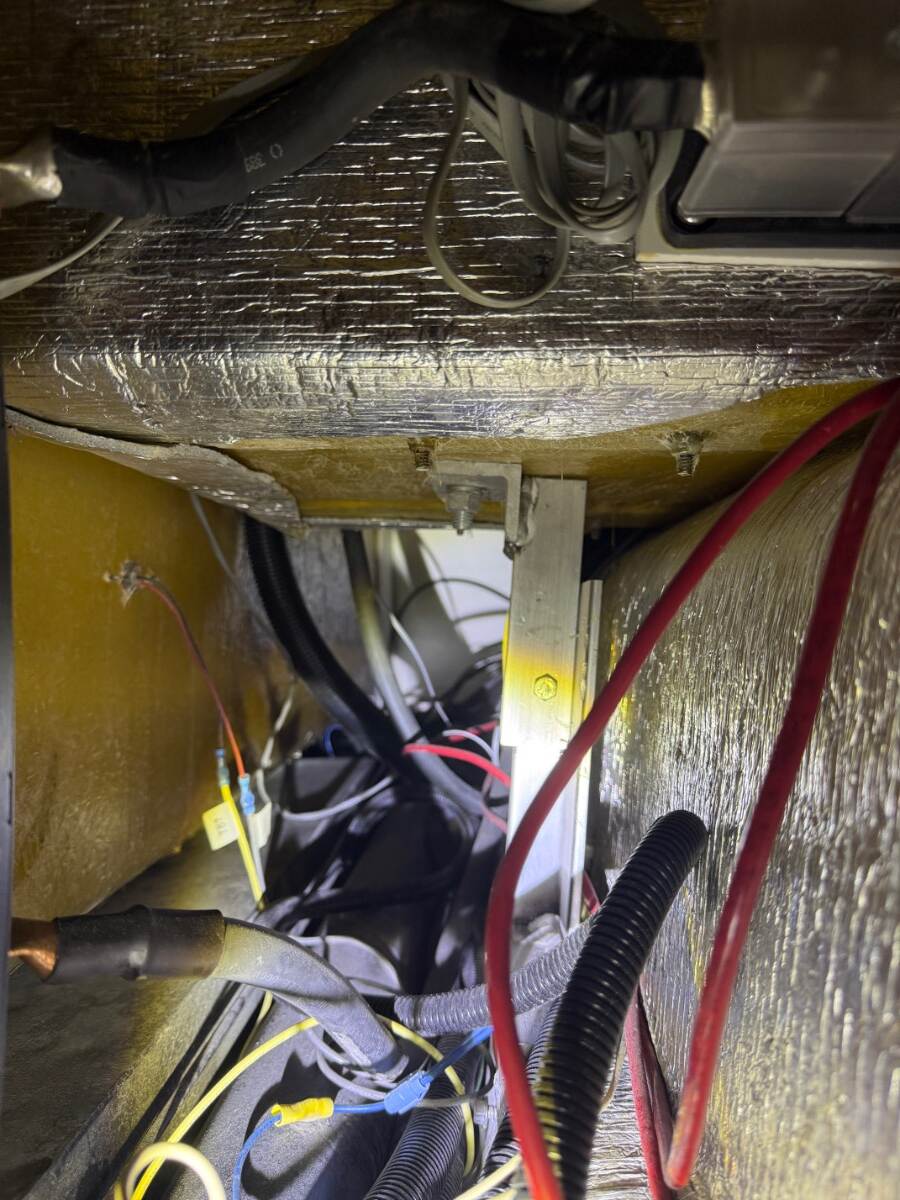
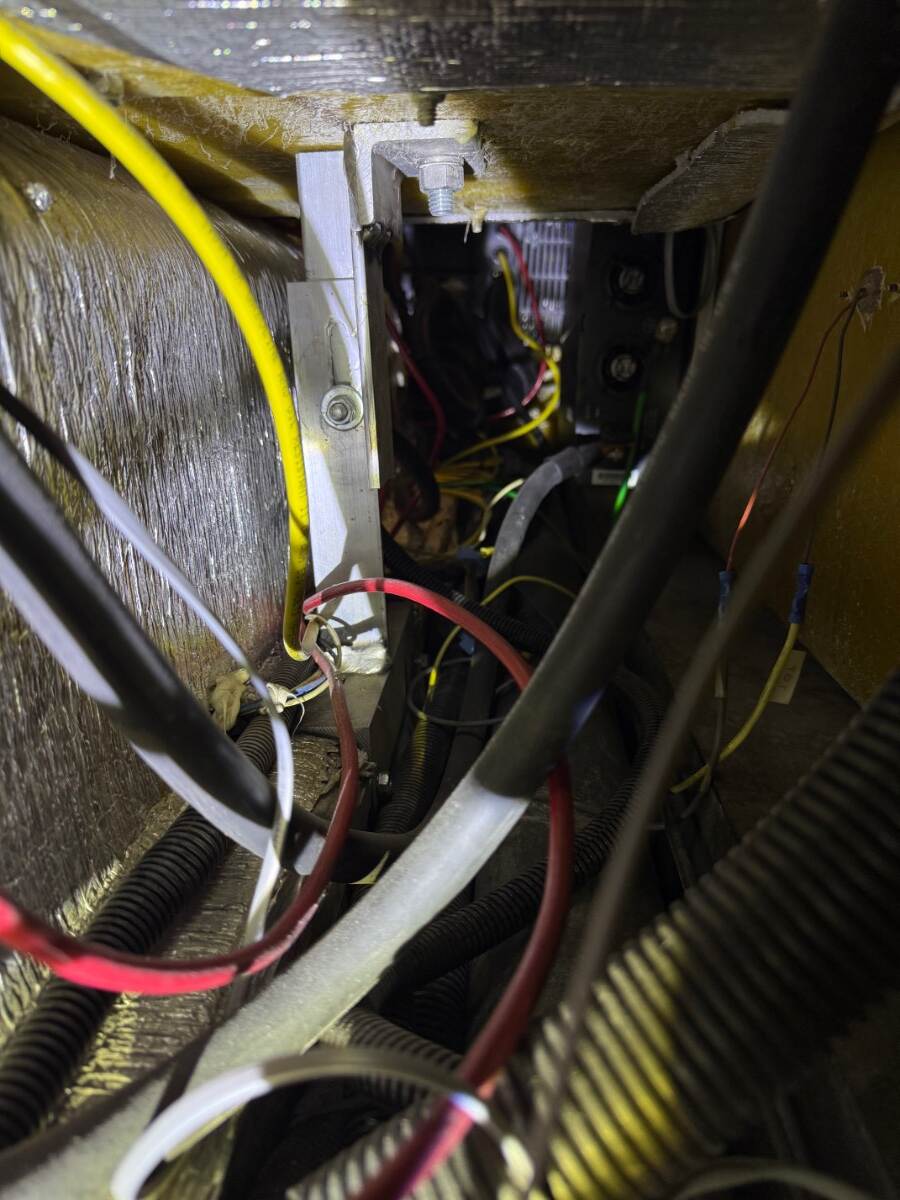
We only recently upgraded our springs and we’ve been at 50psi in our tires for many years. I think the heavy AGMs and many miles is at the root of this issue. There are a number of rivets all around the box that were all popped/damaged/pulled out. It doesn’t seem that that could happen all at once, but probably happened over time and miles. Our lithium batteries, installed 4 years ago, are 1/3 to 1/4 the weight of the AGMs. The Oliver response to my trouble ticket was to check and send pictures of the brace inside the trailer. I did and the response was that I could probably use a good adhesive to repair it since the brace holding up the box looked good. I didn’t like that answer so I asked to be sent over to service for some advice. Mike S in service said they use rivets to repair and also inspect the support bracket. I’m debating whether to try this myself or just make a trip to TN. Unlike Galway Girl, my bracket only has one bolt and it is in an adjustable slot. Other side: It’s interesting that the box is leaning out from the trailer and the bolt is at the bottom of the slot. When I pull the battery tray out, the box moves out more but every so slightly, less than 1/16”. I would think that the sag would be the other way around, leaning into the trailer since the weight is over the support more than 99% of the time.
2 points
-
I just received a call back from Oliver parts so I just ordered from them what they use. Someone on here asked what type of adhesive Oliver uses. I’ll know for sure after I receive the replacement part but looking at what I removed, it appears the adhesive was probably already on the gasket.1 point
-
@Trailerjohngo Shoot me a private message and I will be more than happy to discuss with you details of my install via phone call or PM. As you will see from my first post, I opted to have a complete Victron system installed professionally by an excellent company in White House, Tenn. My main reasons for a professional install is all components and install are warrantied by the company doing the work as long as I own my Oliver. The warranty also conveys to the next owner should we ever sell. My system allows for the company to remote in should I have any issues as long as we have a WiFi signal. We have a SL mini so that’s not an concern. I am not nor claim to be a DYI guy when it comes to this level of electrical work. I also wanted to be able show that Victron system was installed by experts should we ever sell. I opted to have the Victron DC to DC charger installed as well which eliminates having to carry a generator. Shoot me a PM if you I can help with additional questions! And welcome to the fourm!!1 point
-
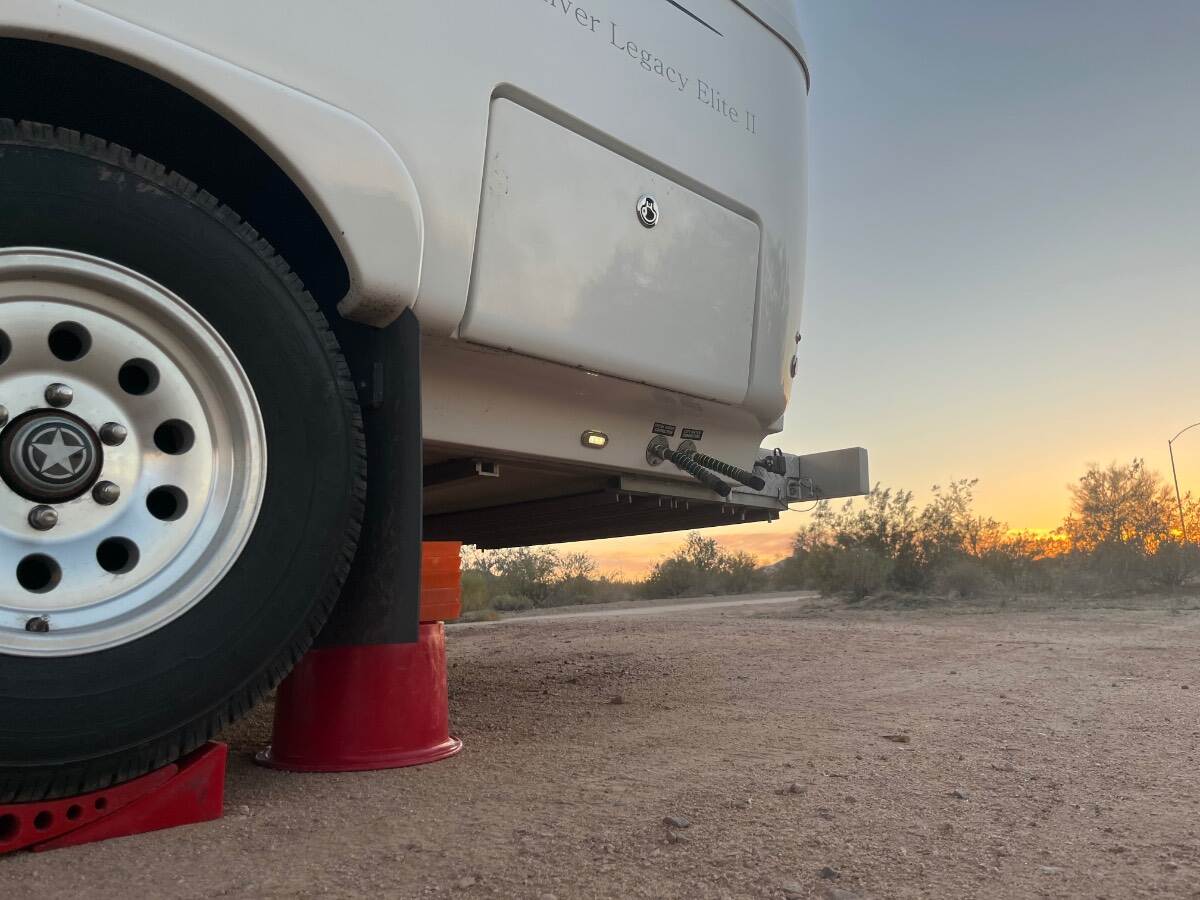
If it was me, I'd look in the aftermarket! Took me a quick search to find this product. I assumed a 1" diameter but did not measure ours. This or something like it would likely work fine: https://www.amazon.com/dp/B0D3PKNY47/?_encoding=UTF8&pd_rd_i=B0D3PKNY47&th=1 CAUTION: You should determine cause for your separation. Check your support beam below the box. View it from both sides, streetside bed (see my picture above) AND look from under the rear dinette seat. OTT forgot a weld on one of my jack brackets. They also forgot to finish this support beam install! Hard to believe, but true. I've compared ours with some of Oliver friends. The others have two bolts which is mandatory! I have to get in there again, drill and add a second bolt! With batteries out, most of the weight off the battery tray, from underneath see if there is movement of the support beam. I plan to remove my batteries AGAIN. Then get a bottle jack under there to see if the support can be raised just a little. The fact that this single bolt is at the bottom of the groove shows it's at the lowest setting. Likely the beam/tray should be raised some for proper support. Then I'll tighten the single bolt installed, drill a second hole through the top of the slot to add a 2nd bolt, then torque down both. Thank goodness we have no door separation, but those who have should investigate the support beams below. Some have reported missing nuts, or nuts falling off the bolts. (How does a Nylok nut fall off a bolt? It doesn't. It was likely laid there never threaded on. Go figure.)1 point
-
Hi Trailerjohngo, welcome to the forum. Once you have a chance to look at this trailer let us know the model year and/or Hull number. There have been manufacturing differences over the years and it always is helpful to know the age of the trailer we’re talking about. Good luck! Mike1 point
-
I was thinking that same thought.1 point
-
That would be a great part number to keep in my parts list. I'd also be interested in this answer if you find out @carnivore. My seals will be showing age more and more now that they're 10 years old.1 point
-
Hate to admit this here on the forum.... but..... Me as well. I travel solo a LOT and the number of wasted trips back and forth does get a bit old. As in older than this RoF! GJ1 point
-
Sounds like it does more than my bubble level! Maybe it’s time I bite the bullet and upgrade.1 point
-
Well, thanks to my buddy Steve, we had a good time putting on the new springs at a great location. He's paying me back for helping him put his springs on. Based off what Lew at Alcan said, this is around 200 Oliver's receiving the springs. Pretty good. Once the weather clears I'll do the first 50 mile ride, come back, and retorque the U-Bolt nuts again to 90 pounds. Oh, and between two of you (us), do not lose your 7/8 inch deep impact socket, and do not forget to pick one up before starting the job. LOL Or, driving to the store to get one will delay you. LOL Helpful tools and hints: The new Ryobi impact drill, grease gun, and 4x4 hydraulic jack were all amazing - made things easy. Best to also have two small bottle jacks, 2x" & 4x" wood for cribbing. Not to mention PB Blaster, or equivalent, for the old U-bolts nuts, and small wire brush to clean off those old U-bolt threads before attempting to remove the nuts. One nut got bound up and I had to use old muscles and extra leverage to get the nut off. (Fun times). LOL
1 point
-
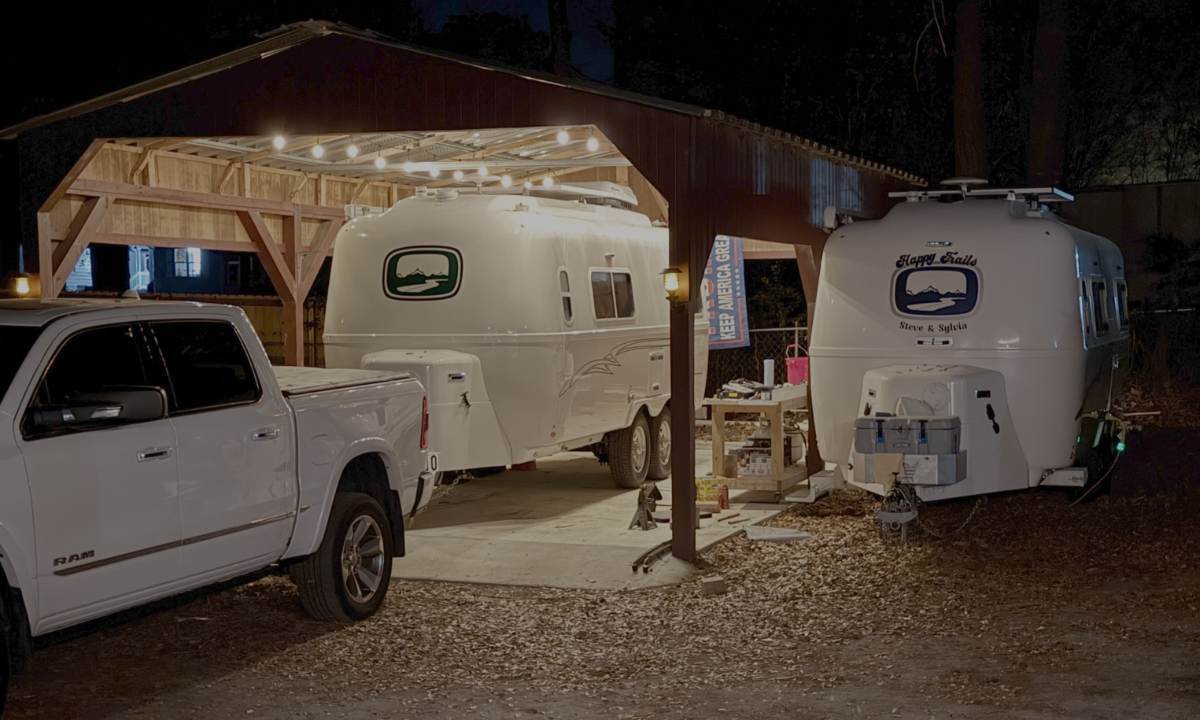
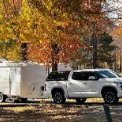
One week on the road. Besides 700+ miles so far, we’ve run 30+ miles on washboard dirt, and through some muddy washes too! No dirt on the rear lowers and no splatters front of Ollie due to the wider TV mud flaps! 😎
1 point
-
Sorry this happened to you Mike! Maybe you could source a local tech if you don’t want to get into this yourself. At least you’re home for a while. Wish I had looked further into this last month when I added a 3rd battery! I can be so dumb, took this pic at that time. The bolt and nut where fine but question is, did the mount sag, should the bolt be tightened higher up in the slot? The main bolt, coming down from the bay was tight which I removed and replaced with a 1/2” eye bolt to hold battery straps and cable lock. It felt firm as I yanked on the battery straps several times. All our rivets look good after we towed 3 hours down the mountain yesterday with the new setup, battery straps were still tight. Two years ago we had 4 LA batteries filling the 30 LB tray. We must be 100 LBS lighter now, no tray and 3 li batteries! Heading back home for the weekend and I’ll have to pull the streetside bed and see if that mount should be raised. Bummer is to do it right I should remove the batteries AGAIN, to get the weight off the shelf to be able to see any movement. I’ll add a second bolt too, seen in other installations. There should always be two bolts and OTT should learn to have a QC specialist check WIP after EVERY installation on the factory floor! 😎
1 point
-
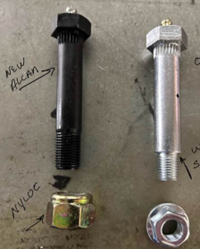
@Geronimo John I have to agree with you. about using the Step wet bolts. When I was installing the Alcan springs in the Oli. I used the wet bolts from Alcan and found when Torqued down to the specs, I could not get grease through the sides on the Bushing. I finally measured the step bolts and the measured the springs and carriers. I found that the should bolt allowed just over .010 slop. This allowed grease to come out of the sides and allowed the shackles and springs to move freely. This allows the EZ-Flex to move freely, and do what it was designed for. All of the stress is on the bolt itself and is not on the threaded shoulder thus allowing a lower torque.1 point
-
Chris: Some thoughts about the standard wet bolts vs step bolts for trailer springs: Standard bolts generally used for light duty trailer shackles using a 9/16" diameter shackle bolts without a zirk fitting. Step Wet Bolts Bolts are used for heavy duty axles where the step is necessary for proper function with bronze bushings. I believe that all of the OTT trailers, and the most other heavy duty trailer spring shackle bolts are step bolts. Yet Alcon is using a standard bolts. This got me wondering about the topic. Wet bolts sandwich the springs between the subframe mounting "tabs". With the step, the step bolts mechanically limit the clamping of the springs. The result is that the bolt head is prevented from turning in the mounting tabs by two means. First, the splines. Secondly the friction on the tabs by the step and the nut itseld. As a result of the design, the spring always has some clearance allowing it to more freely rotate relative to the bolt center line. My concerns are: The Alcans could easily be over tightened thereby forcing the mounting tangs against the springs. This process would result in the spring binding in the tabs and facilitate the stripping of the bolt splines thus creating a "spun bolt". A spun bolt will act as a crude bearing causing the mounting tab holes to quickly wear. And the repair is rather difficult. Been there myself. Use of Nylock's in high torque situtations often results in the Nylock becoming impossible to remove with hand tools. To do so, one will likely want access to air tools or electric grinders to literally cut the nut off. Trying to do so with a hack saw and punch will be tedious, especially it appears that their bolts are very high quality grade 8. As such, failure of a wet bolt will complicate life a lot. The only way I would want standard bolts for a splined application is if the bolt head head was fixed using a Hex Capture Washer. After two years of working with OTT Jason, this approach ended up being the only acceptable long term repair for a spun bolt spline. DIY - Dexter EZ-Flex Center Bolt Spline Repair (20 APR 2024).docx What are your thoughts about Alcon not using step bolts on our springs? Thanks GJ
1 point


-
Recent Achievements
-


")


")
