Galway Girl
-
Posts
779 -
Joined
-
Last visited
-
Days Won
25
Everything posted by Galway Girl
-
 Inverter_Charger_Settings_Table.pdf This is from the Knowledge Base in the Support Section of the Oliver Website:
-
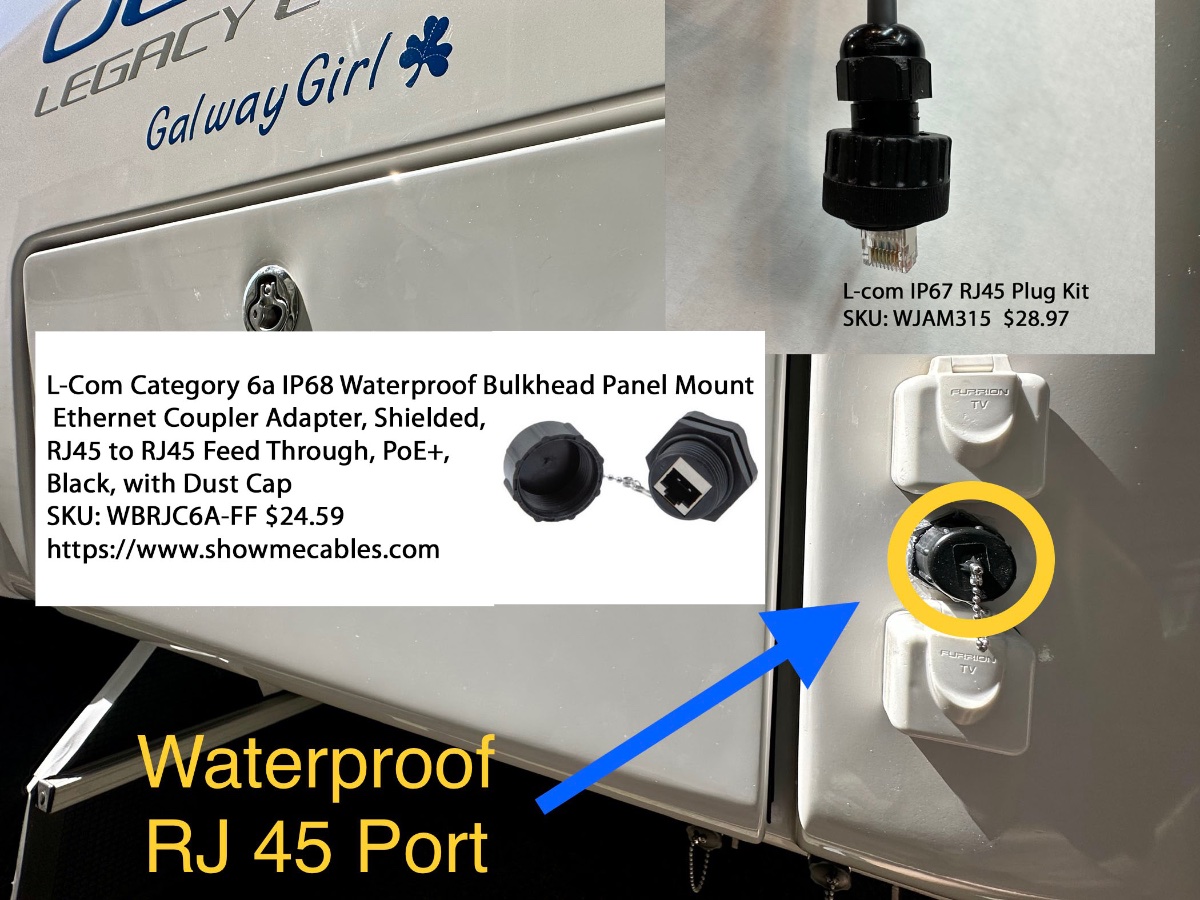
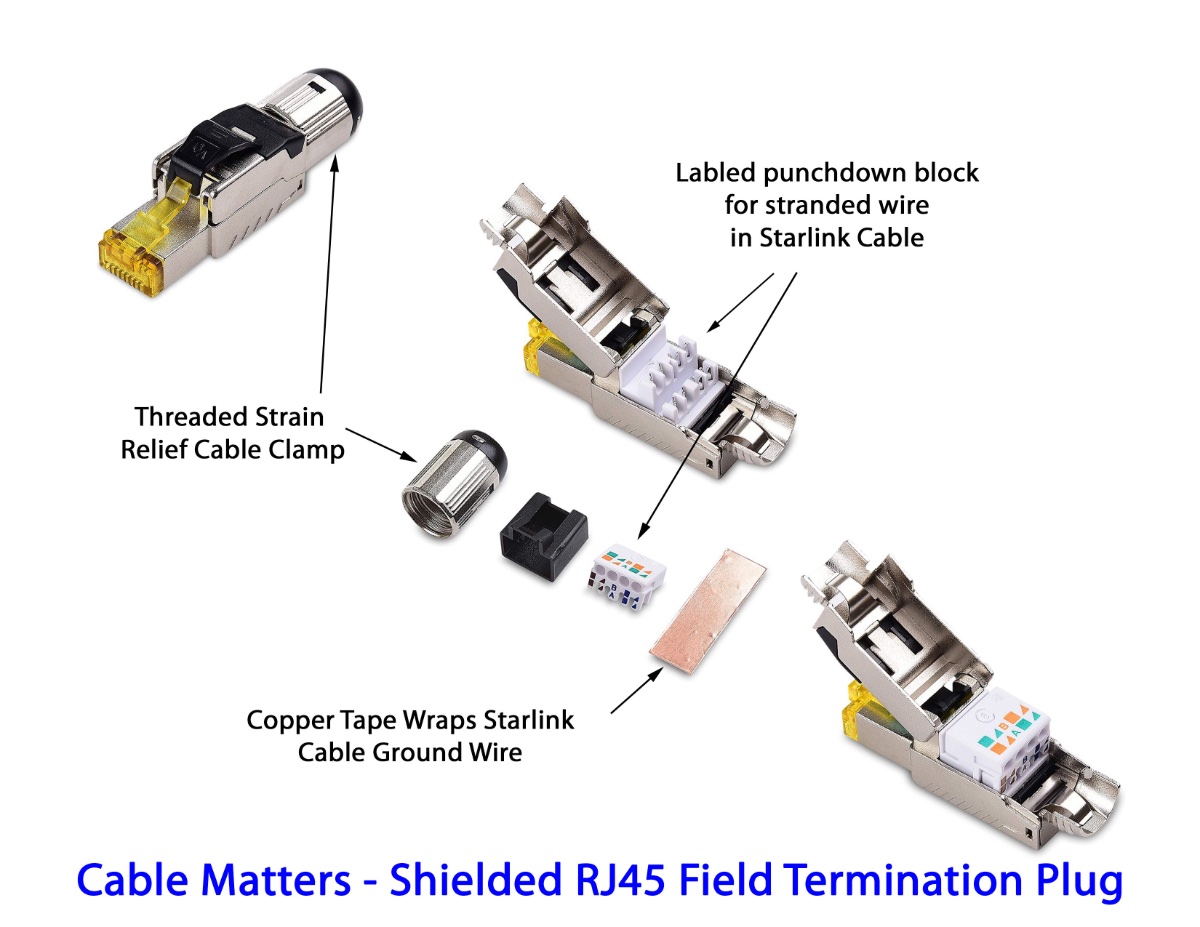
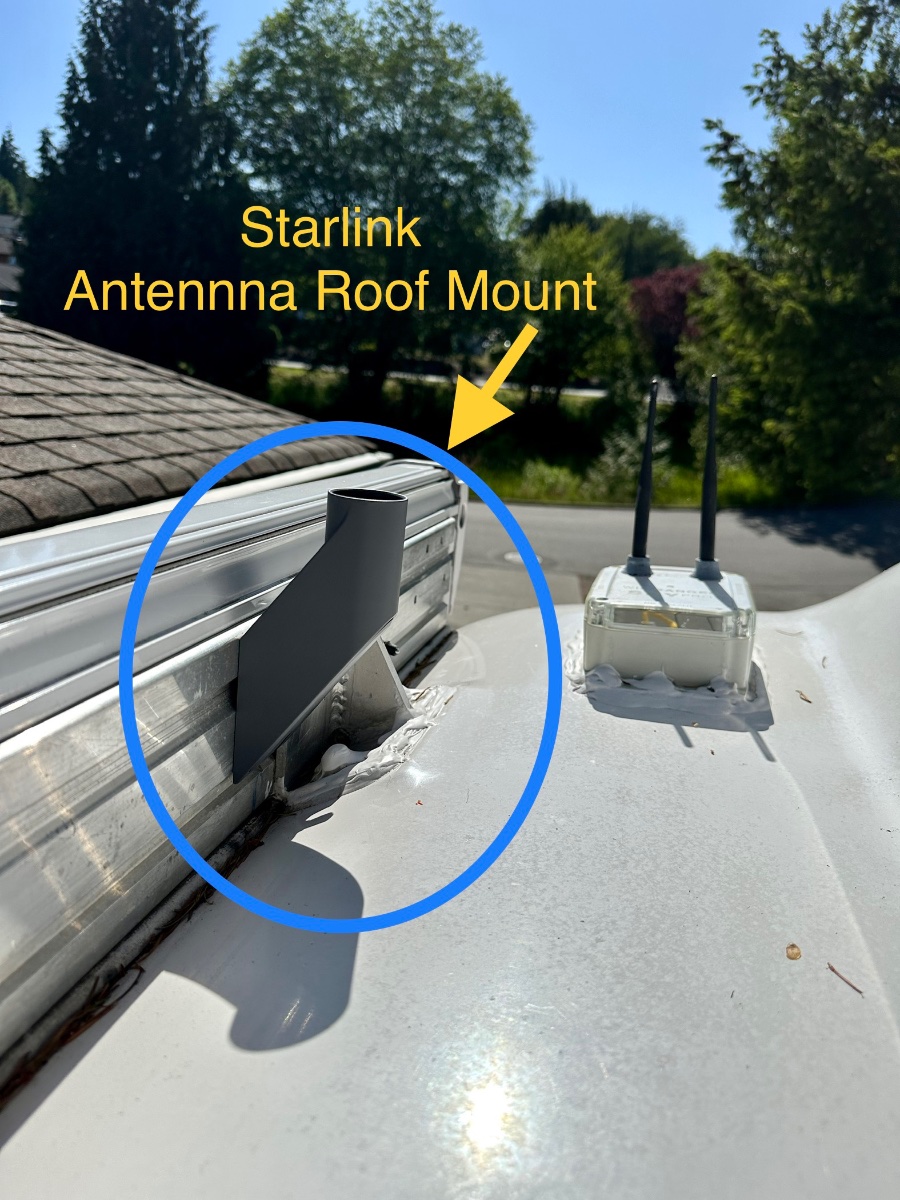
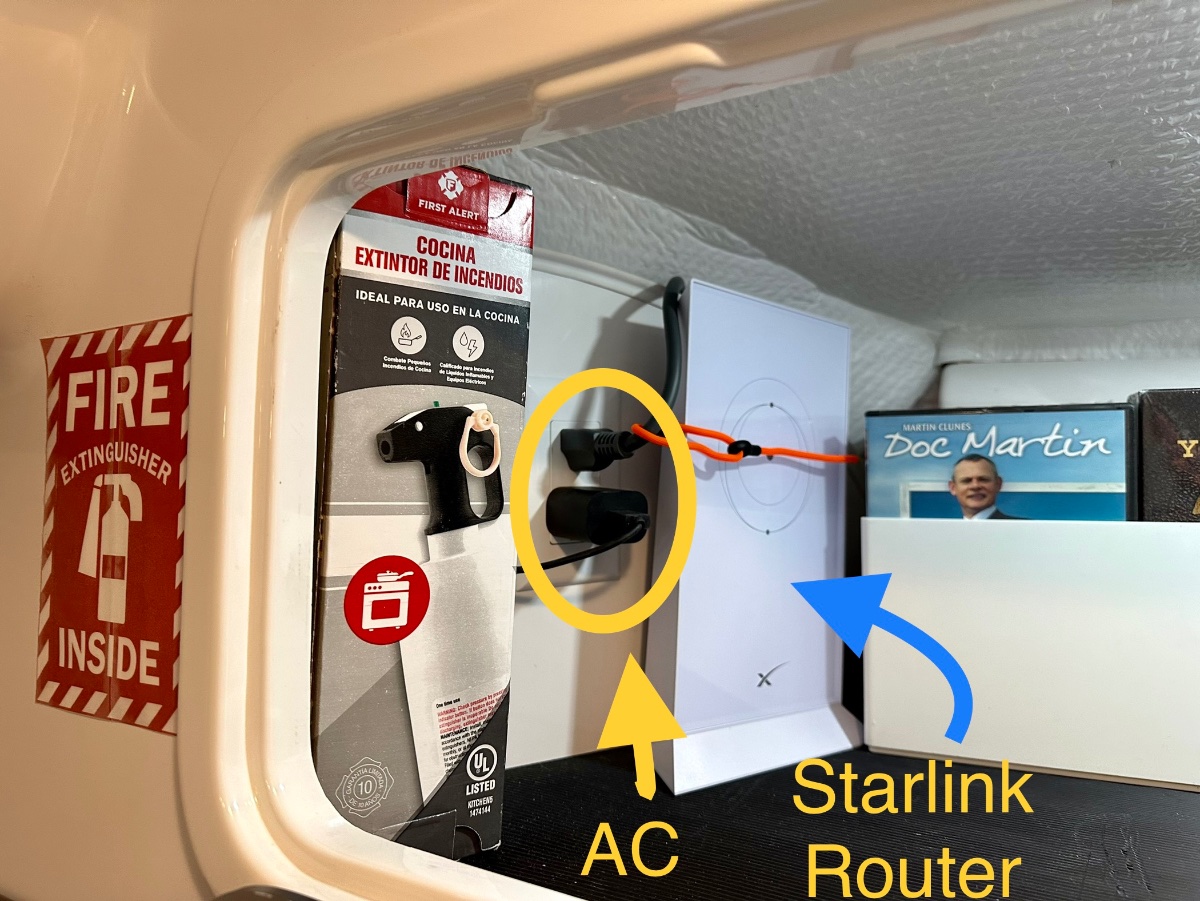
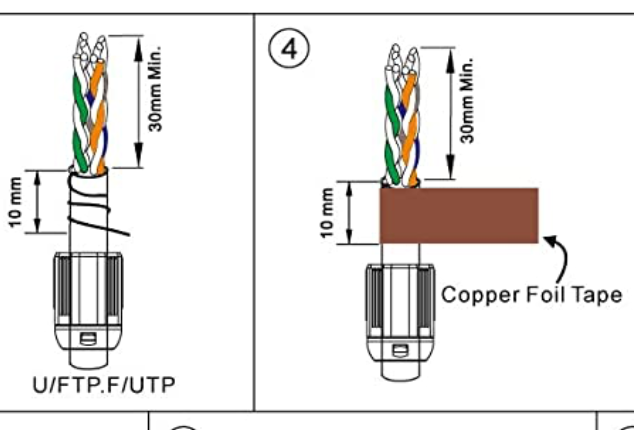
After looking at the forum I found a couple posts on installing Starlink. I decided to add another to the mix. Pre-Installation Starlink Test: In testing the system before a full installation I found that the Starlink Router could be plugged into curb side Oliver outlets and then the router could sit on it's back on top of the tire under the wheel well. This provided 58dB of signal outside the trailer and about 78 dB inside. So if you don't want to hassle with mounting the router, drilling holes etc. you could just find a weatherproof box/cover for the router and leave it outside. (Signal strength and bandwidth drops a bit but not really very much.) Read on if you want to do a more complete installation. 1) Roof Mount: (This is just a way to mount the antenna up high.) I bought the Starlink short roof mount adapter. Our hull 505 had the Dometic Awning, so I could not simply bolt directly to the mounting bolts from the awning brackets as they are at odd angles. I used 1/2" long x 3/8" diameter Self Tapping Bolts. I drilled holes, then drove in the self tappers into the mounting rail making sure to use washer/spacers to keep it from penetrating the back of the awning box. I used blue loctite on those tapped bolts. This mounting position will be perfect in those cases where we have clear sky and want the antenna up high. I'll continue to carry the ground mount for portability uses. I don't plan to drive with the antenna on the roof. 2) Mounting the Router - In the Rear Attic and Running Cable into Basement I mounted the router inside the rear attic cabinet. It's held in place by a simple orange strapping tie that feeds through a hook-eye behind the router. This is a good spot for the Router as it's close to a 110V outlet, and easy to run the cables under and behind the back of the cabinet over to the right side then down to the basement area. To make the cable run to the basement I needed to remove a couple panels: (NOTE: DISCONNECT FROM CURB POWER and make sure Inverters are OFFLINE BEFORE ATTEMPTING) 1) Street side attic panel (2 bolts) tip it down flat to gain access to the street side rear of the cabinet. 2) Basement rear dress panel covering the back the basement. (2 phillips screws). For my installation I ran the cable beside the existing AC drain tube on the street side rear of the trailer. I pushed the cable snake down beside that tube, and then at the bottom in the basement attached and I pulled up a length of pull line from the basement area. I attached the pull line to the end of the Starlink cable (the end that plugs onto the dish) and then pulled the Starlink Cable down into the basement. I tested the Starlink at this point before cutting the cable to get a baseline of speed for comparison after I cut the cable and attached RJ45 network connectors and the thru hull port. After testing I looped up about 3 extra feet of cable in the basement and then cut the cable for installation of the RJ 45 connector that would feed the back side of the thru-hull RJ45 plug. 3) Install new RJ45 male plug on cable in basement: Pro TIP: Use metal field termination plugs for the Starlink cable cut ends if possible/ Trying to use the typical plastic RJ45 connectors is a real hassle as the conductors in the starlink cable which stranded and thicker than normal. I spent well over an hour trying to get my shielded/plastic RJ45's to work. I finally said let's try a real metal coupler. In the picture below is the plug I bought from "Cable Matters" on Amazon $6 ea. They feature a clearly labeled punch down block, a threaded strain relief clamp and copper foil tape that is used to wrap the ground (or drain) wire around the cable shaft where it enters the connector. This is the connector I used on the inside of the trailer connecting the Router to the Thru Hull plug. 4) Install the Thru Hull Connector and connector for Cable to Dish I purchased an L-Com IP68 (waterproof) through hull connector specifically designed for shielded PoE Connections. I also purchased a matching L-Com connector kit for the cut end of the Starlink cable. This matching plug screws onto the outside connector for a waterproof sealed connection. I placed the connector mid line between the two existing connectors leaving both the Cable and Satellite COAX's in place. The new bulkhead coupler fits exactly between those two connectors, but I would suggest shifting UP 3/16" from center to allow the bottom door to fully open. (It's the 'satellite coax' in my case which I never use.) Hope this is useful to any new Starlink owners. More detail is in our blog here: Adding Starlink to Galway Girl Craig Hull 505 - Galway Girl
-
Our Oliver Galley gets a new 3 quart insta pot.
Galway Girl replied to Patriot's topic in General Discussion
Just fyi.. @Galway Girl *Craig & Rose Short* weren't at the rally. Maybe you meant Duke and Chris who referred you maybe with a different screen name. Craig & Rose Hull 505 - Galway Girl -
Welcome to the forum. My wife and I retired a couple years back (she was a teacher too) and bought an Oliver. We created a blog to help our family see various campgrounds, trip logs and provide tips for them and other Oliver owners. Here’s the link to Galway Girls (Hull 505) Blog: https://4-ever-hitched.com At the top and bottom of the blog are links an Amazon "Oliver Outfitters Guide". That guide is a list that’s been made for great Oliver gear along with comments from Oliver owners that describe how it fits or works in and Oliver. Oliver Outfitters Guide on Amazon Craig & Rose Hull 505 - Galway Girl
-
This is an excerpt from our post on upgrading to Lithionics on hull 505. Origin was from a discussion with Jason Essary in Oliver Service. https://4-ever-hitched.com/ggs-blog/f/lithium-battery-upgrade Step 7; Disable the 7 Pin Charge Line: We will be installing a new DC/DC charger into our Oliver EII. But before we do that install we need to disable the current charging wire that runs from the 7 pin cable on the tongue of the Oliver. That 7 pin connector is the one that plugs into the back of the truck for lights, brake lights, emergency brake power. Inside the 7 pin cable there is a BLACK wire that provides 12V (B+ ) from the truck battery/alternator B+ all the way back through the trailer, through a 20A breaker and back to the batteries via the 12V Bus bar in the trailer. We will not be using that (Black) charge line for the trailer an longer. We disabled that line on the 7 pin connector by putting heat shrink coating over the screw terminal on the black B+ wire conductor and also taping up the screw lead the body. We reassembled the conductor and tested that no 12V was present on the wires inside the trailer. Wiring Digram for Oliver EII 7 Pin To disable the Charge Wire (BLACK) from the 7 pin, remove the cover and disconnect the wire from the connector by taping up the wire and putting it back inside the cover. Don't cut the wire in case you need to use it in the future. 7 Pin Connector from Trailer Craig Short Hull 505
-
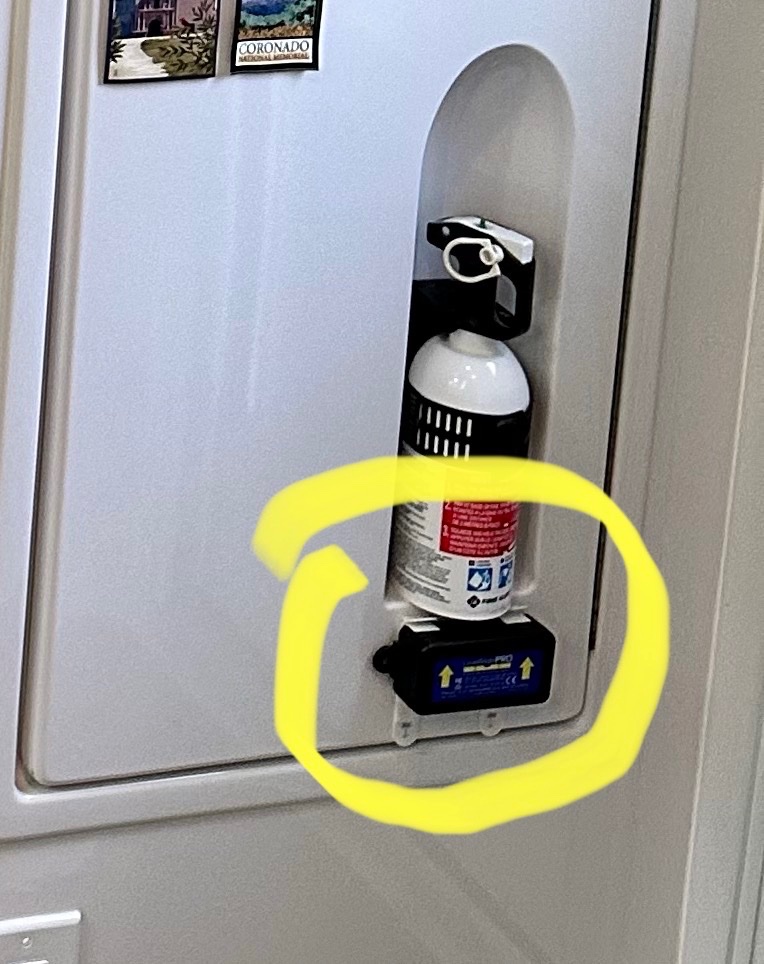
Originally I mounted in back of closet and it was hard to reach. I moved it to the outside of the closet door just below fire extinguisher mounted with double stick Velcro. I can reach it while standing outside with the door open to turn on/off when setting up camp. I can pull off easily to change batteries.
-
Gas Regulator Spare Part - Available GR-9994XF
Galway Girl replied to Galway Girl's topic in Mechanical & Technical Tips
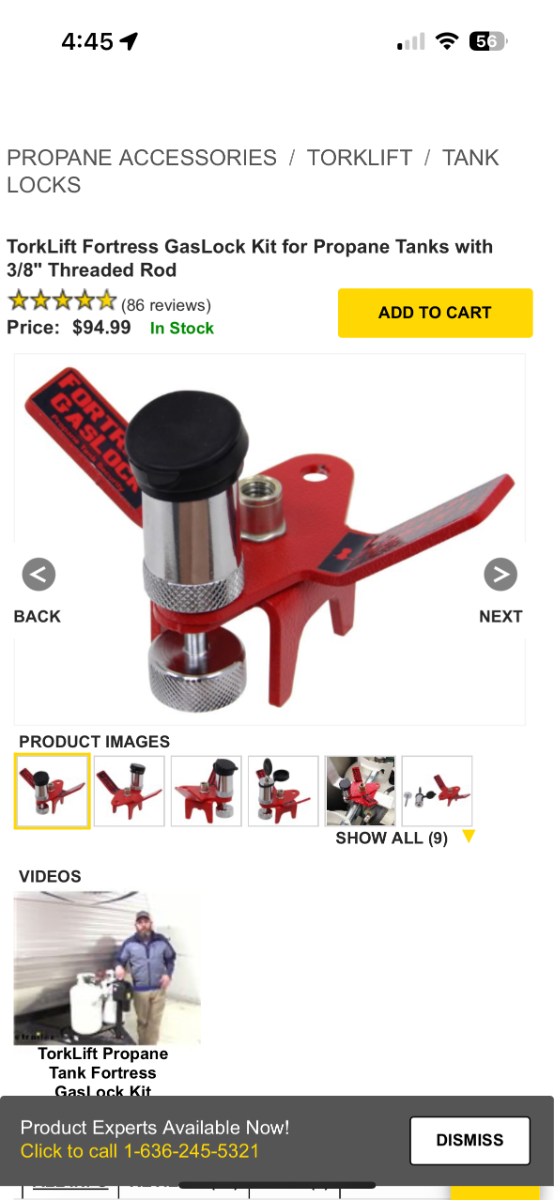
@Galway Girl I see you have some sort of red lock-down screw thingy protecting your propane tanks. Do you have more info on that? Forklift tank lock from etrailer. there are other less expensive solutions on Amazon.
-
As the previous person said…sept to mid October is perfect time. Our blog exists outside of facebook here on our own domain: 4-ever-hitched.com Craig
- 10 replies
-
- 3
-

-
- army corp
- state parks
- (and 1 more)
-
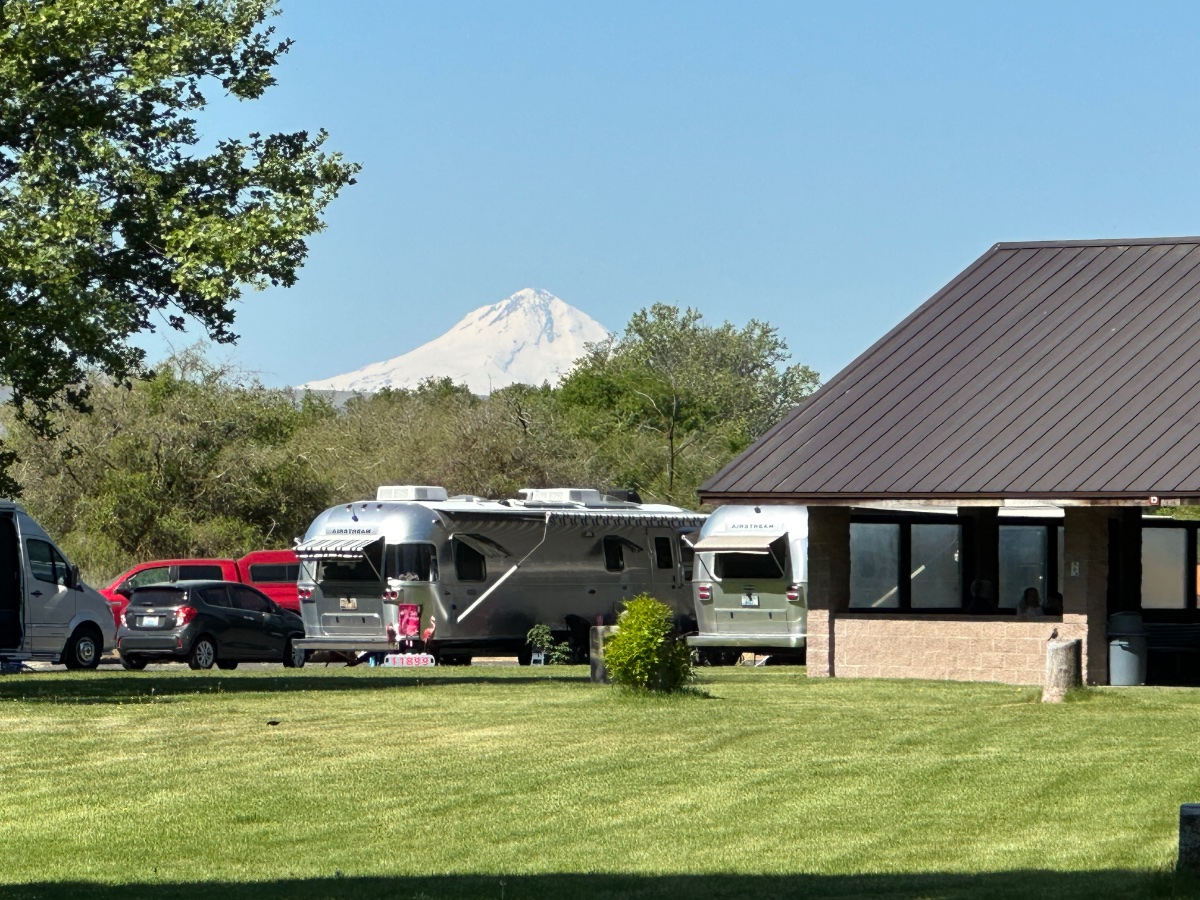
Hull 607 and 505 Re-unite at a historic marker. We were on the eastern slope of the Cascade Range, stopped at a historic roadside for lunch...when another Oliver pulls up beside us. To our surprise Paul and Hull 607 (who we showed our Oliver to as a prospective customer) dropped in. Paul was coming down from Lake Conconully SP and we were on our way to the same park. Small world.
-
Saw the post on QST Mag. KI7SXN checking in from Everett Wa. C. Short Hull 505 - Galway Girl
-
May… or Early June I know the big rally is in May but not sure when next year. Next August we head up to Nova Scotia from Wa. So if we’re involved it would need to be May or June and planned a year out.
-
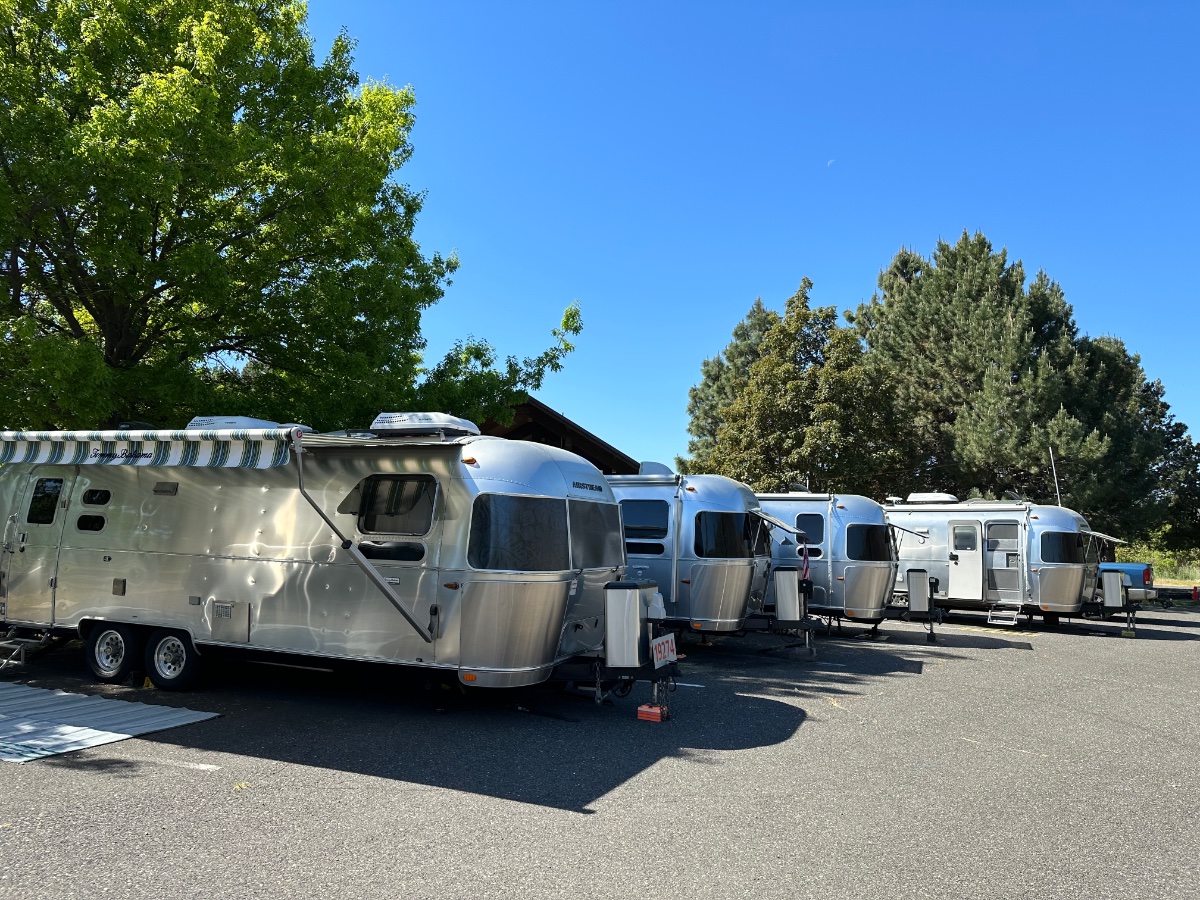
Just taking temperature of those going to the rally this month on possible NWrally sites. Maryhill State Park could be a spot for a NW Oliver Rally. The local Airstream club is here this weekend. >20 group campsites. Maryhill SP is on Columbia River just North of I84 in Oregon. A bit tight in group sites as they have setup but nice covered facilities for events. Another alternative would be Rasar State Park on the N Cascades Highway. Any interest for next year let us know. Craig -Hull 505
-
Here's the link to the load PSE/Load tire inflation chart for those Michelin Agilis Cross Climates https://tirepressure.com/lt225-75r16-tire-pressure Agilis Loading Table: The Agilis has a bit higher payloads in the table than the original Michelin LTX M/S that came on my 2019...so they could be a good replacement. Thanks for your posts. Craig
-
Size of the bearing nut for Dexter Axle?
Galway Girl replied to routlaw's topic in Mechanical & Technical Tips
Like this:
-
Size of the bearing nut for Dexter Axle?
Galway Girl replied to routlaw's topic in Mechanical & Technical Tips
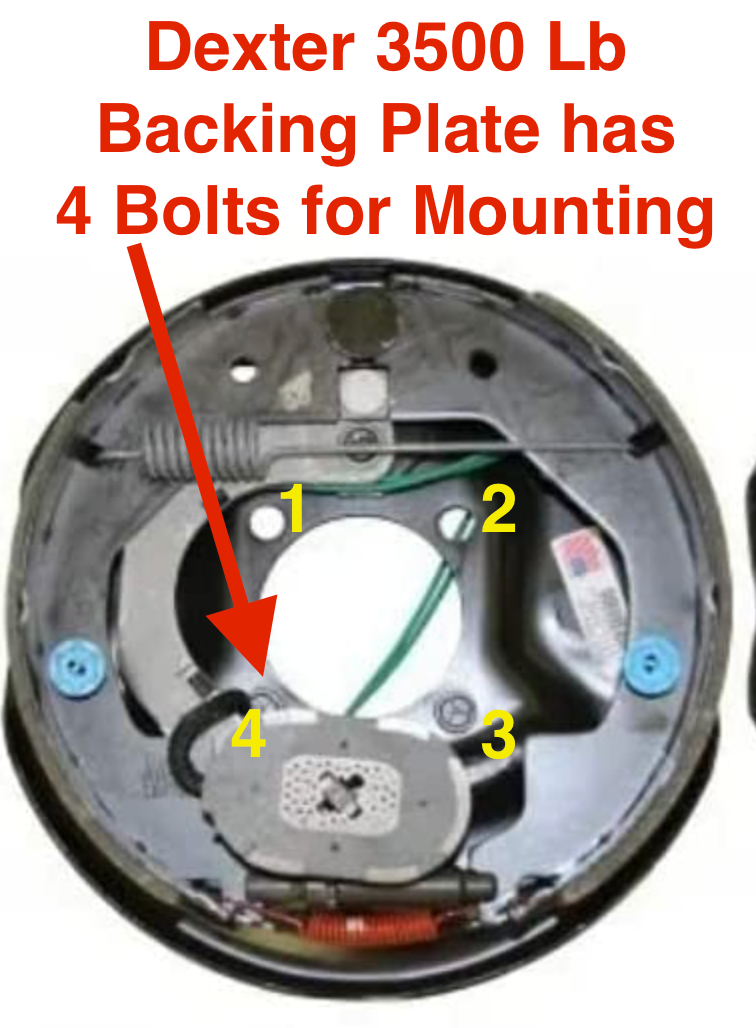
Blast those modifications that the factory makes at times. Sorry to hear that you found out the bearings were wrong. That's a nightmare. Guess the silver lining is that your trailer has heavy duty parts. \\\\ For those with 3500lb axles read on //// A way to save time (and $ over timken) on standard 3500# axles. Dexter (and eTrailer) both sell complete pre-greased hubs with new bearings / seals and caps for many of the dexter hubs for about $95 each. When compared to new timken bearings and seals this is a pretty good value. https://www.dexteraxle.com/results/184/pre-greased-hubs I found this out after I spent several hundred dollars for 4 sets of genuine timken bearings, races and seals. The Dexter Pre-greased-hub likely has the Chinese bearings that come from the dexter factory. That said, you would be amazed at how fast it makes the service, when you have all the parts pre greased and pre-installed capped off ready for installation. Again...this may not work for your particular Oliver trailer, as hubs and axles are known to have been swapped a bit by Oliver in the manufacturing process. One sure way is to check the label on the axle and then confirm parts with Dexter online. Here's the label for our 3500# axles on Hull 505 made in 2019. Size of Hub and depth 4 (backing bolts) RACES DEXTER BEARING TIMKEN BEARING/RACE Applies TO: Timken Parts needed for each end of each axle. 4 each are needed to do the trailer. Item QTY PN Timken seal, 4 473336……or you can use a National seal....Or SKF 17144 Timken Set 17. 4 L68111 (inner race cup) and L68149 for the inner bearing (Cone) Timken Set 4, 4 L44649 (outer race cup) and L44610 for the outer bearing (Cone) Timken Seal Dimensions for 3.5K hubs. Shaft Size 1.718 in 43.637 mm Outer Diameter 2.565 in 65.151 mm Overall Width 0.5 in 12.7 mm Housing Bore 2.561 in 65.049 mm Brakes - Maybe buy the whole assembly. Our trailer has about 35K miles on it and the brakes still have plenty of life left. What I learned is that tearing down a self adjusting brake set is a pain. So I've decided if I ever need to repair/replace the electric brakes, I'll purchase them as a complete assembly as well. The assembly includes a new backing plate, all mounting bolts/nuts, the new magnet, new brake shoes all pre-mounted. This makes it a snap to quickly replace a bad brake assembly. Unbolt the old assembly removing 4 bolts, cut the 12v wires (make sure to disconnect batteries first). Then bolt back on the new assembly and connect the two 12v wires. DEPENDING on your trailer/part they are about $90-$100 per assembly from E-Trailer or Dexter online. The part number can also be referenced as Dexter 23-469 for the right side and 23-468 for the left side. http://www.dexterpartsonline.com/page/399600496 C Short
-
From Michelin Service Site for those owners with Michelin Tires. ———////——-////——-/// A few milestones and tips: 1. Keep five years in mind After five years or more in use, your tires should be thoroughly inspected at least once per year by a professional. 2. Ten years is a maximum If the tires haven't been replaced 10 years after their date of manufacture, as a precaution, Michelin recommends replacing them with new tires. Even if they appear to be in usable condition and have not worn down to the tread wear indicator. This applies to spare tires as well.
-
Trying to understand recharging the batteries
Galway Girl replied to HDRider's topic in Ollie Boondocking
I believe you have the 3000 Watt Xantrex Pro Charger with that package. The OUTPUT Current for charging is user selectable from 5 to 150 Amps. If you are running on Shore Power/30A connection then this setting is usually set for 150Amps. If you are running connected to a generator (not shore power) then what it delivers will depend upon the power output available from the generator. If
-
Maybe give the threads a shot of WD-40 Brand Dry Lube with Teflon. That makes them a bit easier to thread on and off. I was thinking about going the other way, to one with tabs...as they may be easier to open ....but will not do that after seeing your post. CS
-
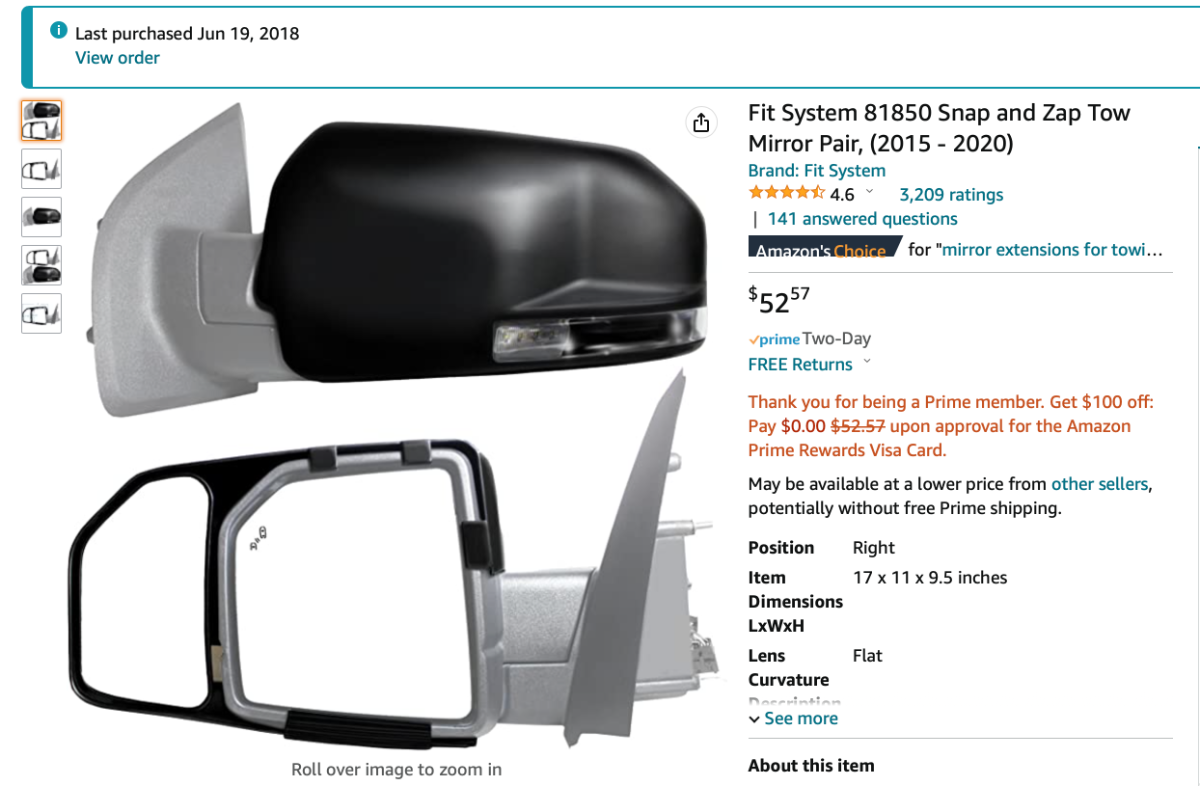
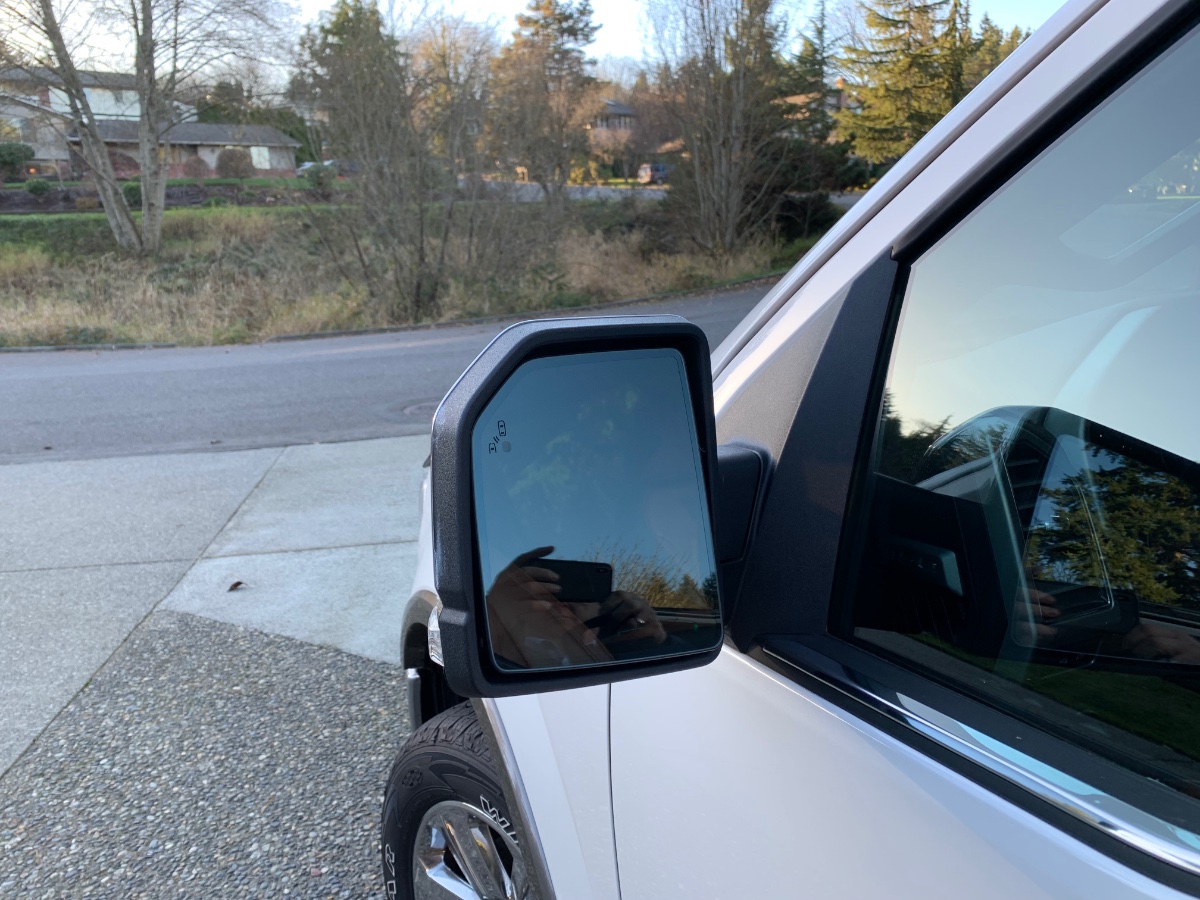
for sale Claimed : Snap ON Mirrors - 2015-2020 - F150
Galway Girl replied to Galway Girl's topic in General Discussion
Updated to "FREE" except shipping. -
for sale Claimed : Snap ON Mirrors - 2015-2020 - F150
Galway Girl posted a topic in General Discussion
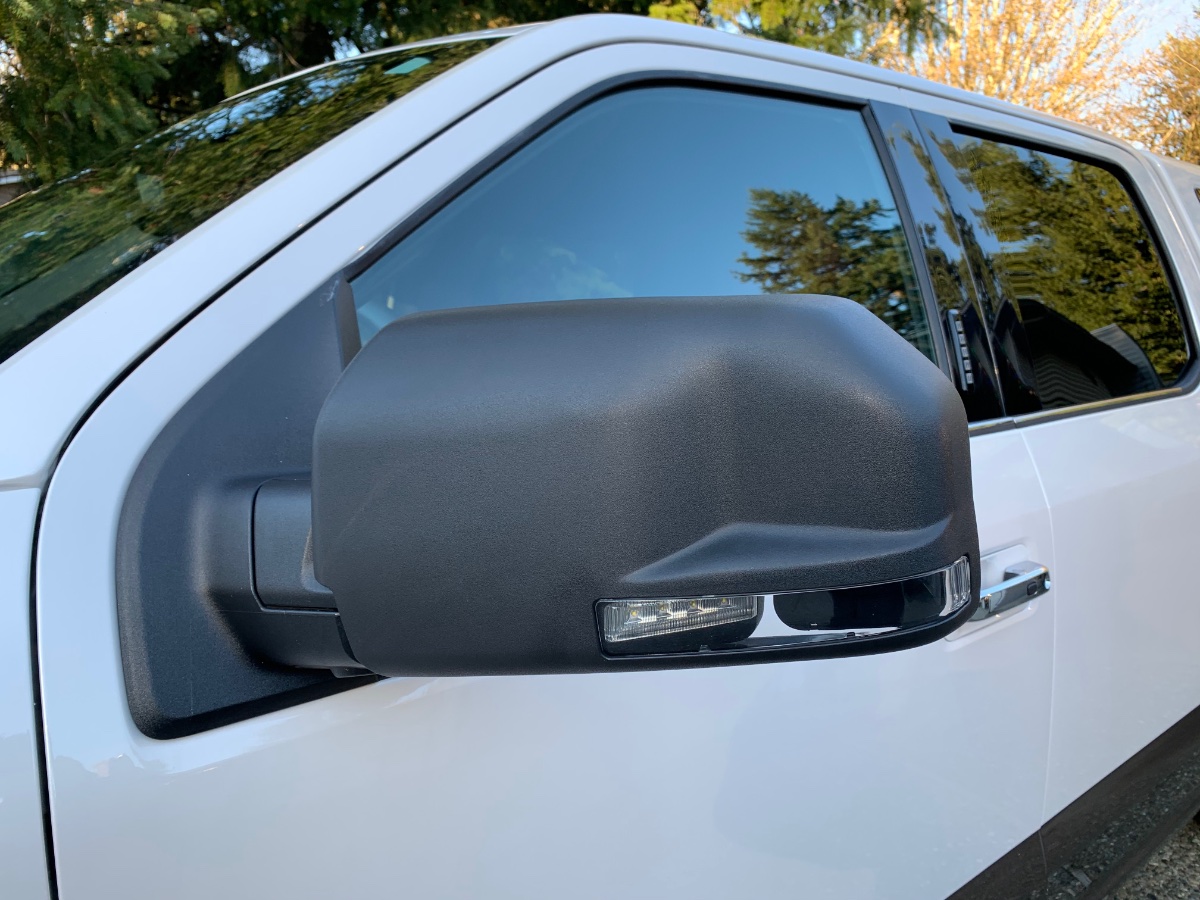
Essentially Free - but I would like at least cover shipping costs to your location. I have a "like new" pair of snap on extension mirrors for our 2018 F150 which we later sold when we upgraded to an F350. If you want these - private message me to exchange details. C. Short - Hull 505 Pair of Snap & Zaps in case: 2018 F150 Mirror - without snap on mirror. 2018 with Snap ON Mirror Added - has window for puddle lights to shine through. 2018 With Snap On Mirror - adds the extra adjustable outside mirror.
-
Ours sometimes smells as well. We've not seen any leaks in the system so I'll be following to see if you learn something new. CS
-
Timken Wheel Bearings - USA manufacture.
Galway Girl replied to BackofBeyond's topic in Mechanical & Technical Tips
Just for grins I ordered 4 "Timken" 477336 seals that are shipped directly from Amazon. That I received was this....one orange marked TIMKEN on the rubber but no stamps on metal (Box said Made in Taiwan) ...and 3 red stamped NATIONAL 477336. (Box Said Made in Mexico). (All are going back to Amazon with a return note about counterfeit items they are shipping.) I've also ordered from my local shop the same seals and I'll see what turns up. CS
-
A. The PD4060 charger is a smart sensing charger it will know when the battery is full and shut off charging and stay in storage mode. "The built-in Charge Wizard automatically selects one of four operating modes: BOOST, NORMAL, STORAGE, DESULFATION." It's likely your solar suitcase charge controller also is smart and senses when to stop or turn into trickle charge mode. Given those two constraints you're OK running both together. In our Hull 505 we don't have a solar cutoff switch so we always are having solar and shore power at the same time and have never had a overcharging issue. (We have changed Hull 505 from the PD4XXX series charge/converter to the Xantrex 2000W inverter.) B. I think the only way you'll do all 3 charging sources is if your truck is hooked up to your trailer and running, at the same time you're hooked up to either a generator / or / shore power...and of course solar. If you did that all at the same time and each leg is fused properly and each leg has a SMART charger that sense the battery level and shut down charging to trickle only once charged you'll be ok. Craig
-
@Ollie-Haus Here's our install blog on that very set of topics. I installed the batteries and a Redarc DC/DC Converter in the bed of the truck for that ARB Fridge Battery. (I also put a DC/DC converter in the Oliver as well to feed the 630AH Lithionics Pair. Here's two describing the install of Batteries and Redarc DC/DC converter for fridge and some added things for longer stays. The Redarc can serve as your solar controller as well as the charger while driving. https://4-ever-hitched.com/ggs-blog/f/power-for-the-arb-fridge https://4-ever-hitched.com/ggs-blog/f/truck-modifications-for-long-trips This post is on the upgrade to dual Lithionics 315gtx and the Victron DC/DC charger inside the Oliver to charge Lithionics while towing. https://4-ever-hitched.com/ggs-blog/f/lithium-battery-upgrade Cheers: Craig Hull 505 - Galway Girl
-
Door holder rubber grommet online source/ part number?
Galway Girl replied to John E Davies's topic in General Discussion
Found this particular 5/16" ID grommet fit perfectly in my bracket. It's designed for a 7/16" holder hole. (Groove) You can buy this at most ACE HW and also from Zoro online. The grommet hole of 5/16" is big enough to securely hold the latch but not so hard to push the latch into the hole. When I tried the earlier listed 1/4" ID grommet it was simply too tight. The latch would try to push the grommet out when inserting. Again...your holder may be different. Anyone want 99 , 1/4" grommets ...let me know. Craig - Hull 505