Galway Girl
-
Posts
779 -
Joined
-
Last visited
-
Days Won
25
Everything posted by Galway Girl
-
Same here, 3 10' sections. Worst case was in a Campground in West Yellowstone. They had the site setup for midship dump for a 40' motor home. They also had a dump station as a backup...but the 3 sections of hose were perfect, and they fit in the rear bumper.
-
It was site 53
-
West Glacier KOA is a wonderful campground and only 6 miles from the Entry Portal to Glacier.

-

Our Truck Specs, Not enough capacity for Elite II?
Galway Girl replied to trekhard's topic in Towing an Oliver
John, I have a Sureline Tongue Wt. Scale. e-trailer had a really nice scale for tongue wt. that is much easier to use. https://www.etrailer.com/Tools/etrailer/e99044.html -
Christi, Our 2019 had a prowatt 2000, with a separate auto transfer switch, and a pd4000 load center with battery charger. When we upgraded to lithium’s we had to swap out the separate inverter and pd4000 charger for an integrated xc2000. The full story is here: https://4-ever-hitched.com/ggs-1 blog/f/lithium-battery-upgrade In 2021 Oliver switch completely to combo inverter/chargers from Xantrex which also caused them to drop the PD4000 load center and start using a pair of static panels, one for ac breakers and one for dc fuses. Both are mounts below the rear dinette seat where the pd4000 load center used to be installed.
-
See our blog for a video showing the install on the Oliver. https://4-ever-hitched.com/ggs-blog/f/new-shoes-for-galway-girls-feet Craig
-
For all kinds of Oliver sized cookware and other items Oliver Users have gathered...check out the Oliver Trailer Outfitters Guide on Amazon here: https://amzn.to/2mAAgPO The pans we use in the convection oven are on that list (about half way down the list) The Nordic Wear line makes special sized pans for toaster oven's and compact convection ovens. Here's one of the compact baking sheets we use. Craig
-
As to the batteries in your last line above about Lithium vs. AGM: Here's a link to an article I wrote on my conversion from 4 AGM's to Lithium. https://4-ever-hitched.com/ggs-blog/f/lithium-battery-upgrade At the end of the article I provide an update data I've gathered...and an estimate on how long our Lithiums run in not sunny (PNW) weather...and another estimate how much longer a Platinum Pro might run (630AH) vs. the Lithium Pro package (390AH) in those boon-docking conditions.
-
Ours did that, an we asked for the camera manufacturer for an exchange assembly. They sent us a new camera, we sent back the old. (Ours was inside warranty). CS
-
I had a link sent to me from Truma to their AC announcement. (Guess I'm on a mailing list.) Link to Truma AC page: https://go.truma.net/aventaThe graph (down below) is of current consumptions and makes it look like it's much quieter than the competitors at first glance...but what's being graphed is Current. Sound levels are in the notes for each portion of the graph. Looking only at noise levels vs. fans speed you would see this chart. They didn't state which competitor they are comparing to... Just passing along what I found. Craig
-
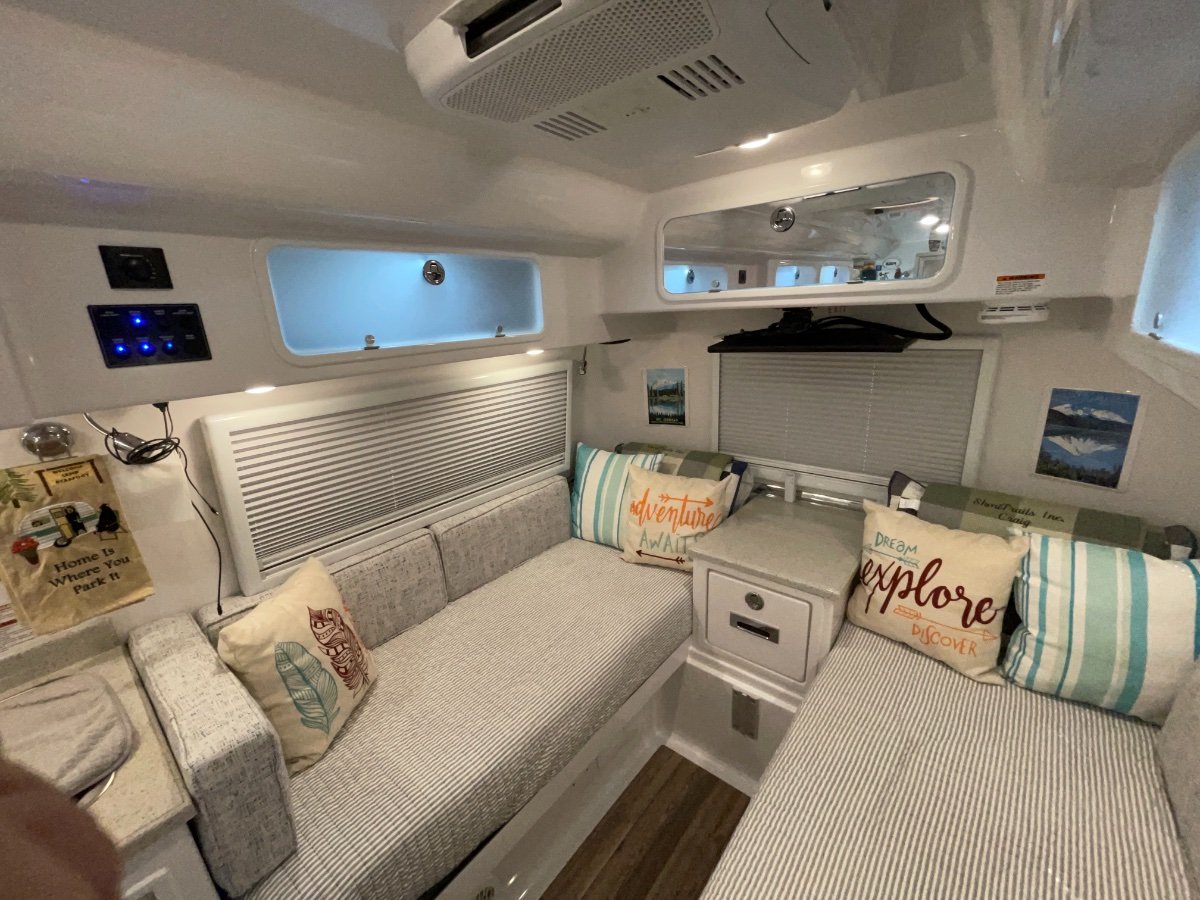
We have a Twin bed EII with KTT Mattresses. Here's the idea we implemented for use of the twins as couches. We added 6 new cushions (3 on each side) with a firmer density foam acquired at a local foam shop. The shop had references for local boat upholstery folks...and we had one of them make up the cushions. 6 - Daybed rectangular back cushions - 25” W x 11”H x 4” Thick Those dimensions just tuck under the window frames snugly. Here's a picture of the end result. We wanted 3 on each side so we could lean against them when watching TV. If we aren't using them when we sleep they stack up nicely on the dinette seats over night. We've actually found the side cushions useful when sleeping. They give us back support if we turn our back to the cushions, and also are extra insulation in cold weather.
-
MB Sturgis sells a kit with all the parts and a video of the retrofit for the Q series is here:
-
FYI - Found this attachment for Lithionics specific storage procedure for the batteries now being sold with Oliver's. It's attached as a PDF bud also at the bottom of this Service Article page: Path: https://support.olivertraveltrailers.com/portal/en/kb/articles/lithionics-battery Lithionics Storage_Procedure_Rev_03.pdf CS
-
The new Oliver's with Solar and the Xantex Charger/Inverters are all set so you can drop in Lithiums in the Future. That means going with the 4 AGM's initially will save you $$ and you'll have an easy upgrade path to LI in the future. In our case, we didn't have the Xantrex Charger/Inverter so our upgrade process was more "invasive". CS
-
New to this forum, looking for feedback on Lithium package
Galway Girl replied to serge's topic in Introduce Yourself
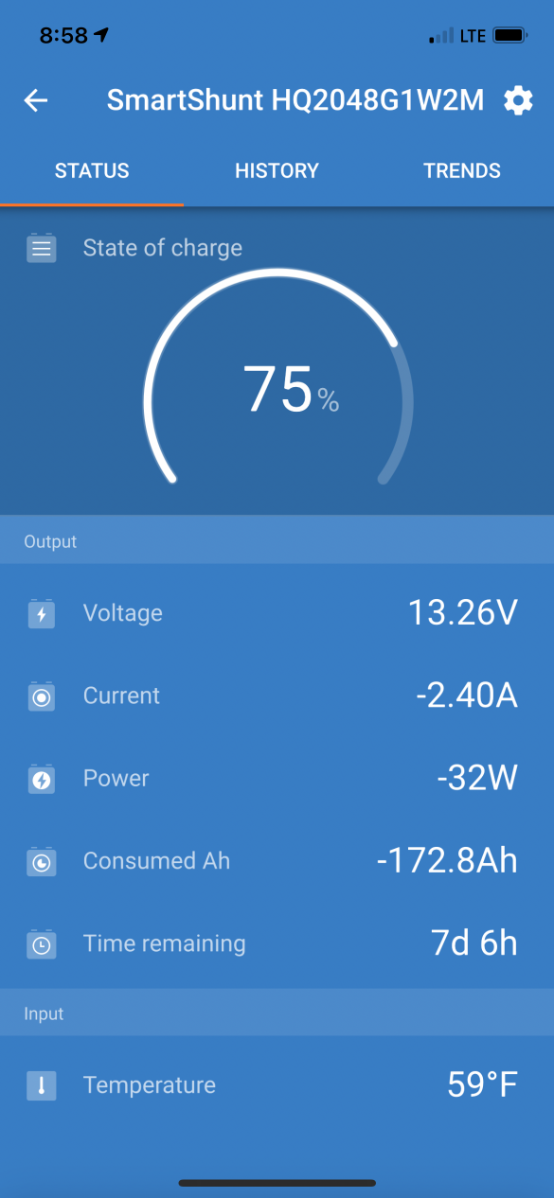
Here's our State of Charge data for the dual GTX 315's in our trailer (Hull 505) over a few days of boon-docking at Kalaloch on the WA Coast. NO Generator Use, No Shore Power. 340W Solar on Roof and 30A Zamp Controller On Board No direct fully sunny days Power Uses: Ran the max fan at night on low for air circulation and most of the afternoons Used the microwave sparingly to do some popcorn. Didn't do the Oven. Did NOT run AC as in our setup we have a 2000W inverter, not connected to the AC. Watched TV (we have a DC powered TV) each night for about 2 hours (streaming from downloads on the tablet.) Ran 2CPAPS all night for 8 hours. Did NOT run the generator nor hook up to any shore power. DATA: Starting AH: 630AH Total Capacity (both batteries) 8:00 AM Day 1 was 100% Partial Sun 6:40 AM Day 2 was 90% Rainy Day 6:13 AM Day 3 was 83% Rainy Day 8:27 AM Day 4 was 75% Departure Day Total Used AH: 154AH or 52AH/day Remaining AH: 236+240 = 476AH (sum of both batteries) I estimated with the dual 315A Batteries we could last 12 total days in overcast conditions like those we experienced with our normal power use model. My guess is if we had the 390AH Battery Set we could maybe last about 7 days. So that means the Dual 315's enable about 5 more days of off grid camping given our use model. *Your use model may be very different* We'll be testing full sun as we travel in Aug-October and we will post an update. Hope that data helps some folks!. Craig Hull 505 - Galway Girl
-
"the best laid plans" Our hull # just changed!
Galway Girl replied to Kevin and Theresa's topic in General Discussion
Good omen! And welcome to Oliver Ownership. If you're looking at items that many other Oliver Owners have used for their Olivers, check out the Oliver Trailer Outfitters guide on Amazon. Each item has a comment about it in the upper right of the picture. Many of the comments are about Oliver specific use and fit. You can see the list here On Amazon: https://amzn.to/2mAAgPO Or through links to the list on our Blog Site here: https://4-ever-hitched.com Happy trails. Craig Short Hull 505 - Galway Girl -
@SeaDawg the faucet was standard in our 2019 EII
-
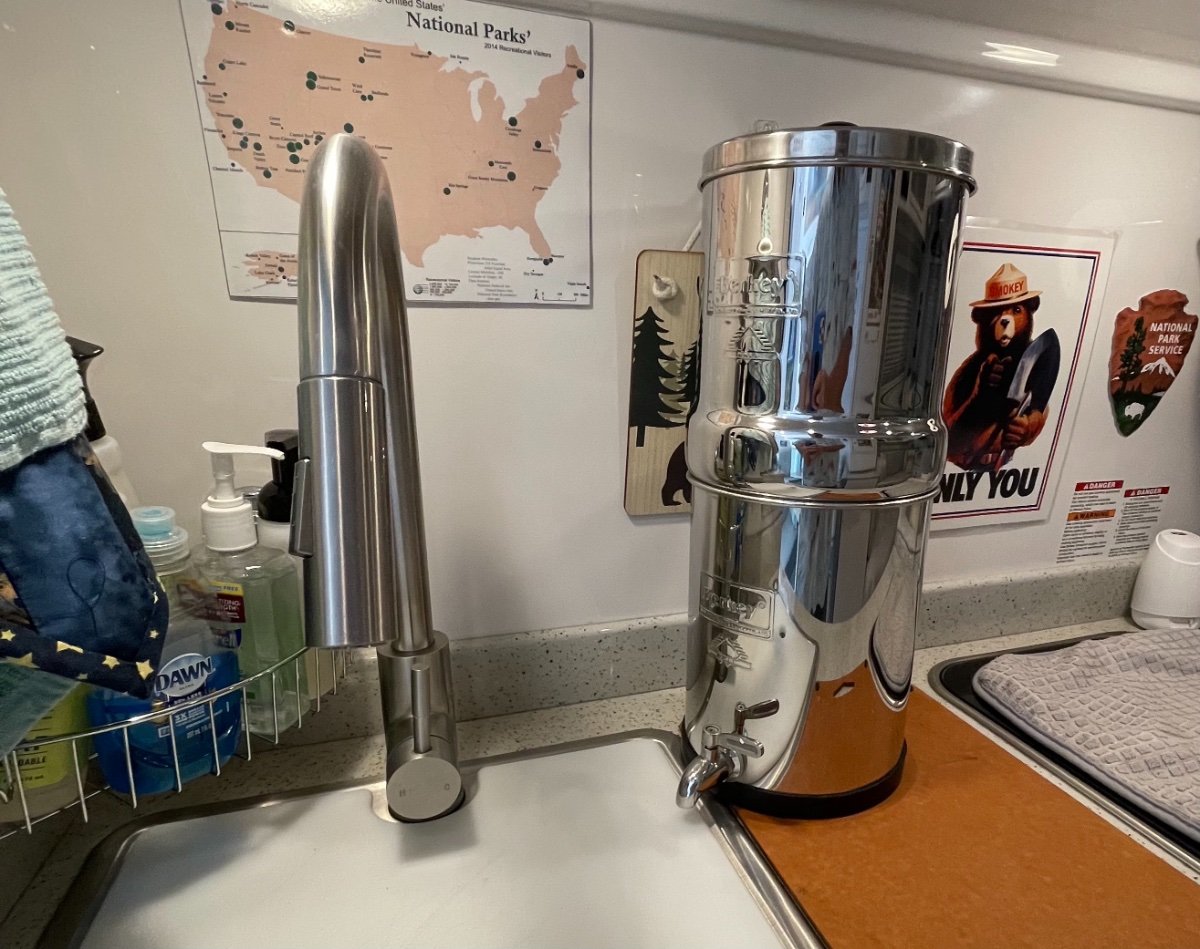
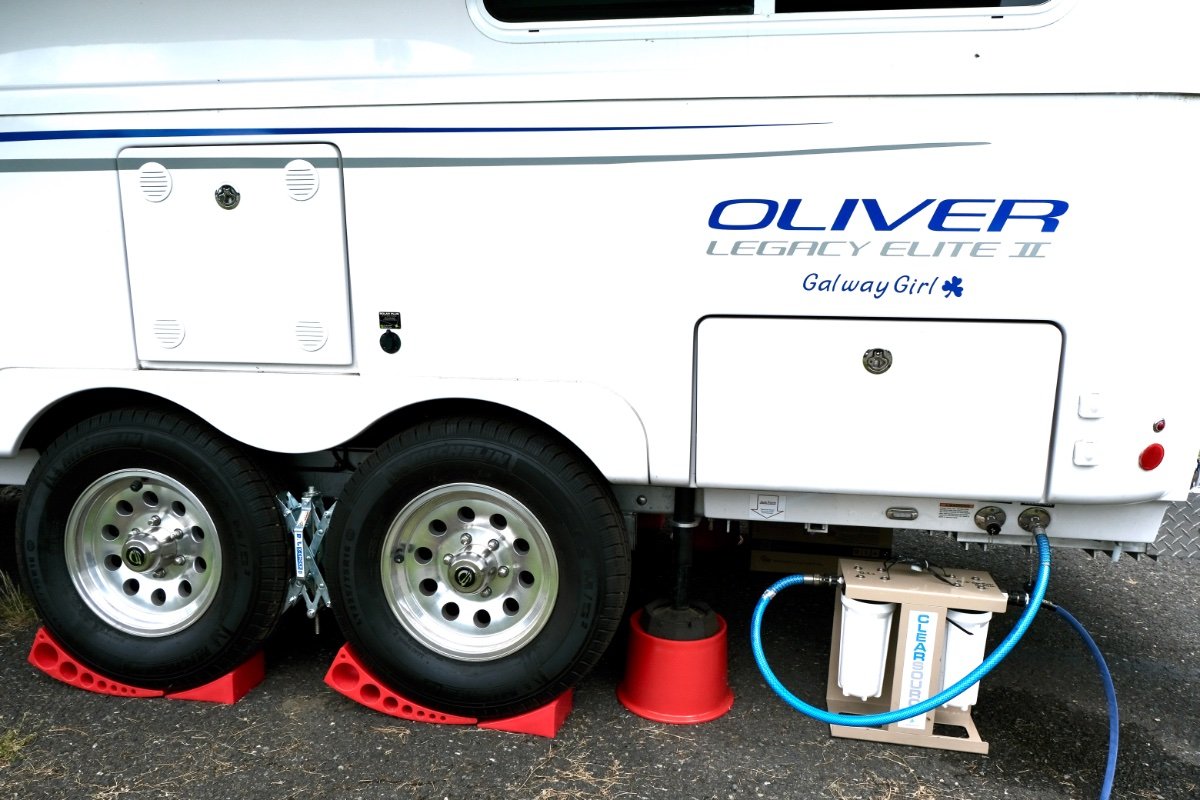
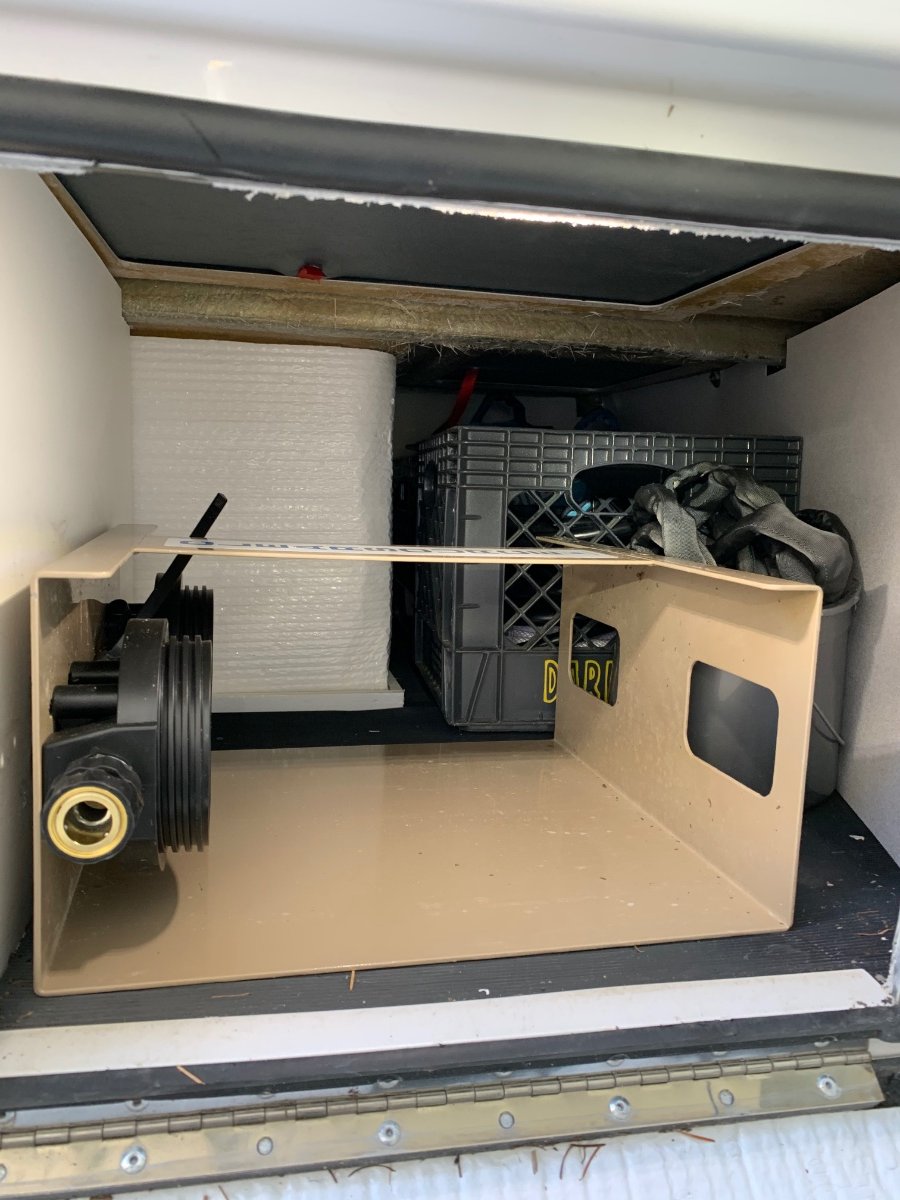
For drinking water, we've found that no matter how hard you try to keep the Fresh Tank clean, there's always the chance that things will grow in the tank, especially in the hot summer weather. So our regimen is to clean the fresh tank 2x per year, and for the fresh tank, we always use a 2 or 3 stage filter for water going INTO the tank, and for all drinking water we use a countertop Berkey Travel Size (1.5 Gal) System . The Berkey sits right beside our sink and provides plenty of water each day for 2-4 people. You can check out water filters at the Amazon Oliver Trailer Outfitters list here: https://amzn.to/2mAAgPO Here's our travel blog for other tips and mods you may find interesting: https://4-ever-hitched.com The Travel Size (1.5Gal) Berkey fits perfectly on either the counter next to the sink, or also on the Bathroom Counter. Clearsource (and Amazon) sell two and three stage high flow rate filters that include both a Sediment Filter and a Carbon Block filter for removing chemicals and improving the taste. These filter frames fit perfectly inside the side storage bay. Two stage Clearsource Filter holder shown in side bay. Filters removed to reveal plenty of room in back for 2 large milk carton containers (6 Gal and 4 Gal). and a small 1.5 Gal Bucket.
-
Fed Up With the RV Standard. Oliver Looks Like the Answer
Galway Girl replied to Kampfirekid's topic in Introduce Yourself
Boreal - A very interesting trailer with a good layout for families. Now...if it had a twin front bed and a rear entry it would have floor plan like our 1971 Ideal which was a fantastic family floor plan. The cupboard area above the twin beds folded down to make a bunk, and the twin's could be pulled together to make a KING up front. Note the area at the front between the Twins had a fold up extension table that seated 6 kids. We often had 10 people (4 adults) and 6 kids eating inside on rainy nights. The rear dry bath included a "Tub" for washing the kids.
-
Adding a link to the article with the SPEC's of those water fittings...Craig
-
Fargoman, The round feet on the Oliver will contact the magnets on the Anderson Tubs and that's a useful feature. We know that because we used them in the first year, but we then switched over to having rubber feet from RV Snap-pad on the pads. You can see our install video here in our blog: https://4-ever-hitched.com/ggs-blog/f/new-shoes-for-galway-girls-feet
-
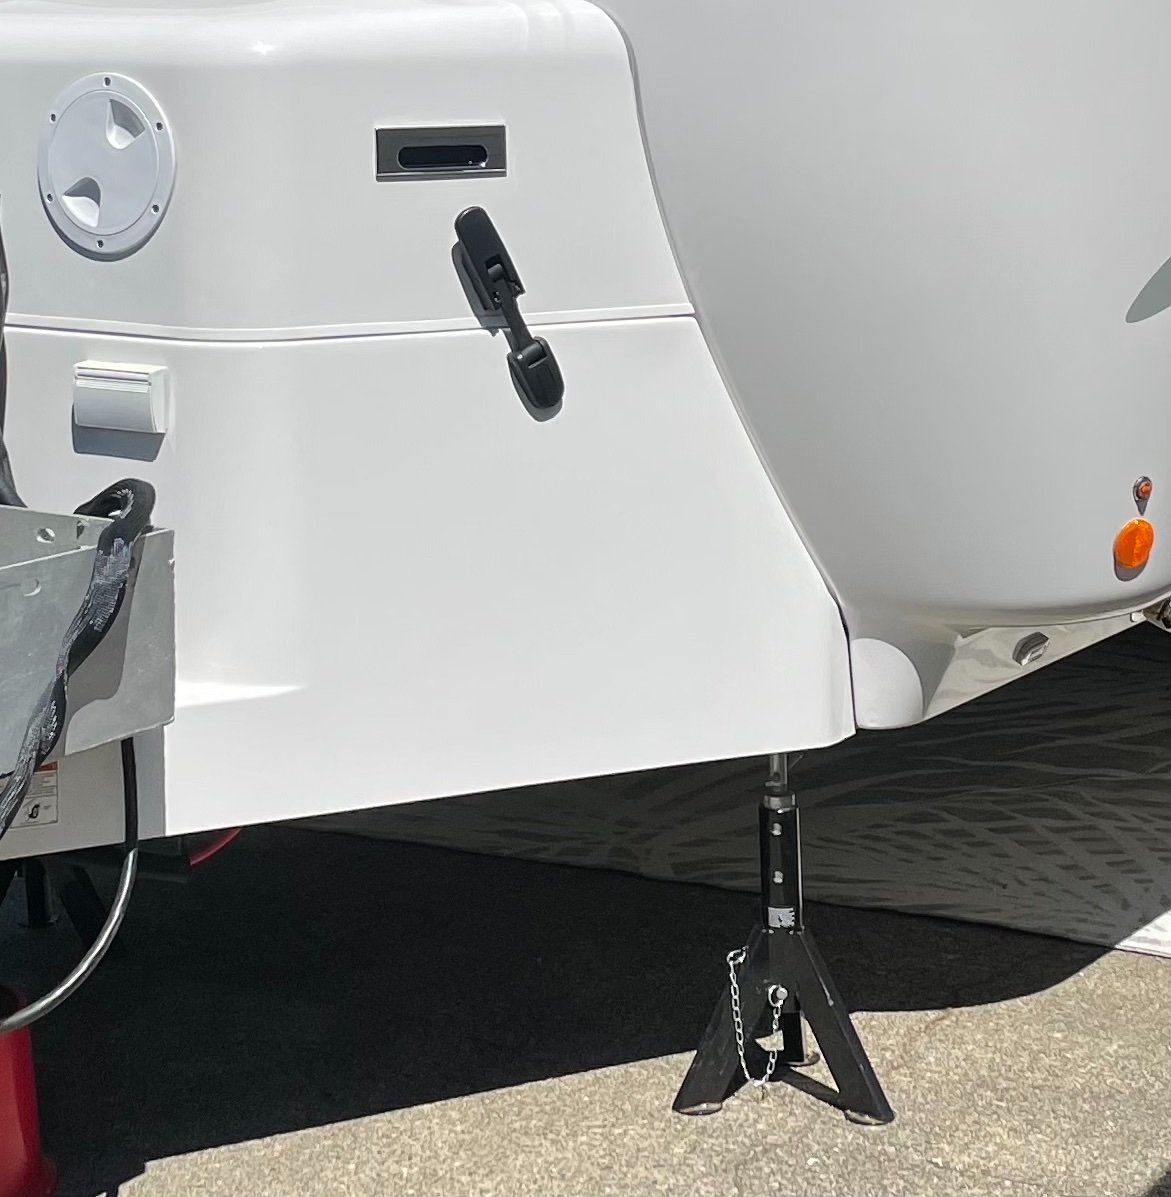
Good tips above. We use these EAZ LIFT 48860 Telescopic Jack stabilizers if we feel the need up front. Sometimes we don't need them, a lot depends upon the specific campsite. They are shown on the Oliver Trailer Outfitters list on Amazon: https://amzn.to/2mAAgPO Craig - Hull 505
-
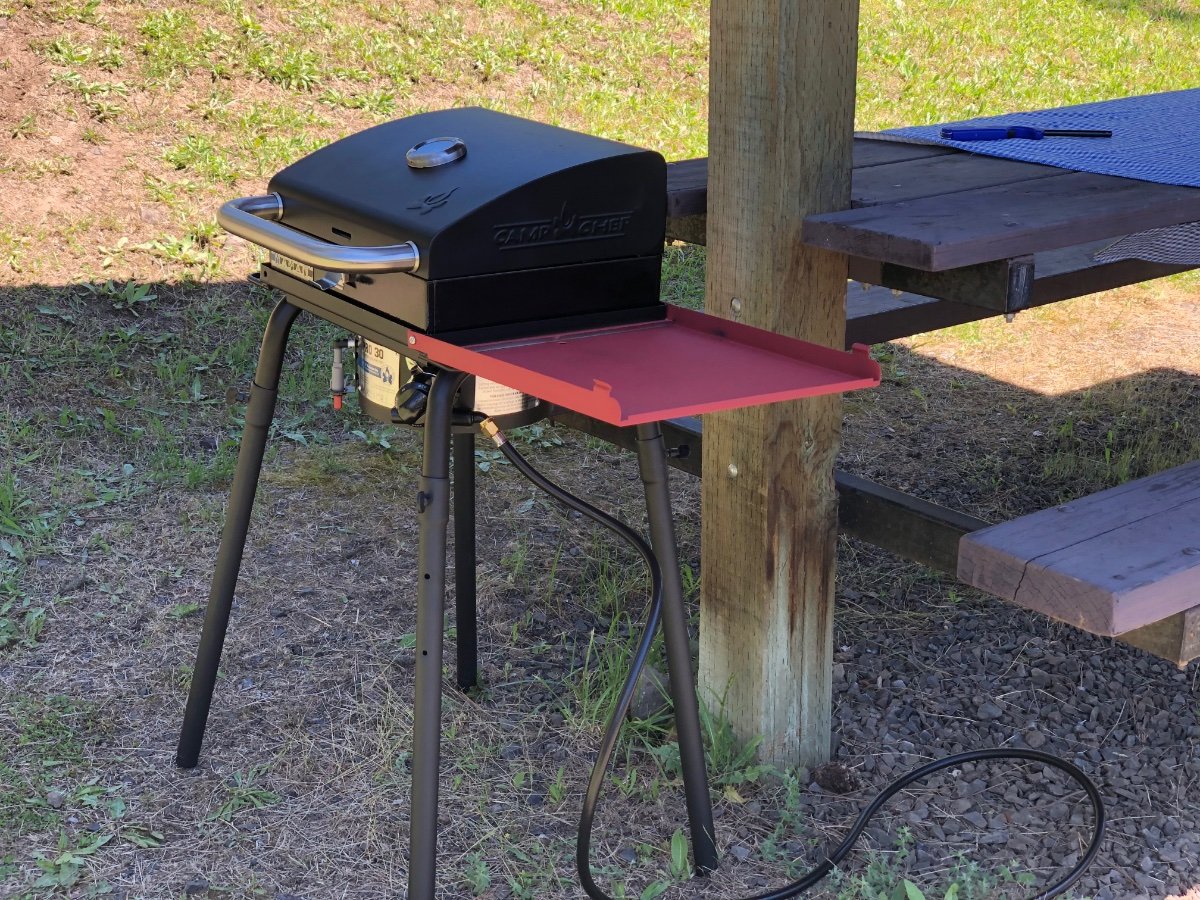
We have a Camp Chef Pro 30 Single Burner 14" system with the 14" BBQ Box and it also has a separate 14" griddle accessory. This is a native LOW pressure burner system and works perfectly with the pressures supplied by the Oliver Regulators. We connect to the quick connects with a hose we bought that connects to the CampChef's flare fitting (near the burner end), The other end is the quick connect which can be plugged into the Oliver Quick Connect or to extra extension hoses. The camp chef ships with a hose and regulator that can be connected to the high pressure port of a propane canister. We carry that regulator along with us in case we want to go PORTABLE with the system and cook somewhere far away from the trailer. Pictured Below: Camp Chef Pro 30 , 14" BBQ Box, Quick Connect Hose, Regulator for Portable Propane Use
-
John, I agree with your comments about trip hazard, and safety for small heaters. Does the unit have a fan that circulates the heat or is it radiant only? If this pans out for you, I'm sure many will want to have it in their "to do list" of updates. Craig
-
Welcome Mike and Sue. We've loved our trailer for just about two years...and here's our Website where we catalog travels, discuss modifications, and share info about various campgrounds. https://4-ever-hitched.com One of the features of the site are links to the Oliver Trailer Outfitters list on Amazon. The links are at the TOP and Bottom of the web page... or here: https://amzn.to/2mAAgPO The list has dozens of items that we and other Oliver owners have acquired over the years...each has a note in the upper right corner of the listing describing Oliver specific topics like how it fits, where it's stored or how it helped. Hope you find our website with campground listings useful and that it helps you stay excited while you await delivery: Craig & Rose Short Hull 505 - Galway Girl