Corvus
-
Posts
92 -
Joined
-
Last visited
Everything posted by Corvus
-
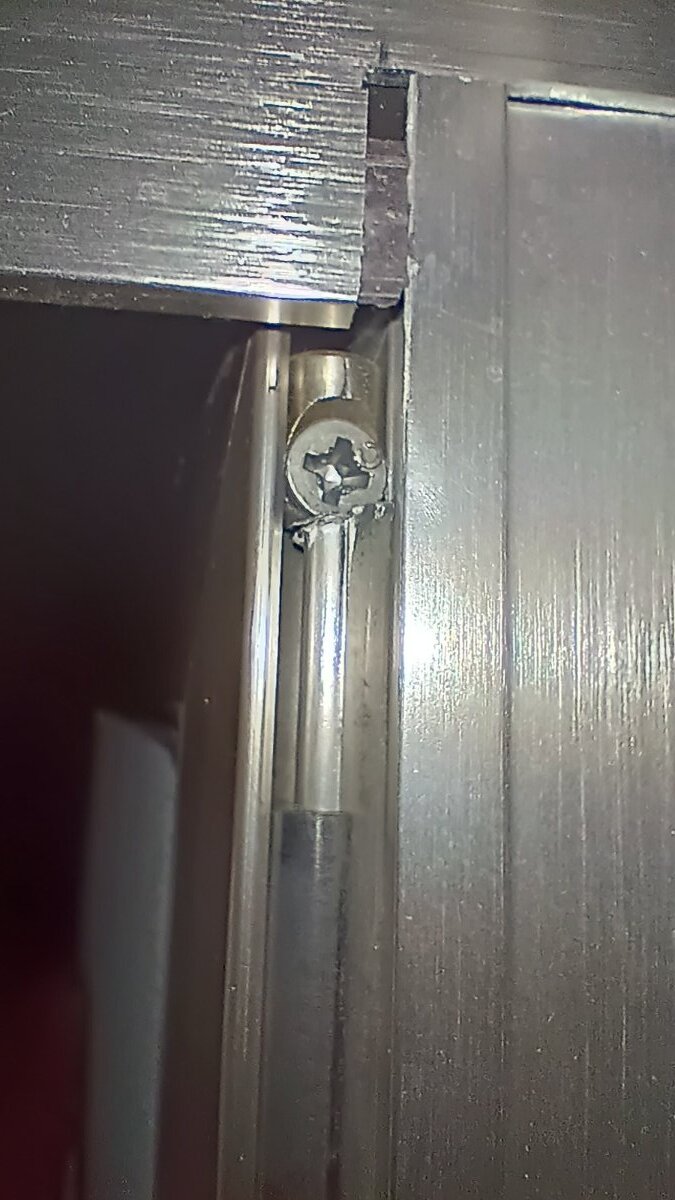
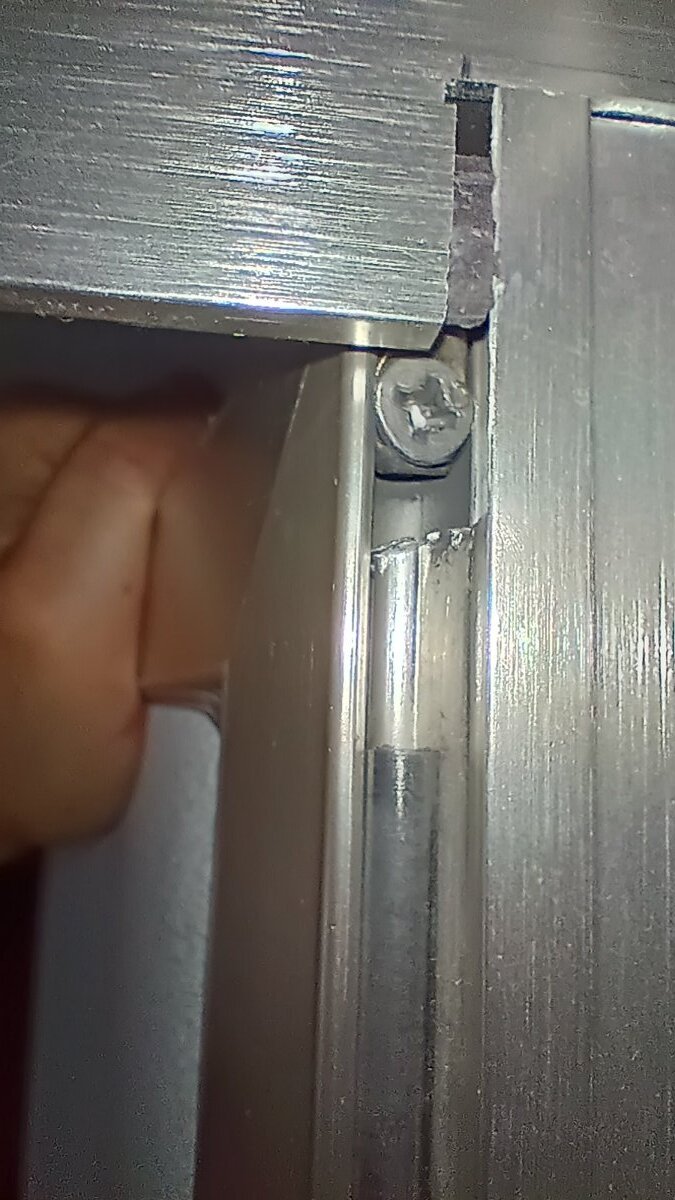
I've had the same problem with mine. Initially when I inspected it I found the door and frame to be surprisingly square and the mitered joints to be firm enough to resist torquing easily by tugging on them. The only points of visible wear were a little at the latch and the plastic seal thing at the bottom. The odd thing to me was that the door would lift a little when closing and drop when opening. Thought that was a feature. Recently I looked closer at the hinge and think I found the issue. The hinge is a solid aluminum pin flange running top to bottom though the barrel. It is held in place At each end by a there is a small steel bar that is tapped for a screw that holds the pin in place. It looks like the top hard steel bar grinds on the soft aluminum pin shaving it away letting the door drop slowly over time. My thoughts to remedy this is to place something like washers on the pin to raise and protect it, but I have not had the time to remove the door to see what could be done. Hopefully this will make a lot more sense with these photos. This is the bottom of the hinge with me lifting the door up. Couldn't get the image to orient properly. This is the top hinge, notice how the top of the pin is getting deformed. I think the angle on the top of the pin explains why the door lifts when closing. This is the top hinge with me lifting the door up, so there's a considerable amount of play.

-
If you have any interest in mineralogy the Crater of Diamonds State Park could be fun too. It is very hot in the summer so your travel dates would match nicely.
-
I see you have the Ouchita National Forest on your list. It has a lot to offer. Mount Magazine camp sites are nice and close to hiking trails and the lodge has wonderful views and a nice restaurant. The hang glider launch, east of the lodge, also has very nice views too. To the south of Mount Magazine is a Corp of Engineers campground on a lake. Lake Ouchita had some camping sites around the lake but I can't remember their names or know their status.
-

HELP! Bad smell from under dinette seat
Corvus replied to NHBoomers's topic in Mechanical & Technical Tips
Have you pulled the bottom left kitchen drawers out to inspect for a faucet leak that can wet wood in that area? Sounds like you've done due diligence with the plumbing so I thought it might be worth a look. It took over six months to find out this was the source of an odor in our camper which was detected in various areas over time. All close to the floor. The odor seemed to move around but I didn't detect it around the drawers until I removed them. It was a peculiar odor that eventually took on an ammonia component. Ammonia odors are classic symptoms of a refrigerant leak, but even while checking out the refrigerator I could not tell the source was the wet drawers. -
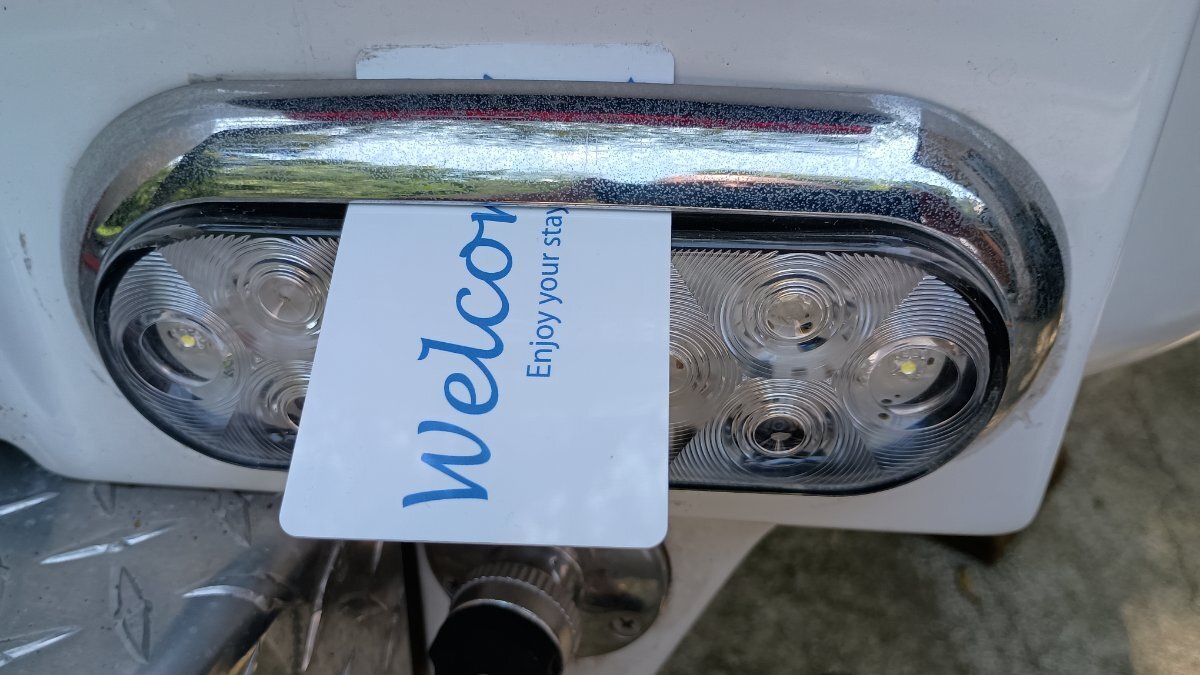
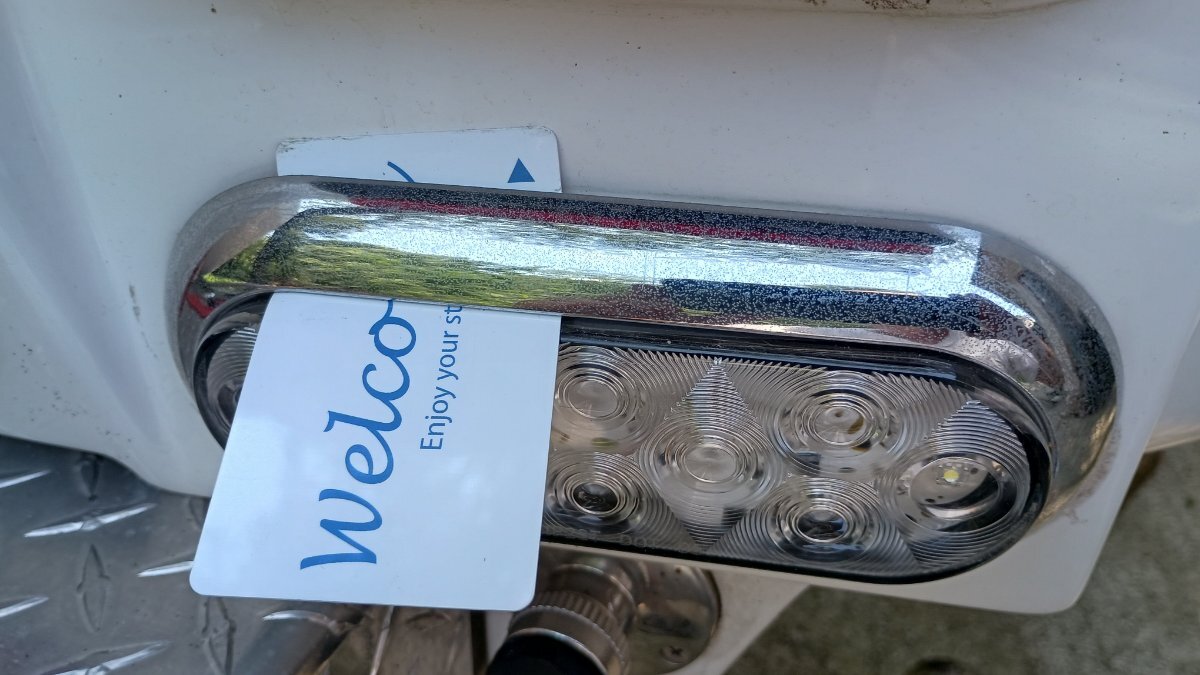
Thought I would post this in case anyone else was reluctant to remove the bezel with metal tools and risk buggering up the light or gelcoat. This involves using an old credit card, or hotel key. First slide the card between the light and bezel in the center. Next slide the card from side to side to release the clips. Sometimes there’s a click. Now the bezel can be gently pulled off. I didn’t find it necessary to release the clips on both sides but that could be the case at times.
-
Thank you, this is very timely. I was trying to figure out how to remove mine yesterday because they are taking on that corroded look too.
-
I recommend everyone learn how to check for faucet leaks. I check mine first thing if I see any sign of a leak and occasionally other times. My faucet leak did not drip out the scuppers for a long time. Good luck finding your leak, hopefully it's not the faucet. A link related to kitchen faucet leaks:
-
You could limit the hose length so it won't pull on the fitting when extended. Tying an overhand knot in it should work. Seriously though a rag tied so the hose couldn't fully extend or a bungee improvised to do the same might take some stress off the fitting so things don't get worse before you can get it repaired.
-
The topside MaxxAir decal on my 2019 #539 says Model 7000K.
-
I would be very interested in hearing about your experience too. Ours hasn't worked properly since we bought the trailer. I can get it to work for a while by pulling then re-installing the fuse.
-
The smoke from Mexico fires got heavy at times here in Florida. Now the wind directions that kept that smoke away brings the smoke from Canada. Due to respiratory issues we have stopped camping until things improve. See the big picture here: https://fire.airnow.gov/ See air currents here: https://earth.nullschool.net/
-
According to the respective company websites the prices listed for the Natures Head and Laveo seem to be comparable. So how would the Laveo be considered 1/2 the price?
-
A revolving tray?
-
Thanks for the report Cameron. Every thing you said fits with our experience making a few jaunts into the hot desert for astronomy related events. We stayed inside our Casita camper running the generator most of the day then came out at night to do astronomy. But it was definitely not 118 F.
-
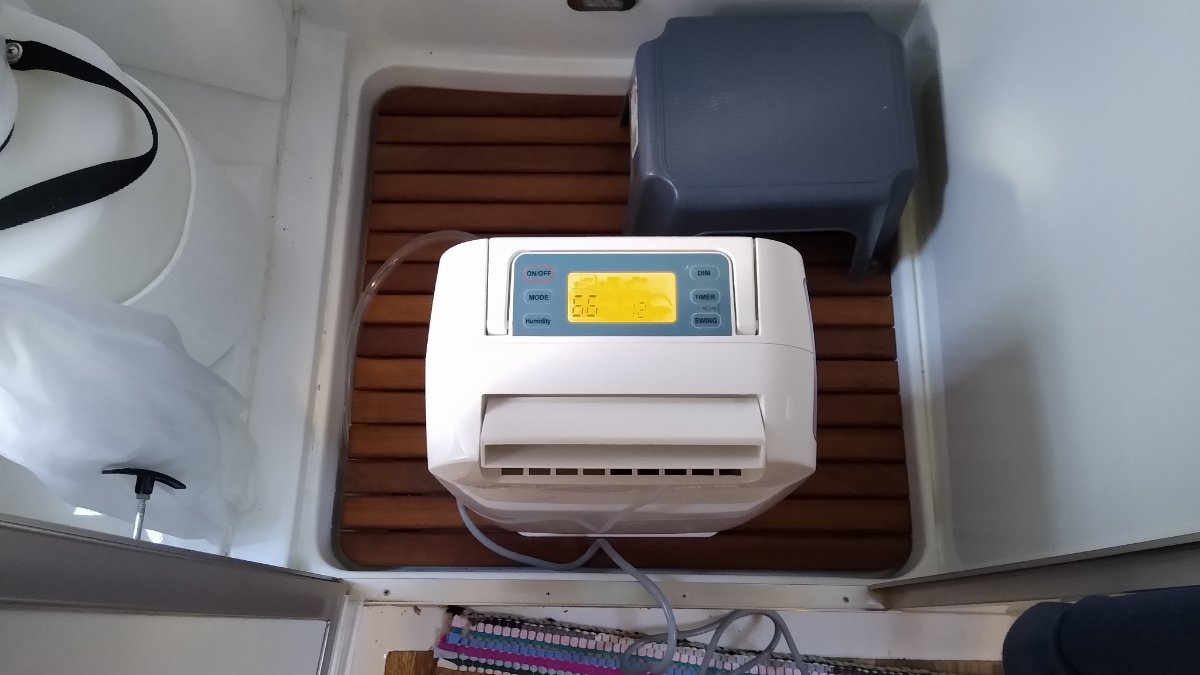
The Ivation 14.7 compressor model NCeagle linked to in his post was not available when I needed one ASAP. Here is my experience with the Ivation 13 Pint desiccant model. Although a desiccant type dehumidifier I've been using mine for up to four weeks continuously in Florida since January. The desiccant types produce more heat than the compressor types plus a significant chemical odor. The unit is only used when in storage so the amount of heat and chemical odor have not been an issue. The chemical odor has diminished but it is still noticeable. I set mine at 65% and the SensorPush placed at various locations shows it works well throughout the interior. I leave doors and drawers a jar to help. I also have a canary on the table (salt shaker) it has not caked yet. The trailer is closed all the time so the unit spends most of the time dormant or monitoring, which is a very nice feature. In monitor mode the fan will occasionally run and oscillate for a few minutes then start the dehumidifier if above the humidity level set. The unit will also restart then run the monitor routine after a power cycle. I didn't have time to route my water hose outside so I placed the unit in the bathroom and ran the supplied hose to the open drain in the shower pan. I was concerned about excessive moisture and stench escaping from the drain, but I was pressed for time. To my surprise, and great relief, that has not been the case, even during the hot summer months.
-
I don't know which model, but the first powered vehicle I learned to drive was an Oliver tractor around the age of ten. Spent a lot of time the next few years helping out in the orange grove, peach orchard and gardens. Until I got my automobile operators permit and interest changed. Now seeing an Oliver tractor brings back some fond memories.
-
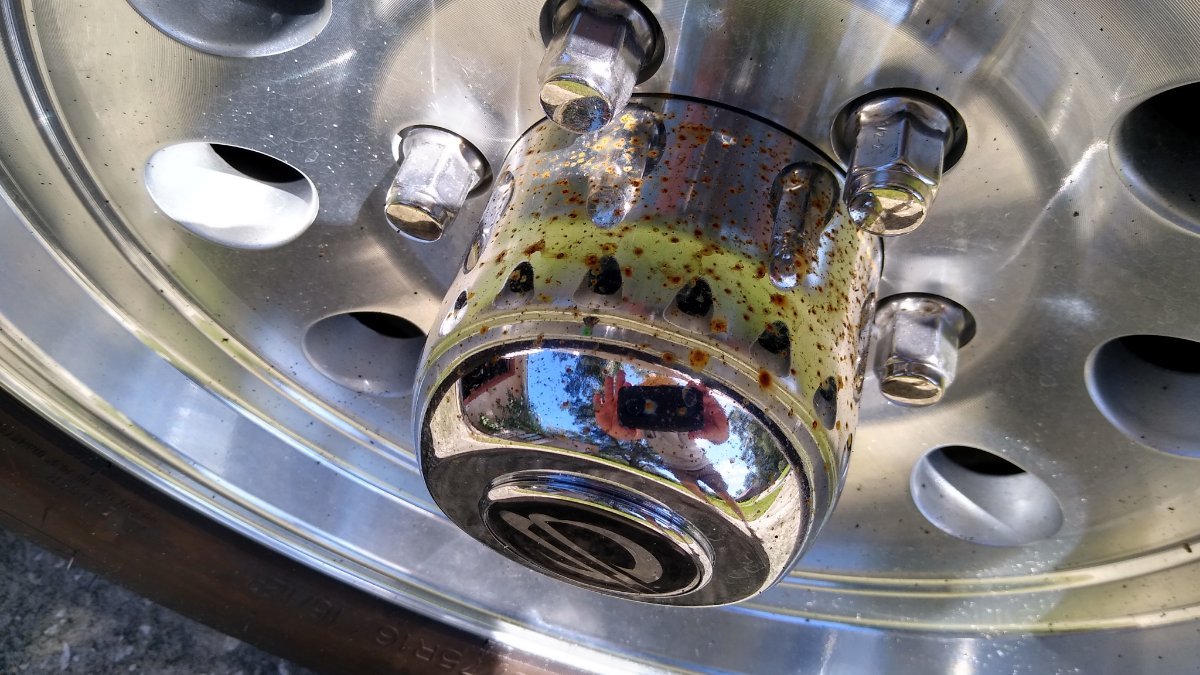
The wheel center caps are probably made by Lionshead and chrome plated steel. The ones on my trailer rusted and pitted in six months. You have to take the wheel off to remove them. All of mine were rusting on the inside too. One of them contained some rusty water. Replaced them with this stainless steel version.
-
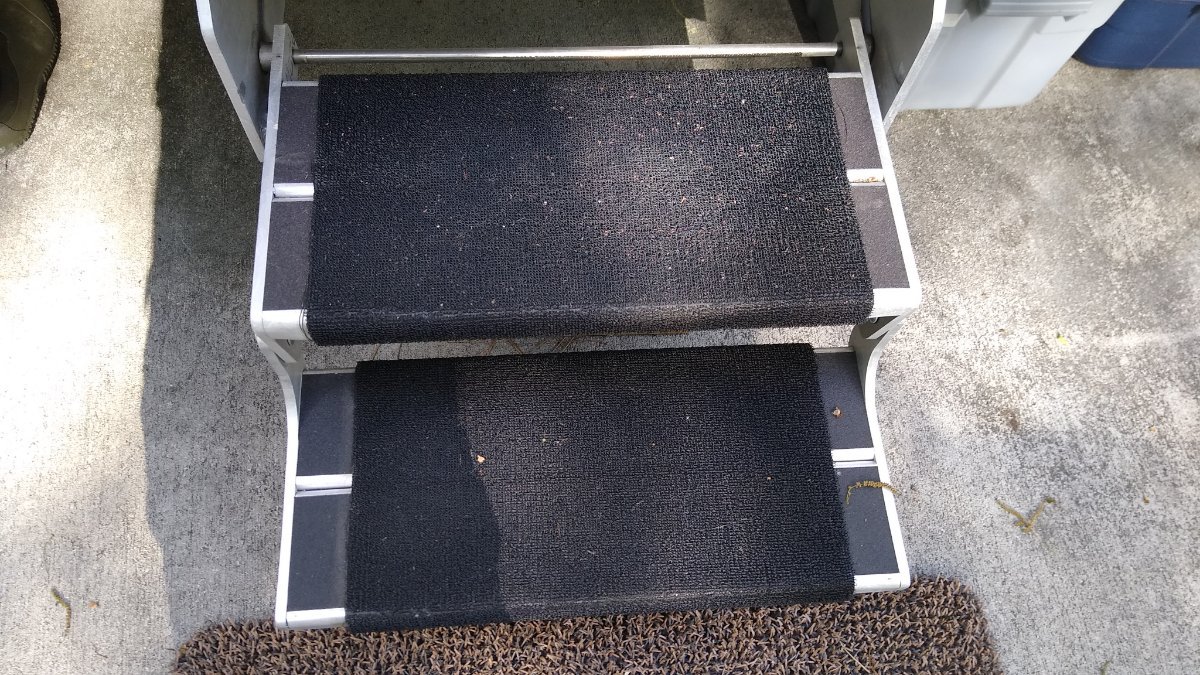
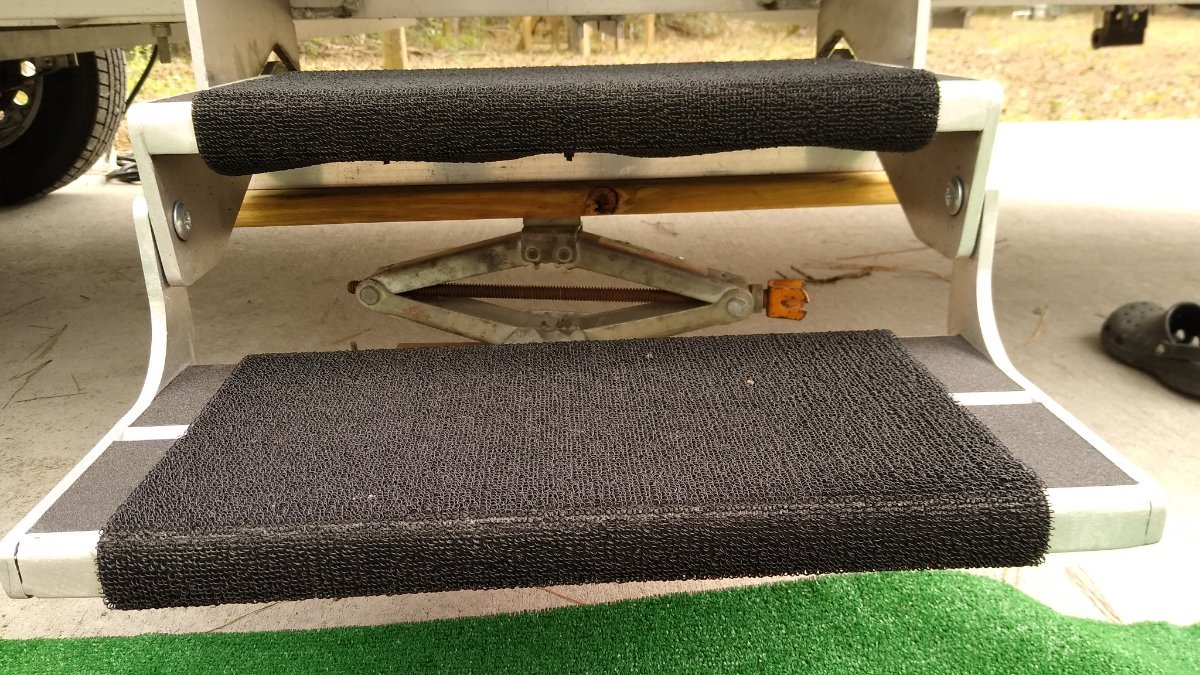
Apologies for the click bait title, but we really do have Grubby Feet and like them a lot. The recent thread Stabilize Oliver II suggestions reminded me of how well our Grubby Feet have worked and thought I would pass it on. Initially our Oliver was in a storage lot infected with Nostoc, a cyanobacteria. When dry it was crisp and dead looking but add a little moisture and it becomes a slippery slimy mess that spreads everywhere it is tracked. It even created a mat of slime on the bare steps making them slippery. I tried one of the carpet wraps on the steps, but it just became a slippery and slimy mess. I came across Grubby Feet while searching for something that would give us more confidence when using the steps. After installing ours nearly two years ago I can say they have performed and lasted better than expected. Here in the southeast it has rained a lot the past two years and I've worn many types of shoes and can say I feel confident when using the steps now. The mats have worn well, looking and feeling nearly the same as they did when I installed them. The only sign of aging is a slight wear pattern and a couple strands that separated on the edge.
-
I place a scissors jack and some blocks of wood under the steps. Hand tight enough to keep the steps from dropping with weight, no jacking. This helps reduce the rocking a lot when someone is using the steps.
-
Here are links to 4 foot and 6 foot cables with pins. My trailer came with a 4 foot cable which pulled soon after picking it up. I now use the 6 foot cable. https://www.amazon.com/Fastway-80-01-2204-Zip-Breakway-Cable/dp/B00718W5GQ/ref=pd_bxgy_sccl_2/141-4122227-5466261?pd_rd_w=gBbgr&content-id=amzn1.sym.7757a8b5-874e-4a67-9d85-54ed32f01737&pf_rd_p=7757a8b5-874e-4a67-9d85-54ed32f01737&pf_rd_r=634XBQTMT3SDF5KKVYGE&pd_rd_wg=exGuc&pd_rd_r=d703b652-ce5f-469a-b934-c5101aa245cc&pd_rd_i=B00718W5GQ&psc=1 https://www.amazon.com/Zip-breakaway-cable-Pin-80-01-2206/dp/B00718W3YK/ref=sr_1_23?keywords=fastway&qid=1662223074&sr=8-23
-
Woke up to a new earwig song after reading this post last night. Silver wings shining in the sunlight . . .
-
Good idea, divide the weight, separate fridge and freeze plus add redundancy. Something for me to seriously consider before going to a larger unit.
-
After a lot of deliberation about weight, size and cost we went with the F40C4TMP. We've used it in multiple settings for nearly a year now and it has performed better than expected. For us it has been a great compliment for the camper, truck, car and house. https://www.amazon.com/gp/product/B08D3T3CJ2/
-
2 bolts behind the propane tanks on the Ollie body
Corvus replied to Coach and JoJo's topic in Mechanical & Technical Tips
Sounds like it may be the bolts that hold the propane shroud on. This thread may have some information for you. -
I guess some people have a different definition of “sanitary”.
Corvus replied to Frank C's topic in Campgrounds & Parks
I wouldn't cross contaminate intentionally but I'm concerned enough about doing it accidentally that my hoses are color coordinated. Blue or white for potable water. Black or grey for grey water or rinsing potentially contaminated items. We have a composting toilet now so that simplifies things a bit. Edit: Forgot to say I also use a dedicated spray nozzle on the dark hoses. The color varies but usually a dark color.