NCeagle
-
Posts
383 -
Joined
-
Last visited
-
Days Won
10
Everything posted by NCeagle
-

HOW TO: Lithium Battery Powered Vent System
NCeagle replied to John E Davies's topic in Ollie Modifications
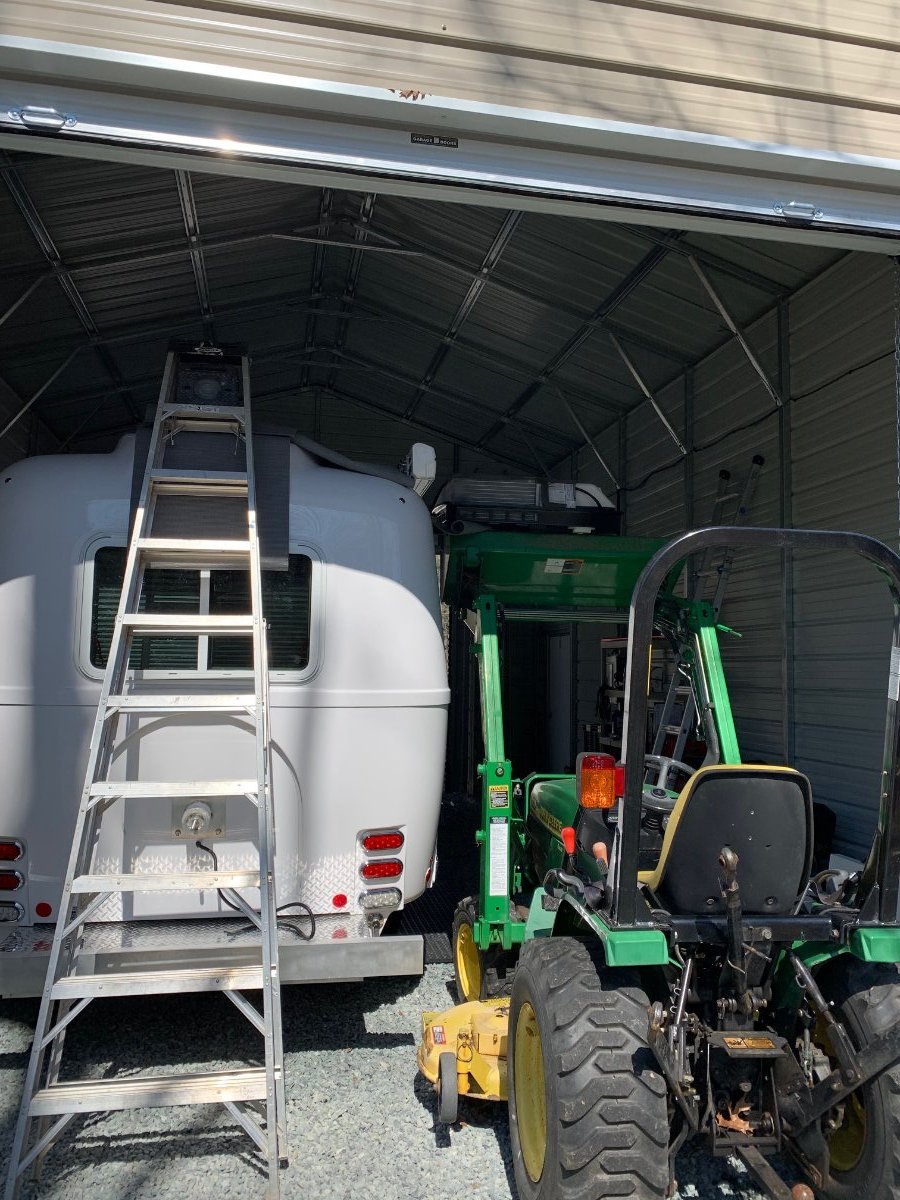
Thanks John. I was thinking about a few more crazy options today. One thing I've got in the back of my mind is that a loss of the fan and having the battery box heat up isn't a show stopper like not having backup heat would be (and having pipes freeze / break). So, I still have a few months (at least) to think about it before we start seriously warming up here. I'm not planning on super hot camping, but all I have is a big steel shed for the Ollie and it could get blistering hot in there over the summer. My batteries are always on to run lights, toilet fan, etc. If you get any data from your design, please let us know - like if you get the bug to head straight south soon. 🙂 Thanks again for reviewing my design and sharing your thoughts. Very helpful. -
HOW TO: Lithium Battery Powered Vent System
NCeagle replied to John E Davies's topic in Ollie Modifications
The temperature data I've been collecting strongly suggest that I need to figure something out with the battery box like you did. My target is to keep the box in a sweet spot of 60F - 80F if possible. Given this limited range, I'm convinced that leaving the battery box door sealed and insulated is mandatory. These Lithiums are just like humans when it comes to temperature I guess! 🙂 Here's my preliminary design: Conditioned air intake: A 4" duct vent under the street side bed and another 4" duct vent in the battery box right above the street side wheel well. There's plenty of room for 3.75" holes in both places to install the ducts. Between the vents I'm planning on using a 4" duct paired with an inline smart fan (yes, I like smart fans!) to pull conditioned air from the cabin and push it into the battery box. The smart fan will fit nicely right on top of the wheel well and can run anywhere from 28 cfm to 280 cfm. It also has a thermostat to provide some automation. Battery box exhaust: I am not planning on exhausting the battery box directly back into the cabin. I have another 6" smart fan under my forward dinette seat to move air slowly or rapidly between the entire basement and the cabin if necessary. Additionally, if I leave the fan pushing conditioned air into the box running long enough it will be pushing conditioned air into that basement area and surrounding electronics. I'm also thinking of using a bunch of smaller holes in the battery box to exhaust the air rather than just one or two bigger holes. For example, a 3.75" diameter input is ~11 square inches of area, so if I use 1.5" diameter holes (1.75 sq. in. area), I would need ~6 holes to provide adequate exhaust area. So I was thinking of drilling the 6 smaller holes in somewhat random places on the front and back sides of the battery box, hoping that would give some good cool air mixing in there. I'm wide open to suggestions, constructive criticism, or any other things to consider that I missed. Especially @John E Davies since you have already thought through and executed on your design. Thanks! -
Just add a big 62 gallon tank like I did recently. Now I bitch about having to put my credit card into the slot twice to fill the tank! 🙂 But deep down I hope that retirement planner app that I'm using isn't lying about our chances to outlive our money. 😬
-
Good article. I agree. I don't even carry or plan to carry a generator in my "generator box". That's where I keep all my chocks and blocks and locks. I like the idea of putting some chill in the cabin (and batteries in your case 😉 ) whenever stopped on warm/hot days.
-
Yeah, it's a whole different topic, but I was thinking more of folks that want to cool down their trailer before pulling into the campsite and so run it while driving. Maybe that's just for the big "RVs" with built in generators. I don't know if it would actually work to run the generator in the basket while driving to "pre-cool" the trailer if pulling in late.
-
I didn't think of an extension cord. I was looking at the twist lock variety since I would be worried about it working it's way out while driving.
-
I've not seen anything under 25'. You could easily make one any size you wanted with the two ends (about $20 each on Amazon) and some 10/3 gauge wire.
-
HOW TO: Lithium Battery Powered Vent System
NCeagle replied to John E Davies's topic in Ollie Modifications
Wow - amazing engineering and work as usual! I have a feeling many of us will be trying something similar once Summer rolls around. This is obviously not an easy mod to pull off. This will help tremendously even if the design varies a bit due to differences in the Ollies. What don't you like about your insulation on the door? I would have to say it's way more insulated than the rest of the Ollie, so I think it may not be a problem. Thanks! -
Hull 688 has this issue. The trim keeps coming loose during every trip. I've tried some duct tape because I didn't want to glue the strip on. That hasn't worked. I got super lucky when search actually found this thread! I do believe this is the first time a forum search has provided a result I was looking for. 😉 The link is still good after nearly 4 years!
-
I've been struggling (thinking too much) about how to attach the Camco furnace screen. The springs simply don't work as you mentioned. Looks like you fabricated a brace to connect to the screws holding the furnace cover on and then connected the screen to the braces? Tough to see what you did in the picture, but I'm sure interested! Thanks!
-
Hi Pat, yes the Hutch Mountain LPG regulator does fit under the propane fiberglass cover on the Elite II. I have the 20 pound tanks which are shorter. Not positive that it would fit with the 30's, but it should as the regulator doesn't sit more than about 4" above the tank and there's a good foot of clearance to the top with the 20's.
-
Ditto. Been cleaning up the dust constantly since the day we picked up and will be for the foreseeable future. It can't be cleaned out easily since it's coming out of the basement when it gets stirred up driving or running the furnace, etc. Some areas of the basement are not reachable and I can still see literally piles of white fiberglass dust in corners of the basement I can't get to with a vacuum or damp rag.
-
I am going to water test it later today. I'm nervous. Fingers and toes crossed. 😏
-
Alaska and BC planning for September, need some info
NCeagle replied to John E Davies's topic in Campgrounds & Parks
What a great plan! Alaska is on the bucket list for my wife and I - but I'm waiting for my wife to retire first so we don't have to rush. This seems like a good time to go - after the tourism of summer wanes, but won't you feel pressured to get back given winter can come very early up there? Thanks for sharing your route and plans - I have a few more years to plan it all out so I'll be looking forward to hearing about your trip later in the year!! -
2,000 watt inverter vs 3,000 watt inverter
NCeagle replied to Fritz's topic in Mechanical & Technical Tips
I have had the new firmware on my 3000W XC Pro for a little over 3 weeks now and I started using the software cutoff I discovered rather than the physical cutoff relay to disconnect the battery from the inverter (to stop charging). Haven't seen the [20] error code since. Maybe it's fixed. I haven't heard back from OTT on their test results with the firmware though and they haven't closed my ticket yet so maybe they know something I don't. -
And my .01 cents (only half as good as what katanapilot has done)... I did something similar to what katanapilot did but I was a bit more lazy. 🙂 I removed the 120V connections from inside the relay box as that's mandatory to connect to the new Houghton. Once those connections are gone it is easy to remove the board as katanapilot did. This is where I got lazy - rather than remove the compressor relay, trim the board and fit it into a custom box, I just wrapped the board in a non-conductive plastic bubble wrap bag and secured it up in a void in the new AC unit. Maybe I'll do it right and do the extra work that katanapilot did one day - especially if my board fries in the bag. 😬 "Right" for me would be not having that board in the Houghton at all - I'd just put a new board near the furnace and run a new set of wires. I don't have the E5 error like katanapilot. My freeze sensor is connected directly to my thermostat apparently as the sensor and wire come out of the wire bundle - not the relay. So I suspect mine was set up slightly differently than katanapilot's but not sure. I just rolled up the wire and stuffed it back into the roof with the thermostat sensor intact. No issues yet. Minnesota Oli, definitely looking forward to a report back on your install after seeing the amazing work you did on the street side heat duct!
-
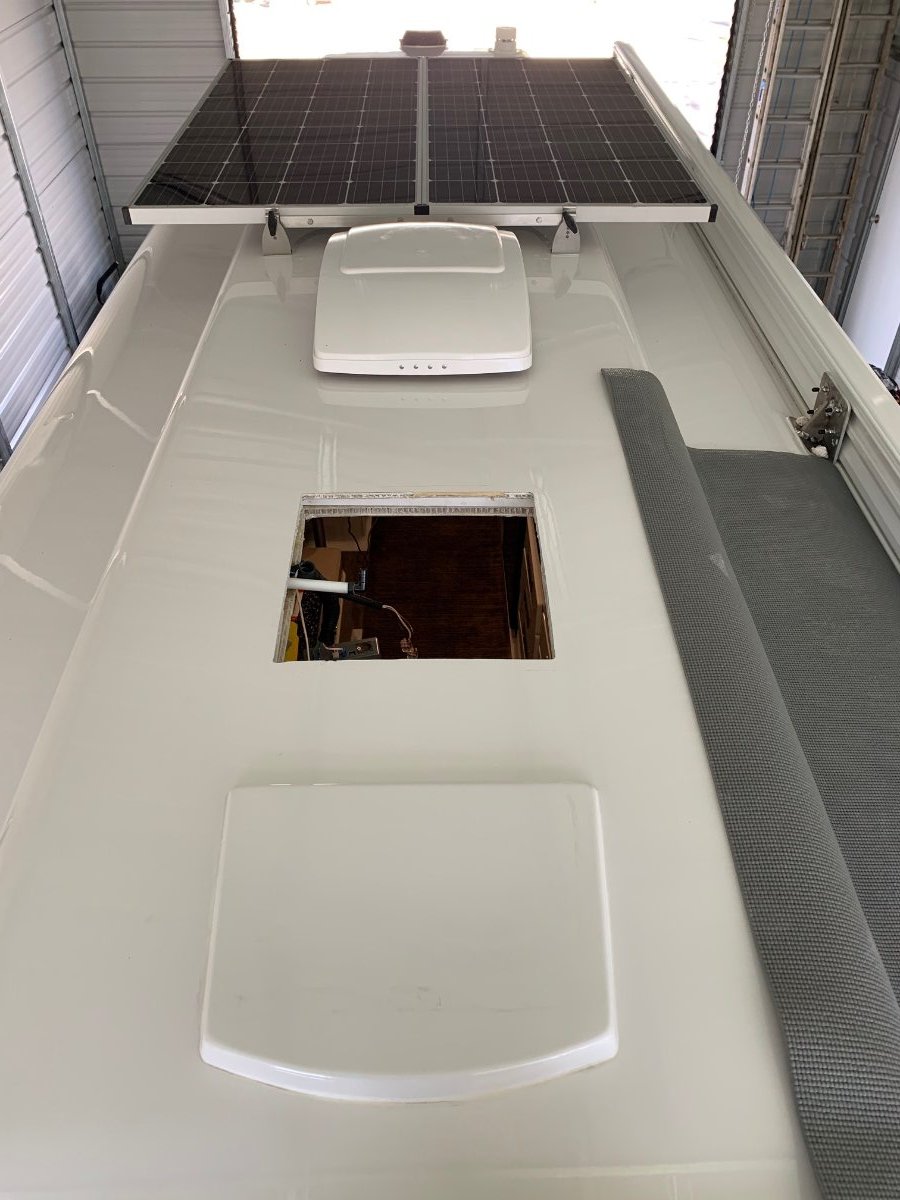
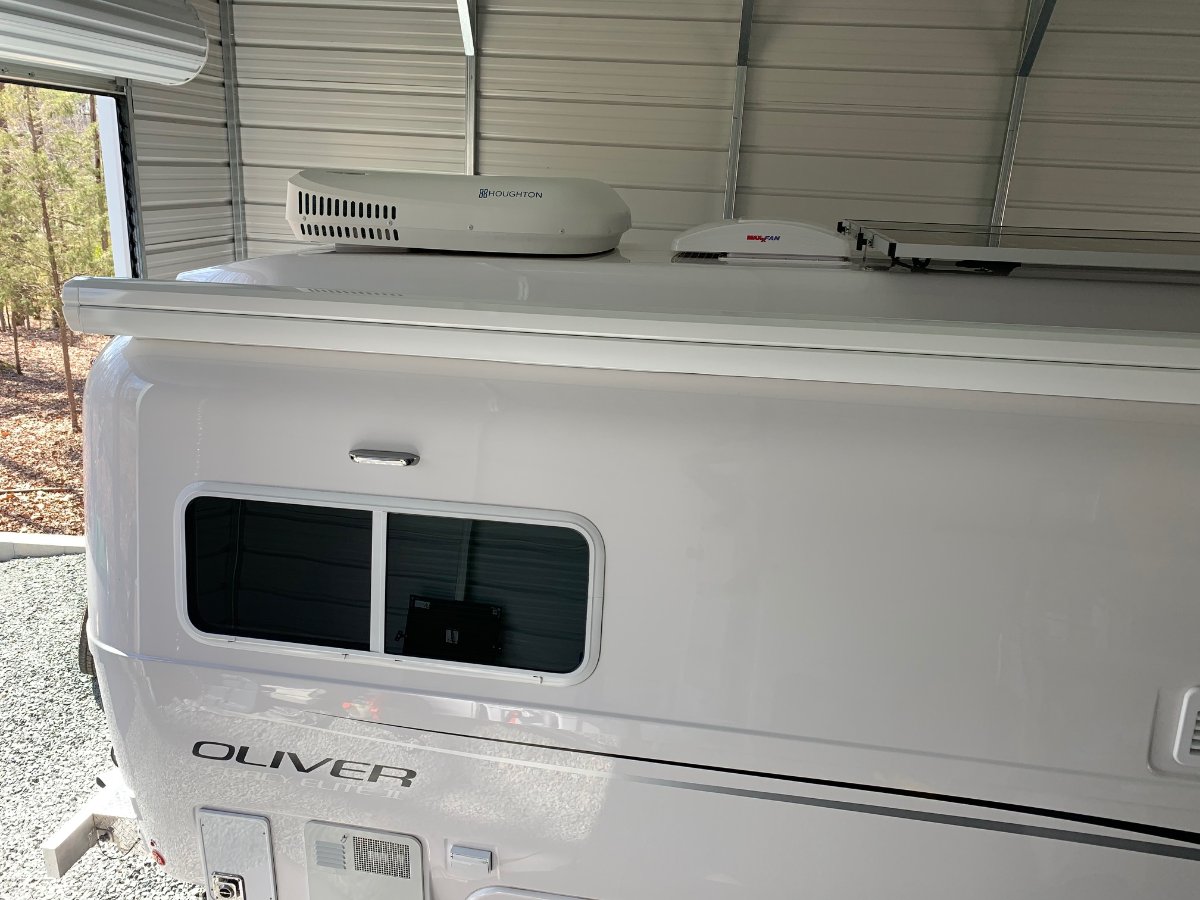
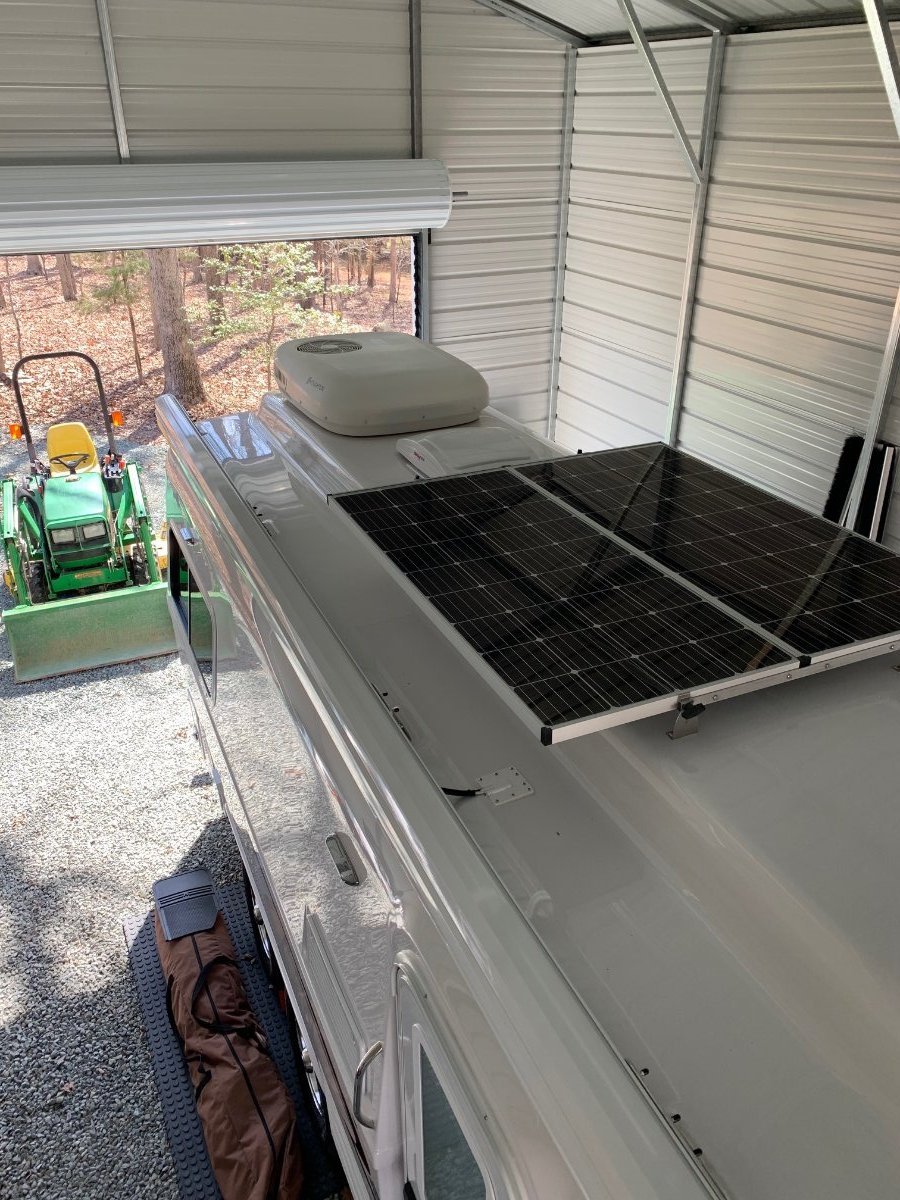
Another Dometic "power lawnmower" AC bites the dust... Created a temporary skylight. What a nice, sturdy, double fiberglass hull with PVC board in between for strength! And a few pics of the outside of the unit since the first two pioneers (katanapilot and seadog) included different parts... All in all, it took me ~3.5 hours. I had two helpers to remove the old unit and put the new one on the roof: John Deere and my son. I ended up using Butyl tape on the outside frame because I had some high quality stuff on hand, I'm familiar with it and that's what OTT had used on the Dometic Penguin II I removed. Now only time will tell how these things perform and last. Some of my notes / observations so far to add to what has already been observed: 1. It's a lot quieter. I only measured sound at the bed where our heads are with high fan and compressor (about 5' away). With the Dometic it was ~80 dB (as loud as a power lawnmower) and with the Houghton it's ~60 dB (as loud as a normal conversation). Definitely will be able to sleep better. 2. AC and Heat Pump both work on either batteries (Lithium) or the Honda 2200 generator without the EasyStart. On battery power through the inverter, it ran smooth / fantastic. However, with the generator there were a few hiccups as the compressor didn't start a few times and the surge protector (I think) made some "strange" clanging sounds. A 2200 generator alone may be borderline and may need either the EasyStart (if possible) or a pair of generators to be safe. 3. Fan alone takes 1 Amp on 120V and 8 amps on 12V. Fan plus AC compressor takes 9 amps on 120V and 90 amps on 12V. Fan plus heat pump takes 13 amps on 120v and 130 amps on 12V. I think I'll still be carrying my small Vortex space heater in the winter, but it's nice to have another all electric option when power is available. 4. The exterior cover is nice, but it's not pure white like the Ollie or the MaxAir fan. It's a bit of an "off white" I think. 5. The AC compressor and the heatpump both cycled about every 7 minutes. I think that's expected since the thermostat is in the unit itself and there's not a lot of air circulation up in the back of the Ollie ceiling. An additional fan may help. 6. It's 3.5" shallower than the Dometic on the outside. Thanks again to katanapilot for researching and finding this alternative and to both seadog and katanapilot for sharing some additional tidbits that helped make my installation painless! Now I will try to sell my old unit to subsidize this upgrade so we can afford diesel for the next camping trip. 😬

-
I have seen some of that grayish paste too - when I changed out my bathroom faucet, which was only about a month after we got our Ollie. It's almost certainly lime / calcium but I couldn't figure out why I would have had so much after such a short period of time. I wish I would have tested it - if I see more I'll let it dry out and then put a drop of acid on it. If it is lime / calcium and it's getting into the plumbing and forming paste that fast, it may be time to add a portable water softener in addition to the Camco filter when going to a full hookup campground.
-
POLL: Balance your trailer tires.
NCeagle replied to John E Davies's topic in Mechanical & Technical Tips
Finally finished having all 5 of my "new" (11/20 Ollie) tires balanced. The first one took 3.25 oz as I mentioned in a previous post and that one was the worst. The other tires required the following: 1.25 oz, 1 oz, 1.75 oz, and 3 oz. All in all not too bad given the size/weight of the tires. I think this indicates pretty high quality rims and tires being used by OTT. Now I hope OTT added "make sure tires / wheels are balanced" to the quality checklist so future owners don't have to go through the hassle of getting it done post-delivery. 🙂 -
Hi @SeaDawg, I had originally planned on using 3M 4200 sealant for the top plate since it's "removable" but after thinking things over for a few days I had settled on butyl tape. I want to avoid silicone or anything "permanent" and difficult to clean off in the future should it be necessary. I hadn't considered a foam seal until I read your post. Did you choose foam over butyl originally because of the ease of installation / de-installation or performance? What brand of seal did you choose? Thanks in advance!!!
-
@katanapilot I've got my Dometic removed and I'm not seeing that E5 error with my furnace running. I did have a freeze sensor on mine that I still have connected to the relay box (currently just hanging in the air). I removed it from the coils before taking the unit out. Not sure why you didn't have a freeze sensor on yours? Also, I seem to have a slightly different thermostat in that it doesn't support bluetooth. Weird that we have a few different components when our Ollies were built fairly close together. Two additional question if you don't mind... 1. How did you safely remove that black compressor relay from the circuit board? 2. Have you tested with a 2K generator by chance? Wondering about needing the EasyStart. Thanks!
-
POLL - IMPORTANT Inspect your battery cables!
NCeagle replied to John E Davies's topic in Mechanical & Technical Tips
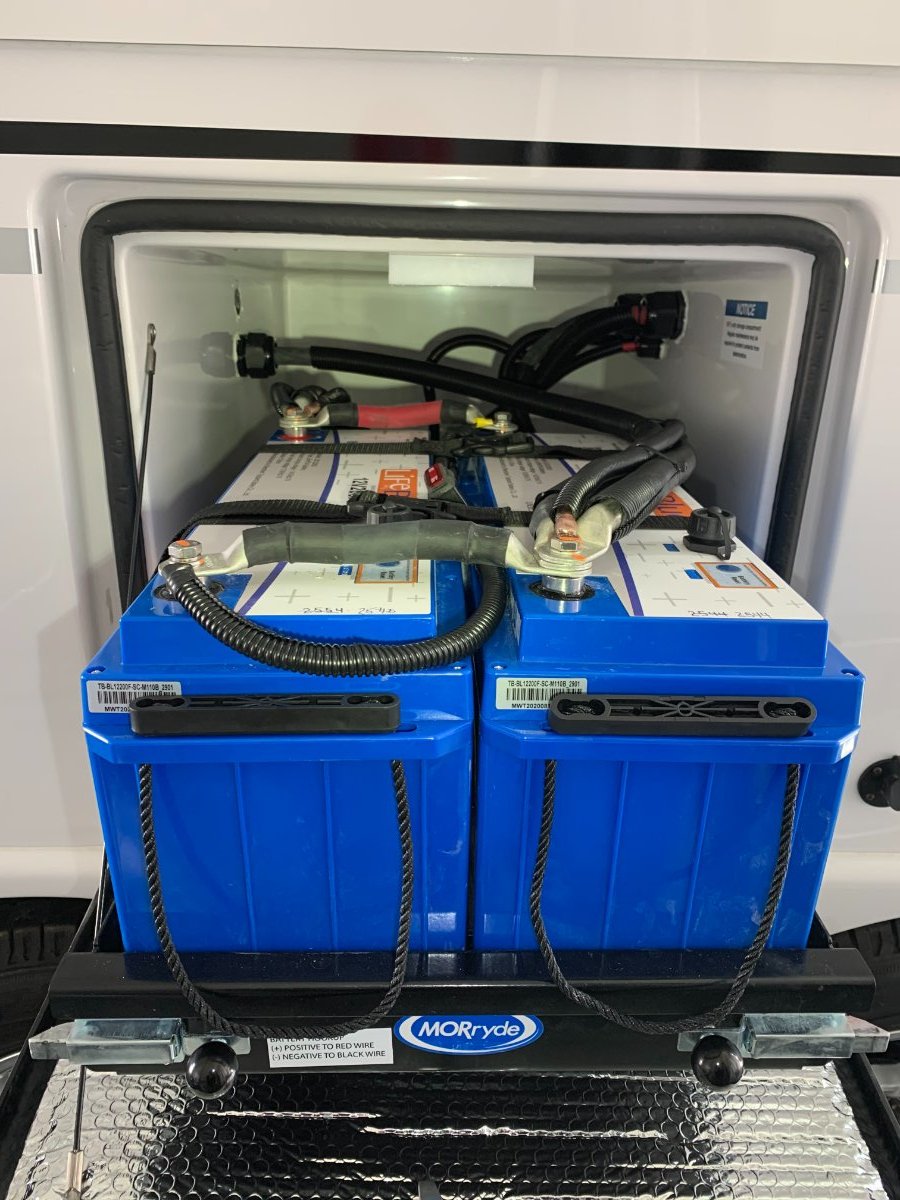
Hull 688, delivered November, 2020 had split plastic loom installed at the factory. There's also no cable anywhere near the bottom of the battery box or tray - it's all up top - at least on this one which is full with the 2 LifeBlue's.
-
@katanapilot, I saw that relay box. I was hoping it would fit somewhere in a "new" void, but if you are modifying it I assume it doesn't. I'll be interested to find out how this final part of your upgrade goes. I'm not against getting a new thermostat if that's easier - running wires to the furnace from where the thermostat is would be pretty simple. I initially toyed with the idea of cutting off or ordering a connector for the main power like the Dometic uses to connect to that relay box and splicing the Houghton in, but quickly realized it might work for the AC but certainly not with the dehumidifier & heater combo that the Dometic lacks. Cheers!
-
We spent our first night in our Oliver with the AC on last week for the first time. I was prepared for loud because I had tested it, but trying to sleep with it running was impossible for both of us. My wife actually considered moving to the truck that night because it woke us up every 20 minutes. I ended up turning it off - a bummer because it really was needed to keep the Ollie reasonably cool that night. A new A/C is now at the top of our list too! Thanks for sharing your experience @katanapilot! It will make this a bit less stressful knowing that you have found a pretty good unit (Houghton) that you have already installed. What are you going to do with your old unit? Ebay?
-
John, thanks for sharing this years ago. A gift that keeps on giving since the Elites still don't come with a mud flap option. 🙂 I'm going to tackle this mod soon. I happen to have enough 1" x 1" x 3/64" scrap steel square tubing for this job but I'm willing to get 1" x 2" aluminum if there's big benefits. To John and others that have done this mod, is 1" square steel tubing feasible? Thanks in advance!