JRK
-
Posts
146 -
Joined
-
Last visited
Everything posted by JRK
-
I was told this morning by Oliver service that the instructions I had been following as presented in the manual I was given March 17 at delivery for the Andersen Hitch are old and have been updated by Andersen. The correct manual coincides with the removal and connection method as presented at delivery. As an fyi, I asked about a connector that was displayed in my manual which is no longer used by Andersen. Without that inquiry, I would not have known that the manual delivered was not correct, and the procedure listed in the manual should not be used. I try to follow the RTFM principle, but when it is the wrong manual, it becomes disappointing. Has anyone found other manuals that might be out of date? https://www.mediafire.com/file/bx5xm3p7hie6515/3932_-_WD_Hitch_installation_manual_May_2021_Low_Res.pdf/file the correct Andersen manual. I was told that Oliver is going through the other manuals that are given out today to verify that they are current. The manuals are copied and placed in a bound book. Nice idea, and the manuals are in one place. Need the correct manuals, though. John
-
Pennie, I am not trying to discourage your purchase, but I have had numerous issues with my LEI that I picked up three months ago that have absolutely nothing to do with the appliances or equipment. The problems are all due to lack of craftsmanship, poor quality control, and a problem at the installation of the equipment and appliances. Axle issues-installed incorrectly, inverter mounting issues, installation of blinds, installation of hoses and faucets, lack of support for the composting toilet, poor electrical connections, and more. I was rushed through delivery for a few reasons - one of which the regular delivery person didn't show up to work on my delivery date. Still, I wanted a trailer. I am content with the Oliver as the problems get solved - I have had no offers of taking the trailer to a local service center, only a discussion on how to do the repairs myself, except the axle, which I will probably return to Oliver on my next trip for a reweld job. A friend laughs at me for not buying an Escape, as he did, for about $15,000 less. He has had zero problems or issues in two years, and is comfortable going on beaches with it. My point - nothing is perfect. This is not a plug and play device, or even a quality car. I have driven nearly one million miles in four different cars (Toyotas and Fords) in the past few years, with not one mechanical or device failure. Just normal wear and tear. The Oliver will have failures, as any trailer will. The range appears to be flimsy. The door hinges will likely fail. The bathroom door is exceptionally lightweight and seems frail. I am concerned about the door lock assembly. The window blind clips fractured (two of them). If you can't or don't learn to do the basic work yourself, you will be spending time and money at dealerships. Learn what you can and practice the basics. And learn the few quirks and tricks, like tilting the nose up a bit to be able to drain the holding tanks. Most importantly, enjoy and have fun. Don't take the problems too seriously, if you are able. My perspective - my wife of 48 years died three weeks ago. This is just a trailer, meant to be used to enjoy life. John
-
I will be at an event at Thomas Point Beach campground July 9-11, and staying a few extra days. First trip to Maine in 30 years. Looking forward to the trip, for the first time by myself. John
-
Dometic thermostat not showing Bluetooth icon
JRK replied to StillGame's topic in Mechanical & Technical Tips
You can get the upgrade to bluetooth. I had same question on my Elite I. I was told that the Elite II came with the bluetooth, but the Elite I did not. John -
When I was there for delivery, there were 19, all sold waiting for pickup. Mine was ready, on the lot, for more than 2 weeks prior to my delivery date.
-
I get free wine from my wine wholesaler daughter, so, being cheap, don't usually buy wine. But HH is worth the membership fees. Do what you are comfortable doing to support host. I like cheese, so buy good bread and cheese, maybe some vinegar and olive oil or fresh produce. Second the Stanford museum. The admission sales person made sure I used my senior discount entry fee, $5, I signed a login sheet and that was it. Bought a space gift in the shop, but the kids running the place had no idea I was there for HH. There were several spaces in their parking lot that was also next to the municipal airport and housing tract access. There are many non-alcohol related locations
-
I registered 2 weeks ago, new, in Ventura county at AAA. It took less than 30 minutes with a reservation, which was required for out of state, although California tax is pretty high (almost $5,000). For an out of state vehicle, I had to have the trailer VIN personally inspected by the AAA person. They need to see both VINs. The 2 labels were acceptable. Otherwise, would have had to take it to CHP. I stamped the vin in two locations on the frame after going to AAA My AAA did all, the registration, VIN verification and took my money. They reviewed the Oliver delivery paperwork, mainly the registration document. My AAA office, in Camarillo, has at least 5 people who handle DMV stuff i am sure an AAA in Redding would be able to handle it. Call if you need more help, 805 two one six, 2569 john
-
Can't find number of zerks on a single axle trailer in any manual. Found that there was no grease in fittings at delivery. Or they dried out completely, no grease, in short time
-
Anyone have experience with this trailer dolley?
JRK replied to Chukarhunter's topic in General Discussion
Just received the TX6000 trailer dolly. It seems to be what it says it is. Worked well for the first time. I bought the batteries through walmart - free shipping and $45 each less. Need 3. Standard power chair batteries - UB12350. Couldn't find the dolly anyplace else that had free shipping - $220 for shipping, but it is heavy. Fun toy. I need to go places, and come home, so I can play with it. I have an all concrete driveway/pad that has an 8' wide gate, but the first 20' is on a slight slope. The eave overhangs enough to rub the awning if not angled just right when at the same time the left rear corner finds the edge of the gate. With a block fence on the opposite side of the driveway, it is close to impossible to get the right angle with the truck, without rubbing against the wall. This dolly made it easy, although there is a bit of manhandling it to get it to turn. No power steering. . Handled it well. No bumps or humps to get over. -
simplistically, a proper antenna is one-half wavelength of the radio frequency. CB has an 11 meter wavelength-the radio wave from peak-to-peak is 11 meters. The frequency is how many entire wave cycles are completed per second (a cycle is called a Hertz). Therefore, the antenna should be about 5.5 meters, cut in half. The center of the coax would be connected to one half with the outer braid connected to the other half, each side one-quarter of a wavelength. That is too long and unreasonable for a car, or handheld, so the two halves are electrically shortened. Wherein comes the magmount. The vertical whip is attached to the center conductor of the coax, one-quarter of the antenna. The other quarter of the antenna is the magnet-magmount that is connected to the coaxial braid. The magmount is inductively connected to the metal car body, or whatever is used, creating the so-called ground plane, or other half of the antenna. The inductive connection is usually poor, which creates a poor radiator and even poorer receiver. So to make a car mounted antenna to work better, use a section of copper braid to connect the base of the antenna directly to the metal car body. And use an antenna analyzer to "tune" the antenna to the desired frequency. I almost always have an antenna analyzer in my truck, along with a portable antenna(s). Easy to use. Available for use. The Oliver hull makes a terrible groundplane. The bike rack makes a great antenna support. The aluminum frame is a pretty good antenna ground.
-
Where in central CA? I am in Ventura county, on the Oxnard Plain.
-
I have been a licensed ham radio since the 7th grade, 54 years ago. The repeater system works well, but I also have a CB mounted in the truck for 2 reasons. Ch 19, the trucker's channel, gives me road information. Ch 9 is the emergency channel used by various volunteer groups to monitor, well, emergencies. REACT monitors ch 9. Range is limited, frequently, depending upon atmospheric conditions. GMRS and FCS are also systems that are available, but every trucker has a cb. Language aside, there is much to be learned about extended road conditions. Other channels have specific purposes. So, yes I use a CB and consider it a communication safety device, albeit sometimes with limited range Ham radio gives me something to do while driving. Worldwide communications are regularly possible. It's fun. Something to do at a rainy campsite. John
-
The disappointment so far is that Andersen has not responded to emails or voicemails. No one has answered the phone. I took the link to a friend who is among other things a forensic metallurgist. His lab has an sem. He put the link under the microscope. There did not appear to be a failure of the threads which tells me that it was not properly connected. Someone forgot to screw it together. Basically, no harm, no foul. Nothing significant happened. The threads had not failed I am trying to verify with Andersen a source for the proper chain, tensile strength of the 3/8" chain. I've been told 2650#, but want to hear that from Andersen. I'll buy the proper length chain. I was also provided a too short brake breakaway cable. Extended the cable for the trip home, but made a proper length cable when I got home. I have to say that this sloppy, haphazard and unprofessional service and supply would not have been tolerated when I was working for my dad doing concrete and reinforcing steel or at McDonald's making hamburgers. Definitely not in the Air Force or in my civil service job.
-
2,000 watt inverter vs 3,000 watt inverter
JRK replied to Fritz's topic in Mechanical & Technical Tips
For those with the XC 2000, like me, I confirmed that they come with the standard remote, not the Bluetooth remote. So, for those who have the remote, is it worth the few hundred dollars to buy a Bluetooth remote? There is nothing wrong with the standard remote, so it is not eligible for an exchange. John -
In my Elite I, XC 2000, I have teh remote with the red X, which I think is the older one. Should I have that upgraded/will it be upgraded? Following the instructions at the Xantrex website, I can't connect the app/phone to the remote - no bluetooth in this remote. Trailer delivered 4 weeks ago.
-
Pat, simlar experience following pickup, first few miles, E1. After a few miles, the Tacoma was wandering a bit. Front end was " light". I was saying bad things about my decision to tow with my Tacoma. Decided to adjust the hitch, assumed to do one turn at a time would be a start, but found that 3/4 turn was all that was needed. Chains usually had about 1/2" deflection. Had other issues with hitch on way back, but as you said, could feel the distributed weight Still trying to get used to the Andersen nuances, and the Tacoma as a tow vehicle for 4,000 lbs. even with headwind, was consistent around 14 mpg. Looking at my next tv, as there are now 160,000 miles on the Tacoma. Used no oil in the 2000 mile return trip. My daughter has an MB GL450. I'll add that to my short list of new vehicles - tundra, sequoia, land cruiser. John
-
When registering my Oliver (I need to move. $4,800 sales/use tax) the VIN had to be identified, and located in 2 different places. I found the stick-on labels that have the VIN, but there is no number stamped into the frame. My personal thing - I prefer to have the number stamped into the frame, which I am going to do. My question: I have never stamped numbers into aluminum. I'll practice in a hidden area, but any suggestions? I have made several trailers, so have stamped VINs into steel. I know how to use the stamps, just looking for precautions for aluminum. Thanks John
-
I decided that I need a different way to move my Elite I through my 8' wide side yard gate that is accessed by a curved, slightly inclined driveway. Looking at 2 powered trailer dollies: Safer Products 7,500 lb capacity Or the Park It 360 powered dolly Does anyone have experience with either? Is there another suggestion? The cost would be about 6 months storage fees at one of the several local storage yards, when there is a space open. They are all full right now. My insurance cost also increases when stored remotely. And I would lack the convenience of being able to work on it when I wanted to, with limited access hours. So, I think I justified in my simple mind the reasons why I want a dolly. I can get it in with my truck, but it is not easy, and I am having difficulty getting it where I want it due to the angles, gas meter, width, etc.
-
I use a Tacoma 4x4 with full tow package/heavy suspension for the elite I. I think that is the max for this truck. I had a head wind from Little Rock to Los Angeles along The entire I40 return trip. Including getting rocked about while sleeping. It did fine. Kept it out of “D”, used 4th gear. Stayed a little more than 2000 rpm most of the way cruising about 65-70. It was ok, had ok acceleration. But I was not in Rockies or sierras. I would not try it with the additional weight of the II. when I replace the Tacoma in about 50,000 miles, it will probably be with a tundra or sequoia, or a decent used land cruiser. the 2014 Tacoma has been perfect for 155,000 miles.
-
Glad it wasn't mice or rats. I had mice in the engine compartment of my older Ford F-250 that chewed the ignition wires and radio wiring. And rats in my Toyota Tacoma cabin air filter, for years. I'd clean them out, they would return. Even killed one with the fan. Had them around my circuit breaker panel in the house, too. When I stopped feeding the birds, the rodents went to my neighbor's. I did find out that a lot of electrical wiring insulation is soy based, so the wiring manufacturers use rodent food. John
-
That was my thought, too. The HDPE is securely affixed, or when I tried to pull it off, it would not budge. I asked service about doing this, but have not had a reply. John
-
Thanks, Neuman's. I had already looked at everything you mentioned, except the threaded rod. John, the problem with mounting into the hull is that there is no inner/outer hull where the mounting plate is glued. It is affixed to the single wall inside, along the center of the trailer, small dinette seat, the seat against the rear dinette. I can't drill or screw into the fiberglas, through the HDPE, without drilling through the wall, into the aisle., exposing the screw. I did open a ticket, with photos. Minimal response so far. The other problem is that I cannot remove the inverter or make it horizontal without disconnecting the 2 heavy cables on the one side and the lighter weight cable on the "bottom". It is not "rotatable". A quality control inspection, or any visual inspection or glance, would not have seen the bottom two screws/holes because they were hidden by the inverter, and teh 4" of space between the inverter and the wheelwell. That I will need to get my hand into to make the screw hole and connection. There is no way to get a drill motor into the space to make holes, or drill additional holes in the flange, that I can figure out. John
-
I agree that the mount should have been plywood. Any suggestions at this point? The plastic (resin?) mount is glued to the inner seat wall. John
-
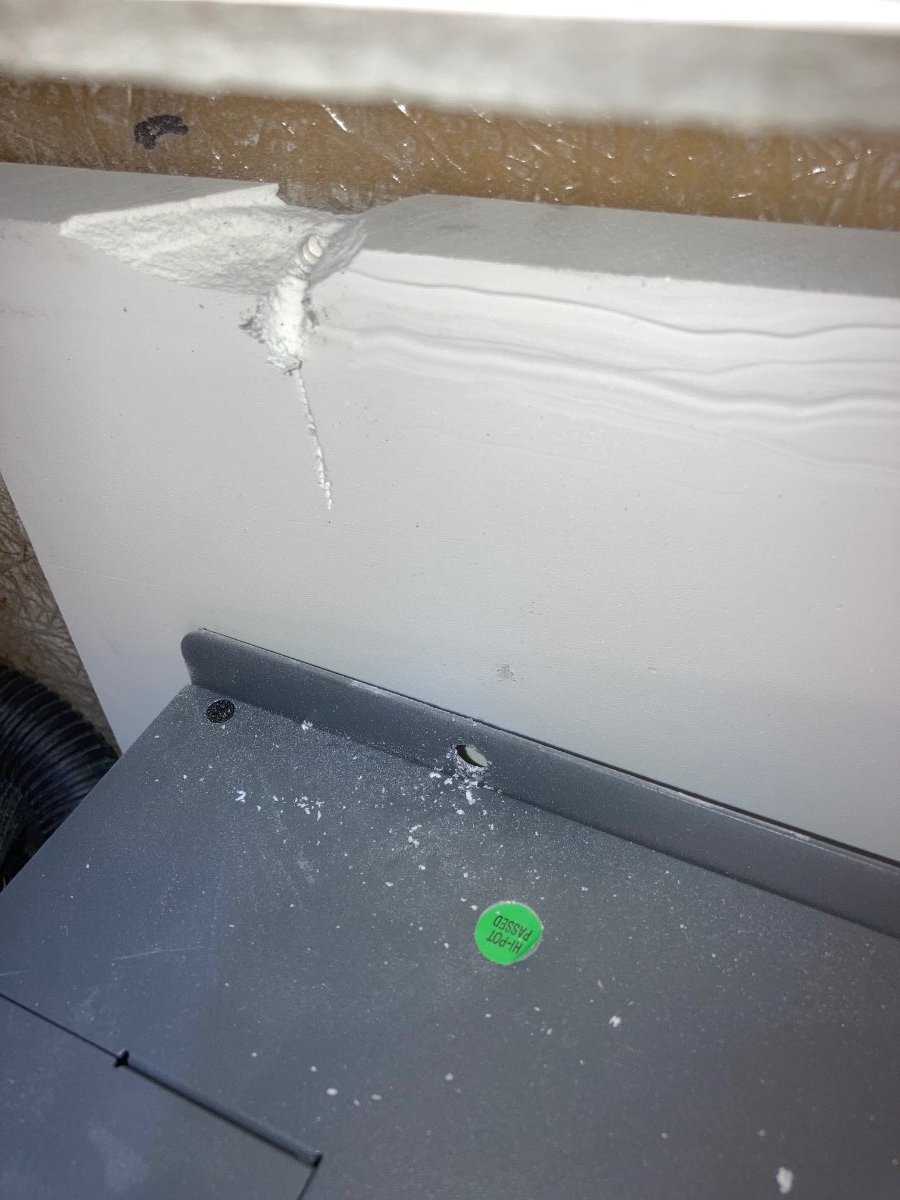
On the drive home from delivery, I noticed that the Oliver rear light was being intermittent. At a forum suggestion, I checked the buss bars beneath the small dinette seat for a loose wire, and found that the inverter had broken loose from its mount. Only the top two screws had been installed. The bottom two screws had not been placed (or there were no screw holes in the mounting plate indicating that). The inverter was able to flop about in the compartment, banging into the circuit breaker and bouncing on the buss bar. The intermittent problem probably has been identified. The mounting plate was plastic - probably resin? The plastic plate is glued or affixed to the interior, inside seat wall. I would prefer to put a bolt through the mounting plate with a fender washer or similar on the back, but do not see how I would be able to do that. One screw stripped out, probably after the stress from the other screw caused the fracture - or the other way round. My question is suggestions on how to best replace and mount the inverter. If all four screws are in place, it probably would stay put. The recommendation was for #8x1/2" screws. Thanks, John