John E Davies
-
Posts
5,759 -
Joined
-
Last visited
-
Days Won
243
Everything posted by John E Davies
-
 Has anyone had to deal with this? I sent an email asking them for a replacement ASAP. It lasted five seasons, I guess that is something. It is going to be interesting, we are staying three nights at a campground with no public toilet. I guess I will be “harvesting” the solids with a pair of bacon tongs to place them in a zip bag…😳 Then we will be home for a week before leaving for Great Basin NP. John Davies Spokane WA
-
Generator consideration for the Elite II
John E Davies replied to Vic and Wanda Shumate's topic in General Discussion
You need more than a 2000/2200 watt unit because you probably will be able to run only the AC by itself, no other loads. With a slightly larger one you should be able to run AC and also the converter. It is nice to be able to recharge your battery bank while cooling off the cabin, especially if you get lithiums which don’t charge off the truck (as delivered)! I have been extremely pleased with the Yamaha 2400 I have used for five seasons. It puts out more than the rated power and in my mind is better engineered and built than a Honda. It is discontinued, you would need to research the “current model” ( generator pun). https://www.yamahagenerators.com/Yamaha-EF2400iSHC-p/ef2400ishc.htm Make sure you pick a unit with a manual fuel shutoff valve so you can run the carb dry each time. At 75 pounds it is manageable, you don’t need wheels. I run mine in the truck usually and I use a little hydraulic lift work table to store it at home, I roll the cart to the truck, jack it up level and push the gennie into place… this is frequently on sale. https://www.harborfreight.com/500-lb-capacity-hydraulic-table-cart-61405.html John Davies Spokane WA -
Harvest Hosts Acquires Boondockers Welcome
John E Davies replied to John E Davies's topic in Campgrounds & Parks
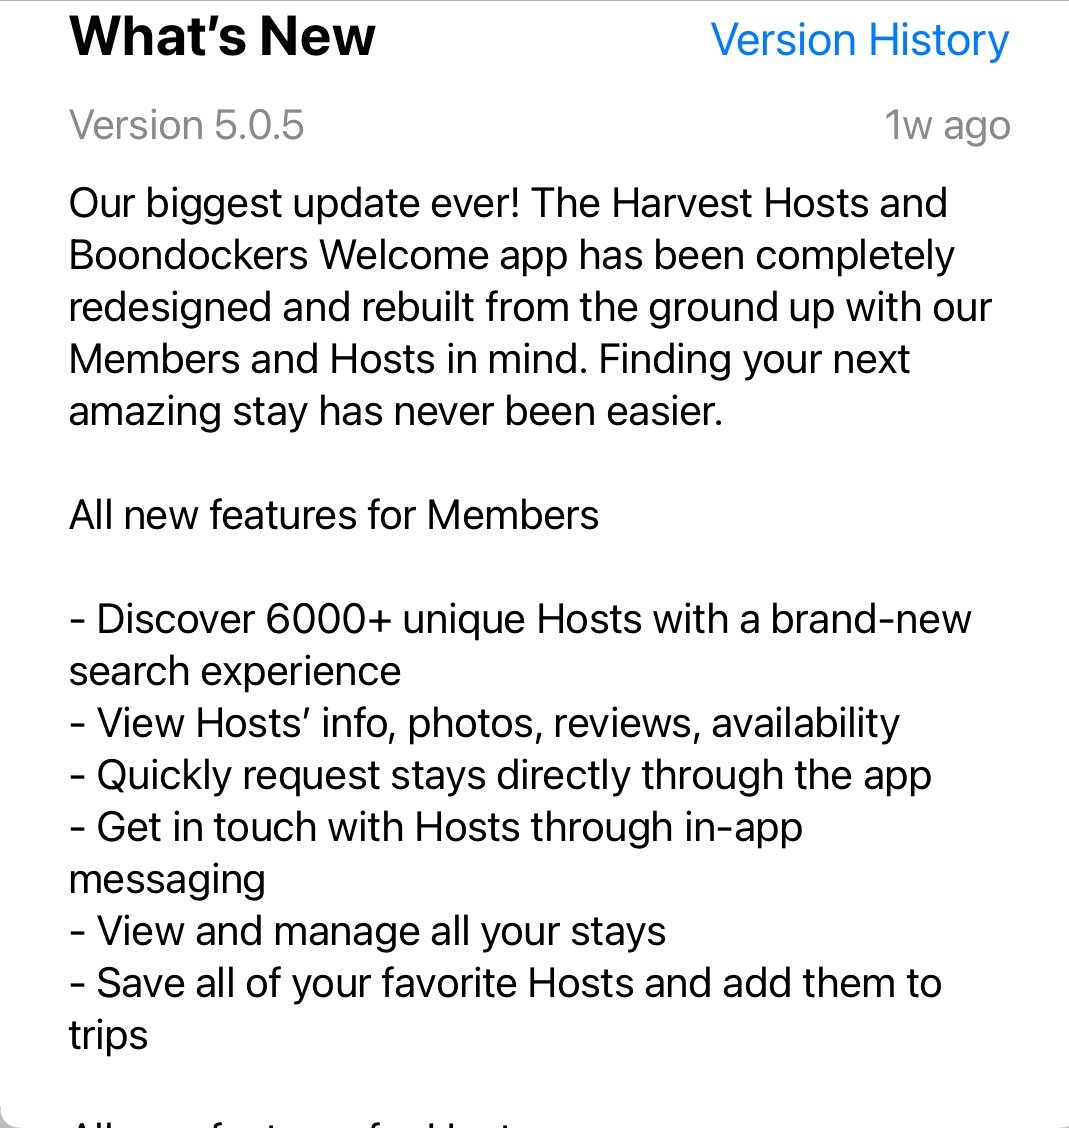
I just added the BW membership to my existing Harvest Hosts one for an extra $40. I am excited because the regular camping possibilities in Western WA (Puget Sound area) are reaaaaaly limited, but there are a number of BW hosts there in the suburbs. I visit my son in Redmond often and would like to bring the Ollie. Has anyone used this and can you comment? What do the hosts get out of being part of it, other than being nice neighbors? Their app has been updated. Here is a screen shot from the webpage for the Boise ID area, we are headed to the Snake RiverBirds of Prey area south of there in about ten days, there are lots of possibilities. Thanks for any comments. John Davies Spokane WA
-
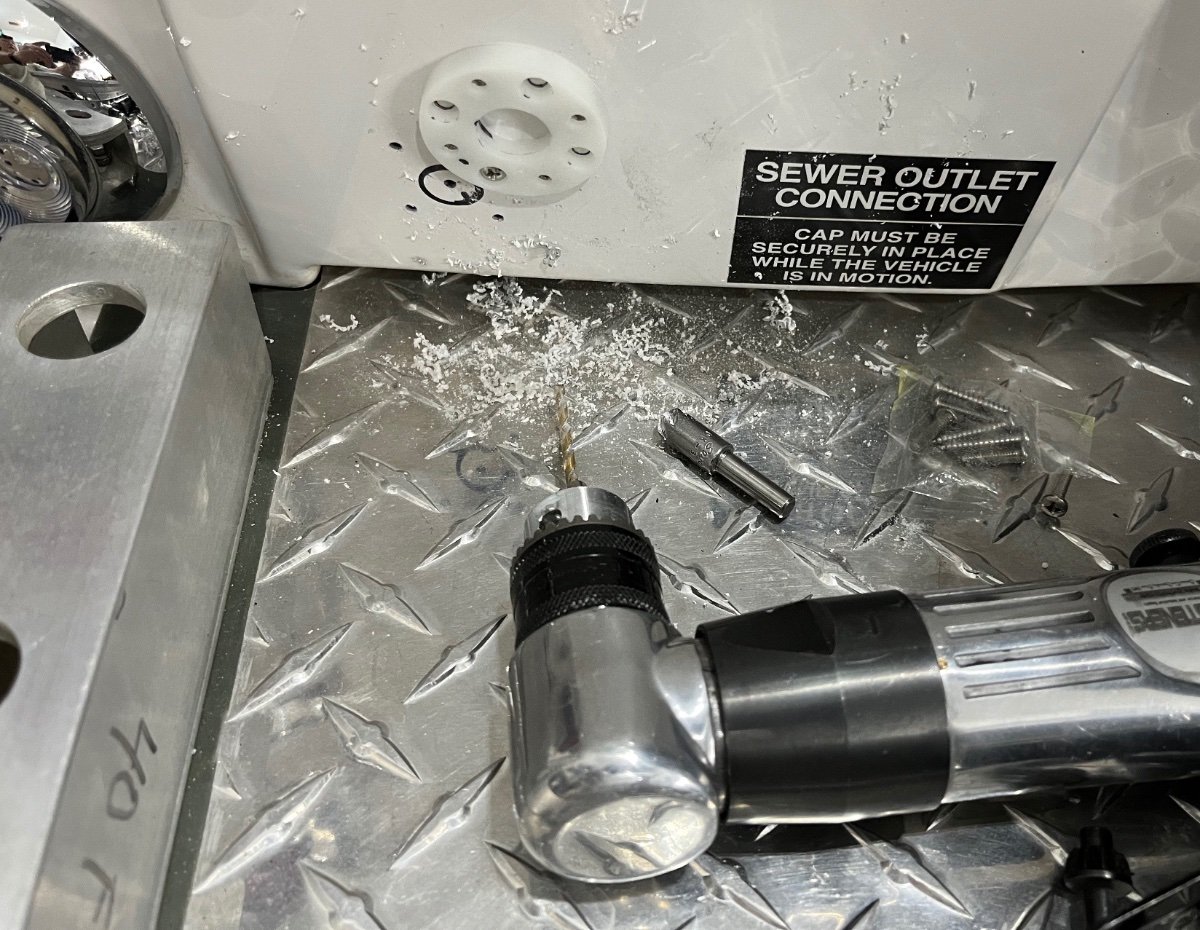
No drain holes = lazy technician. I drilled 1/8”: holes in my bumper at each end, and also in the bottom of the entry steps where water pools. My DIY rack is wide open on the ends so water cannot get trapped, and I can blast inside when I wash the trailer. You can use a drill guide block to get the top and bottom holes to line up. It isn’t as precise as a drill press, but it is good enough for this kind of project. I bought this one, it is super well designed, but $$$. There are some adequate ones with fewer features for less that $20. 30 45 90 Degree Angle 4 Sizes Drill Hole Guide Jig with 4 Drill Bits for Angled and Straight Hole, Portable Cable Railing Lag Screw Drilling Template Block for Cable Wood Post, Wire Metal Handrail John Davies Spokane WA
-
That is a really hazardous location for gas cans. I used to carry two 5 gallon steel NATO cans in back, before I removed my cargo basket entirely. Those are super tough and can take a big impact without rupturing. I think you could mount the Rotopax vertically in the same spot, with the thin sides facing to the rear so they don’t block the lights. But you will have to fabricate brackets. Rotopax offers an L Bracket but it weighs 20 pounds! …. https://www.amazon.com/Rotopax-L-Bracket-Single-Mounting-x13-95/dp/B01LRDVZHA You also need to consider security, is there a way to lock the caps? Unfortunately that diamond plate sewer cover is not designed to support any weight, it has a single thin piece of reinforcing angle running across the back. You could beef it up, so it could actually support the gas cans. I made a long tie down rail for my ebike, it is a 2”x2”x0.188” section of 6061T6. I riveted it down with common 3/16” aluminum pop rivets at 2” spacing. It is hell for strong. If you were willing to get rid of that tire cover, you could easily fabricate a double can mount that attaches to the center threaded rod, I think it is 3/4” diameter. That would put them up out of the way and would look cool! John Davies Spokane WA
-
That is not a prudent method! Two things come to mind. A compete drum with bearing will be REALLY heavy and awkward to store. If you have a big truck bed, that may not matter. A brand new drum will NOT work correctly on worn brake shoes, the diameters are different. This is why you always replace brakes in pairs, on the same axle. The situation where this would work great is if you have disk brakes with slip on rotors, like on your car. Then you could carry a complete hub and bearing and it wouldn't matter because you would be installing the old rotor onto the new hub and everything will match nicely, in terms or wear. Just get the bearing assembly, any decent shop in any little town can easily replace it. John Davies Spokane WA
-
EDIT 05/15/22 see related thread: ... https://olivertraveltrailers.com/forums/topic/6892-how-to-connect-a-standard-sae-4-pin-harness-or-4-pin-with-backup-lights-to-your-oliver-factory-7-pin-wires/ This is just a teaser, I took a video today and it is very cool. I wanted to make very sure my connections were good before putting the rear cargo area back together. I haven't finished the job yet. I will add to this in a couple of days. Video - OLIVER Bike Rack LED Light Bar Initial Test What a pain, the Oliver 7-Pin wire color coding is very different from the industry standard. I figured it out on the first try, and nothing smoked or melted. More later. John Davies Spokane WA
-
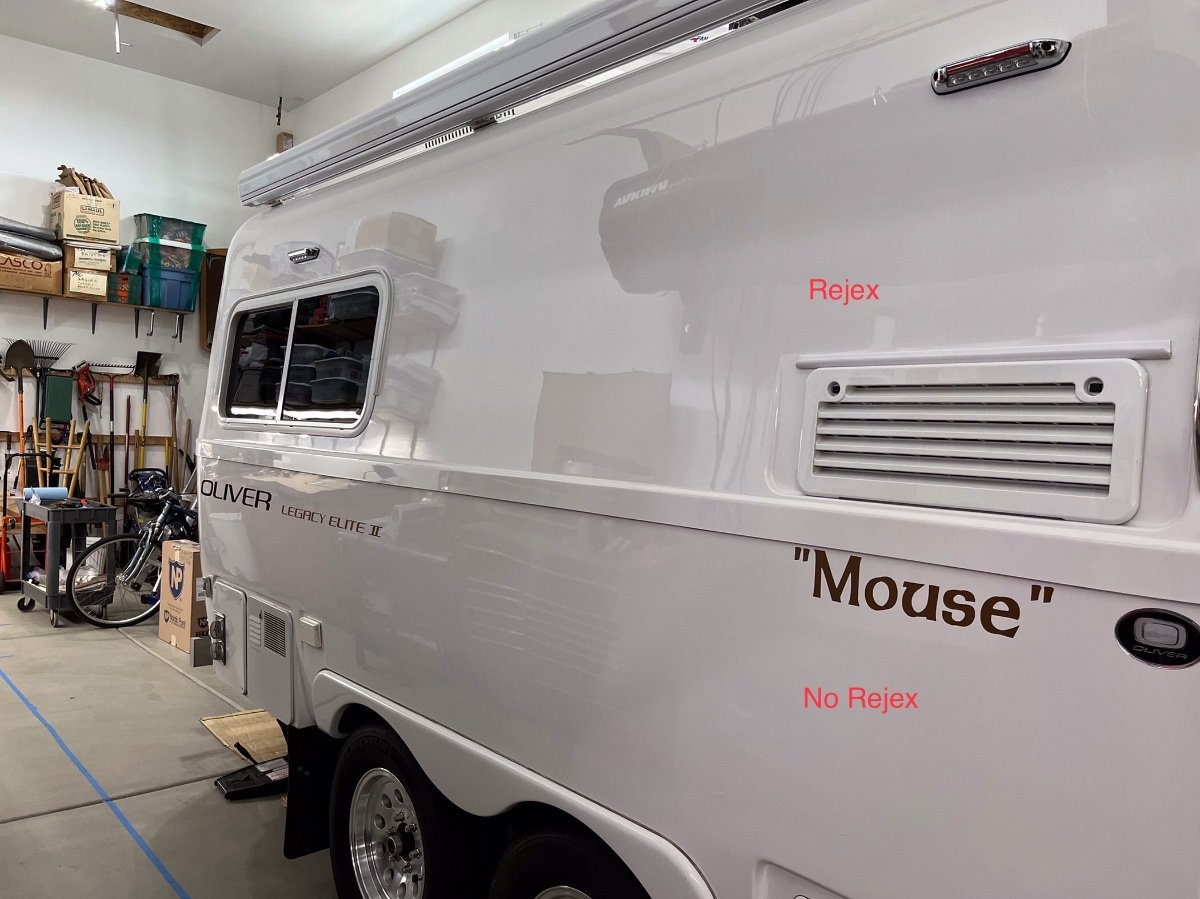
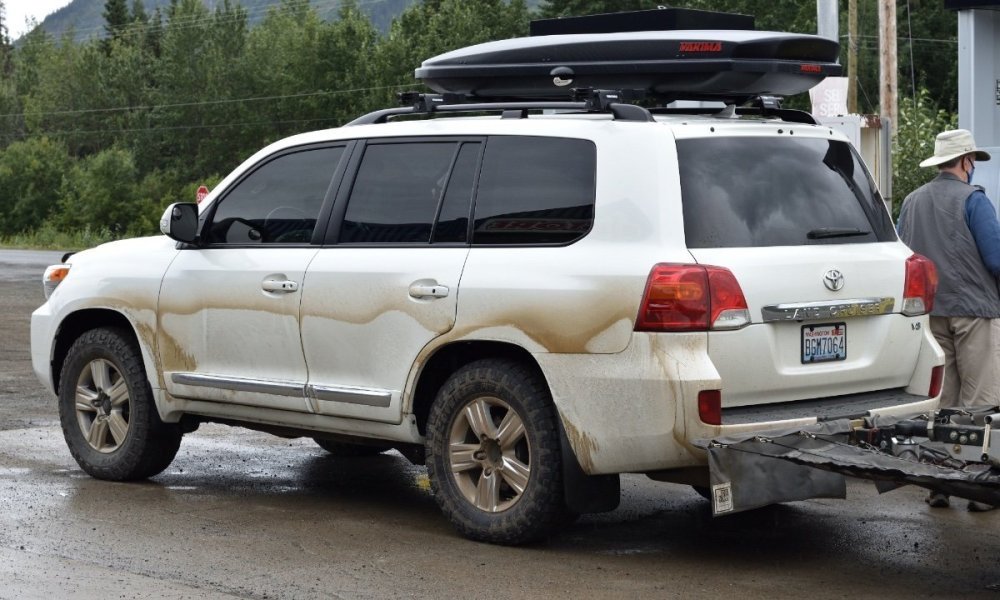
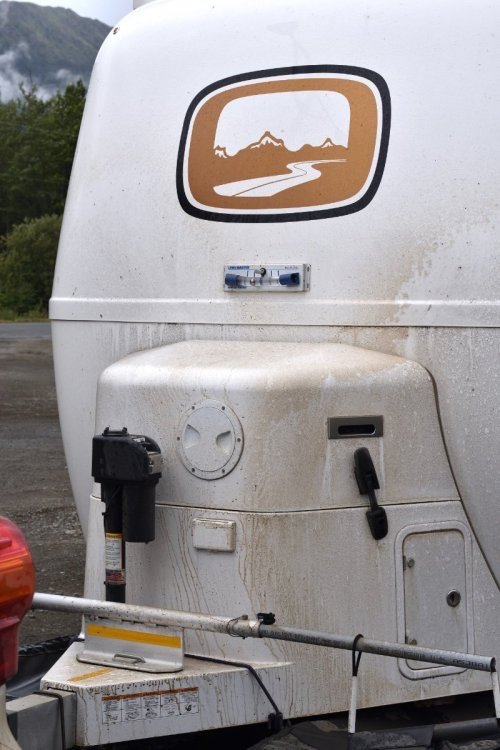
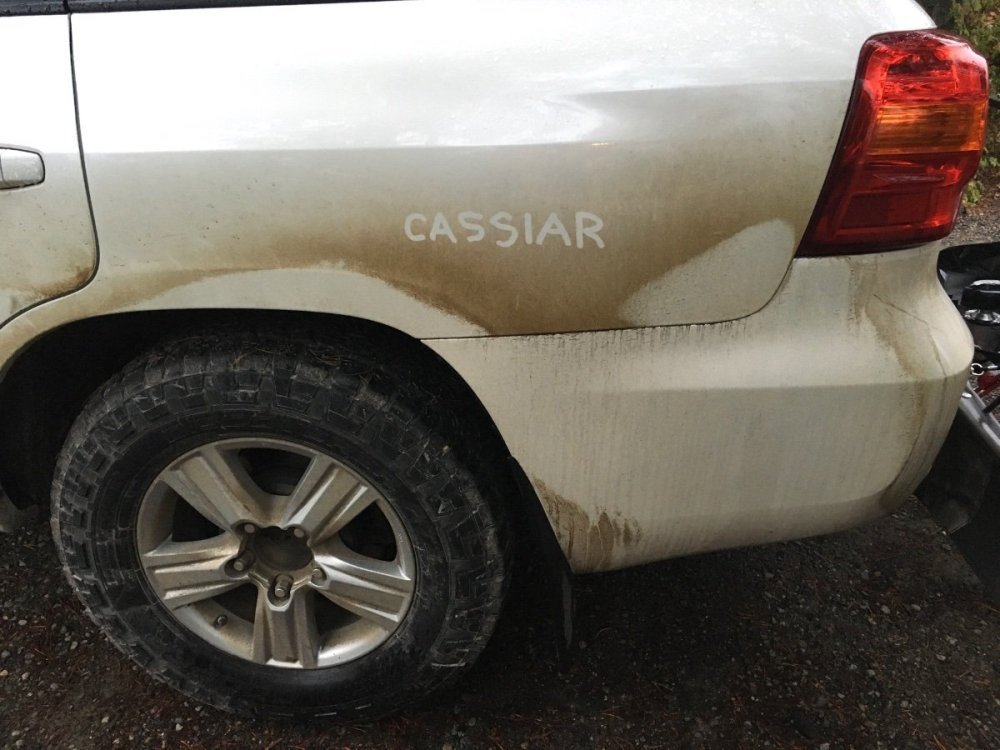
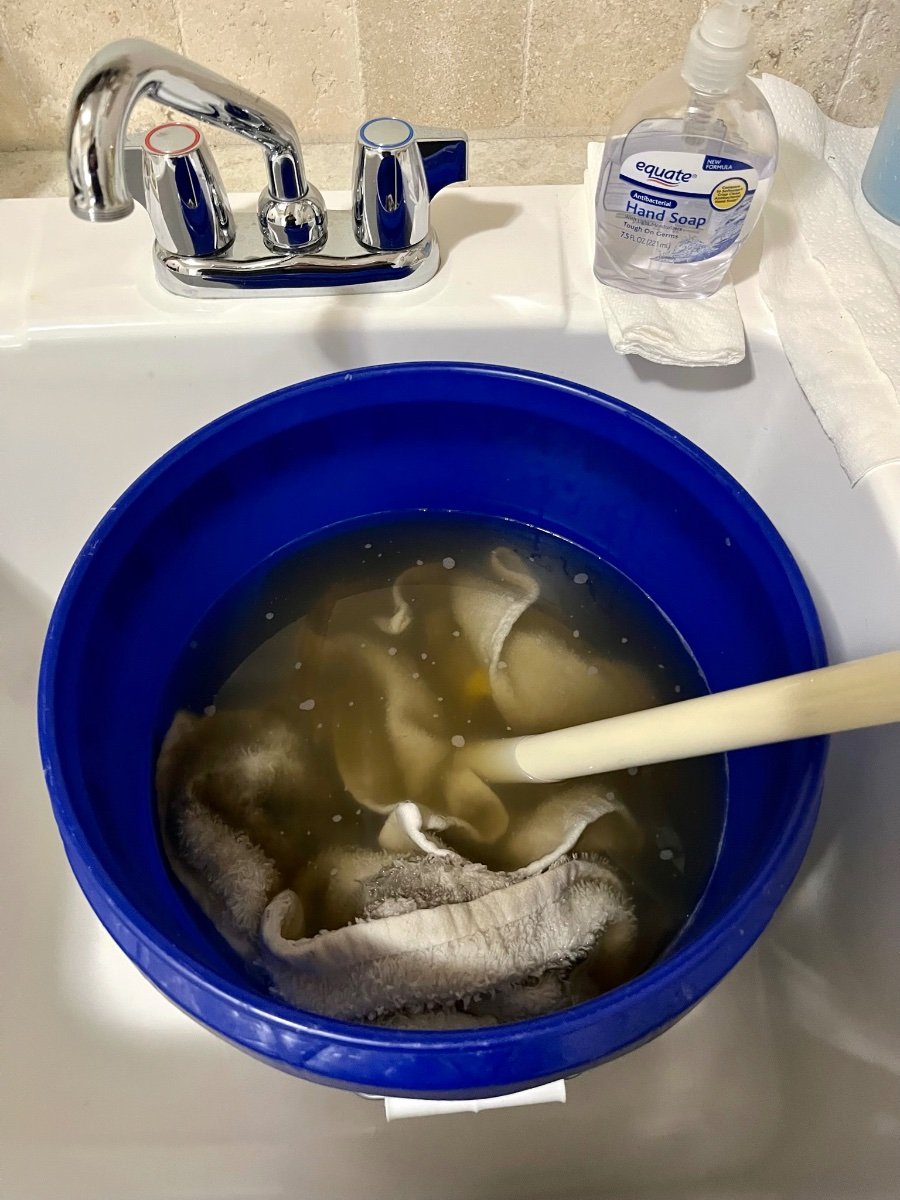
For various reasons my camping season is off to a late start this year. Here is “Mouse” half treated with Rejex. The oily muck that got EVERYWHERE from a 80 km stretch of fresh chip sealed highway (in the rain) on the Cassiar Hwy in central British Columbia last fall took a great deal of hand scrubbing and swearing to remove. I used 409 degreaser and bar towels, followed up with 3M Adhesive cleaner to get the tar and crusty Wood Bison poop off. (They graze the grassy shoulders of the highways and leave their droppings in the road.) I had thoroughly washed the trailer with Dawn before putting it away, but the bottom part was still gross. Here are the towels presoaking so I can get them into the washer, I rinsed them four times before they got clean enough to put in the machine. The Stone Stomper worked great to keep the tailgate and hatch of the Land Cruiser clean, but it is not a miracle worker… I truly hate chip sealing. John Davies Spokane WA
-
My thoughts are yes, definitely. I suspect that in a few years RVs will be designed with lithium batteries located in inside compartments or under the floor like electric cars, vented to the inside. There will be no need to access them routinely…. It will be time to get rid of that sliding tray too. IMHO. John Davies Spokane WA
-
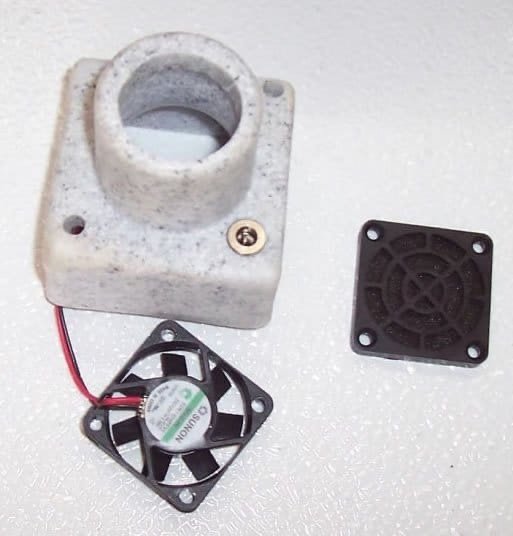
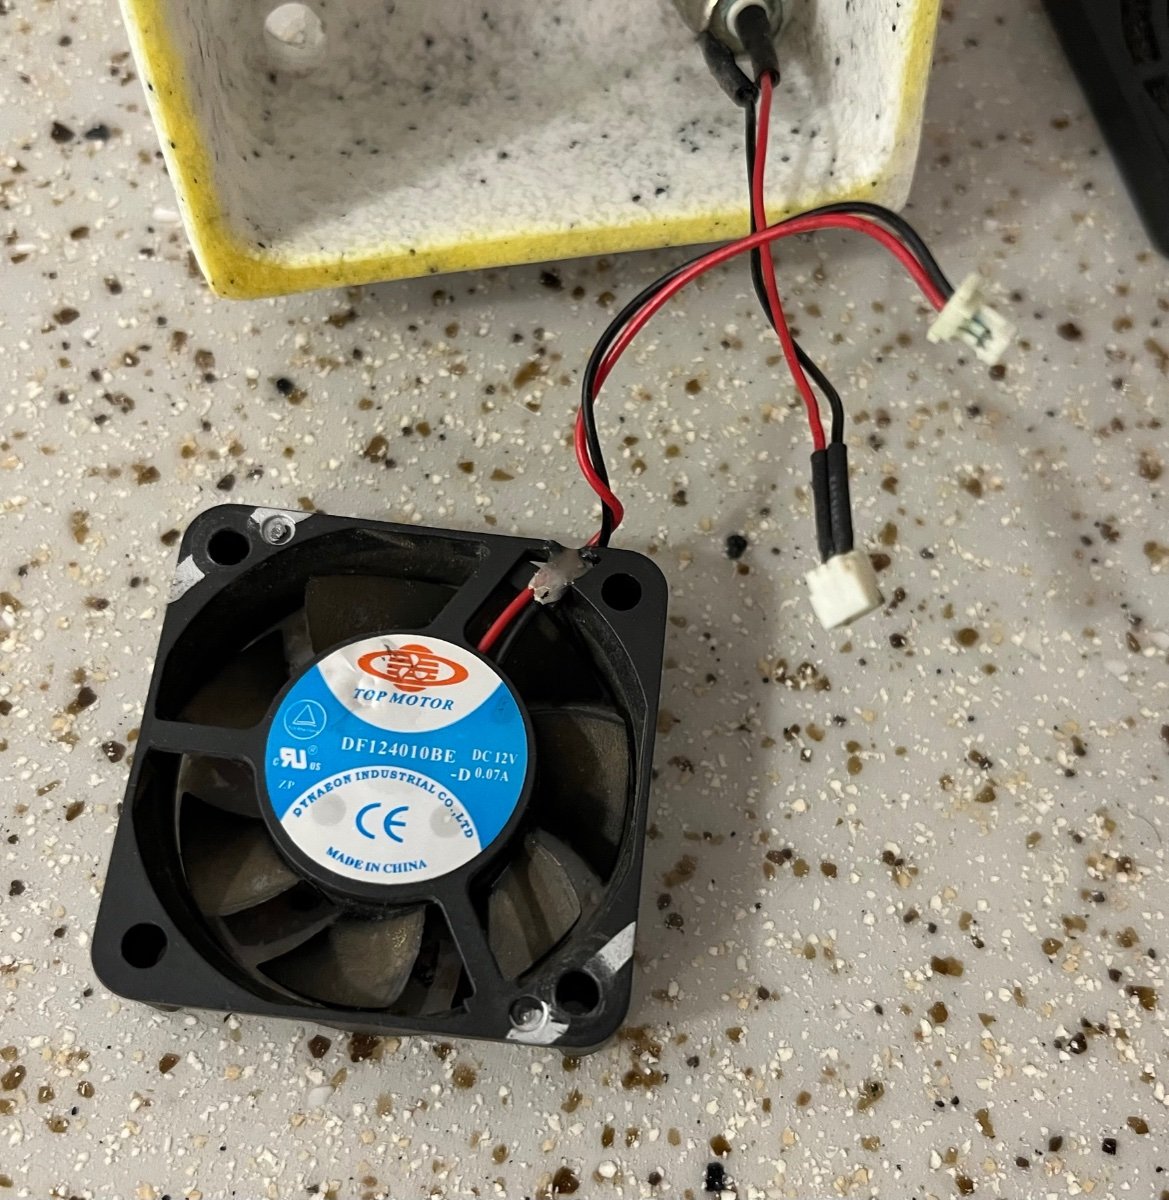
Venting refrigerator heat with fan
John E Davies replied to John & Nancy's topic in Mechanical & Technical Tips
I learned that some Dometic RM2454 fridges have cooling fans located between the upper and lower coils, in an area that is completely inaccessible without removing the unit entirely. Jason in Service told me that they started receiving these units in mid-2017 (mine was delivered in May '17), and that previously there was NO Dometic fan installed. On those units Oliver added their own fan, positioned up high above the upper coils where it was easily reached, and I believe these fans also had an inside On/ Off switch. Yay! Good thinking. https://olivertraveltrailers.com/forums/topic/3296-how-to-dometic-refrigerator-cooling-fan-noisy-disconnect-the-power-wire/ John Davies Spokane WA -
Update, I have had no issues with cooling in hot weather. John Davies Spokane WA
-
https://expeditionportal.com/starlink-satellite-internet-service-is-now-roaming/ John Davies Spokane WA
-
I am very glad that you fixed your problem, but that statement is a little too all inclusive, n’est-ce pas? Since we ain’t got no stinkin’ toilet flange, all us Natures Head owners are free to go watch TV…. John Davies Spokane WA
-
That looks as if might work OK, except I dislike the “debris should deflect to the left or right (into oncoming lanes of traffic)” part, that is not at all good. On low speed gravel forest roads it isn’t a big deal, but on a freshly chip sealed highway it definitely is. Have you researched boat forums for user comments? What is the price, and can you buy replacement parts for when you prang up an arm? Does it flop around in gusty wind? John Davies Spokane WA
-
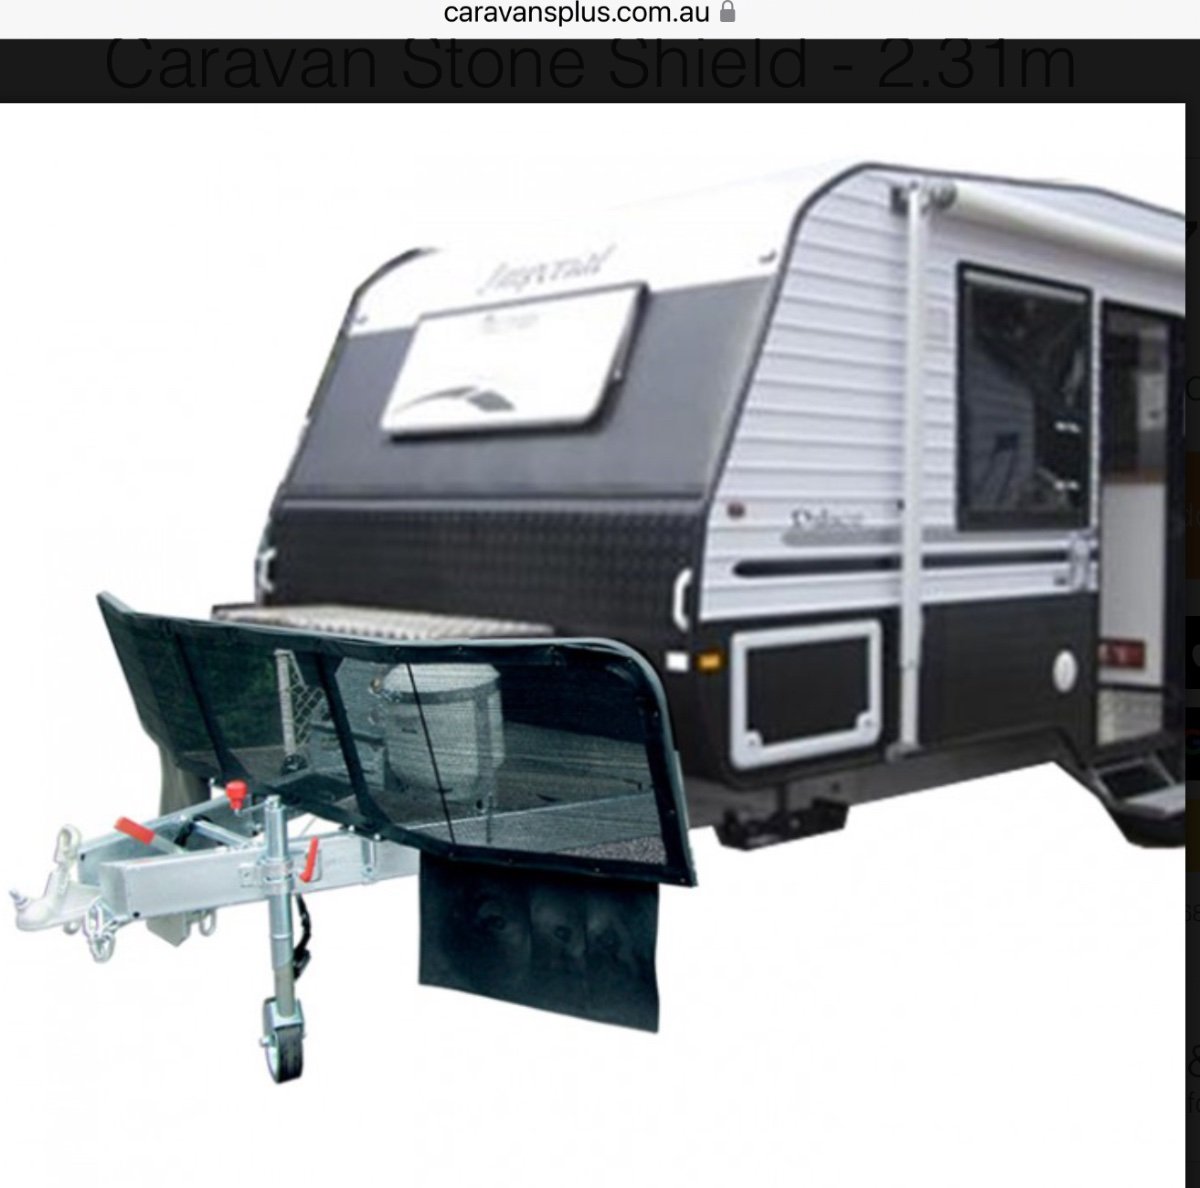
I like the protection it gives, I dislike the design. It will block access to your jack and propane bottles, and your getting underneath to add blocks. and also make it will hard to get stuff out of your truck cargo area. The Aussies use these a lot, but they tend to be mounted quite far back and angled down, to deflect stones onto the road instead of sideways into oncoming traffic or back into your TV tailgate and glass. Like this one: I don’t know how the Rock Buddy mounts, does it just clamp at the front of the tongue? Do you have a dimensional drawing or instructions? I researched all sorts of gravel guards and ended up with a Stone Stomper, it has been superb in keeping the tongue and front of the trailer chip free and clean, and also the back of the TV. In heavy rain at 60 mph the back glass stays dry! After five seasons there are only a handful of tiny gelcoat chips, from stuff thrown up by oncoming traffic. https://olivertraveltrailers.com/forums/topic/2504-how-to-stone-stomper-gravel-guard/ John Davies Spokane WA
-
Zamp says it is perfectly OK to use a mild automotive soap and water, which is what I have always done, I scrub the panels with a soft brush and a pole when I wash the trailer. They also say: “Do not use any harsh chemicals or a power washer when cleaning the panels as this could damage the anti reflective coating applied to the glass.” https://www.zampsolar.com/blogs/solar-101/how-to-clean-zamp-solar-panels But a whole lot of solar specialists say never use soap to clean a panel, the soap remains behind as a film and attracts more dirt and can harm that anti-reflective coating. Here is one article, these guys have developed specialty equipment using deionized water and rotating brushes. It is quite interesting, but there is no way a home or Ollie owner is going to do that! https://www.solarpowerworldonline.com/2020/05/pro-tip-never-use-soap-to-clean-dirty-solar-panels/ I just finished completely detailing the roof of “Mouse” and I used a car detailing spray (Griot’s Speed Shine) which has no waxes or silicones in it. It is perfect for prepping the surface with a clay bar before applying a carauba wax or a coating like Rejex. There were a whole lot of hard water spots on the panels. I used an artificial clay bar with Speed Shine and also scraped a couple of nasty sap deposits using a wet plastic scraper. The panels look great, the spots are gone. BUT did I damage or remove that coating? Are my panels screwed up? Comments welcome, do you clean your panels, and how? https://www.griotsgarage.com/speed-shine/ https://www.griotsgarage.com/brilliant-finish-synthetic-clay/ BTW that bar is truly brilliant compared to a real clay bar. It works great to take off bug carcasses and small sap drops. Really large sap tends to clog it up. I use a plastic scraper with Speed Shine to get those off. If you drop it, wash it off in a bucket of water and carry on. OTH, a genuine clay bar should be thrown out if dropped. One bad thing about the Griots one, it is round, so if you lay it down on the roof it can roll right off and go half way across your garage floor. 😳 John Davies Spokane WA
-
torque values for lug nuts
John E Davies replied to Geronimo John's topic in Mechanical & Technical Tips
When I trained as an A&P tech, the instructor in the How To Use Tools class demonstrated the need to always use a torque wrench. He had a big plate with a bunch of different sized bolts threaded into it. There was a chart with the recommended torque value. He had each of us tighten them by hand with a breaker bar to what we "thought" was the right amount, followed up by a torque wrench. 75% of the guys failed miserably, a couple were pretty close. NONE out of the 20 guys got them all exactly right. All torque wrenches "should" be calibrated, especially after a hard drop onto concrete. Hardly any are. When we torqued a truly critical fastener like a wing attach bolt, we checked the wrench for accuracy directly before using it. And then a second tech would check your work. If you got caught repeatedly hand tightening, you got fired.... Where I am getting is, if there is a good amount of safety margin, no worries, you can get away with sloppy techniques. If the Oliver recommended value is also the published Dexter maximum for the stud, you are asking for a failure and a possible fatality accident. if one stud snaps, it also over-stresses all the others. imagine your 75 pound wheel and tire bouncing across the median at 60 mph into oncoming traffic, while your brake drum throws sparks on the road surface then shatters. https://www.sentinelandenterprise.com/2020/06/10/woman-airlifted-to-umass-memorial-in-worcester-after-tire-struck-suv-she-was-driving/ https://www.wikihow.com/Calibrate-a-Torque-Wrench John Davies Spokane WA -
torque values for lug nuts
John E Davies replied to Geronimo John's topic in Mechanical & Technical Tips
It is nice to be vindicated, thank you. I have been complaining about this here on the forum for six years. Can you please forward this email to Jason with a Service Ticket? They need to stop over-torquing the studs, one day a wheel will come off. There needs to be a recall or at least a Technical Bulletin. If an owner has a cheap or malfunctioning torque wrench, it would be very easy to go WAY over 120. If you use 90, then you have a large amount of built in leeway (safety margin) for an inaccurate tool, or even user error. John Davies Spokane WA -
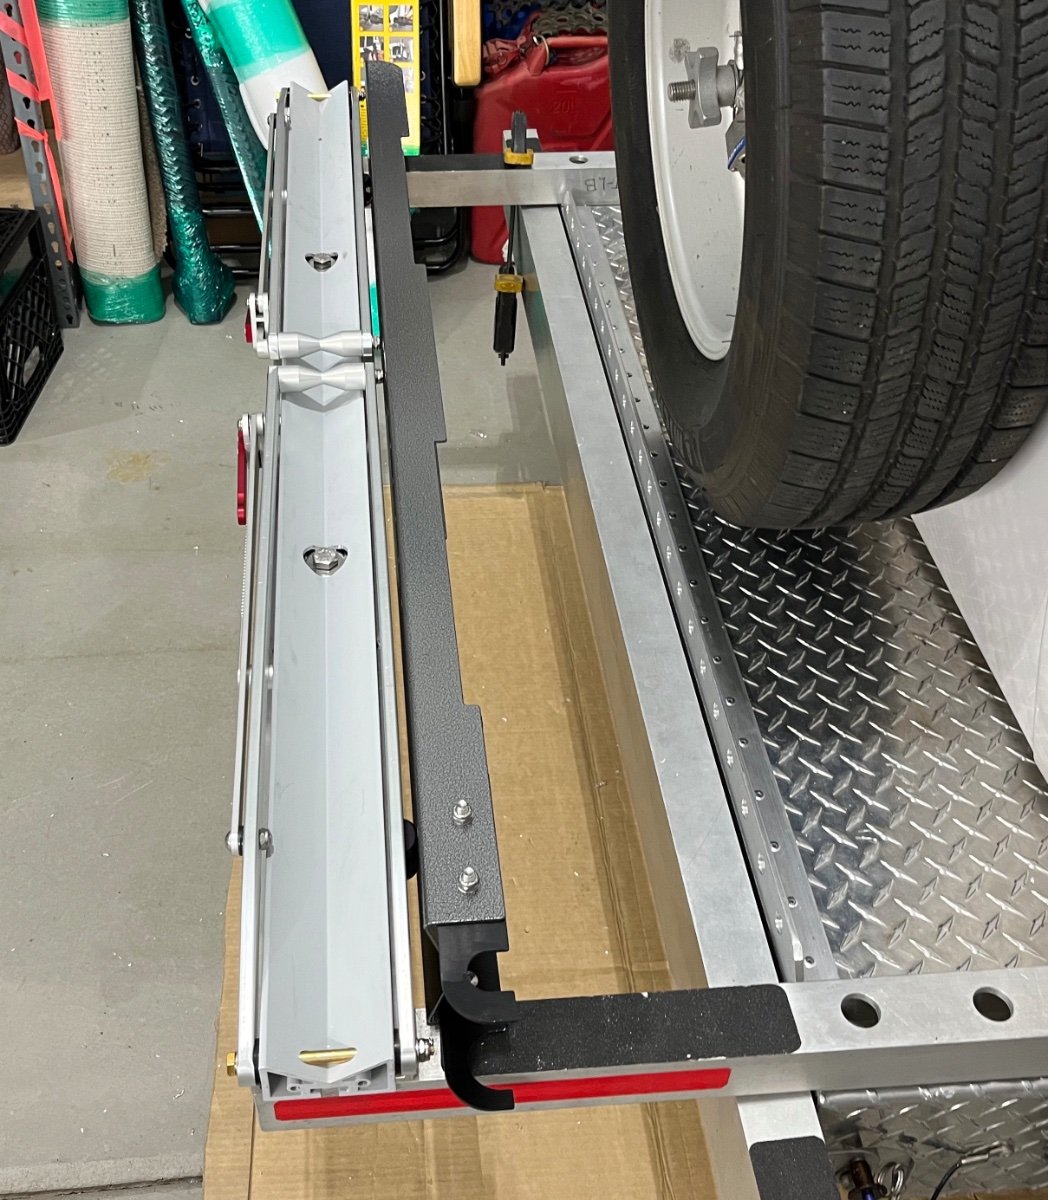
Well, never mind. I ordered the "tap plate" plus the security bolts that the ramp attaches to on the regular Super Duty rack, it will work great to secure the ramp on my setup. You just slide on the ramp "keyhole" slots and tighten the bolts with a special allen wrench that has a pin in the center of the hole. John Davies Spokane WA
- 1 reply
-
- 1
-

-
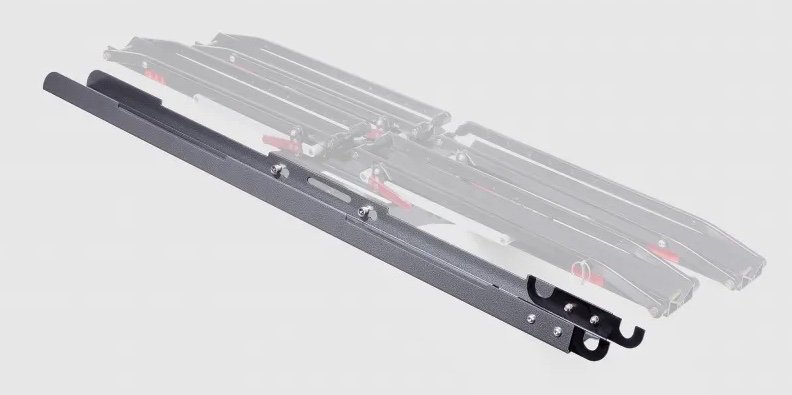
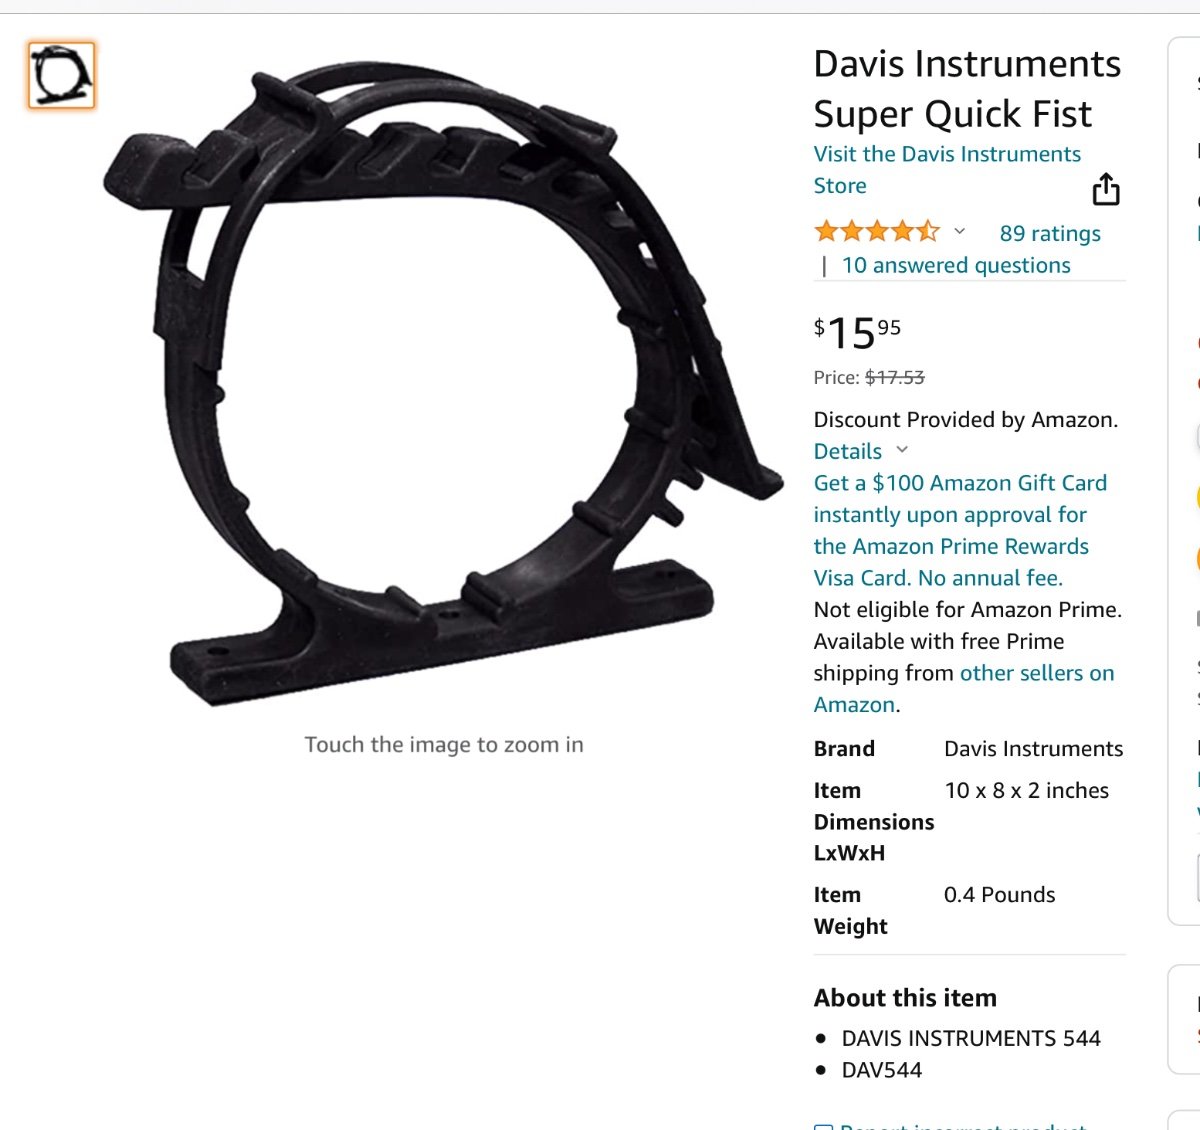
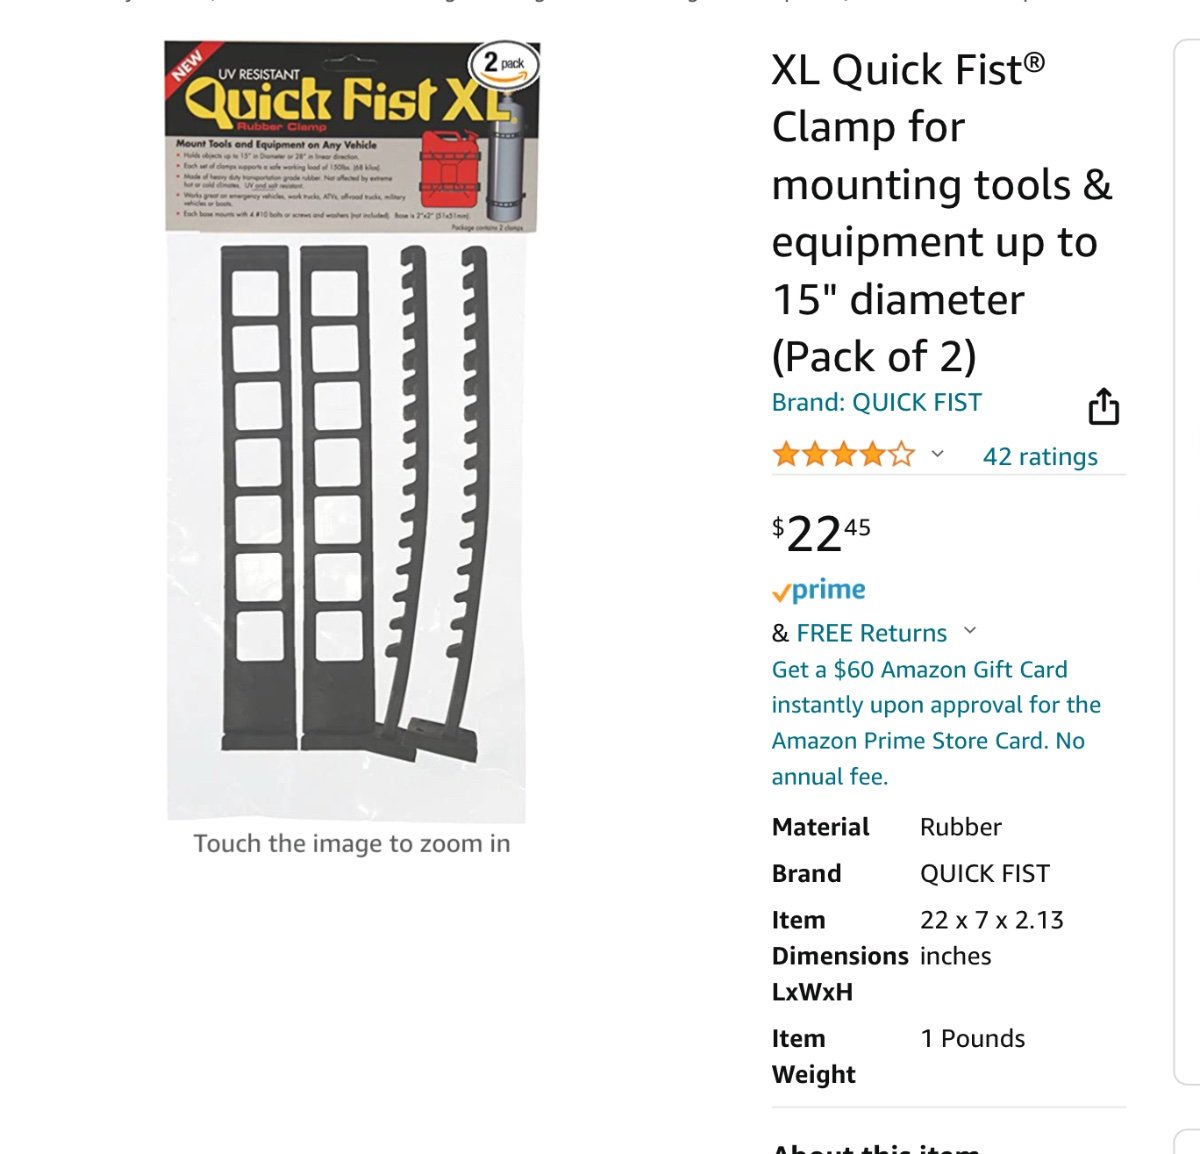
I bought a 1–Up roof rack and mounted it on my Ollie’s rear crossbar in place of the cargo basket. I also got a Super Duty Single for the Land Cruiser. That rack has a place to store the ramp, a couple of big studs on the rear support piece. The roof rack (tray) has no provision for attaching the ramp. The ramp is 2” x 4.5” x 48” steel channel. I do not want to drill any extra holes in it, the powder coat will be compromised. I prefer to mount it vertically, on edge, forward of the tray, so as to not hinder access to the sewer area. I wonder if one of these would work? I can fabricate a sort of cradle from aluminum angle and rubber, and just use a ratchet strap, but I was hoping for something premade and a little more elegant. Any ideas? If I had a pickup truck, the ramp could go in the bed. I do have a roof rack, but prefer not to carry the ramp up there. Thanks for any comments. I’ll post a thread about the rack system when I am done. I am still drilling, my shop is a mess ….😳 John Davies Spokane WA
- 1 reply
-
- 2
-

-
-
torque values for lug nuts
John E Davies replied to Geronimo John's topic in Mechanical & Technical Tips
As you discovered there is no source for a Dexter recommendation for 1/2”-20 studs with alloy wheels, I have never been able to find it, nor did Oliver Service ever respond to my request for their source. Maybe you could ask 😬. If you poke around on tire sites and wheel manufacturers websites, 90-100 is the generally recommended value. The 90-120 figure is for steel. Here is one chart: … https://www.etrailer.com/question-94709.html I have been installing wheels for all my adult life and no way would I consider 120 to be appropriate for an Ollie. I would love to be proven wrong. But I have had no issues with wheels falling off at 90. They must be rechecked after installing the wheels, but they don’t loosen after that initial change. Just because the factory does something doesn’t mean it is acceptable. Like sending owners away with 80 psi in their LE2 tires, which is TWICE the needed amount. Or installing “*******” pattern wheel hubs on the LE2 that make it impossible for an owner to install a standard 10” disk brake kit 😤😤😤. John Davies Spokane WA -
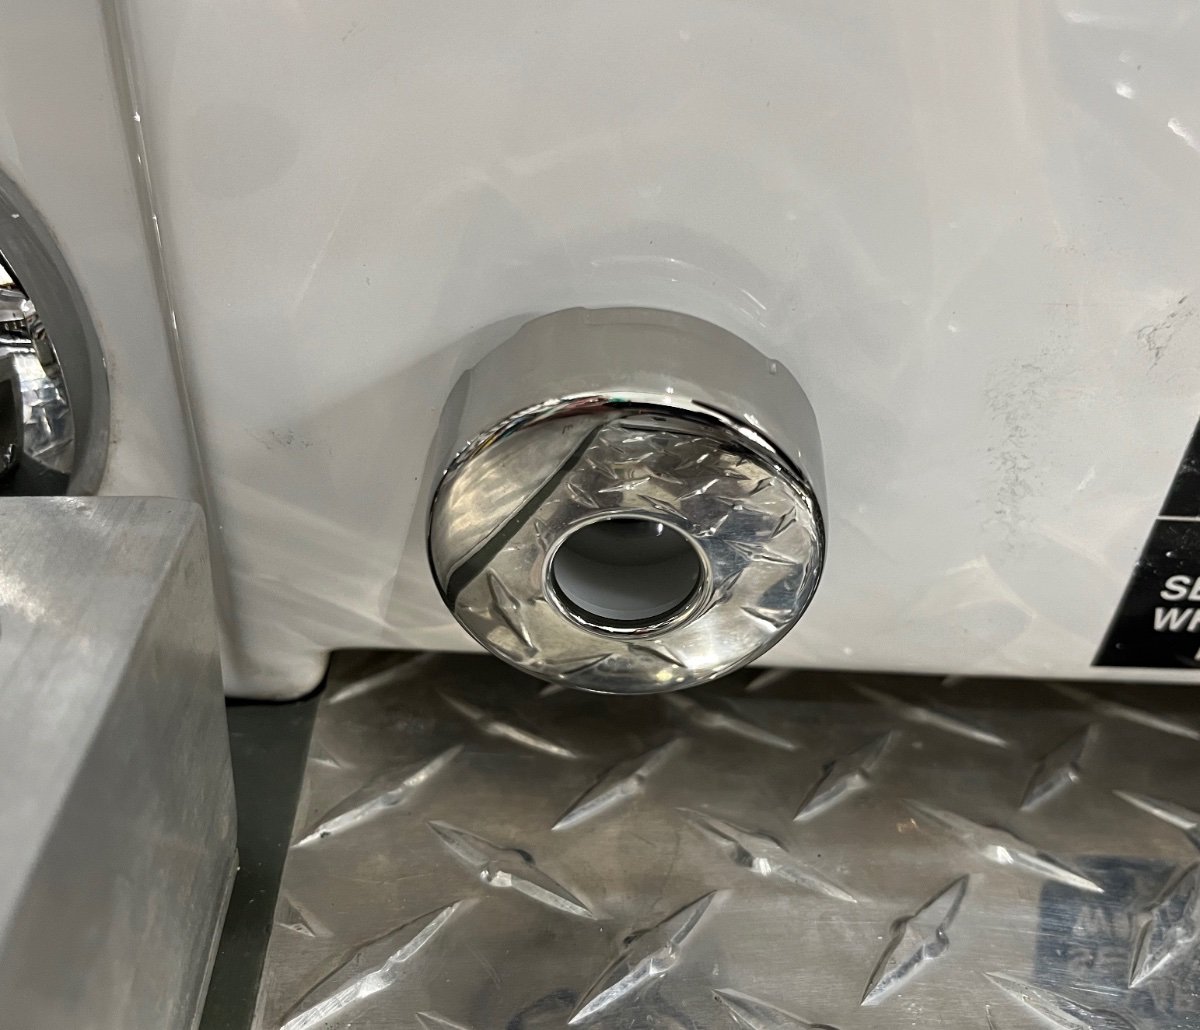
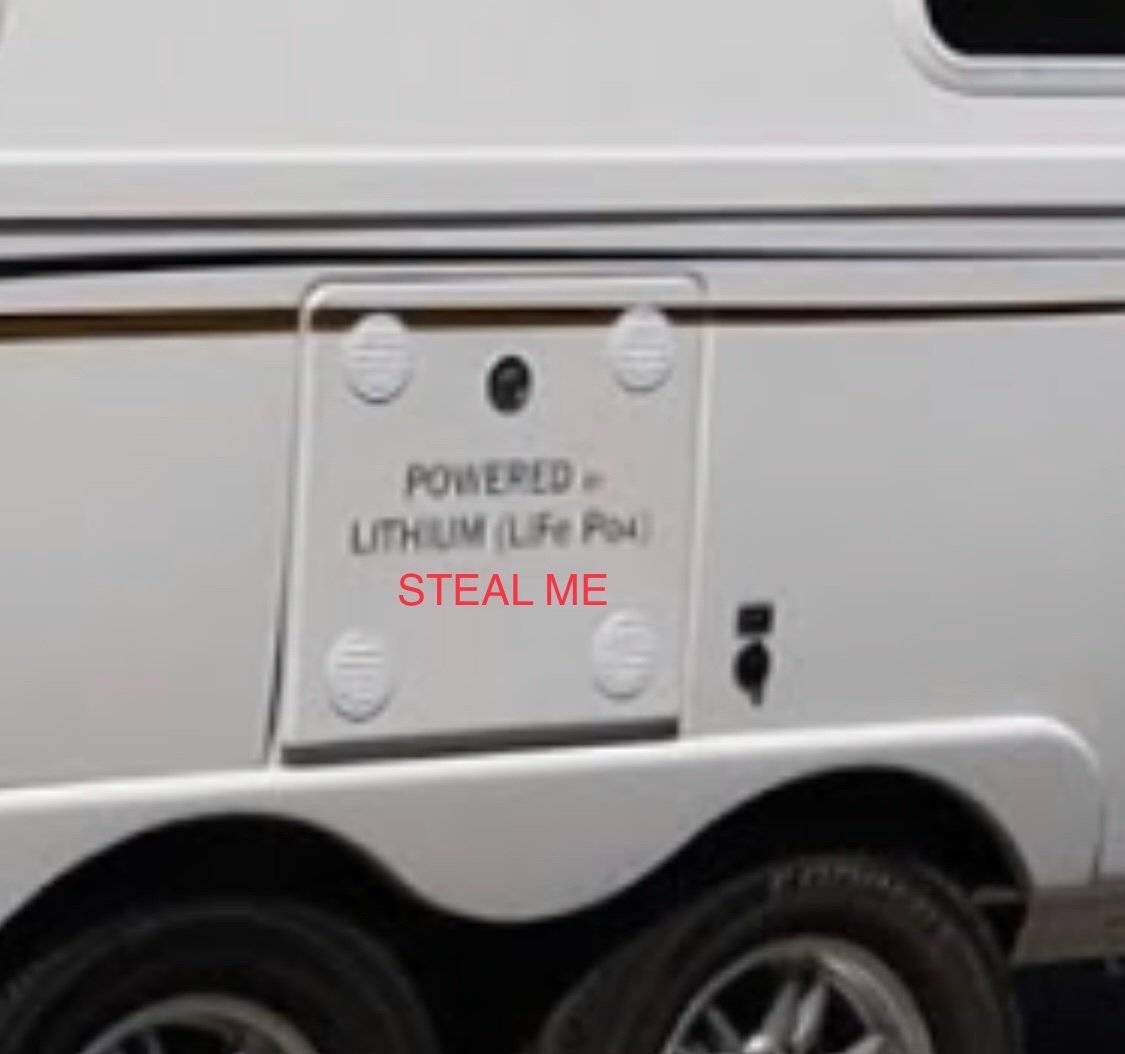
I fixed your screen capture. I think I would be out there with a plastic scraper taking off that stupid decal the very first night…… does this advertisement come on all the lithium optioned hulls? 😳 The vents are RV code, Oliver cannot leave them off..I think the white discs are very unsightly, the earlier hulls had pretty Perko chromed brass marine locker vents.I suspect that those were discontinued, I may have bought the last stock for $15 each….https://olivertraveltrailers.com/forums/topic/5301-how-to-lithium-battery-powered-vent-system/ John Davies Spokane WA
-
Mine had a regular split lock washer and a flat washer under the nut - the other end of the bolt has a carriage head that fits into a square hole in the upper jack mount. I think the whole area shifts around when you are running them on uneven ground. Maybe the aluminum frame “settles”, I dunno. You need to be able to tighten these in the future, loctite prevents that. I don’t think it is dangerous, but it is unpleasant if your jack locks up. With regular checks and retightening it should not be a problem. I am anxious to see if the Ollie engineers will comment or do anything like a bulletin. John Davies Spokane WA
-
Try a local Ace Hardware….. https://www.acehardware.com/departments/home-and-decor/kitchen-utensils-and-gadgets/indoor-floor-mats/60008 I rarely use anything larger, this traps stones and pine needles, and you can clean it with a flip of the wrist, then set it just inside the cabin entry for travel. John Davies Spokane WA
-
I love plain vanilla in ice cream, trucks and Ollies. You have a great setup. How is the grass at the Oliver sites? Smaller images have smaller file sizes and upload a whole lot faster if you have a very poor Internet connection, like in the middle of the Yukon Territory, but otherwise, IMHO don’t bother. Just reorient (rotate) and crop if necessary. The forum automatically reduces them anyway, the only way to see a full sized version is to open it in a new tab or window. Please add your model name, hull number, and tow vehicle info to your signature. And home town, if you want to. John Davies Spokane WA