John E Davies
-
Posts
5,759 -
Joined
-
Last visited
-
Days Won
243
Everything posted by John E Davies
-
I am concerned about how rigid they are. They are much stronger than the thin walled aluminum window frame. If something should impact an eyebrow, like a falling tree branch or an object thrown up on the highway (a truck tire carcass) it could destroy the frame and perhaps damage the hull’s fiberglass window opening. A plastic one would just flex or explode without transferring all that energy to the Ollie window frame and glass. Could this design be reproduced in much thinner lexan, while using the same aluminum clamps? I have actually been through wind storms where large branches came crashing down. I always like to see where the “fuse” in a design is located. I designed in failure (break) points in my mud guard brackets and rear cargo rack mount. In this case, unfortunately the fuse appears to be the window itself… I am not in line to buy this Beta model. But they sure are pretty. John Davies Spokane WA

-

Black Tank and Dump Site Quesions
John E Davies replied to Dwainkitchens's topic in General Discussion
It is OK to dump into your septic system, with appropriate cautions about holding tank chemicals, so you don’t kill the bacteria in your home tanks, but it may not be OK to connect to a public system. It is expressly forbidden in Spokane city by code. But if you live over the County line (which is just yards away from my home), it is OK. It makes very little sense, but you need to check! Just make sure you do the job right with permit and inspection, or you could create trouble for when you sell the house… and this is one job that I would hire a contractor to perform. BTW in another house I used to dump my boat’s black tank into the septic system, I used an electric macerator (mounted near the holding tank) and a 3/4” garden hose. I ran the hose inside the basement and into the toilet there. It worked perfectly, but I was extremely careful to never let the hose come out of the bowl during the pumping !!! John Davies Spokane WA -
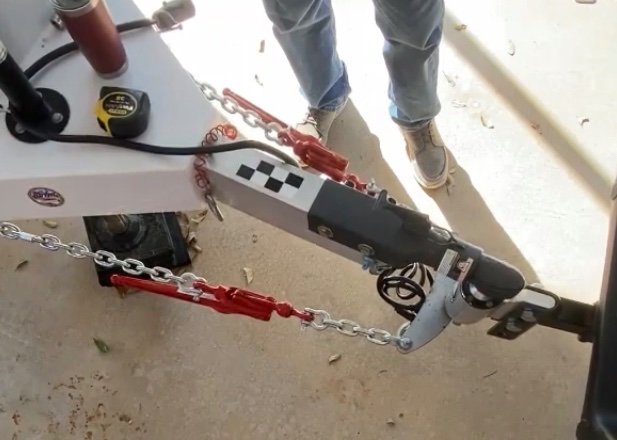
Not only would that create a lot of sparks and noise, it might damage the end of the lever, depending on how long it took before you figured out what happened and also found a safe place to pull over. In rush hour traffic in a big city, the sparks would create some panic from other drivers. But at night it would look great! Like this train track grinder: Sparks Fly on LORAM Rail Grinder Train as It Grinds Railroad Crossing I found it at Home Depot also, it looks identical. These probably come out of the same factory in China. https://www.homedepot.com/p/Everbilt-5-16-in-3-8-in-Red-Load-Binder-803112/203958821 And I found these locks, the first one could take a padlock: One last comment…. your hitch is the old style, but for $100, Andersen Customer Service will send you their latest version with the very effective water seal, and a new ball assembly and whaletail, so it doesn’t wake up the campground when it gets wet overnight. Just tell them it is locking up and shrieking. John Davies Spokane WA
-
That is really slick, thanks for posting. Here is the HF binder: https://www.harborfreight.com/5400-lb-capacity-heavy-duty-non-ratcheting-load-binder-36022.html General info: https://www.myteeproducts.com/blog/how-to-use-chain-binders/ I don’t see any reason to not use these, but I do very much believe that you should secure the handle when it is tensioned. The lever stores a lot of potential energy, depending on how tight you adjust the Andersen nuts. Putting a safety device in each one would eliminate its accidental release, for example if some large kid wandered up and messed with it. One reason I like the Andersen is that it doesn’t have steel spring bars like all other weight distributing designs. You just added two “springs” 😬. Plus an additional 15+ pounds of mass. Some owners might not want to increase the tongue weight. Do the binders require periodic lubrication, or do they have self lubricating bushings? Can you buy cad plated binders? Do you plan to put something under them when disconnected so they won’t get rusty? Can you post some closeup still images of them tensioned? It is hard to see details from your video. How close is the handle end to the chain? Would a big stainless carabiner work as a safety? Is there a reason you placed them where you did? Why not right at the whaletail, that would eliminate two cuts. Nobody likes cutting hardened steel! Thanks. John Davies Spokane WA
-
Once you have used the proper tools you won’t want to go back. This is currently unavailable from Amazon, maybe another source will have it. ABN Bearing Press Bushing Driver Set - Seal Driver Set Bearing Driver Set Bearing Press Kit, 18-65mm, 74mm Metric Discs John Davies Spokane WA
-
Would you mind describing those compounds? I now have a Dewalt 20v random orbit polisher and would like to polish the Ollie - it is in great shape so I only need a fine finish compound. I already have automotive polishes, but I know they are not aggressive enough. Edit - I just read this article, maybe I don’t want to do this with my polisher… can you comment? https://www.best-auto-detailing-tips.com/boat-buffer.html Thanks. John Davies Spokane WA
-
I think it would be fine for light duty towing in the East, but you will probably find it lacking in steep mountain grades and at high altitude. What year and what engine? What is the payload? The 2022 V6 develops peak torque at 4700 rpm, that is extraordinarily high. You would have to be OK with driving in low gears all the time, and it would get very wearing for the passengers. https://www.escapeforum.org/forums/f10/problems-towing-a-19-0r-21-with-a-toyota-highlander-19419.html If you already own the Highlander, then give it a try, but in your shoes I would definitely not go out and buy one for towing the small Ollie. A Sequoia (especially the new hybrid model) would be a dandy choice! John Davies Spokane WA
-
That is good news. Do you know if the driver side turbo is able to be accessed the same way, does the steering column have to come out too? What is your payload? How do you like the interior? Thanks for the report, I am quite interested in the new Sequoia as a LC200 replacement if mine burns up or gets stolen, I am trying to accept the location of the turbos, which isn’t at all great, but if you can get to them without removing the cab or entire body, then that is good news. John Davies Spokane WA
-
How many wheel studs?
John E Davies replied to Steph and Dud B's topic in Mechanical & Technical Tips
Yes, six because Oliver chooses to buy ******* axles, pardon the expression, with the bolt pattern of a heavy 5000 pound axle, but the bearings and spindles of a 3500 pound axle. So you cannot install a plug and play disk brake kit, there are none offered. 😤 John Davies Spokane WA -
HOW TO: Rear mud flaps for the Ollie
John E Davies replied to John E Davies's topic in Towing an Oliver
That is a neat and tidy job, did you add some drain holes underneath the support bars? One reason I left mine open was so water couldn’t pool inside and I could inspect them easily. John Davies Spokane WA -
Water Leak Somewhere under the Kitchen Sink Area
John E Davies replied to Imelda's topic in Mechanical & Technical Tips
I would like to point out one important factor! If you normally use the city water connection, the leak under the sink could go on for a very long time before it was discovered. OTH, If you normally use the 12 volt water pump, it would immediately be obvious that the system was not holding pressure, because the pump would cycle rapidly. I have never looked under my sink (though I plan to ASAP) but I know that the pressure hoses are OK, but there still could be leakage from the sink drain and trap. This should probably be added to your annual maintenance checklist. I am going to investigate, and think about installing a stainless drip tray with a drain hose going out the bottom of the cabinet. John Davies Spokane WA -
Water Leak Somewhere under the Kitchen Sink Area
John E Davies replied to Imelda's topic in Mechanical & Technical Tips
Replace the warped, delaminated, blackened wood, that is mold! You don’t want to keep that inside your trailer. I can’t tell you how to remove that entire cabinet, but that is what I would do. If you can’t do the woodwork repair yourself, find a woodworker shop to do it correctly. You must use the blue plastic clip to hold those two sprayer hose parts together, did you find that, and is it broken? It won’t stay together without that clip. You should also put a new oring on that upper part, the old one could be damaged. Now it’s time to look under my sink…..😳 John Davies Spokane WA -
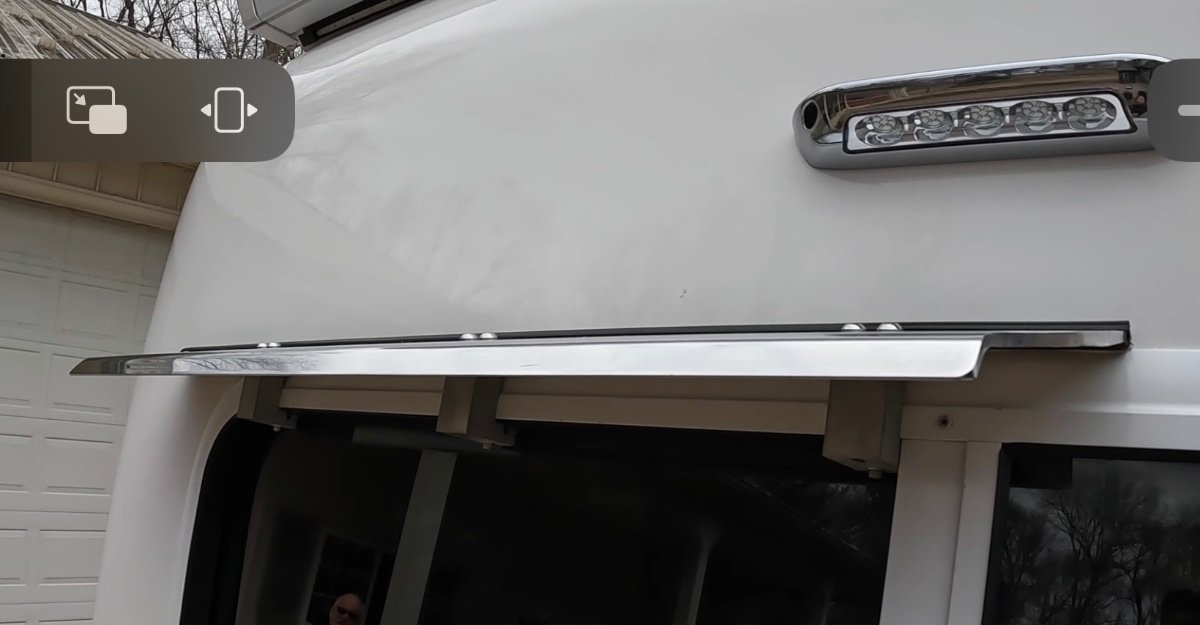
If you have to recaulk, just seal the gap between the window frame and the gutter. I intentionally left that 1/8” gap there, for this reason. No big deal IMHO. John Davies Spokane WA
-
Is a 2021 GMC Sierra Denali 2500 4x4 6.6L V8 Gas a Good TV?
John E Davies replied to BeauDog's topic in Towing an Oliver
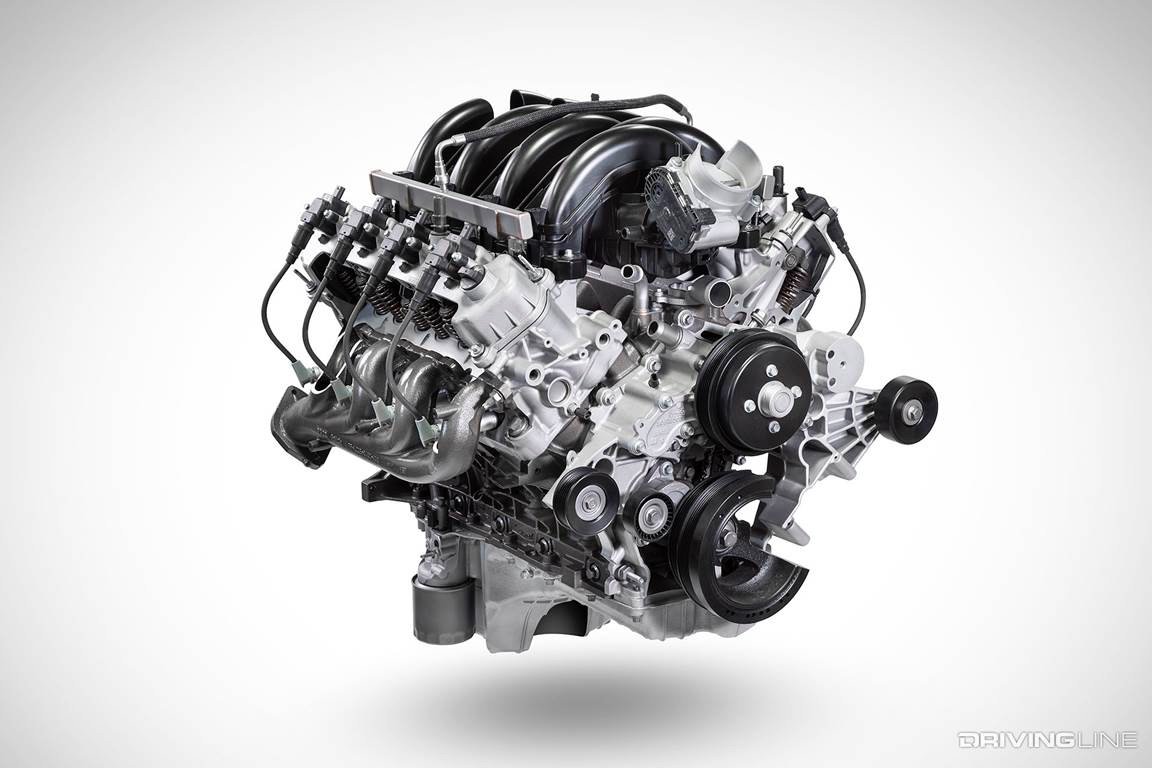
Hill Descent is used at a walking pace, it uses the ABS as a sort of low speed cruise control, for going down really steep hills. It won’t work at highway speeds. I much prefer to just engage 4 Low and shift manually, it is much less chaotic for the passengers that way. I suggest that you research the Ford HD trucks with the 7.3 liter “Godzilla” gas motor. It has almost diesel power characteristics, is super simple and cheap to maintain, and will pull either Ollie easily. https://www.drivingline.com/articles/godzilla-truck-is-the-73-liter-v8-ford-f-250-a-throwback-big-block-muscle-pickup/ John Davies Spokane WA
-
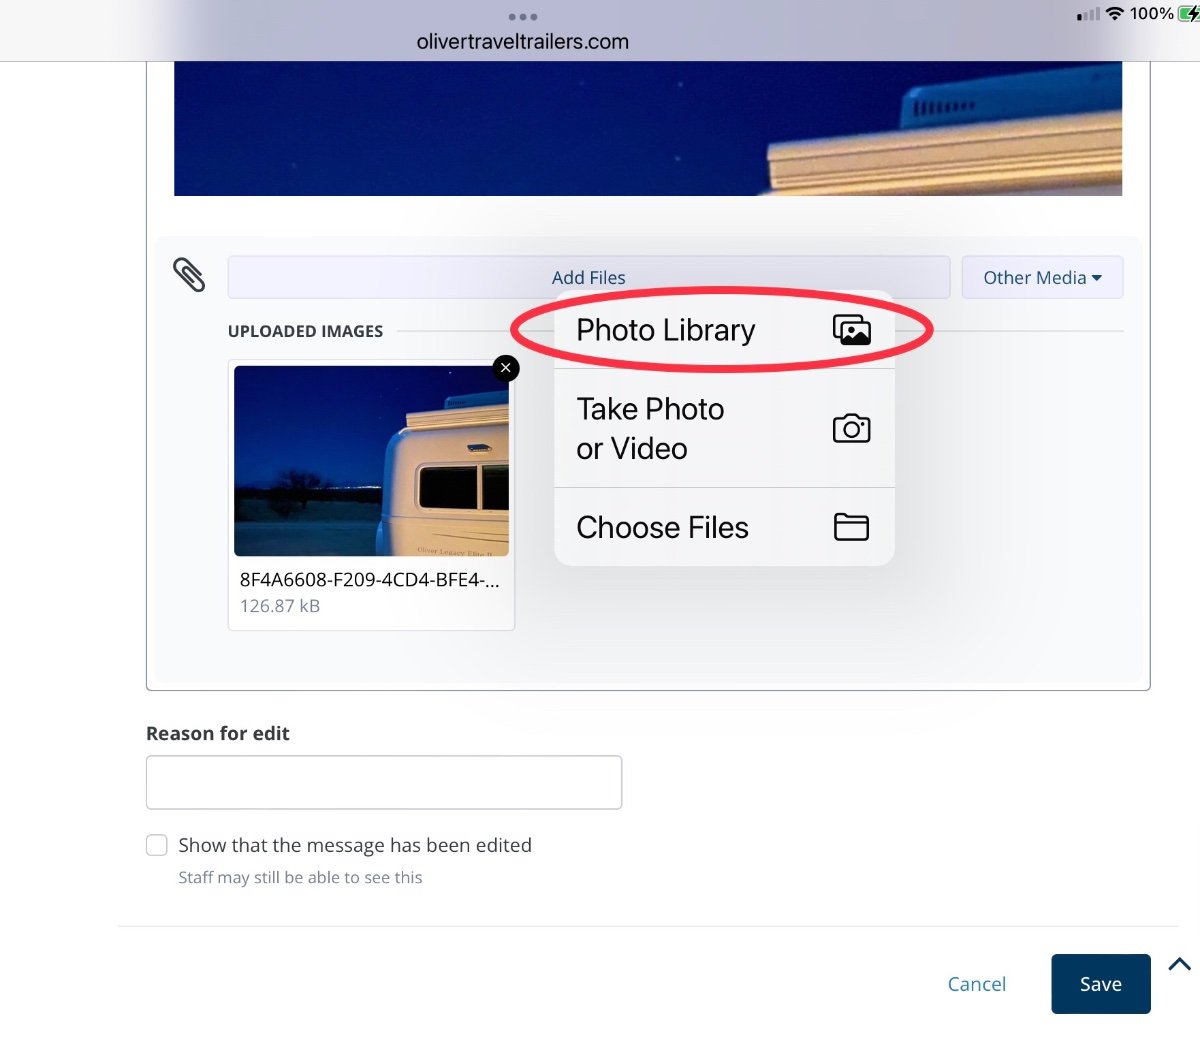
Fixed it for you. 😀 You need to upload as a Photo, not a File; in this case it is an Apple HEIC file. On an iPad or iPhone, the source should be your Photo Library. Read this: …. https://backlightblog.com/iphone-heic-to-jpg John Davies Spokane WA
-
Well, yes, you aren’t telling me anything I didn’t know, I want the kit, I need the big batteries, all mine are 2 AH and smaller, and the yellow storage bag is so cool! I made a $370 offer on an open box kit on eBay, free shipping. Amazon has a couple of vendors but they want $600😳 I don’t care if I get an extra charger, I can sell that on Craigslist for $30. John Davies Spokane WA
-
You need either a bigger hammer and a big fat drift (punch), or else a tool, like this: https://www.harborfreight.com/ball-joint-service-kit-for-2wd-and-4wd-vehicles-63279.html You can rent one at many auto parts stores. You are correct, the bolt should slide out, it should not be turned because of those splines. Some heat from a propane torch might help, but that will get messy and stinky in a hurry. Because its has not been taking grease, it may be rusted or frozen in place. If the bushing is rusted solid to the bolt, uh oh, you might have to take it to a pro trailer repair shop. Sometimes this works: put the press onto the bolt end, really tight (be sure to lubricate the threads with grease). Spray a bunch of penetrating oil (Kroil or PB Blaster) inside, whack the tool end a few times (not the rented one!), leave it there for an hour or three. Go take a long break. If you are really lucky you will hear a "BANG crash" and find the tool lying on the garage floor. If not, let it sit overnight and try tomorrow. Good luck, take pics. John Davies Spokane WA
-
I don’t think it is the same one, (DCM848P2), I can't even find that item listed at Lowes. Dewalt has a gazillion kits. That is how I ended up with so many tools that I haven’t even used yet John Davies Spokane WA
-
Water Leak Somewhere under the Kitchen Sink Area
John E Davies replied to Imelda's topic in Mechanical & Technical Tips
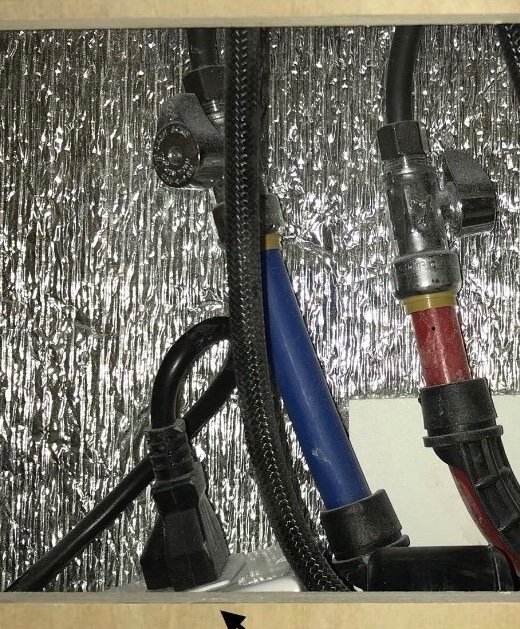
Speaking of refrigerator plug, since your plumbing has been leaking a lot, unplug shore power so that the outlet, which may be full of water, won’t zap you. I doubt if that location meets code, I was pretty amazed when I discovered this setup years ago. Normally you don’t put 120 volt AC electricity directly below plumbing connections. If it can’t go in a dry spot, it needs to be installed in a waterproof enclosure. Bill, I borrowed your pic….. John Davies Spokane WA
-
Sure, I ordered one already. I also decided to buy a random orbit polisher, so I went ahead and bought another $175 worth of pads and potions from Griot's Garage. 😉 Now I just have to find a Dewalt 20-Volt MAX XR Cordless Brushless 5 in. Variable Speed Random Orbit Polisher with (2) 20-Volt 5.0Ah Batteries & Charger that is in stock somewhere ... I did find a couple of "open box" ones on eBay for less than $380, but everybody else seems to be Not Available or full MSRP ($600). John Davies Spokane WA
-
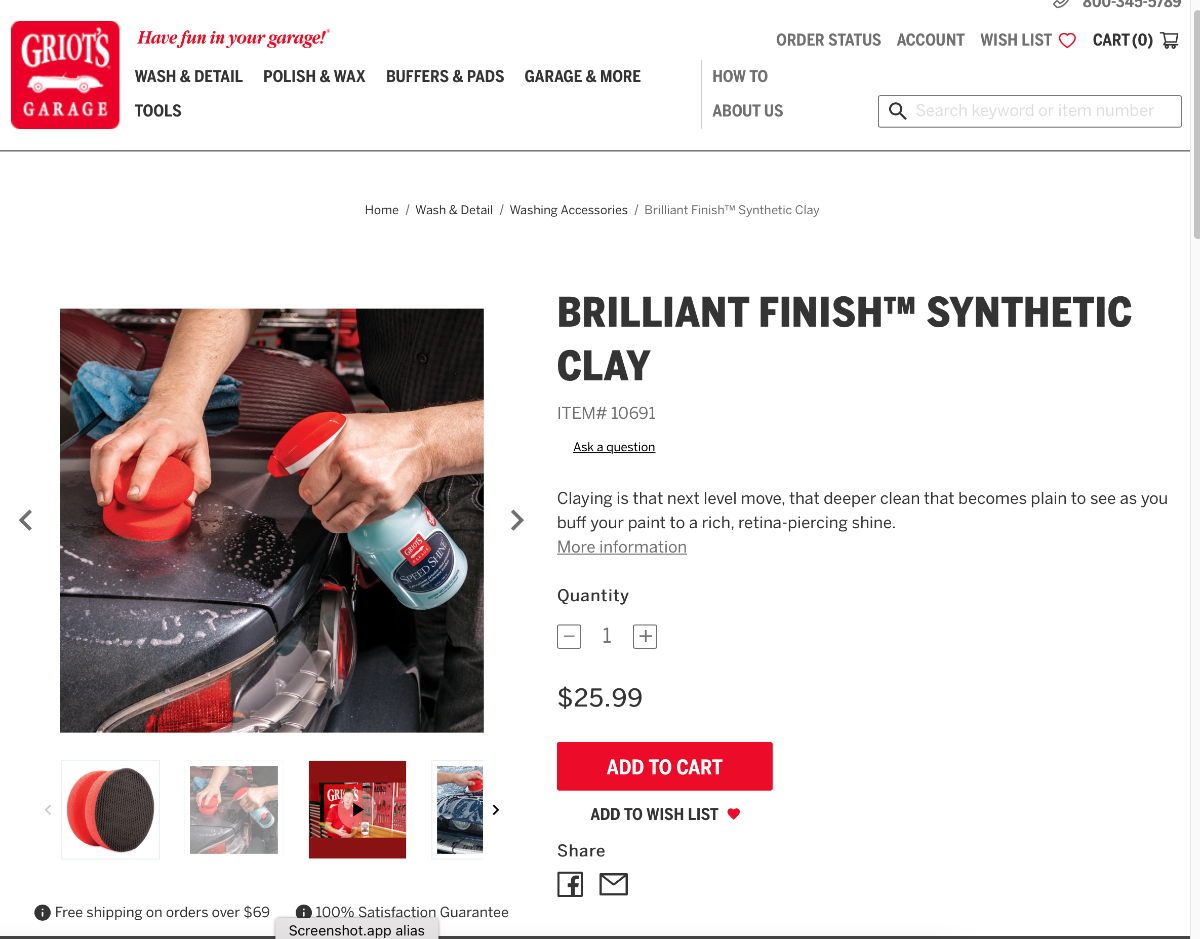
I normally use a degreaser to get off sap and other stubborn crud on the gelcoat. Has anyone tried this clay bar substitute? https://www.griotsgarage.com/brilliant-finish-synthetic-clay/ Here is a great review: https://www.autogeekonline.net/forum/product-reviews-by-mike-phillips/106302-review-how-griots-garage-brilliant-finish-synthetic-clay.html I use a real clay bar on my cars, but when you drop it on the ground, you are screwed, you have to throw that piece away because it traps grit. With the Synthetic Clay you just rinse it and continue on. I may order one to try. Any comments? John Davies Spokane WA
-
mounting of GM trailering rear camera accessory
John E Davies replied to tallmandan's topic in Mechanical & Technical Tips
Can a fifth sensor be installed on the spare, and will that show correctly with the other four on the TV screen? John Davies Spokane WA -
Poor water pressure and flow means either gunked up faucets and aerators (hard water deposits), or possibly plastic shards from the manufacture of the fresh tank. You are going to have to do some exploratory surgery, open up some fixtures and water line connections to see what is going on. Start by removing the plastic bowl under the water pump to see if there is debris in the screen. Hard water deposits can be helped by flushing with a vinegar water mix, to dissolve them. Be sure to treat the hot water heater too. It is the hot lines that create the problem. Blocked lines require disconnecting at both ends and back flushing with water or compressed air. Either method will be messy, wear safety glasses and try not to shoot water where it should not go (electrical stuff!). Good luck. John Davies Spokane WA
-
2022 Owner's Manual with linked TOC
John E Davies replied to Wolfepack's topic in General Discussion
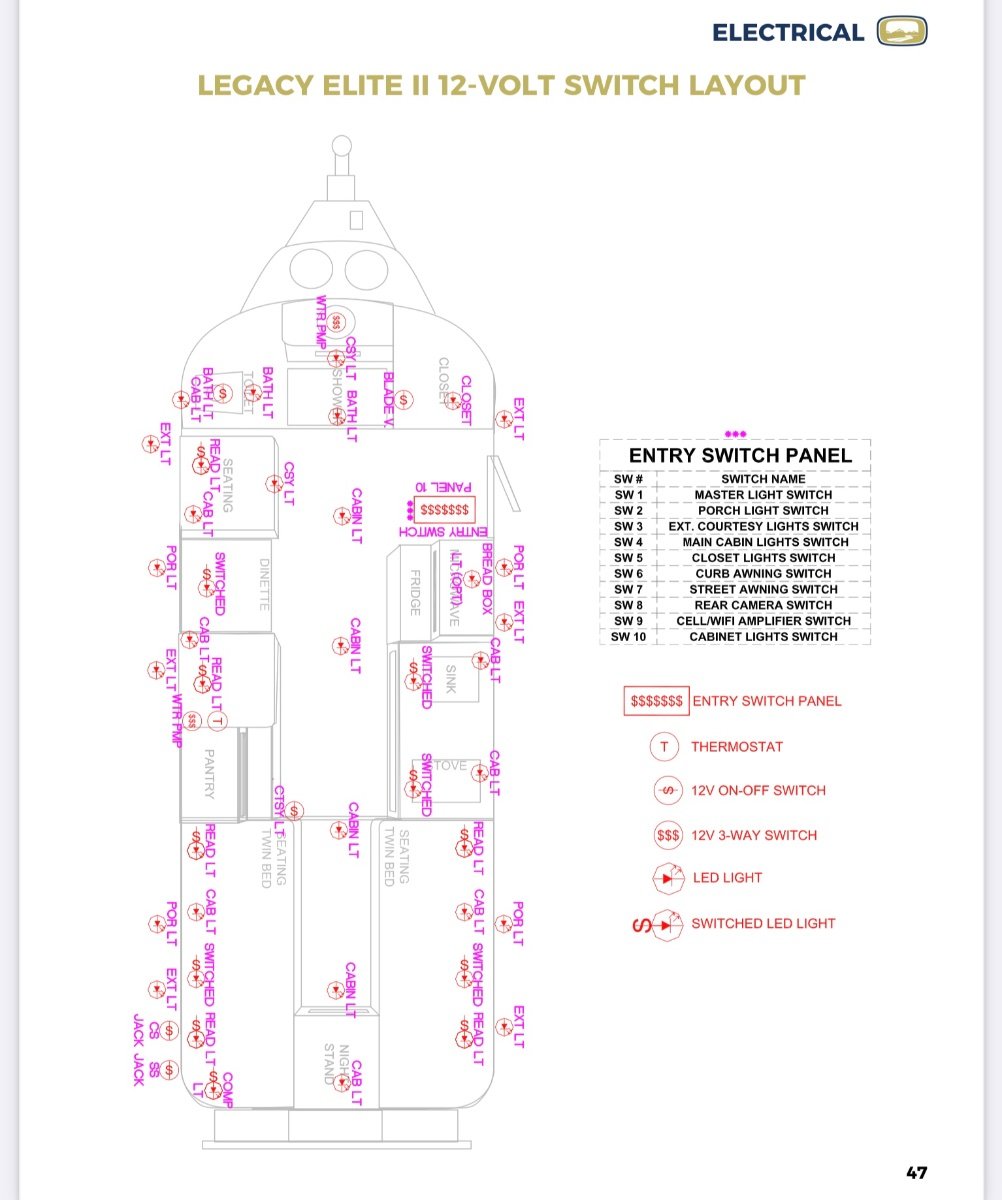
Still no actual wiring diagrams, even though the TOC calls them diagrams, just those lame “Layouts”. Grrrrrr. John Davies Spokane WA
-
That is mine, I like the design and features, it gets good ratings. John Davies Spokane WA