Steve Morris
-
Posts
800 -
Joined
-
Last visited
-
Days Won
17
Everything posted by Steve Morris
-

A quick question on using shore power and air conditioning
Steve Morris replied to Steve Morris's topic in General Discussion
As noted earlier, I had already set my inverter to 15A service. I did this in March, just after taking delivery, since I don’t have 30A at home. Today we tried running the Truma air conditioner on my brother’s outdoor 20A outlet. Surprisingly, it worked just fine! The ambient temperature was 75 degrees, and the thermostat was set at 66 degrees. The air conditioner was set on low mode. I didn’t try it on medium or high. Thanks for the input! -
Truma A/C, Low versus night mode
Steve Morris replied to John and Debbie's topic in General Discussion
From the manual (and from memory, so I could be wrong), the difference between low an night is that at night the fan in the rooftop portion is also on low, making it quieter for those around you. Should use less of your battery, too. At the rally we had ours on night mode all day, and could barely hear it sitting outside. -
A quick question on using shore power and air conditioning
Steve Morris replied to Steve Morris's topic in General Discussion
Yes I have the Truma, and I haven’t checked starting amperage. I don’t intend to run it from his 20A outlet. I am going to simply unplug shore power when I want to cool down the trailer tonight. I sure wish I’d reprioritized mounting the 12V Sirocco fans, instead of working on the scooters and drawers in the Land Cruiser… -
A quick question on using shore power and air conditioning
Steve Morris replied to Steve Morris's topic in General Discussion
Sorry, incomplete information provided. Yes, I have the Xantrax inverter as installed in 2023 Olivers, and I have already set the input breaker to 15A. For clarity, I do not want to run the air conditioner on shore power. I'm just making sure that when I turn on the inverter to run the air conditioner on batteries, does the inverter know to automatically use the batteries and not try to use shore power? Or do I need to unplug the shore power to be sure I'm only using the batteries? Thanks for the input! -
I will be mooch docking in my brother's driveway for the next few days. He does not have a 30A outlet, just a 20A standard outlet. I know that I can't use the air conditioner on 20A, but I will be plugged in to use his shore power to charge the battery, run the microwave, etc. IF I want to use the air conditioner for short periods, all I need to do is unplug the shore power so I don't pop his breaker, correct? Then I can run the air conditioner using the batteries and inverter. (This is where the Victron inverter would be perfect, as it splits the load across the shore power AND the batteries as necessary!) Thanks for any assurance I'm doing the right thing!
-
Huh! I apparently read the FAQs wrong AND misheard the video and the description at the rally. So, you cannot show your trailer to a prospective buyer and earn credit UNLESS it was arranged by Oliver OR that the prospect buys a trailer. That's not at all what I understood the program was going to entail. I thought sure I remembered Matt Duncan saying that now you can earn points just for showing a random inquiry, whether they buy or not. I guess I see no reason to go out of my way spending a bunch of time showing the trailer to curious people, getting their contact info, and then filling out the form just on the off chance that they actually purchase. 🤷♂️
-
Here in Northern Ohio it is quite smoky and there's a definite smell of something burning. Not a campfire smell, more sour. AQI was 291 yesterday morning. We're still camping. We'll be mooch docking at my brother's over the holiday.
-
https://olivertraveltrailers.com/my-account/ Then “Submit Rewards Activity “
-
No, it wasn't arranged by Oliver. And it doesn't need to be according to the form I filled out, the plan brochure,, and the video. You can submit showings at campgrounds, at home, or where anyone stops you. Now, I wouldn't do this for just anyone just passing by and curious. But this man came across the parking lot where we'd stopped for lunch, asked if it was an Oliver, and asked it if was okay if he got his wife and could they see it. They were back ten minutes later, and we spend 30-40 minutes with them. I got everything I needed, and filled out the form when we got home. I didn't know if anyone else had applied through the new portal, and had no expectation as to how long it takes. Or, it might have simply been rejected. If so, I'd rather know that (and why) instead of "not been loaded on your card yet or is not eligible." I know the program is new, and it will take a while to get the kinks out.
-
I submitted my first showing May 24th. Still nothing from it, the only detail showing is: "The Reward amount has not been loaded on your card yet or is not eligible."
-
I found a great use for the awning while at home! #scootermaintenance 😂

-
Congratulations! It'll all come easy after a few trips. That photo from the campground is beautiful! And probably the last time you'll have those overly bright exterior lights on. 😂
-
Two quick/cheap safety mods
Steve Morris replied to Steph and Dud B's topic in Mechanical & Technical Tips
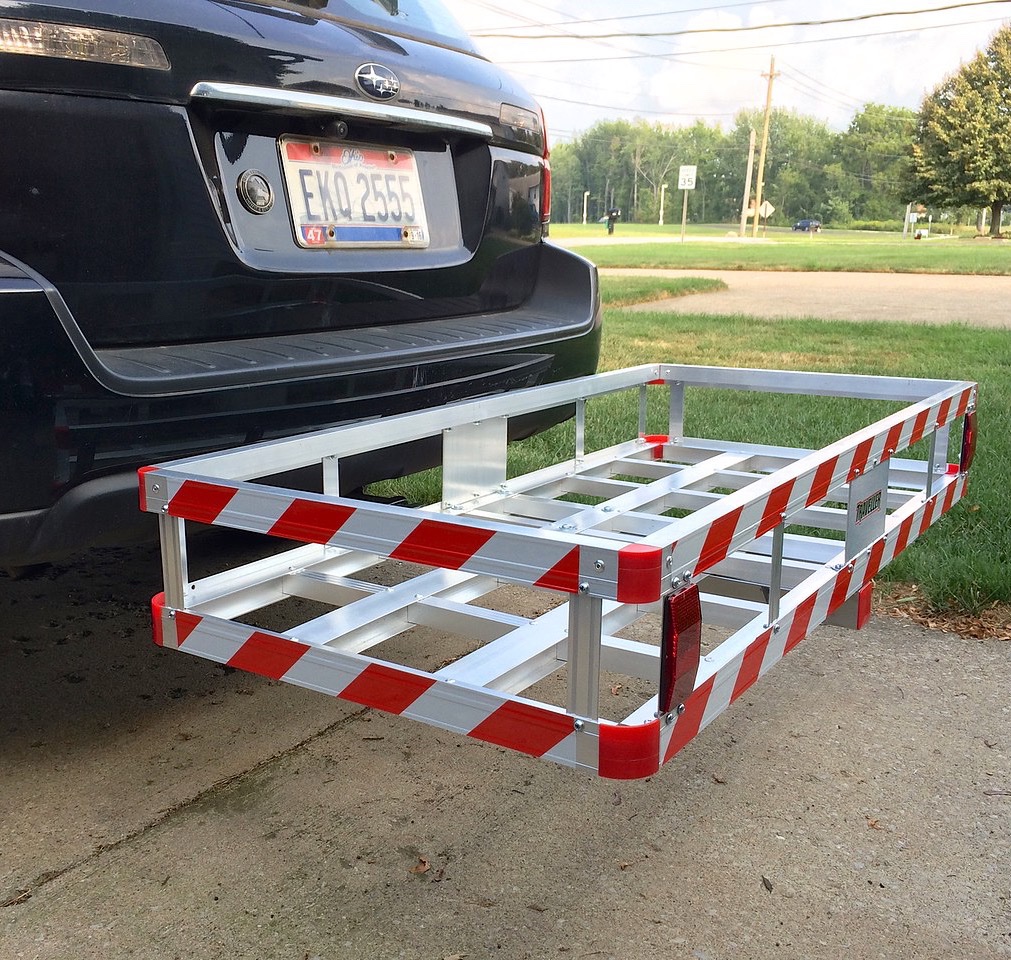
That's a great idea! And it will reflect with headlamps or flashlights to save shins in the night. I added reflective tape to a basket I had on the back of my Outback. Coincidentally, just yesterday I ran across the remainder of the roll of that tape. Now I know where to use it! And if there's enough, on the back bumper, too. Thanks!
-
There are a lot of Oliver owners on the Facebook group that are not on this forum. So I would guess that there are also prospective buyers there that don’t know about this forum. I do not do anything on Facebook except groups. My personal account is locked down with zero info, no friends requests, no location, etc. it’s just a means to use groups that I’m interested in learning about. Case in point: we ordered two Gazelle e-bikes. There’s next to zero forum activity anywhere , but an extremely active Facebook owner’s group. So that’s where I need to go if I want to learn more about our new bikes. Same with our Hiker trailer. The only online activity at all is a Facebook group.
-
Well, that's not going to work. Or at least be a reasonable option. I knew that the top corner of the Oliver aluminum receiver was rounded to accommodate the radius of the square U-bolt. But I didn't realize that there was a groove milled down both sides and across the top, too! So, the stock U-bolt won't fit over the adaptor sleeve I bought. And the next wide square U-bolt I can find is 3/4" wider than the sleeve. I could add 3/8" shims on both sides, but it is going to look bad. I looked at several of the bolt-on bumper hitch receiver like John Davies used. Most are Chinese, and several reviews showed failed welds. Nope! The Reese version at least has the base bent over the end of the square tube, so that might hold it if the weld failed. I might end up with that. I also considered simply putting the OEM U-bolts around the bike rack's 2" mount. I simulated it here with the mount I use for my Hiker trailer. Disadvantages to this would be that the 1UP Super Duty Double is 48 pounds, which would be a bear to hold while I'm trying to tighten the nuts. And, I'd need to add something to act as a stop in the event the U-bolt nuts loosened enough to allow the rack to slide backward. Yikes!! Here is the sleeve I ordered next to the Oliver receiver. I'm not questioning the experience of those of you who punched out the insert and use the OEM aluminum receiver. You've used them thousands of miles without problem, and that's great. But, when I saw how the aluminum receiver was milled to allow clearance for the U-bolt, I decided to take a couple of measurements. The inside of the steel 2" receiver is 2.045". I'm assuming that the OEM receiver with the insert knocked out is close to that, maybe even a little tighter. The dimension across the root of the milled slots is 2.140". 2.140-2.045= .095"/2= .0475" That's an awfully thin wall to rely on to hang 150 pounds from!! That's just over 1mm! Less that 1/16"! I'm sure the U-bolts will retain the rack if it were to fail, but please keep an eye on your mount to be sure fatigue doesn't separate the sections of the receiver.
-
Paging @John Dorrer
-
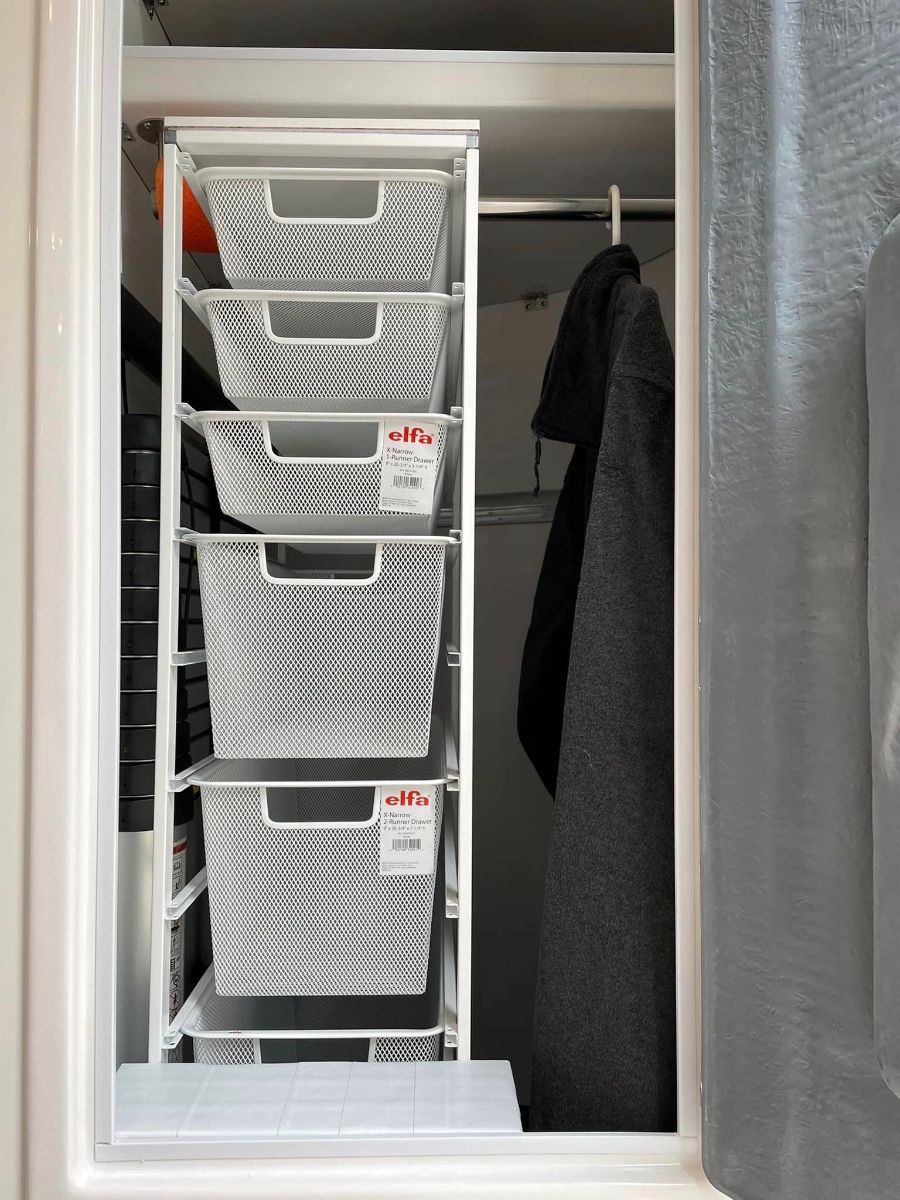
@rich.dev I guess you need to be a member of that Facebook group to view the post. She says: ” Hull #1216 “Ollie Belle” I just completed the Elfa closet project and wanted to share because I’m relieved to be done with it LOL! I went with the X-Narrow because I tried the Narrow and it gave me less room for hanging coats. I’m a coat/sweatshirt hoarder so I wanted to split the space. If you go with the X-Narrow, you have 10” +/- wide of a container and 10” +/- wide of hanging space or “other” space. If you decide on Elfa, you have a handful of configurations for drawer combinations. You’ll absolutely want a 3-runner drawer in the bottom for long term storage because you can’t pull it out, you have to remove drawers above to get to the items, no biggie. I duct taped a piece of styrofoam to create a “shim” at the bottom so it’ll stay in place. I also cut a pool noodle and added it to the clothes rod just for a “shim”. The telescopic ladder is beside it. You also have space for an additional container below the clothes if needed but there’s lots you can do with the space split in half. Others have the Narrow collection which is 14” wide.”
-
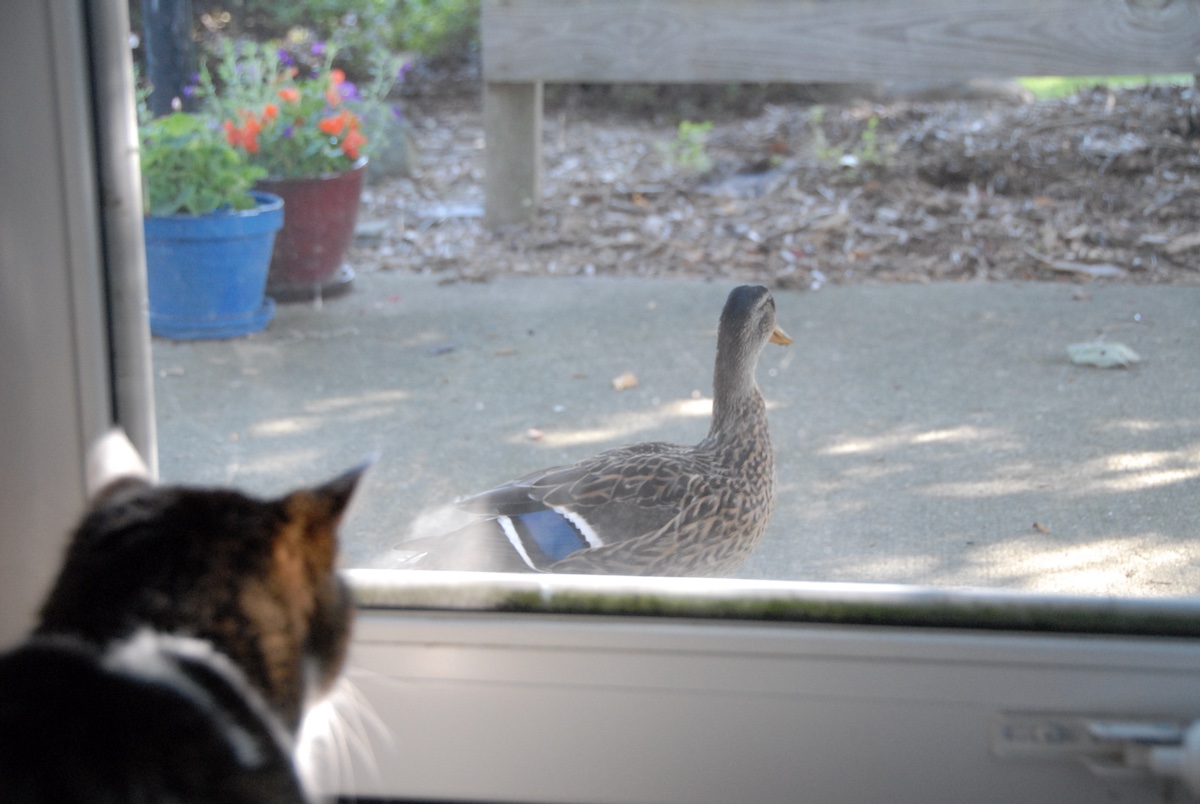
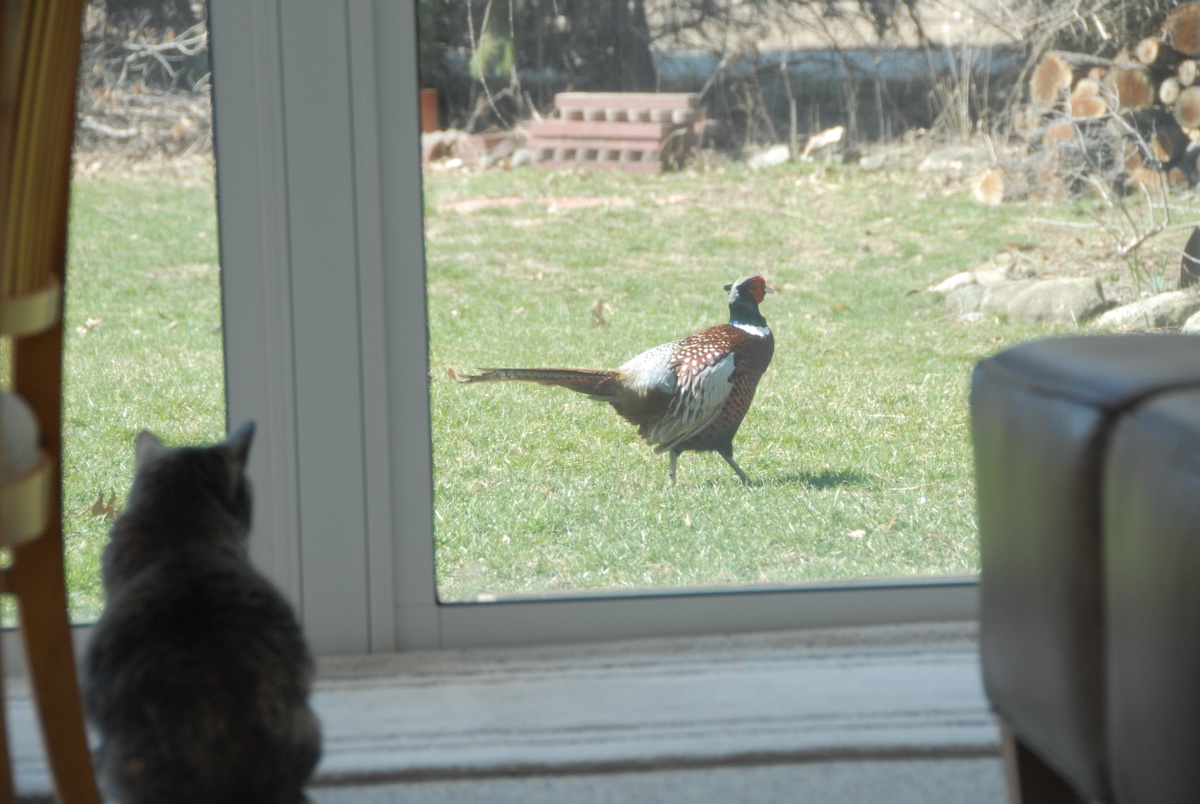
Ours, too. Then, just to show off, he brought his harem! Turn about is fair play. This one wanted in. We only saw this one once, but hear them frequently. Little Green Herons have been nesting in the trees in our yard the past few years. Four fledglings lines up nicely for me. And Screech Owls keep coming to check out the nesting box, but never stick around long enough to build a nest.
-
That looks pretty useful! For additional ideas, there's a place called Katy's Casita Closets that makes the rounds at fiberglass rallies, installing closet inserts. And here's a link to the Oliver Facebook group, where a lady used Elfa baskets in her closet. These look interesting, too. https://www.facebook.com/groups/OllieOwners/posts/1320869994984785/?__cft__[0]=AZUYzaw7itmIpwTl-fIsYD1PrXn88-adduelPhPaNGvVh31UKWdEHCPD2RMyfcl__eZj2wRX3oRL0ZTuu82-3R5xNtPz3PK1ZClQeTY4VOzEdEgjcwFxRB0IC6ahDmL5pIkR5o4f_THtV4mBO0KW0CiH71rjGcU5pASc6AJ3LTwMF8L6p-7DgR_PF-g-j7oMtRg&__tn__=%2CO%2CP-R
-
Oh, I missed that it was an insert! I thought you guys were having the inside machined out. Thanks for the clarification. I'd be pushing load limit with the bikes we're looking at: 47 pound 1Up rack 56 pound bike A 53 pound bike B 156 pound total Kent Harriss created a custom mount for his 1Up, but I can't find the photos I saw a while back. I've messaged him on Facebook for some photos.
-
In thinking about this a bit more, I realized that permanently bolting the rack to the top of the bumper, the front basket (an idea I had a couple of days ago) or to teh back of the rear bumper as shown above, all preclude using the bike rack on my Land Cruiser when I don't have the trailer. So, I'm abandoning those options. However, using the 2" steel receiver reducing sleeve (shown two posts up) in place of the Oliver 1-1/4" still seems like a better option than reworking the supplied receiver. Does anyone see a negative of this direction? Thanks!
-
That's what I was initially looking at, based on the reputation. But I got to looking at reviews on various sites, and found that they fail just as fast as the cheap pumps. I figured I can get three times the life from three $70 pumps as one $220 pump.
-
Be sure to be there plenty early on the 15th if the schedule is like it was this year. Activities started at 4 PM on Wednesday. We're reserved for May 14-20.
-
Discount Tire refuses to sell me LT tires for my trailer
Steve Morris replied to John E Davies's topic in General Discussion
Goodyear Wrangler Workhorse A/T Tires, in LT225/75R16
-
Secondly, I've been looking at the 1Up racks. One option would be to bolt the 1Up roof rack to the top of the Oliver bike rack crossbar. This eliminates some of the cantilevered load of a 2-bike rack. And also leaves one bike rack available if the one in the receiver hitch is removed. The only negative I see (based on holding Deb's bike on top of the crossbar) is that one pedal would need to be removed to avoid the spare tire cover. According to the dimensions on the 1Up page, nothing else would interfere. Another idea is to completely eliminate the receiver (either the original aluminum or the above alternate reducer) and bolt the 1Up directly to the crossbar. To do so, I would only have to reproduce the piece highlighted in green, and then bolt it to the rear face of the Oliver crossbar. A support piece could be inserted to avoid crushing the tubing while through-bolting the rack mount. The negative, would be that the only way to remove the rack would be to completely remove the Oliver crossbar assembly. The advantage would be a less cantilevered load. Does this sound feasible? Thanks in advance for any thoughts or suggestions. Coming from 40+ years of product design (industrial machinery) I can't help but think of alternatives. Whether they work or not is not always the case.


.jpeg.2d058fcabfa2fada616115293ec58e69.jpeg)