Search the Community
Showing results for 'Generator box'.
-
 First, I would say it would be easy to get help from friends at the rally for replacing batteries. A full inverter mod, the custom work of mounting the very LARGE Victron Multiplus II, stripping our all Xantrex parts (ATS and junction box) and related wiring changes may be a lot to accomplish at a campsite! I ran in and out of my garage/workshop 100 times while doing mine for tools and 4-5 trips to Depot or Lowes for hardware over a two-week period of time. If you study the mod threads, plan really well in purchasing parts, get very ready, have a lot of patience (new friends too), maybe, good luck! 🤣 You want the 12V inverter and do not need the UL-certified model (required by code for home installations only). I went with Inverter Supply for these parts for free shipping and no sales tax (see picture). You NEED the VE.bus to configure the Victron for charger/battery spec settings. There are two models (I purchased the USB-C model and there is also USB, depends on the laptop you would use to setup). You need an Ethernet cable also to connect the VE.bus to the Victron MP2. There are YouTube videos showing the configuration steps. You also posted pictures showing the Progressive Industries ATS (Automatic Transfer Switch) and the display which shows the readout of shore power stats. The ATS switches between the two shore power sources (side outlet and front outlet usually for generator in front basket). This will not change but the power coming out of the ATS, connecting to the 120VAC breaker panel has to be replaced with new 10-3 AWG cables to go to the inverter and back to the breaker panel (buy 15 ft to be safe, I used about 12 ft, it runs from streetside bed basement where our new inverter was installed up to the breaker panel under the rear dinette). The Victron MP2 has dual terminal bolts on both + and - sides. I ran the 4/0 battery cables, from batteries directly to the Victron MP2, removed from the 2KW Xantrex (I had the same older model) and all secondary 6 AWG cables that OTT had on the batteries, I also bolted to the Victron bus vs. out to the batteries. If you get this all done at the rally, that will be a great story! Take pictures and post...
-
Maybe a political protest? Though NO mechanical device is completely foolproof and inherently safe, I’d tend to trust Honda before some of the Harbor Freight fly-by-night brands out there. I had a no-name discount store open-frame generator for a season. It kept my freezers going during a week-long power outage, but I wouldn’t trust it as far as I could throw it. I suppose if one were gonna design and install a ventilation/cooling system in an enclosed box on the front of the Ollie, they may as well go whole-hawg and design a system that monitors CO, temperature, etc and shuts down the gen and triggers the fire suppression system if parameters were exceeded. I wonder if folks in motor homes with built-in Onan or Generac generators running -inside- the body of their RVs give it so much thought….
-
We also have a Honda EU2200 in the bed of our F-150. When we need the generator, I remove it from the truck. It sets on the ground outside of our trailer or truck for "Just in Case" bad things that happen. Having it run in your TV or Tongue Box has several problems. One is that up front you have no line of sight to see a fire. At least if you put the generator on the ground and to the street side, if it cooks off, you have a chance of seeing the fire ball directly. Now I have never heard of a Honda generator "Self-Immolating"..... but if ours does, we will not be exiting the trailer about 4 feet from the fire. With it on the street side we at least could have an opportunity to see the fire ball and exit the trailer on the curb side. I would then grab the cord and disconnect it from the generator. Then use our awning crank as a hook to move the burning generator away from our Ollie. Or it could just sit in a box in the box at the front of Ollie and maybe the auto fire extinguishing system will overcome the leaking gasoline fire. Or if you run it in the TV bed, and it has a "problem", you would have a great excuse to buy a new TV. But then, what are the odds? Maybe something to really think about I suspect. 🙂 Safety John
-
We like the looks of the SeaBiscuit strange box. Yeah, a little pricey, but tempting. First major trip out - I lugged the Honda 2200eu (I think) along with us in the truck bed. Never used it once. I was thinking of the SeaBiscuit locking box for the generator - but figured it probably wouldn’t be worth the investment based on that non-usage. Our OEM Oliver storage basket is only used for picking up firewood when entering a CG, bag of garbage heading to the dump station, or staging my blocks, chocks, Andersen WD wrench, and San-T-flush hose. I never traveled with anything in it. Though I know it will likely reap howls of disapproval, I had been thinking that a locking SeaBiscuit box here would be a great place to have a -running- generator. Properly modified with large vents and fan for cooling and combustion air AND a suitable system for moving exhaust away from the trailer. Yeah, that’s the part that will make the hair stand up on the back of your head. That said, every generator-equipped motor home I’ve ever seen just routes the exhaust to the edge of the vehicle. Wonder if there’s any history of CO deaths for those guys. (Like I said guys - I’m not doing this - just brainstorming!) Of course, best practice is keep your running generator FAR from your RV. Unfortunately, the Honda generators seem to have “Steal Me!” stenciled on the side, so unless I’m sitting outside watching it - I’d never even be using it.
-

Sea Biscuit Rear Basket and Storage Boxes
Steve and MA replied to Steve and MA's topic in Ollie Modifications
We've been very pleased with the basket and boxes. Now that we've had them for almost 6 months we can give more feedback. First, many have asked about their weight limit. As @Patriot mentions, this is a question better answered by Oliver. Sea Biscuit doesn't provide a weight limit, but the basket and boxes are very robust. Oliver has a 150 lb limit on their optional bumper receiver. Our unladen receiver weighs 26 lb, so we're looking at a maximum of about 176 lb hanging on the rear bumper. The Oliver receiver could probably handle more weight, but you also have to consider front/rear weight balance. Our Sea Biscuit basket and empty boxes combined weigh 74 lb. If we observe the Oliver weight limit, we can carry 102 lb maximum in the boxes. We only carry about 30 lb of bulky/dirty items in the boxes: chocks and blocks in one rear box and a (very) small grill in the other. We also have the Oliver front basket, sometimes loaded with 70-80 lb of gear (e.g. generator and fuel) which helps offset the weight on the rear. Access to the dump hoses stored in the bumper is a minor inconvenience, but less so if you keep the hoses attached. Since we have the Nature's Head, we only have to deal with gray water. If we had a black tank, then we wouldn't want to troubleshoot a leaky hose or connection while the basket is attached. That brings us to another access issue. The basket must be pulled out about 4-5 inches to remove the spare tire cover. This isn't a big issue though. We can just pull the pins holding the basket on the bumper and slide it back a little without removing it from the mounts. No tools required. Fortunately, we haven't had to use the spare, but the basket won't be a problem if we do. Besides the convenient storage, especially the easy access to the chocks and blocks, an unexpected big benefit is that the boxes are at countertop height when parked on level ground. We always have an outdoor table set up. The boxes are also strong enough for a 225 lb person to stand on, making it easy to visually check things on the roof. Steve- 11 replies
-
- 10
-

-
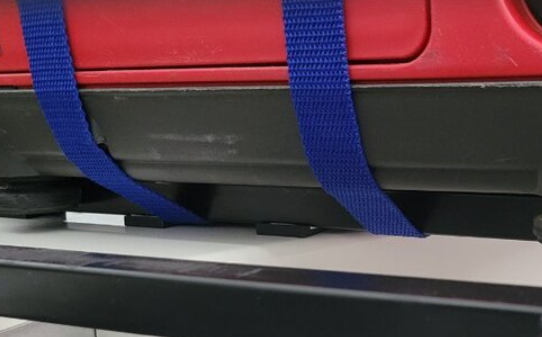
That said.... I like your mounting concept. But in an adverse situation the short height will foster spilling contents out of the storage basket. This is a major reason that the OTT box and all the options above have height enough to ensure stuff in the basket stay in the basket. If you were to:: Match the size and shape of the Oliver Box foot print, this would mitigate the Basket/TV interference damage issue somewhat. Ditch the hanging fuel containers outside the basket. Reduce the fuel load and mount a fuel container inside the frame of your basket. Would require vertical tang. Ditch the blue straps and get some STRONG ones. These plastic strap ends will fail under impact. The larger picture below seems to indicate that the blue straps are run up and to the flanks of the generator handle. IF this is the case, a better solution would be to "X" them on the front and back big sides of the generator, running them through the handle. I would also increase the bottom width distance to help reduce movement port/starboard directional movement. Or add another strong strap port/starboard also passing through the generator handle. Combined the above would significantly mitigate the situation. GJ
-
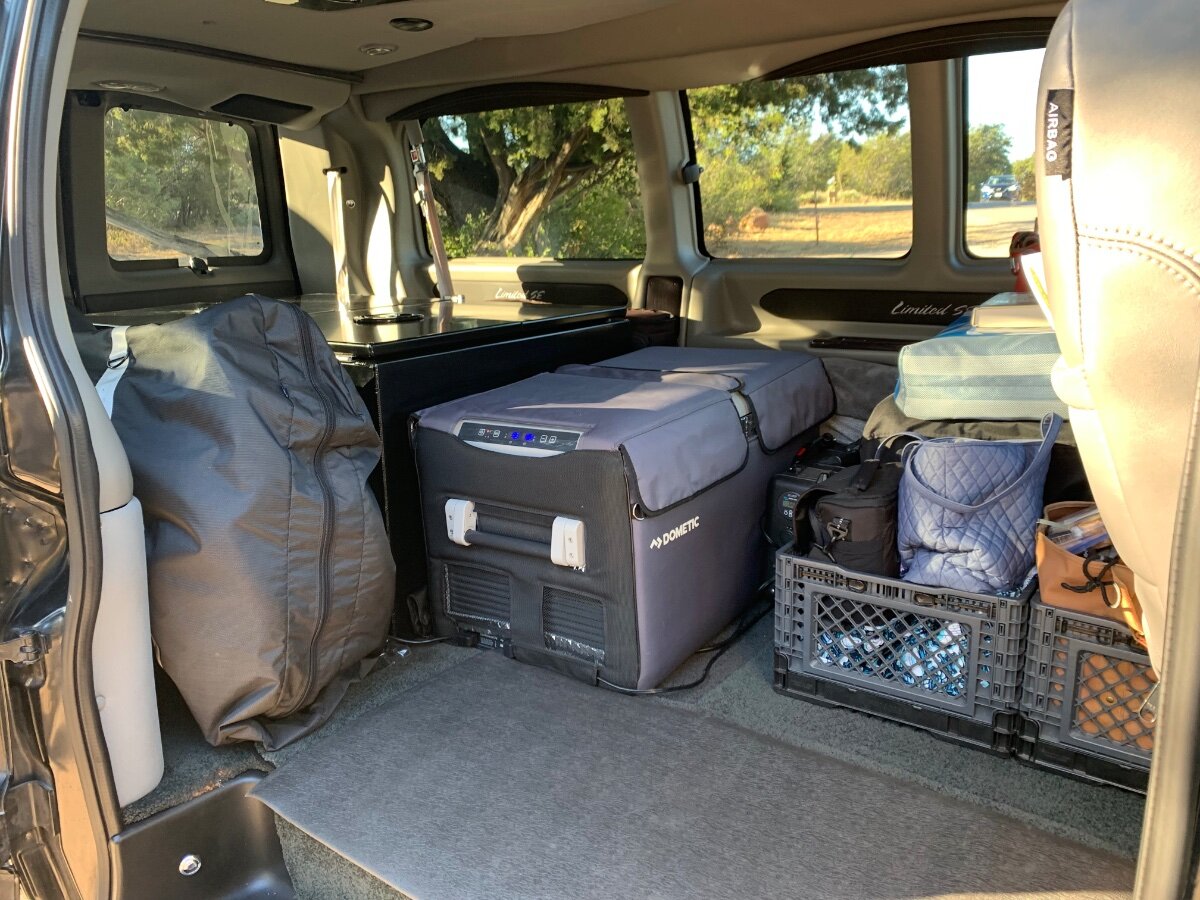
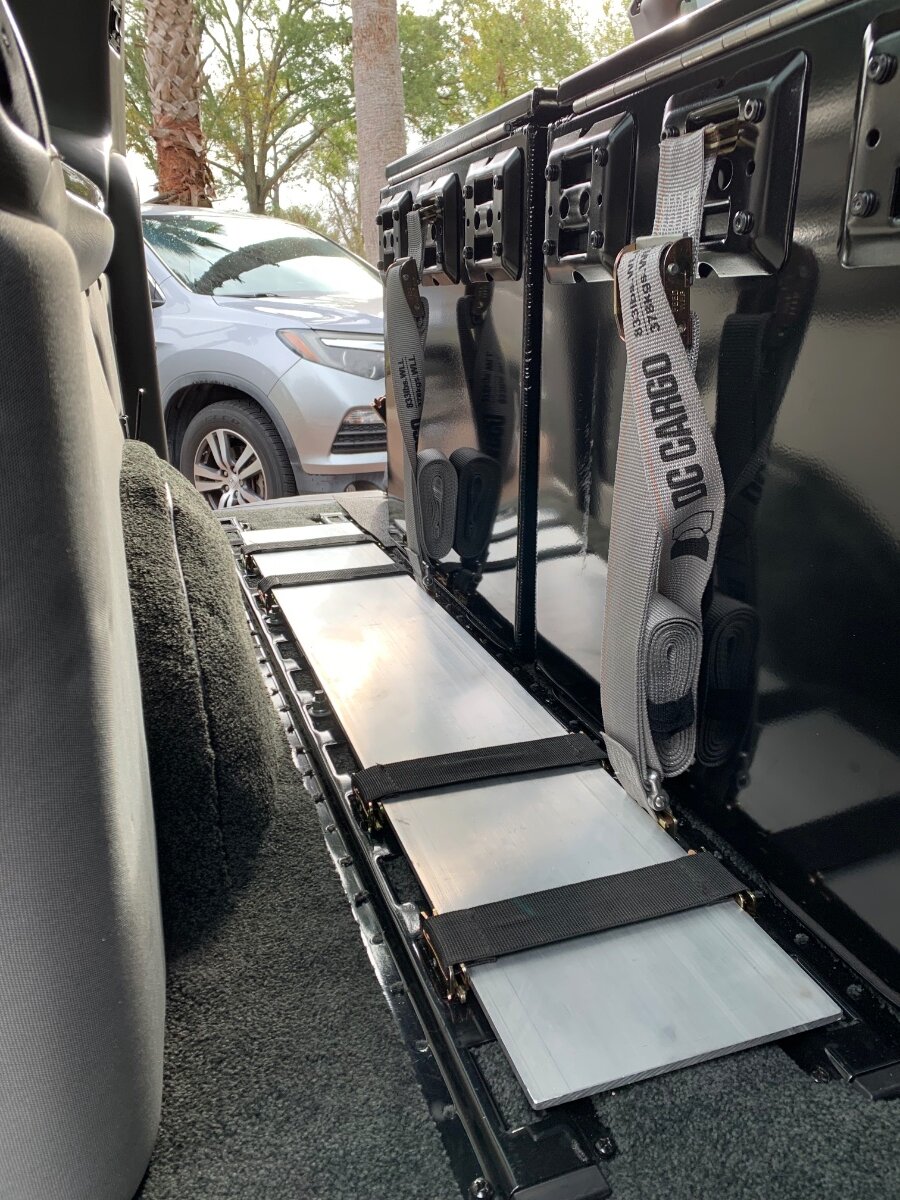
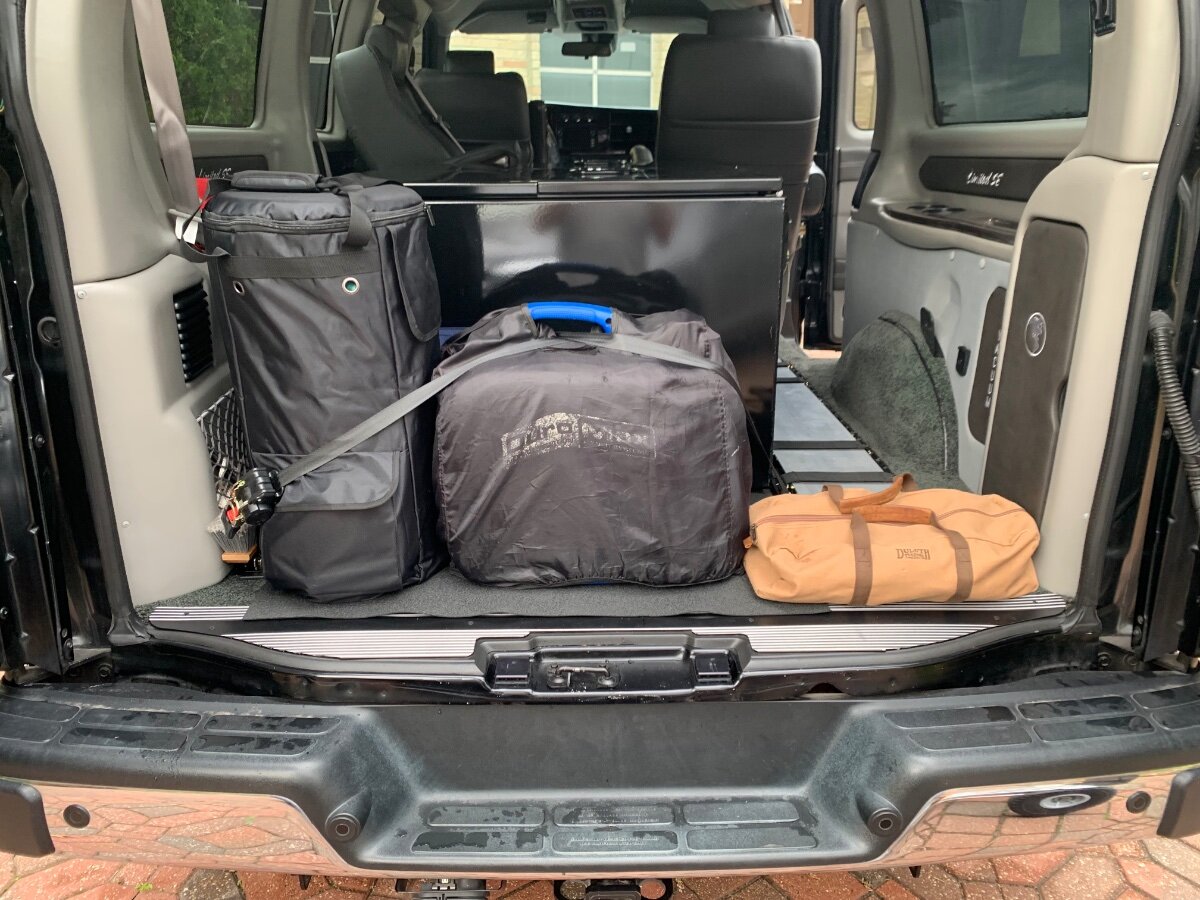
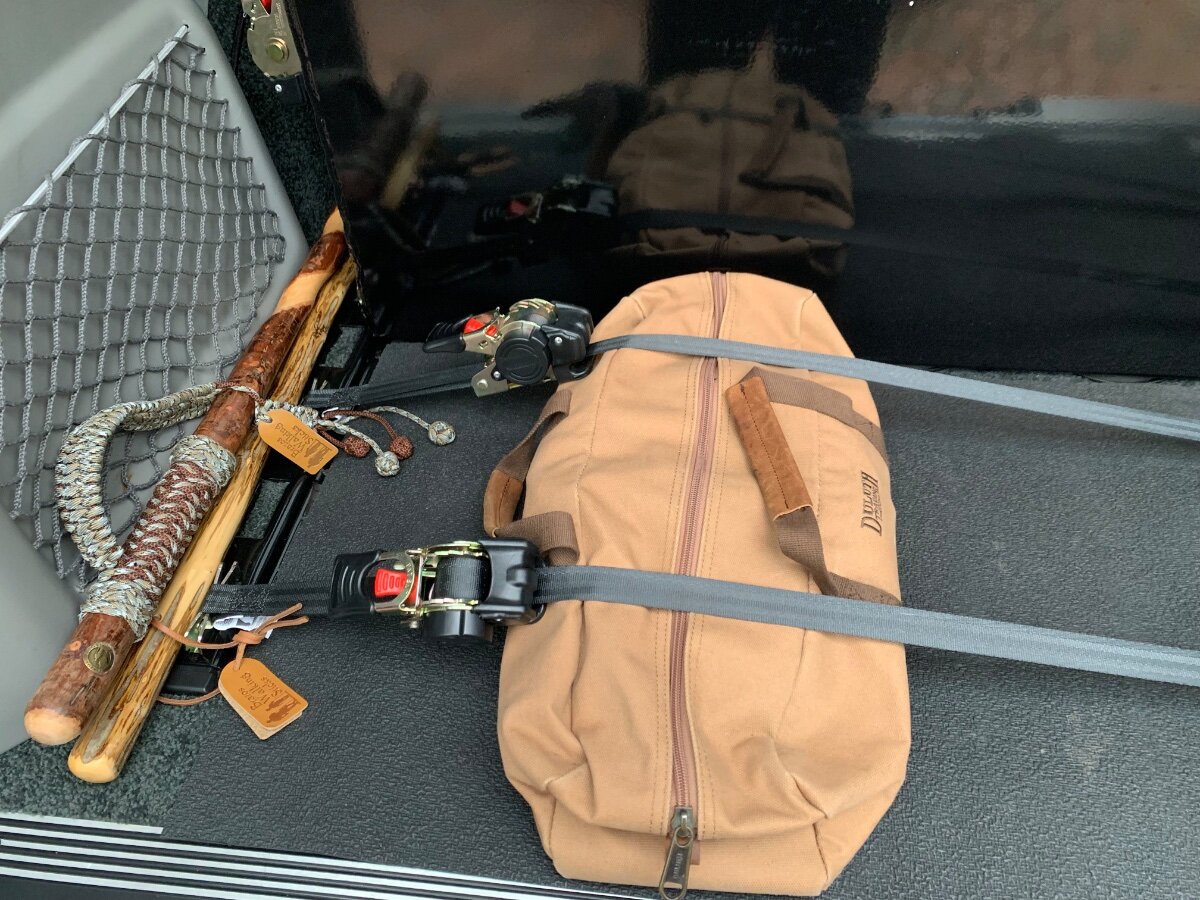
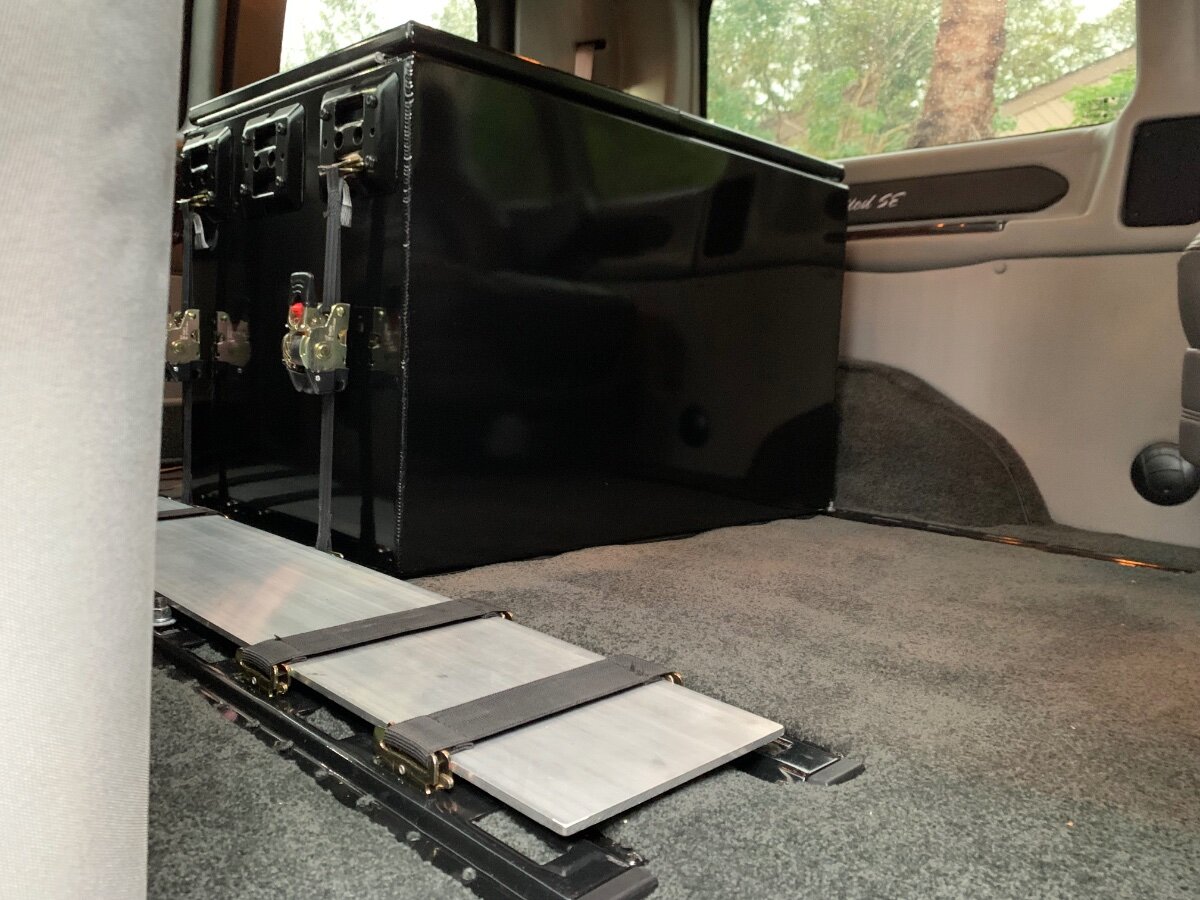
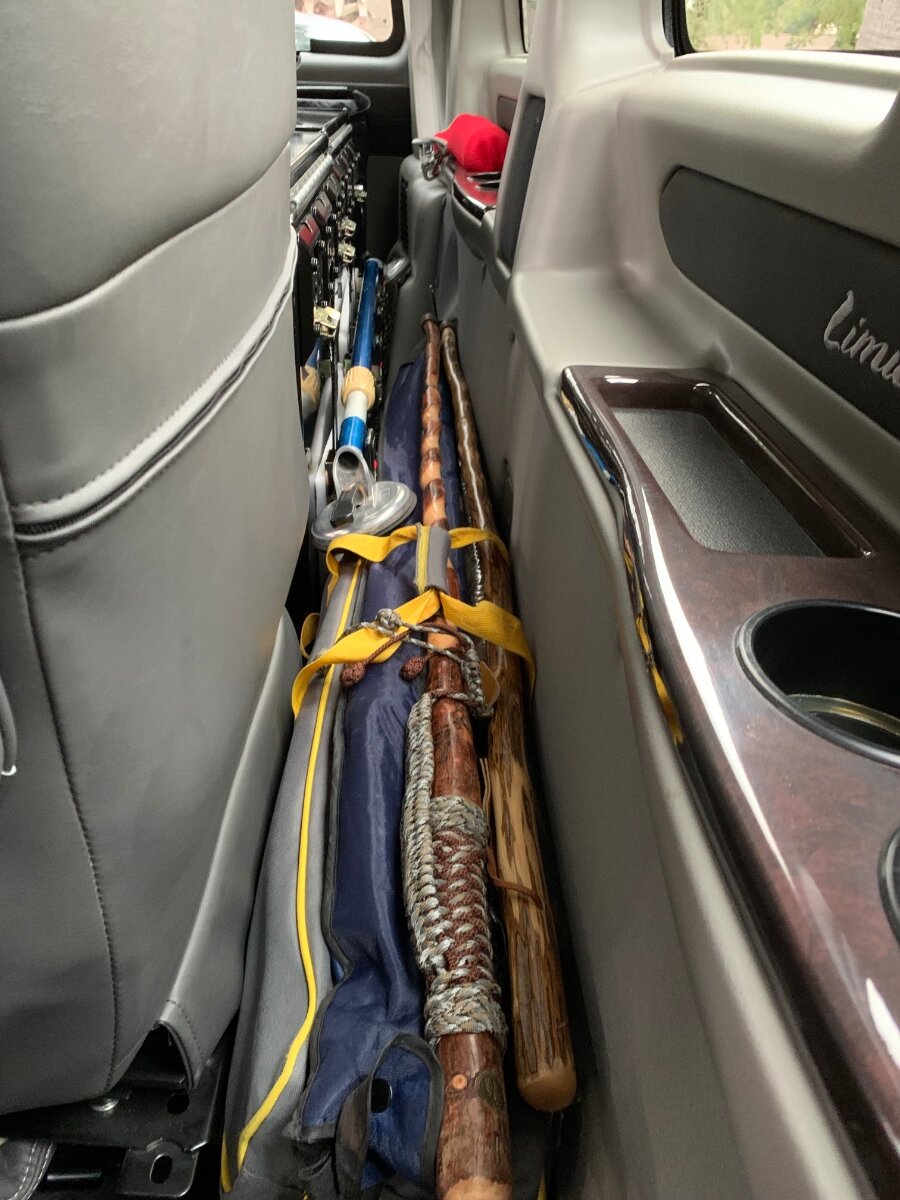
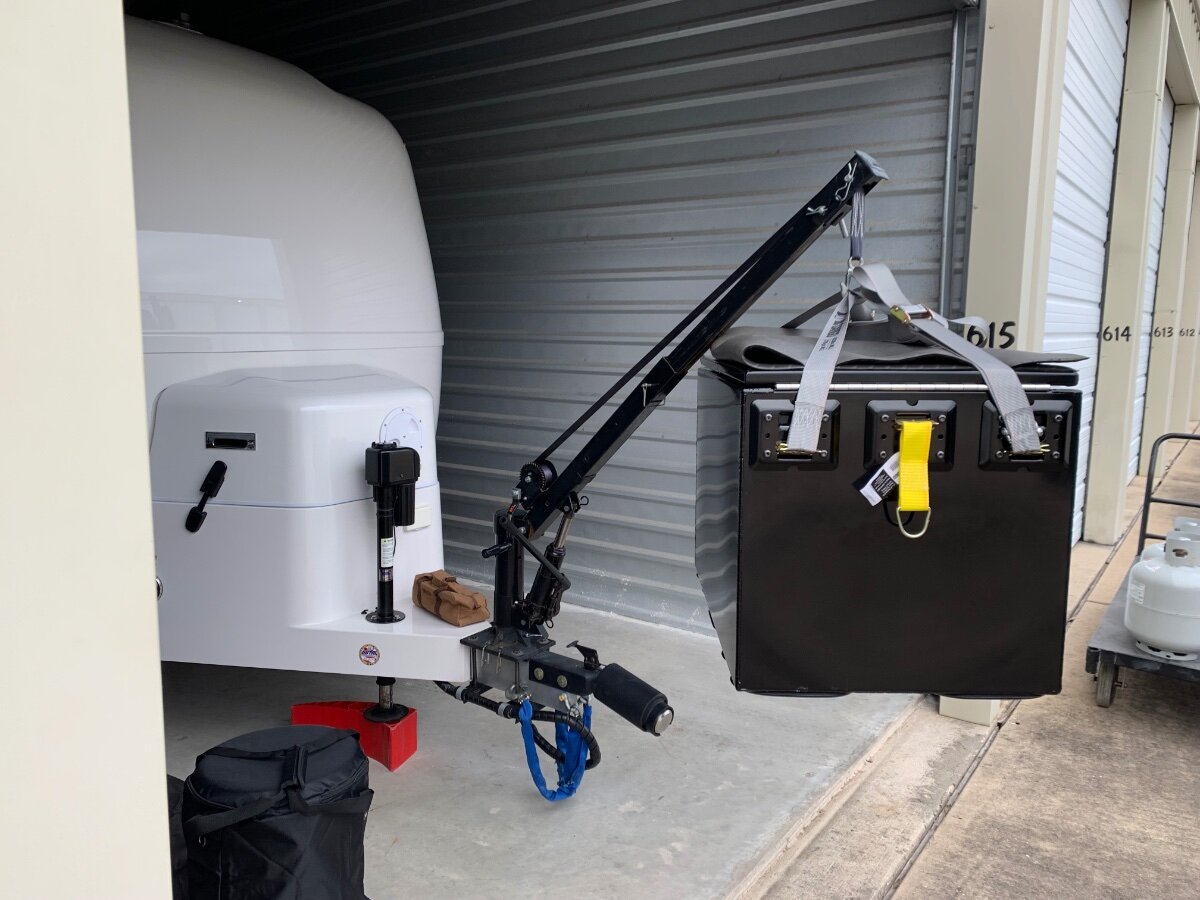
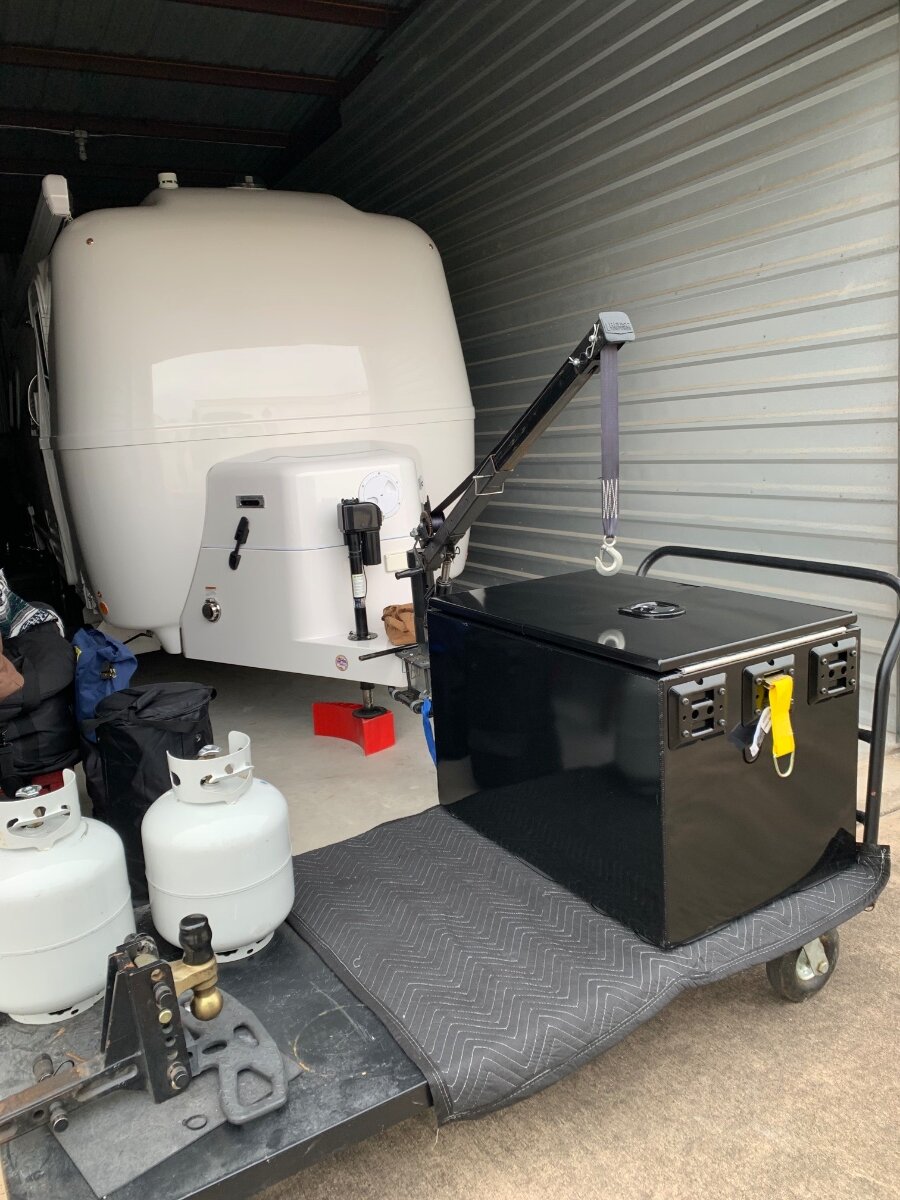
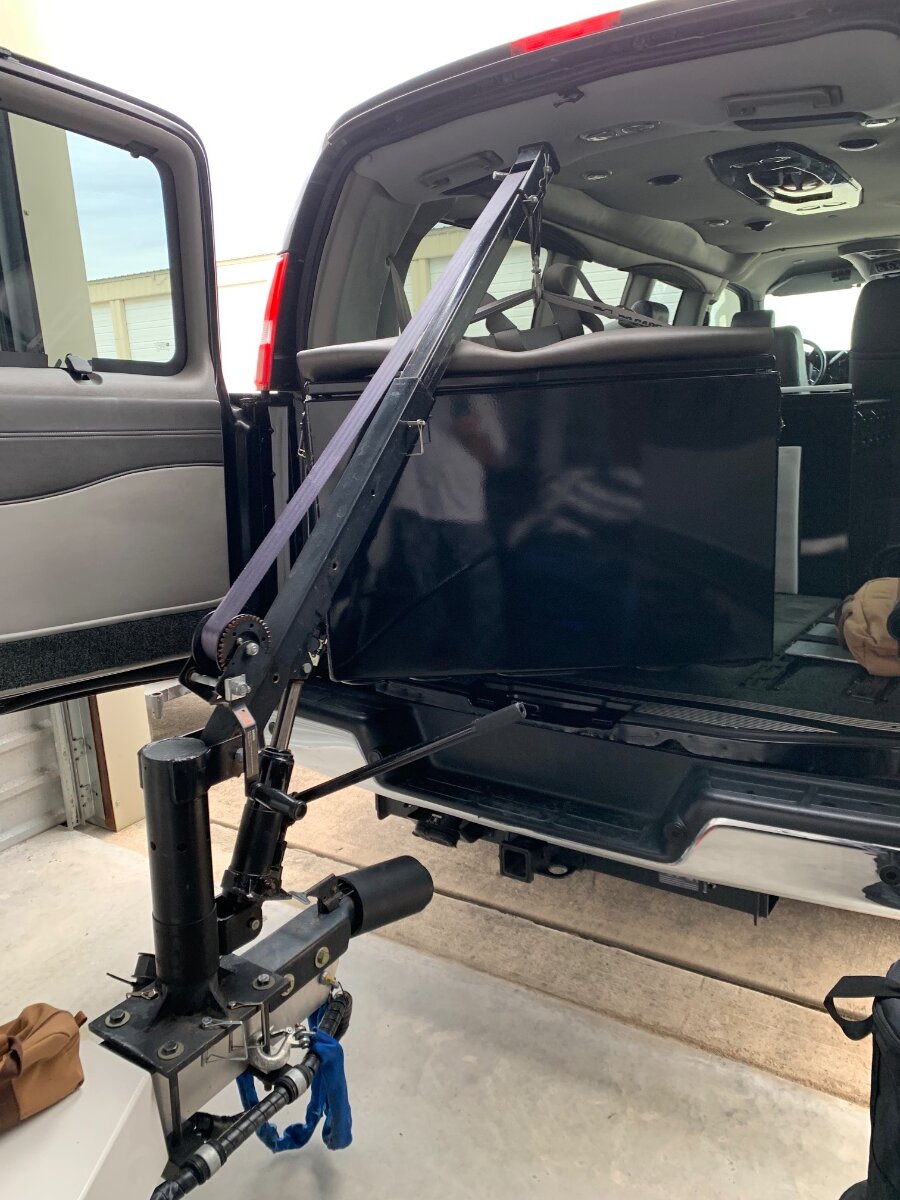
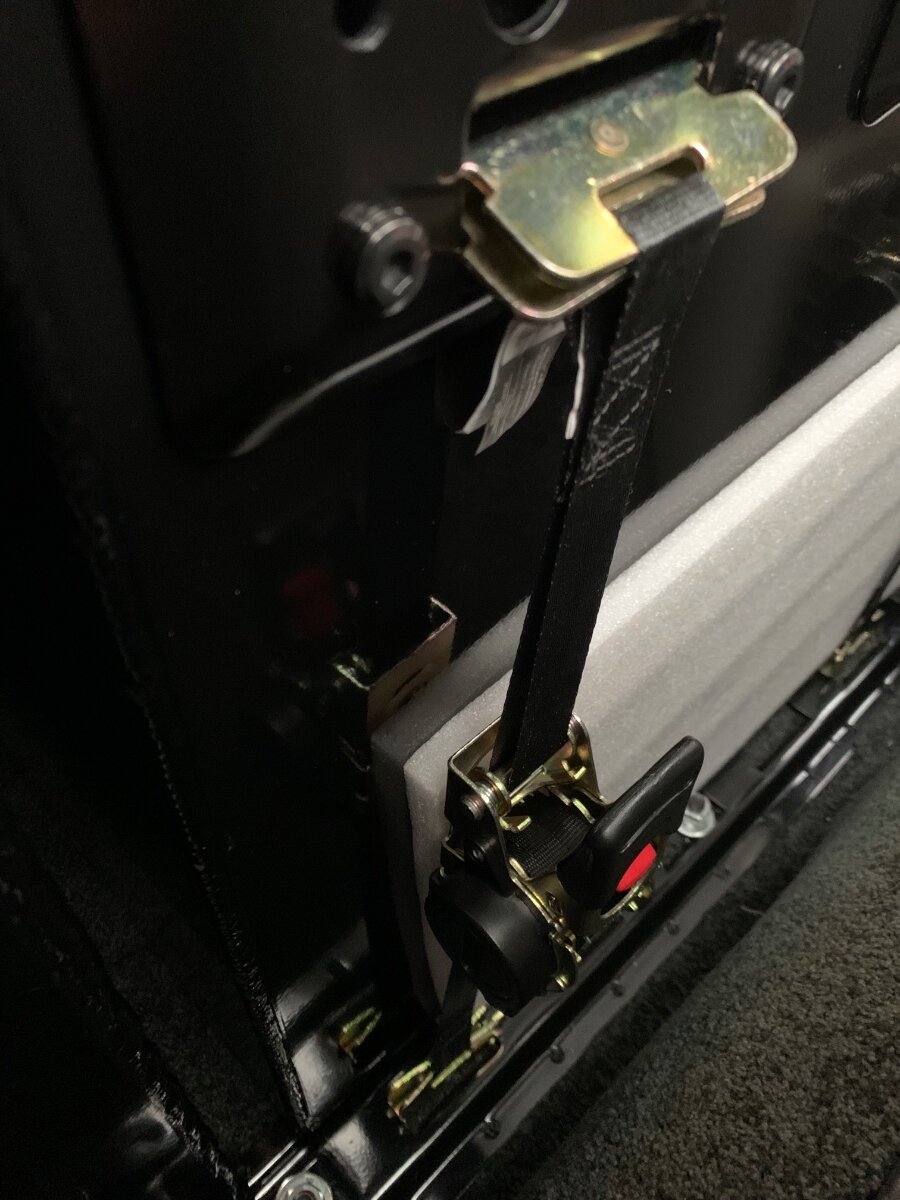
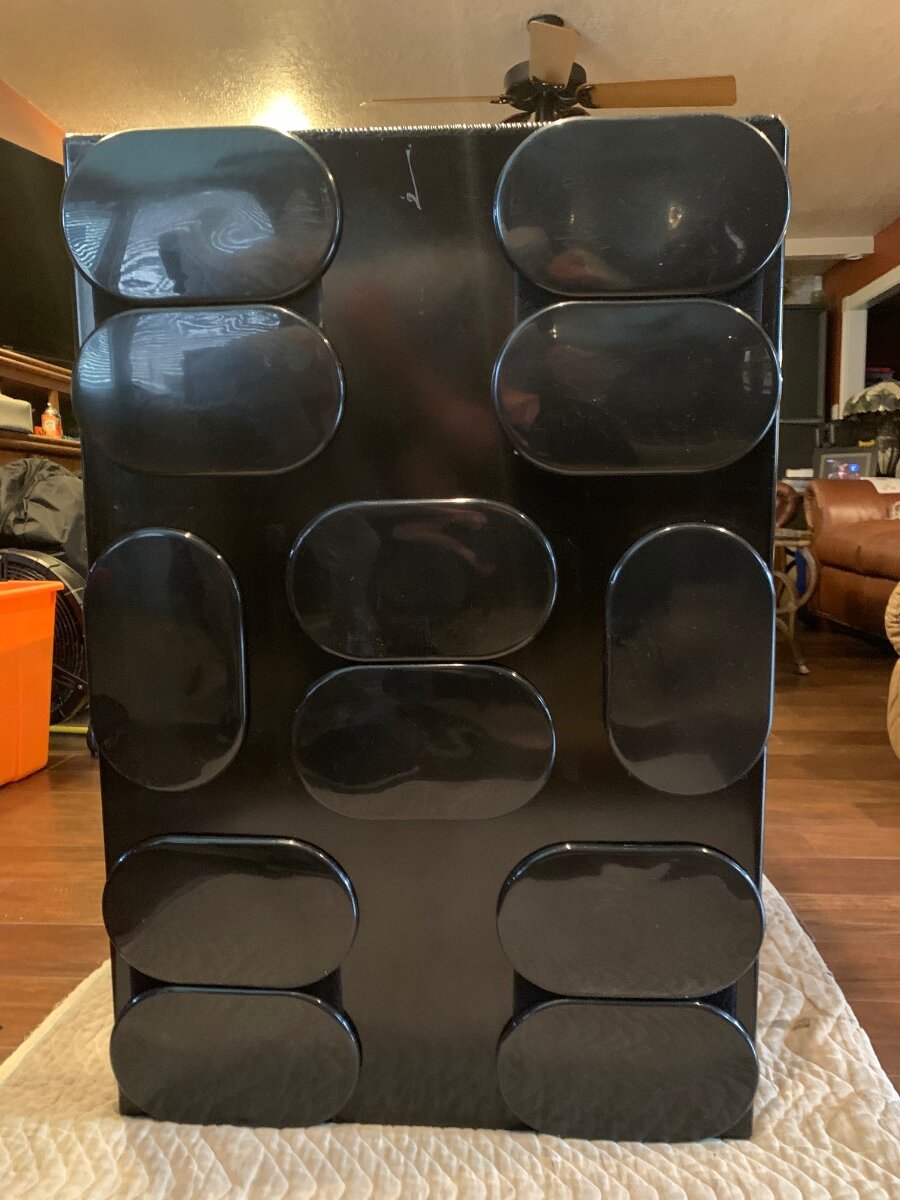
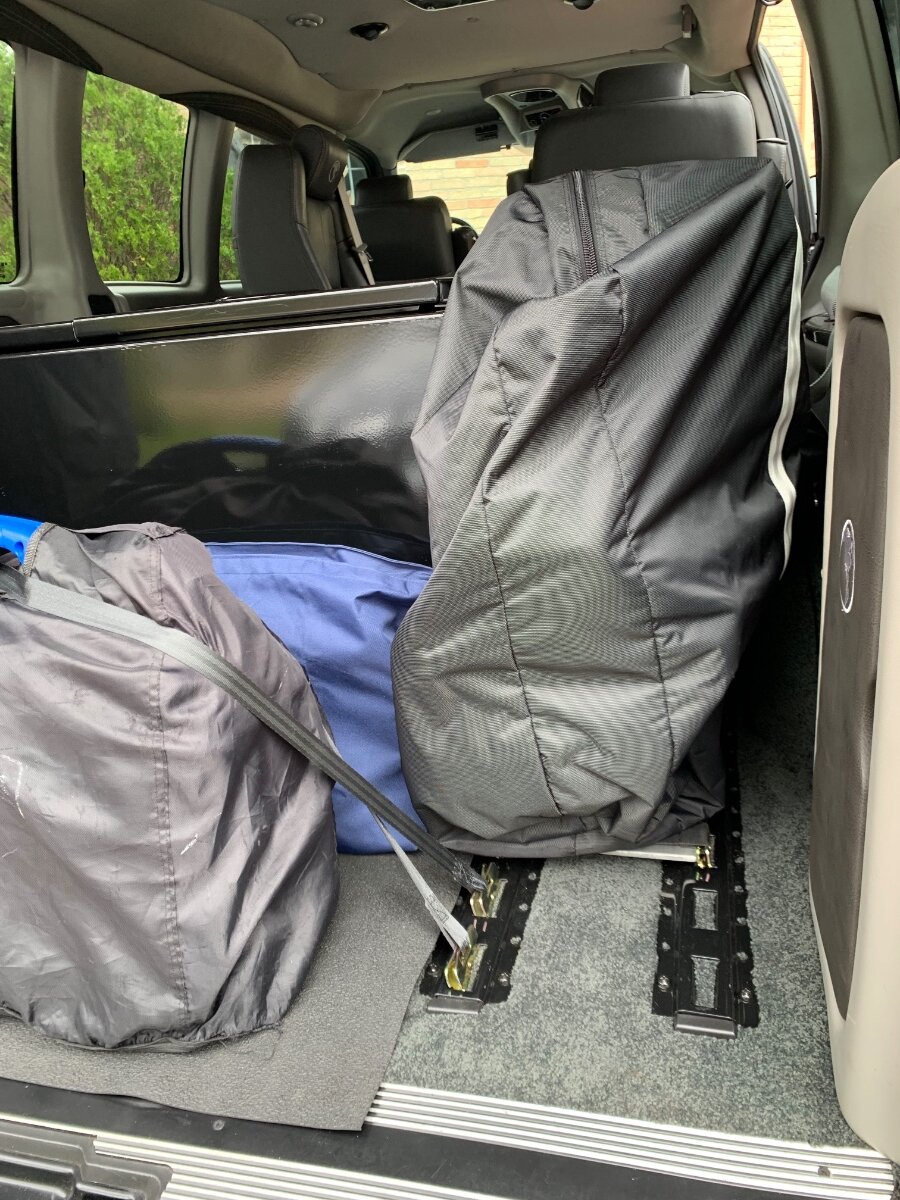
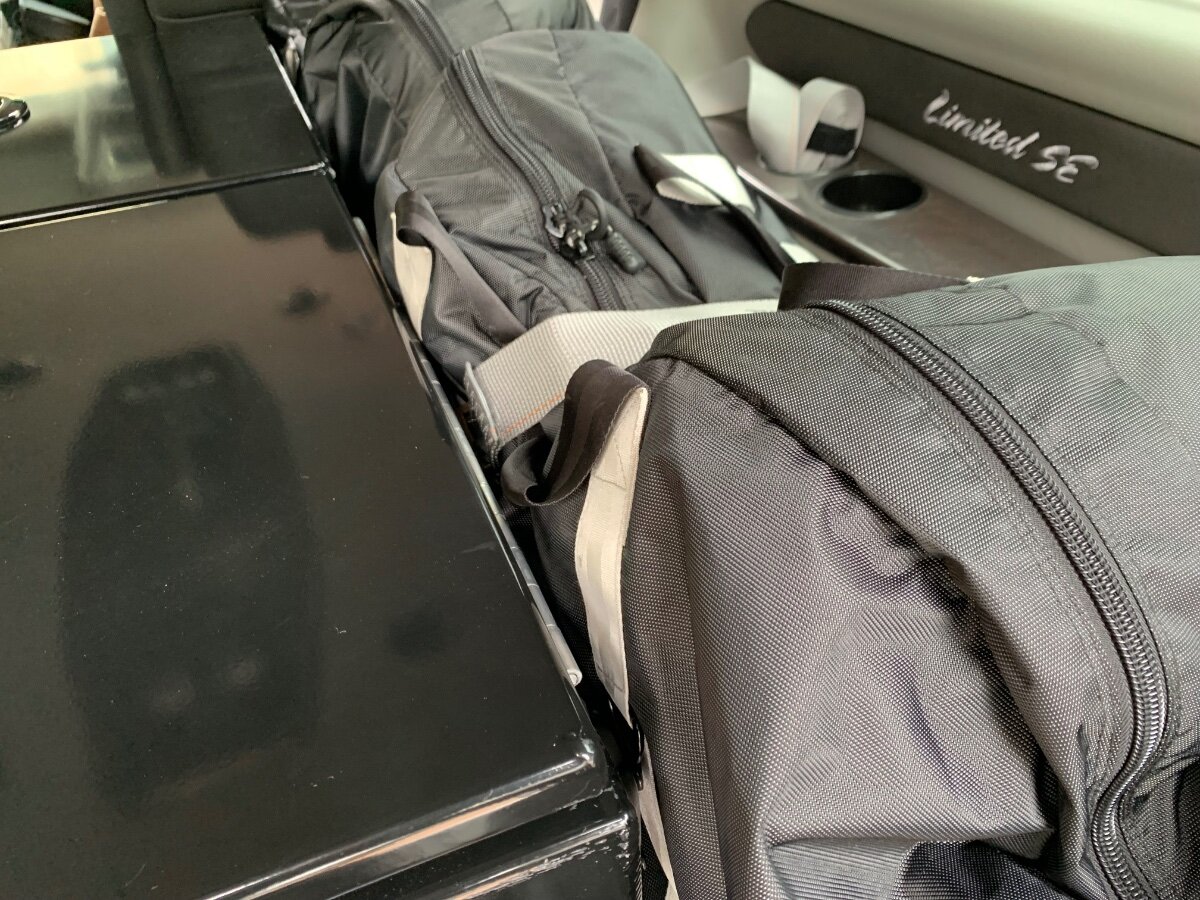
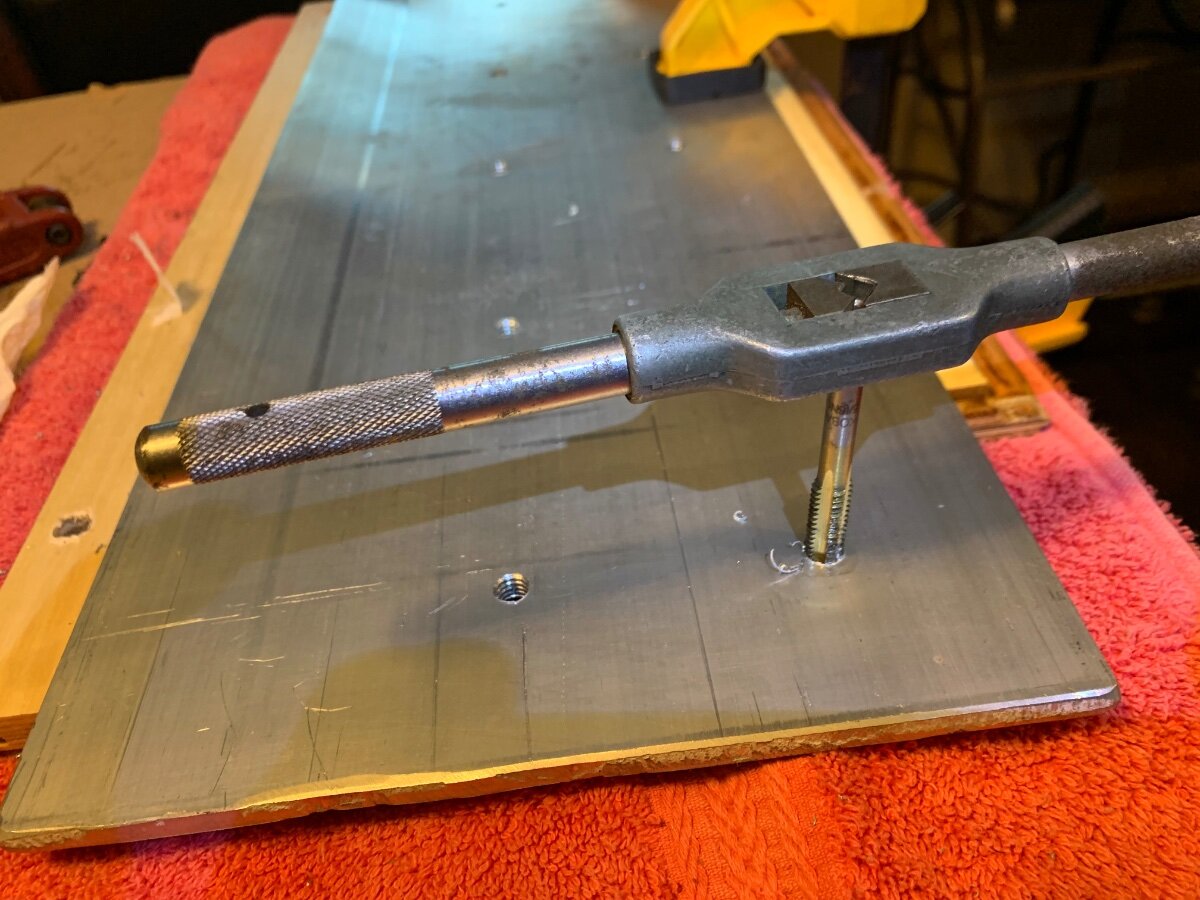
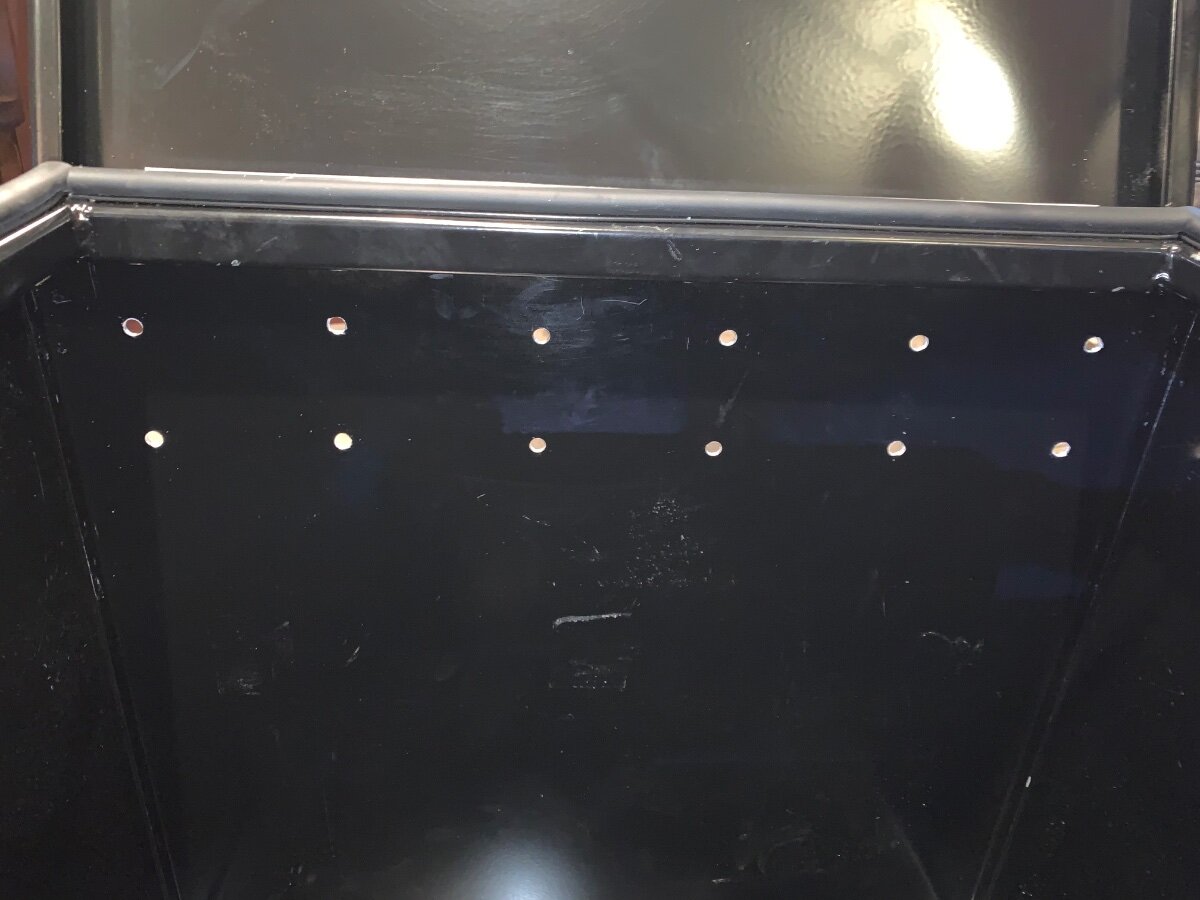
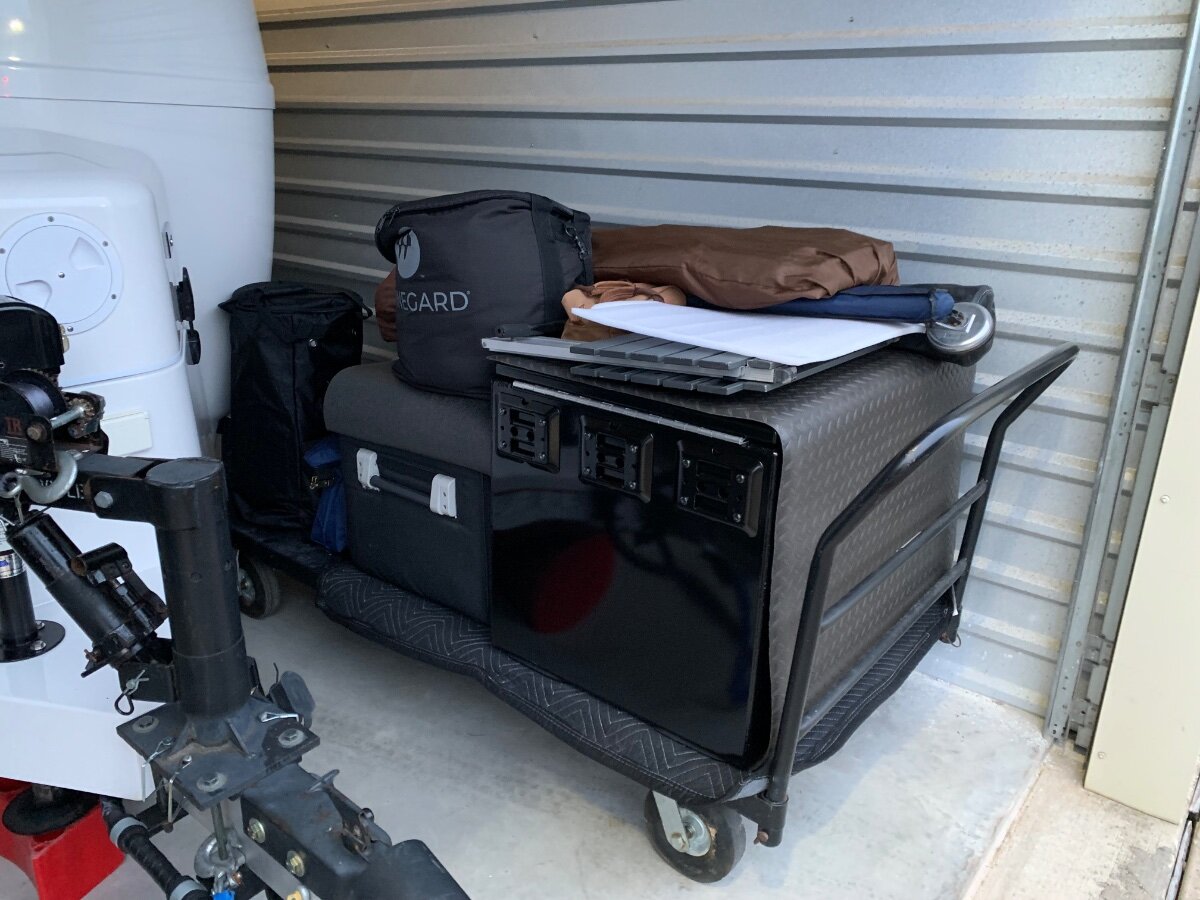
When towing with a truck, the majority of ‘stuff’ brought along on a camping trip or road adventure is conveniently stowed within the various holds of the Oliver and bed of the TV. However, even though my former crew cab Silverado 1500 had a storage box under the rear seat, it was mostly used to accommodate service tools and supplies for the truck and thus, found myself utilizing the rear floorboards and seat as additional cargo space when traveling. There’s peace of mind knowing cargo carried in the bed of a truck is adequately secured, not so much for that behind the front seats! All one needs is something going on from behind when something tragic is happening up front, no bueno! We’re required to wear seatbelts for good reason, proper securement of vehicle interior cargo should be of equal importance. I would be interested in learning how owners with trucks/SUVs safely carry their cargo within. My awareness of cargo securement was heightened recently with acquisition of a converted cargo work van as my TV; specifics are detailed in a forum post last October under ‘Towing an Oliver’ and entitled ‘2019 GMC Savana 2500 Cargo Van’, if interested. Unlike service utility work vans that generally have a partition or cargo net, along with containment shelves and boxes, to secure cargo and ensure personal safety; conversion and passenger vans are more designed for ‘people’ cargo. In the aforementioned forum post, I addressed cargo containment, but cargo securement was still under consideration. Here is what I did to address the subject matter: Maiden voyage to Texas Oliver Rally, Inks Lake SP; cargo contained, but not secured! DC CARGO E-Track system components were obtained via online purchases from Tractor Supply. Each of the Buyers Products boxes were fitted with six of these brackets, three at the top of each end. A 1/4” x 8” aluminum backing plate was used to attach and strengthen these mounts. Backing plate cut to size, holes drilled and tapped for mounting bolts. Containment boxes prepped for backing plate and E-Track bracket installation. Super Sliders affixed to bottom of containment boxes for ease of handling on interior carpet. Three E-Tract rails fastened to deck to accommodate securement straps. Aluminum plate at floor level is runway for folded e-bikes. This box was slid rearward once back box was removed for storage at COW Barn. It primarily contains items typically kept in the TV with additional storage space, as needed, a trunk per se. Ratchet straps best used for non-towing vehicle use. Box securement once e-bikes are deployed. Wider Cam straps best used for e-bikes and subsequent box securement when traveling. Rear box is for camping ‘stuff’, forward as a truck and more ‘stuff’. Driver’s side box securement using ratchet straps. View of e-bikes ready for ‘takeoff’ on runway! Cam strap securing e-bike. Ratchet straps for spare propane tank, generator and other needs. Items too long for the containment boxes are stowed behind at side panel. Oliver-mounted hoist used to transfer box at storage facility. TV moved forward to enable box positioning. Cam straps used for the lift. Containment box lowered onto platform cart. Liking the modular containment storage.
-
@Just Joe There are many available options out there for front storage boxes. In 2023, we did an epic 42 day loop out west and had our Honda 3200i mounted in the front basket. We never used the generator. During the trip, we quickly learned that storing a gen in the basket was not best use of this valuable storage space for our travel needs. The first thing we always found ourselves needing were chocks, blocks, 30 amp cord, LP grill hose, extension cord, and just all things go to gear. This meant opening the tailgate and unloading this gear out of a storage box in the bed of our TV. After returning home and doing a little research, I opted to order and install a front storage box from SeaBiscuit in Johnson City, Tenn. We actually went to their shop and picked it up as we do not live that far away from JC, Tenn. David and Kristine Hess, owners of SeaBiscuit, are some of the nicest people we have ever met. The quality and craftsmanship of their USA 🇺🇸 made products are excellent in our experience. On this year’s 47 day trip out west, the SB cavernous water tight storage box was a great decision for us and has served us well. It sure was nice to have quick access to set up gear instead of opening our tailgate and pulling out our gear at each base camp. We now store/carry our rarely used 3200i gen locked down in our TV bed. Everyone’s budget, storage and travel needs are different. This storage box works for us and is how we roll. If you decide to attend the 2025 Oliver Rally at Lake Guntersville State Park in Ala, David & Kristine Hess and their staff will likely be attending with products to display. Hope to see you there! Welcome to the forum! Patriot🇺🇸
-

Alternative Front Storage Basket
Shawna and Scott replied to Just Joe's topic in Ollie Modifications
I don't have a generator box, just a rubber maid container to put my chocks and stuff in that goes into the front tray/box Oliver provided. I was just putting an option out for others who visit this thread as I mentioned I know several who have the products from Sea Biscuit. Everyone's needs and budgets are different. -
Not good advice, especially for a new Oliver. You will be supplied with brand new tanks with warranty, date coded for 10 years of use. The swap tanks are often abused/damaged. I got one once where the O-ring was missing and the LP would leak. Also, it’s expensive. I just got one 30# and one 20# we use at home filled from empty for $29.80 which is the price of a swap tank at our local big box stores! Our local Ford dealer charges $2.50 per gallon Keep your original tanks for cost savings and your safety. We’re on a 3 1/2 week trip and will likely only use one 30# for furnace, cooking and we love our LP fire ring. Years ago we ran out on a trip in a Class-C and best price nearby in the Phoenix valley was $5/gal. We have enough batteries/inverter/solar to keep us fine and can run A/C for 3-4 hours when needed. If I was going to run a generator for A/C, I’d have more than enough LP, would look to fill one 30 when starting the second. If the E1 can only hold 20s, I’d buy a 3rd tank at a local HW store and have it filled up ready in the truck bed.
-
@Blain, Champion Power Equipment offer a number of dual fuel models, including a 3400 watt model, which can produce a maximum of 25.5 starting amps and 23.3 running amps when running on propane. The downside of this larger capacity generator is a weight slightly over 95 pounds. In contract my 2500 watt generator (Model 200961) approximately 40 pounds. Check the specs of these generators to ensure they will fit into the front storage box. You should also check the allowable tongue weight of your tow vehicle to ensure a heavy generator does present too much weight. How did you determine you need a generator capable of producing 30amps? I suggest this is overkill for an LEI. Do you really want to carry gasoline in your tow vehicle? As @dewdev pointed out, our LEII does not have the Truma AC unit. From what I have read on the OTT forum, I expect Oliver will confirm the Truma AC unit has lower power requirements than the Dometic Penguin. I suggest you add details of your tow vehicle and LEl below your signature, which will help other owners to make appropriate recommendations. Don
-

LE1 Generator Selection
My Imagination replied to My Imagination's topic in Mechanical & Technical Tips
Thank you both. I’m hoping to find a generator that will fit the front storage box and will generate 30 amps. We intend to travel mostly, boondocking along the way. The LE1 air conditioner will require either shore power or a generator during the summer months. The battery bank is not sufficient. Again thank you for responding. -
Hey Jim, My input- We are one of the first owners of many to install the SB cargo box. We absolutely love the amount of room it has, and it suits our set up gear with quick access perfectly. I use to secure our generator in the OEM Cargo box. After our 6000 mile trip out west last year and never using the generator, we reevaluated keeping the generator on the tongue and decided to just carry our Honda 3200i in the bed of our TV. The room in the SB cargo box allows me to keep all my immediate set up gear ready to deploy - 30 amp cord, chocks, Andersen blocks and levelers, 4 rubber chocks with lots of room for other miscellaneous items. Before the SB box install I was storing these items in the bed of our TV in an Action Packer box. The SB cargo box has made life easier just keeping everything right where I can get to it quickly vs unloading gear out of the bed. This box has continued to serve us very well even right now as we are out west again. We have not had any issues with water getting into the interior of the cargo box and we have been through some heavy rains on past trips. We always try and support USA made 🇺🇸 products and I think you will find David and Kristine Hess the owners of SeaBiscuit some of the finest people you will ever meet. David and his team take pride in what they craft and produce. I would also suggest you consider the moose rack he makes (pic below the hitch). It will keep your safety chains or cables stowed and off the ground. For what it’s worth, that is my input all the way from Cody, Wyoming now slowly headed home the long way round to North Carolina. 🇺🇸 Cheers and Happy Trails! Patriot🇺🇸
- 1 reply
-
- 4
-
-

Atmos 4.4 vs the Dometic FreshJet 3 (13,500BTU) vs Penguin II
theOrca replied to theOrca's topic in Ollie Modifications
ADB is the "air distribution box" on the inside side of the roof. My install dealer and I are still working out the ramifications of they having installed a 15K BTU FreshJet3 instead of my requested 13.5K BTU version. There is now some question as to my Honda 2200 being able to run the 13.5 version. I can attest to the fact that it is NOT able to run the 15K version. 😒 Measured data 15K Dometic FreshJet 3 (with the Dometic Easy Start) and a Honda 2200 gen: Sea level, 73F. Low setting on the A/C - 13 amps. Generator runs fine Medium setting on the A/C - 15 to 16 amps, gen running hard, evidently right at it's max wattage output. High or Turbo setting on the A/C - 18 to 19 amps - Gen shuts down immediately due to overload. I am having difficulty getting my mind around the fact that Dometic claims that the amperage draw of the 13.5K unit and the 15K unit are the same. If they are the same, then why is one de-rated to 13.5K? in my mind, BTU = energy = watts = amps.... 🤯 -
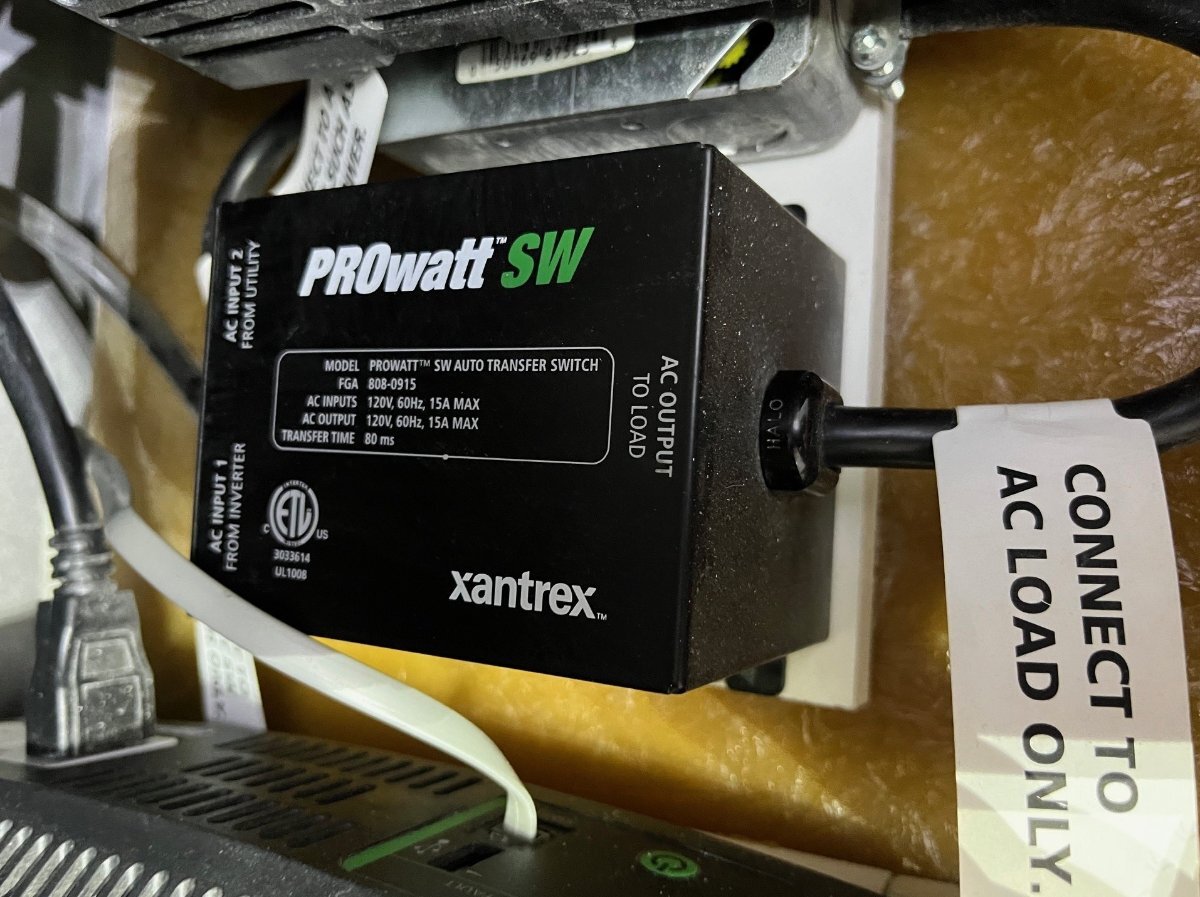
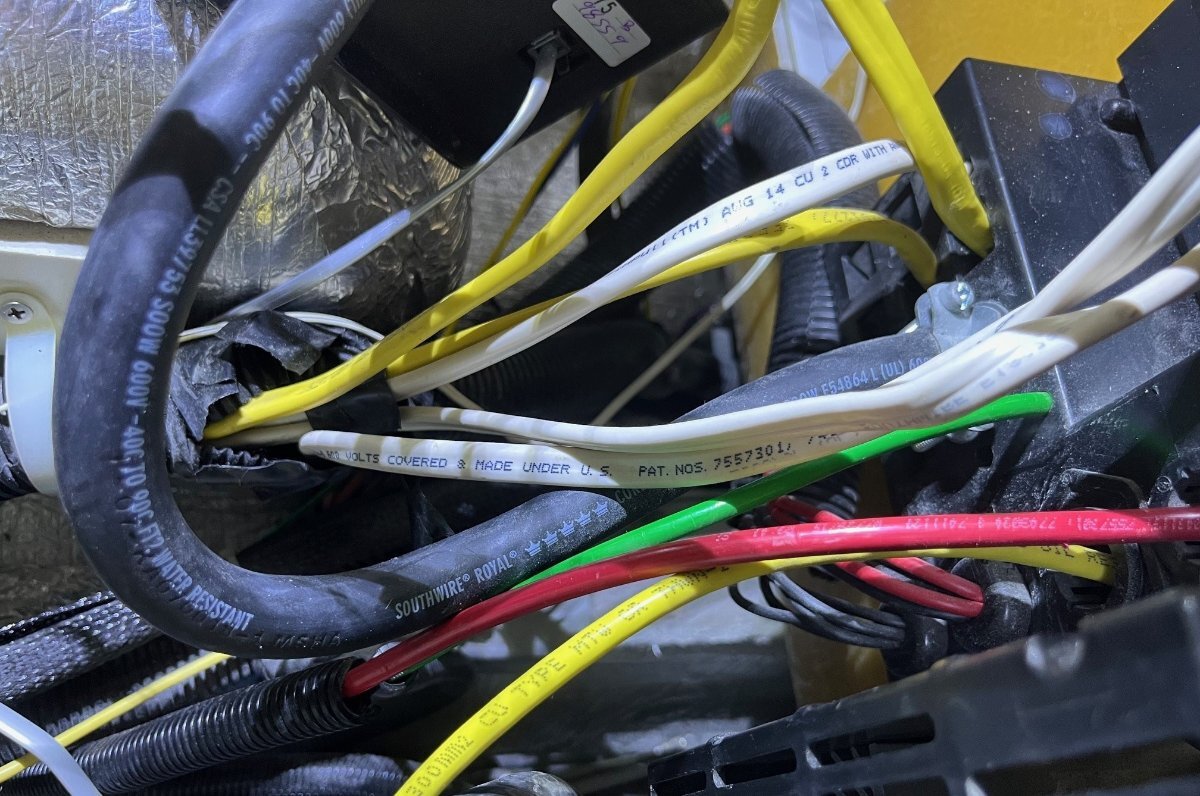
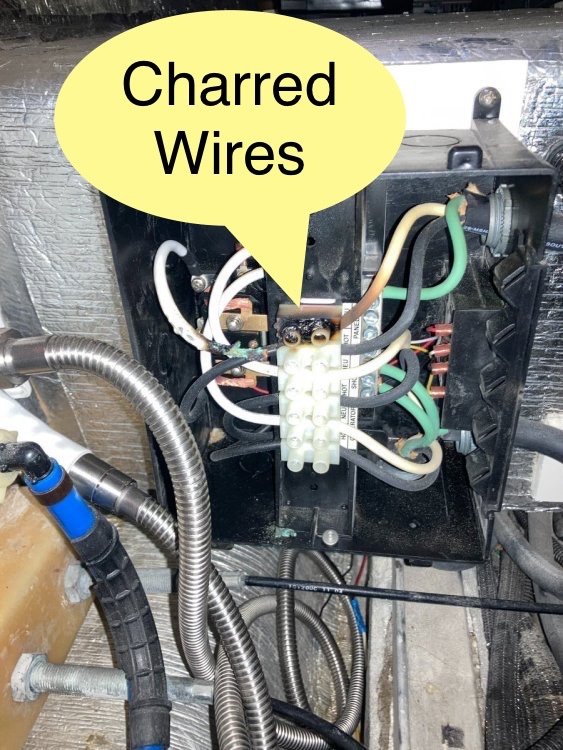
There I go again, quoting myself! 🤣 By chance I found the individual electrical runs for the 110v outlets and microwave. This may not be true in newer hulls, but on ours there is one breaker for both. Good news is the run to the microwave is separate and can be wired to a separate breaker, given one available in the panel. Since I will soon eliminate the PD converter/charger I could use its breaker or install a thin double in its place. I already wired the panel in this way but need the PD converter while I have no batteries in ours, working on the new inverter/charger installation. I removed the Xantrex 2KW inverter yesterday. Ours is inverter only, no charger and it also has the Xantrex PROwatt SW external ATS. The freed-up space is perfect to add a DC-to-DC charger or other needs. I also plan to move the solar ON/OFF switch from under the streetside bed to rear dinette. I already upgraded to motorized ball valves so no pulling of the curbside bed, and I want absolutely no reason to move either bed when camping. OTT really needs this as a future design goal! I sure hope the MP2 does not have some kind of manual reset button! What hokey wiring OTT did. Though I'm thinking back in 2016 the solar inverter option was a rare add-on. When I built an inverter system in our past Class-C, I created a split bus in the panel, one side served by the inverter and the other side having A/C and converter/charger breakers only to be powered by shore power. PD actually makes panels with a split bus for this reason, but mine was hand-cut! OTT wired the microwave and 110v outlets into a standard electrical junction box using only wire-nuts to connect these runs to both shore and inverter. These only went through the breaker on the panel when on shore power, otherwise are protected by the GFCI outlet on the inverter. I removed everything you see in this picture, and you can see the junction box at the top of the picture. The second picture shows the two cables that were wired into the box. They are the two white cables you see lose above the panel which I wired into the panel afterwards. Also yesterday, I purchased my Victron MP2 and VE.bus for programming and Bluetooth connection from Inverter Supply, at a good OTD price, no additional costs: Victron Energy PMP122305120 - Inverter Supply The second picture also shows the main shore power cable (heavy black 600V 10-3 cable on LHS). This will be removed. A new 10-3 cable will be wired from the EMS as input to the MP2 and another from MP2 output to the panel so that the inverter handles all loads including air conditioning. When on shore power from either input (grid or generator) it will allow pass-through 120VAC and/or Power Assist when needed. No generator on our rig, just 600AH Epoch and 3KVA MP2. If this doesn't do it, though it should, I can always add more batteries in the basement!
-
 We used Two 100 Watt Costco Solar Panels that they sell new in the box for just under $100. I bought three. Two to use and one as a spare. Each panel comes with instructions and wiring. The Airstream had an external connection for Solar on the Battery Box that holds the two 12 volt AGM Interstate Batteries that now can be purchased, also at Costco. I am not an electrician. I am not a Solar Installer for a Travel Trailer lot. You connect the + to the + side of the battery and the - to the - of the battery with the +/- of the Solar Panel. Diode is yellow when Charging and Green when batteries are charged. I could run a long thin pair of wires to place the Solar Panel against a milk crate with some rocks added, and move it with the Sun. Then I bought a second panel added it and charged faster. I sold the 25 foot Airstream and gave them one panel and now have Solar on the Roof of the Oliver and the Airstream. Easier for sure... but the Costco panels I have two left and if I need them in the future... repeat what I did previously. My rooftop Solar Panels provide us with all the 12 volt power we need. If they do not keep up with our simple needs for minimal power... add a panel, lean it against a Milk Crate and back in business. If anyone is curious I will try to find some photographs of our Portable Solar System for $100 and double it for $200. Better than the Honda that came with the Oliver that we never use. No Air Conditioning or TV while Off the Grid Boondocking. If you NEED Air Conditioning and Television... look into an expensive Generator that needs to be hauled around with gasoline. Been doing our own Solar since 2006. I am a Neanderthal, but common sense and two thin wires was MAGIC to ME. You may want to explain how you managed to ADD portable Solar for the price of a roll of wire and some wire connectors and go Human Bean. Like me.
 -

Oliver batteries not charging with generator
Galway Girl replied to chiwald's topic in Mechanical & Technical Tips
As a safety check as you contact Oliver. There have been a few of those under the dinette transfer switches that failed due to loose wiring connections inside and had thus melted internal wiring. Transfer relay wires can wiggle loose and cause the switch to toggle back and forth when power is applied. To check, you would need to disconnect from shore power and generator, then open the transfer switch box to check if its connections are tight and no smoked wiring.
-

Oliver batteries not charging with generator
rich.dev replied to chiwald's topic in Mechanical & Technical Tips
You should have a breaker for the inverter under the street side bed on the wheel well, looks like this. Some suggestions... 1) Did you check if the ground bonding plug is seated properly in your generator? 2) Are you running your 3500W generator on gas or propane. Because it generates only approx. 2800 continuous running watts on propane, which at 120V is approx. 23A, which should still be enough power to run your trailer without changing the Xantrex settings. Try changing the Xantrex AC input settings from the factory 25A to 20A, that would be #28 setting in the Xantrex "FXC Control" app. This setting is set to 25A at the facory because the breaker size for the inverter is 25A and the main power supply is 30A which is greater than the breaker size. When you connect to a generator or house receptical that supplies a lower amps, you need to adjust setting #28 down to match the current incoming power supply. Your smaller generator could have messed it up. 3) Like @topgun2 suggested, take a rubber mallet and tap the transfer switch box 4) If you trust your generator turn off the EMS and see if it works.
-

Oliver batteries not charging with generator
topgun2 replied to chiwald's topic in Mechanical & Technical Tips
A couple more things to try - 1. have you simply shut everything off, unplugged the generator from the Ollie and waited at least 5 minutes to give all systems a chance to reset? 2. If it is the transfer switch (I doubt this because you've now had the same problem with both the front and side transfer switches on your Ollie) and you have a rubber mallet then you can hit (tap) the transfer switch box. This will help the springs inside the switch snap back into place if they are "stuck". -

Enclosed Aluminum Box Front Mount
Patriot replied to Tim and Christie's topic in Ollie Modifications
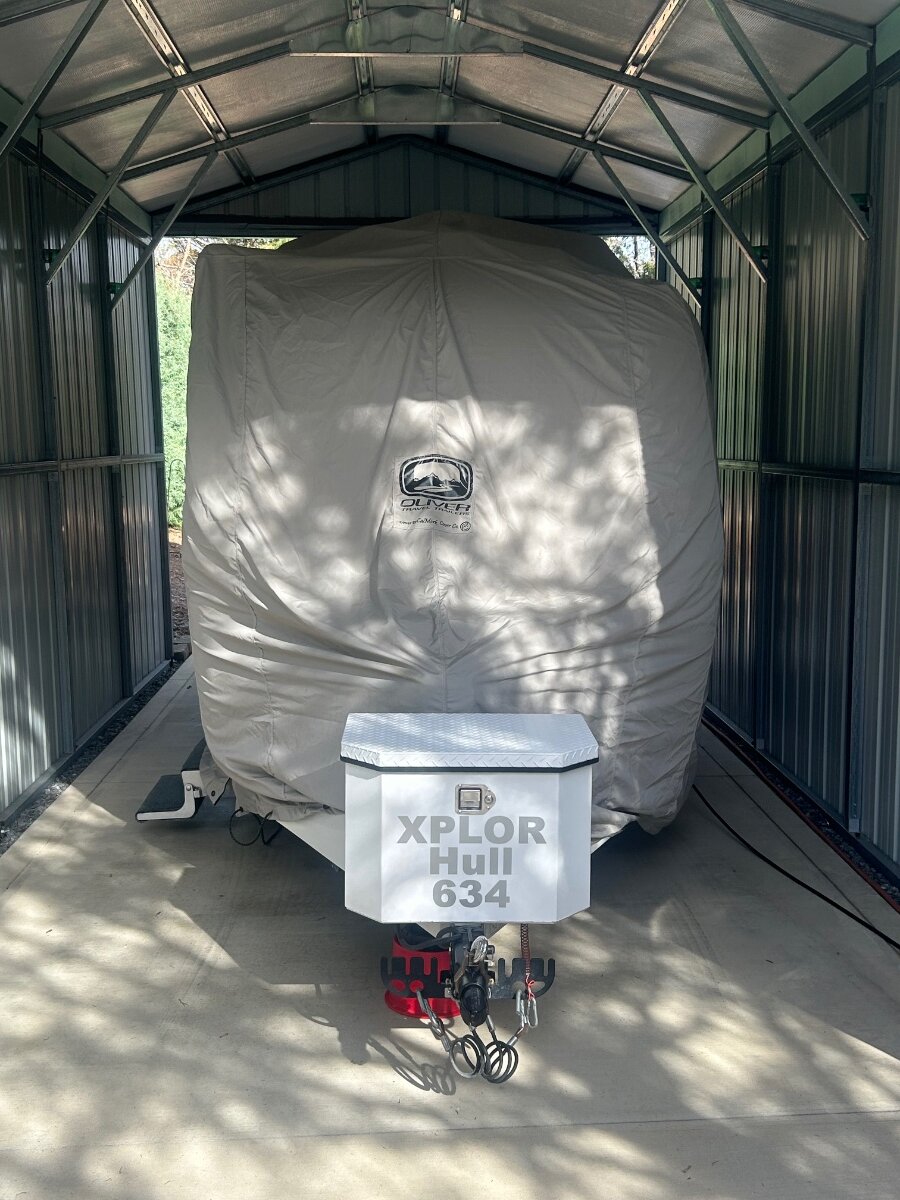
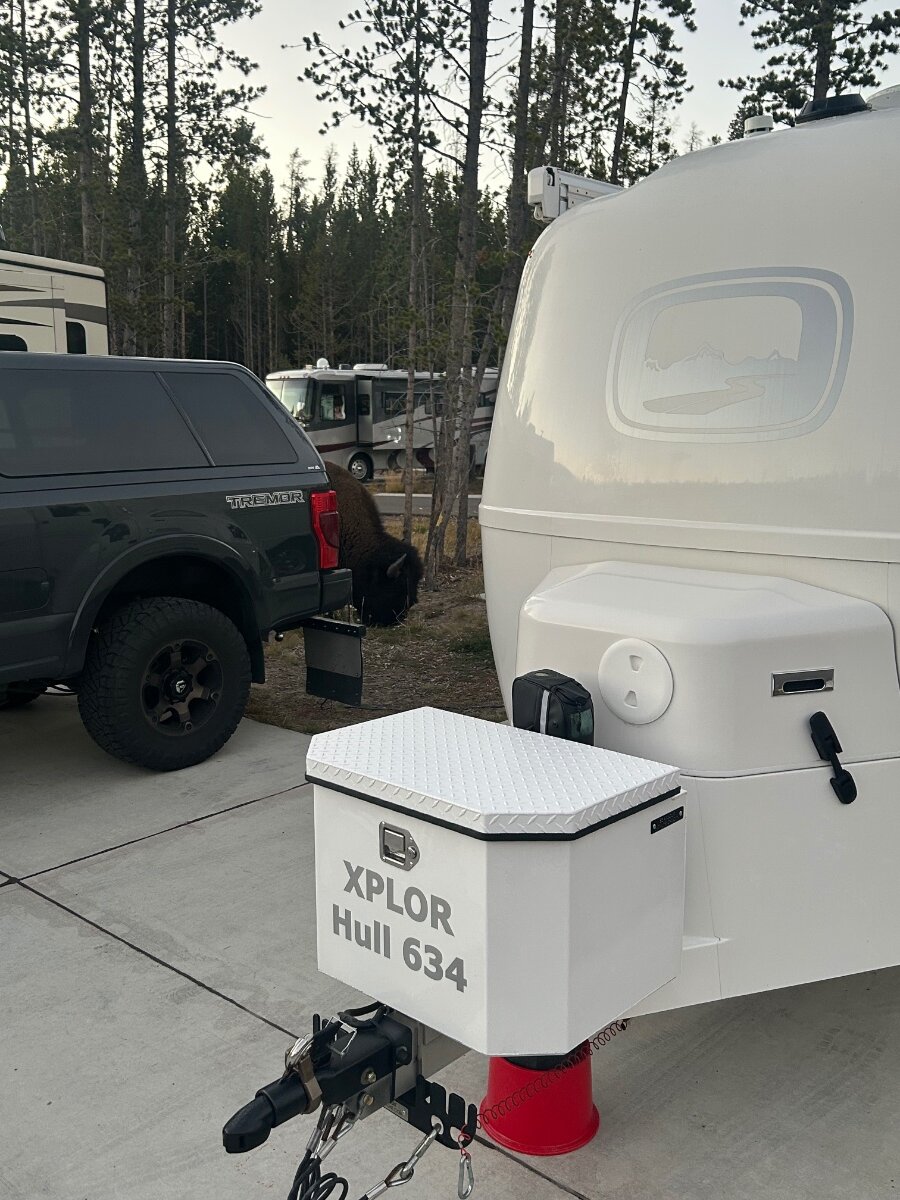
After some thought of how little we used our 3200i generator in the cargo tray on our last 42 day trip out west, we decided to move forward with a custom all aluminum cargo/storage box from Sea Biscuit metal fabrication shop. My wife and I took a 3 hr drive up to Johnson City, Tenn and visited the Sea Biscuit metal fabrication shop. We met David and Kristine Hess the owners. Some of the nicest folks you will ever meet, and they are campers as well. After seeing the high quality of the Oliver storage boxes that David and his team craft we decided to purchase one. The fit and finish is excellent. We like supporting small companies and their products made right here in the USA 🇺🇸. We know we will get a lot more use from our cargo box each time we set up camp. It has lots of room for all things for initial set up. Our gen will be secured in the truck bed. I custom ordered and installed the XPLOR metallic silver graphics from https://lettering.com/ another excellent customer service experience. Had a buddy of mine install XPEL PPF on the front and sides of the box as it sits in the road rash blast zone. For questions on custom boxes and pricing reach out to -https://seabiscuitmetaldesigns.com/product/oliver-box/ a few photos - PPF - I bought and trimmed a fatigue mat to fit from HF to line the shelf and bottom. Added graphics- Moose rack holds our cables off the ground. Plenty of storage for all initial set up gear- XPLOR graphics installed-
-
Simple AGM to Lithium Conversion question(s)
mountainoliver replied to Danno and Donna's topic in Mechanical & Technical Tips
My original battery setup was four 6 volt batteries. When I changed my batteries to 3 Battle Born 12 volt batteries several years ago, I basically connected the batteries in parallel in order to maintain 12 volts and provide 300 amps. I did have to make two new jumper cables between batteries using 4/0 welding cable. I also used the existing 4/0 Oliver installed cable that runs between the batteries and inside the camper. I also moved the #6 cables from the batteries to inside the camper to clean up the battery box, but this is not at all necessary for changing from lead acid batteries to lithium batteries. The only other change required (besides the previously mentioned Blue Sky setup) is to make sure the PD 4045 (shore power) charger is either switched to the lithium setting or as I had to do, replaced with a charger module that is lithium capable. My setup has been working flawlessly for about four years. I almost never turn on the PD4045 charger and depend on the solar setup to keep the batteries charged. We have a compressor type fridge which is used 24/7 and the batteries are able to keep up just fine. We are careful with power consumption but use what we need. Typically when boondocking we still make coffee every morning, cook breakfast in an electric frying pan, my wife dries her hair in the morning, we watch tv at night, occasionally use the microwave, charge cell phones and laptops occasionally, and in the winter the furnace is used. Again, we are careful with our power consumption so the above list of appliances used varies greatly based on current conditions and predicted conditions. Typically while traveling in the winter in the south west the batteries are fully charged by between noon and one o’clock. I carry a 100 watt folding solar panel and a small propane powered generator just in case and have used these once or twice due to extended overcast days. -
Need to add EMS, none installed on older hulls?
jd1923 replied to jd1923's topic in Mechanical & Technical Tips
Once I got to it, the job was only about 2 hours total. If yours has the front power receptacle for a generator, then you should have the PD5100 Automatic Transfer Switch right where mine is under the rear dinette seat. But either way, you want to cut the main line going into the PD4000 Power Control Center. It's easy to see, on mine it looped down to the floor. You can cut it in half (at the floor) to be safe and trim some excess when you get the EMS box in position. @ScubaRx yep, it has a bright RED display that constantly changes every few seconds. Why does OTT put these in the attic? It's a long walk around to get up there after plugging into shore power, which is the only time you really need to check it. I would think you could see the flashing red during the night, and more so for those that have the frosted glass cabinet doors. You could easily move the attic display to where I have mine or another location. An easy way to do this is to merely remove the new display (two screws), purchase a new data cable (looks like a phone cord) and run it from the EMS to a preferred location. Just leave the old cable where it was, or you could pull it down from the attic to the rear trunk area and reuse it (if so, tape the head of the cable so it doesn't get wrecked from pulling it). -
Generator power not going into trailer
rich.dev replied to DonnaDuane's topic in Welcome To The Oliver Travel Trailer Forums
@DonnaDuane here is a list of the EMS codes, looks like open ground! this box should be under your rear dinette. Check out this thread, sounds like (might be) your ground bonding plug is faulty, so either get a replacement neutral ground bonding plug, or turn off the EMS and trust the generator. IF it’s a faulty ground bonding plug, a replacement bonding plug is not that expensive, that would be my go to. Stupid question, did you check if the ground bonding plug is seated properly in your generator?
-
 Yes. Using front generator/shore power hook up. Excuse my ignorance but where is the EMS display? When I look in the compartment there’s a little box with a led display and a switch. I’ve tried flipping the switch but nothing changed. The usual click when the system switches from battery to AC didn’t happen.
 -

Enclosed Aluminum Box Front Mount
RoadKingsofGA replied to Tim and Christie's topic in Ollie Modifications
I wanted to see if you are still happy with this box since install? We need one to contain set-up stuff only as we keep our larger generator in the truck bed.