All Activity
- Past hour
-

Trailer Brake Disconnect Warning/Message
Mike and Carol replied to Mike and Carol's topic in Mechanical & Technical Tips
Another Nevada owner that was very active on this forum was John Roemer @Raspy. He sold his Oliver for a Black Series, then moved on to other interesting travel trailers. He did a lot of mods, I forgot who bought his trailer, but it is still around. -
I've never heard of a carbon fiber frame for RV's but given that thousands of road and mountain bikes are made from this material and given how they are ridden most likely a frame made of the same material would hold up well too. It's expensive to make, so one has to take that into consideration as well, meaning the price of admission for an RV made partly or whole with CC could become very pricey. Not that the Olivers are chump change, far from it.
- 1 reply
-
- 1
-

- Today
-
Hi everyone... I am new to camping, and I am shopping for a trailer. There are so many out there, and a ton of options, and it is confusing me. I have found two models, but I'm not sure which to choose. The Oliver has a traditional aluminum frame. The other uses a new type of frame made of composites with carbon fiber, which they say is 30% lighter. Should I be concerned about this carbon fiber trailer? Do you think Oliver might move to this type of trailer?
-
.thumb.jpg.e34bf01ef7f7d5e99ad31856d45afbeb.jpg)
NO BRAKES ; 2019 Oliver Elite II-Hull #448
CRM replied to BoondockingAirstream's topic in Mechanical & Technical Tips
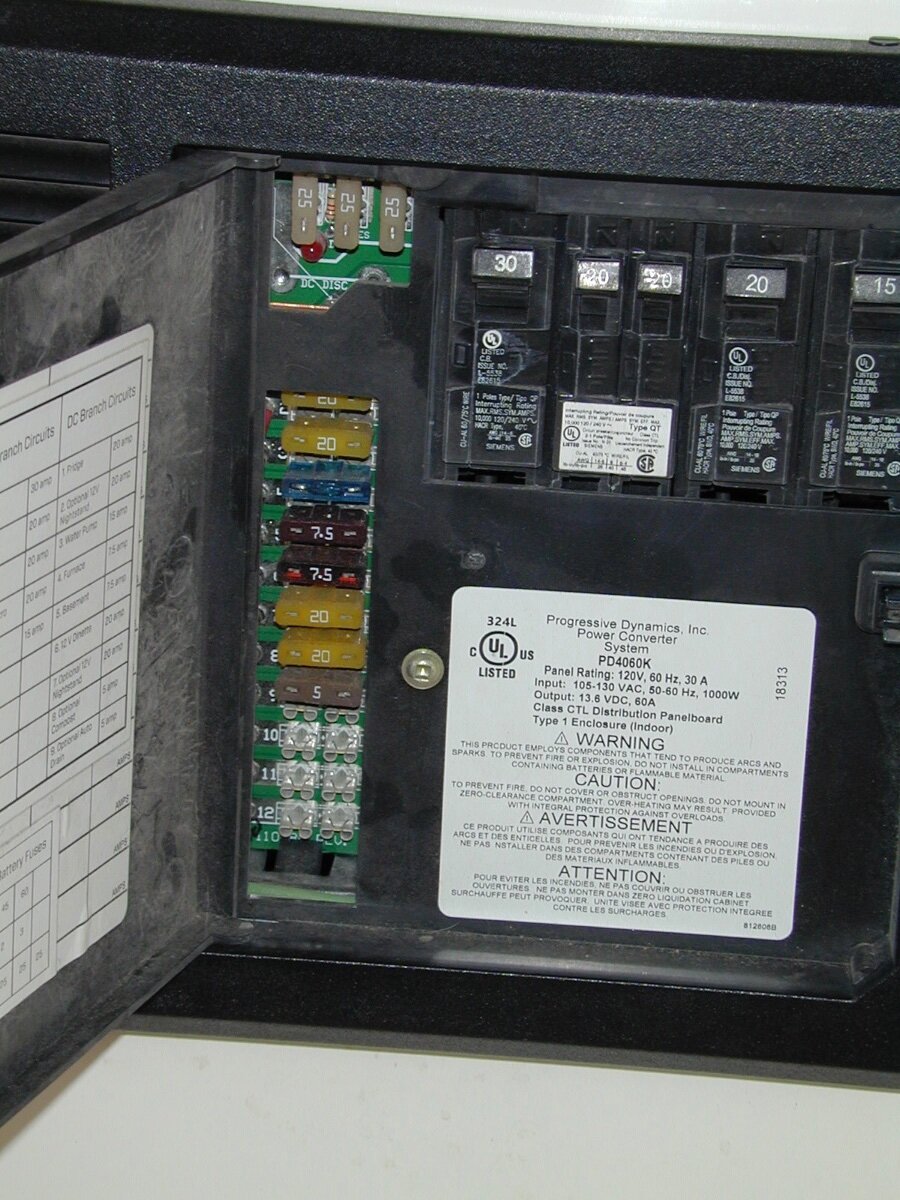
According to the label on the fuse box door it's for the furnace. If you want to check your blue wire and white wire for continuity, just put a 12v test light between the blue and white wire connectors at the 7 pin and then activate your breakaway switch. According to the schematic, that should power the blue wire and the white wire should complete the circuit to ground to light the test light. -

NO BRAKES ; 2019 Oliver Elite II-Hull #448
Galway Girl replied to BoondockingAirstream's topic in Mechanical & Technical Tips
It appears you have brakes that work (from your break away switch test). But your 7 pin to brake connection isn't working. Hoping the RV Tech helps you out and gets it all set up correctly. As an aside to your brake issues....it's important whenever brake assemblies are new or changed to "burnish them" in before full trailer use. I learned when picking up Hull 505 that electric trailer brakes on new trailers must be BURNISHED or heated up to brake them in and seat them to the drums. When we started to pull away I grabbed the controller and squeezed...no brake action. I walked back into the service team and they showed me a page in the Dexter Service manual. They said I needed to burnish my brakes by driving on some back roads on my way to the first campground. I found that after about 30 applications my brakes where really starting to work well. The next morning as we pulled away I dropped the controller back to 5 out of 10 and I had working brakes on our trailer. This is NOT done by the factory that assembles the trailer. It must be done either by the DEALERSHIP selling the trailer....or more likely the OWNER. Hopefully you'll catch a break and things will all be fine after your RV Tech visit. To seat the brakes, Dexter and other manufacturers have a recommended brake in procedure. *See video&
-
 Wow, such an old thread dredged up! I read it two years ago when I first joined the forum! Rivernerd, where you ever able to get OTT to assure the correct wire gauge in your hull? Doesn't matter for our 2016 but I'm getting new D52 axles next week. Wonder what gauge is used in the axles? And what gauge OTT installed from the junction box under the bathroom vanity and to the wheels. If I find this wire undersized I will replaced that section of wiring (and all of the usual butt connectors installed by OTT). Going to 12" brakes on the new axles and want them working correctly. But sorry, I do not need an amp gauge and temp gun (although I have both tools) to tell whether our brakes are working properly. You just need to get each wheel off the ground and test each by rolling the wheels and actuating the brakes, listening and feeling for proper drag. Make sure the self-adjusters are where they should be (tighten them as needed). Just did this in May prior to our long trip and in doing so found out our brake controller needed replacing. John E Davies was an artist when it came to Oliver mods! But many of them left me with the question, as to why? I believe wiring the brake wires external to the axle is nuts! Not only for the reason of road debris and zip-tie maintenance, and what a mess! And Pack Rats are big where we live and that external wiring covered or not would be a goner in a few nights out here, I promise! He also told me I was crazy for installing a metal-cased 7-blade plug. It has worked fine. No corrosion in the desert SW and its shorter profile allows me to connect and disconnect it more easily in a cramped space. The other thing is the suggestion to go to manual-adjust brakes, equally nuts! If you do, you better get yourself under your trailers every few hundred miles and adjust them yourselves. This means every week or two for those of you who tow 1000s miles trips! The only issue with self-adjusters is that they may not adjust adequately and so should be checked/tightened (they don’t over-adjust, they can’t). But, if you install manual-adjust brakes you must adjust yourself often, way too OFTEN! I do not mean to offend those who have made these changes but brake wires in trailer axles and self-adjusters on drum brakes have been industry standards for longer than our lifetimes. This Arizona Pack Rat looks too cute just sitting there. They are troublesome little SOBs and they take too much of our lives in trapping them and removing their nests from our property. Everybody in our town leaves the hood up on their pickup trucks so that their engine bay does not become one big nest made of hood insultation, wire insulation, shock boots, plastic parts, etc.
-
 I do not offer any repair tips or clues. But... sure can look for them. I noted the Blue Fuse in the fuse box under the 'dining table'. Of course the door opens outward, you crawl under the table and discover that reading glasses are not enough to read the small print. But the BLUE Fuse number was not as clear as the others. Took a photograph, under the table and left room for my head and camera for the photo. My thought was... I had expired into the 'after world'. But photo flashed, I grunted.. she did not call 911. I finished a new possible discovery. Much like Columbus... but without a sail. Here I am. My very old Mac Computer was out of date, now have a new modern computer and things are... different. But this is my practice, like a being a horse, learning to carry a gal on a saddle... kind of experience. No spurs needed... I cooperate very well. If it is this fuse... I will keep it... frame it on the wall... and curse at it once a year on the repair date. I replaced a 15 year old computer than worked fine... but the software needed to use it... made it obsolete. Now a 2019 Oliver Elite II... six years old and turning me back into a Neanderthal that uses a walking stick as a... tool of sorts... if everything else fails? Whack it. What is the Blue Fuse...? Human Beans with an Oliver know. I cannot read the tiny print, backwards and upside down... Have a good day. Mine is coming Wednesday. I hope.
-
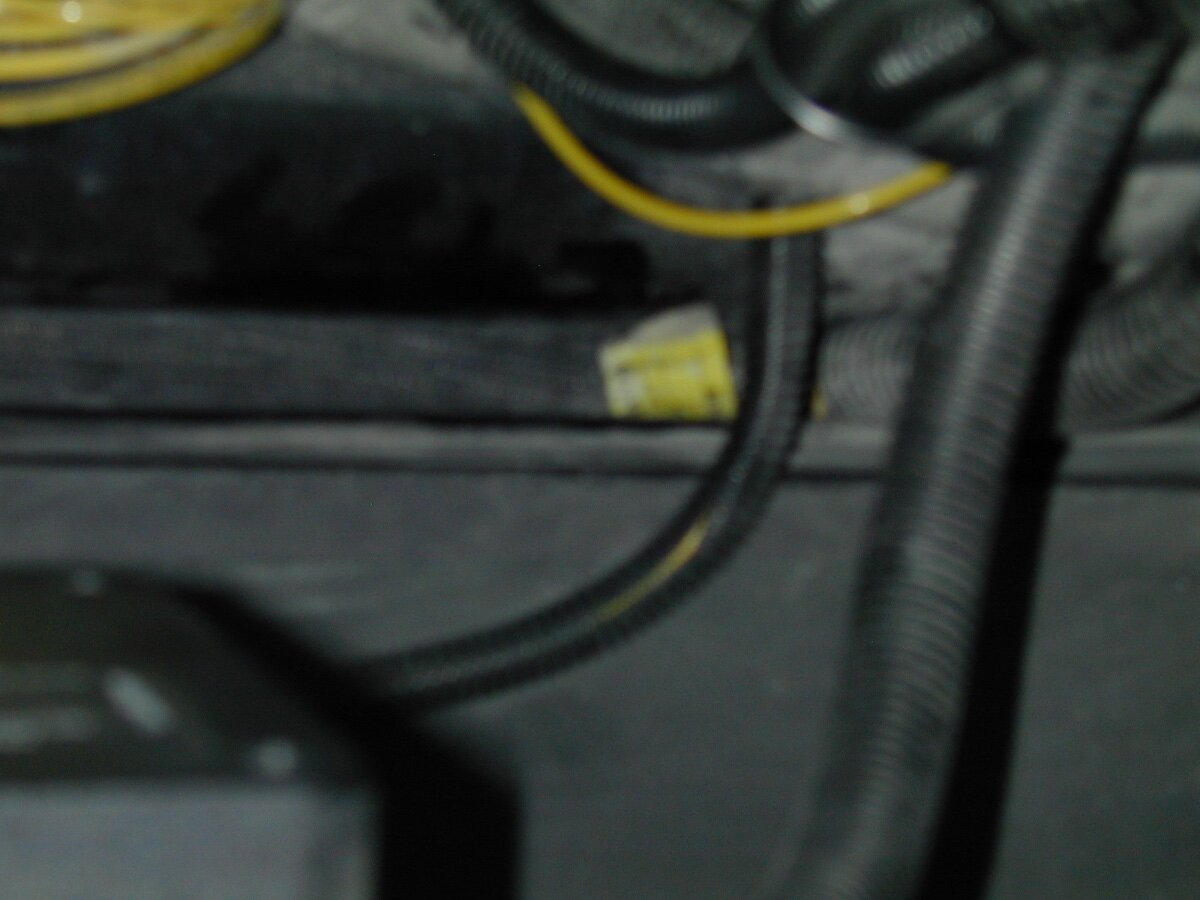
Snackchaser... removed the six screws with snap on covers. Yep... cable bundles down low. Very... non accessible location. Maybe for a chipmunk... but my head is bigger. Flashlight indicated nothing out of the ordinary. Good place to pull the bundles into the main cabin space. Spending way too much time in the Oliver 'John', I say. At least the connections of wires and junctions are easier to fine. Remove the covers and moved them to the Service Tech can get to business. At $175 an hour... in comparison, I am in the $1 a day payroll. This may be first and only Oliver Elite II in Nevada. I am the second owner. Now a gopher... go for this or that... for the Tech. Ice Water... no problem. Need a snack no problem. Need advice... keeping my mouse trap tight and quiet. I am an observer. Not a chipmunk chattering about fires in the Grand Canyon... geez. What next. Lost our great Off the Grid Boondocking campsite on the Rim. We have a Composting Toilet. Does that affect braking? Just kidding... I think.
-
When I inquired to Oliver Inc. I was told that the Brake wiring bundle goes into the Bathroom Toilet/Sink area. I pulled out my Garage 'scooter', laid onto it and scooted to find three threaded tubes going into the bathroom, behind the panel with six screws. They are there and intact. Nothing inside the space that smelled or looked out of place. Way down and low... I do not know if this is an area with any connections, or just the position for the wire bundles to enter the interior. From my adding reading glasses and a bright flashlight... just a convenient way to bring all of the wiring into the Hull. Good planning in my opinion. Nothing unusual to see beneath the Oliver frame either... but now know where the wiring bundles enters. We had 248,000+ miles on our 'old 1994 Land Cruiser', that sold in one day with a Craigs List ad. Ran perfectly, If I cannot get this figured out, I am inept with diagnosing anything electrical, unless it is smoking or hanging bare somewhere. I do not abuse my vehicle brakes and do not over use braking traveling slow or upon level highways. (NO, I have not towed up Pikes Peak in Colorado with either trailer... you knew that already. Going up and down in a 4x4 vehicle was interesting enough for my mother, wife and me showing them... a good time. They looked pale and dehydrated.) I read a post by John E Davies about Brake Wiring being undersized in 2018. Holy Cow... now what? Like a water bottler using paper screw caps, rather than more expensive plastic screw caps? If I had not all of my own natural Gray Hair from being a 1949er... it may turn grey after this. Which... may be a good side effect. My wife does not care. She helps me look around for obvious issues in the Oliver... which are not being obvious. I can wire a 1946 Wurlitzer model 1015 bubbler... but an Oliver Elite II is an entire line of jukeboxes from the transistor age. At least when I plug it in, deposit a nickel and it always works. I pace around the Oliver... and get lost in the process, Yeah... Service Tech. I hope to learn something. If he cannot figure it out... maybe rent it out as an apartment?
-
Our 2021 Toyota Land Cruiser had 500 miles of break in on the engine, before being installed into the vehicle. (From the Dealership quote.) Our 2019 Oliver Elite II apparently did not get one mile testing the BRAKES... Hope to know next week with a Mobile RV Service technician to figure it all out. Great post. Beyond my comprehension, but an excellent look under the Oliver.
-
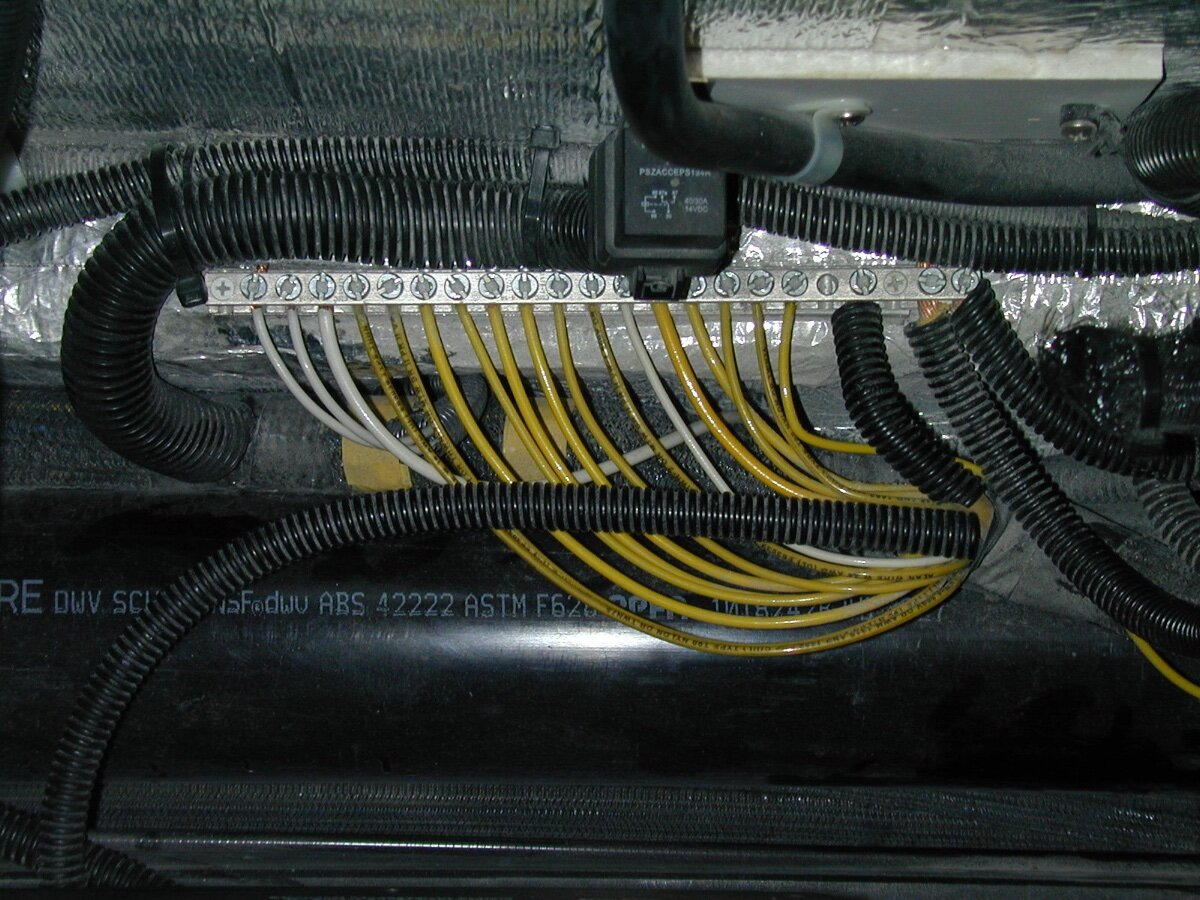
Since we are close to build numbers... I took some more photographs before the Trailer Service Tech checks out my no Braking situation, I am hull #448 probably with all the options you may have in your #505. My other appliances and systems seem to work just fine, but my wire colors seem to be different. I do not know if Braking Ground in on the Buss Bar (?) if that is what it is called. I was expecting the same color wires. Although if grounds... maybe wire diameters are the important things to notice. There is a sticker of an Inspection sign off along the floor near the other wiring. Brakes? I may remove this sticker to find out what was... inspected. Other than the Electric Brakes connected to the Tow Vehicle, everything else seems to be working. I am forced to learn more about Electric Brakes in an Oliver, and now, maybe others can compare internal wiring that is visible, An Oliver in Nevada is like finding Trout and Water Falls in our Deserts. These wires are under the outside in the rear seating at the table. Manuals tell you HOW THINGS WORK... but do not have WHAT TO DO IF THEY DO NOT. I also have the four 6 Volt Batteries with Solar Panels. Work just fine. I could be organizing the garage, but that has been done. Maybe trim ornamental palms and flowering bushes, but that has been done. So... this is an education that I need. Not wanted... but curiosity is a good thing if it is to learn and understand more about my Oliver. Learning a lot about the 7 Plug Trailer Plug...
-
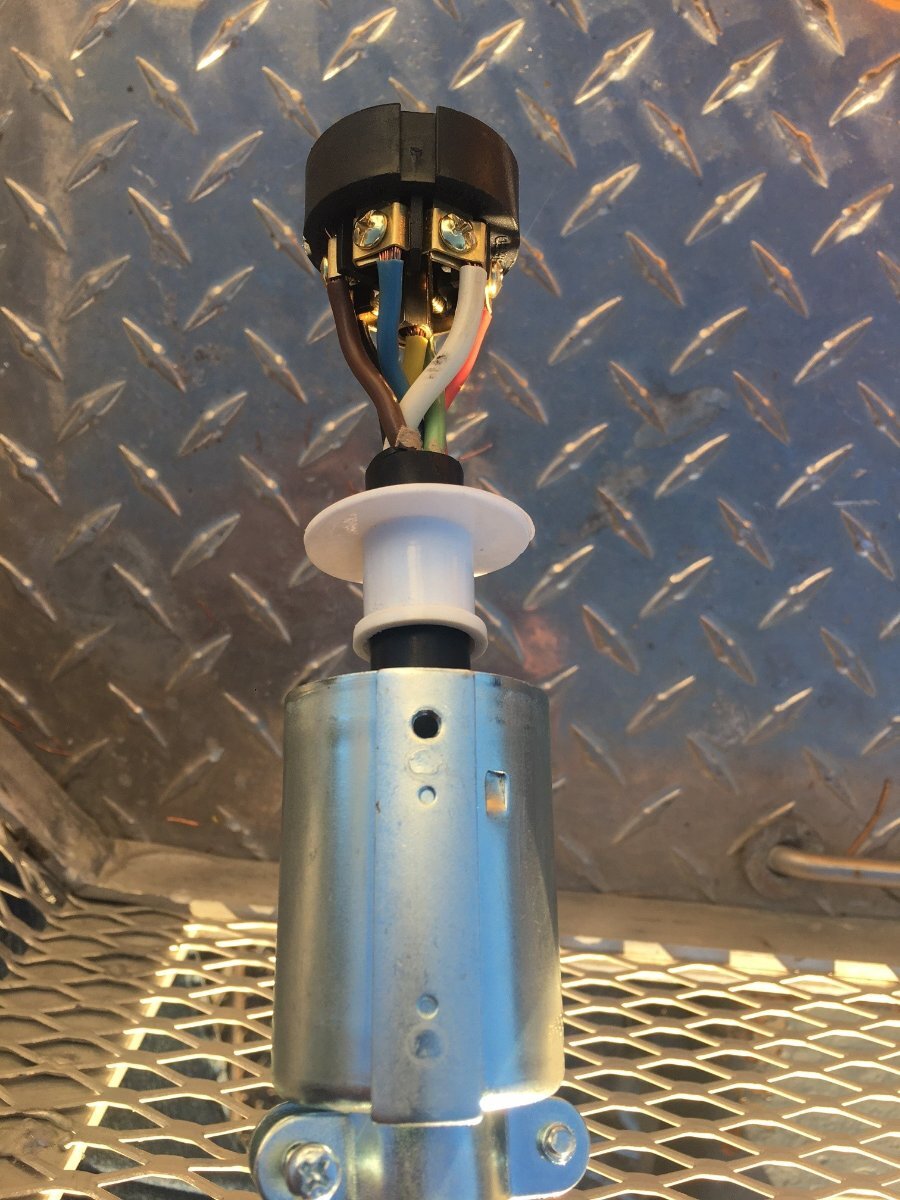
SeaDawg... the 7 way plug was simple to slide the interior out with no effort. I watched a number of videos on the Internet and with one small screw to secure up front, and a back screw and bracket to tighten onto the covered wire bundle... took a couple minutes. The 7 pin assembly and wires slide out easily. What appeared as caulk was a white plastic ring that slips over the back, slips over the wire bundle as it enters the interior. You see it just flush flush in the back of the plug. The wiring was all correct and the assortment of colors shown on the wiring diagram were all Oliver wire bundle. Wires were all screwed tight and did not loosen or pull out bare wires. Just visually looked secure. I now do not suspect the plug or its wiring. If this is NOT the original plug,... there was an issue by the original owner, It is available on the Internet by name. Obviously, this did not FIX IT. So back to waiting for the professional to dig into this. NOT the 7 way Plug... to blame... yet. It was amazing how many videos are to be found just about these plugs. I am rather... over exposed... exploring those. Now... have to let the professional, using his electronics and experience to find the... ORIGINAL PROBLEM. Getting the feeling if the original owner had issues and tried to have it repaired... it is inside the trailer, For what it is costing me for the exploration and possible fix, I do not wish this on anyone. Just a few more days. I will have my F350 handy to plug into and MAKE SURE THAT EVERYTHING OPERATES. Before it seemed to be a quirk with the year of my 2016 F350 and a 2019 Oliver model.... but all is well with the 2019 27FBQ Airstream. It is now the Oliver. Cannot say what or who did what... it is, I hope, to be discovered. I will plug my F350 into the Oliver to make sure the 'repair' works... It either does work or does not work after the Service. If it works... I will describe what the Service Tech did to fix it. He will be happy as he earned his $$$$. I will be disappointed that the Original Owner had this problem, and it was not fixed when he discovered there was something not right. I learned as well.
-

Furnace Duct Modification for Improved Air Flow and Circulation
Snackchaser replied to jd1923's topic in Ollie Modifications
Hey John, It might be worth checking out my post Bathroom Heat - a more direct approach! It's an easy and significant improvement to bathroom heating. It won't help with your dust issue, but it includes replacement of some of that problematic flexible duct. It would be near impossible to replace that long duct going to the bathroom, but I think with a filter installed the dust problem should go away. Since I've done that mod, I've added more semi rigid duct from the furnace to the kitchen. It's tucked up out of the way into the space above the return air register as seen in the photo, and it eliminated some restrictions and puncture hazards. I also cut a vent hole in the wall on the left side of the toilet through to under the dinette seat as others have recommended. It helped a lot! Afterall, bathroom heat is a nice luxury, and it helps with the wet bath humidity too! Cheers, Geoff
-

Furnace Duct Modification for Improved Air Flow and Circulation
johnwen replied to jd1923's topic in Ollie Modifications
Thanks, John I appreciate your help and insight, as always! Hope to see ya'll in Quartzsite next year :) Safe travels... Ditto on above... John -
Correct! Who knows why Dexter makes a marketing slogan out of “Nev-R Adjust!” Drum brakes have had self-adjusters almost since the automobile industry invented drum brakes! 🤣
-
Yes John, a good reminder! You can tell a lot lifting the tires off the ground, have a helper press the TV brake pedal gently then abruptly. Tighten the self-adjusters to the point where you just hear and feel the shoes rub, because we know they don’t always self-adjust as they should and the rears will be usually be looser than the fronts. Get them as so and you can be relatively confident all inside the drum is working as designed. I worked this service recently and found out brake controller was not working right. Replaced the controller and brake response was night and day. To do a full interior inspection with the Nev-R Lube bearings you’ll need a new set of 4 spindle nuts but on the positive side you won’t have to remove and repack the outer bearings (or both) as we have for decades with the old-style wheel bearings.
-

Made in USA leaf springs
Gliddenwoods replied to Mountainman198's topic in Mechanical & Technical Tips
Thanks for the explanation! If I understand correctly it is very possibe (likely) I have "nev-r-lube" axles AND "nev-r-adjust" brakes. Yes? -

Replace Andersen WDH Sleeve
srthomsen replied to Ralph Mawyer's topic in Mechanical & Technical Tips
Remove the ball & ball mount from the receiver and replace them in the receiver upside down. Then use your favorite hammer and let gravity help. -

Made in USA leaf springs
Geronimo John replied to Mountainman198's topic in Mechanical & Technical Tips
Some would also say that the brakes will need inspection occasionally as well. GJ -
Made in USA leaf springs
Geronimo John replied to Mountainman198's topic in Mechanical & Technical Tips
The number is way north of double that. GJ -
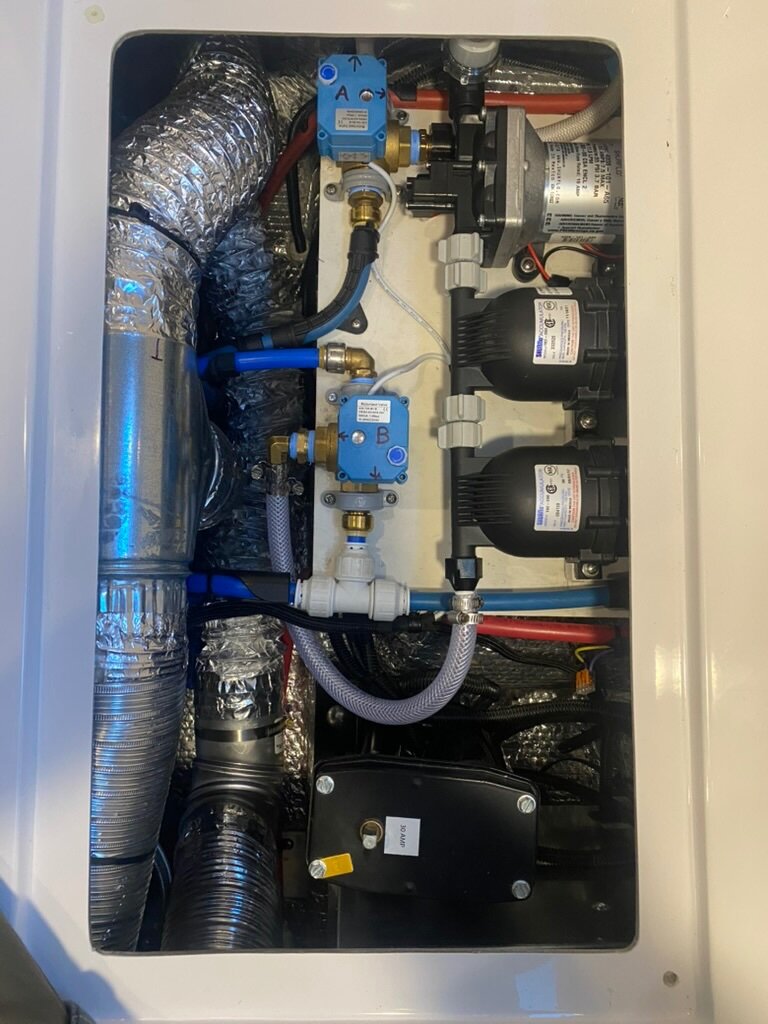
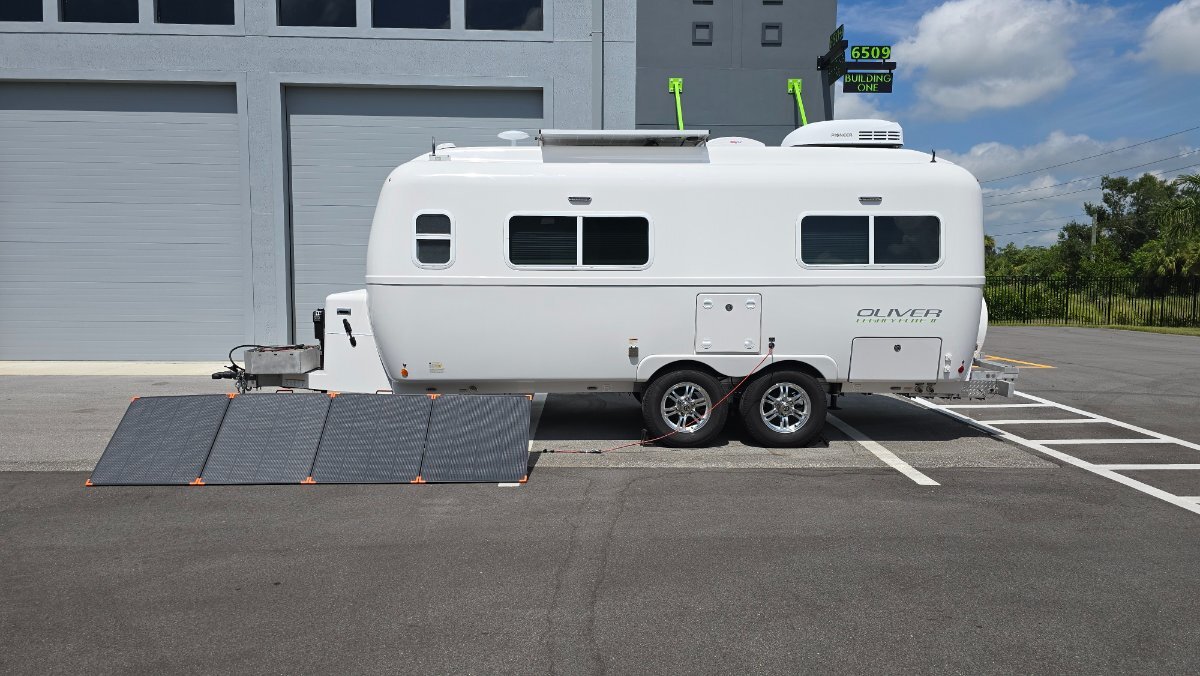
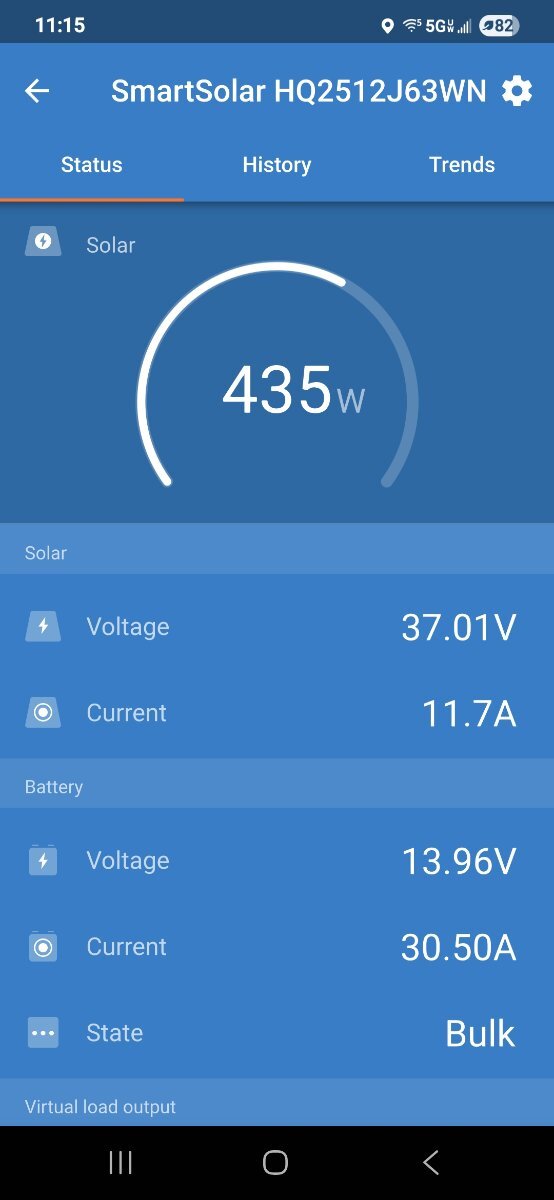
 Got the Secondary Solar Power System finished. Works well.
-
Here is a pretty straight forward SS install video…
- Yesterday
-
Replace Andersen WDH Sleeve
Mike and Carol replied to Ralph Mawyer's topic in Mechanical & Technical Tips
Ralph, I tried replacing the sleeve on that hitch back in 2017 and couldn’t get it out. I contacted Andersen and they sent me a new assembly in exchange for the old one. The linked thread below is from a 2016 thread on the Andersen where I described trying to get the sleeve out. In those days Andersen was on this forum and answered questions. Mike My Andersen post in 2017 -
More DC to DC charger installation tidbits
jd1923 replied to Snackchaser's topic in Ollie Modifications
No inverter in your Oliver? In our hull the B+ and B- battery cables go directly to the inverter, not to a ground stud as you've show. The negative DC bus under the rear dinette seat may be easier for your ground. Notice the 4 AWG cables shown in the picture which is how I grounded ours (second picture in the post linked below). Bottom-line is you want the most direct connection (least resistance) from the Orion charger to battery +/-. There are many ways to do this. Do purchase the Orion XS 50A model. -

First Oliver sighting. . . love at first sight!
FloraFauna replied to Snackchaser's topic in Submit Your Story
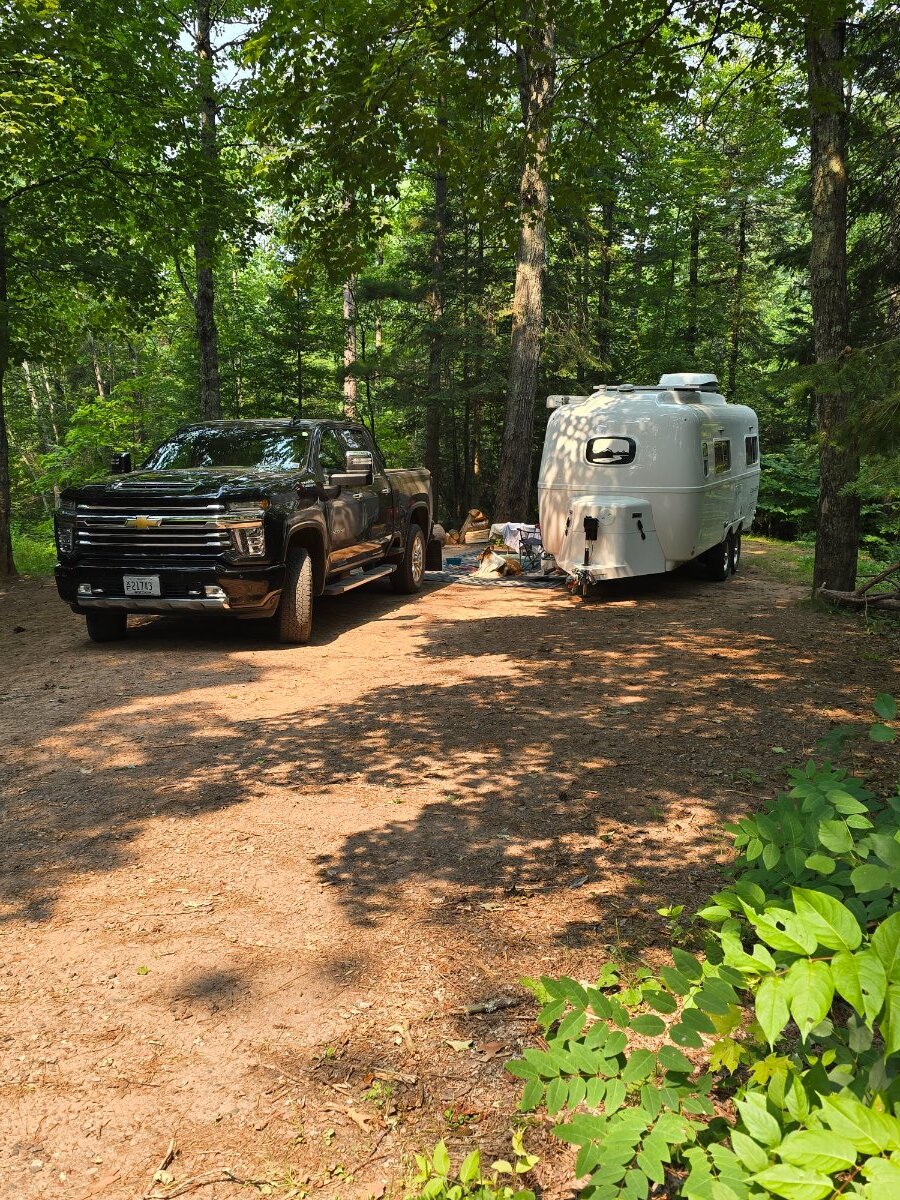
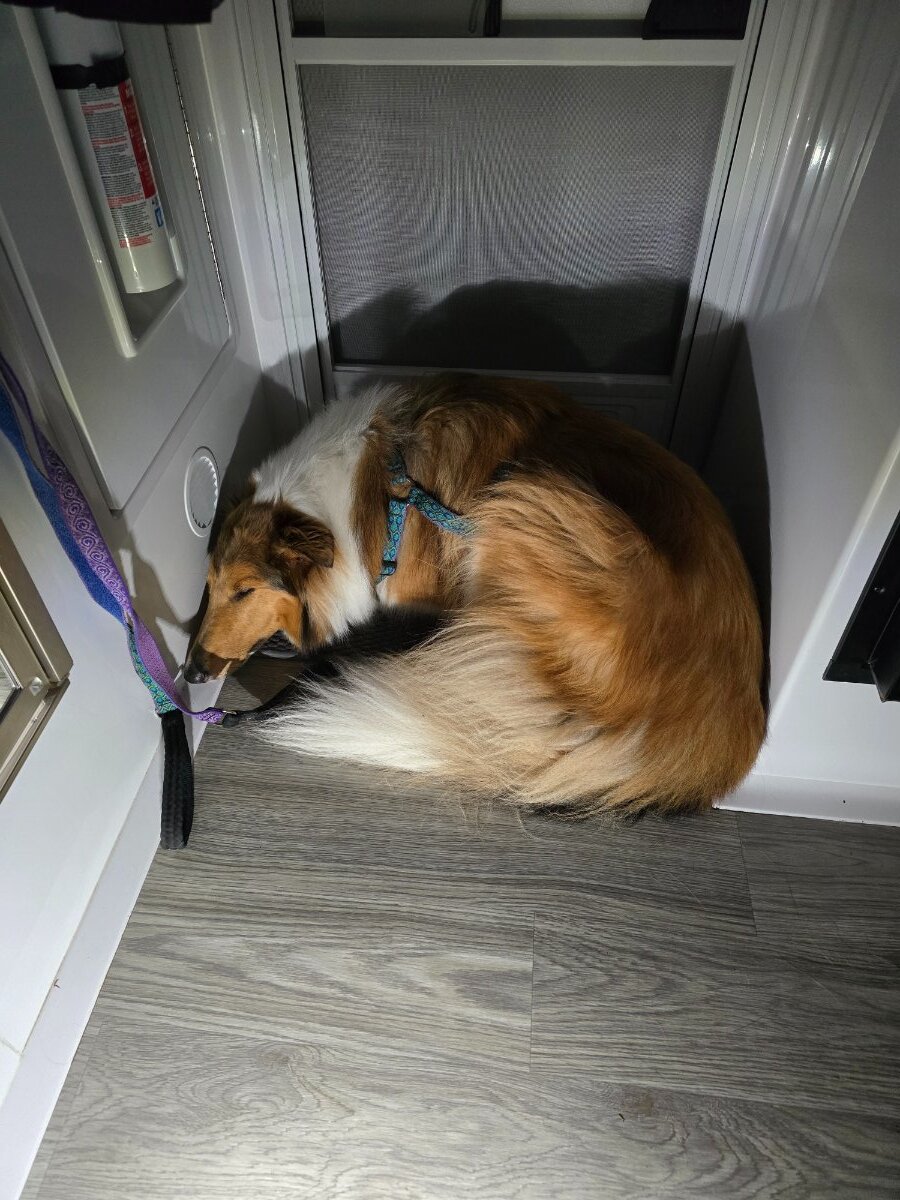
Our story is different, but equally compelling. Hadn't camped in 30 years and had never owned an RV. Purchased Hull 1394 in August of 2023 sight unseen but after a lot of research. We knew what we wanted. Just completed trip #13 today arriving home from the Chequamegon-Nicolet National Forest. Little FS primitive campground nestled away through 10 miles of single lane gravel road. Temperatures got down in the 40's most nights - we love the northern cool. No regrets. Perfect trailer for us.