Leaderboard


Popular Content
Showing content with the highest reputation on 06/15/2017 in all areas
-
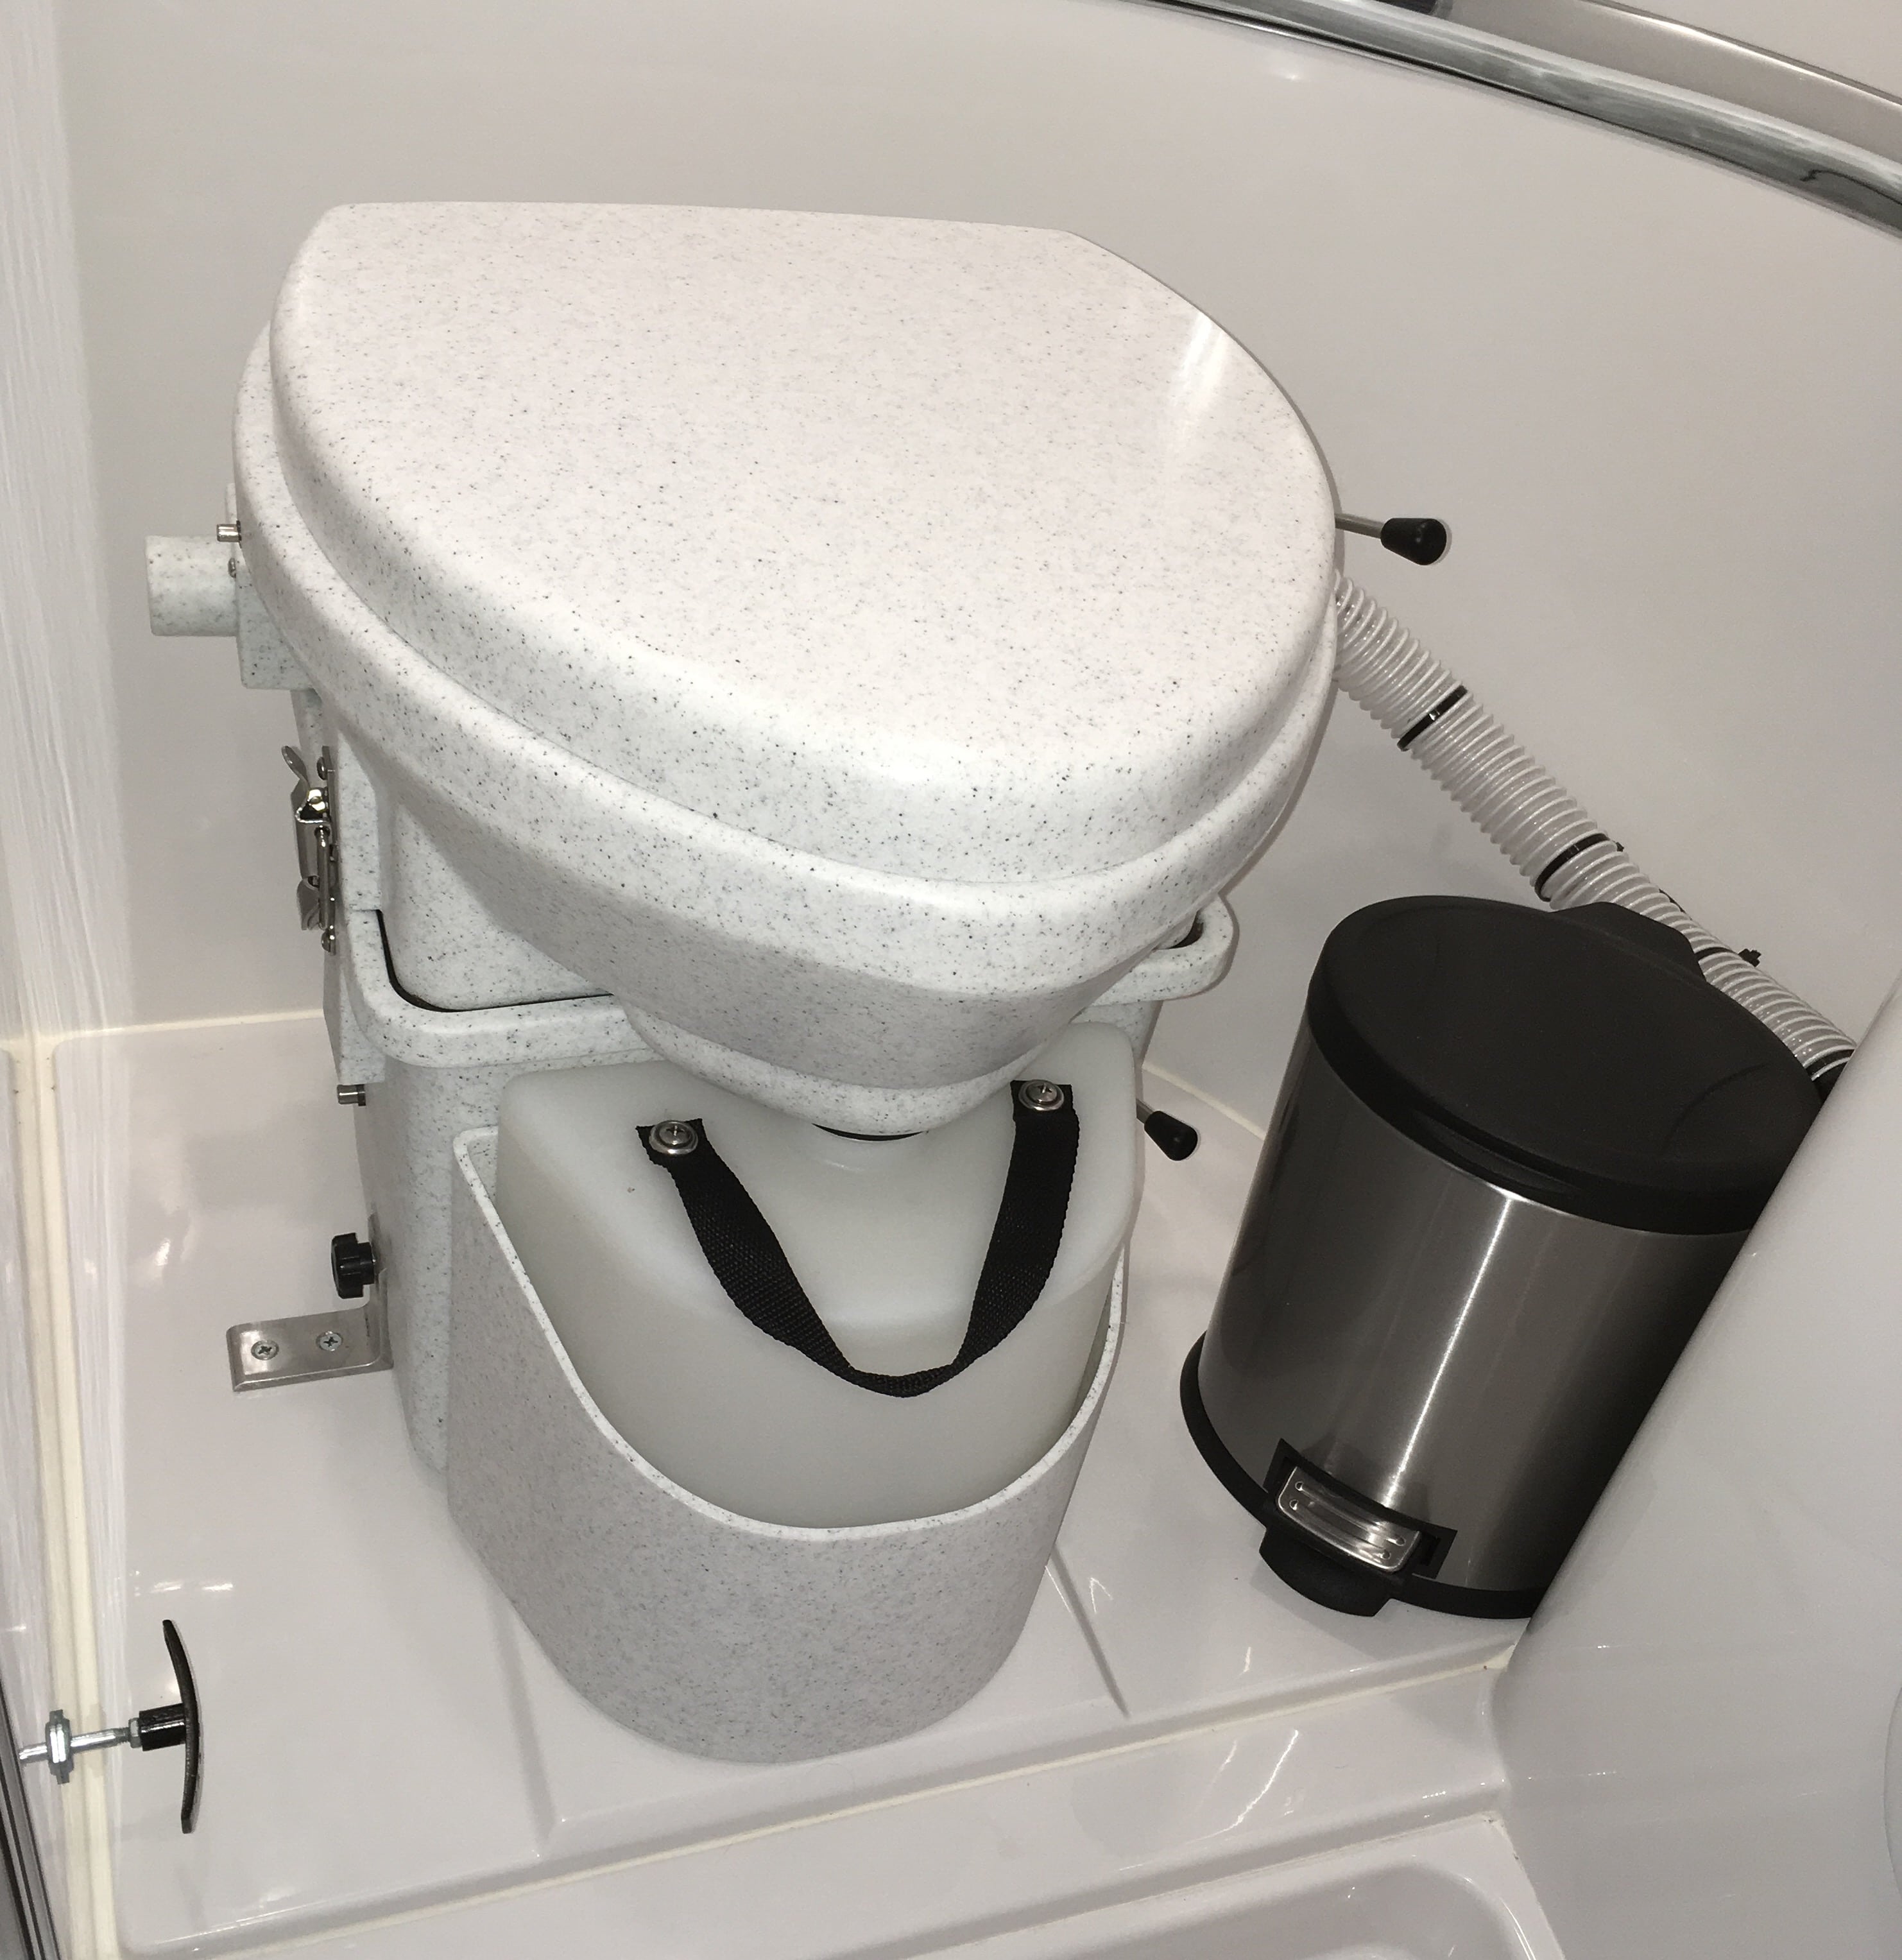
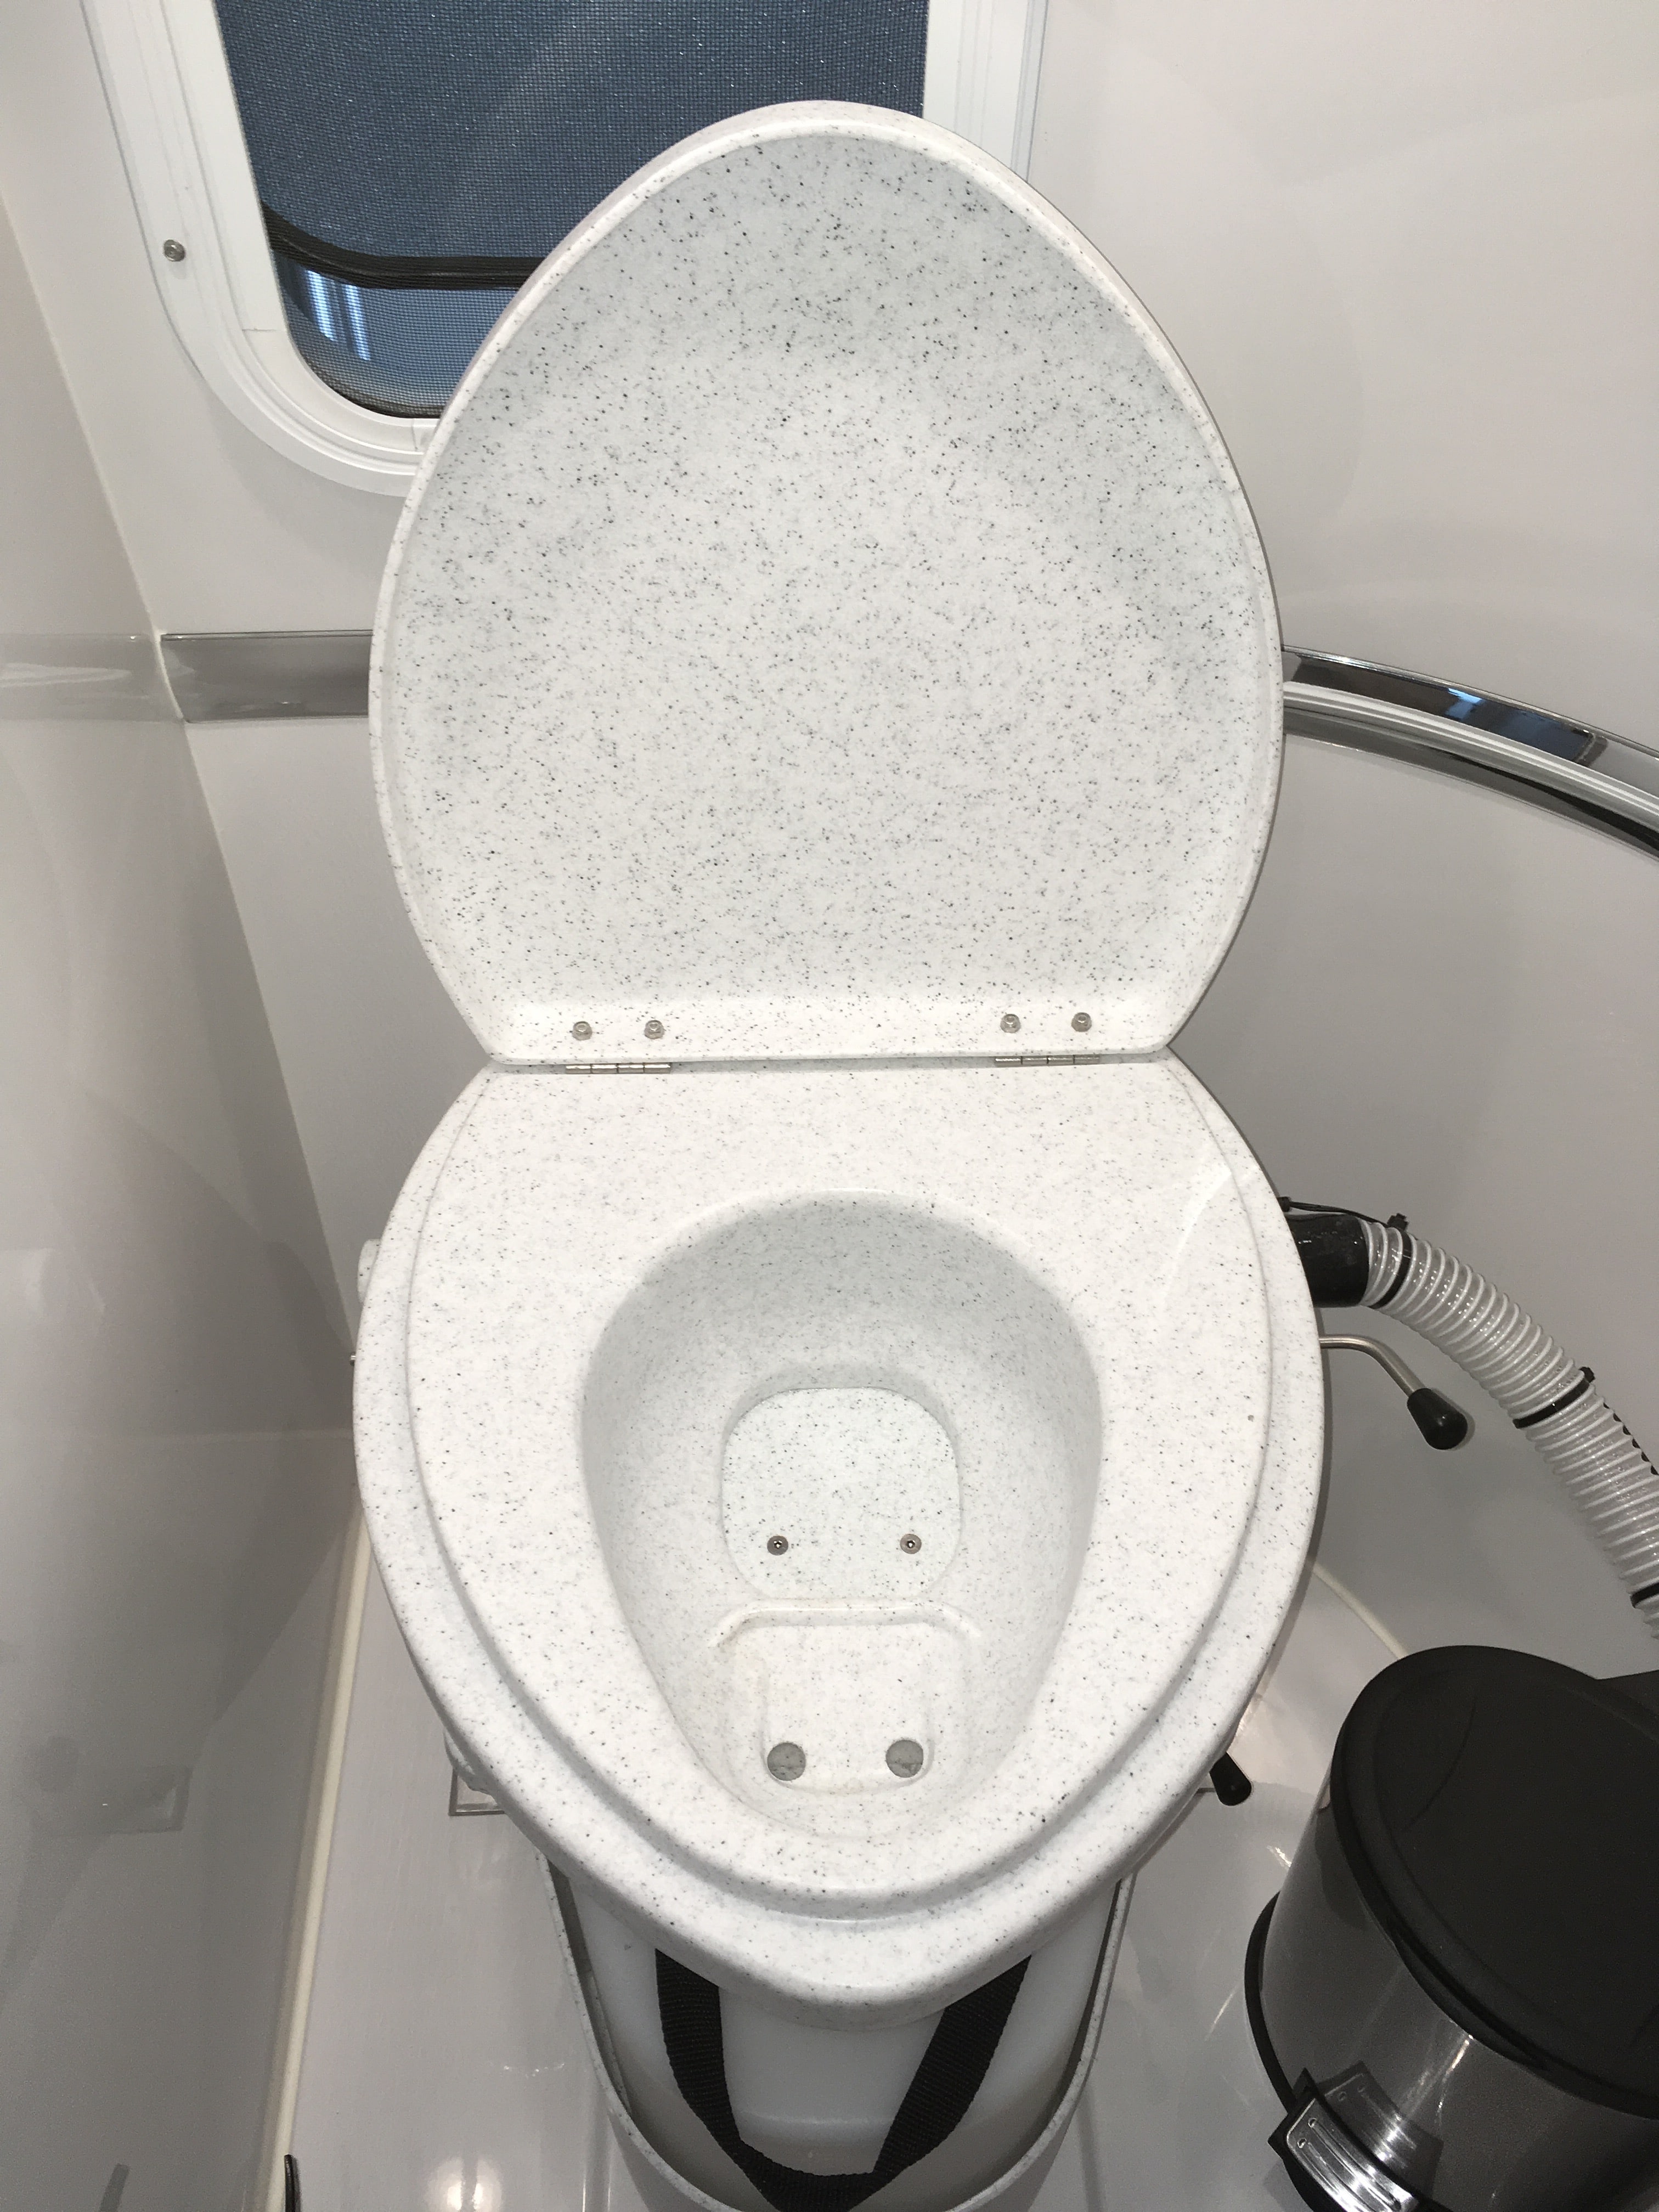
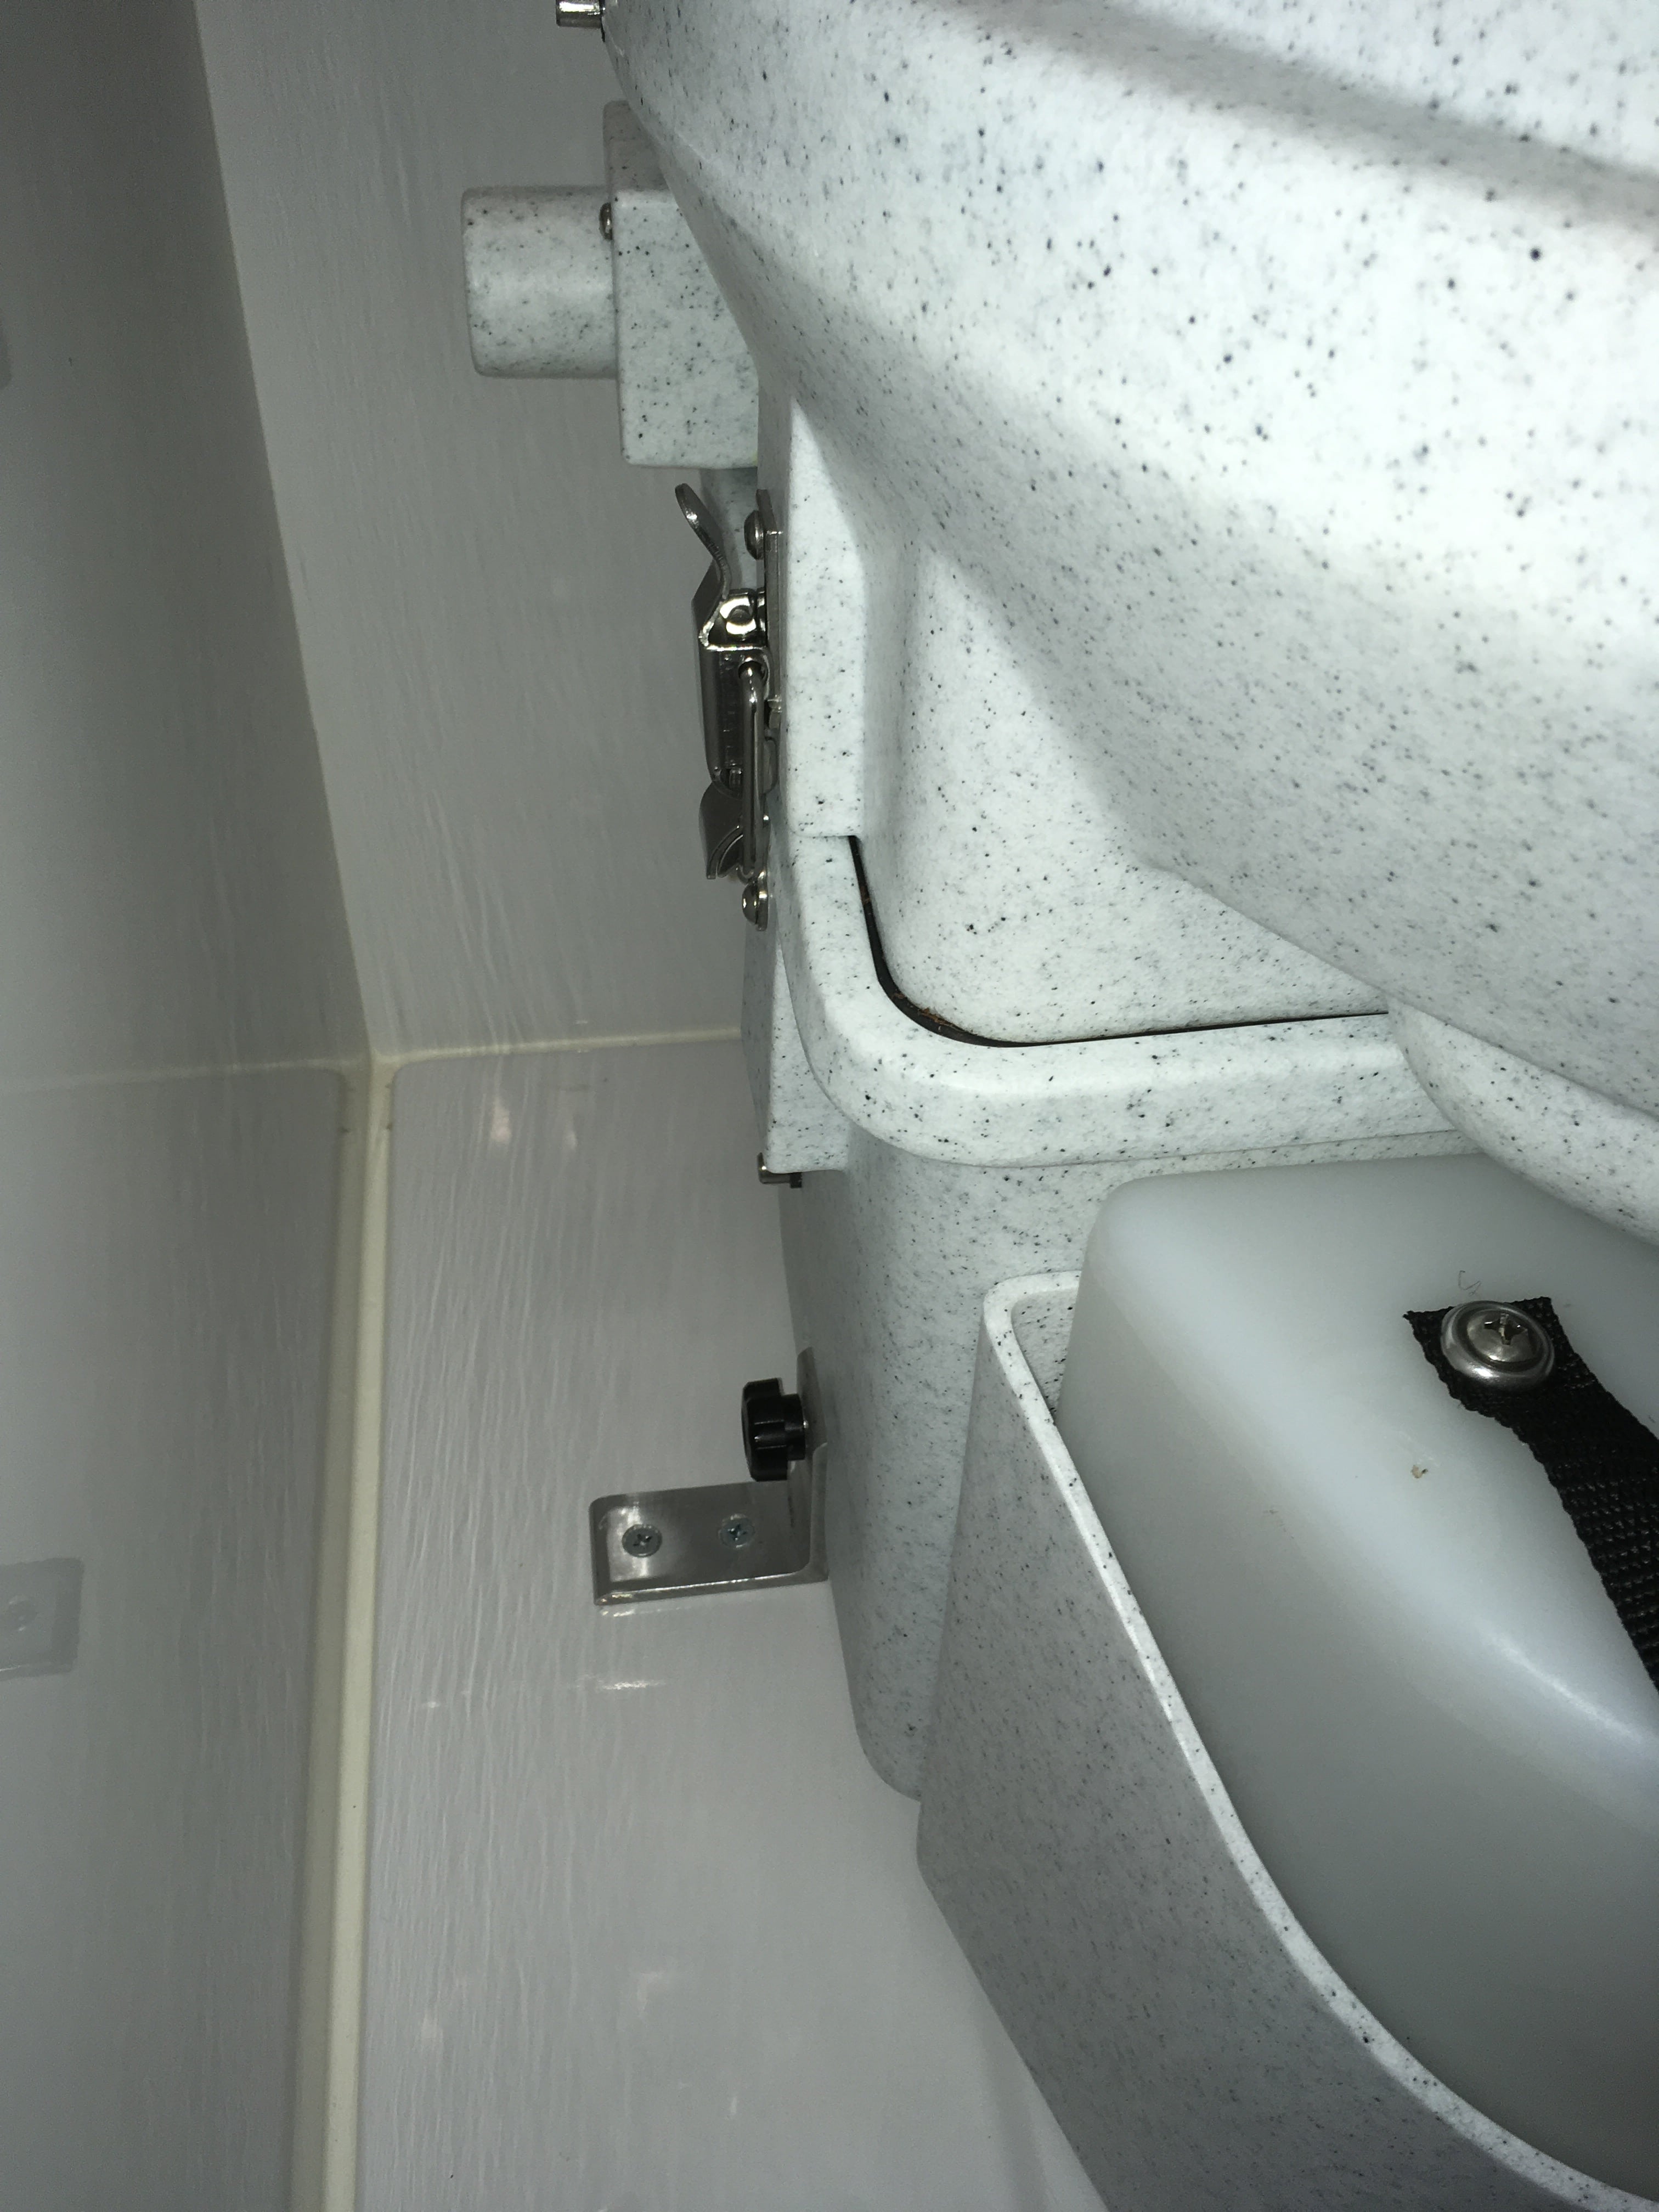
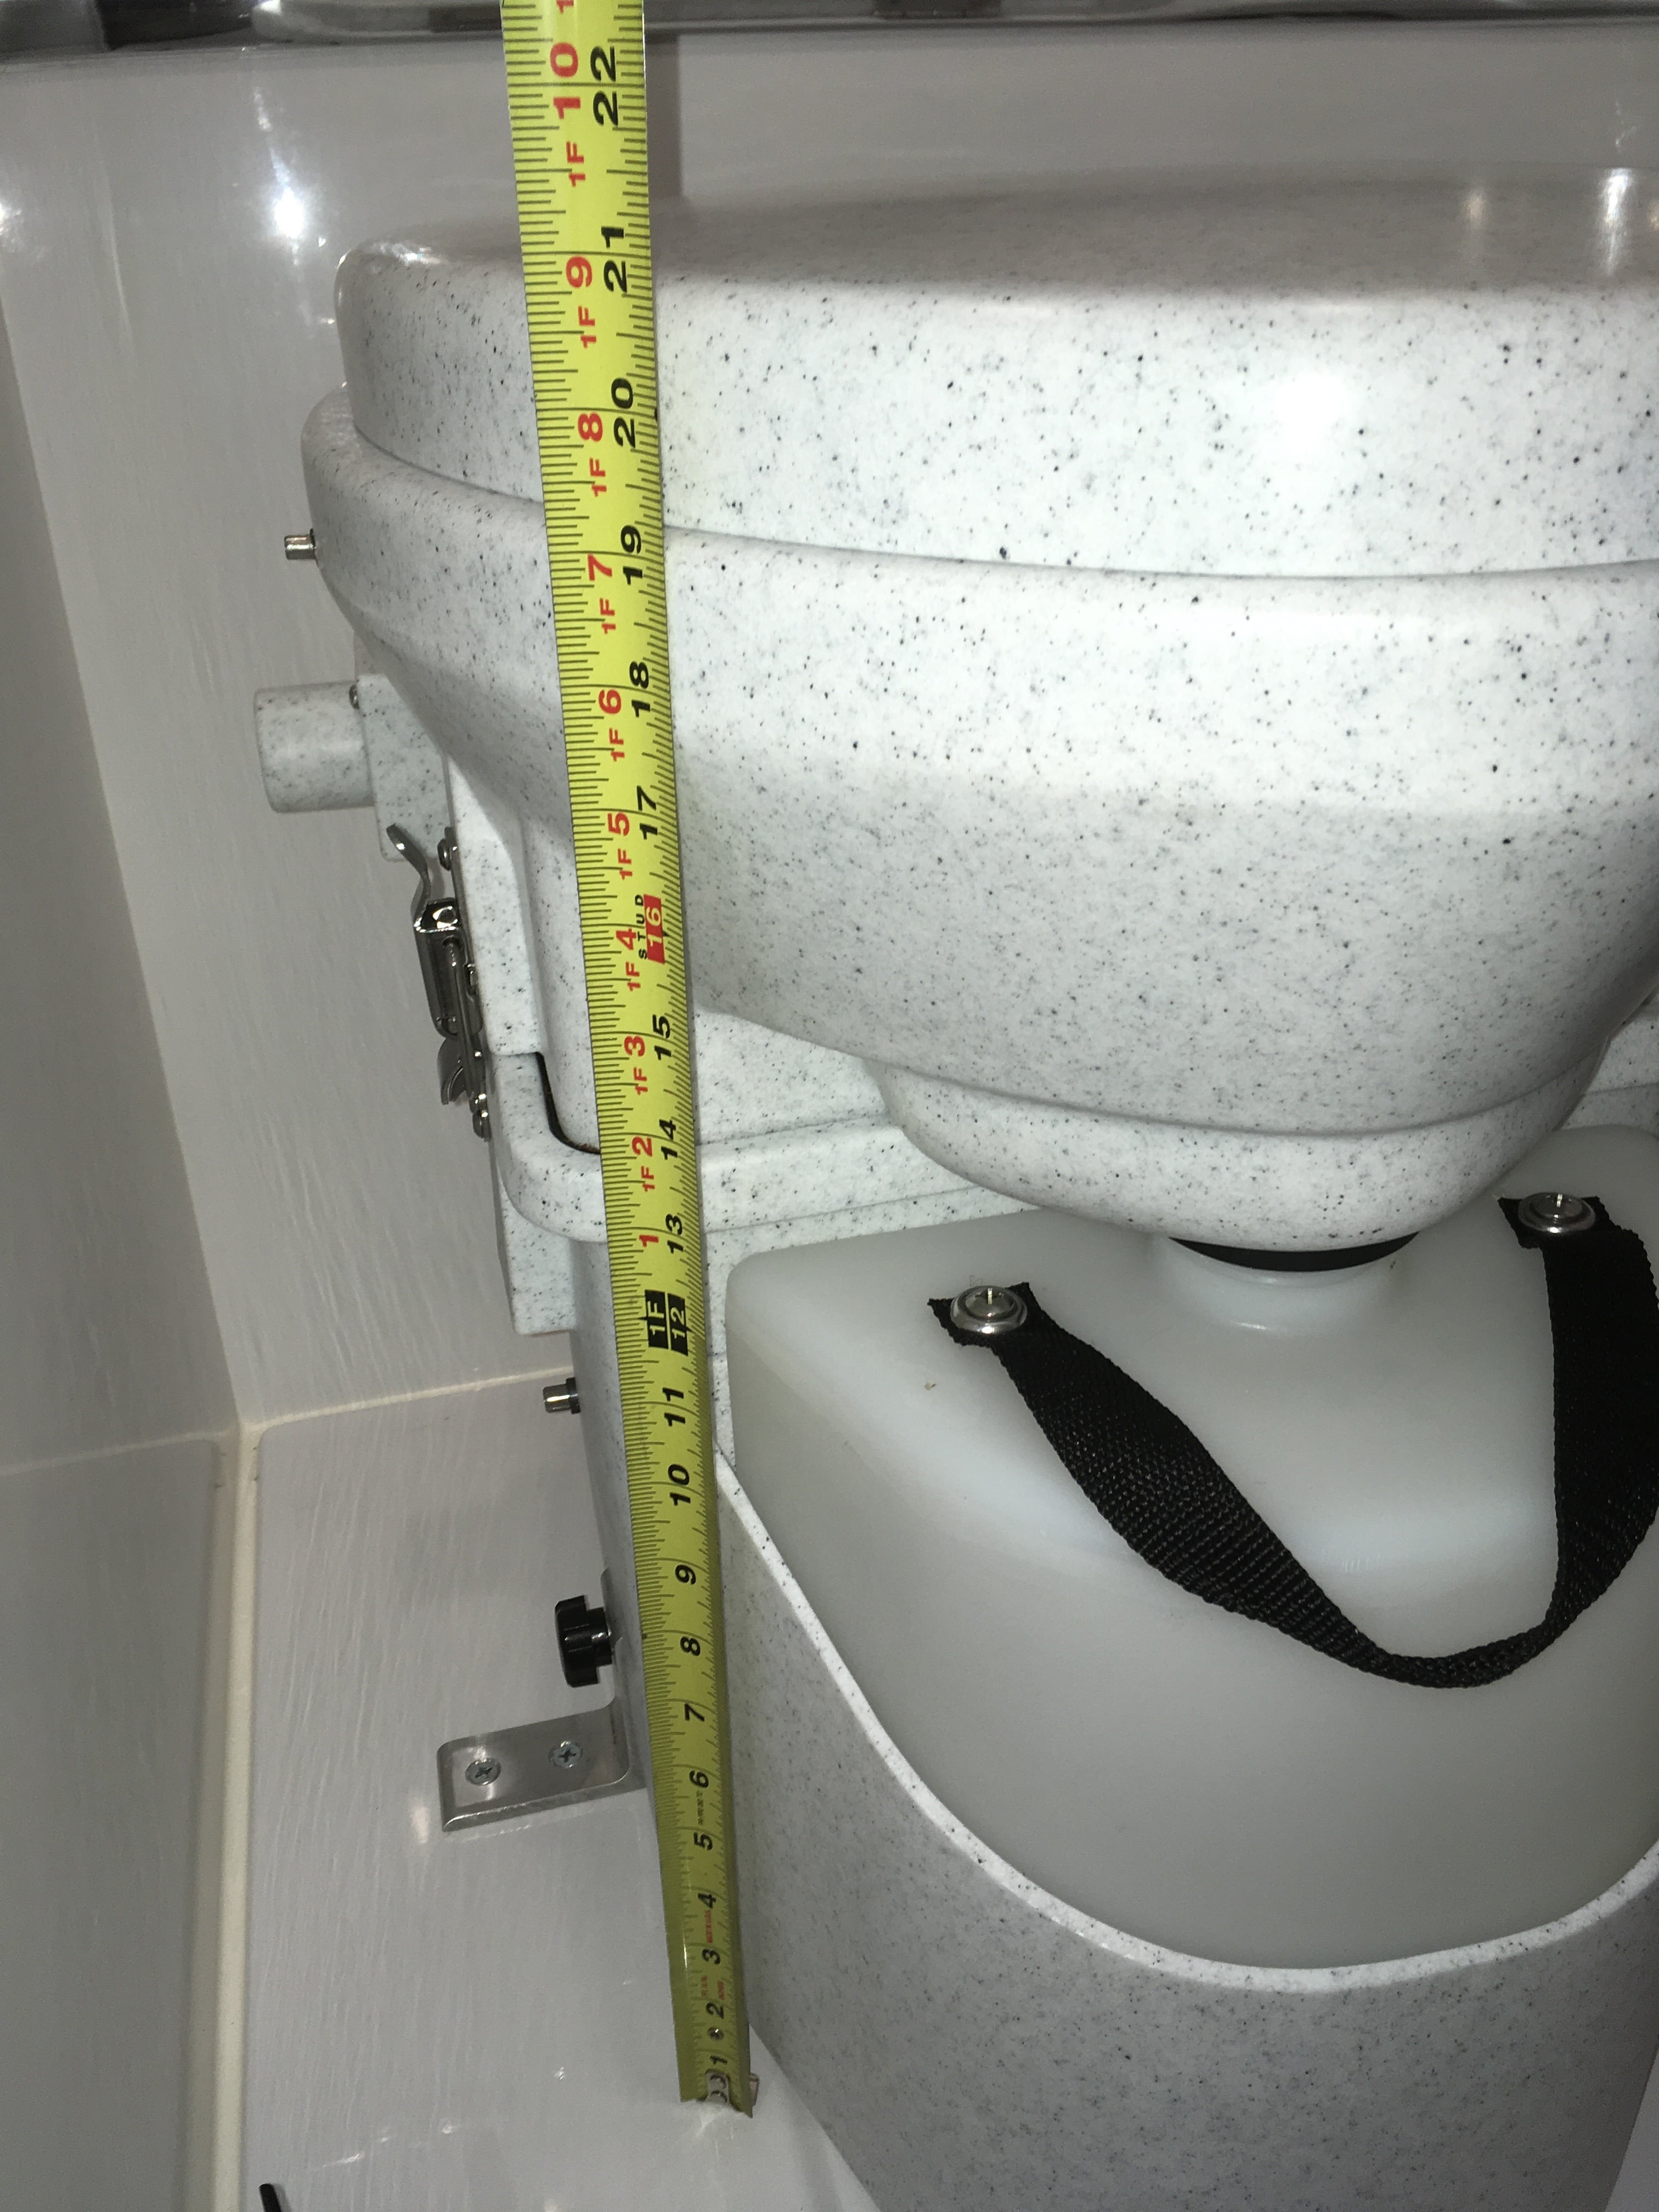
EDIT 12/10/23. Useful link: https://olivertraveltrailers.com/forums/topic/6720-natures-head-compost-toilet-troubleshooting-user-guide/ EDIT 06/06/23. This is an Oliver factory installation, not mine. One member has assumed that I did this. There are a number of threads asking about this toilet. I hope we can gather up a lot of the talk here in one place. I think there has been one other installation in an Ollie but there have been NO published pictures of any kind, that I have been able to find, even from the factory. This is baffling to me. I really wanted to cut the dump station umbilical. We routinely dry camp and finding an open station during a busy holiday weekend or off season is not something I want to face. With the NH toilet we can get rid of our grey water with a 3/4 inch garden hose. In many western states it is legal and encouraged to run a hose out to a nearby shrub and let your water trickle into the ground. The black tank, drain plumbing and vent system are all completely retained. The factory folks are extremely reluctant to delete these parts, since they are part of their certification. If you wanted to reinstall a regular toilet, it would be a very minor job. The fresh water line is even in place, next to the wall. You could sell the used NH for $400 and that would pay for the replacement conventional RV toilet, with a lot left over. An RV toilet is less than $200.... I chose to charge the base with coconut coir rather than peat moss, since it is a renewable resource and doesn't damage the environment. https://smile.amazon.com/s/ref=nb_sb_noss_1?url=search-alias%3Daps&field-keywords=coconut+coir I made the mistake of just dropping a dry 2 pound brick into the bottom, adding water and then letting it hydrate. I ended up with WAY too much material. You need to do this in a bucket, outside, and then transfer the expanded stuff into the base, and the leftovers into gallon zip bags. The correct height is even with the internal agitator centerline. Any higher and it becomes difficult to turn with the handle. It takes about two gallons, I did not measure. There are many online sources with info. To summarize: Sit to pee, everybody, so there is no splashing. The trapdoor stays closed and your pee goes forward, and then down into the reservoir. Which you pre-treated with a half cup of vinegar, to kill the odor. That part is easy. To poop, open the trapdoor, finish the job, wipe and close the door. Give the agitator handle two or three turns. The poop and paper will decompose rapidly once the natural process gets going, which may take a few days. The fan keeps a steady flow of fresh air into the reservoir and out of the trailer through the existing roof vent. I never noticed any bad odors except the first days, before I figured out that Oliver had installed the wrong fuse, a 1 amp, which had blown. Once I installed the correct fuse (2 to 5 specified, I used 3 amp), the fan worked as designed. The fuse is located in the main distribution panel under the dinette table, right row, bottom position (UN-labeled!). It is best to put only the absolute minimum amount of RV toilet paper into the base. If you put a lot in, it wraps around the agitator and makes it harder to turn. Only stinky paper goes down - the rest (damp with pee) goes into the small covered waste can to be disposed of weekly. The can came from Walmart, $10 I think. Cleaning is simple: spritz the area lightly with a dilute vinegar spray and wipe down with a disposable baby wipe, toss in can. Done. The residual vinegar and wipes control any odor from the can. The pee tank is big but it will fill up faster than you can believe if you have four people using it! Empty when it gets to within an inch or two from the top: Flip the two side latches, carefully rotate the top off the base, remove the pee bottle and cap it. Dump it in any approved location - a pit toilet or a rest stop restroom. Rinse with fresh water a couple of times and recharge with half a cup of vinegar. Reinstall into the toilet and close and latch the top. The pee will eventually form crusty yellow deposits. The fix, I have read, is to add gravel and water and shake it hard, then rinse several times. In two weeks of use I never noticed any significant deposits. The longer you let the poop decompose the better. If you can leave it over the winter, dump it out in the spring and it will be totally benign. If you need to empty it mid-season, remove the pee bottle and vent hose, unscrew the two hold down knobs and lift out the entire unit. Carry it outside and put a 13 gallon or larger trash bag on top, flip it over and empty the compost. Refill with clean coir to the centerline. There is NO need to clean it out. Any residual material will just help the next batch get started. The organic waste you can double bag and put in the trash, or if fully decomposed, it can be spread out in the woods, but not near a potable water supply or garden. The way to keep the smell in control is to keep the pee out of the main reservoir. It's the urine that makes a pit toilet smell so bad.... If you throw up or have a messy poop, you can add a little more fresh coir to help absorb the extra fluids. I keep a gallon bag of the hydrated stuff in the overheard cabinet (along with a quart of vinegar) and haven't had to add any extra. The fan has a dust filter that is supposed to be checked every few weeks, by removing two Philips screws. I think that is way too often in the clean environment of a fiberglass trailer, unless you have a dog that sheds. You can put your hand over the left (inlet) opening and feel a light suction. If that isn't present, you need to clean the filter. The pee bottle sits in a sealed cavity to catch overflows, This is a problem since when you take a shower, a bunch of fresh water gets trapped there. I intend to drill a couple of small drain holes in the bottom. I don't care if the pee bottle overflows onto the floor of the head, at least that way I will notice it! unless it is dark, and I am barefooted.... that would be bad 😉 This is why you want to empty the tank before it gets too close to the top. Agitator handle: ours fell off right away, the shaft has a set screw with lock nut. It is very easy to tighten correctly. I am not sure why the factory guy couldn't do it successfully. Spares: I intend to purchase a spare pee tank ($40), spare lids, and a fan.I already have extra 3 amp fuses. ... http://store.natureshead.net I intend to wire in a small LED in the wire harness to show that the fan has power. You can probably hear it running, faintly, if you are in a very quiet area and don't have bad tinnitus, as I do. The Nature's Head is a cool device, but it is really just a fancy bucket. A solidly built, very expensive bucket. I wish the price were about $250 instead of $800. That seems about right for what you get. OTH it is very rugged, and long time users seem to love it. My wife still has some reservations about using it, and we need to get a short step stool since it sits so much higher than even a tall toilet. This one might work well, and it might fit in close to the base with a bungee cord around it for travel: .... https://www.squattypotty.com/shop/poop-better/classic-ecco I am still learning, but I have no regrets at this time. Questions? John Davies Spokane WA
 2 points
 -
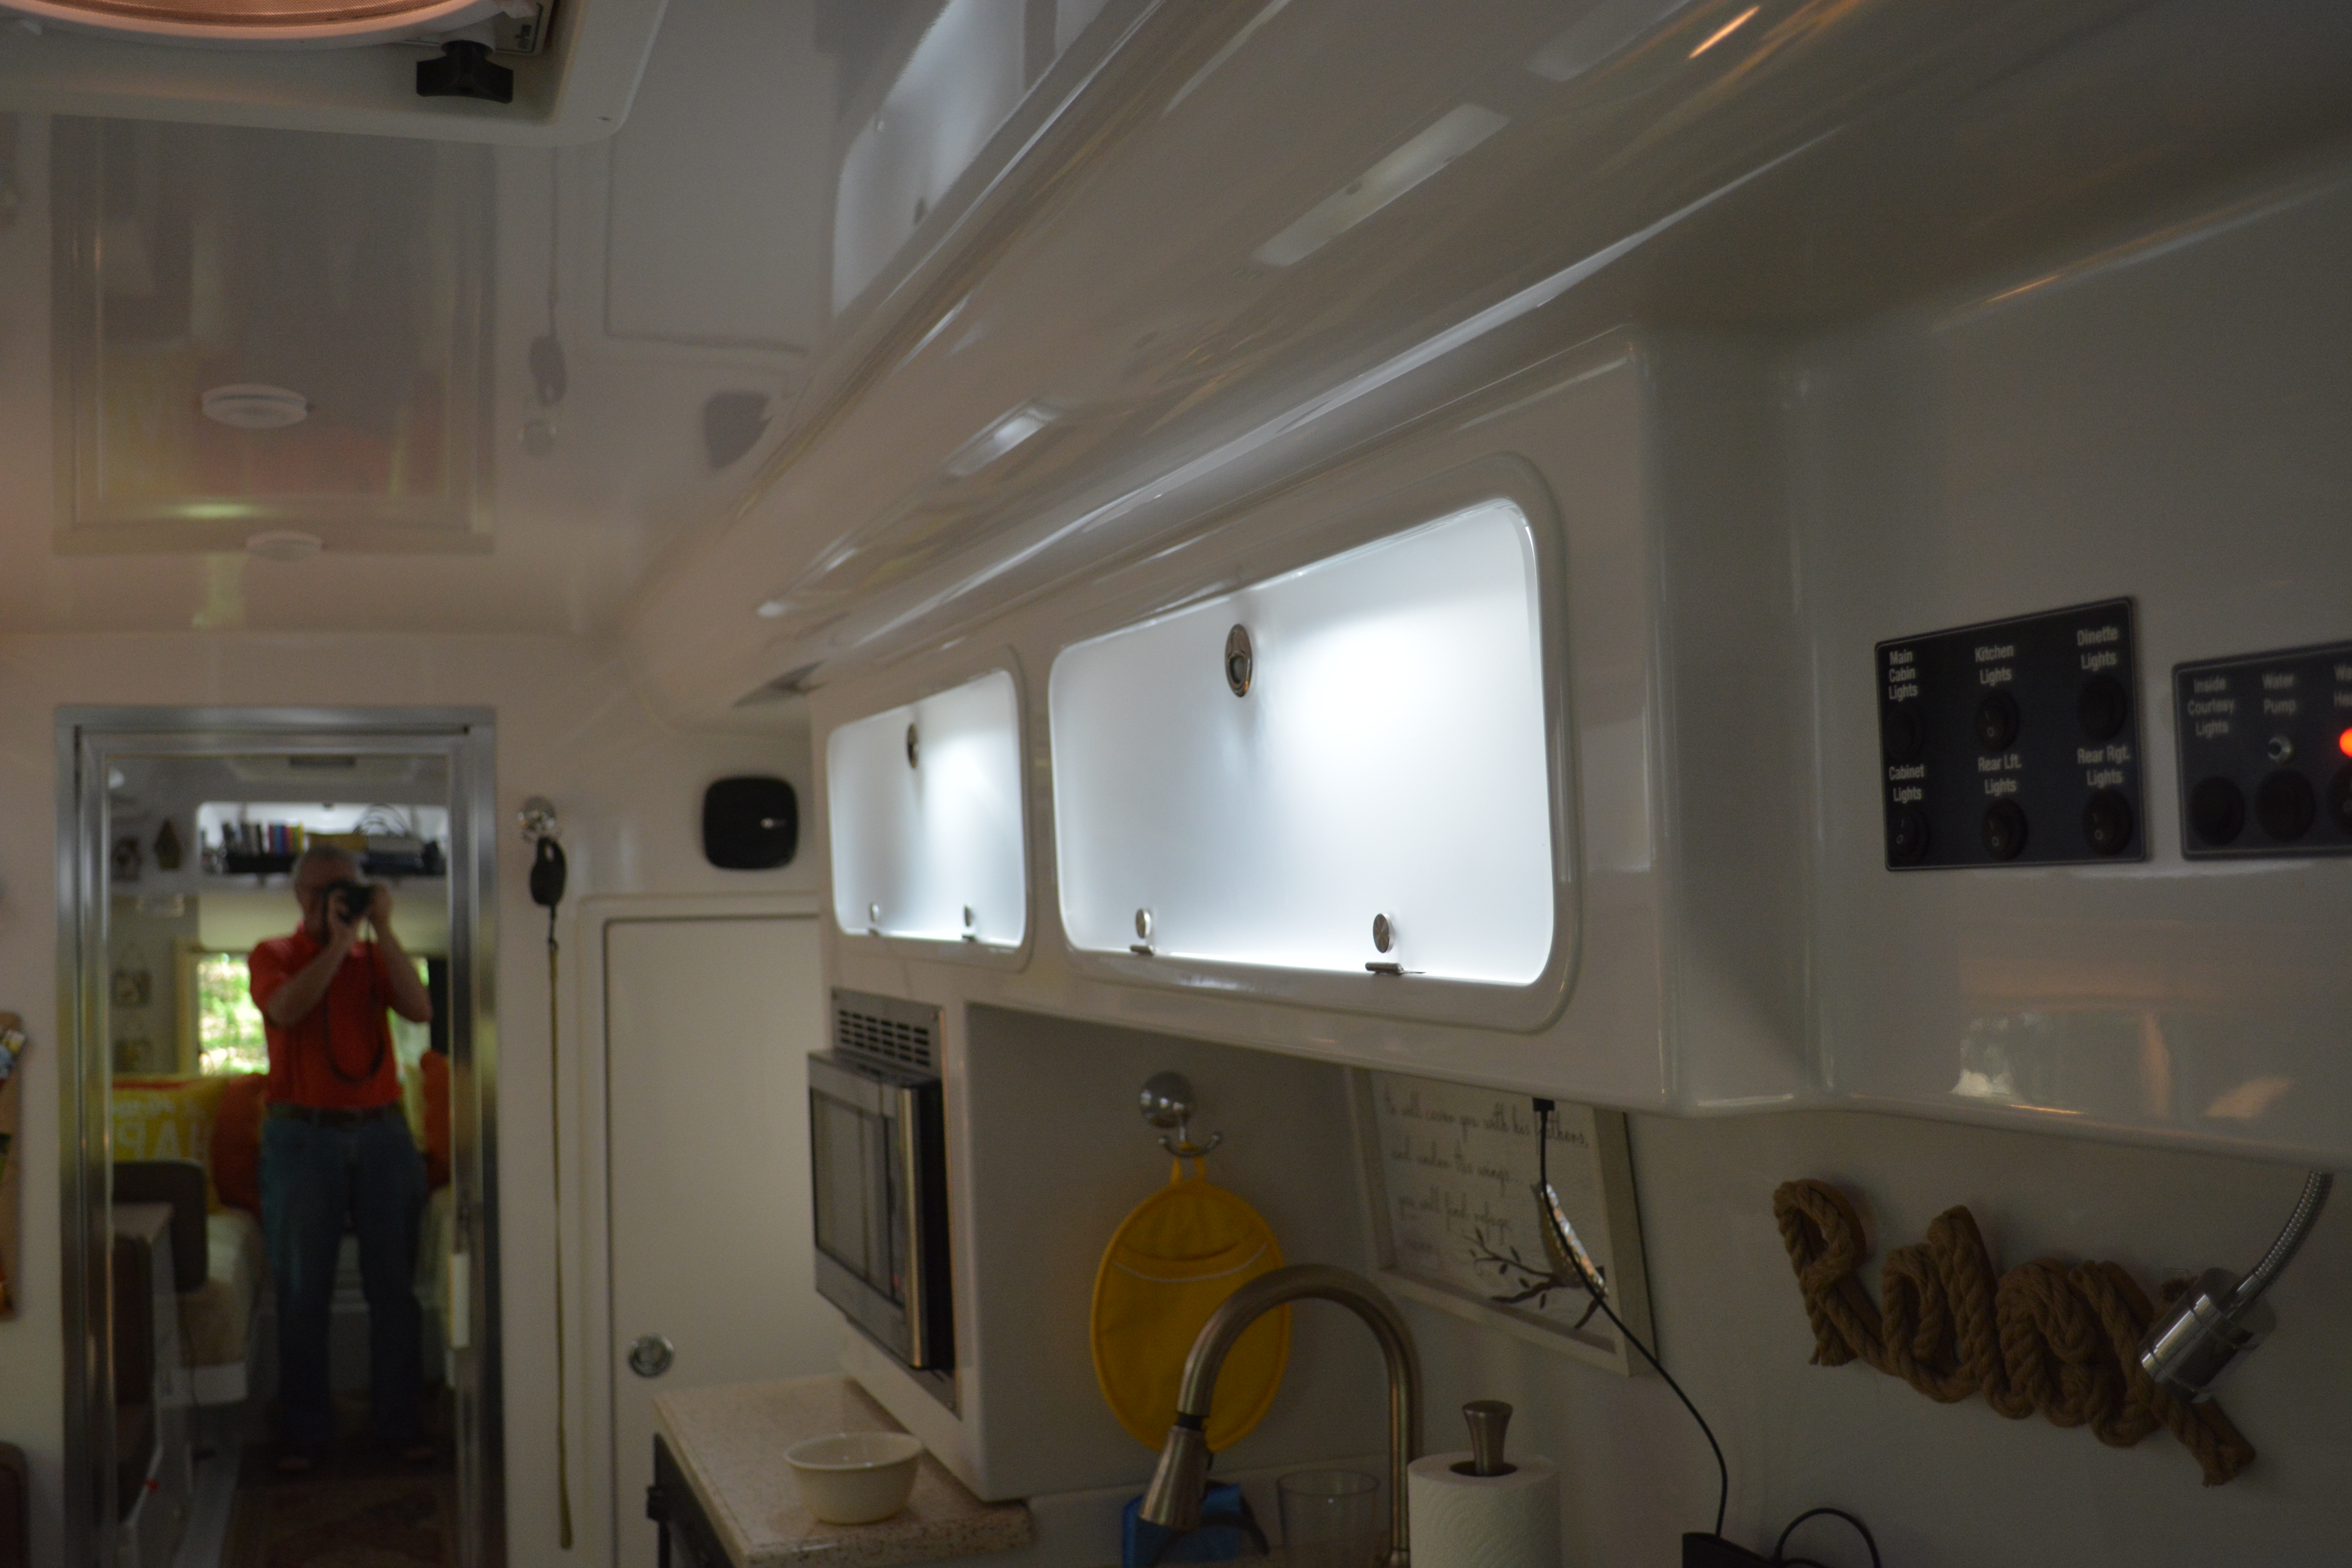
We chose the frosted glass look because we did not want to see ourselves everytime we got up in the Oliver through all the mirrored cabinets. Also the constant cleaning of the fingerprints from the mirrored cabinets. We can see a bit of what is inside of the cabinets but not much at all but do not think they look cheap or tacky. We also like the ambient light when the cabinet lights are turned on. In all things, it is a choice that each person feels good about and likes because all likes are not the same. Because we are full- timing in our Oliver, the cabinets are full.
2 points
-
After several dr appointments and other things life throws at you I must say it sure feels great being in the Oliver again. We Are in New Orleans and the heat and humidity are intense. I must say the Ollie A/C sure does one awesome job keeping us comfortable. We even got our first shower last night and I was pleasantly surprised how great it was. I'm also happy with the drivers side awning we had put in. The nice thing about that is you can open it enough just to block the sun from shinning in the windows. I'm at a Naval base with full hook ups so I can get a better understands of my tank readings. Overall I must say I'm impressed with our Ollie!1 point
-
Yes we have the Omni Multi directional antenna it works quite well maybe half the parks have cable, some to remote, but some are just right and I like to get the local news and weather once in a while. I have been in some parks and received 20 to 30 plus channels and other times scrambled eggs but you can't use it if you don't have it. I would not use a satellite unless it was free standing so you can take aim at the southern sky without trees. Been camping 9 years without one so maybe someday if i do some camp hosting in the future i'll consider the satellite. Thanks Gary1 point
-
I really like the ambient light it gives off as well. They look great!1 point
-
Looks like you already have a good read on this one. Many commercial RV parks have cable so you don't need the Winegard for that. You've already got the DVD player and you have the ability to stream movies via your cell, so you don't need the Winegard for that. Depending on where you intend to do most of your camping - if it is in the boonies you will not have over the air TV signal - you just might not need it. So, unless you think that you might want to view a "local" weather and/or news program it looks like you simply don't need or want it. As John implied - you can always add it later. Bill1 point
-
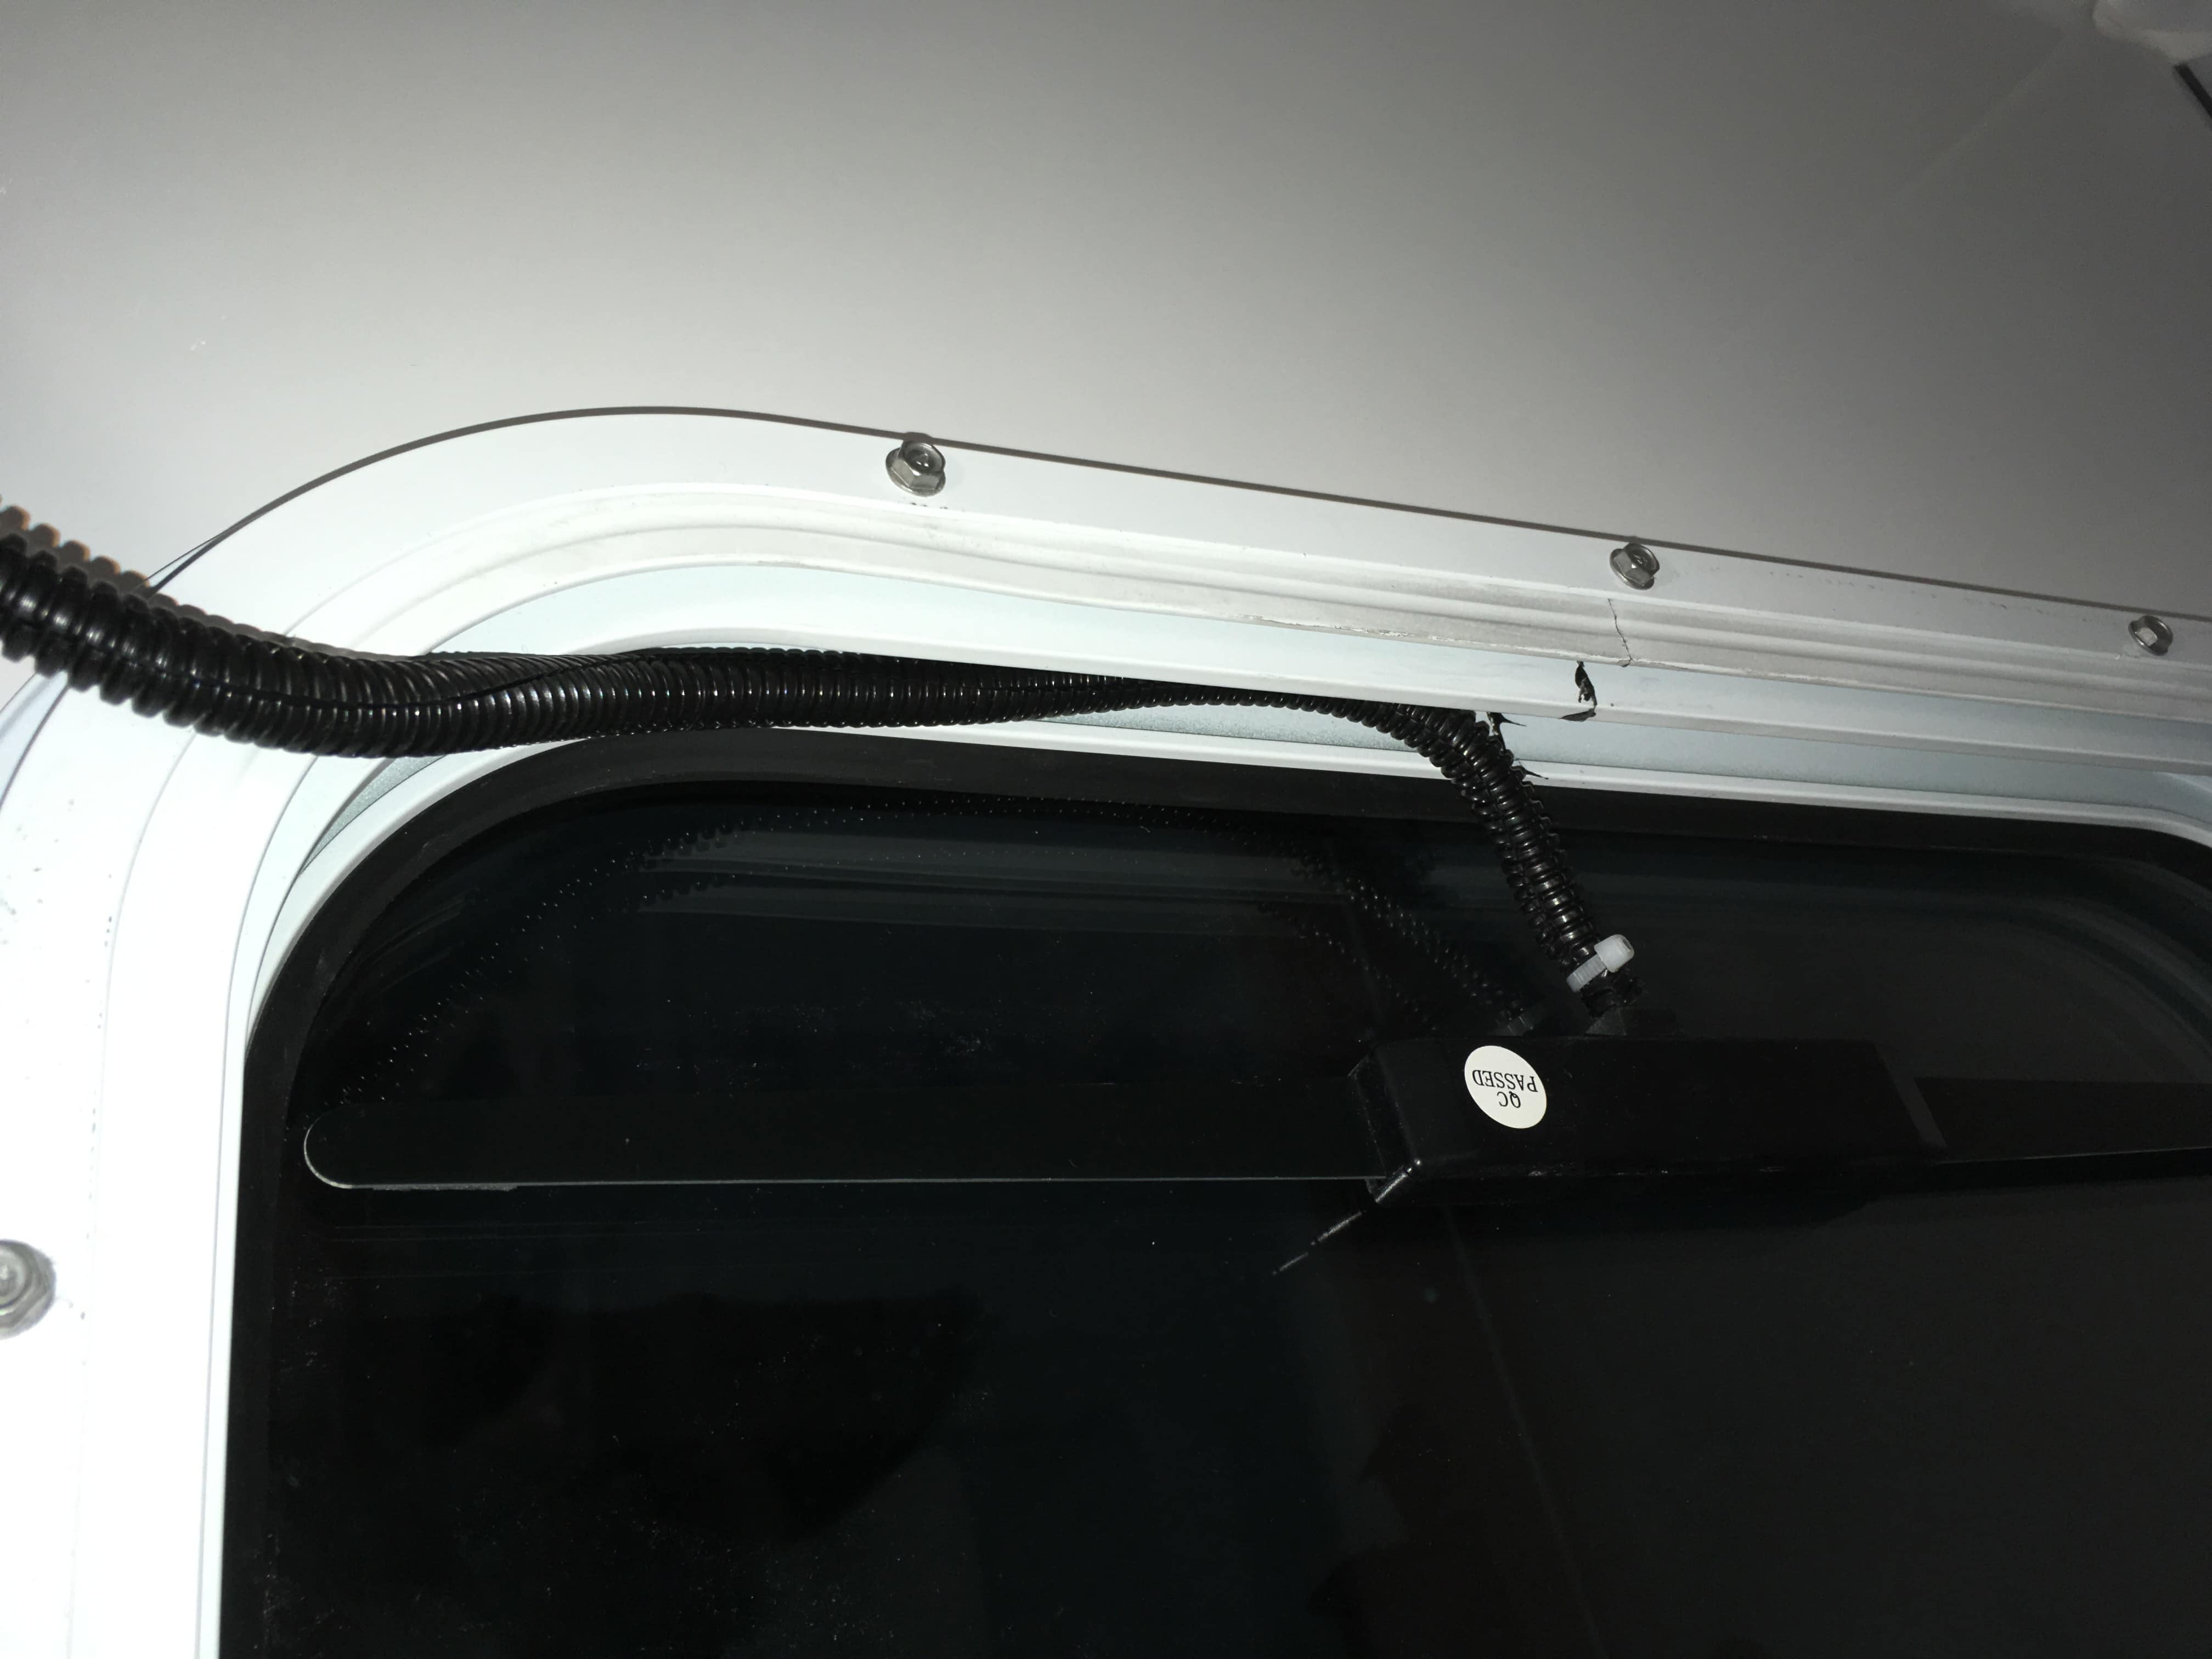
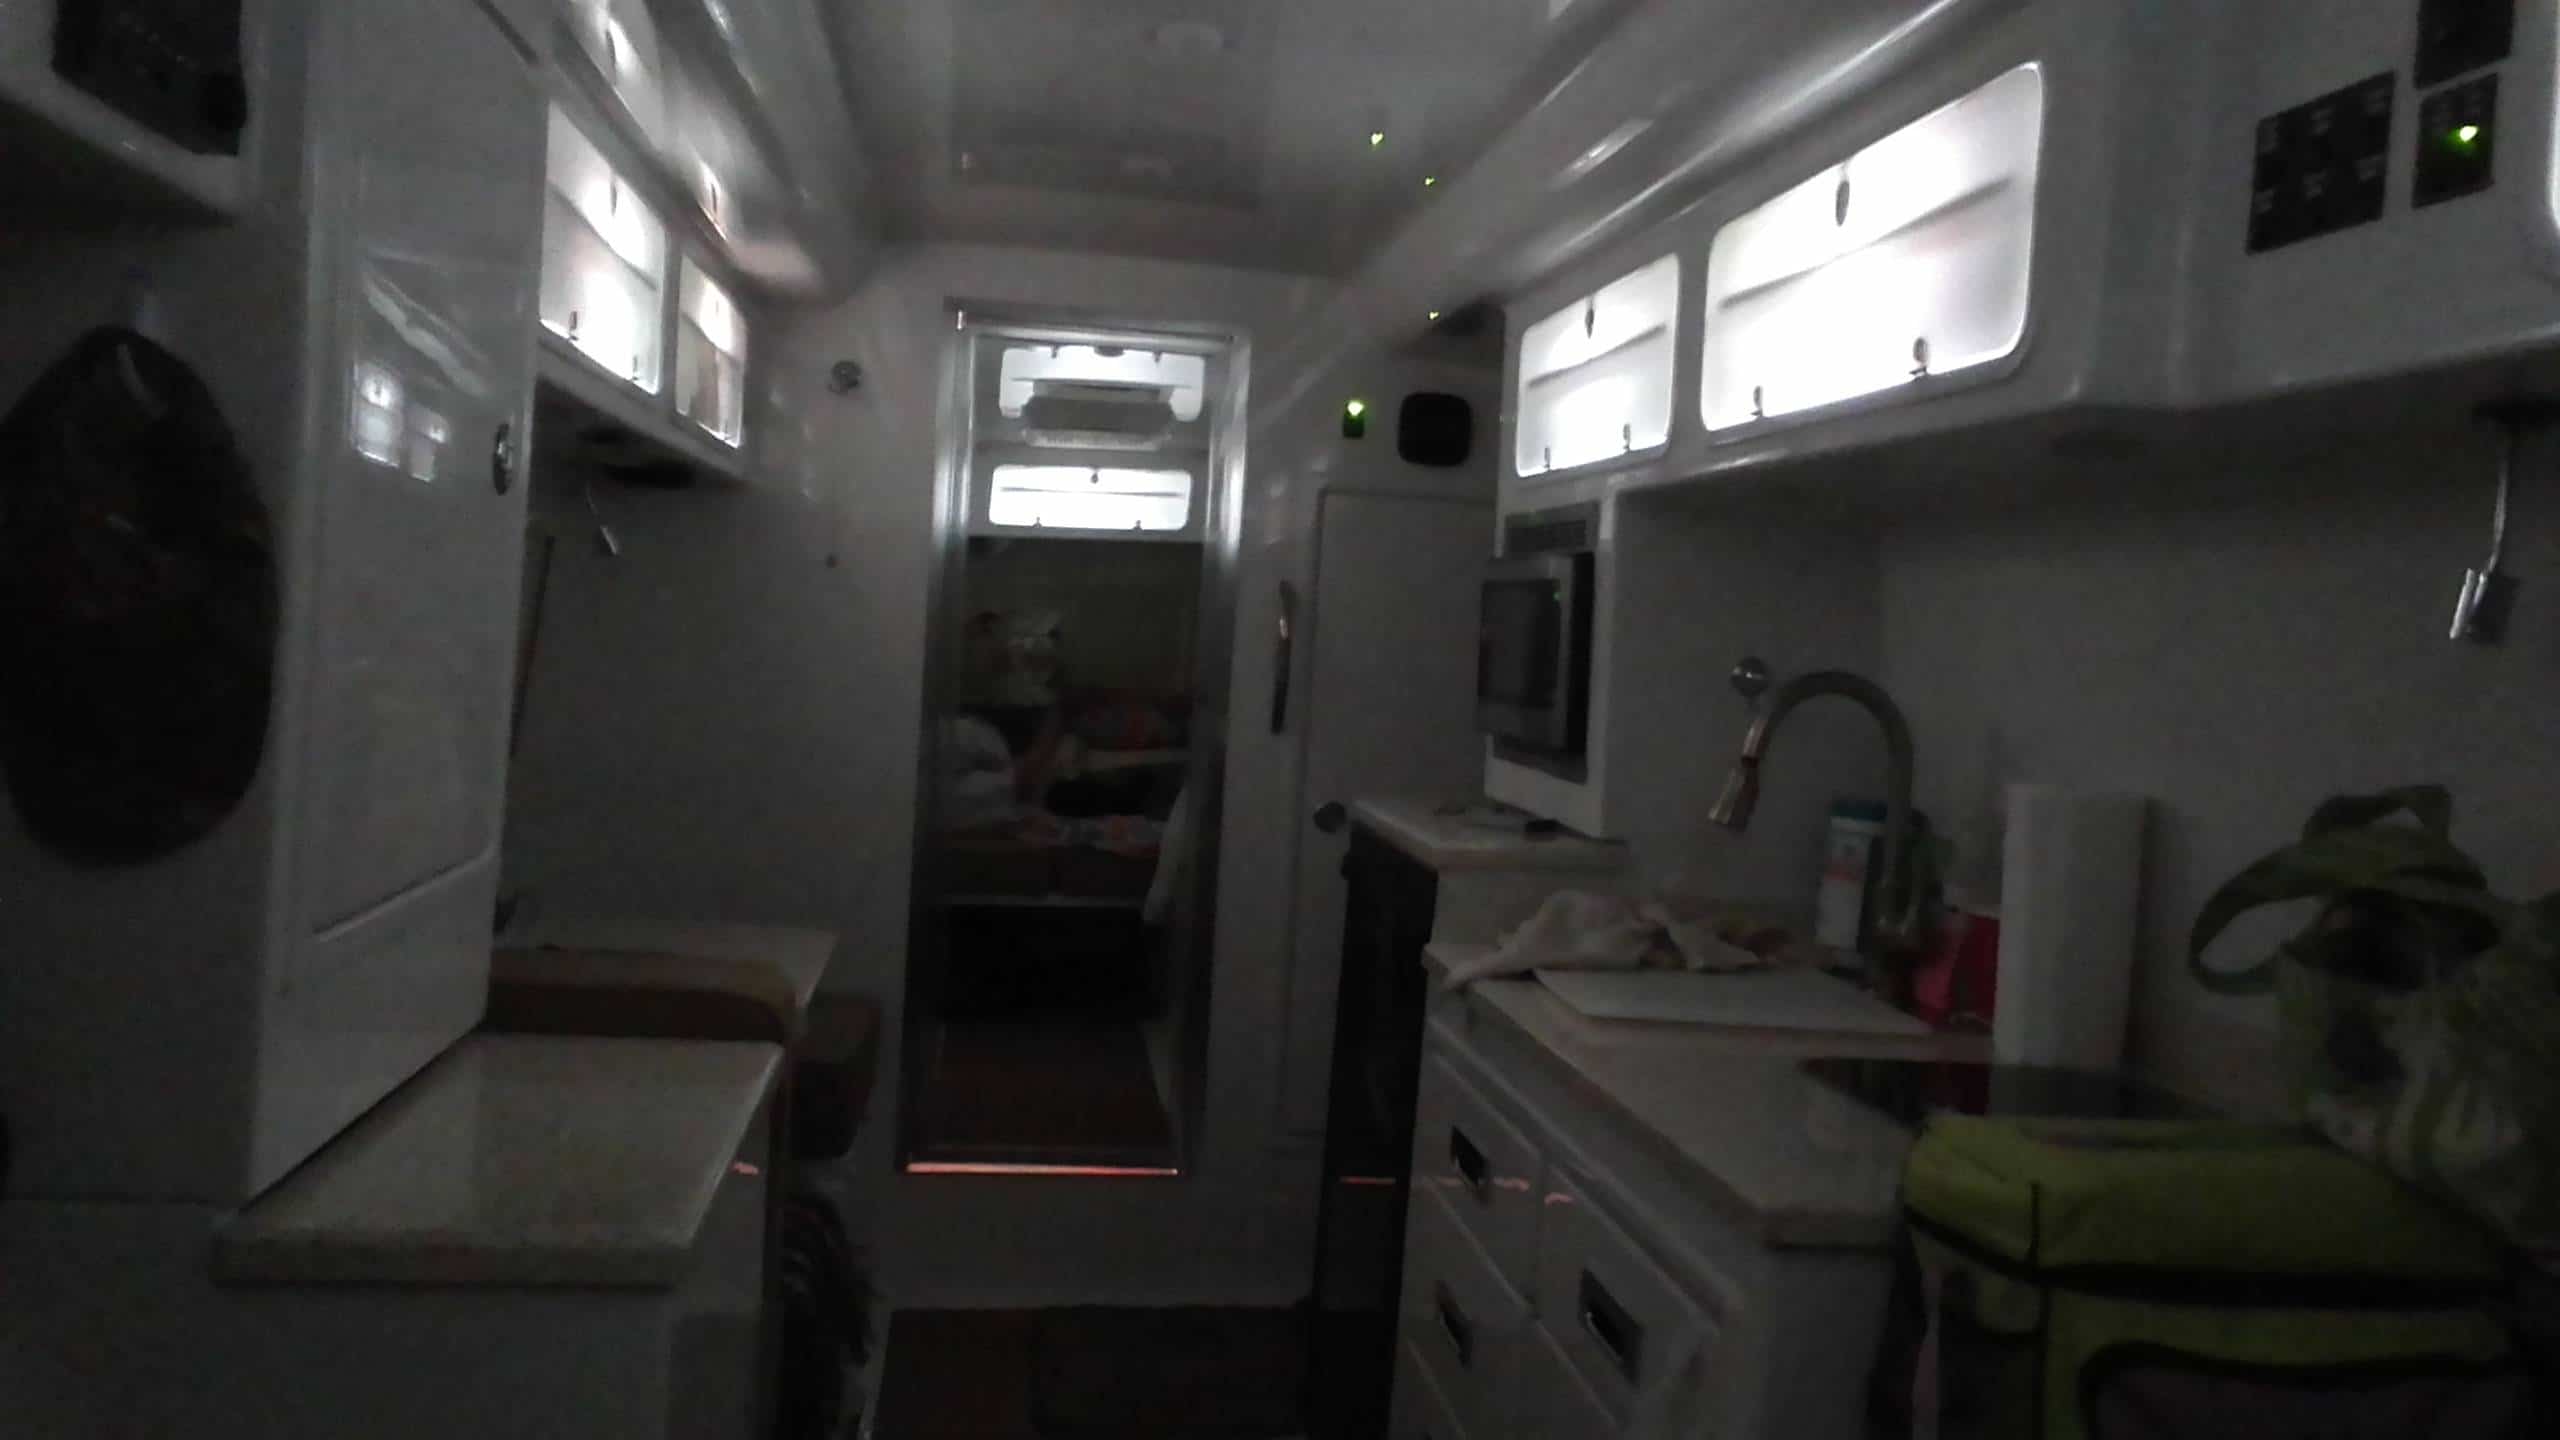
You get tv and fm radio through the Winegard. If you don't have one, you get the funky self adhesive bar antenna that came with the entertainment system, glued to the inside of the left rear window. Radio reception is adequate and tv reception is pretty much nil with the little one. Sorry for the dark, it is hard to show a black antenna on a tinted glass surface... We chose not to have the outside tv antenna since like you, we watch dvds or maybe downloaded Amazon Prime stuff on my iPad. We watch network tv for the news, but haven't watched any broadcast primetime show in way over a decade. Nor do we miss them. Unless you really need the capability of the outside antenna, skip it. The less things poking up out of the roof, the better. The wires are there inside the roof, if a future owner wanted to install one. John Davies Spokane WA
1 point
-
We have the Omni-Directional Antenna and to my knowledge we have never used it. We don't watch a lot of TV so we bought the Roku and subscribe to PlayStation View (Sony company) and stream what we want to watch. We have AT &T unlimited data with a hot spot on the phone. Works for us. We bought the Winegard Carryout G2+ and because we like the woods we have not been successful in locking on the satellite. We plan to sell it. Everyone is different and their likes and needs are different. This works for us. We watch TV on a limited basis.1 point
-
As John Davies says above, there is a method of opening and closing the mirrored doors that does not involve actually touching the mirrored part. Simply using your index finger you open the latch and then lightly pull on that latch as the door opens. As the door continues to open you leave you index finger in place allowing the door to fully open before removing your finger. When it comes time to close the door, again using your index finger, you reach behind the door placing your index finger in the latch. Then simply rotate your finger inside the latch surface as you lift and close the door. Really is a piece of cake and no prints are left on the mirrored part. Bill1 point
-
We have the mirrored doors and like them a lot. Mike1 point
-
To my knowledge the current gaskets have not been changed. The "problem" with the bleeding gaskets didn't appear on my Oliver until 6 to 9 months after delivery. At the Oliver Owner's Rally this past May, Oliver gave everyone in attendance a tube of clear Dow Aquarium sealant to be used on these gaskets to stop the bleeding. Basically this is a silicone sealant and I was hesitant to use it because I had read that one should never use silicone on a fiberglass trailer. In any case - I finally did use it (very lightly and carefully to not use anymore than necessary to cover just the exposed black gaskets). It has now been approximately 6 weeks and the gaskets have not bled. So, it appears that it "cured" the problem. How long will it last before it is necessary to re-apply? Don't know. If I was to do it again, I think that I'd try the Captain Tolley's - for no reason other than it appears to also work to cure the problem and I don't think that it is silicone. Bill1 point
-
We don't have the frosted but we have the white. We chose this so that we would have a nice white canvass that we can do anything with. You can add wallpaper paintings or whatever you wish throughout the trailer. We did have them put the mirrored door in the bathroom. I like sleeping in the dark and we thought that the mirrored doors would basically create a laser light show all over with the green lights in the cabin at night. Plus with the white, there are no visible fingerprints at all.
1 point
-
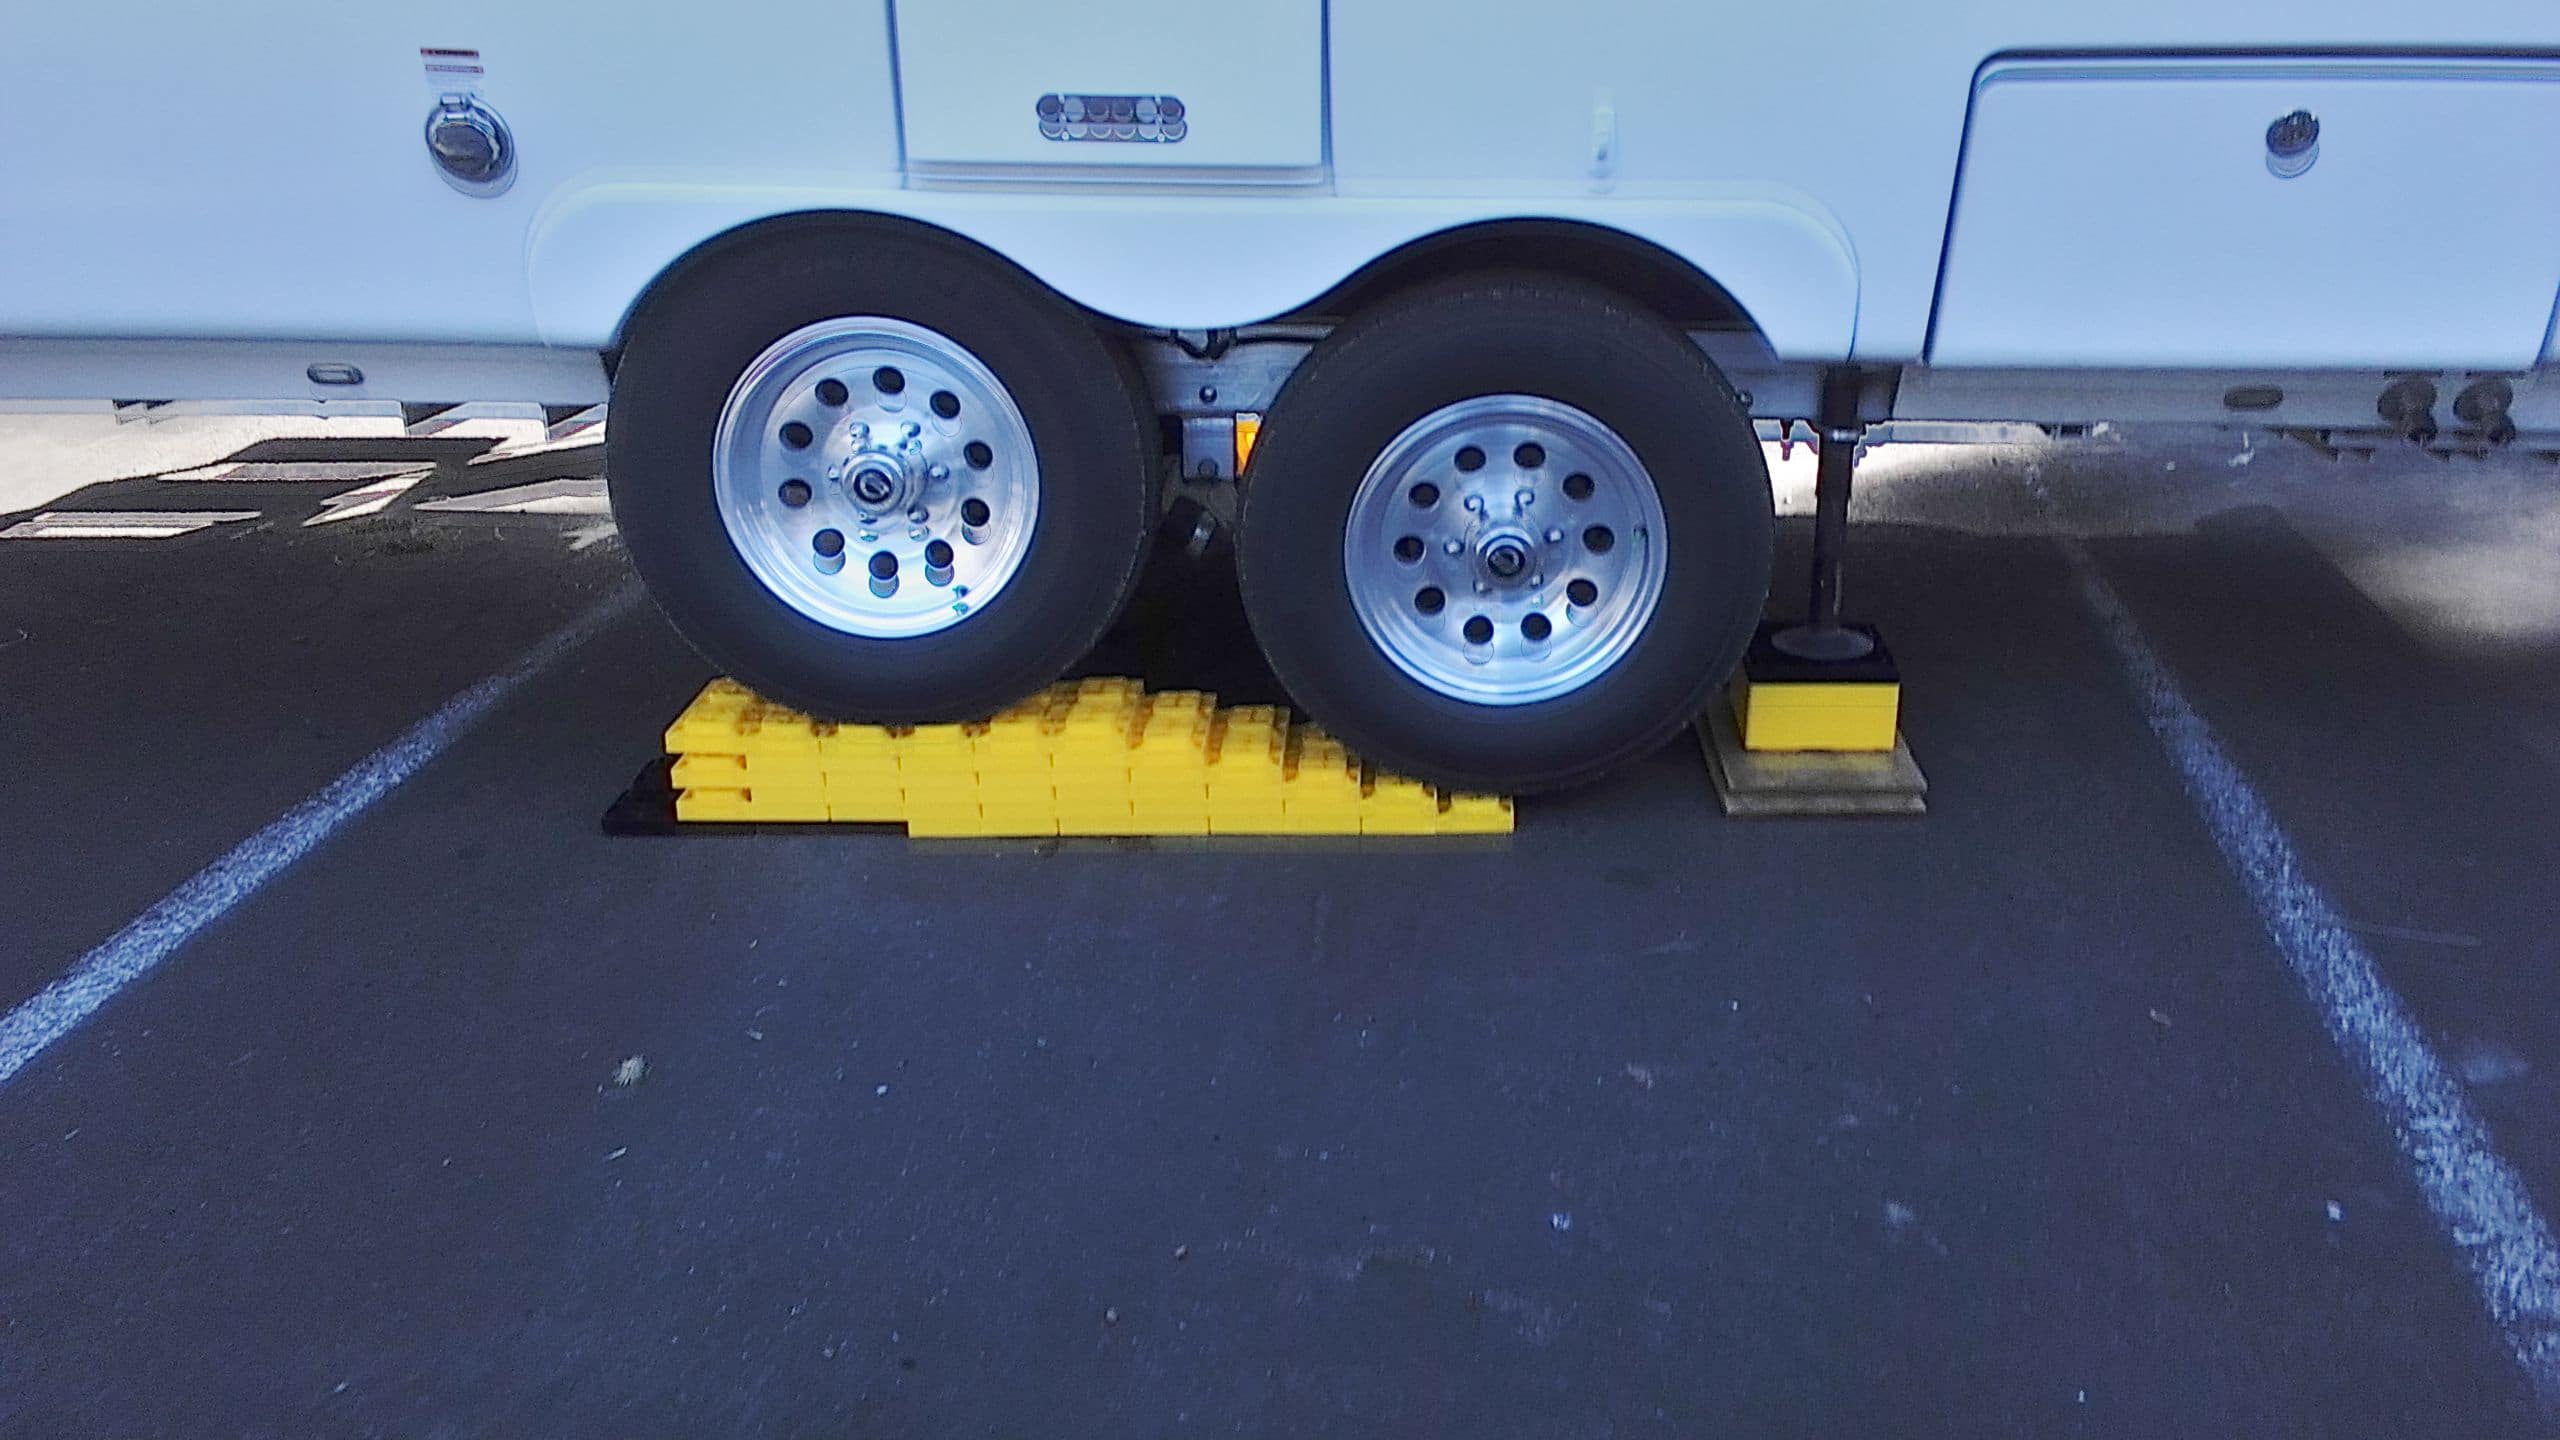
Let's start by making it as easy as possible, and that comes with the right Level on the front of the trailer. Walmart, Camping World, Amazon all have graduated levels. I can see really good so I use the Hopkins Graduated Level and have it placed where I can see it in my rear view mirror. For my tow vehicle, right below the seam is perfect. These levels are numbered, and when the level has the bubble sitting on say #3, that means that you will need 3 blocks under the tires. I try to get it with in an inch and then use the rear stabilizers to level it out the rest of the way. When installing these levels, one is marked for the side to side level and the other is marked for the front to back, so be sure that you put the right level in the right place. I bought 3 packages of them and have the one in the front, one behind the door when it's open, one below the bathroom window and another in the storage compartment, above the outside shower. This way, no matter what side I am putting blocks under, I have levels that I can see. Then I have 2 inside, one over the bathroom door and the other above the switch panel to the right of the kitchen. If you are using the store bought blocks, then keep using them and don't get discouraged. You can just put blocks under the tires and not make a ramp. Right now we have one trailer on top of a 7 high stack, where we started out with 2 blocks, then put 4 blocks 3" in front of the first stack. Then our friend pulled onto the 4 stack and we put 3 more for a double stack of 7 under both of his tires. For extreme cases, you will need up to 4 sets of the 10 block stacks, because you will need enough to raise the stabilizers also. Basically, if you want to get it right the first time, then the levels are the key. You will want to take your trailer to a really level parking lot and use at least a 2' long level along the seam to get the trailer as close to perfect as you can. You want it on level ground for this so that you won't have any frame flex at all. Level it and check the level on all 4 corners of the sides and front and rear. Once leveled, take out your new Hopkins RV levels and place them accordingly. Then just use them every time and before long, you will have it right the first time, every time :) Lot's of times I will use a full stack of blocks under each stabilizer and the front jack to keep set up time to a minimum when pulling over for one night. Reed
1 point
-
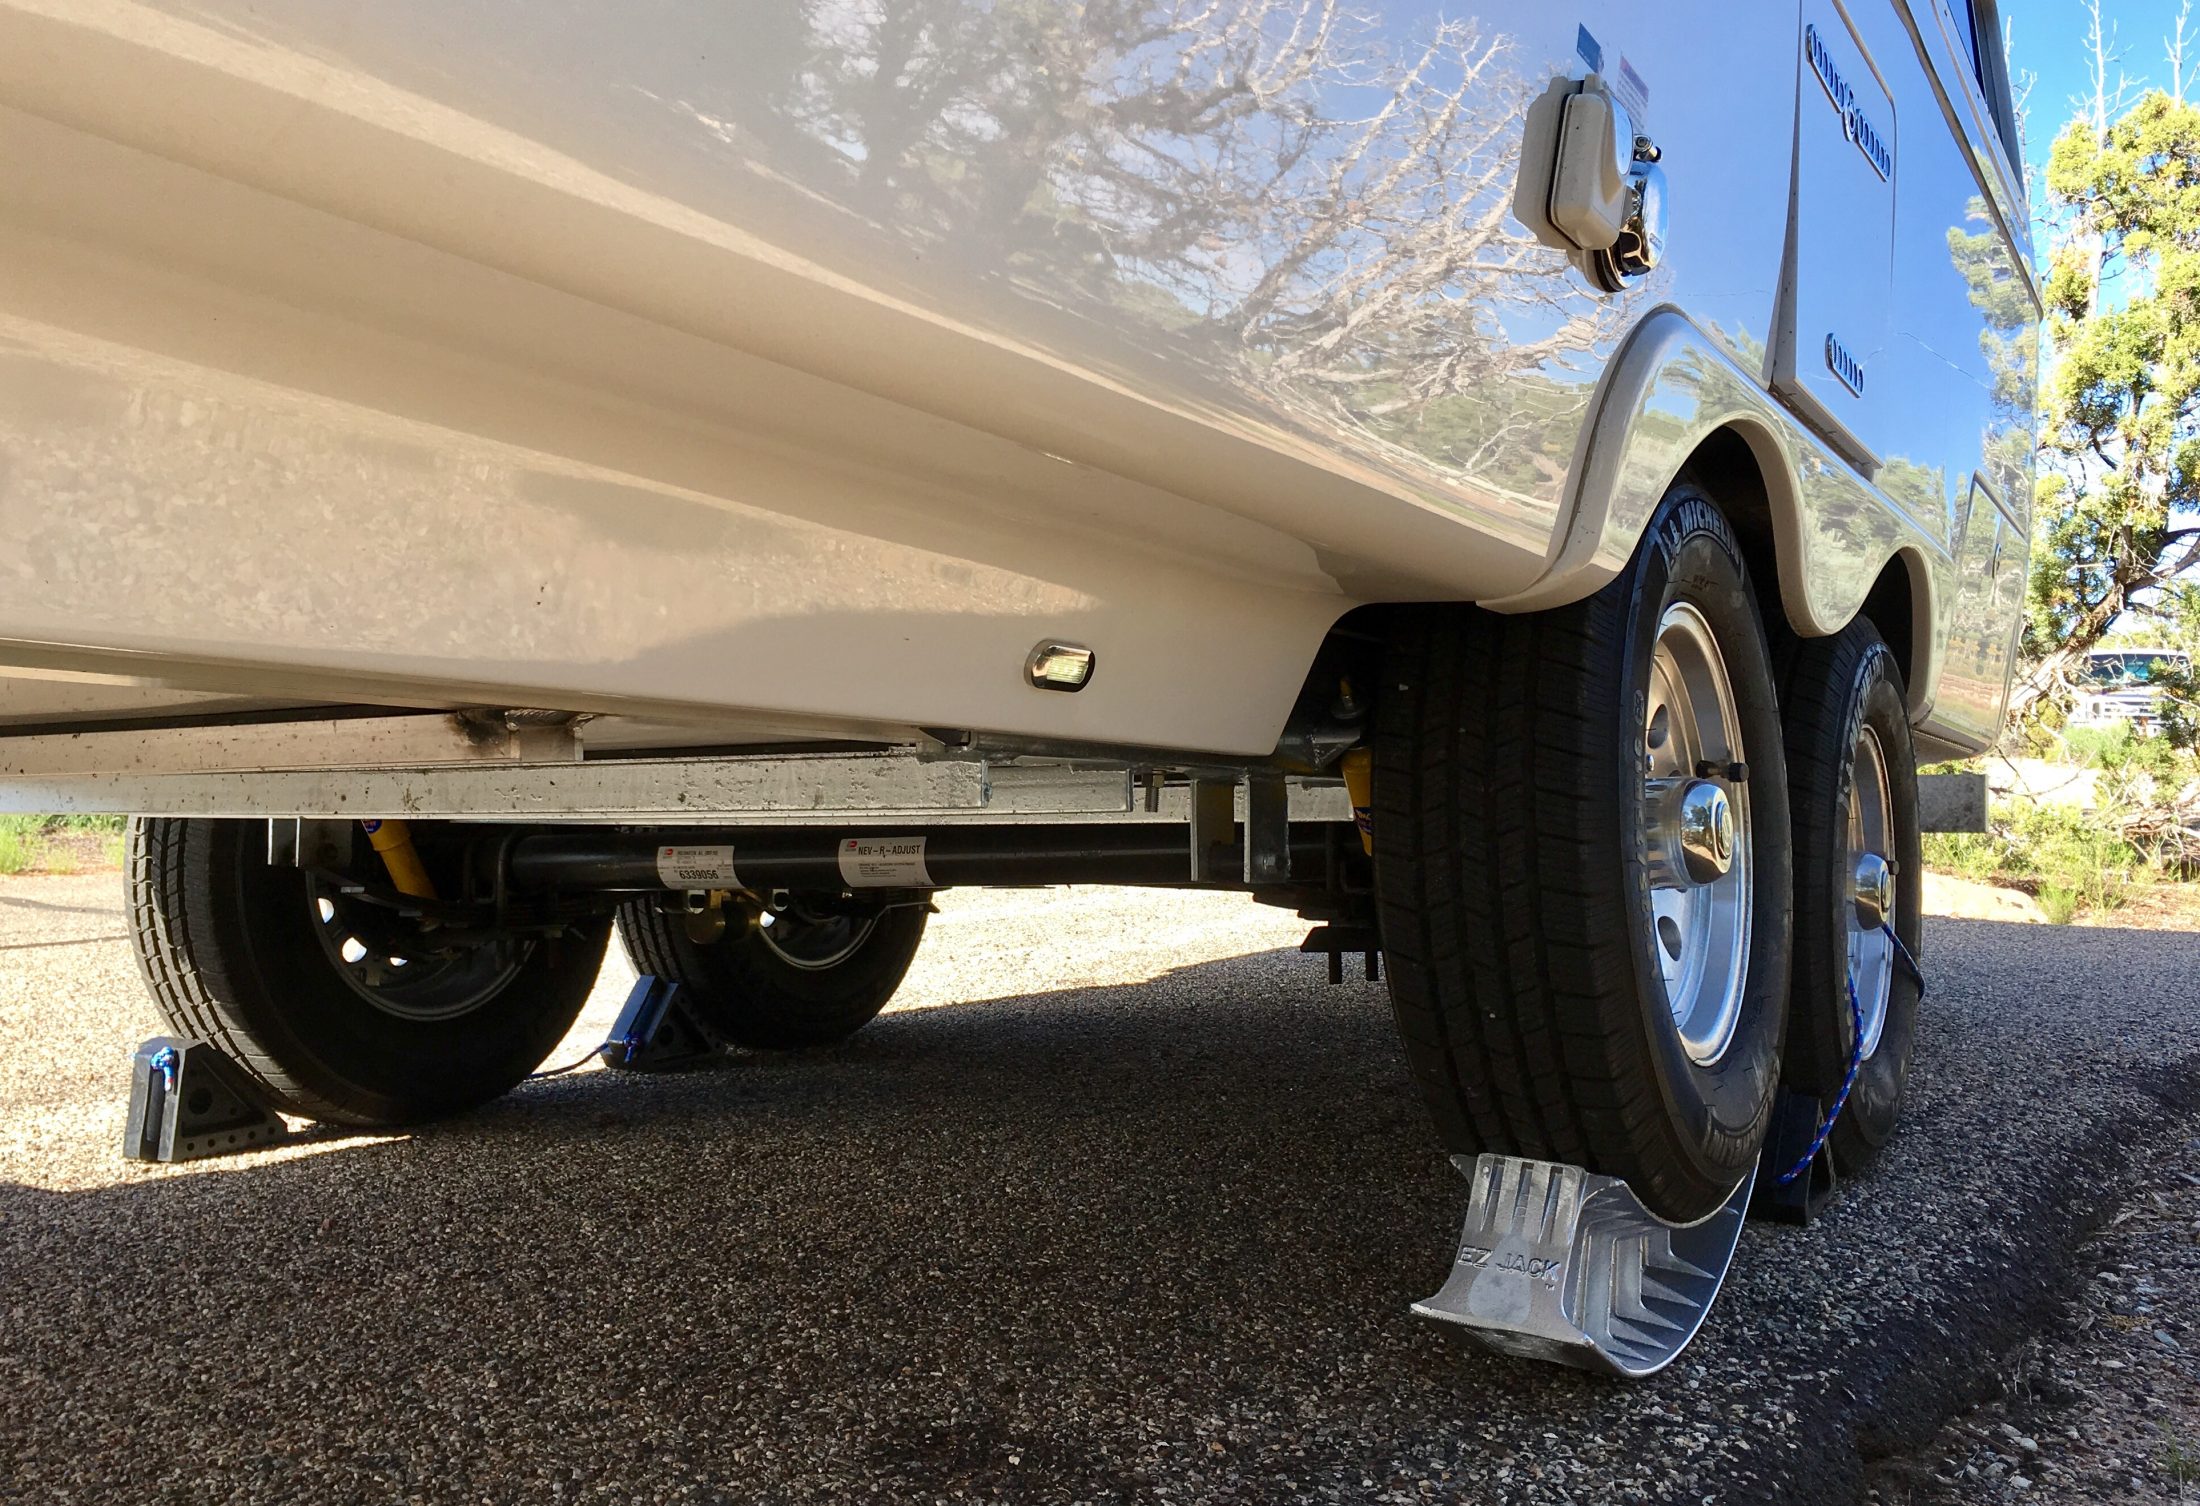
This is quick and easy to use and I hate mine with a passion. I'm going to sell it. You just set it in front of the low front tire and drive forward. But it is huge and sharp and horrible to store. I would rather carry a bunch of 2x6x6 and/ or 4x6x6 wood blocks and stack them as needed under the jacks. They transport MUCH more efficiently and aren't heavy. The Anderson version of this is plastic and not as heavy, but it is still an extremely inefficient shape to carry around all the time. You can buy a single piece of lumber at Home Depot and cut it into everything you need. Cutting a 2 inch one is easy, cutting a 4 inch thick one takes more time and effort since a standard circular saw won't do it in a single cut. John Davies Spokane WA
1 point
-
I don't have a pic, but I have seen one trailer with frosted glass and I thought it looked cheap and tacky. Seeing ghostly shapes of your pots, pans, shampoo bottles and stacked clothes is not exactly uplifting. After a few false starts, you will quickly remember where you stored your stuff, if you go wth mirrored or dark. I like the mirrors, they really add a lot of reflected light and make the cabin feel bigger inside, day or night. You soon learn to open and close them using the latches, to avoid getting your fingerprints everywhere. Well ... one of us has learned that. There are lots of general pics of frosted glass cabinets, here is one: Keep in mind that your trailer shelves won't look anything like that after a long bumpy trip - your stuff will be a lot less tidy and photogenic. Nor will you be putting pretty and fragile glassware up there.... John Davies Spokane WA1 point
-
Tripus Interruptus. Elizabeth came down with a severely upset stomach (my bacon?) so we laid over an extra day near Rapid City. Took some of the time to work on trip planning for the next week. That was when, on Allstays, I found a BLM campsite just South of Wall Drugs off 205. We are there now, camped atop a wall, or what the old Tarzan called an escarpment. I am about ten foot from a drop off of....maybe 200 feet, overlooking the plains below. I can see for miles. We'll overnight here tonight, then head east in the morning. We plan to hit Minnesota, Wisconsin, and Iowa before heading home. Will try to upload a couple of iPhone pics...but they really do not show the depth.
1 point
-
Thank you for sharing your picture Karen! We love it. Please share with us more of your wonderful pictures. :)1 point
-
In backing into a space I get the camper close to where I want it, but, since I'm still attached to the TV, in most cases, it is impossible to use the jack bubble level for anything. So, right after I brought Twist home I got it as leveled as possible and then attached a couple of Camco levels to the exterior near the belly line - one on the front and two on either side by the front door and near the bath window. Now when I get close I simply look at the bubble level on the front of the camper and estimate how much I will need to raise (or lower) that side in order to get the side to side issue close. Using the Andersen levelers makes this process a bit easier as compared to using the lego stacking blocks or scraps of wood. Once the side to side is taken care of and I disconnect from the TV I use the Jack level to get close but final adjustments are made by looking at the bubble level that I stuck to either side of Twist. If I'm stopping somewhere just for the night and not disconnecting from the truck, I again use the level on the front of the camper for the side to side issue and if the camper is nose down I use the jack and its level to get close as long as I don't need to raise the nose too far - I don't want to raise both the camper and the rear of the truck too far. These little levels only cost a couple of bucks and once they are stuck they don't seem to move. I would have purchased a larger level fro the front similar to what Reed and Karen have done, but, I've not been able to find one that I like the looks of yet. Bill1 point
-
I was leaving the gym in Holly Springs, MS about 4:30 pm yesterday, October 30th. As I went out the door, I looked across I-22 (Hwy 78) and saw what appeared to be an Ollie circling the Walmart parking lot. I naturally had to investigate. I drove to Walmart and found the Ollie there. It was a brand new Hull 199 headed home to Texas. I flagged Don and Ginger down and they stopped to see what I wanted. I could see there concern as I walked up..likely wondering..."what is this guy doing? Is he going to chase us off?". I introduced myself, and soon learned that they had misgivings about spending the night at this particular Walmart. (It is an older store, in a poor neighbrhood, closes early, and has zero security). I told them that I didn't blame them, but could really only recommend one parking spot nearby-my house. So I brought them home, alerting the wife by phone as we caravaned. Spent a few hours with the new owners, talking towing, hitching, campsites, discount clubs, and reviewing the upgrades Ollie has made since manufacture of my Hull 64. Such a fun evening welcoming new family members into our (yours and my) Ollie family and our (my) home. By the way, I was most impressed with all I have learned since I picked up my Ollie (from Trumpet Guy) in Sept 2016. Good luck, Don and Ginger!1 point


-
Recent Achievements
-


")


")


")
