Leaderboard


Popular Content
Showing content with the highest reputation on 06/27/2017 in all areas
-
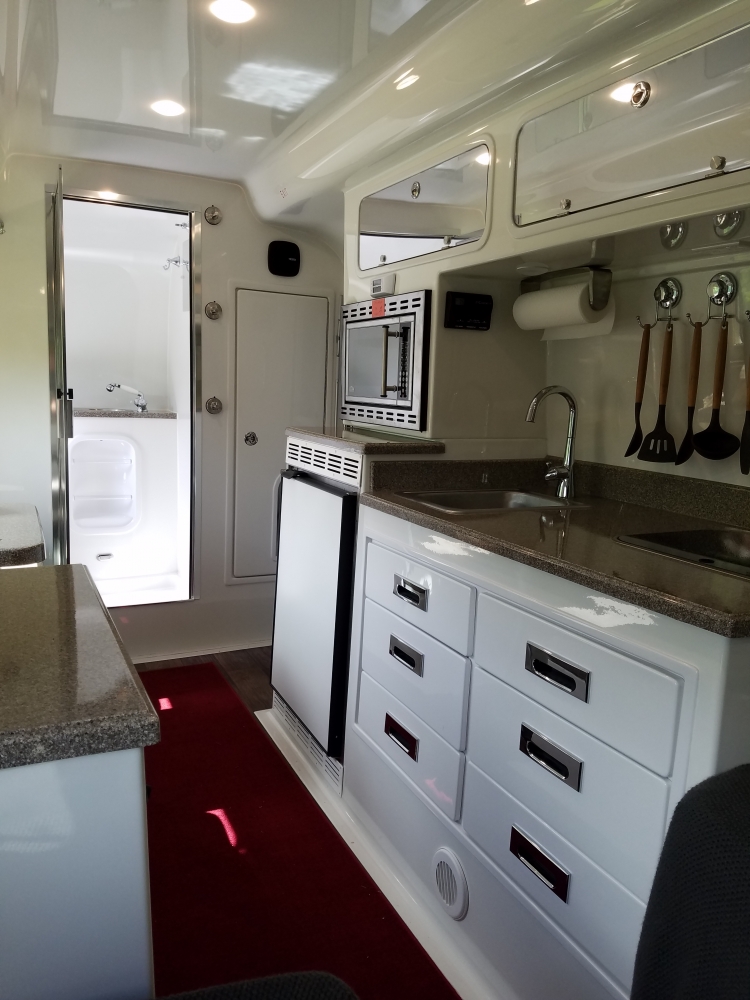
I'm happy to report that I have finally replaced the stock Dometic with a NovaKool 5810. The swap out wasn't too complicated, however getting the Dometic out (the door) proved to be fatal (for it). The 5810 is a larger volume, but smaller footprint, width and depth are almost perfect the height is approx 4" shorter, which is also perfect for the space and my process. Upon removing the old one, I sealed off the two exterior vents and layered 5 sheets of reflectix, to cover the entire exterior wall, I also ran 2 new higher gauge wires for power. The 5810 comes with a 40mm fan mounted directly over the compressor, which is controlled to turn on when it runs, I removed this and replaced it with two quieter high volume fans mounted on top of the unit to draw the air from the rear of the unit. The extra 4 inches of height allow for the unit to be mounted on 2x1" aluminum channels and leave the remaining space at the top, this the fans draw the coolest air in the trailer in the bottom, up the back and exhaust it out the top, this exhaust air is barely even warm, so it does not really add to trailer temp. Performance wise, it is a WORLD of difference. One day I let the trailer cook, inside temp 94° held steady at 38° and 19°, cycling on and off as necessary. Unplugged it for a week to see how it affects the battery, no problem handling it, where it's parked is a late sunrise and early sunset, due to hills and trees, morning voltage 12.8 and bluesky monitor indicating 23 amp hours from full. The temp hold is rock steady, all of this was done with a completely empty fridge, so once there's mass in it it should run less and hold even better. Max indicated current draw is 4.3 amps on the system. Personally, I would consider this a completely worthwhile investment and effort.
 2 points
 -
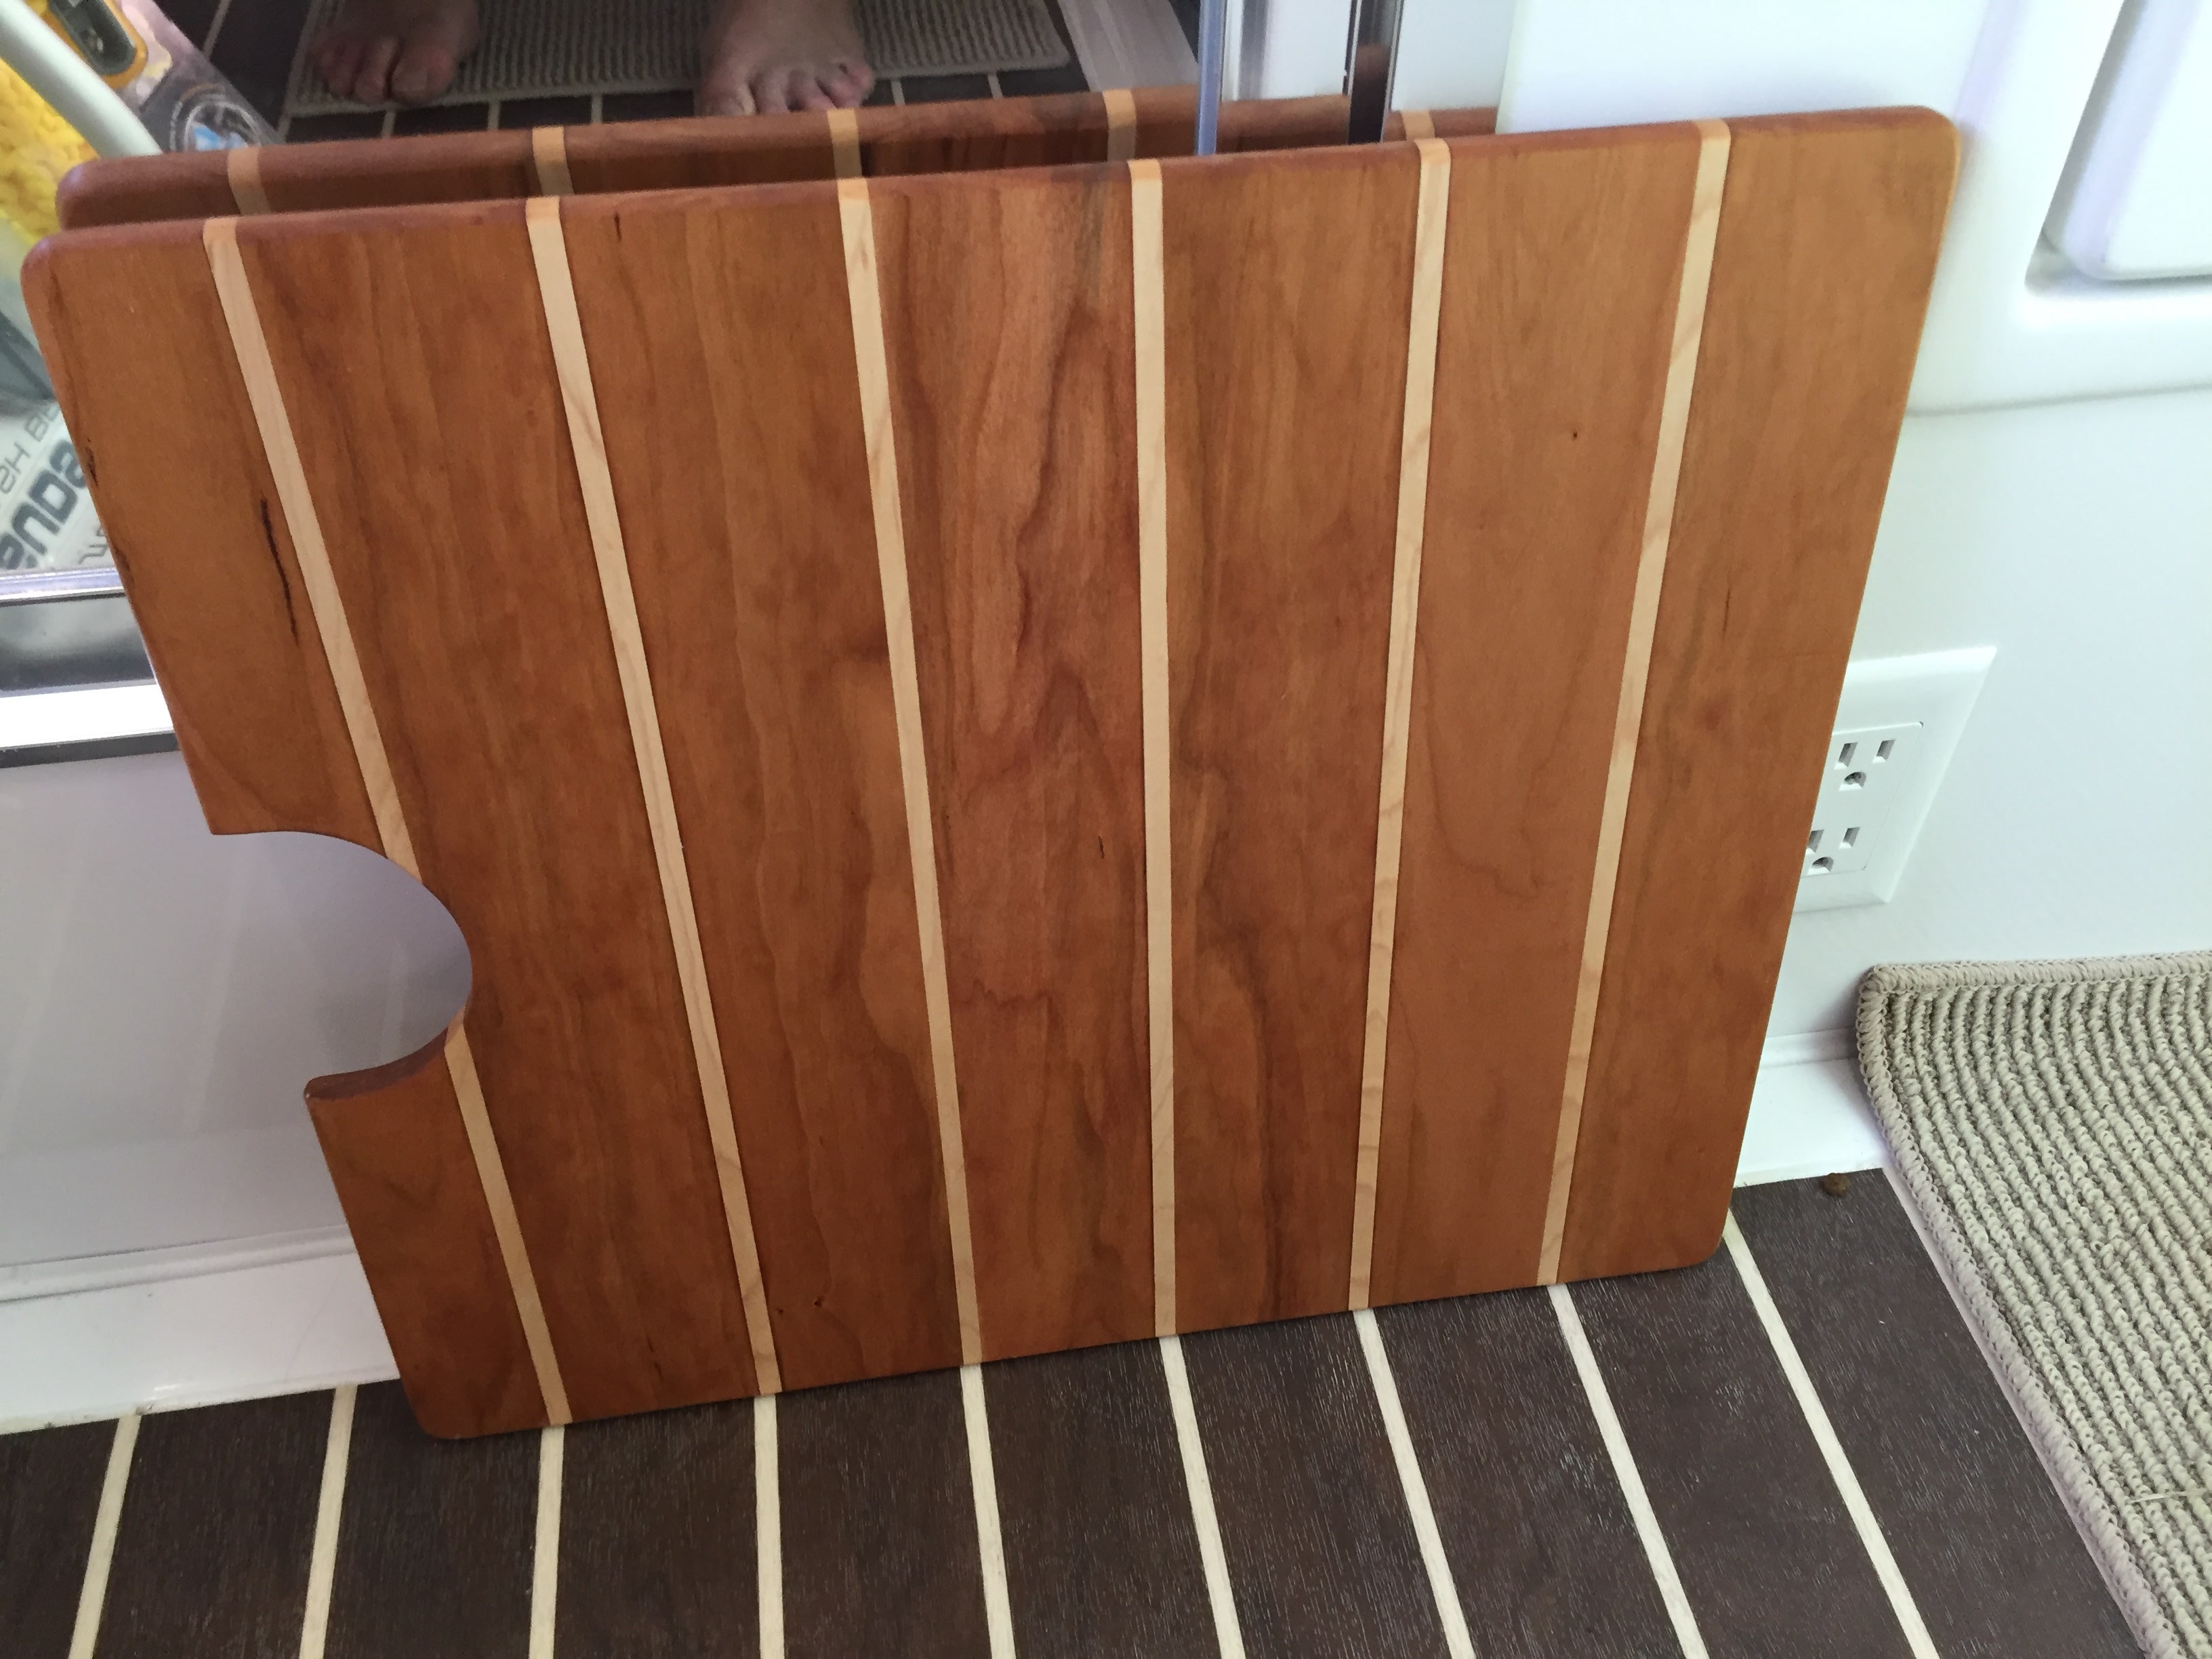
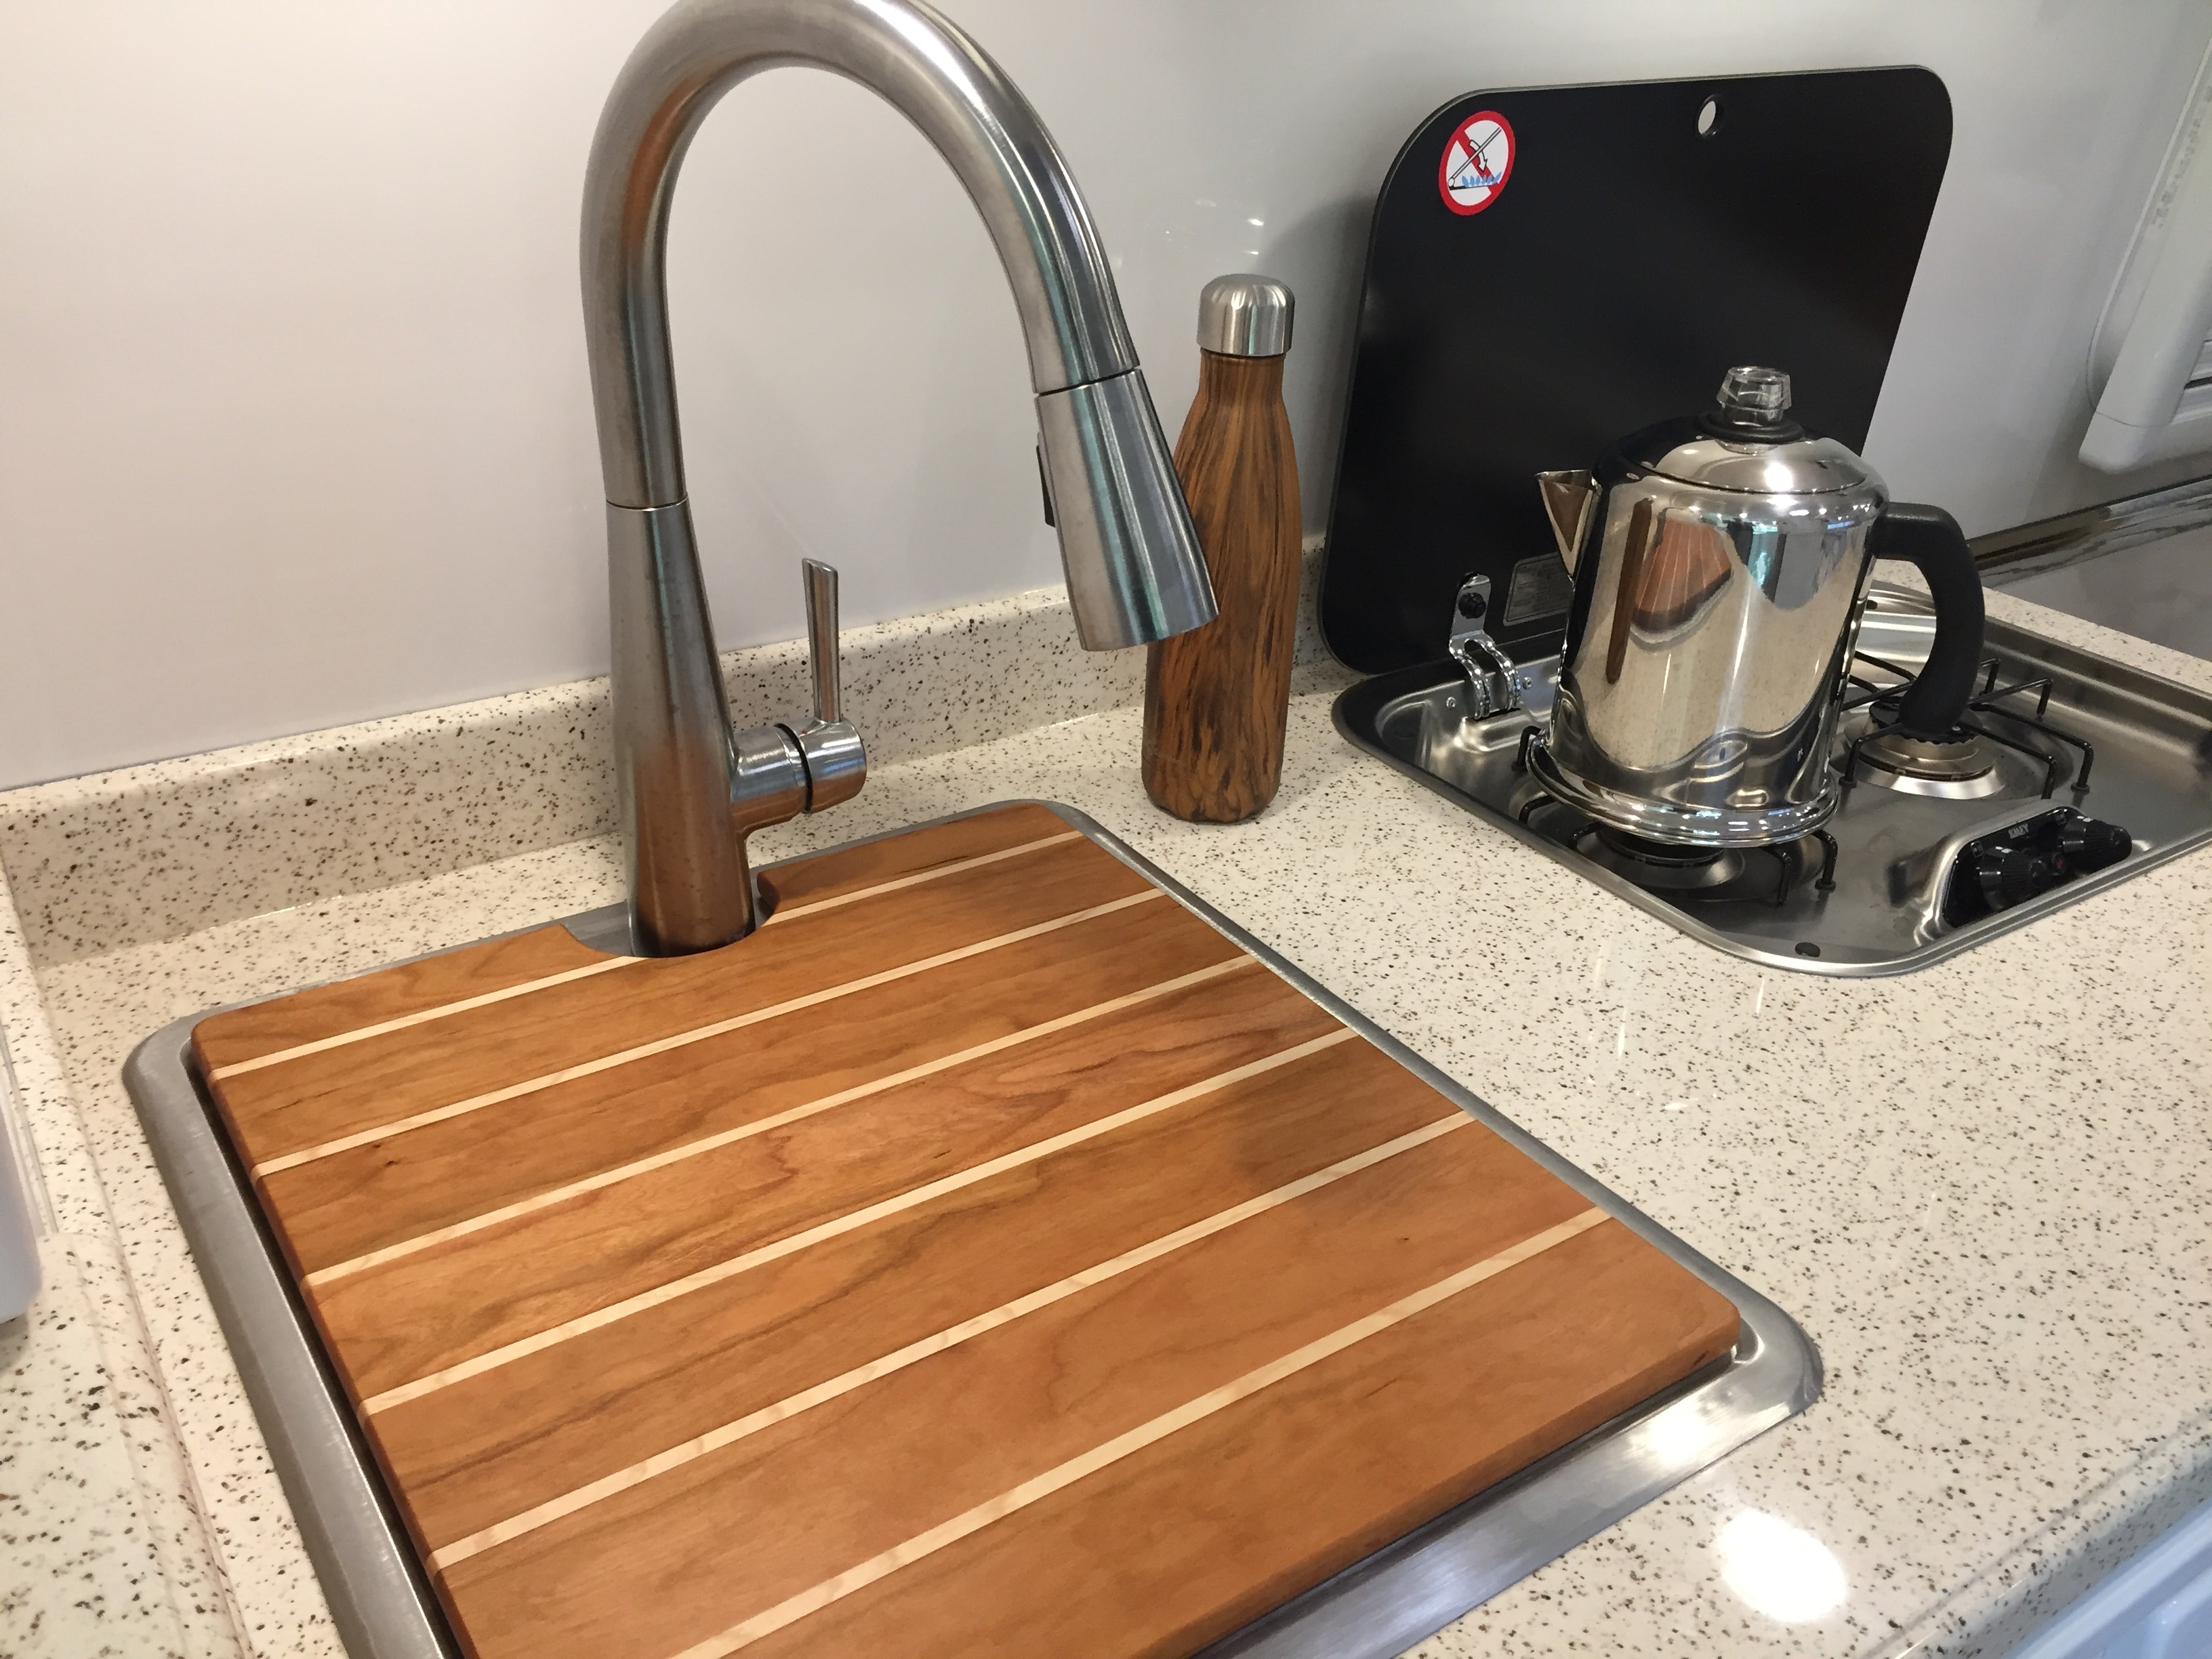
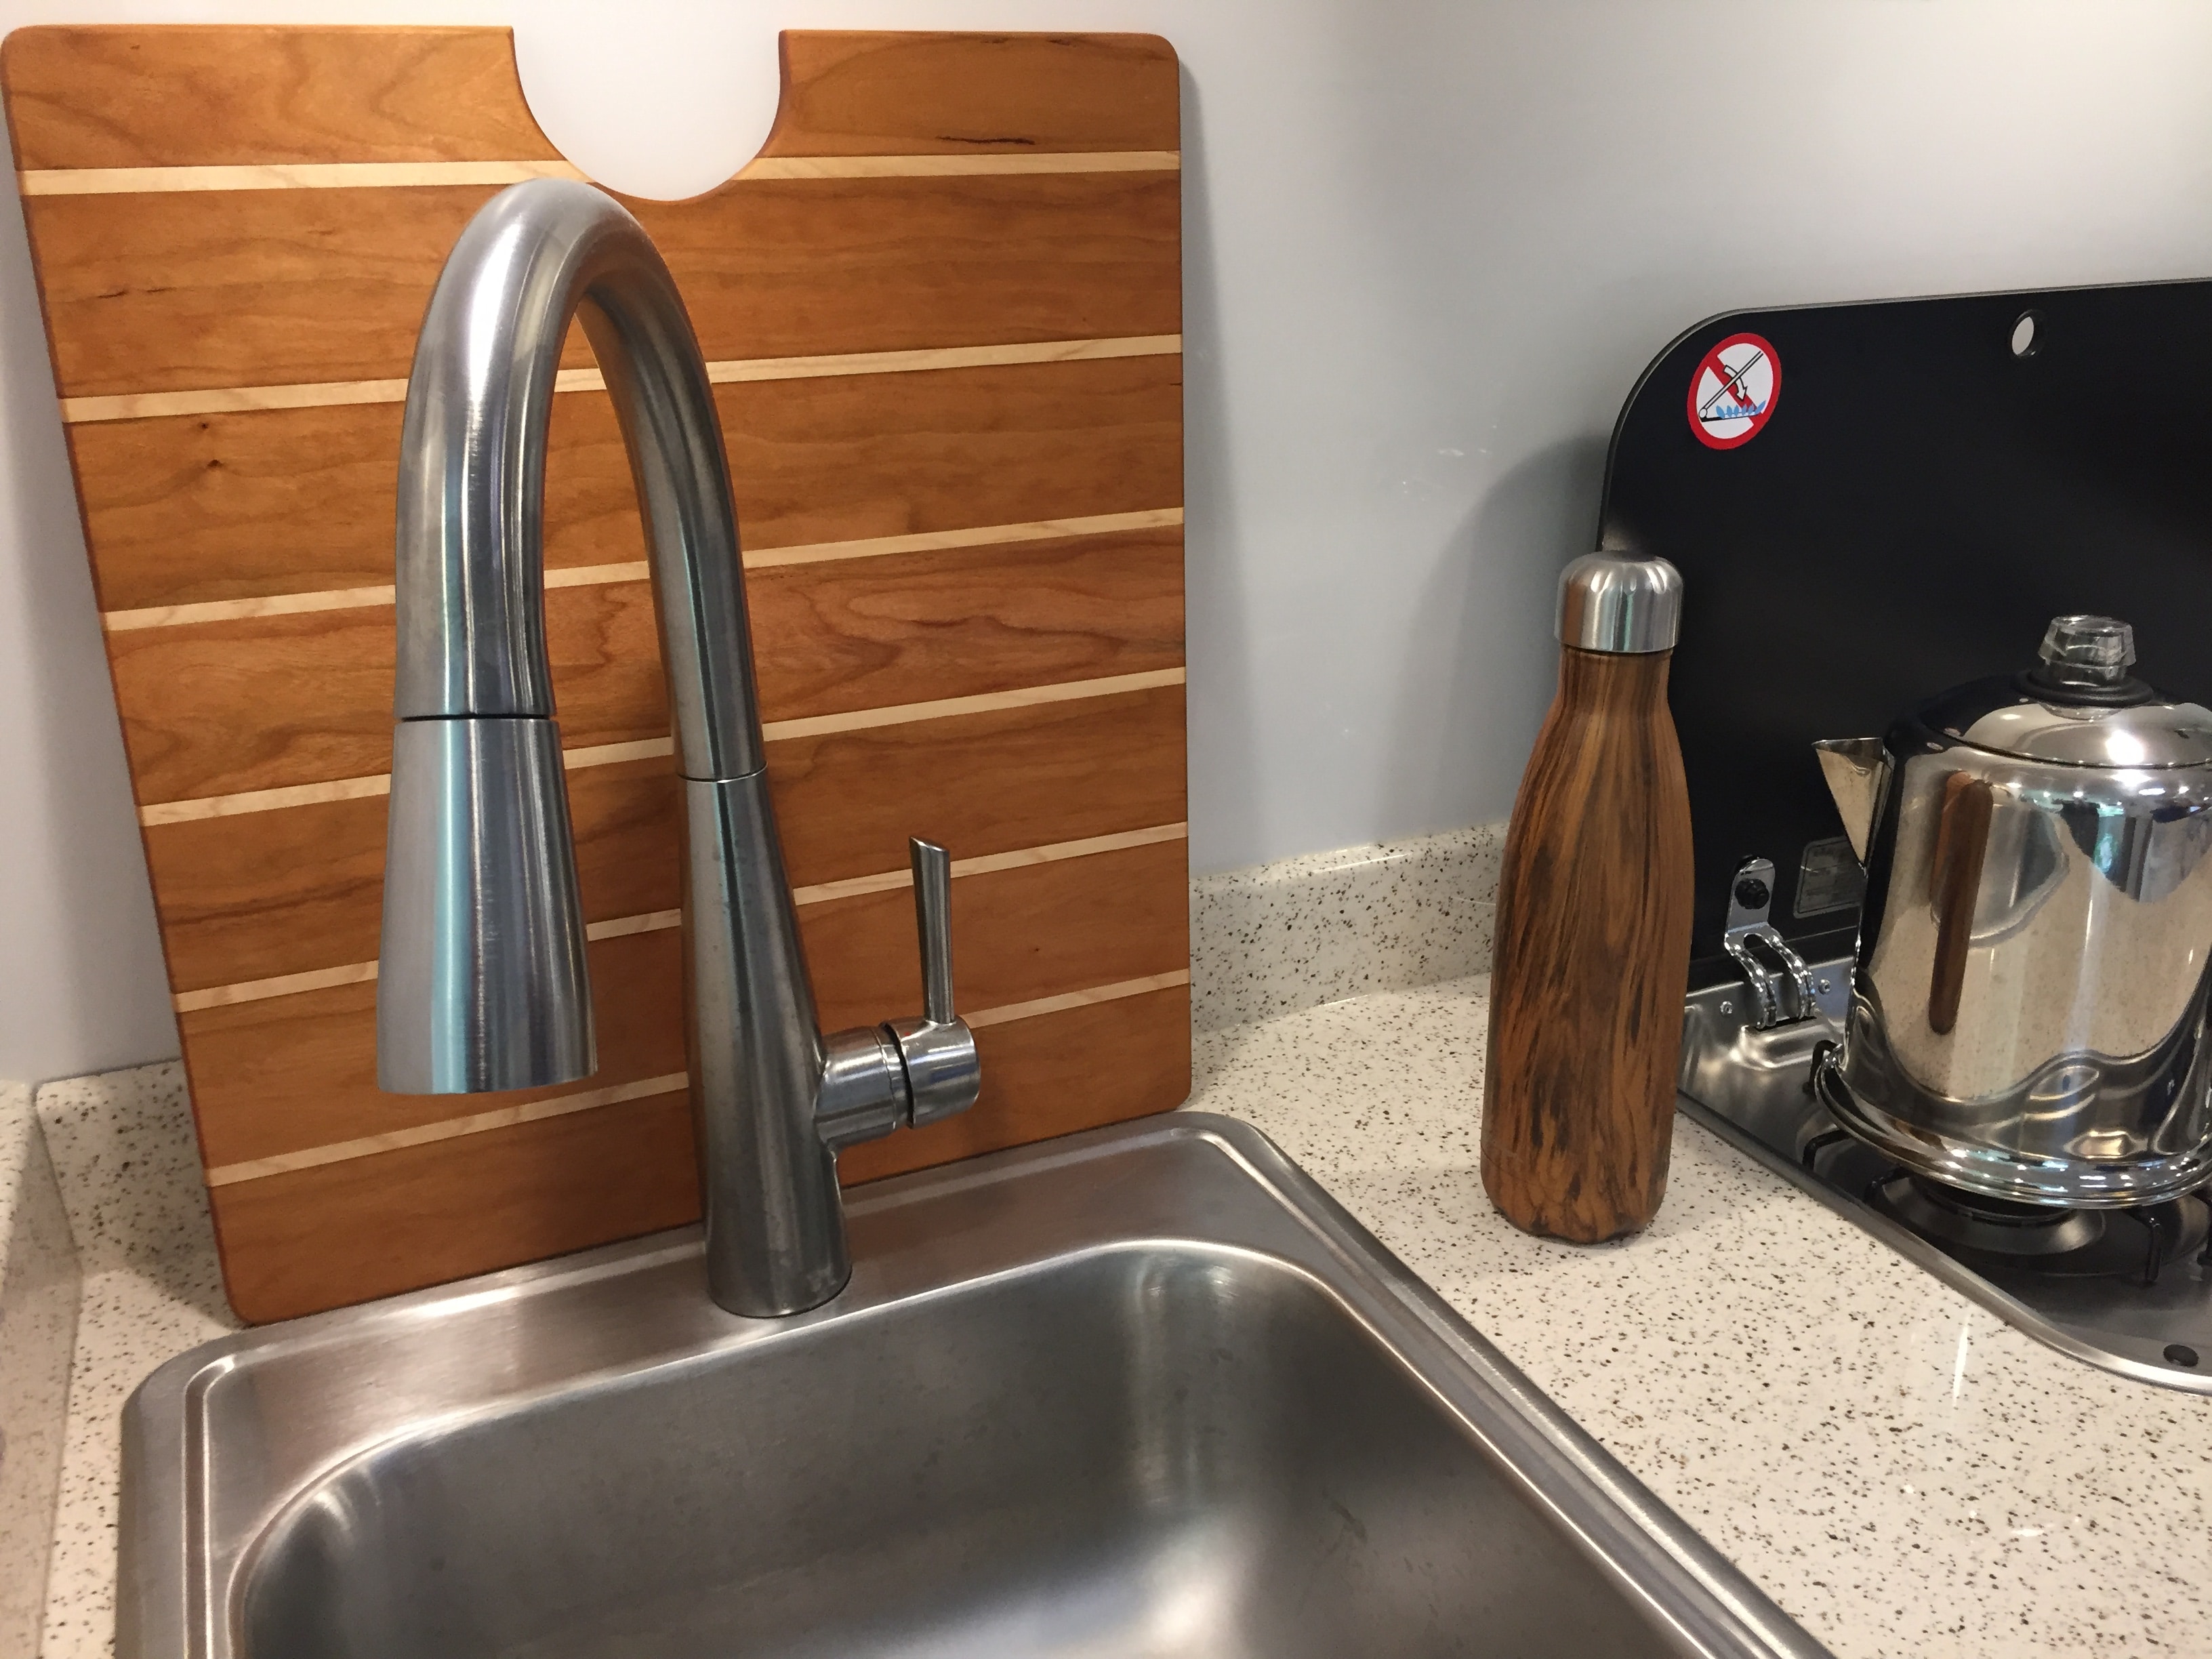
With "Roamy" home and in his storage place, I thought back to our first week of camping as we headed back to Florida from Hohenwald. We had wonderful times gazing out the windows at nature with morning coffee, dinners under the awning with fireflies and really peaceful nights of sleep. Being newly retired, I am still learning to slow down and relax so, this morning I decide to head out to the shop and build our first upgrade. So much for relaxing! Space being a premium, I want to give us some extra kitchen counter room by making a cutting board that would fit over the sink. In fitting out our Oliver we selected a flooring which emulates the deck of a sailboat. I wanted the cutting board to match that look. So with some quick measurements 2 5/16" for the darker strips and 1/4" for the lighter strips, I turned to the sink to get the overall dimensions inside of the raised aluminum band around the sink - 15" by 17". Looking over my wood supplies, I knew rock maple would be a great match for the narrow strips but the darker wood would be a challenge. I decide on American cherry knowing it would darken with age. Couple hours of milling, cutting, gluing, sanding and a few coats of mineral oil, my first upgrade was ready to use. Pictures below.
1 point
-
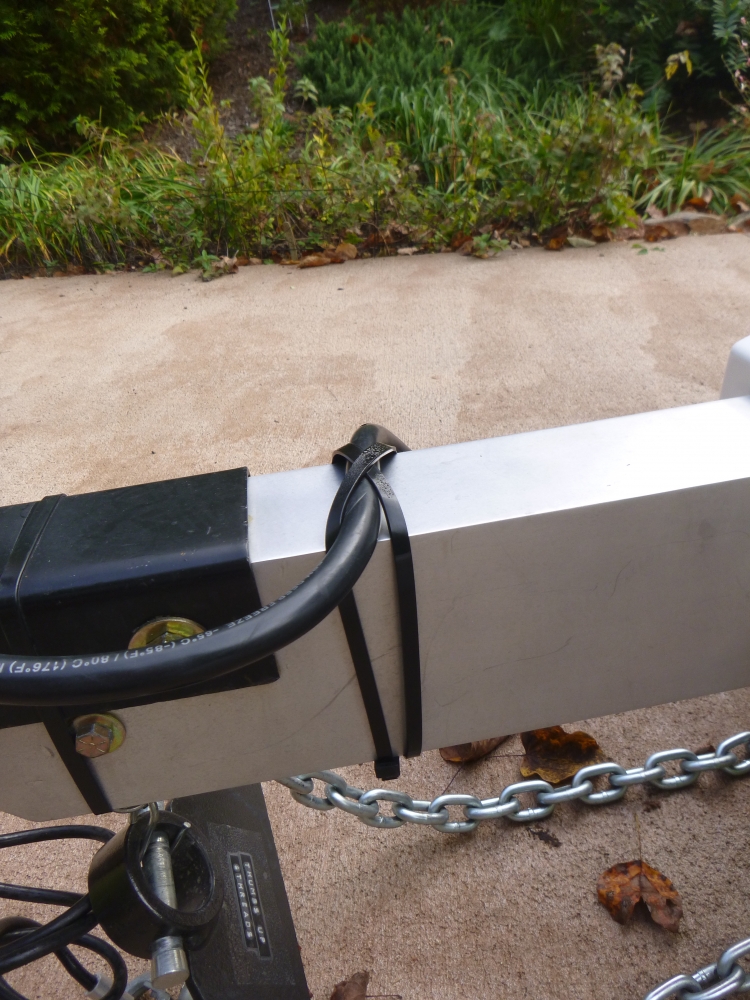
This doesn't get the chains totally off the ground but it does keep the "whale tail" off and cleaner than it would be otherwise AND it is simple (like me). Bill
1 point
-
If the Renology kit has it's own charge controller, then it shouldn't interfere with the Zamp system. The problem comes if you try to run unregulated panels through the Zamp charge controller, since you may exceed the amperage limit of the controller. Eventually, we're going to add a Victron BMV-700 battery monitor along with our other kit. It's only $145 and should work as a stand alone monitor with the Zamp system, so you might check it out.1 point
-
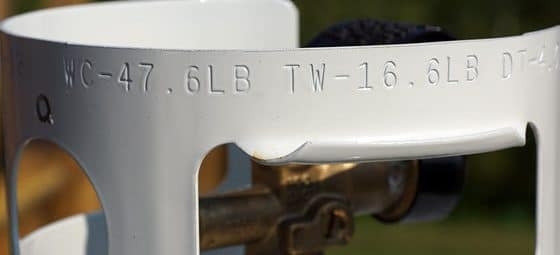
Propane weighs 4.2 pounds per gallon at 60* f. In the photo above the number on the left is the full weight. The number on the right is the empty weight. simple math tells us that the tank can hold 31 pounds of propane, or roughly 7.4 gallons of propane. A quick weigh on the bathroom scales will tell you exactly how much propane is in the tank.
1 point
-
Here is a recent blog posting that gives accurate measurement with a small scale: http://olivertraveltrailers.com/winter-camping-larry-mountainborn-harmon/1 point
-
Pour a cup of hot water down the tank. Where the condensation forms is the propane level. They do have stick on gauges (magnetic) available at camping stores that us same principle.1 point
-
Being 6' 5" that puts a whole new perspective on the shower mat project. Thanks Reed!1 point
-
George, When at the recent Oliver rally, the Truma representative gave a presentation on the Truma tankless water heater. After the presentation, I won a http://www.levelcheck.com/us/ propane level indicator by answering one of his questions proving I was paying attention. :) It works most of the time, you need a good clean contact between the probe and the tank. It works using ultrasound, and the light turns either green or red, and there's an audio sound that represents propane or no propane. There's a video on the site to show how to operate it. I think it's a little pricey at $70, but I'm happy to have won it. I see something similar on Amazon for $18 and another for $40. Search for "propane level indicator". )1 point
-
Nice job!1 point
-
If anyone is interested, the Breville Mini smart oven fits perfectly on the bottom of the pantry...if you get the urge to roast a chicken, just saying1 point
-
Overland, The dip tube that is in the picture is designed to go all the way to the bottom of the tank and sit against the bottom. It is designed with a bit of extra length to accommodate tanks that may be slightly different from the normal overall depth by dropping all the way to the bottom in any of them. If you look closely, you'll see the end is capped. This particular style sweat cap was picked because it is flat on the end and has rounded smooth corners. In other words, it is very kind and won't dig into the bottom of the tank. All of the water enters around the perimeter of the cap, not the end of the pipe. The cross-drilled pickup holes were drilled tangent to the inside surface of the cap. If you add the diameter of the pickup holes to the thickness of the cap wall, it comes to just under 1/4". The top of the holes are 1/4" or less, from the inside surface of the tank. This arrangement will pick up water down to about 1/4" deep and do it consistantly in any tank it is installed in. As mentioned earlier, mine began to get some air at 6% tank level, but ran until the gauge read 0%. At that point it was sputtering, but still drawing enough water to drink, but not to shower. There are four holes. The surface area of all four holes added together equals about 1.7 times the surface area of the inside of a PEX fitting. Allowing for the vena contracta of the flow through those four holes, the restriction is still less than each PEX fitting used in the rest of the system. I also chose to install brass fittings and a brass PEX ball valve. These have slightly larger holes through them than the factory plastic fittings. So, the pickup holes have no affect on the flow rate compared to the stock pickup. But if the holes were bigger, we could not get as much water out of the tank. This was the only way I could think of that had a consistent pickup depth, could be installed in any tank and always end up with that same depth (with no measuring or possible installation error). It is totally accessible and serviceable, even with the water tank full. It does not affect the original pickup fitting, or the original tank drain piping. And it ties into the existing piping at locations that are accessible, which makes the work much easier than it might have been. If debris enters the tank at some point and clogs one of the pickup holes, it will still work well. If more than one hole gets clogged and a restriction is noticed, the dip tube assembly can easily be removed, without draining the tank, cleaned and re-installed. You cannot do this with the stock pickup tube as originally built. BTW, any restriction that reduced the flow would put no extra load on the pump. They are designed to run fine with a wide range of suction head pressures and they are just diaphragm pumps, which are very tolerant of flow restrictions. These pumps can run dry or at full pressure constantly without damage. They can draw from full or nearly empty tanks without damage. The first thing you might notice with a clog is a reduced flow at the faucet with the pump running. This is the same thing you might notice with a clogged aerator in the faucet, it's the same effect as when the faucet is only partially open. Until my system started drawing air at about 6%, I could not detect a difference in the pump sound or the flow rate compared to before the modification. Then it pumped the air and the water to varying ratios until the tank was pretty much empty. This kind of tank, with wide and shallow dimensions, requires a non standard kind of pickup. It won't get every last drop, but I think it's the best we can do. Having tanks of this shape is a real advantage because they take up so little room, are protected from freezing and are not outside where they could get damaged. Fortunately, the corner of the tank and its piping are right there below the cover under the bed. In the past, I wanted to do some work on the water tank in my Fleetwood, but found it was nearly impossible. This is relatively easy and I was inside instead of underneath. The biggest problem here is making the emotional leap of deciding you are going to make a hole in the tank and then spin welding on a fitting. Once that hurdle is over it is just a matter of doing some PEX and fittings. I think the future ones will have a larger tank fitting bushed down to the 3/4" dip tube assembly. This will help with screwing the fittings together and give a larger hole to vacuum out the tank if needed.1 point


-
Recent Achievements
-


")


")


")
