Leaderboard



Popular Content
Showing content with the highest reputation on 03/22/2018 in all areas
-
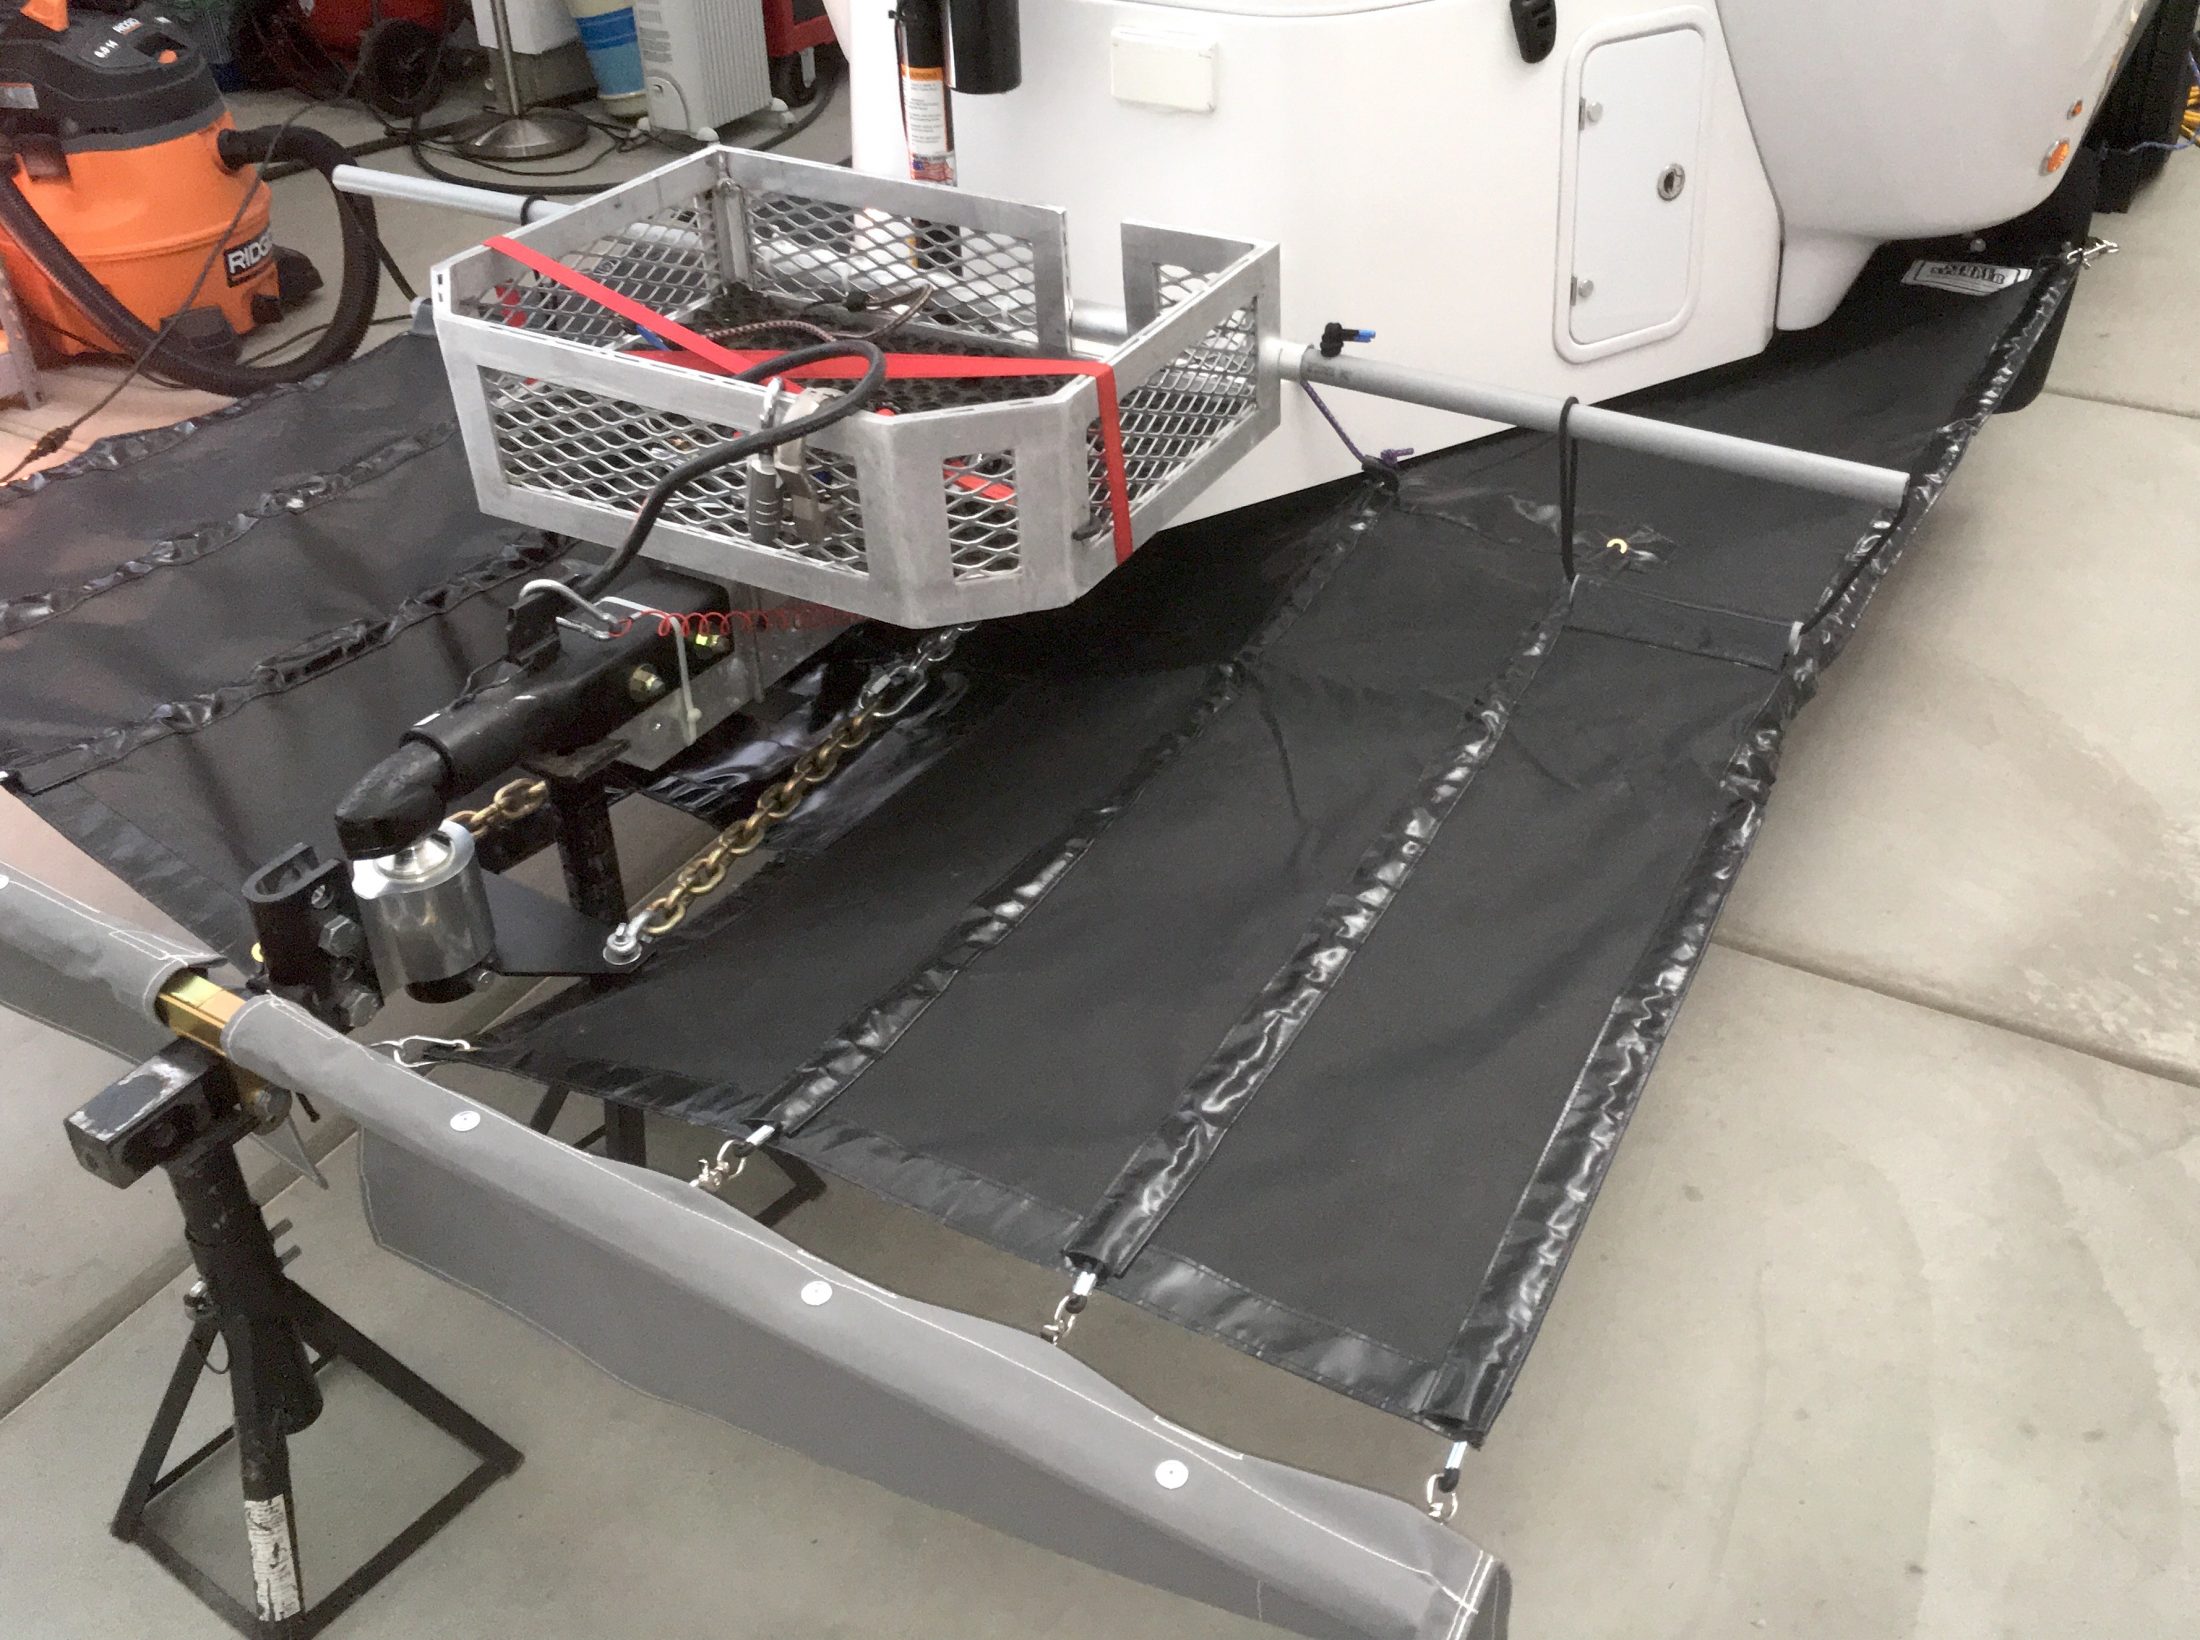
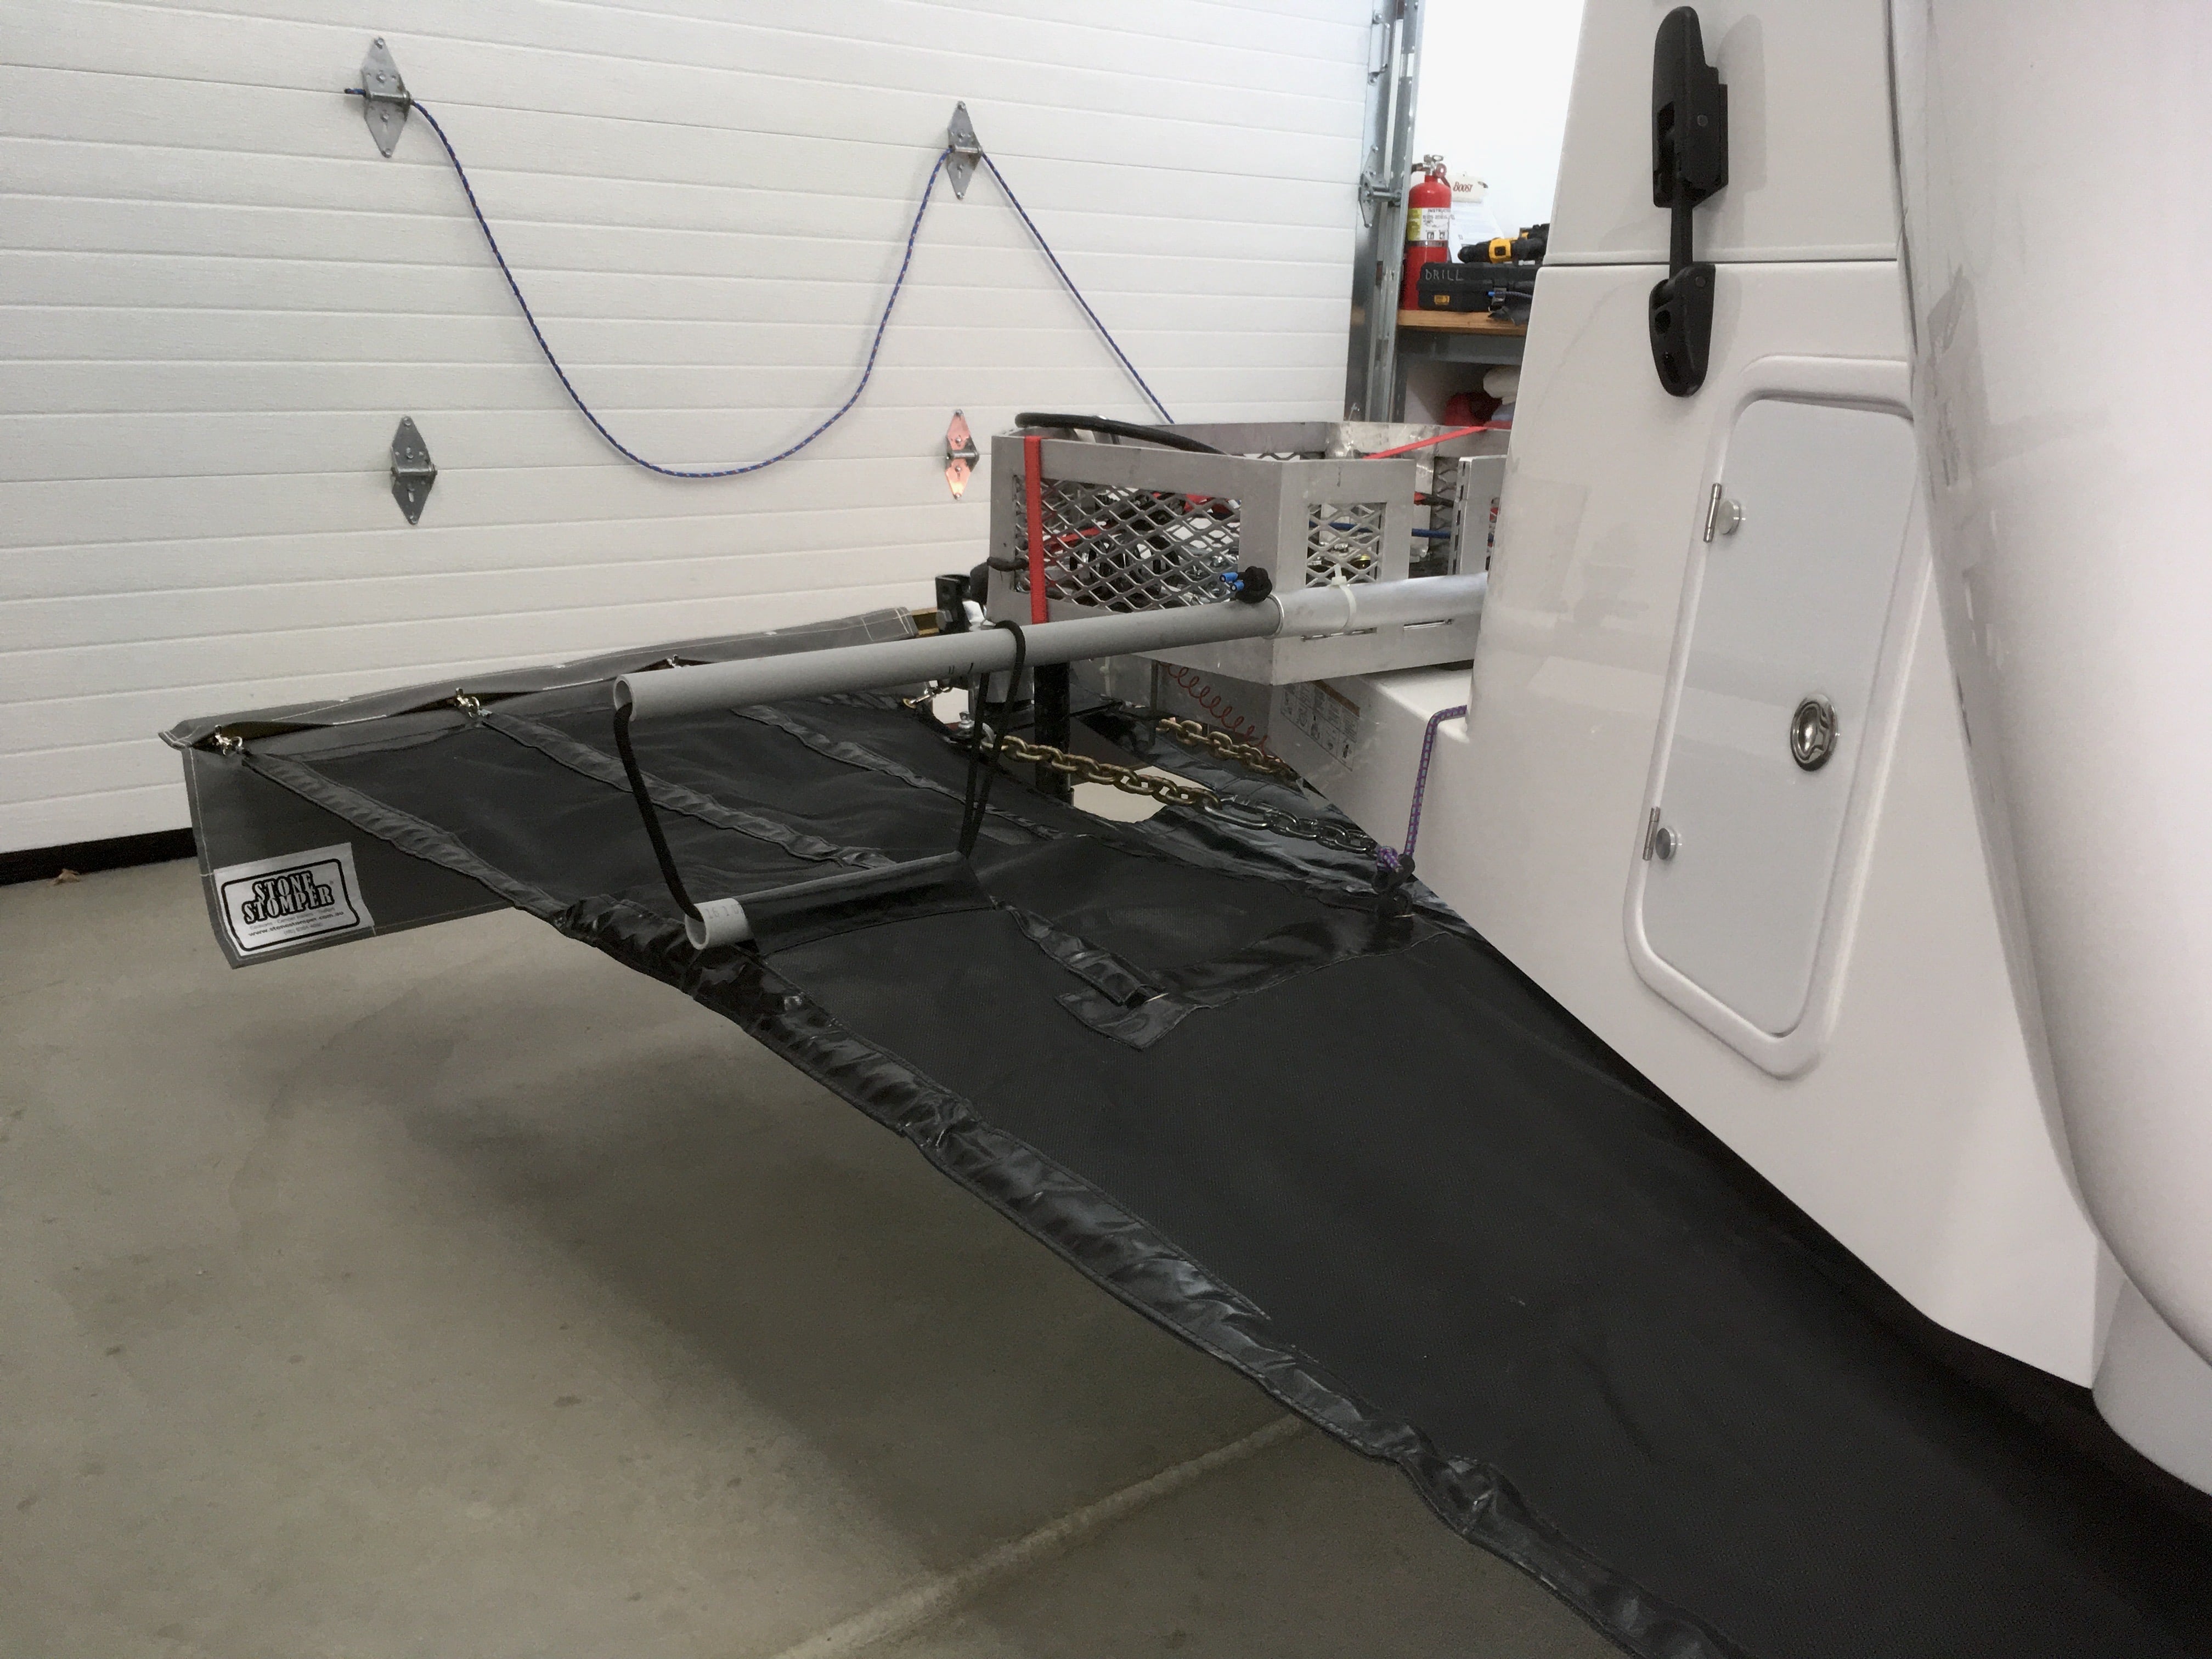
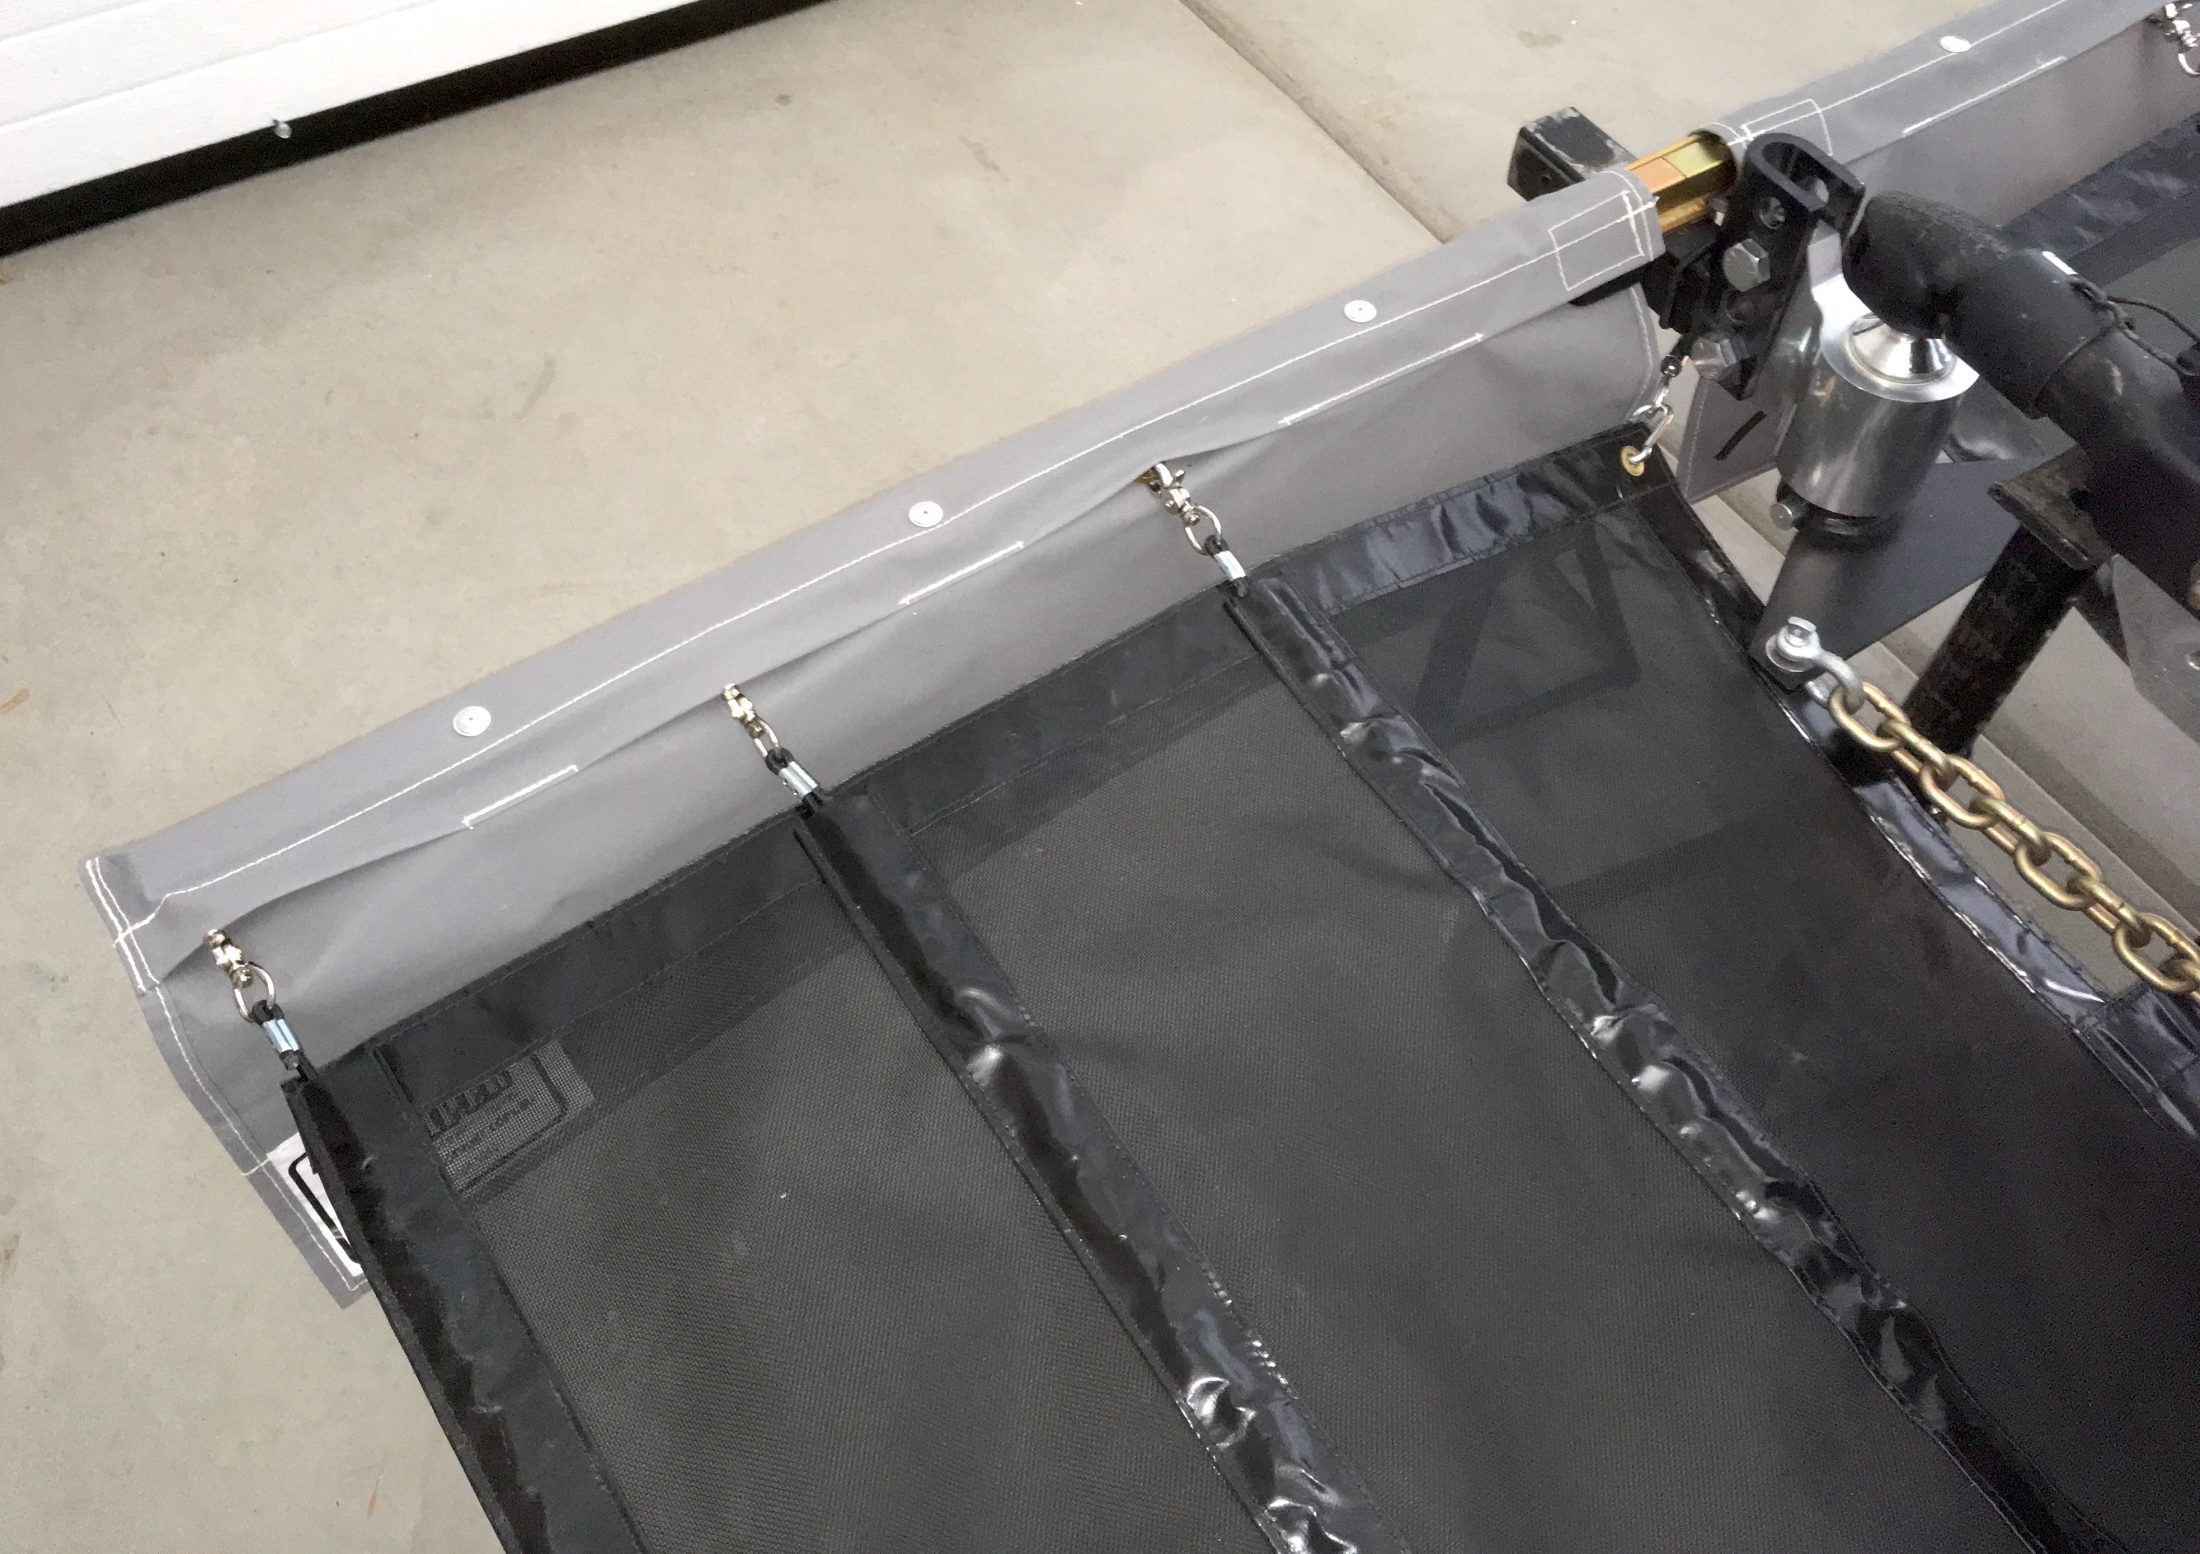
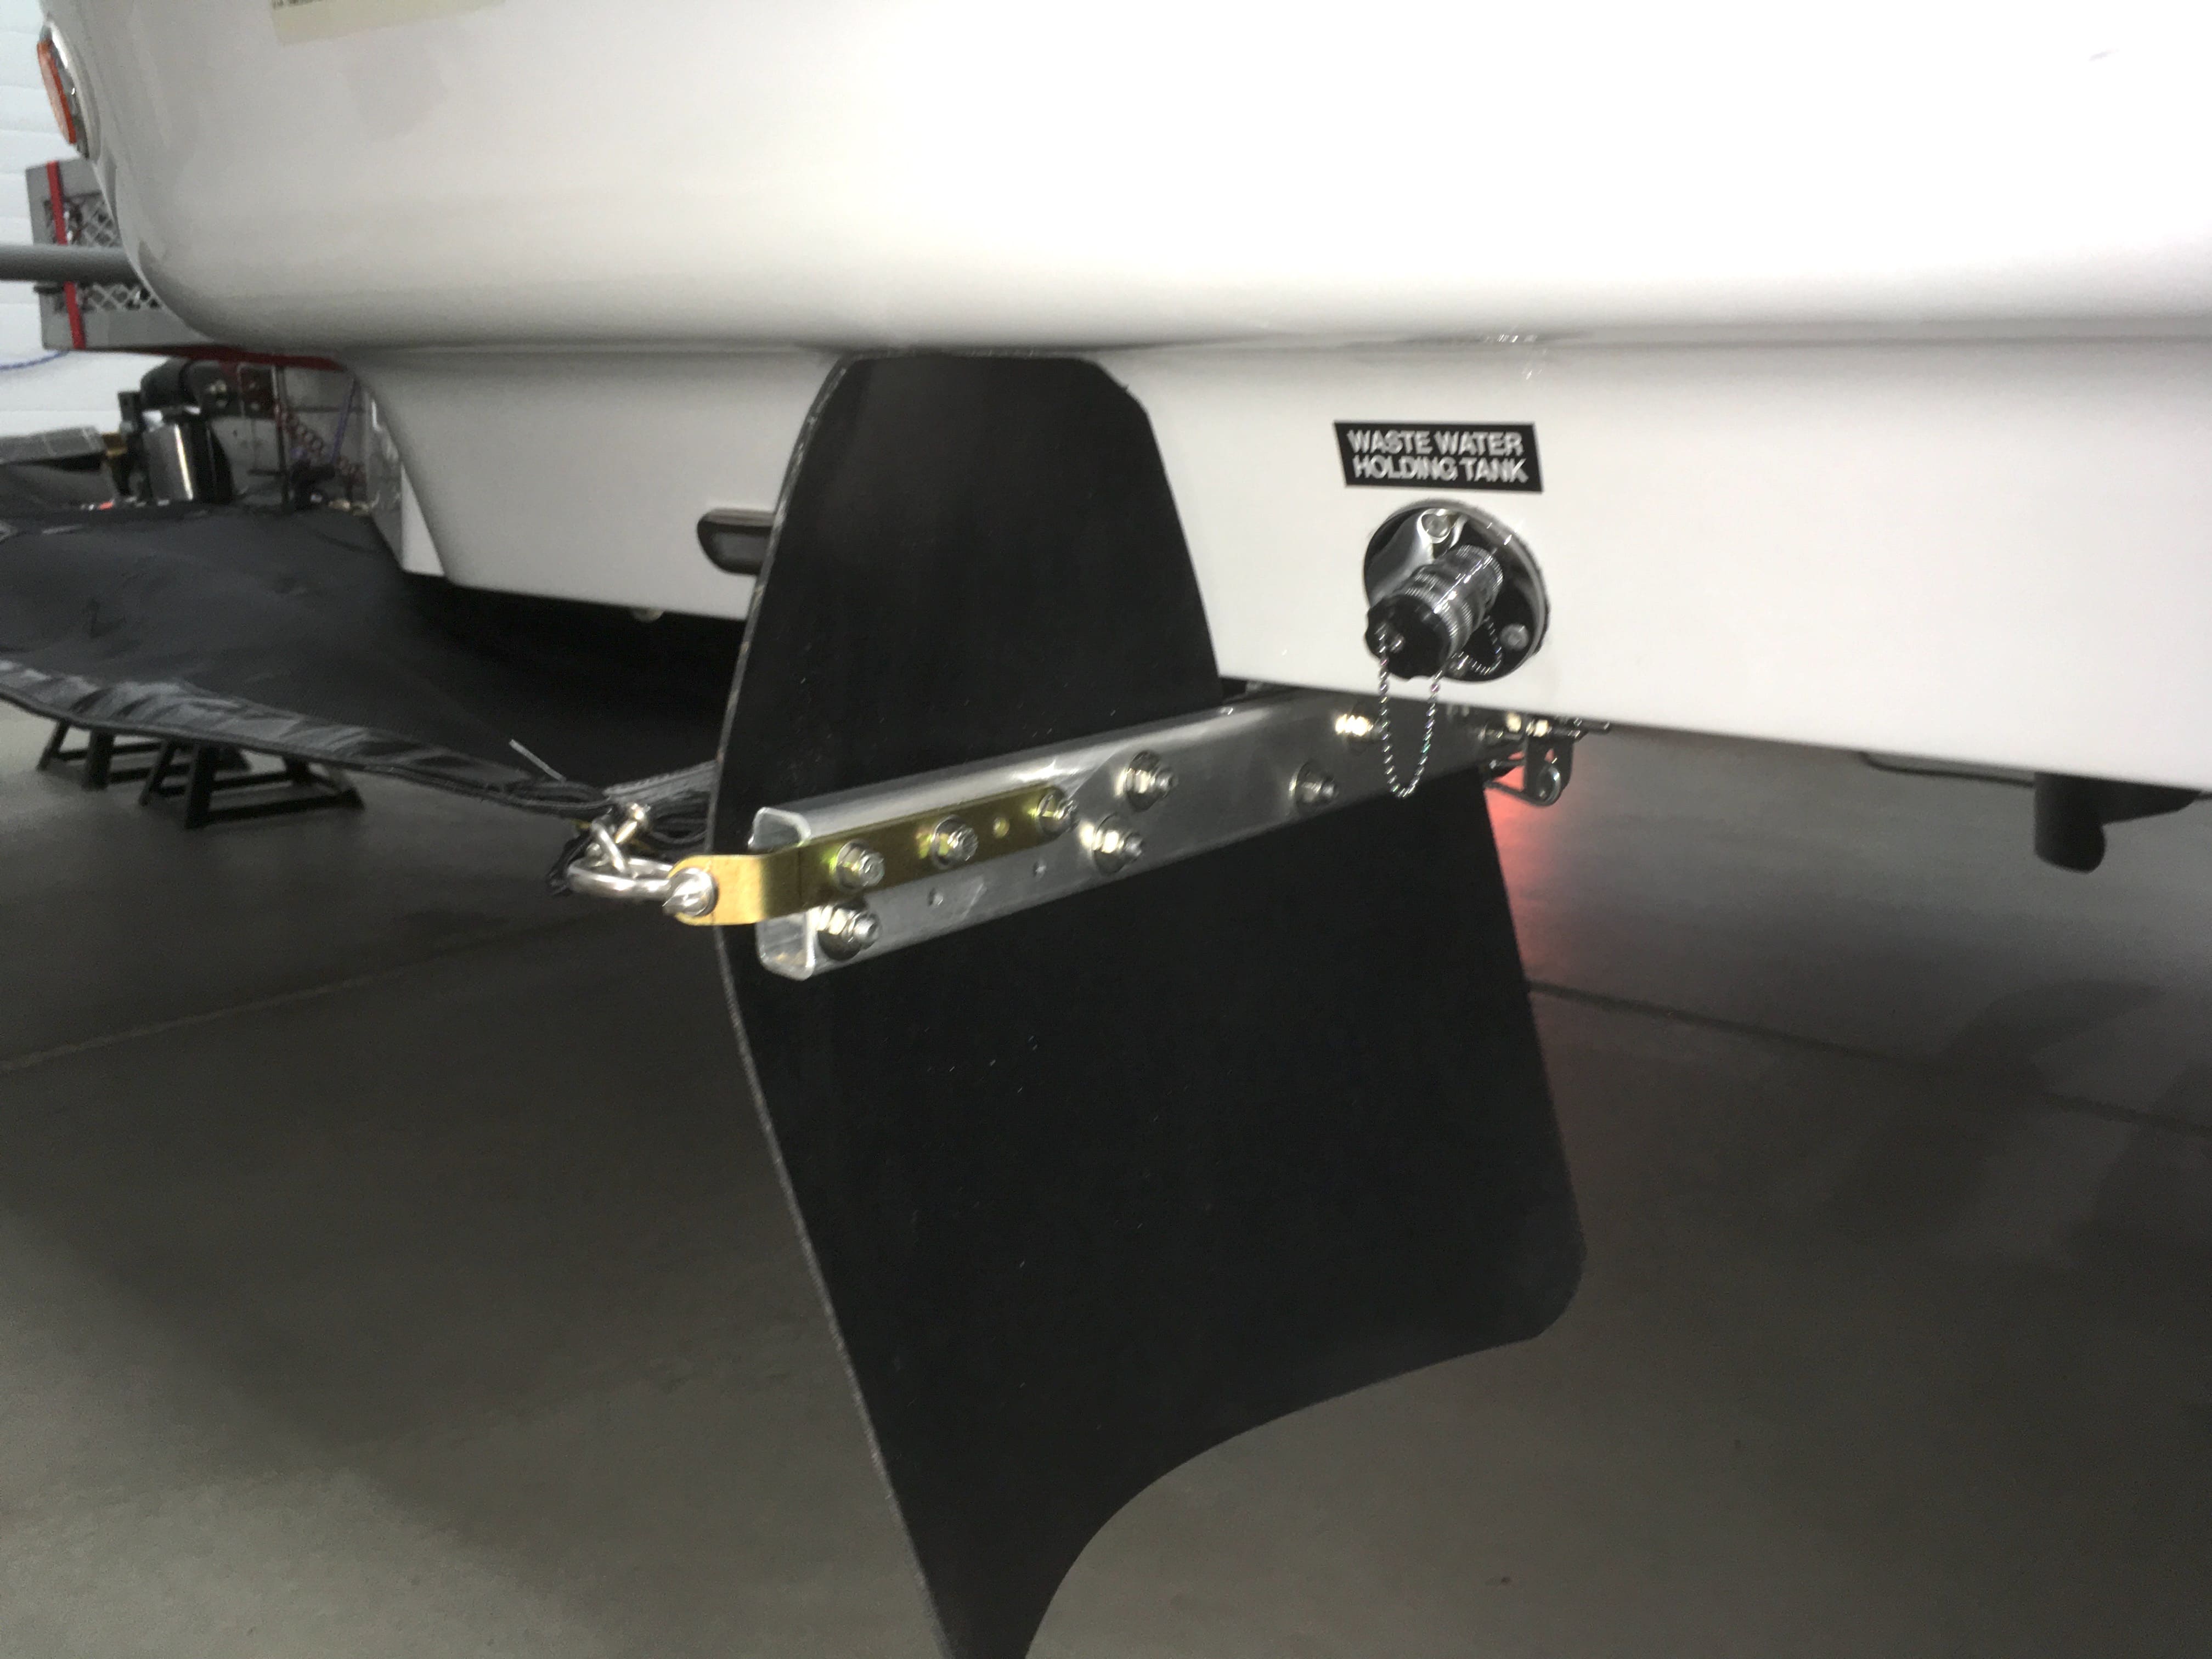
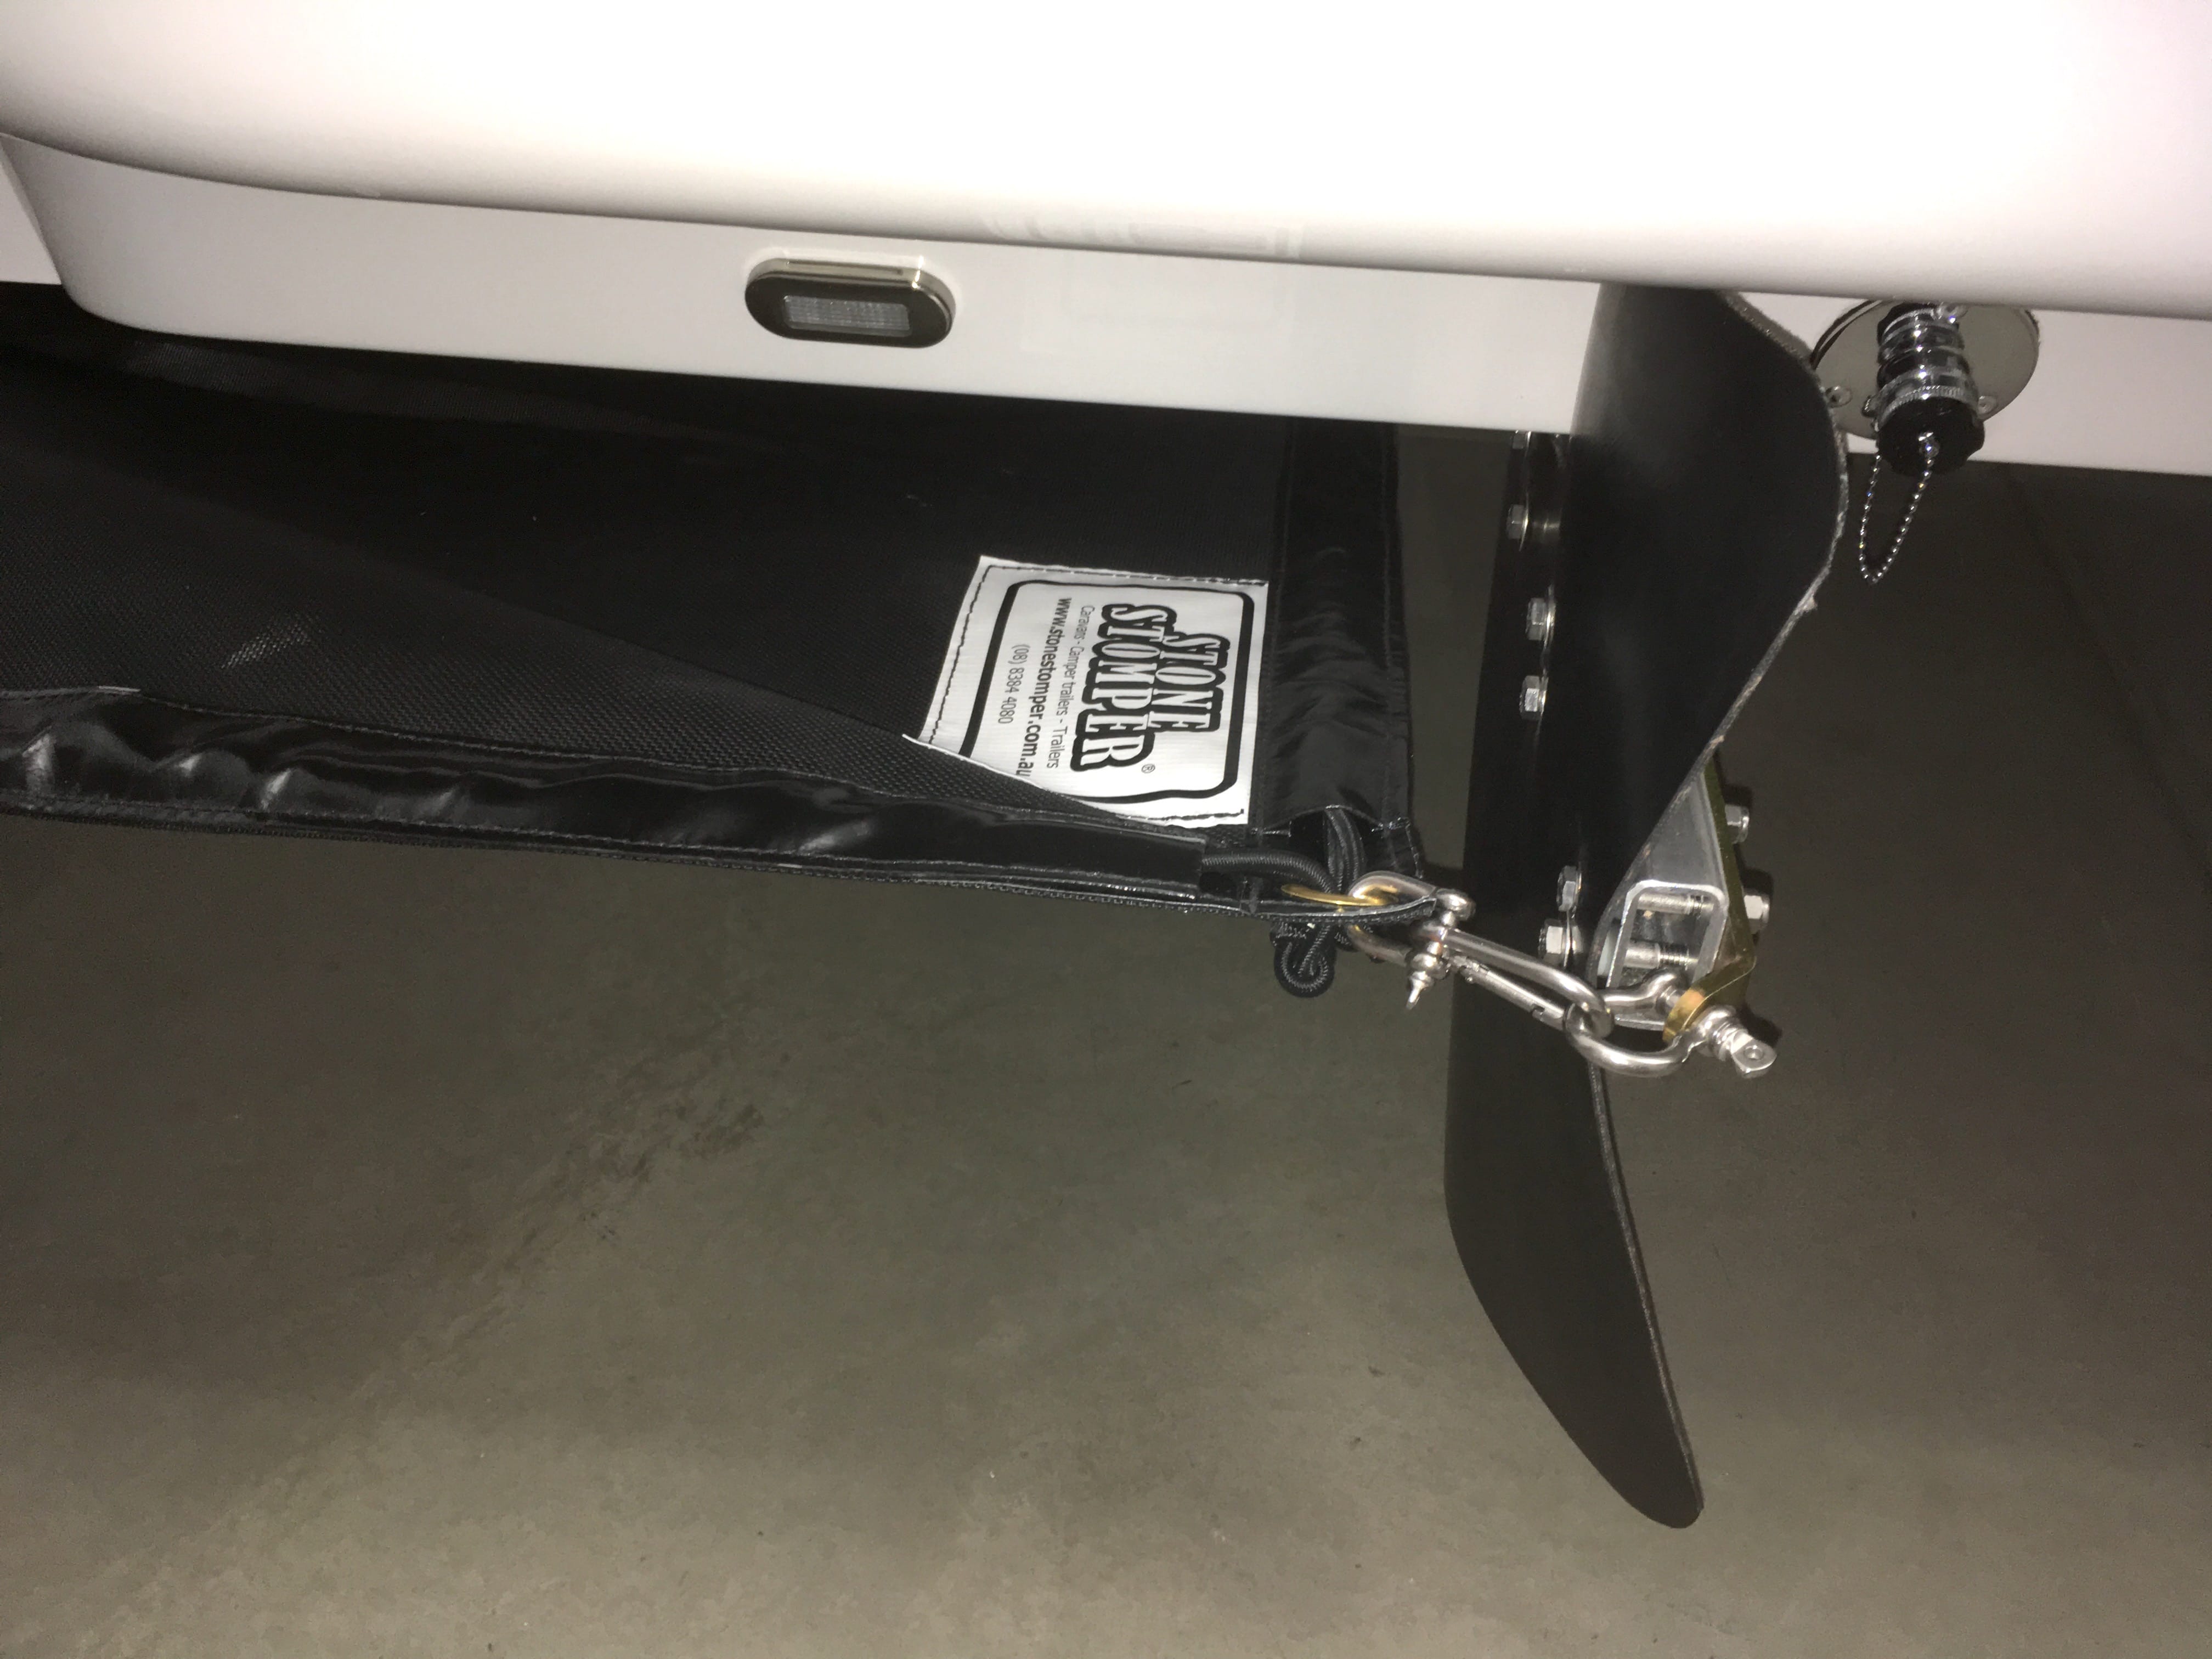
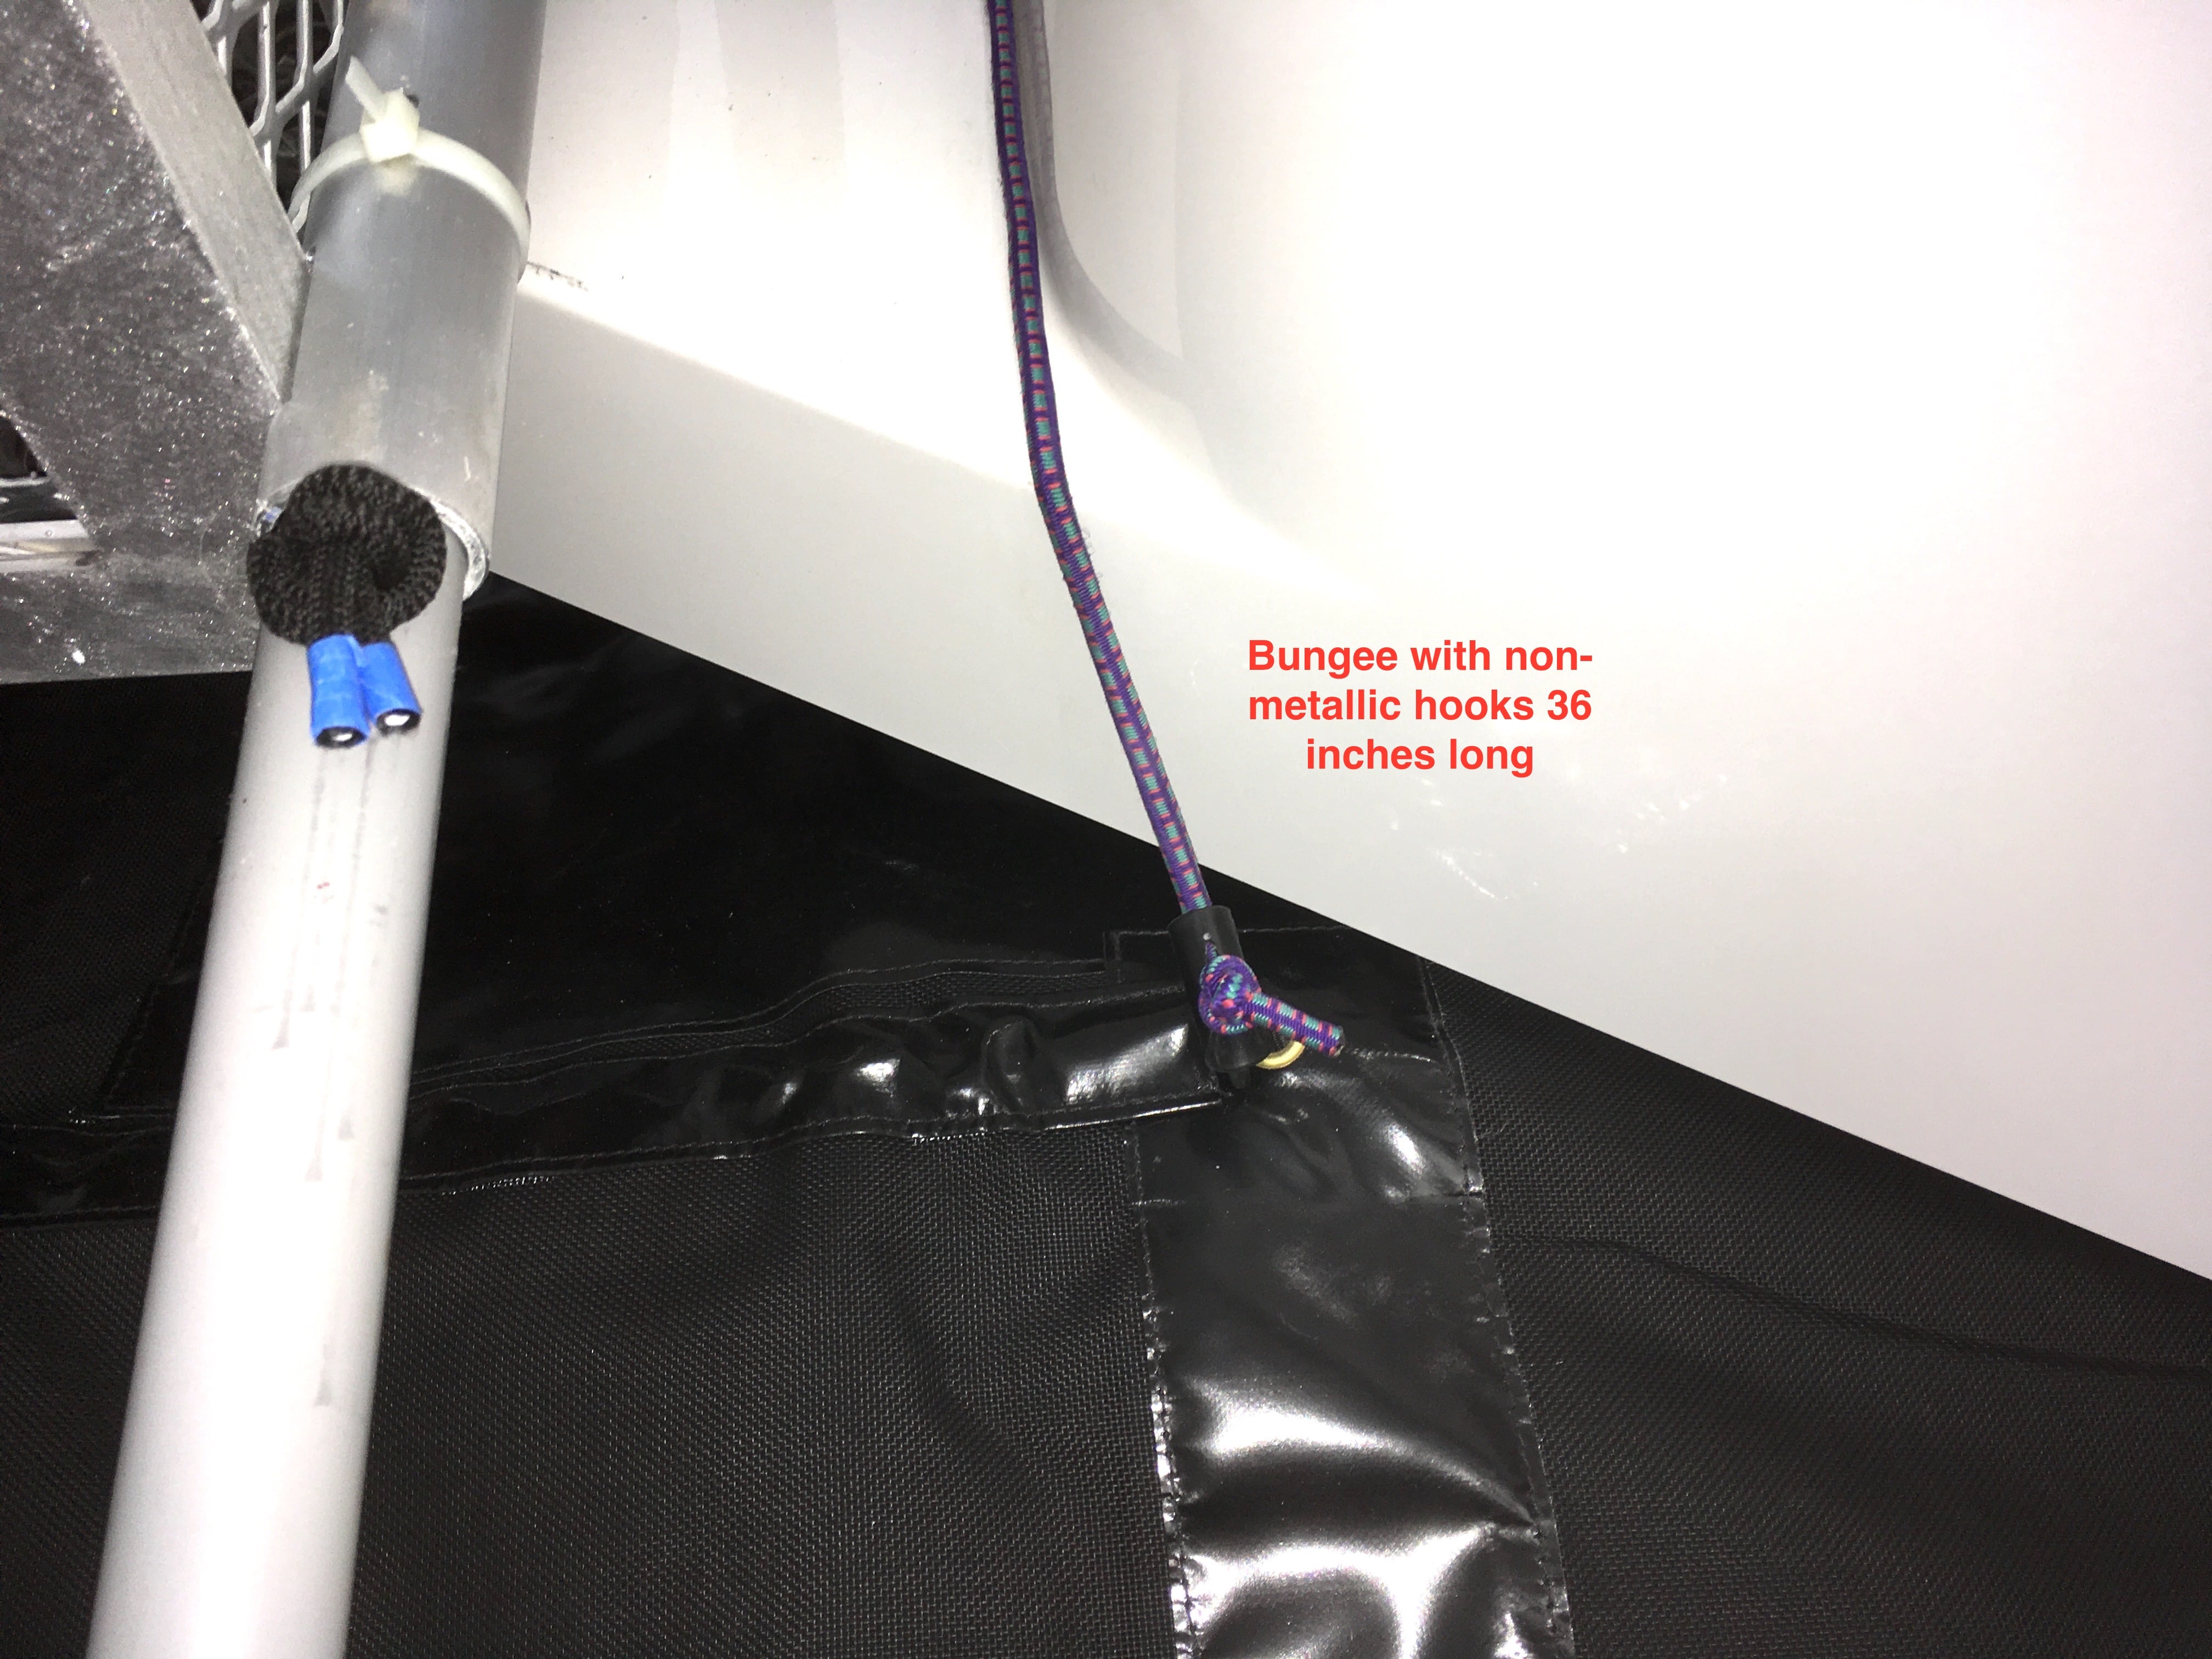
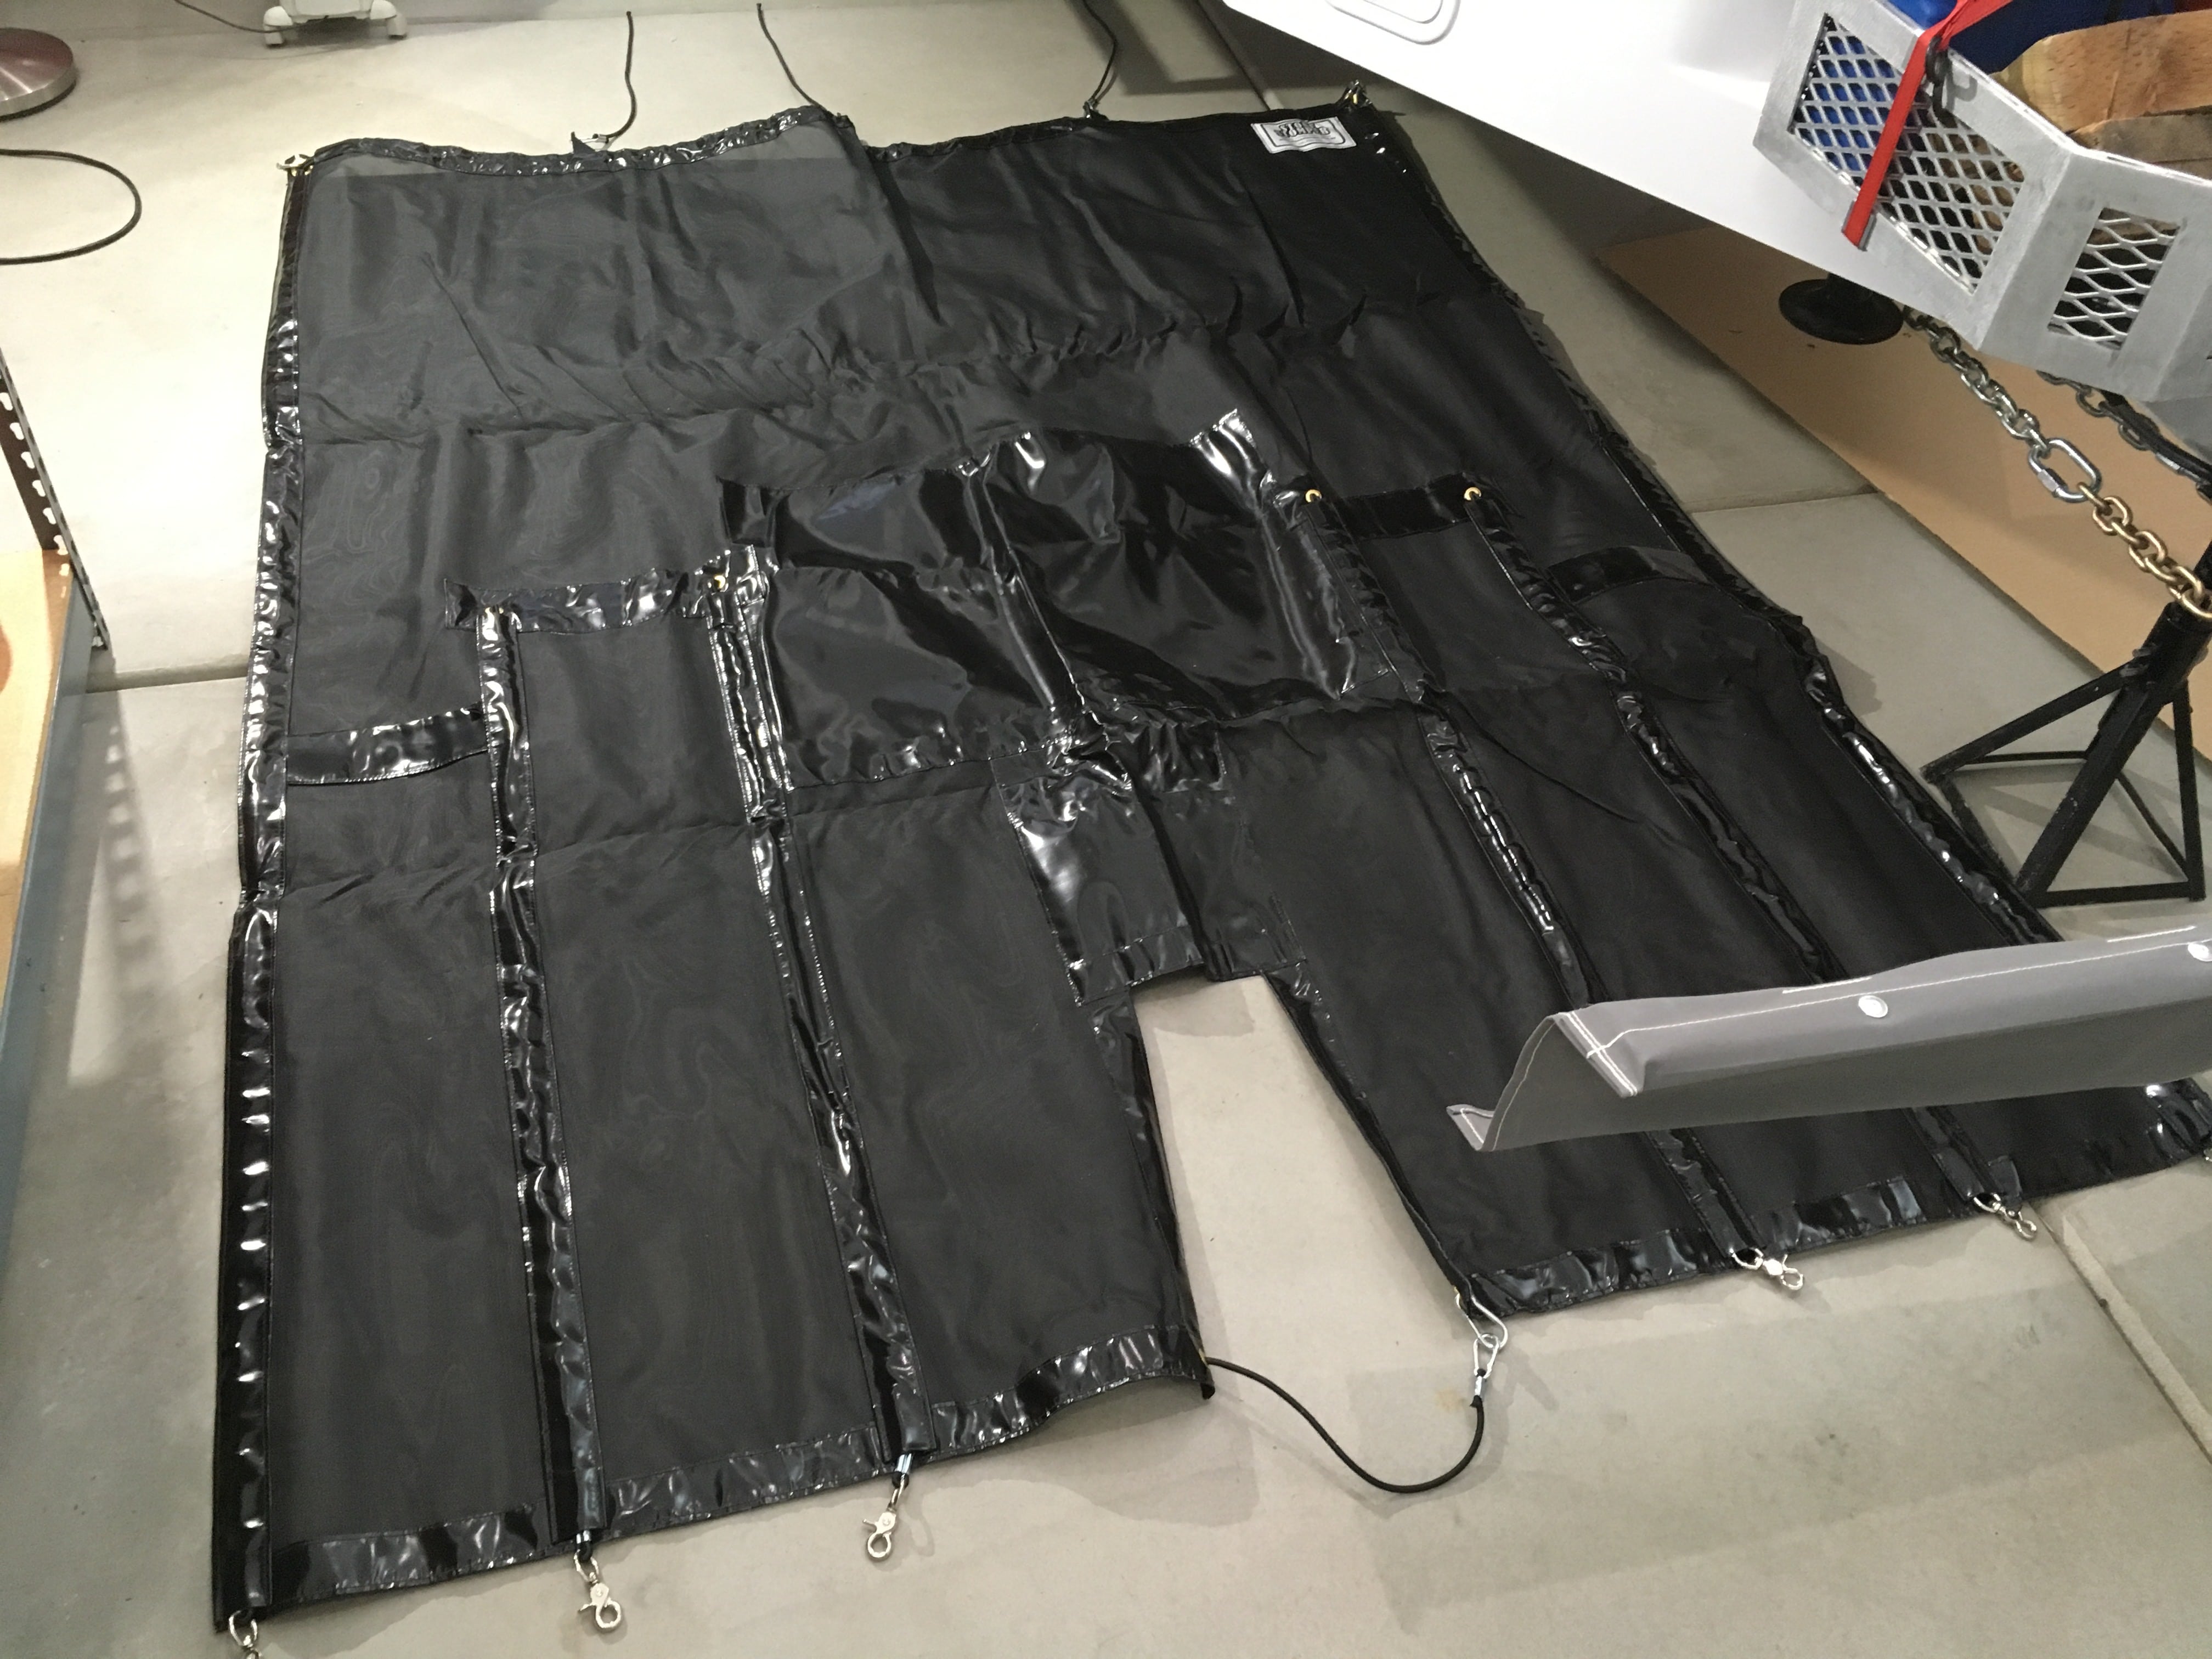
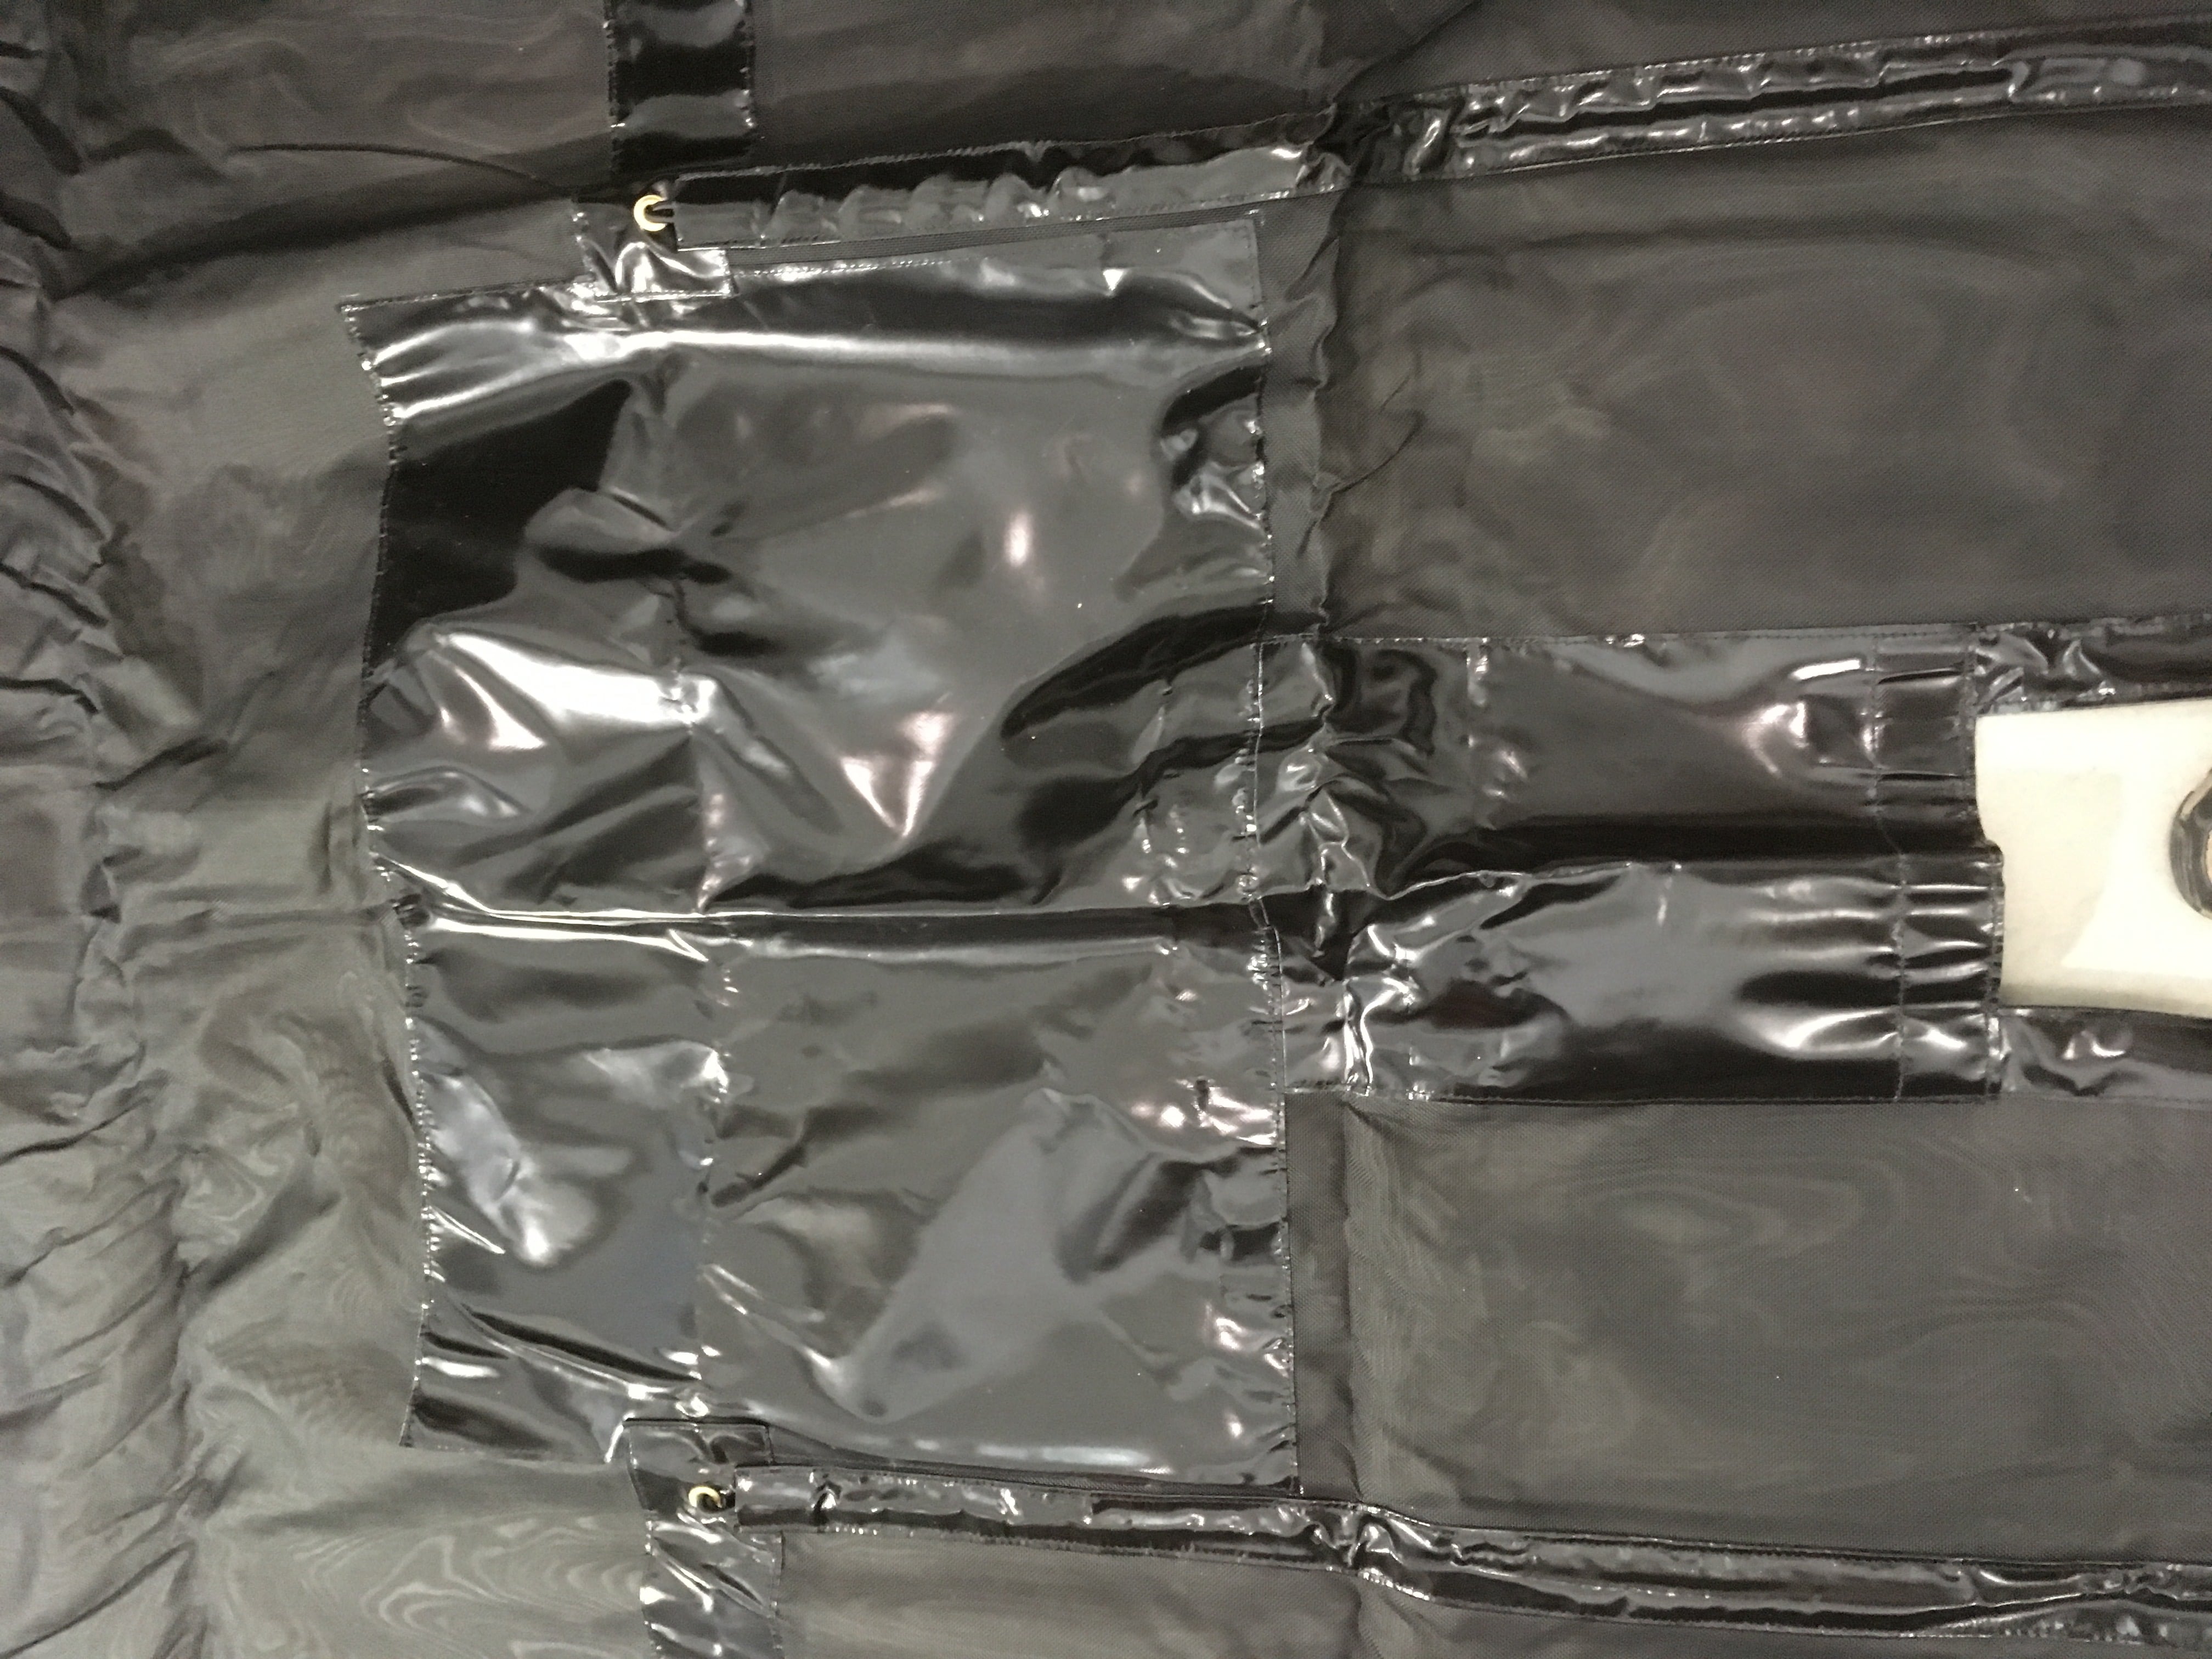
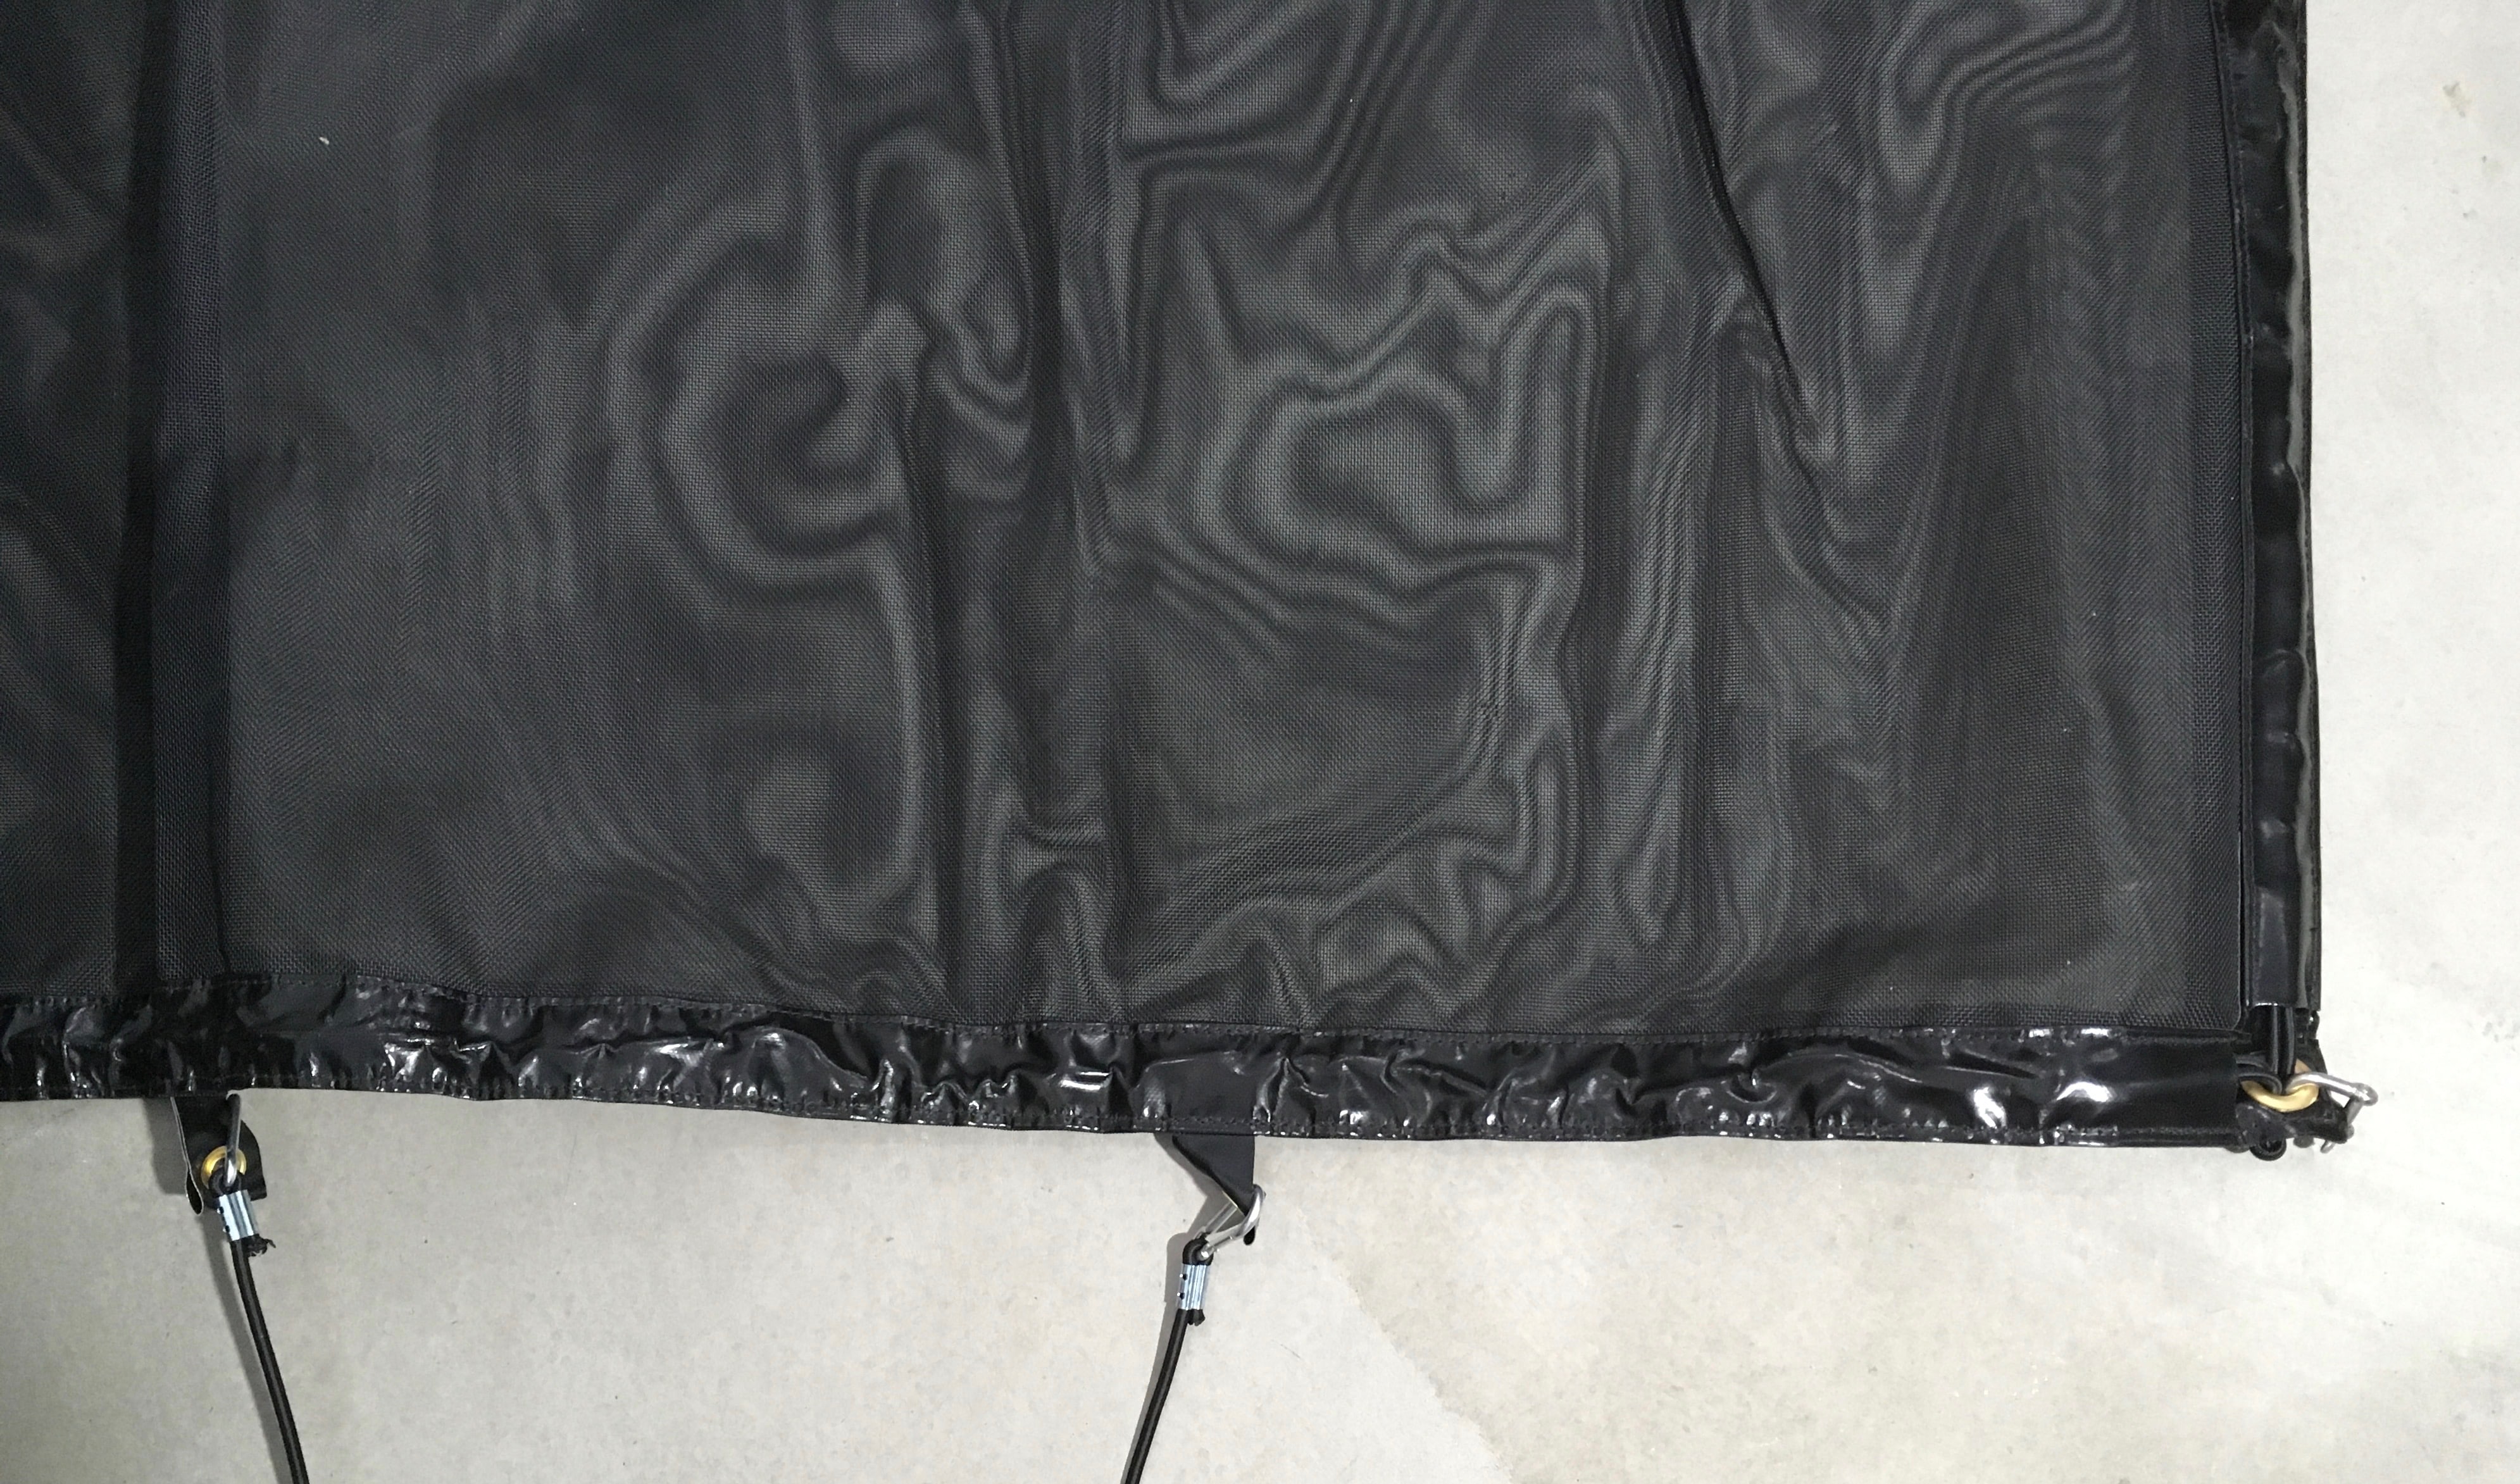
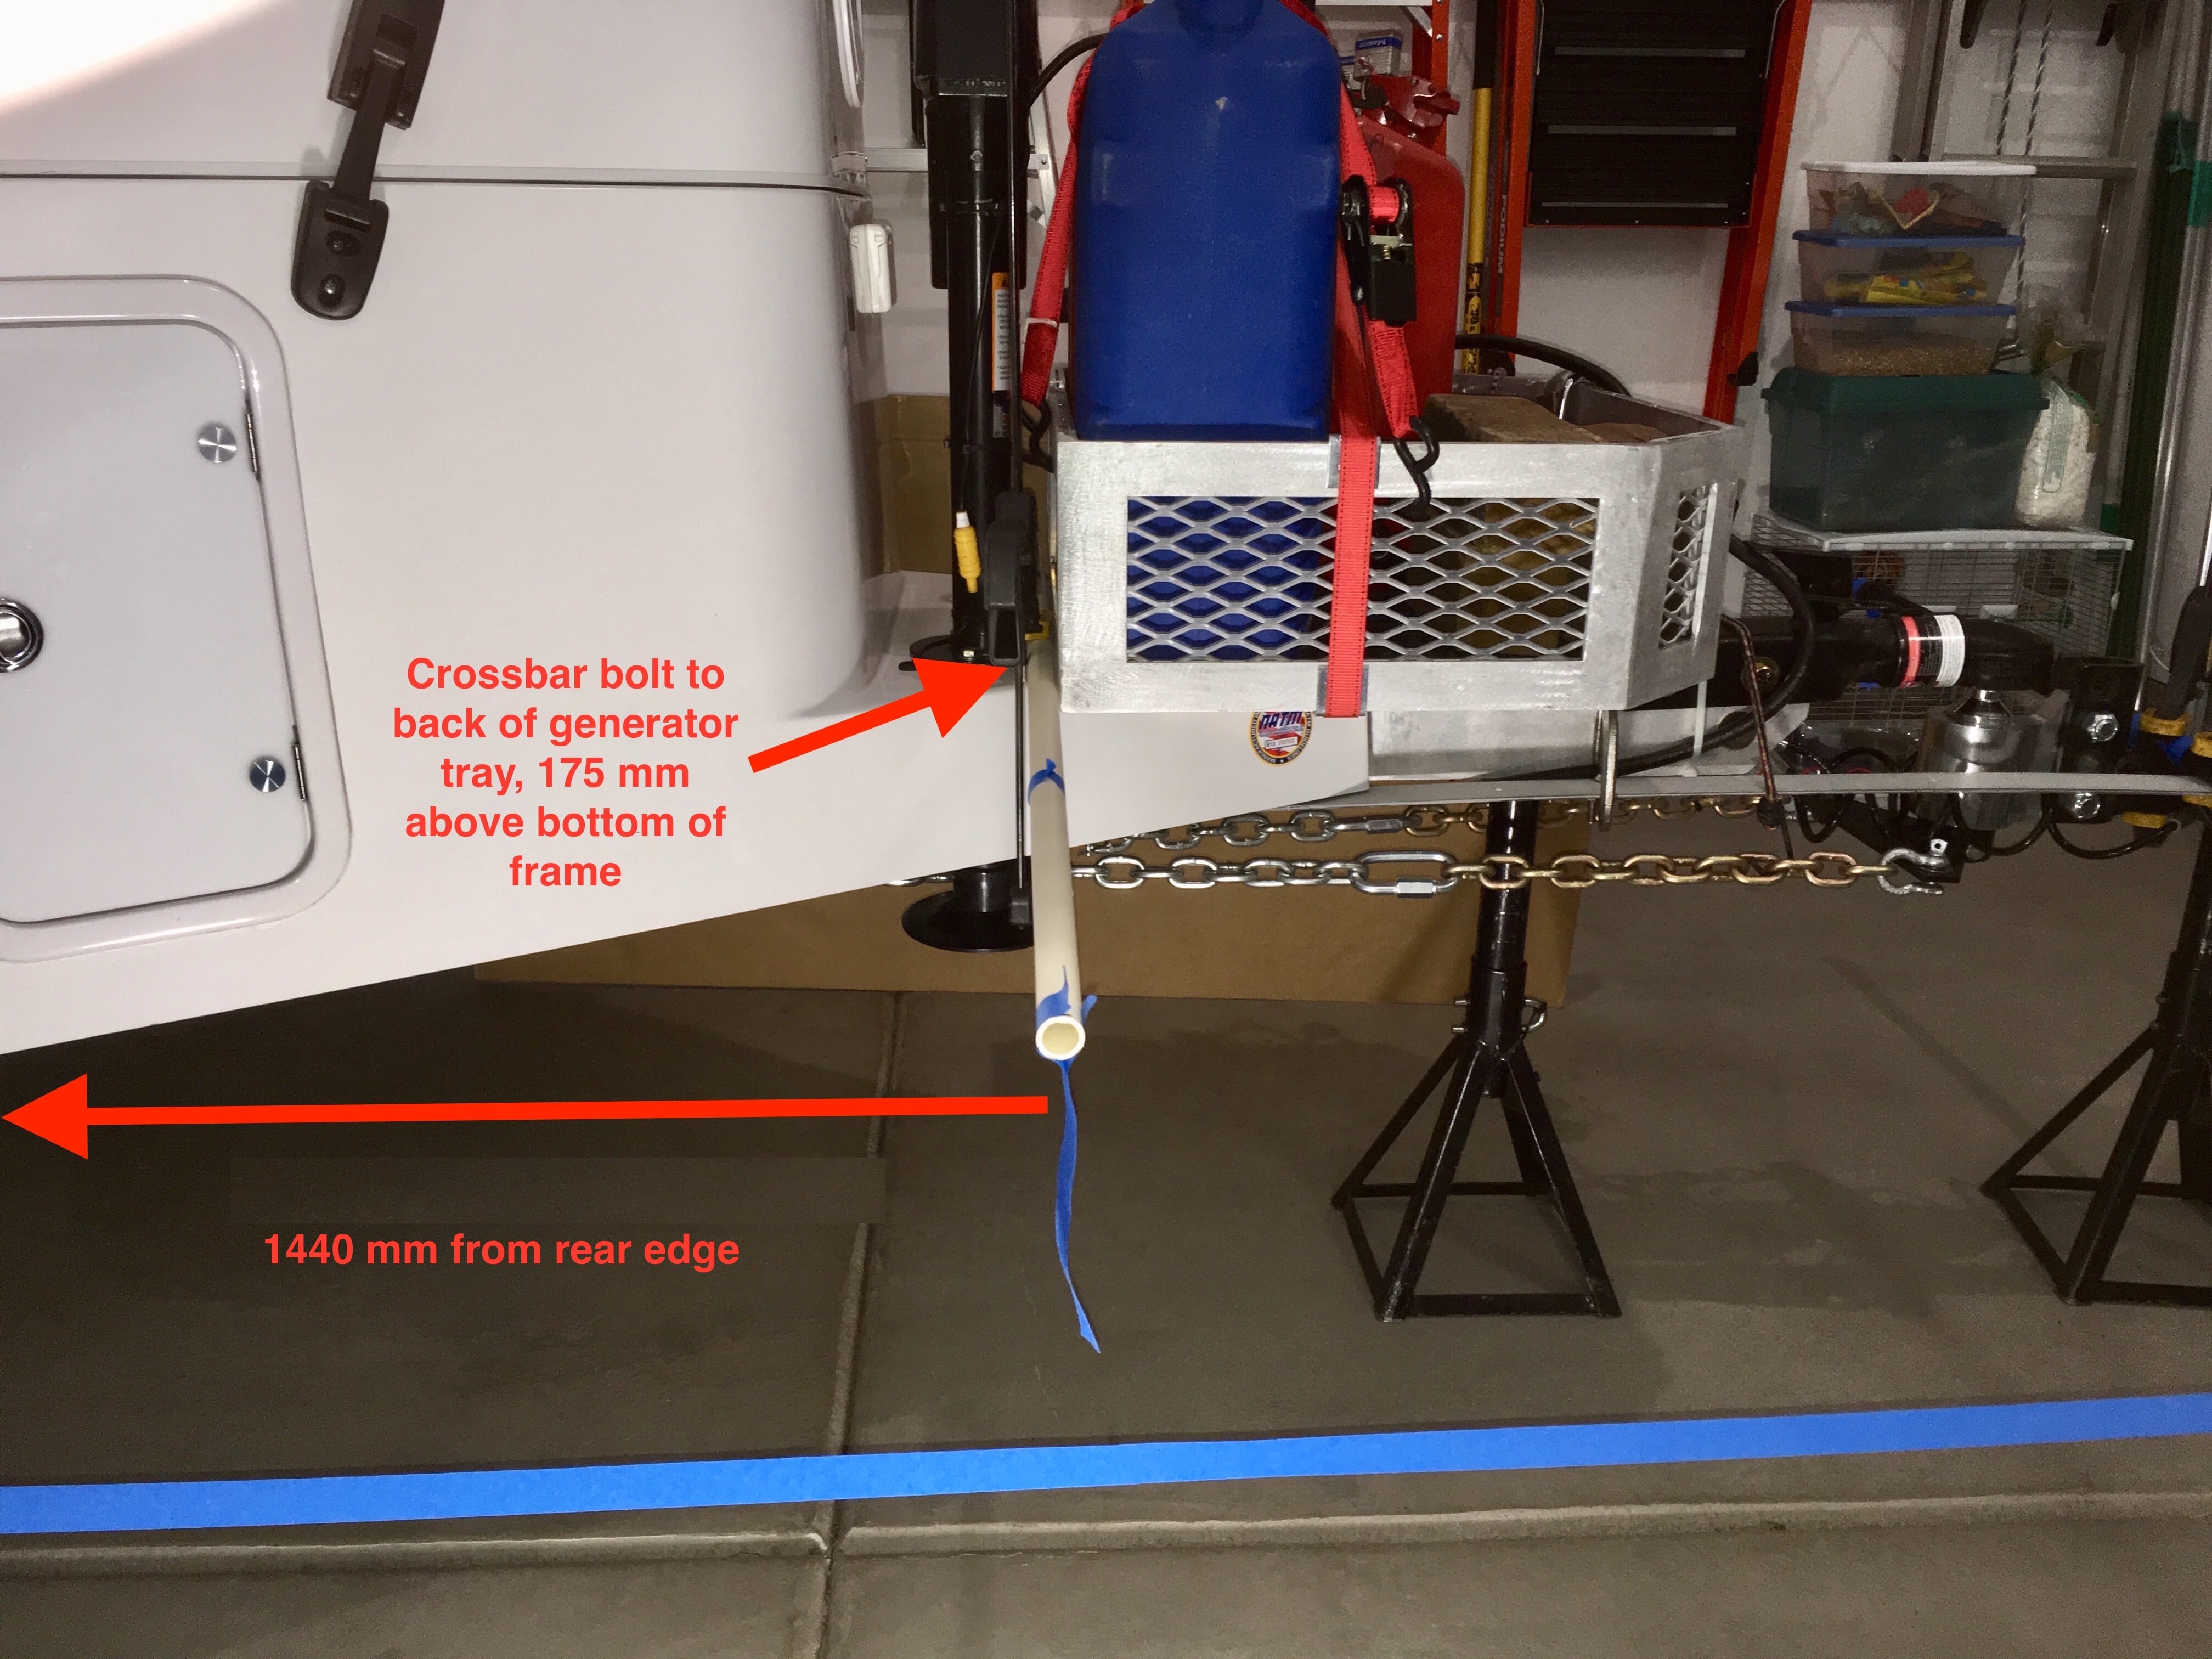
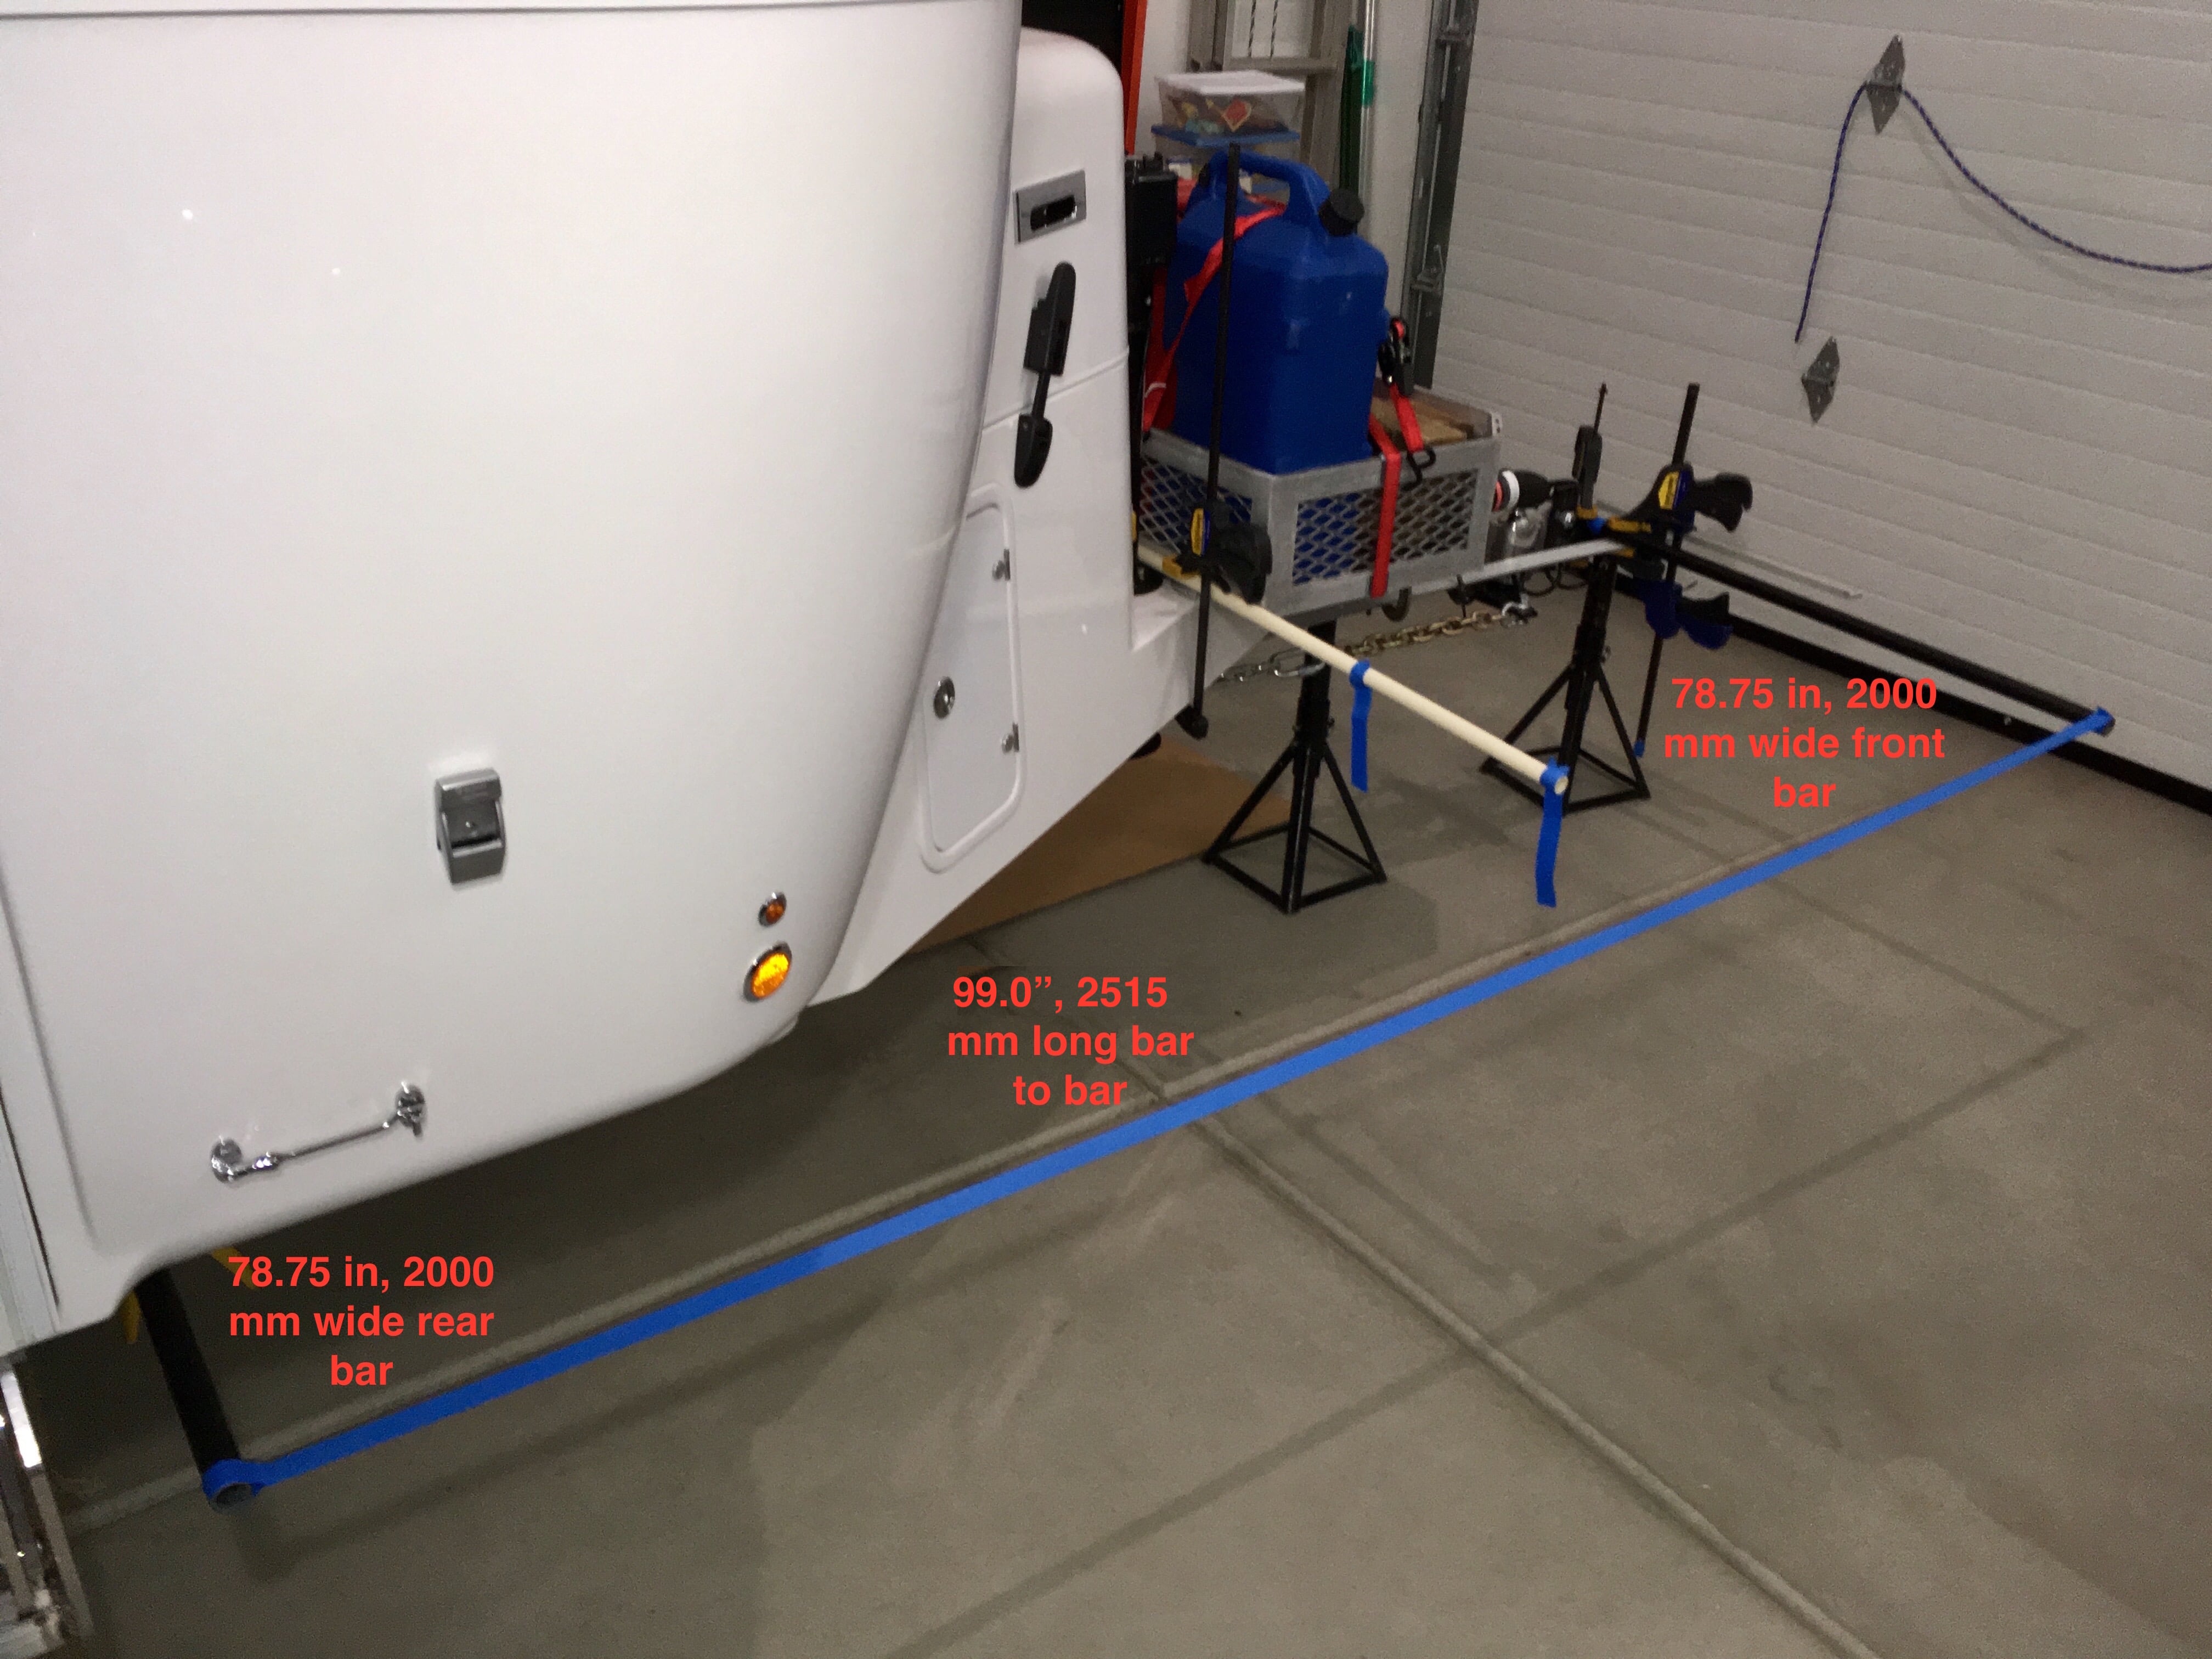
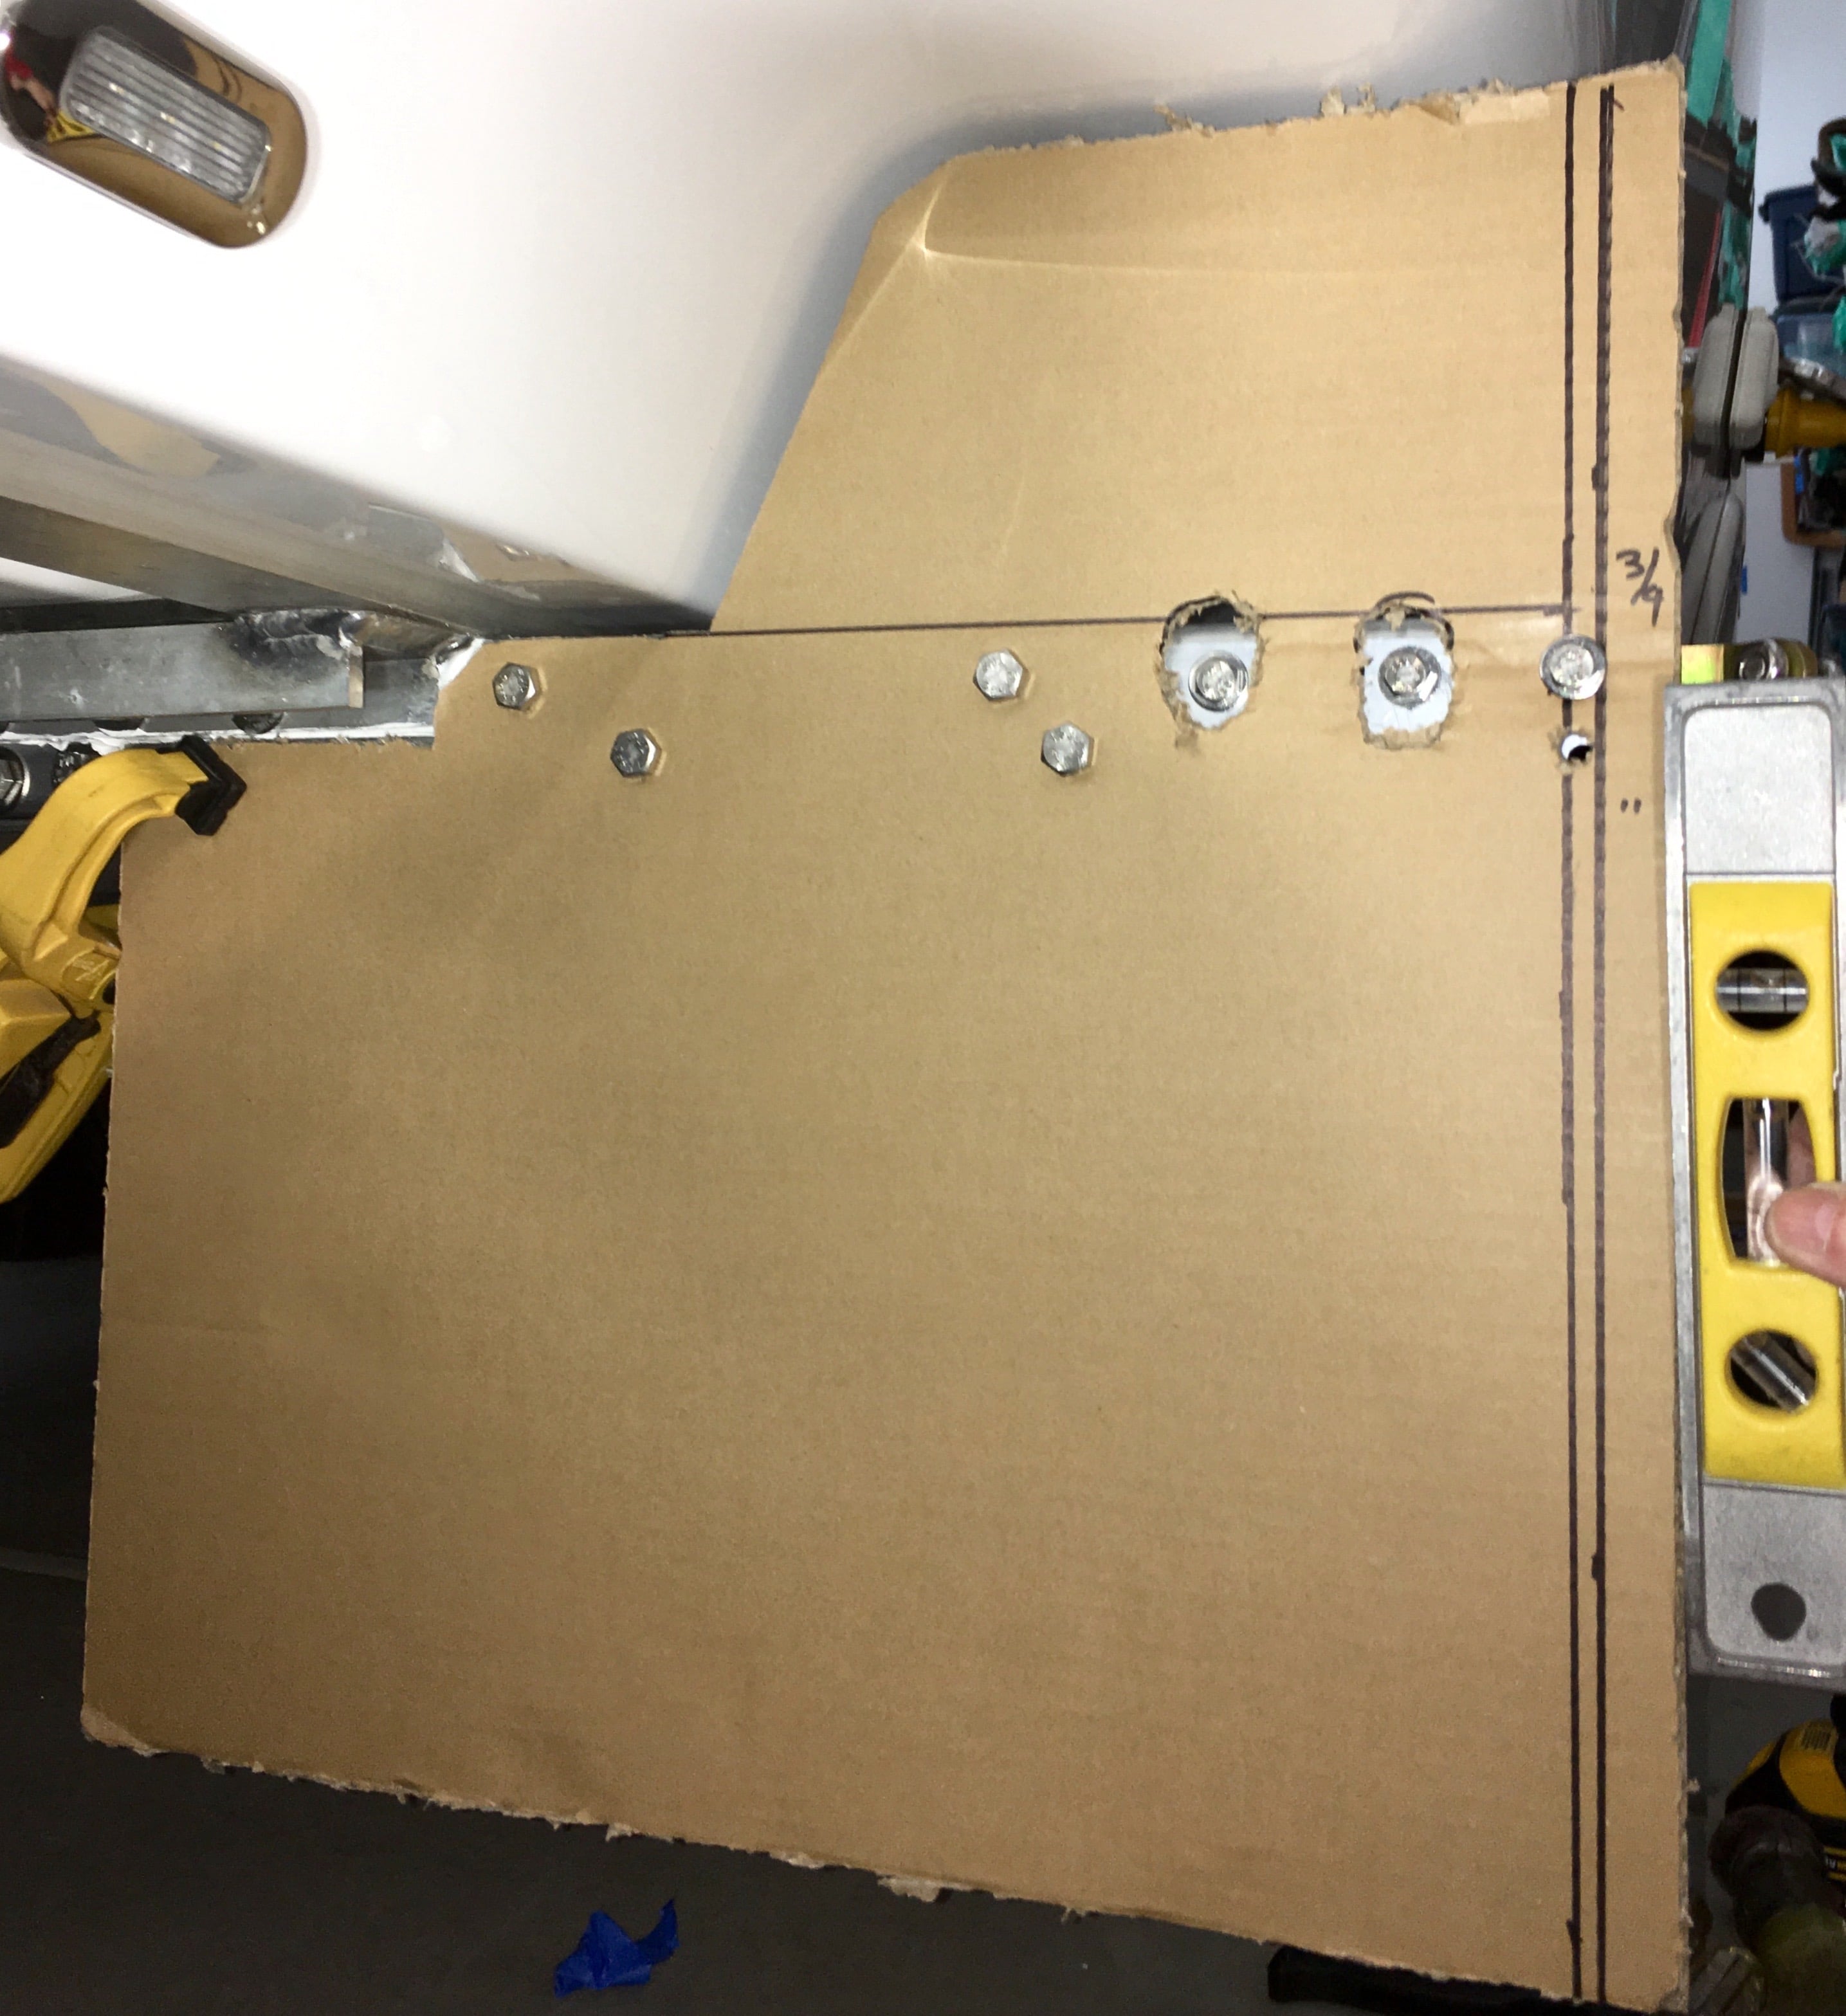
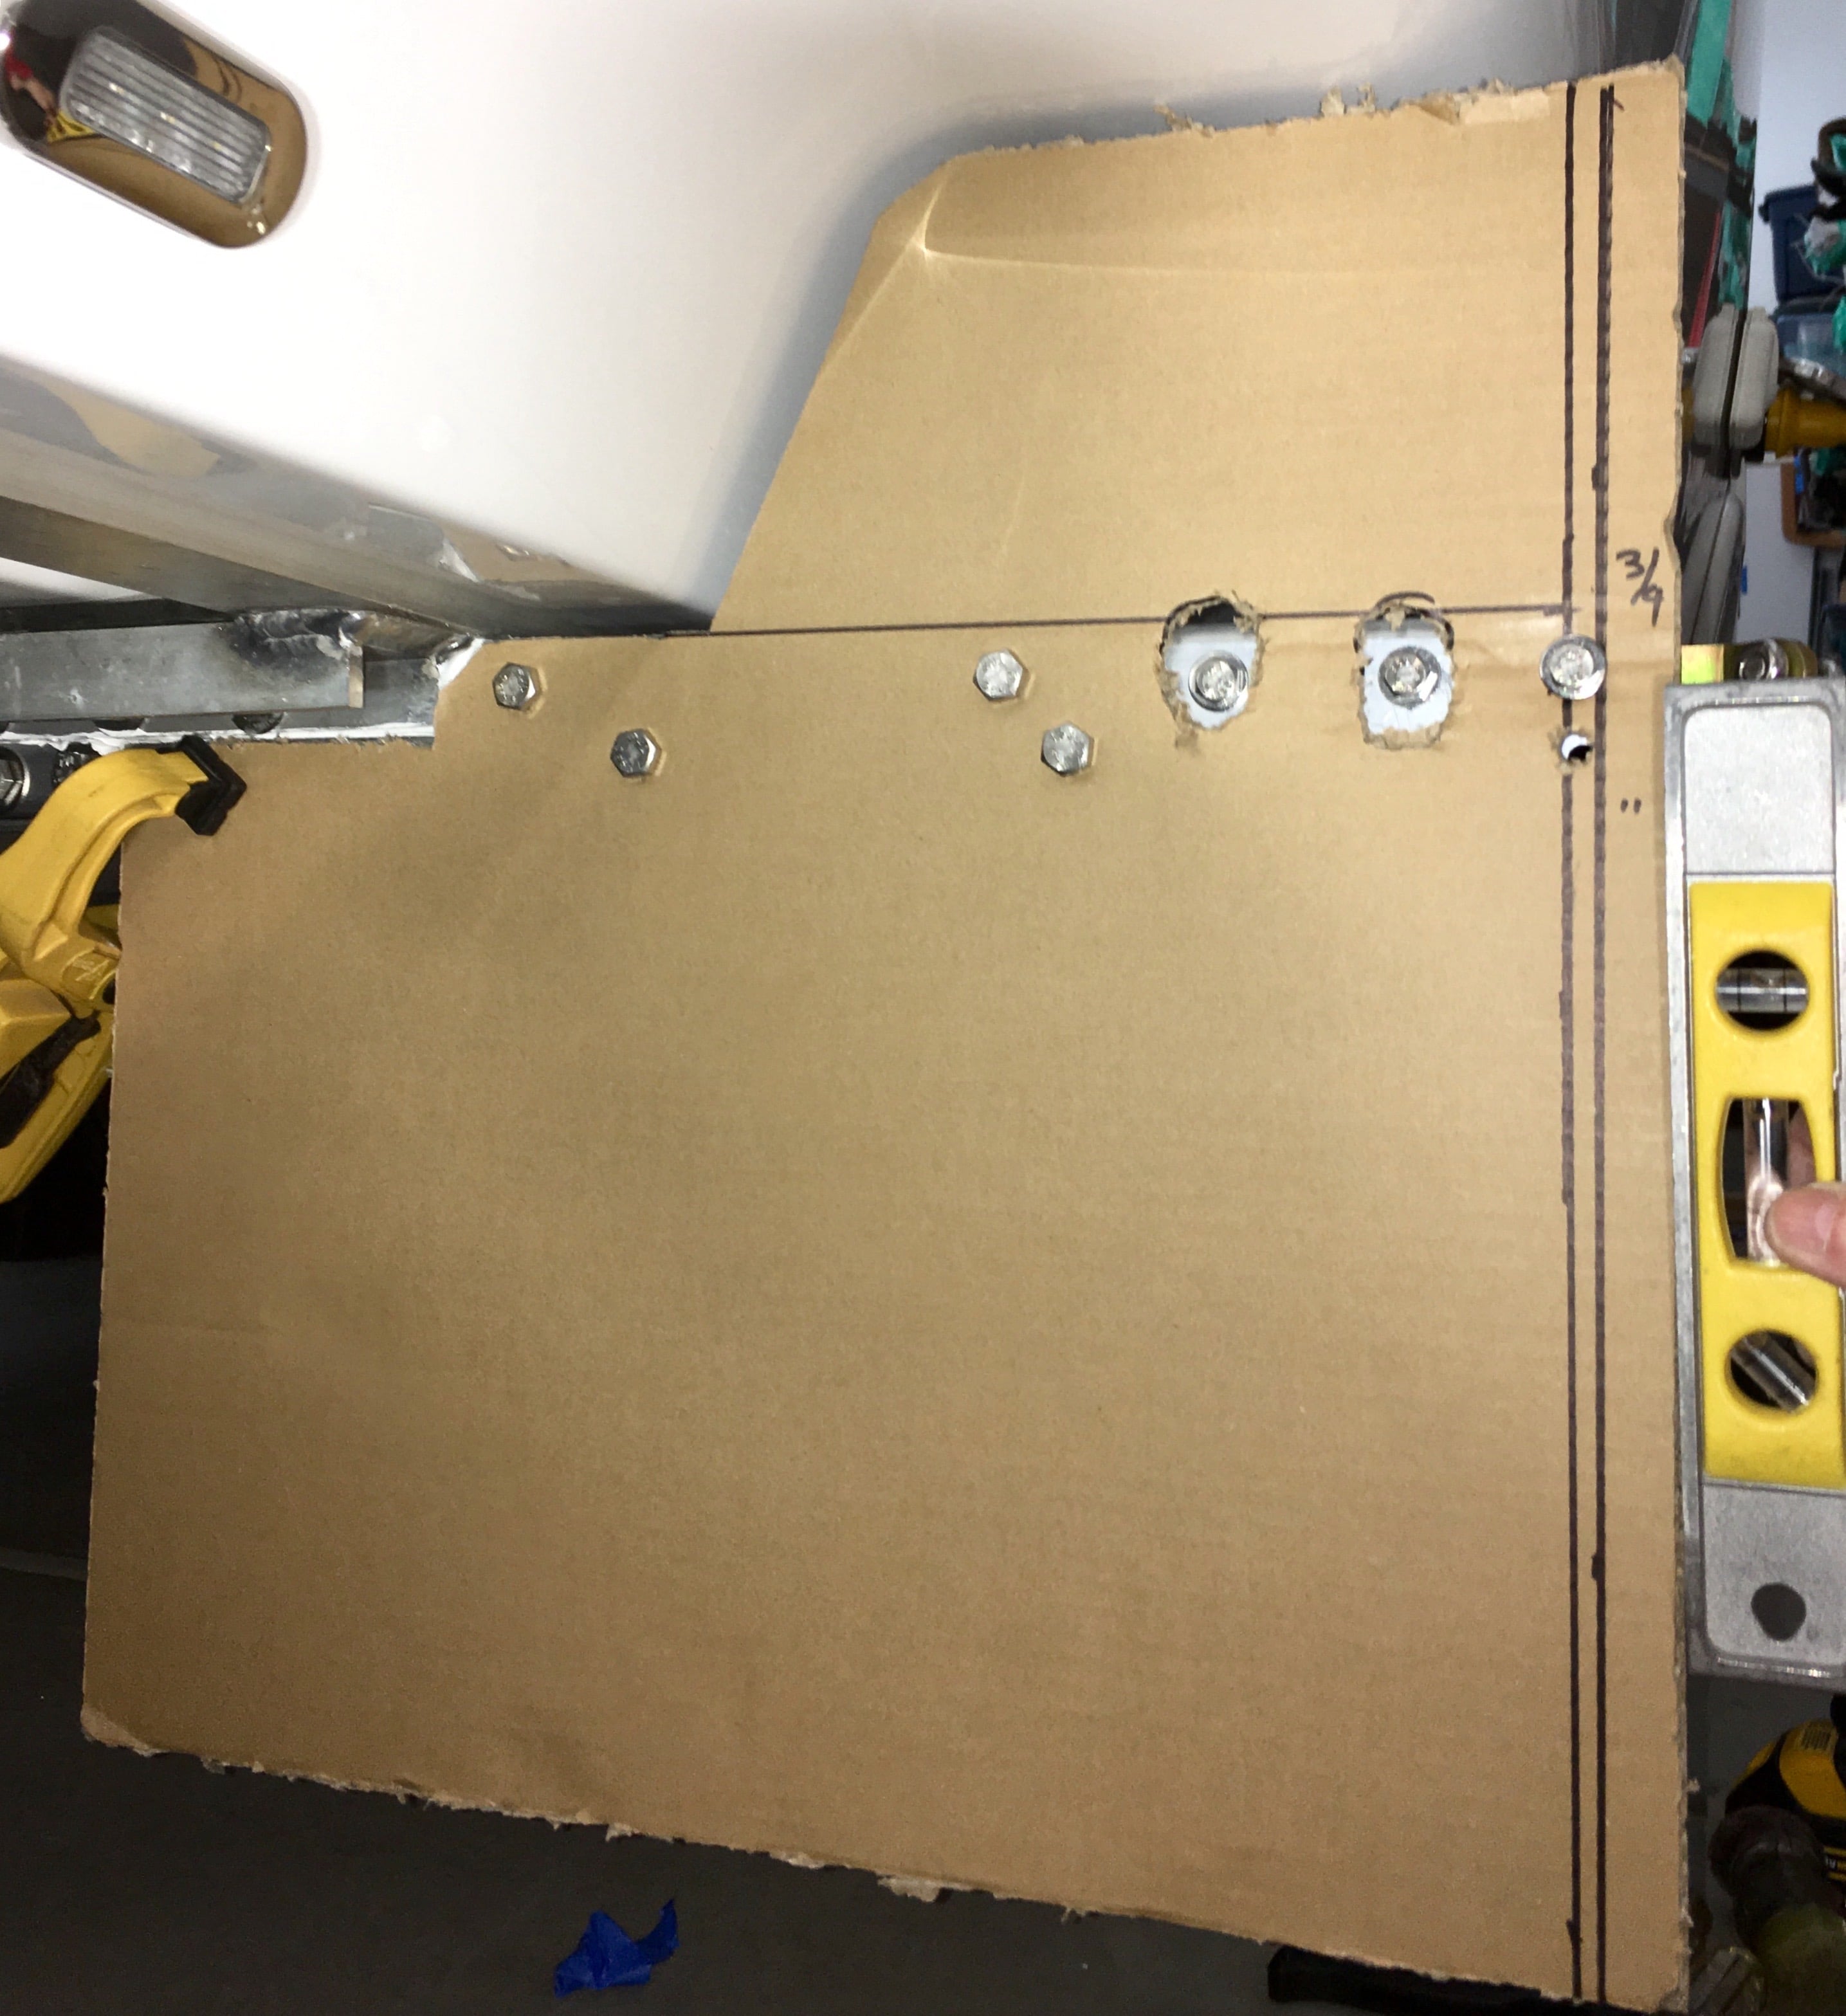
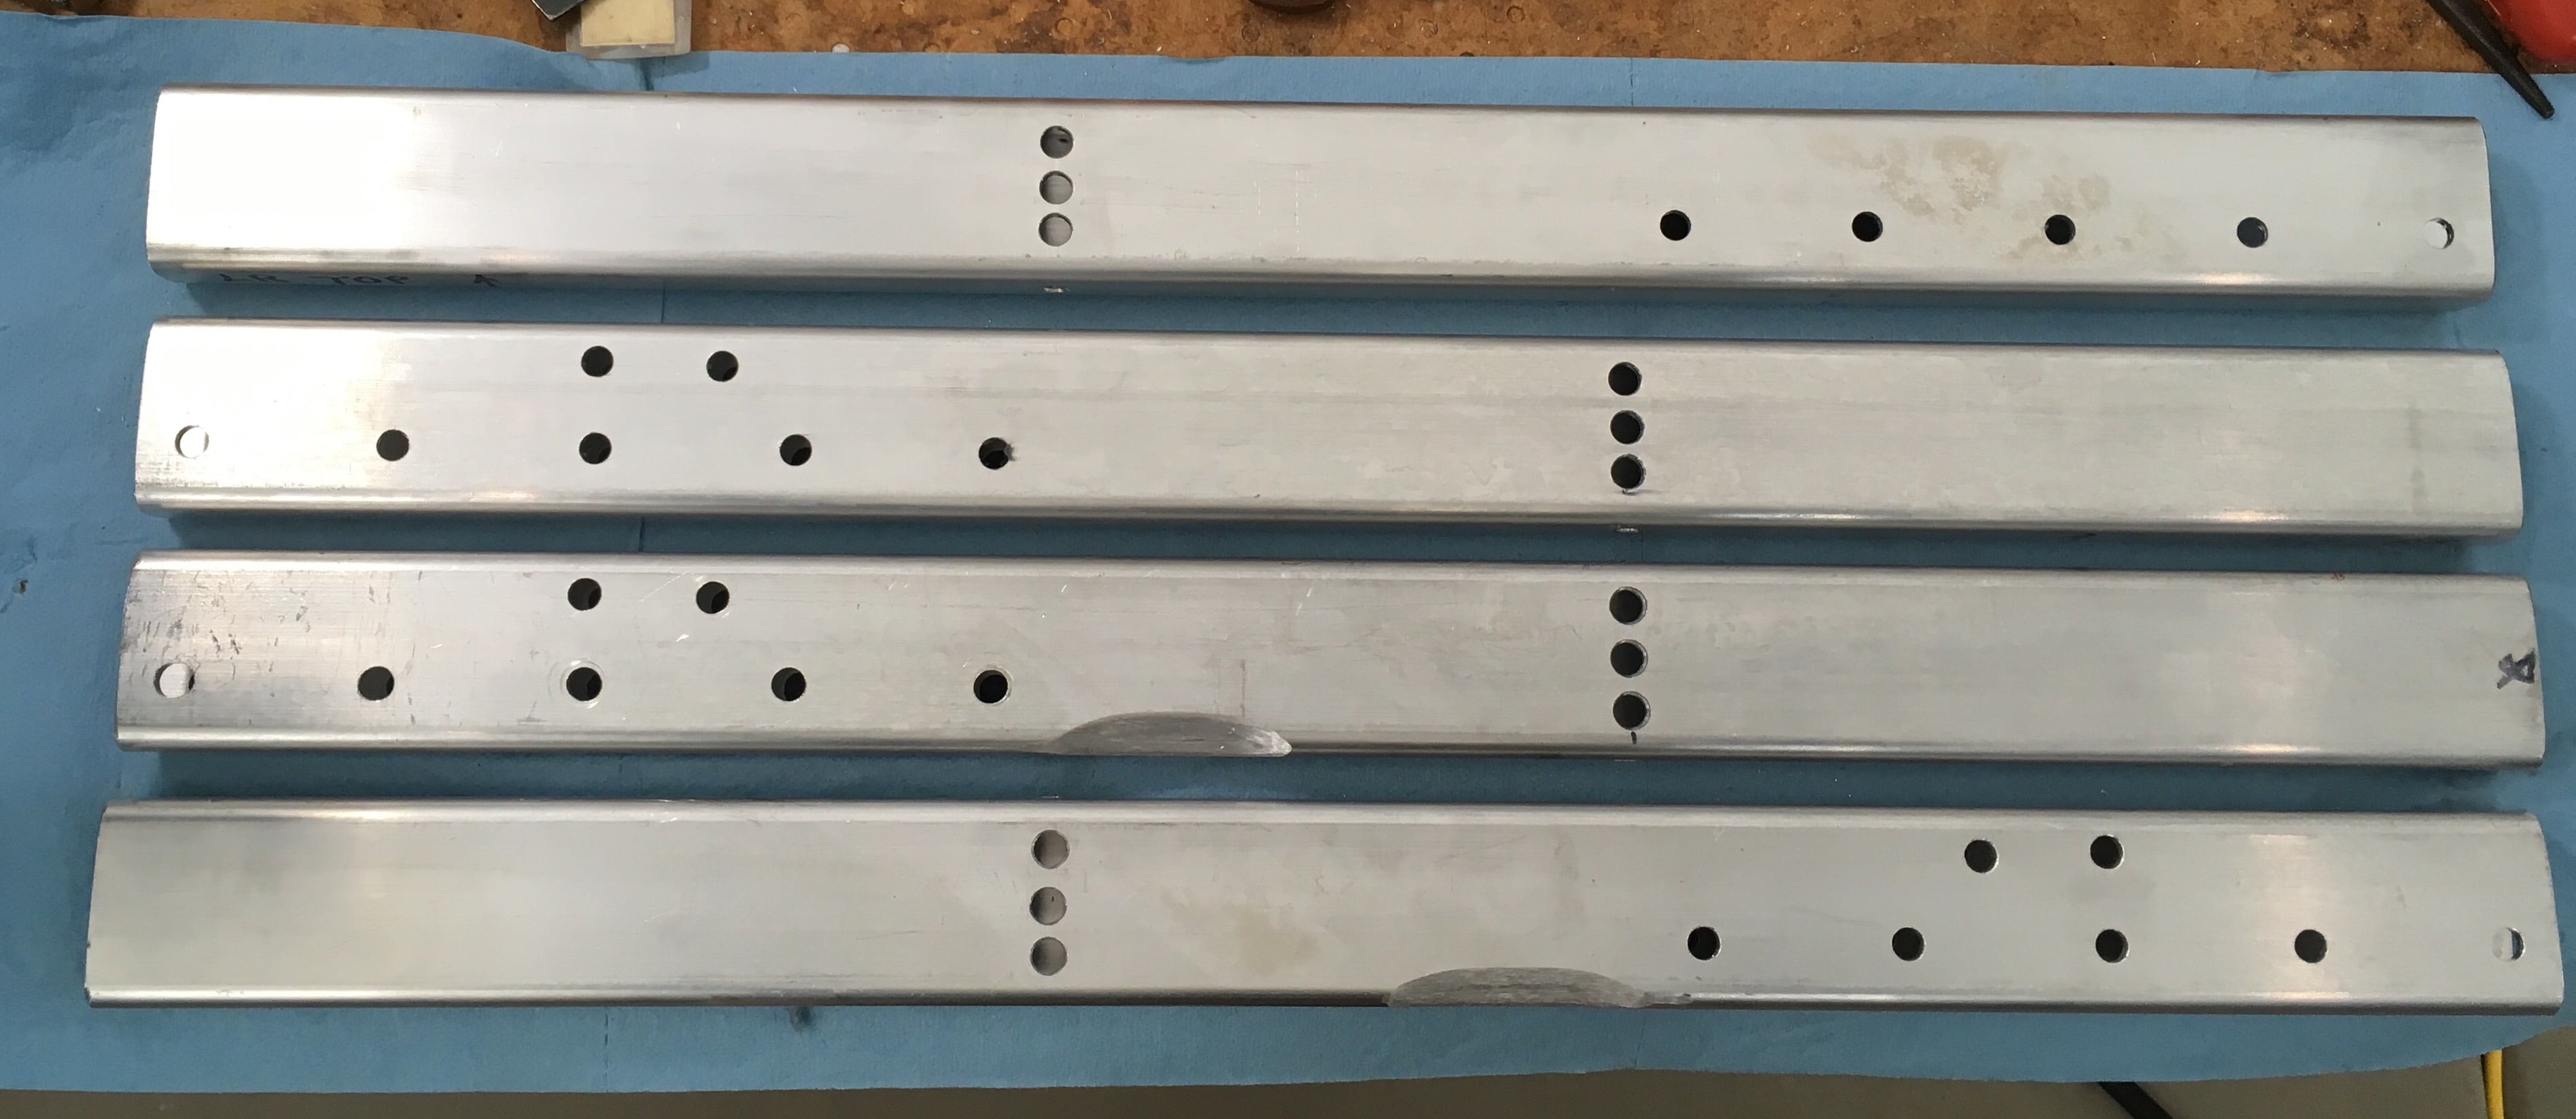
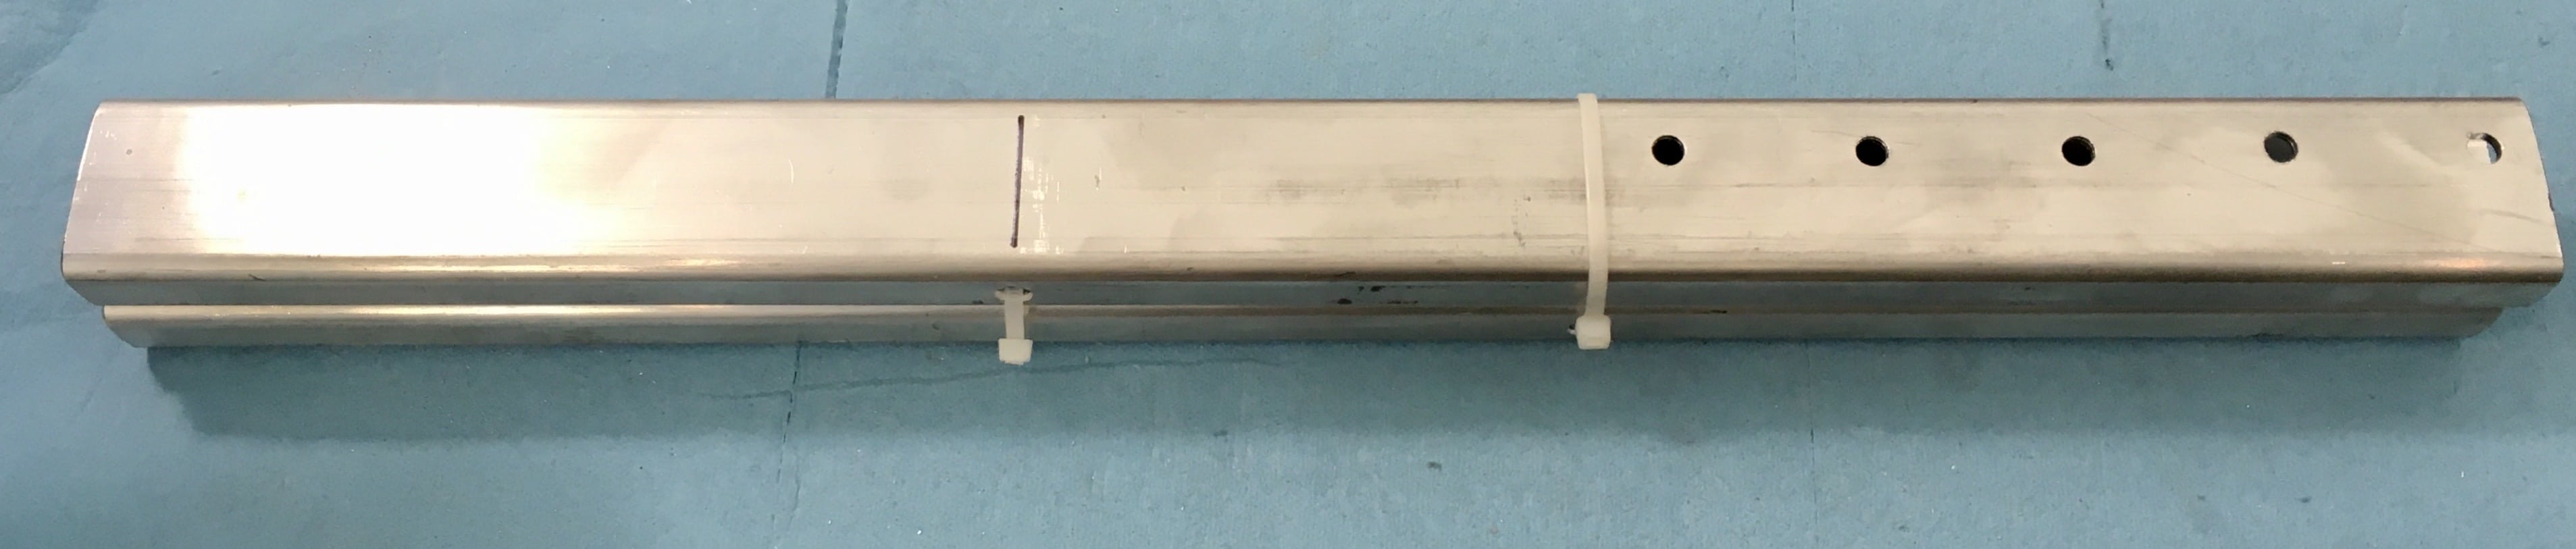
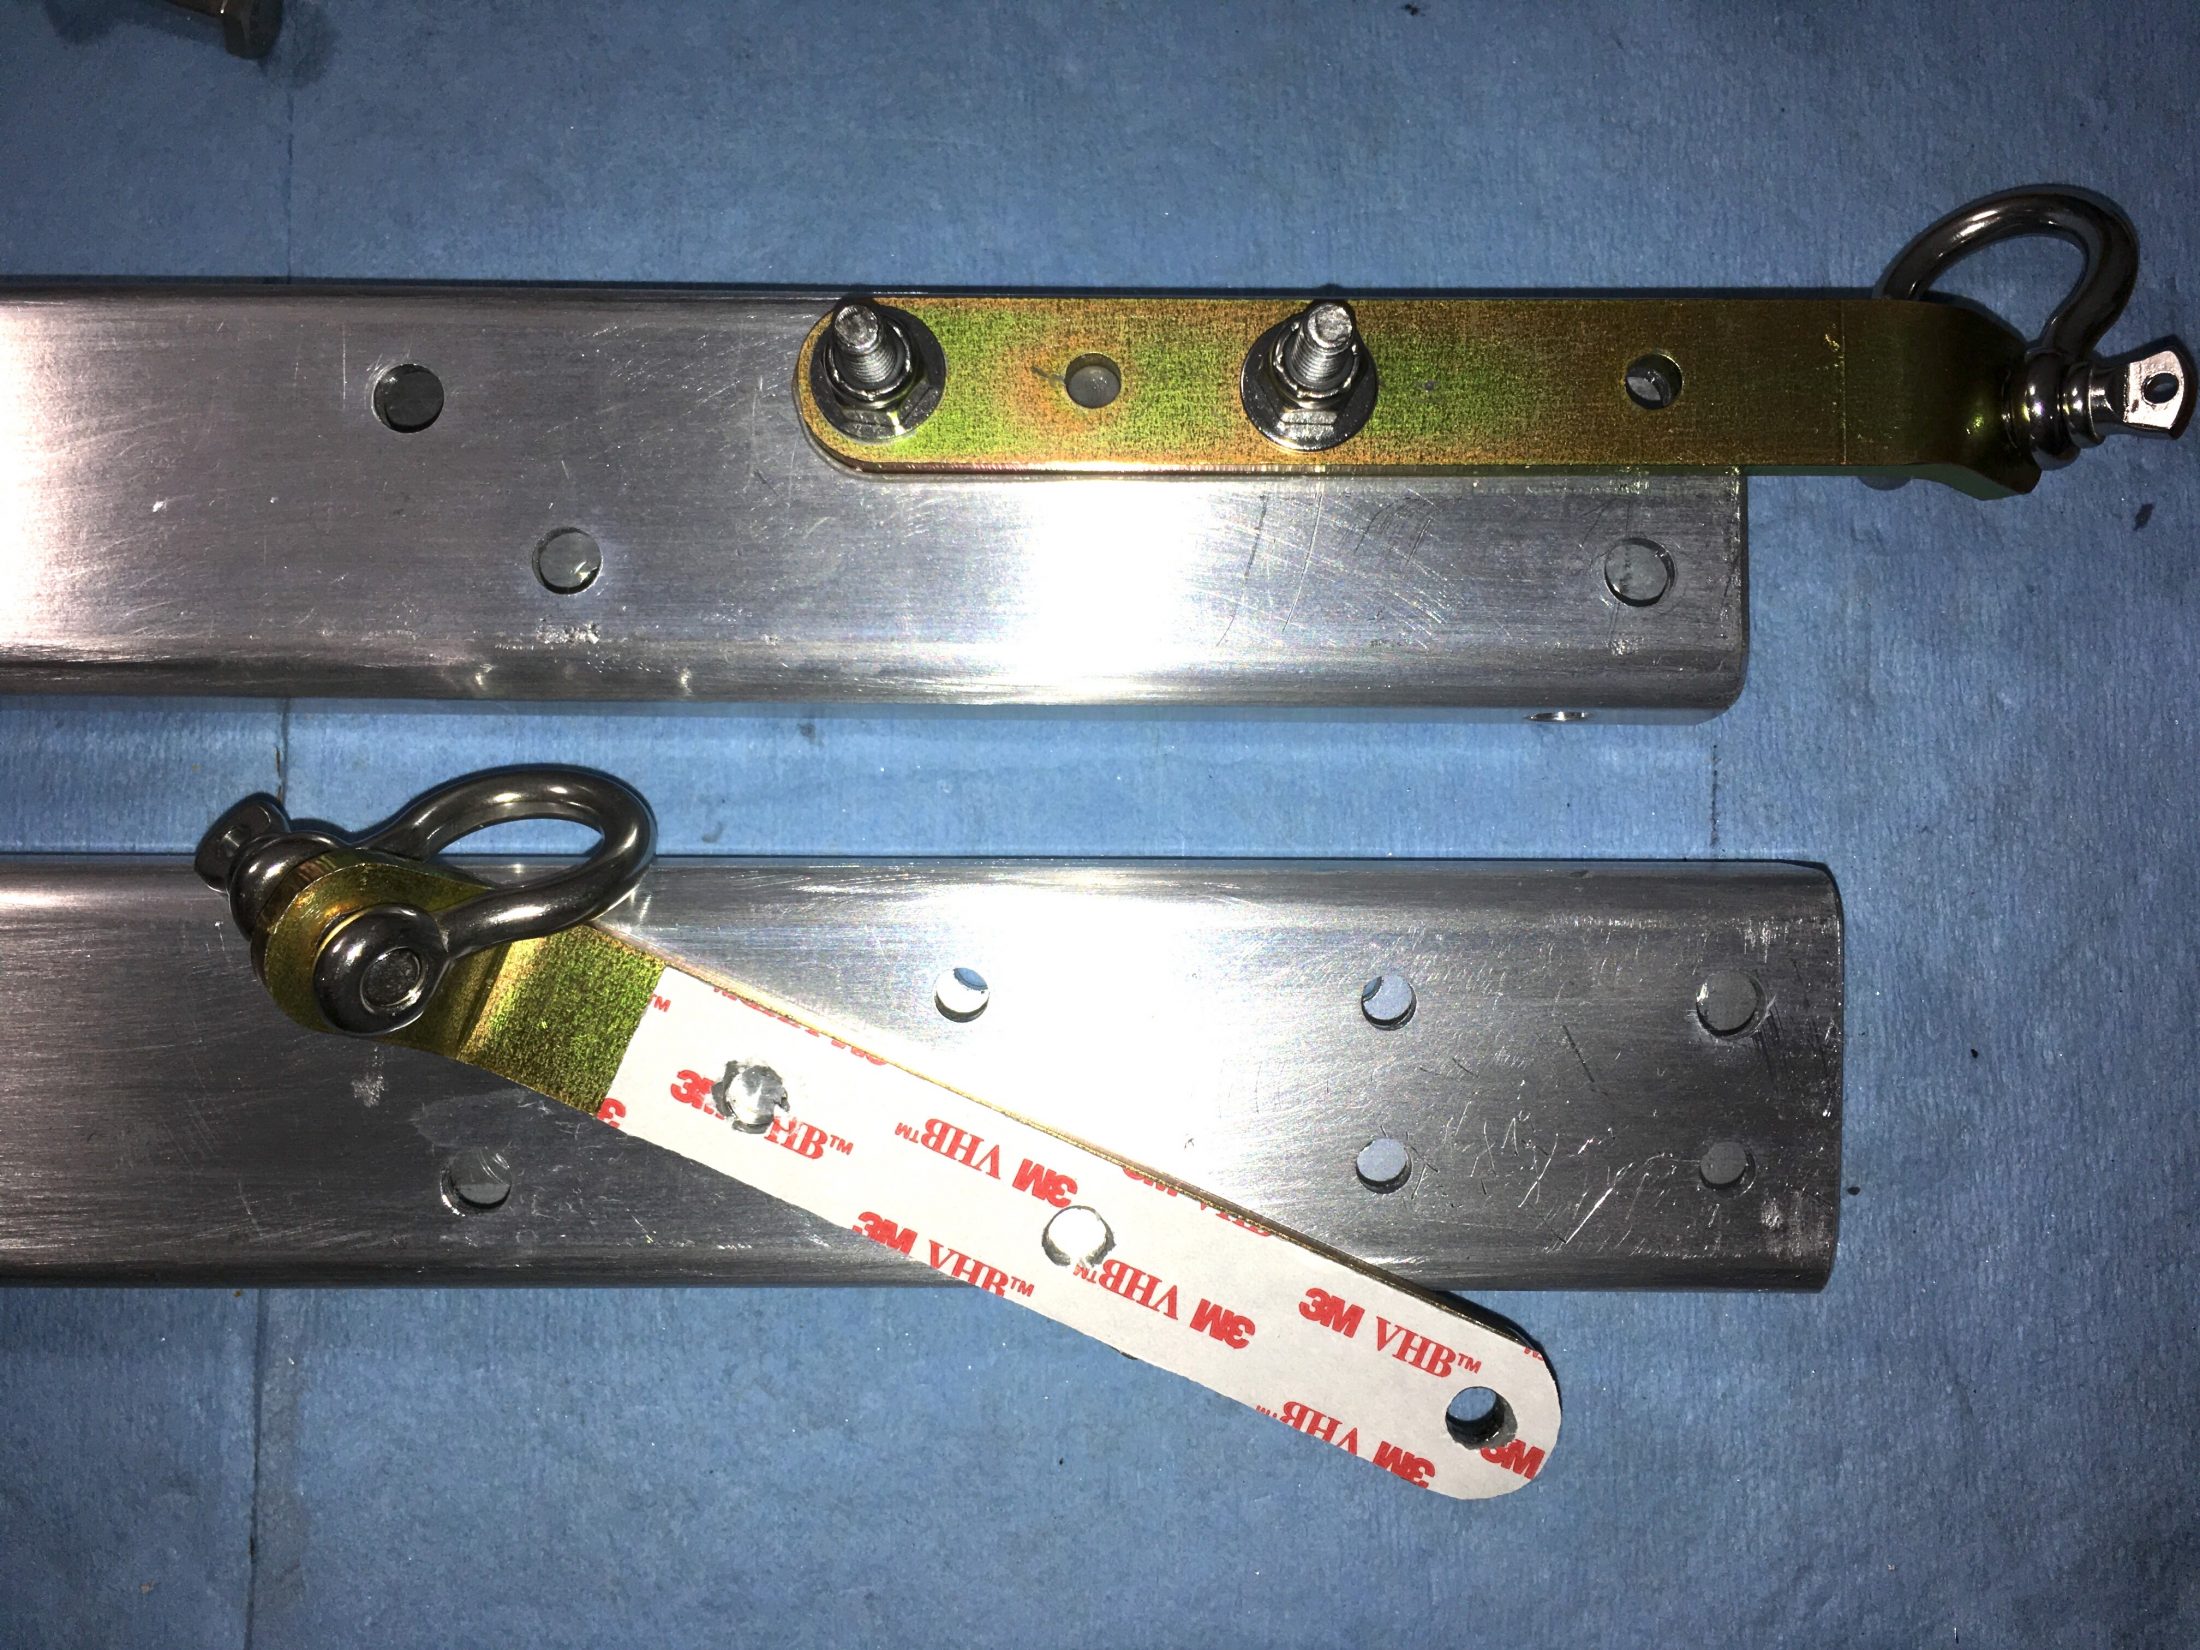
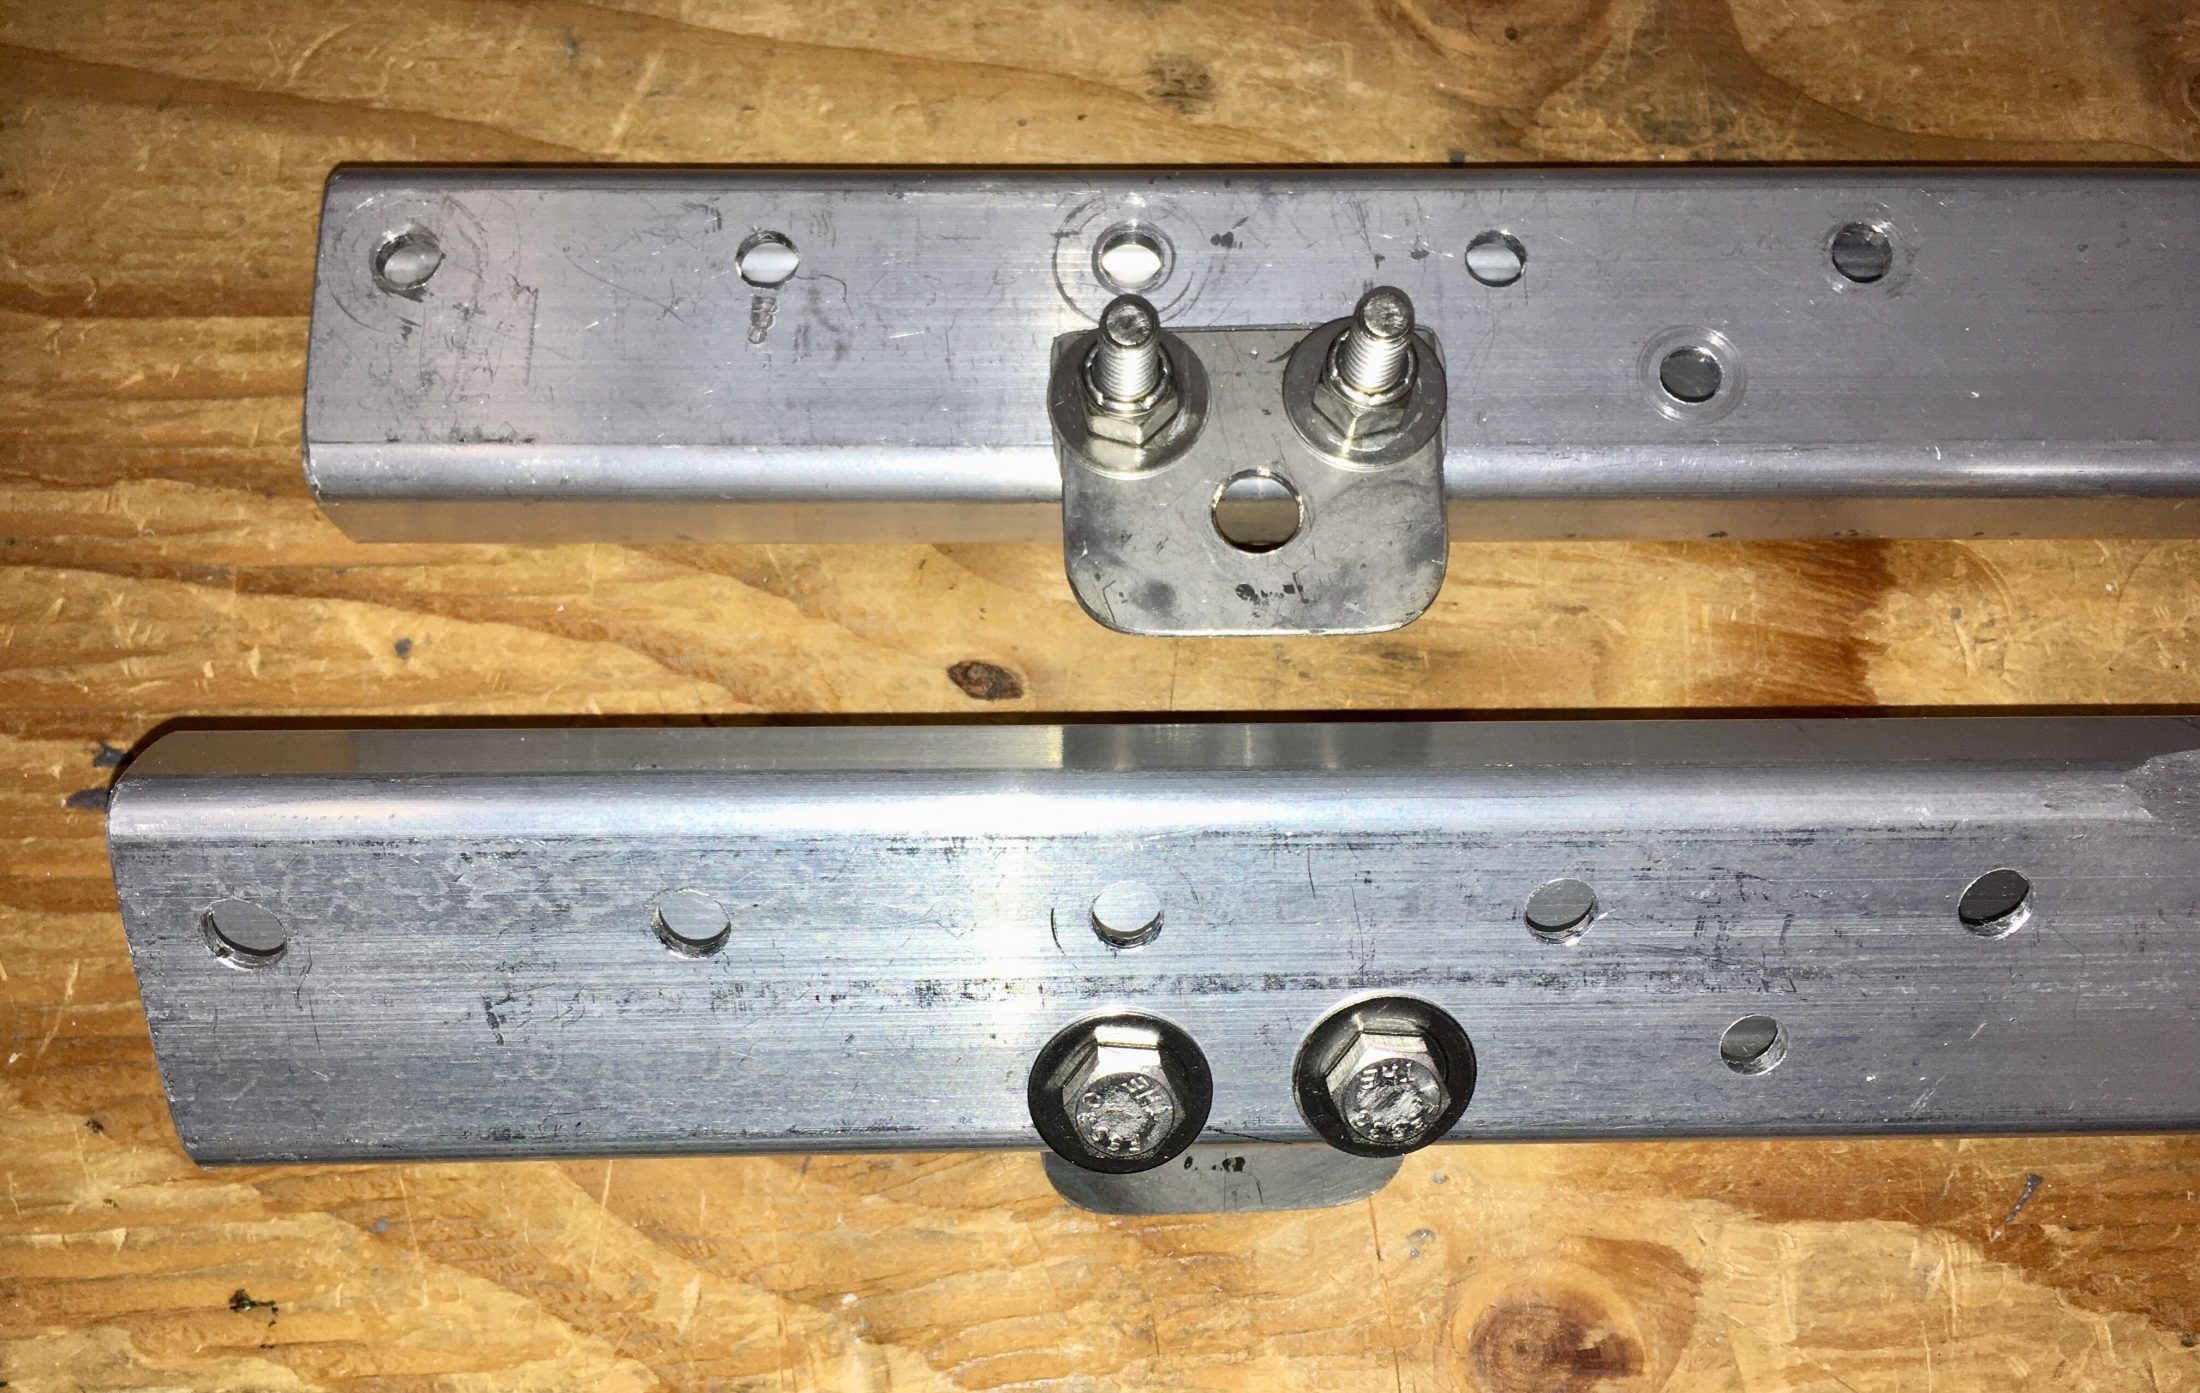
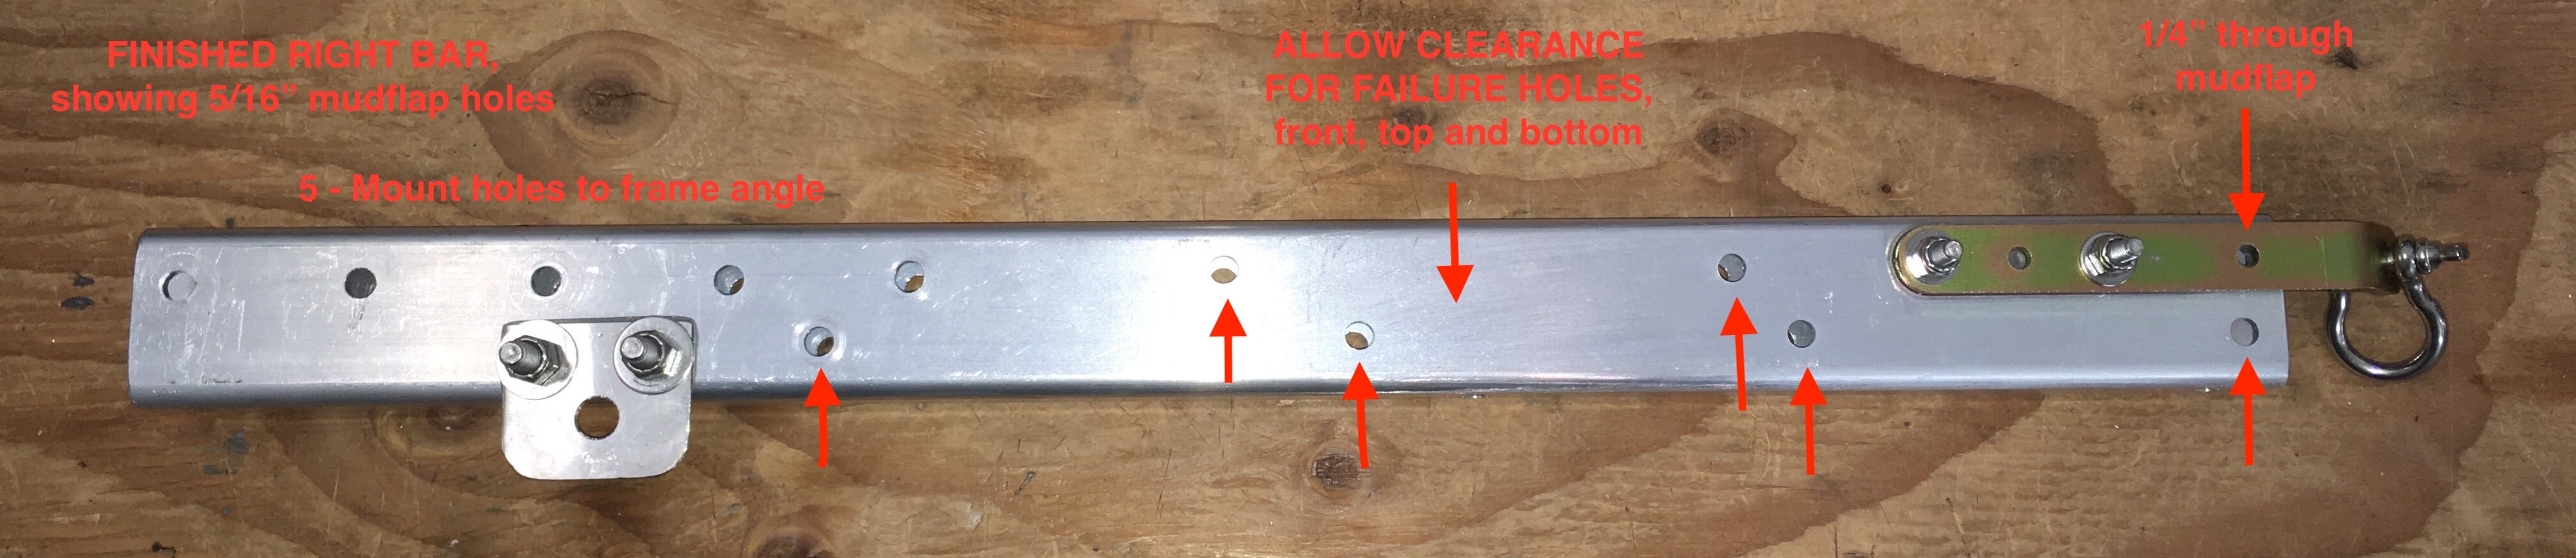
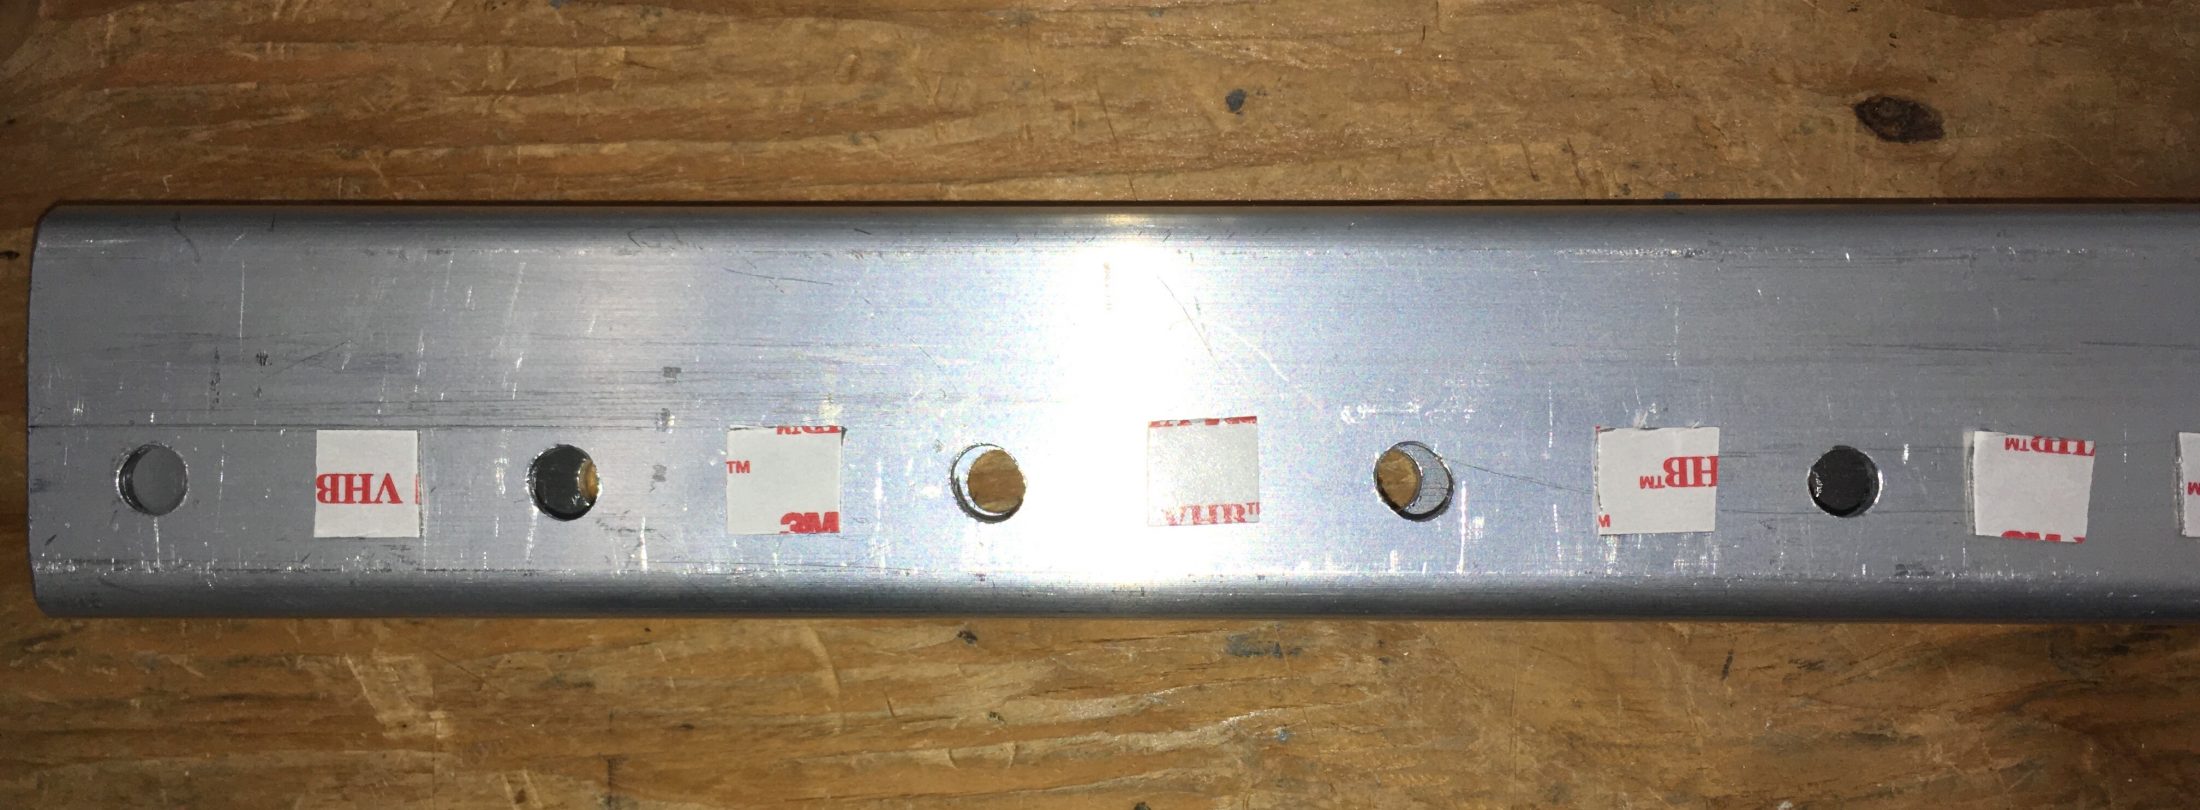
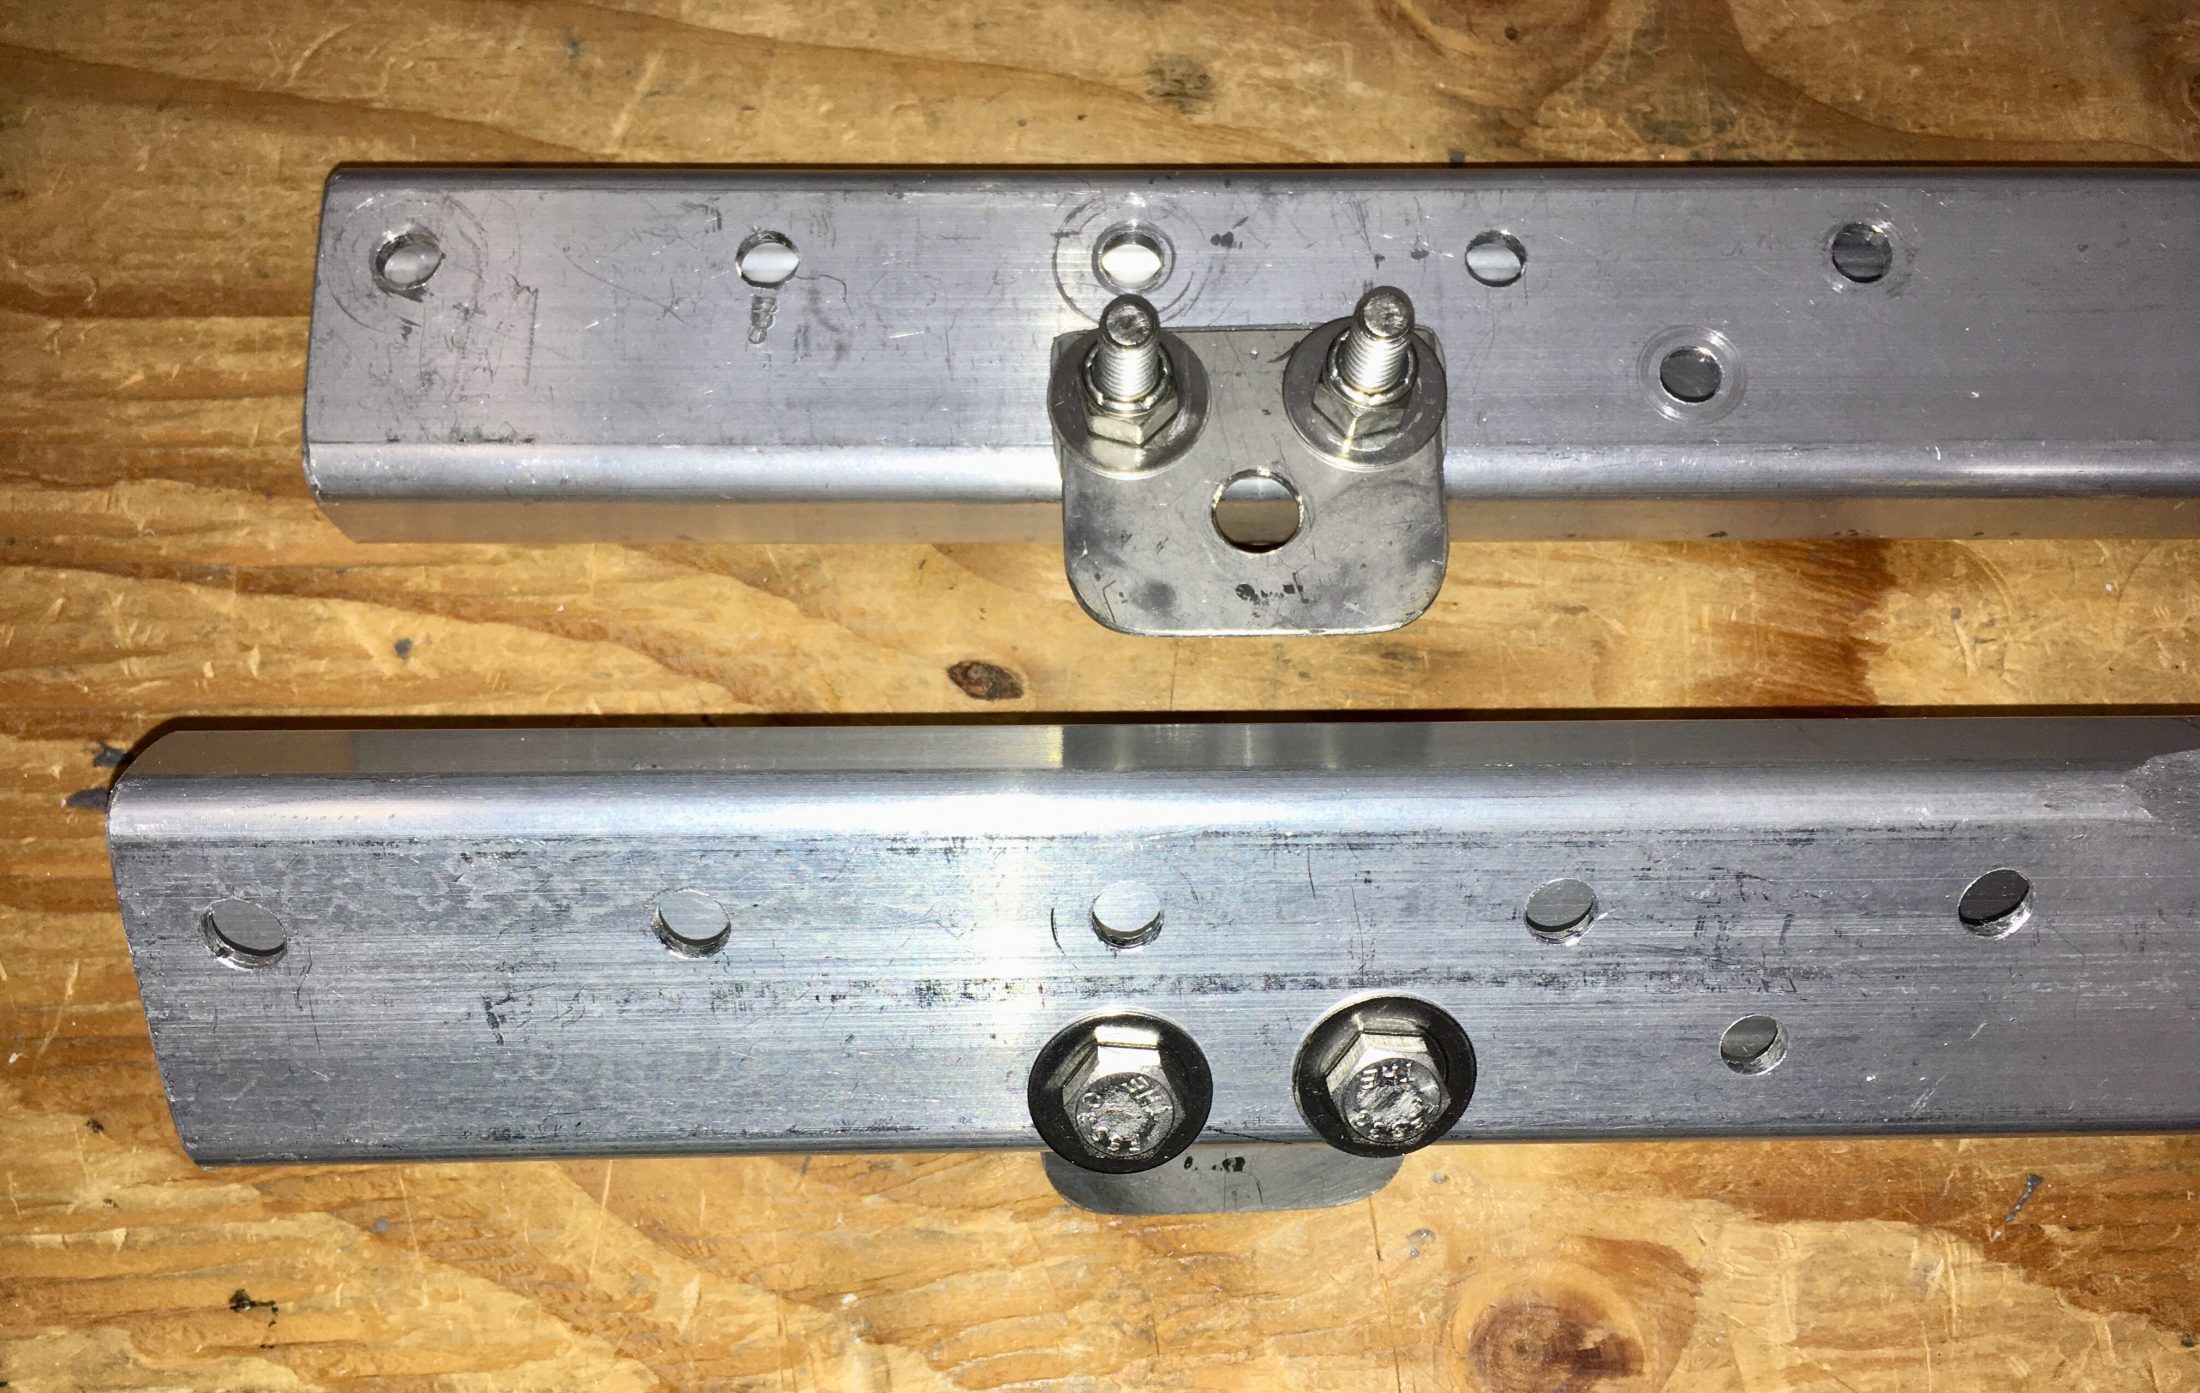
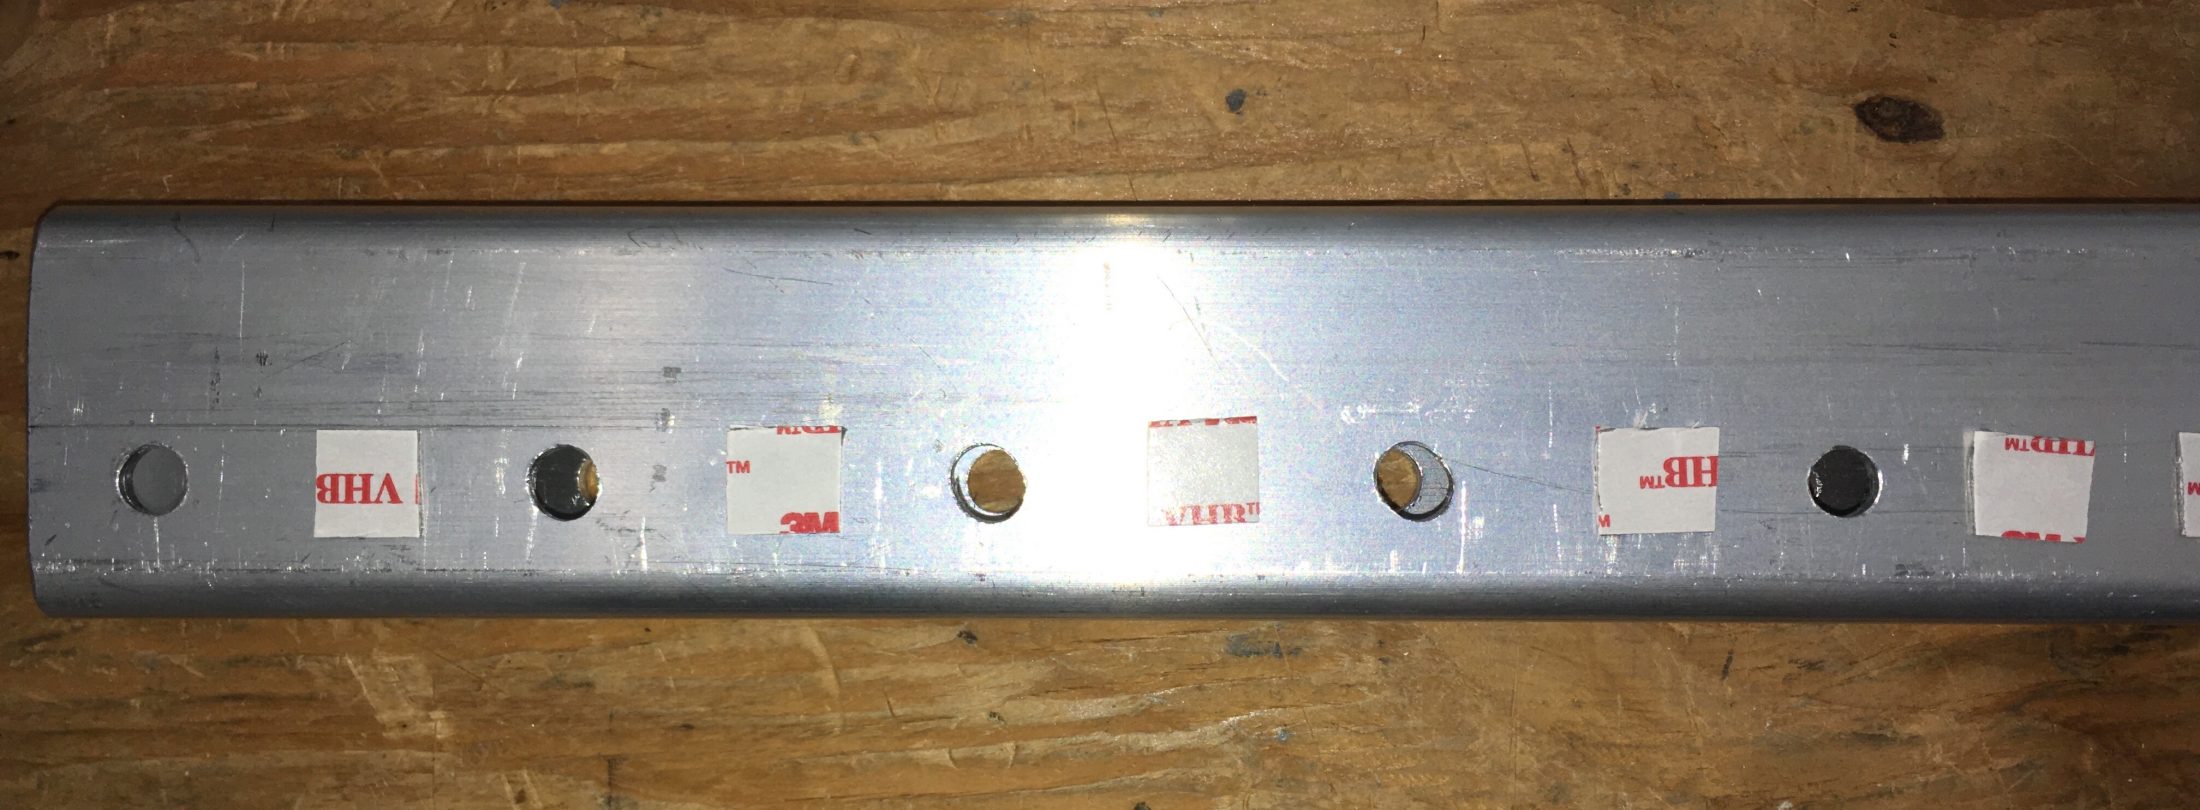
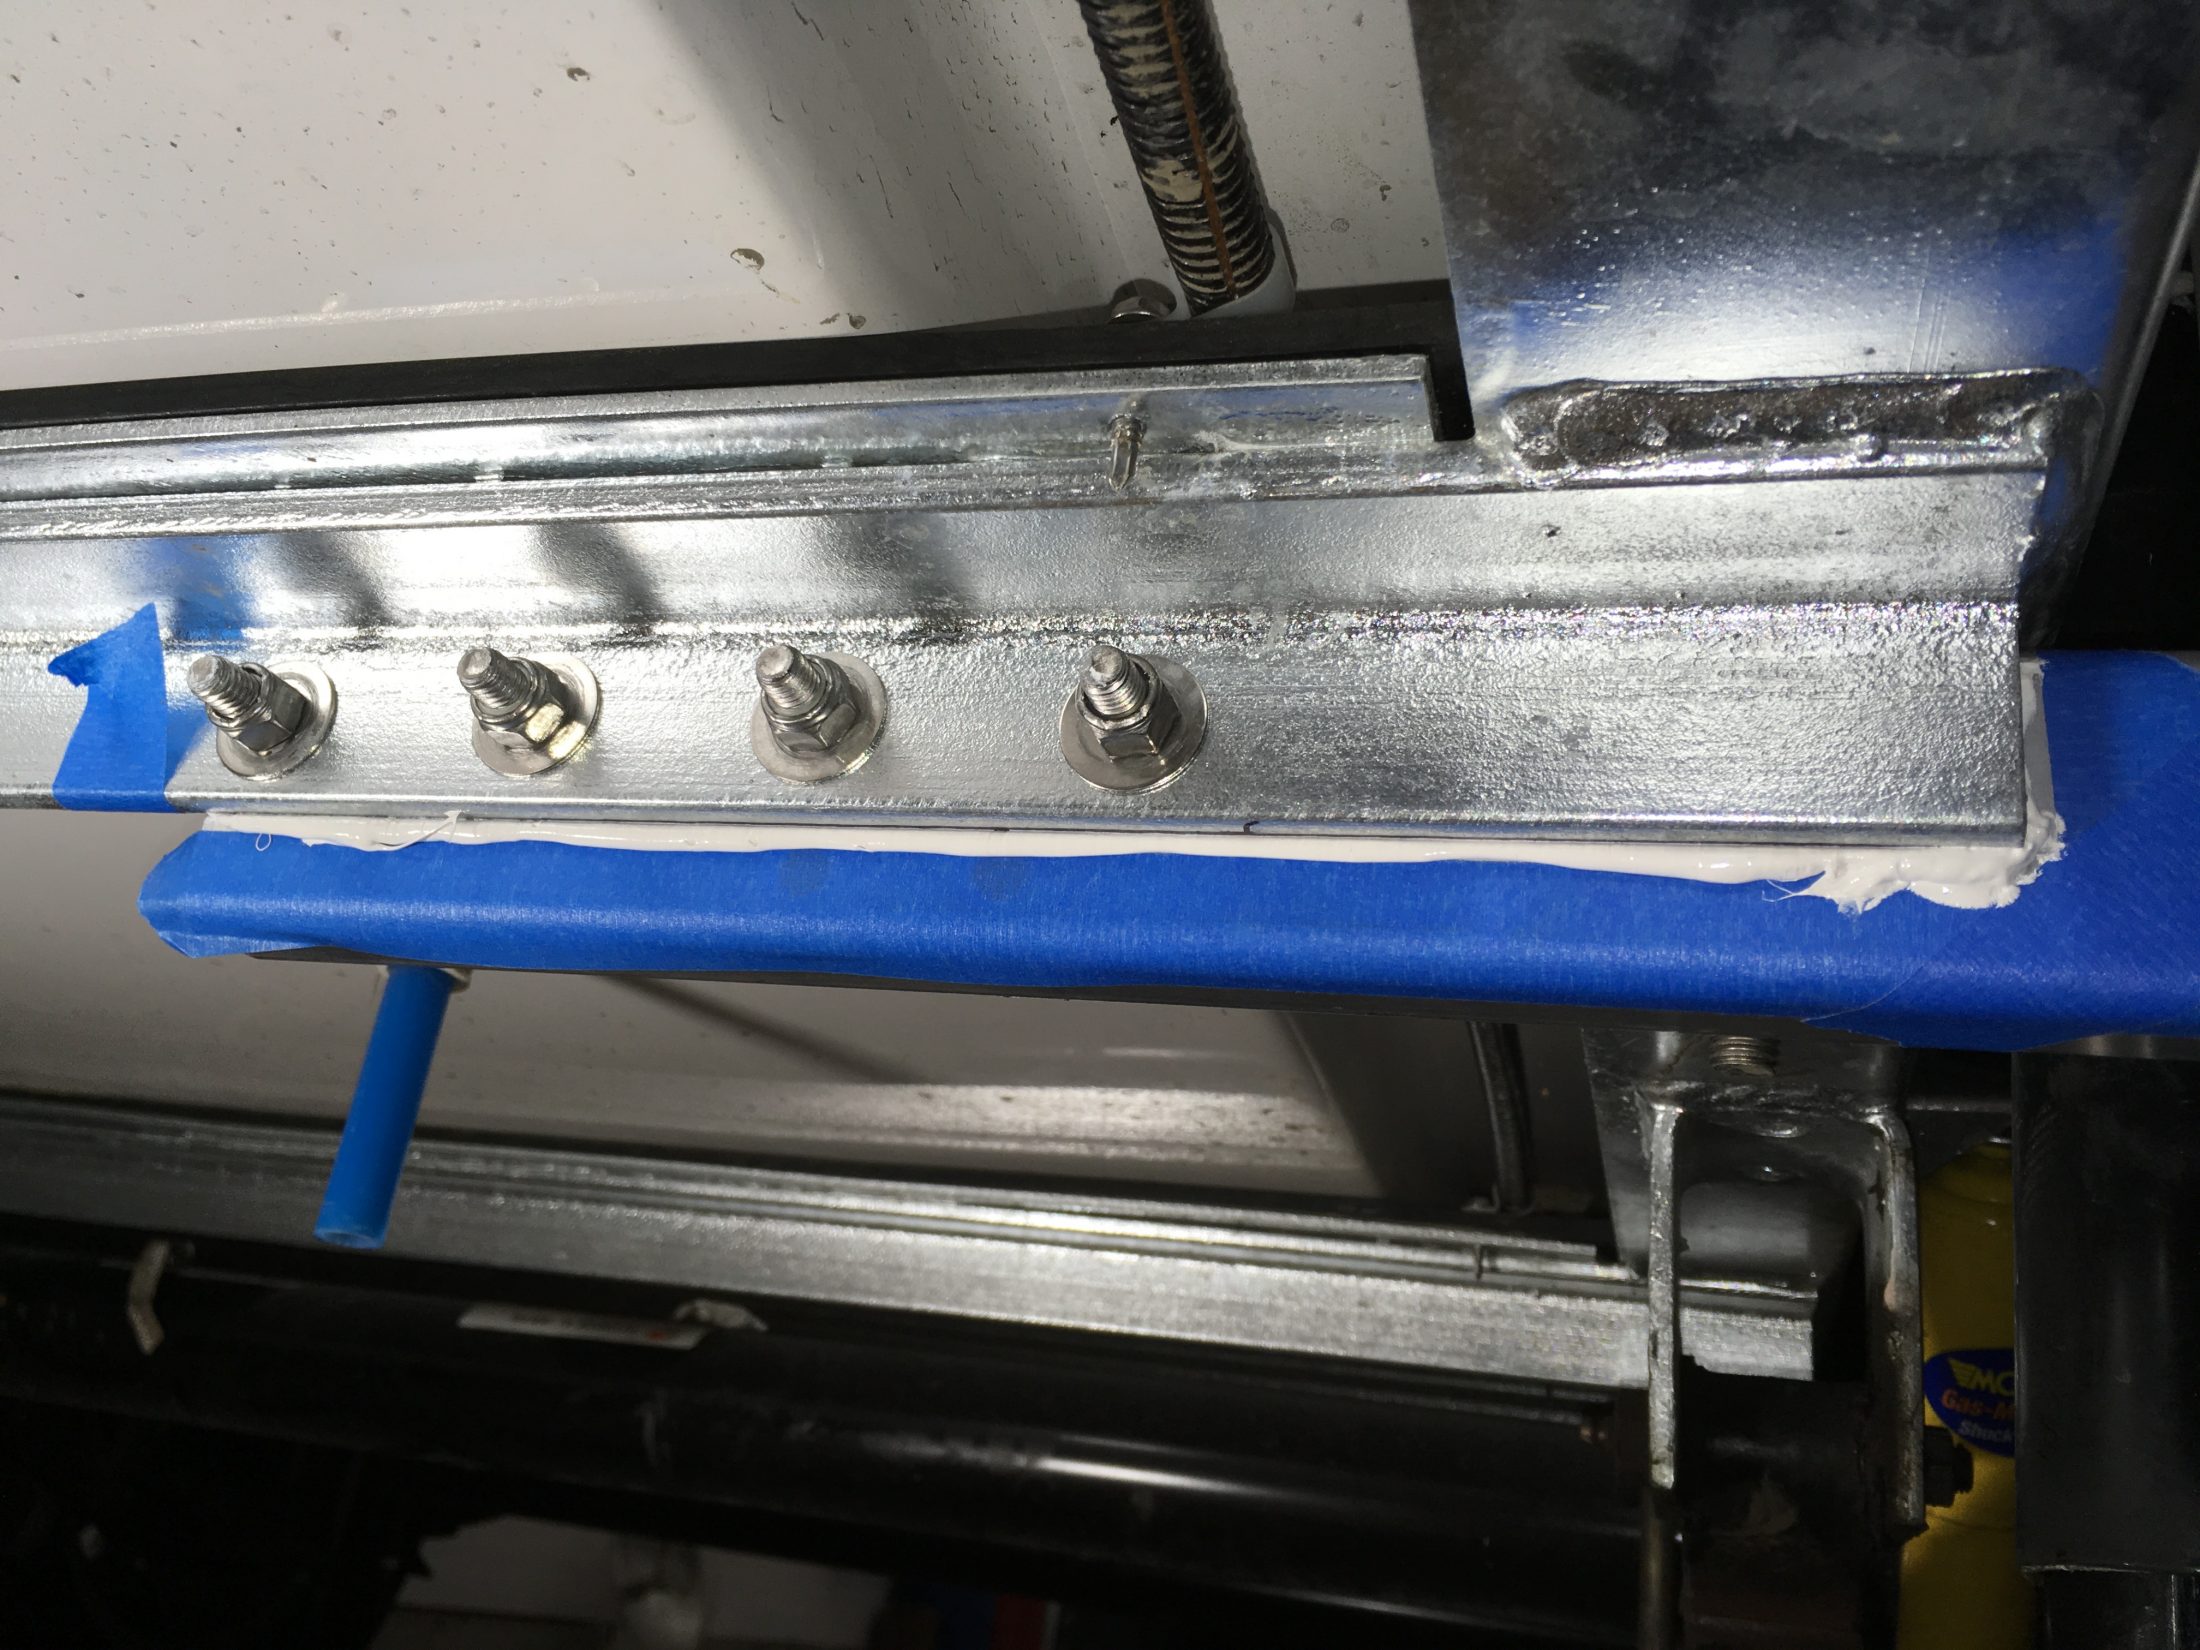
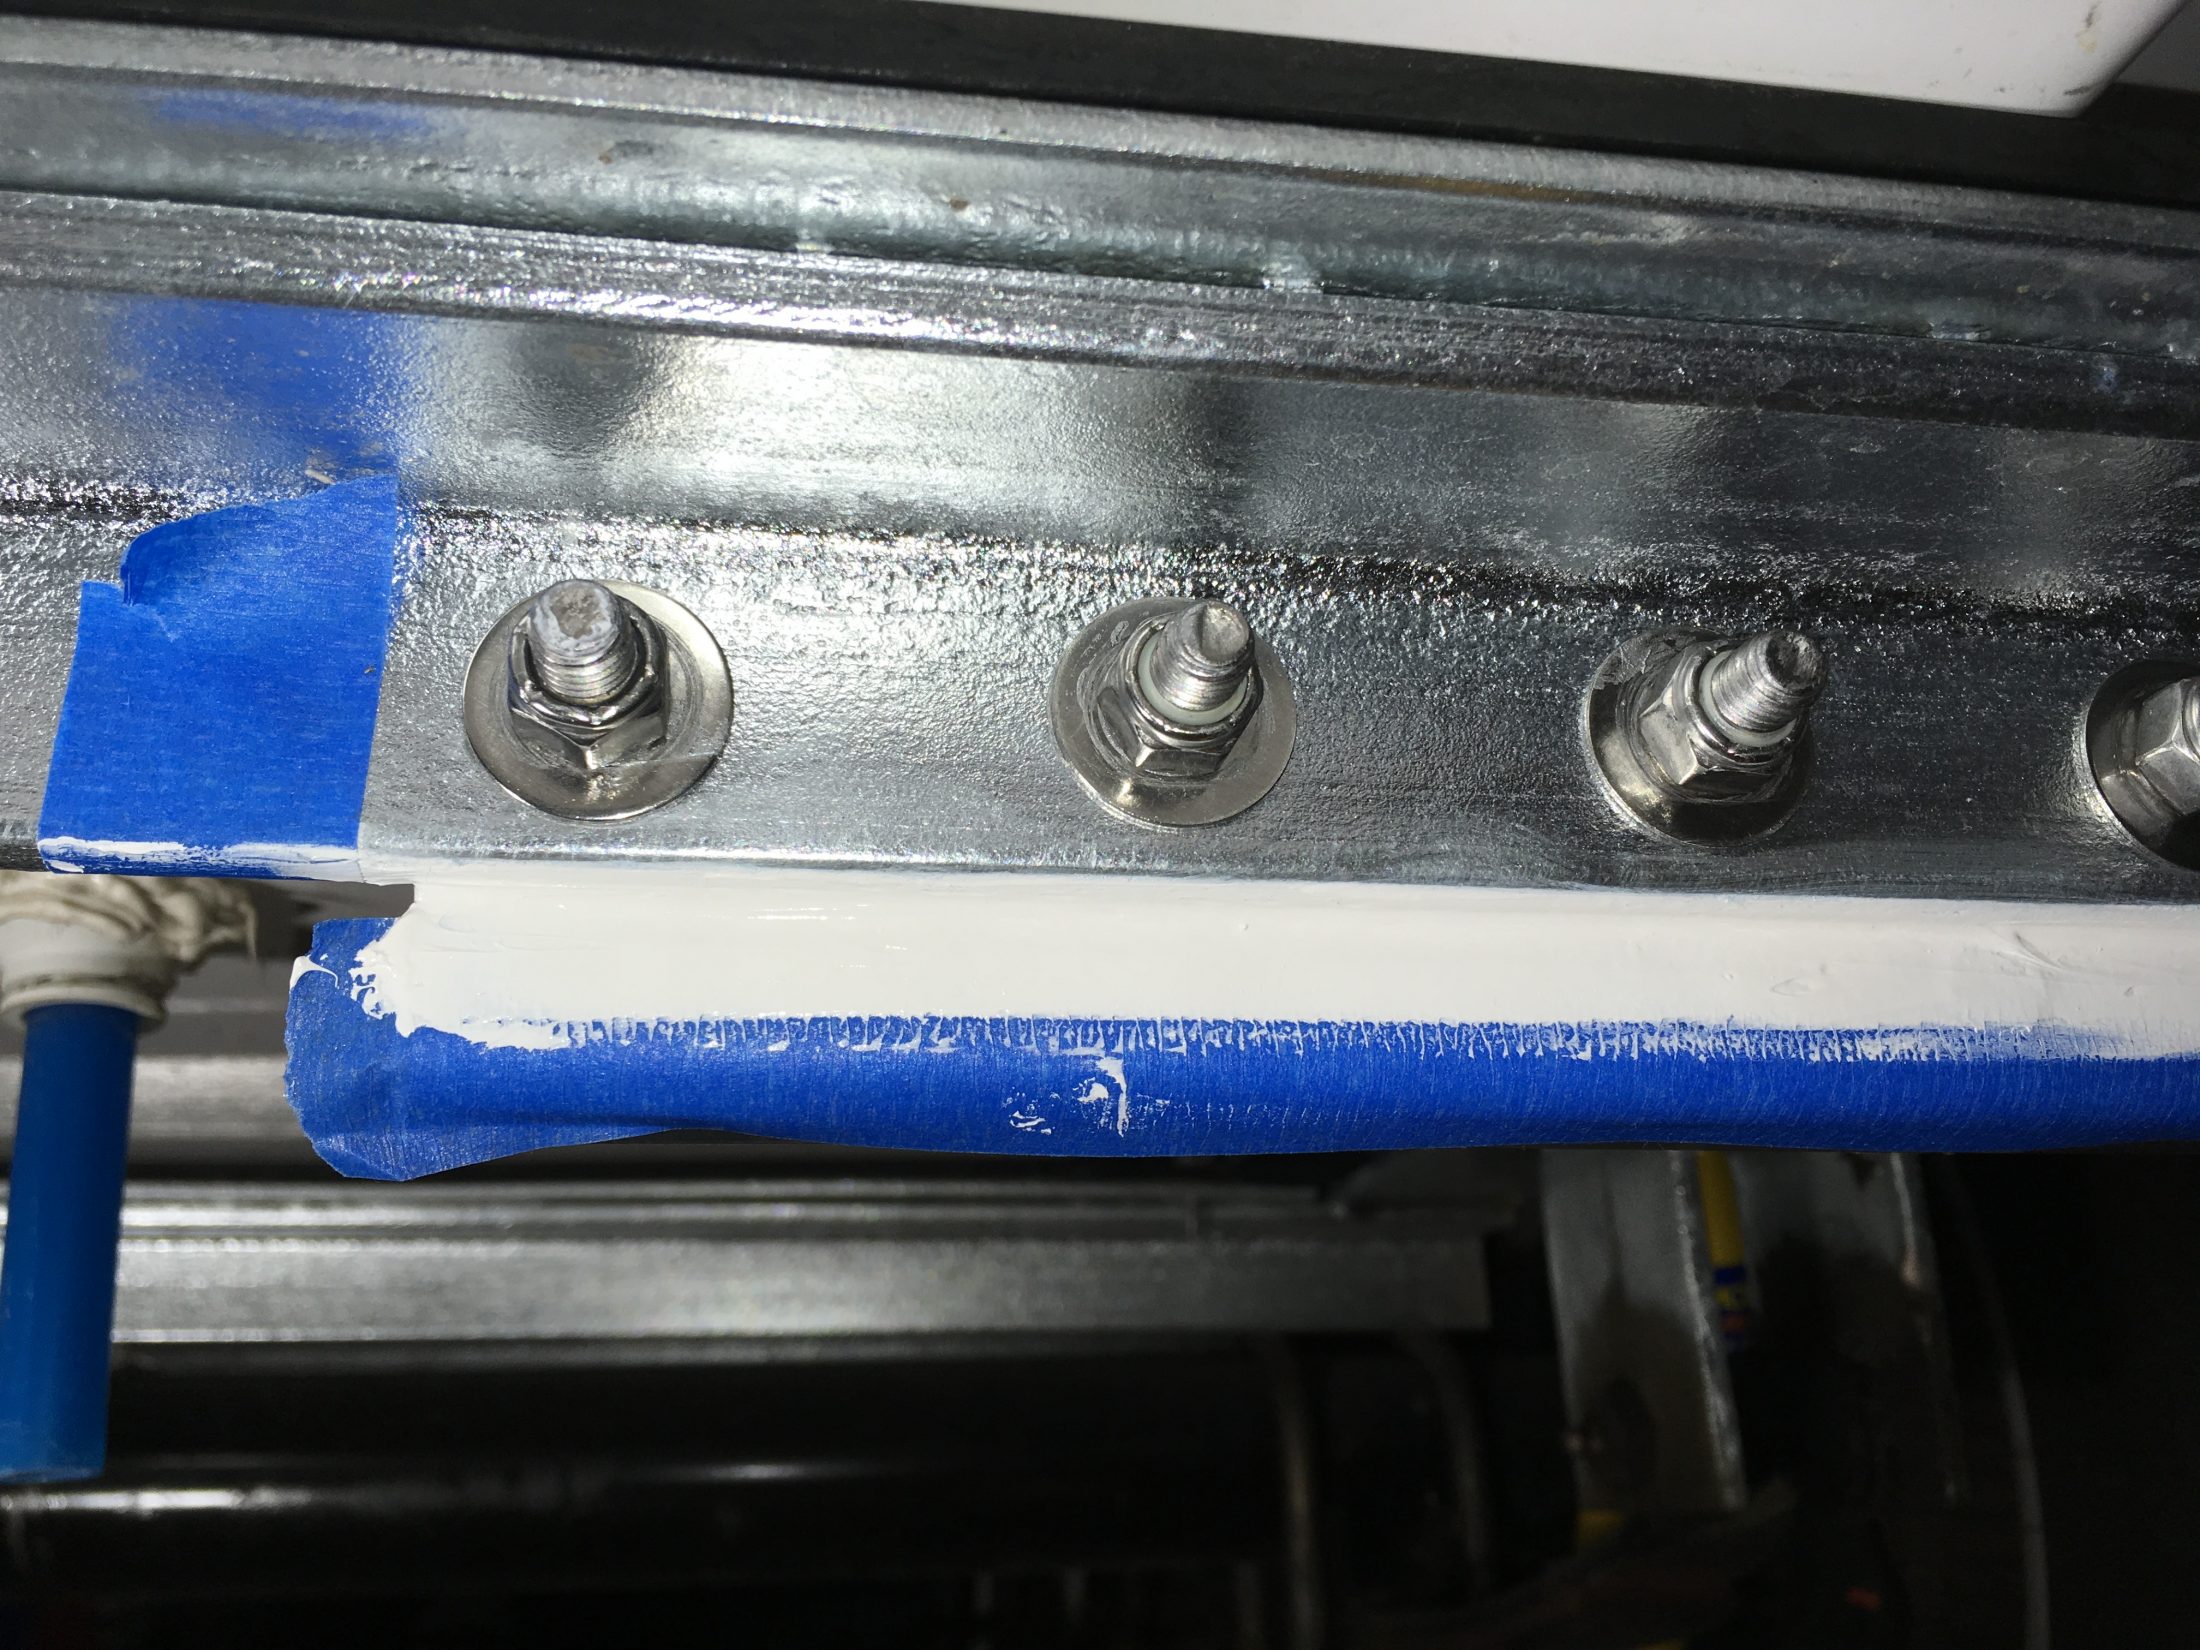
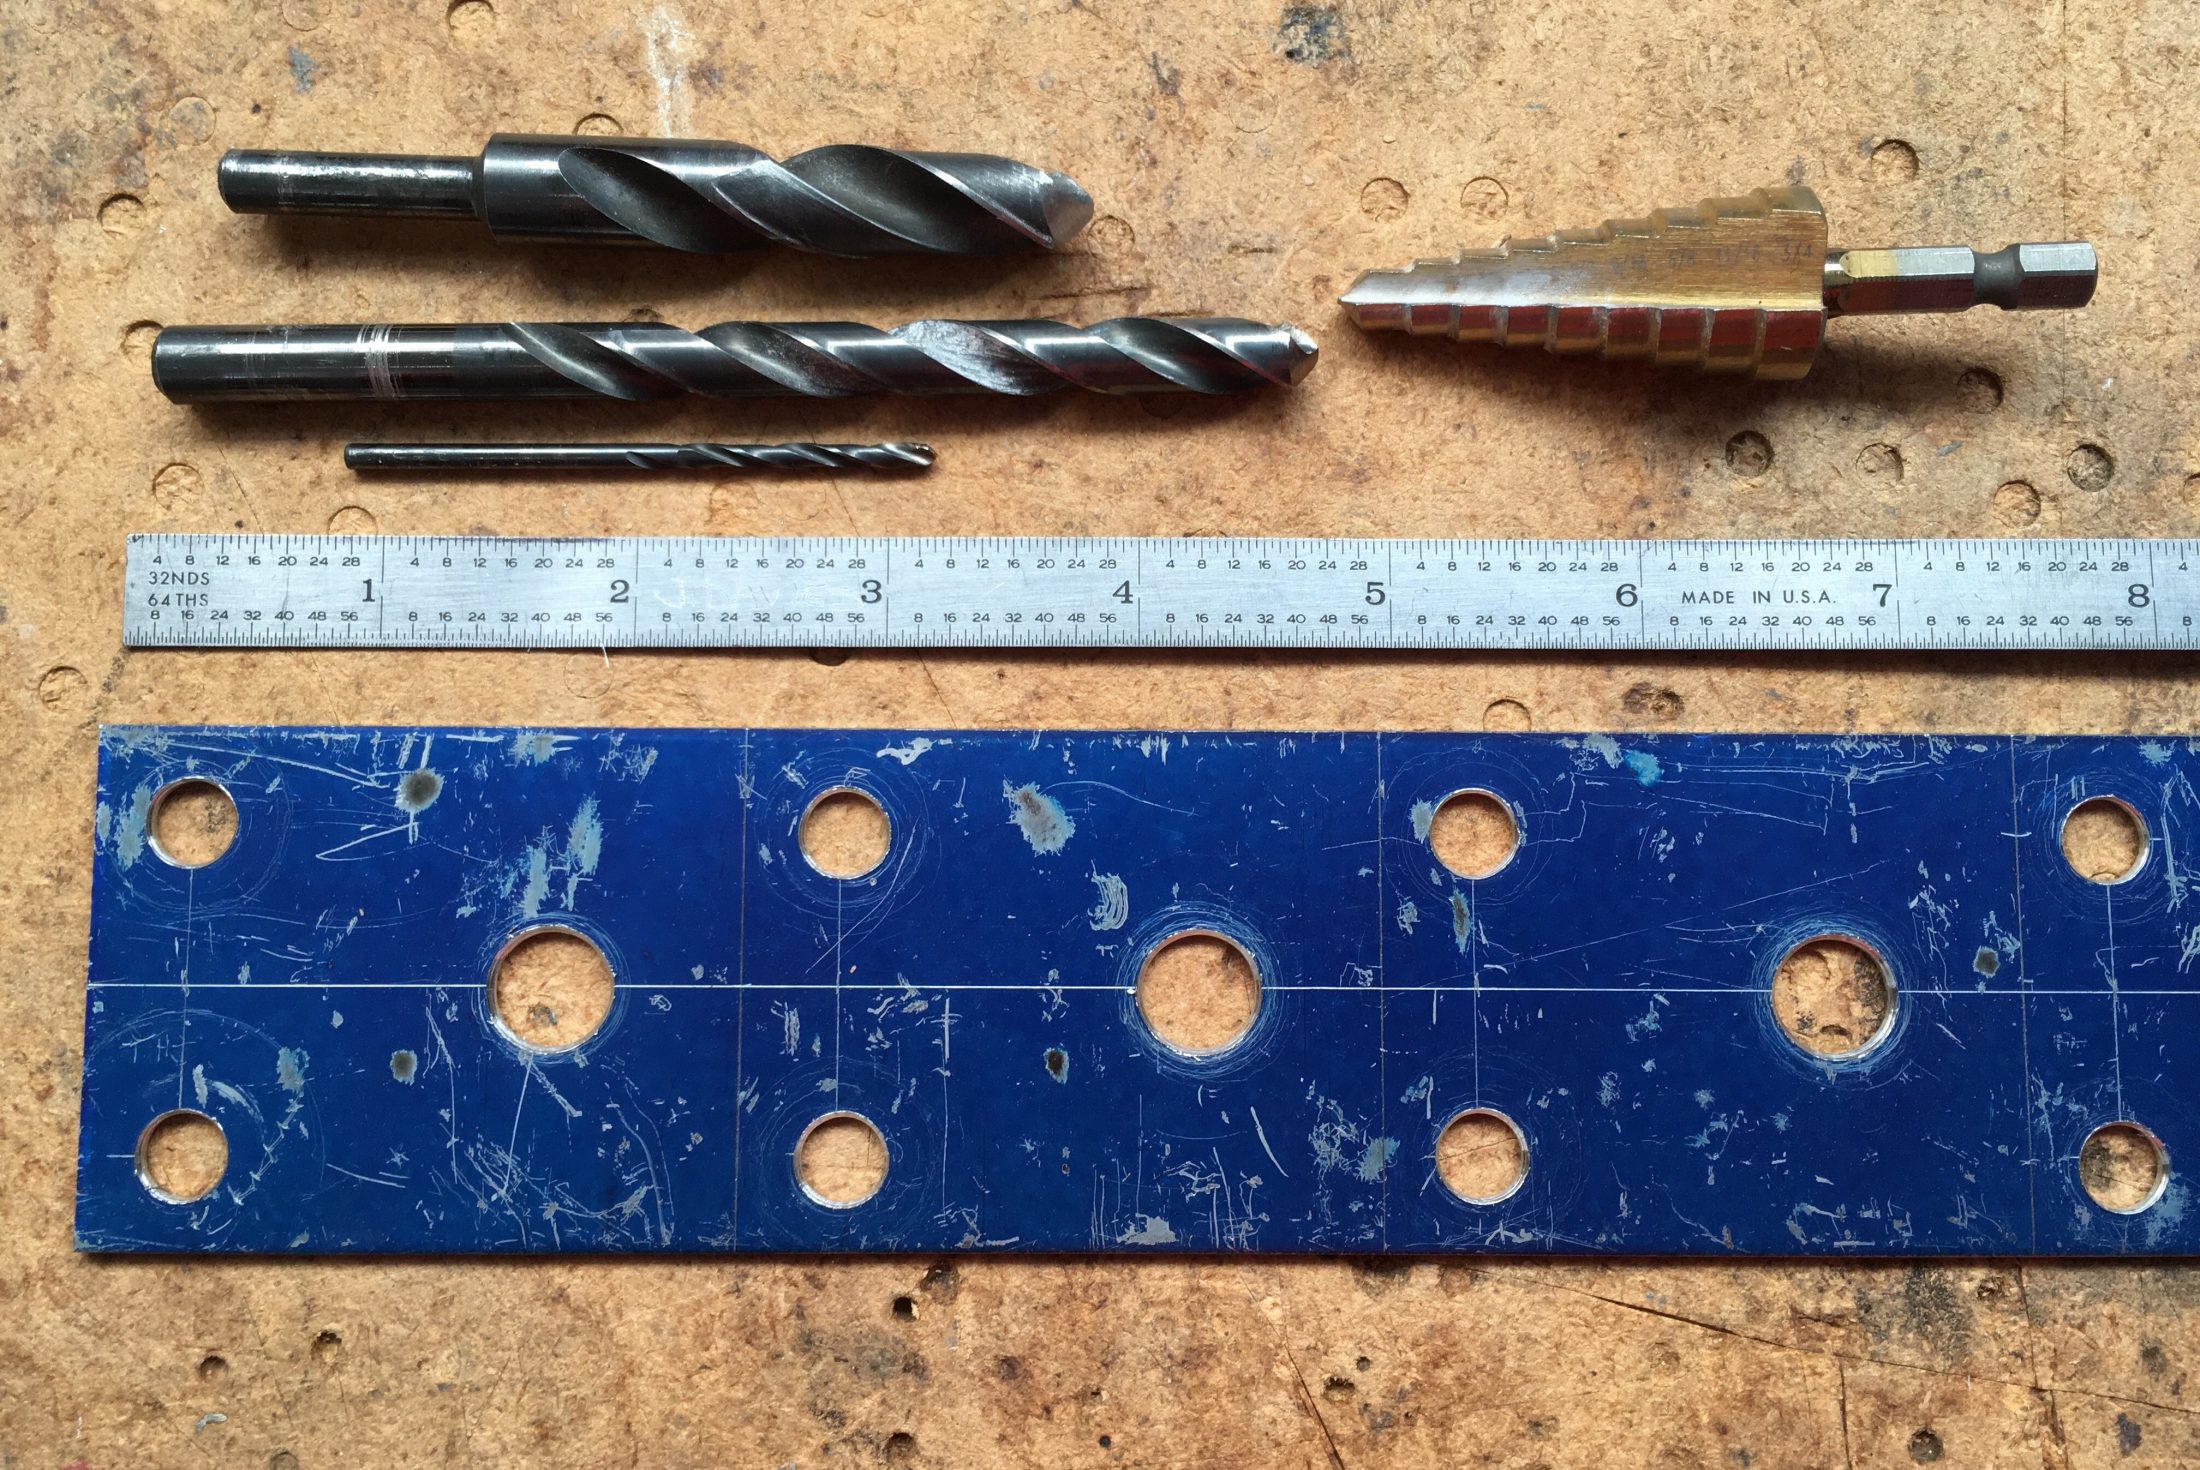
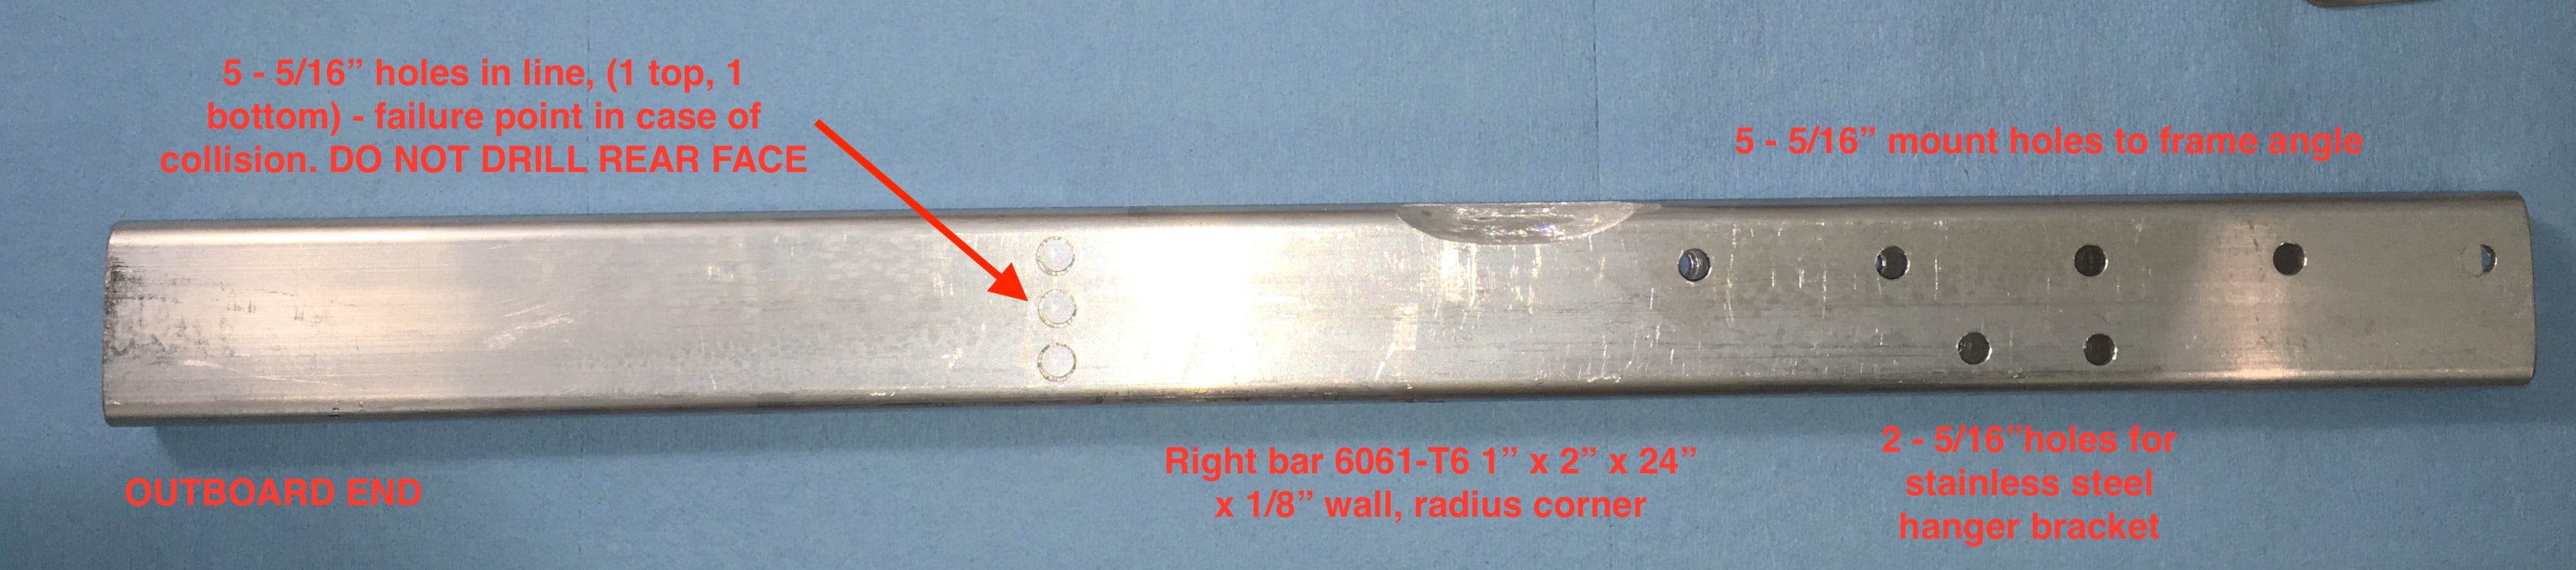
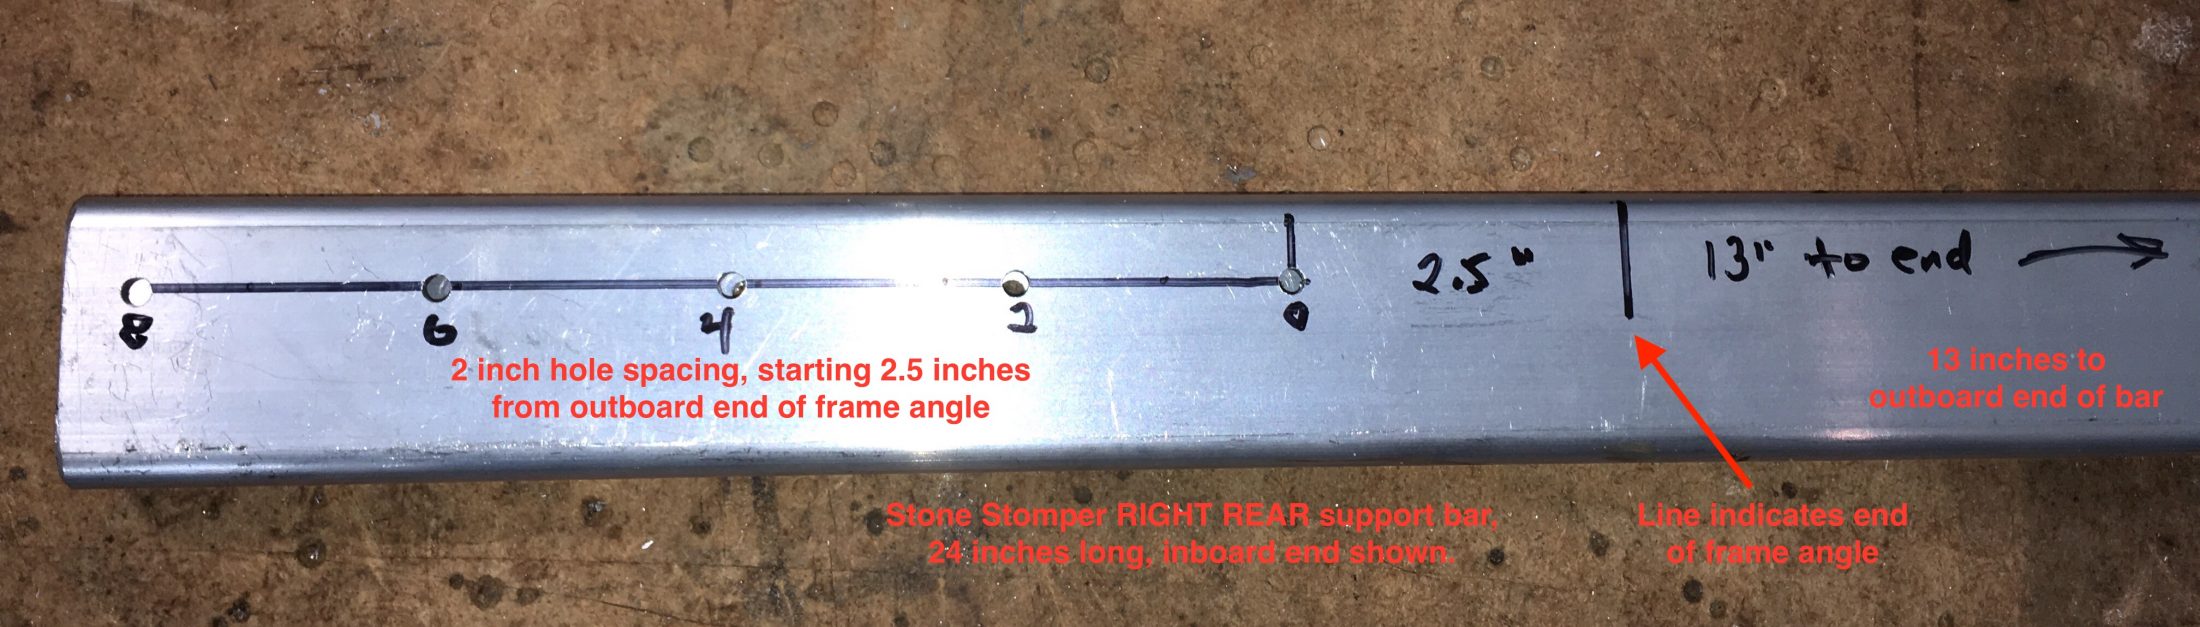
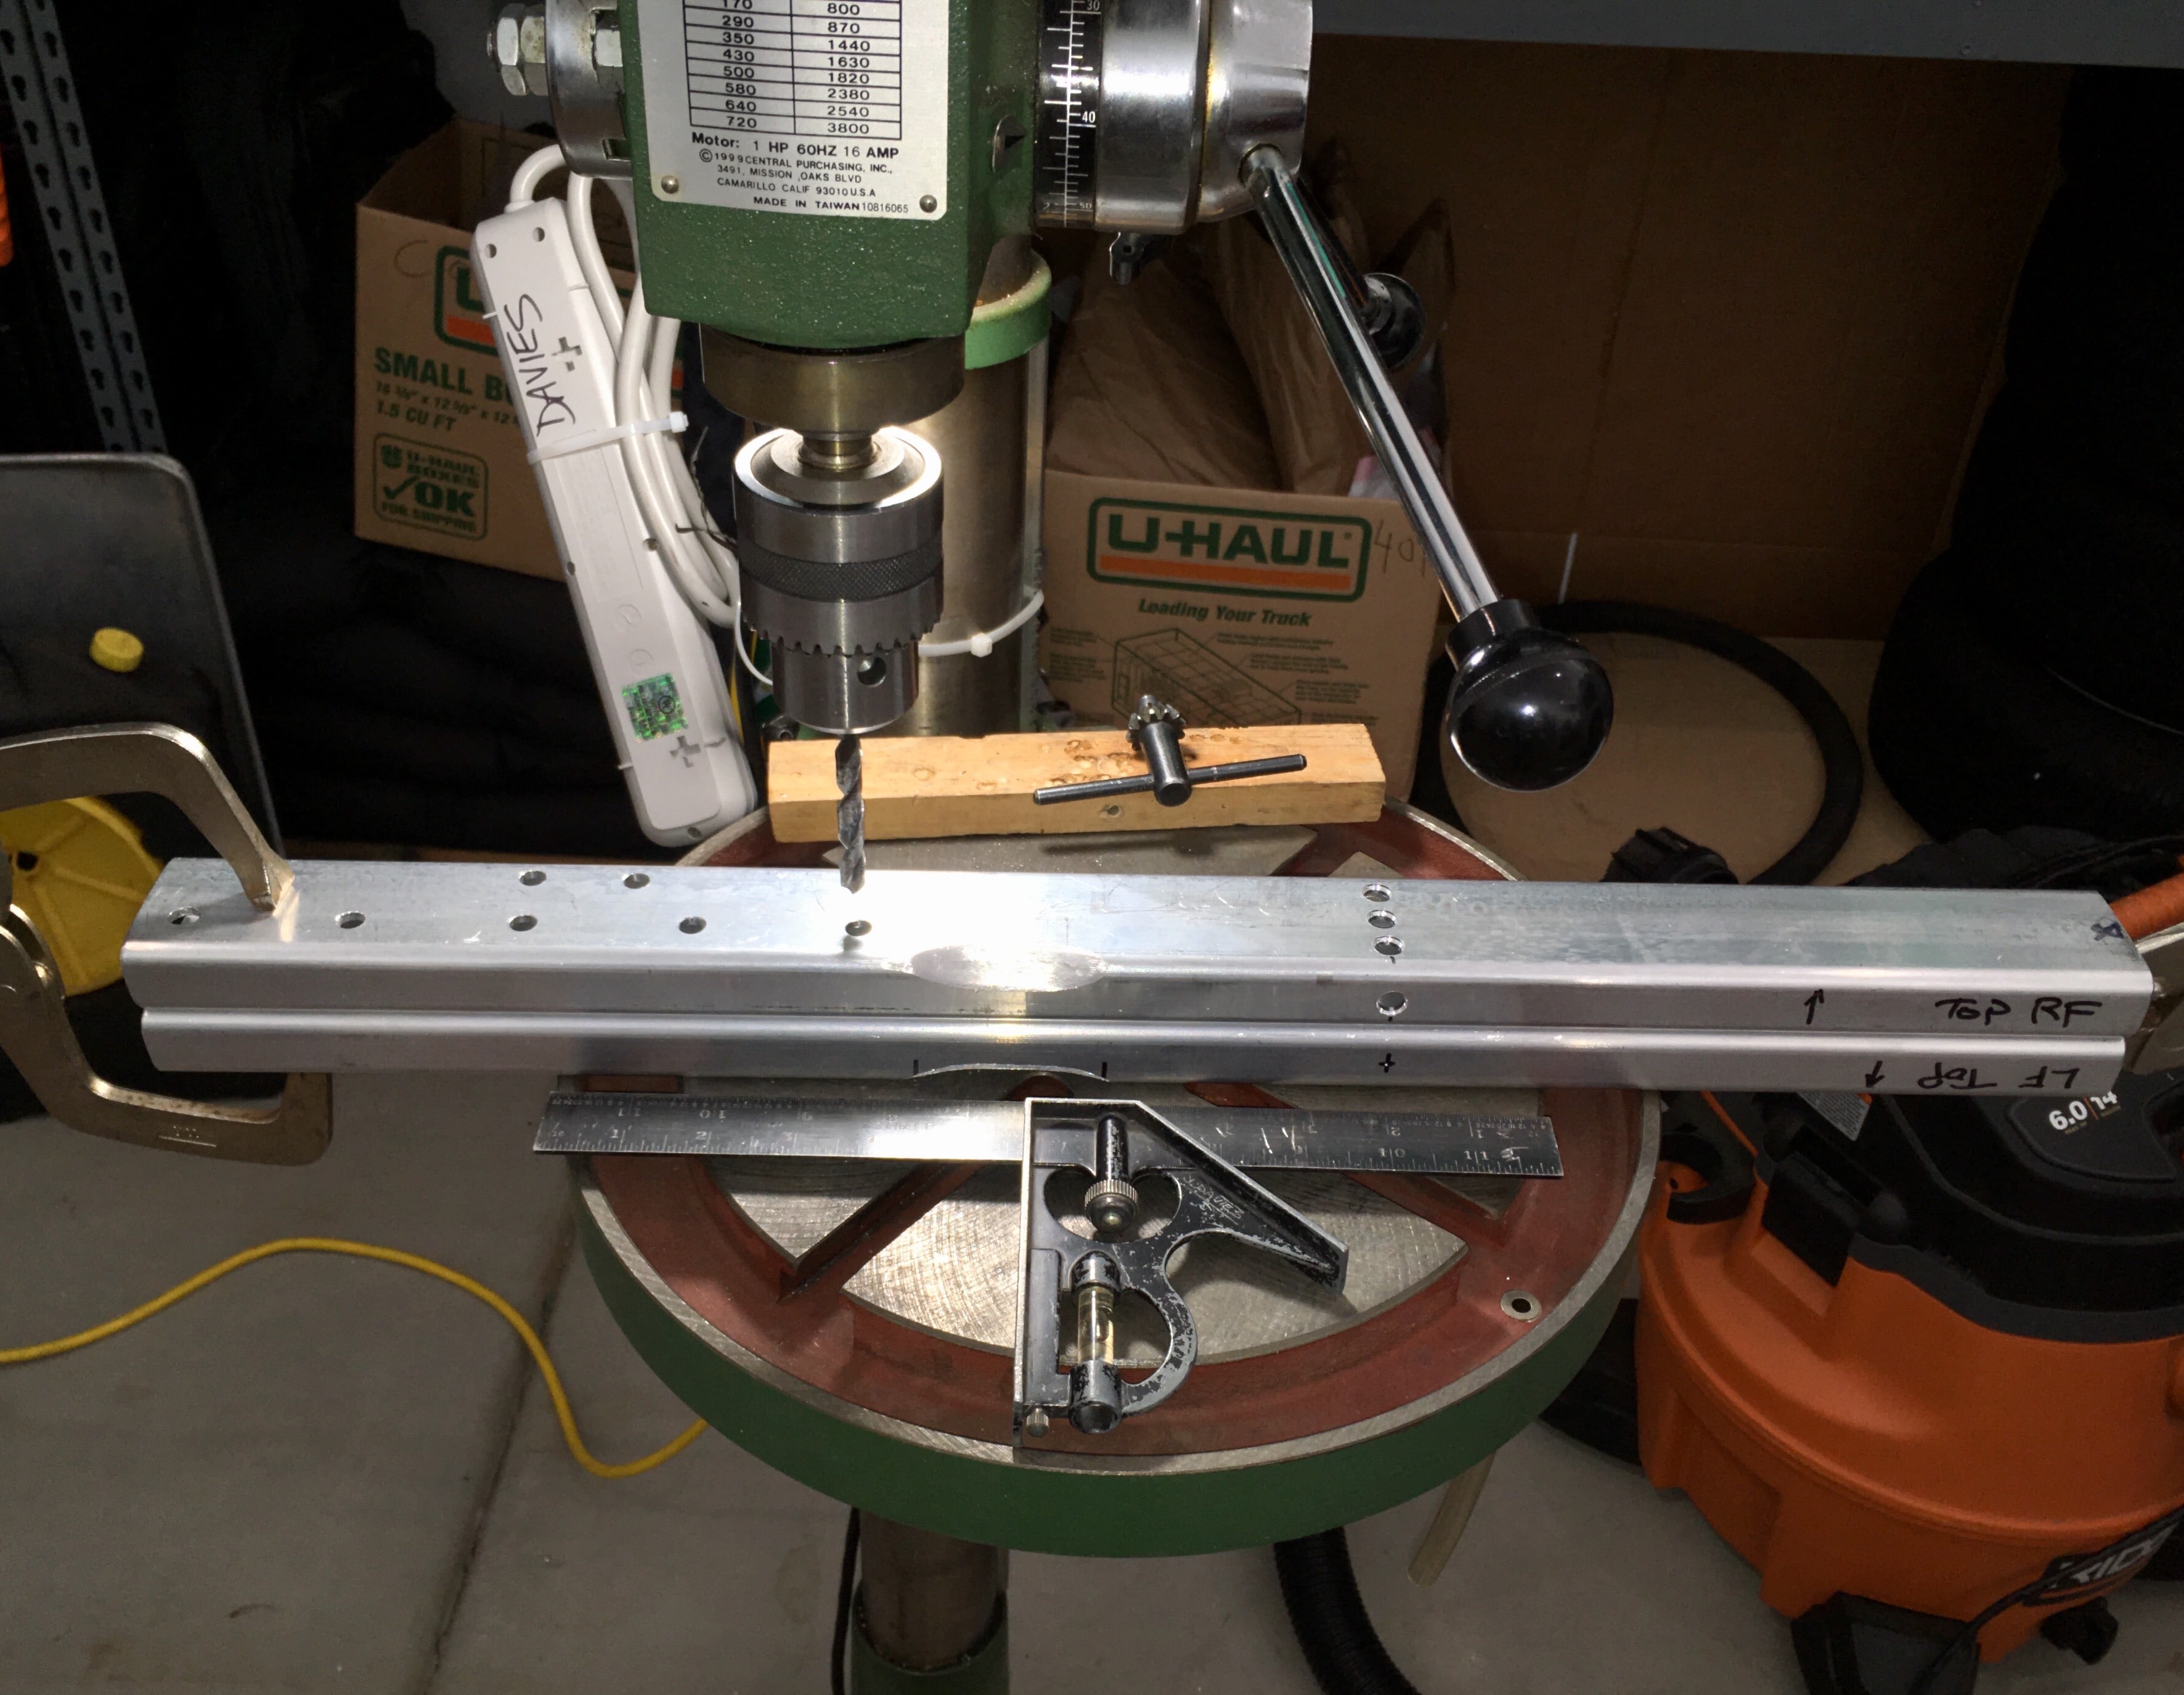
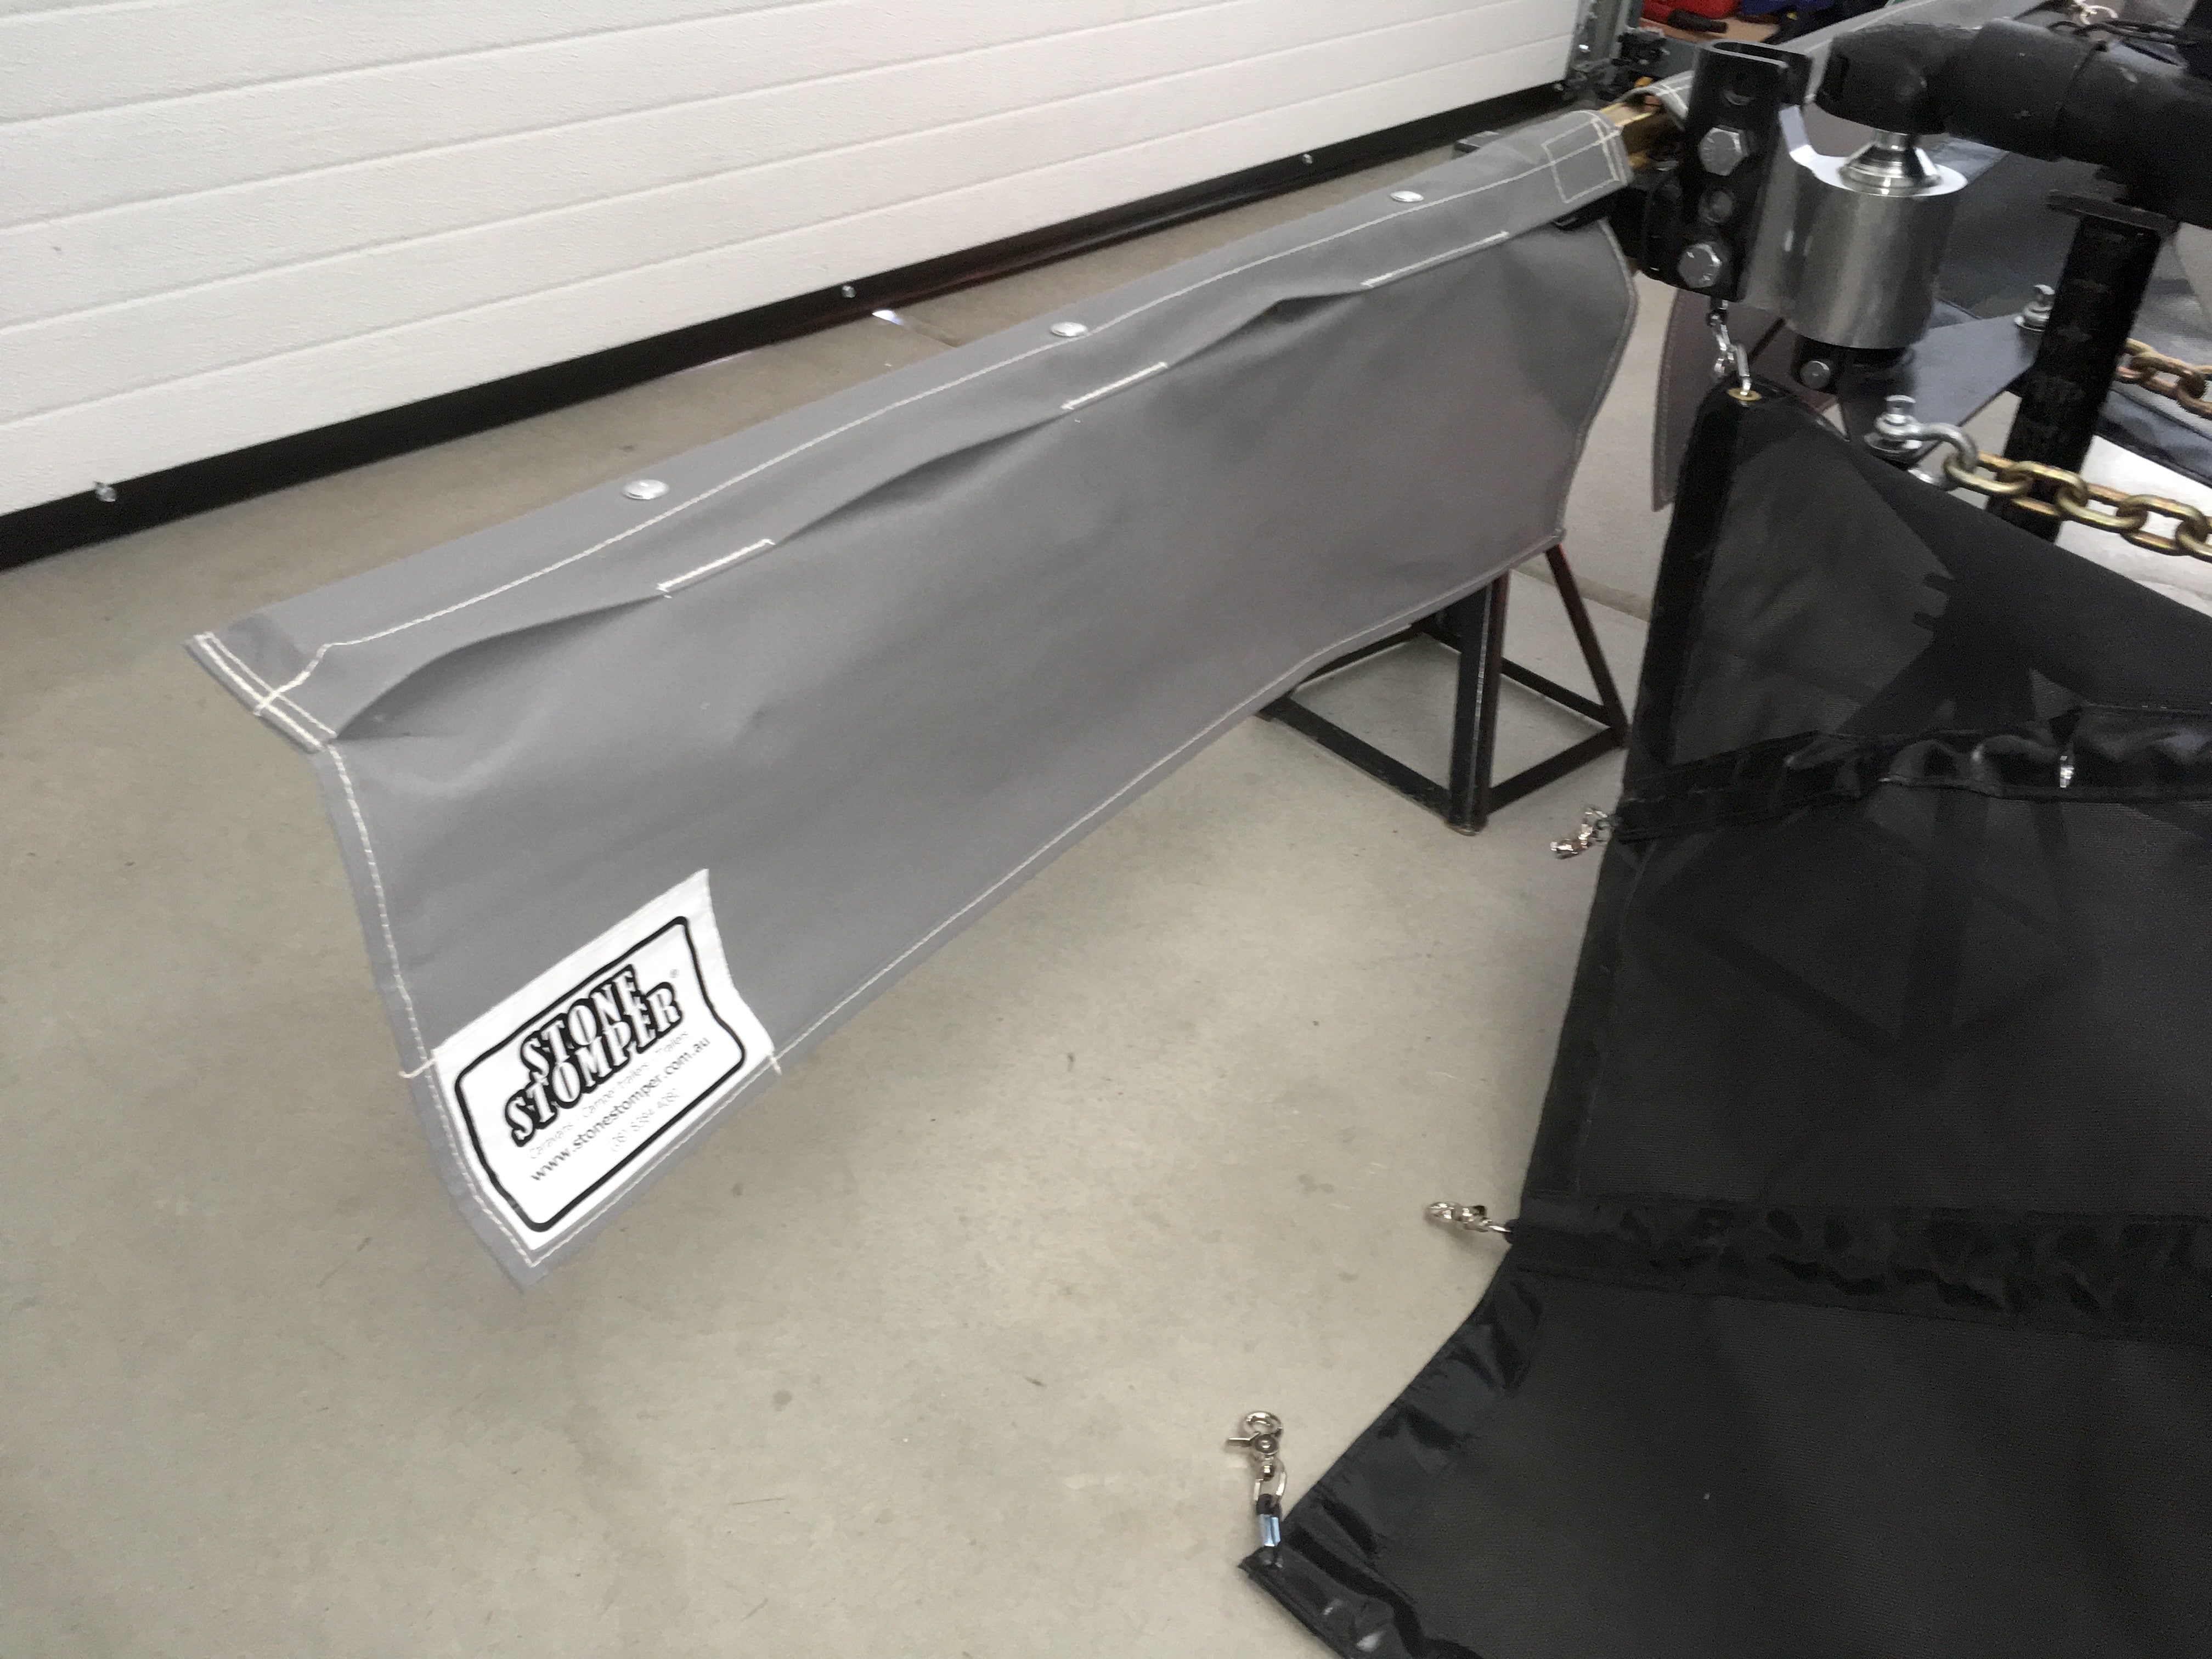
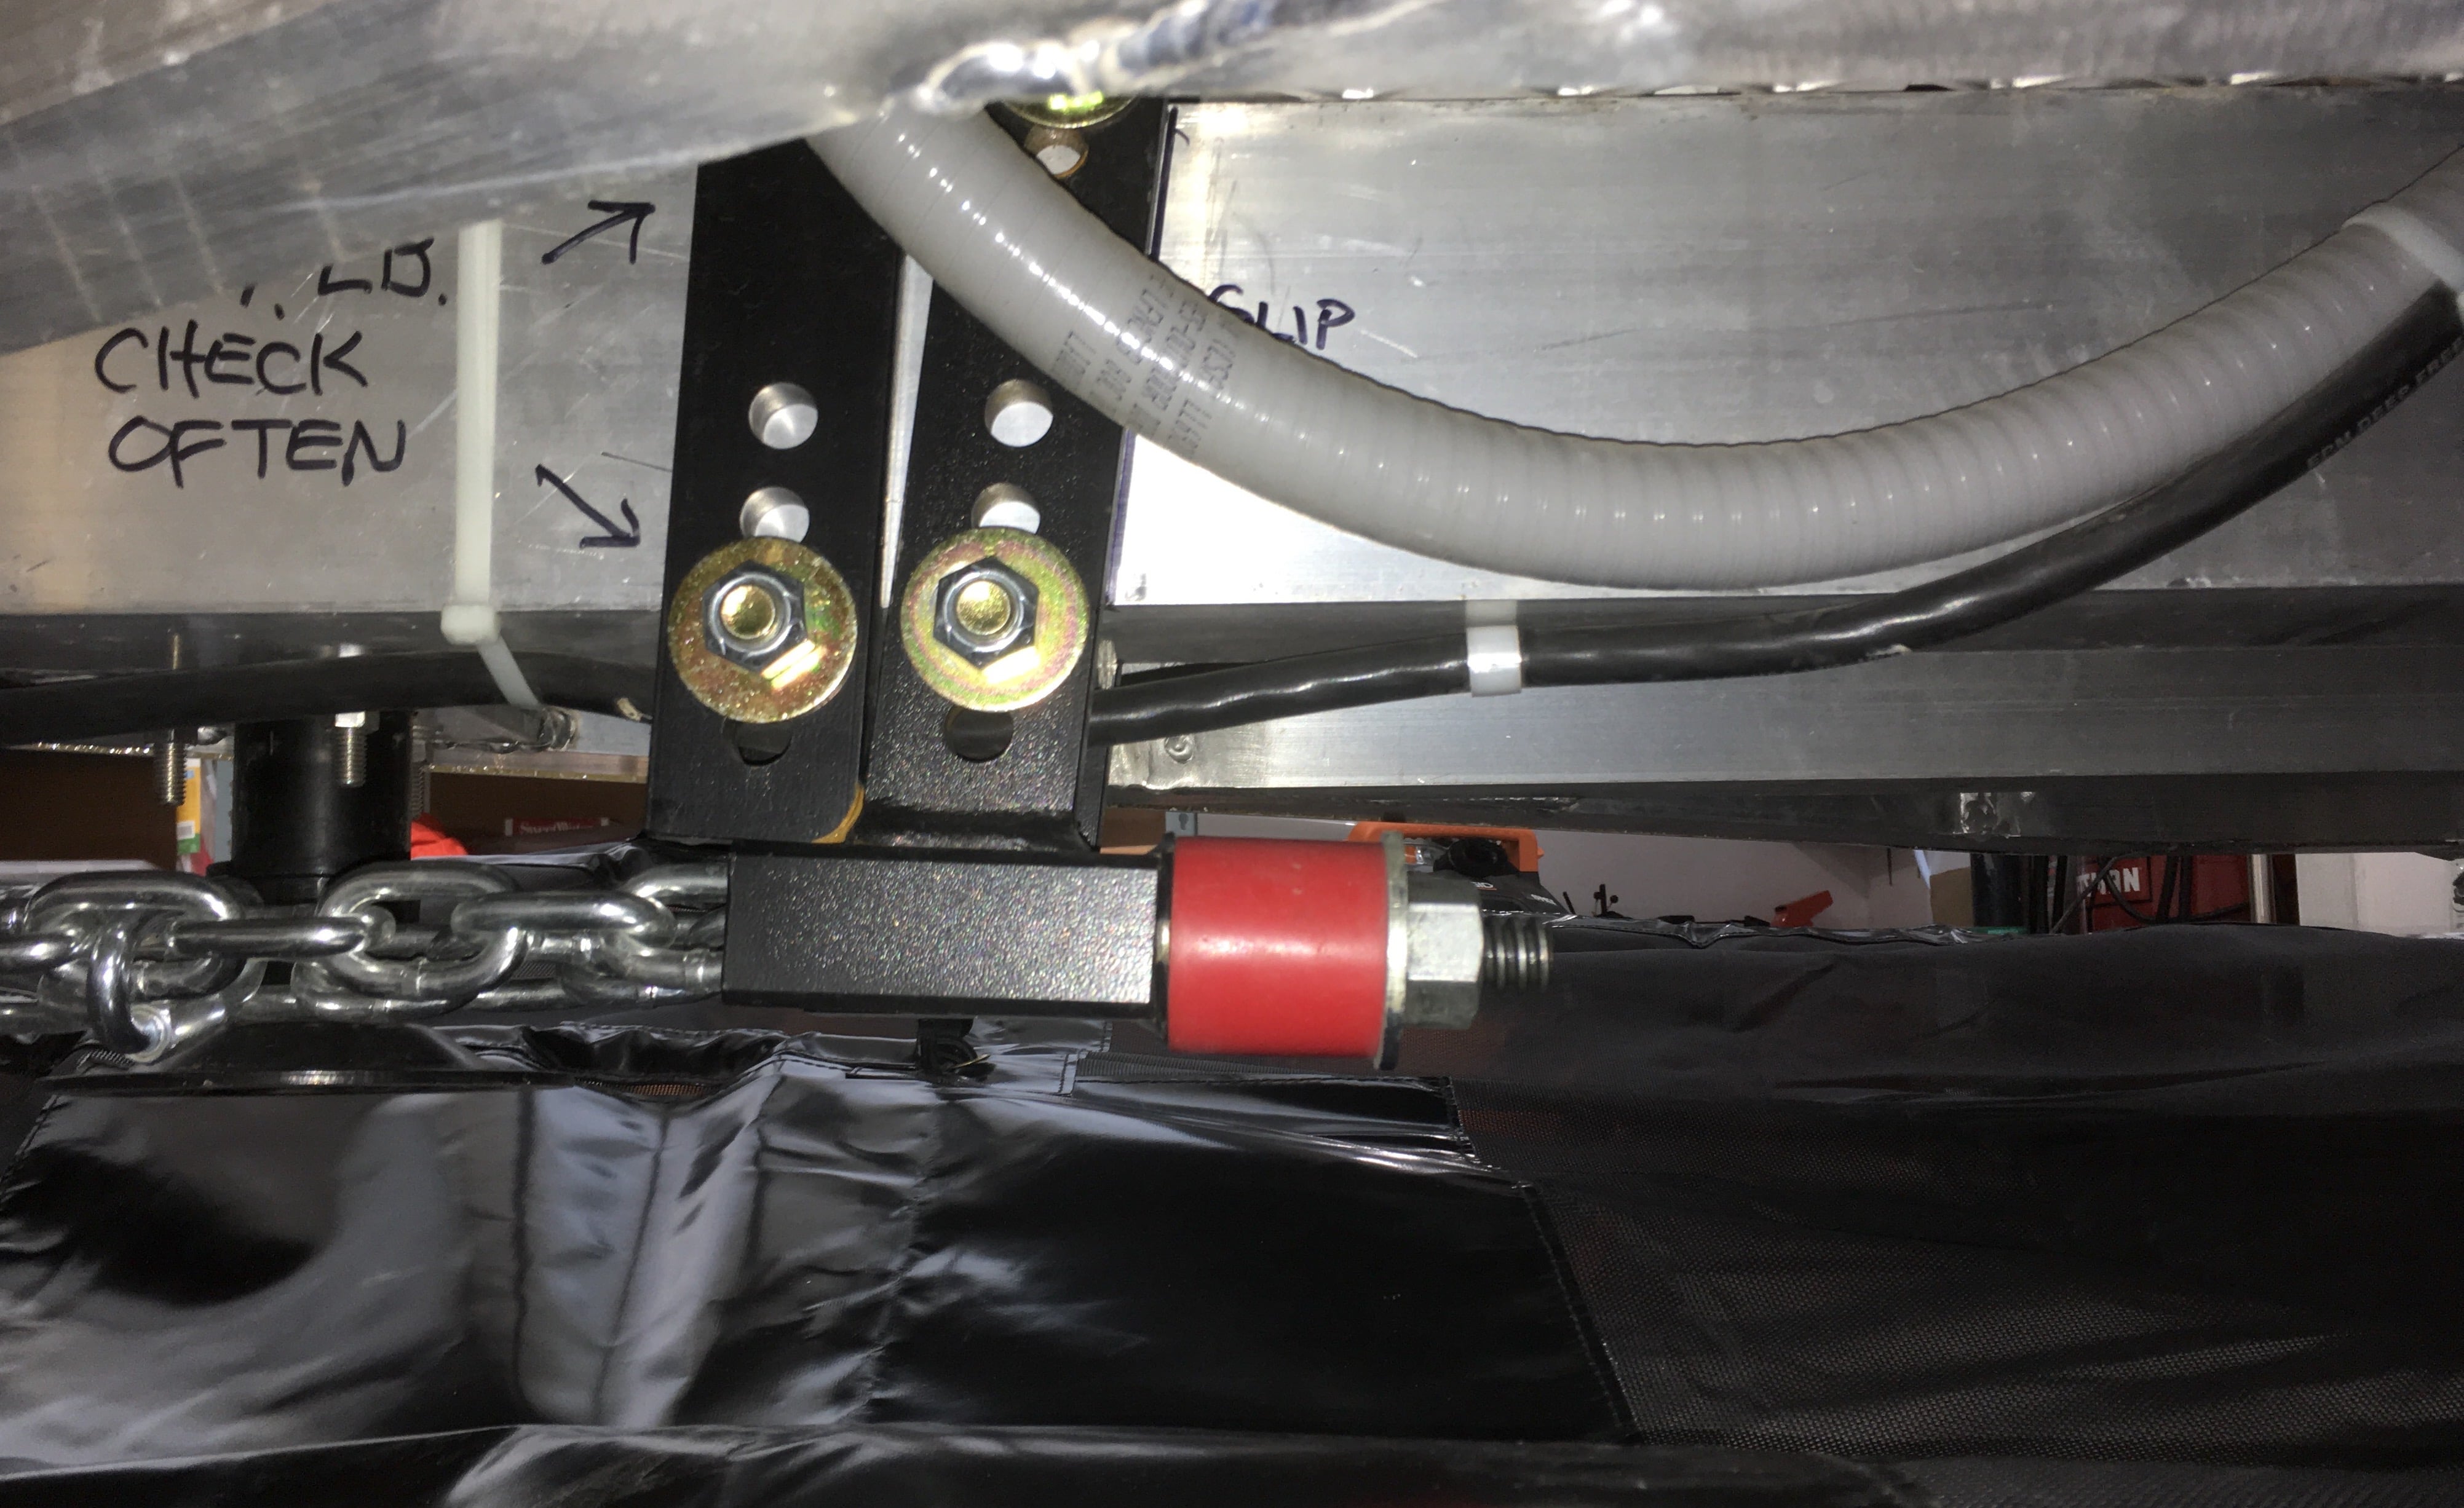
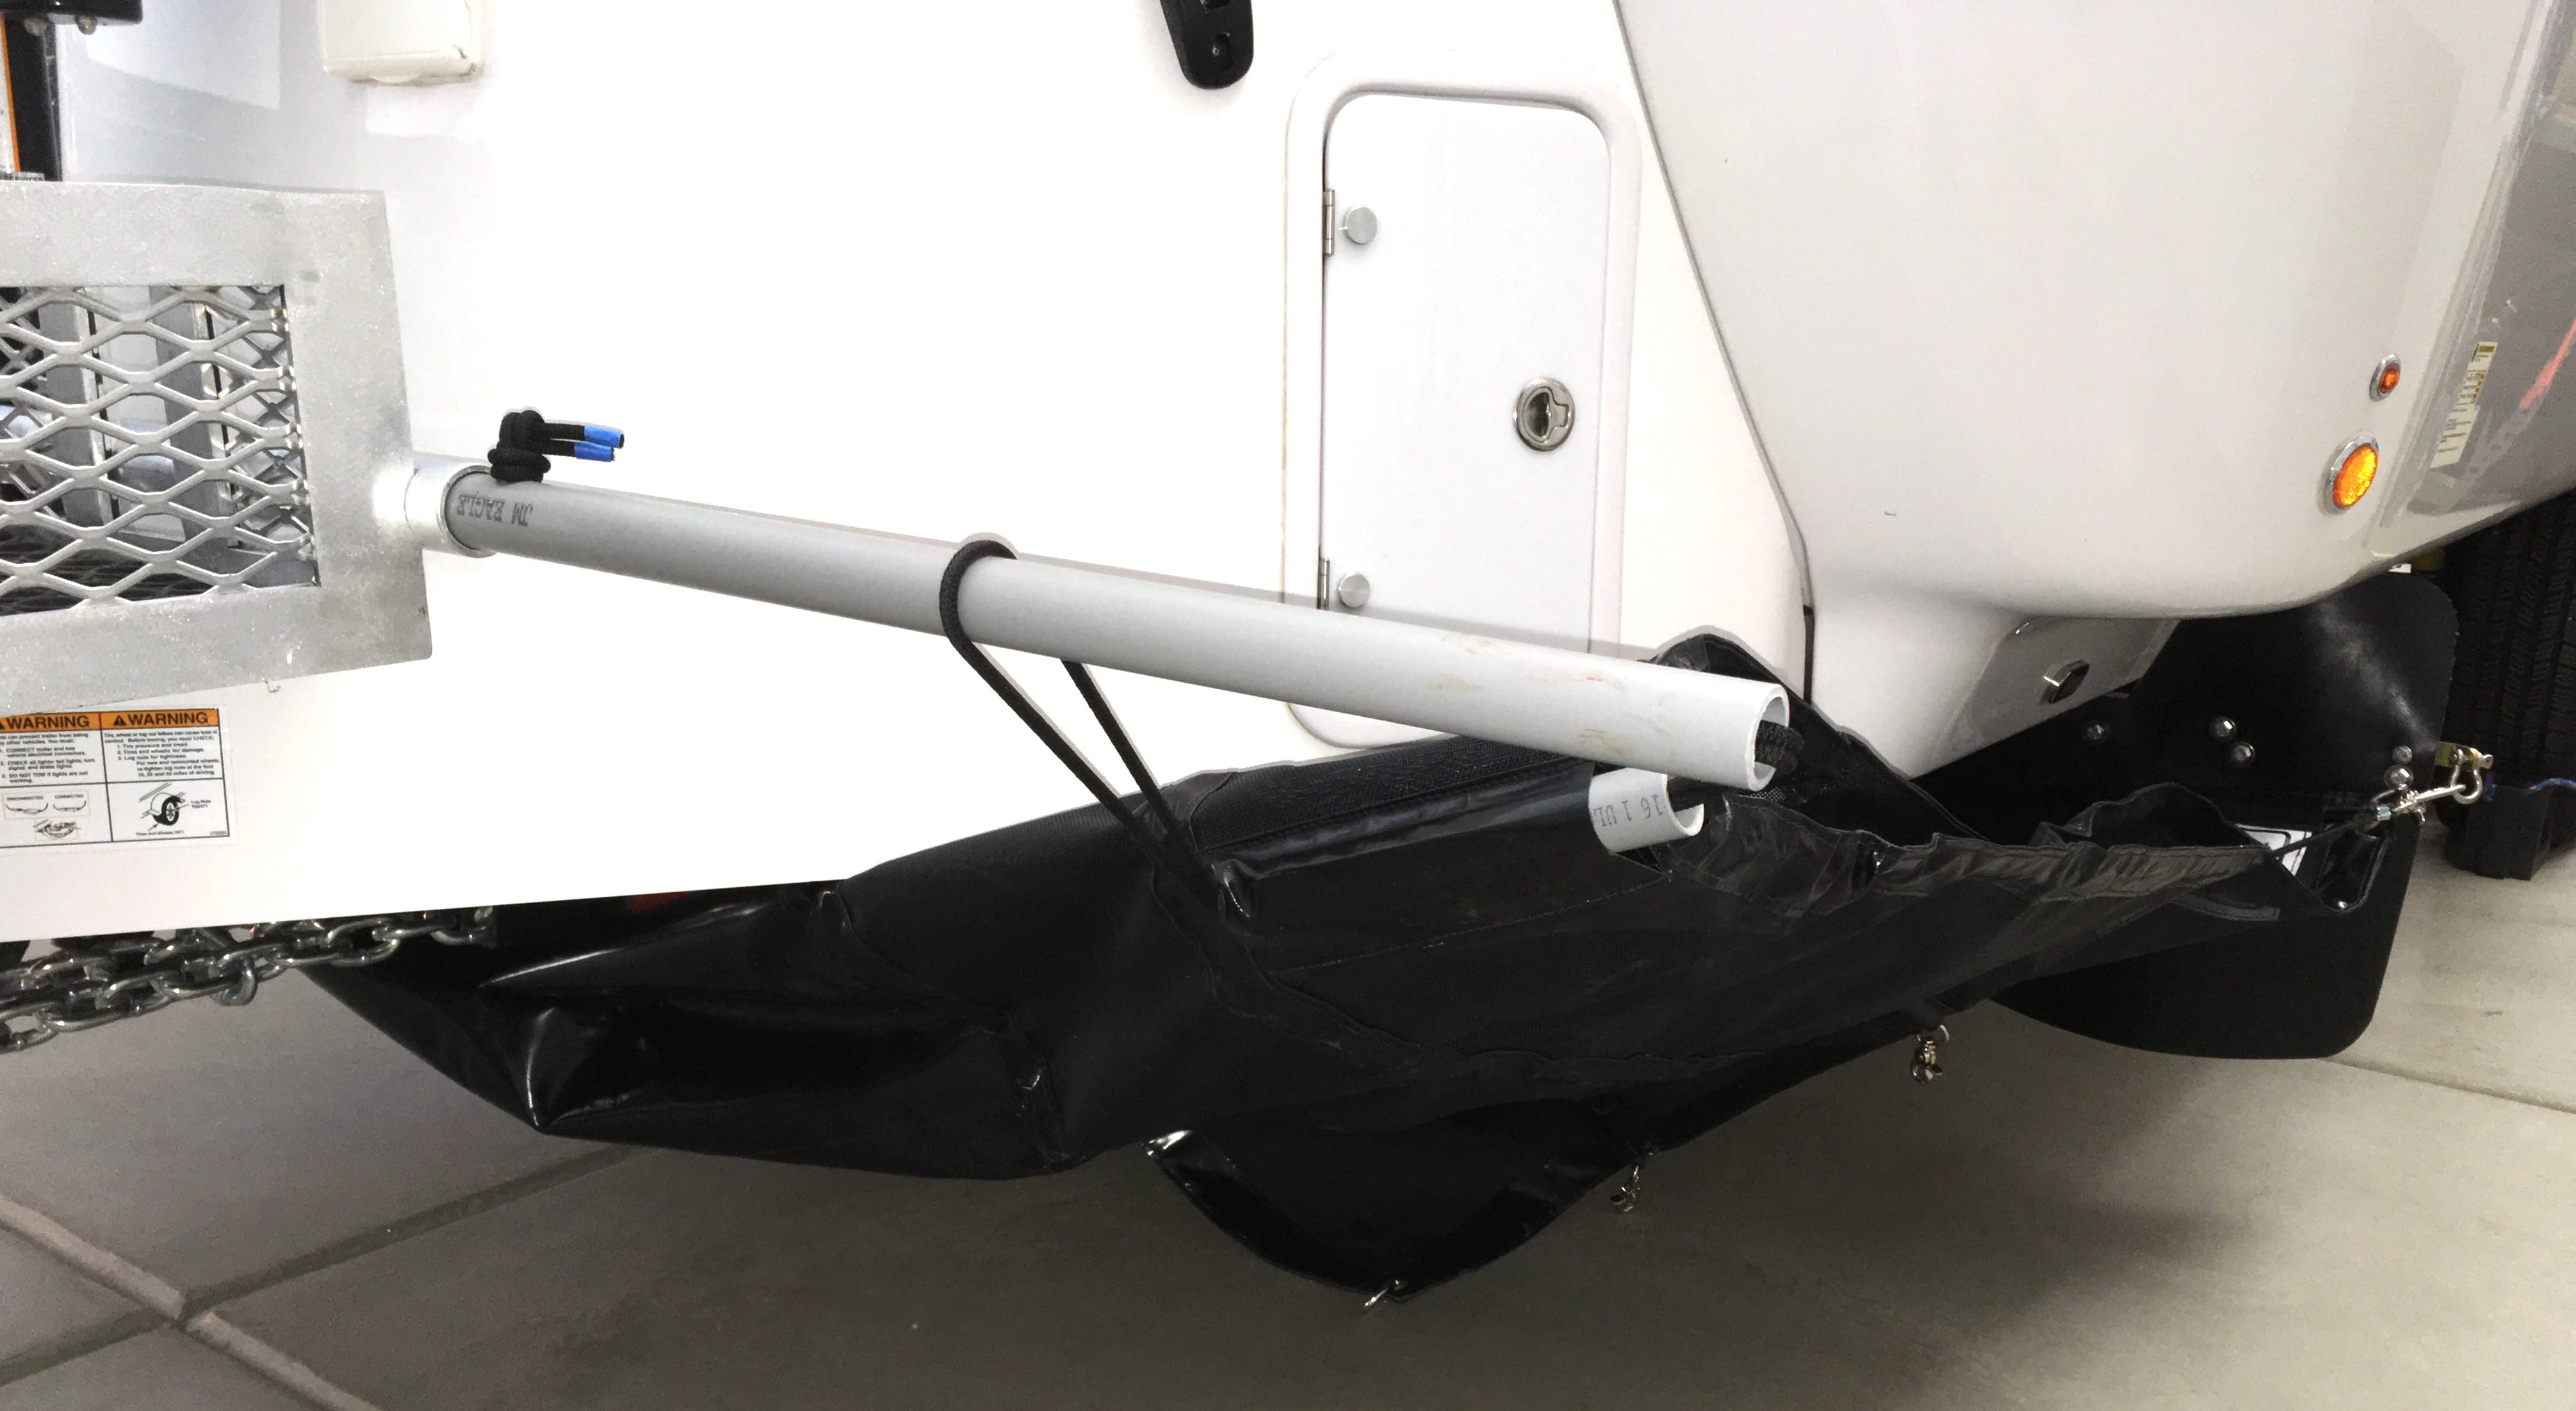
EDIT 03/27/18. Added text to first four parts. JD EDIT 03/29/18: Added road test with pics, see the below post with this date. This is going to be a super long thread, I have a lot of pics and text to work on. For now I am going to get my order document (with measurements) and the install pics loaded. I am going to be away from home for a week, but maybe I can work on getting the "How To" text entered also. While I am doing that I will insert the pics into the text as needed. The job is finished but I have not yet towed with it. A road report will follow somewhere, somewhen. Please look at this doc for ordering and measuring info: DAVIES-Stone-Stomper-NOTES-MEASUREMENTS-013118-EDITED-FOR-POSTING.docx PART 1 EDIT 03/27/18 SUMMARY AND BASIC DESCRIPTION This is frustrating, a very long, 20 minute edit vanished. Completely. I should know better than to write online and not back stuff up. I hate the forum software. It is a measure of how much I like you guys that I will rebuild that post. Stone Stomper is an Australian manufacturer that has been making these guards for many years, they are extensively engineered and tested over tens of thousands of miles of rough tracks to perform well under harsh conditions. The owners who use them really like the product. There are plenty of reviews and videos, so I will just send you to their site for now: …. http://stonestomper.com.au At this time they have virtually zero market exposure in the USA, though they have shipped them here. I really hope that they will consider opening a small USA distributor/ manufacturer so that the issues with exchange rate, high International; shipping and possible warranty claims would be more palatable. I don’t think that will happen unless we as foreign buyers ask hard. At the end of this thread are “unboxing” and “initial layout” pics. I will add some comments there. The basic premise is that an underslung heavy mesh fabric that rides underneath the entire A Frame structure stops rocks from getting past, stopping paint erosion, gravel rash and damage to the trailer body and the tow vehicle rear hatch and glass. The design offers way, way more coverage than your typical RV gravel flaps. The mesh is suspended in front with 6 long shock cords connected to a custom crossbar, and is anchored to the ball mount with a seventh short one. During maneuvering, the inside part folds in on itself and the cords stretch on the outside part. Normally the mesh just “floats” on the six main cords. On longer installations like the Ollie, there is a central support bar that helps to hold up the fabric in turns and also has other functions. Short coupled camp/ utility trailers don’t have or need the support bar. The gray fabric up front is light and fairly flexible, and it is intended to sail up to seal the gap between the TV and the front of the fabric when moving. When not being used you can roll it up and slide on optional sleeves made in a matching material. The challenge on the Oliver is that there is no easy way to attach the supplied rear anchors to the hull. One could drill into the fiberglass but that would be ugly and it would not get the rear of the fabric positioned in the best place. I elected to build aluminum mount bars that extend out to provide complete coverage of the fiberglass, and also to give me a place to mount additional sheet neoprene guards to protect the steps, underneath puddle lights and the black tank rinse fitting. The center support bar was a challenge. The instructions call for a simple one piece section of 1 inch ID plastic conduit, lying on top of the frame and slid into the two sleeves. That seemed primitive and again, I did not want to deal with a really long pipe, so I designed a system where two small pipes slide into a fixed center alloy tube. Shock cord comes down from the tubes and allows me some adjustment of the support tension. The reason for plastic supports is two fold: they are strong, cheap, UV resistant, flexible and the material can be found at any hardware store for $0.40 per foot. And if they take a hit, or I somehow jackknife into them, they will hopefully bend or break before damaging the TV. Being short allows me to carry pre-cut spare sections easily, since they are less than three feet long. At Stone Stomper’s suggestion, I added a short length of chock cord just in front of the doghouse, with plastic hooks slid under the rear or the innermost SS shock cords. This helps support the fabric and keep it from drooping down under the center of the frame. MORE TO FOLLOW. John Davies Spokane WA
 3 points
 -
If you have a built in inverter from the factory, all the outlets come off a single 15 amp breaker, microwave included (Maybe 20? The 2017 wiring diagram says 15, so is this different for 2018's or just wrong in the manual?) Regardless, even if you have 20 amps, that's only 2400 watts which probably wouldn't be enough juice for both appliances anyway - you'd likely need 30; i.e., two separate circuits, for it to work reliably. Now, if you don't get the inverter, then the microwave gets a separate circuit direct from the distribution panel with it's own 15 amp breaker, so you get 30 amps total and can easily run two appliances at once. I suspect that this is in line with other manufacturers, though I don't know for sure. It may be a limitation of the inverter/transfer switch the way they have it wired. When we added our inverter, we put it in front of the distribution panel, so shore power runs directly to the transfer switch/inverter and then to the panel. That arrangement makes much more sense to me and it gives us both an inverter and a dedicated circuit to the microwave, or in our case a toaster oven.2 points
-
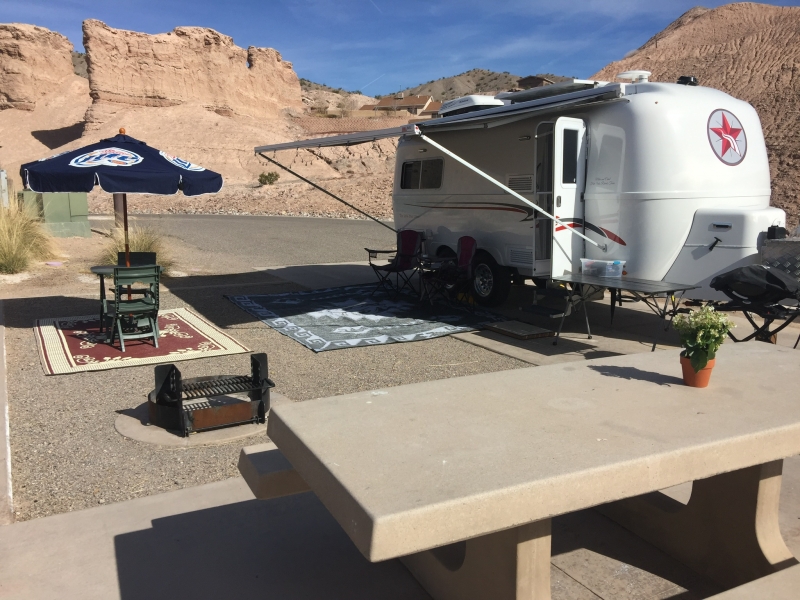
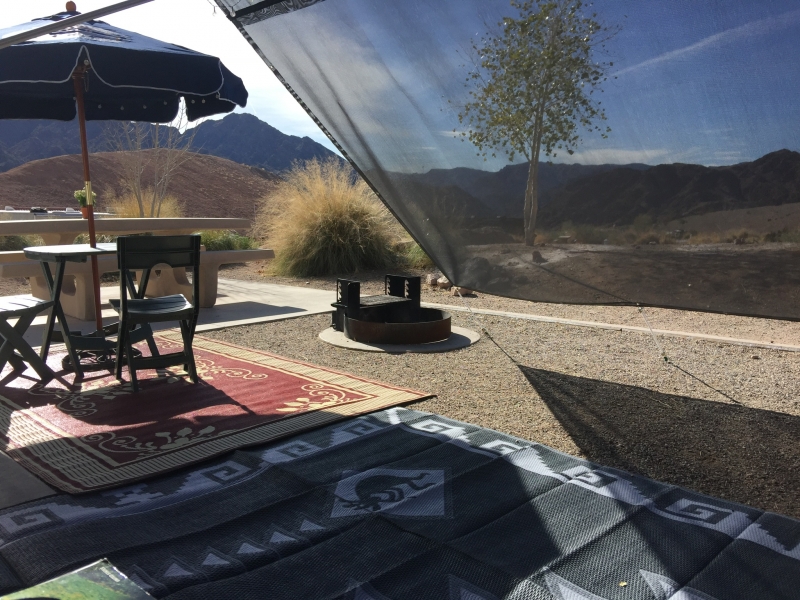
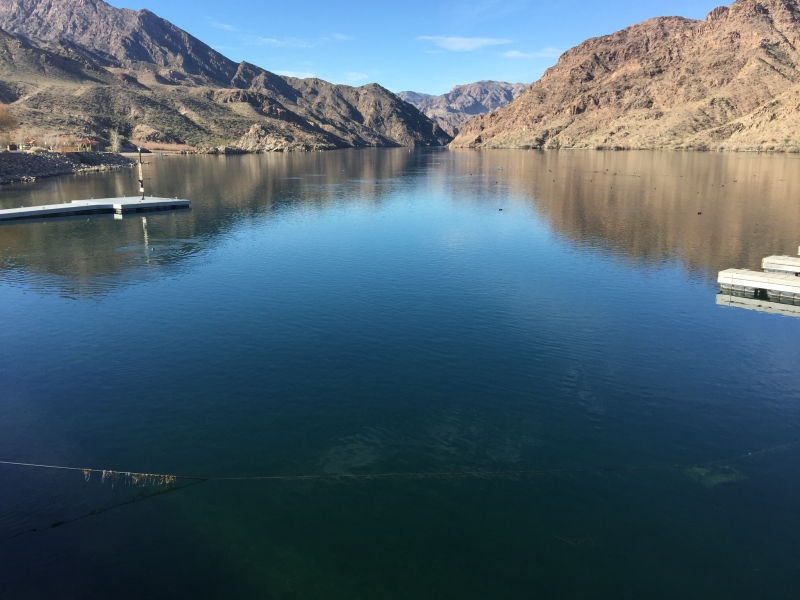
We deviated from our stay in Quartzsite last week to visit some new areas. While on our way to Las Vegas we spent the better part of a week at Willow Beach Marina, part of Lake Mead NRA, about 10 miles from Hoover Dam. The campground is small but well maintained. Very quiet with lots of stars at night. The facilities are top notch. Mike
2 points
-
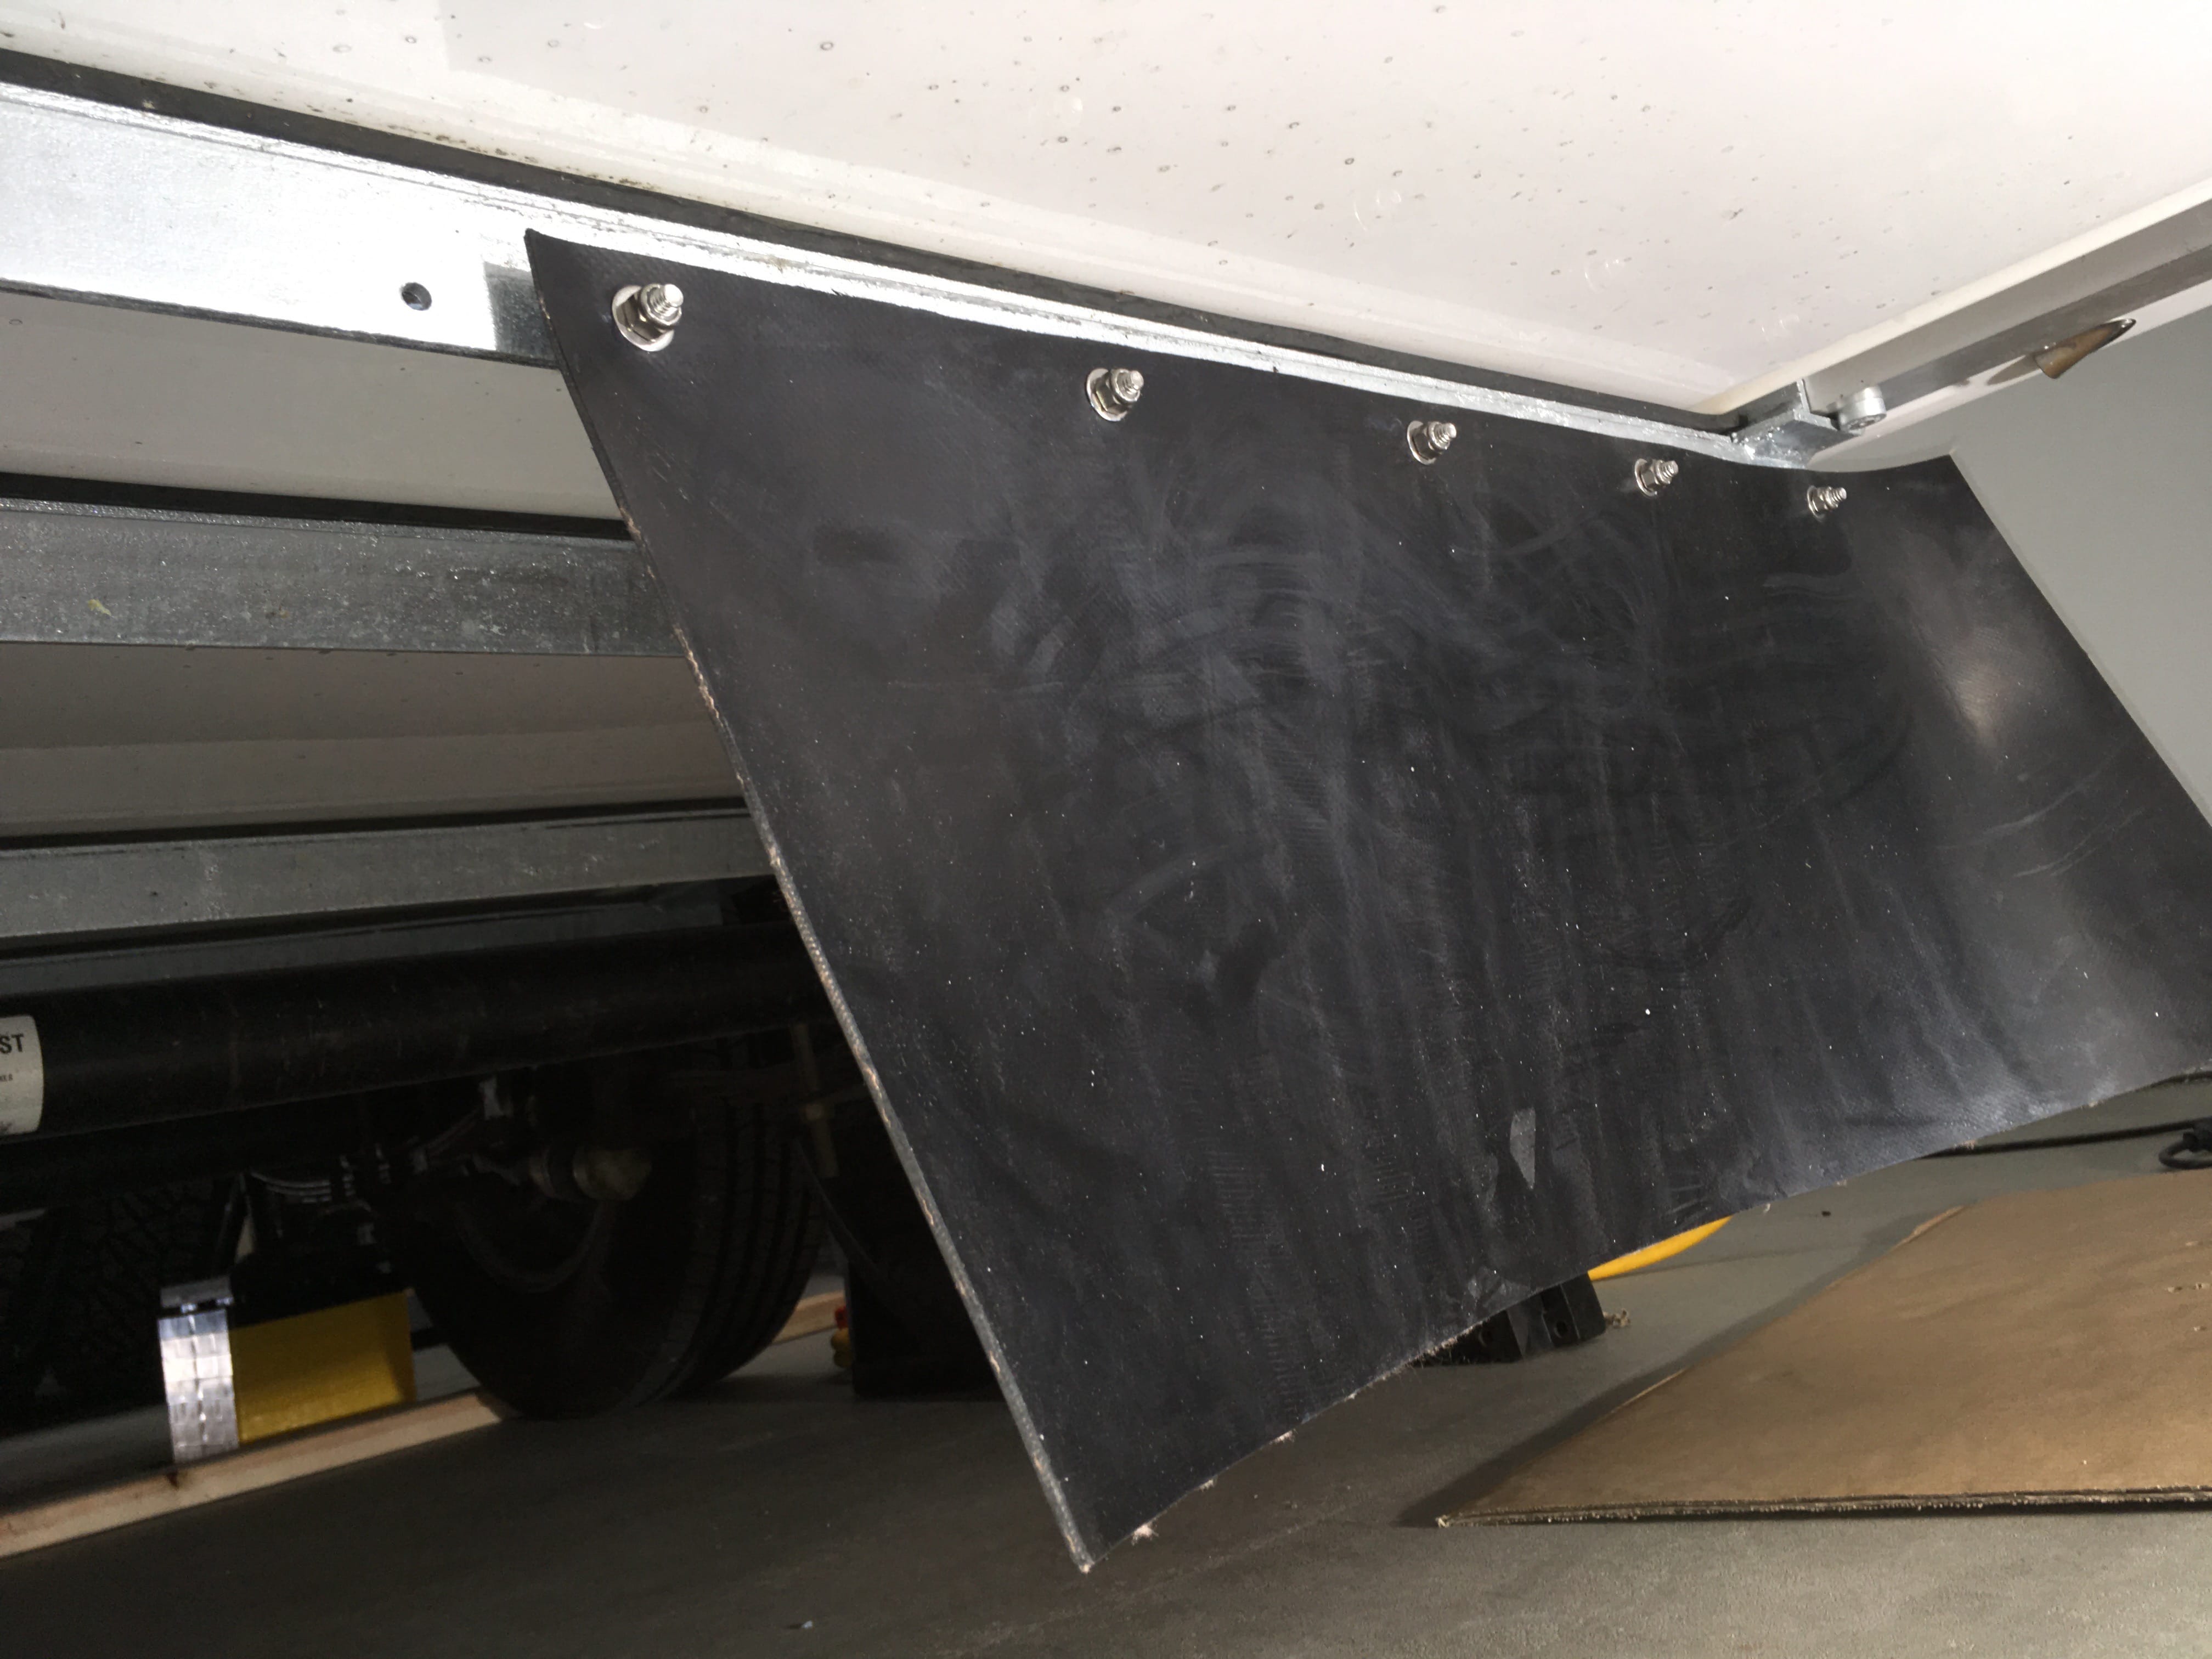
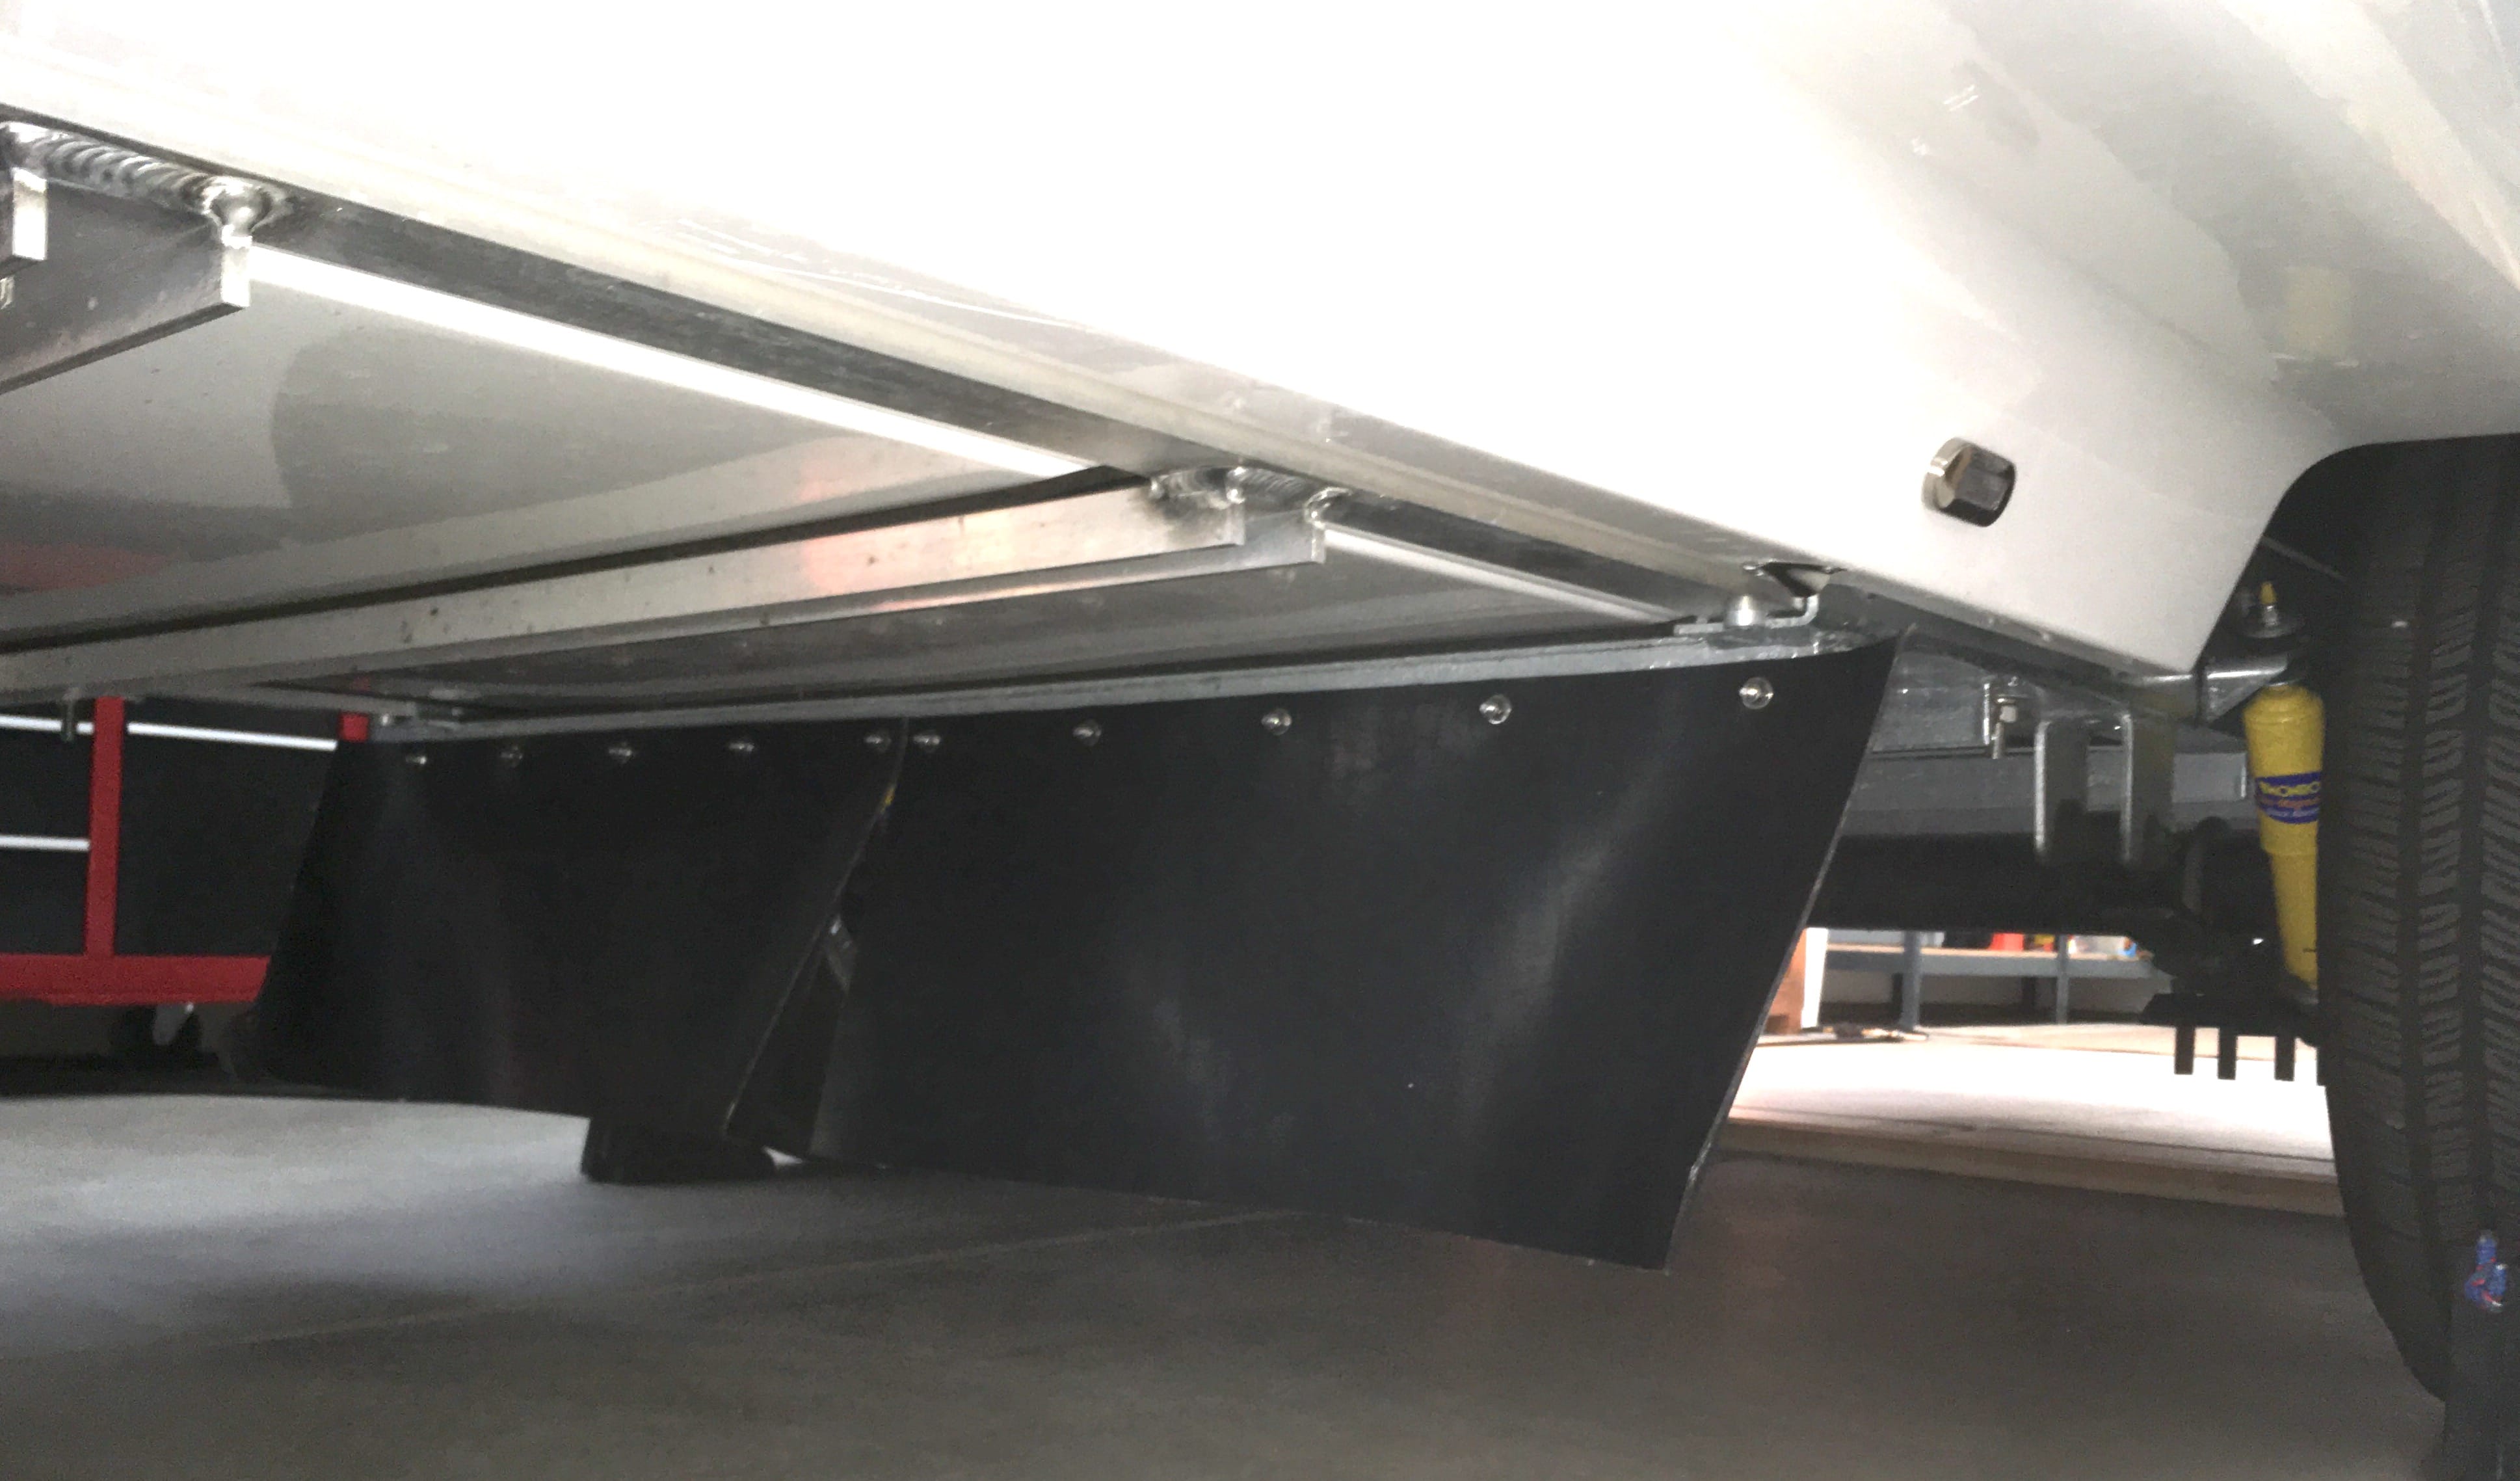
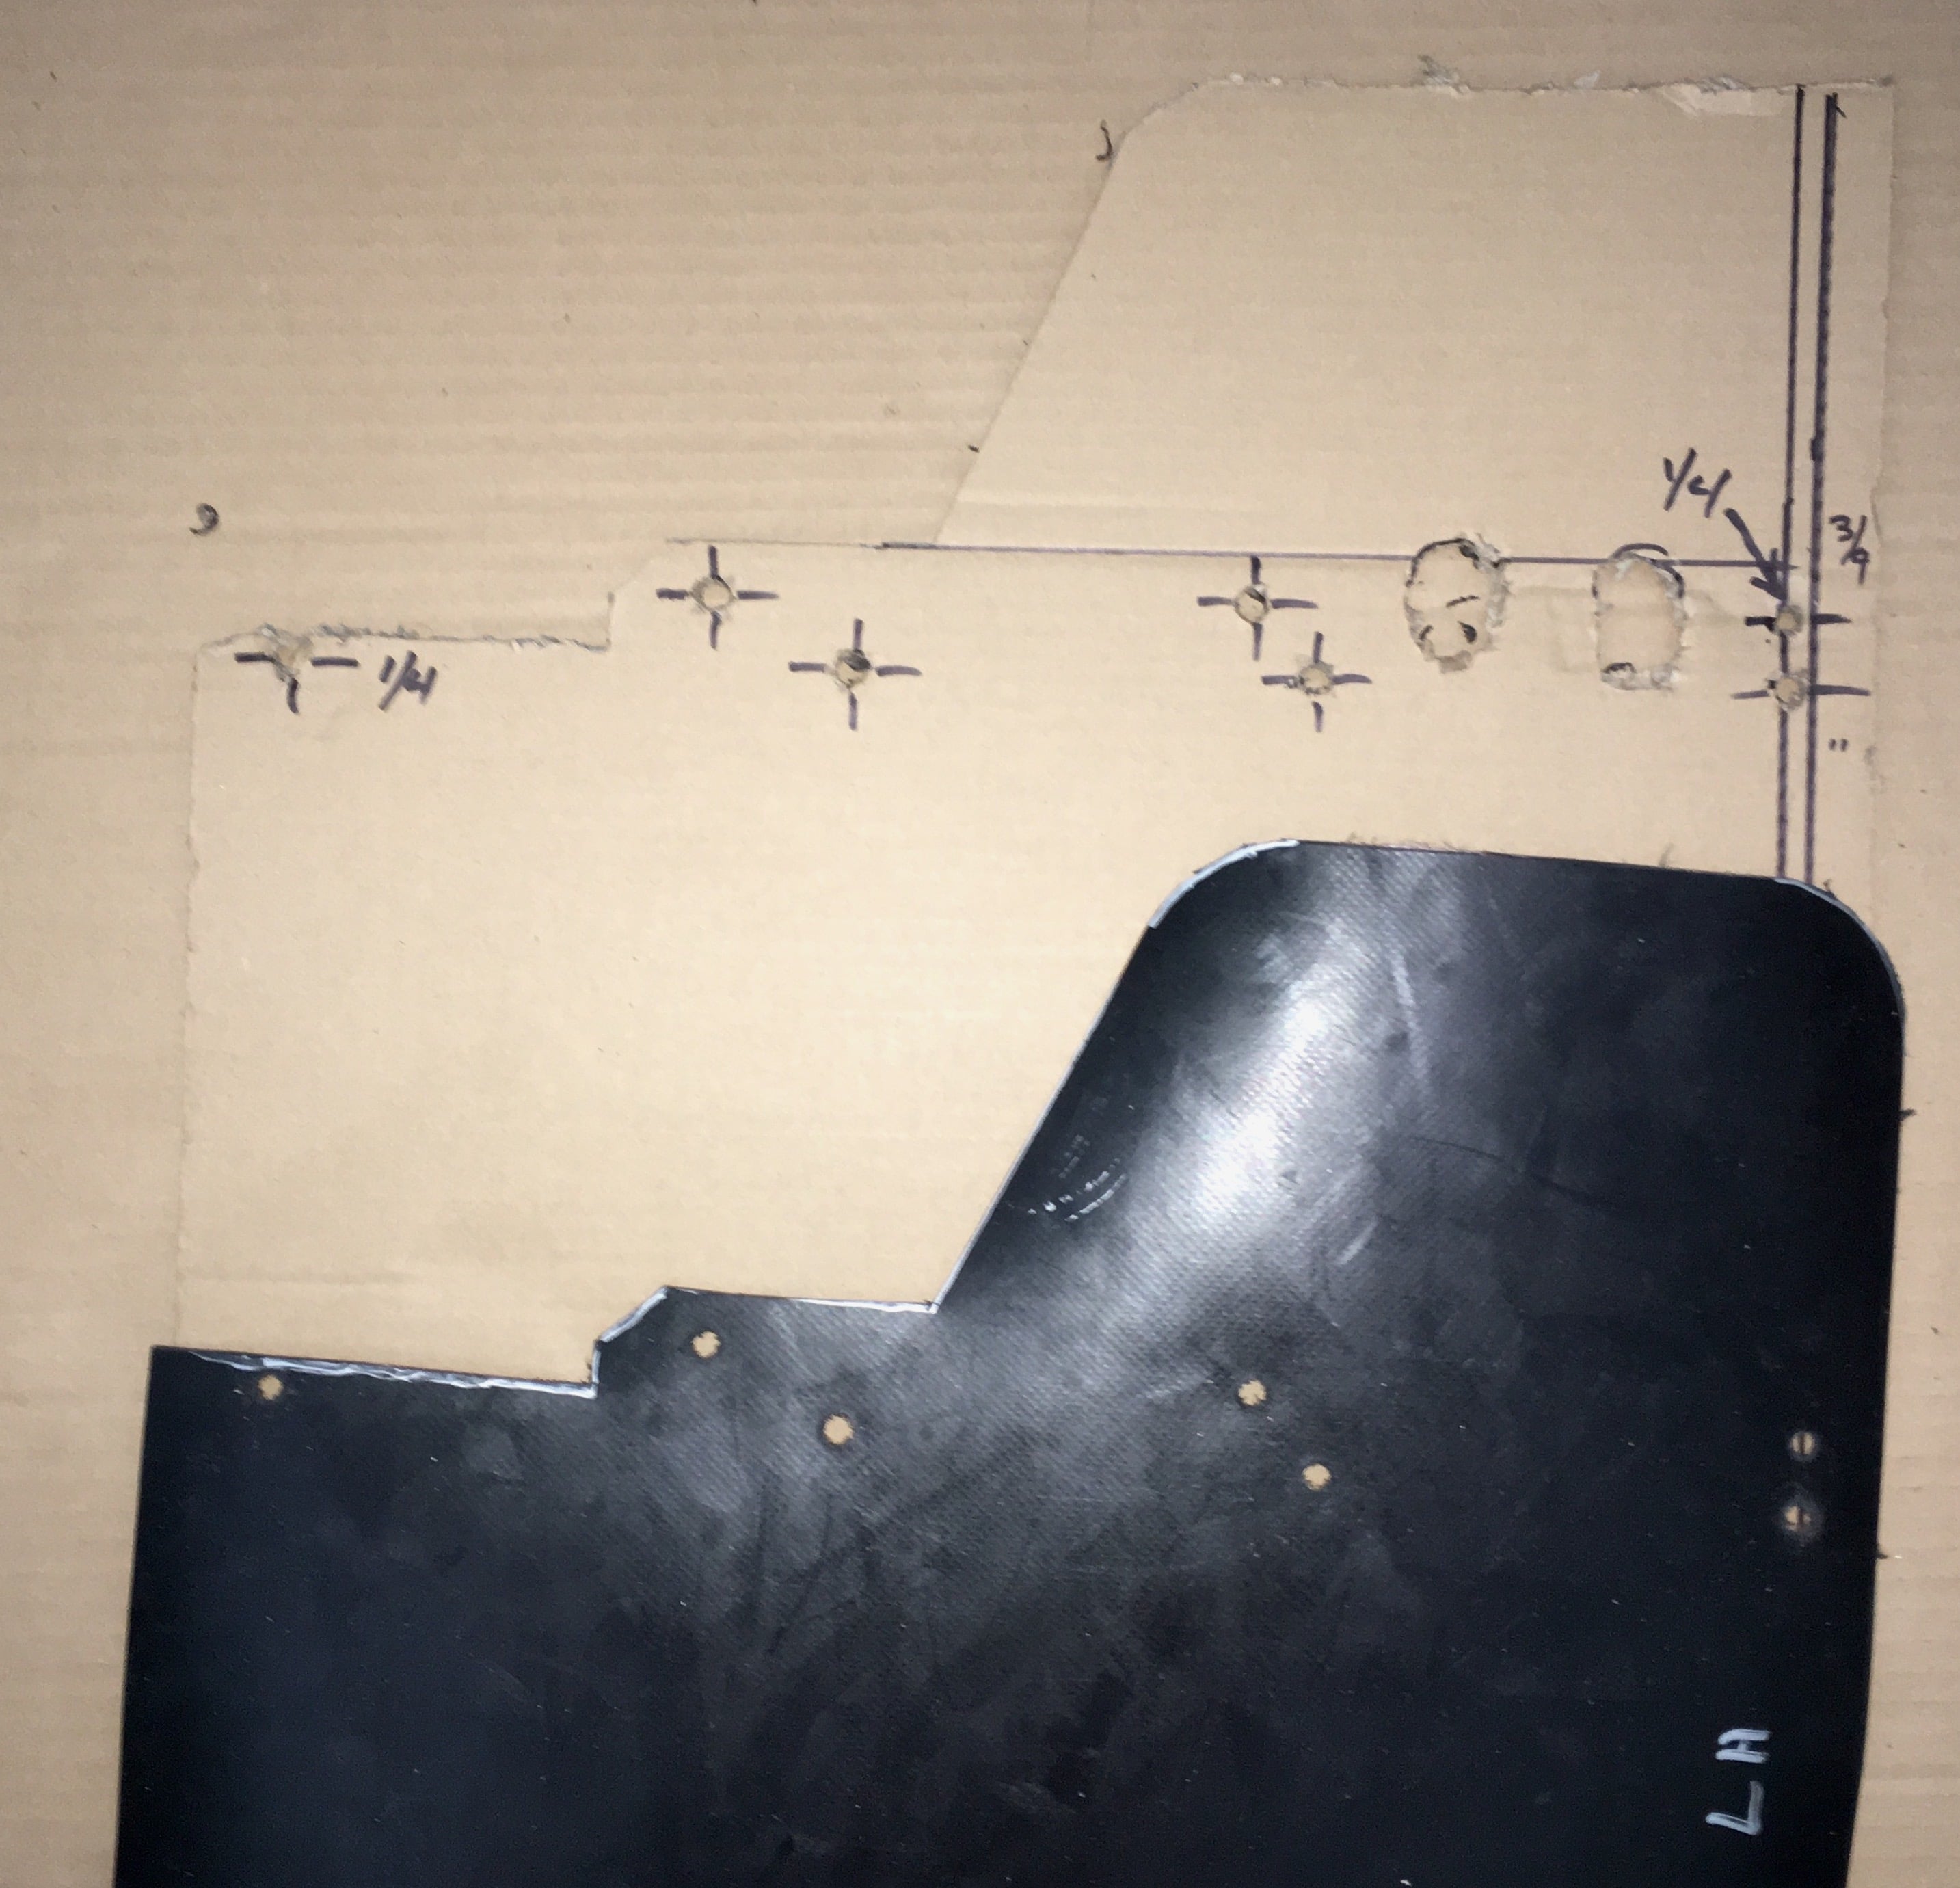
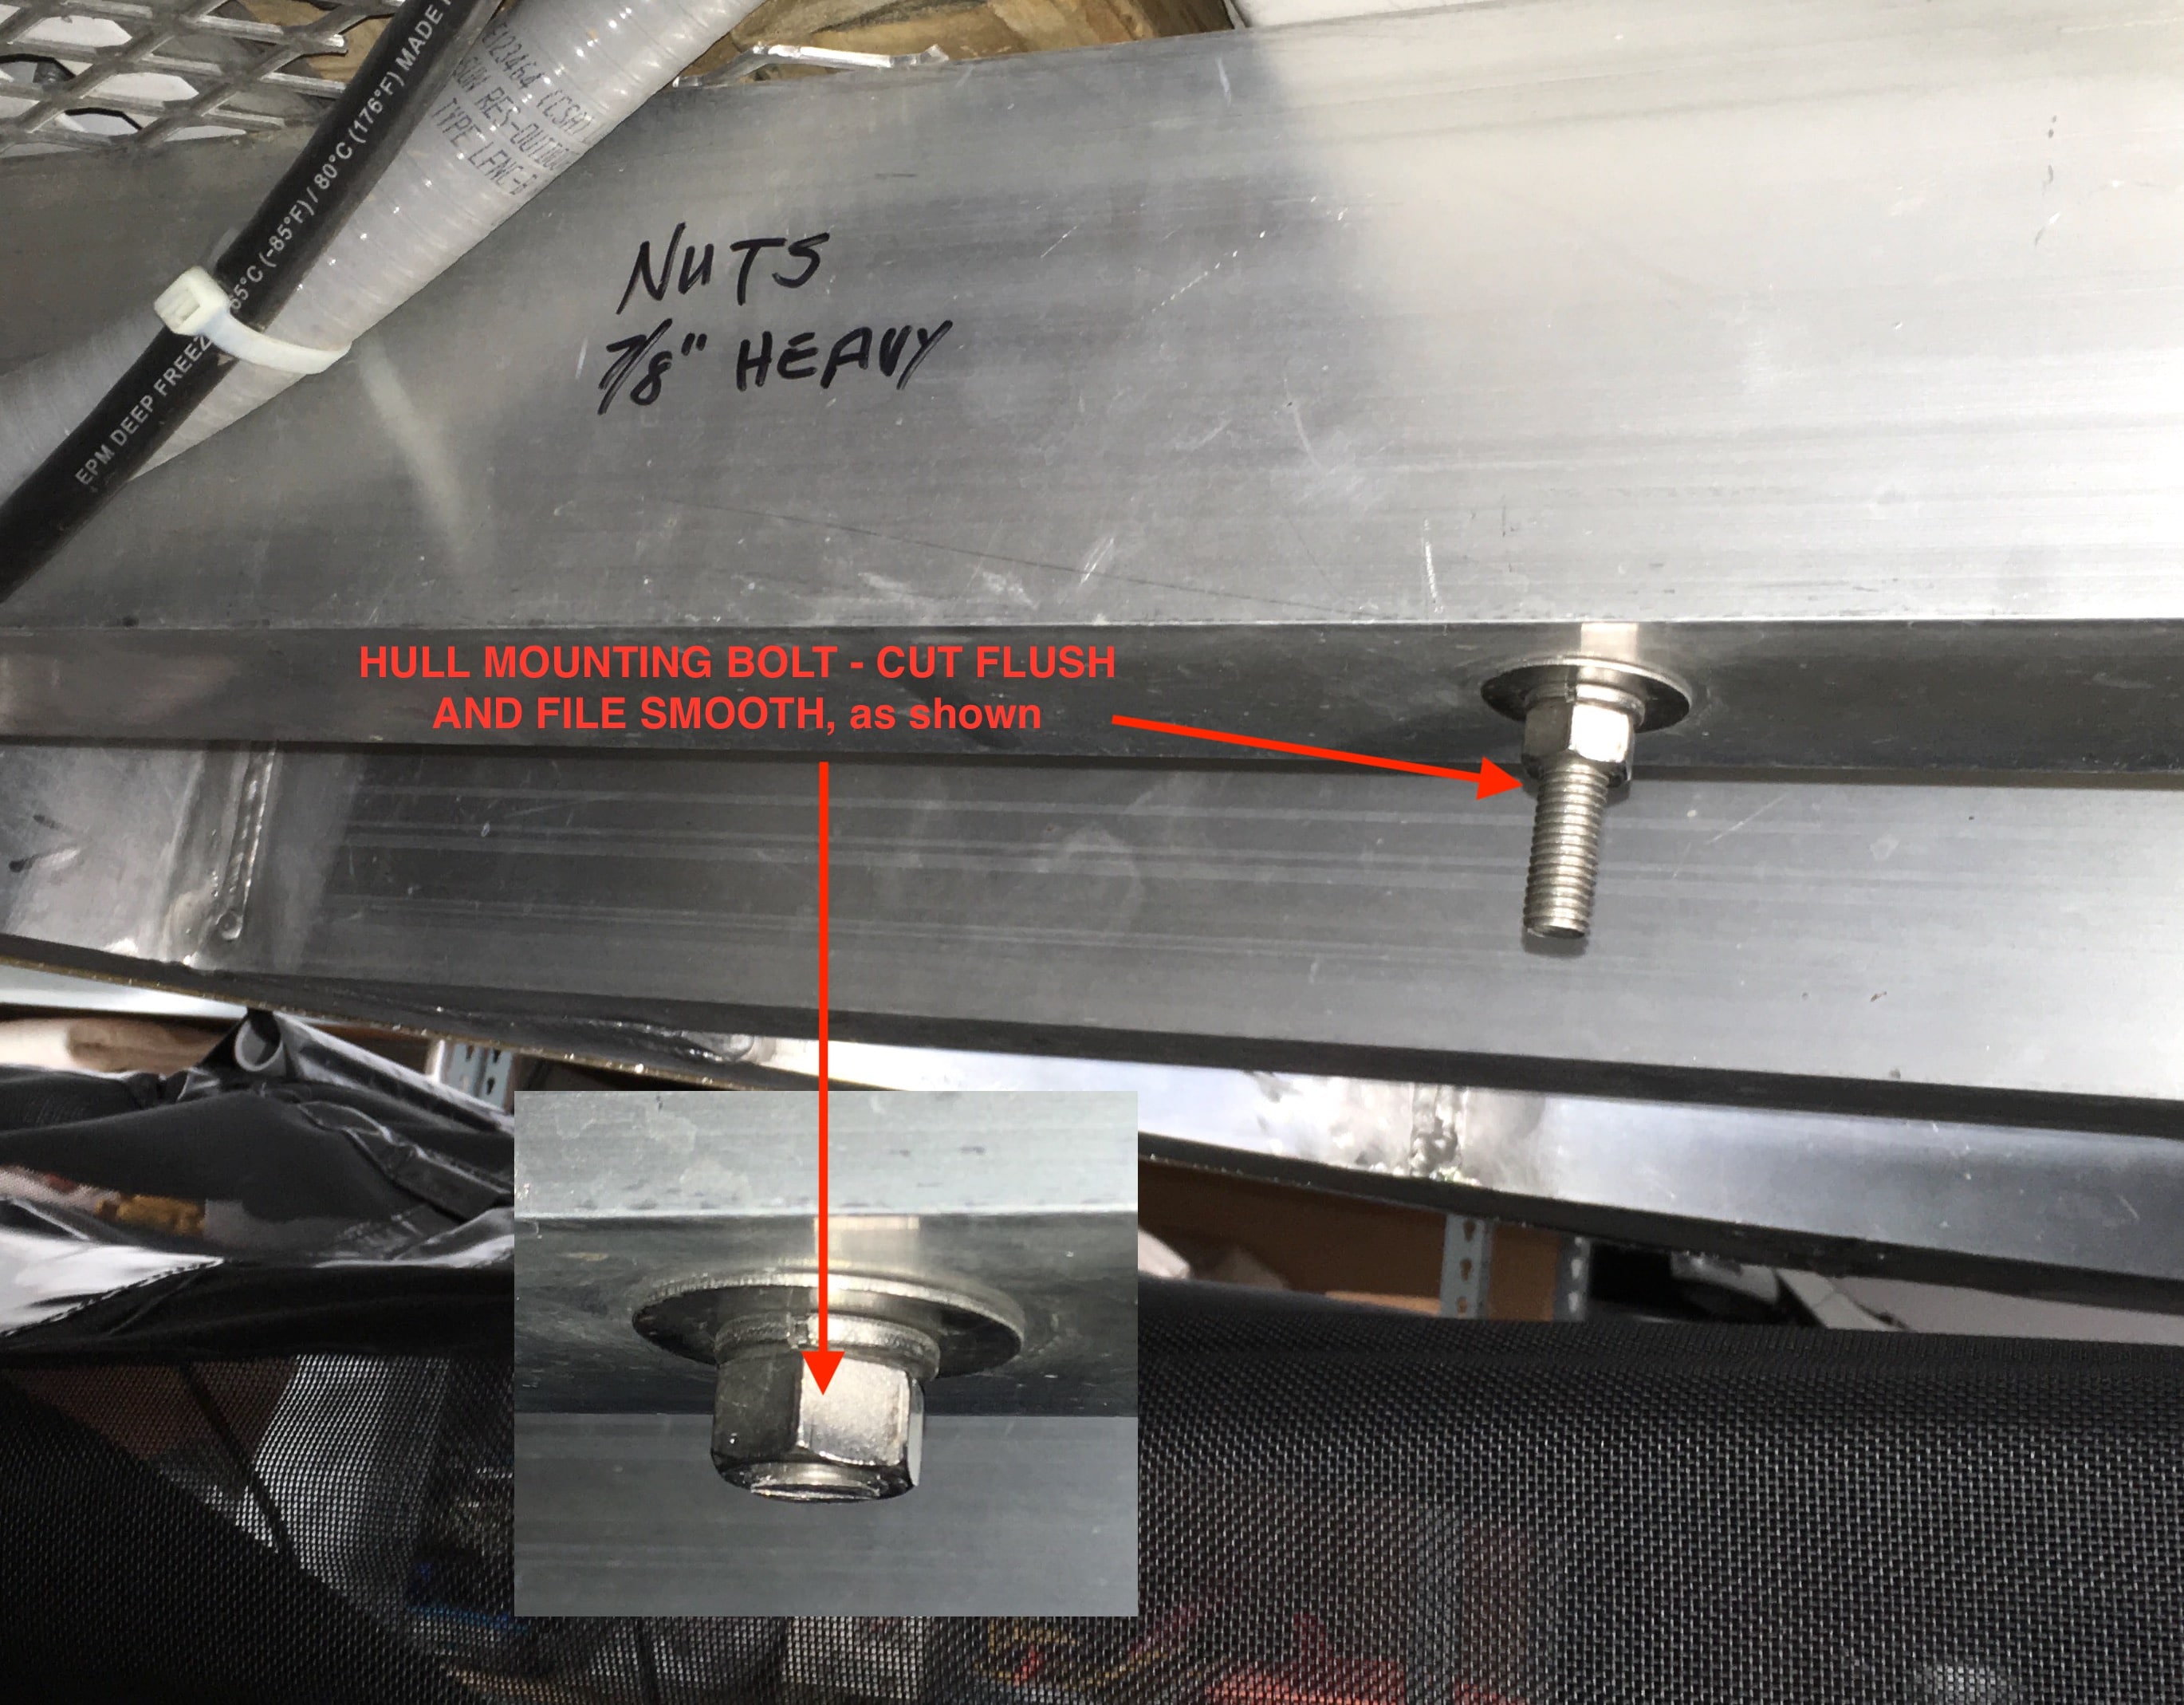
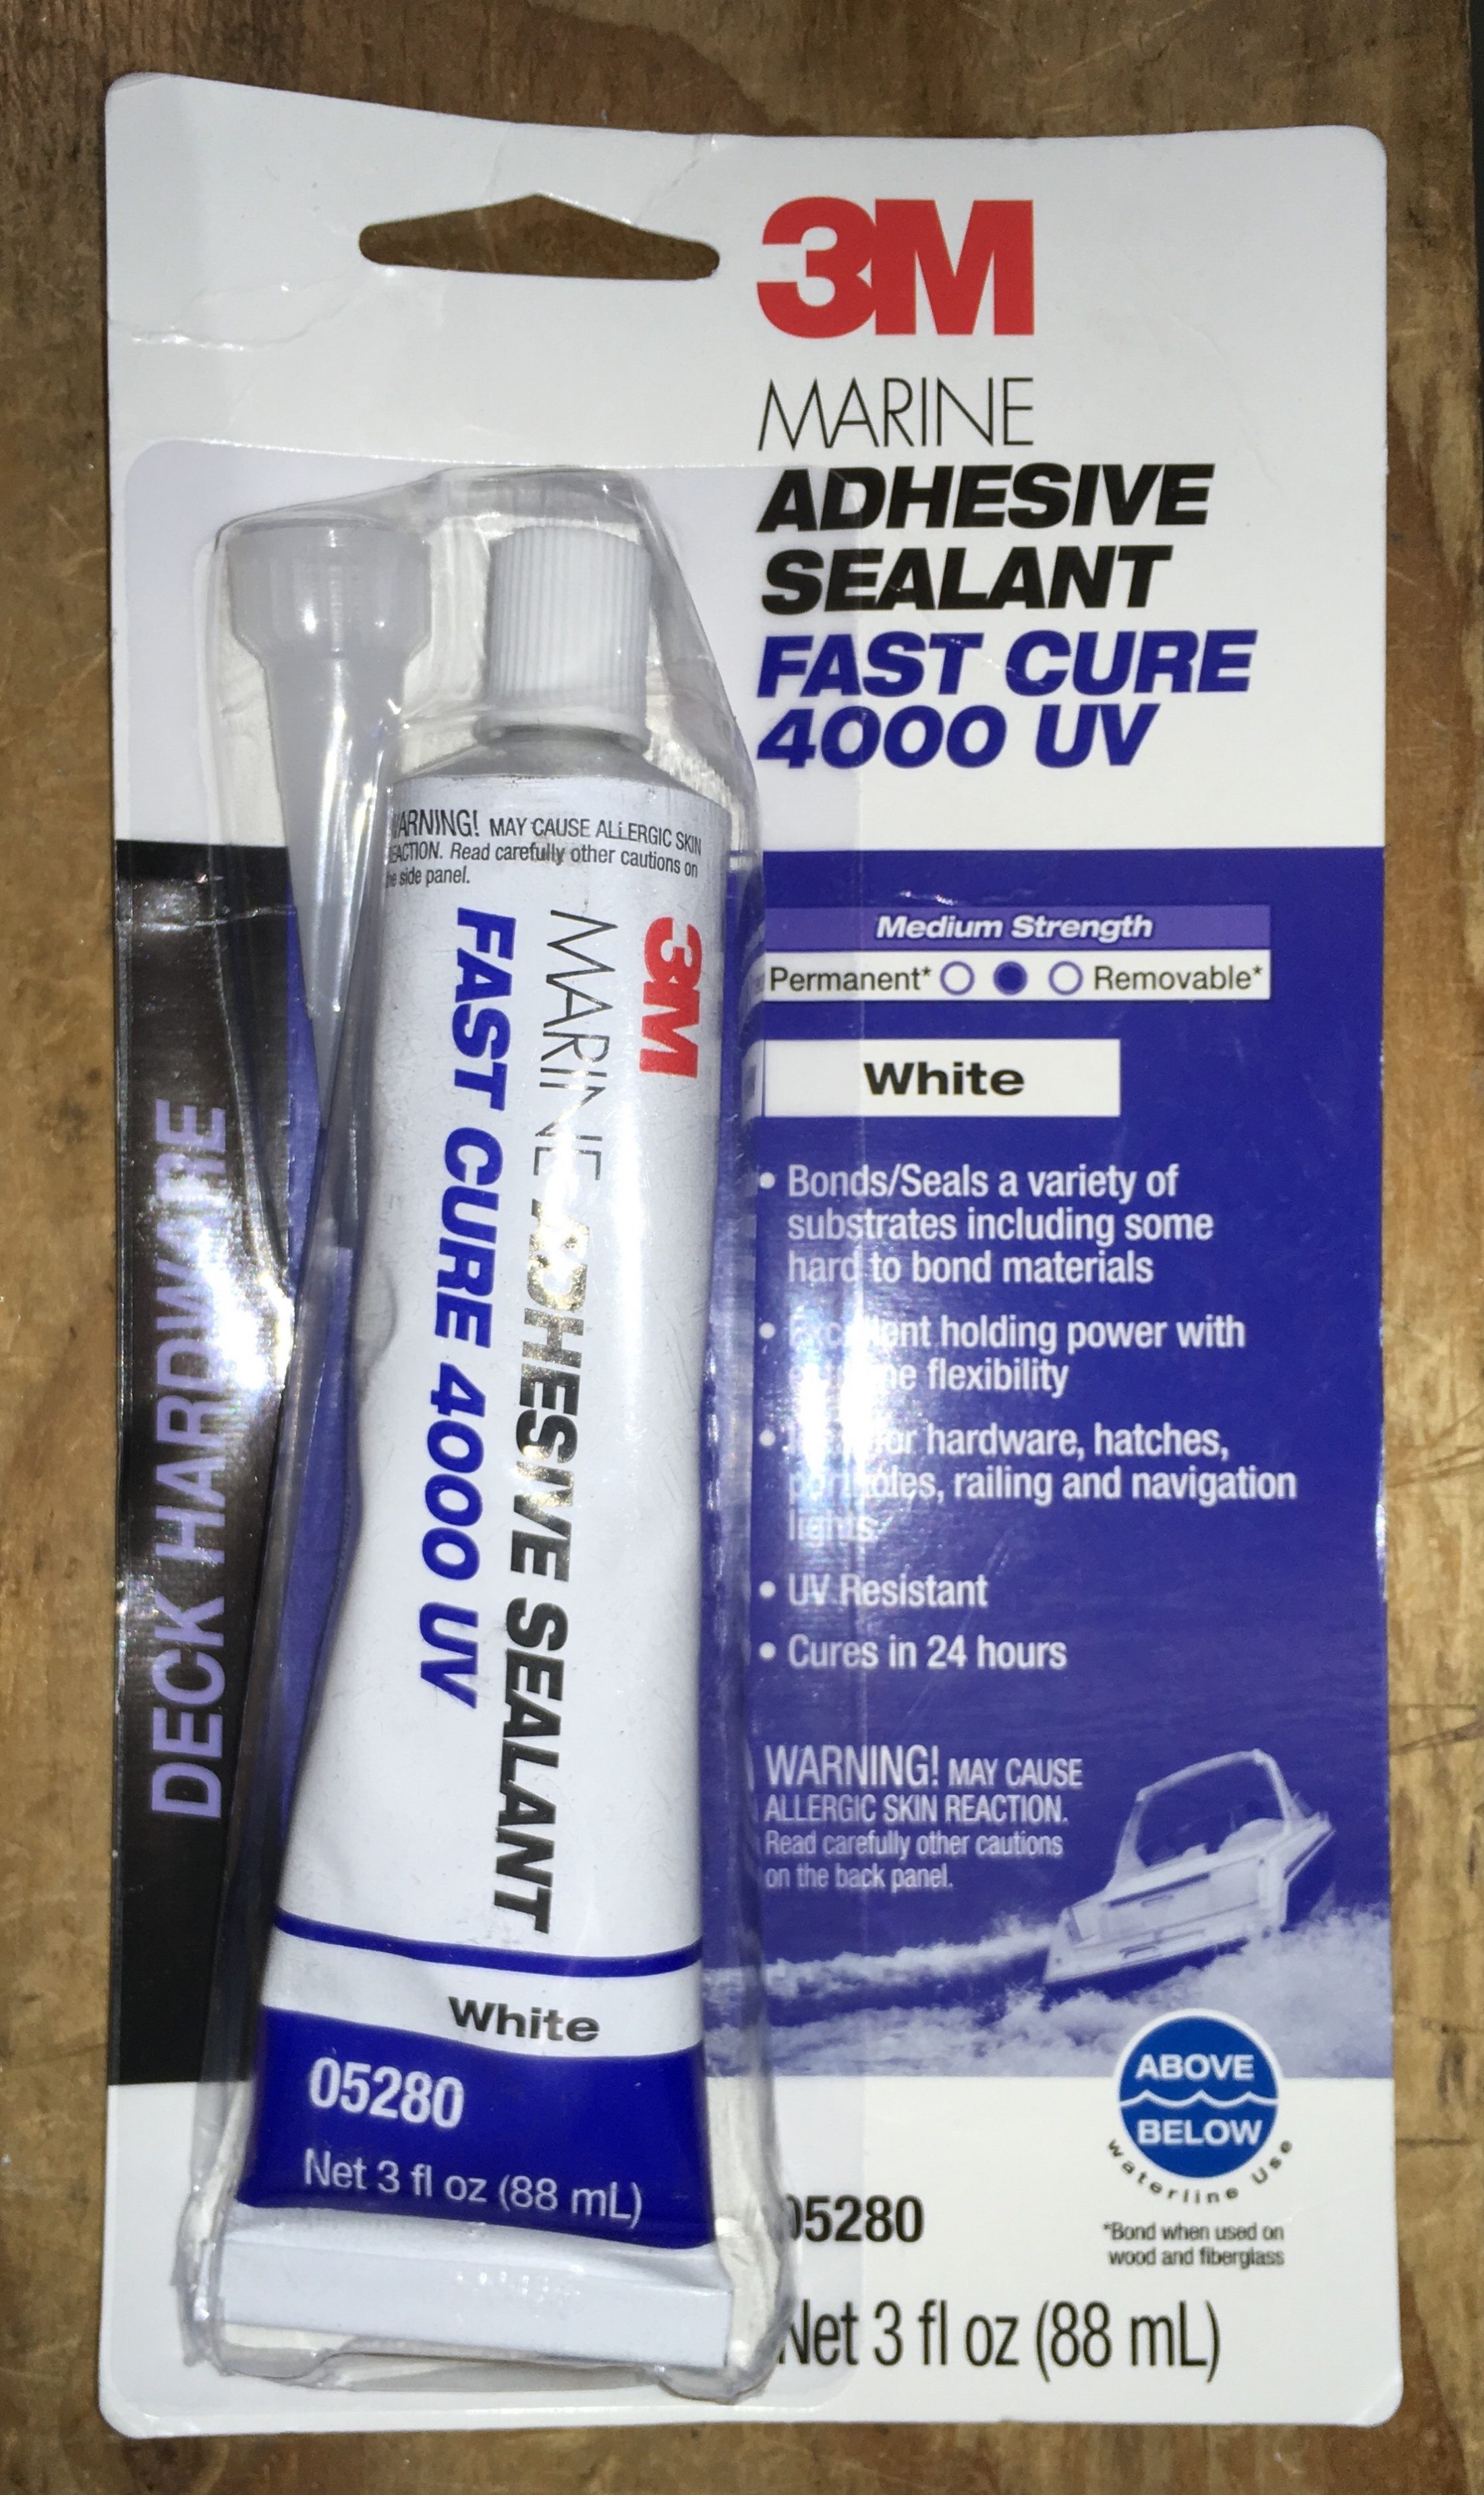
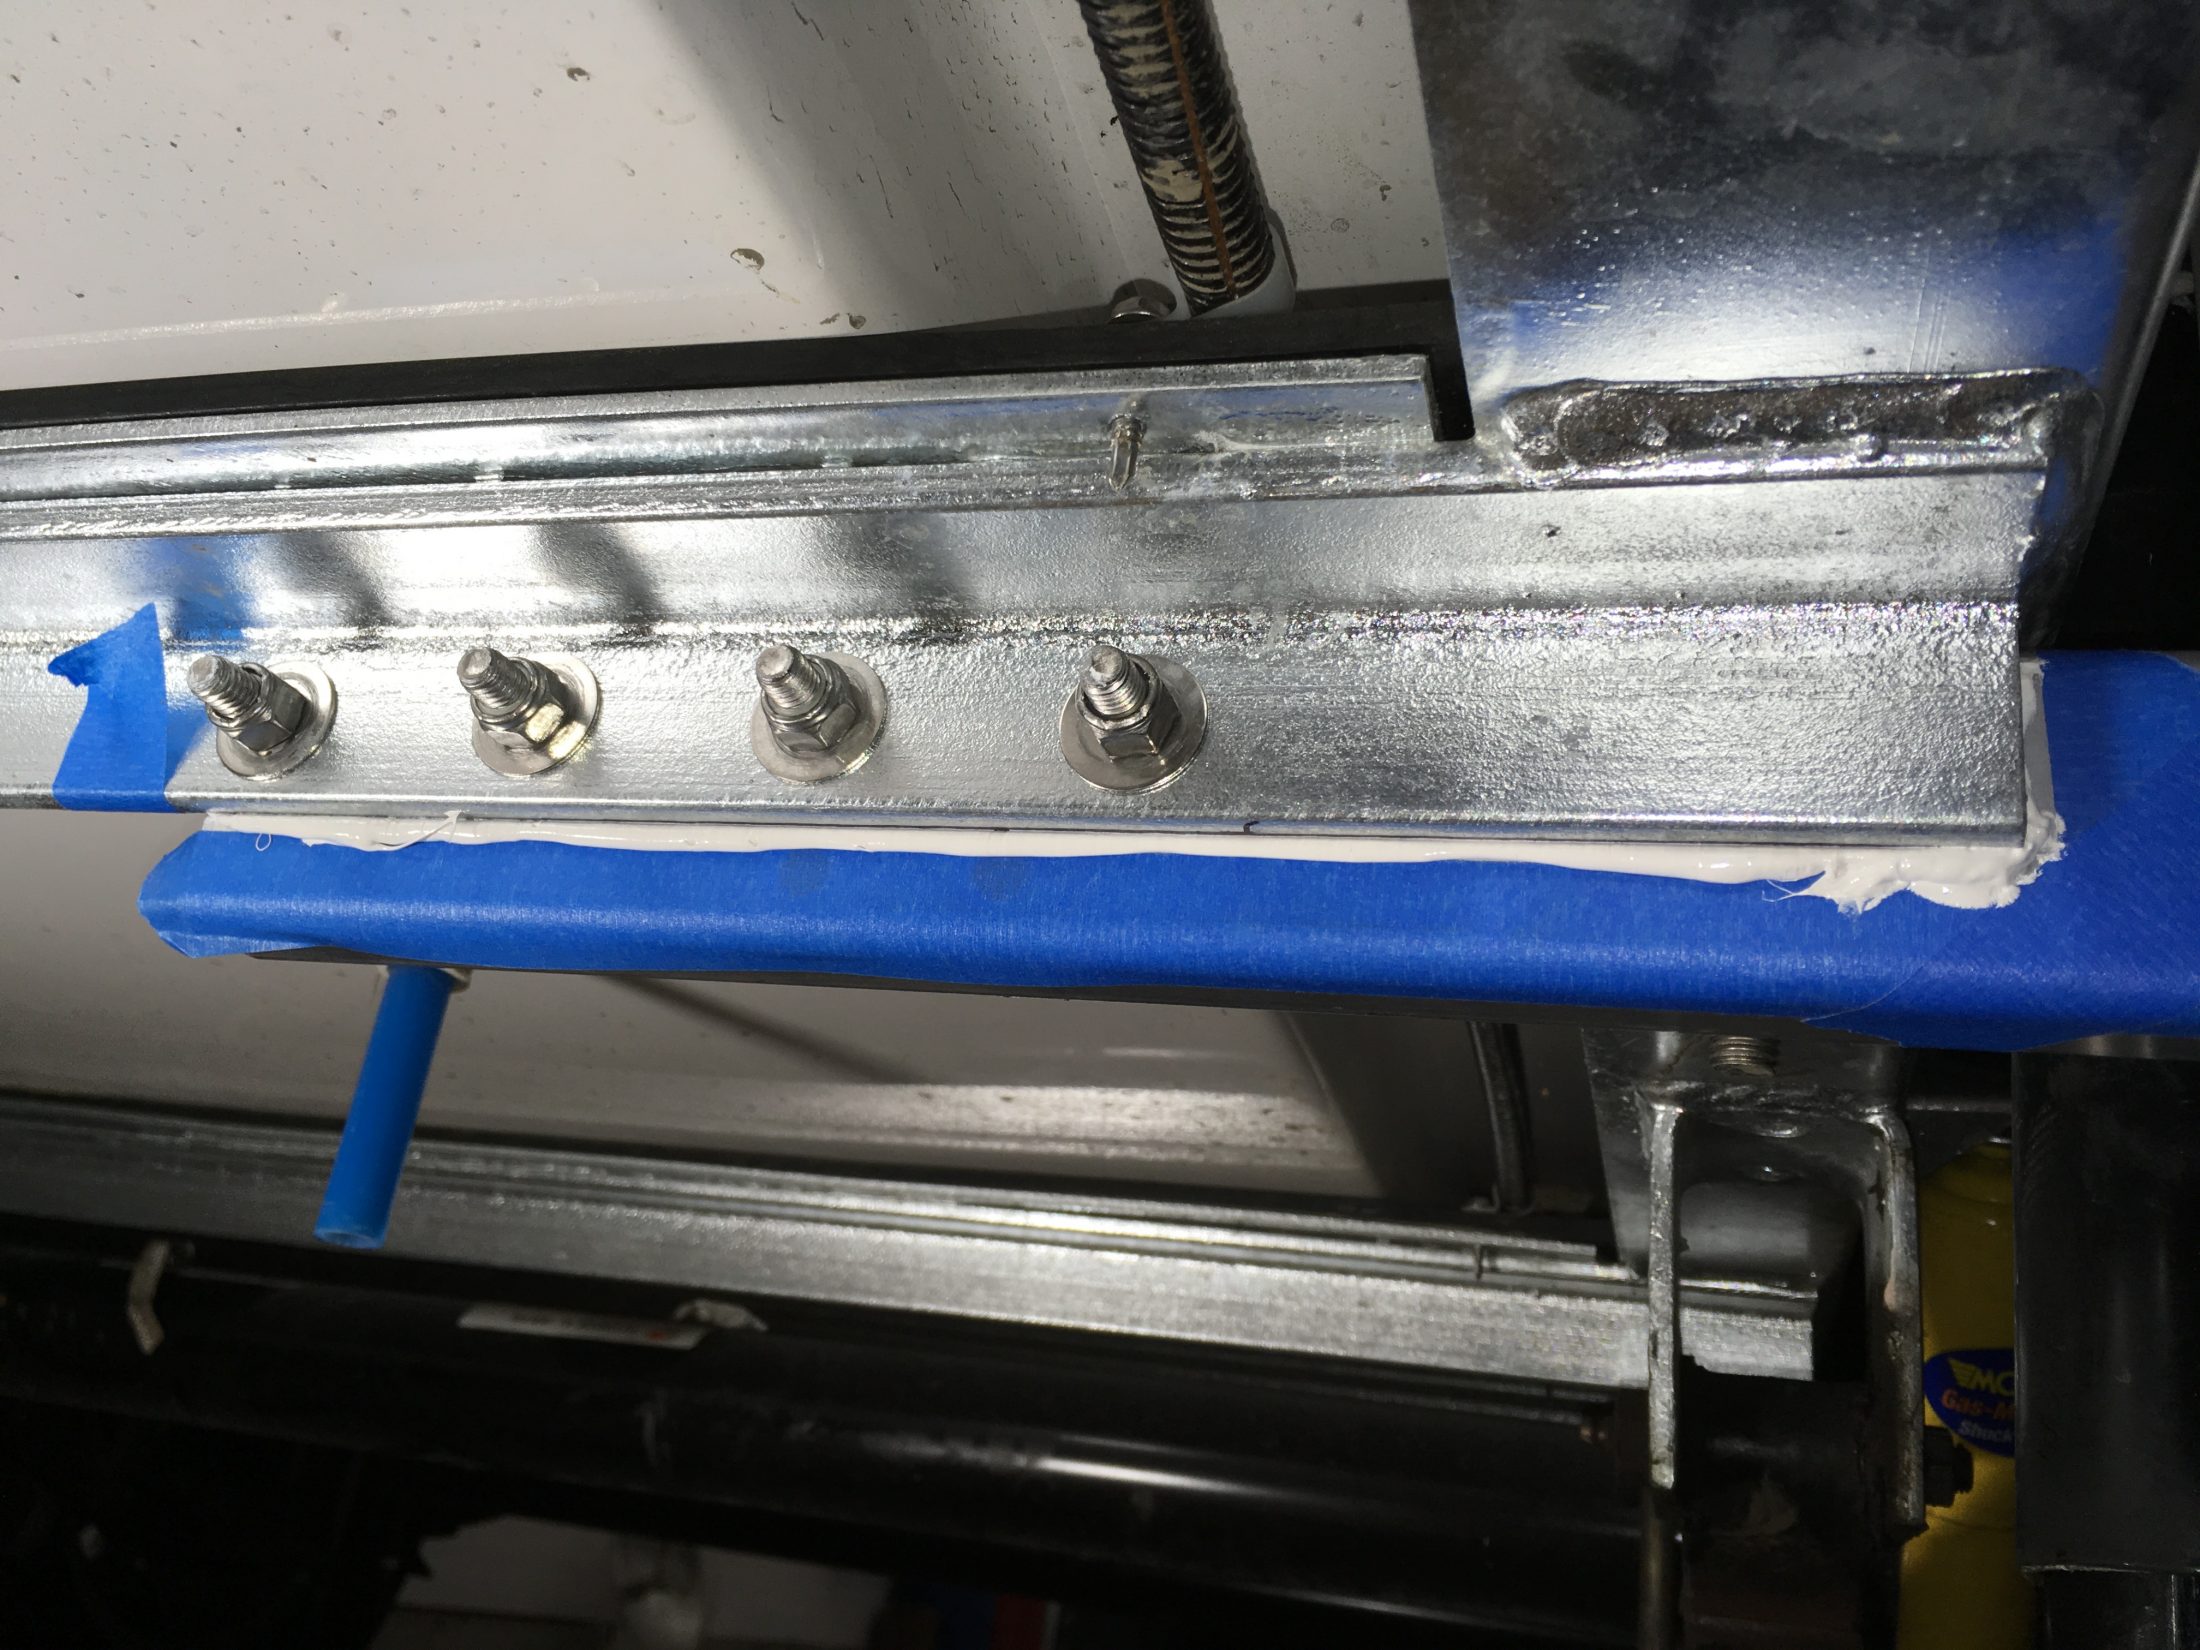
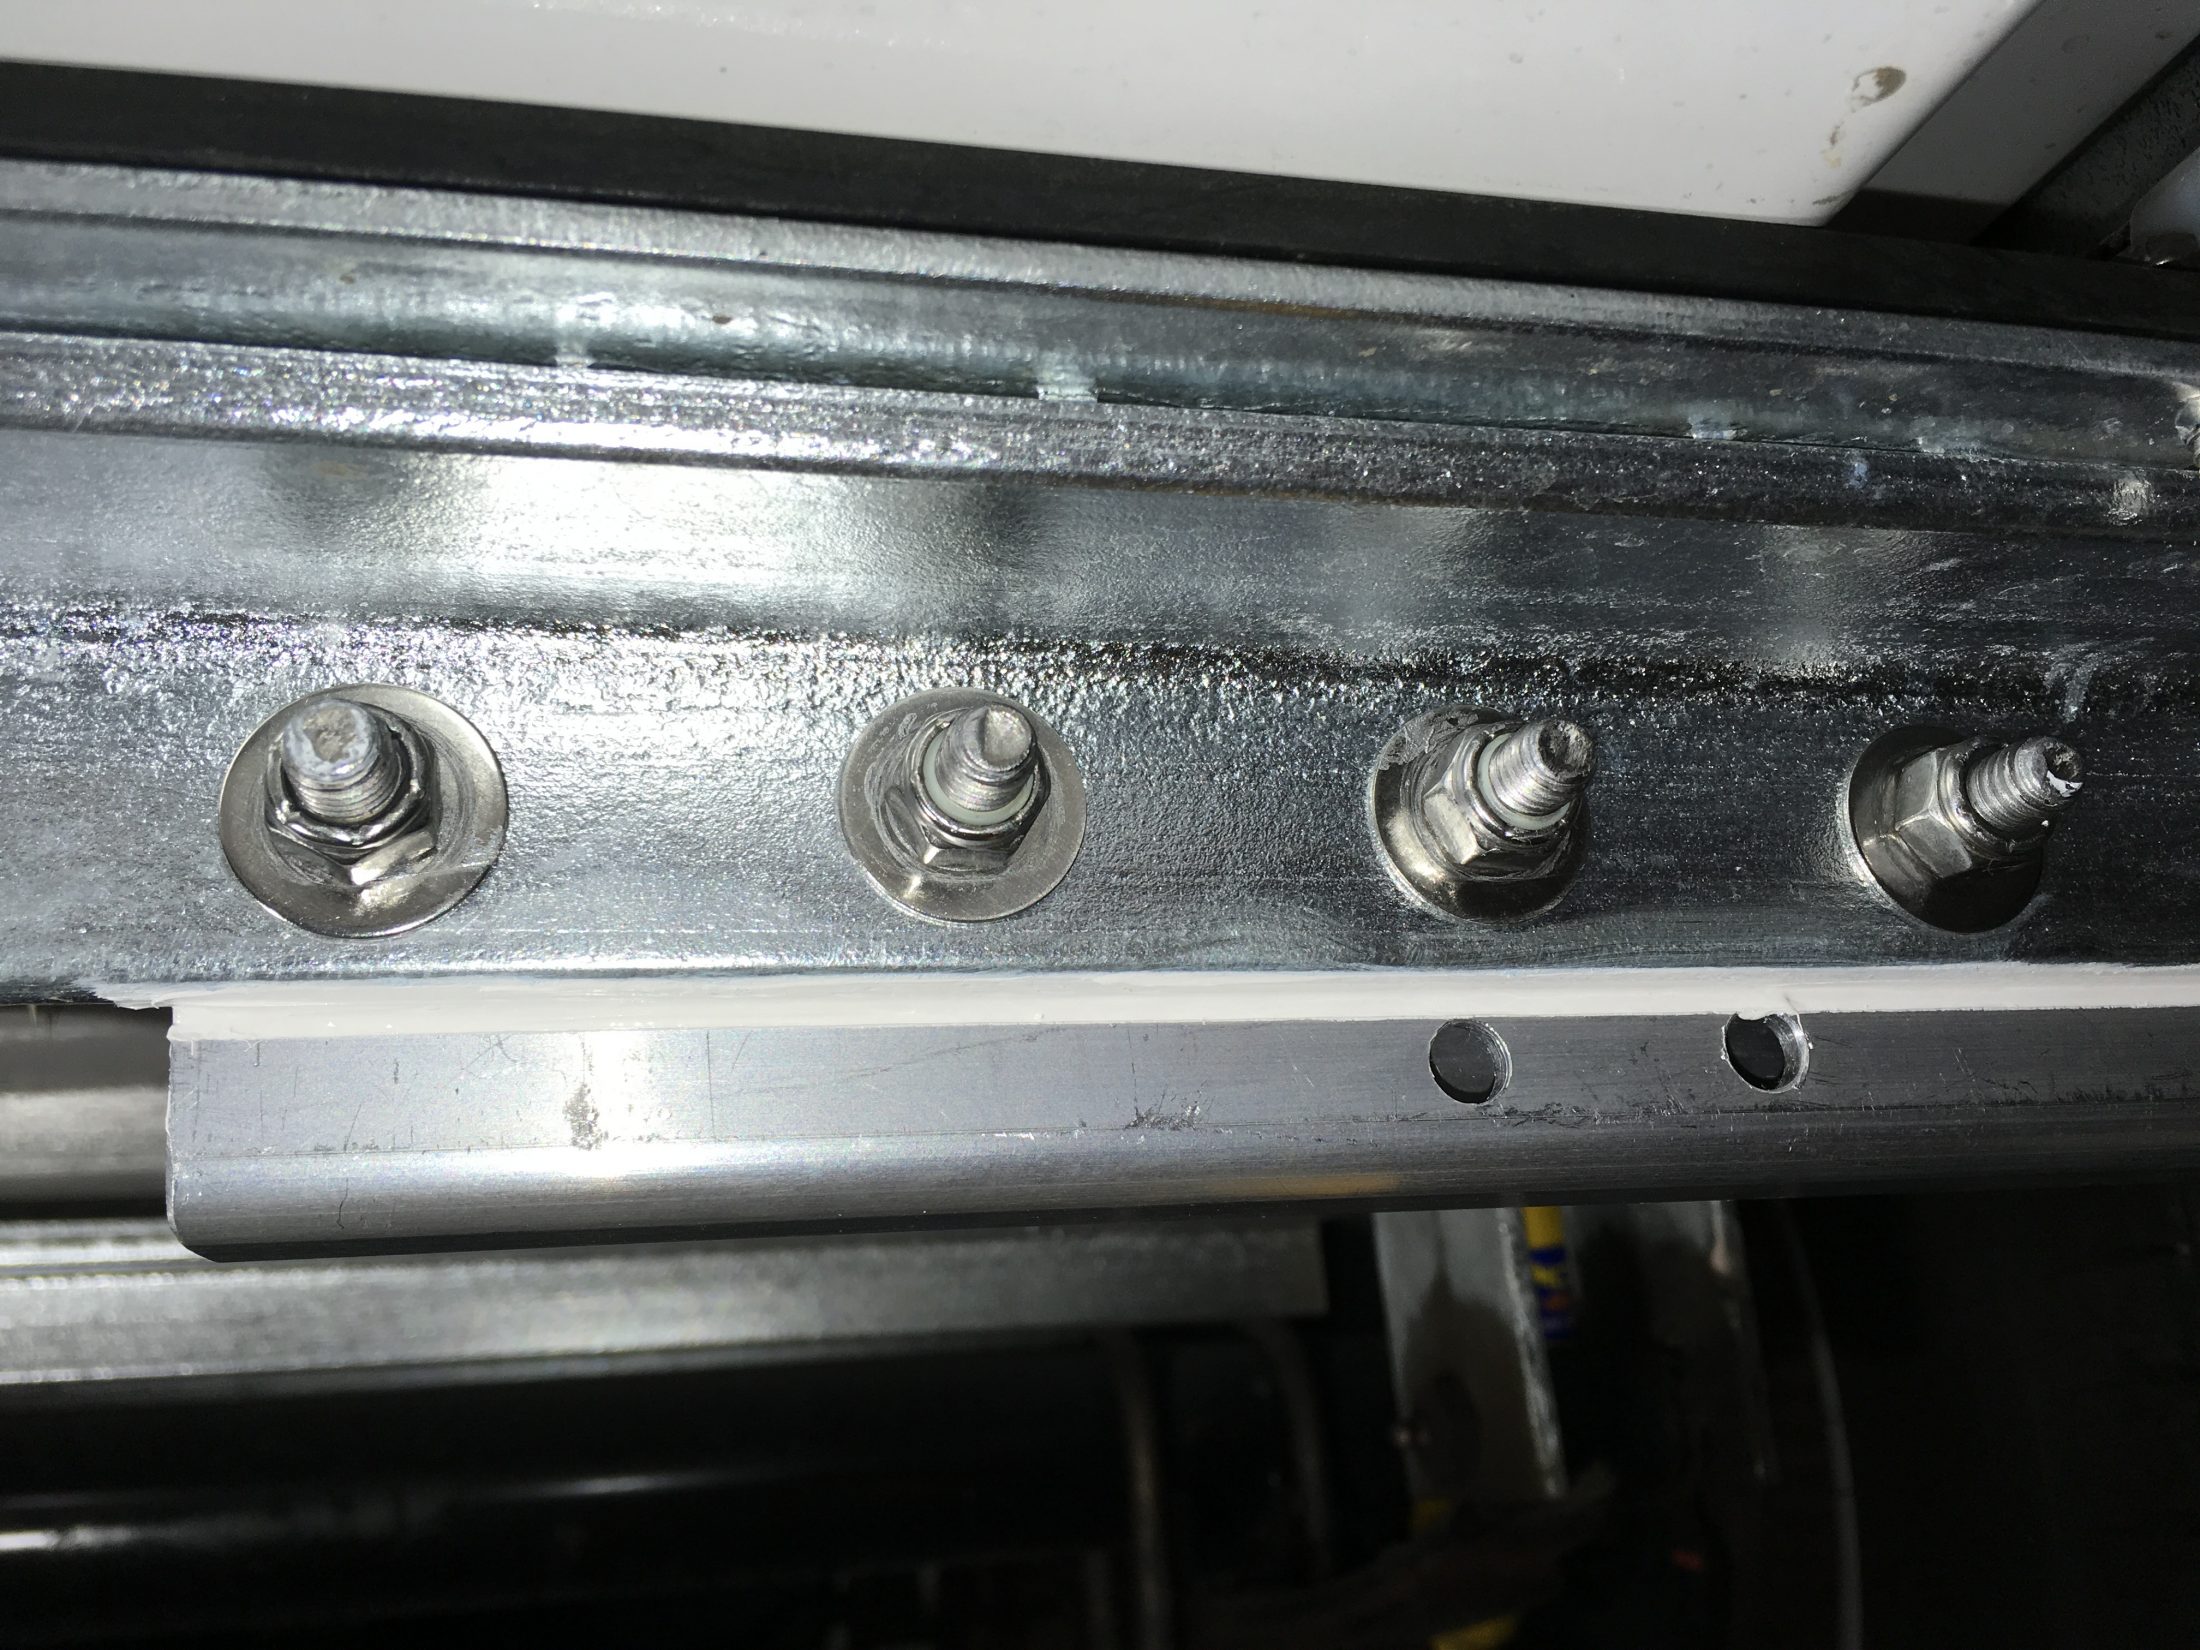
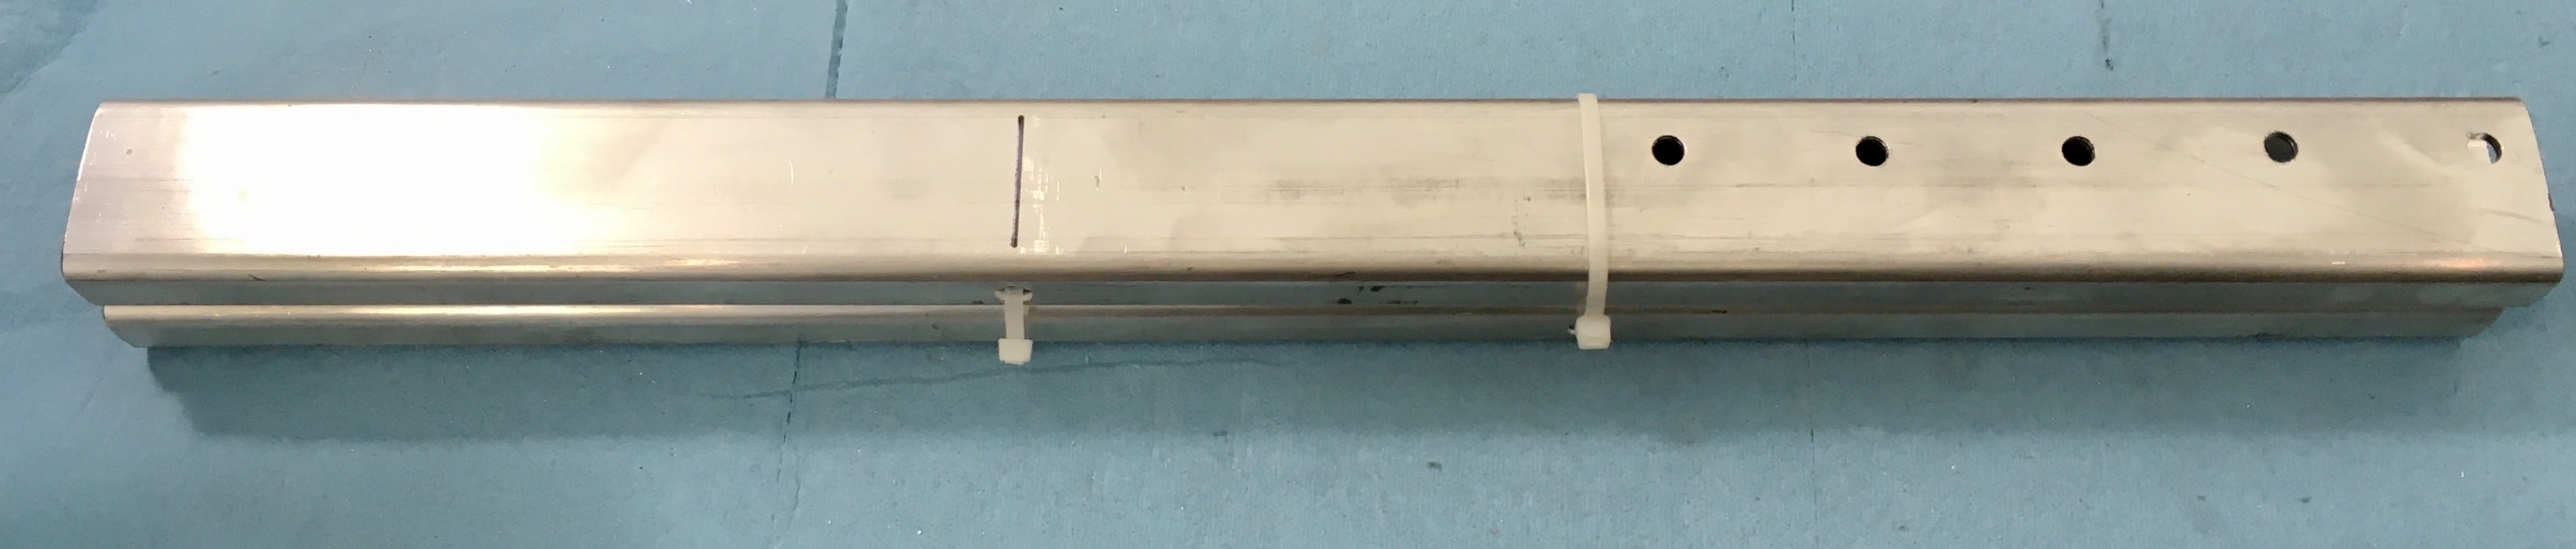
This could go in Modifications, but it really has to do with protecting the suspension and subframe from gravel rash and water while towing off pavement. Moderators, you can move it there if you like. This is an easy mod, you just have to get over your fear of drilling into your frame. Why would you want to do this? It will stop the paint on the axles, hubs and shocks from eroding and rusting (gravel rash). It will help to protect the plated finish on the steel subframe. It will reduce or at least soften the high pressure water blast that sprays up onto your spring bearings in wet weather from your tow vehicle, washing out the lubricant. It may help to reduce the blast on the rear bumper and bumper compartment. And it looks cool. The material is 1/8 inch sheet neoprene, cloth reinforced. I think it is used for conveyor belts. I located it in bulk at a local rubber supplier. A 3 x 4 ft sheet cost $90. The rest of the material was used elsewhere on Mouse. I cut two strips 12"x 26". They meet in the center and extend about 3 inches beyond the frame angle. The extended part will protect the shocks, which are pretty far outboard. Hardware is 1/4" x 1 1/4" stainless bolts, washers and nylocks (locking nuts). To keep the rubber off the steel I used 5/6-18 nylon nuts (full plastic, no steel) as spacers. They are a little hard to find - the box stores and Ace Hardware keep only a few in stock. You might be able to use circular nylon spacers, but these nuts work fine and are half the cost (about $0.60 each). Drill a neat row of 1/4 inch holes at 6 inch spacing along the bottom of the front-most steel cross angle. Use a sharp pilot bit first and it is not difficult, just a little messy. Wear eye protection and old clothes! Drill the rubber to match the spacing using a 5/16" bit. Clean the steel with a good solvent, not alcohol. Use of alcohol for prepping the parts before sealing will prevent the sealant from curing! Install the bolt and washer with the threads facing forward, with a dab of 3M Fast Cure 4000 or another excellent marine sealant under the head. Add another dab of sealant on the shank and push the nylon nut into place, and add a flat washer. Place the flap onto the threaded part of the bolt, add another washer and a nylock. Repeat for all the holes and tighten evenly. Unless you were frugal with the sealant this could be MESSY! You can use a good solvent like Acetone or MEK to clean up any messes. The rubber I used is curling since it was in a tight roll for six weeks. I think it will straighten out when exposed to wind blast and heat, if not I can install some stainless strips along the bottom to weight them down. John Davies Spokane WA
1 point
-
Thanks for this - really appreciate it. A few questions: I thought that the cross bar that attaches to the truck was hinged with a spring so that it bends when turning. I guess I was wrong or they changed the design, since it looks like it's depending on bungees stretching when you turn. Maybe I was thinking about a different product. Anyway, how does it keep from bunching up the fabric when you straighten up again, or what's keeping the wind from pushing the fabric back on the bungees? Is there another bungee that attaches from the truck to the fabric to pull it back? Are you worried about catching on anything with the front crossbar? I don't think for us that I'd want it to extend past the truck. The middle cross bar looks like it will really limit turning while backing up. In fact, even while going forward my truck bumper almost touches the fiberglass in a full lock. How feasible do you think it would be to move that bar back so it clears the truck in a turn, or eliminate it entirely? I suppose it wouldn't be hard to make a hinged support with a bungee that would pull it back in a turn - you could make it out of 80/20 and tie the bungee back to the LP box. I think 80/20 might be a good alternate for the whole project - it would look nice and then you'd be all aluminum. Speaking of backing up, it seems like there will be a lot of material on the ground, and I wonder if there's any chance of it getting caught under the rear tires, esp. if you have a vehicle with little rear overhang? If your flaps don't uncurl you can always add a metal strip to the bottom. How difficult will it be to remove, or to unhitch with it in place? Is it just the four clips each side? Have you thought about how you're going to deal with the fabric when camped, to keep it out of the mud or whatever? You mentioned needing to detach it entirely if it's super muddy - would you have to crawl under the trailer to detach the rear? That's not something I'd love doing in the middle of a muddy road, so I'm thinking it wouldn't happen. I wonder if the rear cross bar could be made so that it only uses one clip each side. What's the black pipe in the second to the last set? How do you feel about the width now that you have it installed? Would you have gone wider, to protect the trailer more, or narrower so it didn't extend past the Cruiser? I wonder if they'd make a tapered version that got wider towards the trailer, or if that would make any sense. Could you share the dimensions you gave Stone Stomper when ordering?1 point
-
Once again, your contributions are above and beyond my expectations. The improvements to your Ollie are very well thought out and the detail you share with the forum is appreciated. Looking forward to your road report.1 point
-
1 point
-
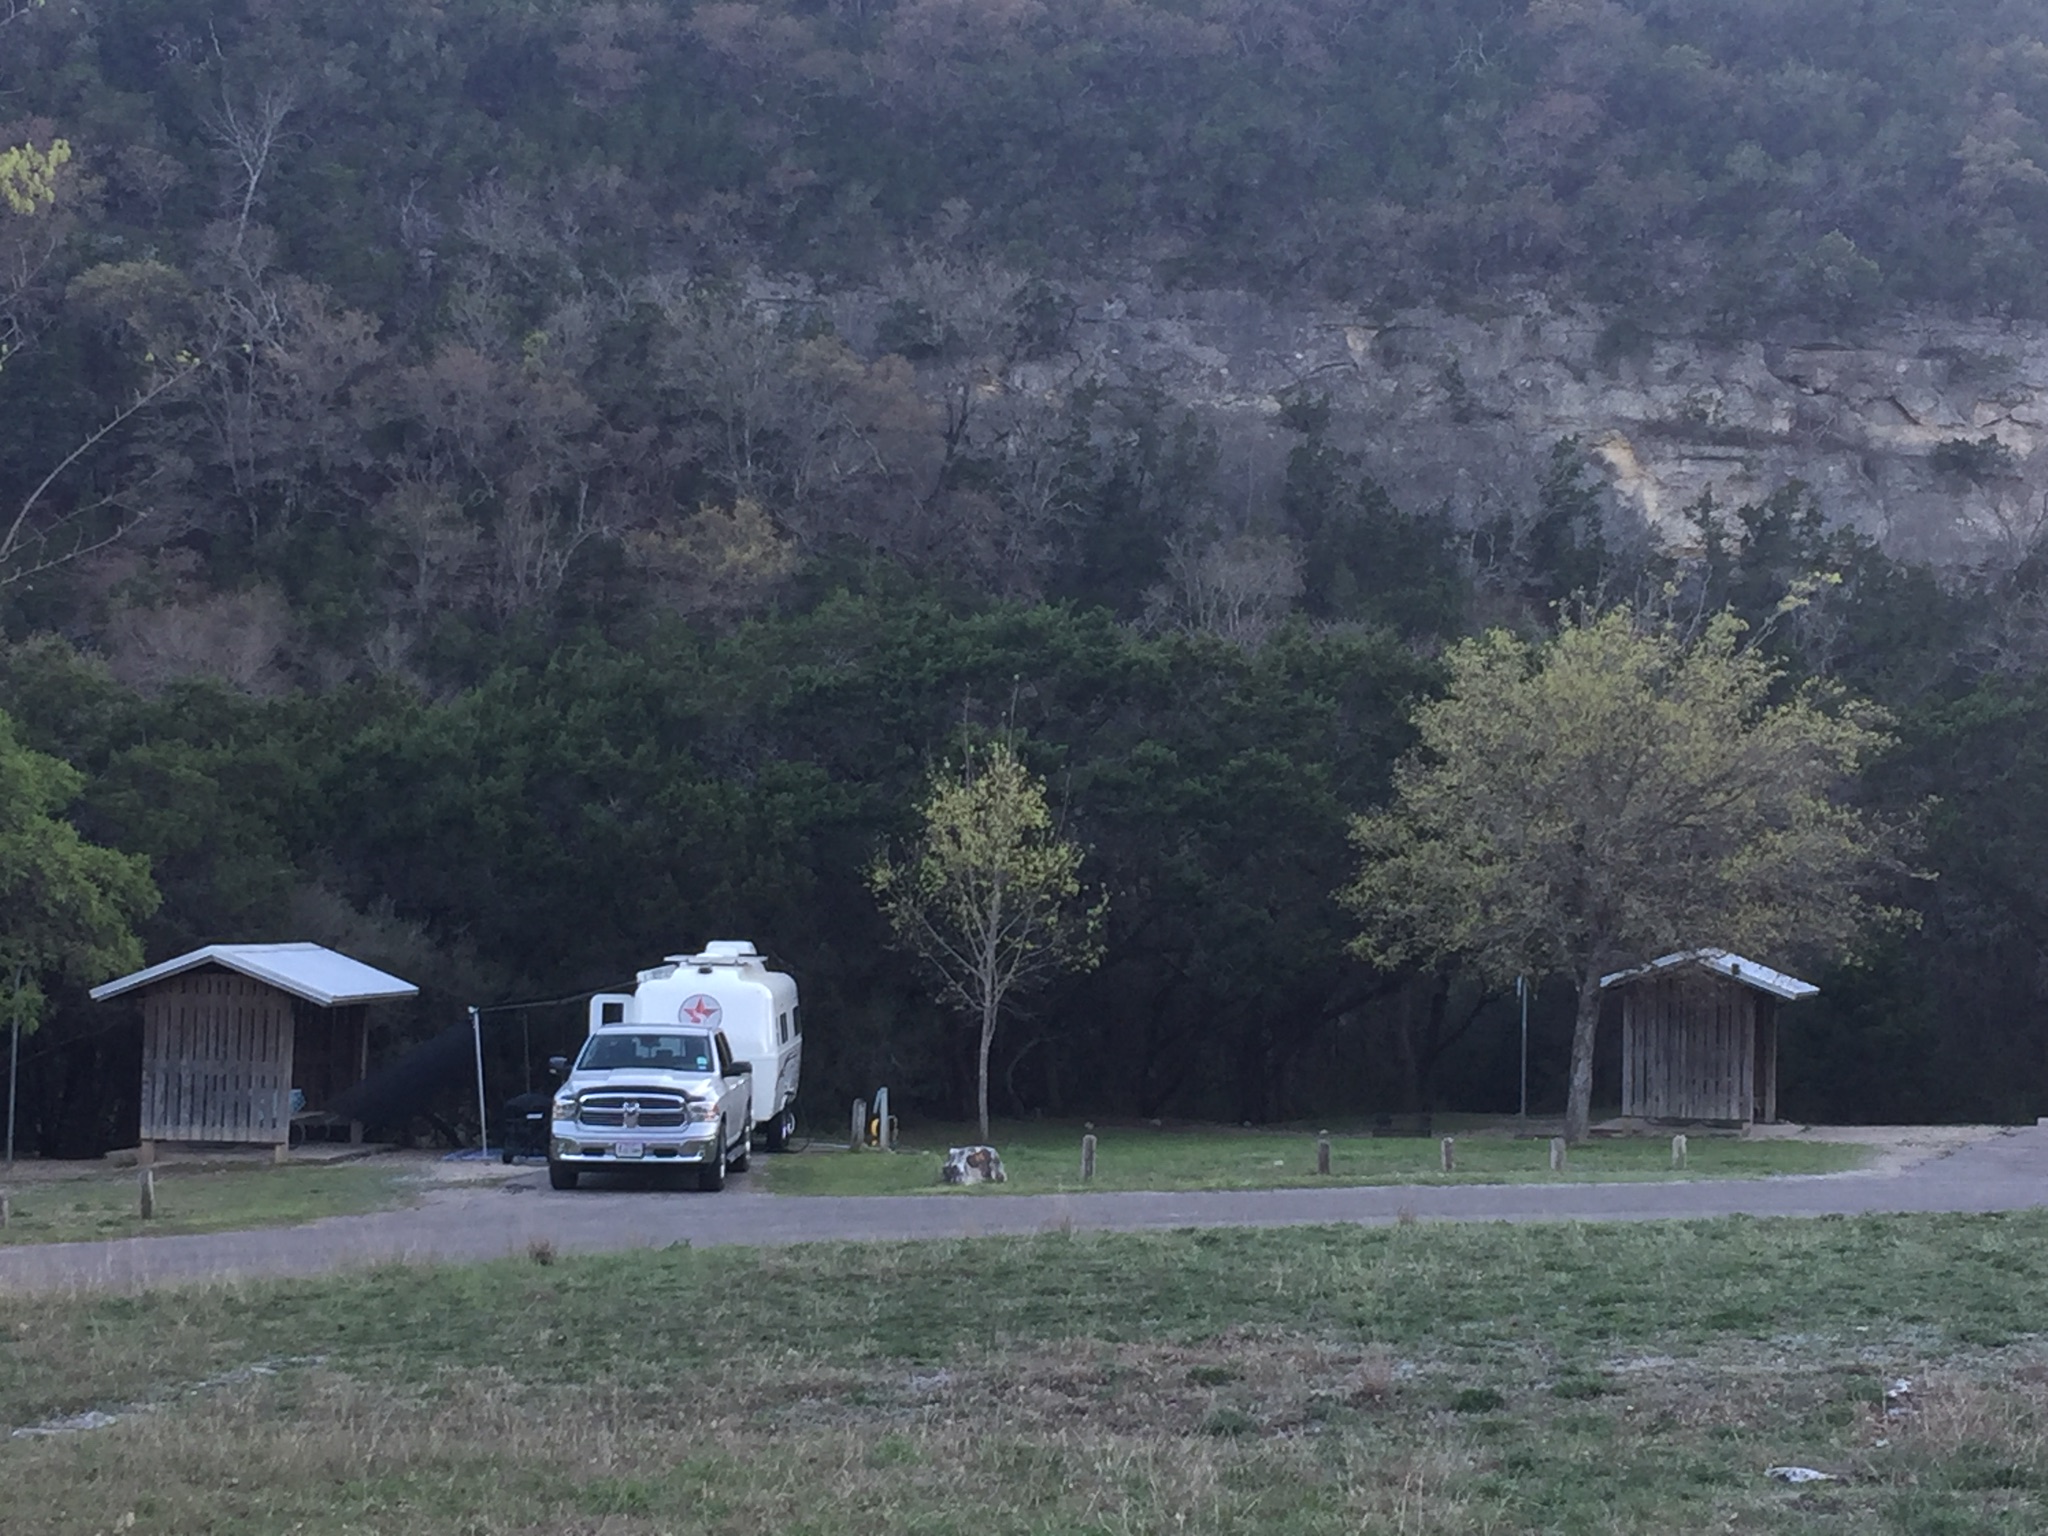
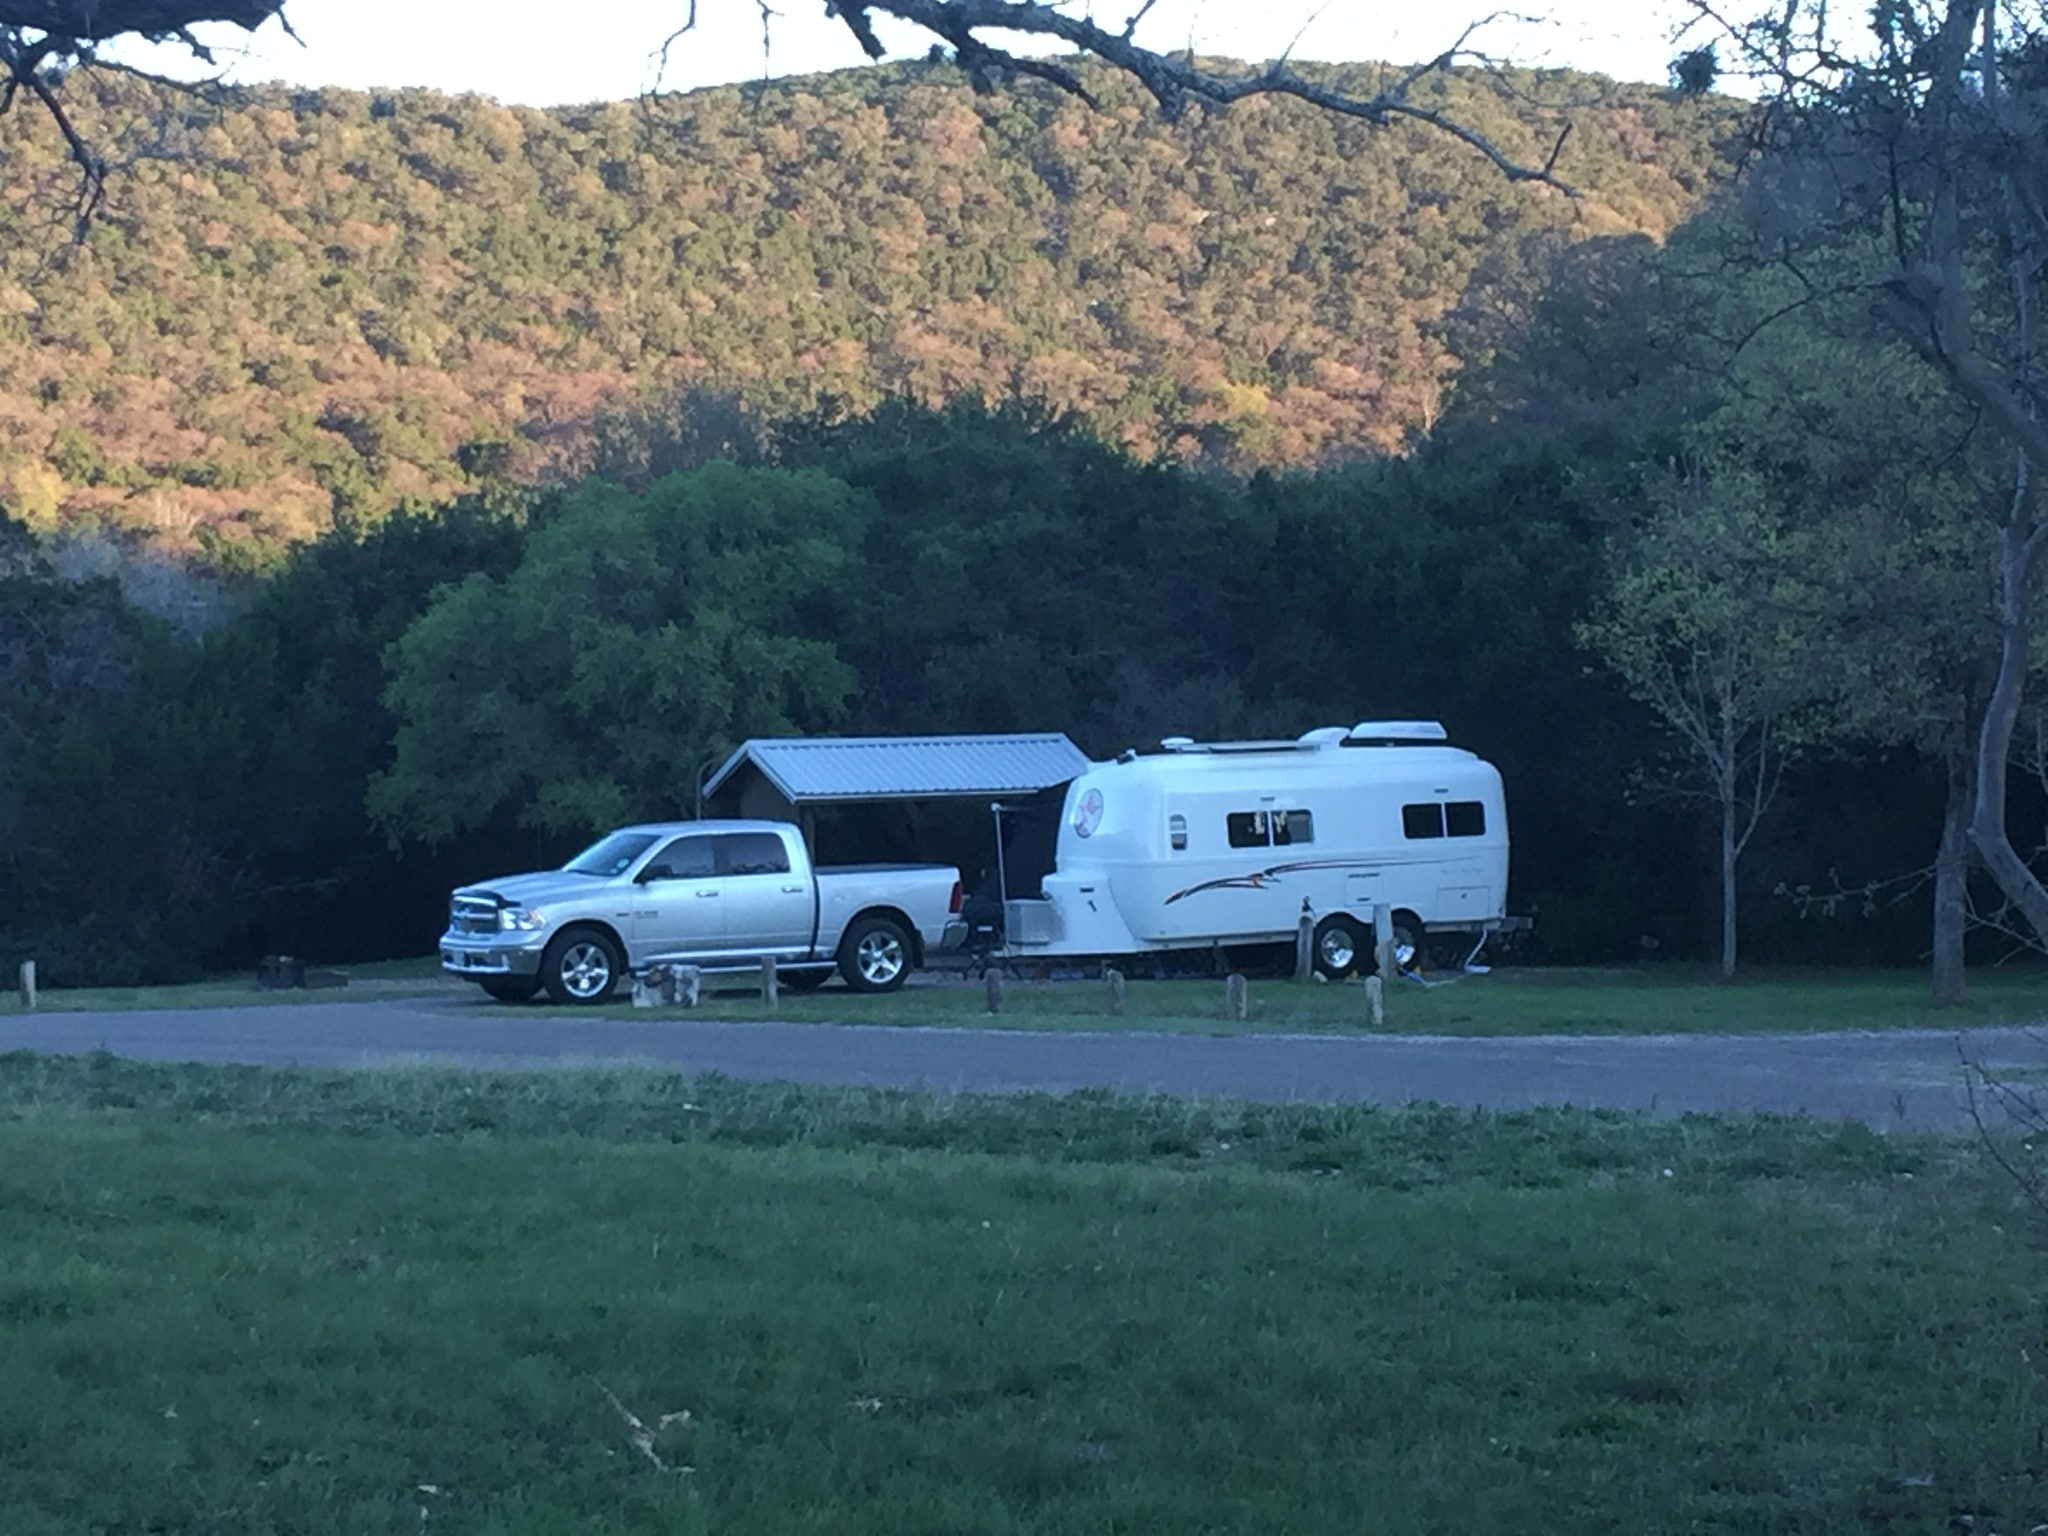
Spent the last week at Lost Maples State Park just 70 miles west from where we live north of San Antonio. It’s in the middle of nowhere with absolutely no cell service. It’s a small campground - only 30 campsites with water and 30a electric hookups. Very quiet with some good hiking trails. We really enjoyed the peace and quiet. We plan on going back in the fall when the maple trees are turning. Mike
1 point
-
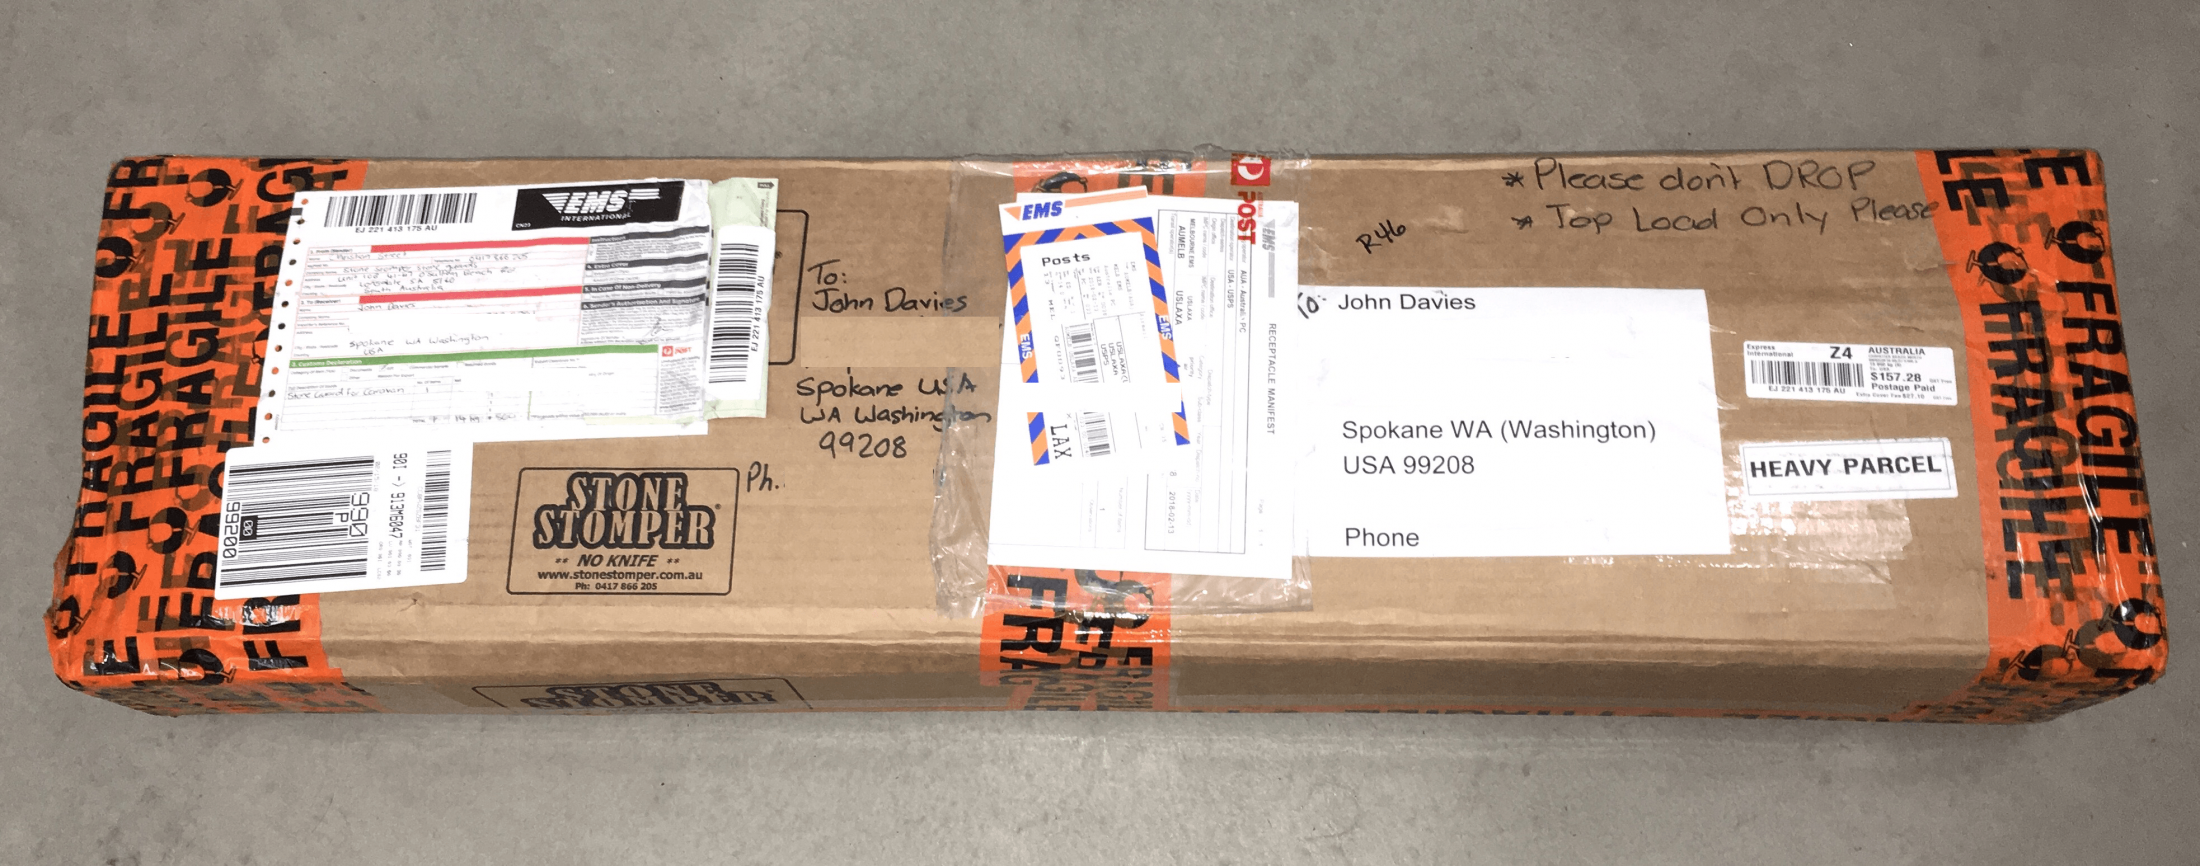
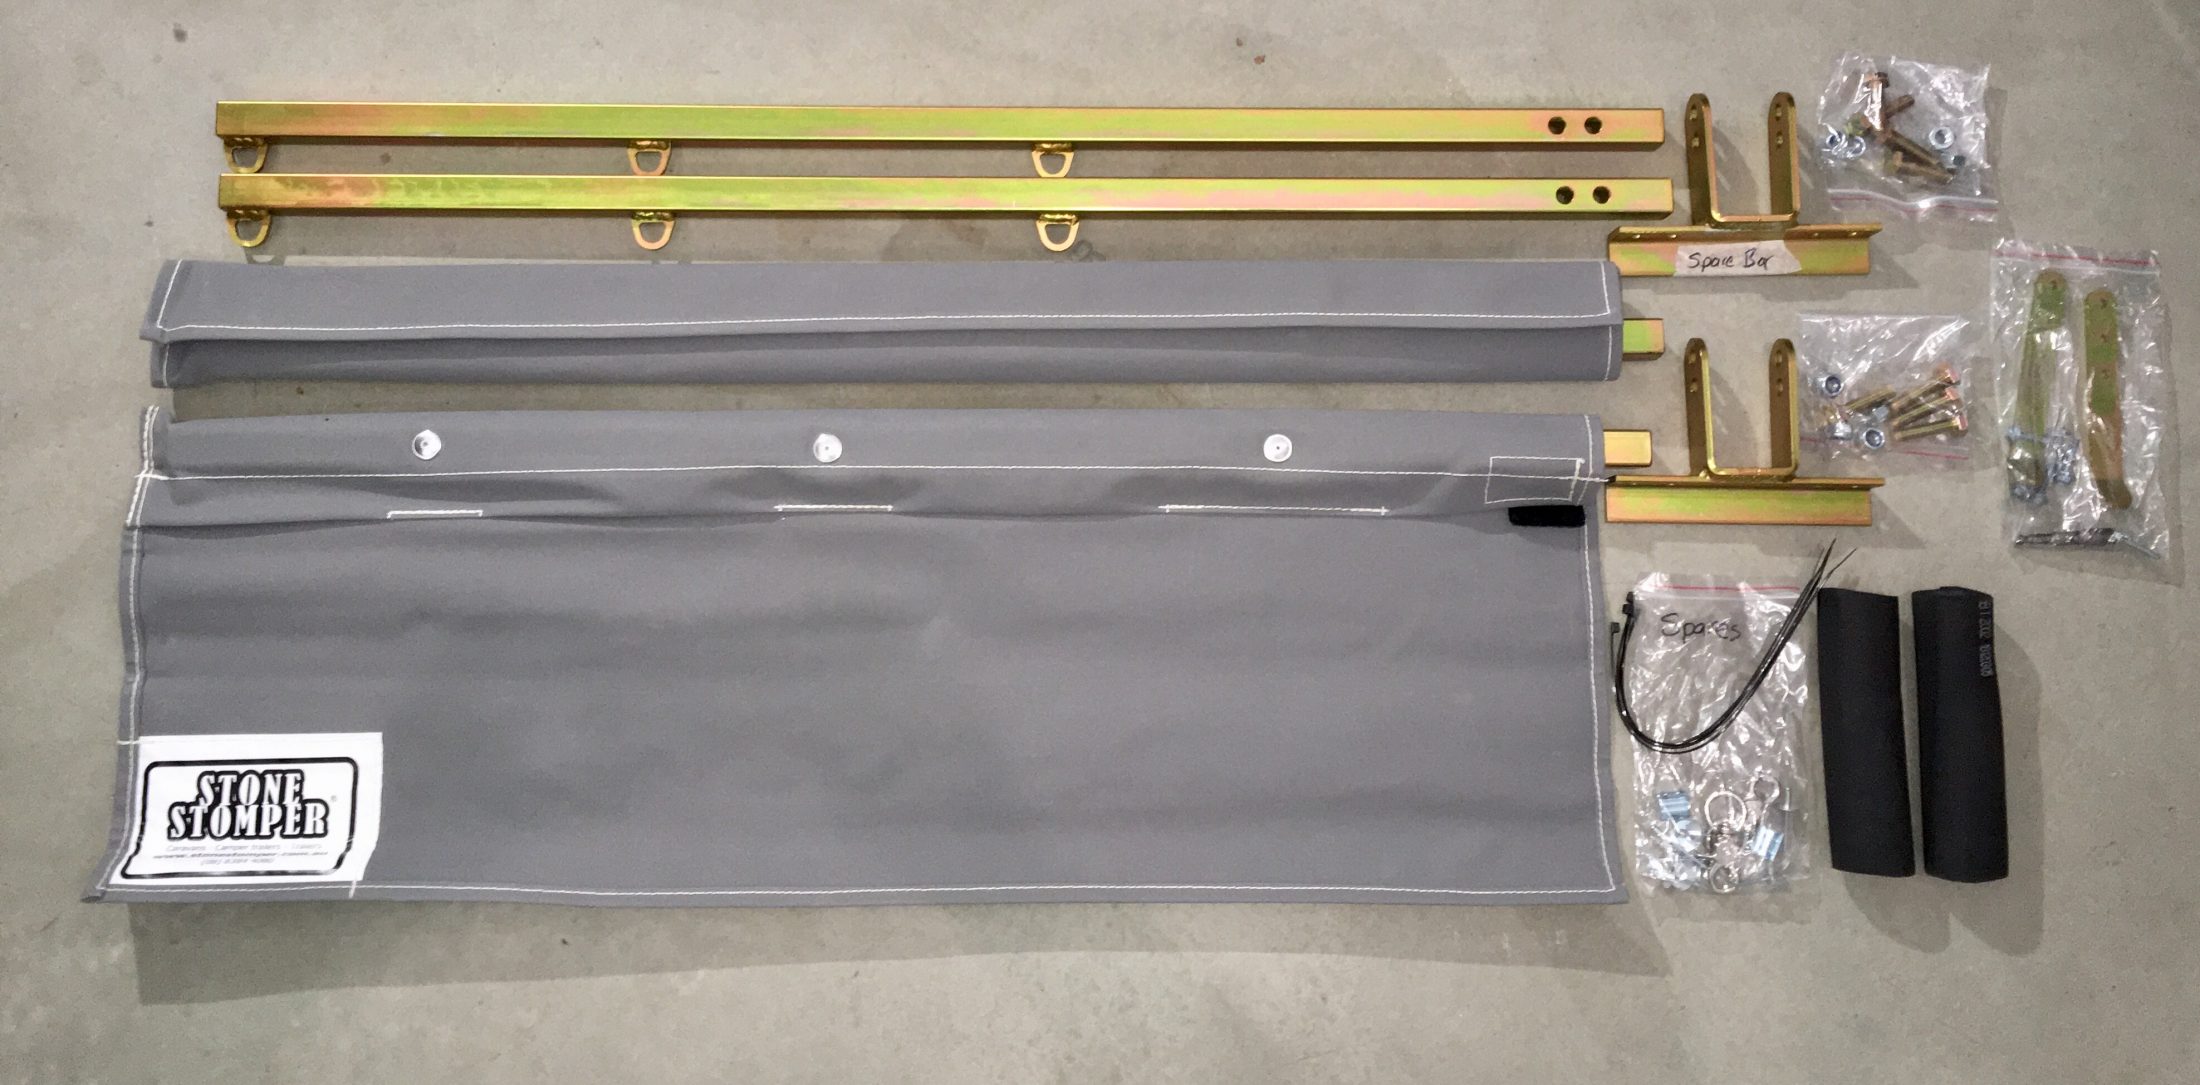
More 8 - Unboxing. This is the last section, feel free to comment but I may not be able to respond for a while. John Davies Spokane WA
1 point
-
1 point
-
1 point
-
1 point
-
1 point
-
Looks great, love the small Ollie’s! Hope to see you out on the road - Mike1 point
-
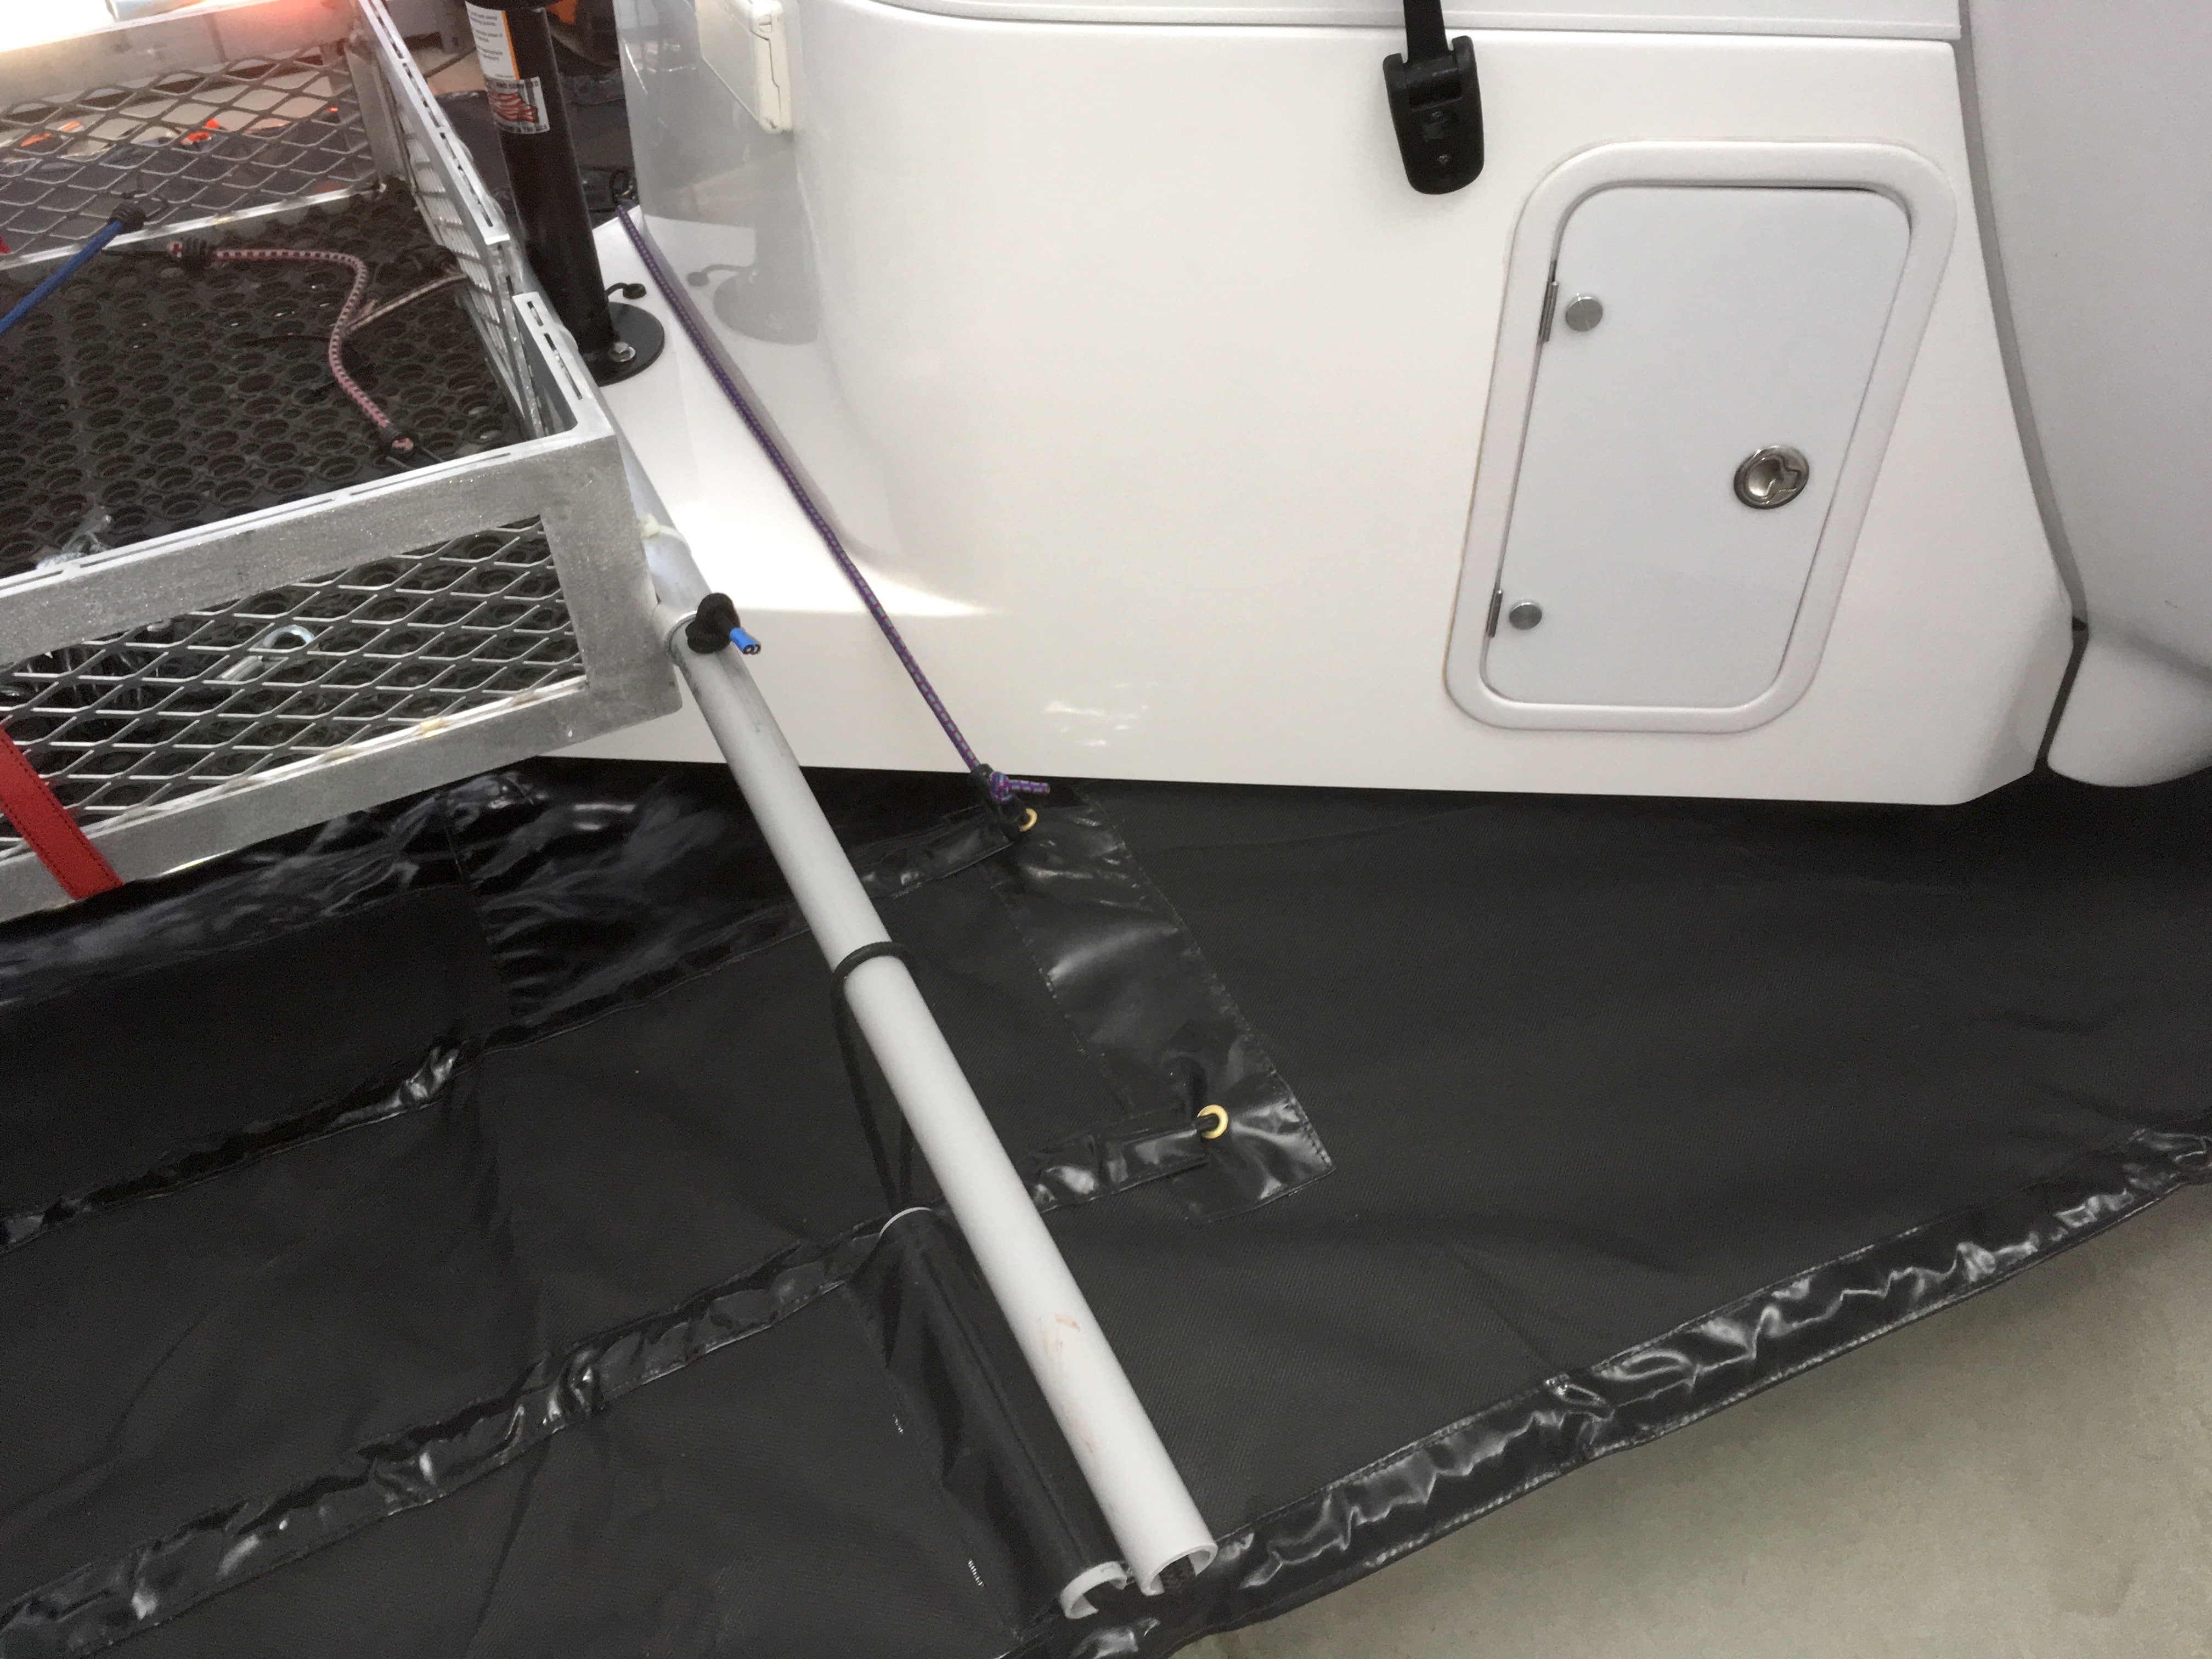
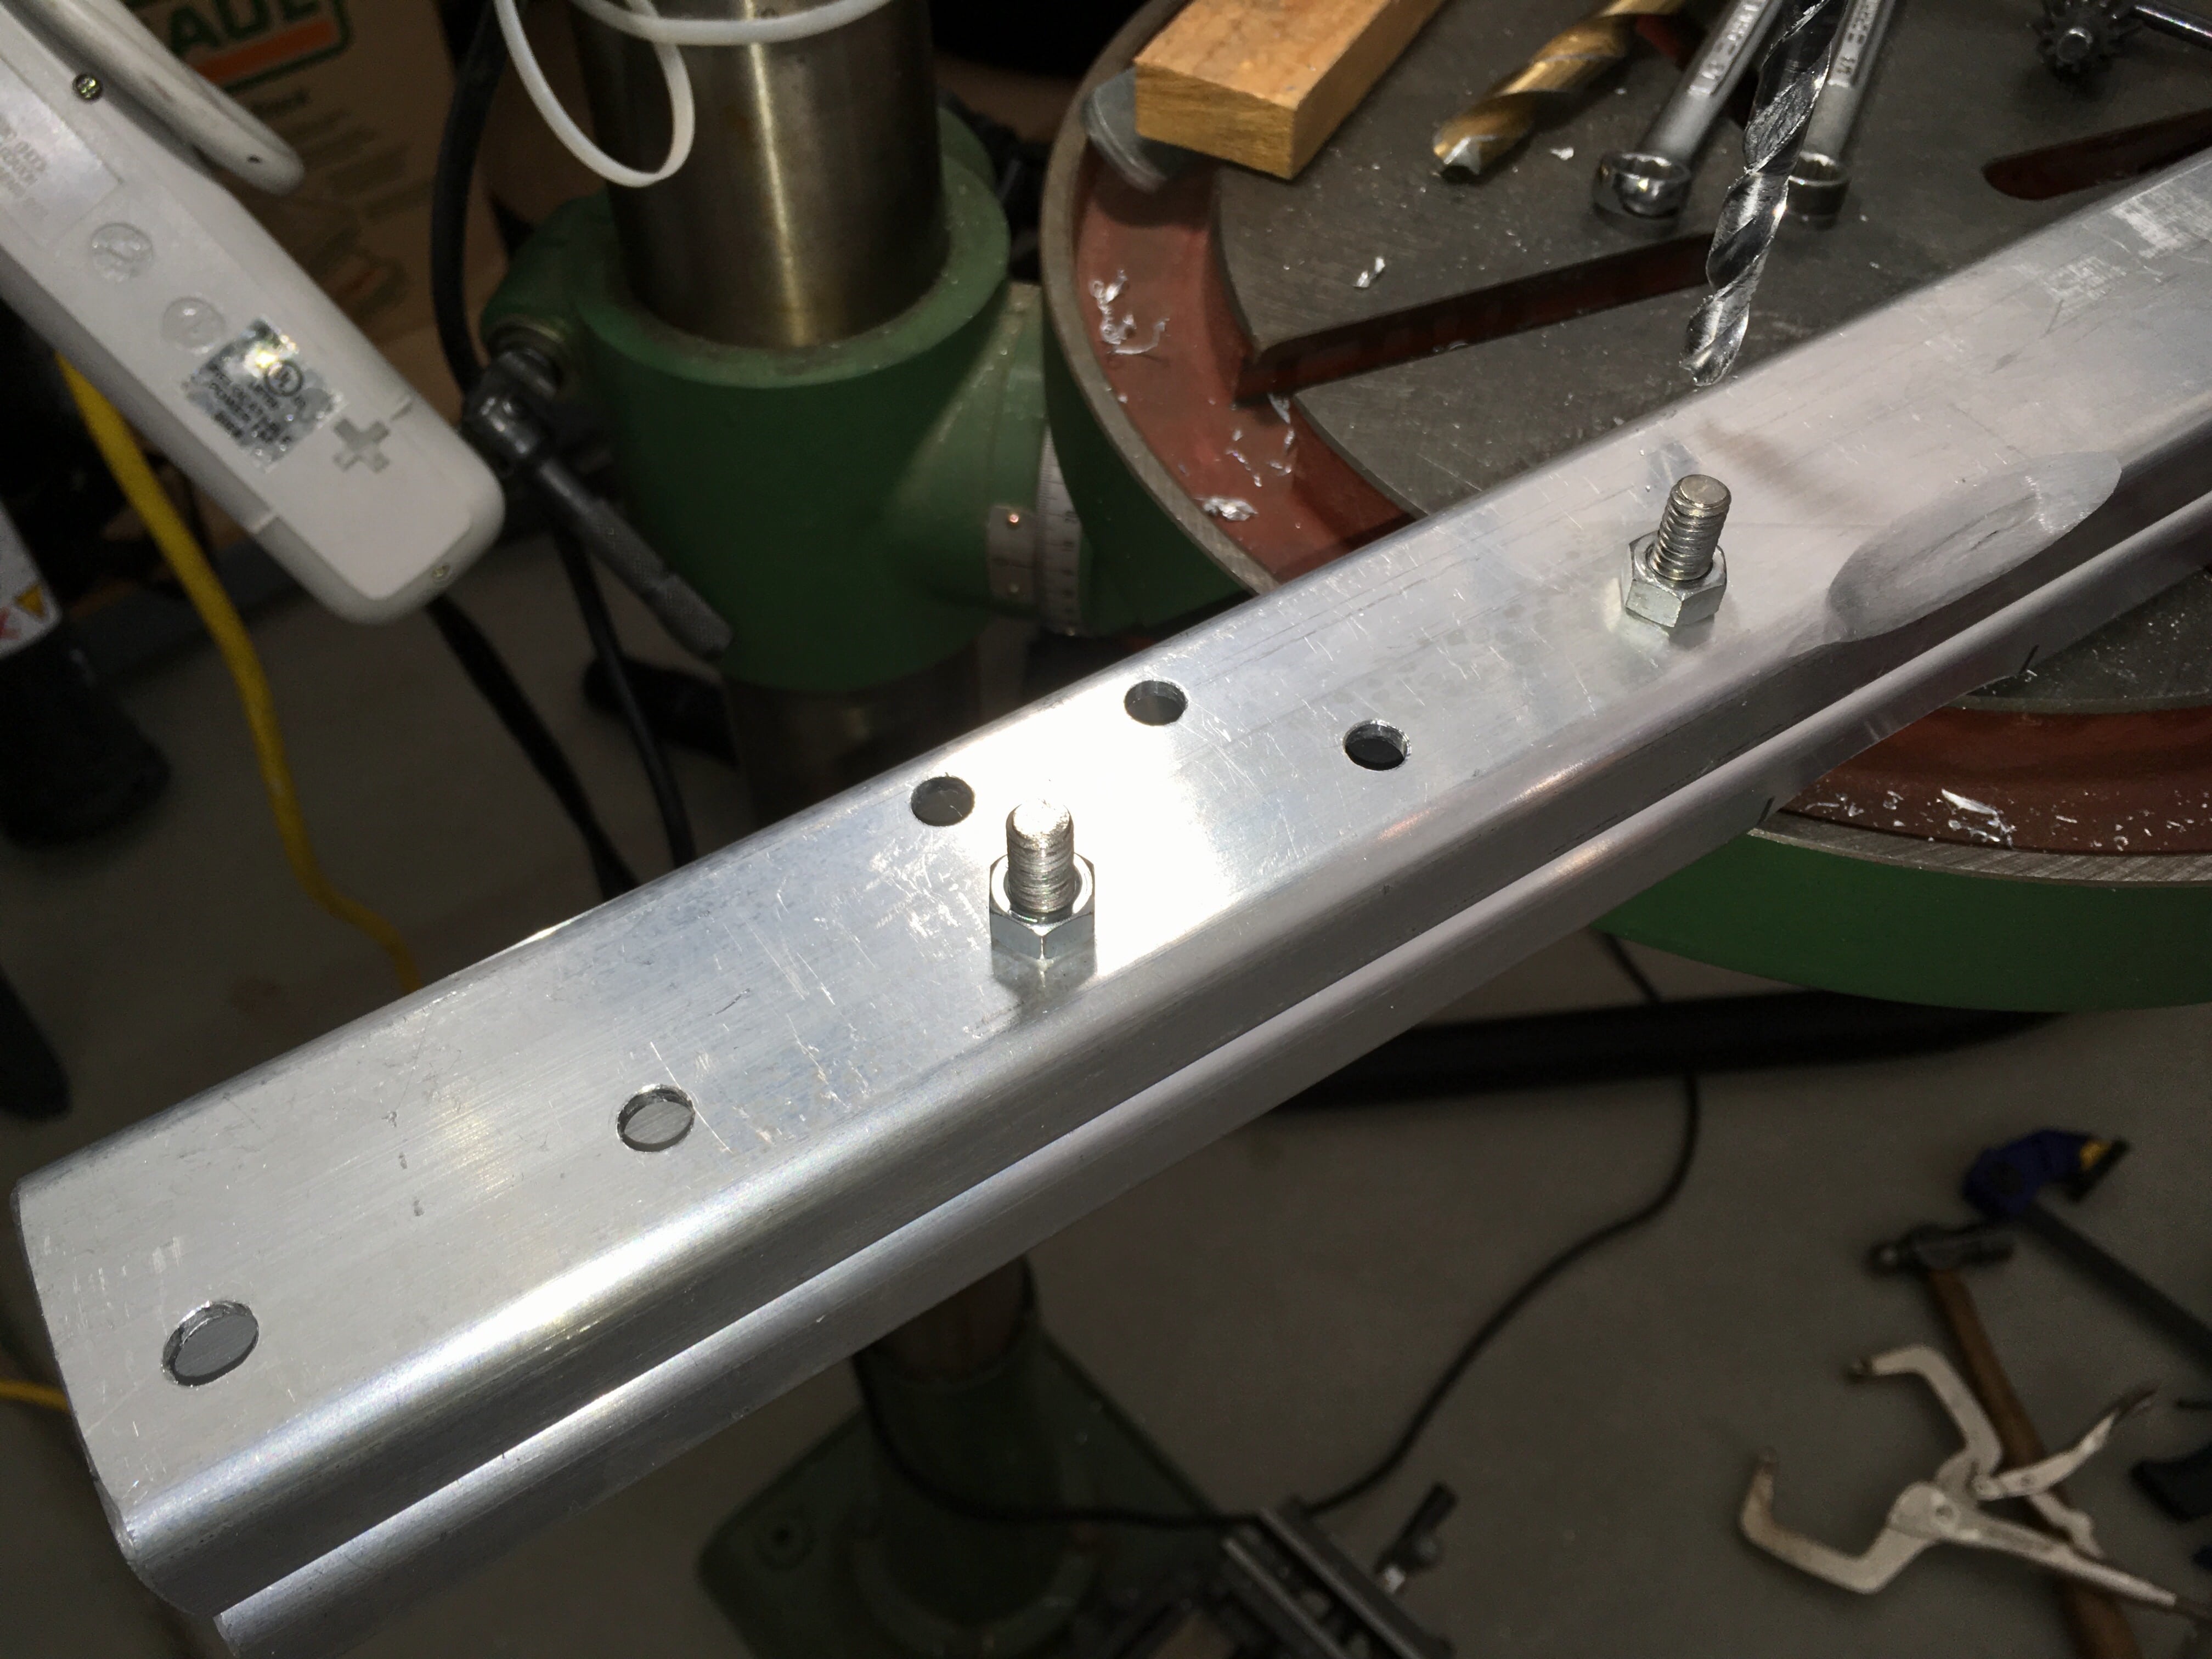
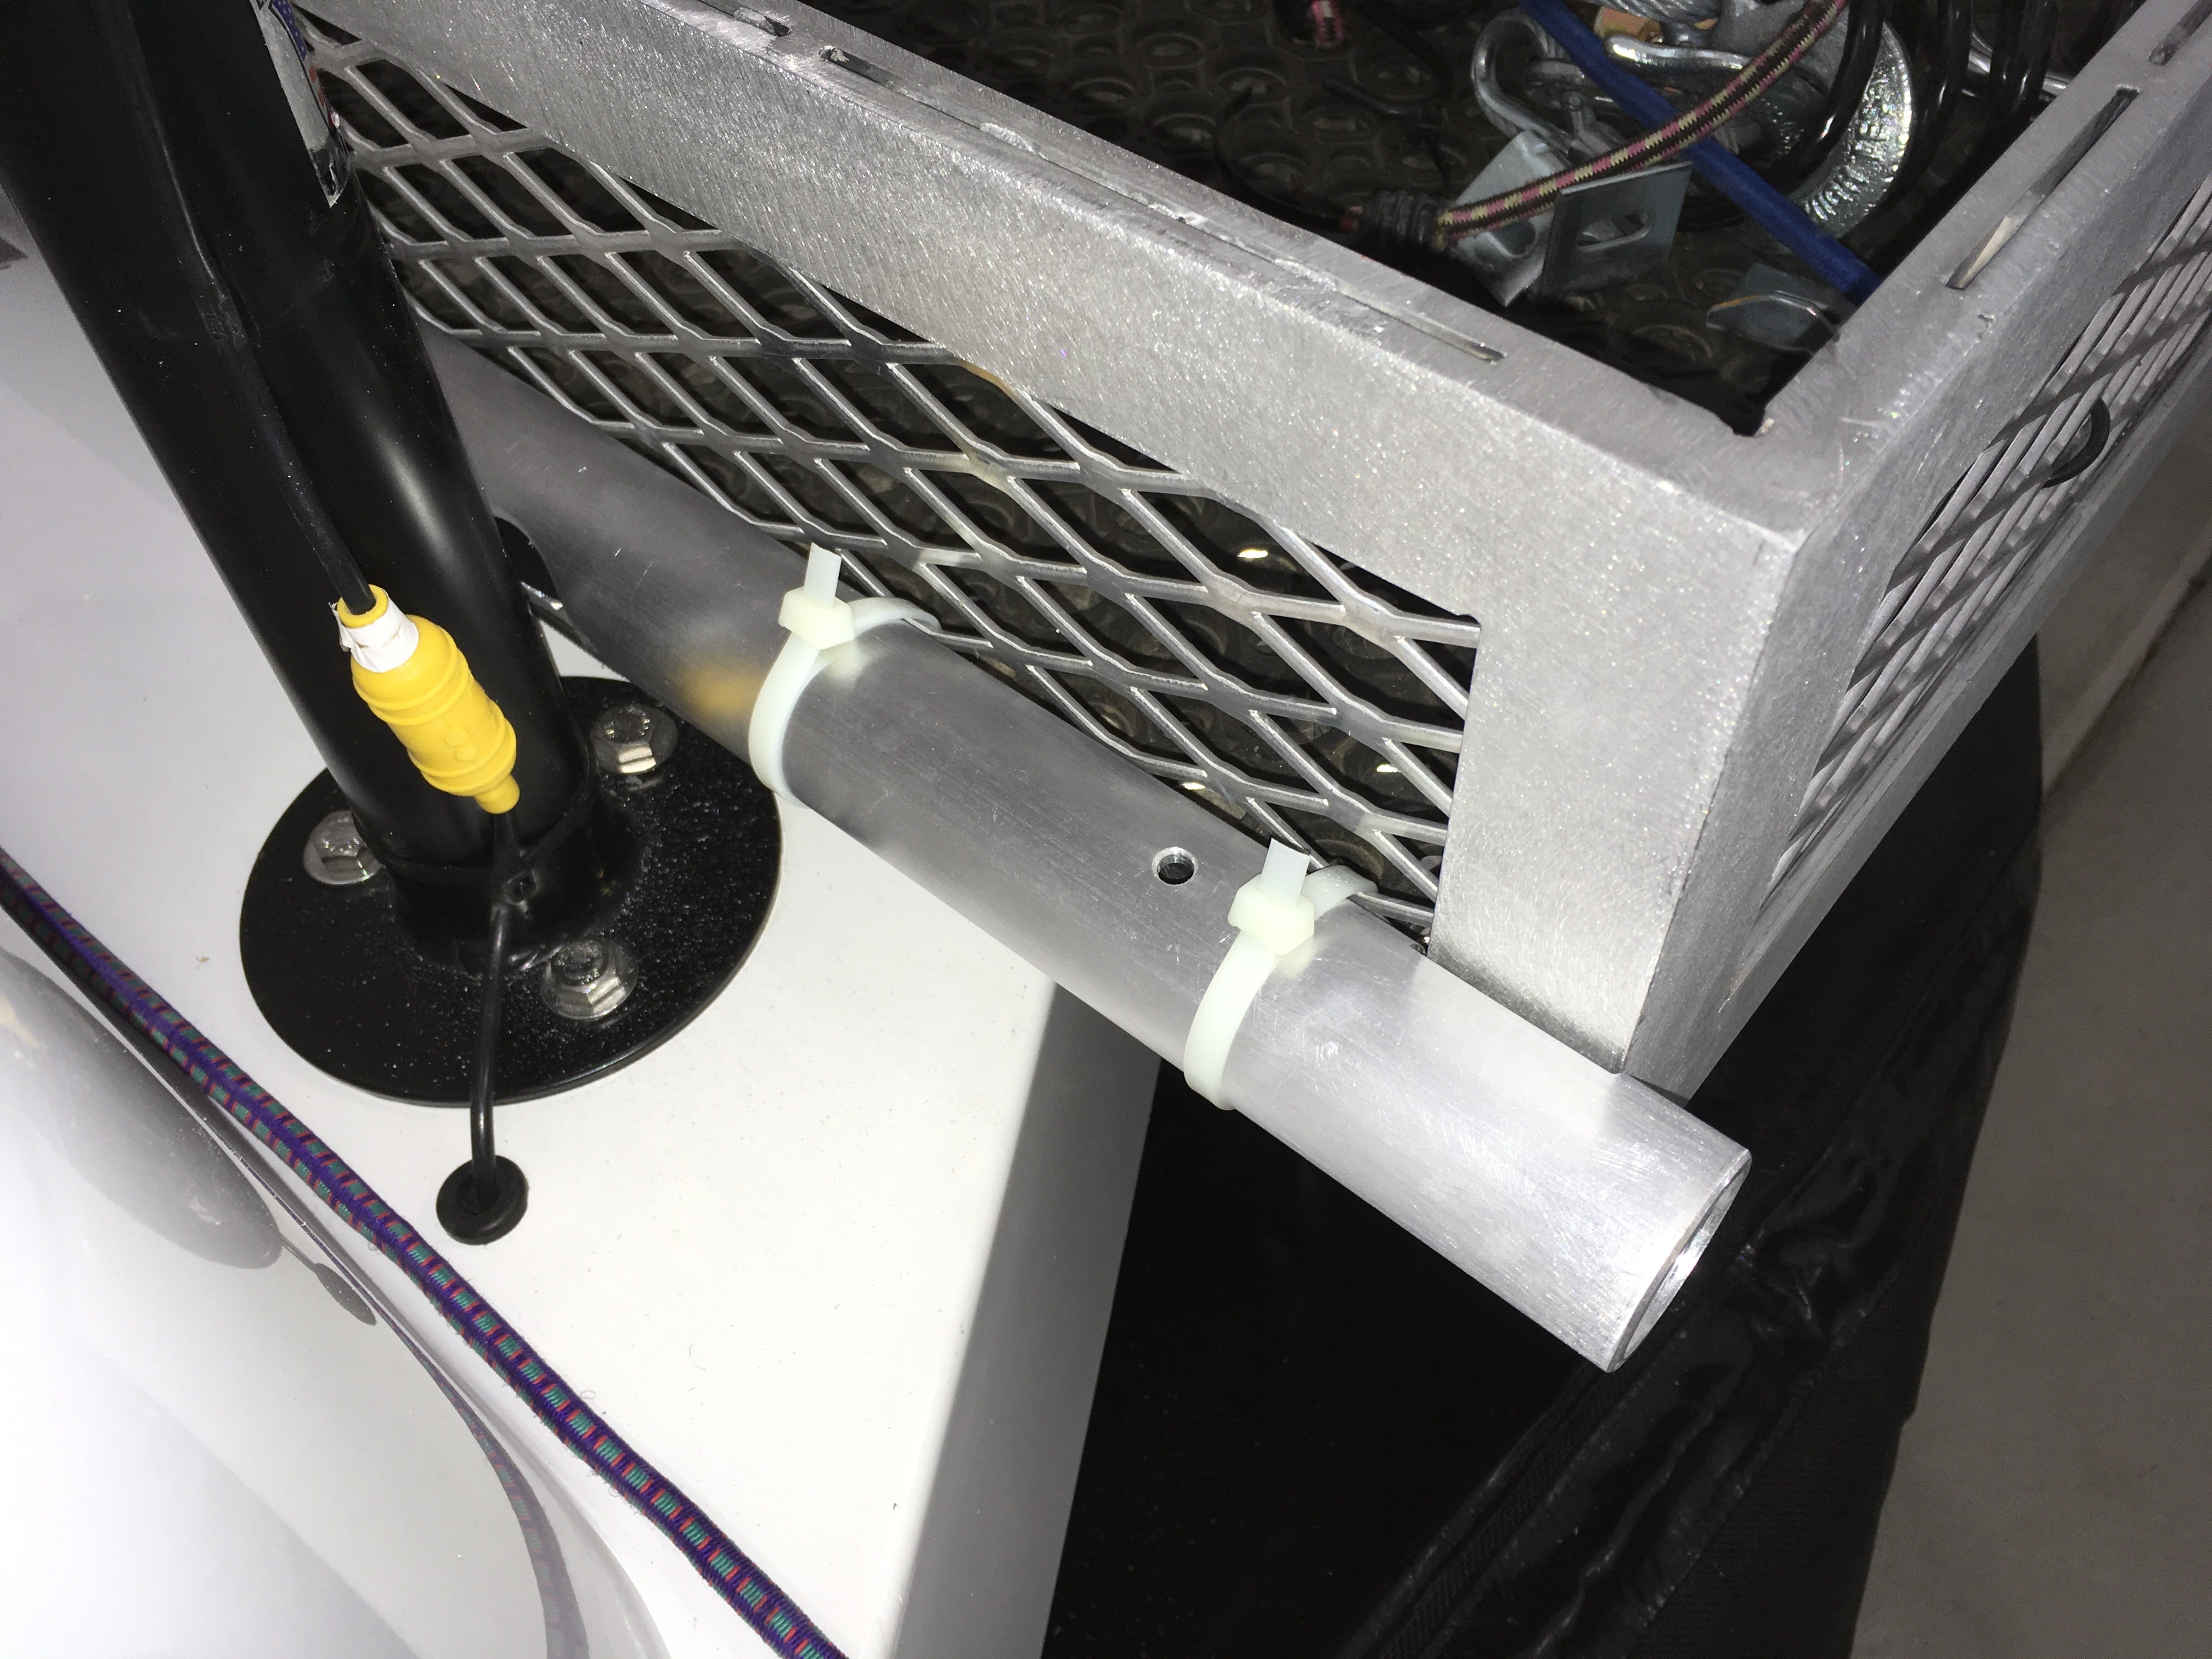
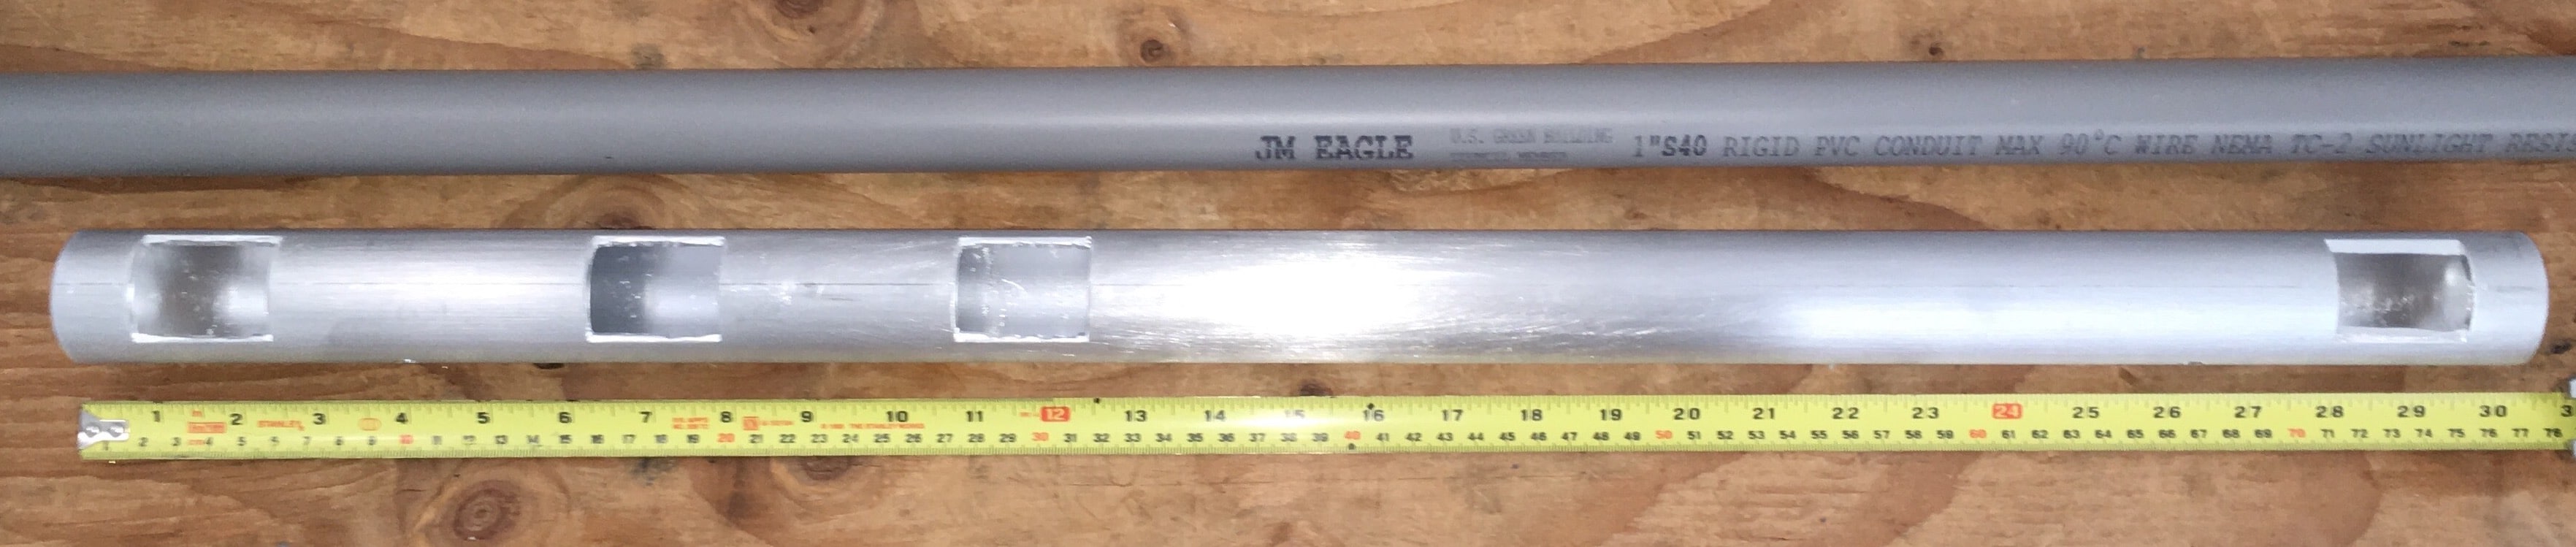
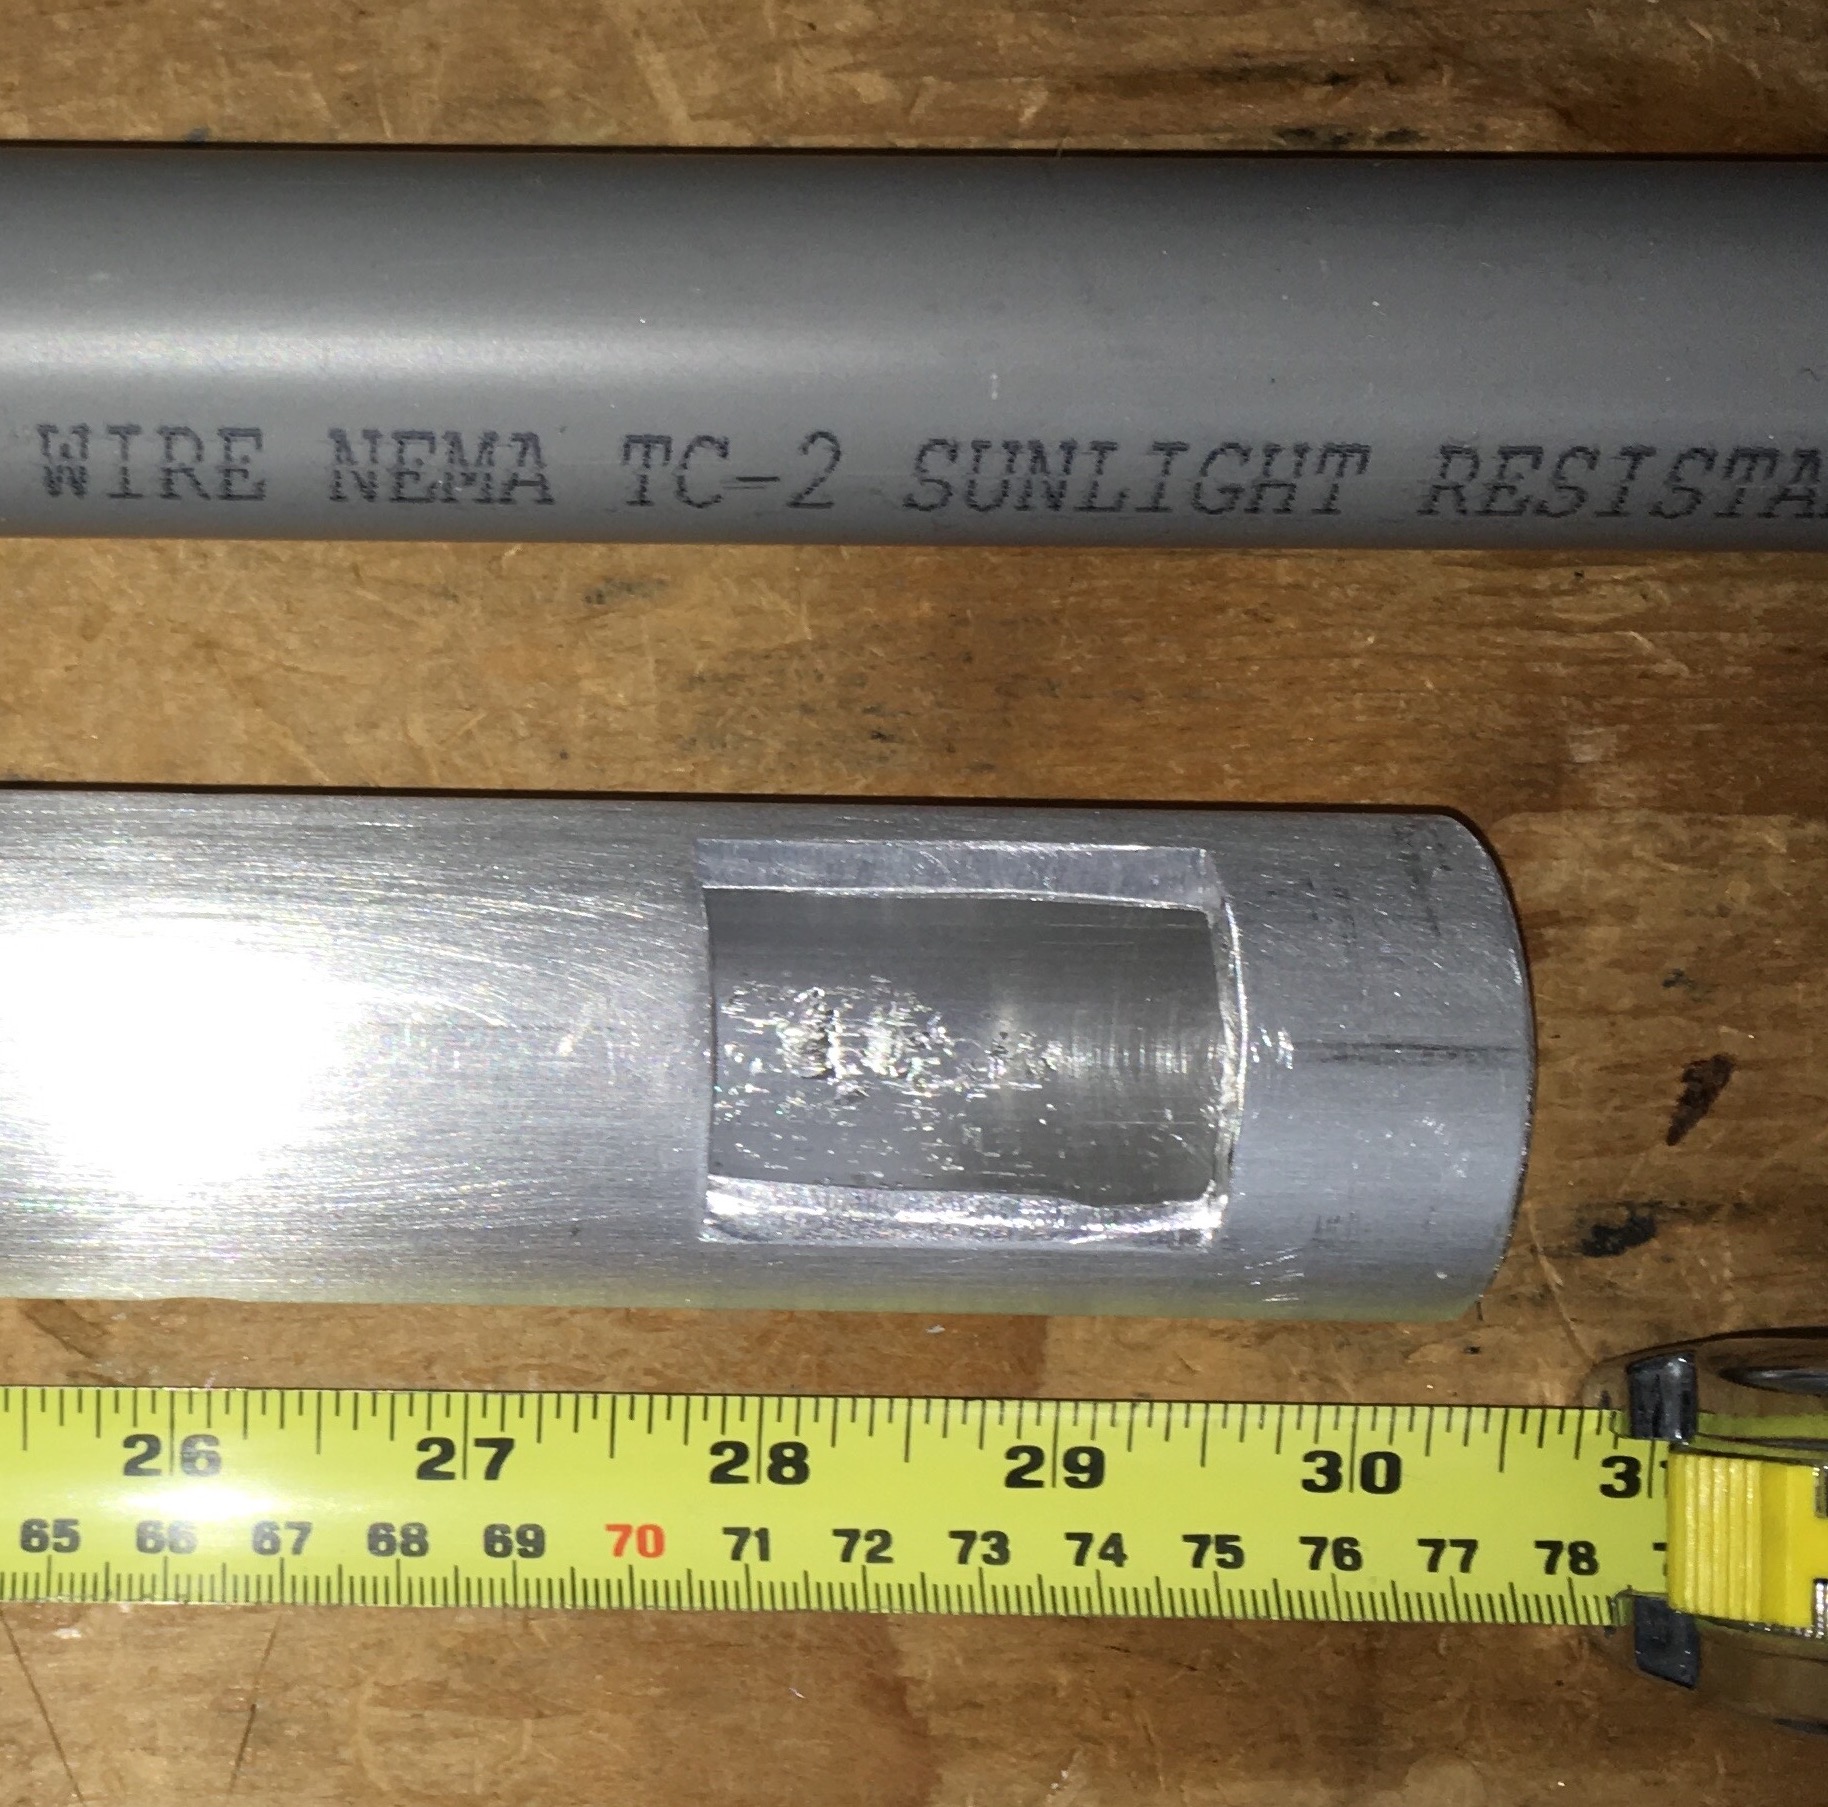
PART 4 EDIT 03/27/18 CENTER SUPPORT BAR The bar mount is made of 6062T6 aluminum tubing, 1 ¼ ID x 1/8 wall (Schedule 40). I had to cut and grind clearance pockets so that I could nest it in between the basket and the jack. It is a snug fit (needed to be tapped into place with a mallet) and is secured with four great big nylon cable ties. It is rock solid but quick to remove if needed, to remove the jack for example. I did not want to weld or drill into the basket. If you have access to a GOOD welder, a permanent welded join would be better overall. But you would have to remove the basket for jack access. Detail showing the two plastic inserts that go in the mesh sleeves (9.25”) and the two main support tubes (36.25”). They are ground to clear the basket frame, I drilled then for retaining pins but I do not think they will be needed. MORE TO COME. John Davies Spokane WA
1 point
-
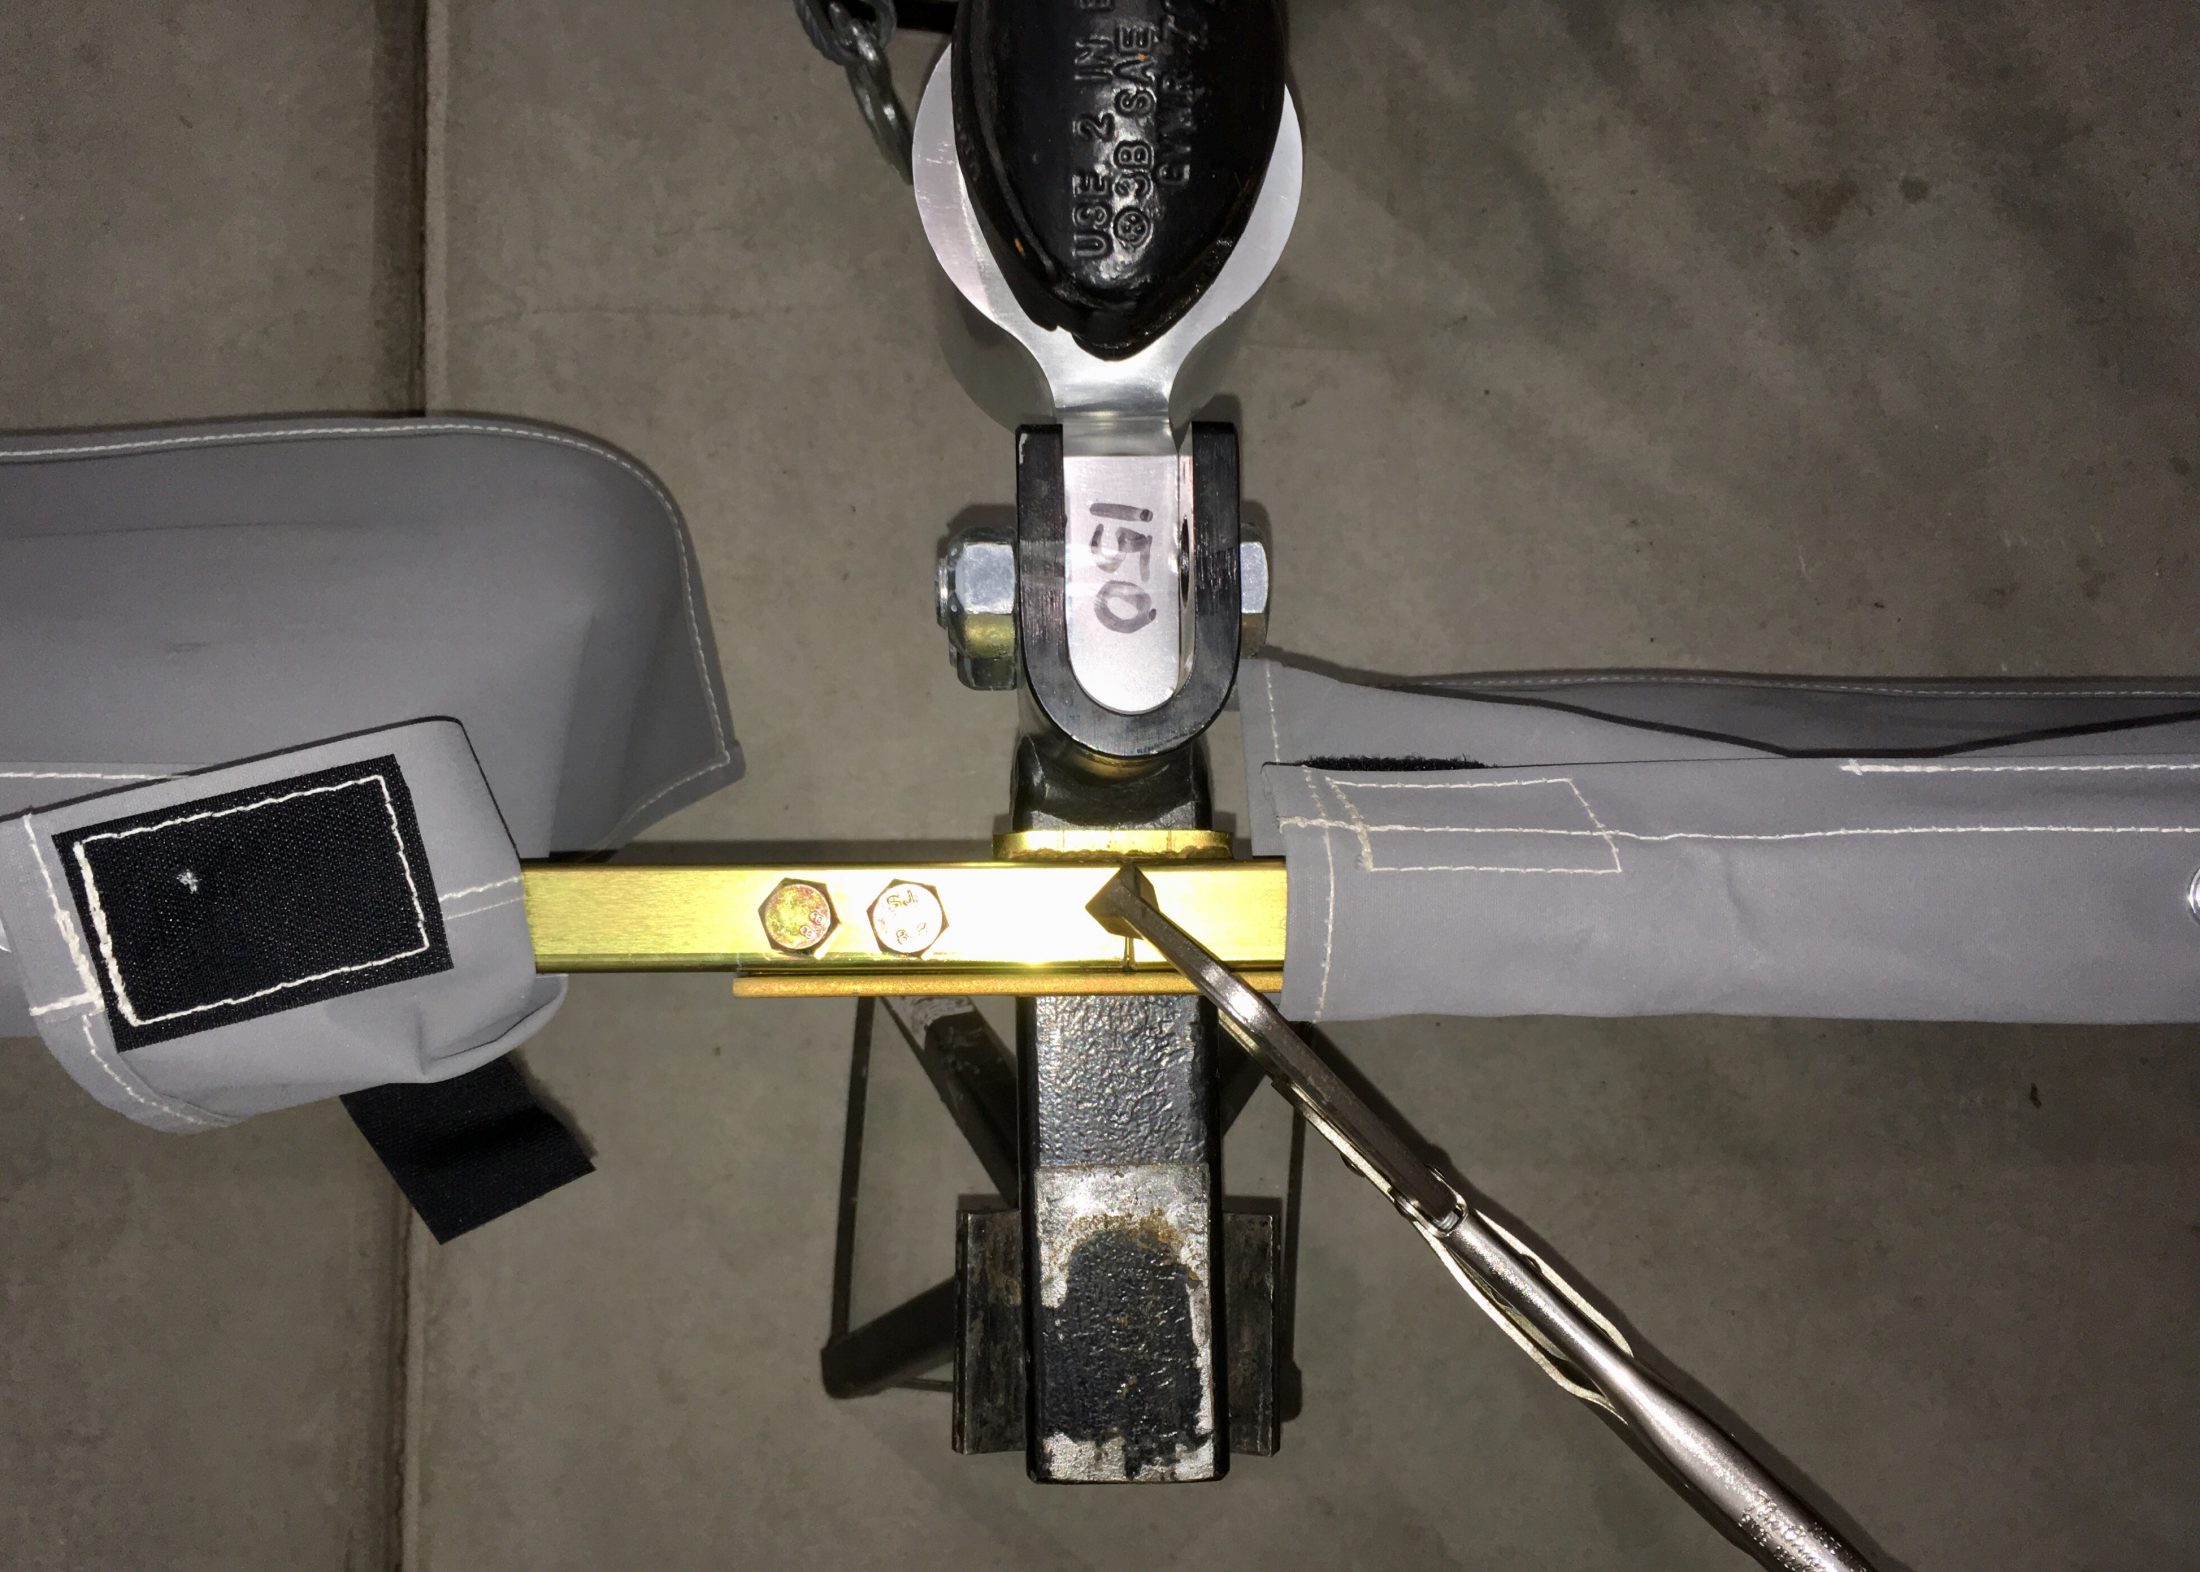
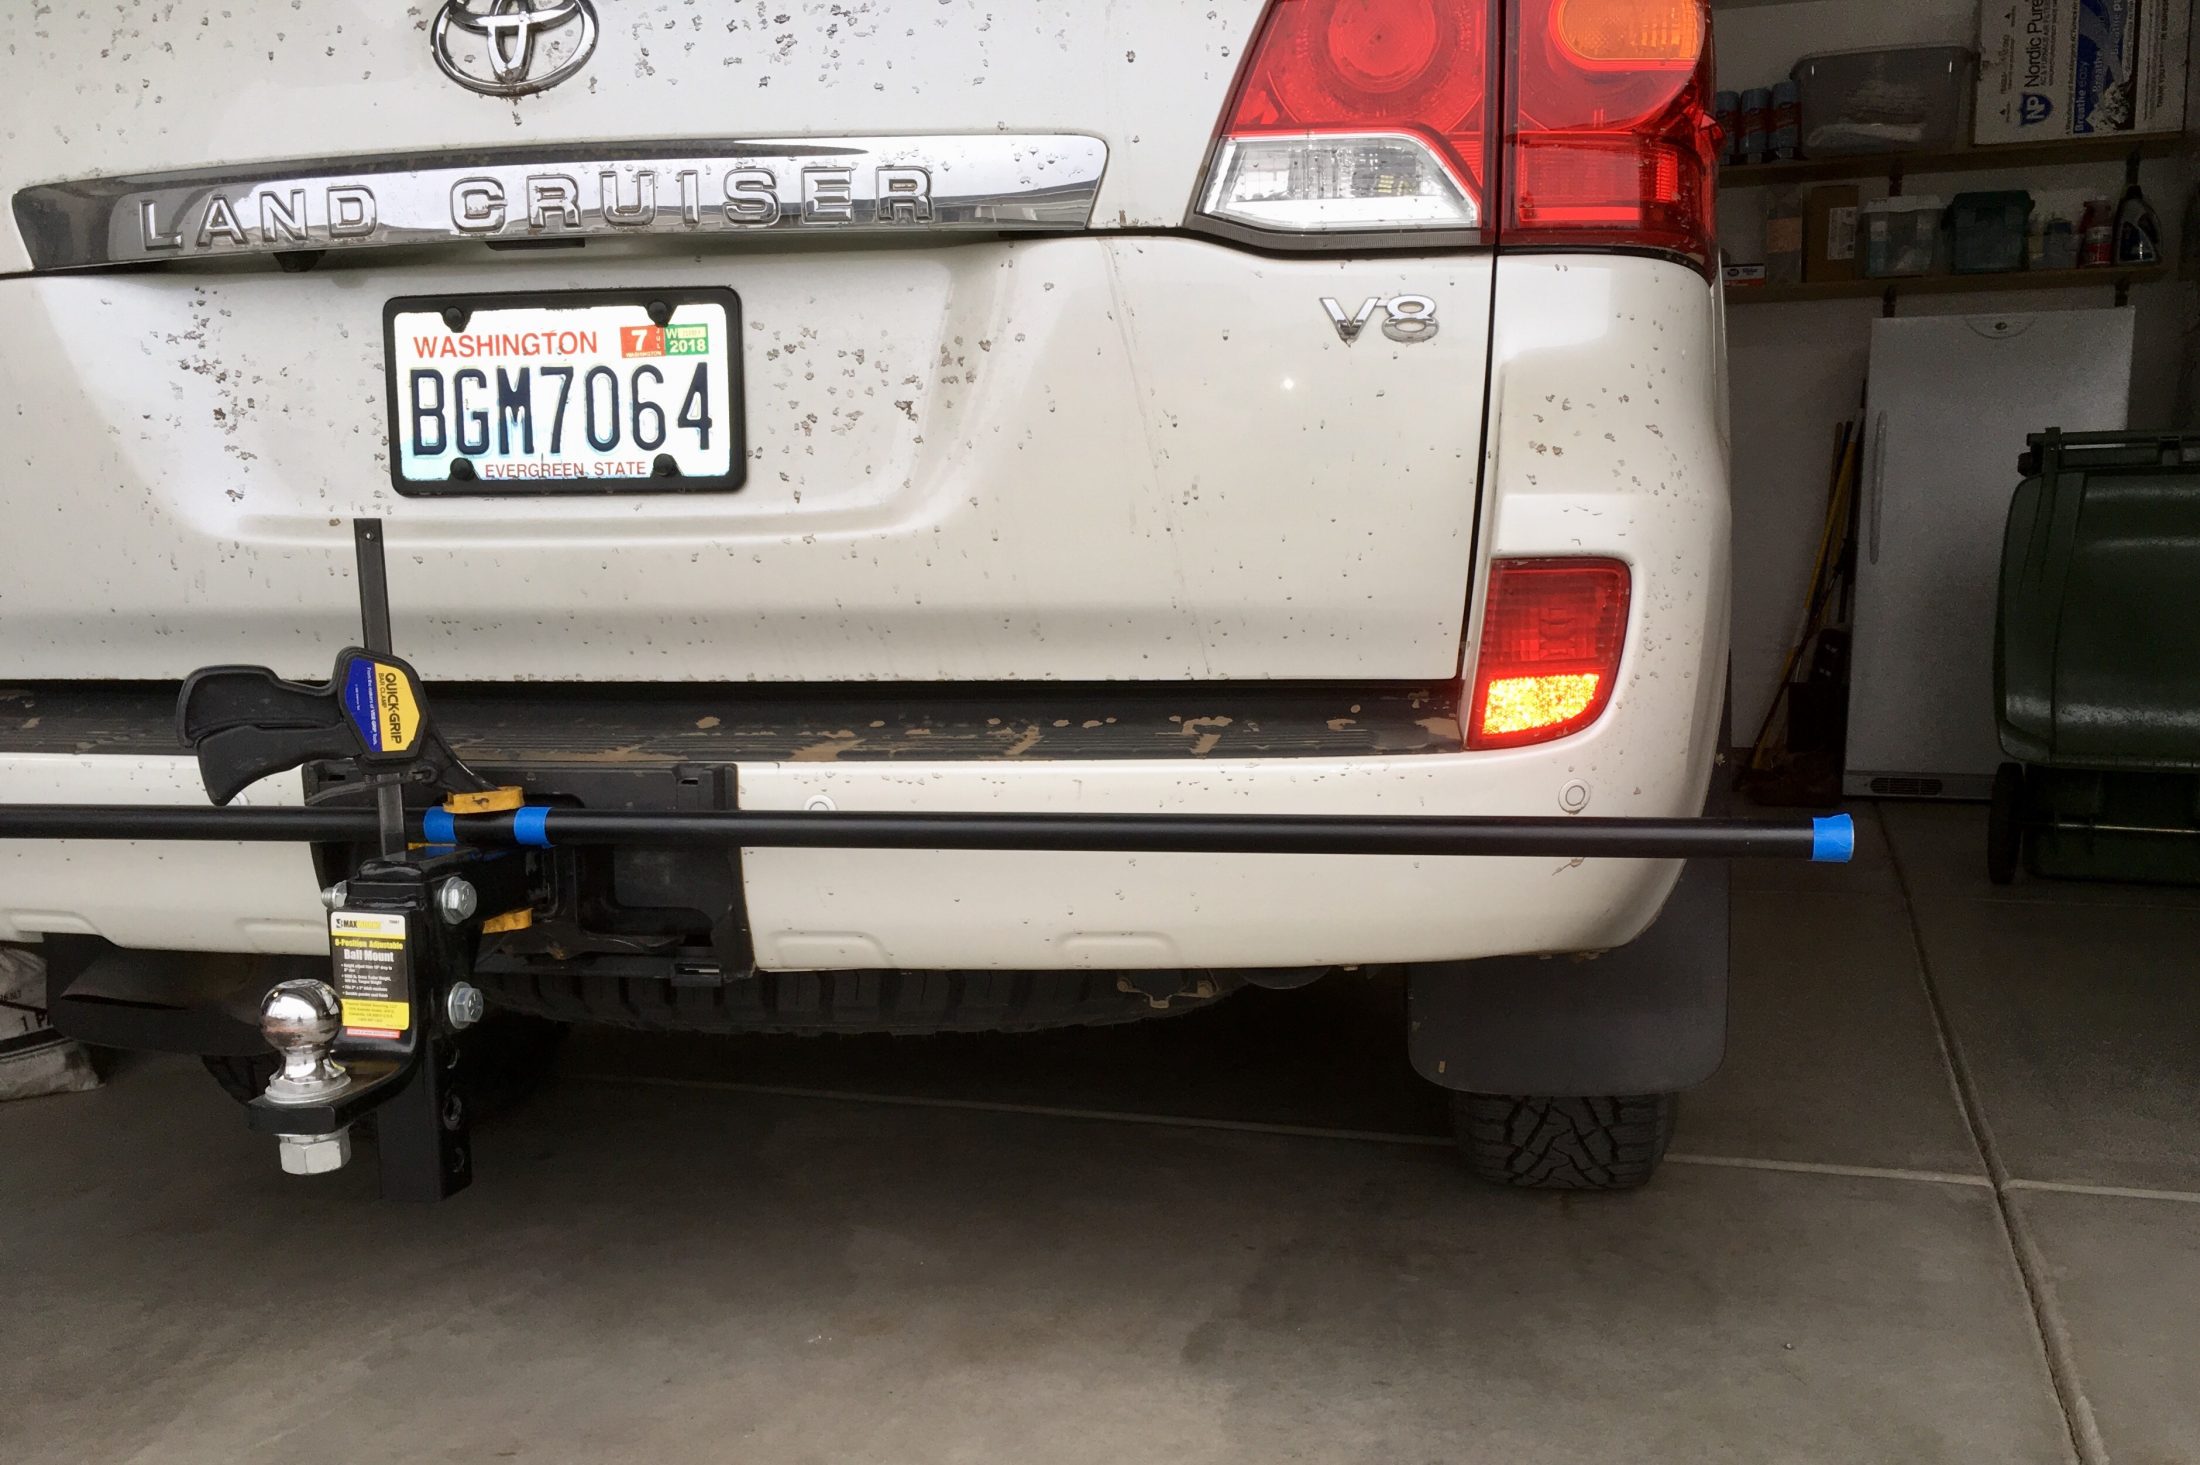
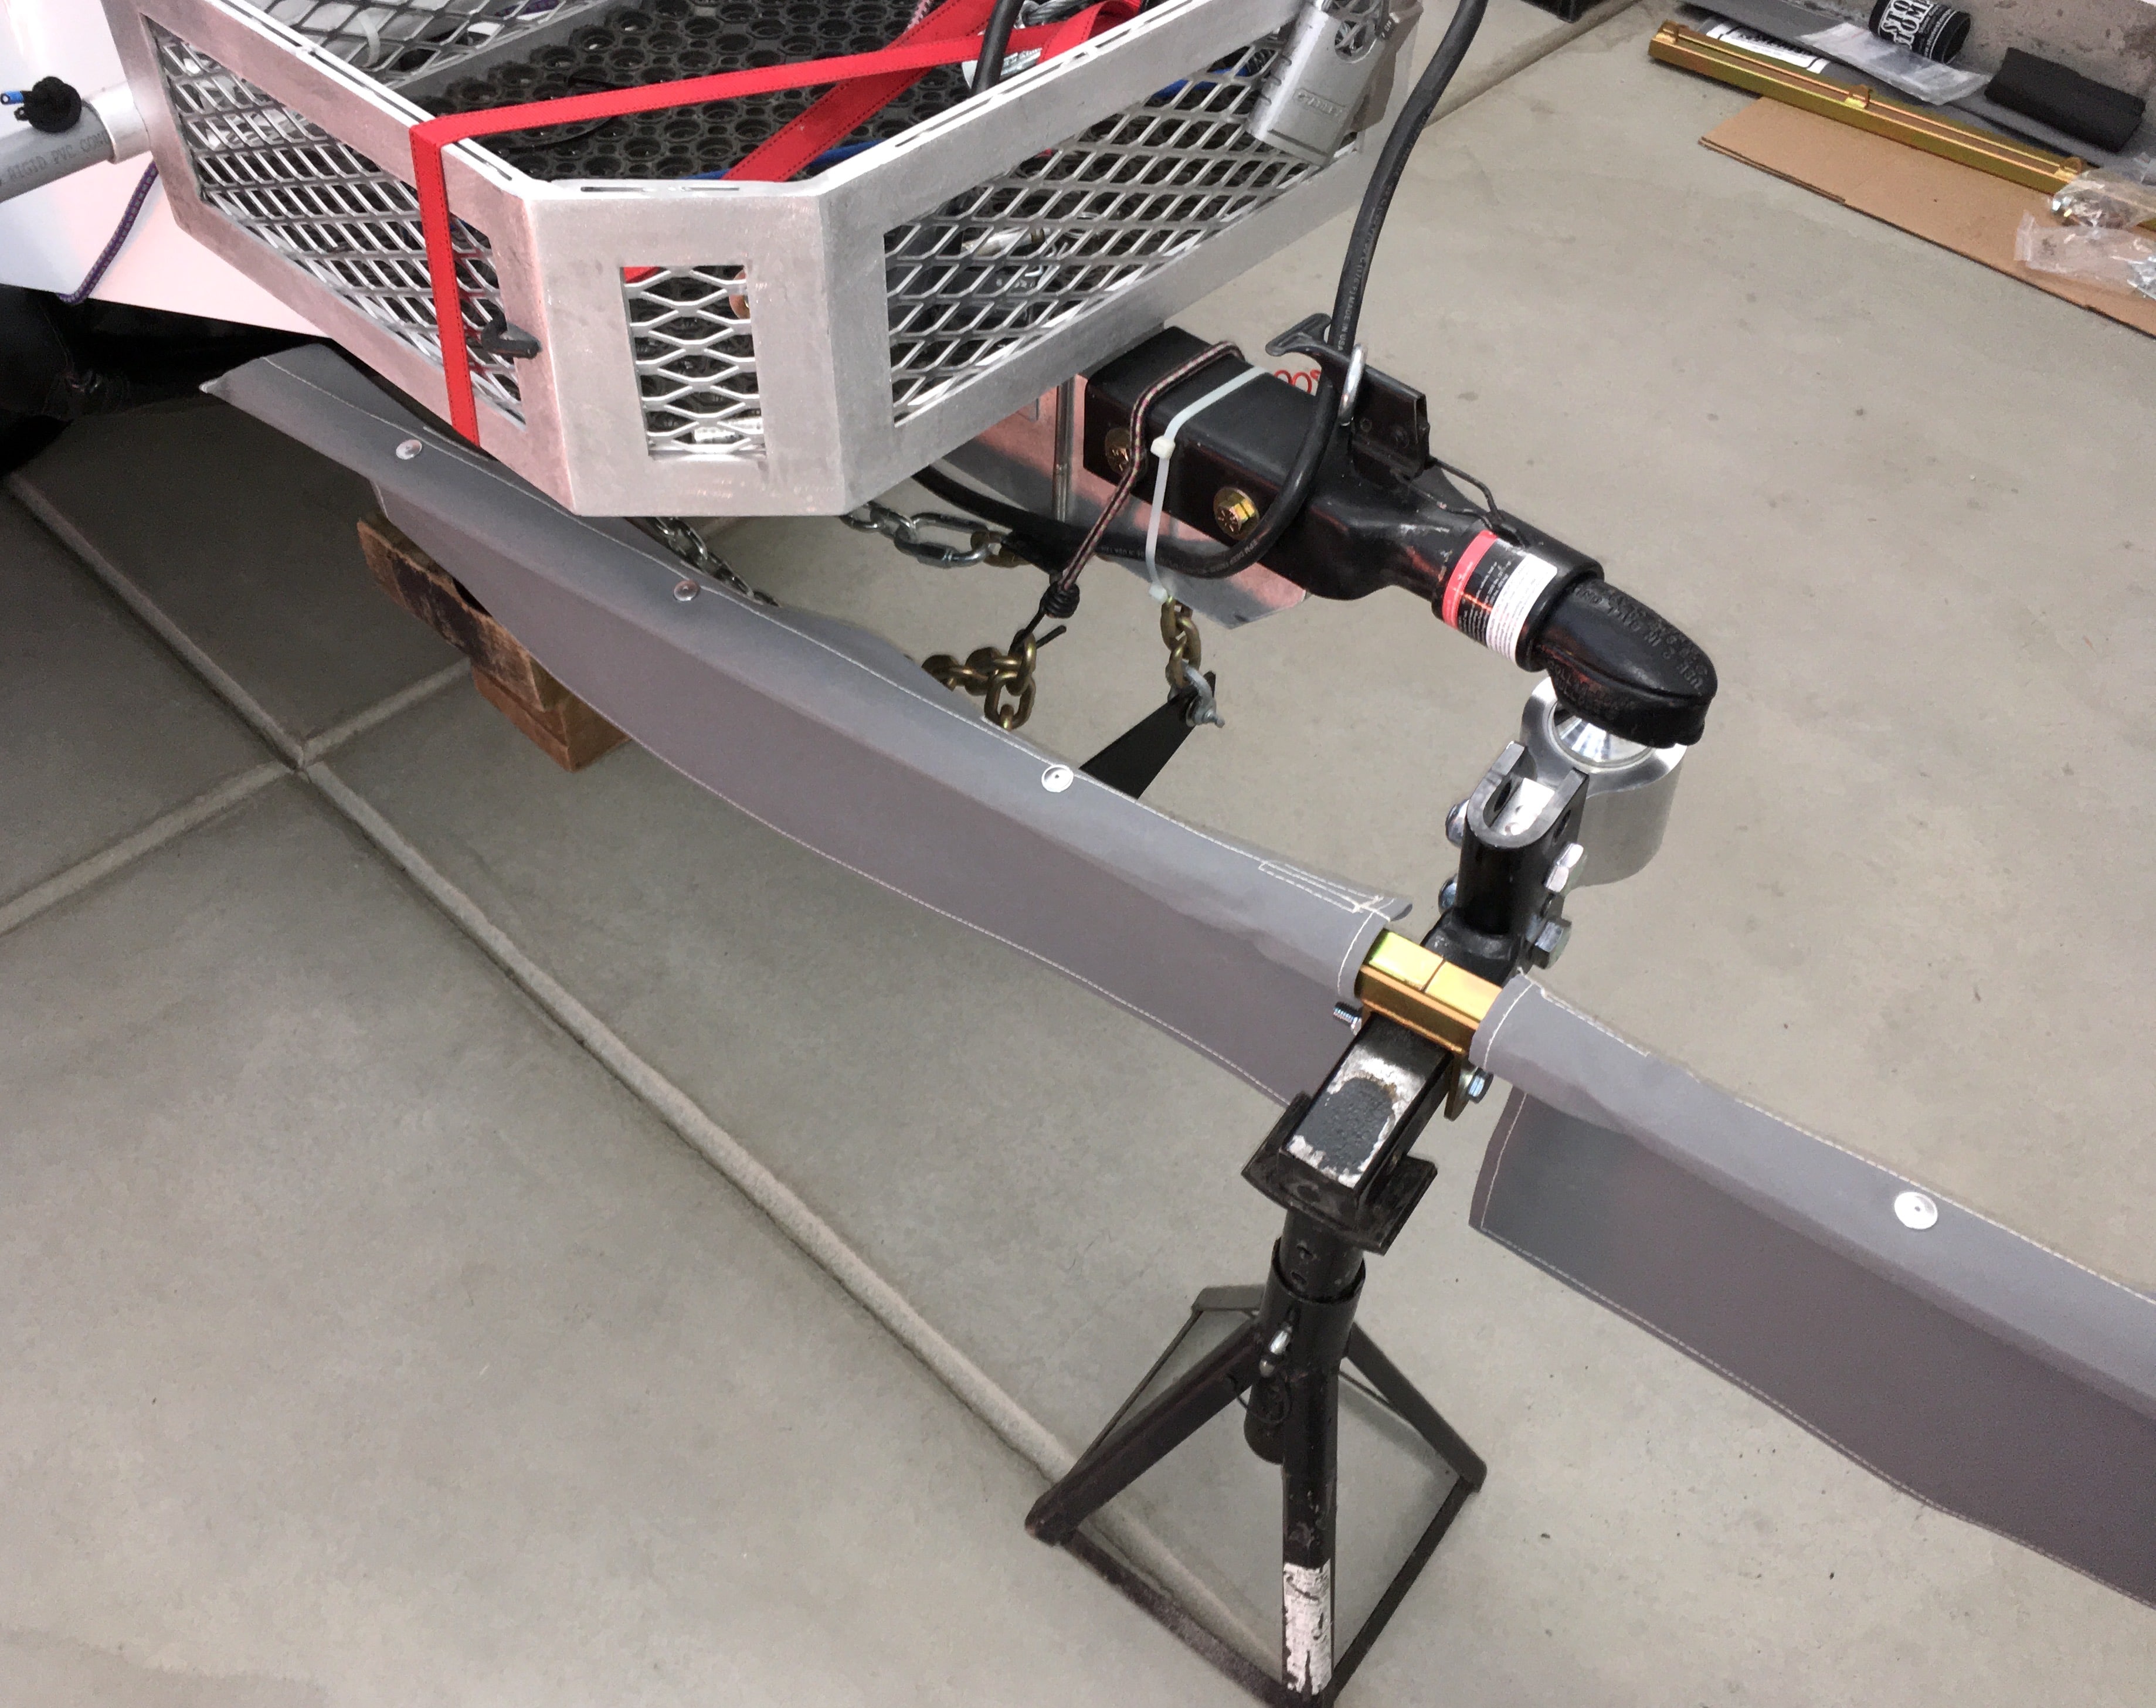
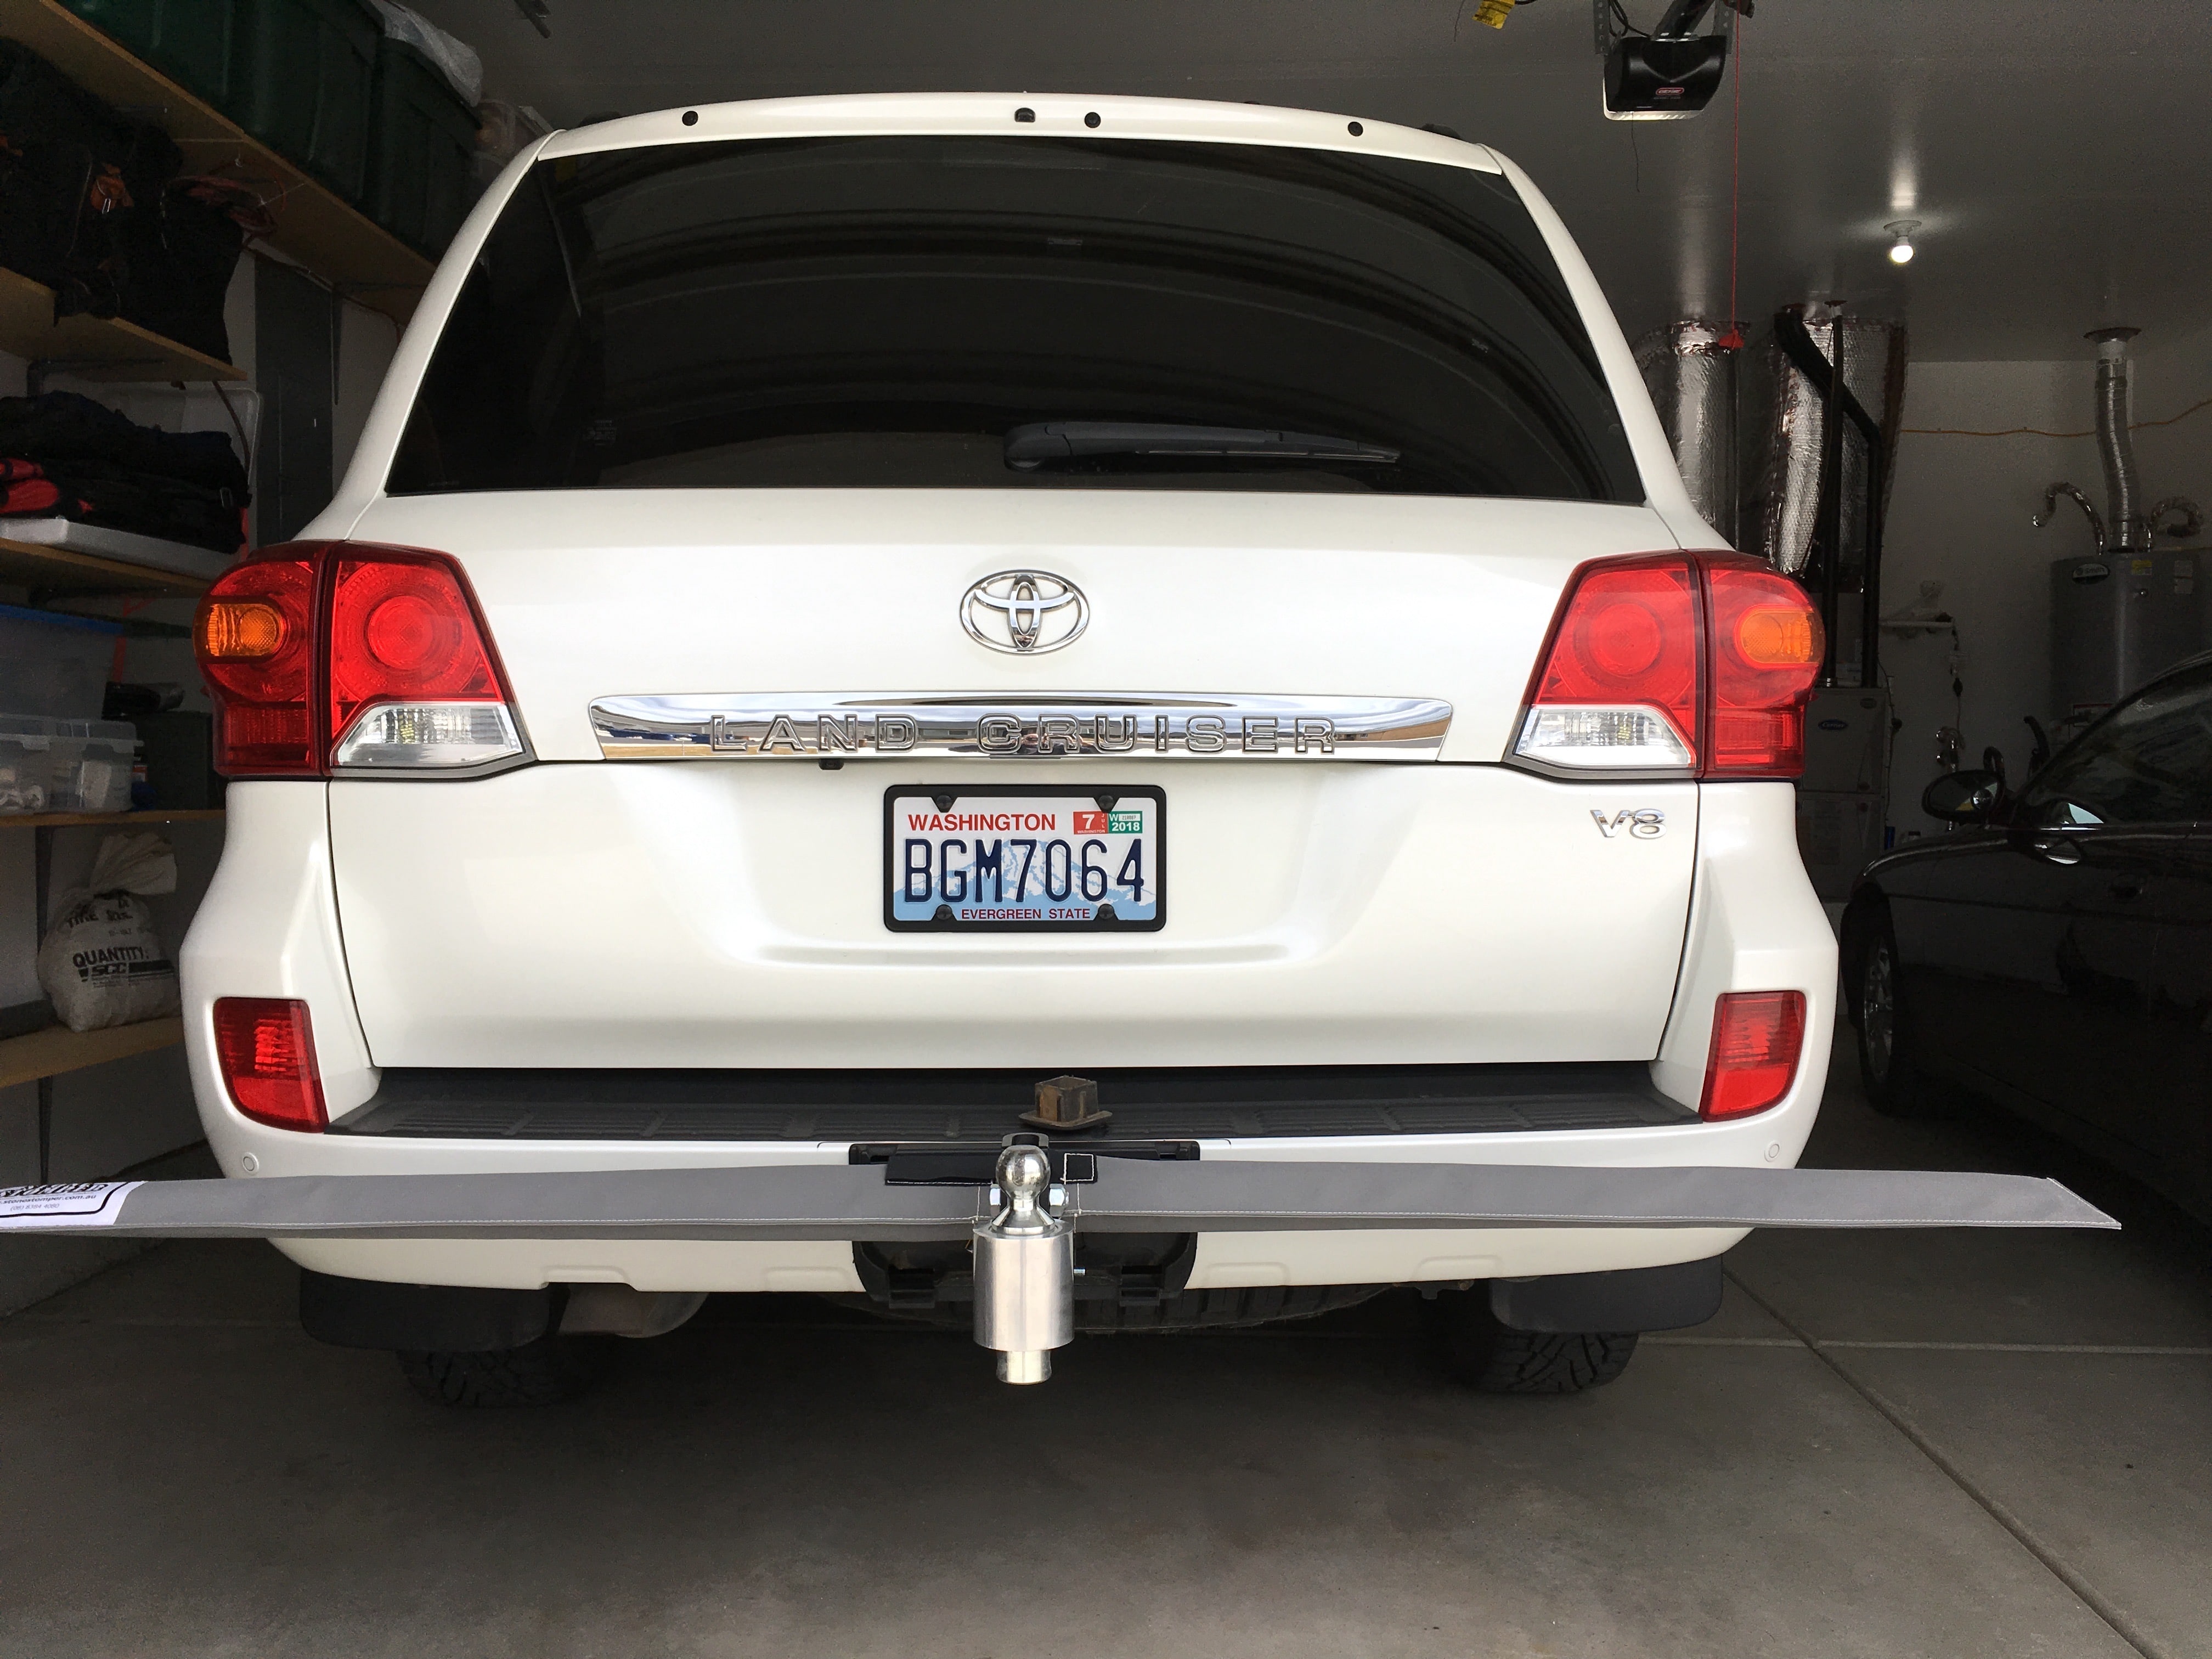
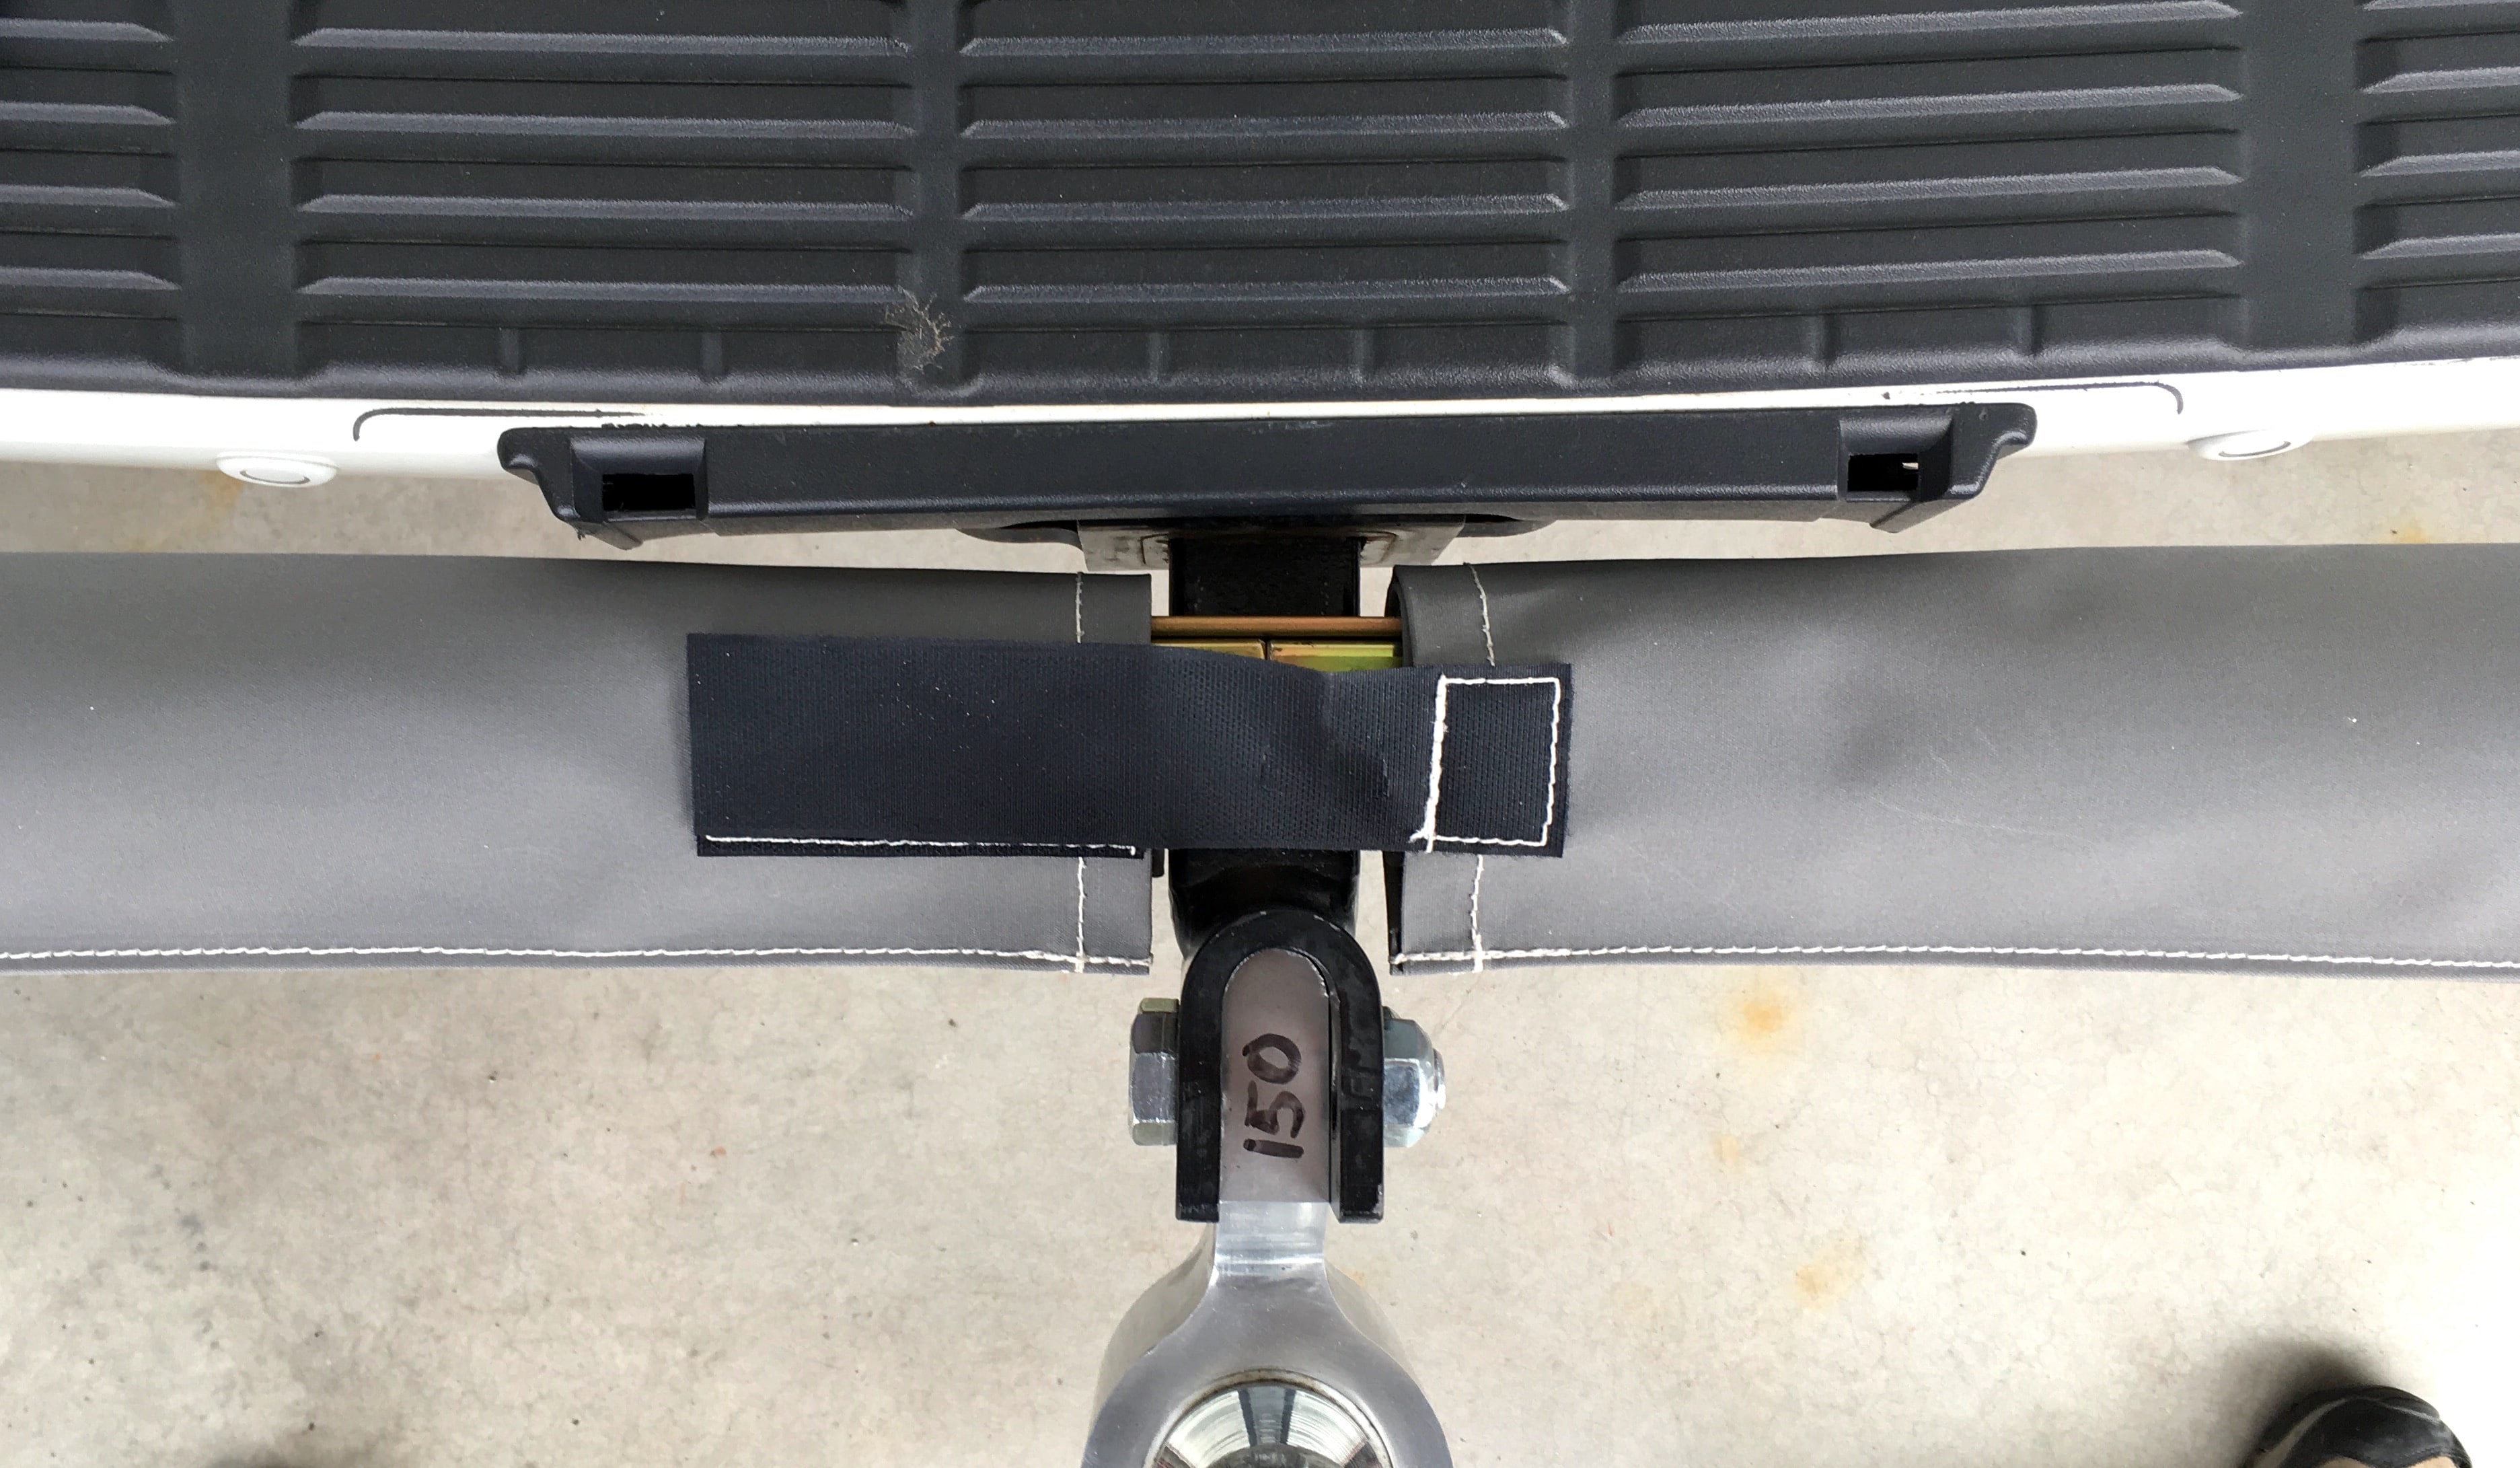
PART 3 EDIT 03/27/18 FRONT BAR DETAILS The steel bar on my SS is 2 meters end to end and it does clear my storage basket at full “jackknife”, a position I would never achieve. My rear bumper and quarter panel would hit first. Views of the front bar and hitch connected to the Land Cruiser. The sleeves are installed and they are longer than the bar itself, which extends out just past the width of the sidewalls of the rear tires. For more on this, refer to the pics at the end of the thread. MORE TO COME. John Davies Spokane WA
1 point
-
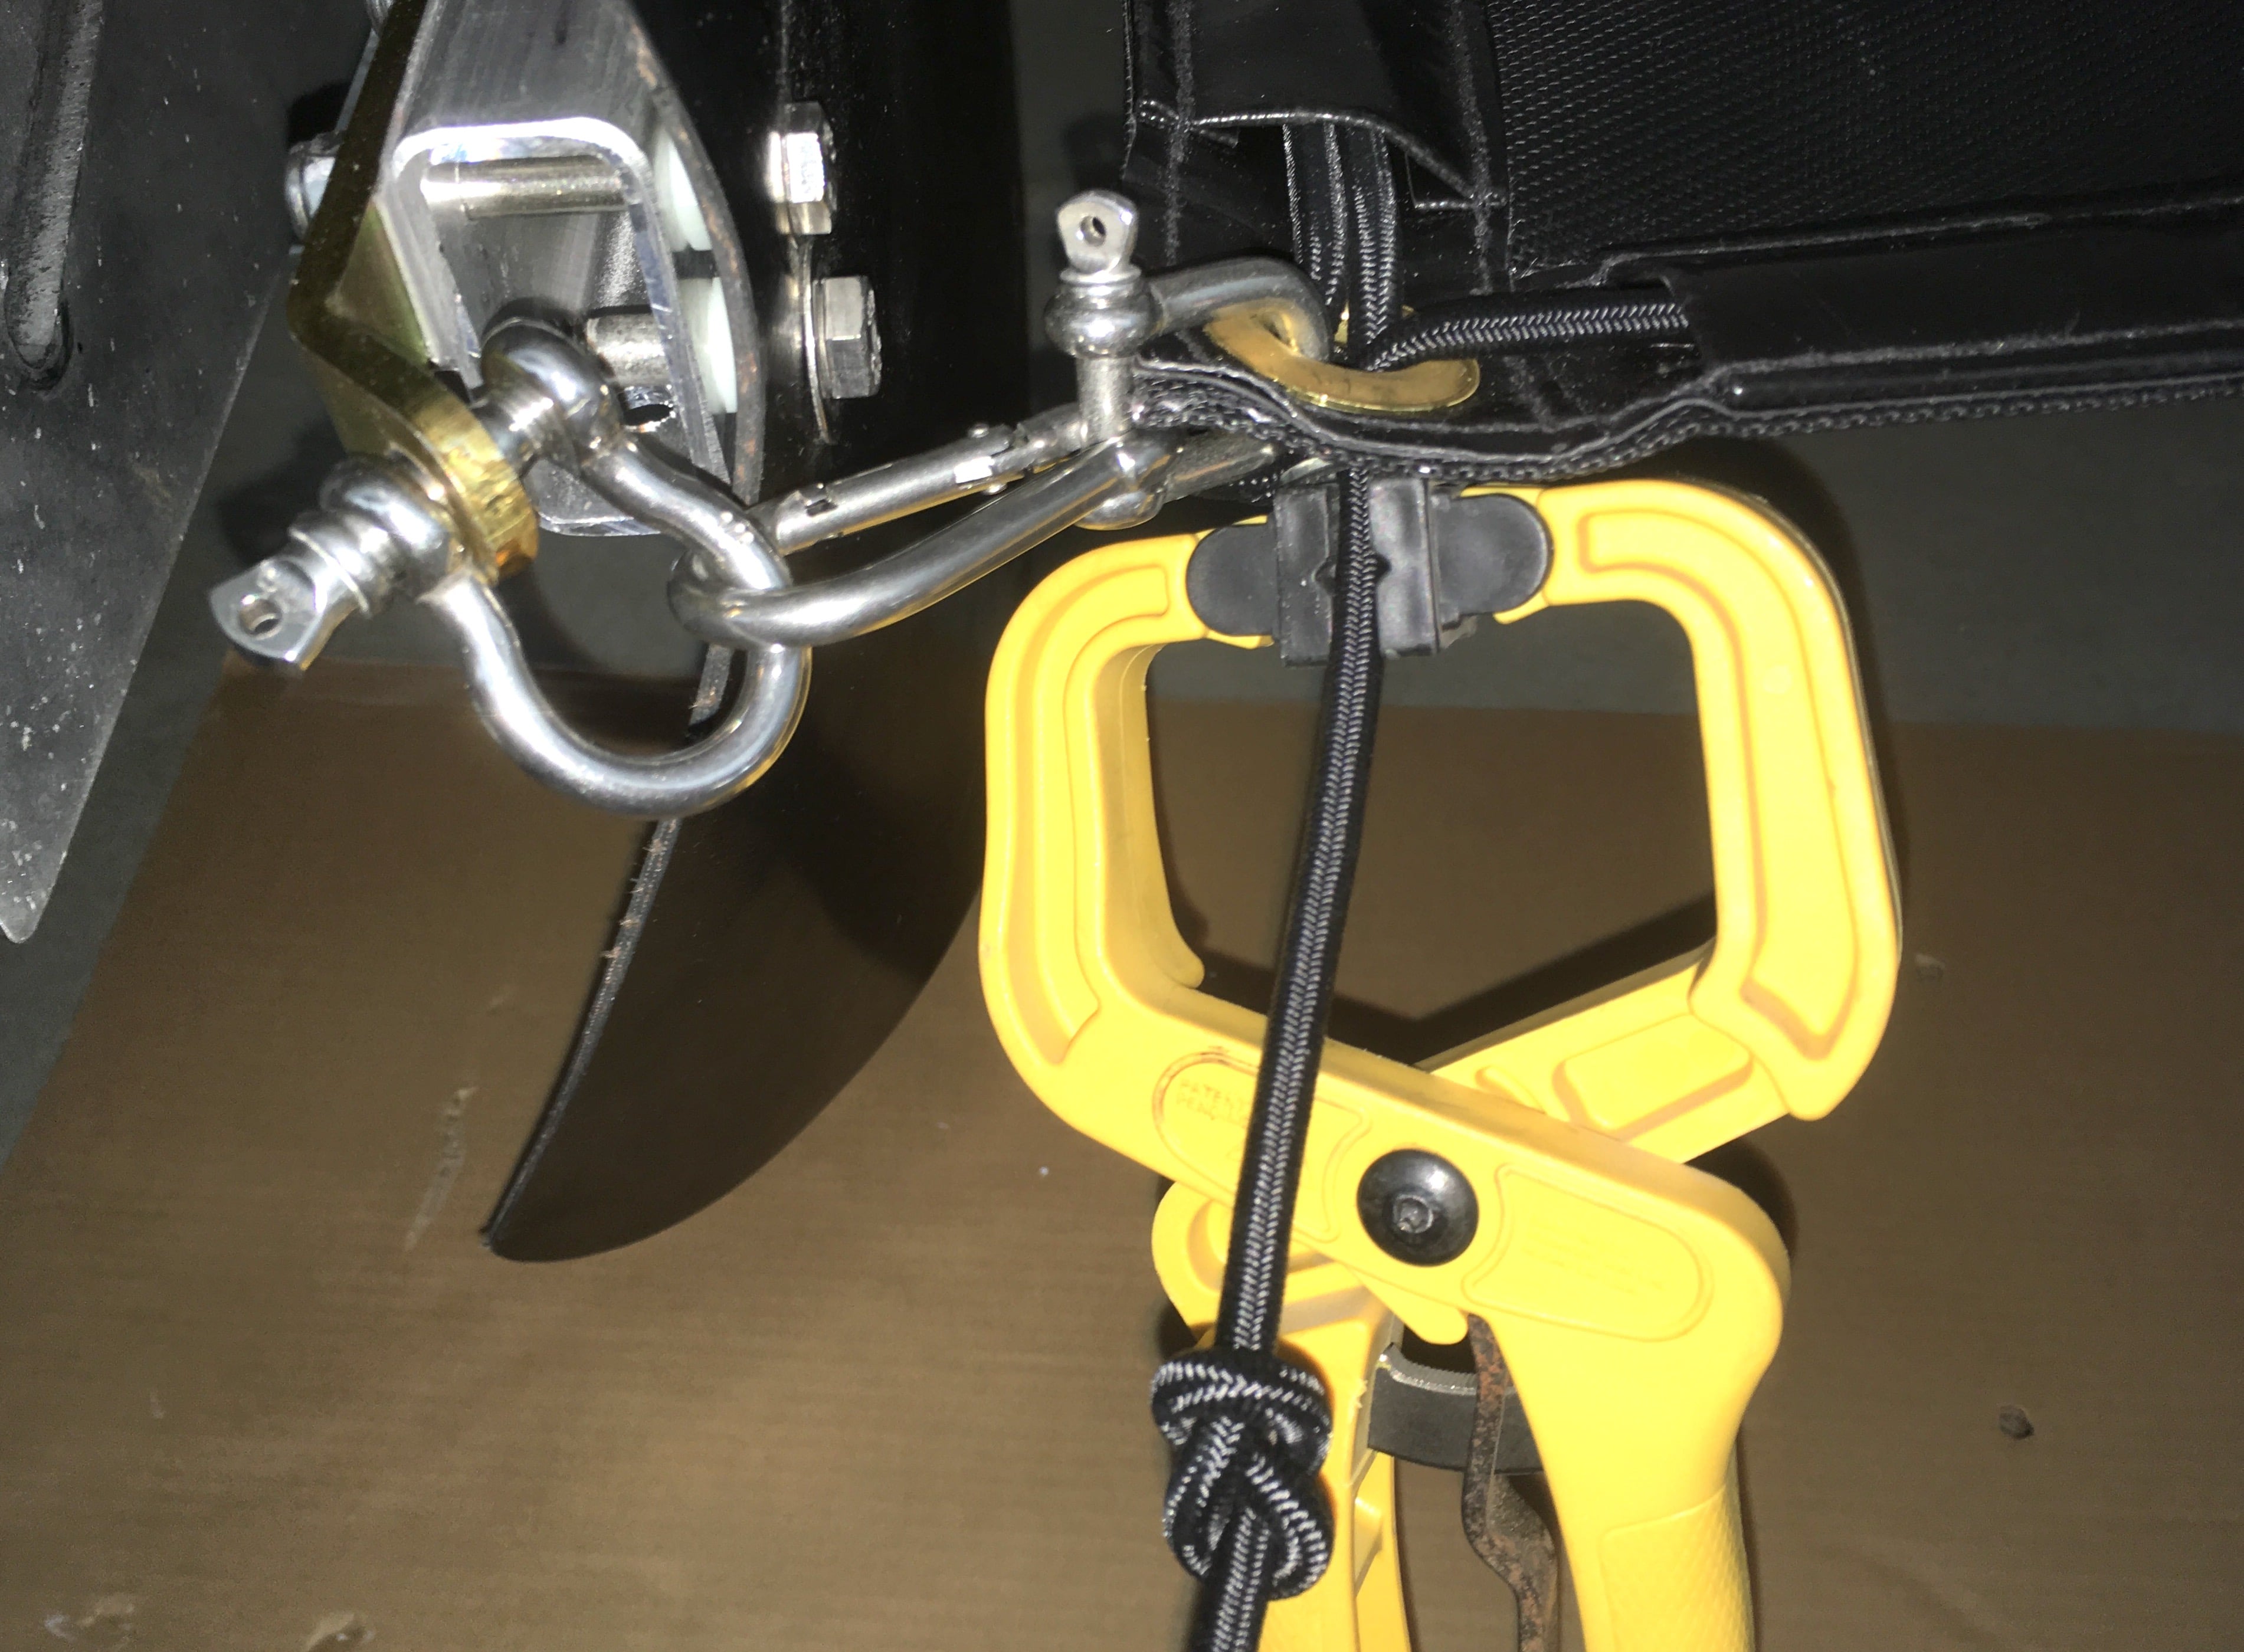
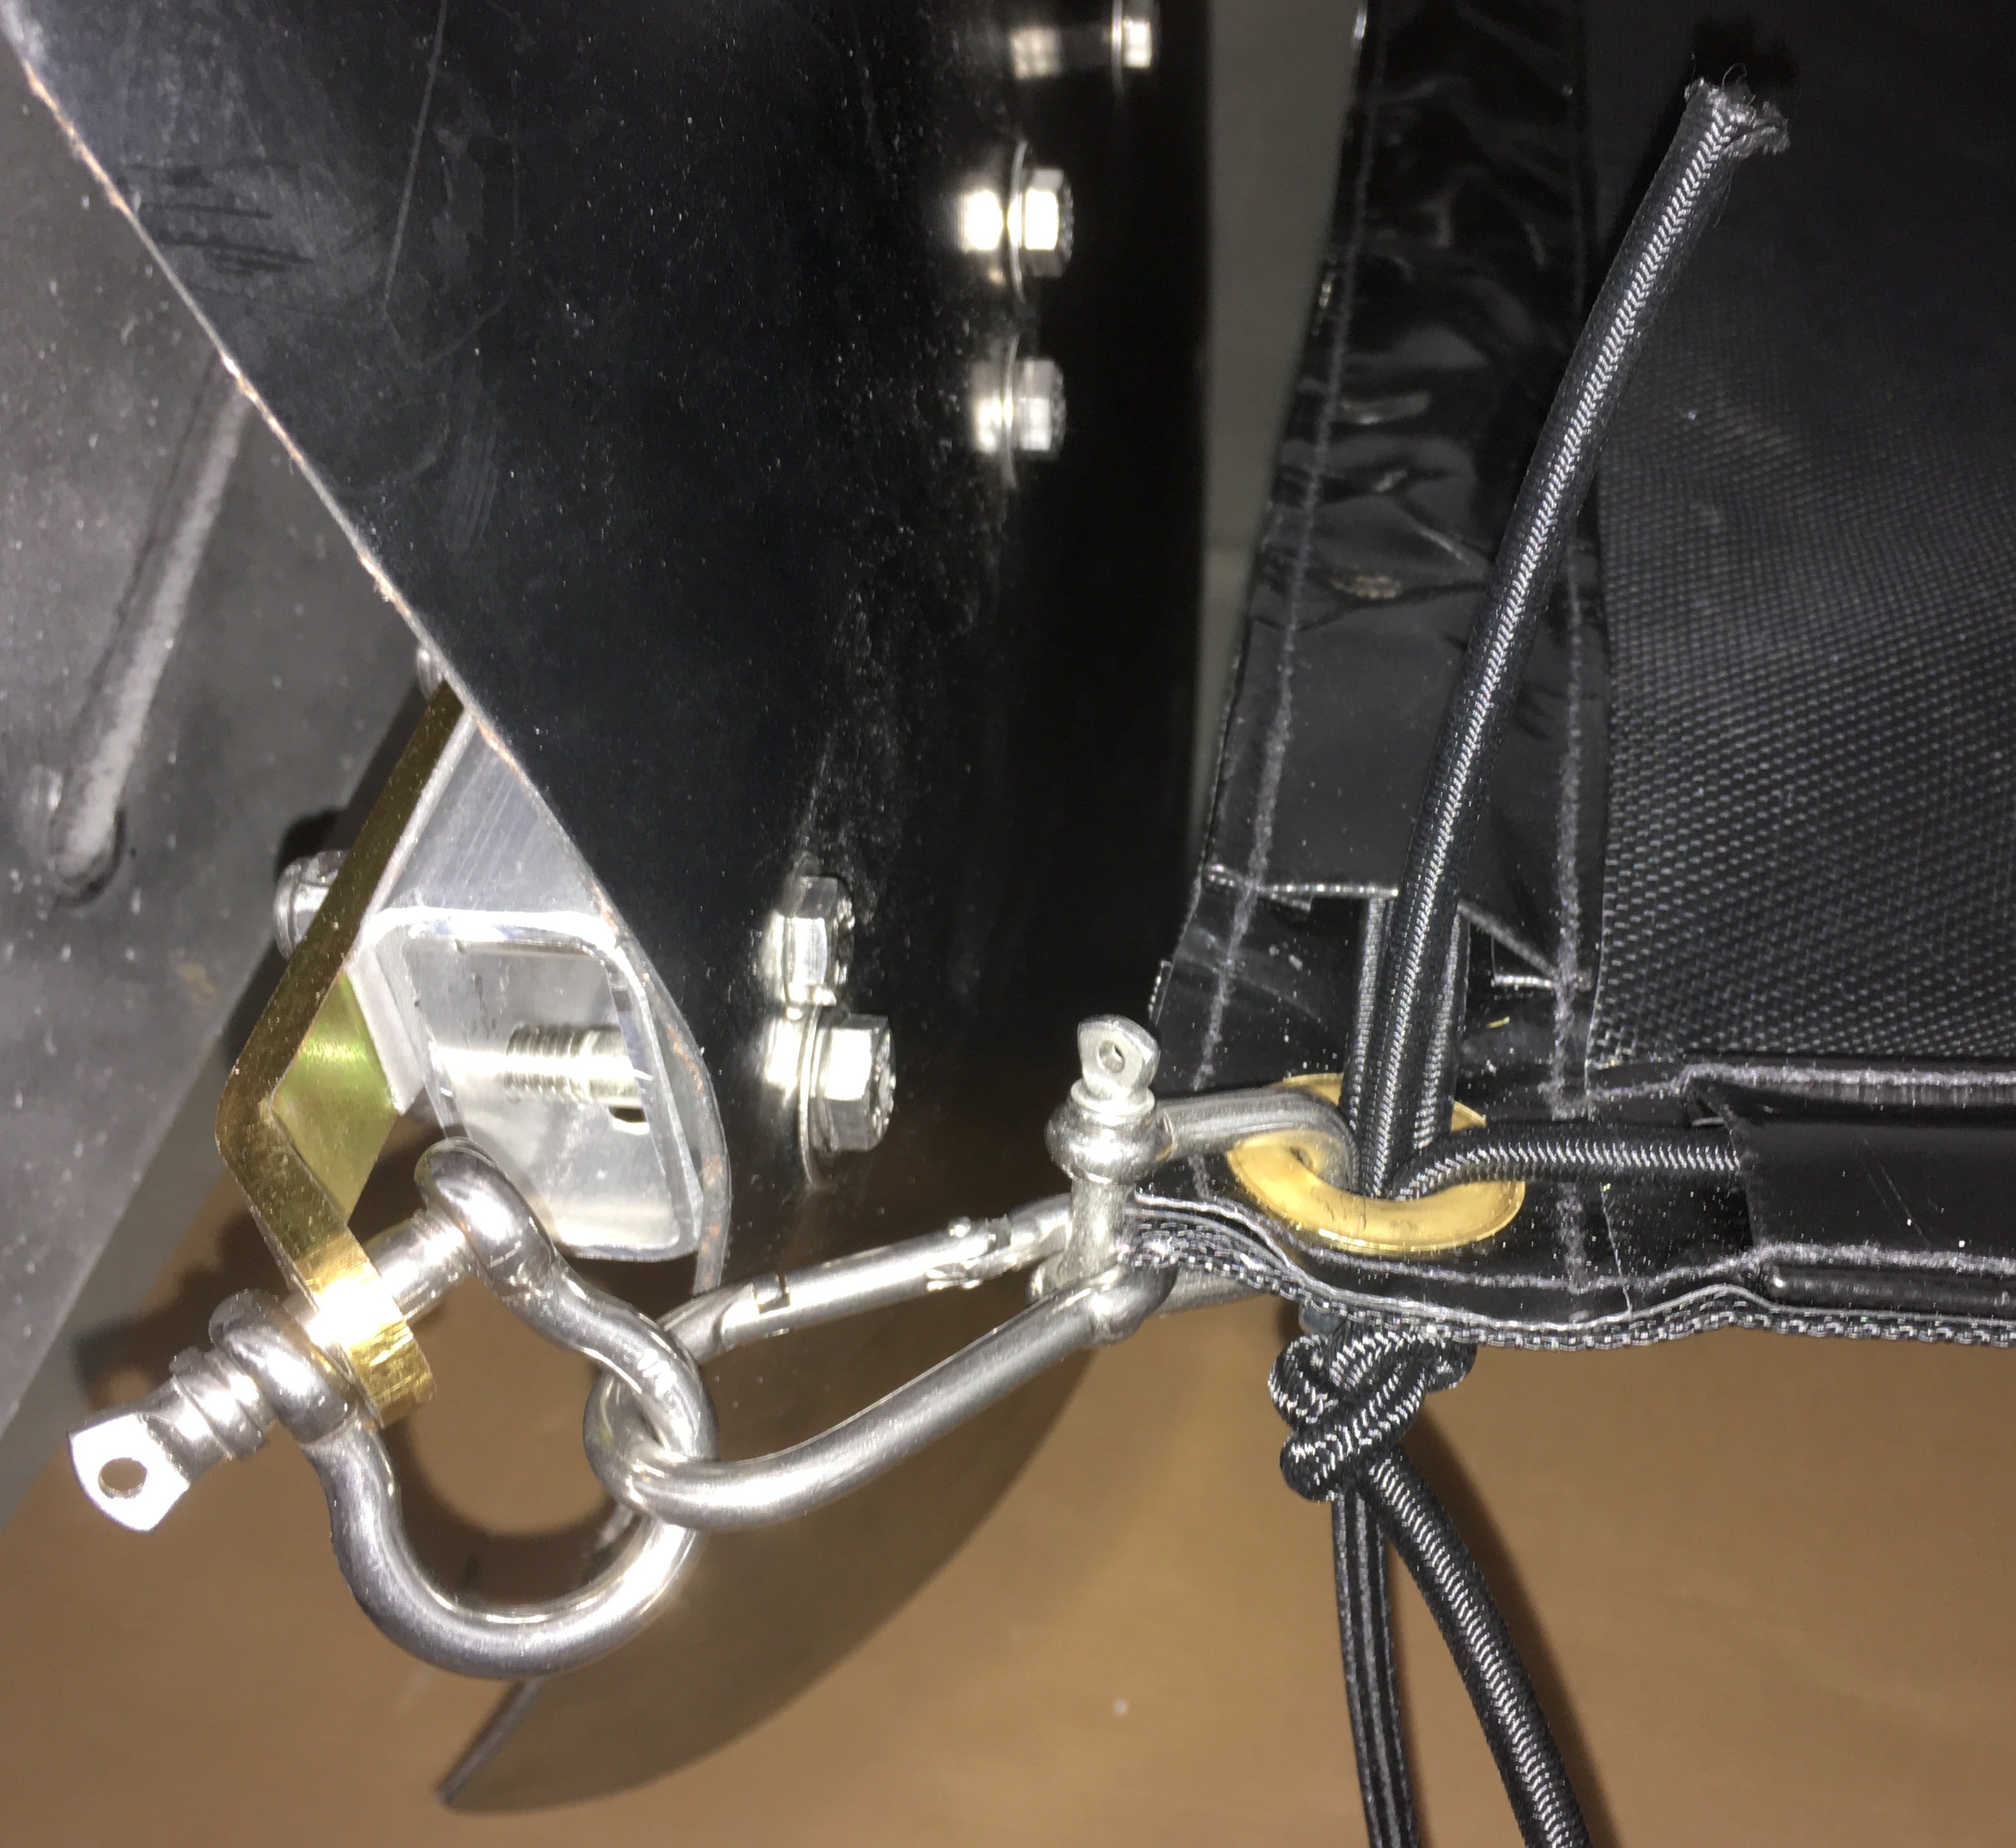
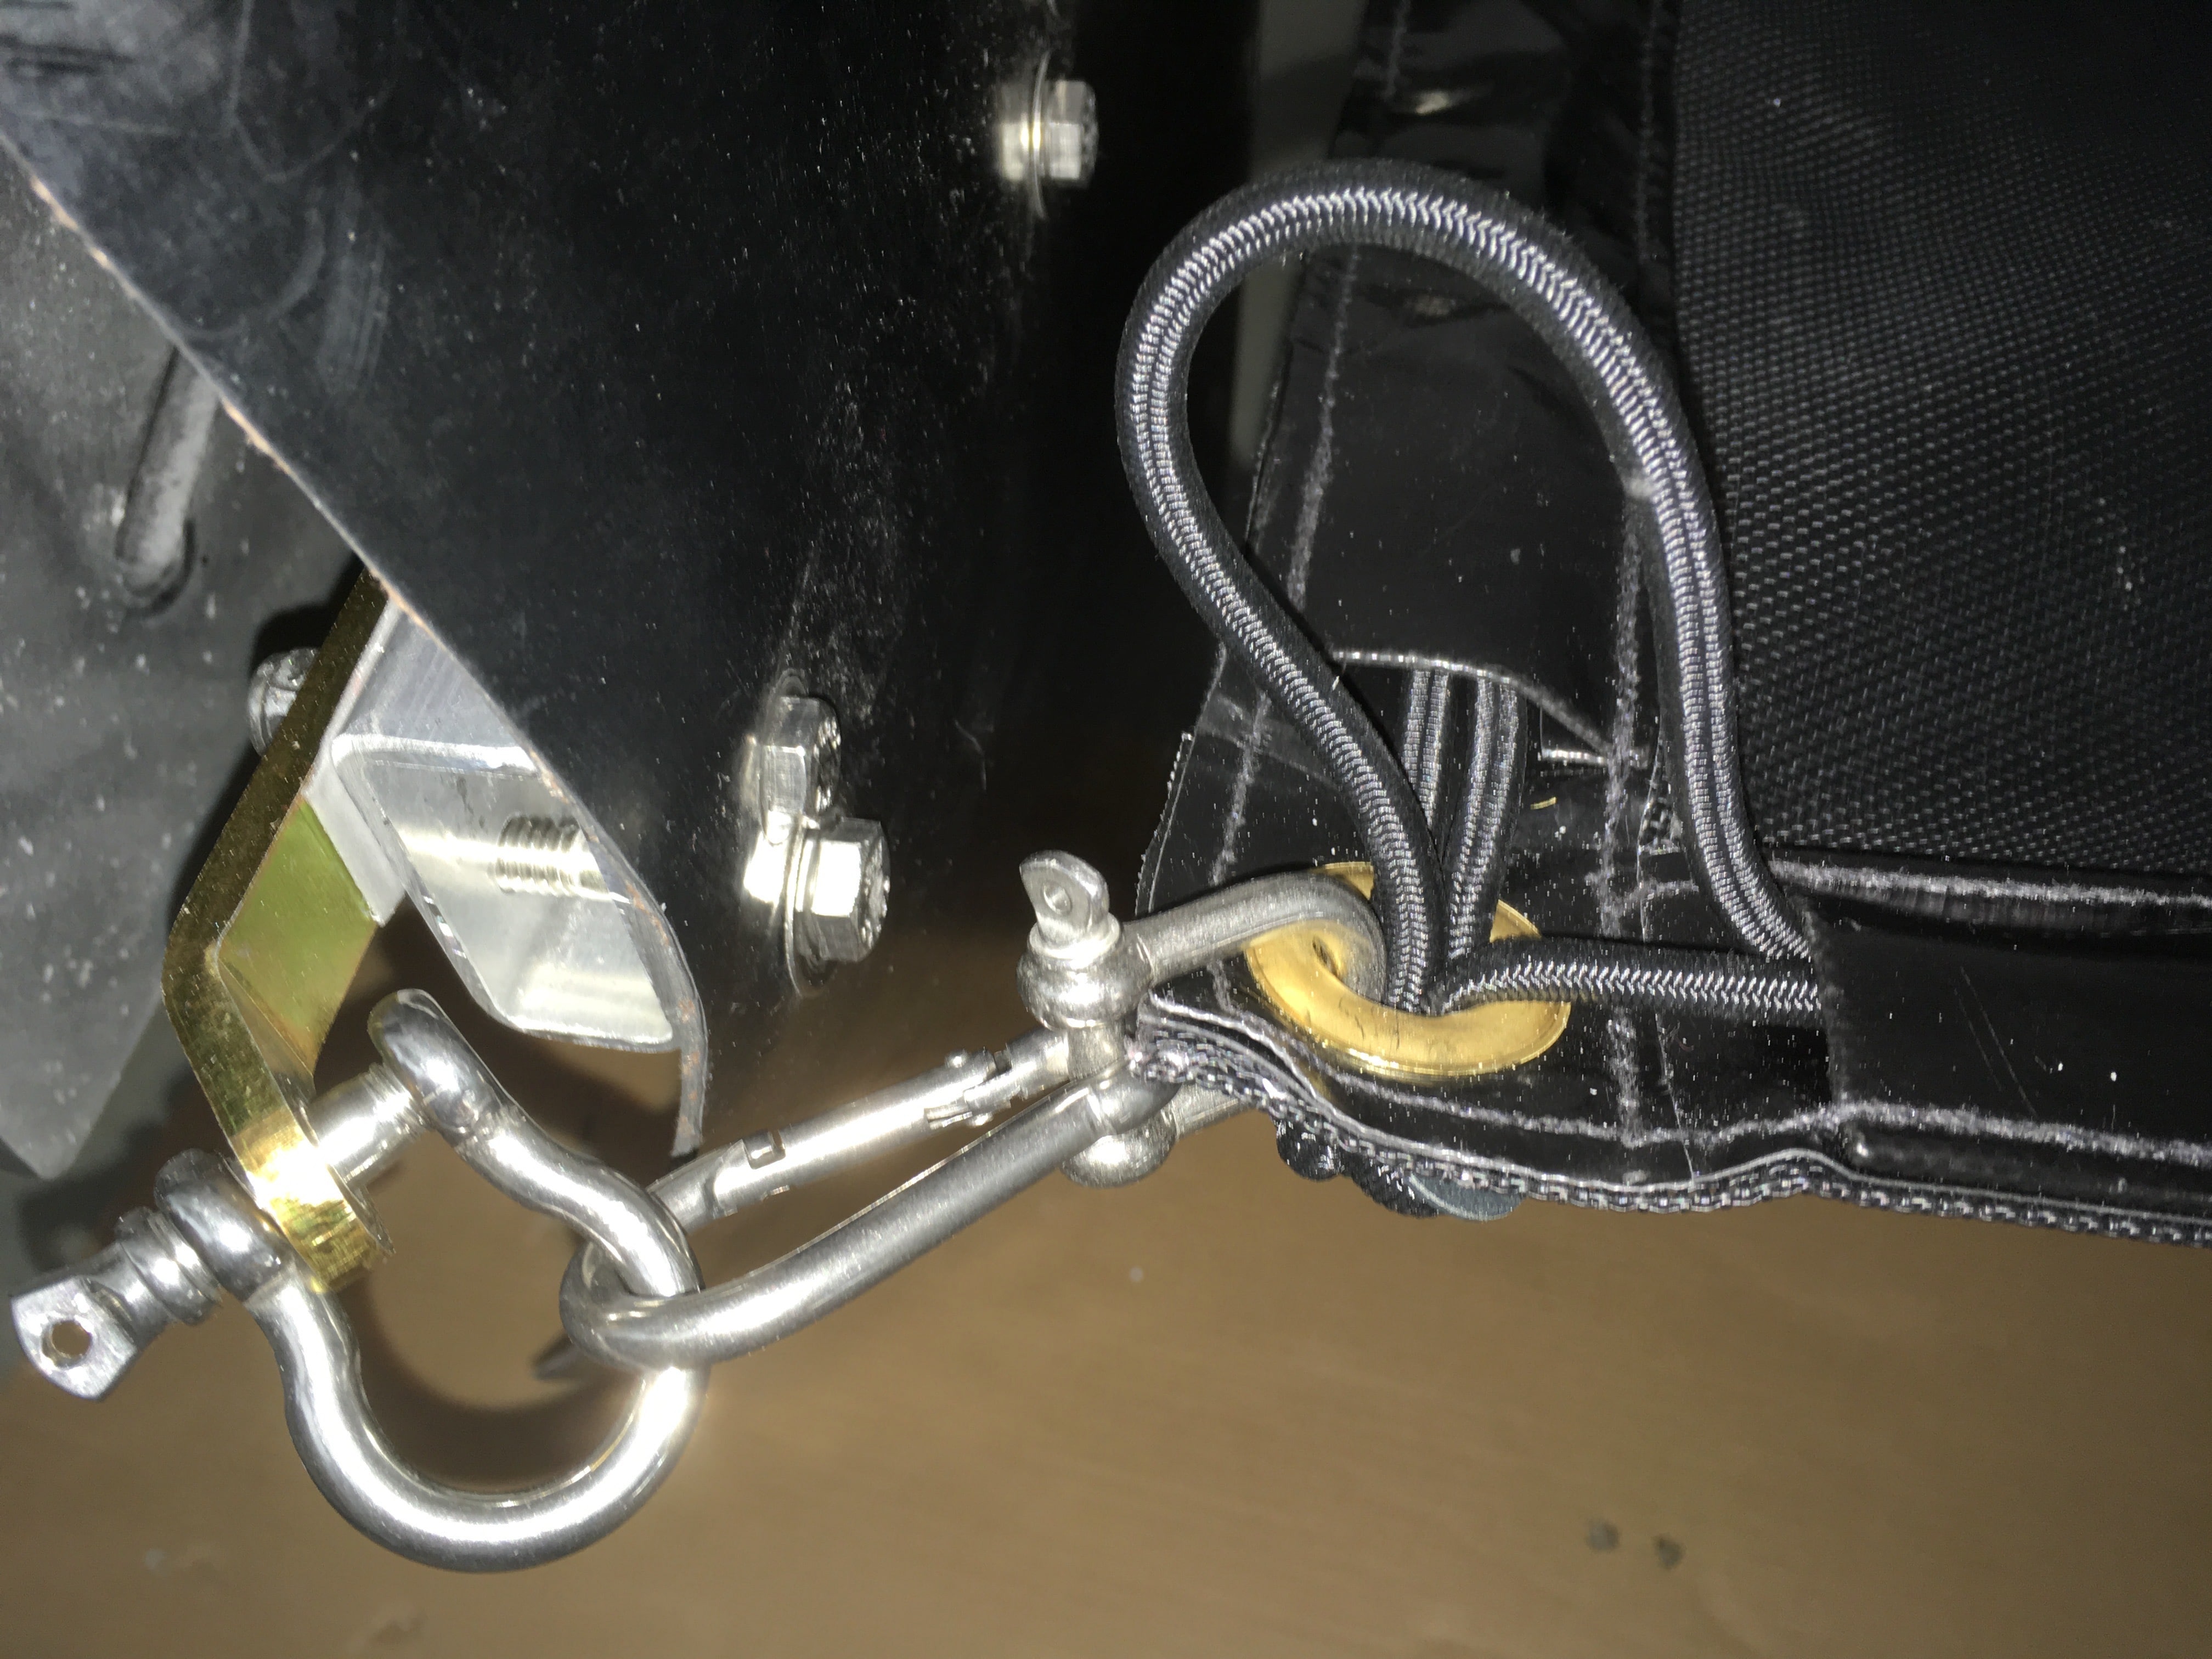
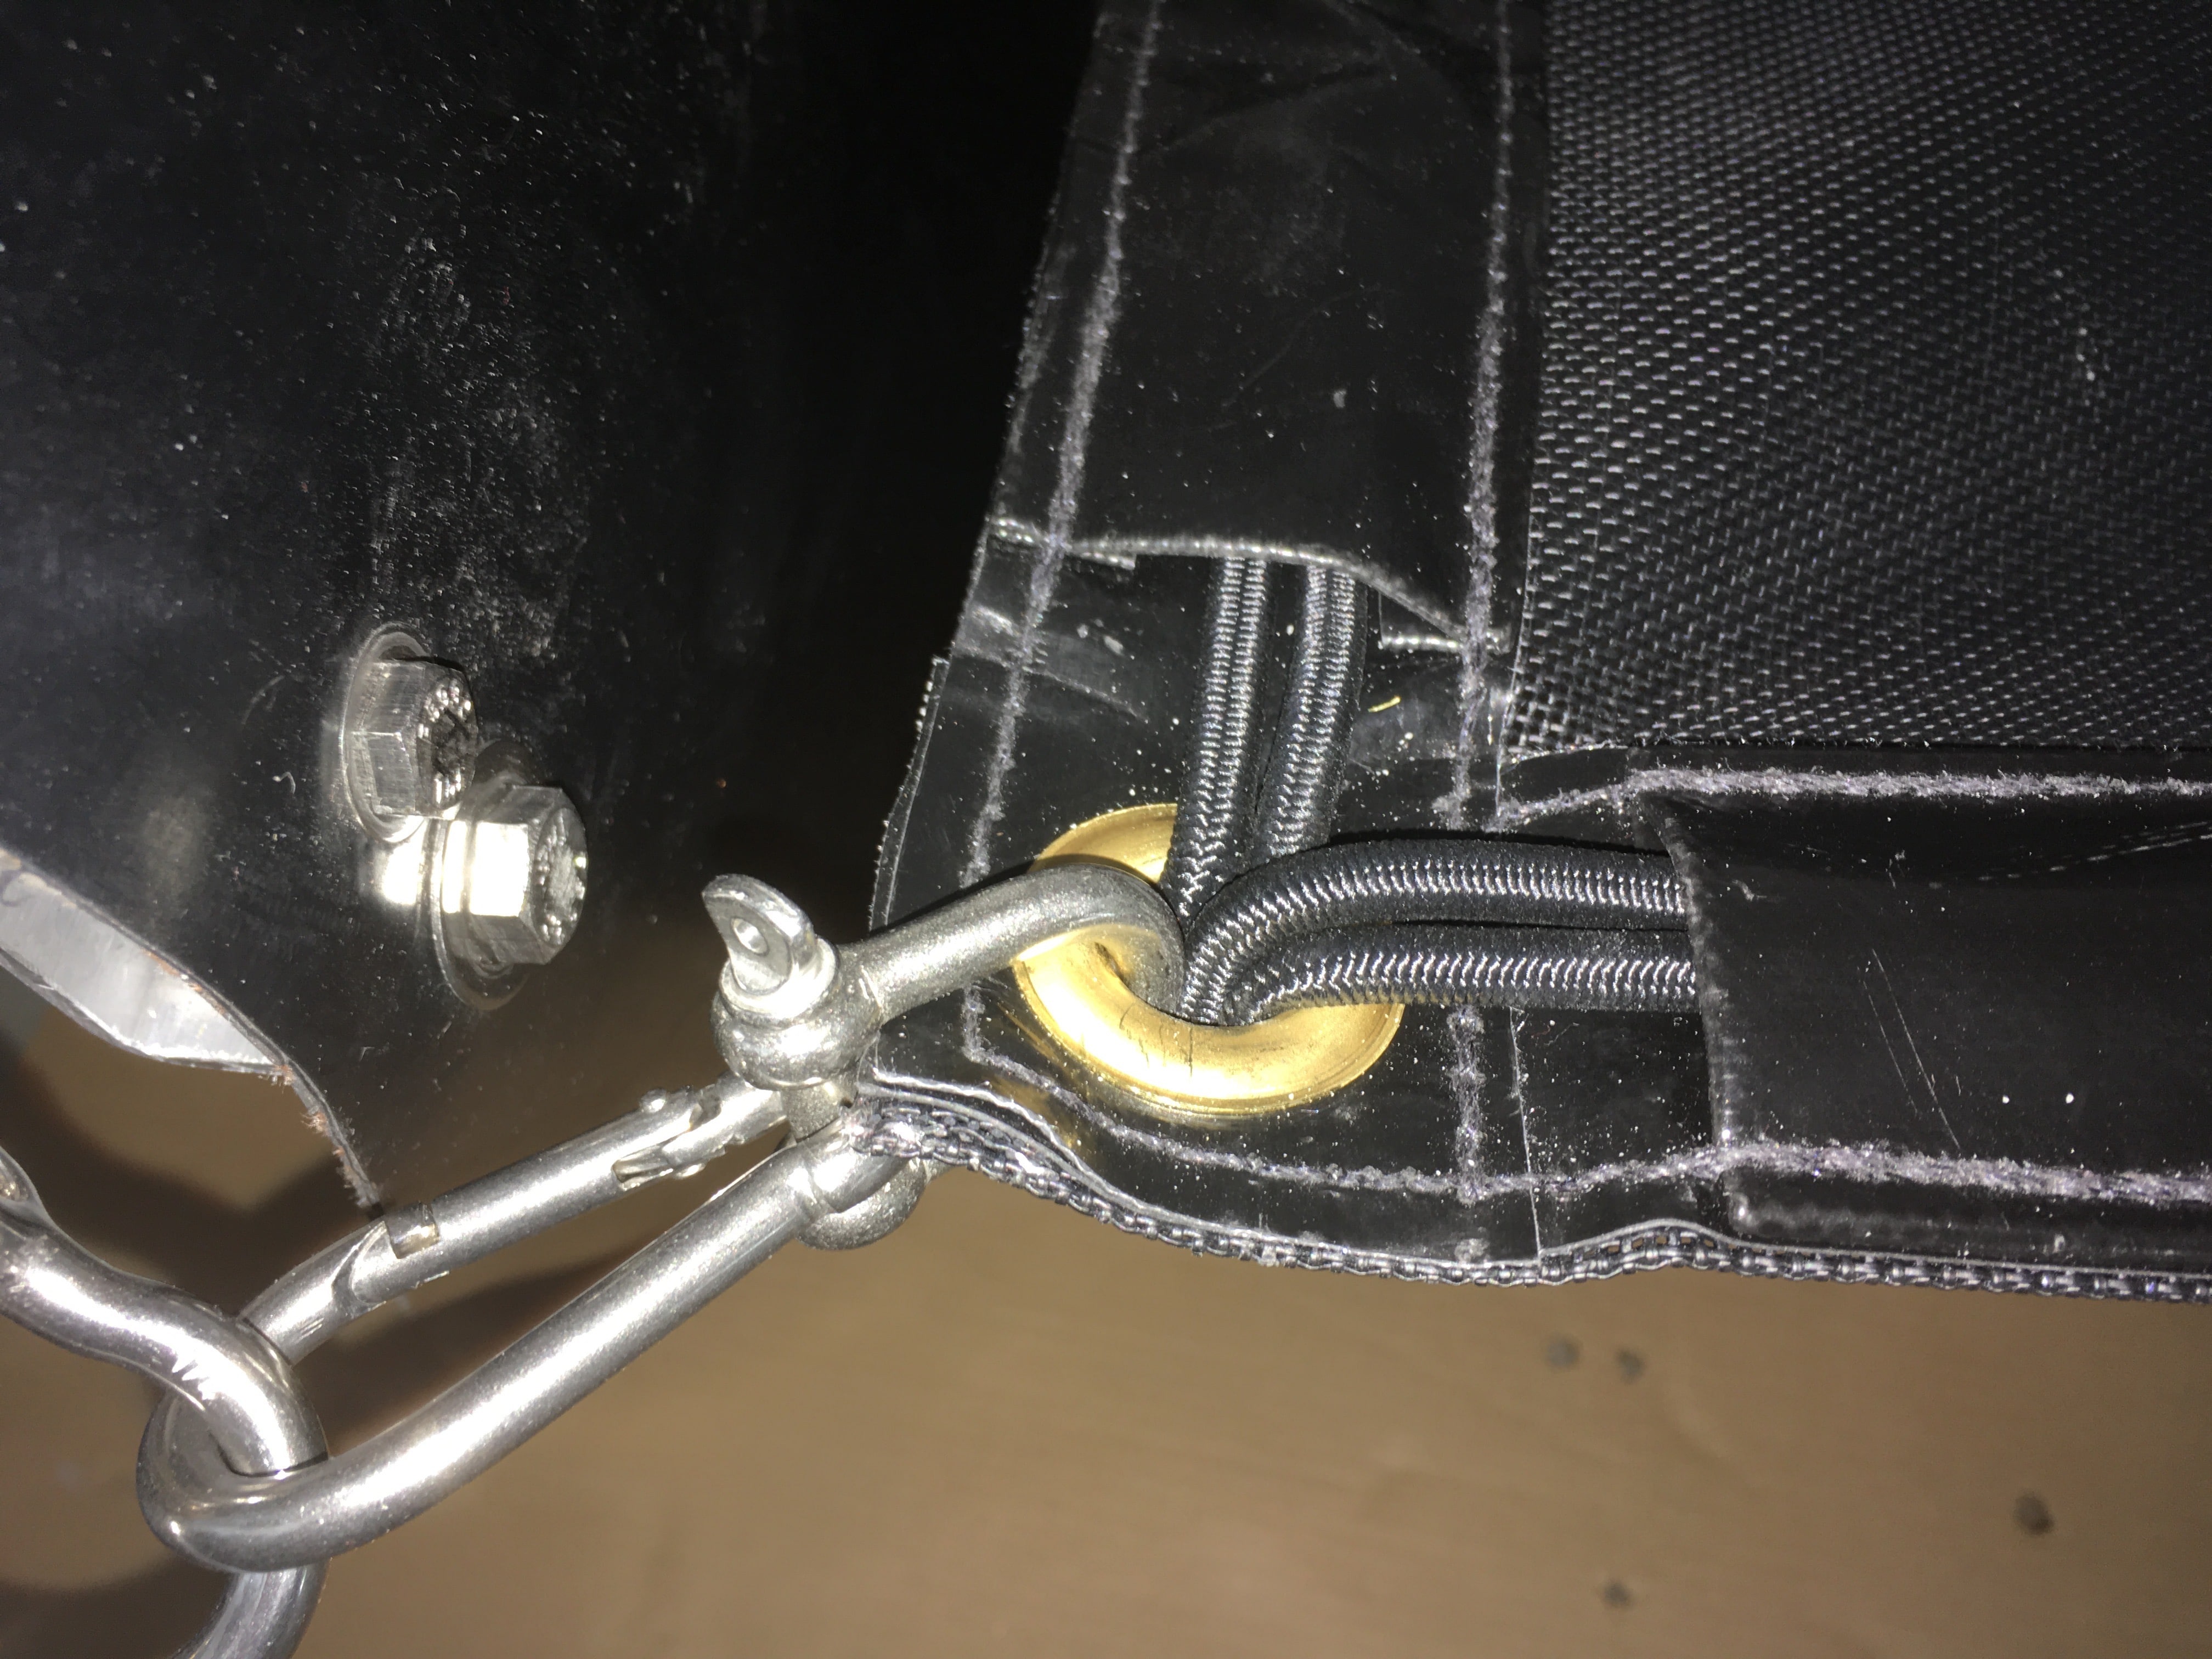
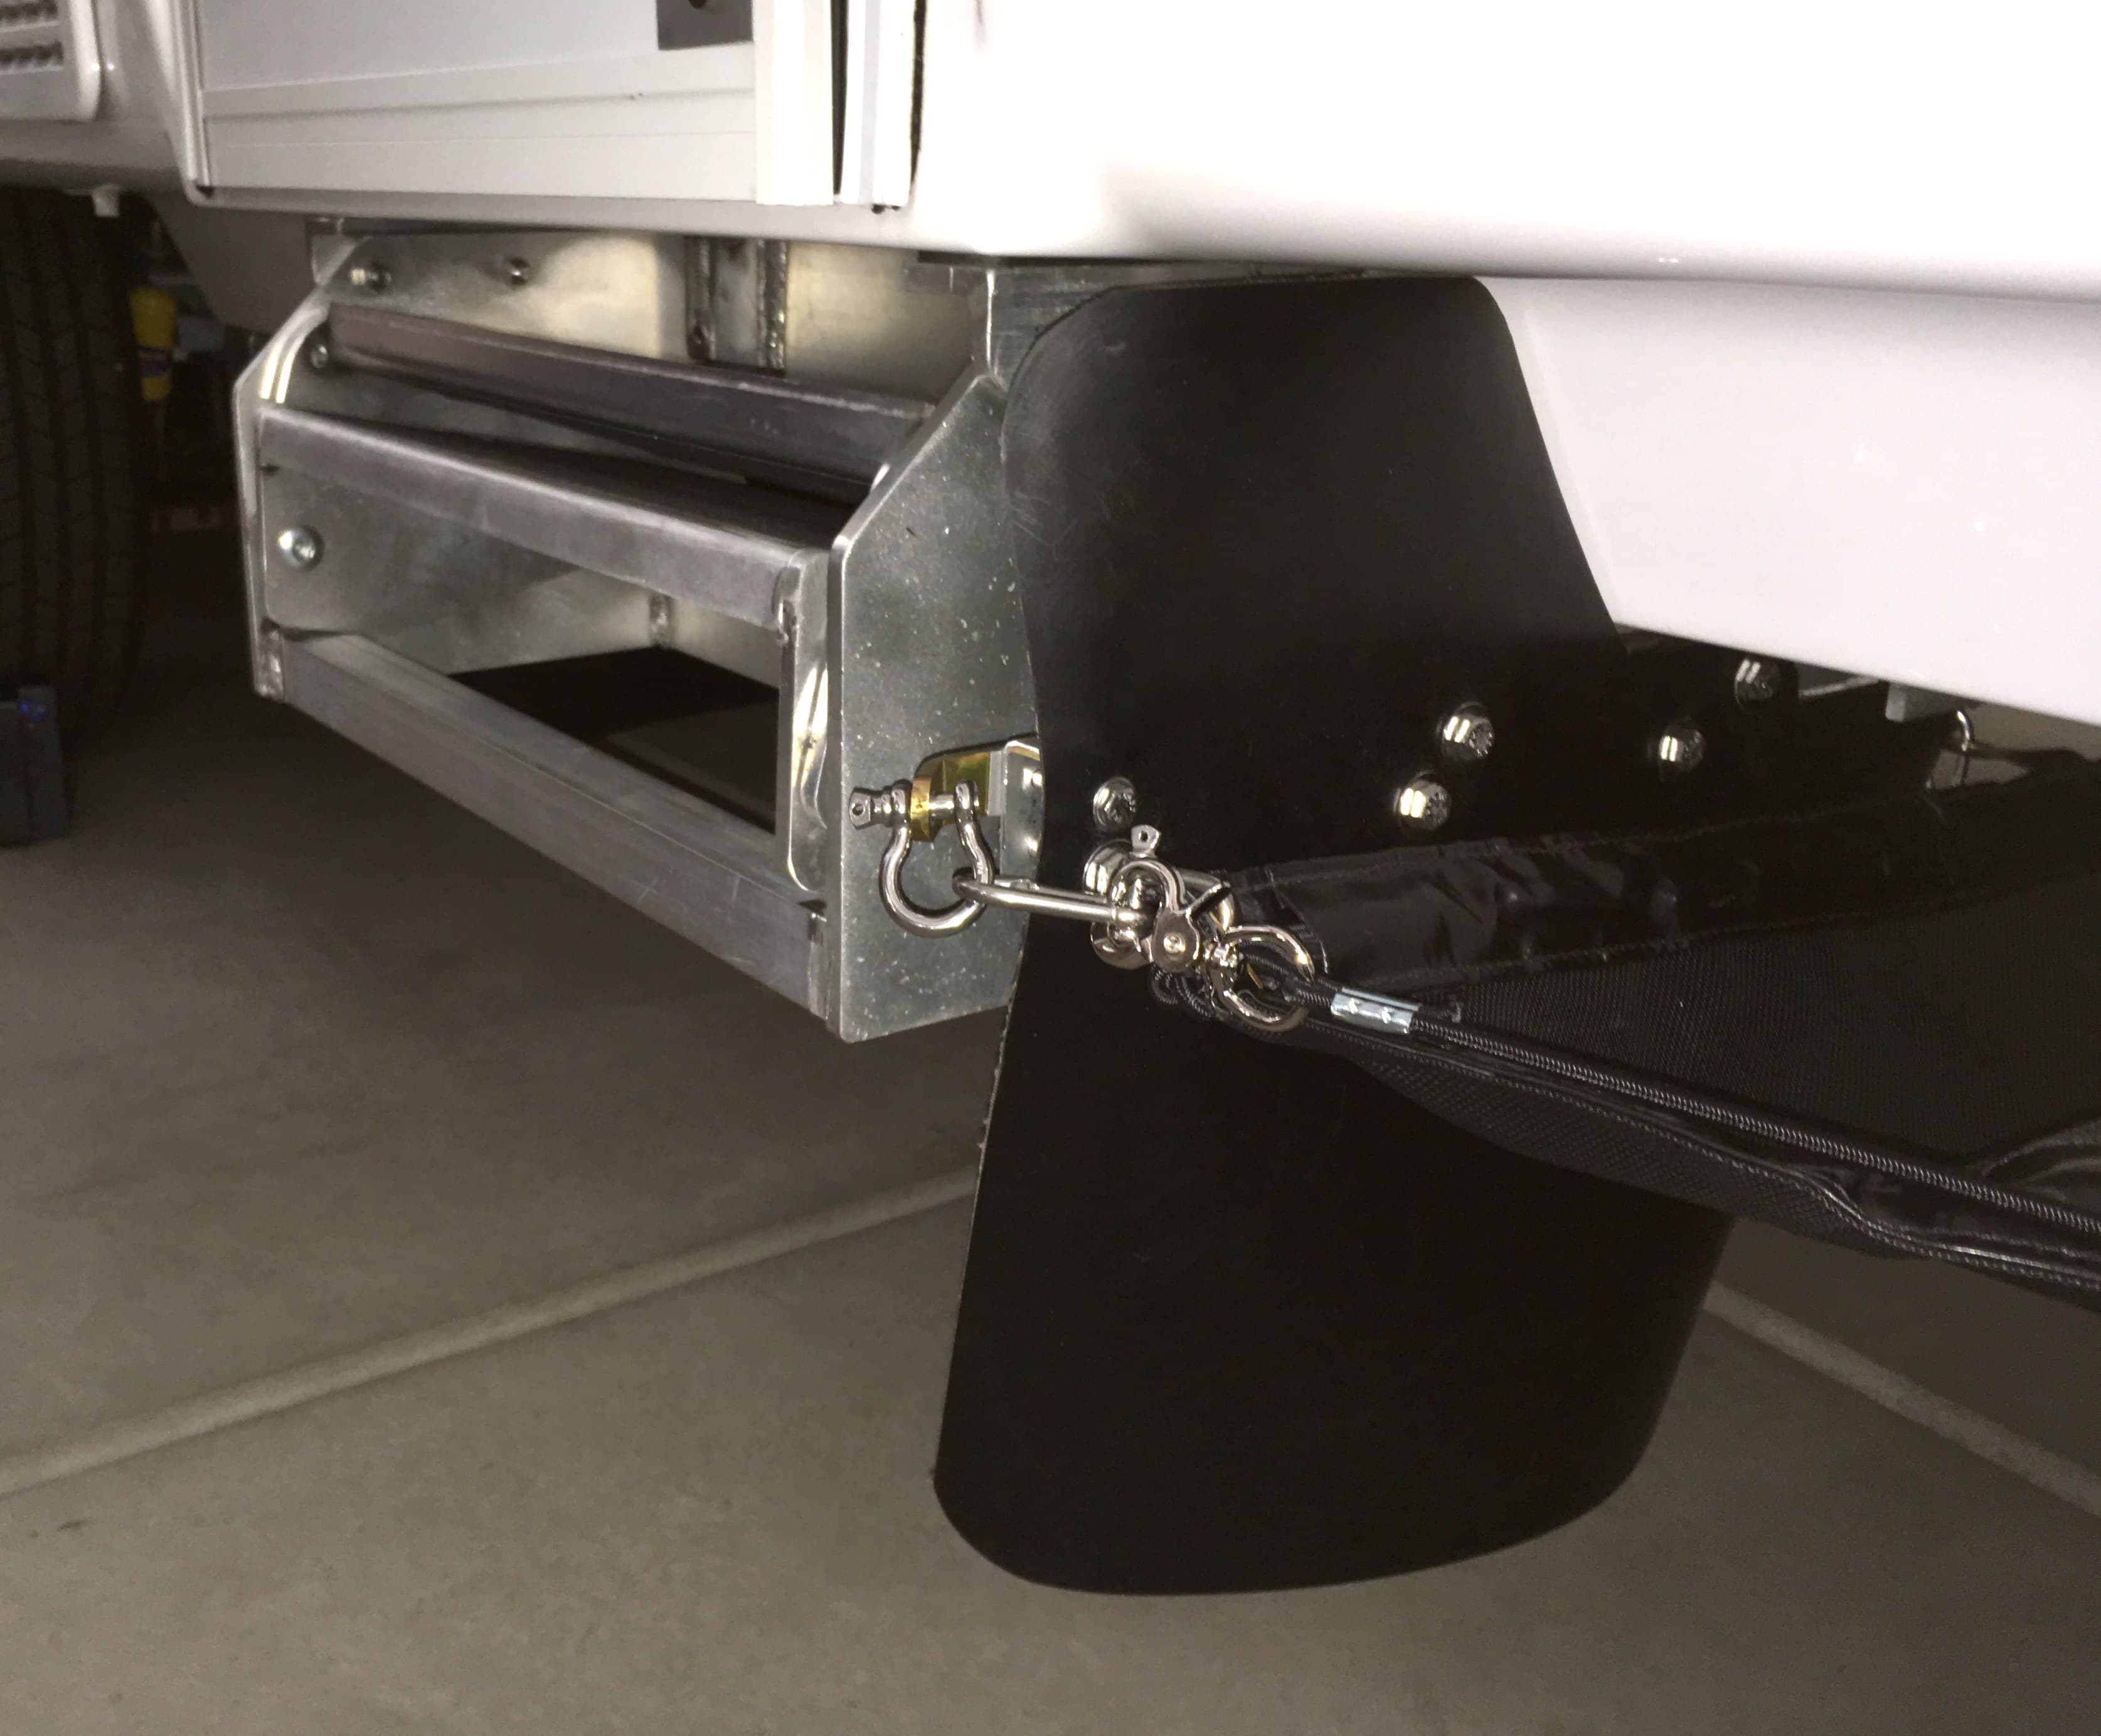
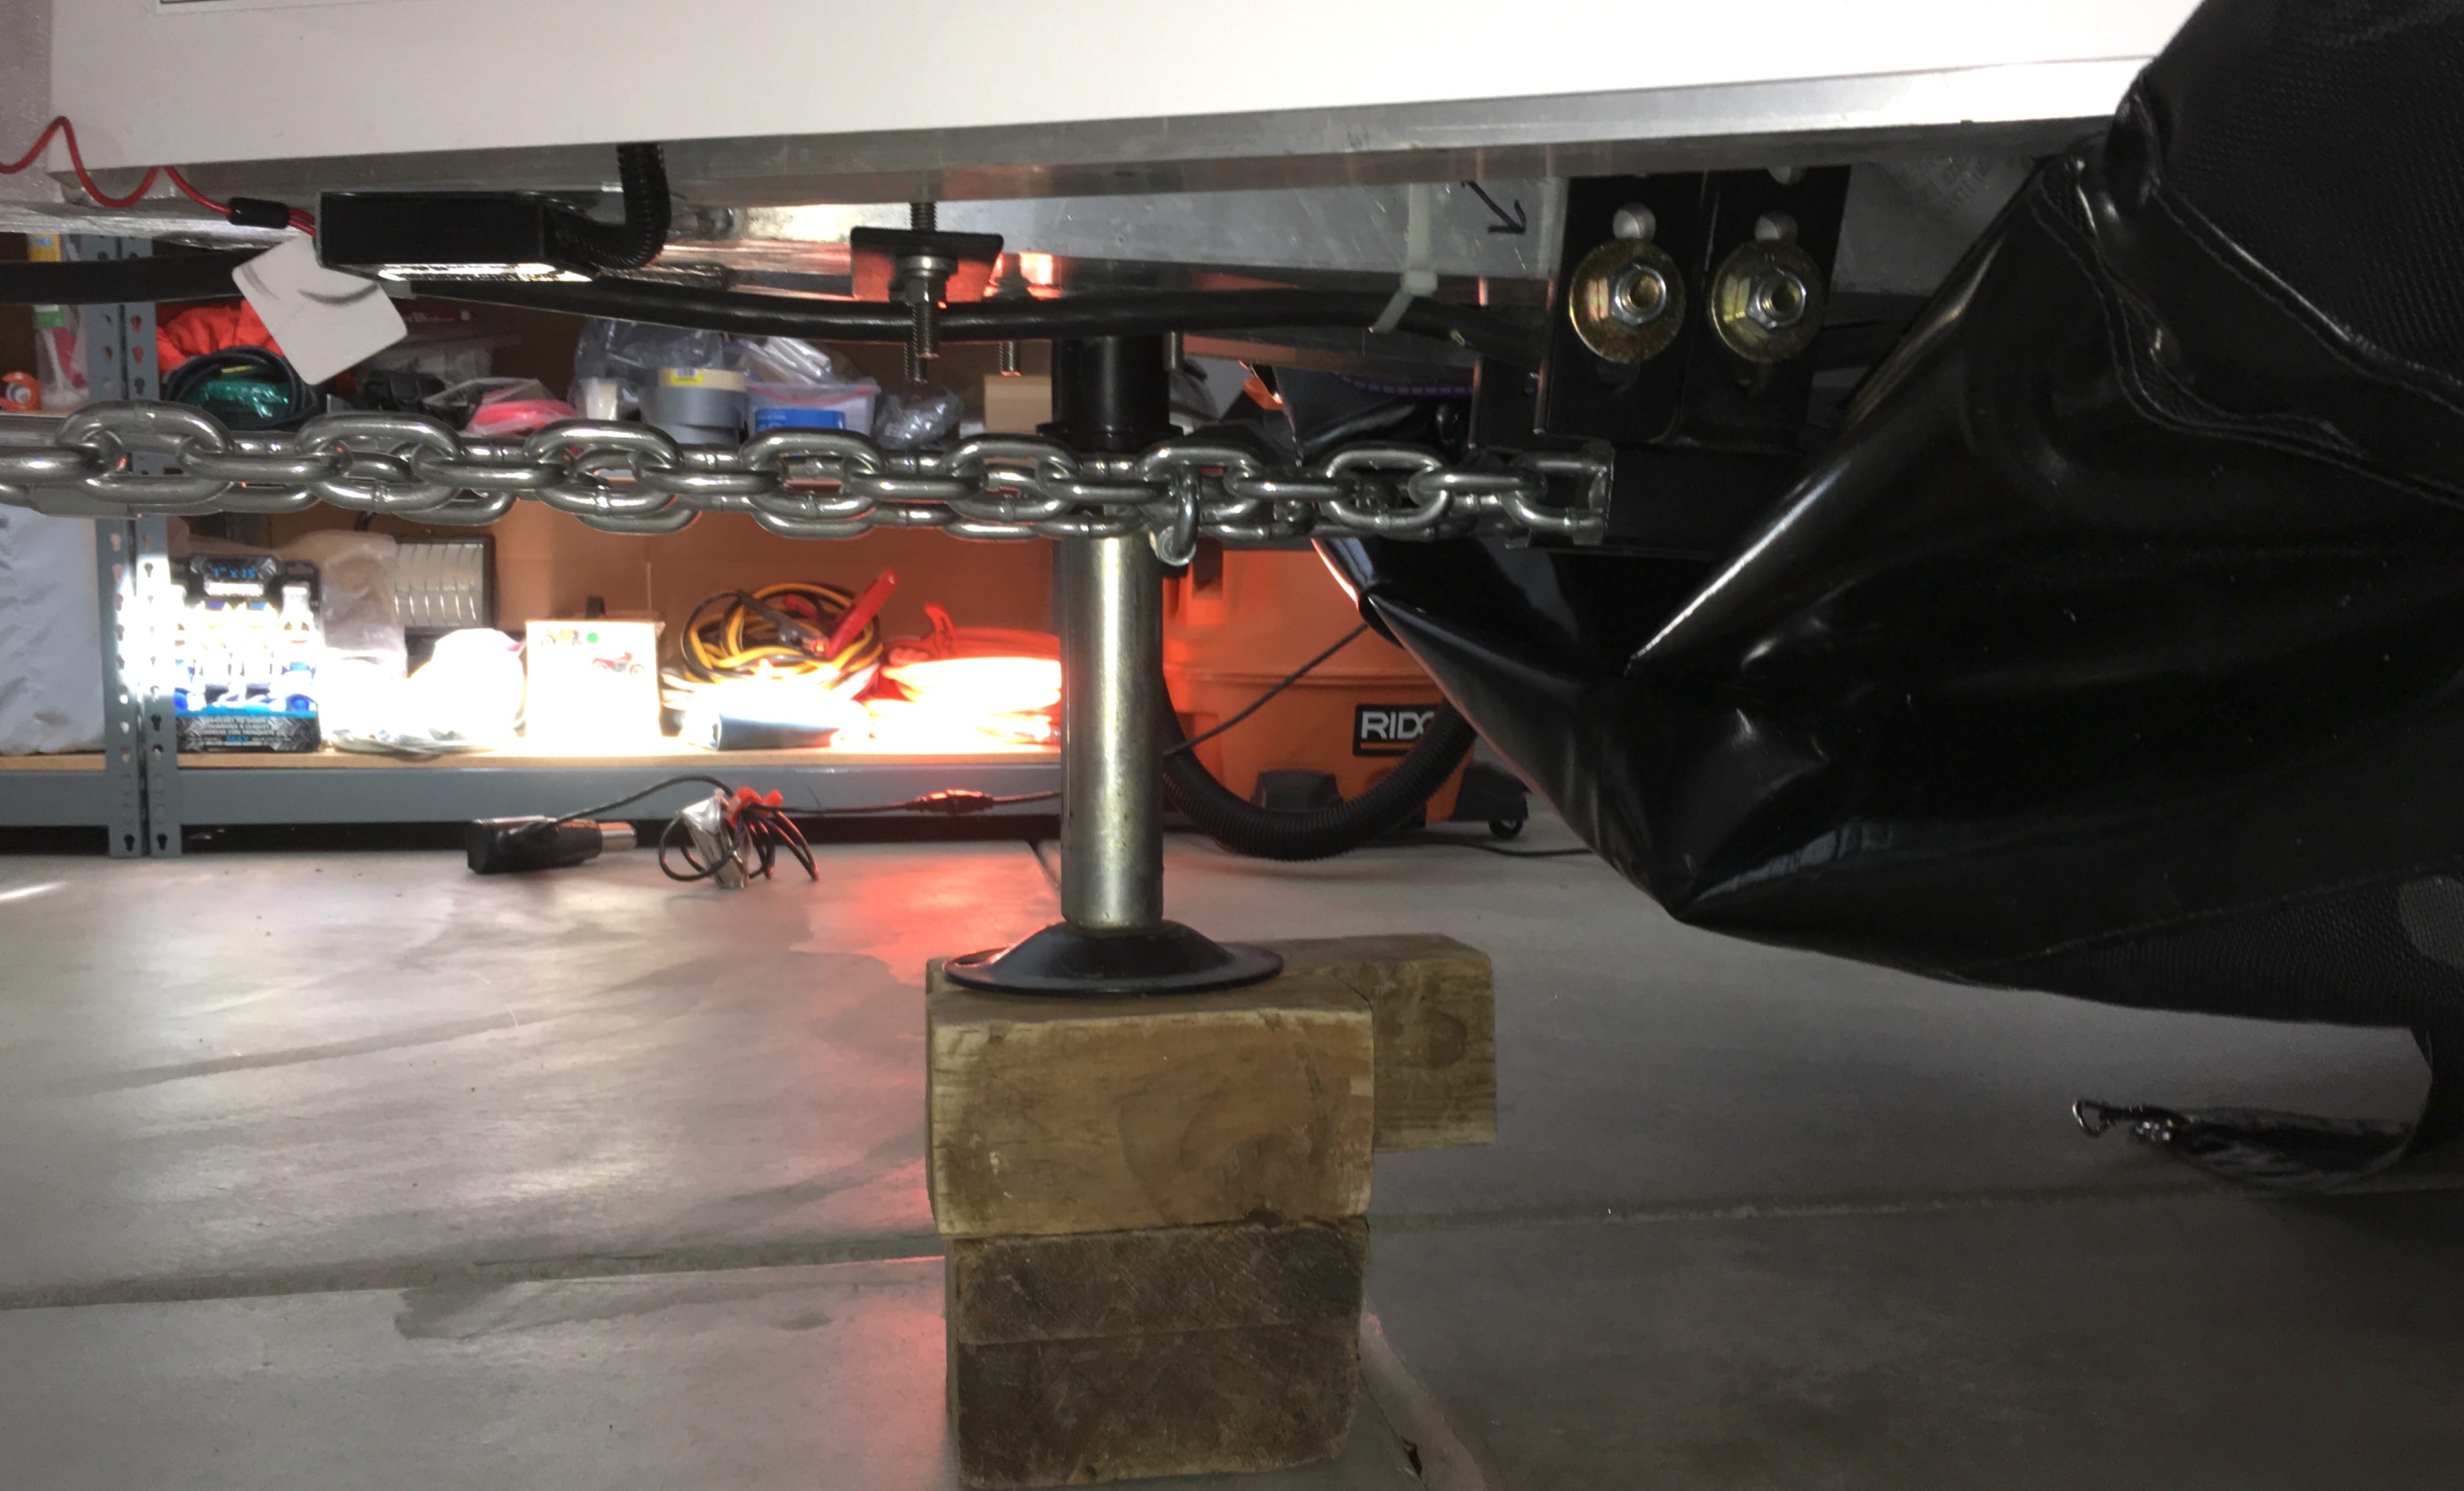
PART 2 EDIT 03/27/18 DETAILS OF FINAL INSTALLATION Detail of the front, showing how the fabric is cut out to clear the Anderson mount and chains. The opening is reinforced with heavy fabric, and there is another heavy chafe patch underneath the tongue jack, the chains and rear brackets. The small front (central) bungee anchors everything to the hitch and holds the two corners of the mesh cutout together. Detail of the right rear attach design. The SS bracket is the bright plated steel bar that the stainless shackle is connected to. Note how well the steps are protected by the extra flap. In this shot the SS is in the “Parked” mode, folded back underneath the tongue and the right front SS bungee is clipped to the rear shackle. This keeps everything off the ground and also away from the jack shaft and foot. Detail showing the front left three cords unclipped from the bar, the center one remains attached. The clips are quick and easy to manipulate. In this mode you might be accessing the rear hatch or the bed of the TV. Also, this allows the fabric to droop and you can get easy access to the rear Anderson nuts under the tongue. This shows the view under the tongue when “Parked”. The fabric clears the jack and support blocks and stays clear of the ground. Finally, this shows the left center support bar removed and lying down on the fabric. This lets the fabric lie on the ground and gives the best access under the A frame, short of actually removing it entirely. MORE TO COME. John Davies Spokane WA
1 point
-
Thanks for shading the sticky posts - that was getting a bit annoying with so many of them floating up there. And the blue text is far easier on the eyes. The blue/gold is a nice color scheme, so I hope you guys stick with it for more than a few months, lol. When I was photoshopping graphics ideas for or trailer, one of my favorites was a simple blue & gold stripe down the side. In the end, it was a bit too conservative for us, but as a 'corporate' color scheme, I think it would work well for Oliver.1 point
-
Mike, Fine photos. We're looking forward to camping in this area during late summer on our way from southern Utah! Thanks for the report.1 point
-
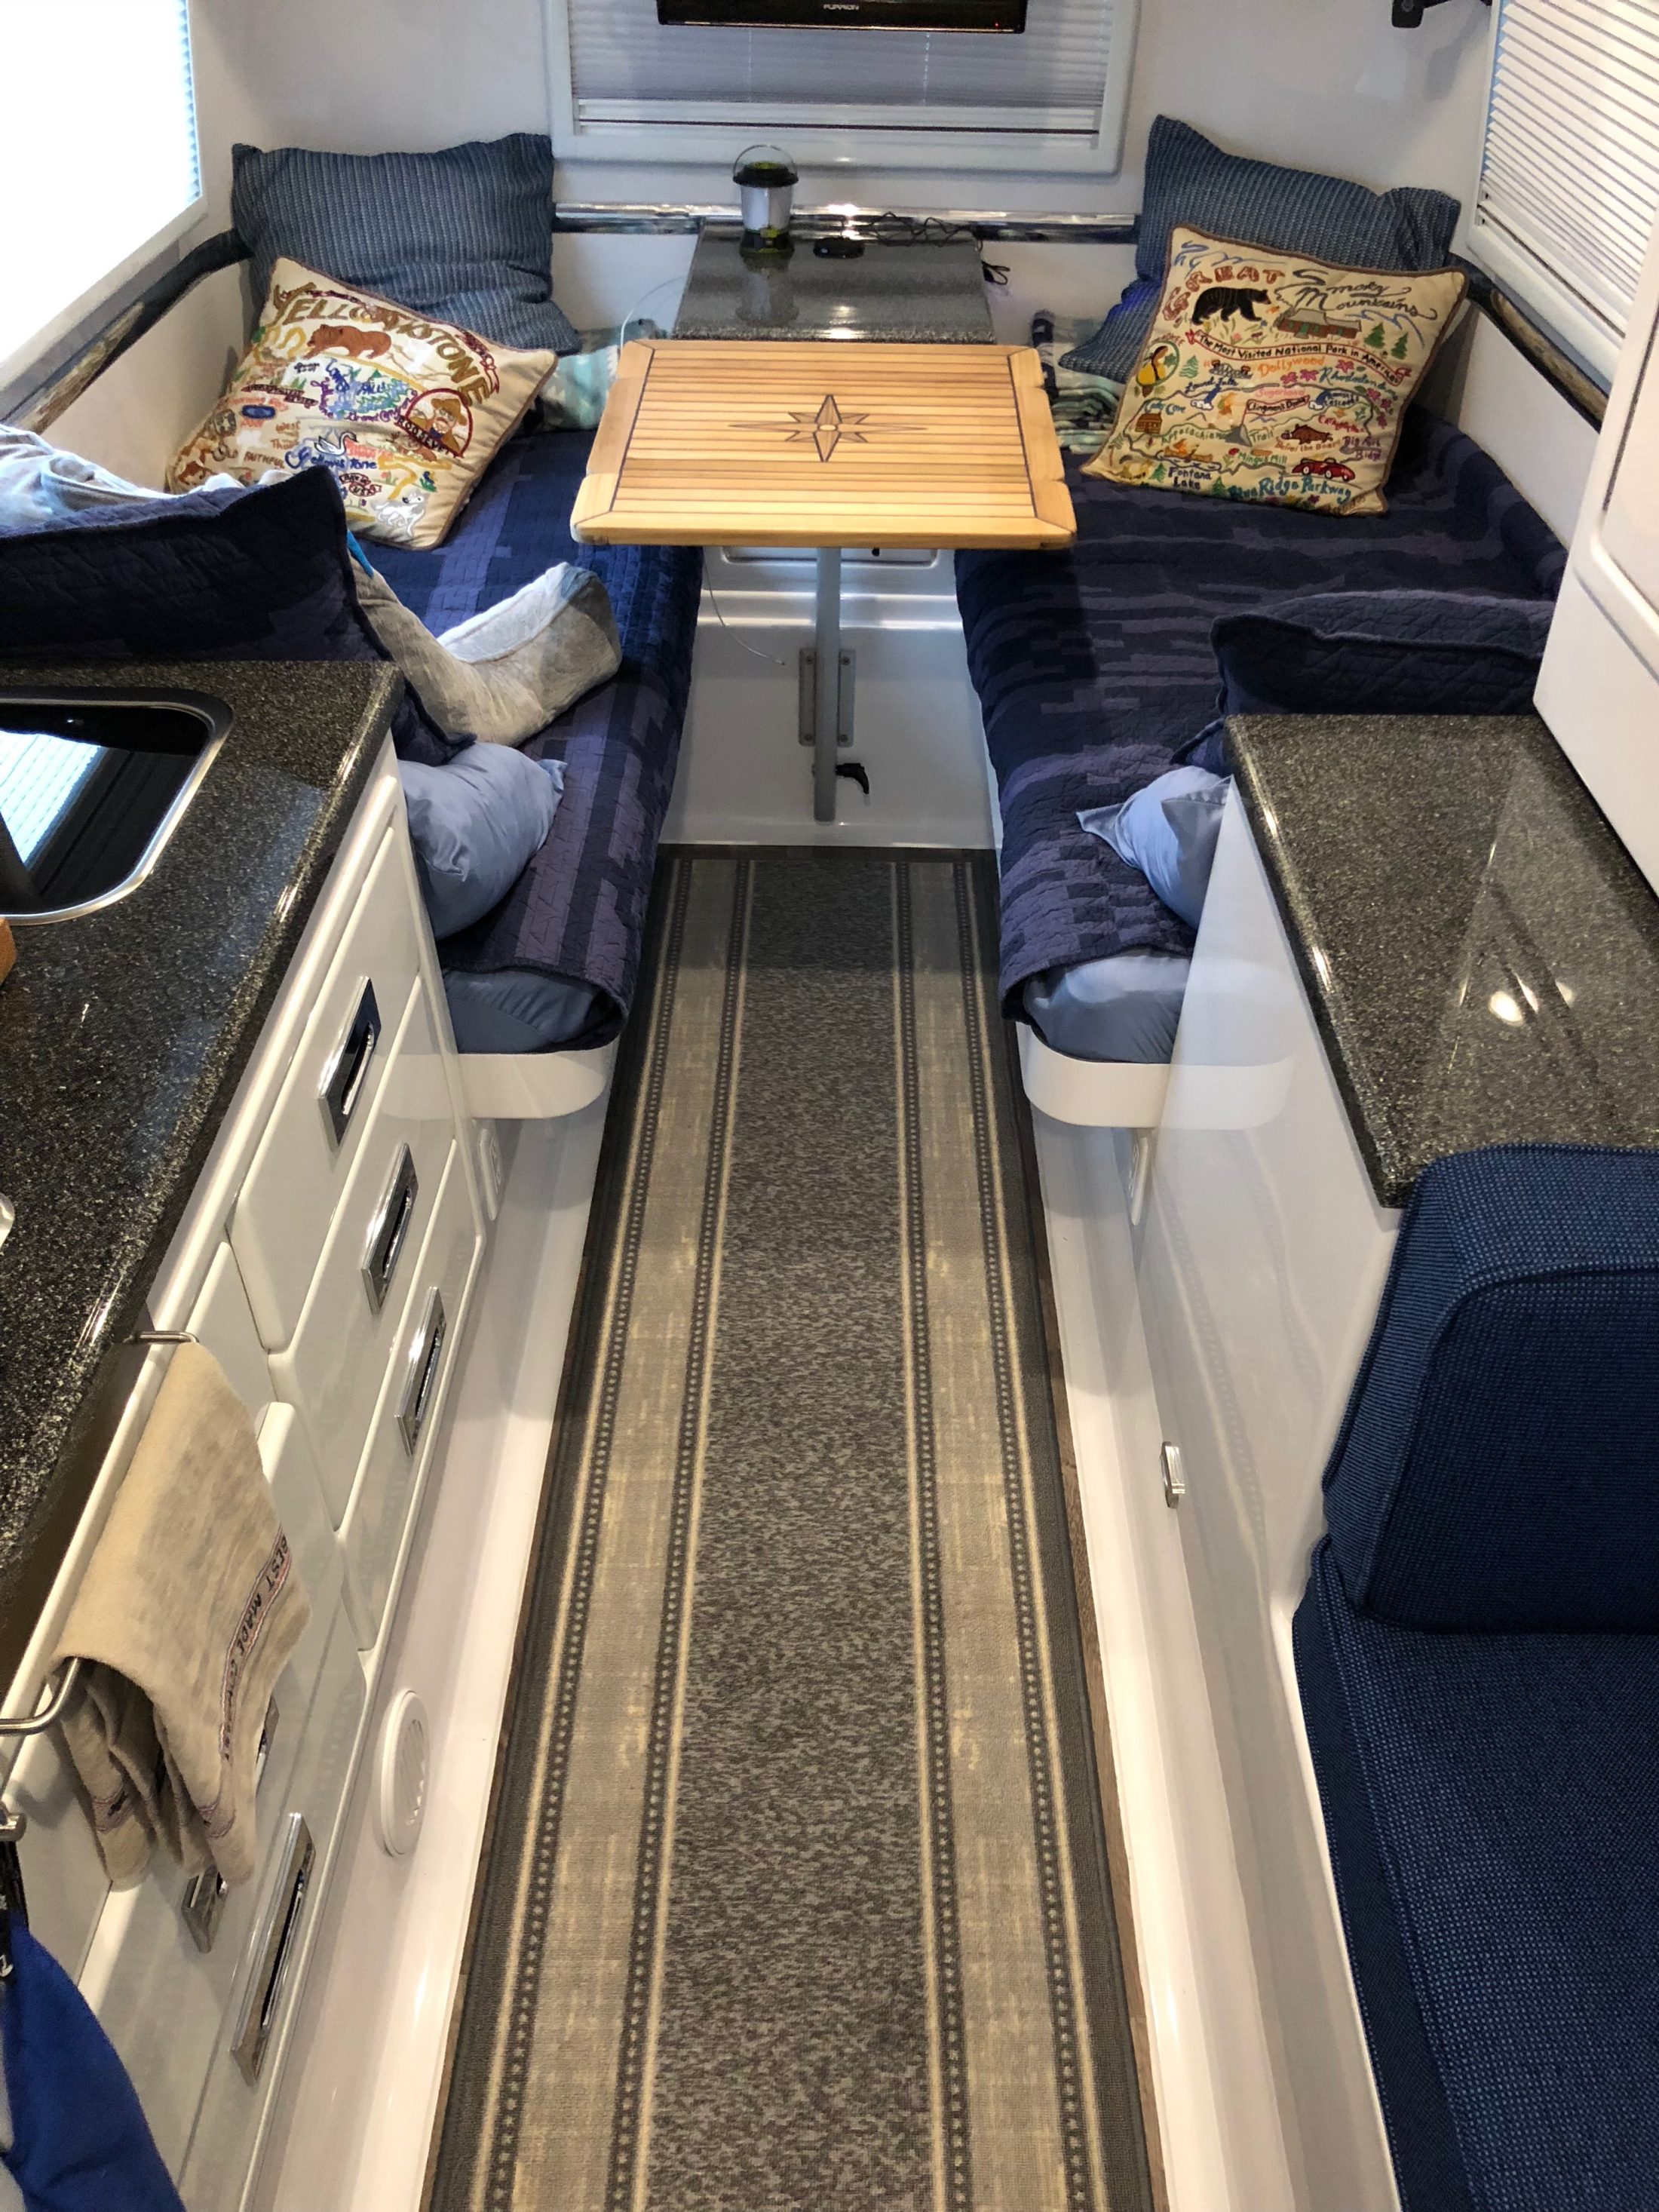
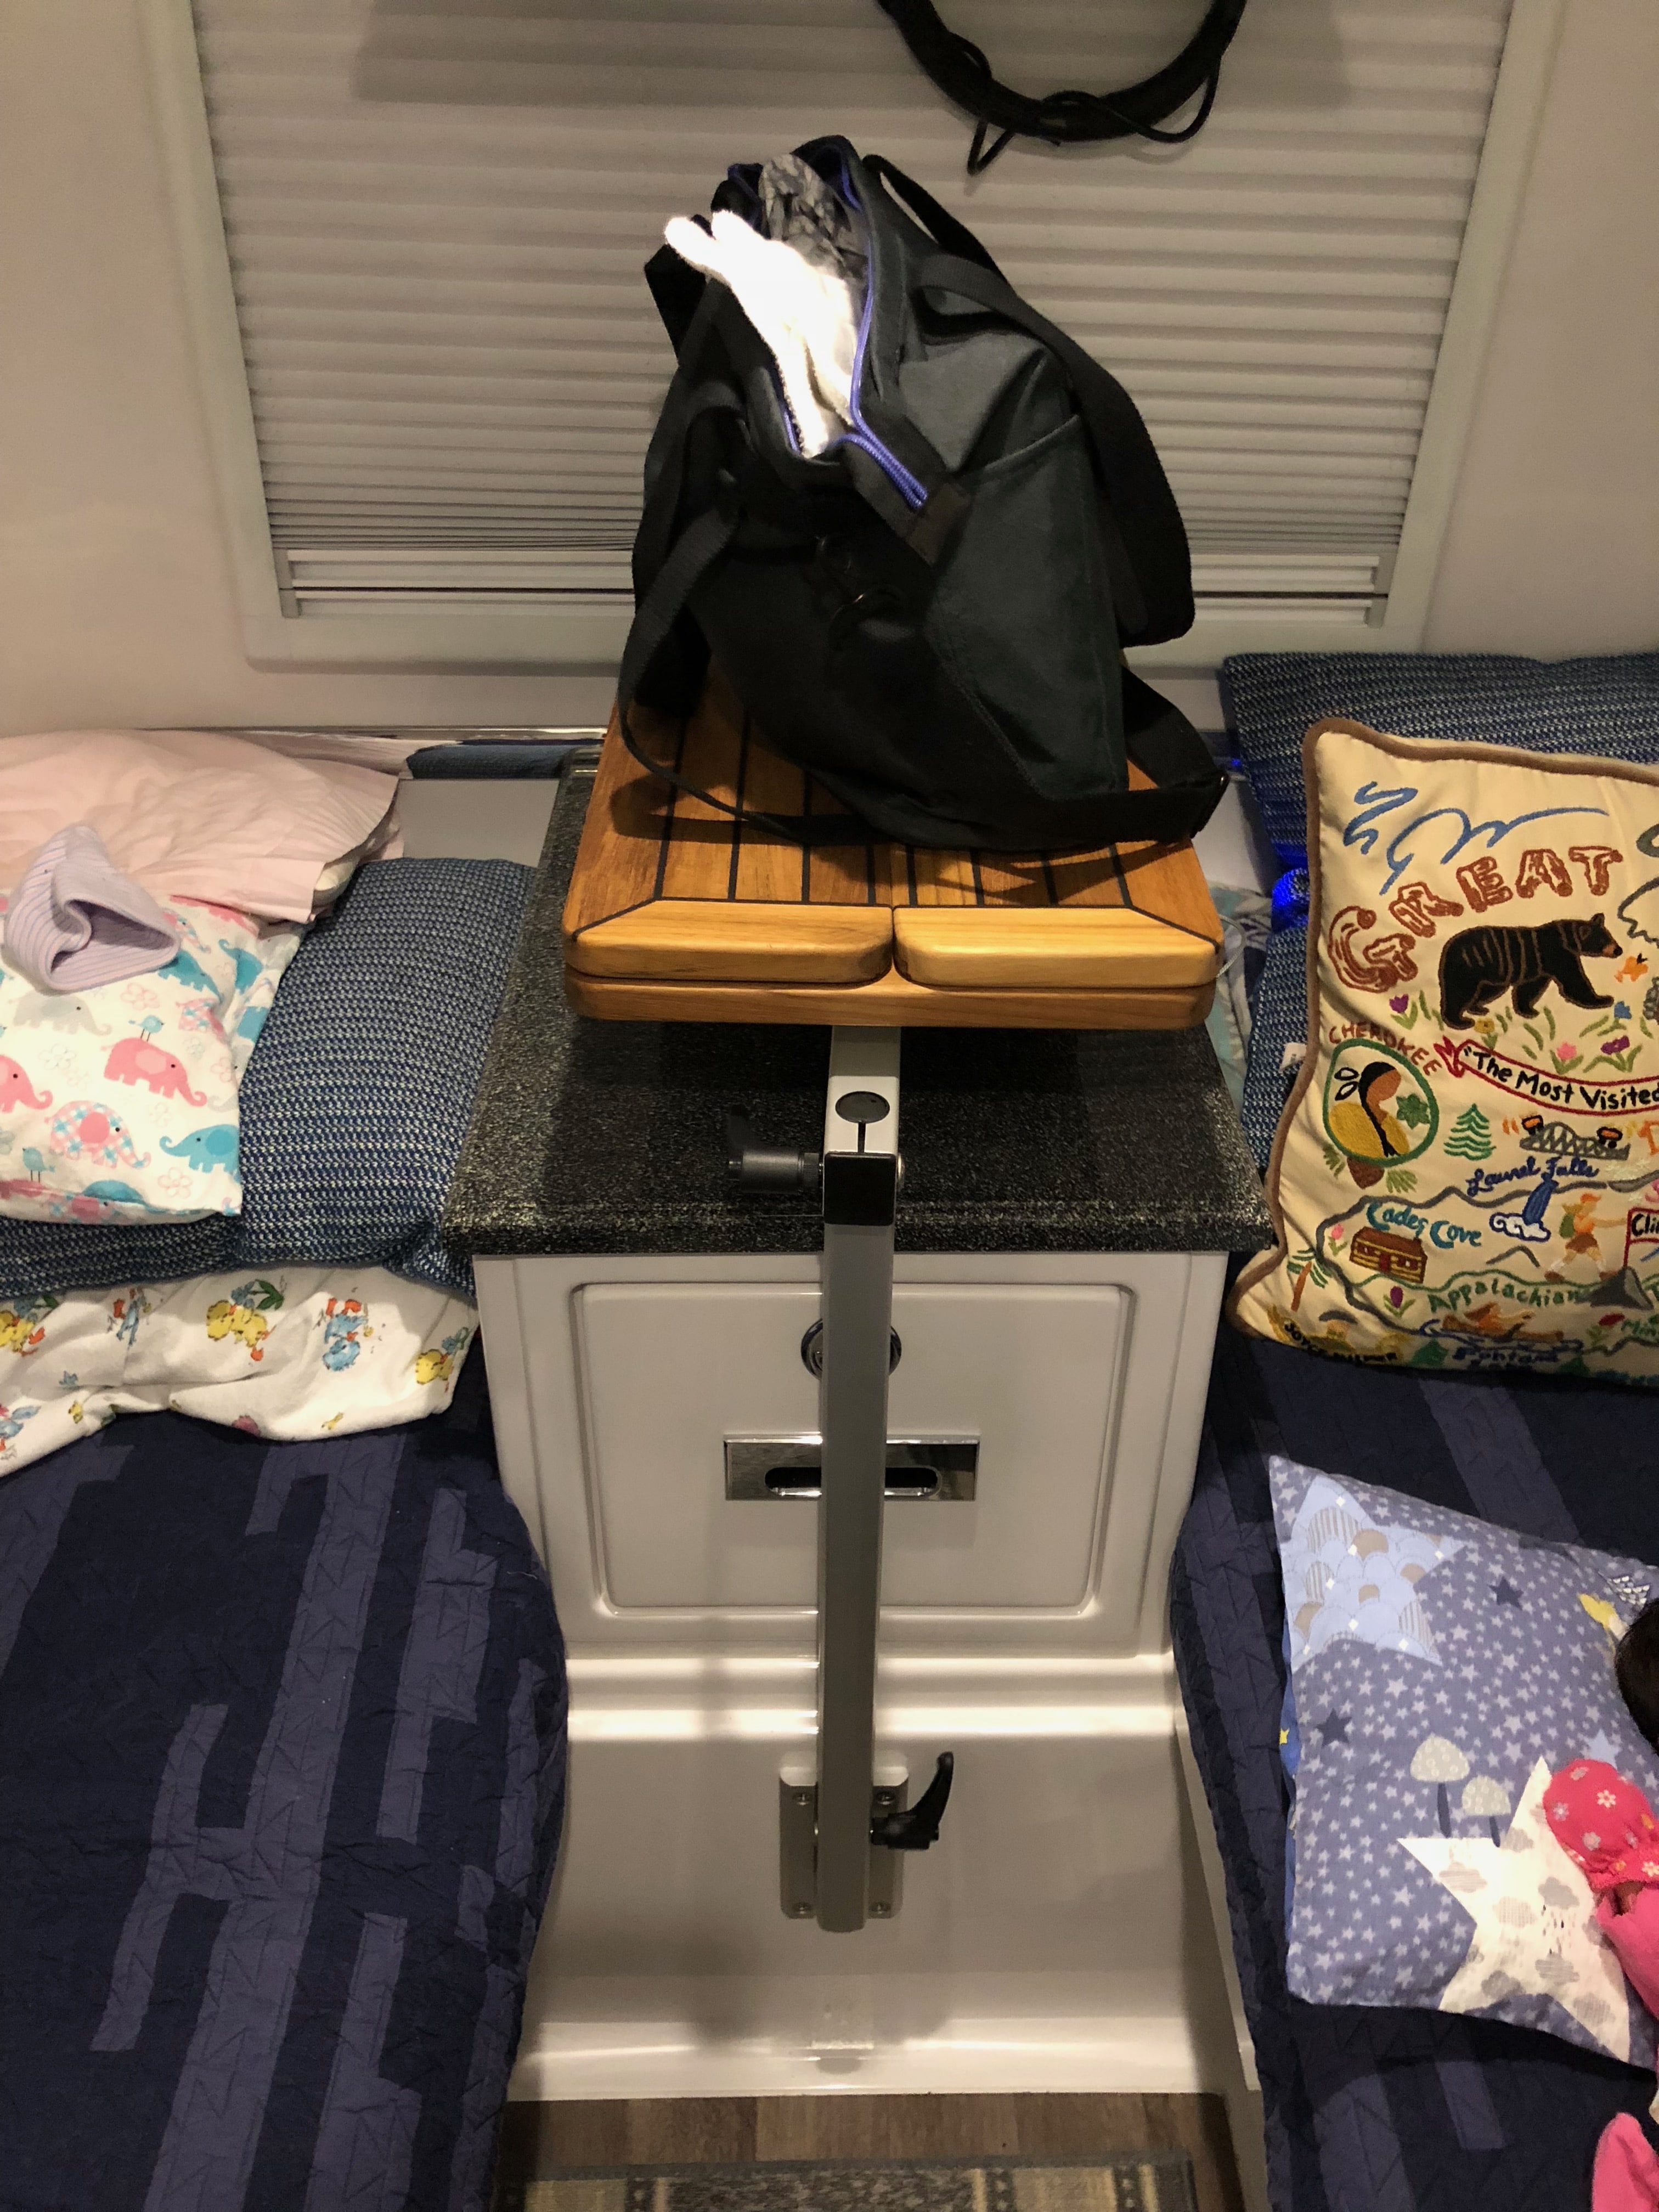
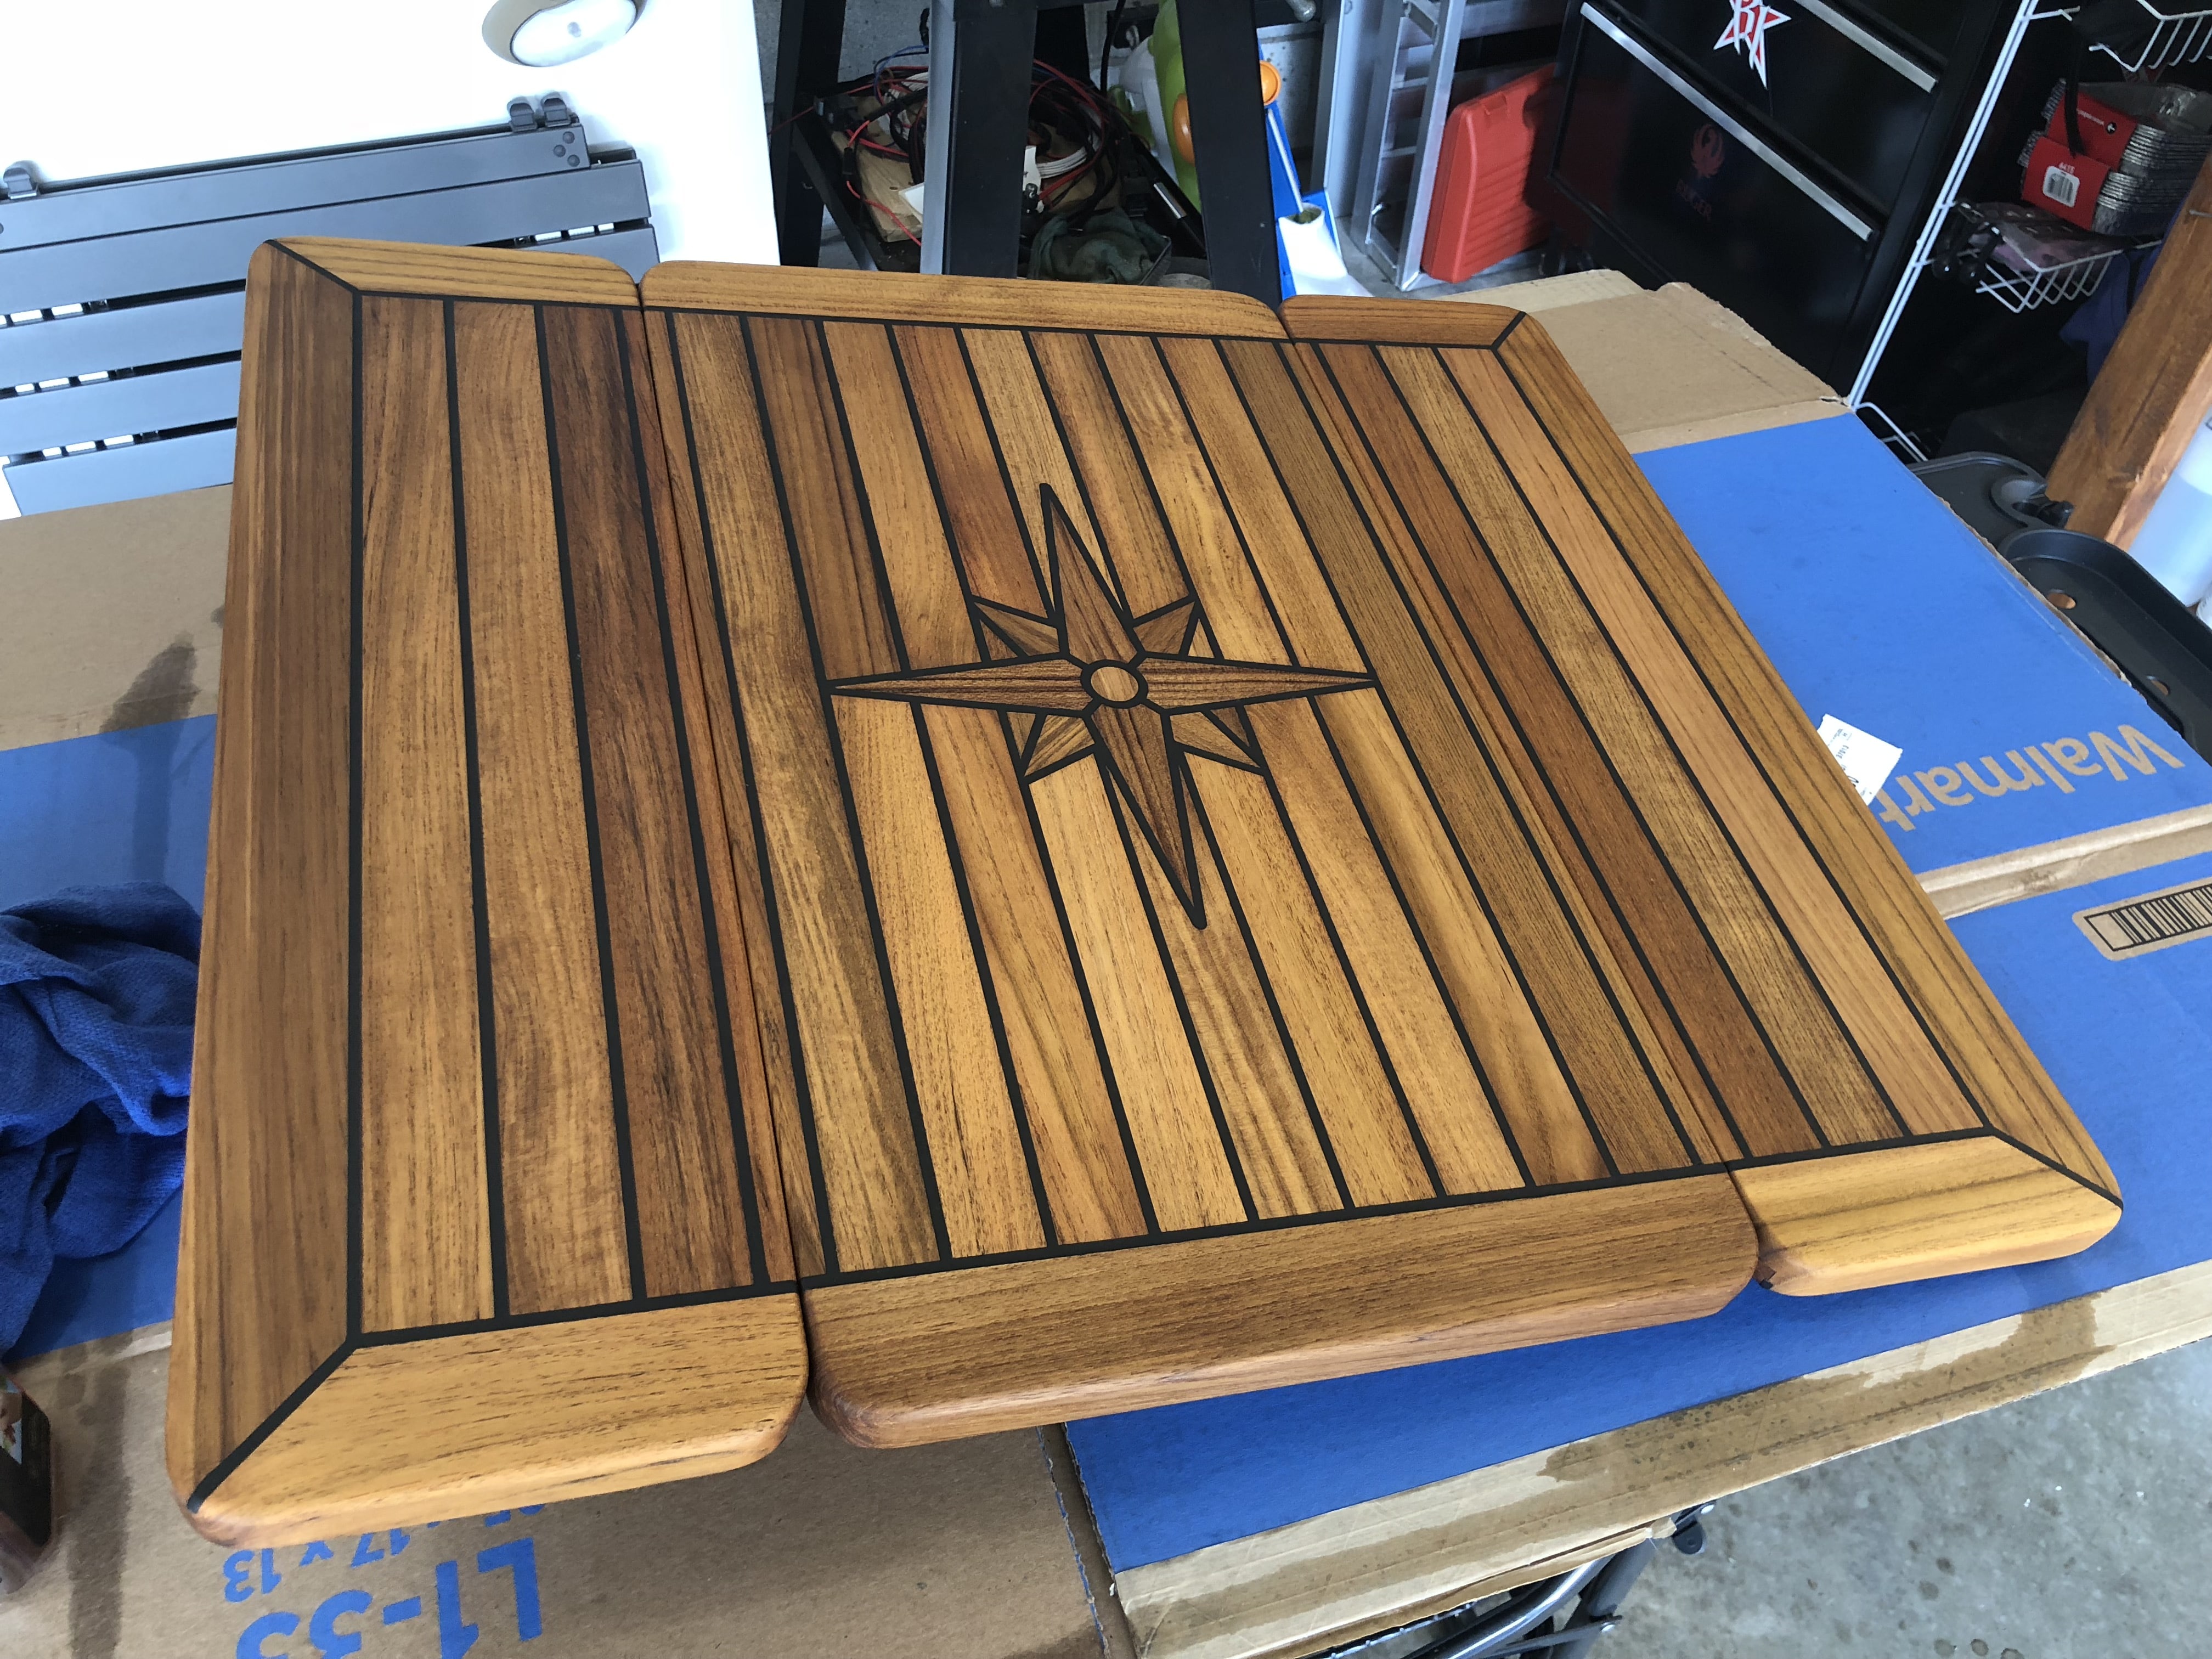
Sorry, been camping in the Oliver. Not sure what happened to original post but here are some pics. I will post link to original manufacturer. I ordered the longer post and cut off about 2 in. and also screwed a 1" x 3" aluminum piece to keep it from going all the way down and hitting gelcoat. Last picture is after a couple coats of teak oil on the table. Also, I don't seem to be getting my email/responses. Mike
1 point
-
Why would you need an a/c tester when it tells you all of that on the built in surge protector? You either have a/c or you don't... and when you don't in these trailers it's usually the gfi under the dinette. Either that or the surge protector is already telling you why your power is shut off when you plug in. For me, a multimeter that allows me to check either a/c, d/c or ohms is the Only needed electronics tester because it does it all and most of the problems will be on the d/c side anyway. When the a/c power outlets go off, reset the gfi and unplug the blow drier :) Reed1 point


























-
Recent Achievements
-