Leaderboard


Popular Content
Showing content with the highest reputation on 10/02/2025 in Posts
-
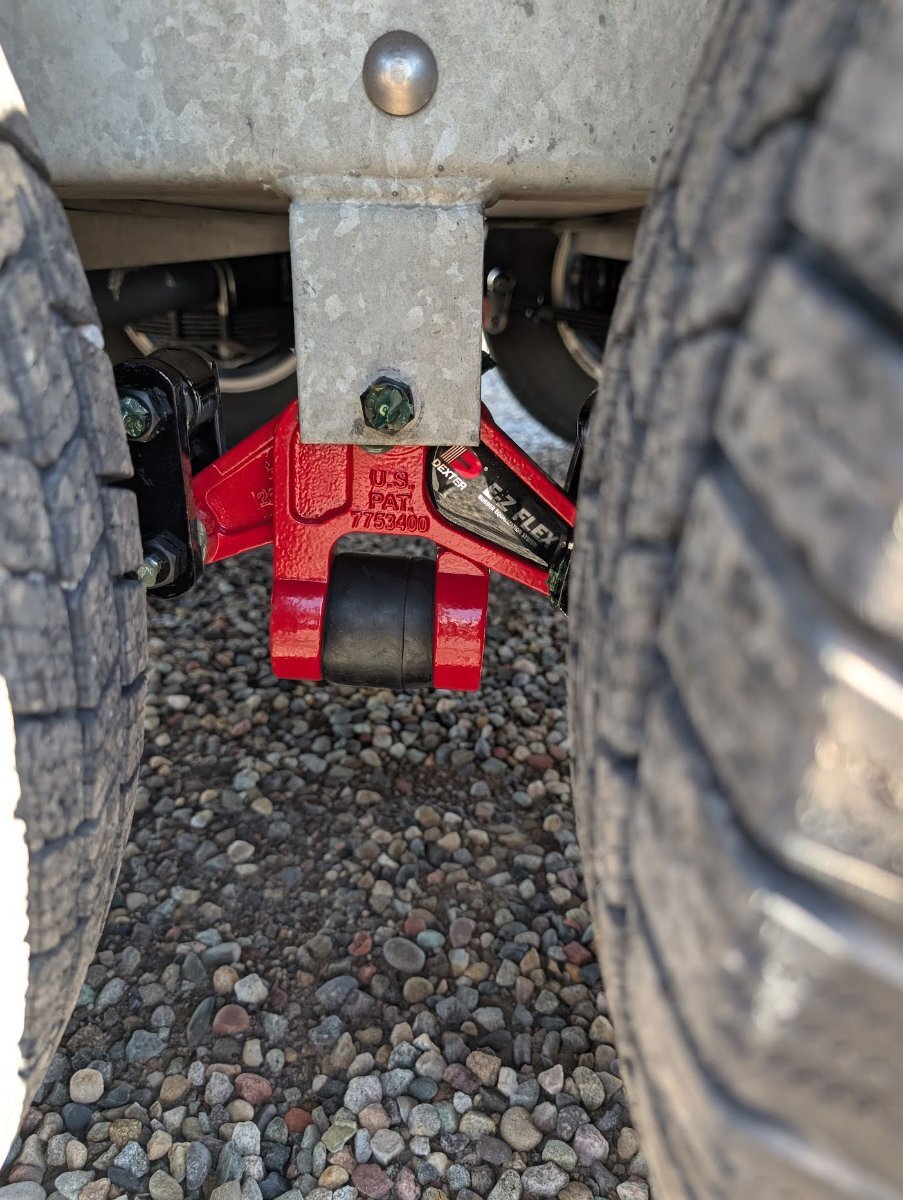
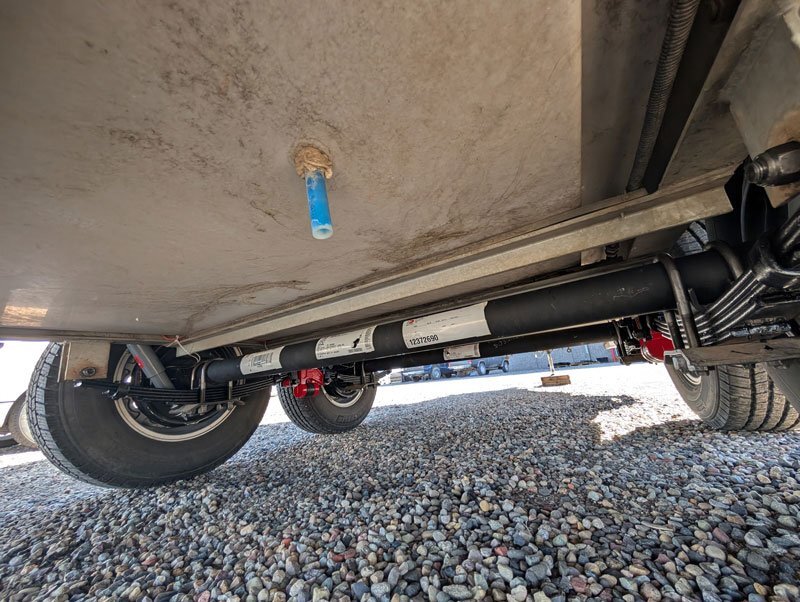
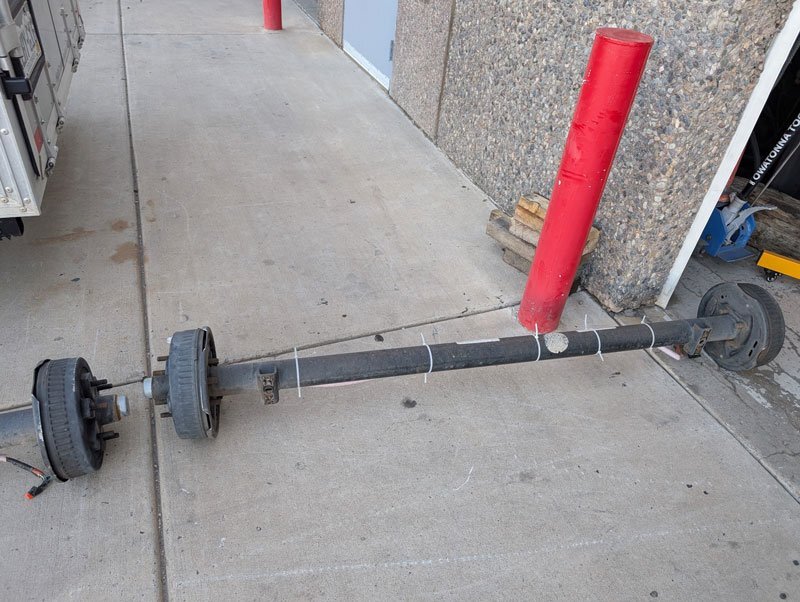
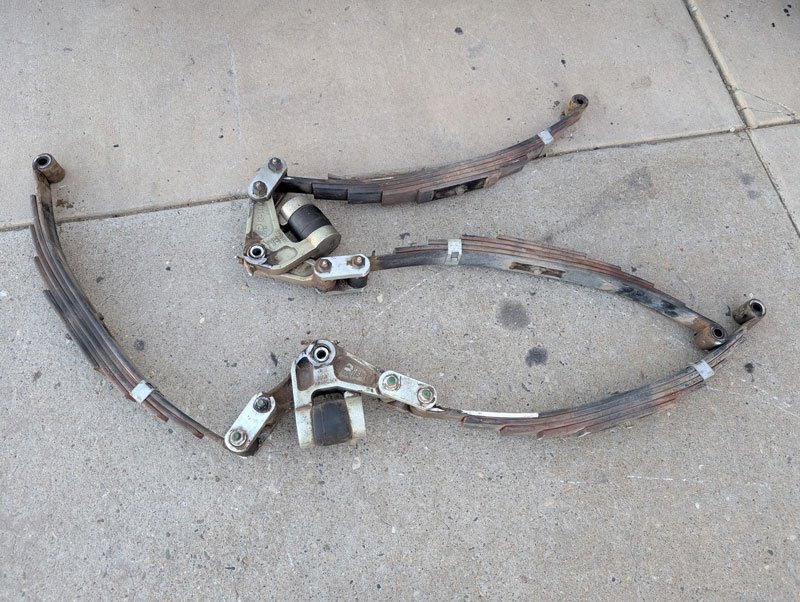
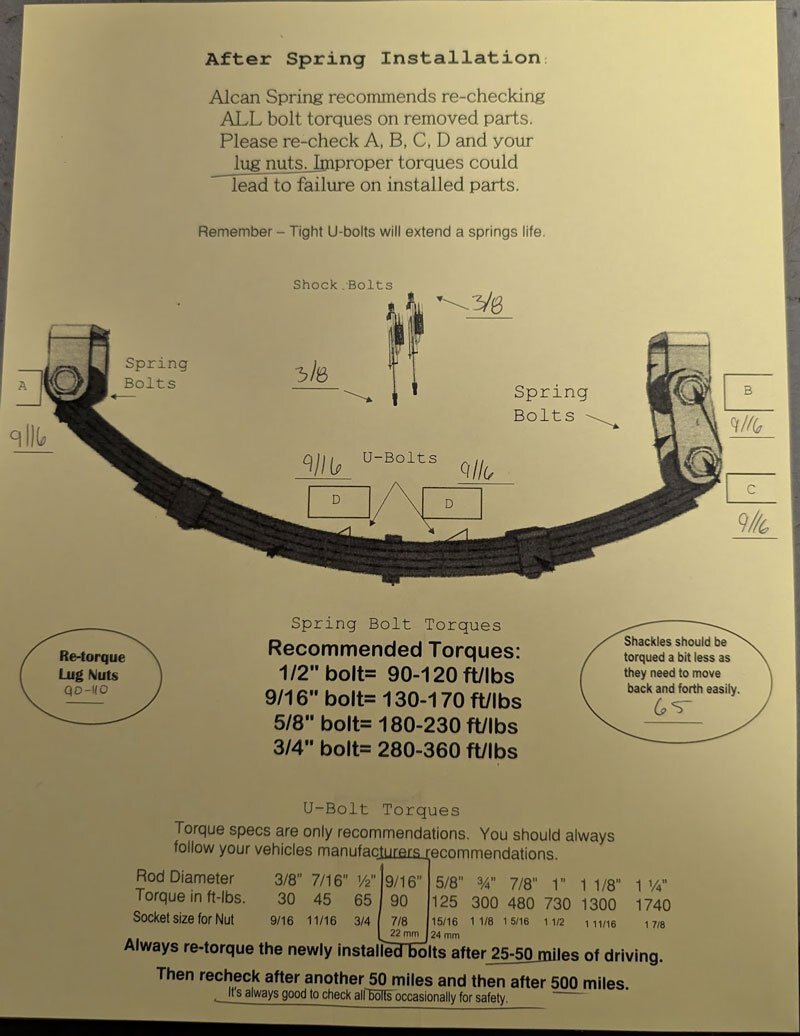
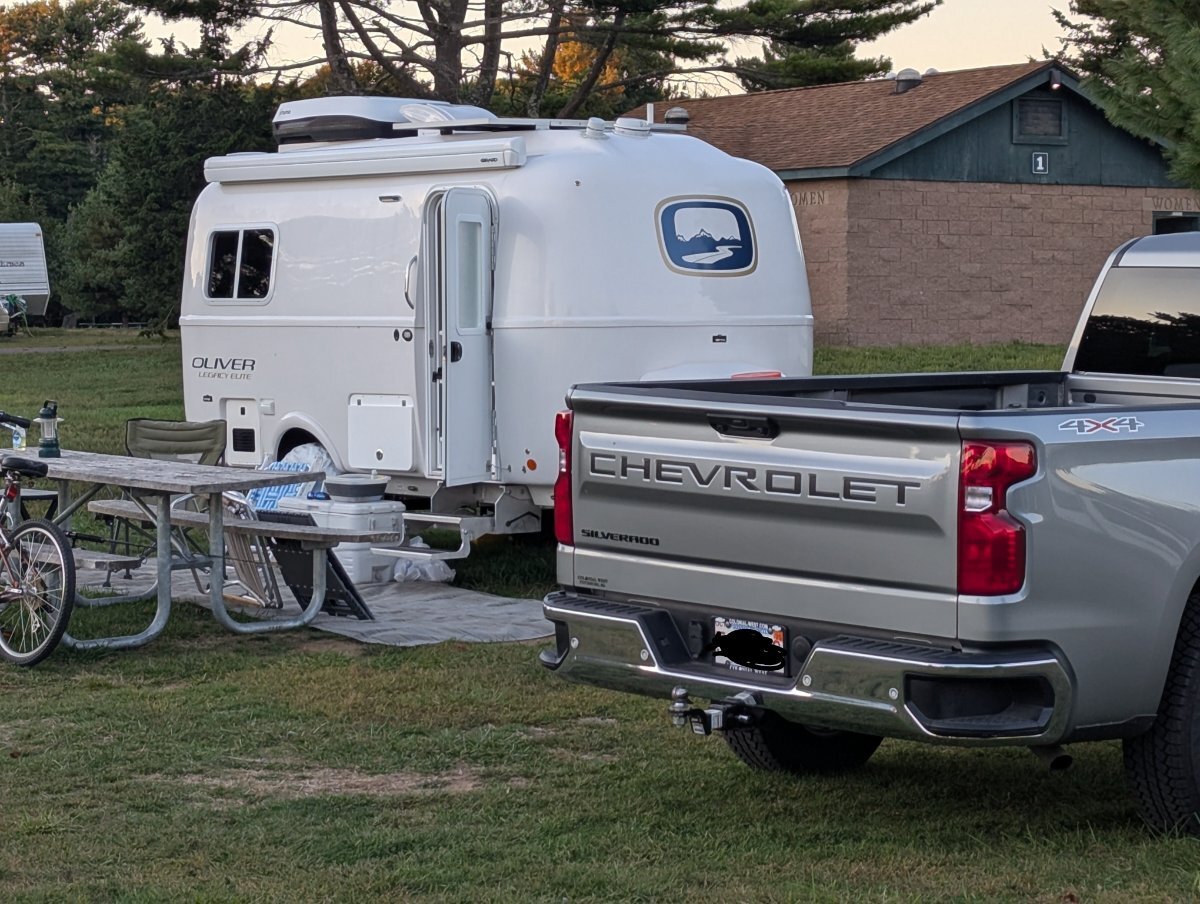
Got back from Grand Junction, Co last night. Took the Oli up to Alcan to have new Dexter 5200lb D52 axels, new Alcan springs, Bulldog HD shocks, and new Dexter E-Z Flex Suspension Kit (K71-653-00) installed. Took my little buddy Benny with for the day there, day back trip. The guys at Alcan met me out front at 7:30am. I dropped the trailer in the parking lot and they took care of everything. During the wait I drove the Rim Rock Drive in Colorado National Monument. After that, I went for a coffee, spent about half hour there and drove back to Alcan. The trailers was finished already! Then loaded up the old axels and springs into my t.v. and drove to Home Depot to get a torque wrench and sockets. Long drive home, but now the Ollie has all new axels and suspension. First time staying in the trailer. Bed is small for me, so I need to figure out a center connector piece and fill it with cushions to increase the leg area. I know about the Foy product, but may come up with something on my own.
 4 points
 -
' ILOVHER ' ~ 🙂4 points
-
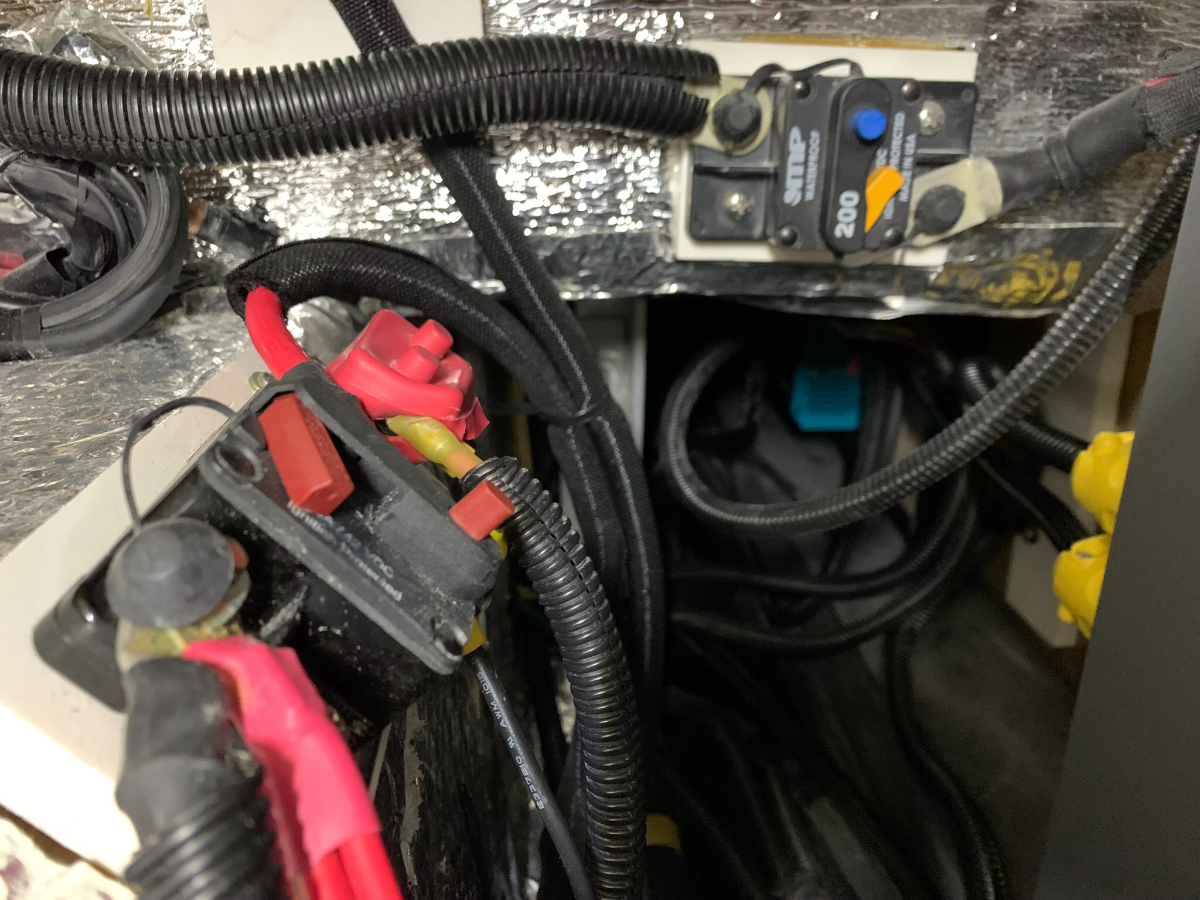
I used both the MRBF and ANL (250A each) with my LFP upgrade, as well as a Victron SmartShunt. I didn’t add a monitor for the SmartShunt, just use the Victron Connect app. I considered adding a battery cut-off switch, but just use the stock 200A blade breaker between the batts and inverter in like manner. I have the Xantrex 2000W in my 2020 OLEll.
3 points
-
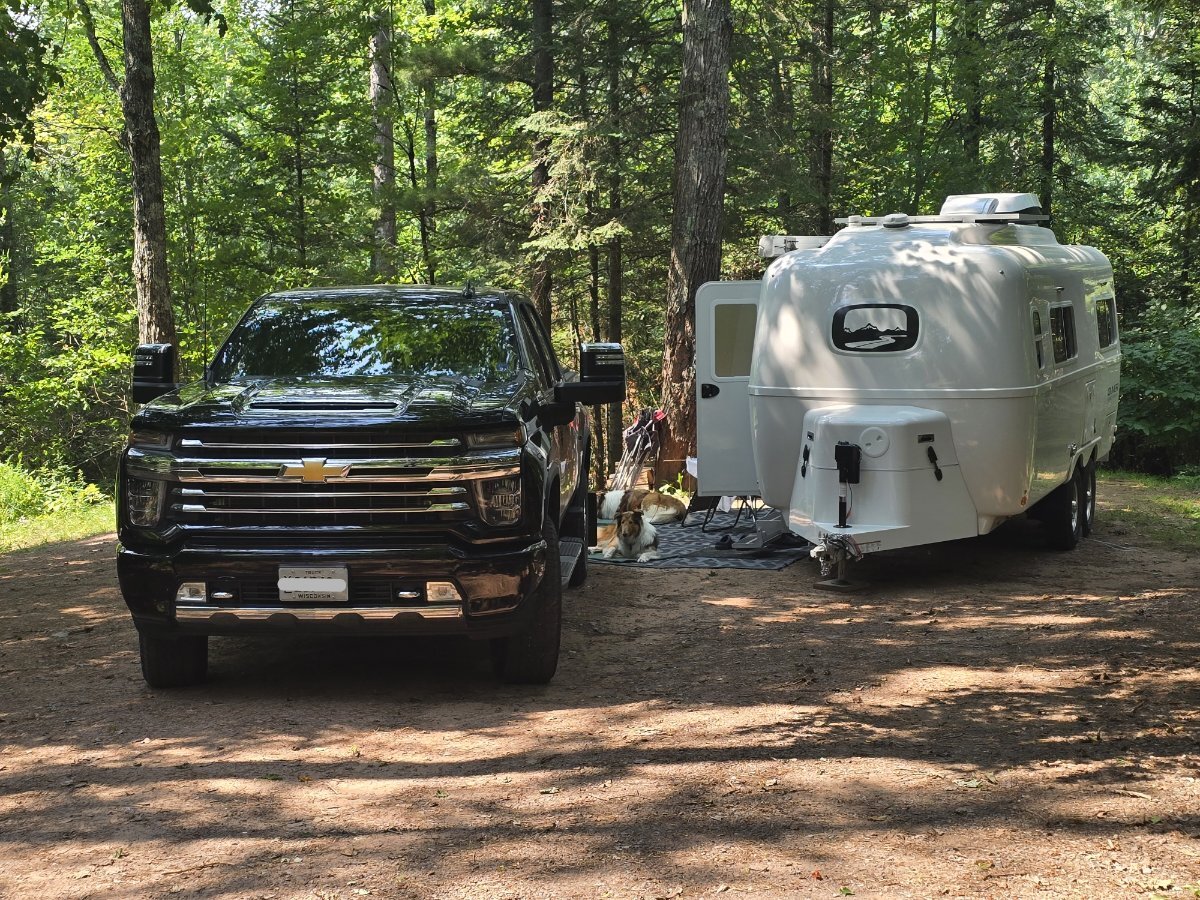
Greetings to the Oliver LE1 sharing Hammonasset State Park with us. That's the second LE1 we've seen here this year.
3 points
-
@Boudicca908 The man made mounting material or as I refer to as PVC, does not hold screws or threaded fasteners very well when using the same size fasteners as were original installed. I would suggest removing one of the existing screws and then finding the same type of screw that is one size larger. I think they are common pan head screws and installation and removal can be accomplished with a Phillips screwdriver. Some type of adhesive may help, but anything like epoxy may make removal difficult. So if you do use an adhesive, use it sparingly. You can always add more the next time. Mossey3 points
-
Great news!!!!! Oliver (Jason Essary) called me and offered to cover the BBQ which I accepted. What this means is those of you that paid for their dinner will be reimbursed. Please extend thank yous to Oliver Travel Trailers for their generosity. There is still a cost for the hall rental and the music at the potluck which comes out to $12.00 per campsite. Paula and I discussed how we would handle this and have come up with this: The money we will be reimbursing will be less $12.00. those that paid for 1 dinner will get $13.00; those that paid for 2 will get $38.00; those that didn't pay for dinner please bring $12 so Paula and I may be reimbursed for costs we covered.3 points
-
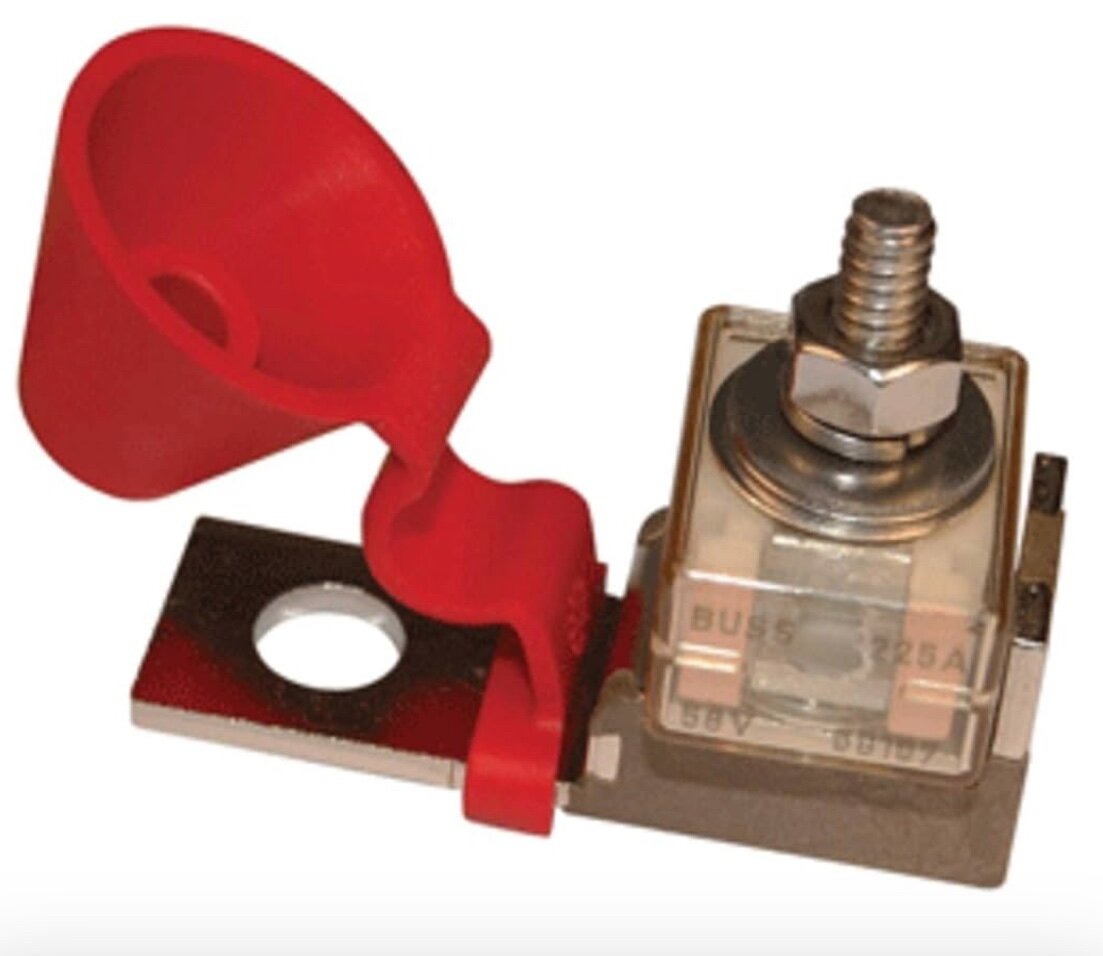
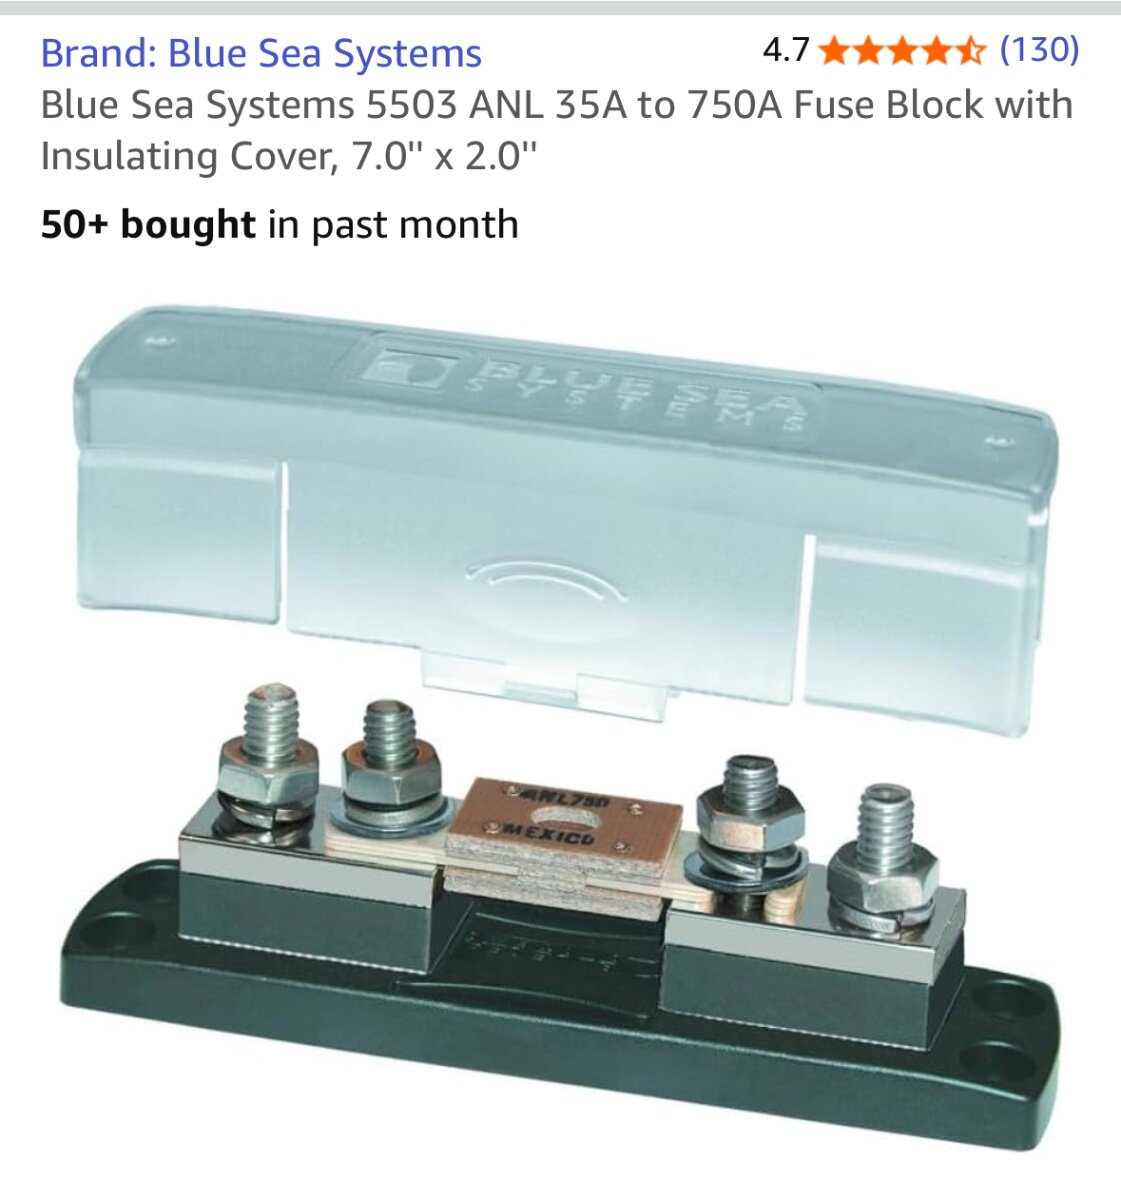
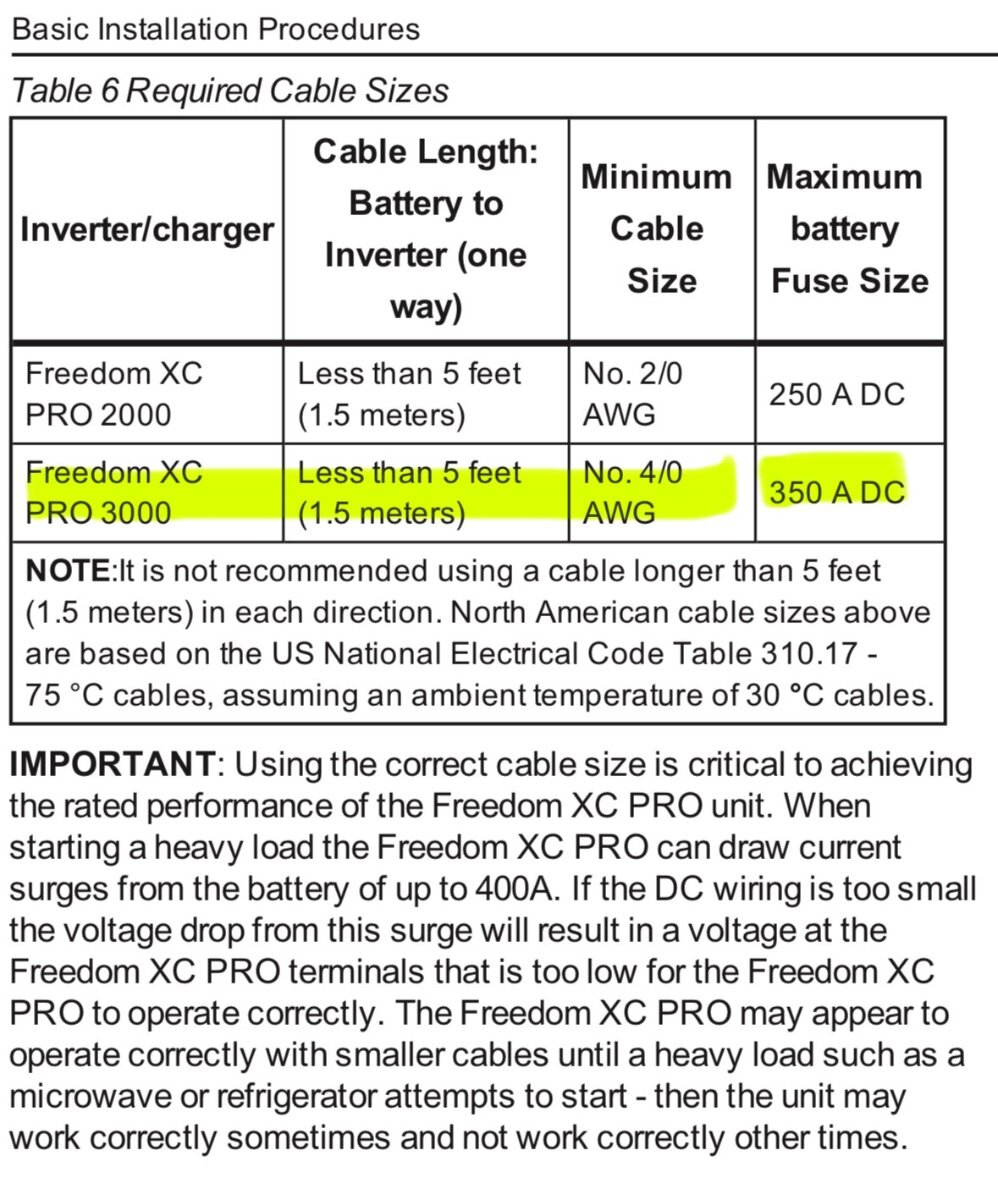
JD1923, I got ahold of Lithionics and they say MRBF Fuses are ok. They say I can do a single 300a fuse. This fuse attaches to the battery terminal. So protects right from the source. I also found out Xantrex recommends a 350a fuse max. So the inline 400a I put in for testing will be down graded to 350a if not removed. Thanks everyone for the help as I researched this issue.
2 points
-
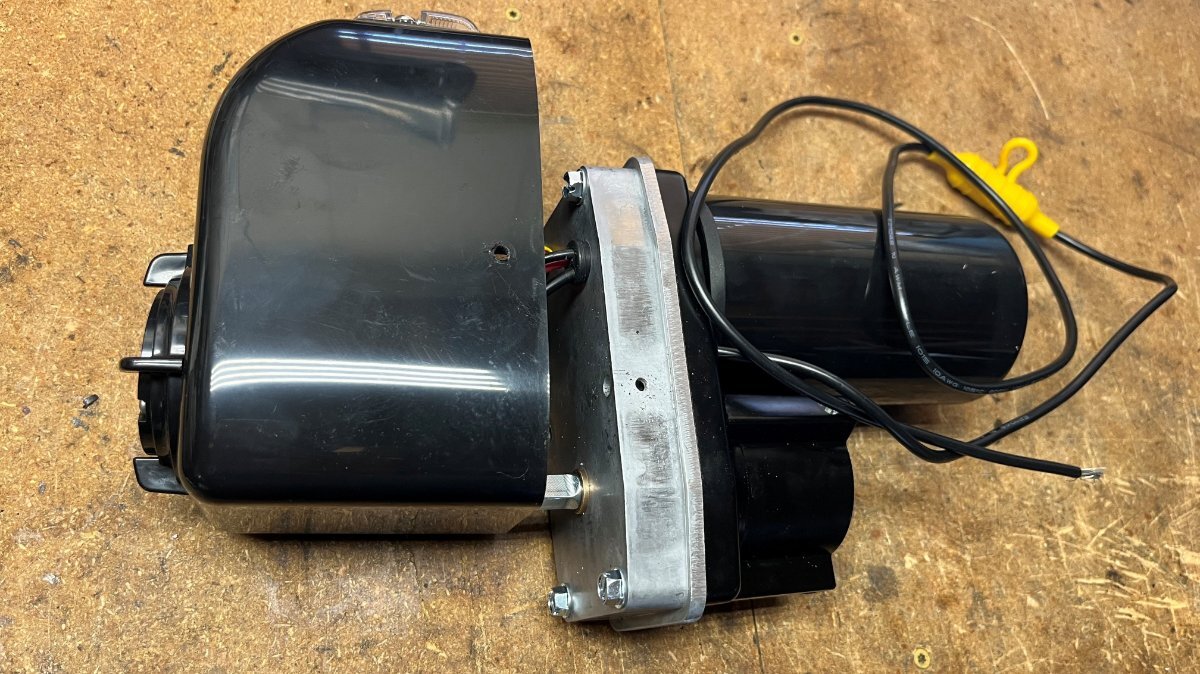
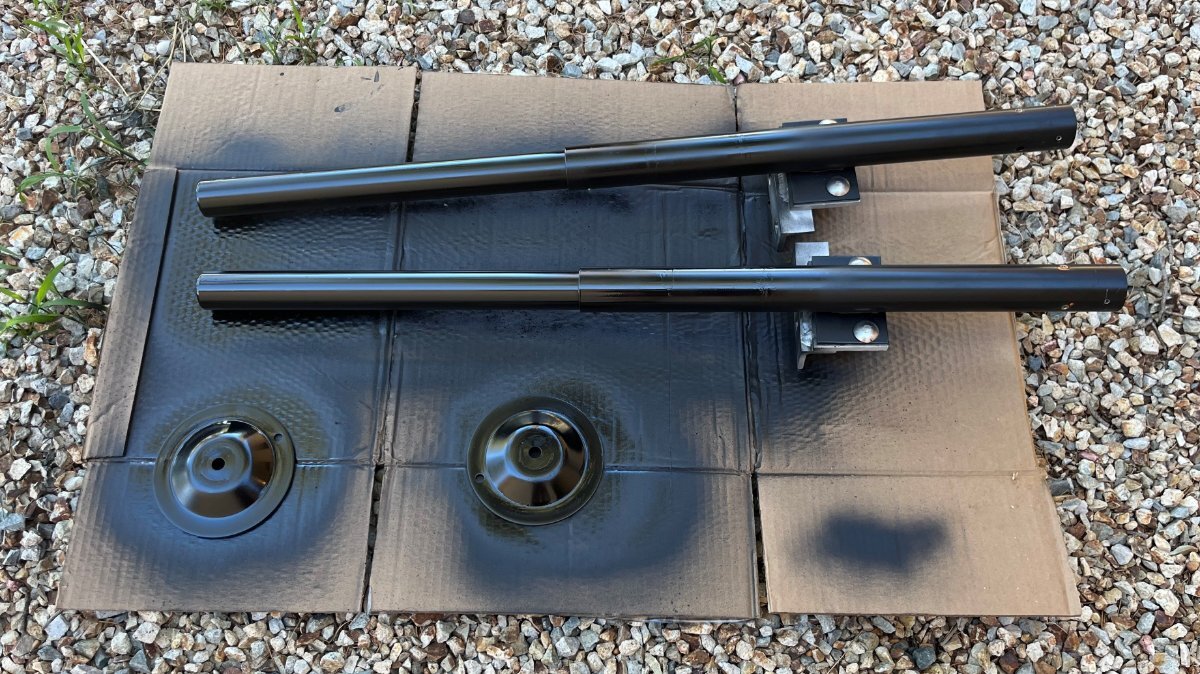
New motor heads, rebuilt post assemblies, all parts cleaned and painted and I'm ready for assembly! It's not easy to get the posts out and back in. To get them out, I removed the motor heads first, removed the long mounting bolts and used a hydraulic jack to break the old caulk bead pushing the post up. You could do this with the stabilizer jack itself if the motor heads clear the fiberglass of your bed platforms. Ours has 1/2" clearance on one side and only 1/8" on the other. OTT could cut the basement opening 1" further to the rear so that we have proper clearance, but it is what it is! 🤣 Put new butyl on the posts where the old markings showed the correct position. One is likely enough, but I ended up using two strips of 3/4" butyl on each post. Afterwards you can pushe the excess butyl down aring the post. You really have to cock the post on an outward angle to get it past a mounted support on the frame. Then get underneath to mount the nuts on the long carriage bolts. The aluminum bracket should be pushed in to support the post. Some thread locker on the bolt mounting the foot and all done in working these steps, now looking pretty good! The reman motor heads are standard VIP 3000 heads, meaning they are wired through the top vs. at the motor bottoms. Cut off the heavy gauge wire on both sides top and bottom as these are not used. The two lighter gauge wired, red and black are what is wired. Before crimping make sure the switch runs the motor in the proper direction. If it's running the wrong way swap the wires. I need to add 1 ft lengths of 12 AWG wire to reach the tops.
2 points
-
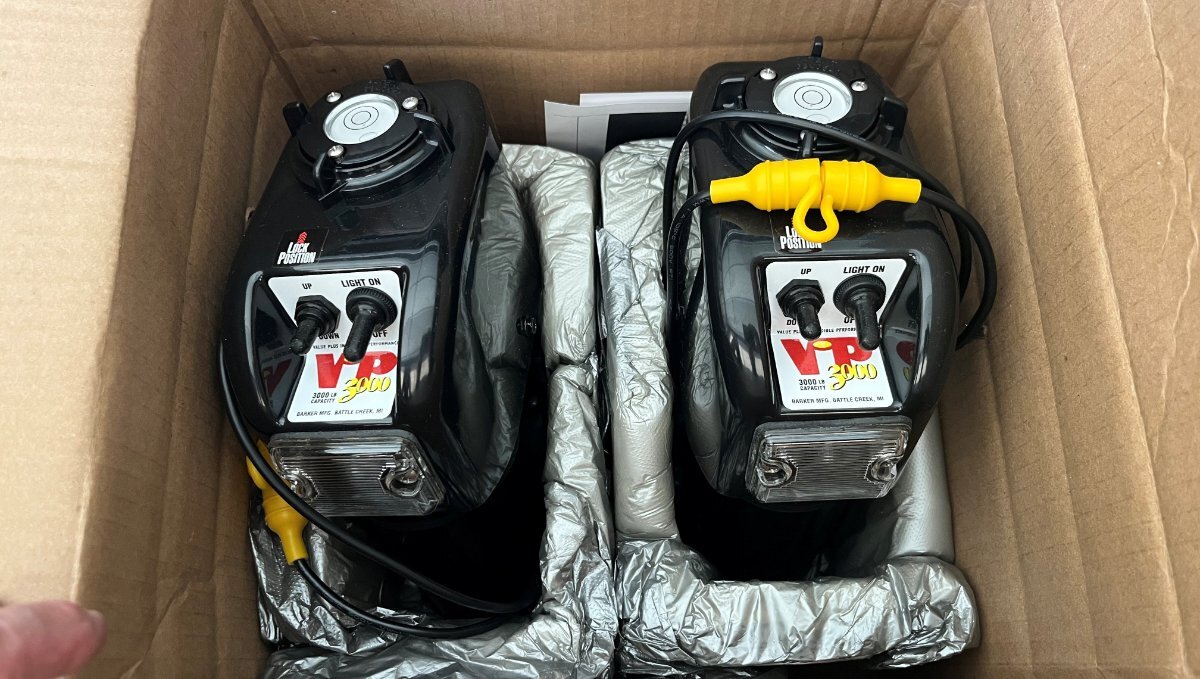
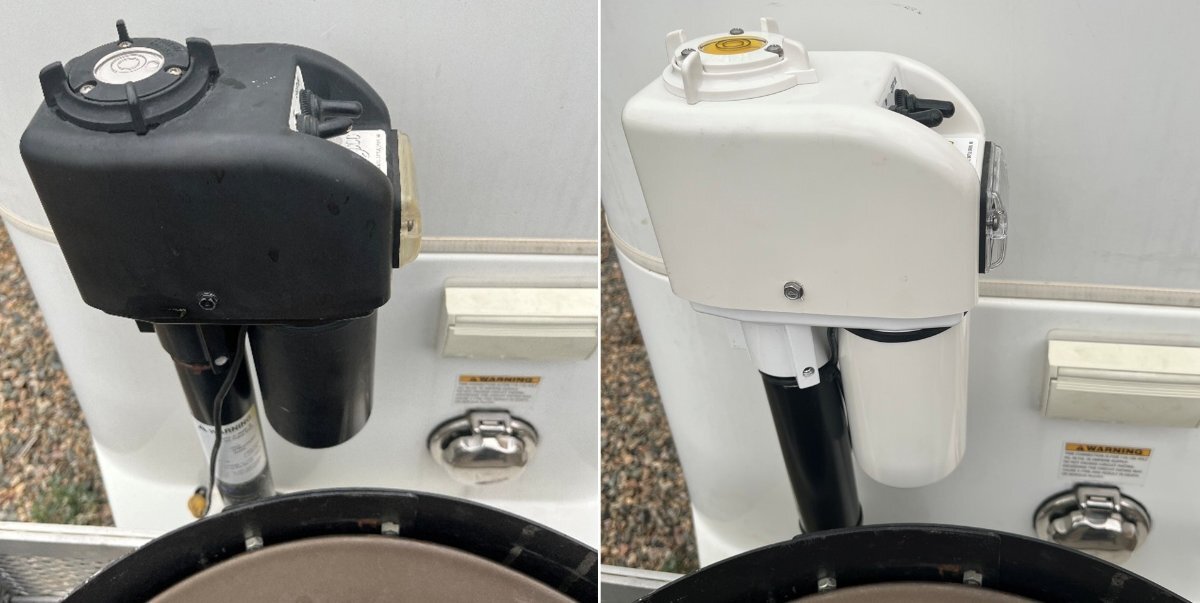
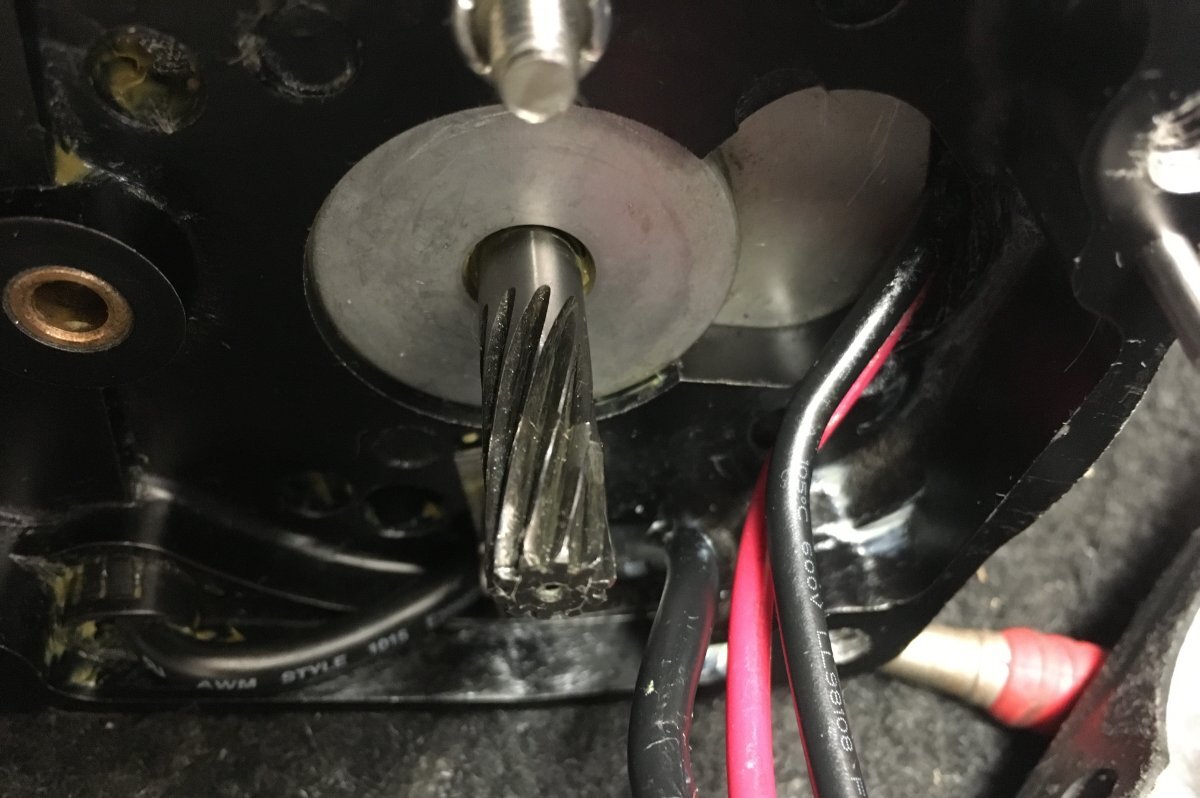
The failure on the rear curbside jack started with a clicking noise, the jack slipping not lifting and I could hear the motor slowing too. The worm-drive gear is connected to the motor, so the motor needed to be replaced. I figured I would rebuild both sides with new parts. Looking online it's near impossible to find these motors. I had the part number provided in the Barker VIP 3000 installation manual. I called Barker to see if they could provide an online retailer. A few minutes on the phone with Donna at Barker and she informed me that they sell remanufactured motor heads for only $75! I found some online listings at $150 to over $200 for the motor alone (but TG they on back-order)! I ordered two heads over the phone with shipping $185 total. Look at these beauties! Need a need front motor head? Call Barker! Three Allen screws, plug in power to the fuse and you're done in 5-min! Do you pay somebody to work RV service for you, like servicing jacks? You can replace the head for less money, new gears nicely greased, the switches are all new, shiny plastic casing - nice!
2 points
-
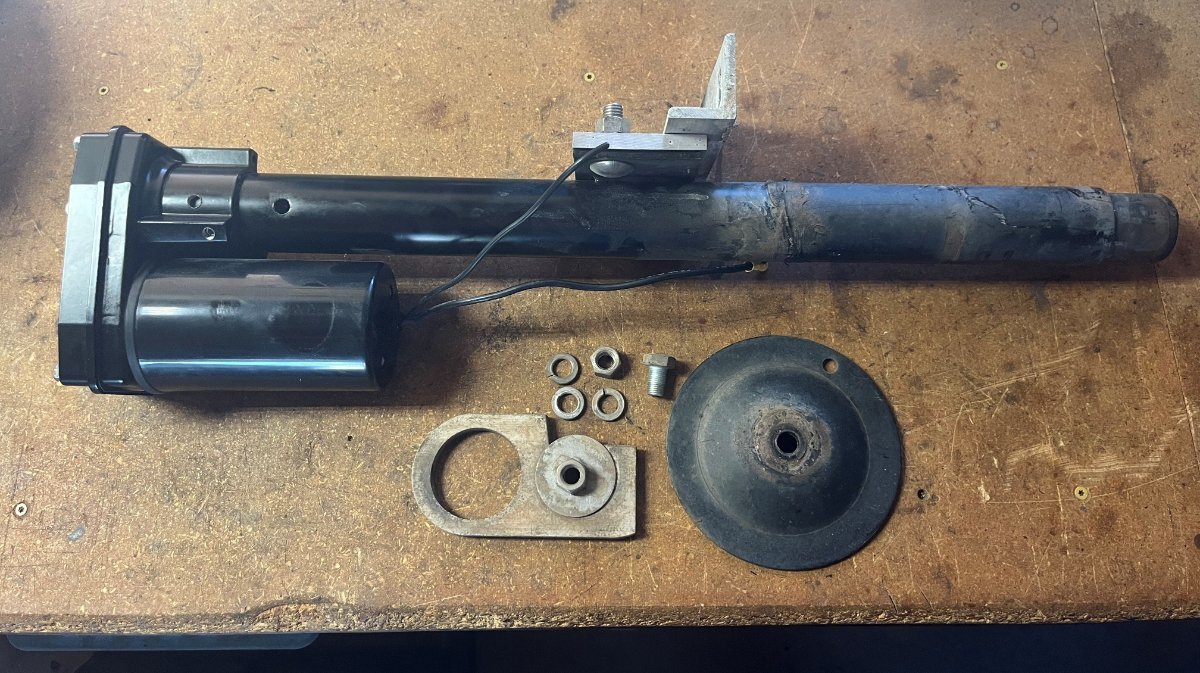
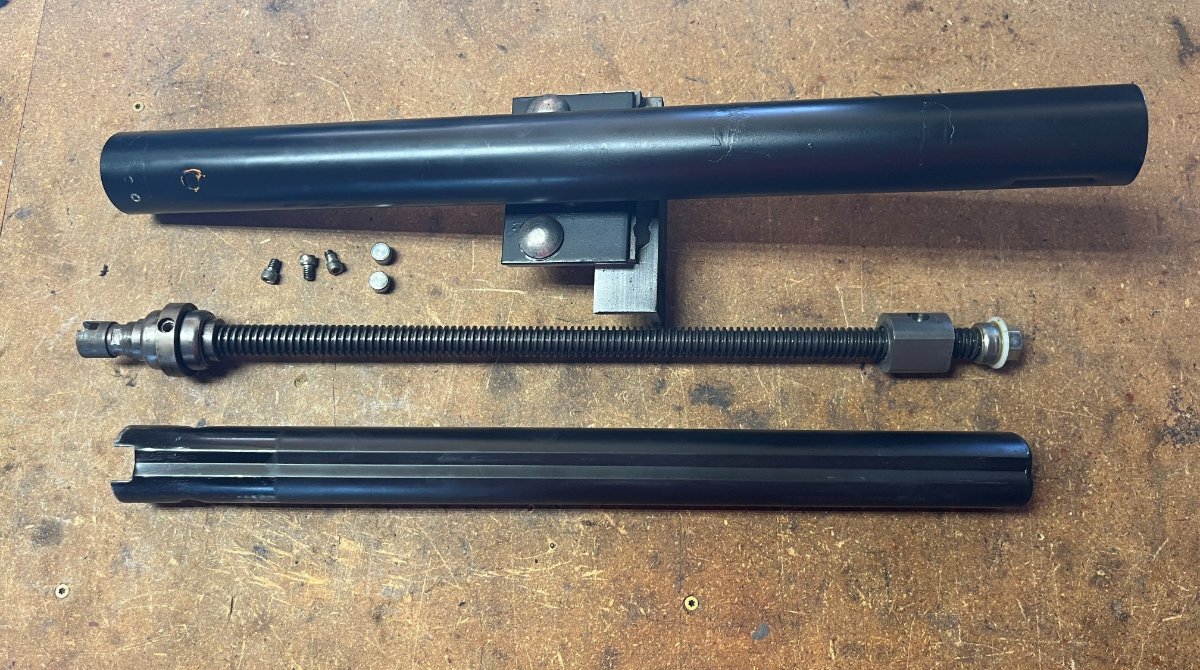
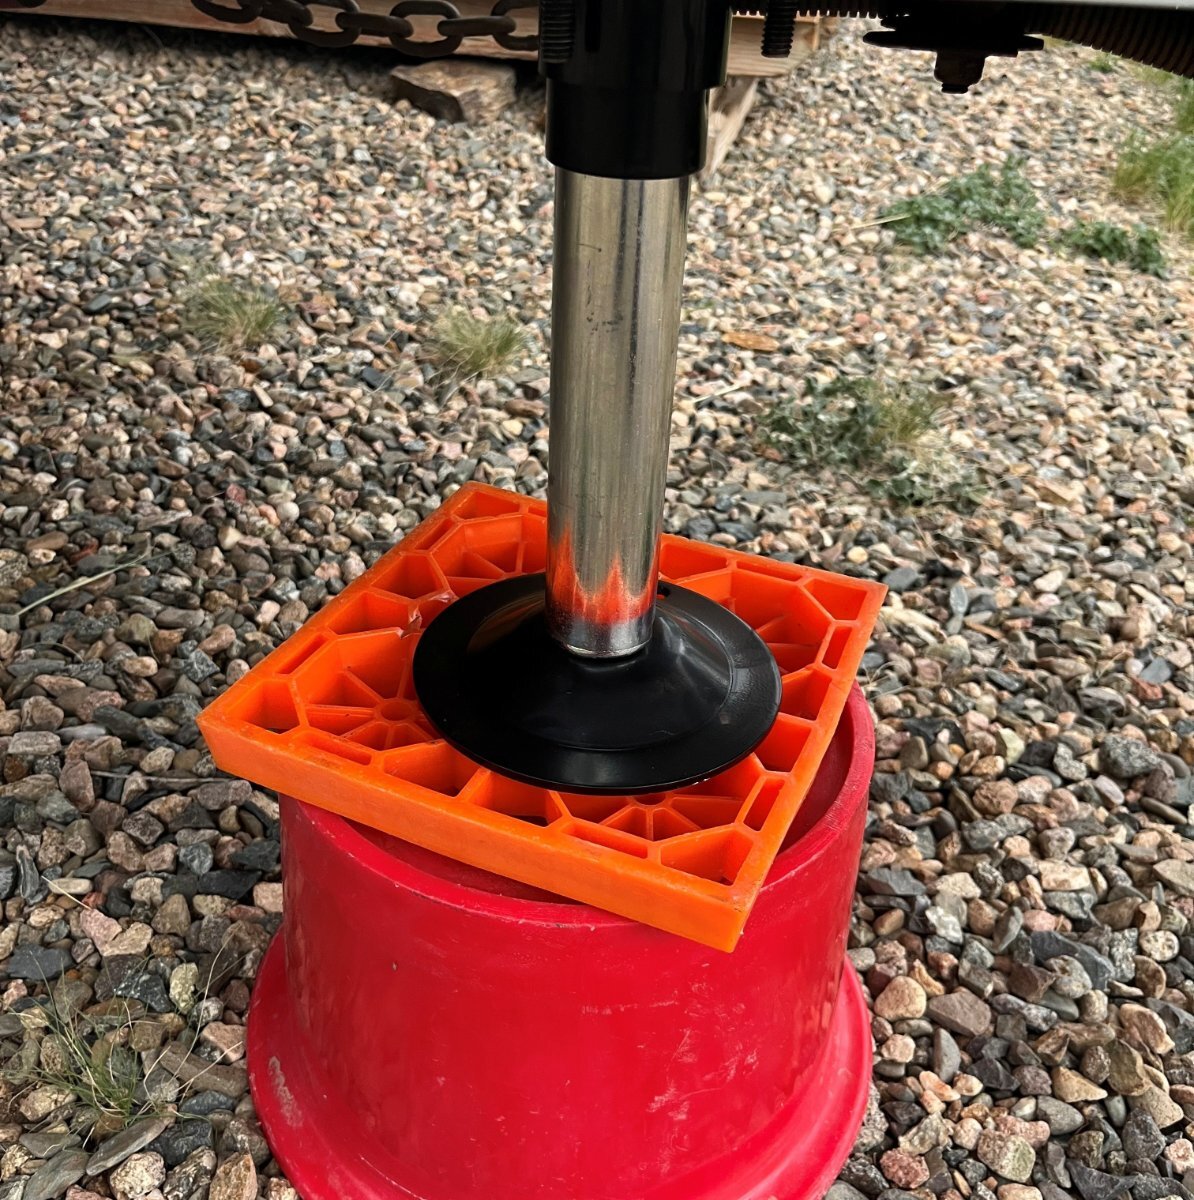
Then plan was to leave on our camping trip at the start of this week. One failed stabilizer jack put our trip on hold. I will finalize all repairs today, so we're now planning to leave to SW Colorado in a couple days. Good news is I have completely rebuilt, or replaced, all three (3) stabilizer jacks. Our 10-year-old hull now has new axles and full suspension and now all new jacks, besides all the new electrical systems, plumbing, etc. Our hull is now far better than a new one! 🤣 I will go through everything in the next few posts. Barker sells remanufactured jack heads for only $75 which I will explain fully, and many of you may want to consider this exceptional deal! Step one is removal of the rear stabilizer jacks. Using a 3/4" deep socket and impact tool if available, remove the jack foot and the nuts from the two long carriage bolts. Notice the markings on the posts where they contact the hull and support bracket below. I've seen postings here and on other forums about servicing the jacks. Never have I seen anything about servicing the posts. The post on the front jack, the standard Barker VIP 3000 jack cannot be serviced. The top on the jack is sealed, pressed into place. However, the OTT custom Barker rear jacks can be serviced. There are 3 Allen keys to remove motor head of the jack. You want to do that first. There are 3 more 1/4-20 Allen screws that hold the top of the screw drive to the upper/outer post. Once the top of lower post is revealed there are two steel pucks that hold it into position (see pics). Clean all parts and grease with Mobilith 460: https://www.amazon.com/dp/B07CTJ97SV?ref=fed_asin_title
2 points
-
The fuse rating should be based on the max load amperage plus a safety margin (+25%). Ah of batteries is not a factor except for runtime. The inverter is the largest load in an RV. Xantrex specs 350A as shown above. Victron specs 400A for the Multiplus II 3KVA inverter-charger. Best to go with manufacturer’s specs. The 400A is likely OK for the Xantrex too, or buy a 350A fuse and keep the 400A as a backup. OTT installed a 300A breaker which has little margin if your running at a 3KW inverter at capacity. But you would have to run your A/C and microwave on inverter simultaneously to get to near 300A! 🤣1 point
-
@aaronorange did you replace the OEM 300A breaker with a 400A breaker? It was not clear to me that the 400A was for testing purposes. If you haven’t had any issues with the 400A breaker, it may be that the 300A breaker was simply undersized for 390 AH's of batteries. Mossey1 point
-
It took over a week to arrive, but Amazon Used "Like New" condition came with the sealing tape open but everything else was certainly like new! They still have them for $86 on the link above, vs new at $116. I had to bring it to a dark bedroom for the picture. It's so shiny-new that anywhere else all you see is reflections (like the picture of the dual-burner @Ollie-Haus posted above). Thanks again Chris & Stacie! My wife Chris was very happy as I surprised her today with this cooktop. She said, "All the cooking shows use these!" 😂
1 point
-
This is a good addition. If I had to do it over again, I would add the ss washers. The heads of the bolts do embed too much.1 point
-
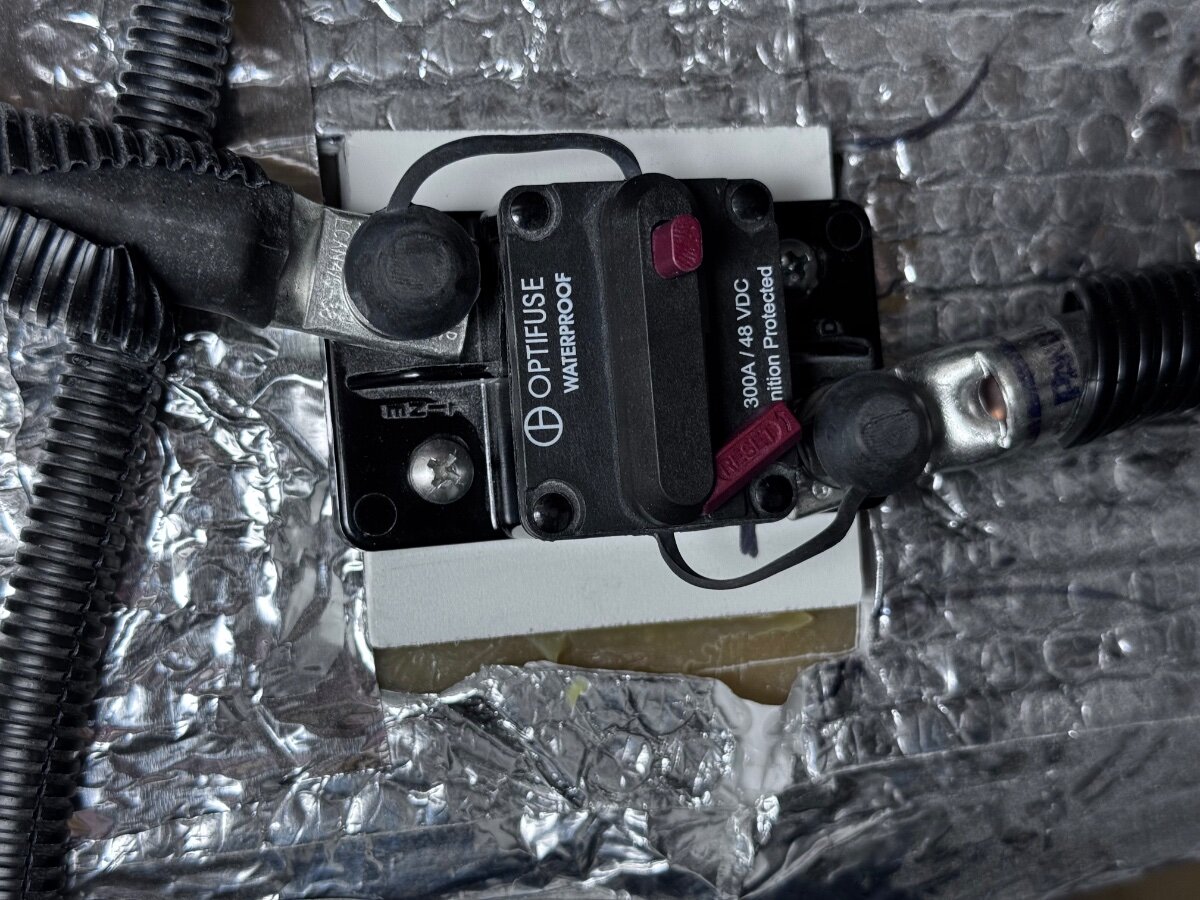
Mossemi- Sorry let me try to clarify, The Optofuse was between the 3 lithionics 130ah batteries and the 3000W Xantrex inverter/charger. (OEM from Oliver) My real question is does anyone use MRBF fuses, if yes what amp fuse are they using? Are they using one fuse or one on each positive terminal? Just wanted to see how others are handling the issue with the Optifuse breaker. I understand others are also having problems.
1 point
-
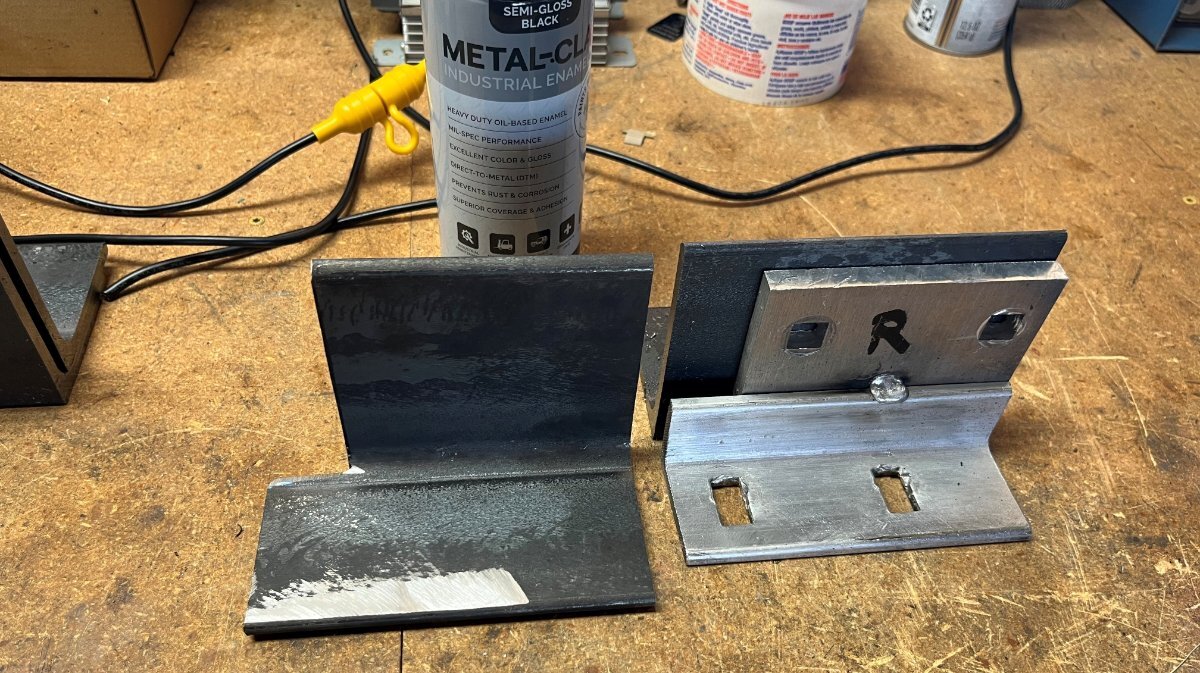
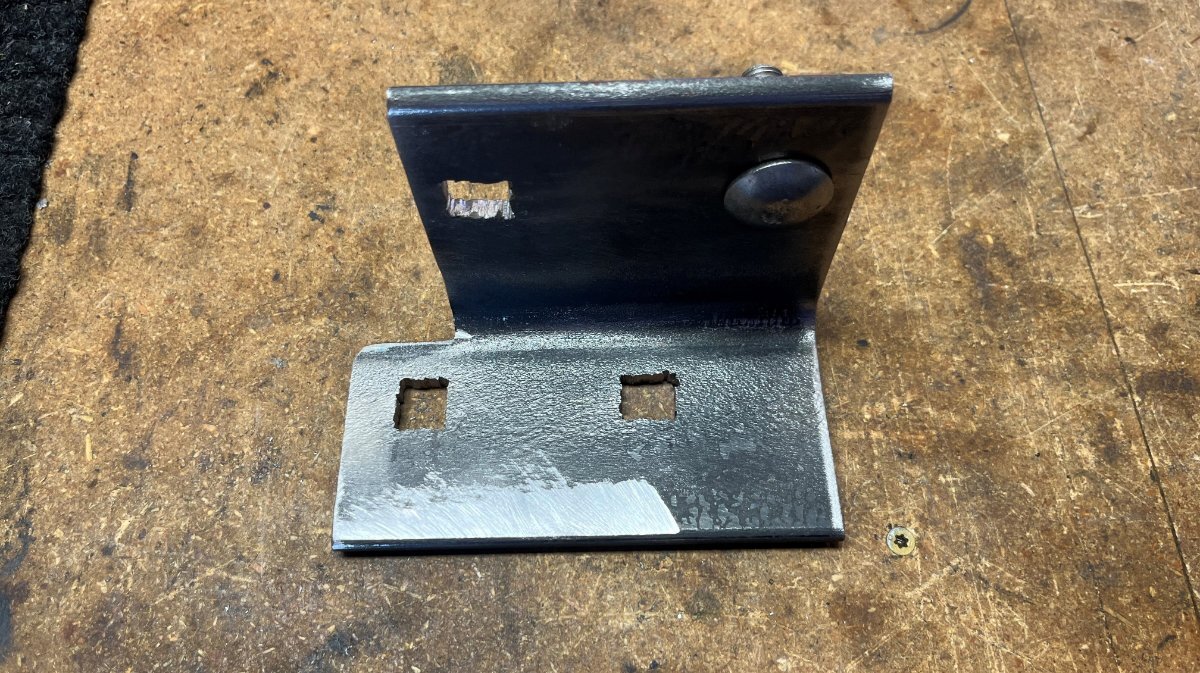
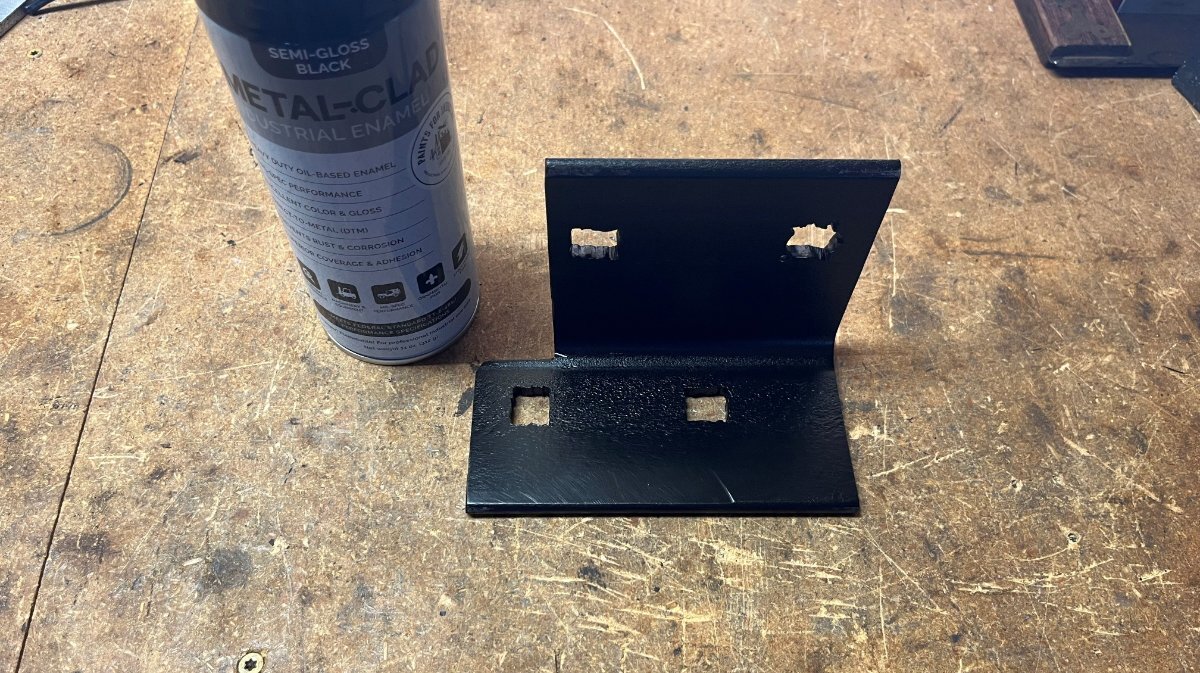
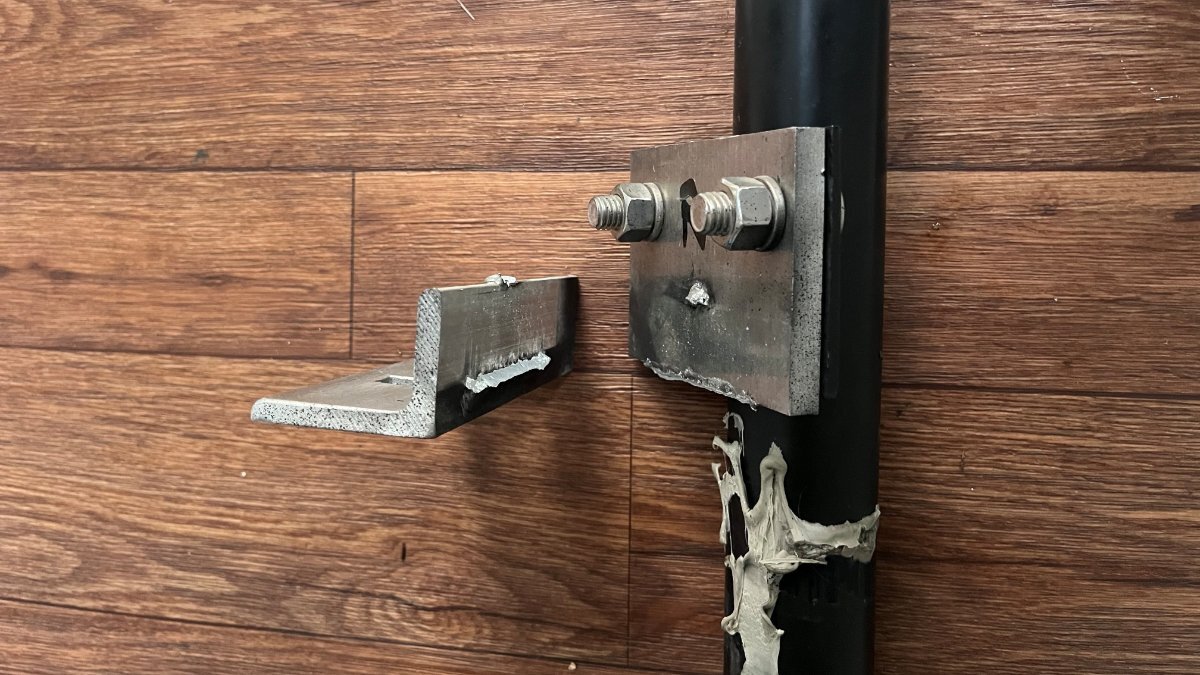
I could have had the aluminum brackets re-welded, but then I thought of a way I could fix this myself if I had the right 1/4" steel angle iron. OTT uses two pieces fitted together since they're easier to fit in place during installation. One piece would require the holes to be drilled in precise locations. Getting 4 squared offset holes to align exactly is no easy feat! 🤣 Solid steel must be stronger than 2 pieces of aluminum welded together. I went to Prescott Steel & Welding and they had the steel I needed and also referred me to a good welder that also works with aluminum. For $15 They cut me two 3x4" angle iron 5 1/2" long and another $10 for this Direct-to-Metal paint which is amazing! One coat, covers in seconds, no drips. Wish I knew of this paint in all my years of auto restoration! Must have taken me 2 1/2 hours total to fab this bracket. Being L-shaped there is no way to trace the original part, so measure and measure again and hope for the best! I drilled the 1/2" holes and cut the corners with a jigsaw. My first hole was not so clean, thinking I could drill 1/8" holes in the 4 corners (it didn't work). I purchased two brackets, but after I realized the other side had full welds, I just made one saving the 2 hours it would have taken me to make a second bracket. Both sides are done and tested. I still have the wheels up in the air on the side with the new bracket! 🤣 If the weld had not failed this rebuild project would have been done last Friday when Barker delivered the new heads. Beds are in and Chris is making the beds! We'll leave to Colorado by the weekend, a few days later than plan, but all the better! 😎
1 point
-
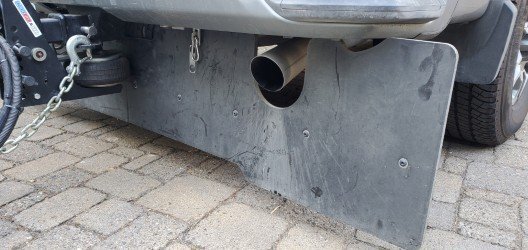
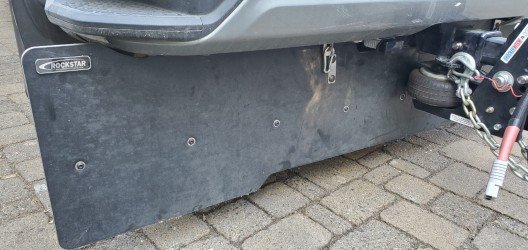
Took me a while to get to this.... I also have the Rockstar Commercial Flaps on my rig and really like it. My old flaps clamped on to my ball mount shank and were just OK. It made removing and placing the ball mount a very cumbersome and heavy affair. These are way more convenient to put on and take off since they are separate from the ball mount and do a much better job protecting the trailer from flying debris. Perhaps because they sit further forward under the bumper. My rig is gas but the cutout is similar I'm sure. Perfect fit. I added stainless steel fender washers to the bolts that attach the crossbar to the rubber flaps to spread out the load. The torque spec in the install guide was pulling the heads too deep into the rubber for my taste. Even with the washers, I didn't get as tight as was specified. But no issues with many miles on them. You'll love them! Cheers, Dave
1 point
-
Agree…this is the one I got that’s specifically for the barker jack. https://trailersphere.com/products/clever-cover-forbarker-jack-the-wenatchee1 point
-
For the couple of times during the winter months that you may want to check on the batteries I'm guessing that the price that Calmark would want to install an access flap would be a bit high. Living in western North Carolina, our temps don't usually get very cold for very long. I do not charge my lithium batteries from the time I put it to bed until about a month before I wake it up in the Spring. When I wake it up, I simply plug in a small (25 watt) solar panel and leave it that way for a month or so. Then when I uncover the trailer, the batteries are fully charged and ready to go. Bill p.s. But, as aaronorange says above - you should answer the questions he proposes before you decide what to do about your cover.1 point
-
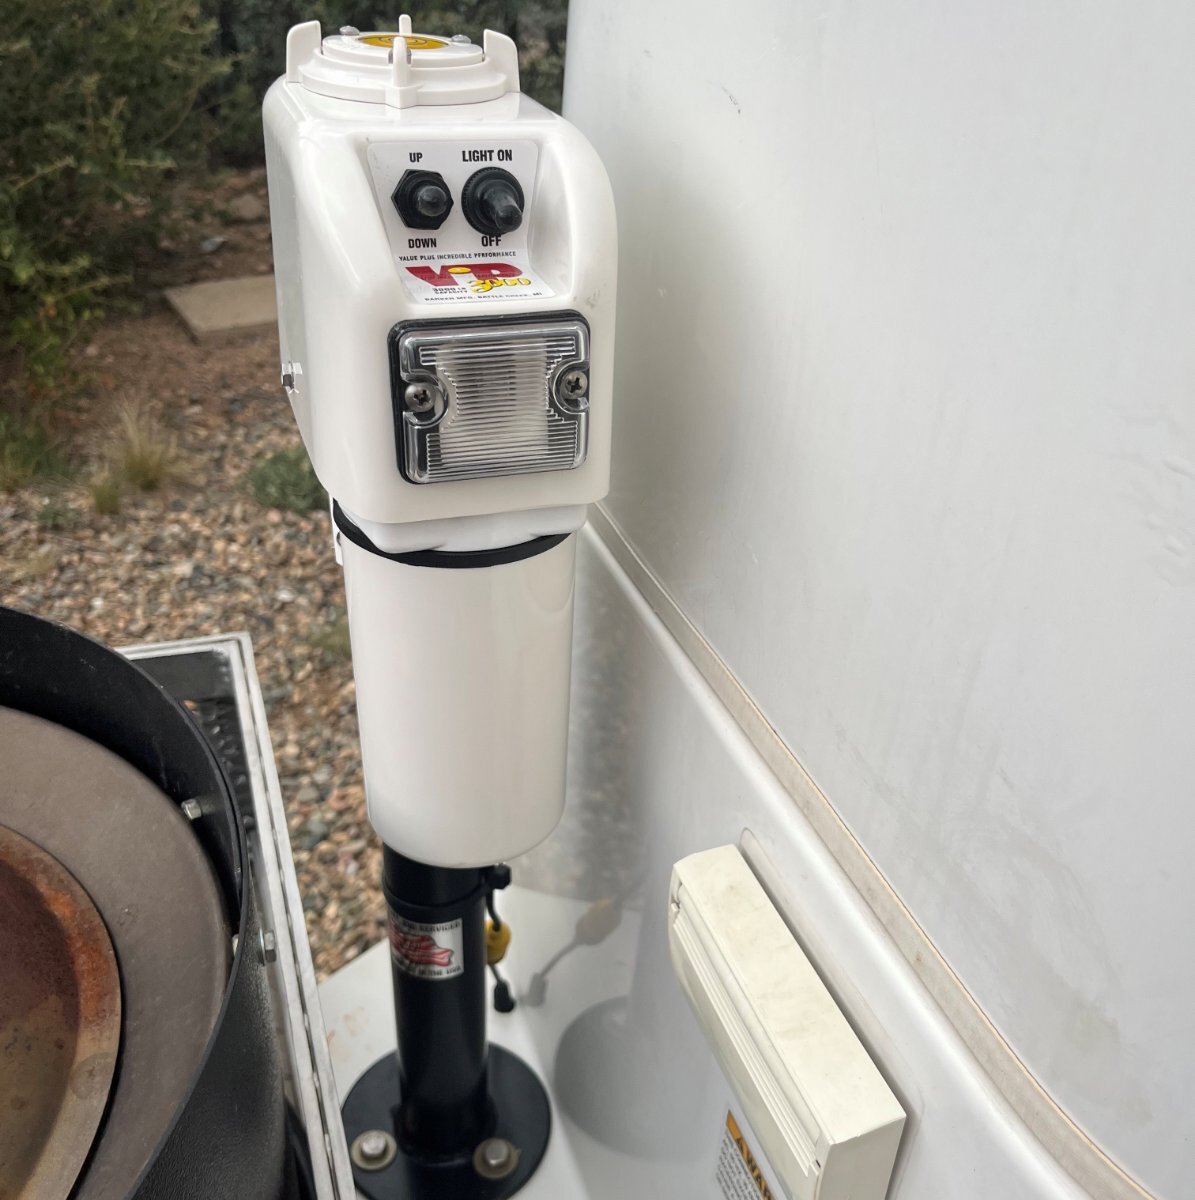
@jd1923 If you care - get yourself a cover for that new jack - the white ones yellow badly after a year or so out in the sun. Bill1 point
-
While I was online searching for VIP 3000 motors, I ran across an eBay auction. The listing was for a new-in-box VIP 3000 30826 (in WHITE)! Some of you know, I do have good luck in finding deals when it comes to my projects! 🤣 The eBay auction was for $250 plus tax and shipping but it also had the "Make an Offer" option. I offered $200 and he took it. Was $258.60 OTD? These are $500+ retail!
1 point
-
I'm thinking a good tech at Xantrex should get you up and running... But, if it turns out you need to replace the unit and want to swap with the same model, I would do this. This eBay Seller with decent feedback is an RV parts & salvage co, this item is open box, "guaranteed to work." https://www.ebay.com/itm/267389119450?_skw=xantrex+freedom+xc+pro The labor is simple, since the model is identical. Just disconnect your shore power and batteries, and solar switch OFF. Then swap wires from your original unit to the new one. $650 plus tax vs. $1,800 plus tax and labor! 🤣1 point
-
I installed GasStop RV Propane Emergency Shut-Off Valve Gauges on both propane cylinders, which are also useful in testing for minor leaks and purging lines when cylinders are first opened.1 point
-
June. She "got hitched" to Cash, the man in black, back in Sept of 2023. The picture will explain.
1 point
-
I serviced the front jack after we purchased our Oliver near 2 years ago. It sounded dry and the front lift jack is certainly used at least 2x more often than the rears. The rears are also protected from the elements. To date the motor/gear sounds on the rear jacks where good. I've been replacing the Dexter axles and leaf springs on our Oliver and using the rear jacks for the heavy lift, getting the wheels off the ground, a few times in the last couple weeks. Yesterday the curbside sounded like the motor was drawing too much current (slowing down) and then started clicking not lifting. The clicking sound was like the sound you get when releasing the jack, lifting the shaft too high hitting the stop, but it made this sound while pushing down to lift the trailer, only halfway up, nowhere near the 18" lift-height of the VIP3000. From rebuilding the front jack, I noted wear on the worm-drive gear that's attached to the motor (see picture of motor gear from my front jack service). If the rears show the same upon disassembly, I will need to replace the motor(s). I found this part with a quick search. I can buy 3 of these for the cost of one complete VIP3000 and we know the rear jacks have a custom weld that must be reused or replaced. https://highskyrvparts.com/barker-mfg-trailer-landing-gear-motor-16263 Have any of you have to service your rear jacks, including replacing any worn parts? I understand how to remove them and service them. I guess I'll only know after I remove the jack that is presently not functioning. See page 2 of this link to see the service I worked on the front jack. I will keep y'all posted on the repair... https://olivertraveltrailers.com/forums/topic/4094-how-to-vip-3000-electric-stabilizer-jack-service/page/2/#comment-94339
0 points
-
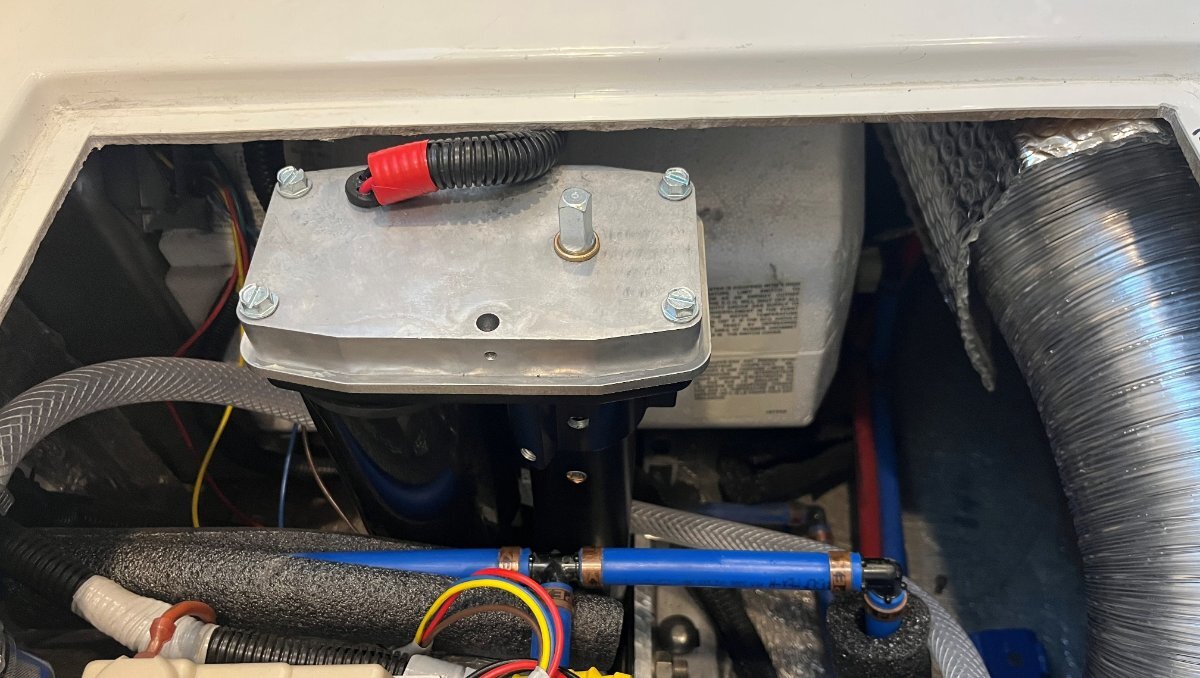
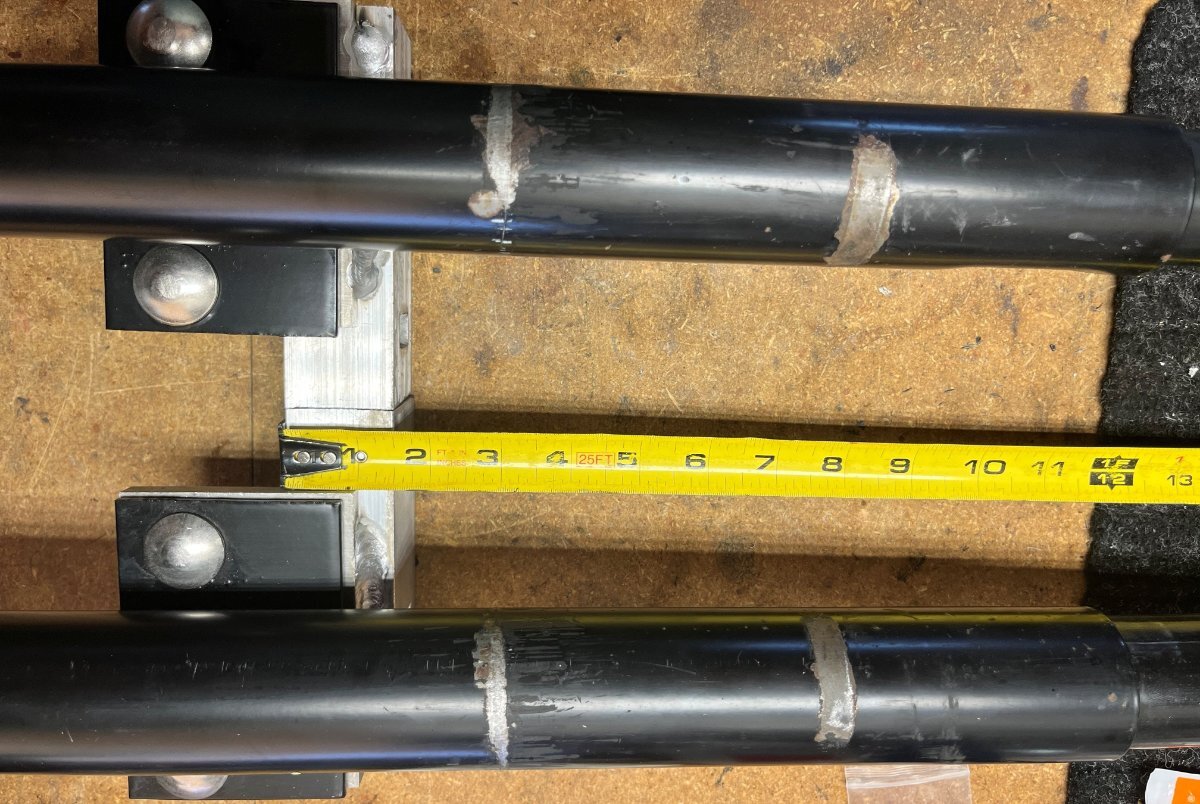
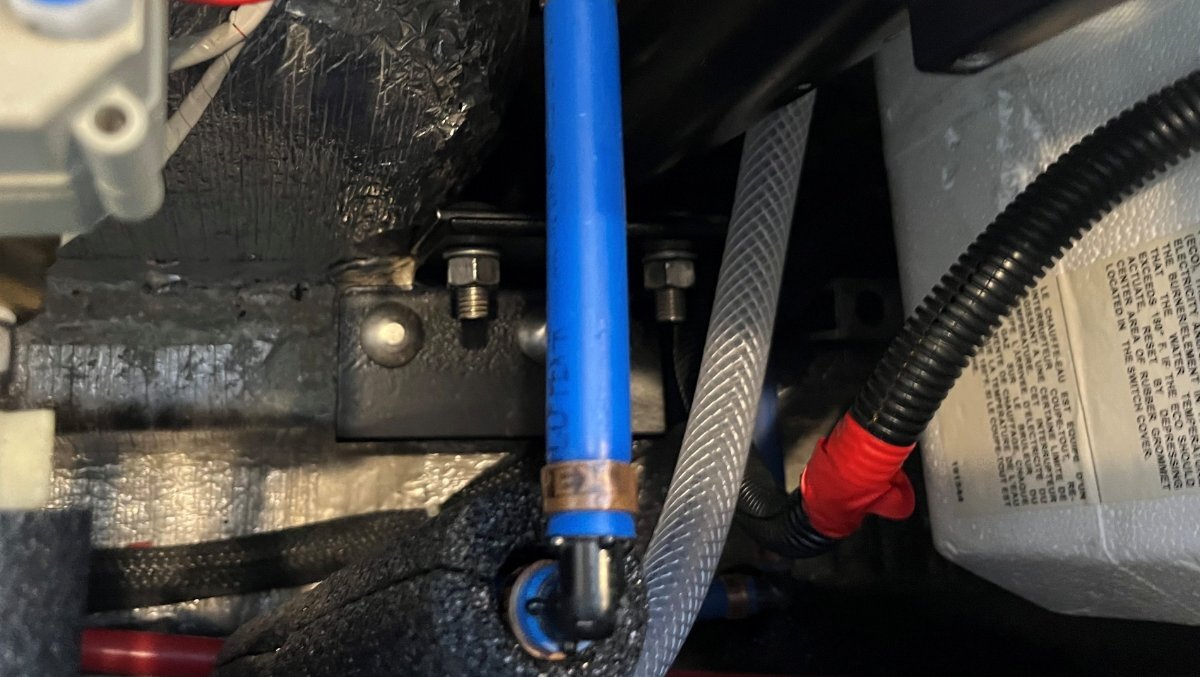
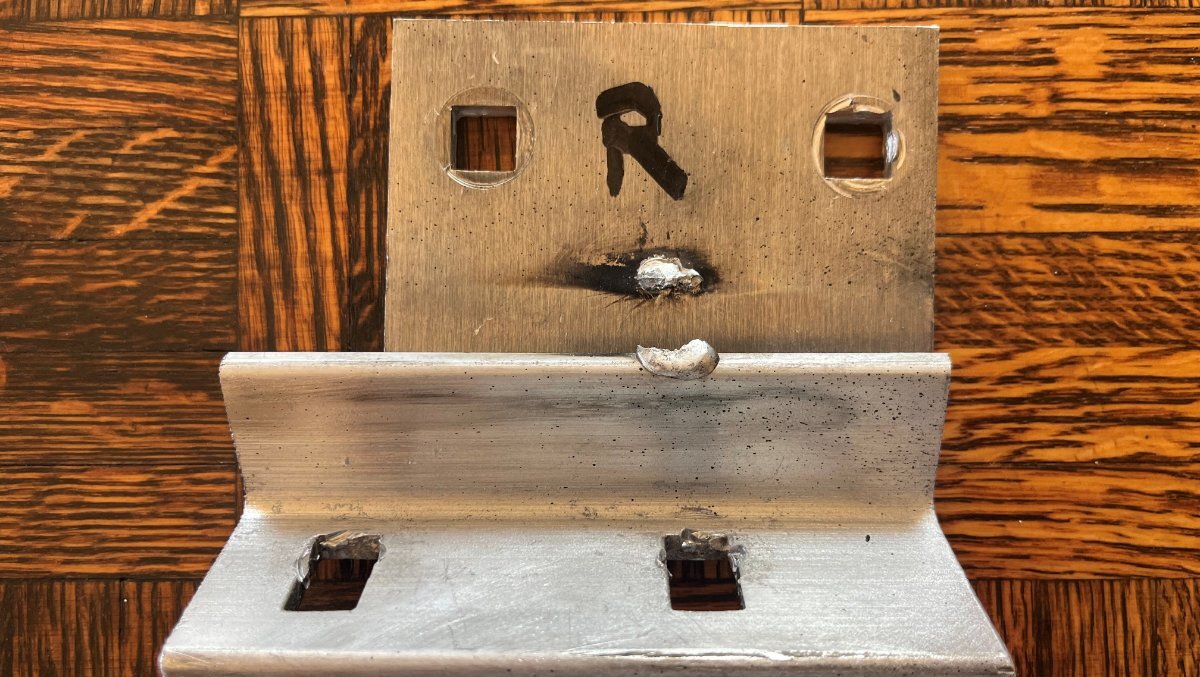
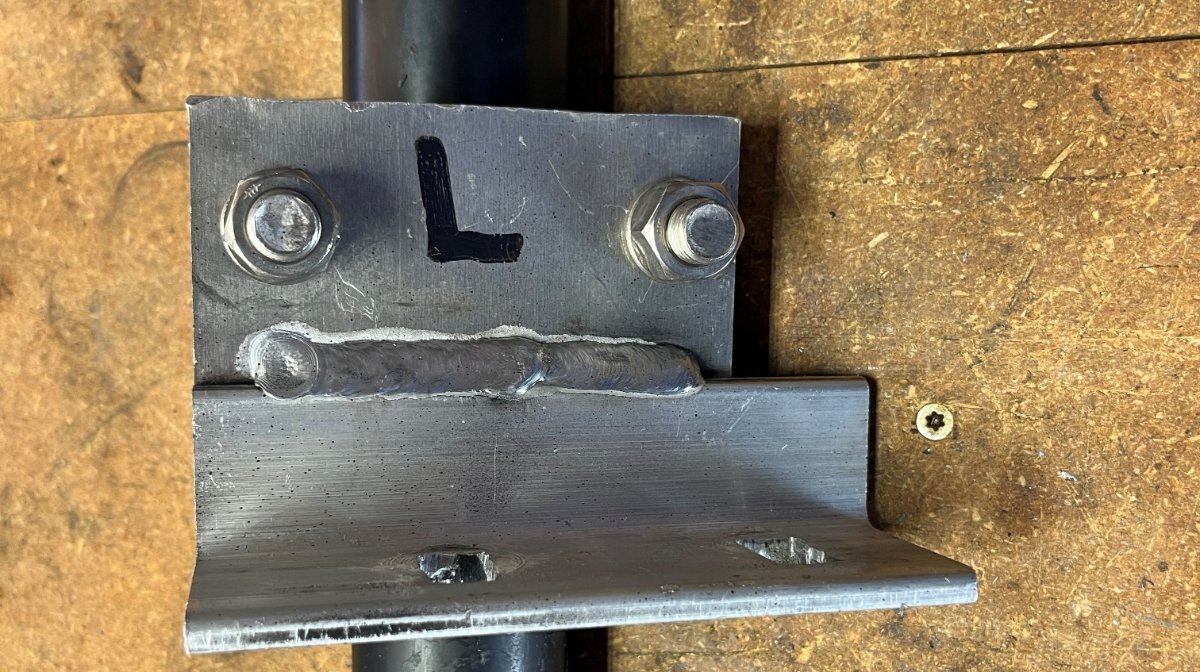
So, here's where this project went a little of course... Next step was to test the jack. Something happened that I could not imagine. It started lifting the hull, wheels not yet fully off the ground and BANG! The jack and hull dropped, OMG! 🫢 I asked Chris to come out so she could operate the button as I watched the jack. As soon as she pushed to lift the hull, I observed the outer post lift up into the hull. The outer should remain fixed, welded and bolted to the frame. I thought, the weld must have broke (it did)! I figured that when remounting the alignment would be slightly different and this could put new stress on the weld. I didn't pay much attention to the welds when it was out since they had lasted 10 years. I talked to a couple of Oliver Elders, first was Ken @mountainoliver who told me that years back some Oliver owners found out that OTT did not finish the welding job properly. Then a conversation with Steve @ScubaRx confirmed this fact! I wrote a Service Ticket and Mike at OTT responded promptly. He was thinking it was a Barker issue, but after our call I realized there was nothing OTT could do except perhaps pay for me to hire a local welder. IMHO, this was certainly an OTT installation issue. The installation procedure is to bolt the two aluminum blocks into position, tack weld them when in position, then remove the assembly to complete weld along both upper and lower surfaces. Turns out they forgot to finish the job on the curbside but did the full weld on the streetside (pics of both below). Next time y'all have your beds off and basement doors open, take a flashlight to inspect yours to confirm you have a full weld on top. Your top weld should look like my 3rd picture. If it only has a tack weld like the 2nd picture you need to remove the bracket (the jack can stay in place if you like) and have it fully welded properly. Thank goodness this happened while home AND that when it failed it did not damage the fiberglass under the bed. On this side we have 1/2" between the top of the motor head and the fixed fiberglass. When it failed it merely pushed the basement cover and bed up and down a couple inches.
0 points


-
Recent Achievements
-


")


")


")

