Leaderboard




Popular Content
Showing content with the highest reputation on 09/22/2026 in Posts
-
Craig, I would caution you about using paint to touch up your Oliver. Paint and Gelcoat are two entirely different coatings. I would suggest a quick google search or a visit to some boating forums to learn about the process of repairing damaged gelcoat. You didn't specify your issues, but if they are rock dings and such, I would not paint them. Paint will not age well, doesn't have the build of gelcoat, and cannot be polished with the rest of the trailer when that time comes (and it will). You will need to apply your 2 part gelcoat (it can be tinted and is a catalyzed product) to a properly prepared surface. Overfill slightly, wet sand flush, then polish out. Yes, it's a lot more labor than spraying on a coat of paint, but will give you far superior and much longer lasting results. My 2 cents. Dave5 points
-
What JD said. I'll have to try lifting the curbside of the trailer next dump. But I will say that because of all the afore mentioned design characteristics of the Gray tank, it is very slow to drain! Aren't the gray tanks also "L" shaped?? Which is why a curbside lift is a great idea to help things along. One thing I do is to open the back flow valve in the bathroom to help let more air in the tank when draining, I don't think there is a trap on that drain, seems to help. Dave3 points
-
I asked the factory about my paint / gel coat color 6 months ago. They did not have the information for my trailer (hull # 124). I solved the problem by taking the trailer's propane cover to a good automotive paint store. they had tools to shoot images of the gel coat and were able to match the color precisely. they can give you a code to mix the color needed.3 points
-
OK - I think I've got it. The reason that you have to raise the front of the Ollie to drain the tanks is common to all Olivers that I know of. This is because of the basic design of the tanks - they are fairly wide and long - but - not very tall since they have to fit between the inner and outer shells of the Oliver. The good news is that this design helps lower the trailer's center of gravity and more evenly distributes the weight of the tank's contents from side to side and front to back. In addition, the location provides protection to the tanks from sources outside the outer shell of the Oliver and given that in colder temperatures the area between the shells is somewhat warmer as compared to outside. Unfortunately, the downside to this location and design is that in order to completely empty the tanks, the front of the trailer must be elevated such that the liquid contents flow more completely (and faster) towards the outlet which is basically at the rear of the camper. Your 40% seems a bit on the high side but that could be a sensor issue (again, it really doesn't take all that much of a mis-placed sensor and/or the degree of level of the trailer to have a fairly dramatic effect on the reading). I think that most of us develop an idea/sense of when and how long we can "go" before these tanks need to be emptied and or what our readings really mean. But, in virtually all cases if we want to really empty these tanks, the nose of the Oliver must come up. Bill3 points
-
I put trim lok over the lighted Oliver sign. Thought it would be good insurance against leaks from the seals aging on the sign. Many folks have had that problem. Scotty2 points
-
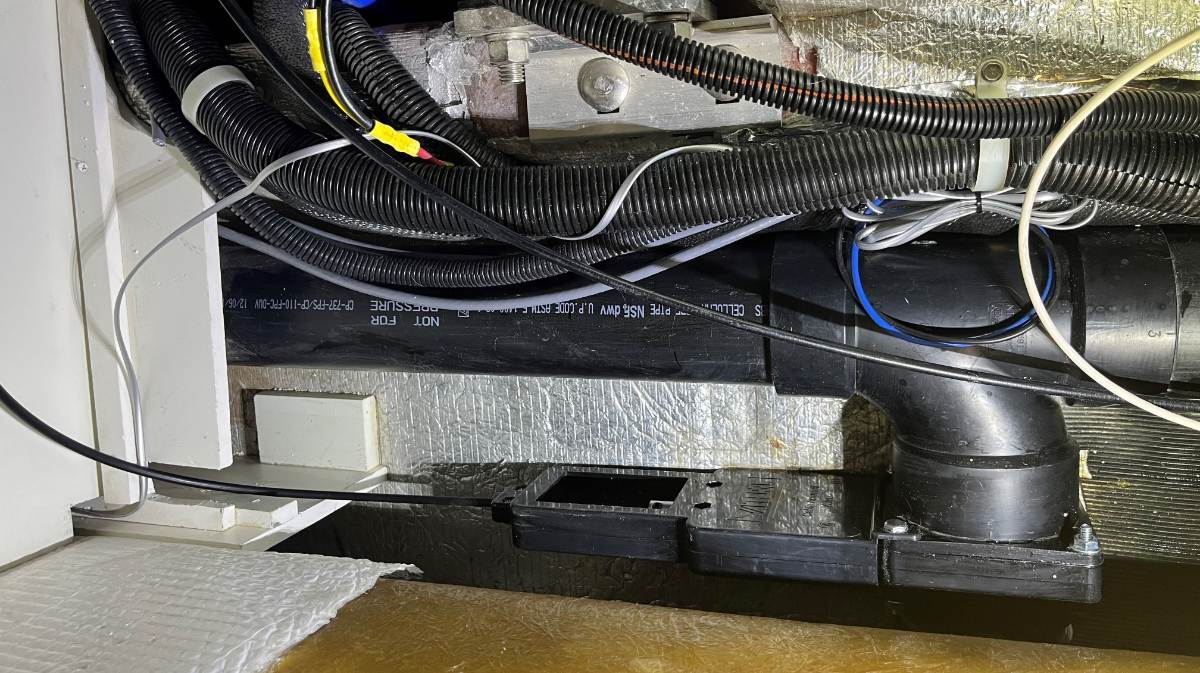
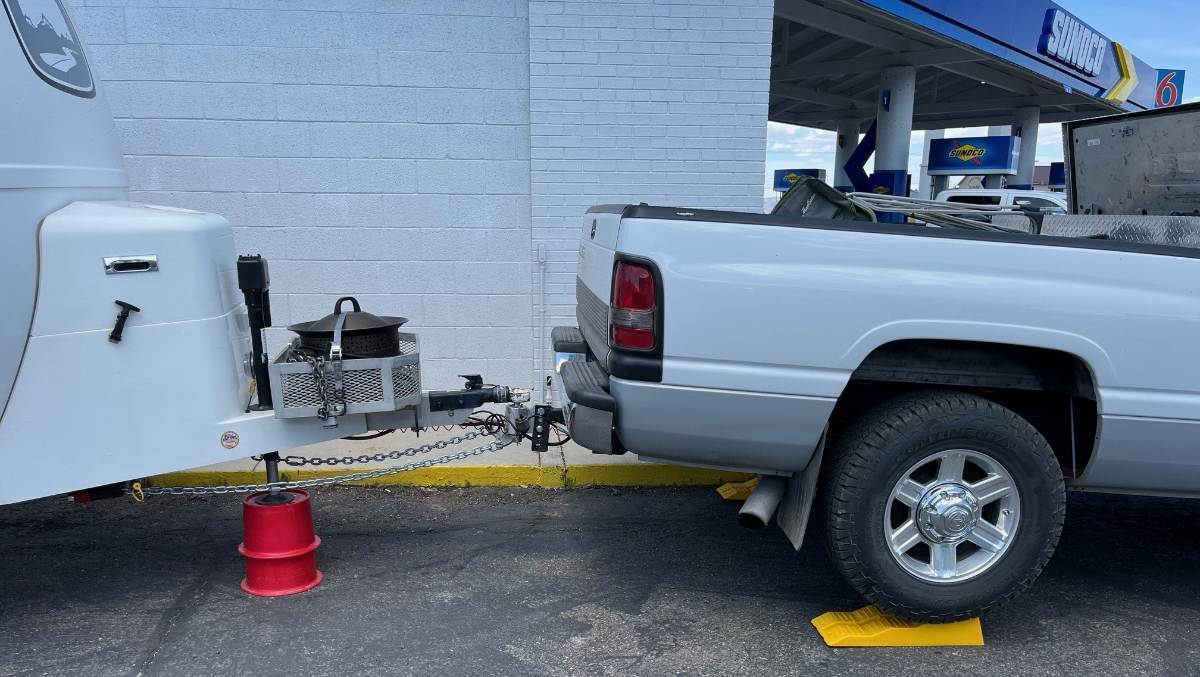
Lifting the front jack is a MUST at least 2-3" high. We read the LevelMatePRO app to know. If there are two ways you can pull into a dump station, enter to be driving uphill whenever possible. This should get the black tank 98% empty. The black tank is a taller tank and if nose up it should empty fully. The grey tank is another story. Besides nose up the grey will only fully empty when the curbside is also up 1-2". This is because the 4" waste line exiting the grey tank heads out from the rear of the tank towards the streetside (pic1). If the curbside is very low, the grey tank could be half full and not able to empty. Every time we dump, I'm taking our two 8" Andersen Blocks out of the truck bed, one under the front jack and one under the curbside jack, often lifting the curbside wheels up in the air. I lift the front up first and then pull the black valve, then I raise the curbside and pull the grey valve in this same order every time! Lift before you open the valves so that the waste water runs out most quickly. We had an extreme situation at the Sunoco in Cedar City UT. You had to back into the dump station which was uphill. It took all this lifting to dump effectively! 😎 (pic2)
 2 points
 -
Totally agree with Bill. Your readings seem high, but we always have to raise the nose when dumping. If we don't, we often have 6-12% left in the tanks (according to our monitors).2 points
-
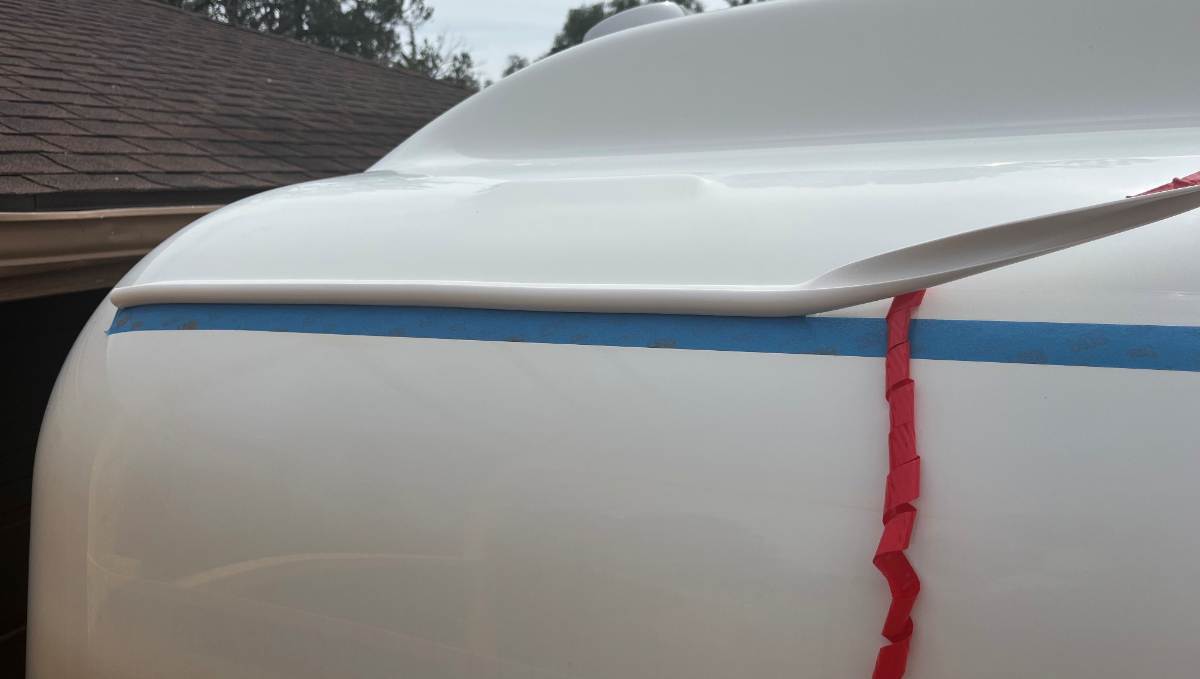
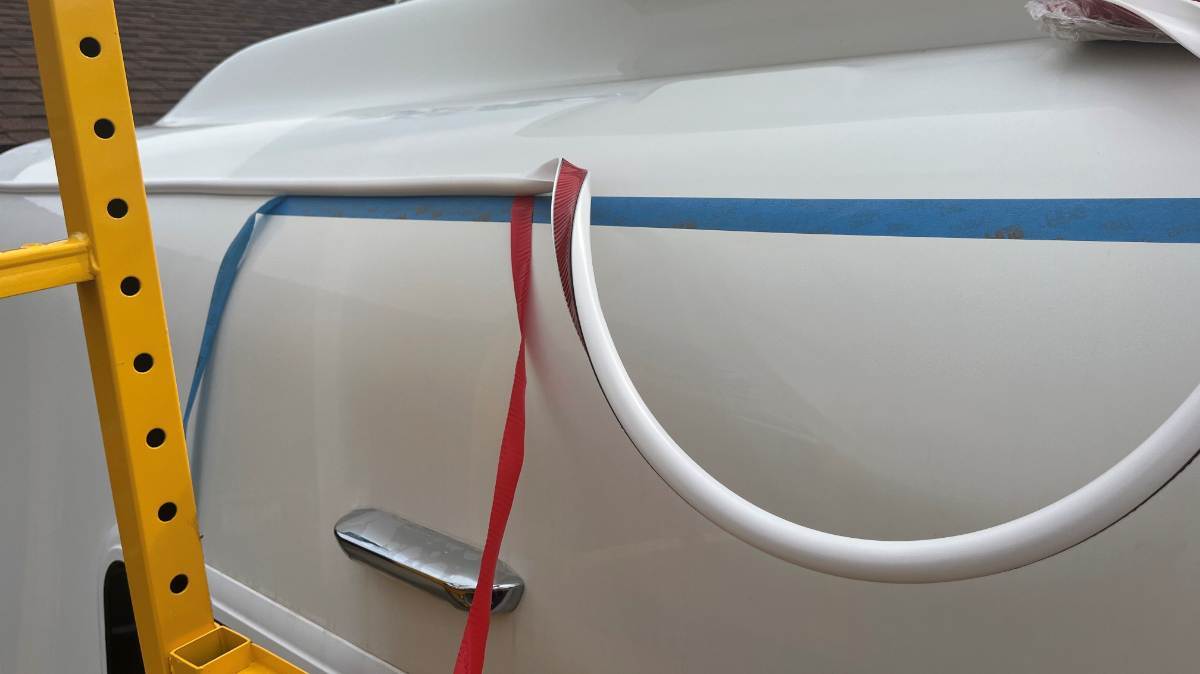
First step was to talk to my ceramic coating guy. I knew that 3M VHB tape will not stick well to ceramic coating. It's 39" from the bottom of hull belly seam to the bottom of the drip rail in the original installation. On the scaffolding, the floor set only 3 ft high to work at eye level, I measured 39" up about every 18" left to right and placed a 1" piece painter's blue tape just where the new drip rail will be (this step not pictured). Then I ran the masking tape the entire length of the hull. Next step was to sand off the ceramic coating. I carefully hand sanded just <1" above the masking tape, first using a worn sanding sponge and then 400 and 800 grit paper. Smoothing it with acetone you could see the yellow ceramic residue on the rags. Final clean with 90% rubbing alcohol. I was careful, but should have been more anal, laid a second line of masking tape so to sand exactly a 7/8" strip. Then, game on, VHB tape doesn't fool around! I cut the ends angled back using a hose cutter. Stuck down the first few inches just above the masking tape. You pull the red backing tape off only for the next length. You keep the 25 ft length coiled ahead of you. With an 8 ft scaffold, you also move it 3x as you work left to right. The product is a very soft PVC that can bend in any direction and stretch. You have to stretch it to get it in a straight line and then you have to let some tension off as you lay it down. It's not that easy keeping a straight line that long. I think it came out pretty good. I'm happy. From the ground it looks straight as an arrow! I took the final picture from up on a ladder so we can see the line. It is straighter than the "professional" who did the there other side and it's a good product which allows for a straight installation. 😎
2 points
-
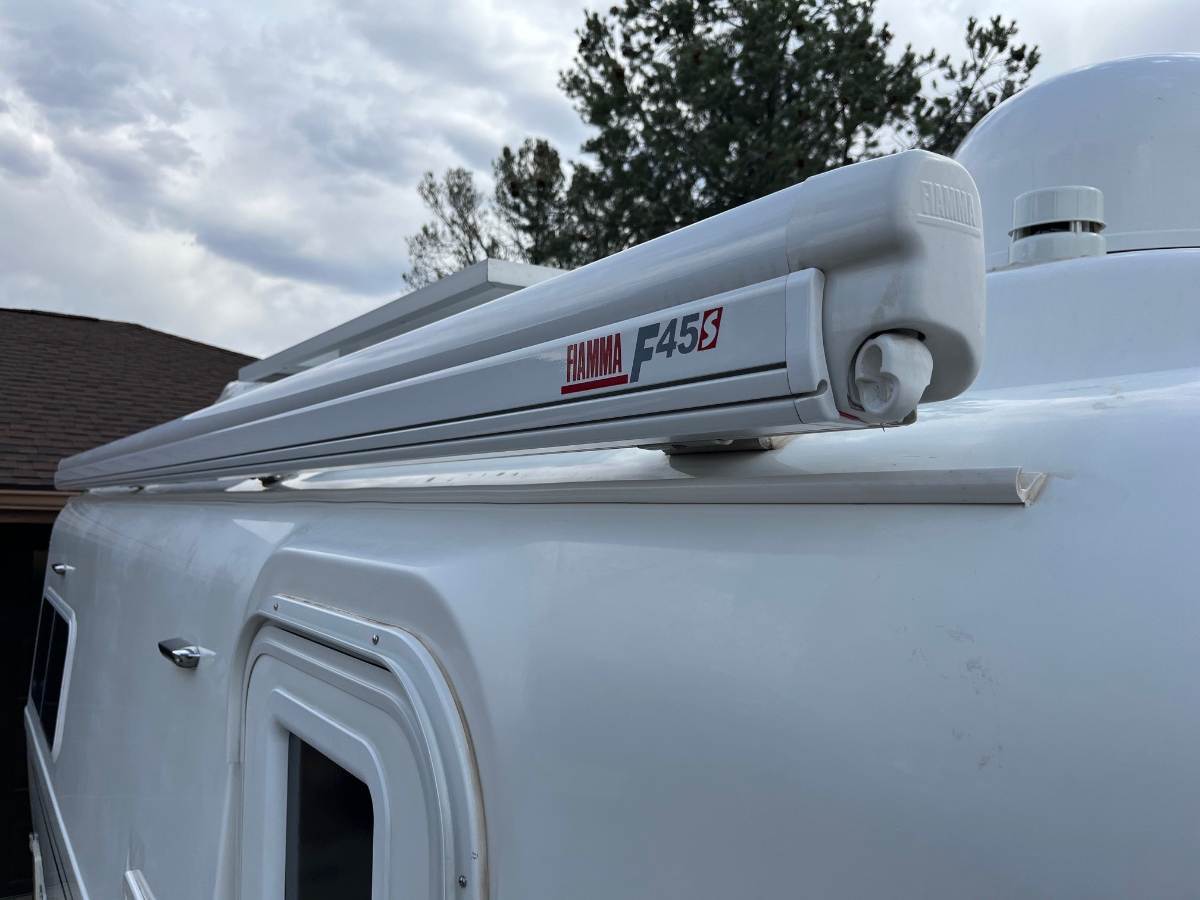
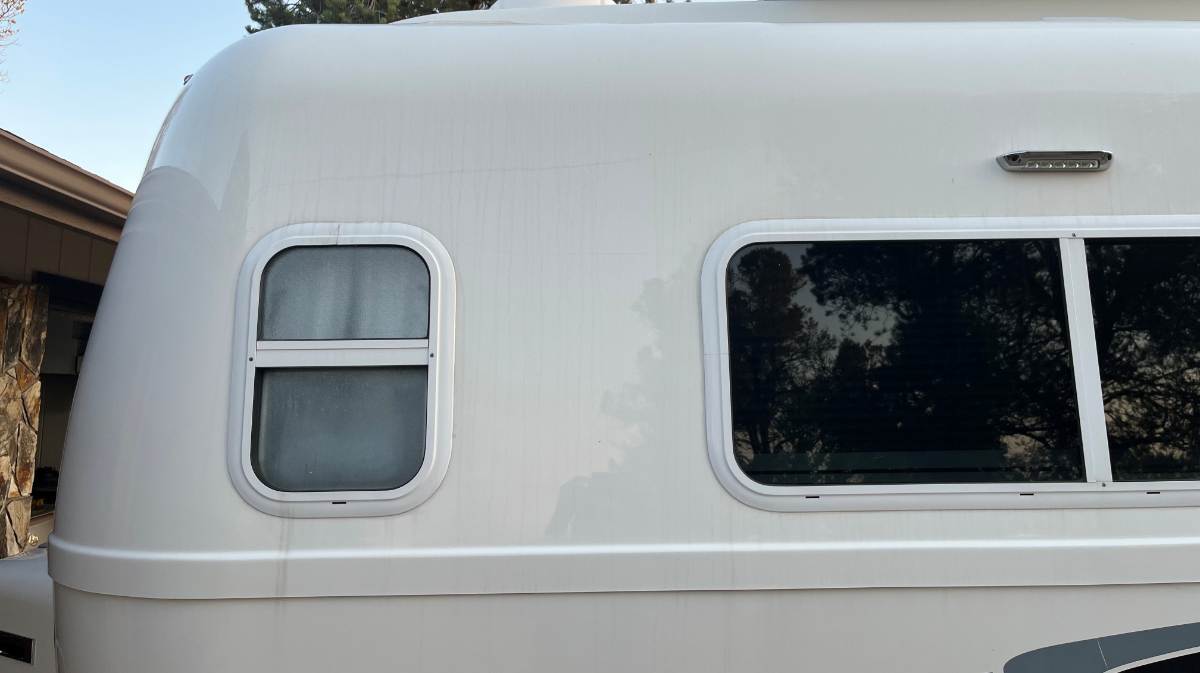
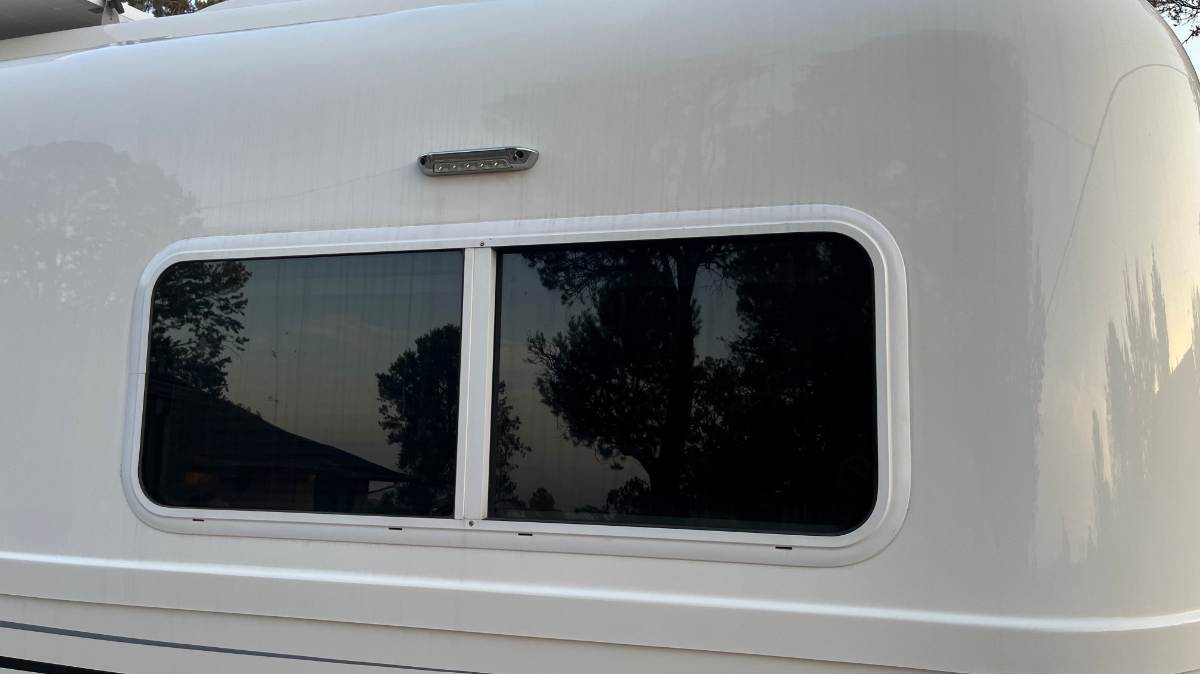
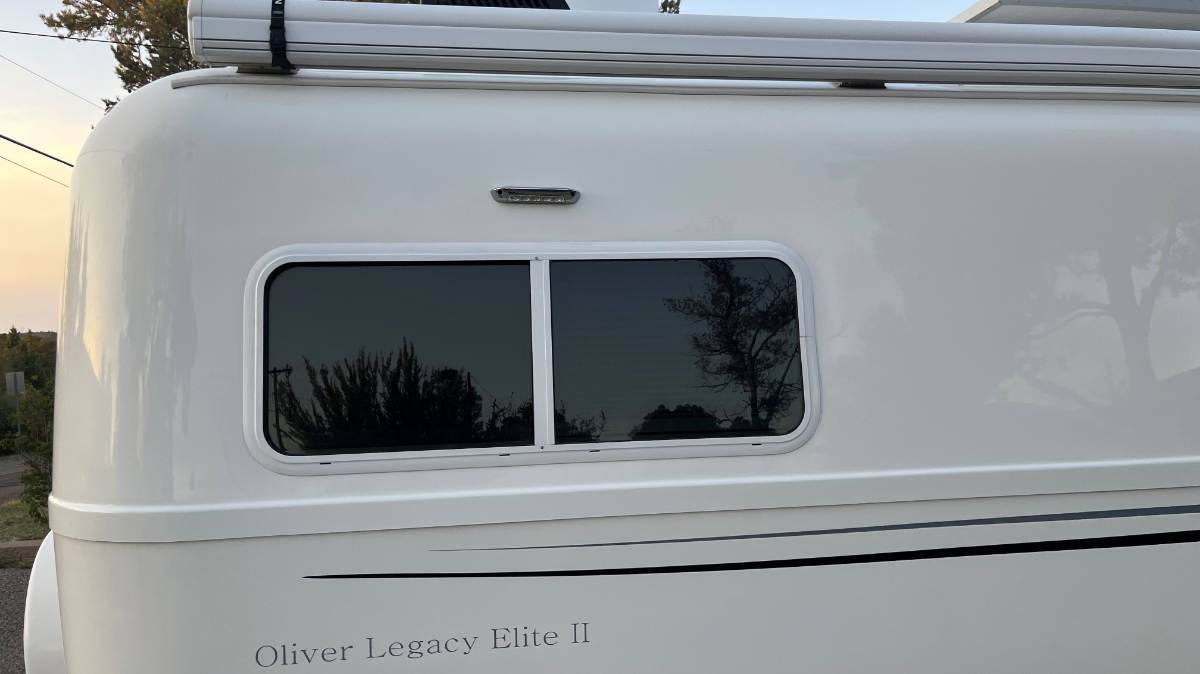
This came up in another thread recently, but I didn't post my installation there since the title of the old thread was "DO NOT use this product." 🤣 Turns out with the help of @ScottyGS the best product is the Trim-Lok Drip Rail: https://www.amazon.com/dp/B01CJRH19Y/ We've had streaking down the hull exterior mainly from nightly condensate (not much rain here). Our nights year-round are a 30F drop in temps and condensation collects on the roof and after dawn it will trickle down the fiberglass making dirty striping all down the body. It seems even worse after we made the investment in a full detailing and ceramic coating (we just notice it more). The first picture is from 2023 when we purchased out Oliver. Prior owner had remove the original gutter from behind the awning and installed this drip rail, curbside only under the awning and this thread will show installing one on the other side. The new Trim-Lok I purchased looks to be the same. The issue is, except for the the curbside where drip rail was installed there is dirty striping, not easy to clean. The next two pictures show examples of the striping and the final picture shows a picture of the curbside which stays clean! Next posts will detail the installation...
1 point
-
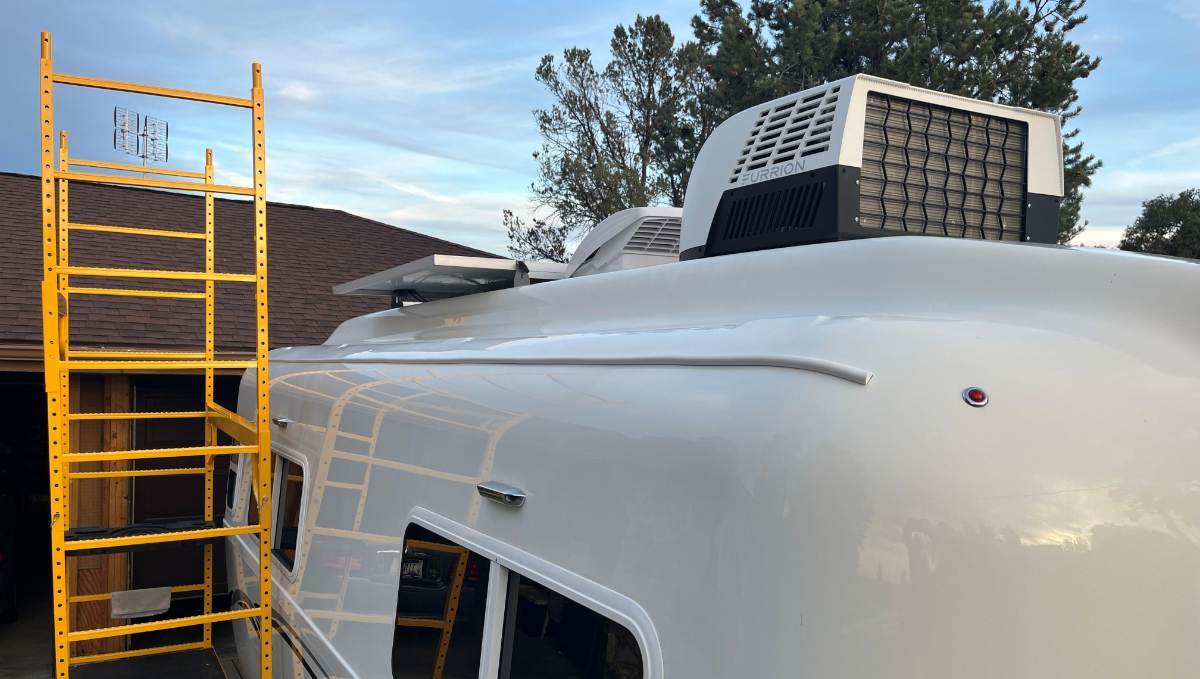
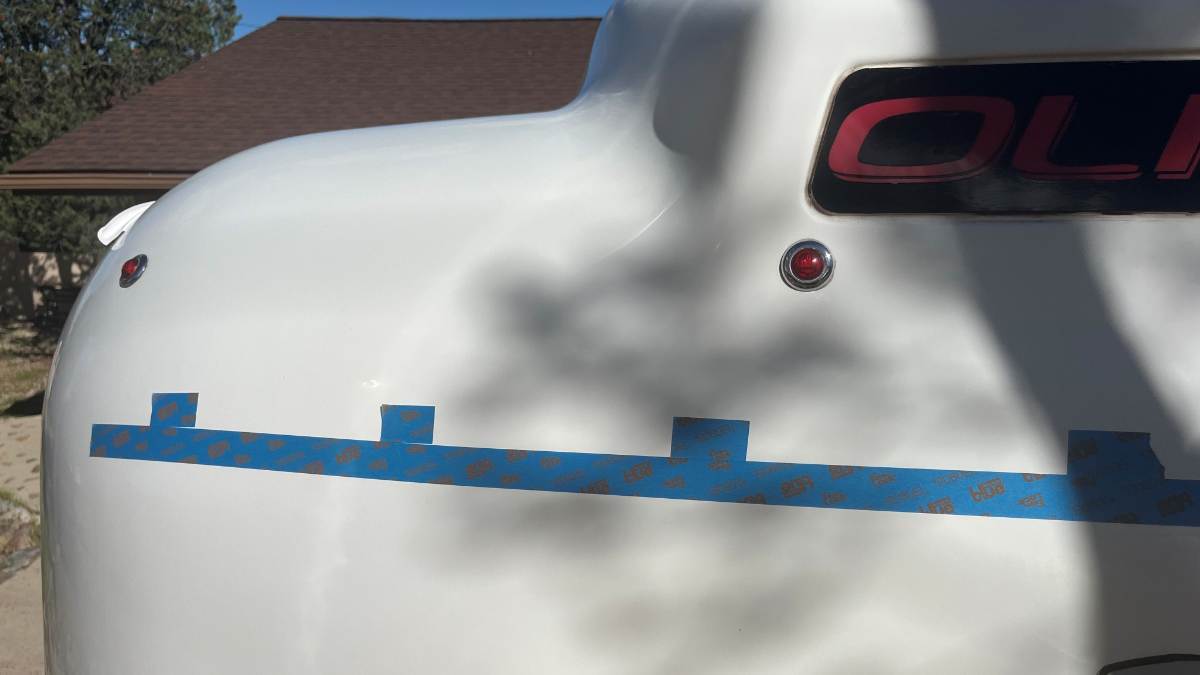
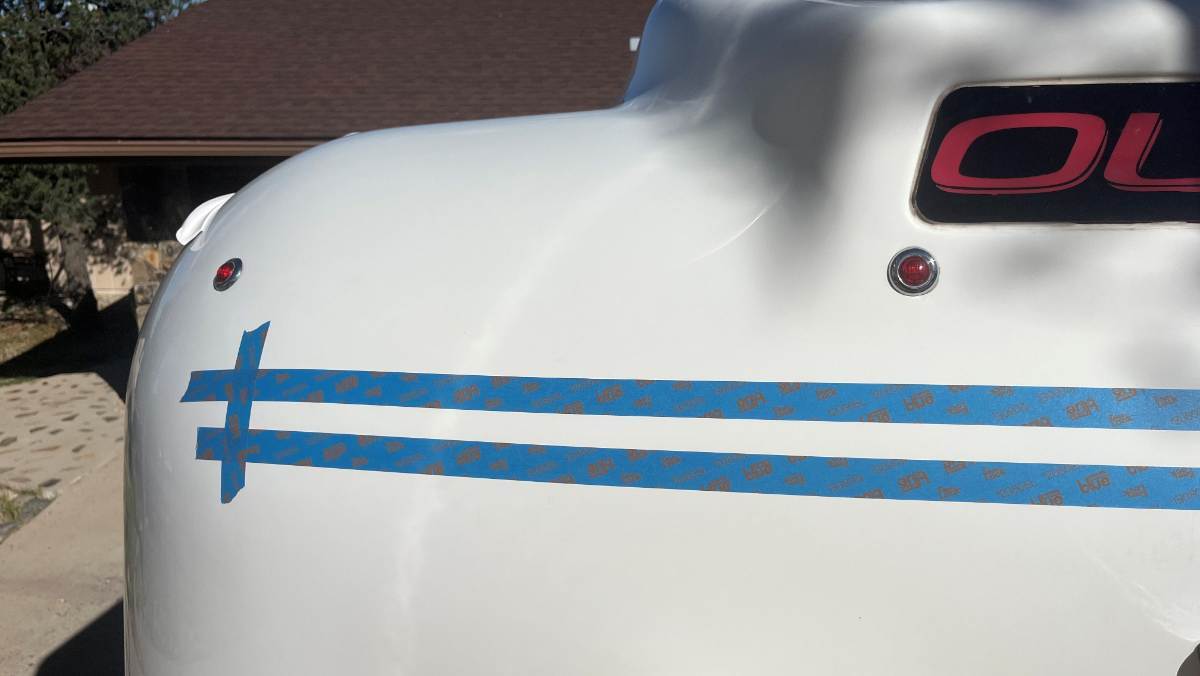
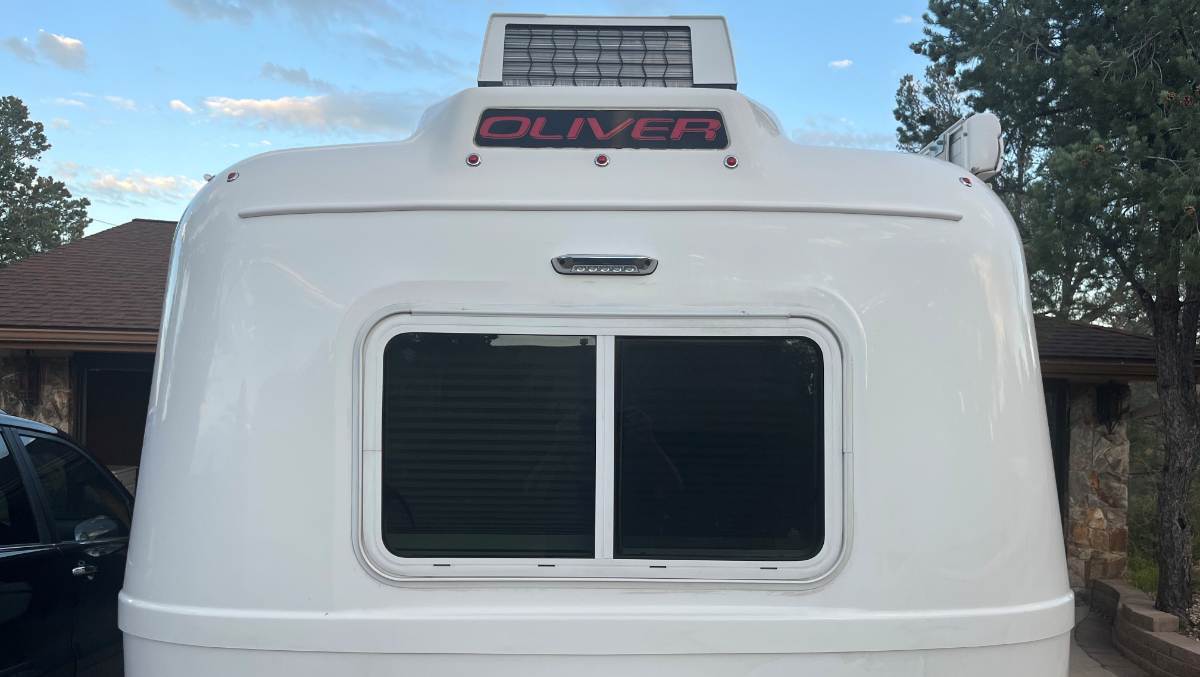
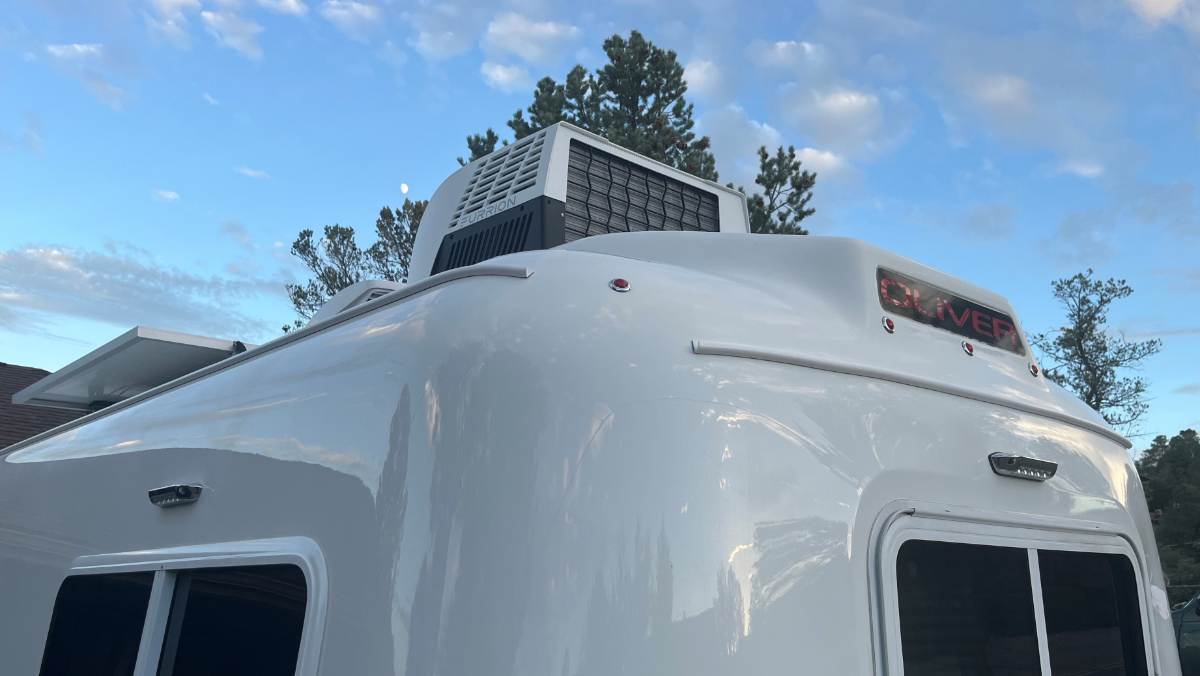
Next was to create a roofline drip rail to eliminate the streaking down the rear. This time I took pictures of my early steps. First thing to assure the drip rail will be straight and parallel to the hull is to measure heights. I use the hull seam, the belly bar or hull waistband so to speak. It protrudes quite a bit and holds the tape measure nicely. I used 39" on the side rail (bending it around the top curve) and 33" for the rear. I cut a bunch of 1" pieces of blue tape and stuck them to the scaffolding to have ready. On the side rail, I placed them about every 16" and about every 10" on the rear. You place these at the height you want the drip rail. Then you place one STRAIGHT long length of masking tape which becomes the lower edge of the rail. Then measure 7/8" spacing to place a second line of tape. I marked the center using the Oliver sign and the 3 little marker lights and taped the end points 28" each way, 56" of drip rail for the rear. I made both drip rails 1/4" lower on the ends. Then sand the gap smooth, use acetone to remove the ceramic residue. Then remove the top line of tape and use rubbing alcohol to clean the area. Now it's time to place the Trim-Lok drip rail. After Bill's mention above, I read some of the "Window Gutter" threads. There was talk about installing on a hot day and maybe a heat gun, but none of that is necessary with the Trim-Lok product today. This product is great. It was 76F when I finished yesterday and the product is very flexible, keeping the straight line is the deal. BTW, our Furrion Chill Cube has never overflowed condensate since it is designed to use it in cooling the condenser fins, but if we are to camp in a hot humid location, you can see where the condensate would now be channeled. Our nose is always up a little higher and lift the curbside jack 1/2" taller than the streetside and any dripping will go down the corner area pictured. The massive Pinion Pine on the edge of our property makes the Chill Cube look even taller! 🤣 If you're on the highway one day, following an Oliver that has a rear drip rail and a matching rear porch light, that would be us in Hull #113! I like how the two drip rails come together in both rear corners. The back corner surfaces will get dirtier but an easy area to clean. And the old girl still looks nice and shiny now 10 months after ceramic coating! 😎
1 point
-
I always dread a dump station that aims my rig nose down.1 point
-
In prior conversation a few years ago with Jason Essary at Oliver Service, I learned that Oliver Service would have to physically see your Oliver to match your paint and gelcoat in order to properly match/repair chips. Oliver no longer maintains any history paint colors. I think @taylor.coyote has offered the best remedy. I would also suggest calling a local fiberglass boat/yacht club as they can be a great resource for mobile fiberglass touch ups if you want it done professionally. DYI touch ups more often than not end up looking like DYI touch ups 😕 and will highlight your chip repairs vs make them disappear. I had 8 mil XPEL PPF (paint protection film) installed on the front blast zones of our 2020 Oliver LE2 and am glad I did. It really has helped preserve the gelcoat especially on the front corners, dog house aka propane tank storage. I also had it installed under the quarter panels front to back.1 point
-
Yep - Twist was treated to the window gutters a number of years ago. There are numerous threads here on the Forum concerning these window gutters - from installation to length of gutter for each window. Bill1 point
-
@jd1923 my screen was WAY up in the pipe, there was no reaching it with a finger. Only a bright flashlight revealed the screen up in the pipe. Not sure if they are all like that was products change constantly, but you'd think there would be a screen somewhere.1 point
-
Next years rally is June 8th through June 13th, 2027 at Shore Hills Campground Boothbay, Maine Oliver Mini Rally 2026.mp41 point





-
Recent Achievements
-