
Townesw
-
Posts
567 -
Joined
-
Last visited
-
Days Won
24
Everything posted by Townesw
-
Thanks Jason! This new forum software looks great! Questions: 1)On the old forum I could click on the banner at the top to go to the Oliver website. Clicking on the banner above no longer goes to the Oliver website. How do I get to the Oliver website from this forum? 2)There used to be a “slide out” or “drop down” menu with a tab to access Service. How do I access Service now? 3)How will posts created in the old forum react to being modified in the new forum? The following picture is a test insertion And we can now insert videos B6B3F93C-8AE7-416C-AE1E-C6CCE4A1A808.MOV

-

Looking for the best way to change out the bathroom faucet
Townesw replied to Markmck's topic in General Discussion
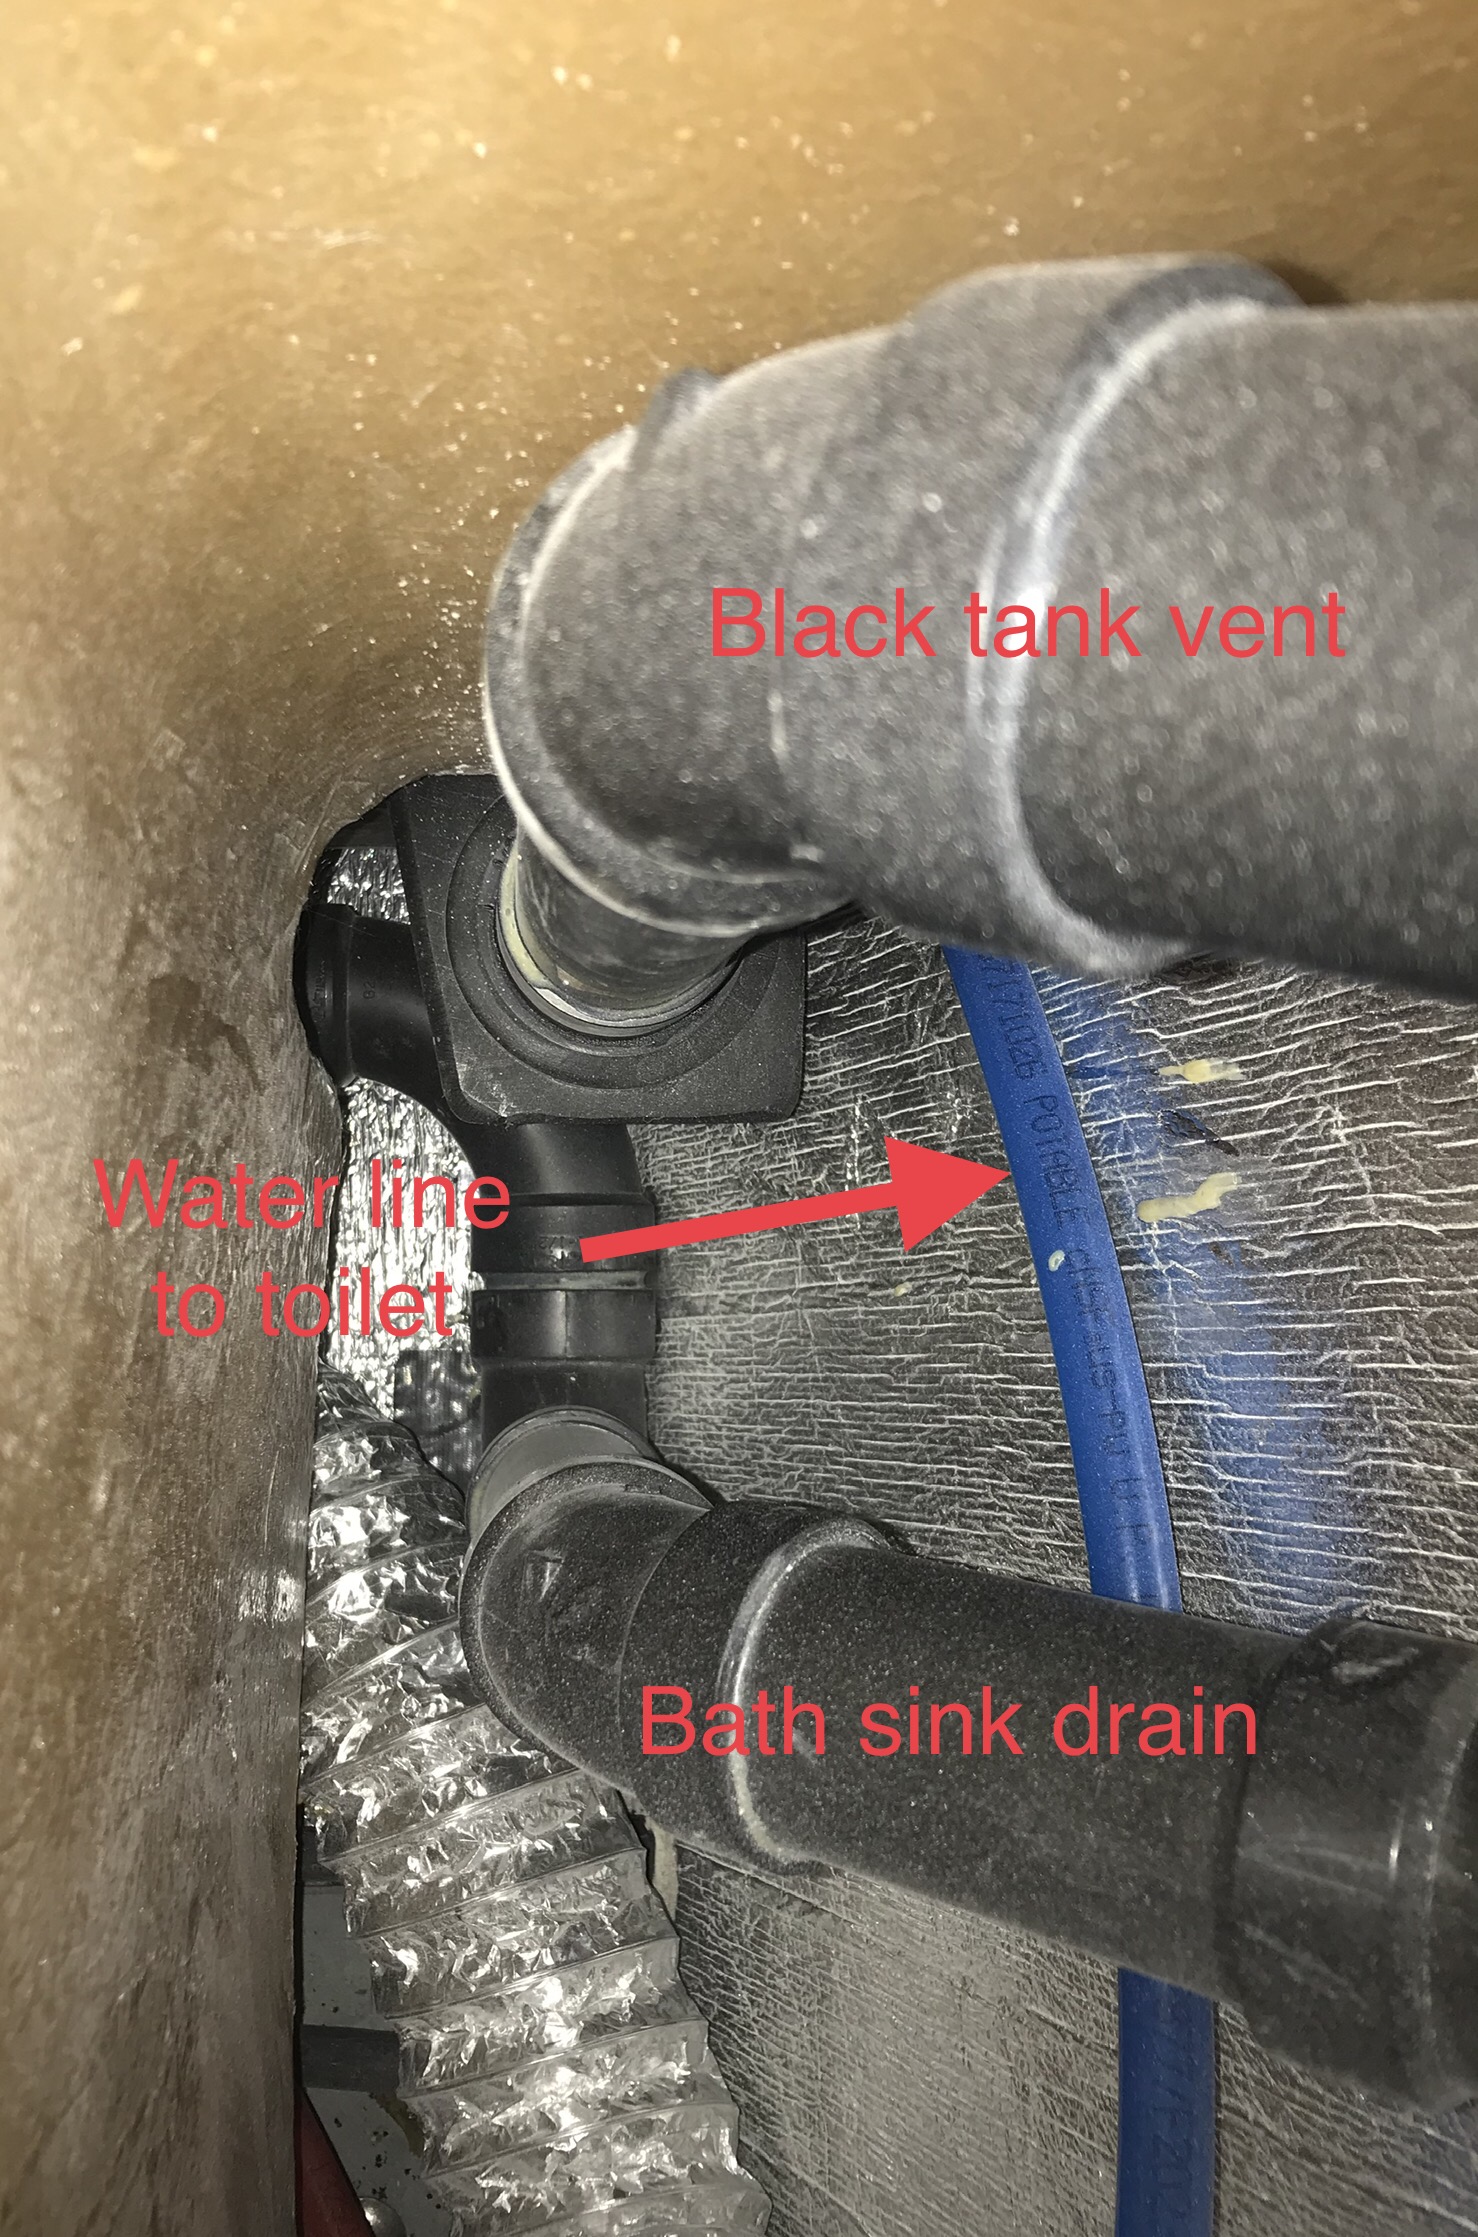
John, here’s the water line you mention
-
Looking for the best way to change out the bathroom faucet
Townesw replied to Markmck's topic in General Discussion
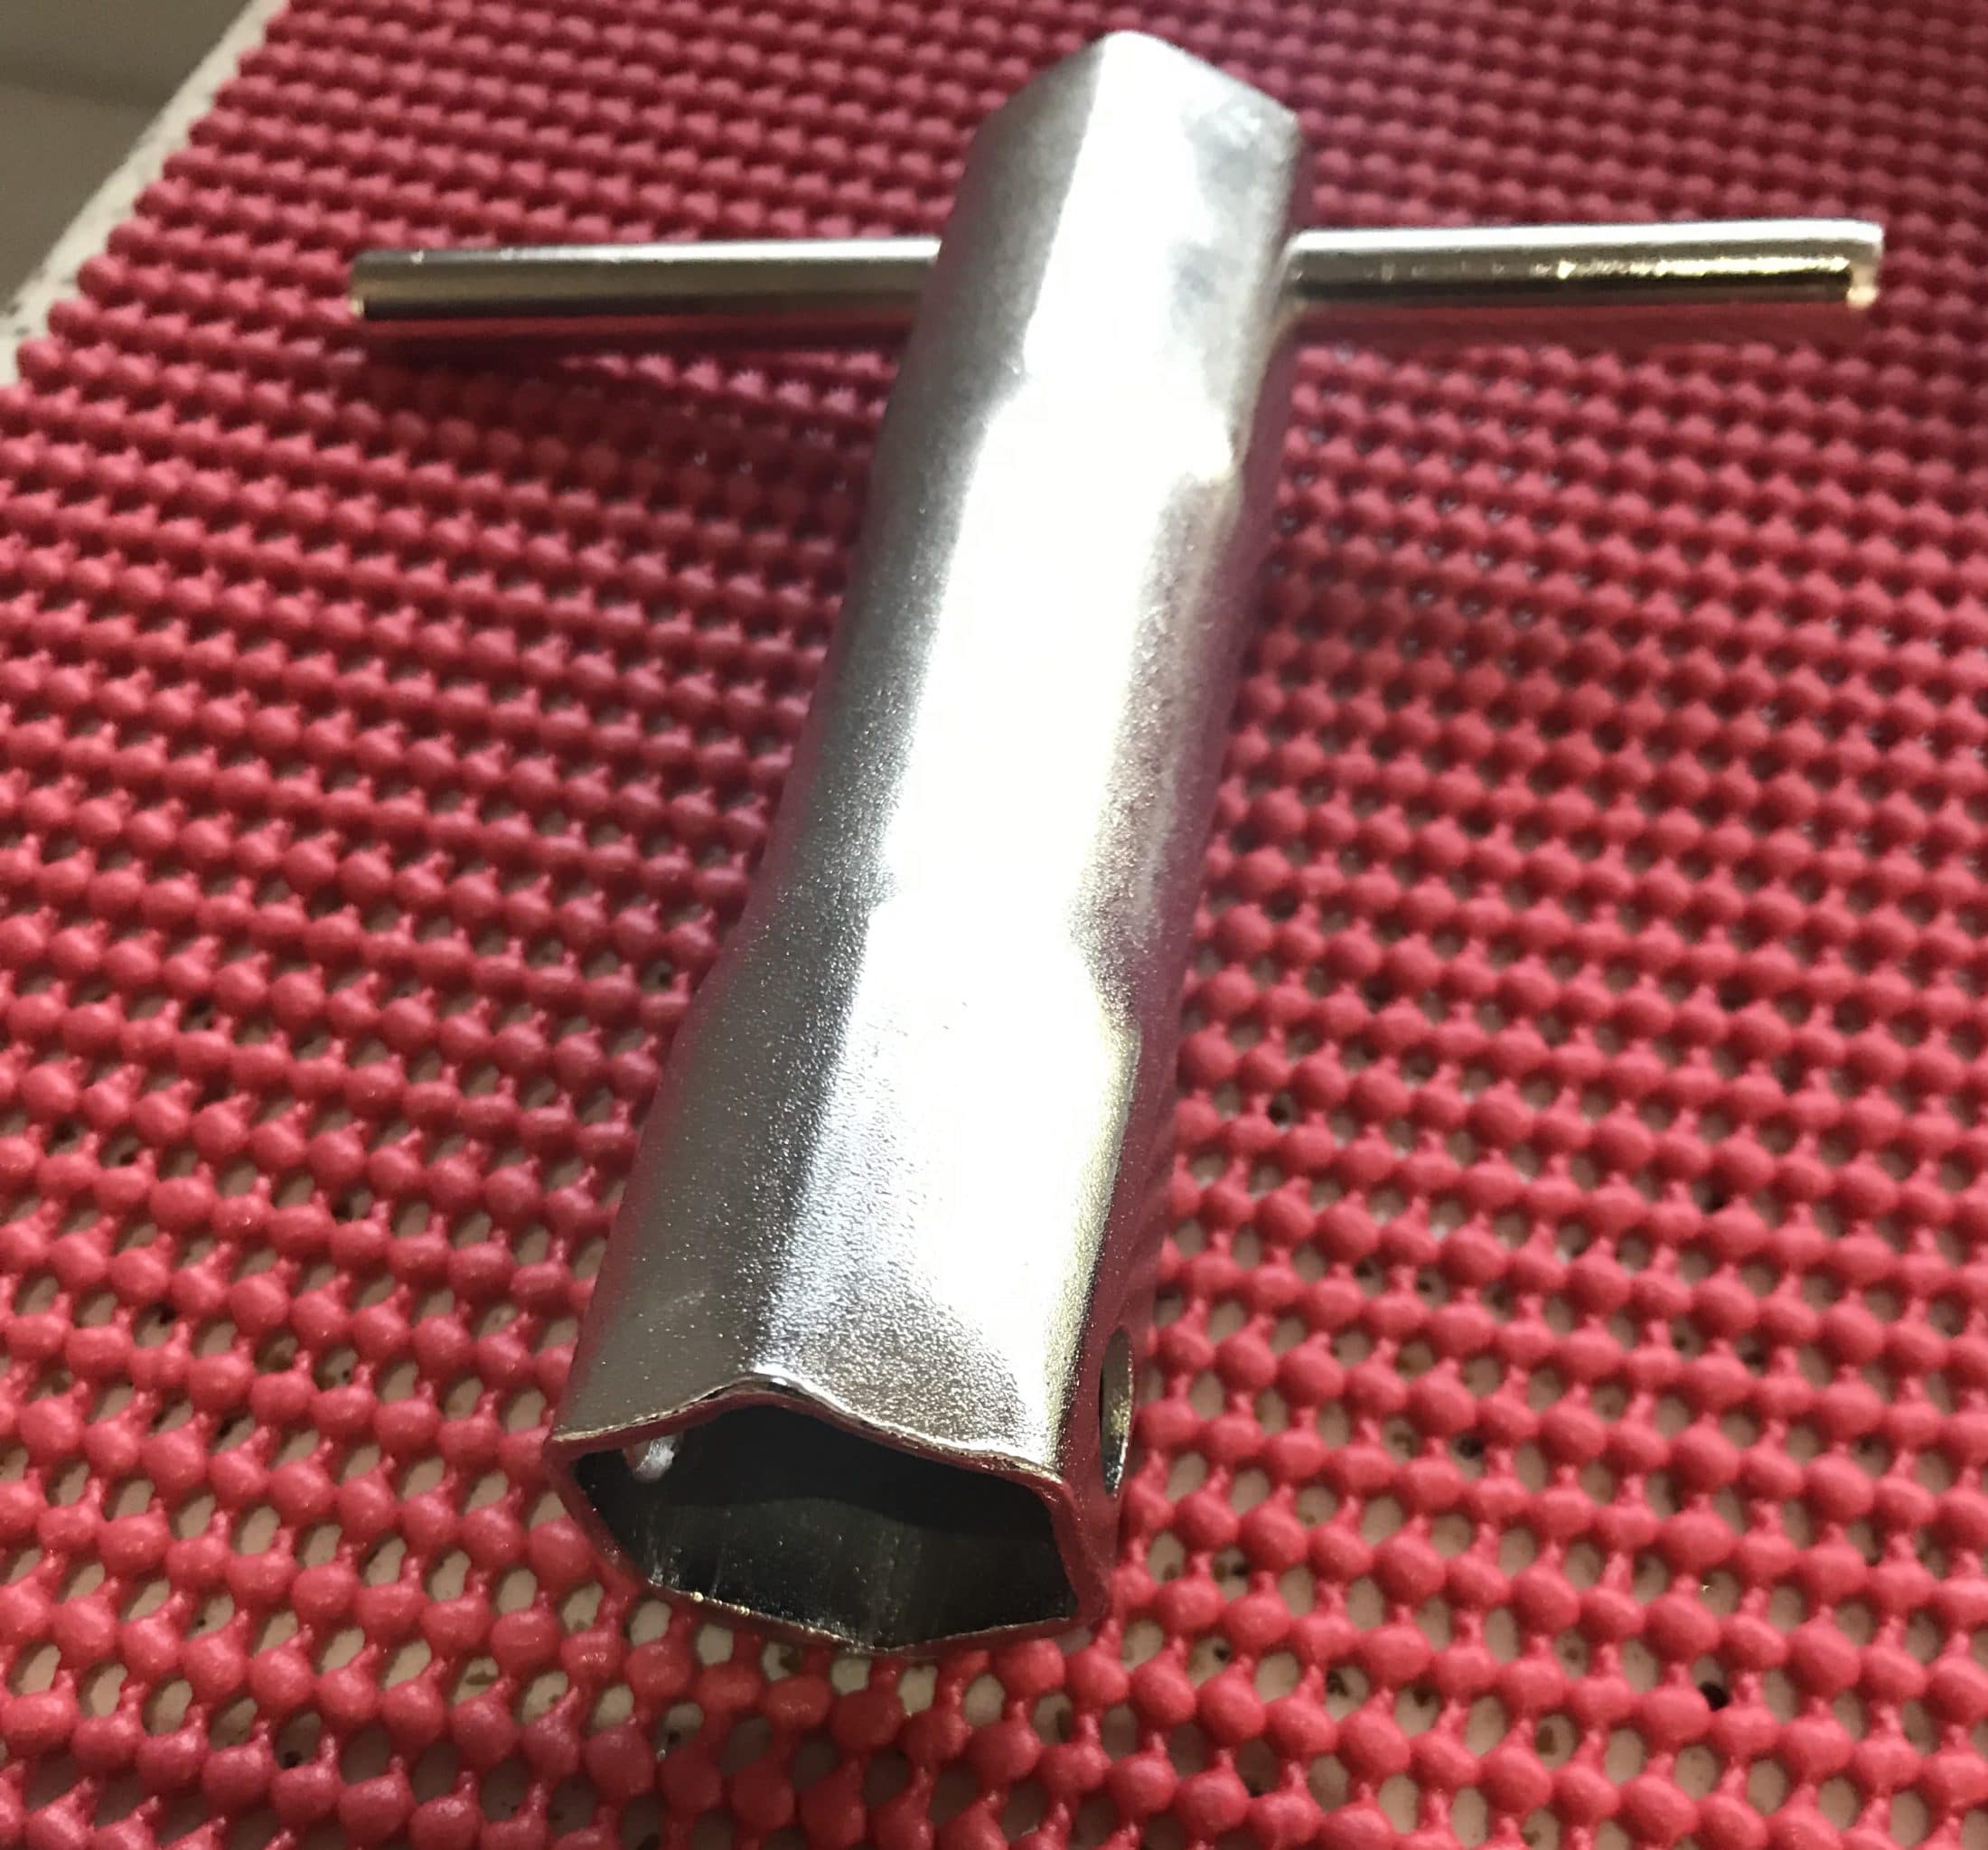
Thanks John. The wrench comes in a set like this https://www.harborfreight.com/shower-valve-socket-wrench-set-96322.html?cid=paid_google I used the 29/32 x 31/32 wrench. You can get the wrench set at “most good hardware stores”. As for the pictures, I take and edit them on my iPhone. It’s often frustrating but I can do it sitting in a chair in the shop. -
Looking for the best way to change out the bathroom faucet
Townesw replied to Markmck's topic in General Discussion
Stuff you will need https://www.americansealantsinc.com/adhesivecleanerandremover/ https://www.americansealantsinc.com/asi-335-neutral-cure-silicone-sealantadhesive/ PLASTIC razor blades. Do not use steel. Change these plastic blades often. https://www.oreillyauto.com/detail/b/titan-5120/paint—body-repair-16614/body-repair-16510/body—trim-tools-25197/razor-blades-scrapers-17948/1c24653634cf/titan-scraper-blades/12038/4753744?pos=17 Remove the steel blade from this holder and insert a plastic razor blade. https://www.oreillyauto.com/detail/b/titan-5120/paint—body-repair-16614/body-repair-16510/body—trim-tools-25197/razor-blades-scrapers-17948/1c24653634cf/titan-scraper/12031/4753743?pos=18 -
Looking for the best way to change out the bathroom faucet
Townesw replied to Markmck's topic in General Discussion
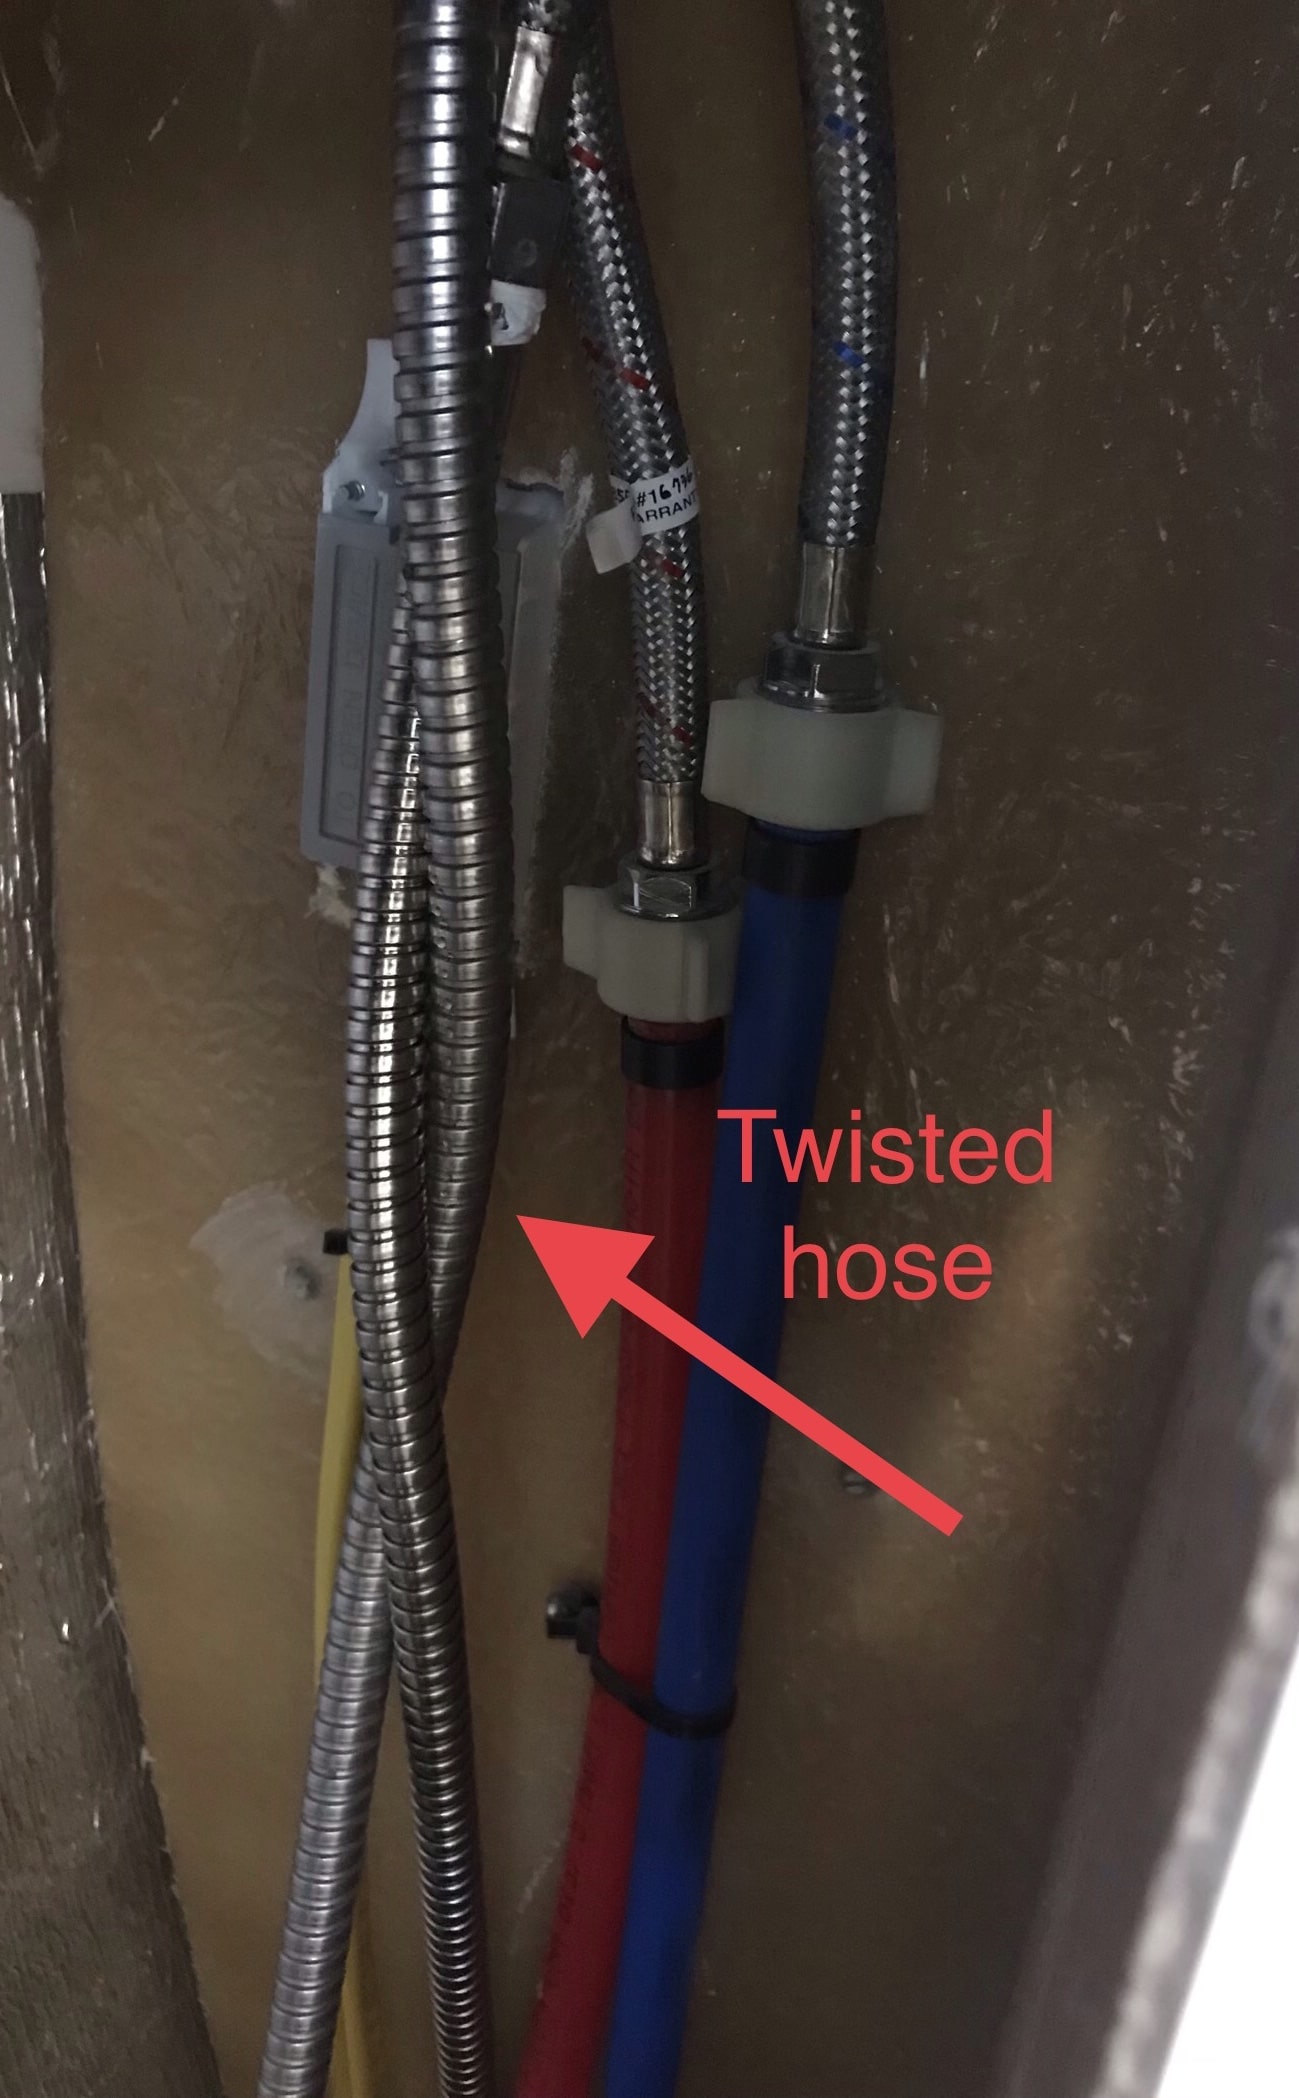
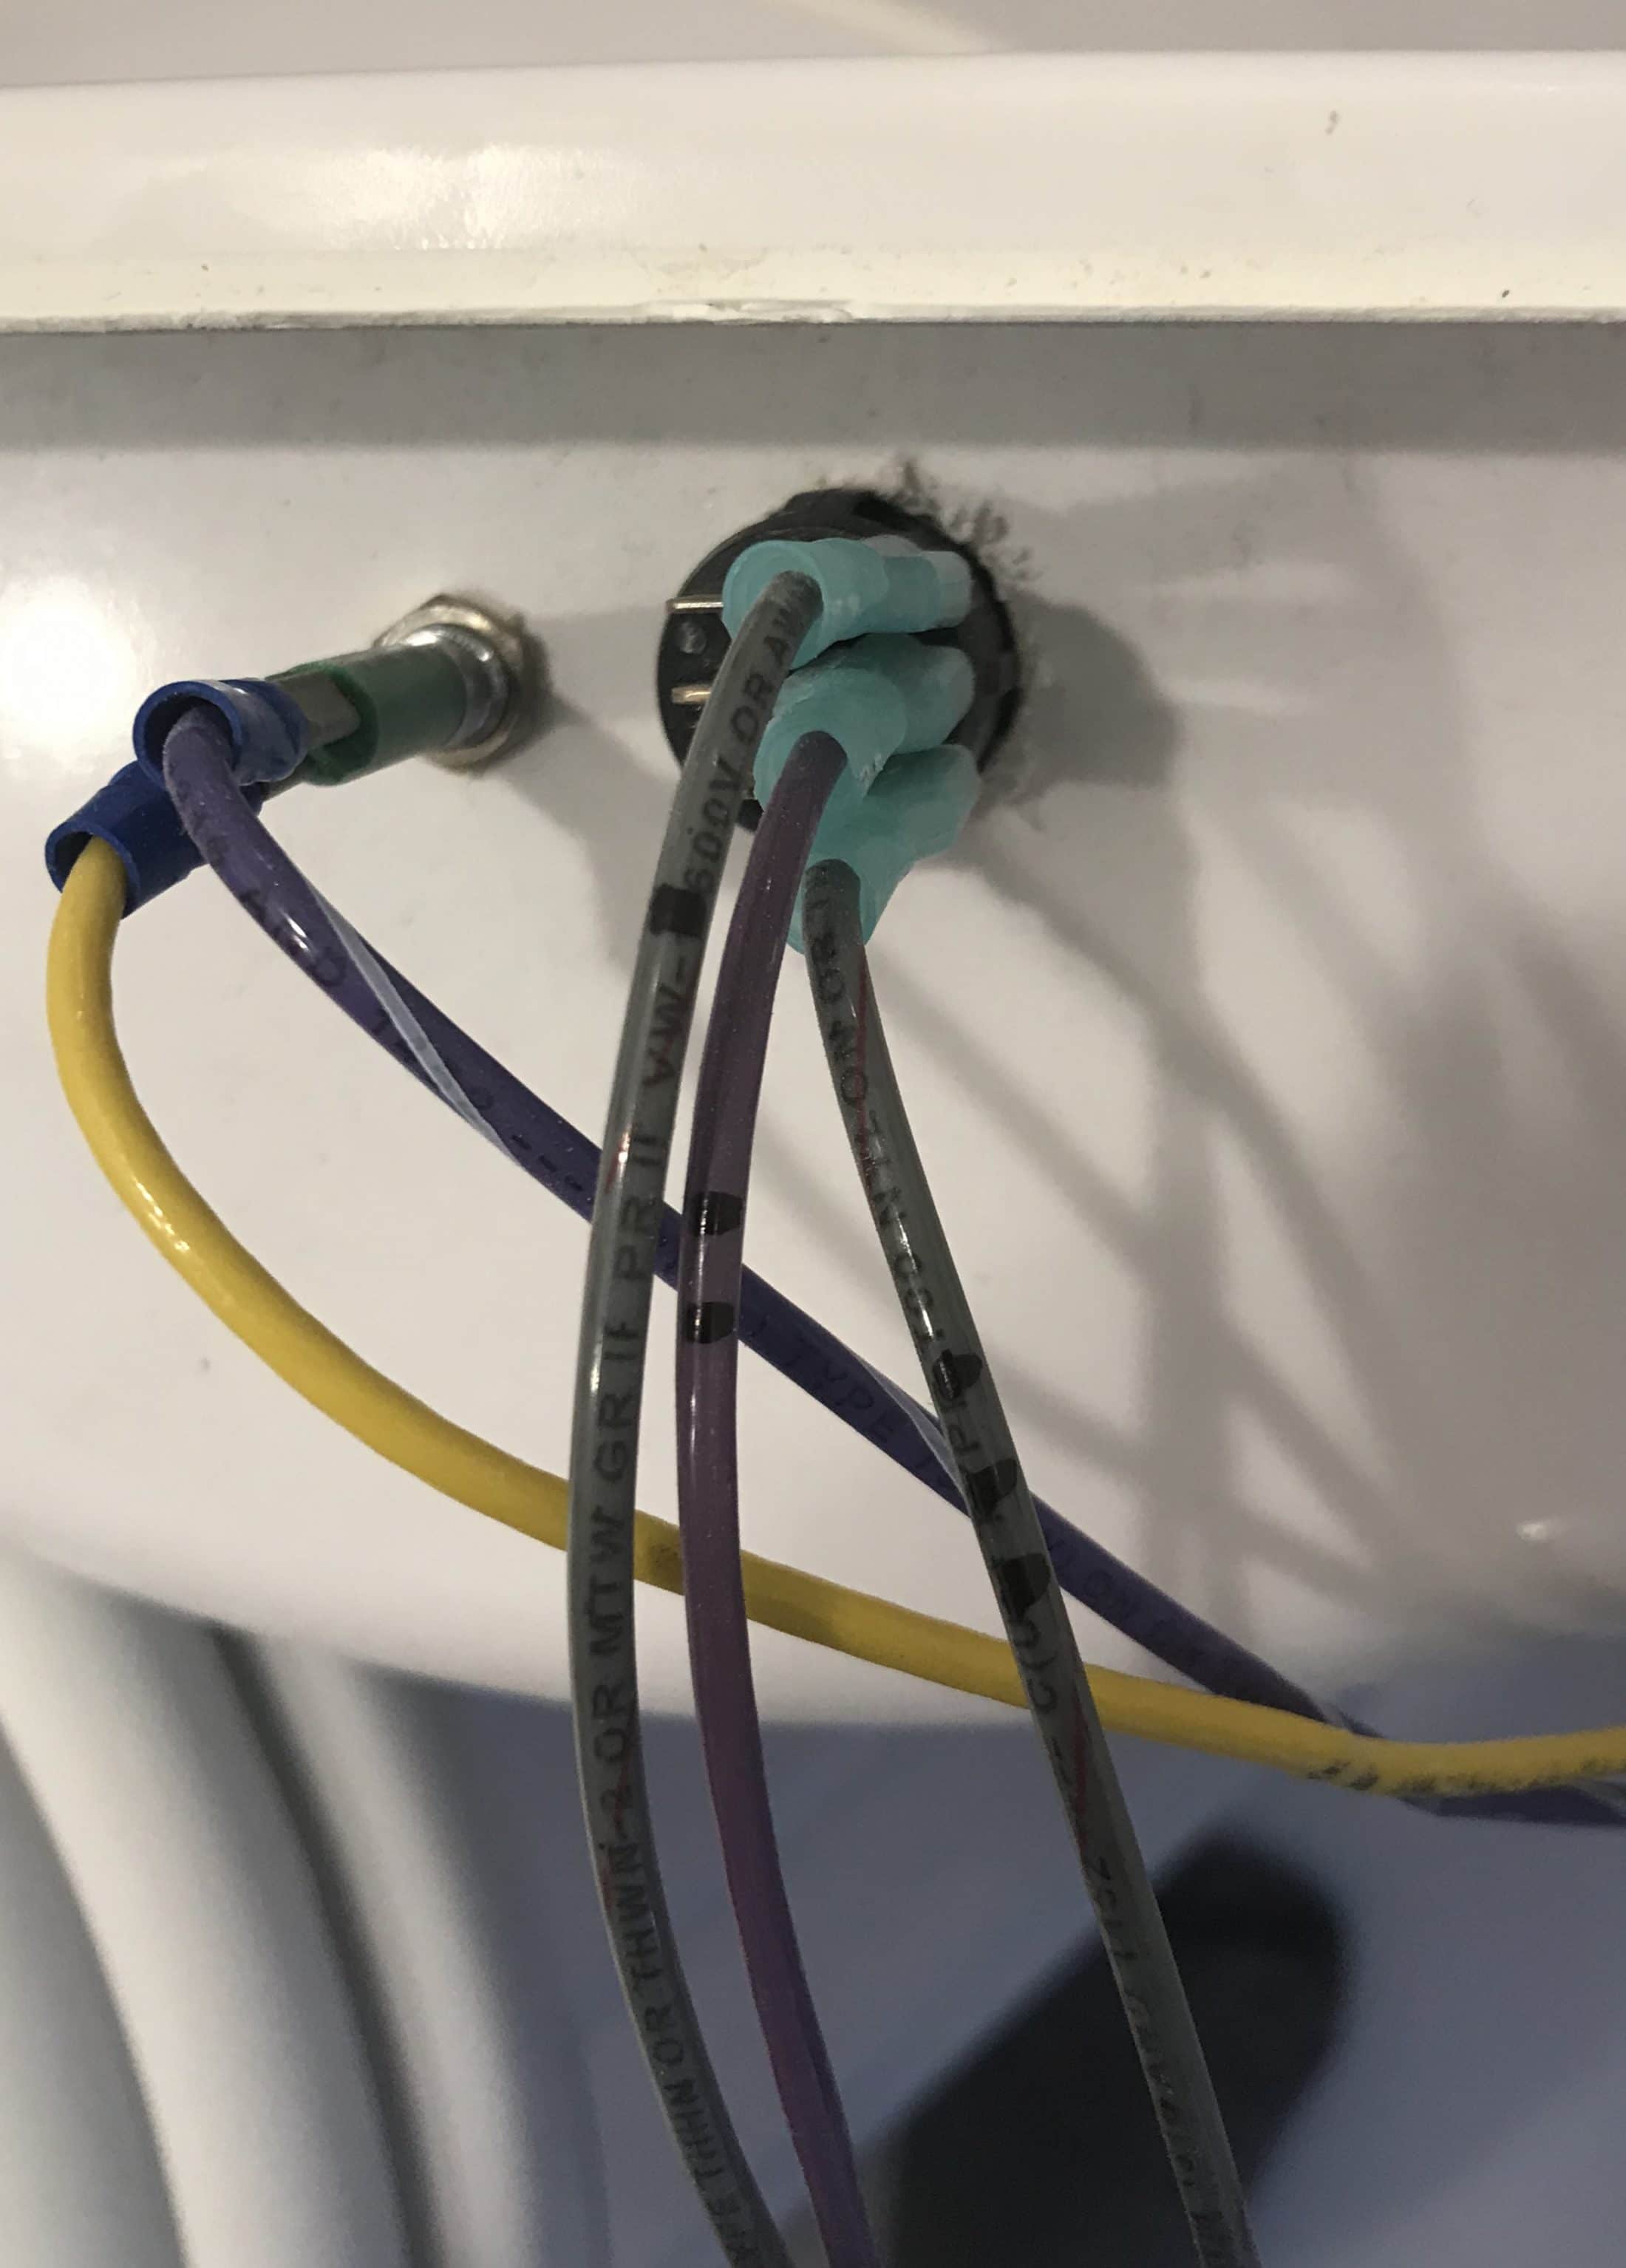
Make sure hose is not twisted. It will pull out and go back in much easier. Mark these wires before you unplug them
-
Looking for the best way to change out the bathroom faucet
Townesw replied to Markmck's topic in General Discussion
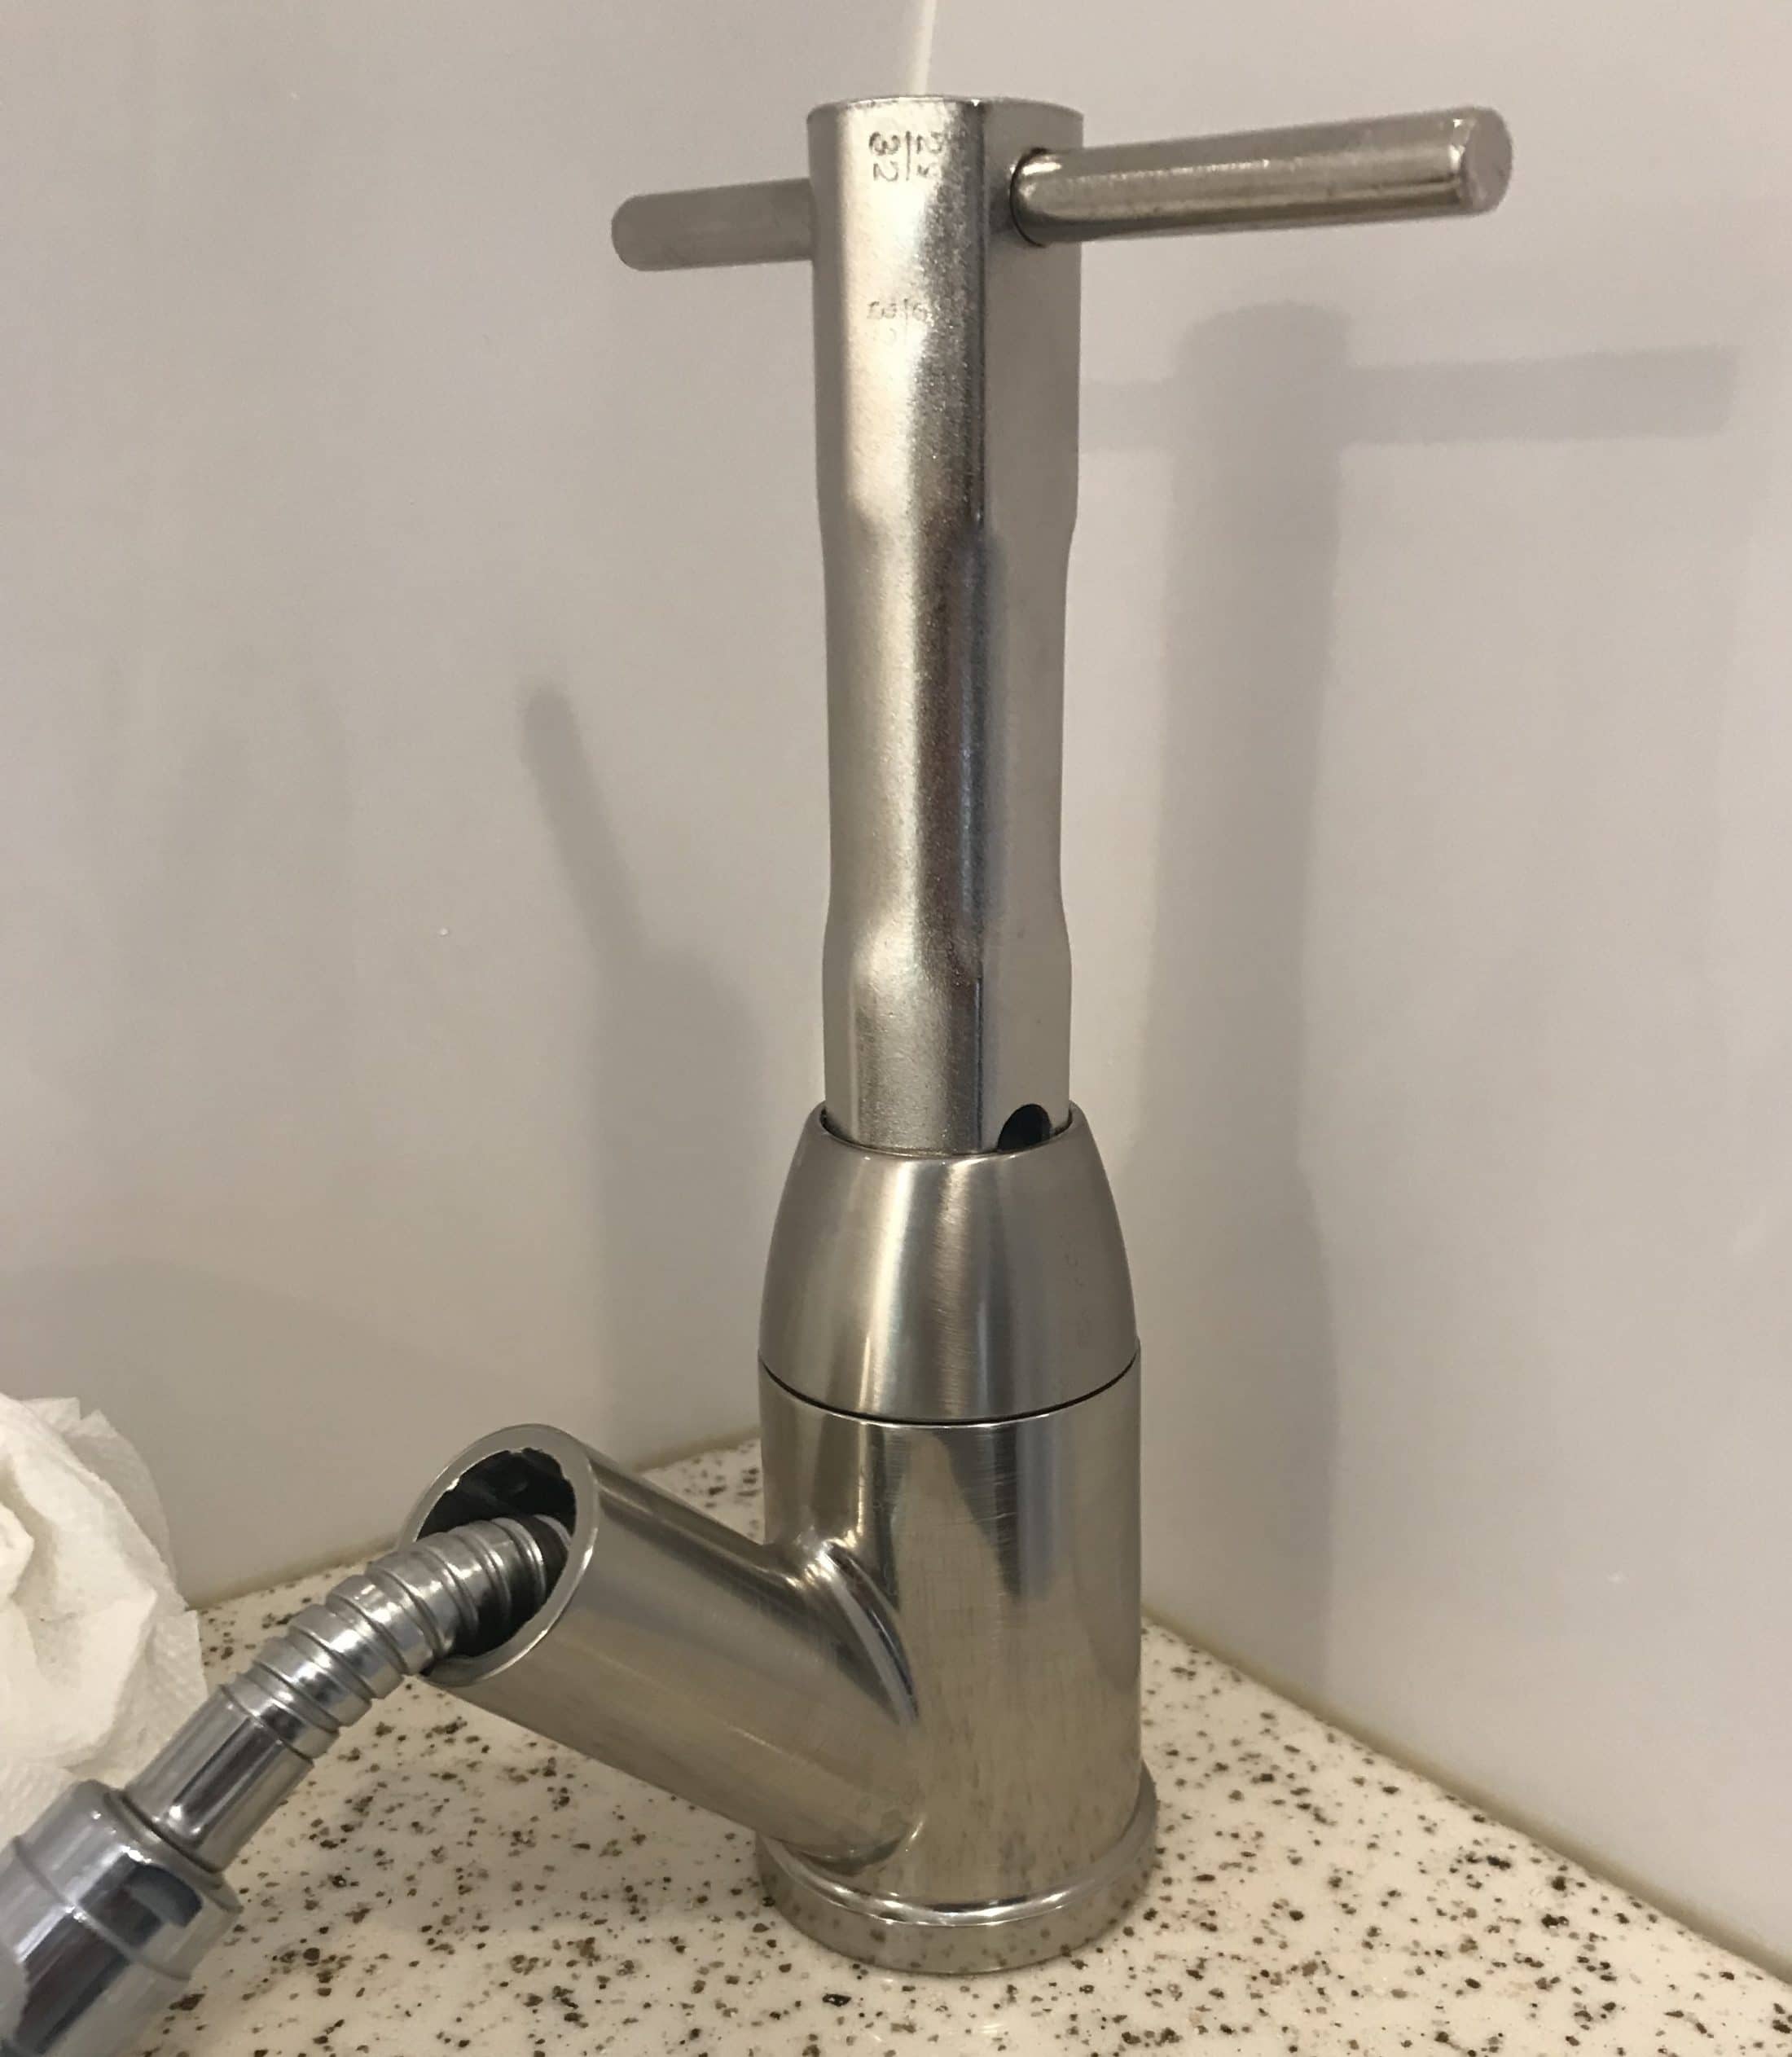
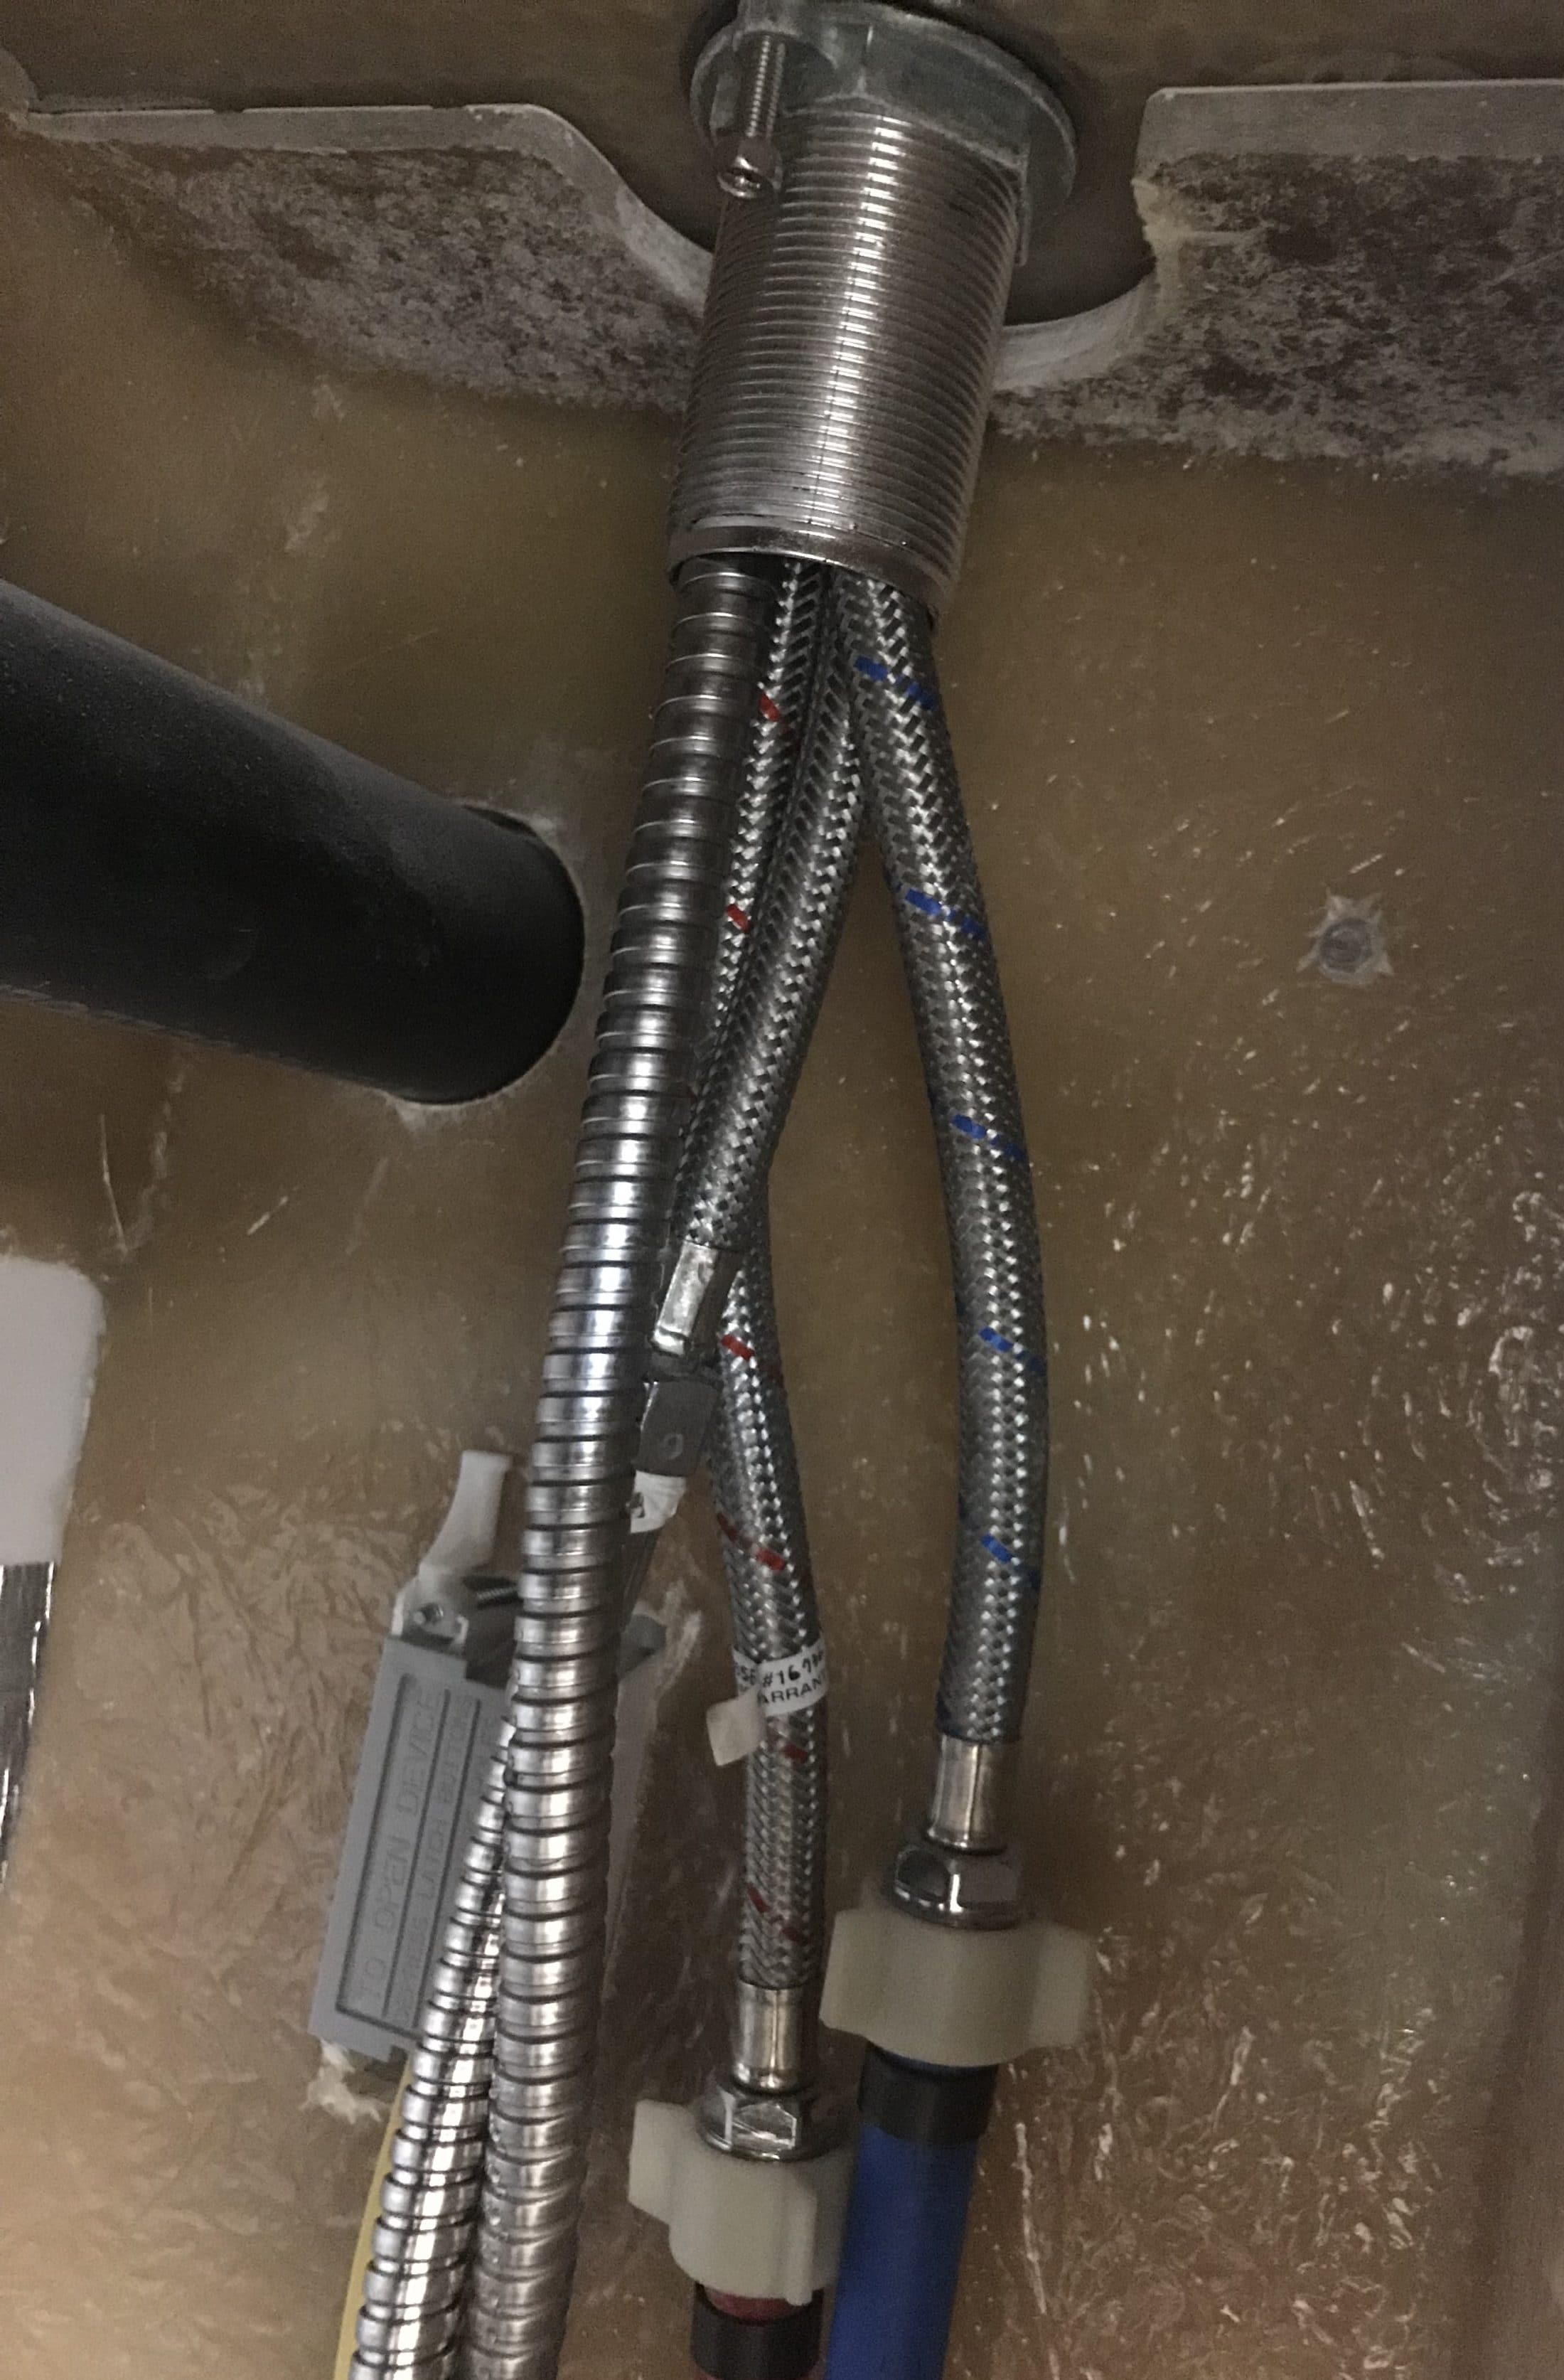
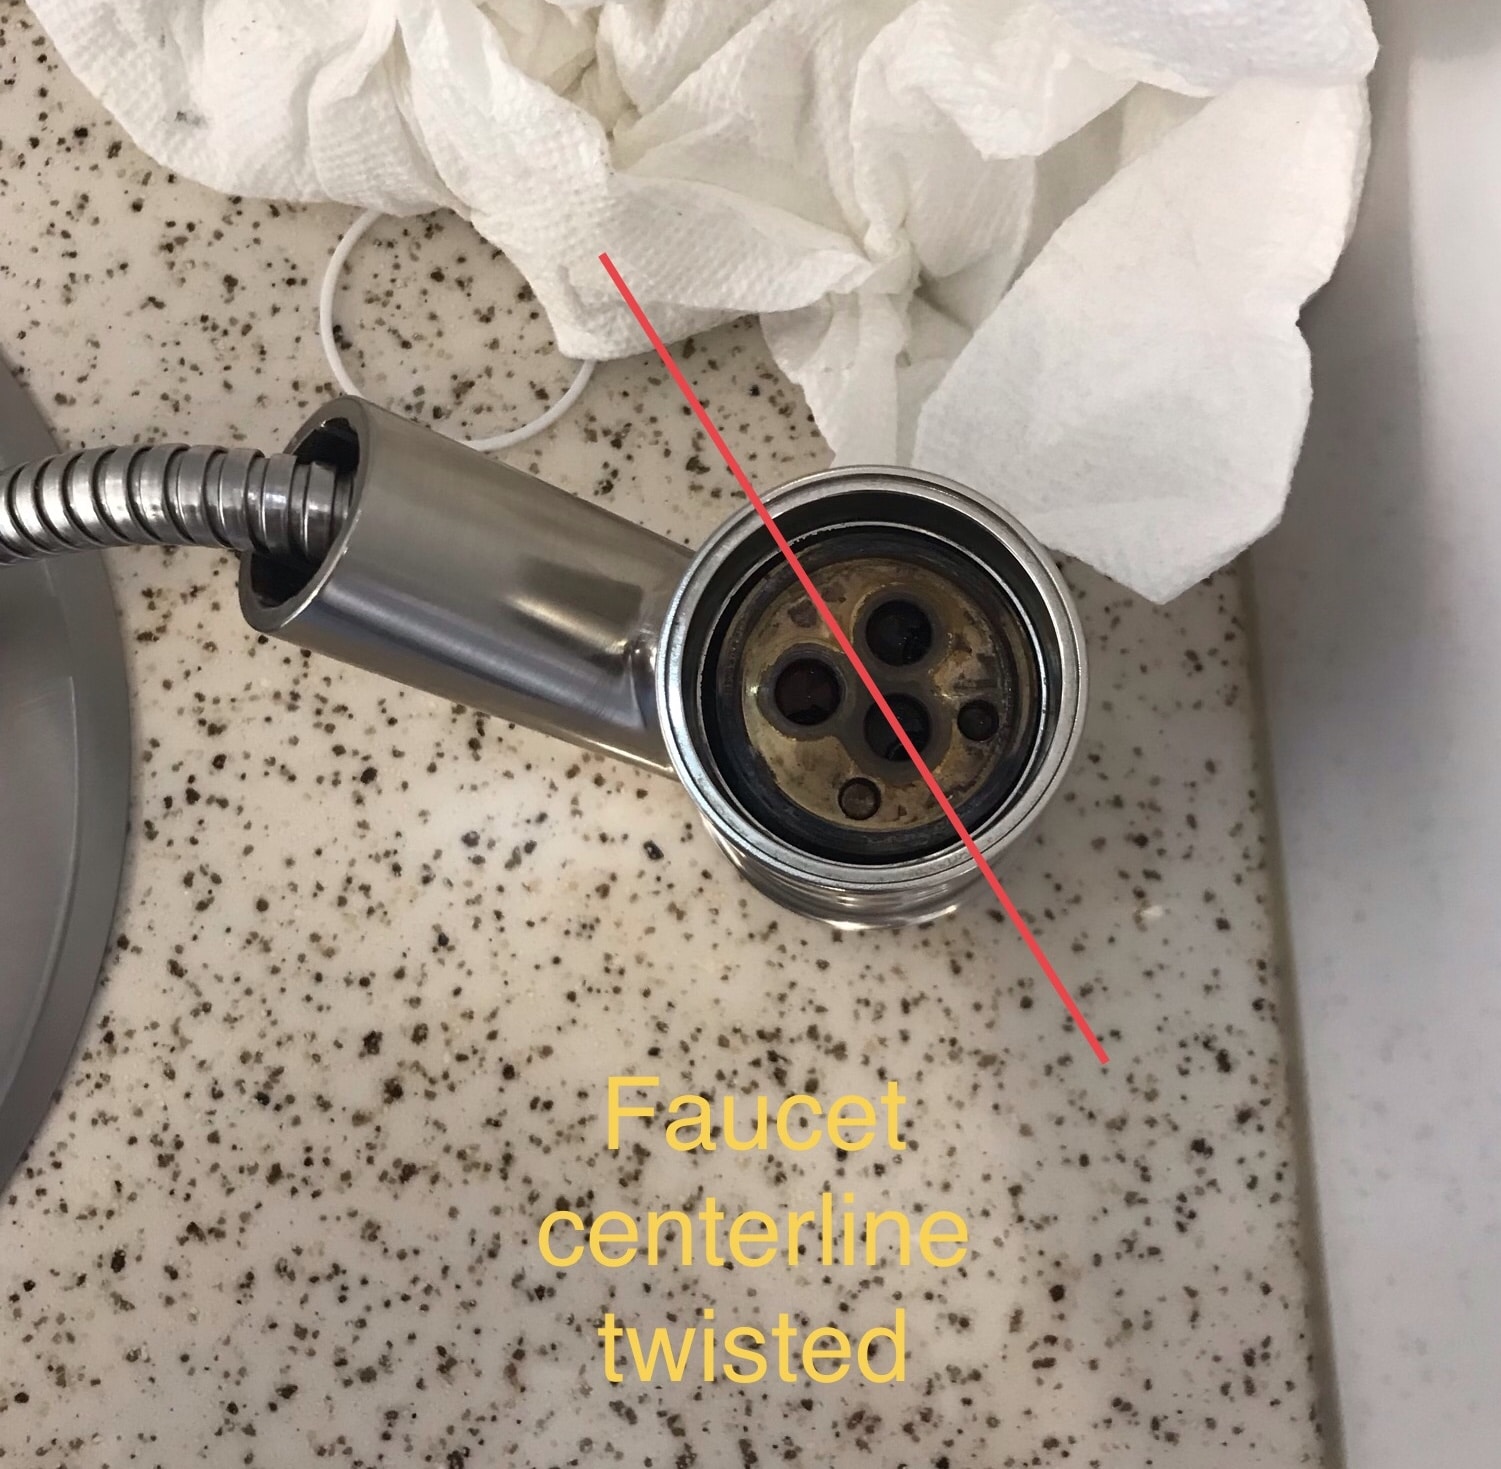
I’ve been under my sink to realign the faucet after replacing the cartridge. Use plastic razor blades to remove old caulk from the shelf and vanity. ASI 0240 works real well to remove old caulk. ASI 335 is what I just used to reseal my shower pan. I think you’ll need one of these wrenches to keep from having to use a pair of Channellock plies which will mar your new faucet Wrench in use What it looks like under there Be sure to “clock” the faucet centerline so that it is perpendicular to the wall otherwise the wand will either hit the wall or swivel out from above the sink and the hot vs. cold adjustment will be awkward.
-
MaryRn I see where no one has responded to your request so I’ll post this to hopefully stir up some more responses. I have the Dometic Atwood furnace in Hull 313 but I remember reading this thread about the Suburban furnace that made me glad I had the Dometic Atwood https://olivertraveltrailers.com/topic/suburban-furnace-acting-very-erratic/#post-190686 From this thread it sounds like the Suburban is a bear to get to. I have had the sail switch out on my Dometic Atwood and it was no problem. Edit: Well I just looked and I have an Atwood furnace but I think Atwood is part of Dometic now.
-
You’re very welcome. Glad I could help.
-
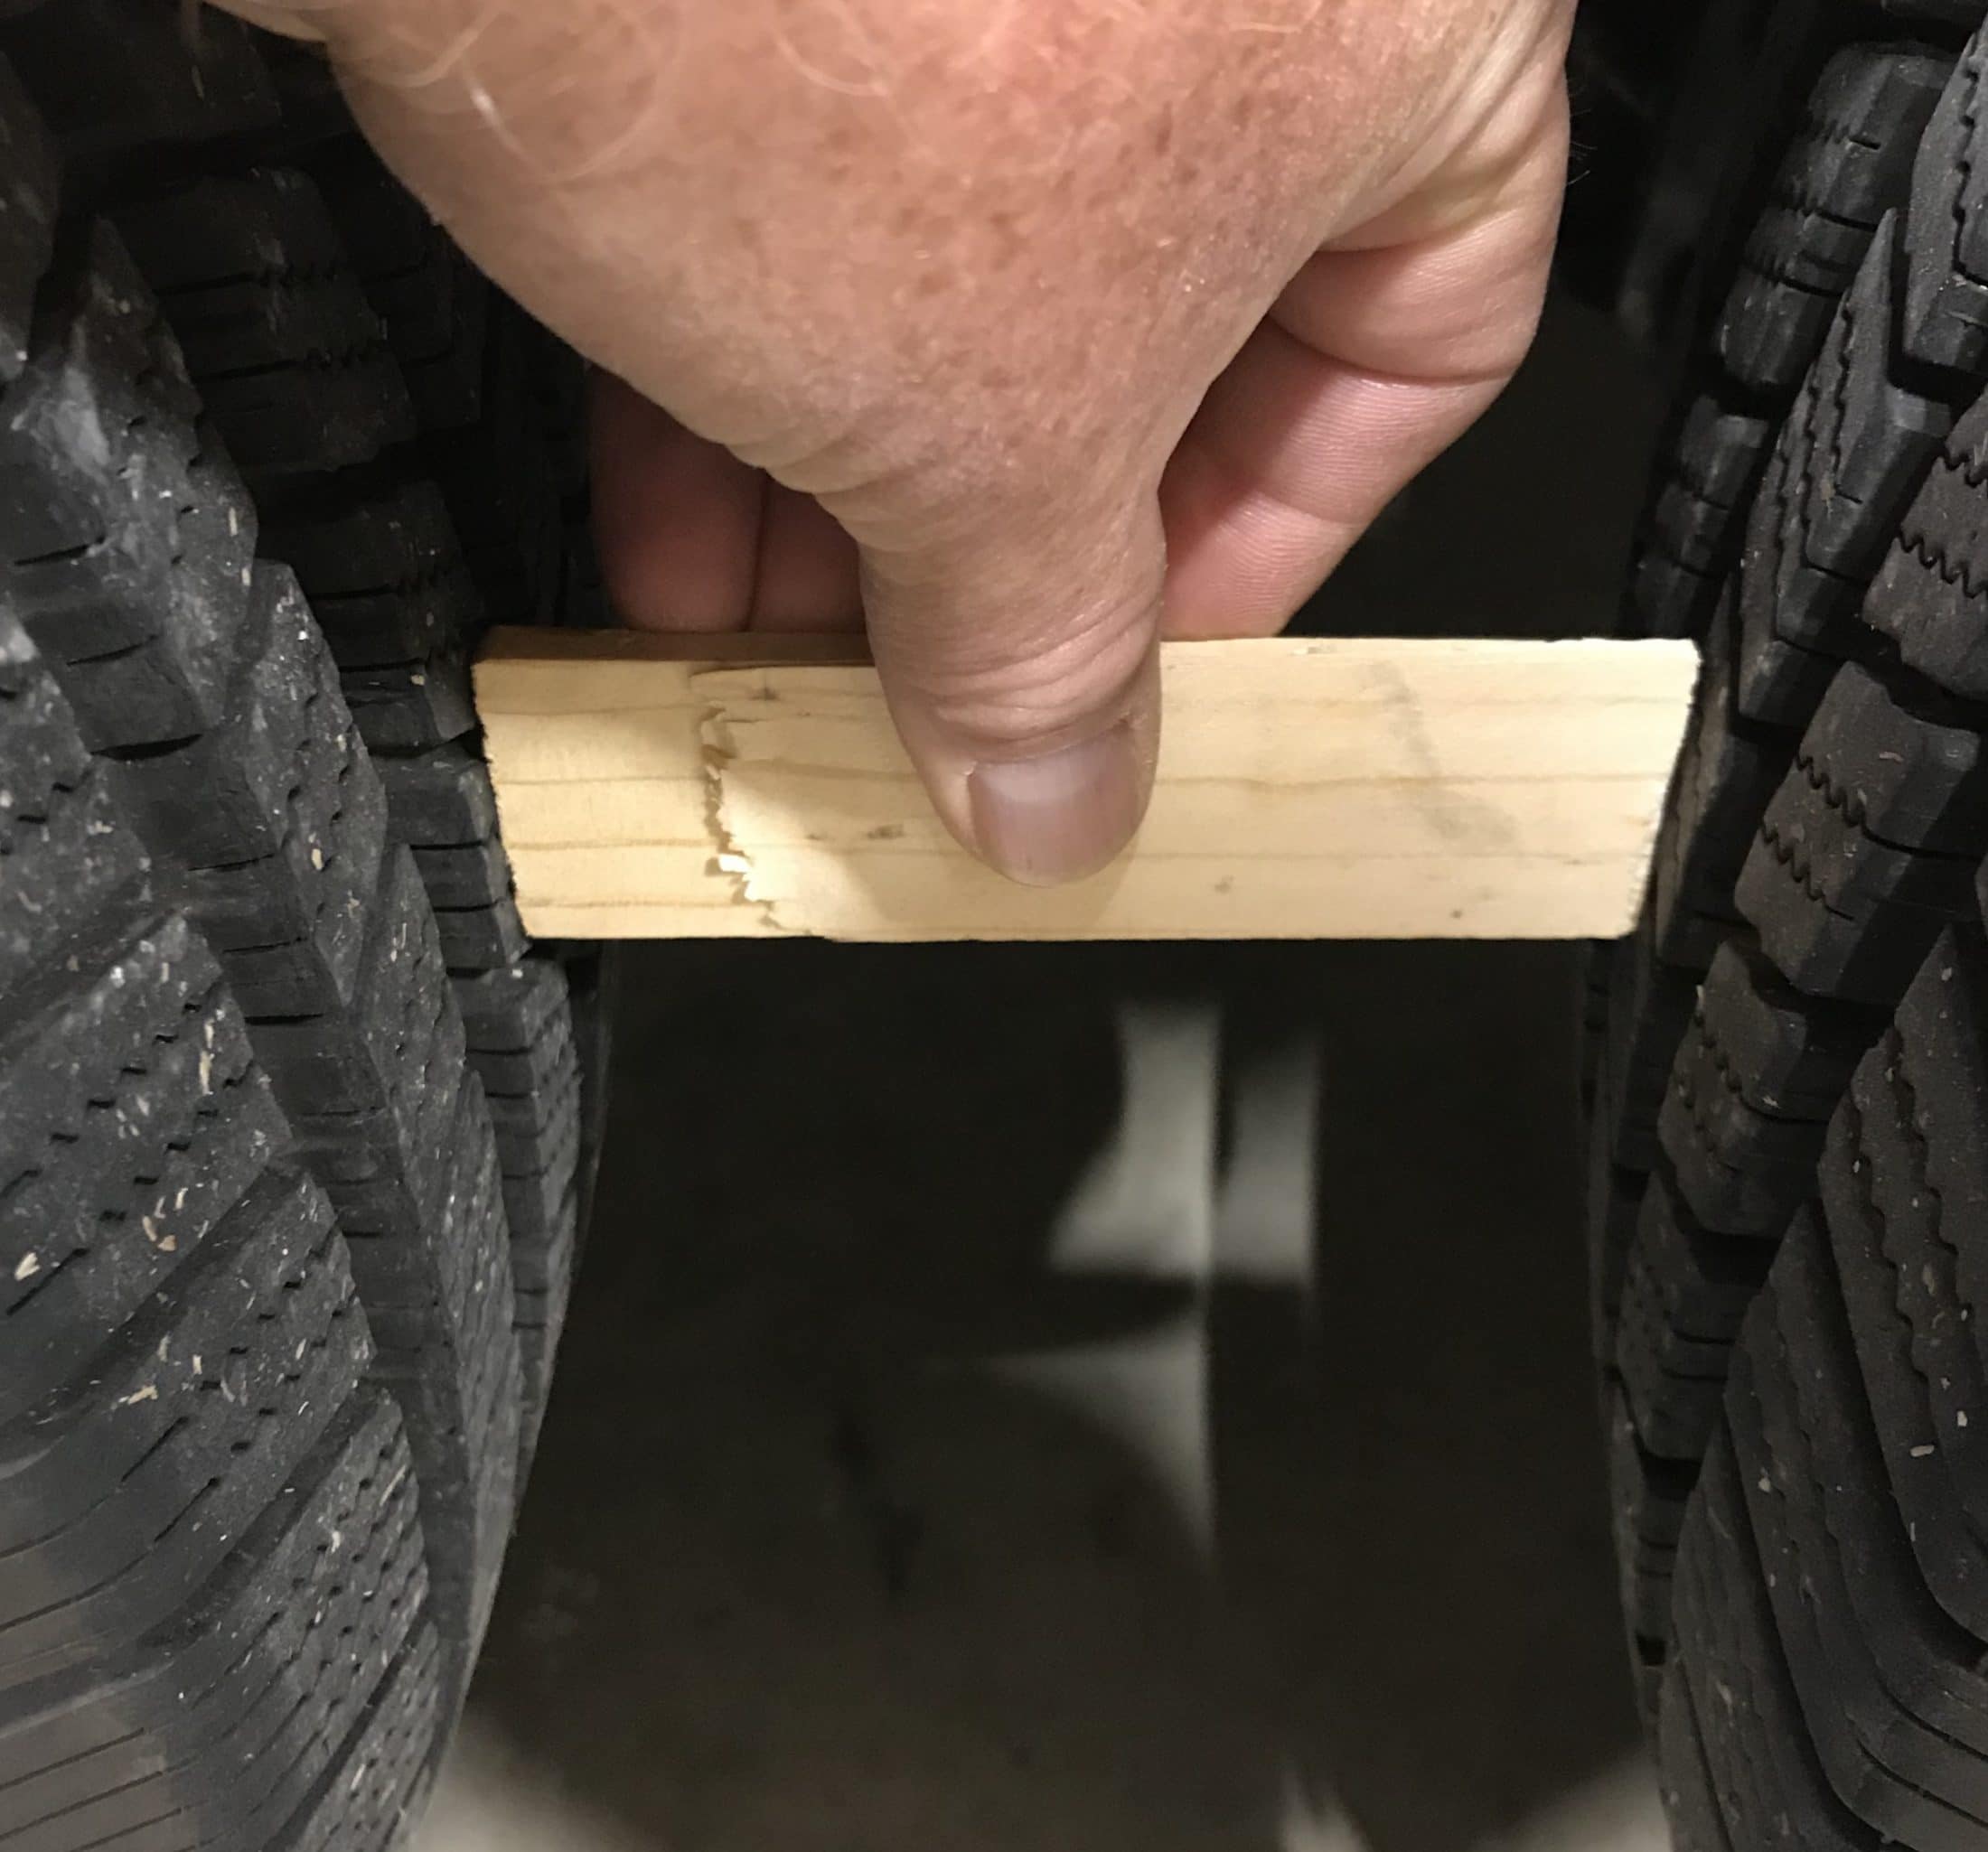
I measured 4-3/8 one side, 4-7/16 other side. Measured as pictured below. 51 psi in the tires. Sitting level on concrete floor.
-
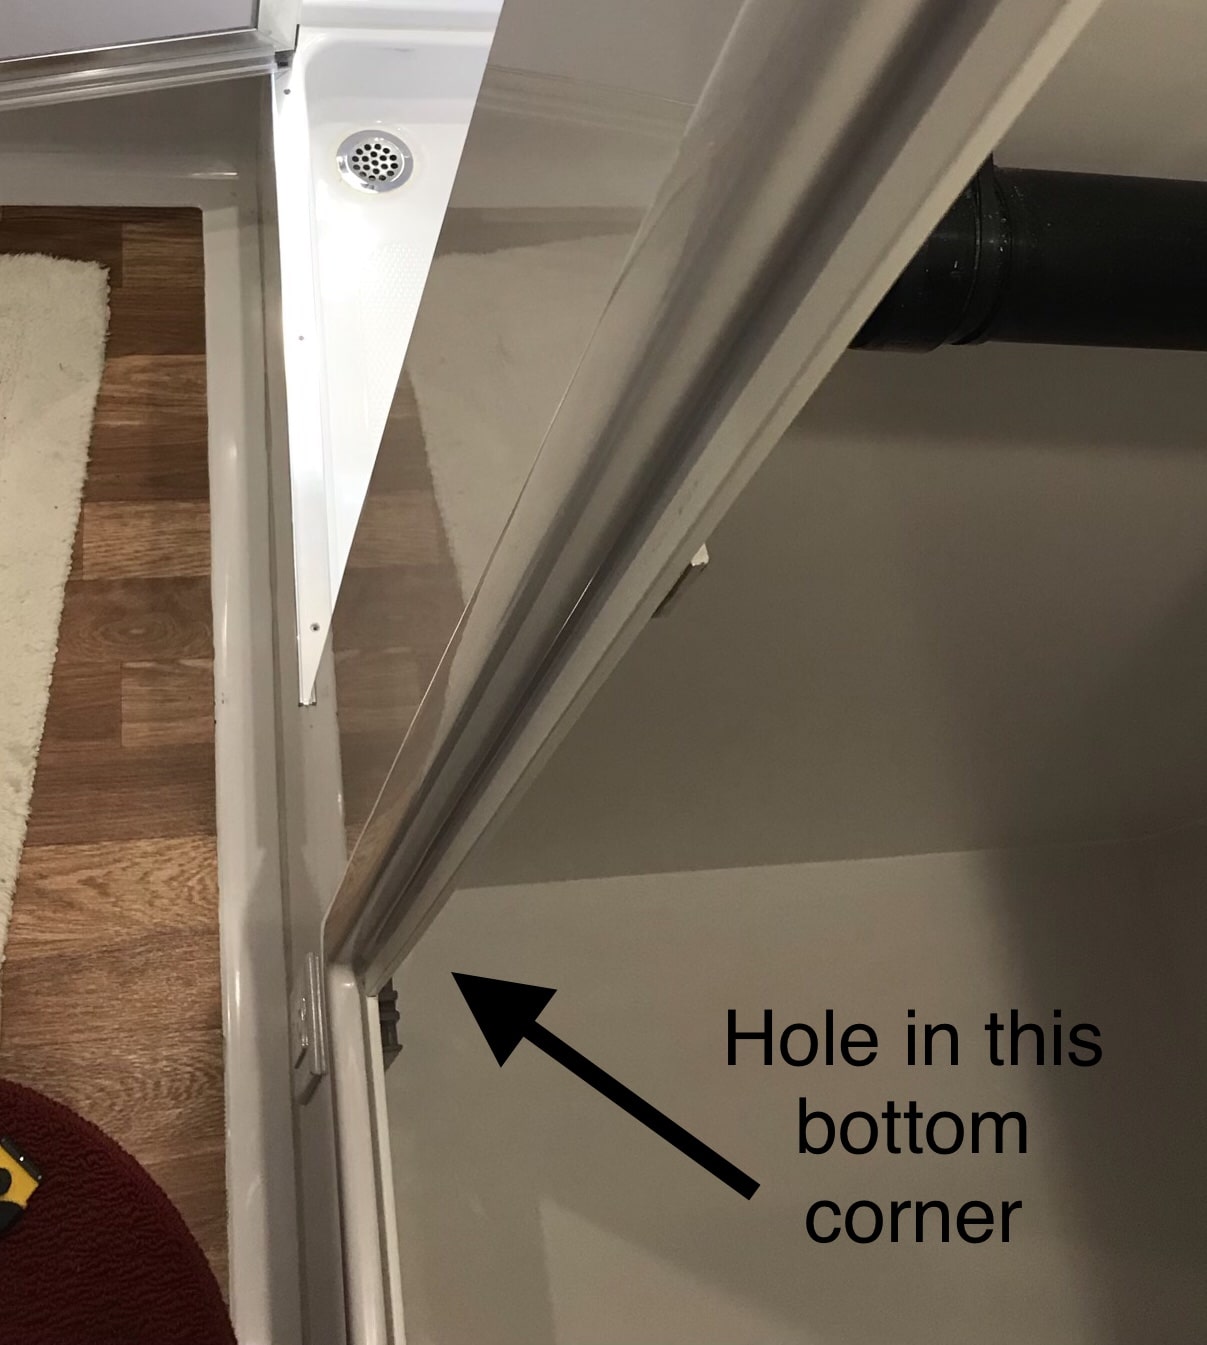
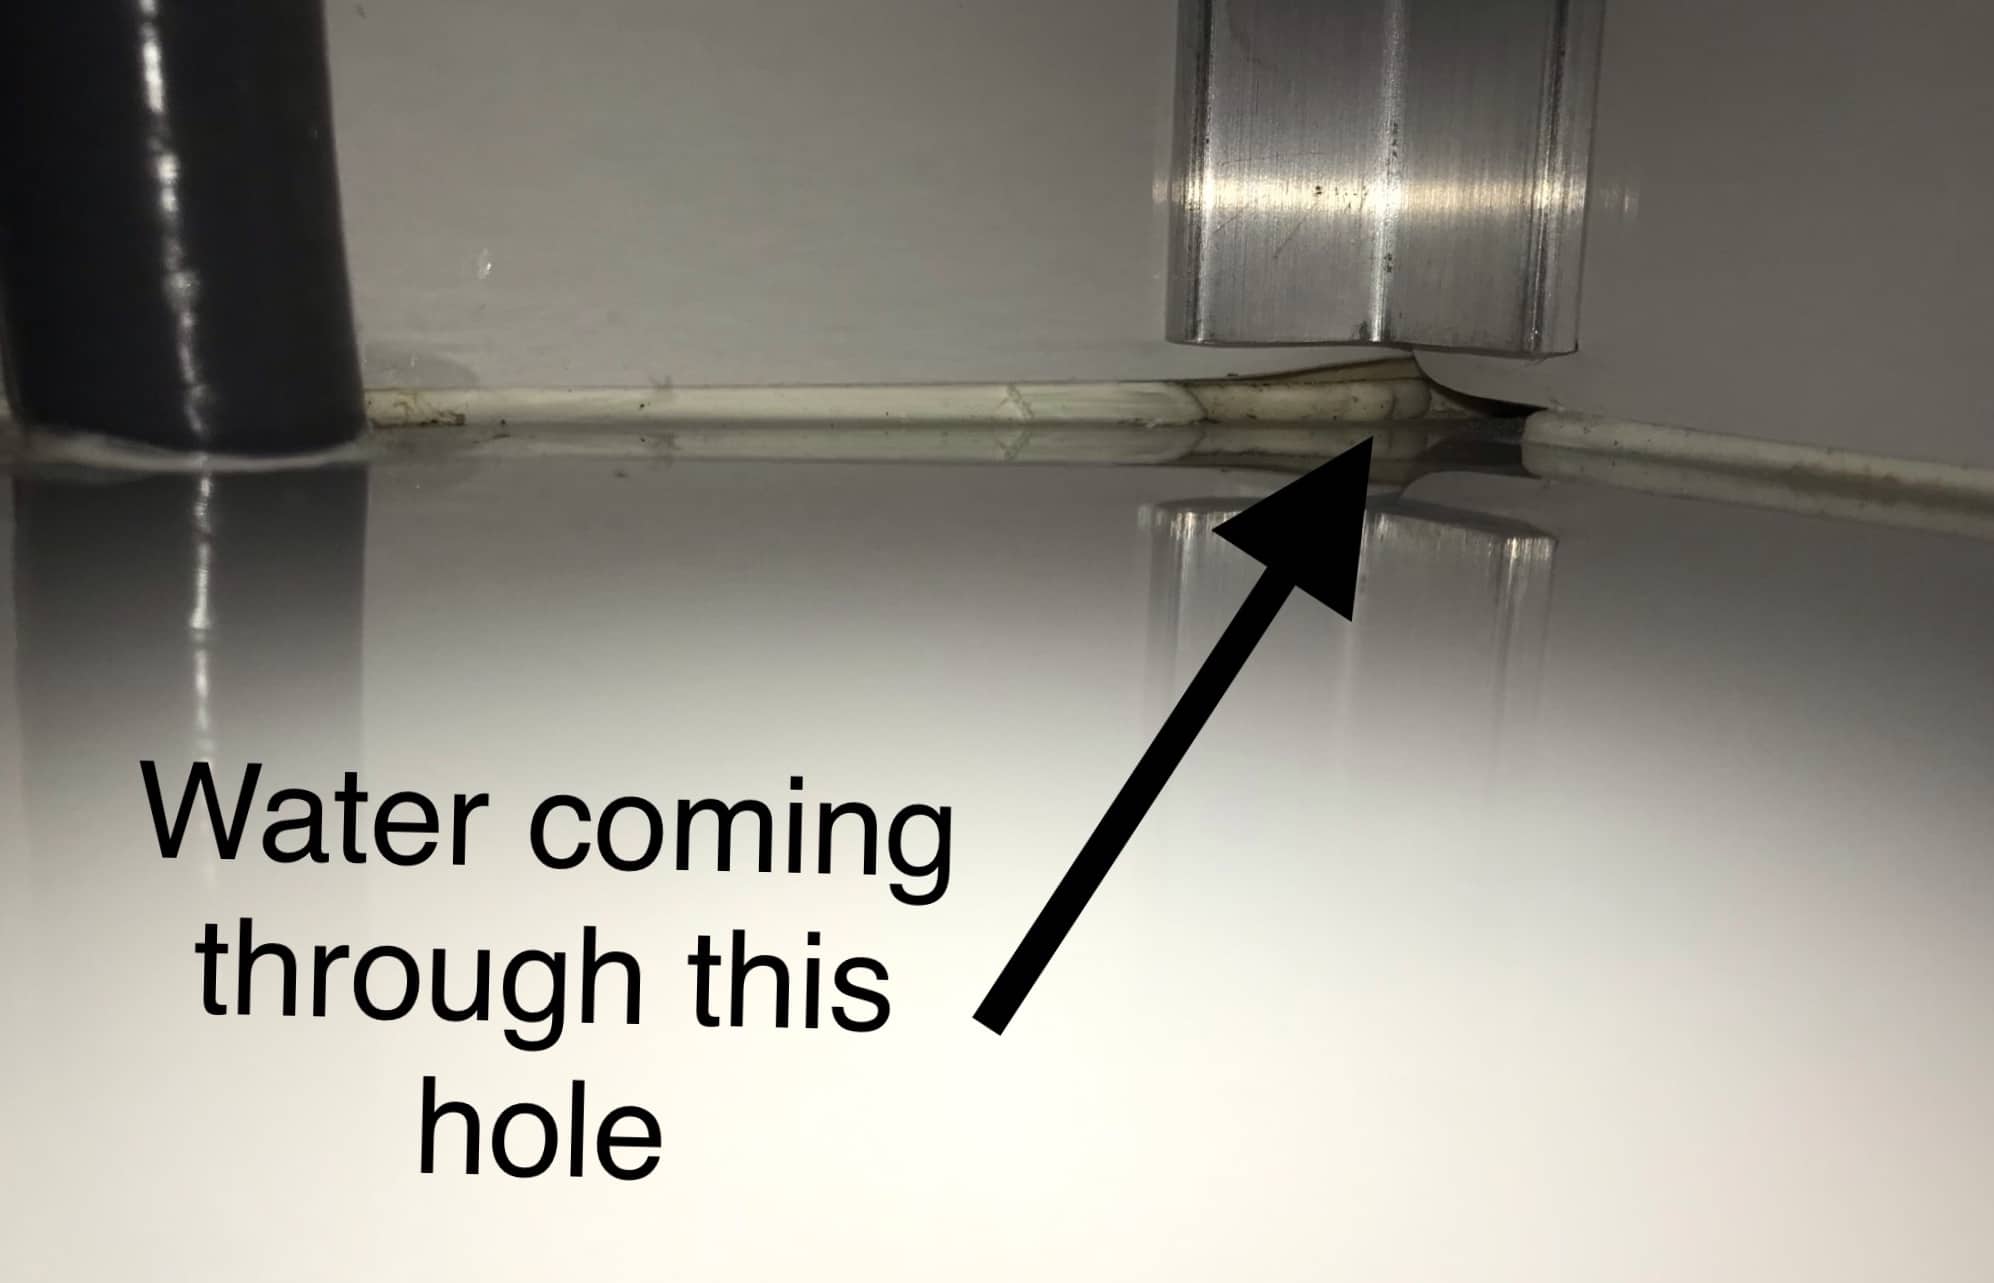
Those of you who have shower pans that squeak and flex, check under the black mat in your closet and see if you have or have had water there. I found water under ours and traced it to a crack in the caulk between the shower pan and wall. The crack was not easily visible when no one was standing on the pan but when weight was applied to the pan the edges flexed in slightly and the crack opened up. We keep the nose of our camper slightly elevated so the water ran back against the inside of the wall under the shower door then ran towards the closet and came through this hole in the bottom corner of the closet
-
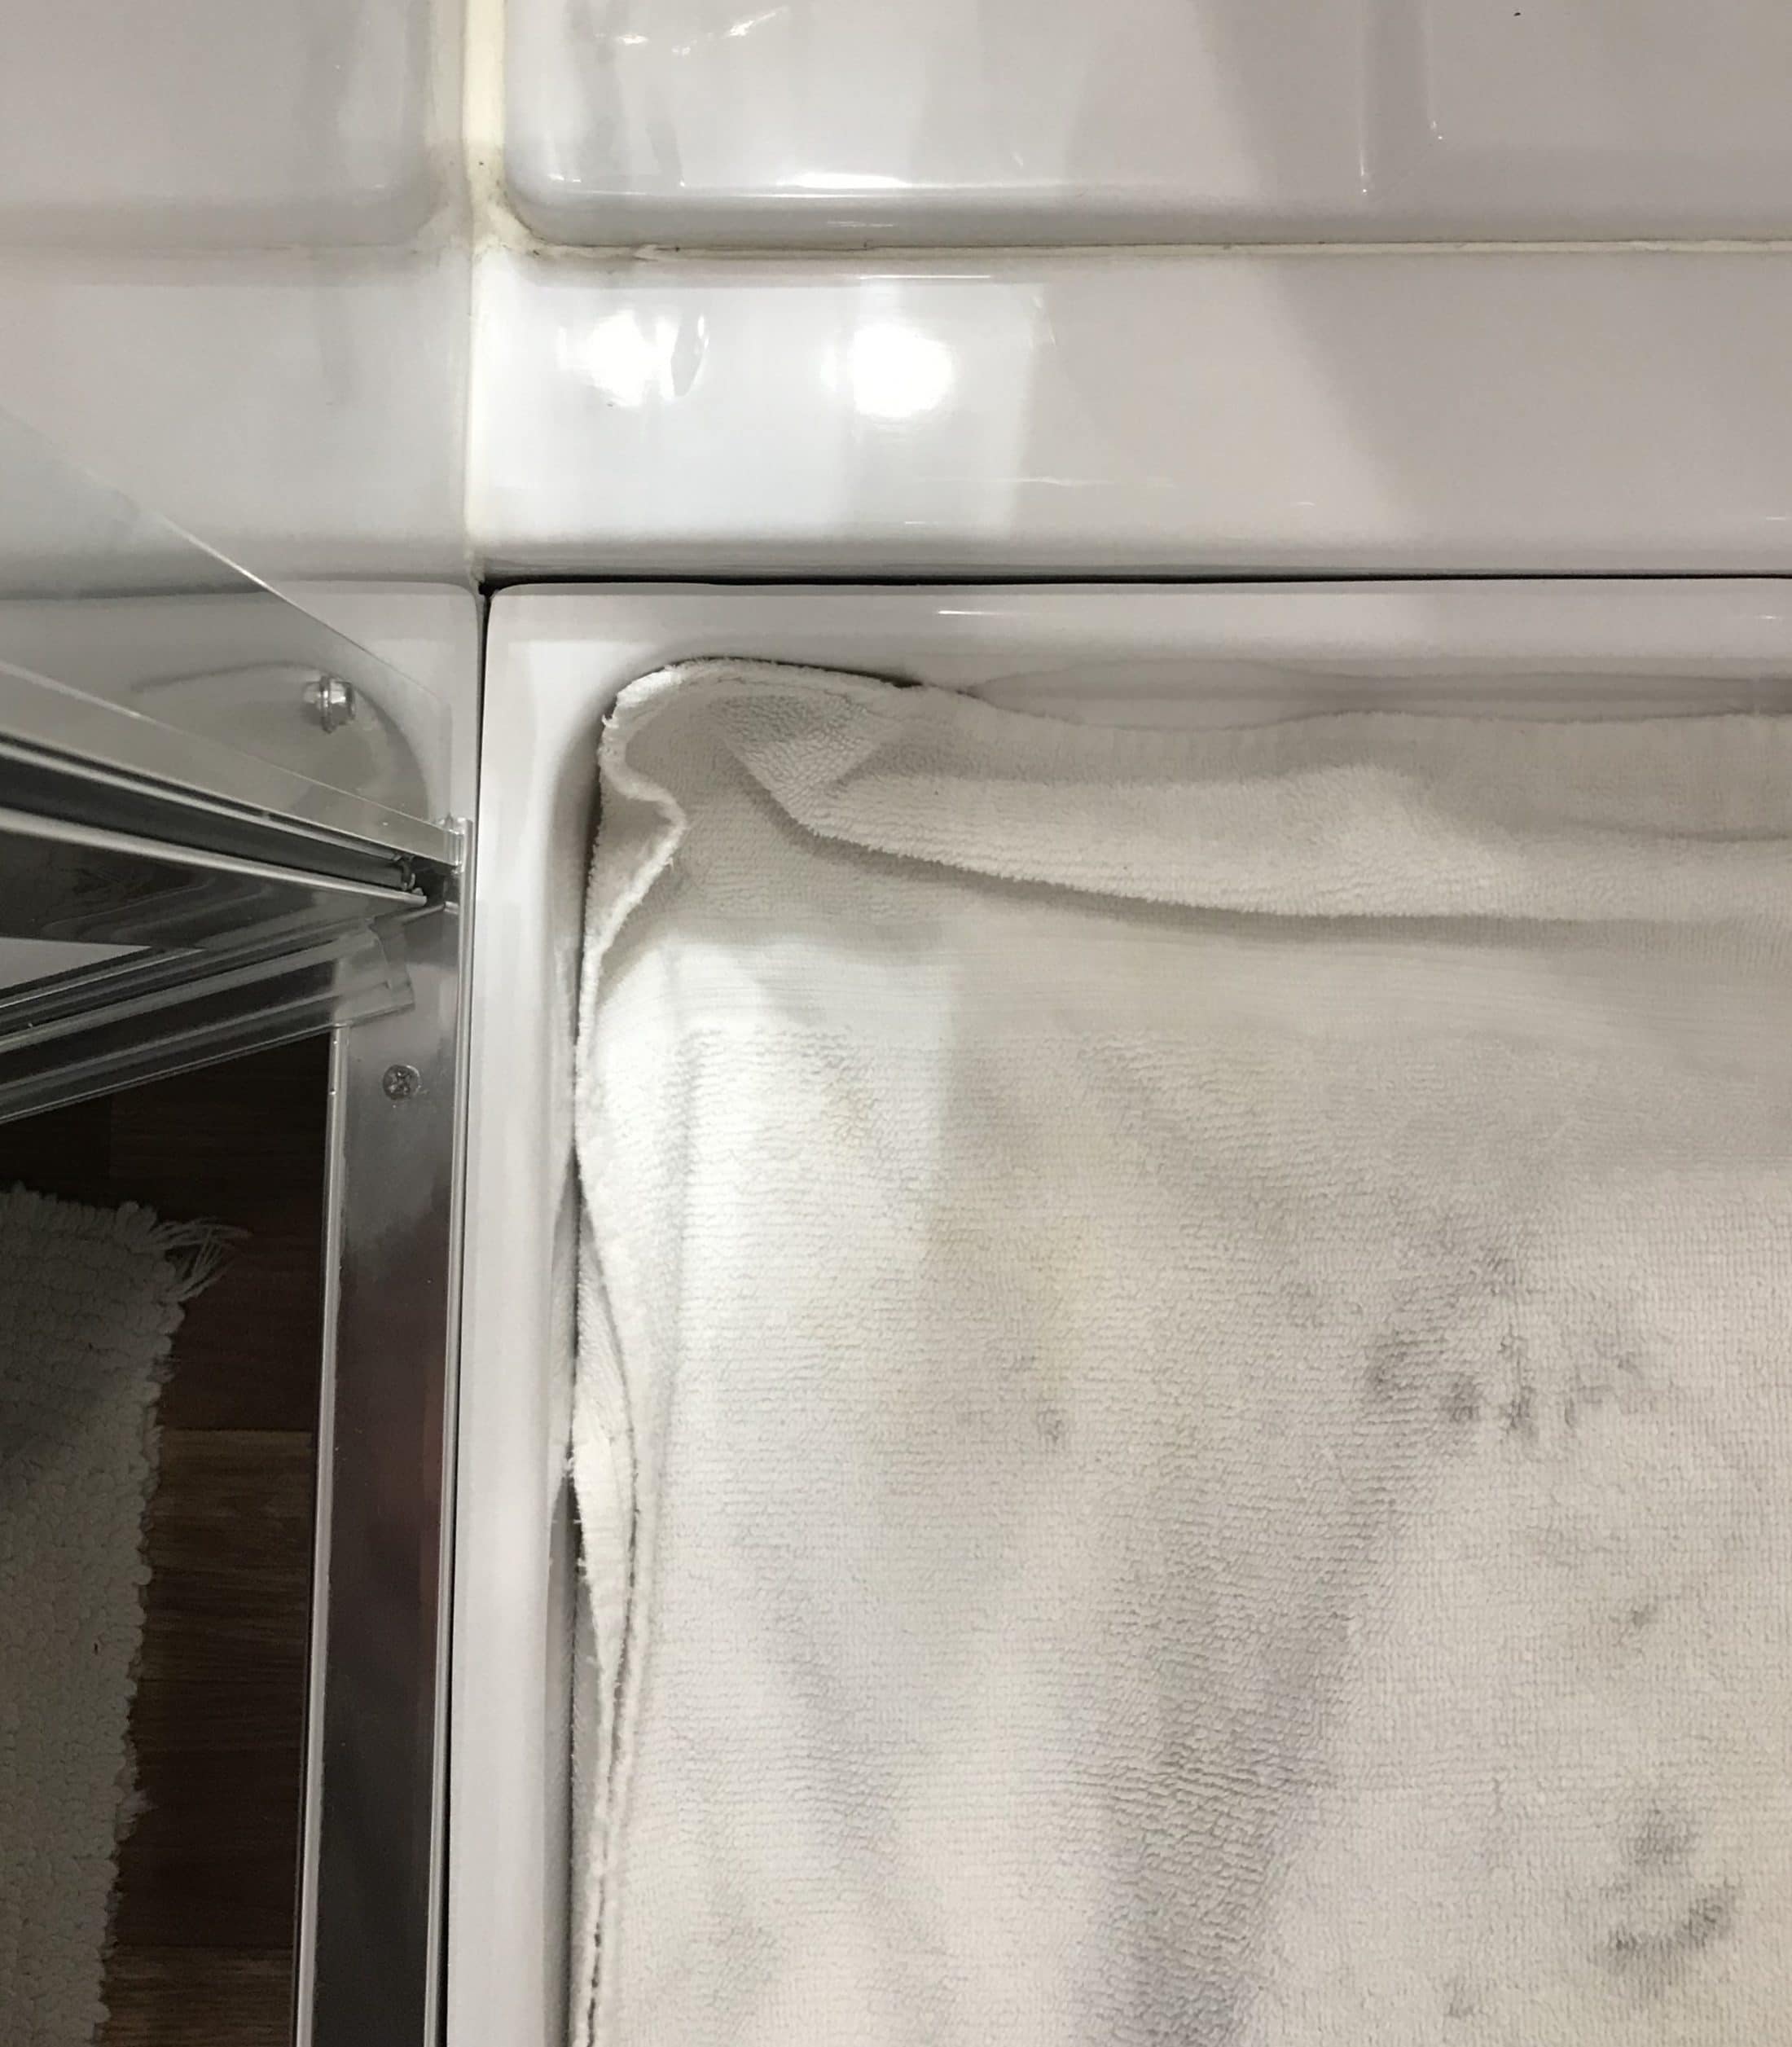
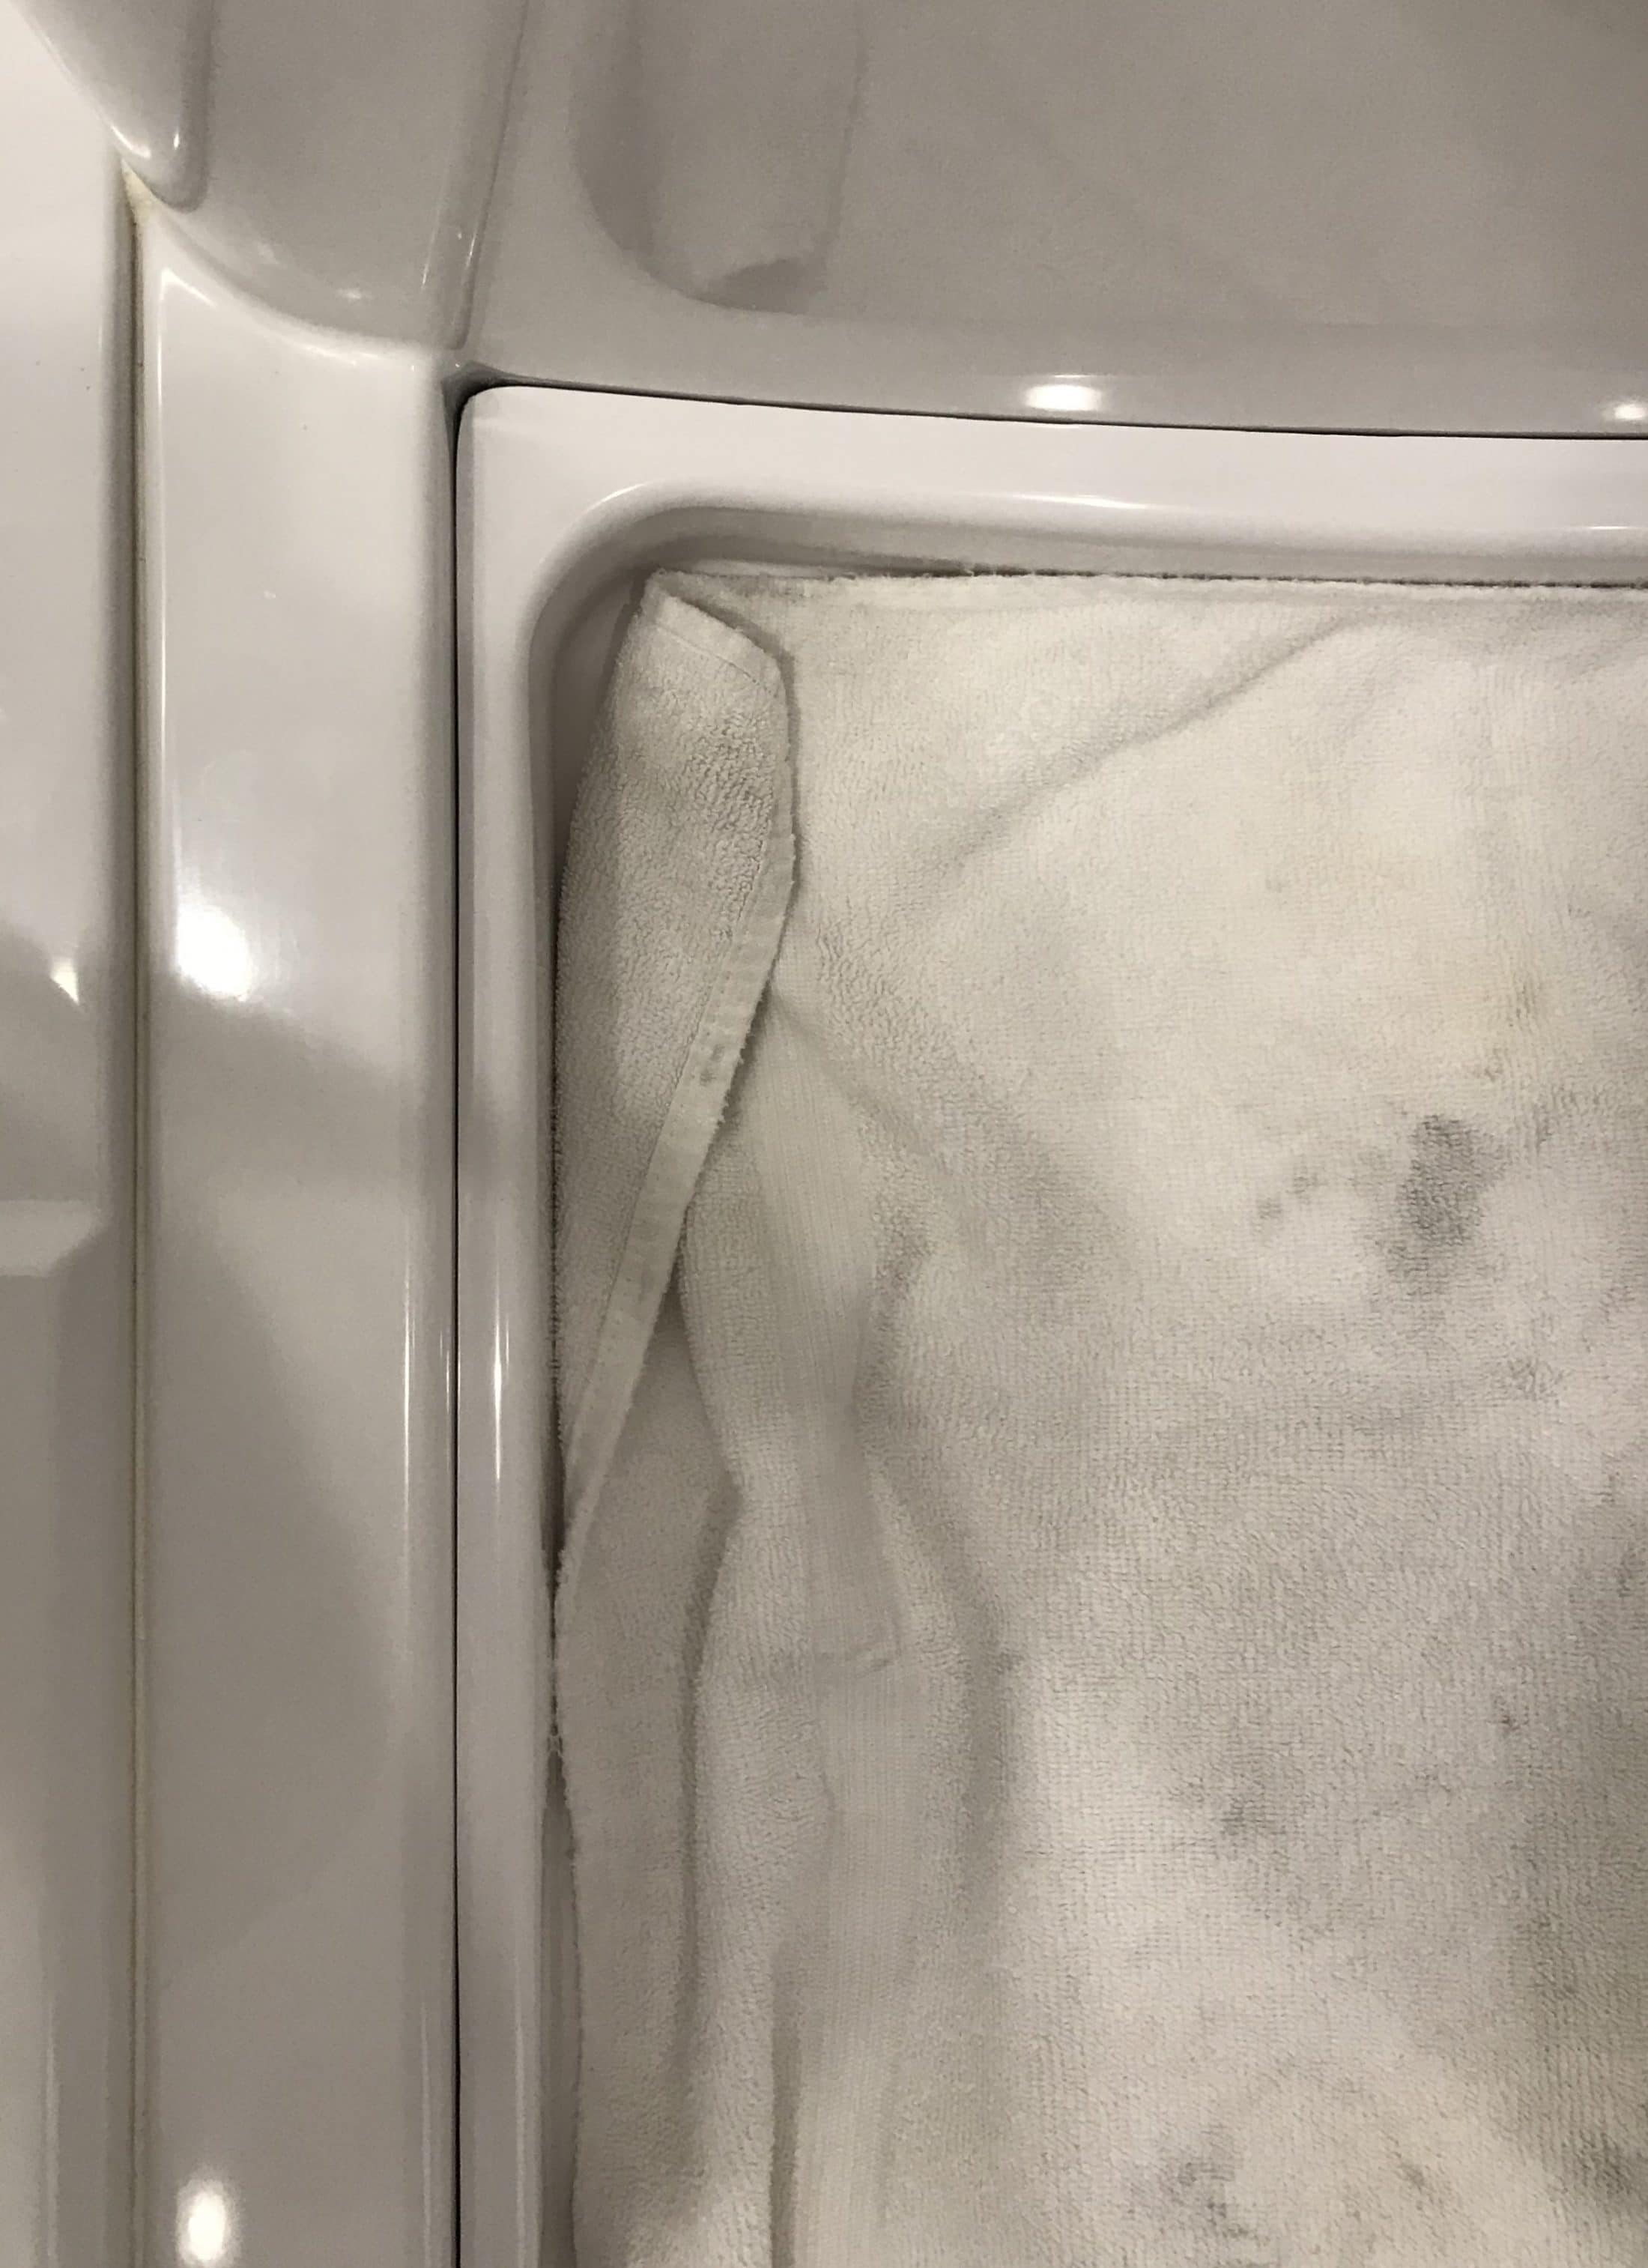
Work slowly and use the plastic razor blades and other plastic tools to remove the old sealant. I ordered 1 can of the ASI 0240 was very impressed with the ASI 0240 cleaner/remover. I ordered 2 tubes of the ASI 335. You’ll only need a small amount but get 2 tubes in case one is bad. Remove all of the old caulk using whatever combination of plastic tools work. I didn’t spray the ASI 0240 directly on the surfaces but instead sprayed it on a rag and wiped it on the sealant to be removed. I used rubbing alcohol very sparingly for the final wipe down prior to applying the ASI 335. Apply the sealant by pushing it ahead of the nozzle and force it into the gap. Quickly smooth it with your finger but do not get it too thin. The folks at the factory remove too much of the sealant and it only “bridges” the gap instead of filling the gap and leaving a bead or fillet to provide a proper seal. The thin bridge will not properly seal the shower wall/pan gap. I can not stress this enough. When you step on the pan the bottom flexes down and causes the edges to pull inward slightly. By placing weight in the pan prior to resealing you open that gap up slightly to hopefully allow more sealant into the gap. Use at least 100 lbs. More would be better. Let the sealant cure for a couple of days before removing the pre-load weight.
-
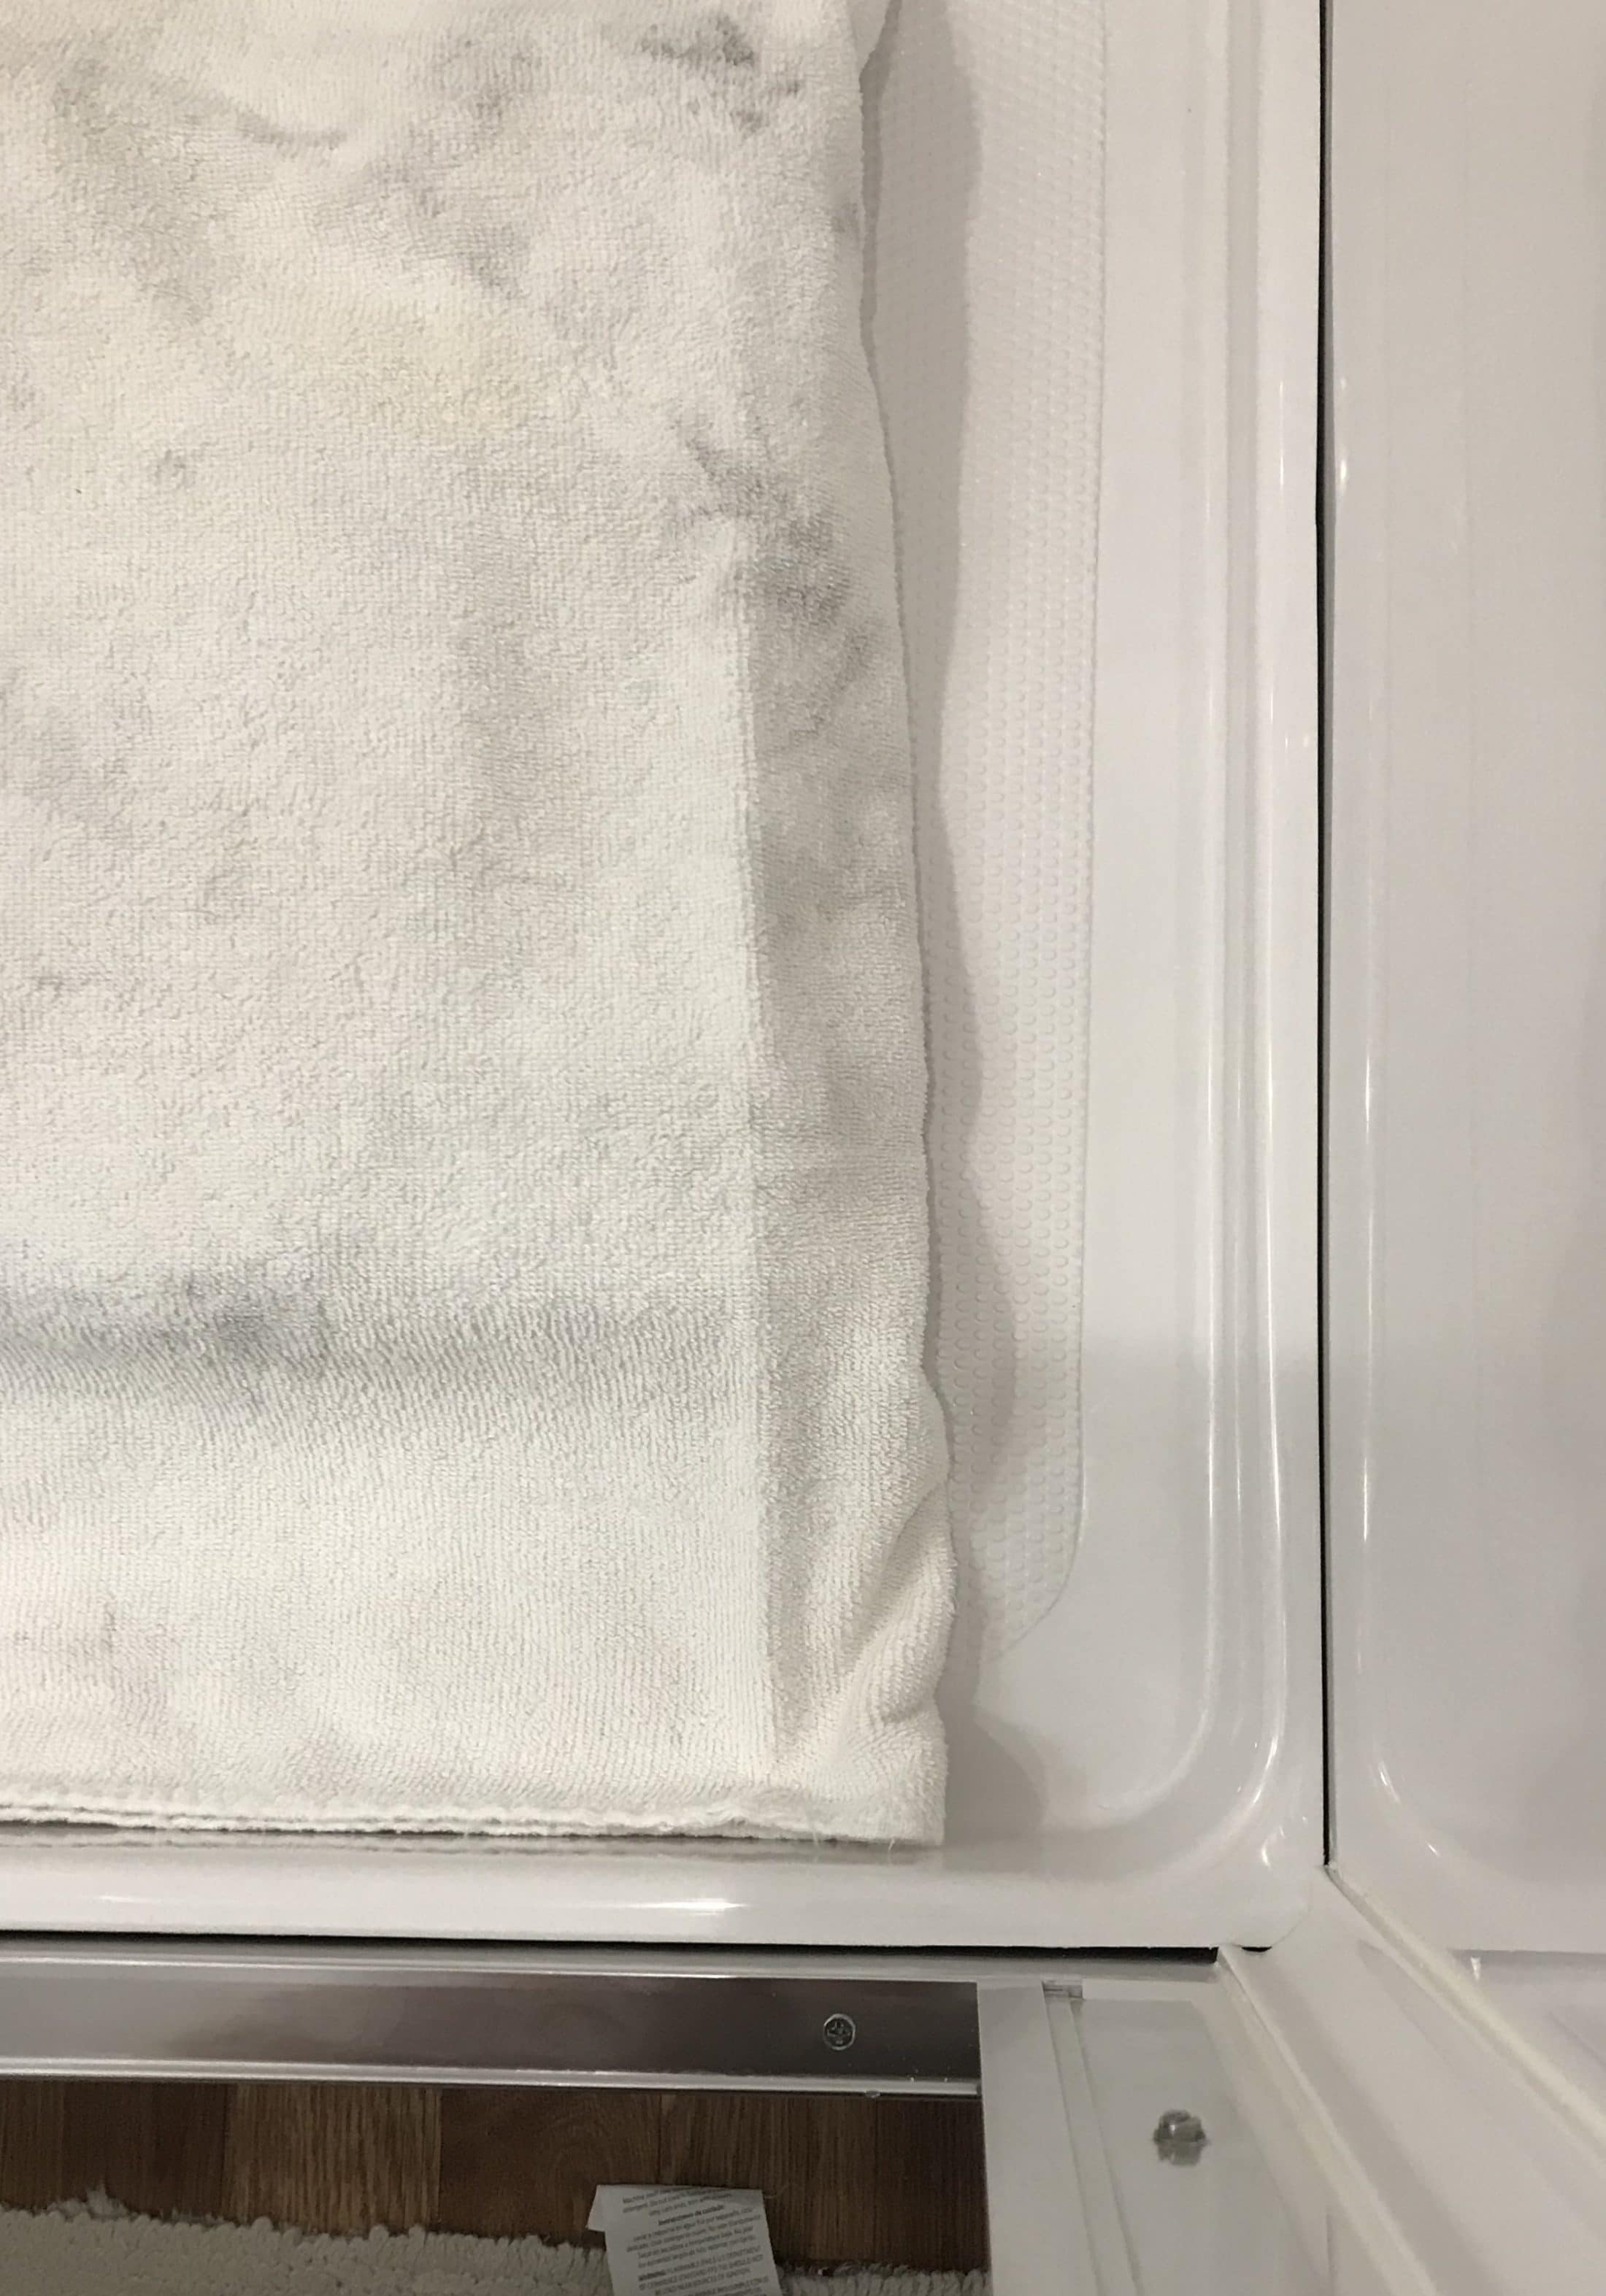
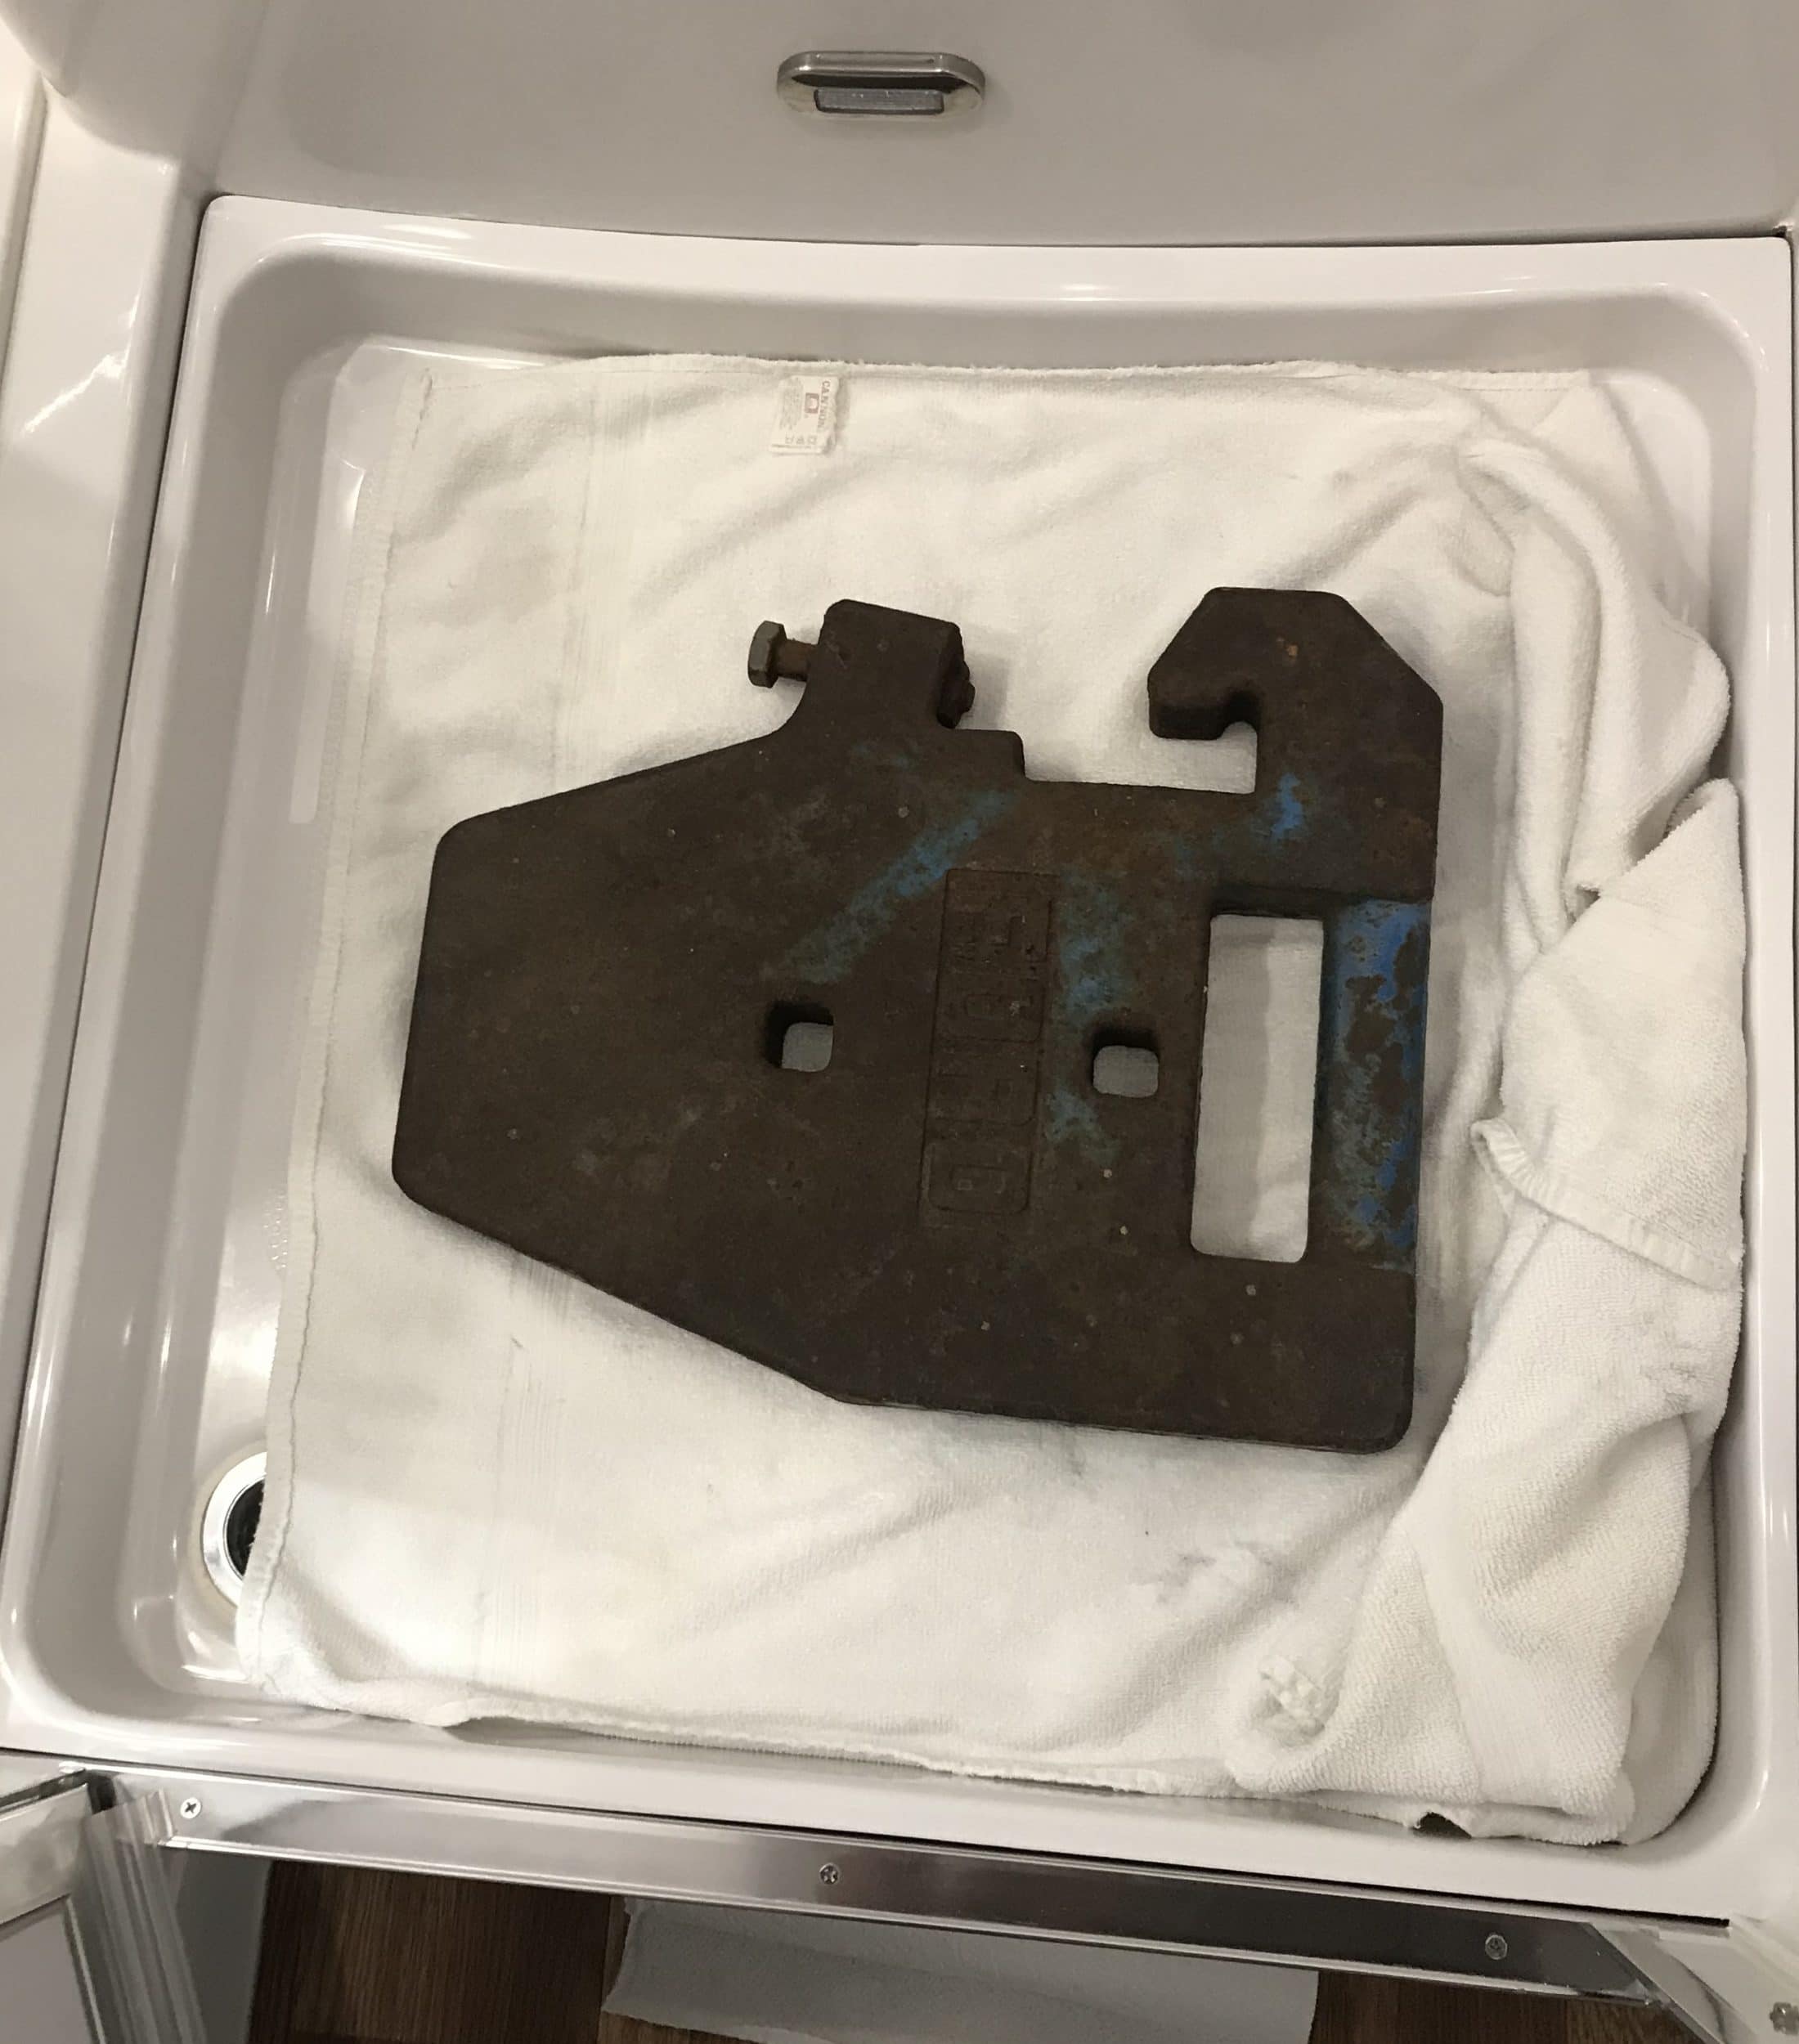
Photos showing caulk removed. Note that the tractor weight is in place when these pictures were made. The weight has a towel under it and is covered with a towel. Tractor weight in shower floor. This weight is probably 100 lbs. (continued)
-
Stuff you will need https://www.americansealantsinc.com/adhesivecleanerandremover/ https://www.americansealantsinc.com/asi-335-neutral-cure-silicone-sealantadhesive/ PLASTIC razor blades. Do not use steel. Change these plastic blades often. https://www.oreillyauto.com/detail/b/titan-5120/paint---body-repair-16614/body-repair-16510/body---trim-tools-25197/razor-blades-scrapers-17948/1c24653634cf/titan-scraper-blades/12038/4753744?pos=17 Remove the steel blade from this holder and insert a plastic razor blade. https://www.oreillyauto.com/detail/b/titan-5120/paint---body-repair-16614/body-repair-16510/body---trim-tools-25197/razor-blades-scrapers-17948/1c24653634cf/titan-scraper/12031/4753743?pos=18 (continued)
-
I have removed all of the sealant around my shower pan and resealed it without having to completely remove the pan. After removing all of the sealant I placed a tractor front end weight in the shower pan to pre-load it before resealing it. This pulled the edges away from the wall to allow more caulk into the gap. The caulk applied at the factory was smoothed too thin and the flexing of the shower pan caused the gap to open between the shower wall and pan and allowed water to leak down the wall between the shower and closet. I had water under the mat in the closet. After my repair I have not had any more water in the closet. I realize your problem is a squeaky shower pan instead of a leak but I believe you will have to do as I have done to fix your problem. (continued)
-
Haha, I knew what that meant without having to Google it.
-
Just recently everyone’s “avatars” have started showing up MUCH larger. Is it just me or is anybody else having this problem?
-
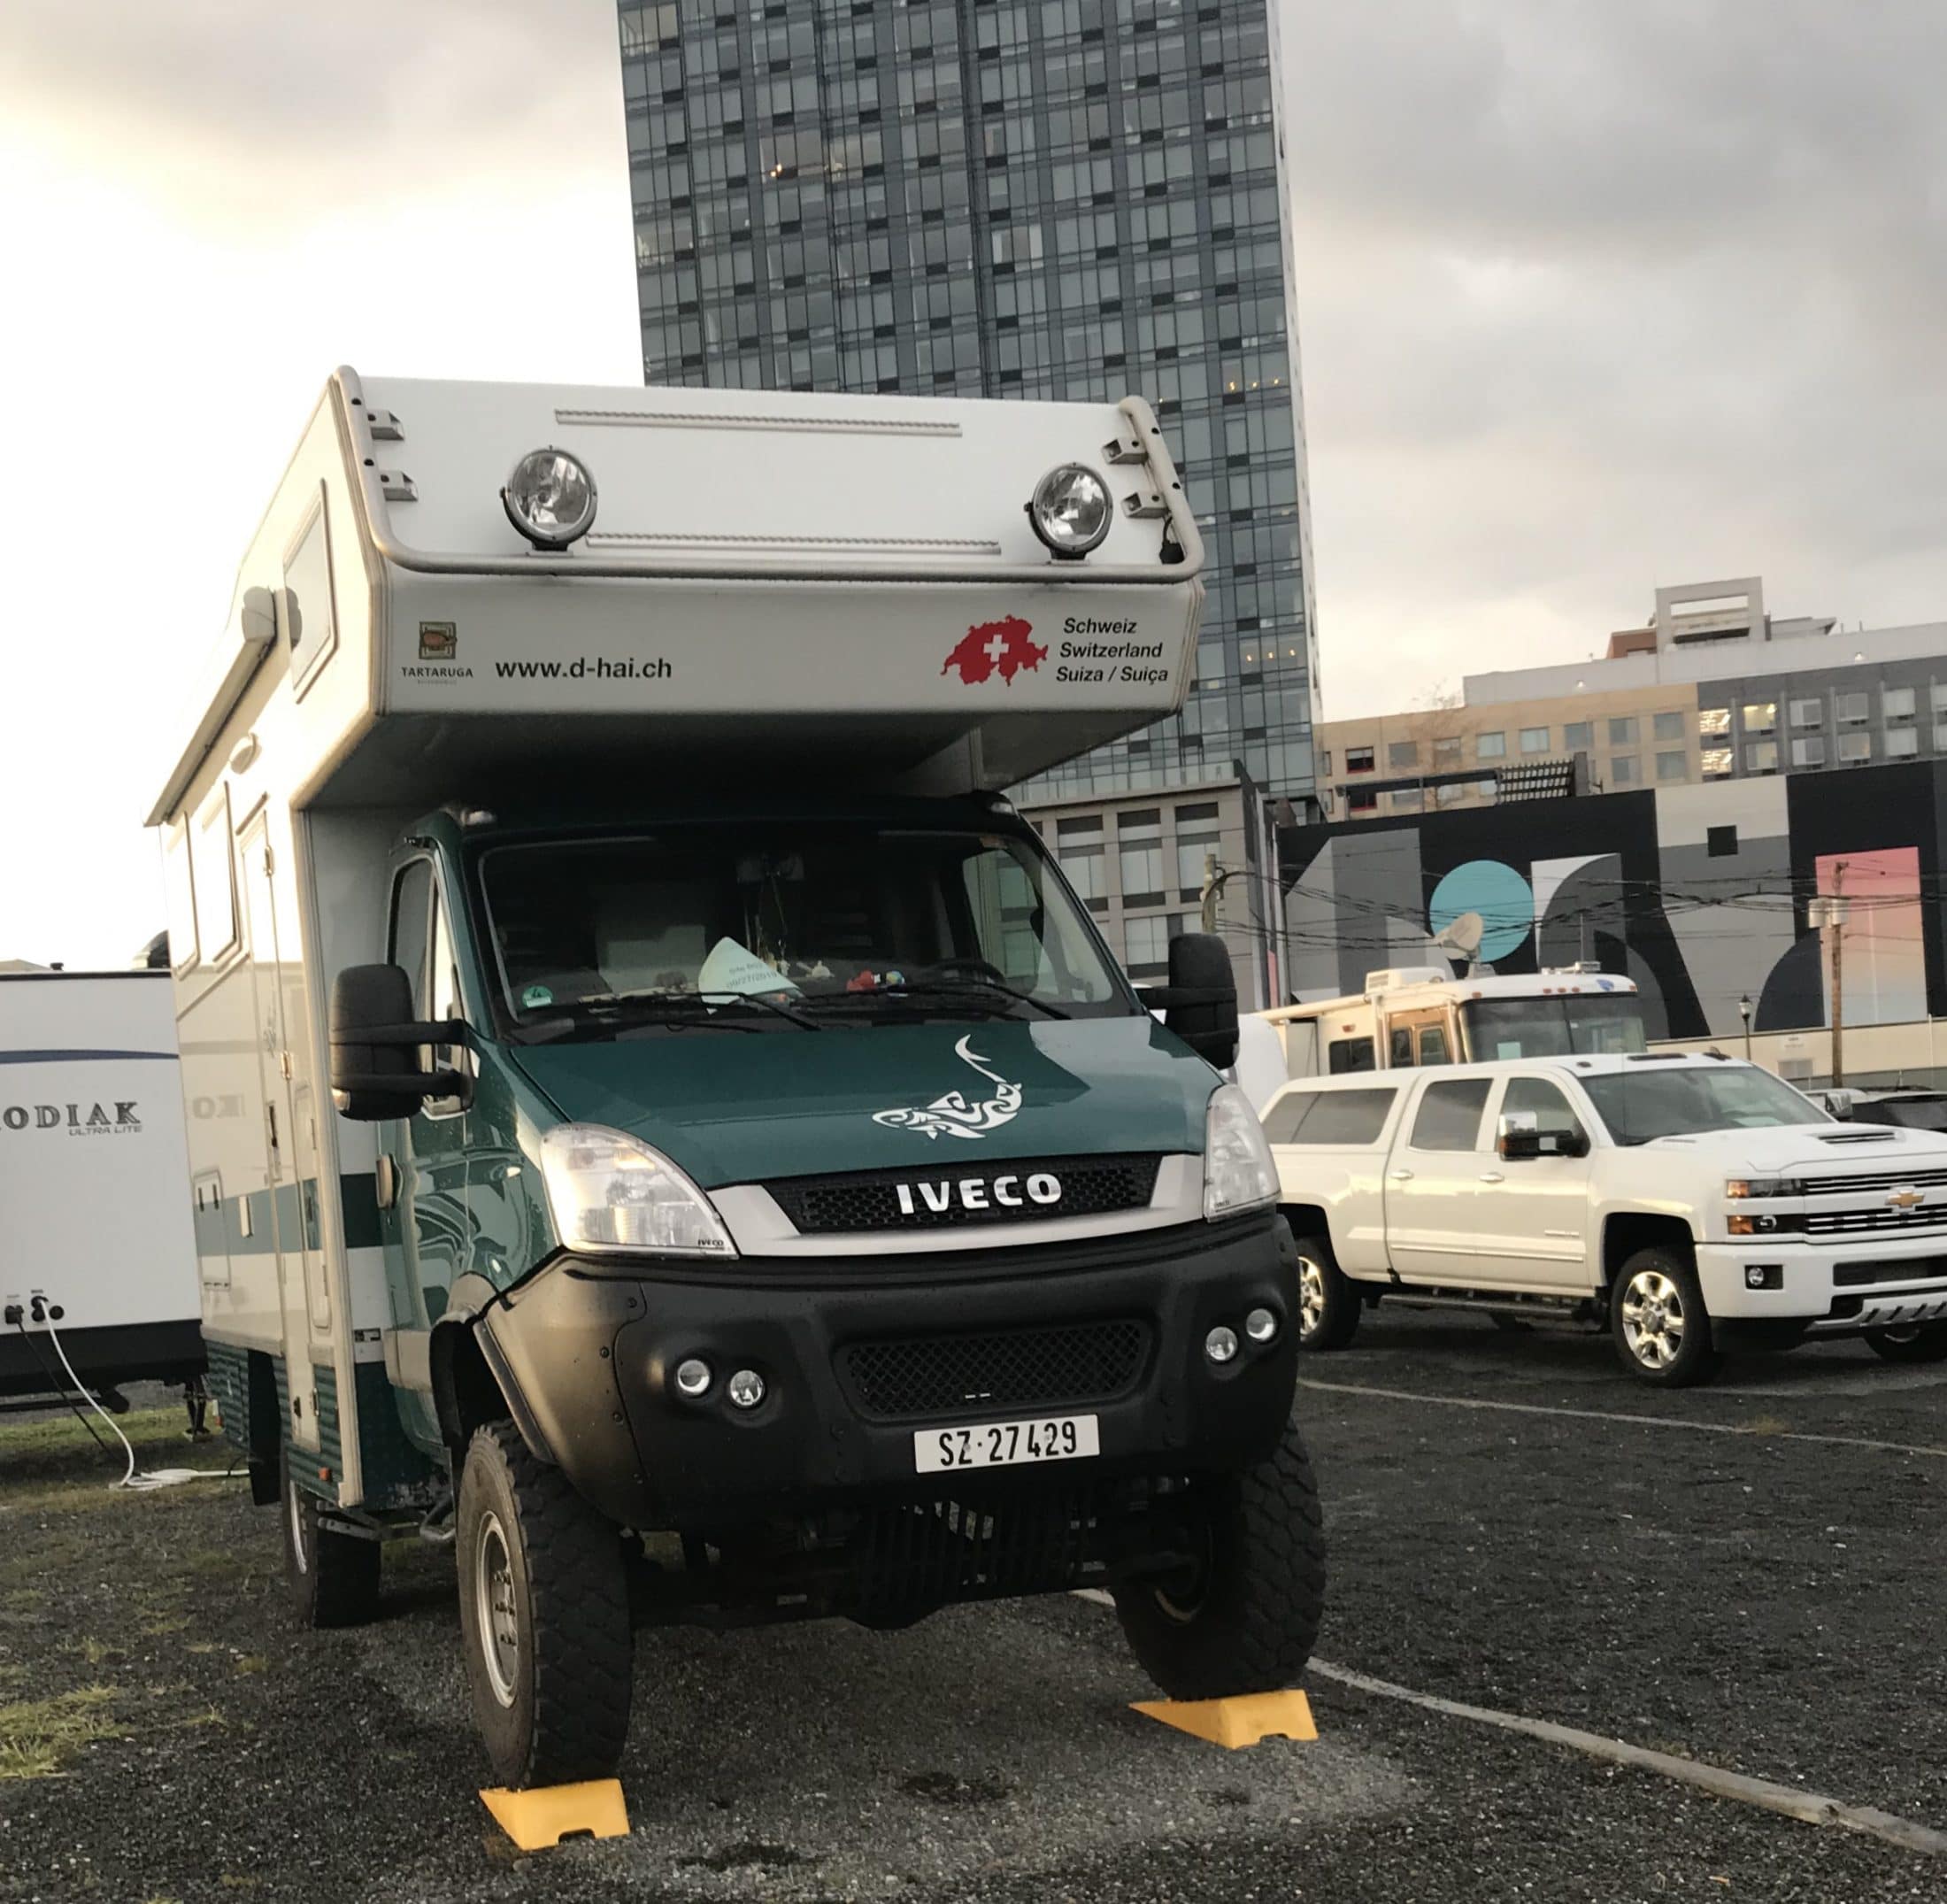
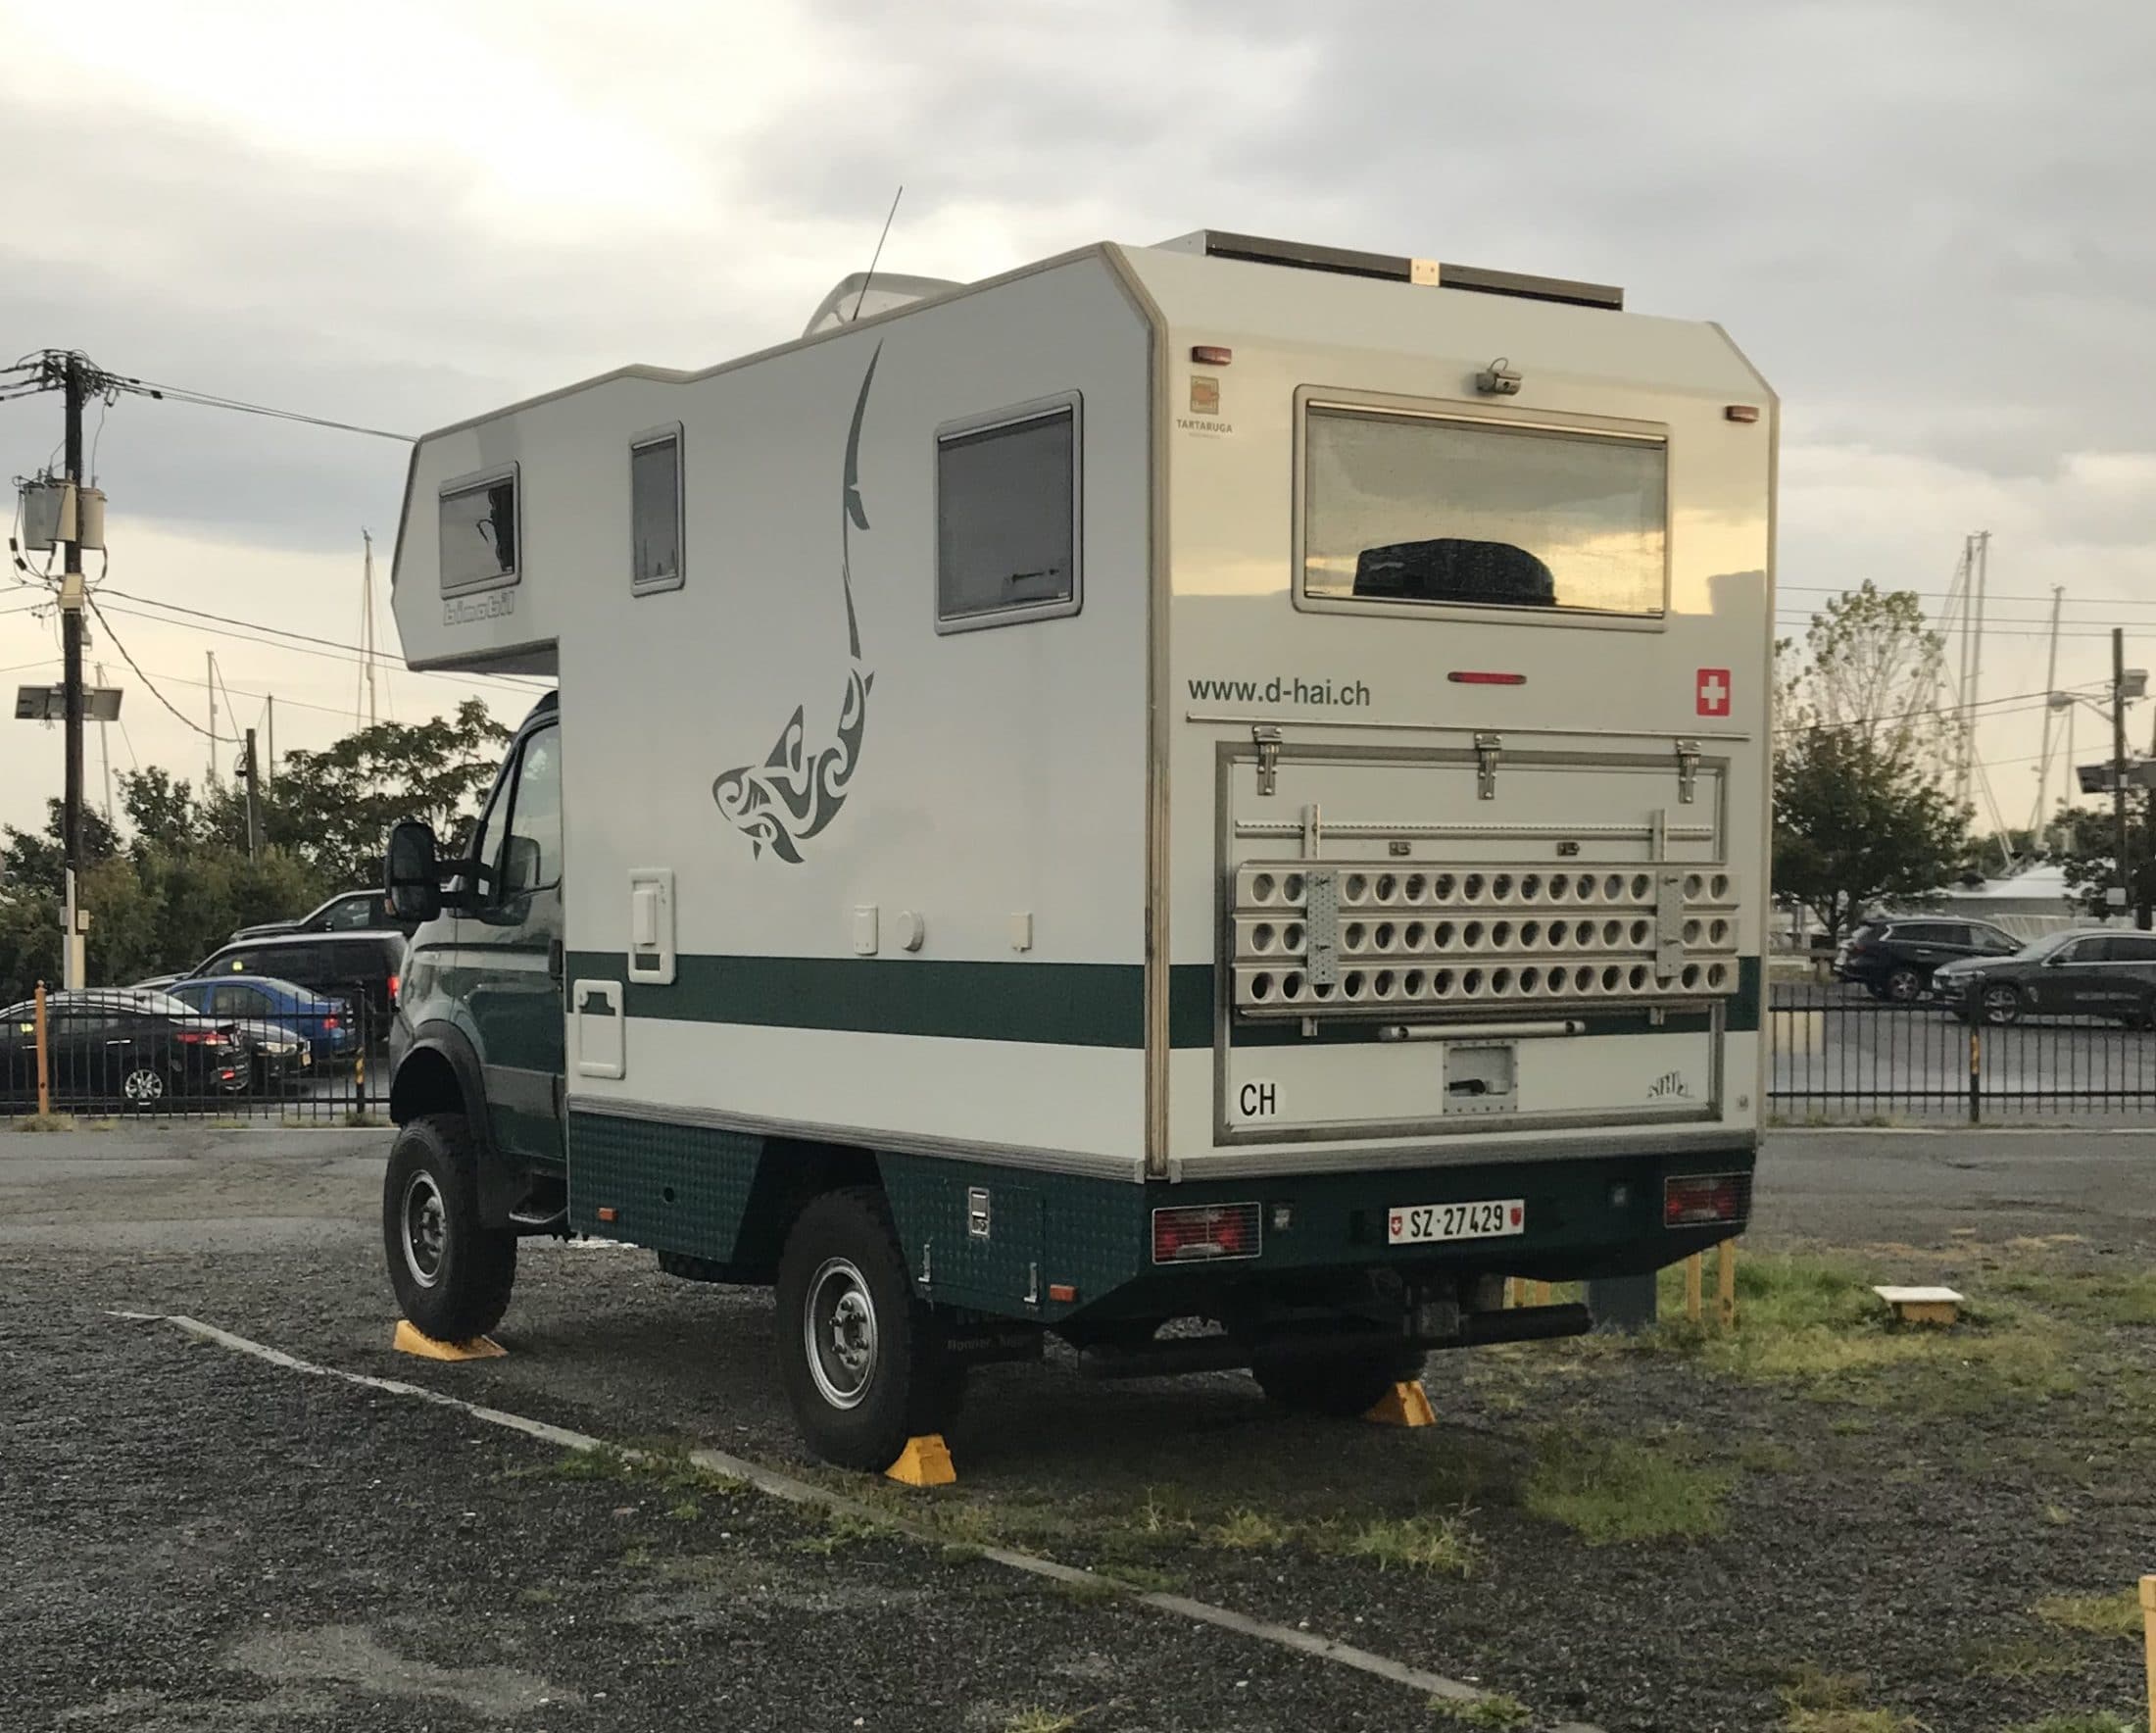
This Bimobil rig was parked next to us at Liberty Harbor RV Park just across the Hudson from Manhattan. Wanted to take a look inside but never saw the owners. Looks like Switzerland tags? Tried to pull up the website shown on the top left rear but couldn’t. https://www.bimobil.com/en/
-
Yes I have it also and mine stays in an enclosed shop when it’s not on the road.
-
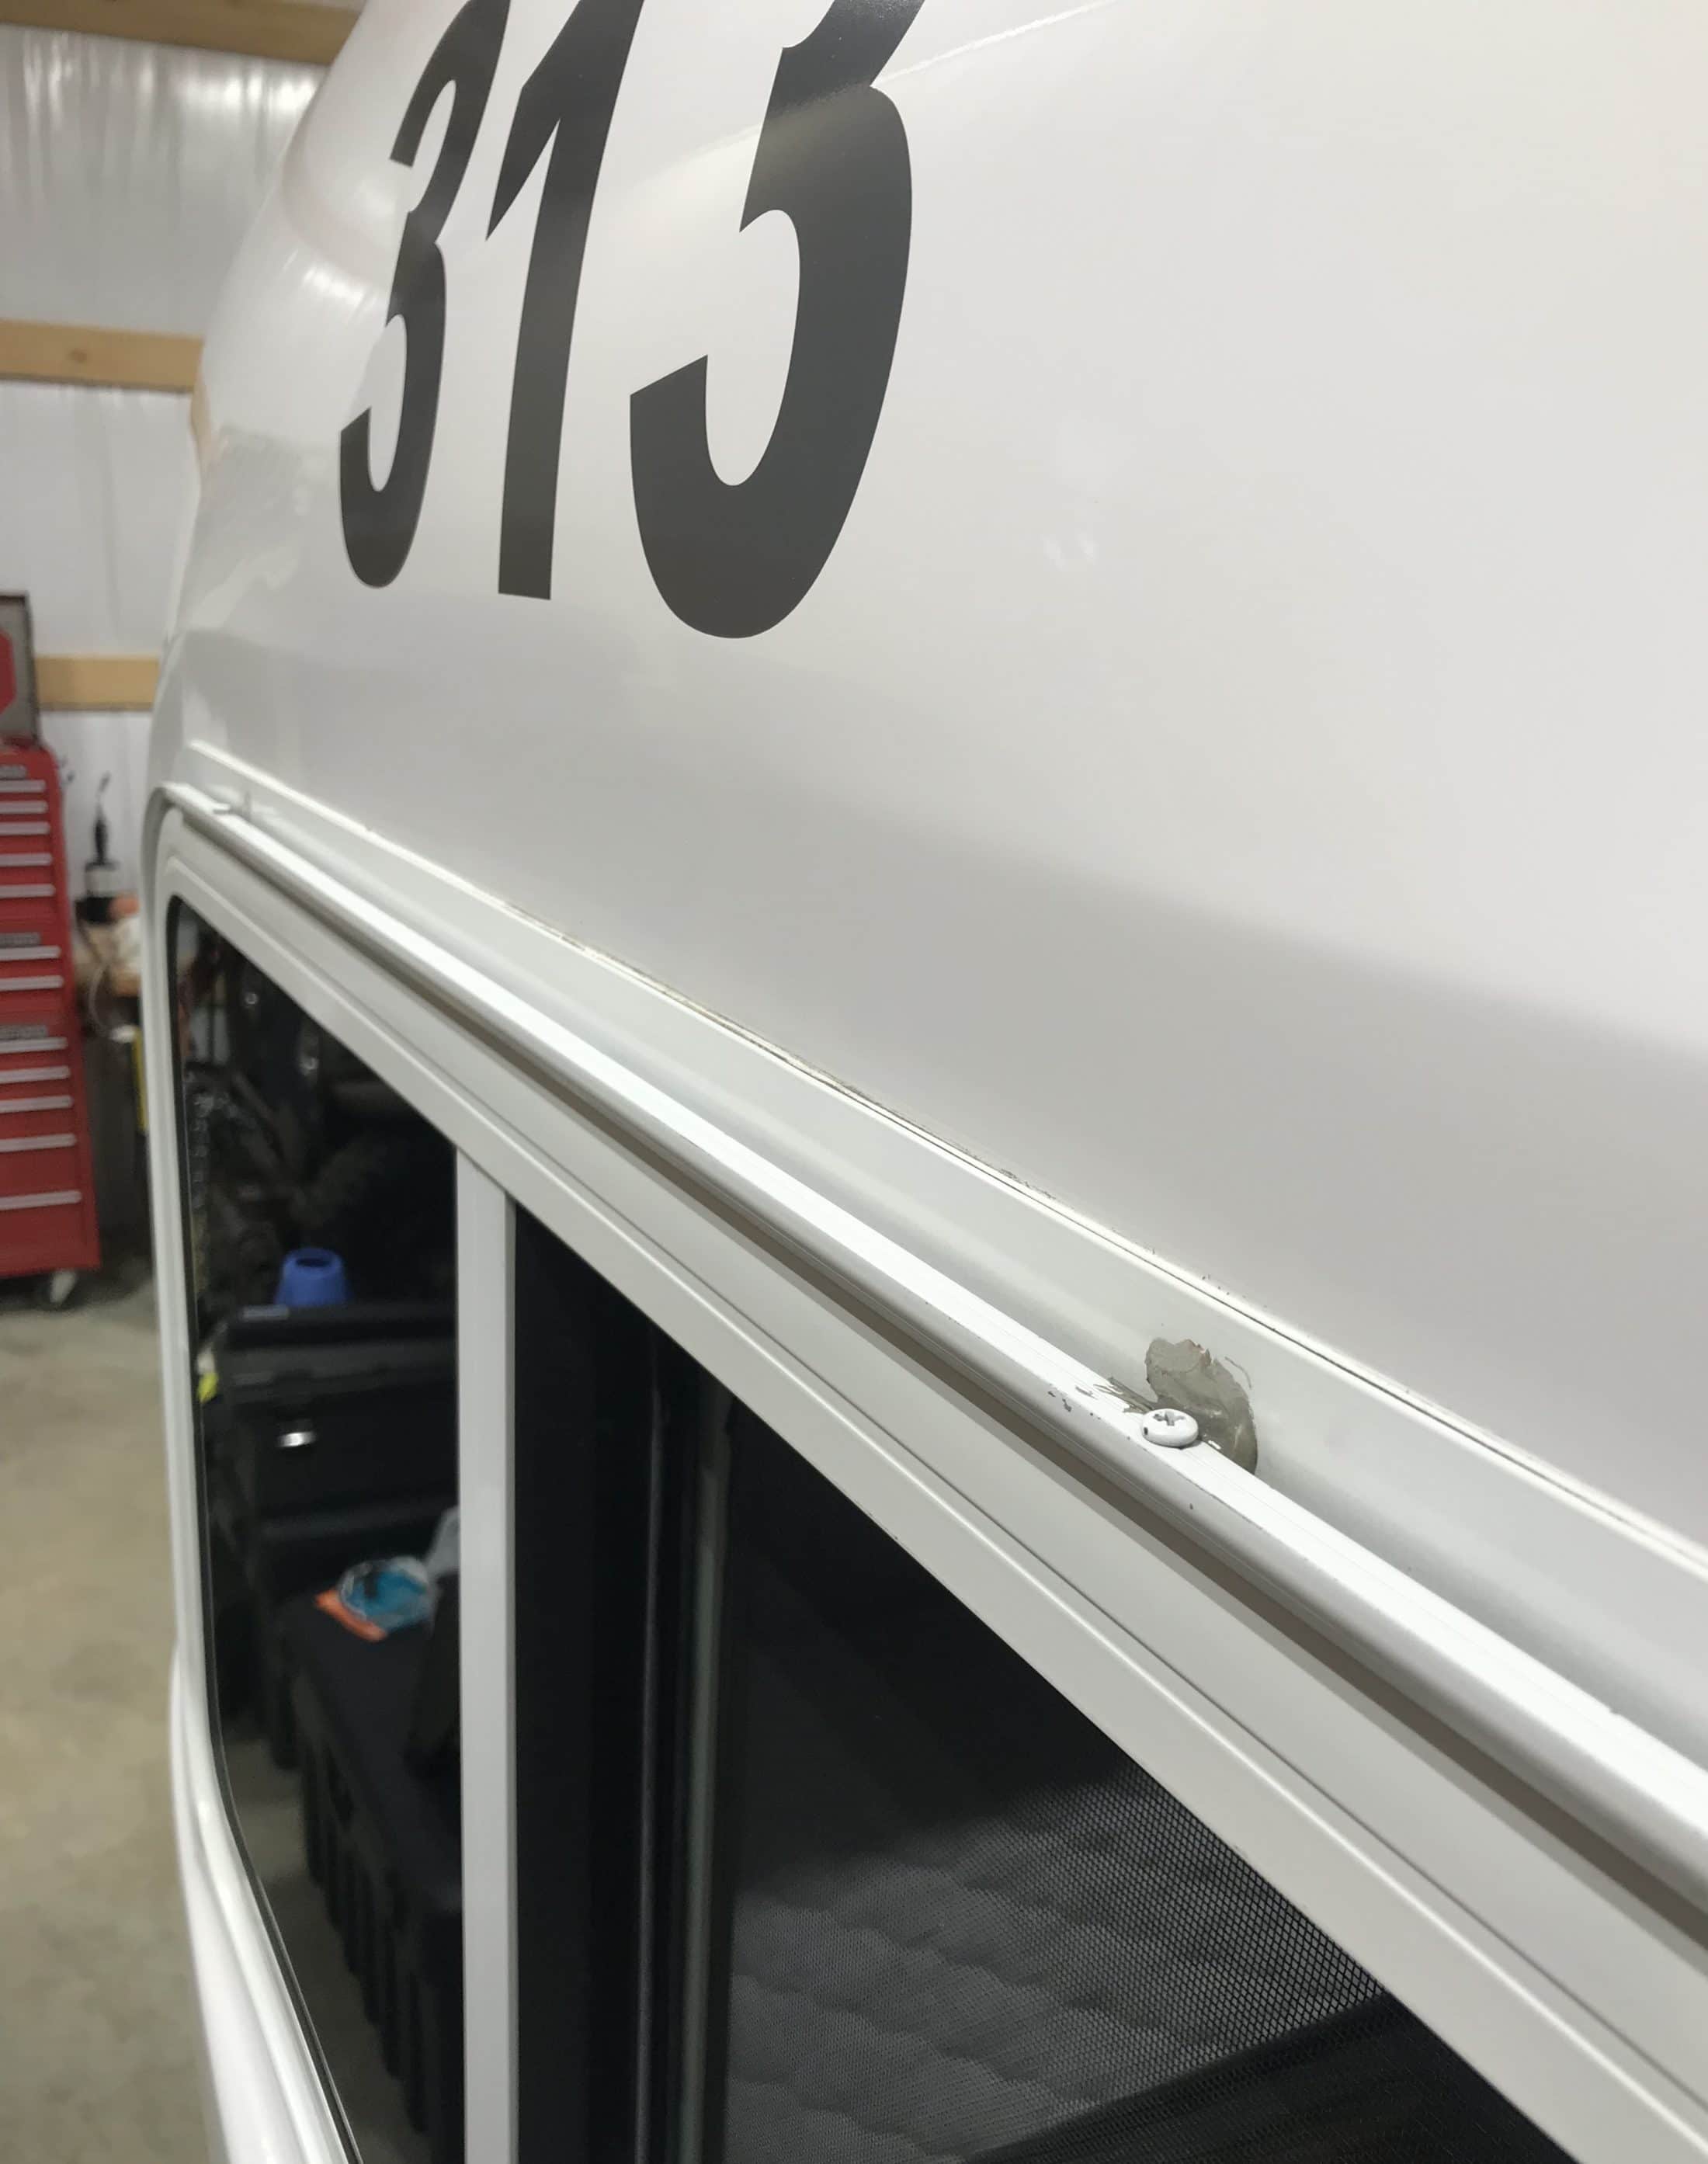
Yes I noticed that also Overland and it’s on my To Do list. I have ASI 335 Sealant and ASI 0240 Cleaner on hand, just need to get to it. https://www.americansealantsinc.com/asi-335-neutral-cure-silicone-sealantadhesive/ https://www.americansealantsinc.com/adhesivecleanerandremover/
-
I agree it doesn’t look good but I guess it’s the best they can do.
-
They are on our 2018 LE2 also. Only you got a lot more. It’s sealant over these screws.
-
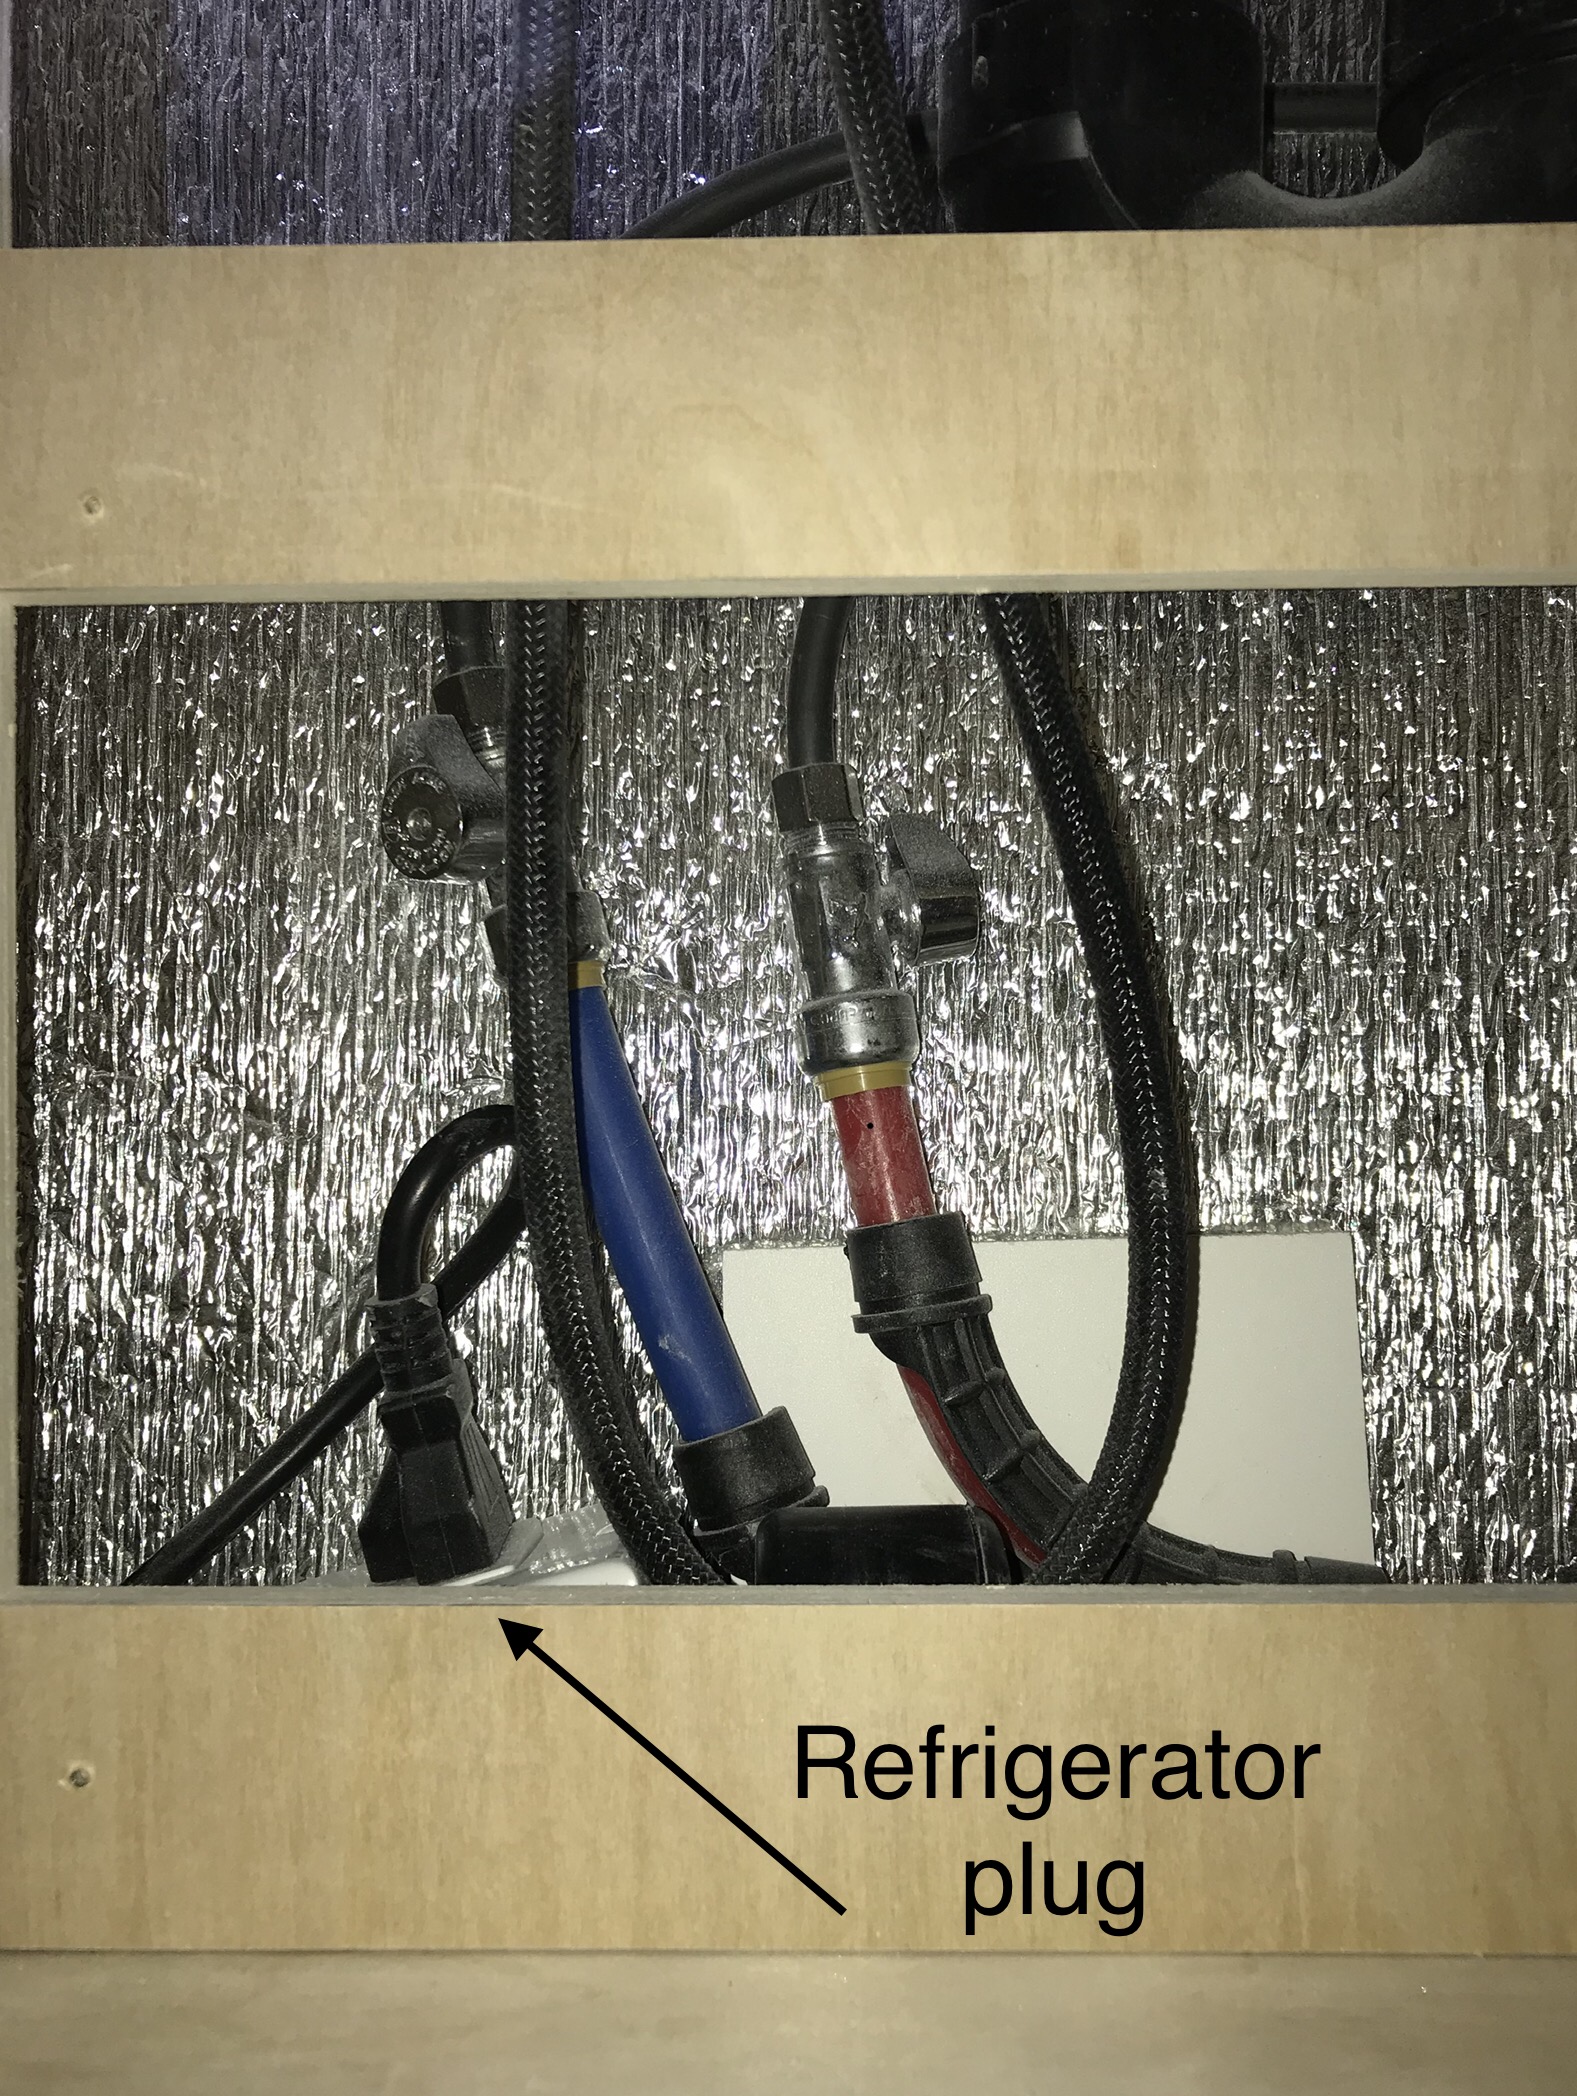
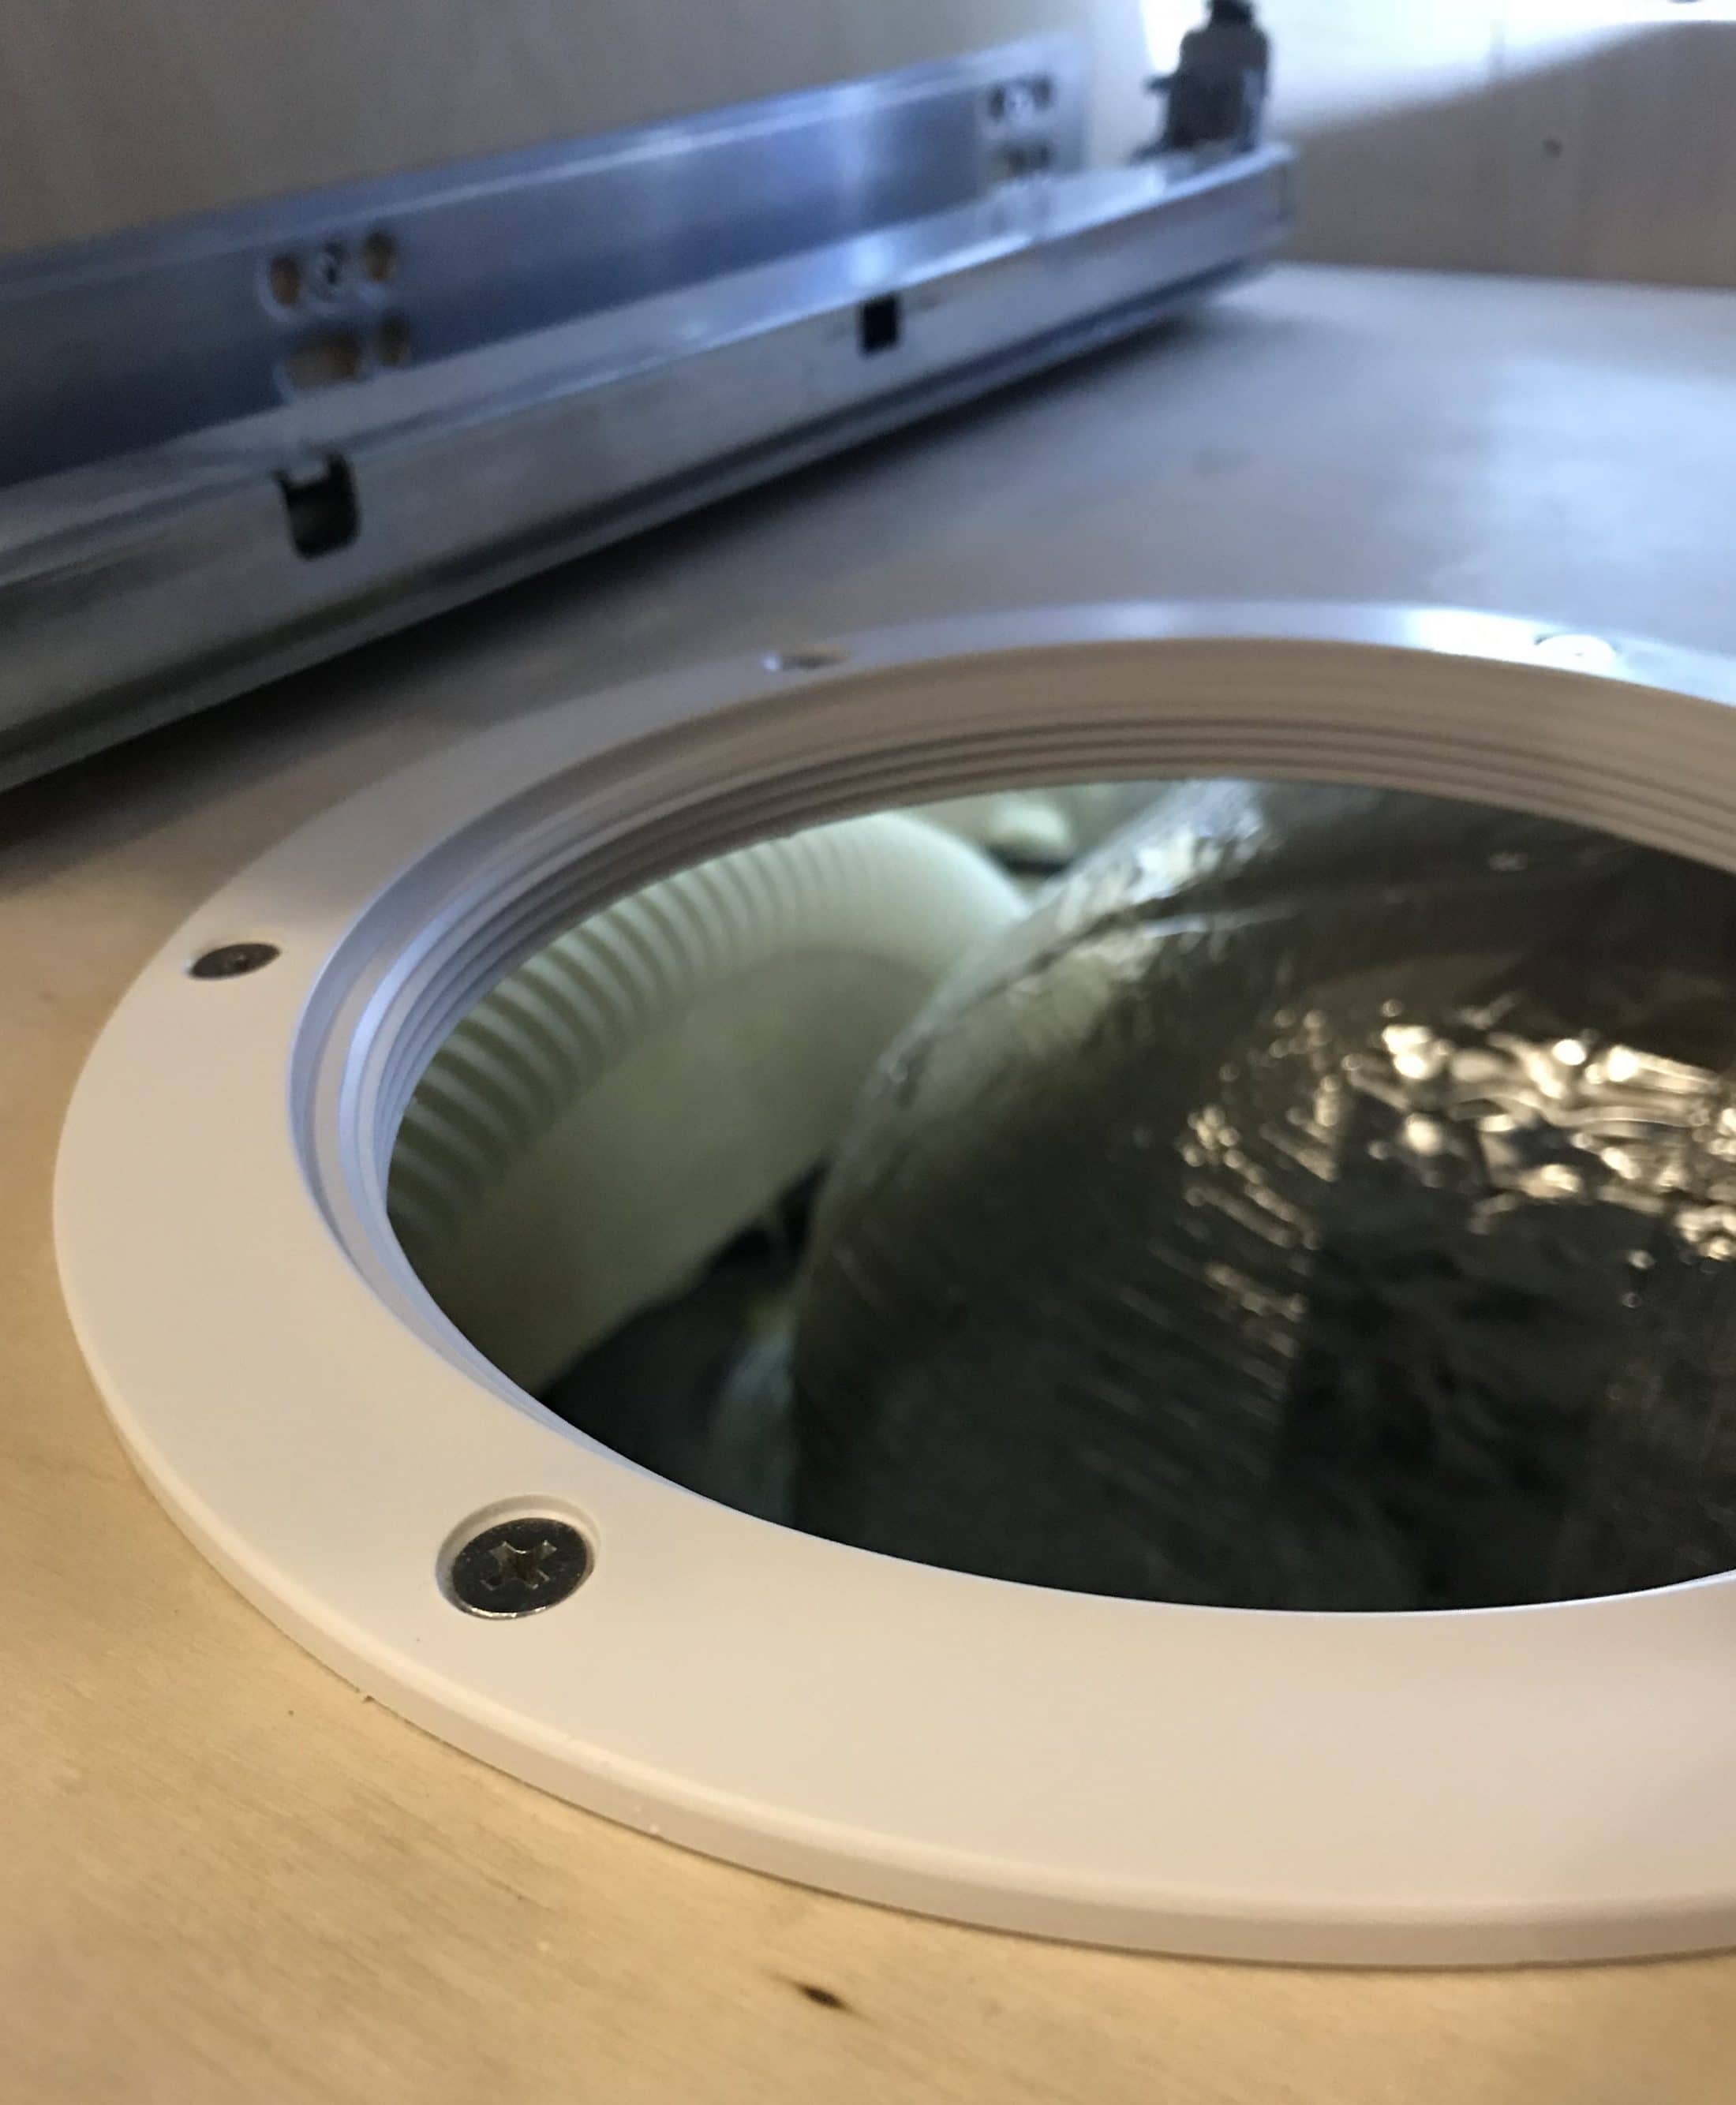
Remove the three left kitchen drawers. Remove the plywood panel at the back. See picture for location of the plug. Before you put everything back together move the weighted sink hose so that it is between the back of the drawers and the back wall of the cabinet.
-
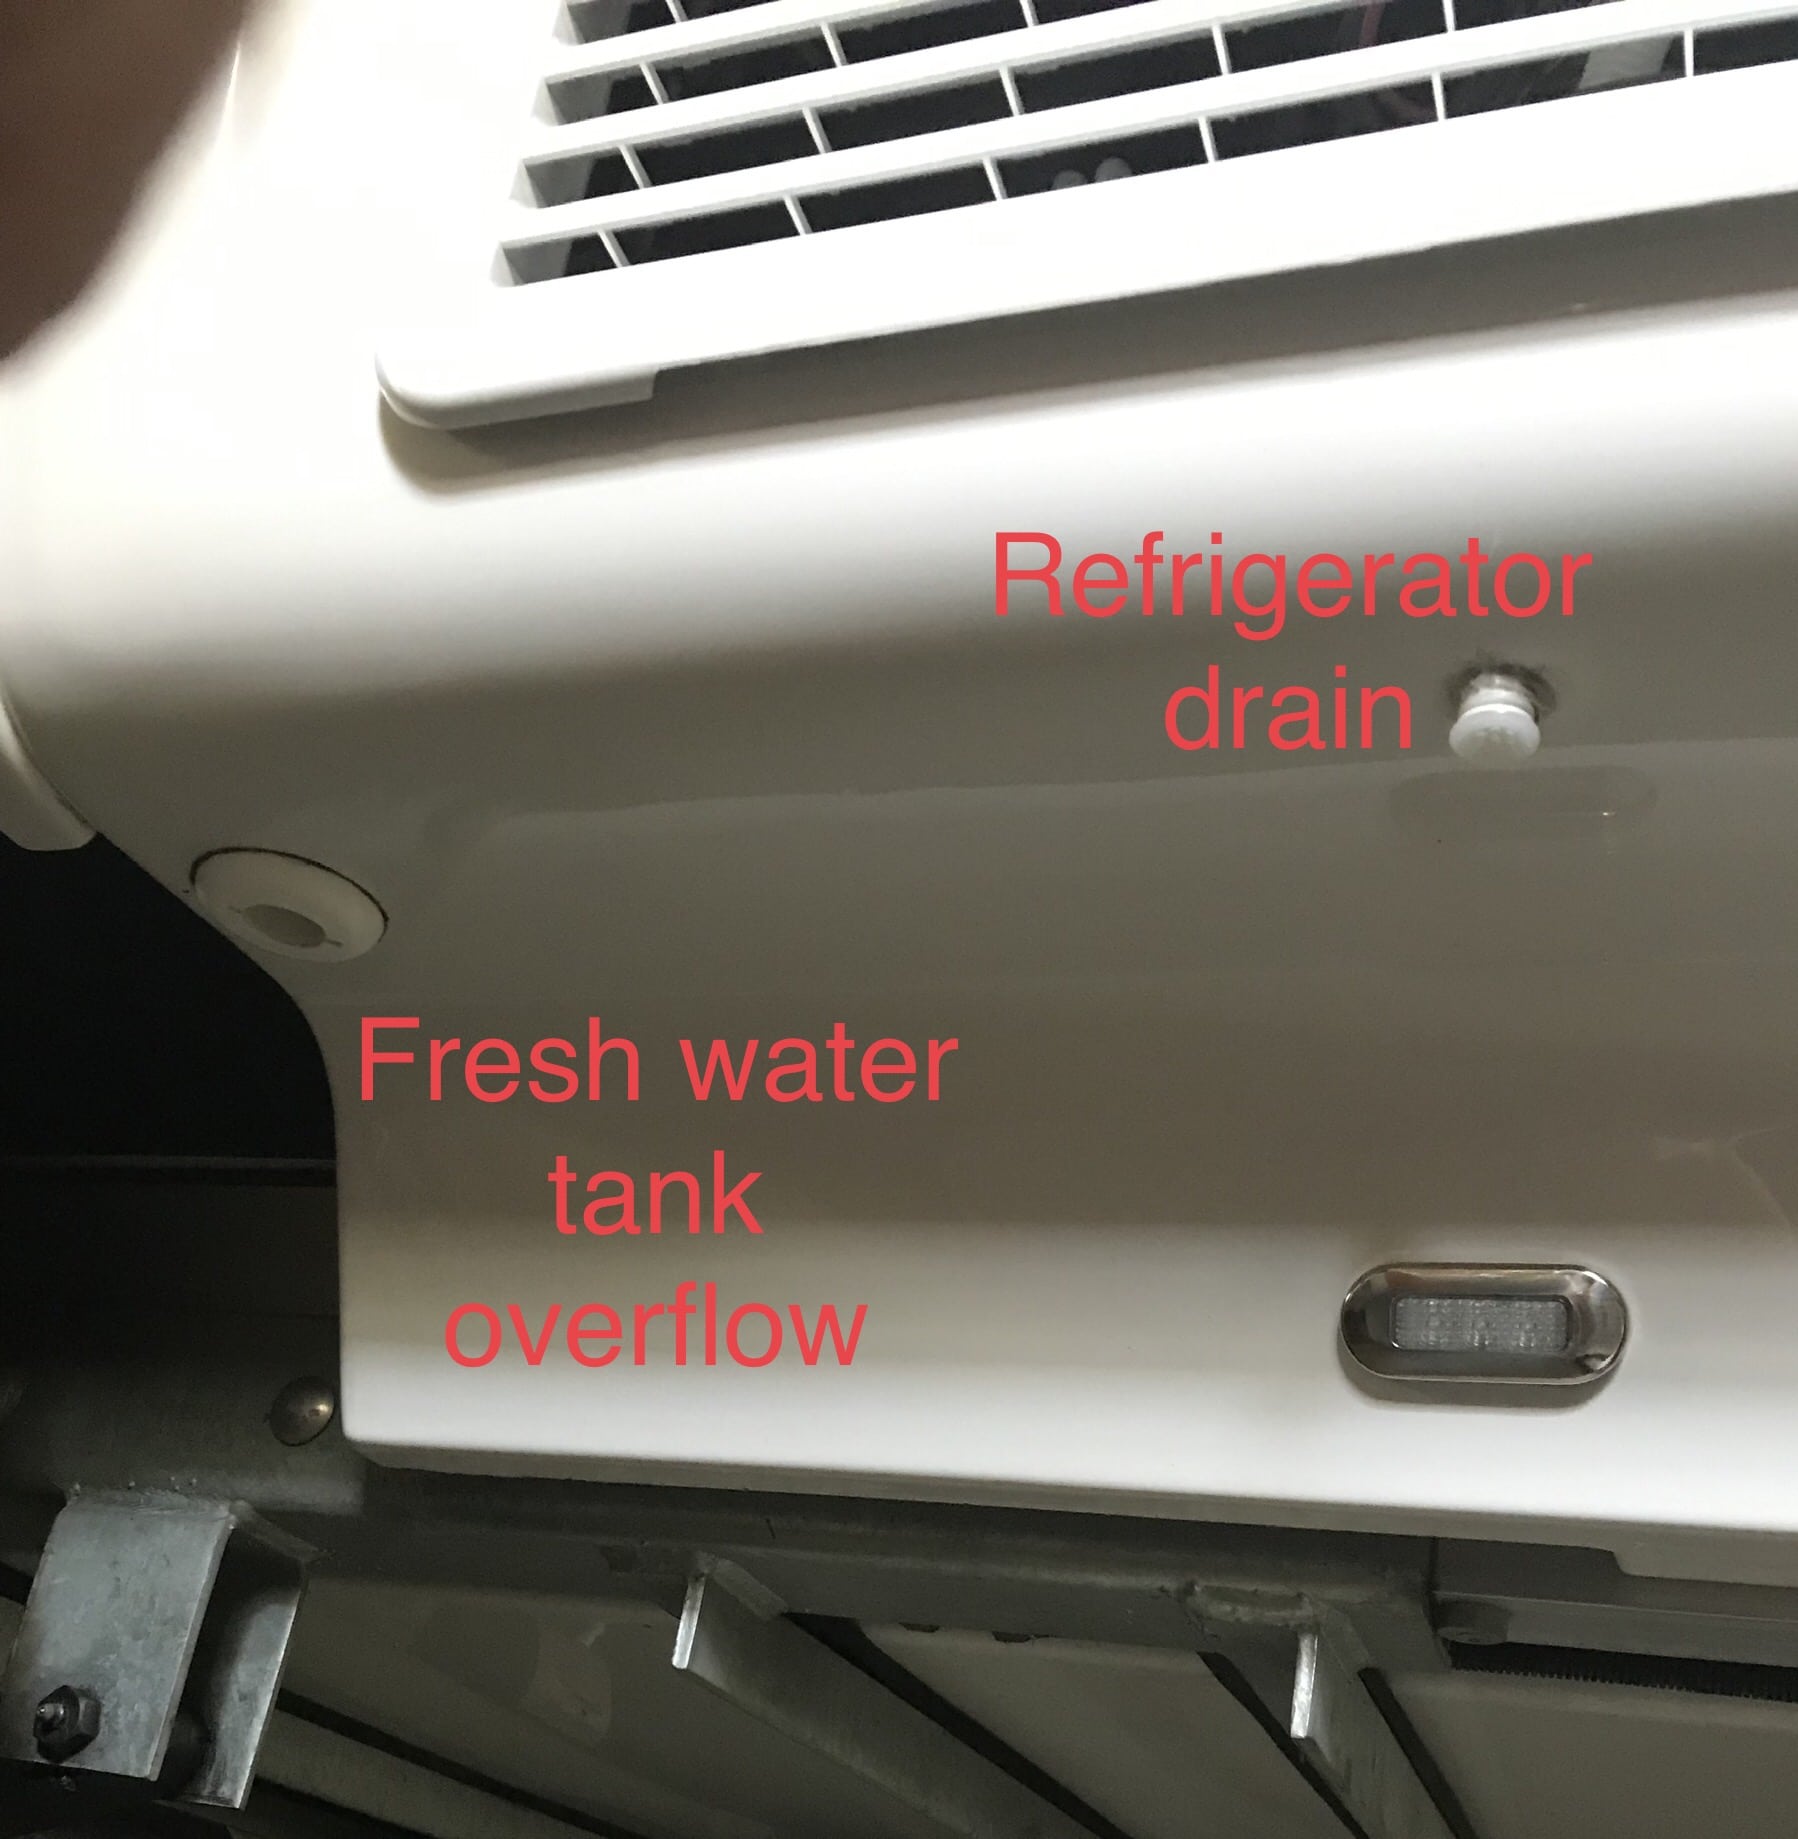
Was the water under your refrigerator area coming from the fresh water tank overflow or from the refrigerator drain? If coming from the refrigerator drain, was it coming out of the tube or from a gap between the tube and the hull?
-
I found the thread on this forum that mentions the split fitting under the basement floor. https://olivertraveltrailers.com/topic/city-water-connection/#post-161513
-
My overflow tube clamp was loose. The fellows at the factory added this port But if I had it to do over I would have cut the hole myself and made it larger. I’ve got some measurements to make the job less scary if you ever need to cut the hole.