Townesw
-
Posts
553 -
Joined
-
Last visited
-
Days Won
22
Everything posted by Townesw
-
I’ve had to remove the shelf under the bathroom sink. I found some plastic razor blades and scraped the old sealant off the fiberglass around the hole and the plastic around the shelf edge. I can’t scrape any more off. Is there a solvent that will remove the thin layer of remaining sealant or do I just put it back together and seal with new sealant? This is the sealant I will be using https://www.boatlife.com/product/lifeseal-sealant-tubes/
-

Left black tank clean out hose on!
Townesw replied to rideadeuce's topic in Mechanical & Technical Tips
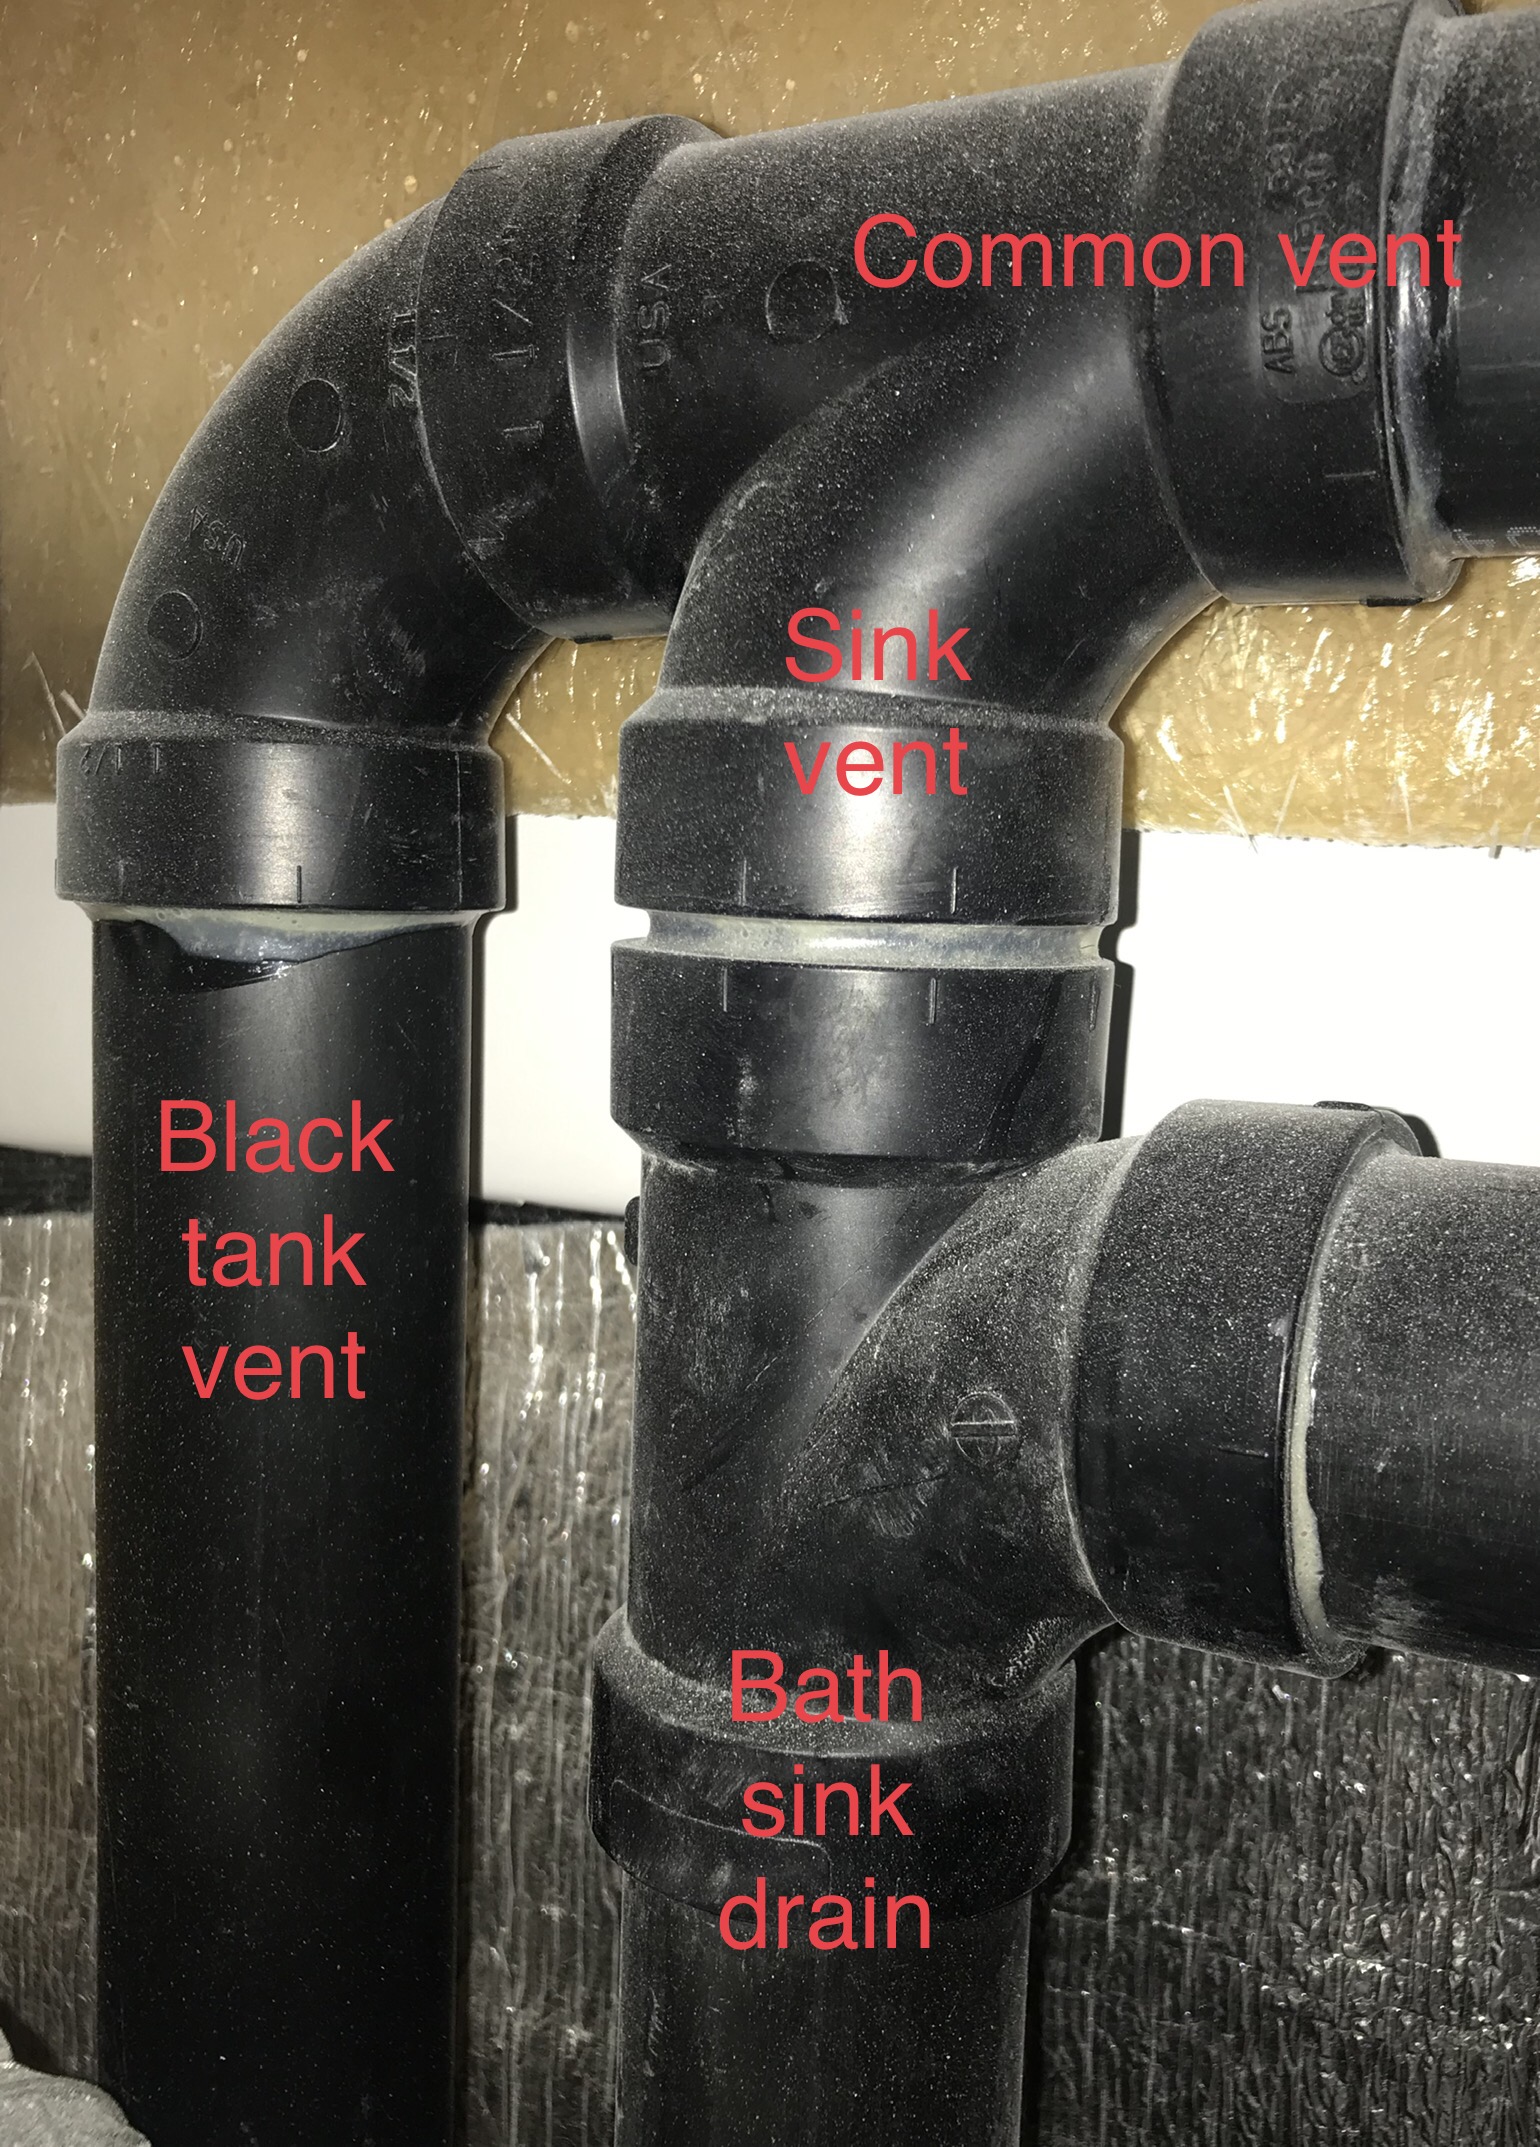
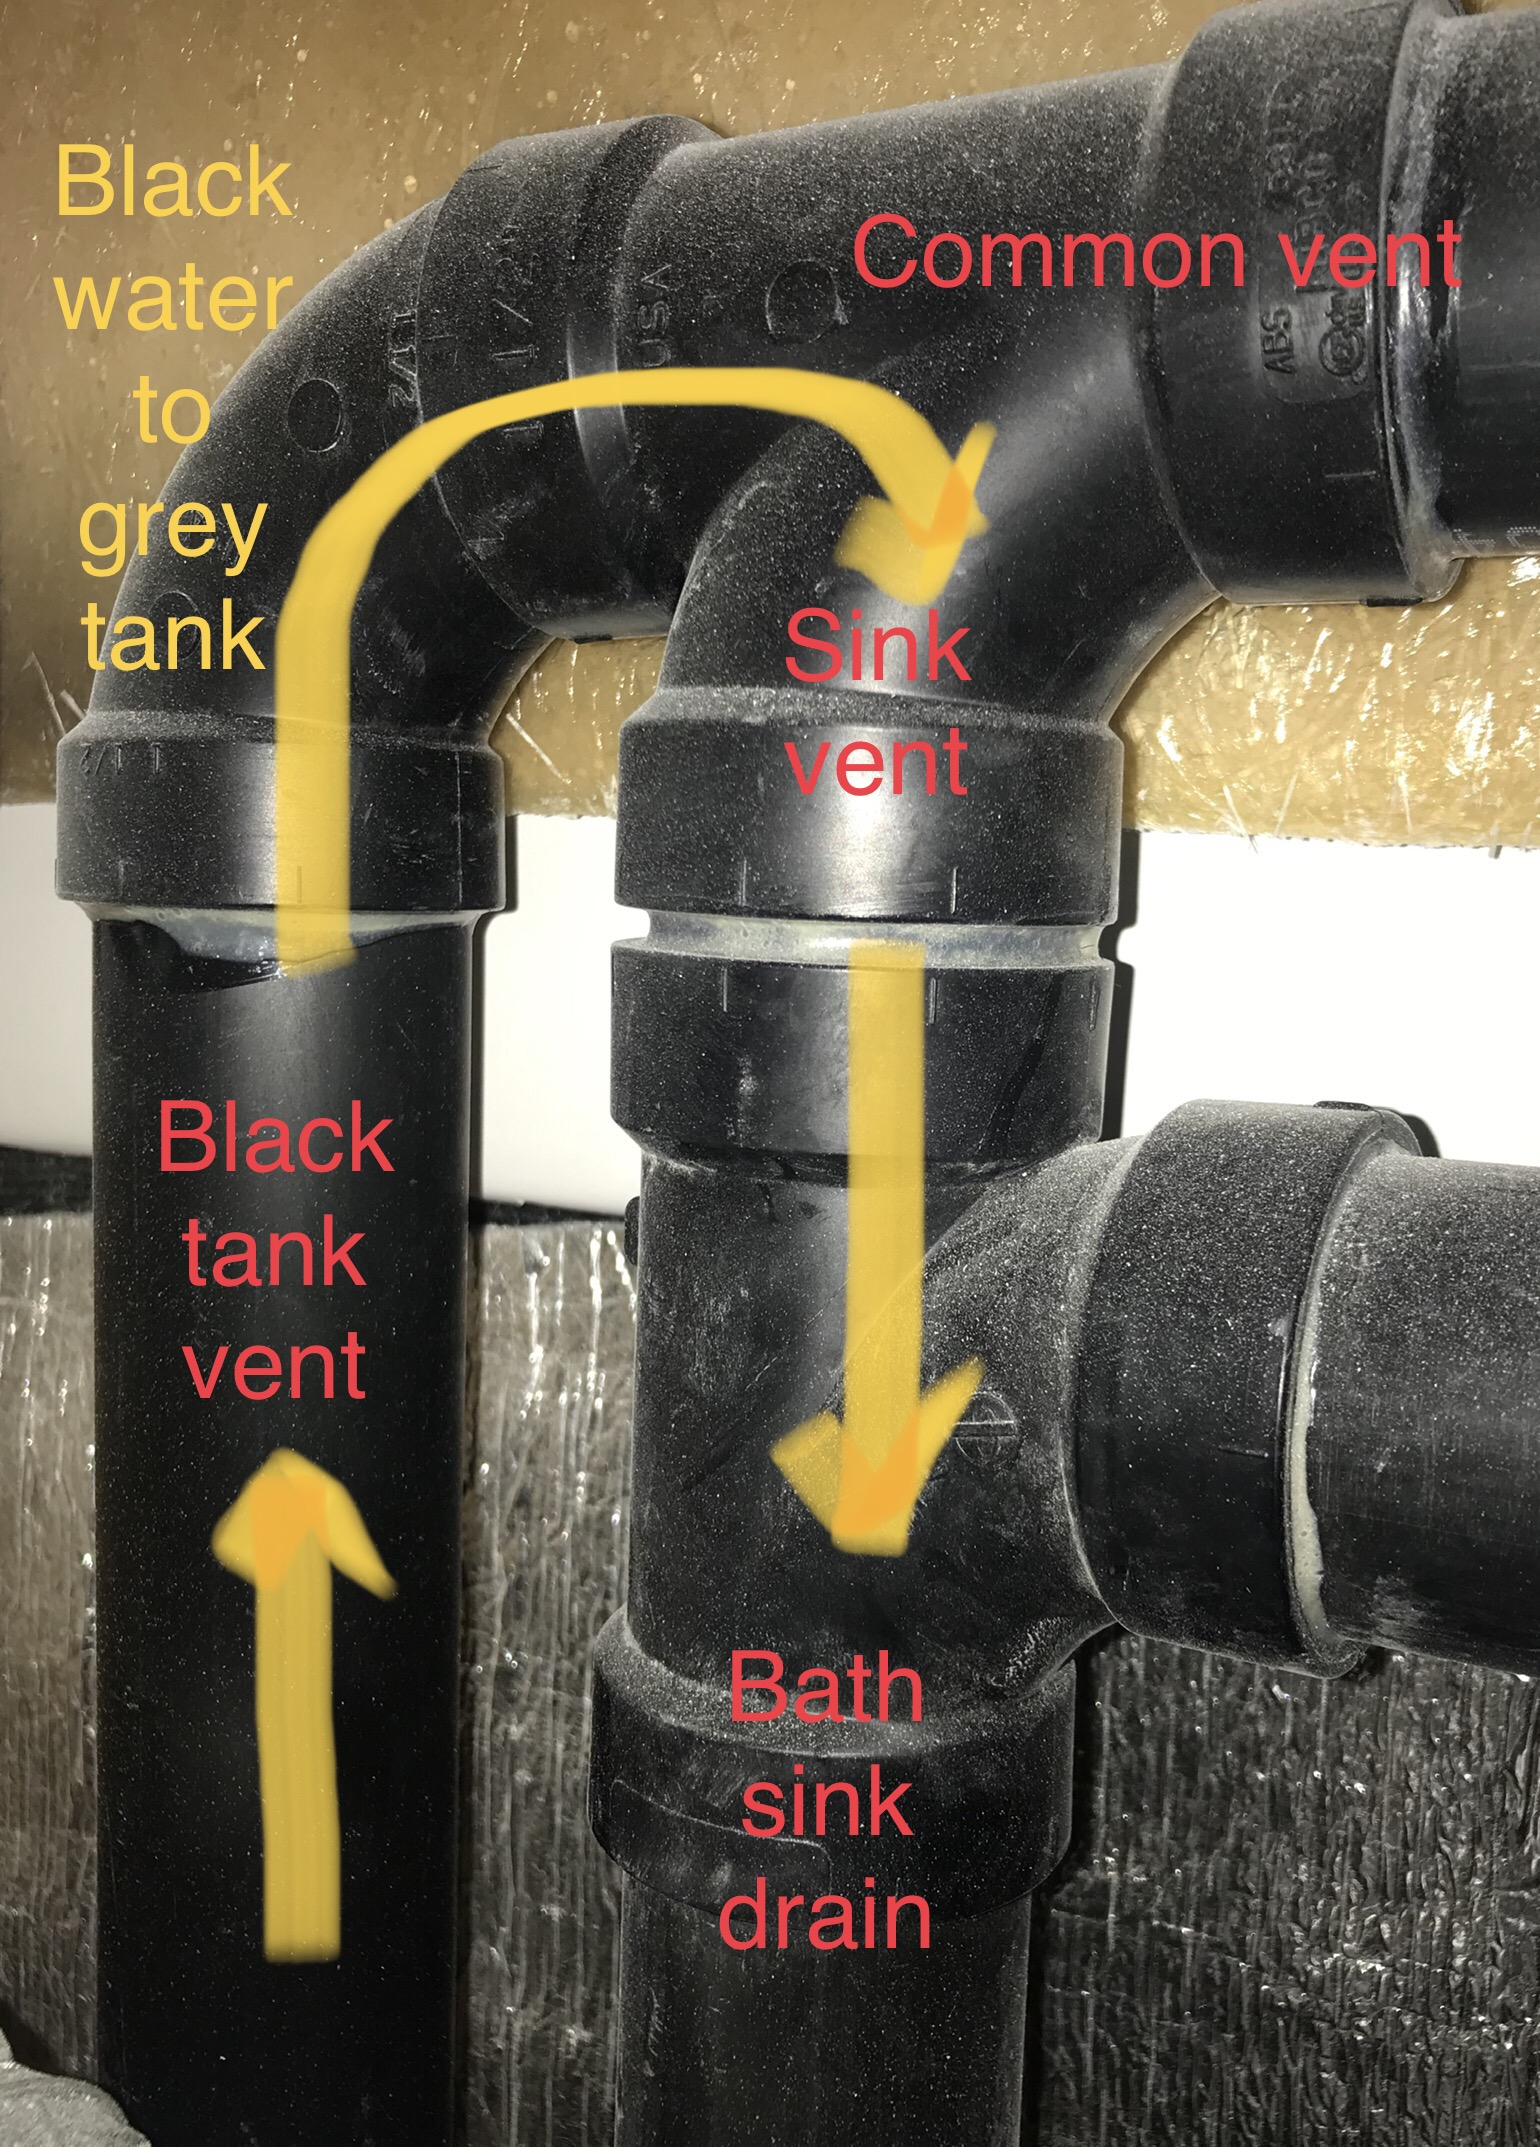
I had to go in under the bathroom sink to work on the faucet. I’ll post about that later. Took some pictures while I was in there to show Steve’s explanation of the black water to grey tank to shower drain path.
-
We were traveling from Grand Marais MN to Baileys Harbor WI today and made a detour to Antigo WI where Slide Masters are made. This is the company that made ScubaRx’s slide out tray. Looked at a display at a store there and also a Slide Master in the bed of the truck that belongs to the fellow that runs the company. All of their slide outs are custom made to your dimensions. Based on what I saw today I think I’ll go with the Slide Master. Traveling through Antigo I saw a sign “SQUIRREL TAILS WANTED”. Turns out Mepps Spinners (fishing lures) are made here. https://www.mepps.com/
-
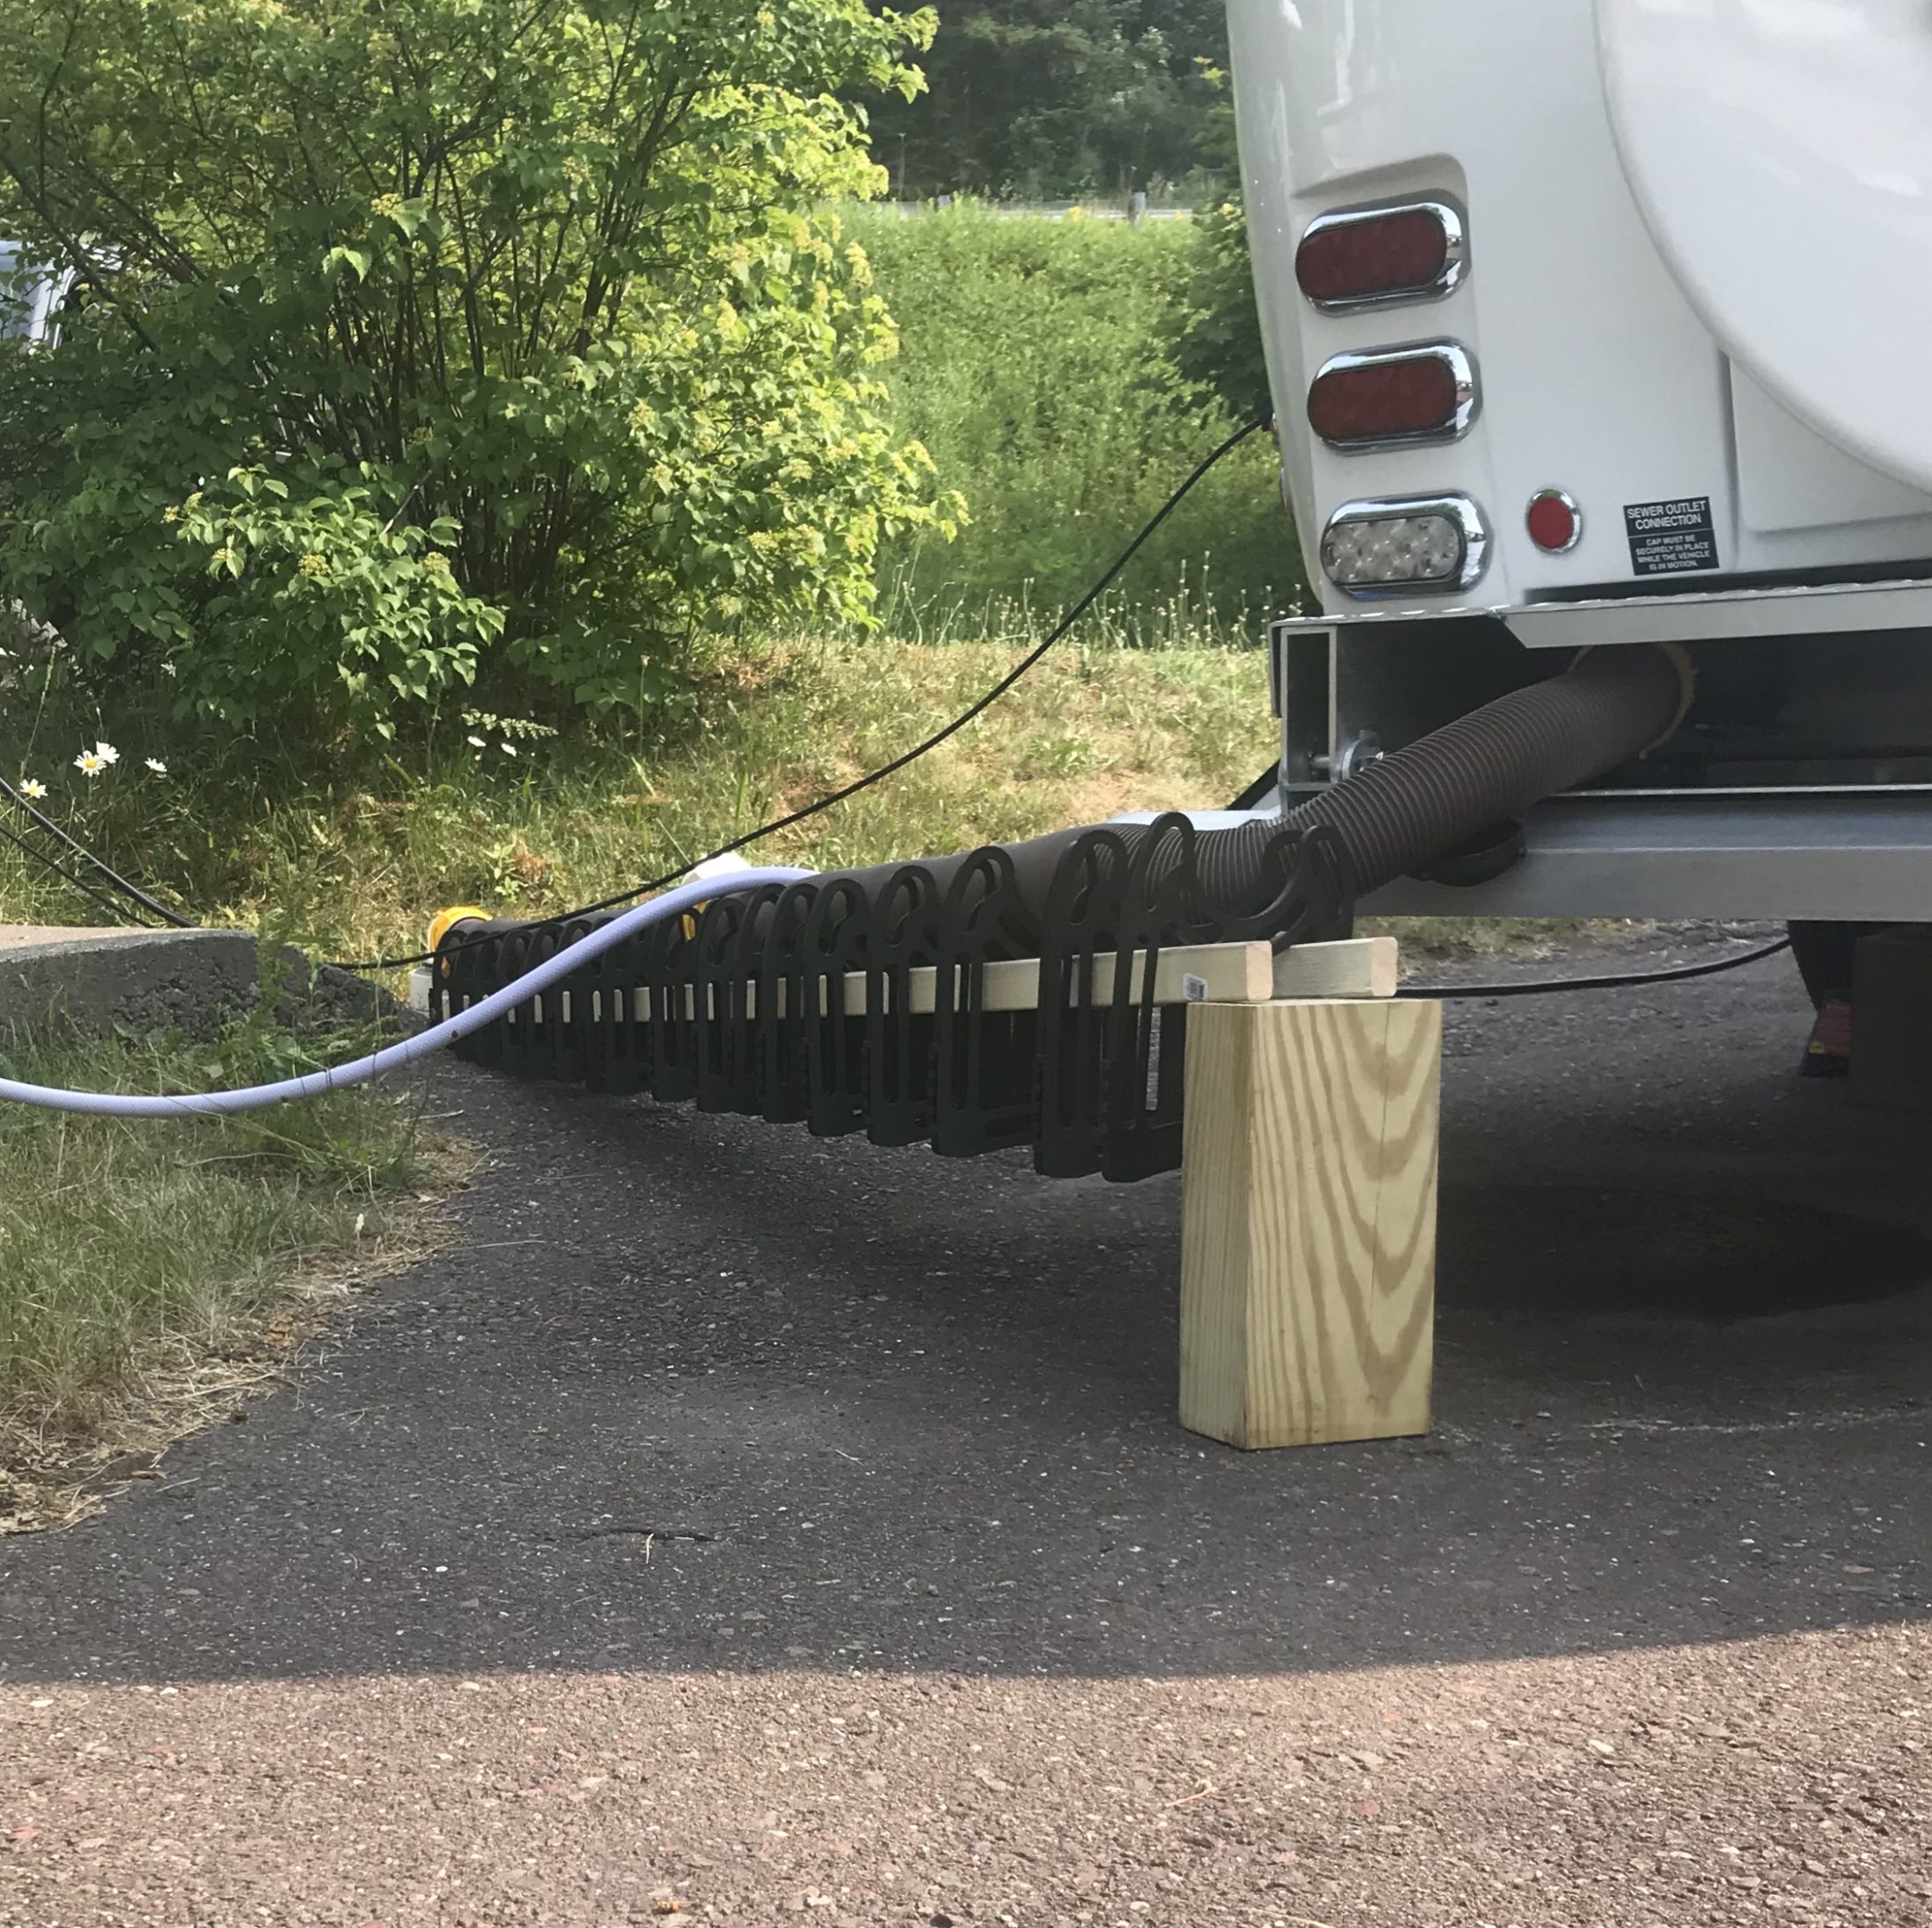
How to make your sewer water flow slightly uphill Addition to initial setup
- 1 reply
-
- 4
-

-
Left black tank clean out hose on!
Townesw replied to rideadeuce's topic in Mechanical & Technical Tips
So both the black tank and grey tank drains were left open and the drain line was capped at the rear of the camper? -
Left black tank clean out hose on!
Townesw replied to rideadeuce's topic in Mechanical & Technical Tips
Check the condition of the gasket in the bottom of your bowl. The pressure from the clean out hose may have blown the seal out of place which would explain the water coming up and then receding once your neighbor turned the faucet off. -
Left black tank clean out hose on!
Townesw replied to rideadeuce's topic in Mechanical & Technical Tips
If you left water flowing into the black tank clean out then the water in your floor came up through the toilet. Not up through the shower drain. The water may have first filled the grey tank and then the shower pan and then your trailer but it came up through the toilet first. But what doesn’t make sense is how did the water get past the gate in the bottom of the toilet bowl? Was your grey tank full after you discovered the problem? Was your toilet bowl full? -
Who has upgraded their Andersen to the latest version?
Townesw replied to John E Davies's topic in Ollie Modifications
[postquote quote=180273][/postquote] Ken, When I was towing with the Chevrolet 1500 I had 7 threads showing. I tightened them real tight to try to reduce bucking. With the Duramax I have now I have backed off to 6 and will probably back off to 5. The ride is so much better with the 3/4 ton truck. -
[postquote quote=179751][/postquote] I just started using the Hitch Vise. They are not made in the US anymore. At least mine wasn’t.
-
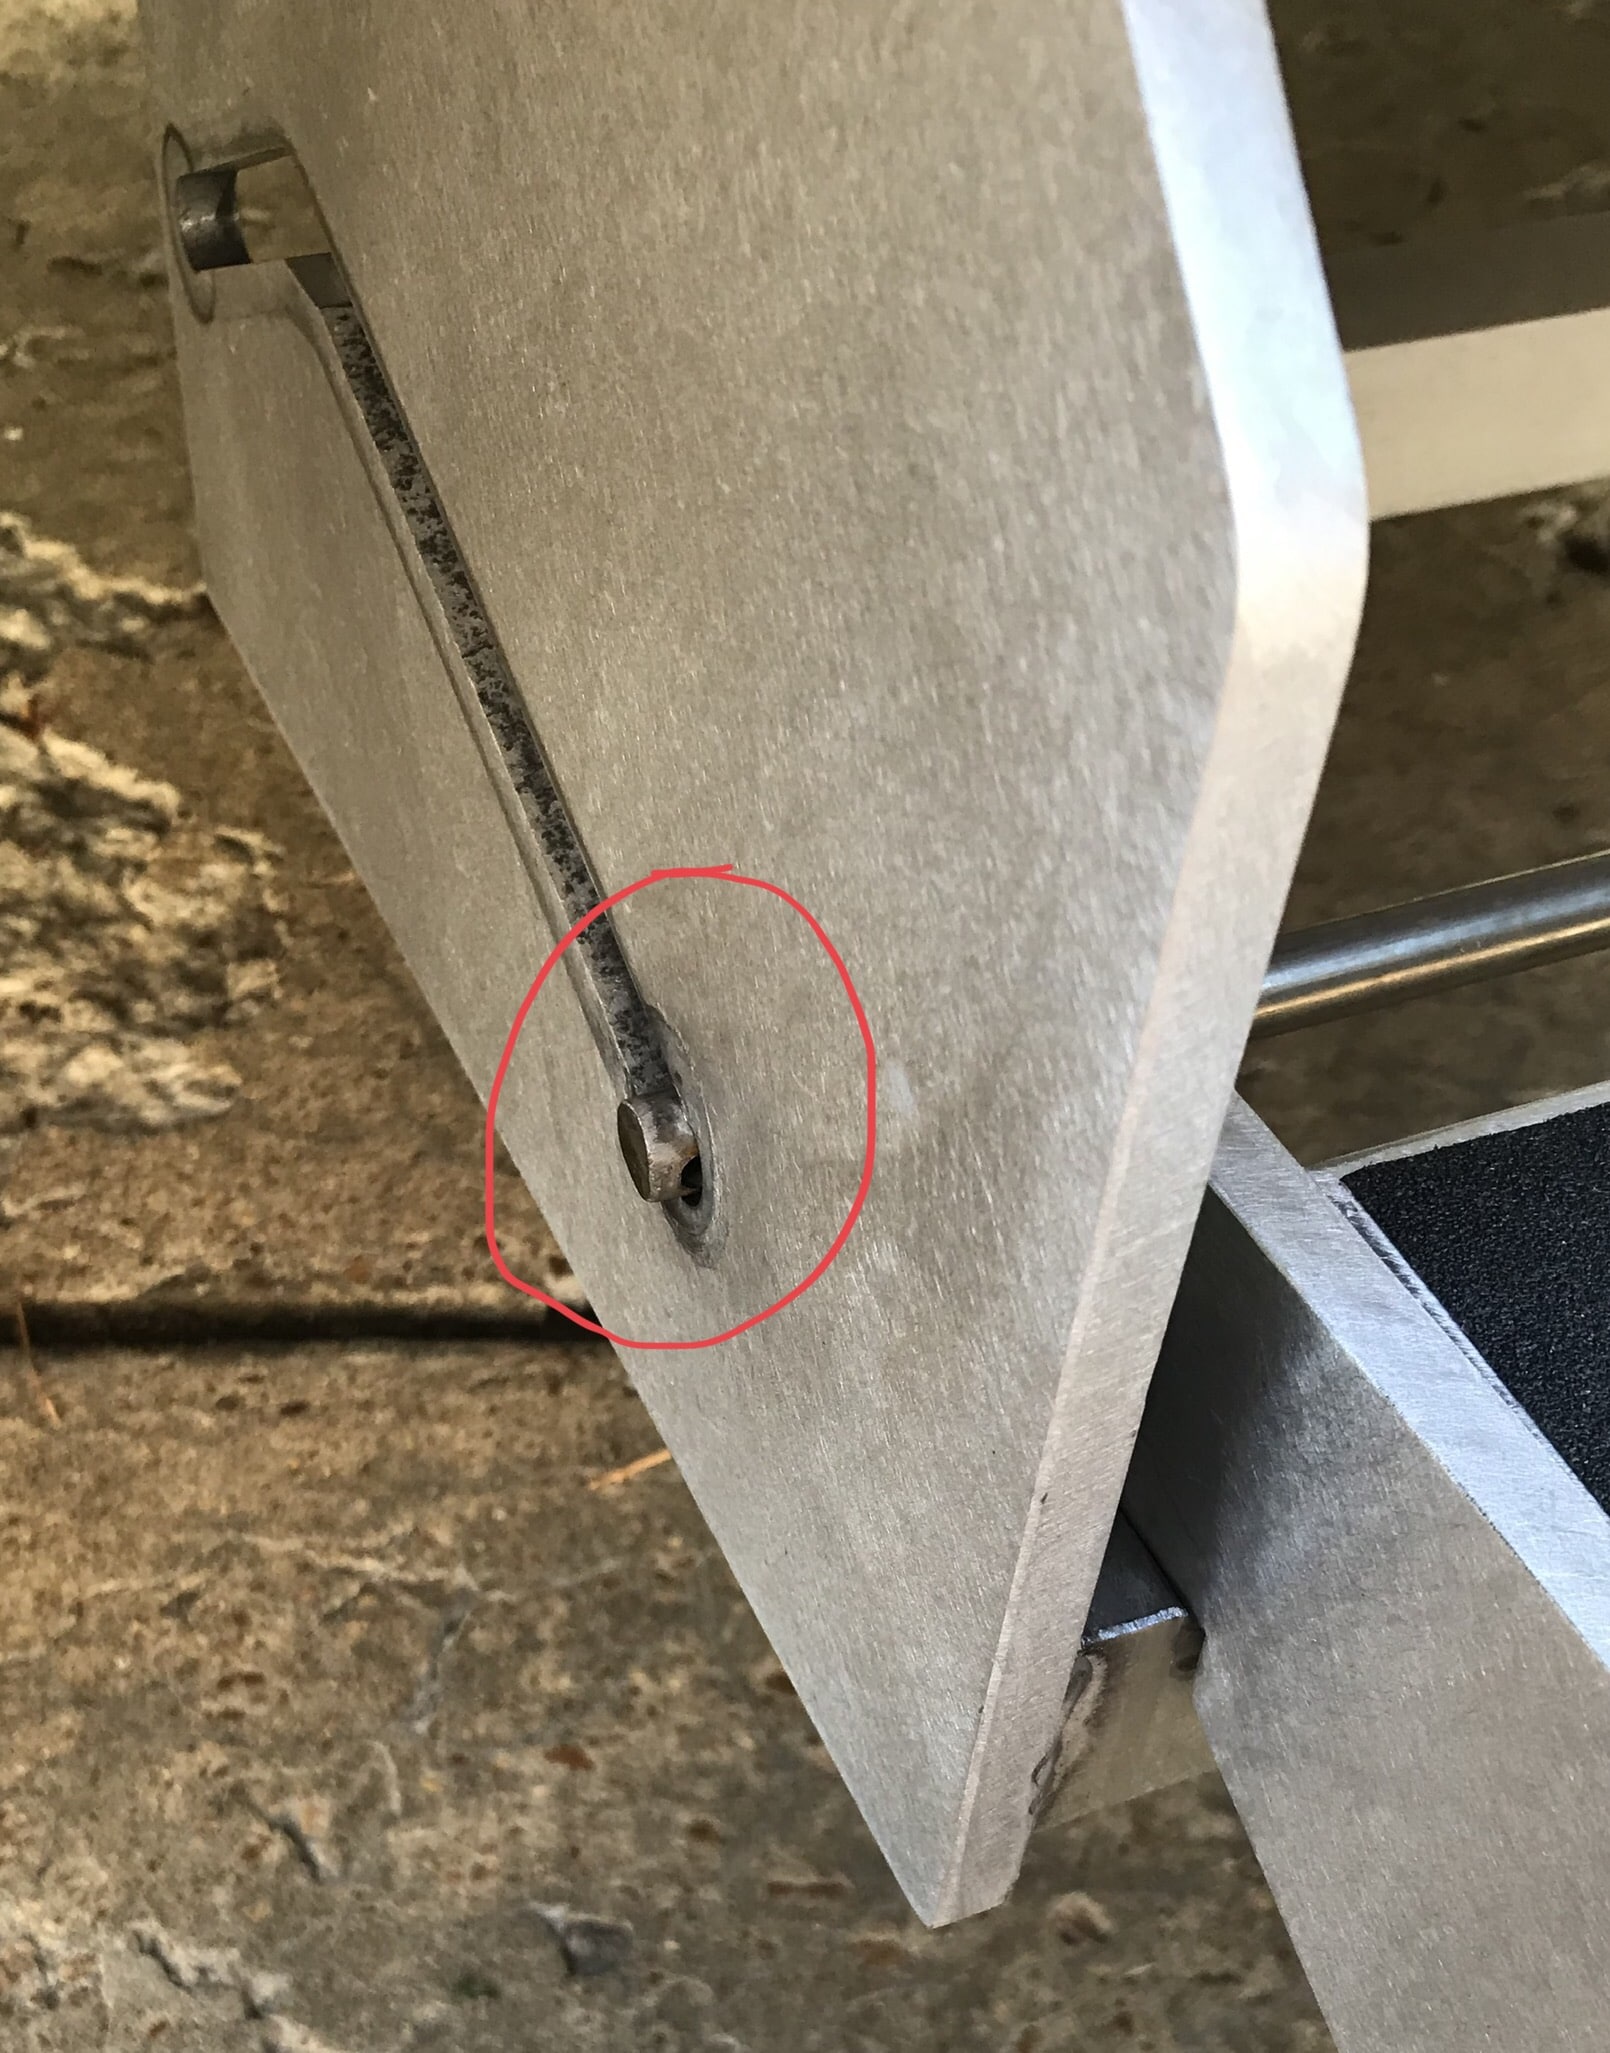
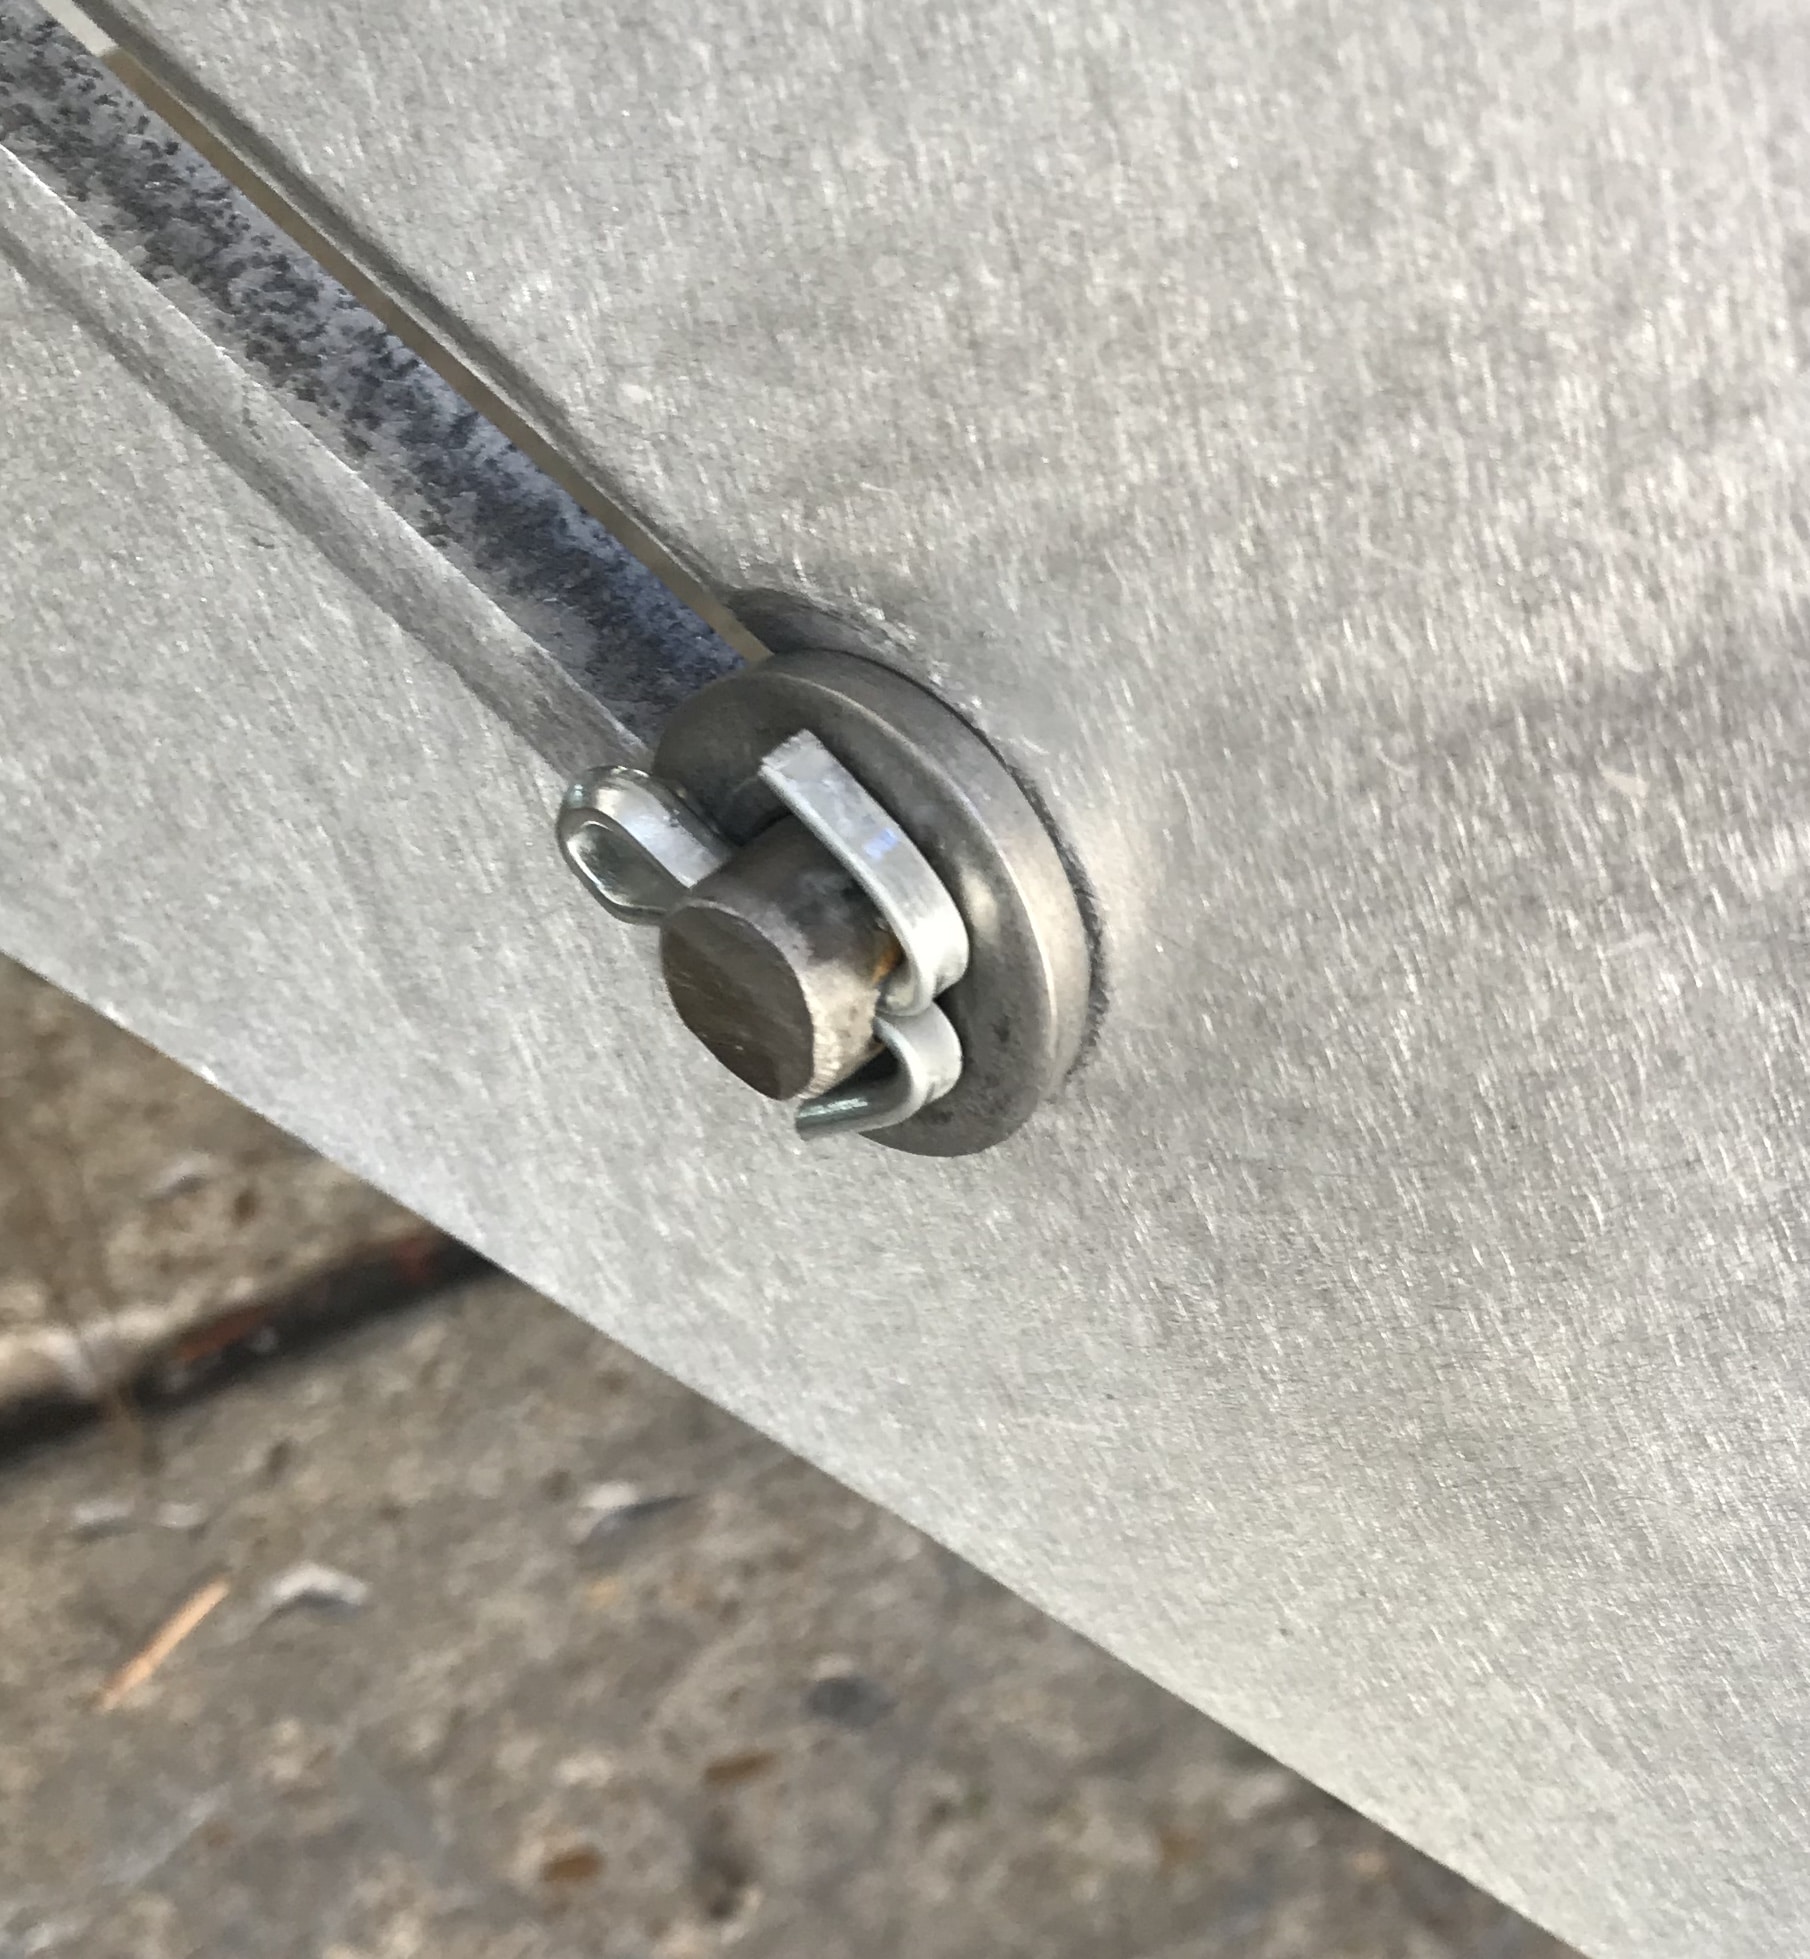
Check the cotter pin, aka split pin, that keeps the step rod in place. There should also be a thick flat washer on the rod.
-
[postquote quote=175502][/postquote] I can’t figure out what causes this. I wonder if there are baffles or supports inside the tank that, when the trailer attitude and water level is just right, traps air that prevents the kitchen sink from draining. There is a one way air vent under the kitchen counter but it should only allow air in and not out.
-
Is your trailer fairly level front to back and side to side? Is the bathroom sink and shower drain valve open (the one beside the toilet - is the handle pulled out)? Those tank level indicators are not real reliable. The level is greatly affected by the attitude of the trailer.
-
[postquote quote=175221][/postquote] I agree about doing it yourself. [postquote quote=175233][/postquote] The video I watched on the CargoGlide install shows them drilling holes. Not something I’m looking forward to doing to a new Duramax, but I’d rather me do it than some installer.
-
I bet the rear window in the Oliver is like it is because it is the escape hatch.
-
Would you recommend this as a good Oliver TV?
Townesw replied to SissyBoyFloyd's topic in Towing an Oliver
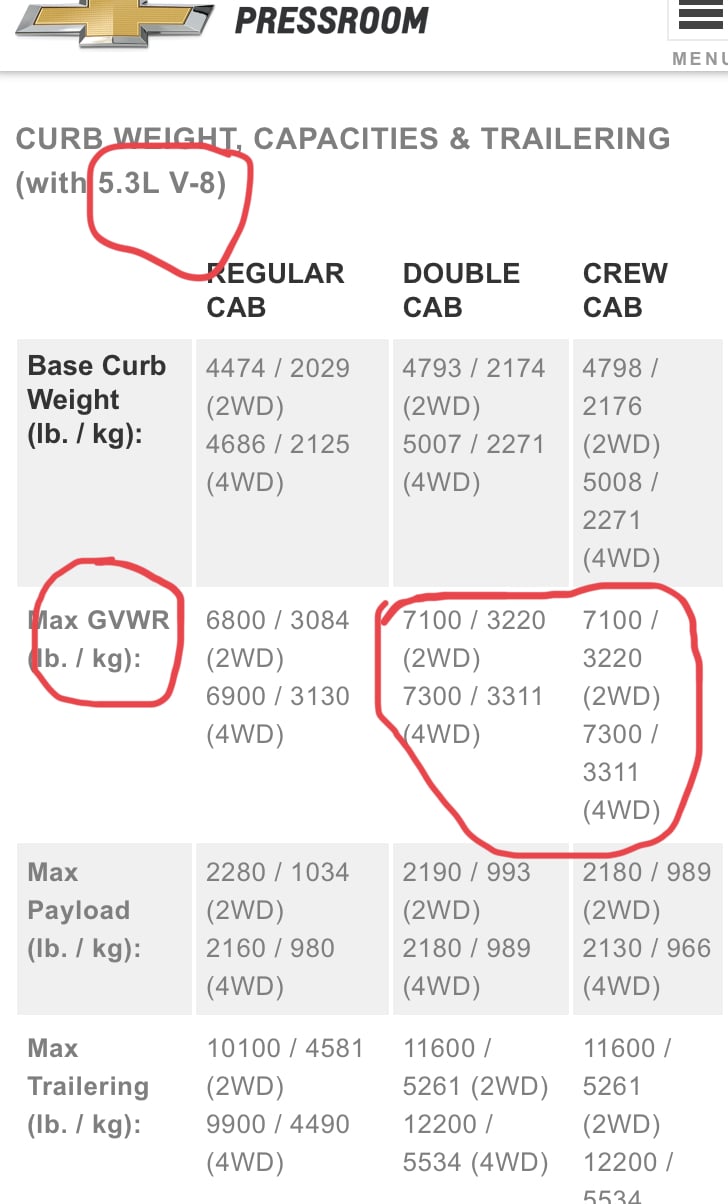
Yes you can get a nice Chevy truck with plenty of towing capacity but I think you will quickly reach the GVWR of the 1500. Occupants, tongue weight, gear in the bed and you quickly approach the 7300 lb rating on the 2019 Crew Cab. I don’t think the towing package or gear ratio affects the GVWR. All 1/2 tons are max 7300 lb.
-
Would you recommend this as a good Oliver TV?
Townesw replied to SissyBoyFloyd's topic in Towing an Oliver
TL,DR: You need to look at the GVWR and the GAWR. Here’s why: I had a 2017 Chevrolet Silverado 1500 Crew Cab Short bed 4x4 Z71 with the 5.3L V-8. Then we found out about Oliver Travel Trailers and ordered an LE2. This truck pulled and stopped the trailer just fine and all weights were well within the limits. But then I wanted a camper shell to keep the stuff in the back of the truck dry. The back of the truck is like your storage shed at home. I carry tools, a grill, chairs, a cooler, some spares, blocks, chocks, grease, and a few more things. Now with my truck loaded and the Oliver sitting on the ball my Gross Vehicle Weight is 7180 lbs against a GVWR of 7200 lbs. I can’t add a CargoGlide, a portable fire fit, a sewer tote, a generator, a clam tent, an outdoor carpet, etc. without putting me over my GVWR. I come from a farming background where “if a truck could pull it we loaded it” but that won’t work on the open road. You must stay within the weight ratings of the TV, the trailer and the combination. So, given my situation I just bought a 2500 Duramax with 10,000 lb GVWR. Now I’m not saying that you need that much truck, but I suggest that you consider what you want to carry, how you want to carry it, then add some capacity to carry more, then consider weight ratings on any TV before you buy. Or you will end up buying again. And soon. -
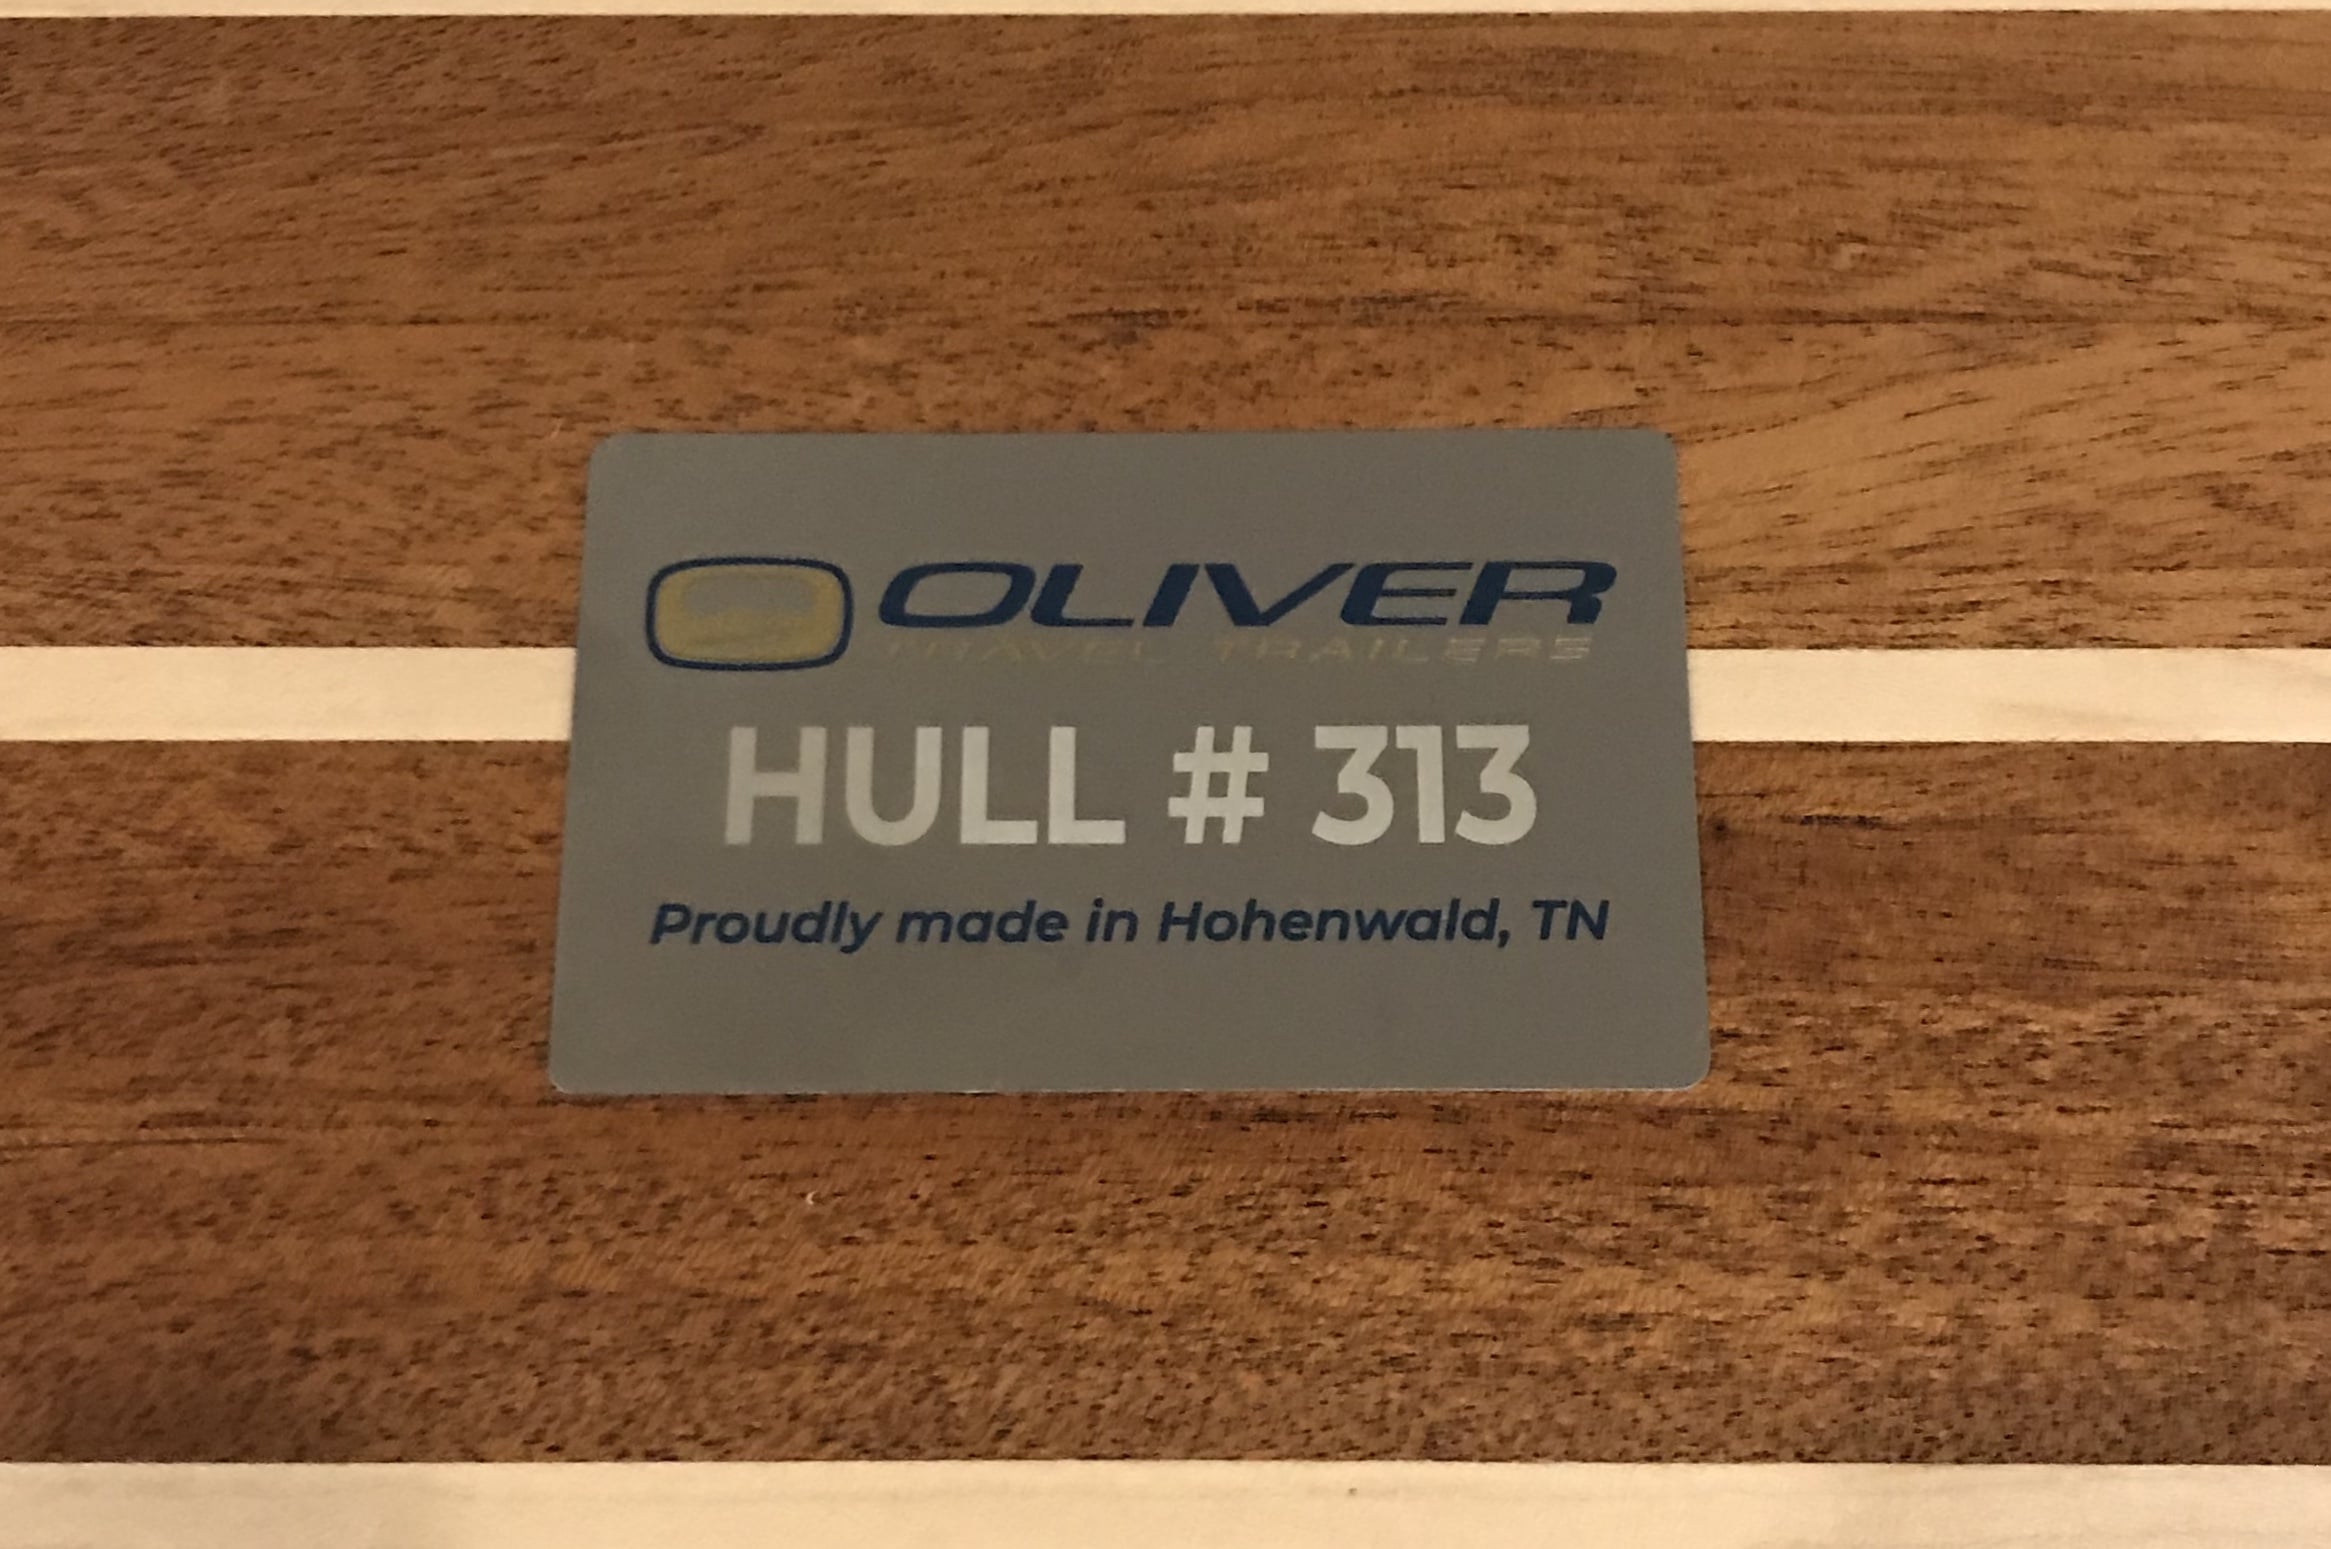
For a while the last 3 numbers in the VIN was the hull number. They had to change the way they assign VIN numbers so now the hull number is on a plate just inside the door under the switch plate. Oliver is sending out hull number plates to owners of trailers built before the change. They gave out plates to those who were at the rally. Here’s a picture of mine laying on the very nice cutting board that Foy Sperring makes
-
Who is towing with a Chevrolet 2500HD Duramax?
Townesw replied to dbp05ret's topic in Towing an Oliver
Couldn’t stand it. Bought a Duramax today. You all be sure to collect your GM sales commissions. -
CAT scale is a company that has Certified Automated Truck scales located throughout the US. Many RVers use these scales to weigh if they don’t have access to another private or public scales. https://catscale.com/ https://www.thefitrv.com/rv-tips/the-easy-way-to-weigh-your-rv/
-
RTV means RTV silicone sealant https://en.m.wikipedia.org/wiki/RTV_silicone There are several types depending on the application. https://www.permatex.com/products/gasketing/gasket-makers/permatex-high-temp-red-rtv-silicone-gasket/
-
“Inch WC” is one way of representing “inches of water column” which is a unit of pressure. Most, if not all, of our propane appliances operate on low gas pressure such as 11 inch WC, which is equal to about 0.4 psi. https://en.m.wikipedia.org/wiki/Inch_of_water
-
AGM means Absorbed Glass Mat as in AGM batteries. https://en.m.wikipedia.org/wiki/VRLA_battery
-
Hz stands for Hertz, as in 120 volt, 60 Hz AC power. Your Progressive Industries remote display will show “60H”. https://en.m.wikipedia.org/wiki/Utility_frequency
-
Another one seen on fiberglass trailer forums: MFG meaning Molded FiberGlass, as in an MFG camper.
-
SOB means Some Other Brand when referring to travel trailers other than Olivers.