Galway Girl
-
Posts
748 -
Joined
-
Last visited
-
Days Won
23
Everything posted by Galway Girl
-
 Here's a checklist we used for the first 2 years with our trailer ( Hull 505) We've not been updating it as much so it's been good enough. GG Checklists.pdf Craig
 -
Surge protector "clunk"..no 120
Galway Girl replied to Gliddenwoods's topic in Mechanical & Technical Tips
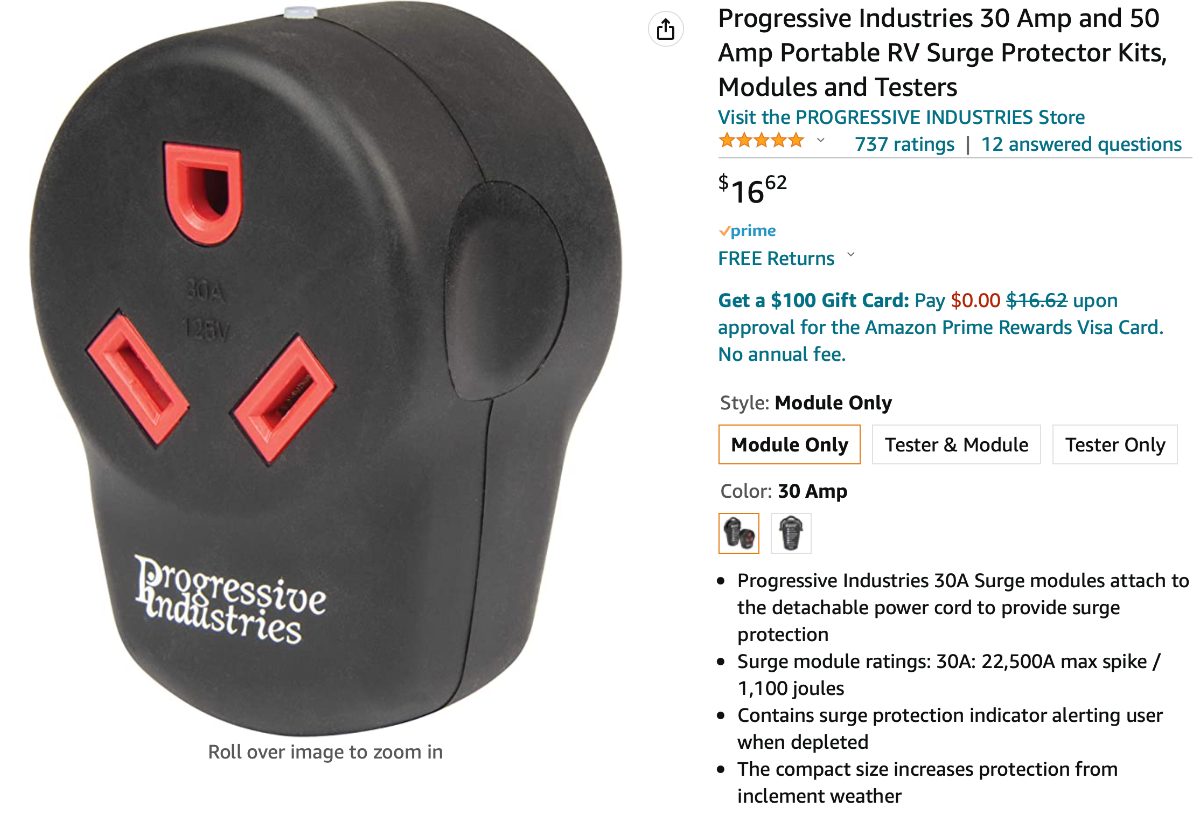
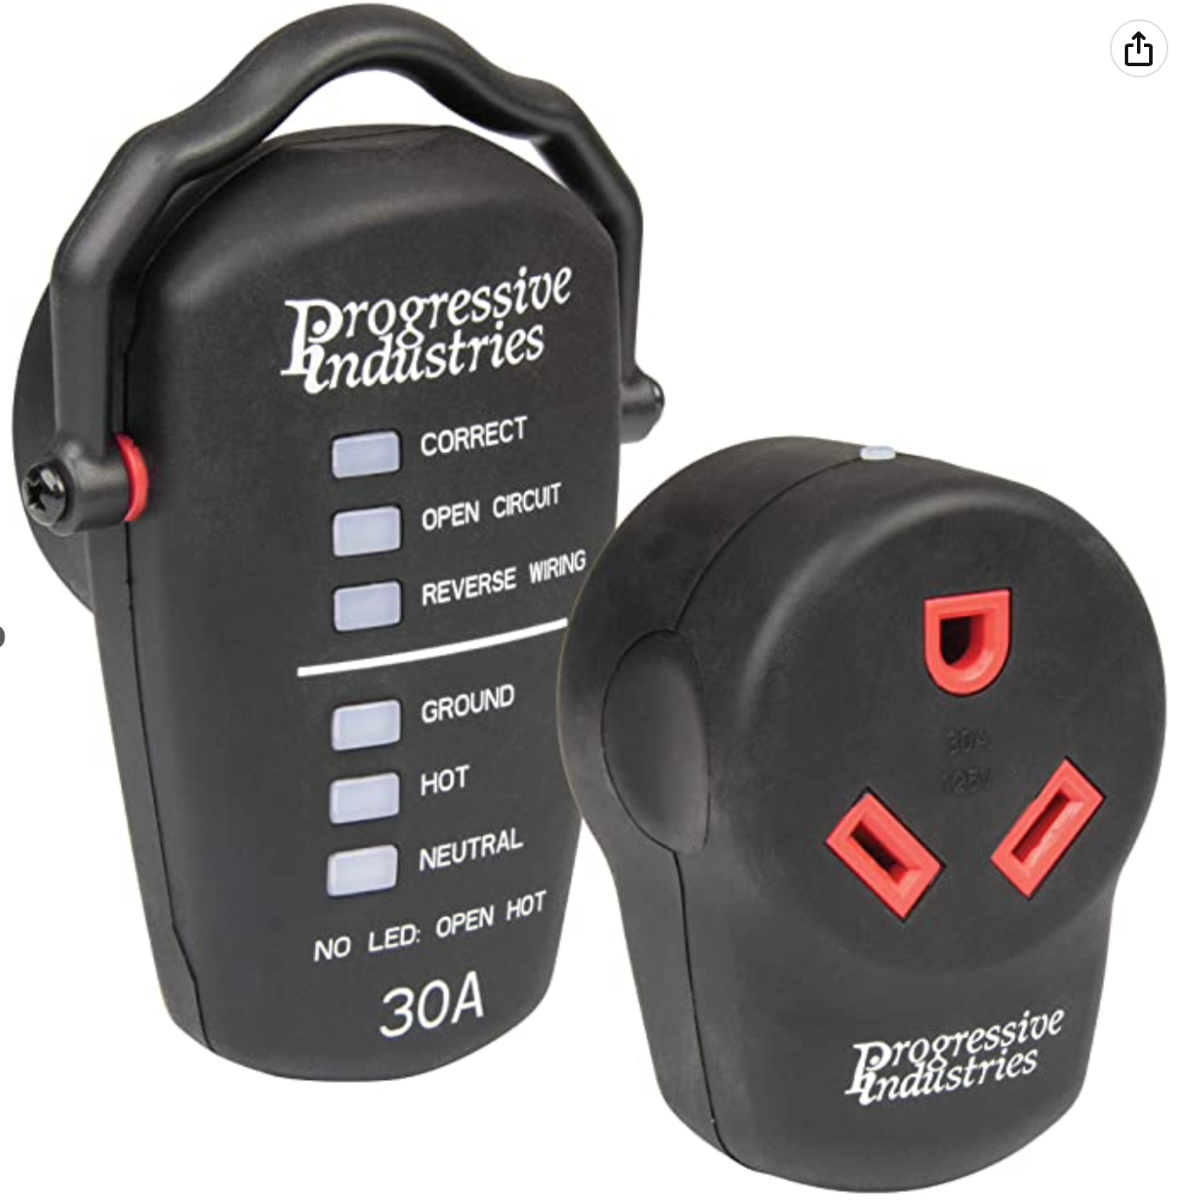
If you want to double surge suppress Progressive makes this 30A supressor unit that you would plug onto the pedestal first, then 30 amp into that unit. If you want to test, and also have a backup suppressor you can buy both 30 A units for $38 on Amazon. I simply leave these on the power cord when I put things away as I tear down at a site. Craig
-
We're heading up to Alaska this summer - 2023. Here's the map of our route. I see Costco's in Fairbanks, Anchorage, Prince George BC. Any tips on Diesel along the routes we show below? Craig - Hull 505
-
Protective Edge Strip for Spare Tire Cover
Galway Girl replied to MAX Burner's topic in Ollie Modifications
The product Oliver sells as an option is called Hypervent. We've had it for 3 years and it's keep our mattresses dry from any condensation. It's sold directly from HyperVent but you might be able to get it through Oliver Service. Not cheap - you'll need 14' to do 2 twin beds... ($189.00) https://www.hyperventonline.com Hypervent is only sold by phone. Call 206-783-1696 to Order. Genuine Hypervent is $13.50 per linear foot.
-
Registering the SureCall FUSION2GO cell booster
Galway Girl replied to jpk323's topic in Mechanical & Technical Tips
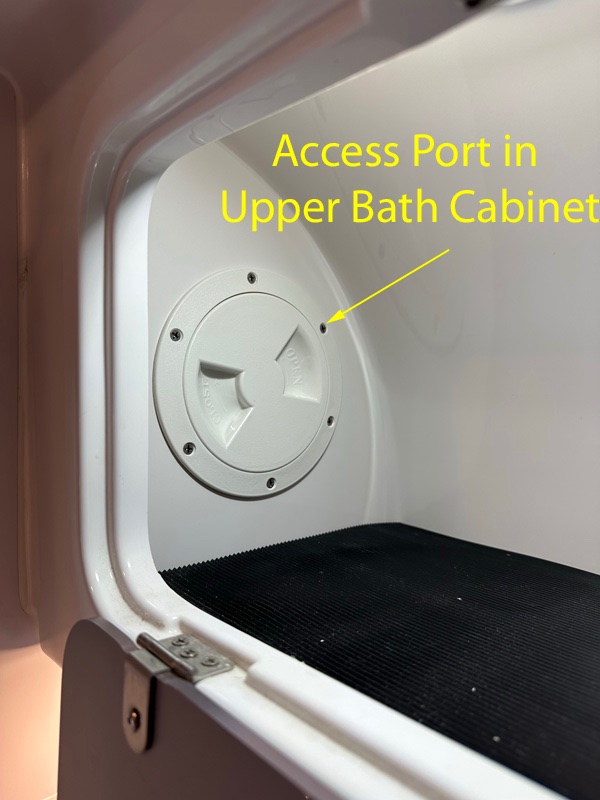
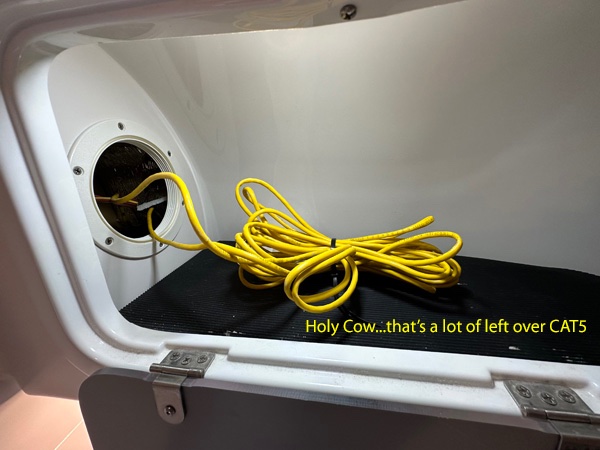
If this helps: In 2019 - Hull 505 - The Cell Booster and WIFI power switches are mounted to the right of the upper storage bin above the front dinette seat. There's an access port in the left side of the upper bathroom storage cabinet (above toilet with the mirrored front.) Inside that access port is where the cables run down from the WIFI Booster on the Drivers Side FRONT of the trailer. The WIFI Router is mounted on the wall inside the upper cabinet on the right end (against that cabinet wall). The actual external WIFI Booster/Antenna's are mounted outside on the top of trailer just above bathroom cabinet. The Cell booster is at the far end in the upper cabinet mounted against the pantry wall. There's an access port inside the pantry wall. The outside cell antenna is a magnetic mount on a plate on the roof. The cable runs through that plate with lot's of sealant around it. The cable snakes it's way between the two hulls and eventually ends up in the pantry access area. What I've learned is new "wifi boosters" use a different kind of cable than the ones put in older vintage trailers. (Sigh) So even if the cable is inside the trailer it might not be the correct cable for todays boosters. Hope this helps a bit. Craig
-
Need help with propane generator setup
Galway Girl replied to Happy Camper's topic in Mechanical & Technical Tips
I own both the Champion 3500W and now the 2500W Generator. I wanted to mod both to run off the Quick Connects from the Oliver...and also still have the ability to quickly setup with stand alone propane tanks for other applications. Both use the 2500W and 3500W us a dual stage regulator propane hose (one with the little finger, one without.) The first stage small regulator connects to a standard propane tank with the larger plastic ACME fitting. The first stage regulator knocks down the high pressure from stand alone propane tanks in prep for the larger diameter second stage regulator. This second stage (much larger size) provides a more precise regulation needed for the generator under various load situations. Stage 2 is really a flow regulator. It doesn't change pressure, it just restricts the amount of gas that flows into the generator. Without it you basically flood the generator with gas and it won't start. To make the Generator work with the quick connects from the trailer, one must remove that smaller first stage regulator. The Oliver Quick connects are already regulated to the correct pressure for the larger second stage regulator on the generator propane cable shipped with the Champion Dual Fuel Generators. In my case, I've disassembled the original dual stage and broken it into two pieces at the coupler between the stage 1 and stage 2 regulators. 1) The second stage regulator has been modified to have a quick connect male feeding into the larger regulator. That stage 2 regulator now connects to my long extension hoses that attach to the female quick connects on the trailer. 2) The first stage regulator is then coupled to a FEMALE quick connect for re-use with stand alone propane tanks. Shown below: First stage regulator with ACME fitting is modified to have a female quick connect coupler. The benefit of this mod is that I still am able to use stand alone 20lb propane tank by coupling the modified smaller regulator to the tank, and the larger stage 2 regulator hose to that this modified coupler. This may be a repeat but I was writing up for my blog anyway so thought I'd post it here. Craig Hull 505
-
Gas Regulator Spare Part - Available GR-9994XF
Galway Girl replied to Galway Girl's topic in Mechanical & Technical Tips
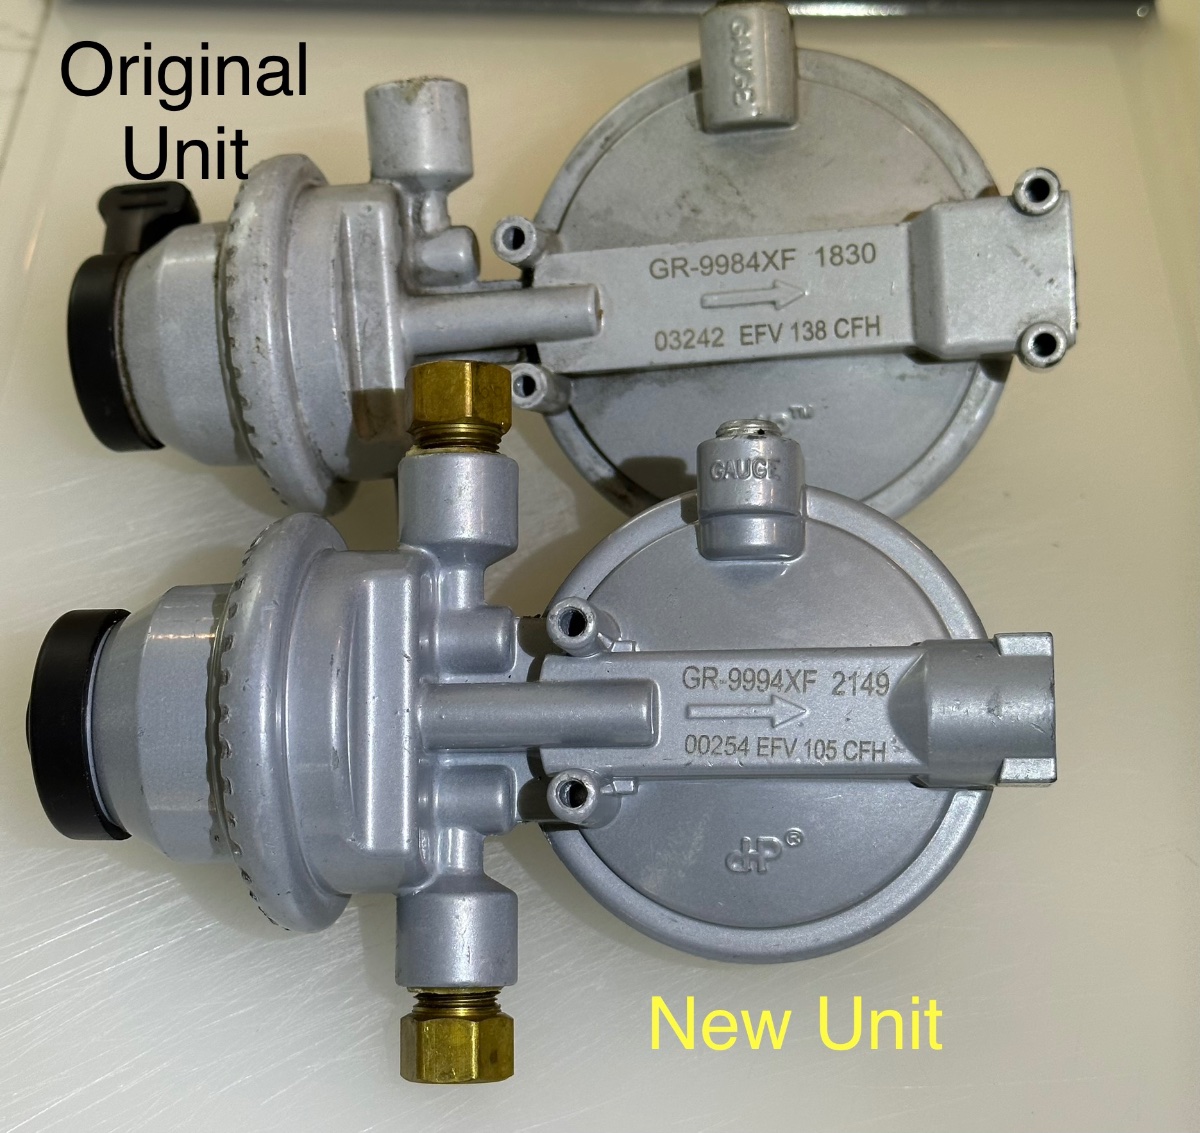
Wrote an updated BLOG post on this after posting: https://4-ever-hitched.com/ggs-blog/f/whats-that-humming-sound In it I give part numbers for the two regulators that can be used. The original factory 345,000 BTU/BR regulator data sheet (top half) is here as reference.
-
Gas Regulator Spare Part - Available GR-9994XF
Galway Girl replied to Galway Girl's topic in Mechanical & Technical Tips
Thanks for the tip on summing up all propane users for the trailer and comparing to the max BTU output from the regulator. Here's what I found out about my Hull 505 Propane Users: Propane draws Norcold N412.3FUI: 1,200 BTU/HR. *From Fridge Service Manual* Suburban Furnace: 18,000 BTU/HR. *Printed on Side of Furnace* Truma Waterheater: 60,000 BTU/HR. * Printed on Side of Water Heater* Outland Fire Bowl : 58,000 BTU/HR. *From Specs on Outland Website* Dometic Cooktop : 9,600 BTU/HR. * From Domestic Website* Sum of ALL: 146,800 BTU/HR Other BBQ’s etc: TBD So it appears the smaller 262,000 BTU regulator will work just fine and can feed all those things running at the same time...and I shouldn't worry about upgrading to the larger 345K BTU regulator that was originally on the unit. I still have one in the box if anyone needs it. Craig -
Gas Regulator Spare Part - Available GR-9994XF
Galway Girl replied to Galway Girl's topic in Mechanical & Technical Tips
Thanks GJ. I'll do that math exercise. -
I recently had my original gas regulator die on Hull 505. I wasn't paying close attention when I ordered the replacement and ended up ordering one with a lower BTU Rating. The original Hull 505 part - GR-9984XF with 345,000 BTU from the Main Service Cylinder is what I should have ordered. The replacement part - GR-9994XF has 262,500 BTU from the Main Service Cylinder is what I have now sitting in a box. Since I learned of my error, I've ordered the original part and left the other new in the original box. I can't return it as the time's expired for exchange. Net Result: I have a NEW in Box GR-9994XF sitting in my garage. I'm wondering if the GR-9994XF would work as a spare for those of you with newer trailers that no longer have the Gas Fridge? If you're interested in the unit...send me a private message and we can work out details. Craig Short
-
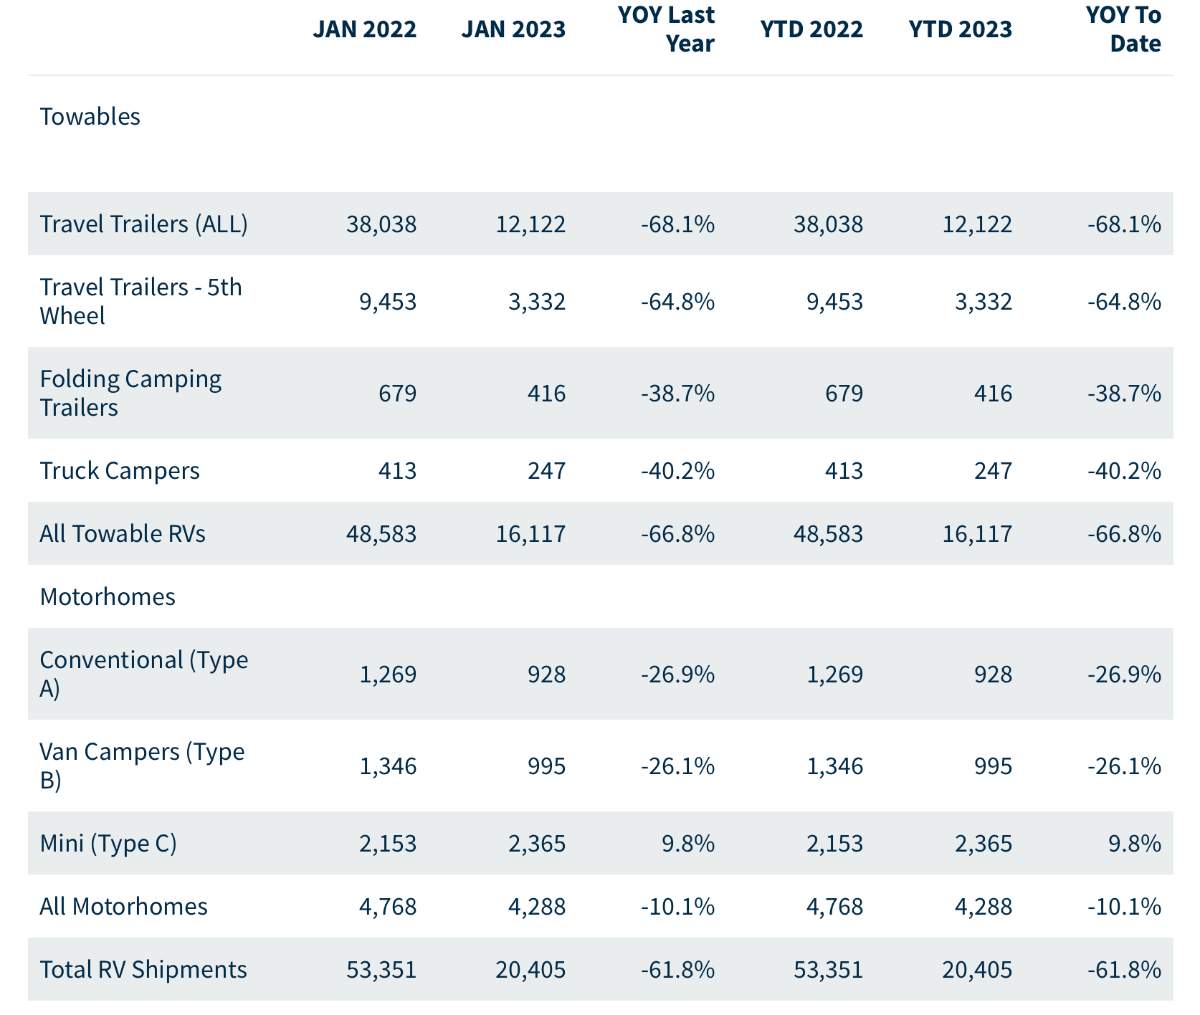
In part the article stated: According to the RV Industry Association, total RV shipments for January fell nearly 62% from a year earlier, marking a reversal for the industry, which saw demand rise during the pandemic. One of the reasons cited for falling demand are rising interest rates for larger loans like those used to purchase RV's. ad
-
HOW TO: Rear mud flaps for the Ollie
Galway Girl replied to John E Davies's topic in Towing an Oliver
Thanks for the info. I ended up needing 3/4" bolts 1/4 x 20 along with the shoulder and lock washers. Project completed in about 4 hours thanks to all the previous excellent write ups. They fit perfectly just behind the red Andersen tubs we use for the stabilizers.
-
HOW TO: Rear mud flaps for the Ollie
Galway Girl replied to John E Davies's topic in Towing an Oliver
The length of the screws are important. Can you recall how long the screws were that you used and which stainless formula? -
The platforms search tools are limited...I just recalled the specific post. We have the Lagun Table which blocks the drawer, and hardly ever use it...but each person's use model is different. CS
-
2023 Lithium Platinum Package 7-Pin connector 12v Charging
Galway Girl replied to JDAstroPhoto's topic in General Discussion
I put in a DC to DC charger as I added the two 315AH Lithionics to our hull as shown here: https://4-ever-hitched.com/ggs-blog/f/lithium-battery-upgrade Happy reading. Craig -
Hello New Friends: Picking up Hull Number 1335 Next Week
Galway Girl replied to RichM's topic in Introduce Yourself
Welcome to the family. Here is a link to our blog for inspiration and upgrades. You also will find links to the Oliver Outfitters Guide, a list of accessories we’ve compiled specifically for Oliver owners. https://4-ever-hitched.com/ Hull 505 - Galway Girl Craig & Rose -
Welcome from Everett Wa. As inspiration check our blog on Oliver pickup and the “Oliver Outfitters Guide here: https://4-ever-hitched.com/ Hope to see you on the road. Craig & Rose
-
Ford finally launched their VIN specific towing calculator. After inputting your VIN it allows you to input values for Passenger wt, box payload, and choose between Goosneck, 5th wheel or conventional bumper trailers. it calculates remaining available tongue weight and total max trailer weight. link below: https://t.m.email-ford.com/r/?id=h74cb0e7e,8d77749d,7c1fa34e&e=Y2lkPVBST0RETTk4MTk5MyZiaWQ9MTk1OTQ2NDU3NCZwMT13d3cuZm9yZC5jb20vc3VwcG9ydD9lbWFpbGlkPUZEXyBUUlVDSyBUT1dJTkcgRVhQRVJJRU5DRSBFTV9GLTM1MCBPV04&s=5Ij45wNQTUXCV4HKKrOWf8DmysLGRqmuRHqVkfPBOSs The towing support you need. Towing just got a whole lot easier with the new Towing Calculator. Follow these steps to help make sure you’re within your vehicle’s towing capacity: Log into www.ford.com/support/ using your existing account information. Once logged in, click on the Towing Calculator tile in your owner’s dashboard. The calculator will automatically pull in your vehicle’s towing capacity based on your VIN number. Add your occupant, cargo, and accessory weight. Determine whether or not you’re within your vehicle’s towing capacity and make adjustments accordingly. It’s that easy!
-
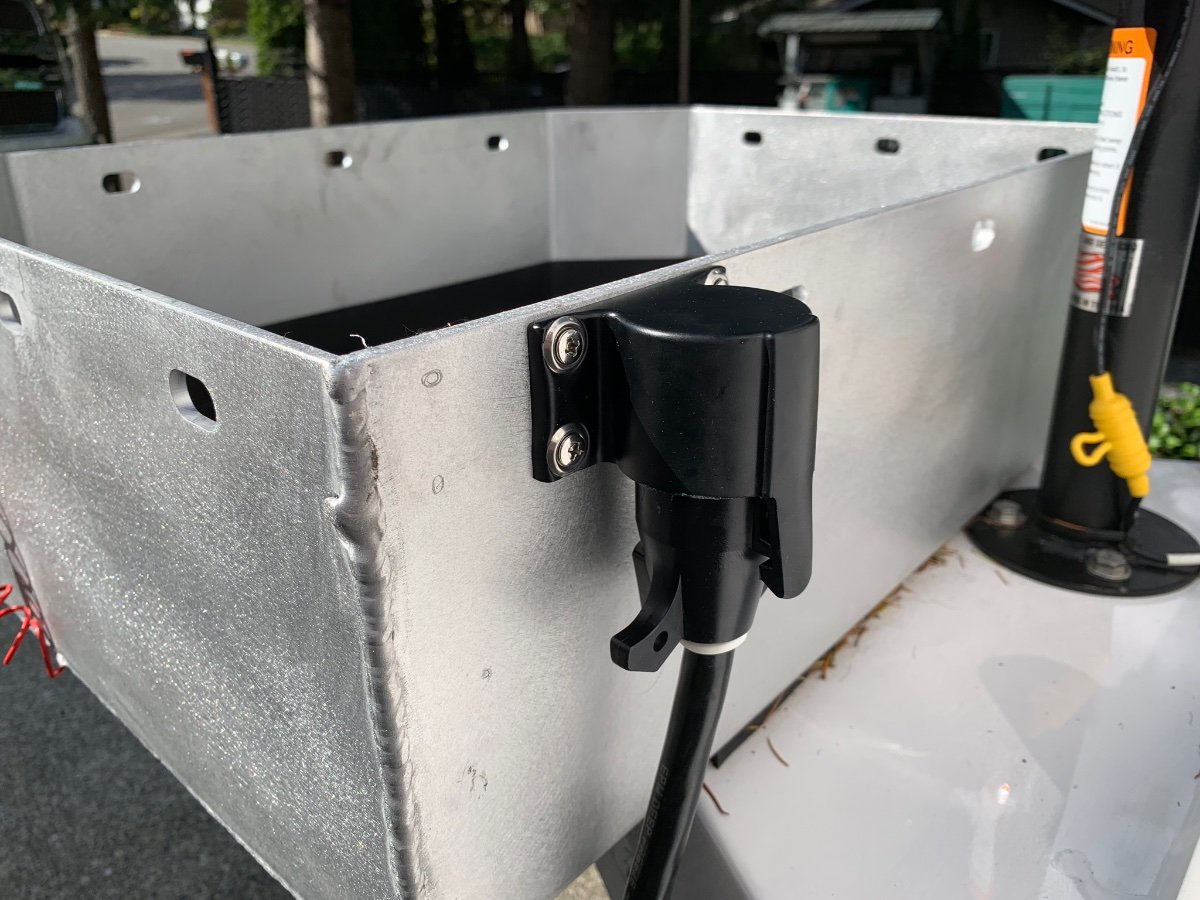
Rivernerd: I posted an update based on your feedback. What a pain. I wonder if the connector changed at the factory or if the holder inside dimensions changed.
- 24 replies
-
- 1
-

-
- 7 pin
- tail lights
- (and 2 more)
-
Great news. If you come over to Wa check out our guide here: https://4-ever-hitched.com/ Hull 505
-
See this holder Oliver Outfitters Guide on Amazon We mounted it on our tongue box.
-
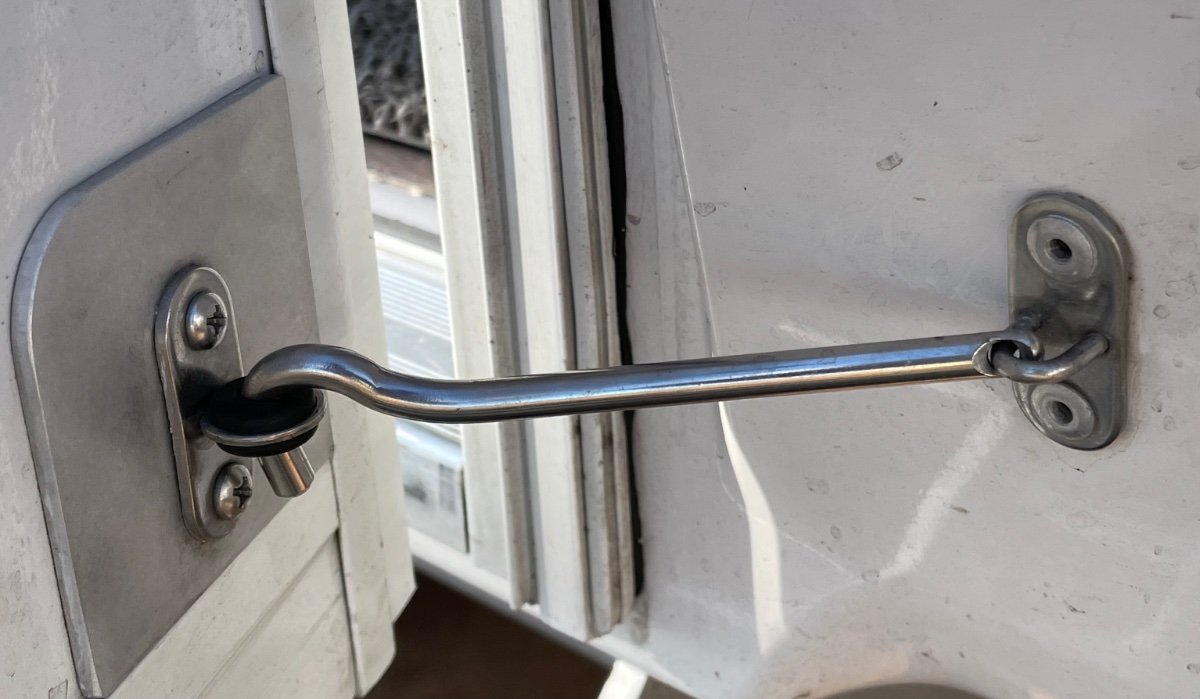
Replaced grommets in door hooks. Found at Ace HW and Lowes in the nut bins sector he store. Specs: Hook itself is 1/4” dia Bracket Hole size 1/2” Grommet hole 5/16” grommet is 1/4” thick
-
New Trading Cards - Hull 505 - Galway Girl
Galway Girl replied to Galway Girl's topic in Introduce Yourself
Yes… KI7SXN -
Norcold will not work on anything but DC
Galway Girl replied to Jibbyboo's topic in Mechanical & Technical Tips