MAX Burner
-
Posts
1,681 -
Joined
-
Last visited
-
Days Won
68
Everything posted by MAX Burner
-

Enclosed Aluminum Box Front Mount
MAX Burner replied to Tim and Christie's topic in Ollie Modifications
Just about finished installing the cargo box we ordered from Amazon. FYI: Used 6 each, 1 1/4" self-tapping screws with lock washers over a 1/8" x 2" x 18" aluminum band across the back (port/stbd) to distribute the load. Used a shorter 8" piece (fore/aft) in the center. A single screw with a fender washer was used for the forward-most position over the A-frame where a spacer was used under the box. We're using the box to secure items such as OTT 30A Furrion power cord & adapters, surge protector, fresh water hose/filter, plastic "Leggo" blocks, wheel chocks, torque wrench, Magnus' cable lanyard, and there's room left over. Thanks to @John E Davies, @ScubaRx, @Ollie-Haus and others for their suggestions and recommendations... We also think this idea will be a game changer for better access to items needed for set-up. Beats the "deep knee squat - bending over drill" to pull boxes out of the rear storage compartment! HA! IMG_7354.HEIC IMG_7353.HEIC
-
Rocky Point #2.pdf Maybe a OTT "Spine of the Rockies - Hot Springs Tour"... any interest?
-
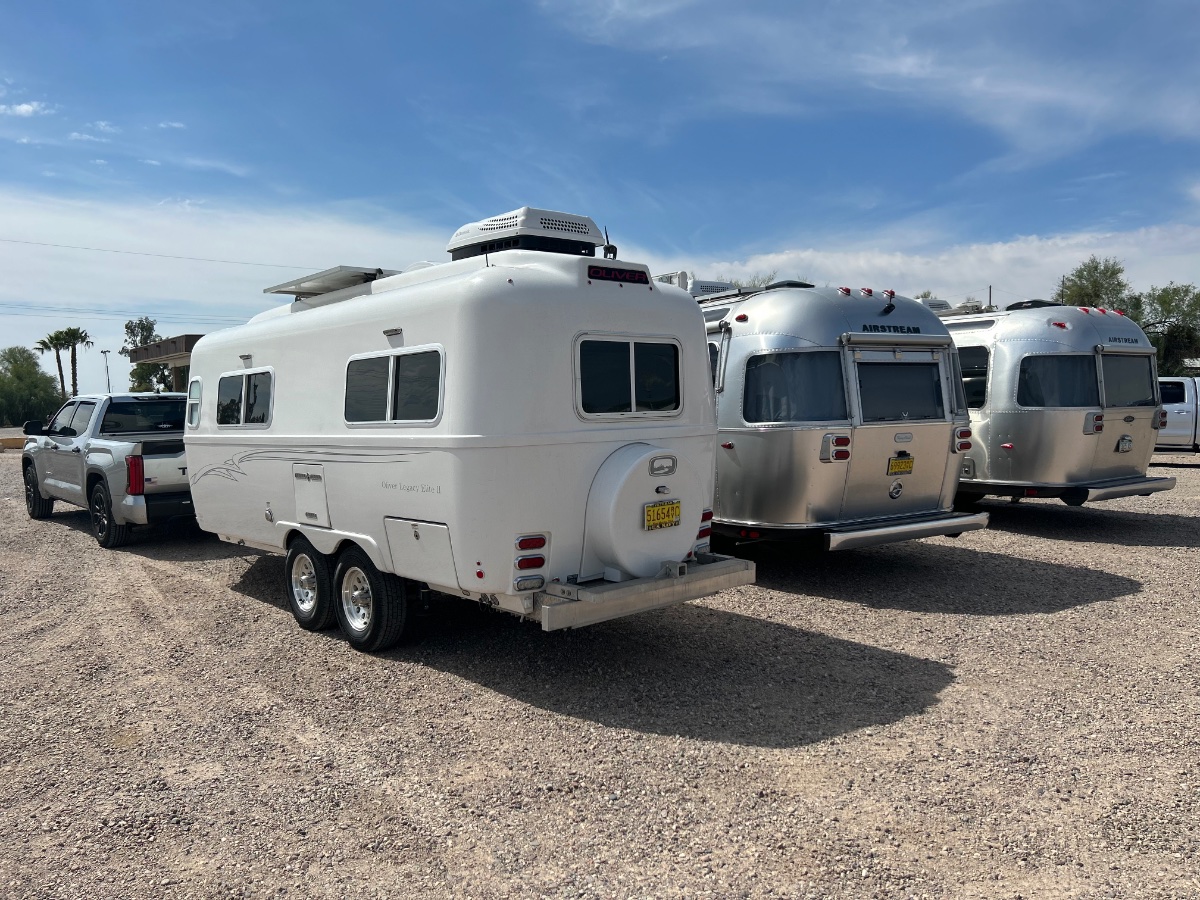
How cool would it be to have a shot of 4 or 5 Ollies parked along the bulkhead sidewalk at Rocky Point...? La Playa Bonita RV PARK #1.pdf
-
100% Concur, definitely need OTT Caravans! Let's make 'em happen.... Funny story: We were passing through Durango, CO a few weeks ago. Stop/go traffic, etc., at one of the stops a dude next to us is yelling, "what kind of rig is that?". We give them the 25 second answer to his question - he and his lady respond with: "We want one!".... Can you imagine an Oliver caravan through some of these towns? It would be impressive, IMO...
-
We carry the same - pre-grease packed in ziplock bags, ready to install on the side of the road....
-
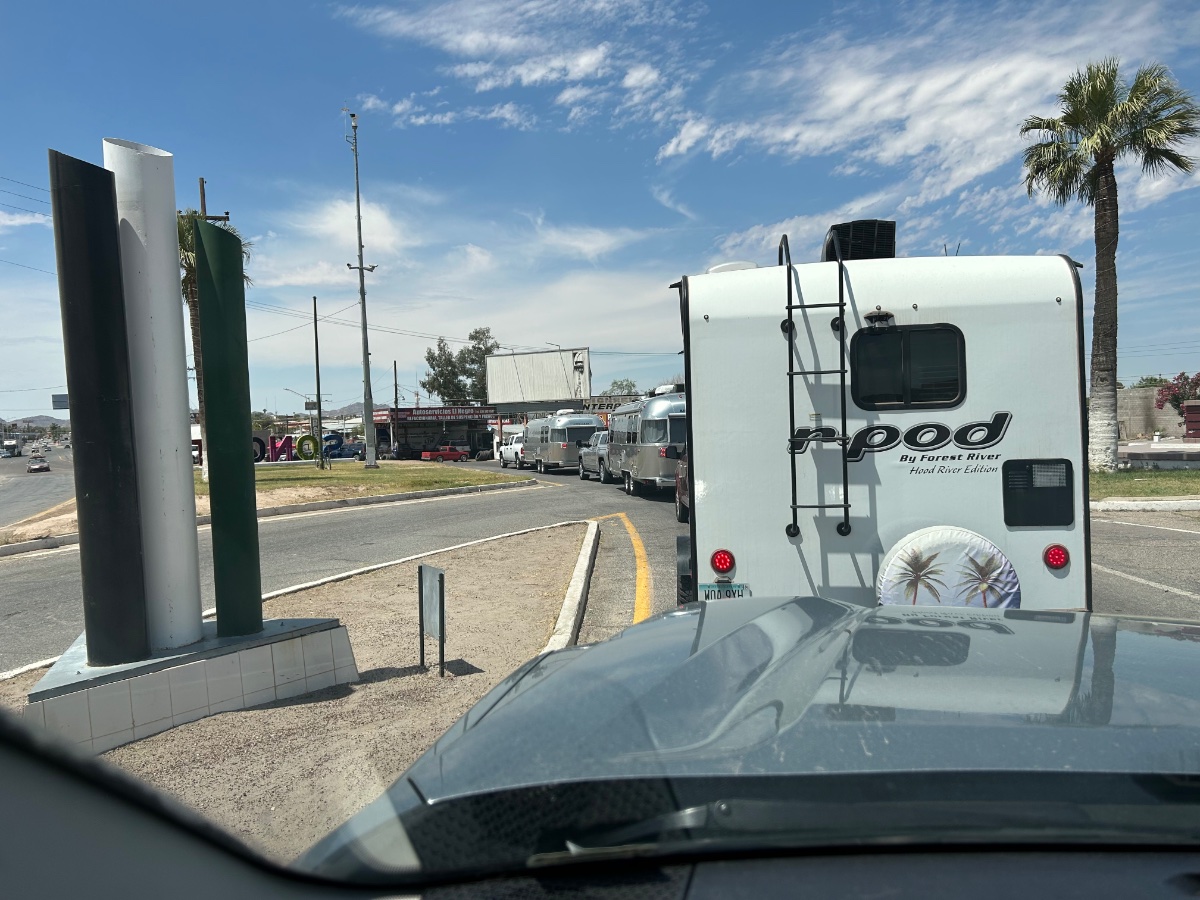
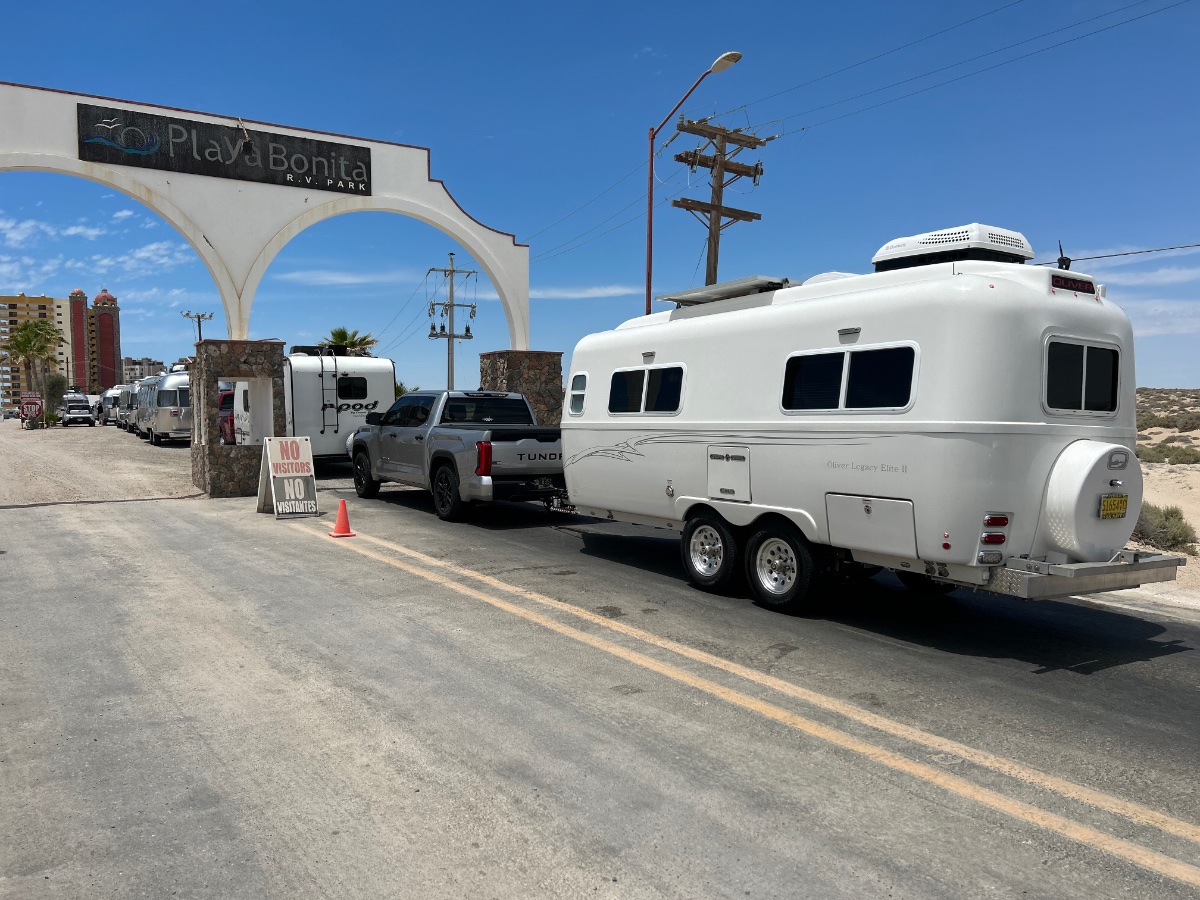
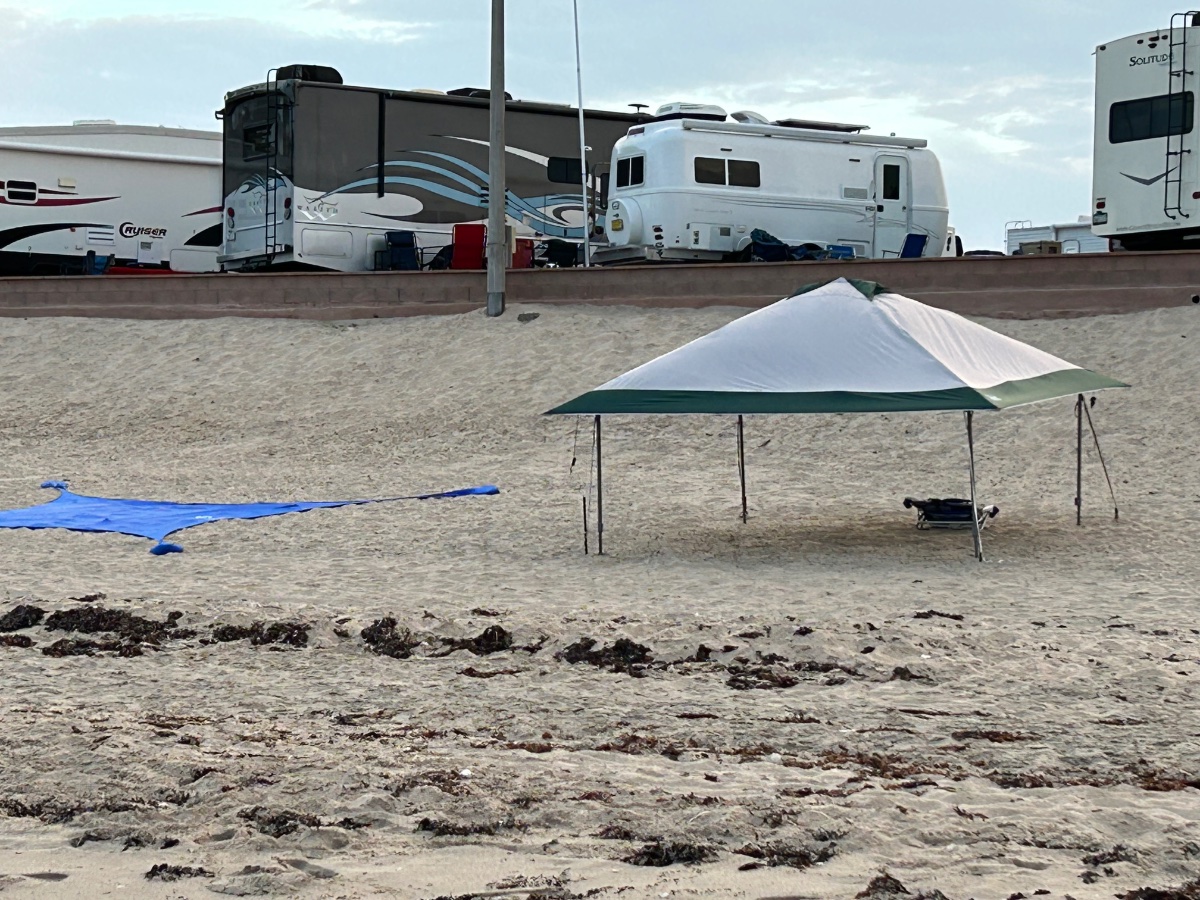
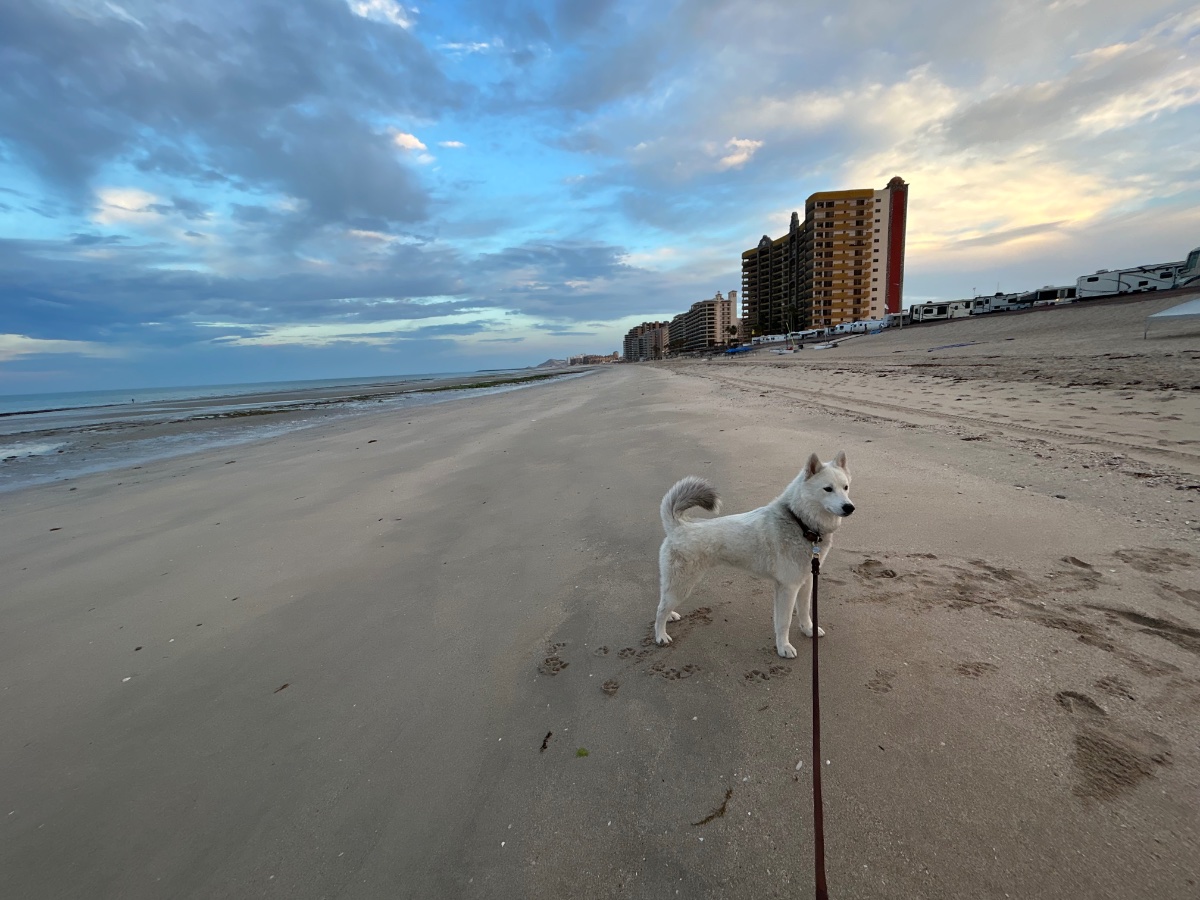
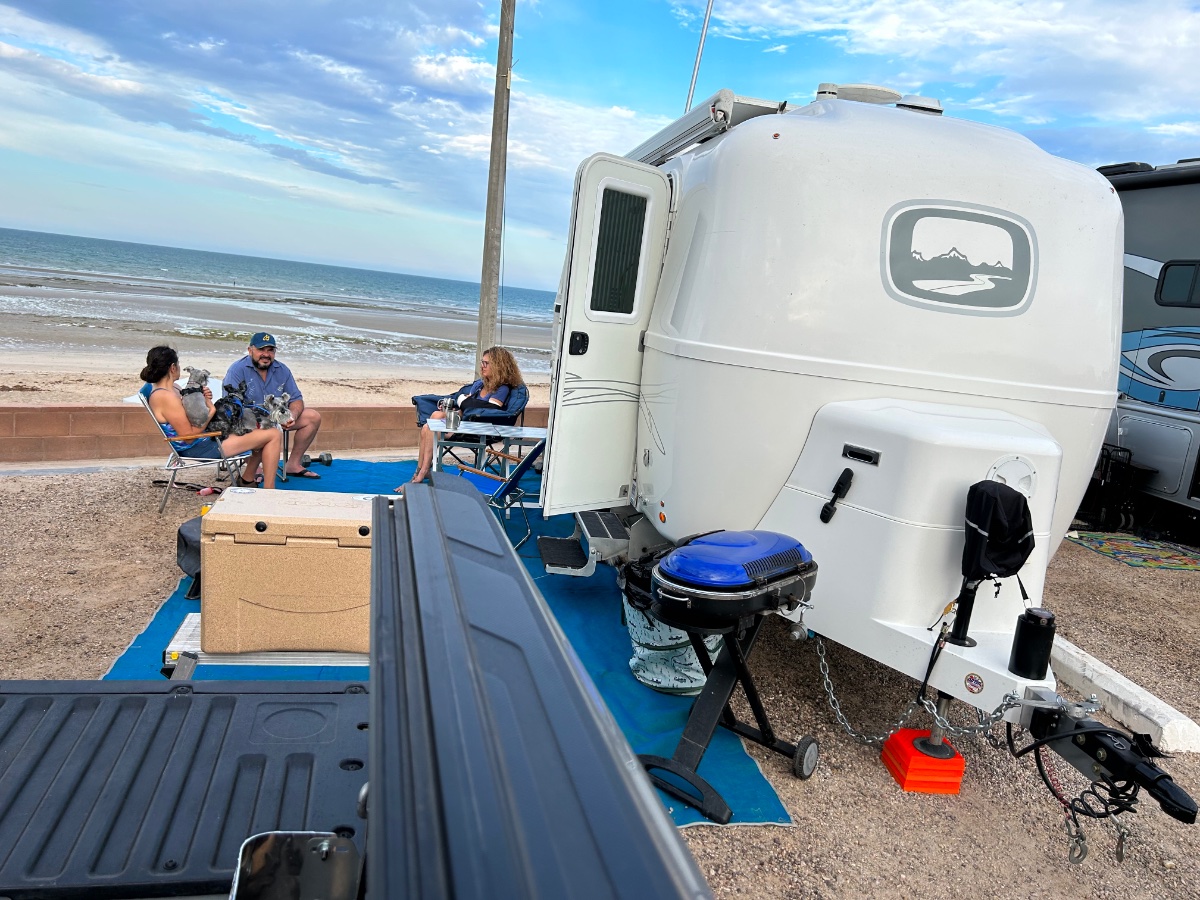
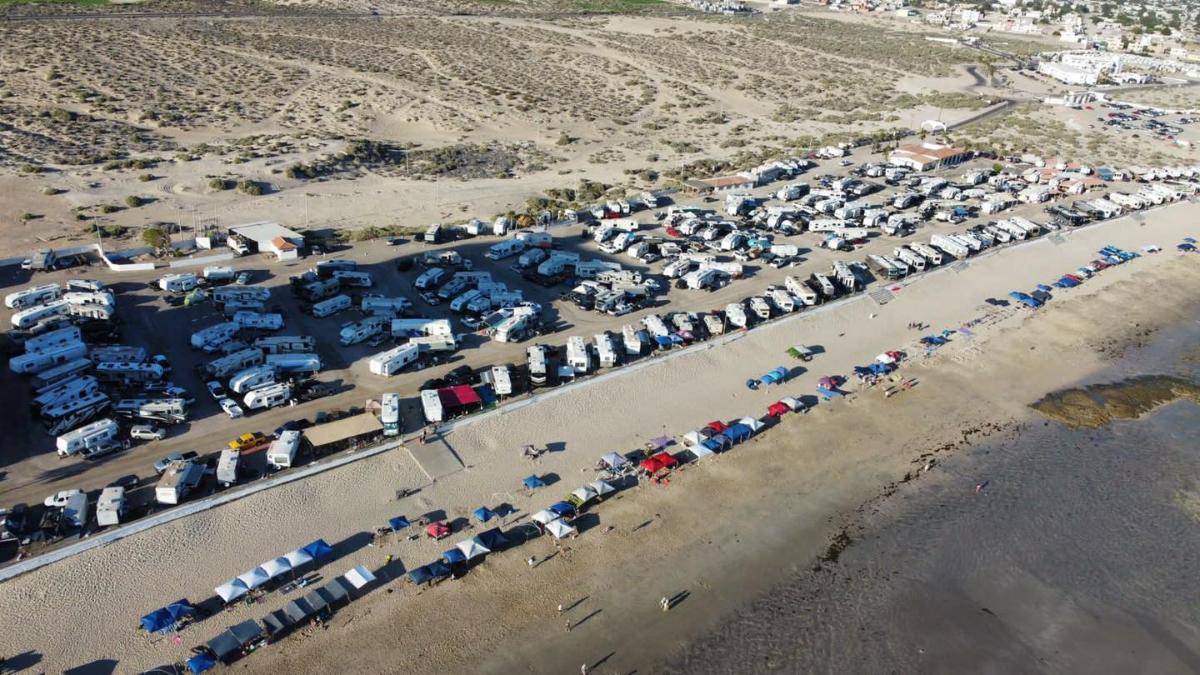
Making the border crossing.... Entrance to the Playa Bonita RV Park - roughly $35/nite... Magnus' intro to the salty water of the Sea of Cortez... Casablanca at the beach - tide goes WAY out in the AM...
-
We've had this trip on our radar screen for years.... Finally, we're able to align the planets to make it happen - we're traveling with friends from our old Airstream club (4 Corners Unit) who've been doing this trek annually since 2003. They've got it down - it's actually an easy transition from Lukeville, AZ (border crossing)/Sonoyta, Sonora Mex. The only documents asked for by the Mexican side was our TV and OTT registrations - they took a peek inside Casablanca and "one and done." No guide needed...
-
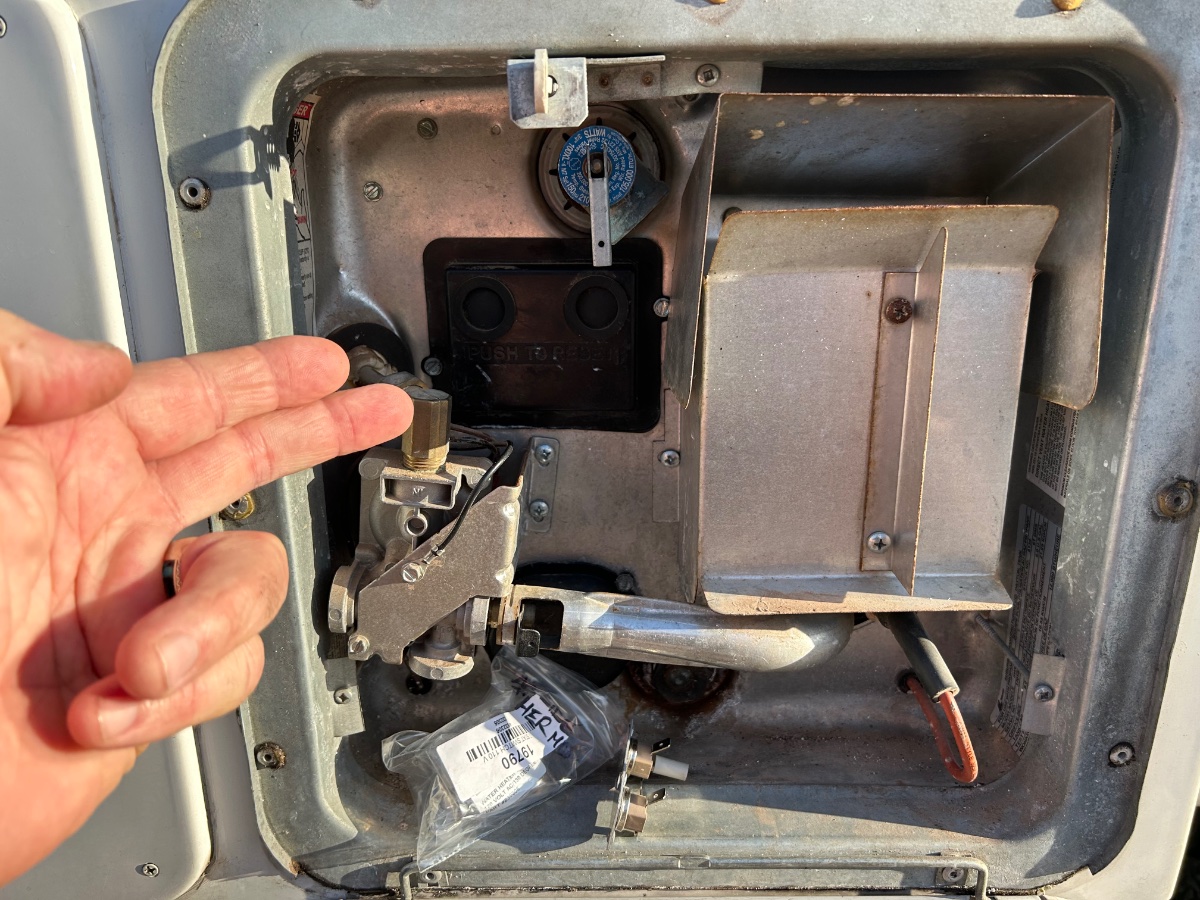
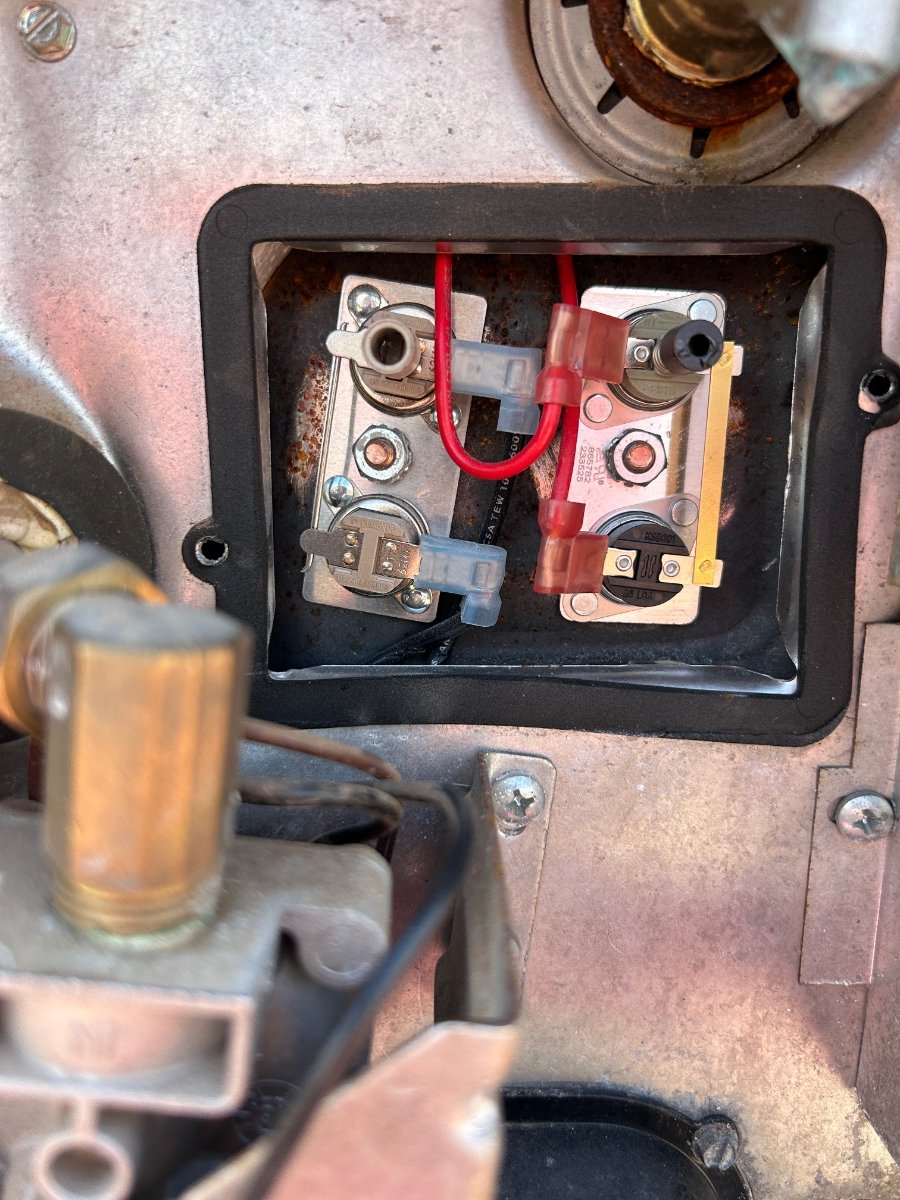
SITREP 18MAY: Departed Wednesday AM with 6 Airstreams, an RPod, and our OTT for Playa Bonita RV Park at Rocky Point, Puerto Penasco. FYI, our only issue with Casablanca was a faulty Suburban SW6DE water heater DC-side thermostat. Replaced the Tstat in short order - all good, so momma got her "Hollywood Shower" this morning (and I'm back in "hero" status). Best wishes to all those at the Ollie Rally this week! We would have been there had we not already planned this trip... Cheers! A & D (Magnus, too - WOOF!!!)
-
Well... This thread may not get much mileage because it's happening during the Ollie Rally in Alabama. But here's an initial SITREP for all y'all that will capture our Sea of Cortez beach adventure over the next week or so... We're in Ajo, AZ ATM and about ready to launch on the 100+ mile trip to the beach later this morning... More to follow!
-
...and a handgun, to make their way to the scoped long-gun should they become separated.
-
Enclosed Aluminum Box Front Mount
MAX Burner replied to Tim and Christie's topic in Ollie Modifications
Couldn't beat the price point and description of this one... Just ordered: For us... a game changer. Thanks for the link!
-
Well, let's see... I suppose ours would be this 48-foot Leopard Cat made in South Africa (including the stow-away). Twin 250 Yanmars, AC, air compressor (fills scuba tanks), fully integrated cockpit, power winches, 4 staterooms, 2 full heads, massive galley... Custom davit with 14-foot RHIB for tooling around to the beach. Bare-boated this baby out of Tortola, BVI in '18 for a week - absolutely fine a sailing getaway.
-
...down to MEXICO
-
These sheets are 100% worth the price point, IMO. We put a small sharpie indicator on each sheet "PORT" or "STBD" so we can get them to the correct side quicker, FYI.
-
It's the "Look Pretty" sleeve that's cracked. Some that aren't cracked are loose - my thought is that the sleeve could fail before the nut torque is decreased and the nut couldn't be removed without special tools that we, in particular, do not carry. I believe another Forum member had this happen - the sleeve failed during a flat tire exchange and would slip/spin around the actual nut making it not possible to remove with tools at hand.
-
Taking our Oliver...
-
Exactly right on! The Beddy's looks sloppy compared to the AB Lifestyles...
-
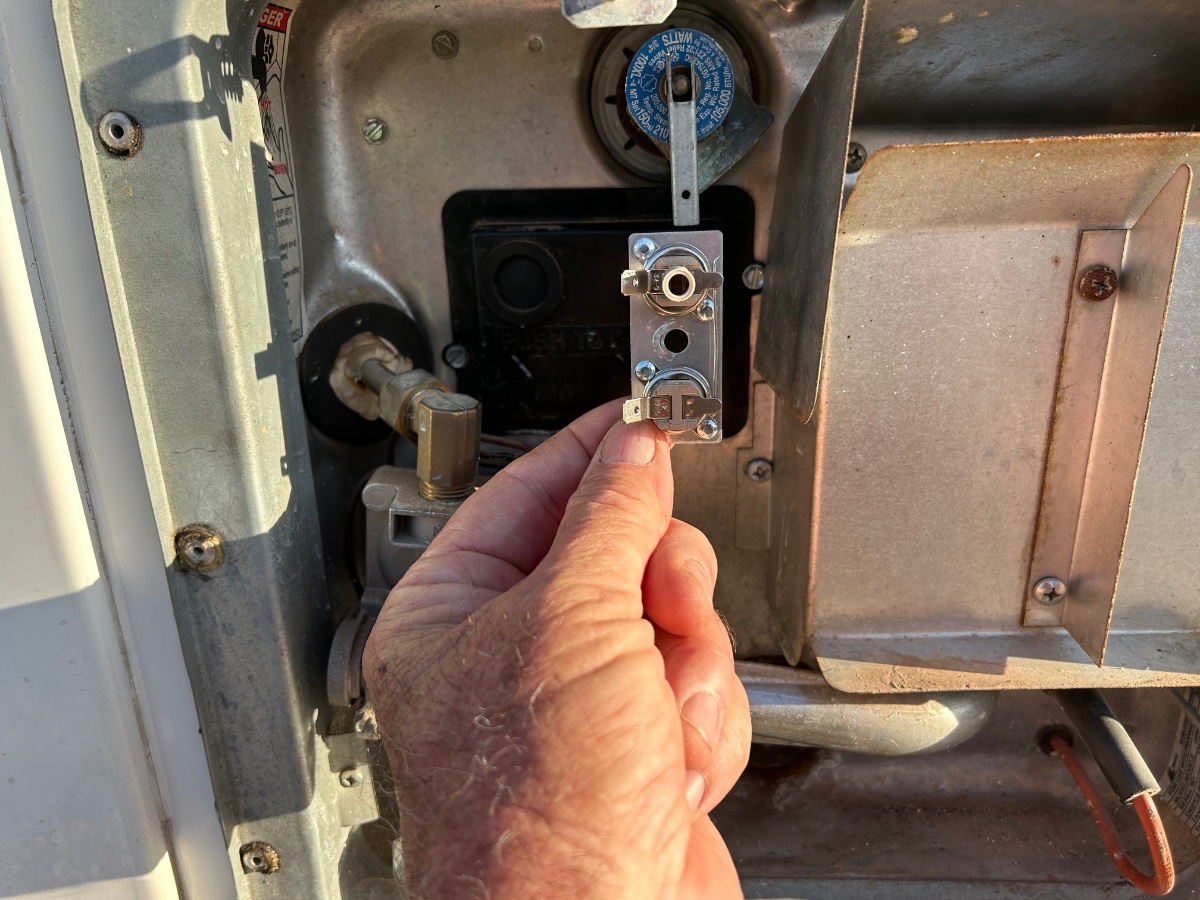
R&R'd the stock OTT wheel lug nuts with Gorilla Nuts this morning. 9 of the nuts were either cracked or have loose sleeves - all were rusty and dinged up. $60 for GN's - peace of mind? Worth it, IMO. Wheel lugs.pdfOld Lug Nuts.pdf
-
@HDRider: Awesome idea, brother. You've got our vote. We've camped there many times in various off-grid and full-hookup locations... Early spring to early fall is best for optimal WX conditions. Pix below from Monument Valley area near 4 Corners, around JUN2018... There's a great photo op there where, if you've got a party of 4, you can each be standing in a different state while still holding hands... HA! Utah, Colorado, New Mexico, and Arizona... Pretty cool.
-
If ya ain't cheat'n - ya ain't try'n!!!
-
Very cool mods @Ron and Phyllis! Especially like your rear cargo arrangement. Can you give a link to the rear platform for the storage box, pls? Thanks, brother!
-
@Geronimo John: now that's just pure and simple alcohol abuse, brother! HA!
-
We also transitioned from the "Beddys" (which zip the sheets and a blanket together -but were too big for the OTT mattresses) to the Allison's AB Lifestyles sheets and they fit perfect and we love them. Great job on your interior decor theme - I'd leave the bathroom door open too! That wall tattoo looks phenomenal!!!
-
The checklists get you into the "ball-park" for a standard camping evolution - whether you're departing your driveway or leaving a campsite after 2 weeks on the road. Should go without saying, but - "checklists do not make up for a lack of common sense." Every situation is different - we're never necessarily always "ready" for something to go wrong, but we should always be "prepared" for it, there's a difference, IMO.
-
Good one, @SeaDawg!!! When we were younger, such "Small-World" Stories used to absolutely amaze us. Getting older, we've learned to "accept" the fact SWSs will keep surfacing - it is.... a very small blue ball spinning around the sun! IMO, this might be an interesting Forum Thread subject... "OTT Small-World Stories." Cheers!