MAX Burner
-
Posts
1,681 -
Joined
-
Last visited
-
Days Won
68
Everything posted by MAX Burner
-
Ha! Good morning, Bill! Nope just me and a knucklehead wandering about in the dark. It’s 41F here now - quite a bit warmer than your location! Best regards, Art & Oscar (woof!)
-
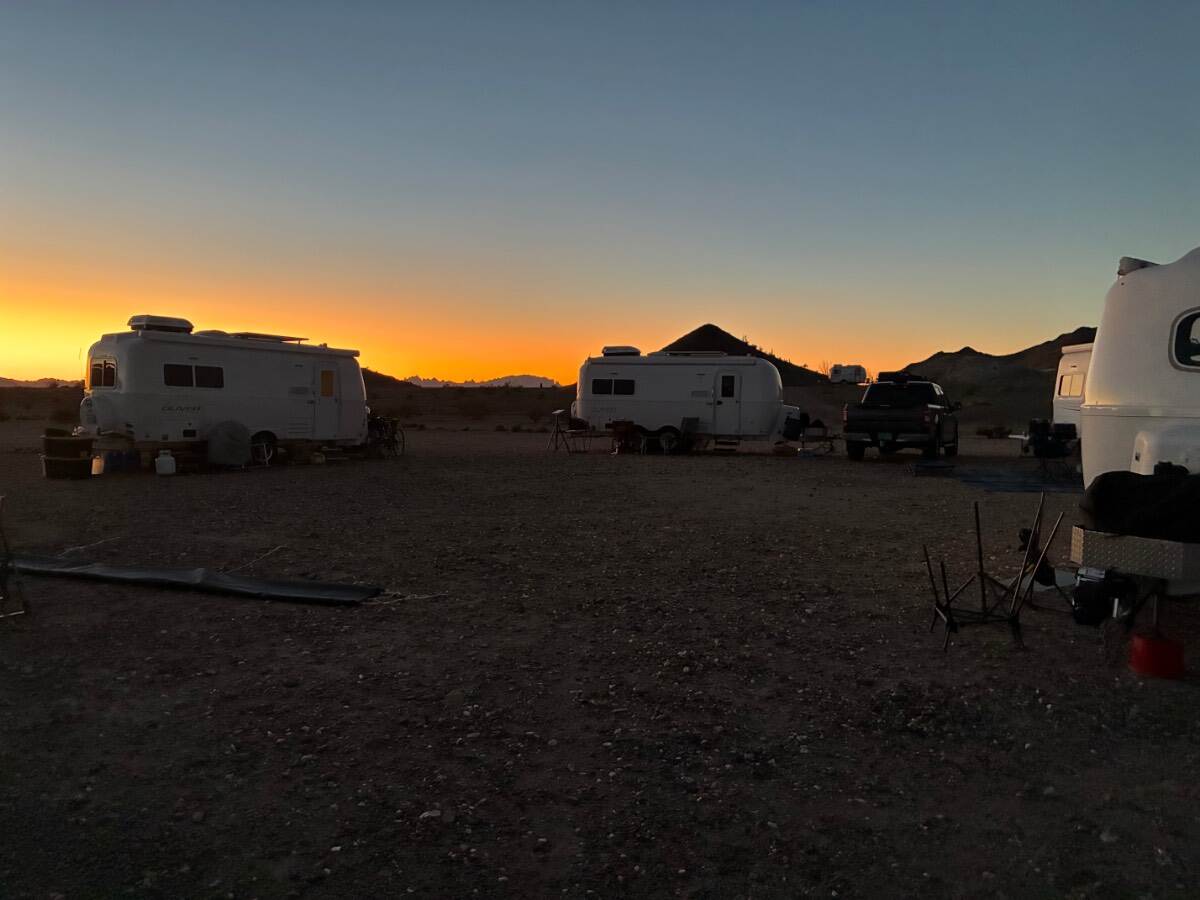
A beautiful Quartzite sunrise with 6 Oliver LEIIs….

- 162 replies
-
- 10
-

-

-

Alcan spring kit sprung stiffer or is it bad roads?
MAX Burner replied to taylor.coyote's topic in Ollie Modifications
We reconfigured our OTT in the same manner and have logged over 12k miles since. Concur w/ @Mike and Carol, the rig feels solid and tracks true over various terrain conditions. @Geronimo John and I ventured over several dozens of USFS roads in rough and muddy conditions earlier this year while searching around and met @jd1923 w/o any noticeable relocation of contents inside the cabin. Rugged terrain should be transited slowly and surely, IMO. I would not have chose to transit those USFS roads without the suspension upgrades you've done to your Ollie. just my $0.02... Be safe out there... -
Great talking with you last night, David! Your new Victron upgrades look flawlessly integrated into EXPLOR -- they will serve you and Kathy well as y'all continue making future OTT adventures. Very impressive. As goes with all in the OTT community -- please reach out to us here in NM, as @Geronimo John and others can attest, we've got a nice flat area with 30Amps/fresh well water/and dump station for over-nighting in the Great Southwest USA! Nothing like burning game meat on the Green Egg and quaffing a few cold ones with friends. Safe travels, all and Happy (early) Thanksgiving to all y'all!
-
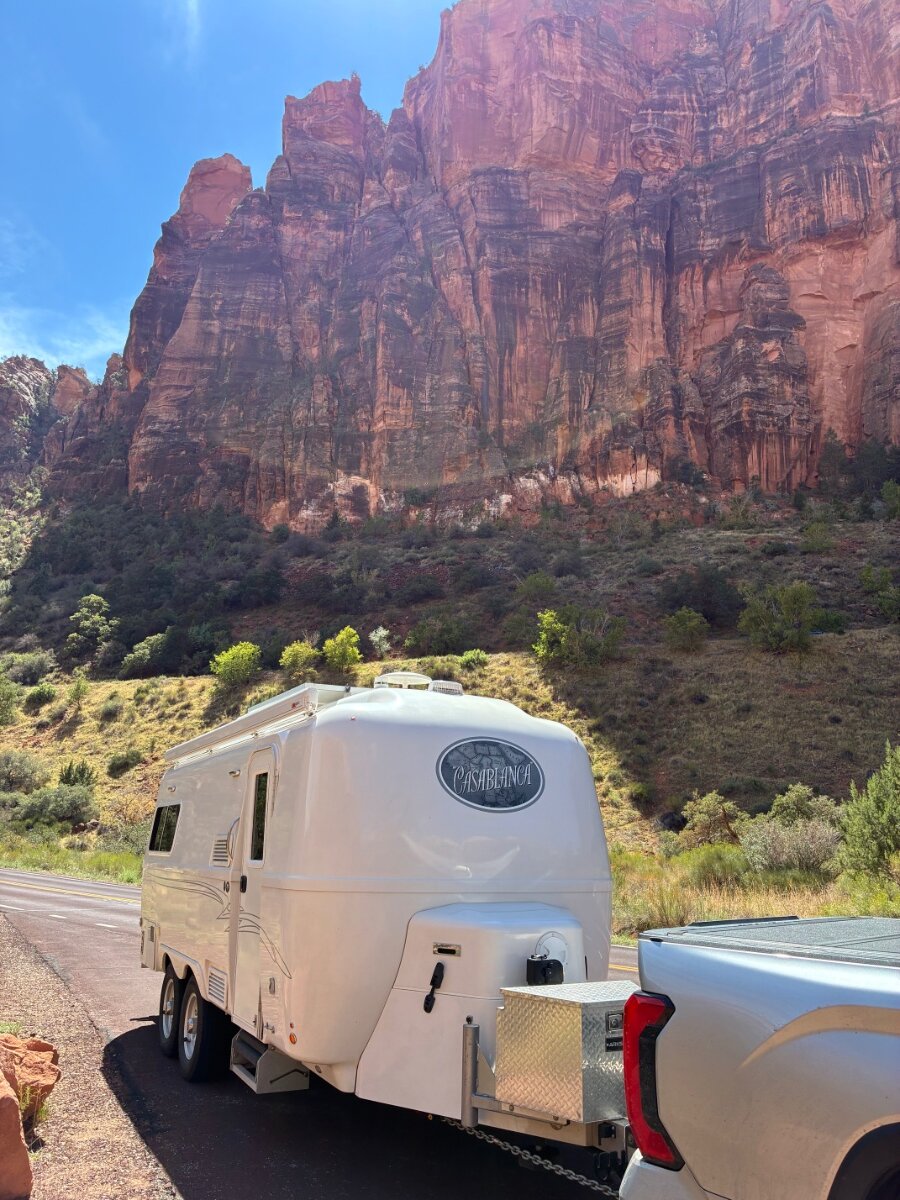
Greetings, All! Well D and I went over to the "dark side" and sold Casa Blanca to a great guy from near Kerrville, TX, David Knight. Please welcome aboard @Kpaladin David into the Oliver family. We're now into our next chapter of RV'ing and starting new adventures with our 2026 Brinkley I 235. It's totally "Victron'ed" out and includes 600A-Hrs of Epoch LiFePO4s and 800W of solar modules. We'll stay in touch! MAX Burner
- 12 replies
-
- 14
-
-
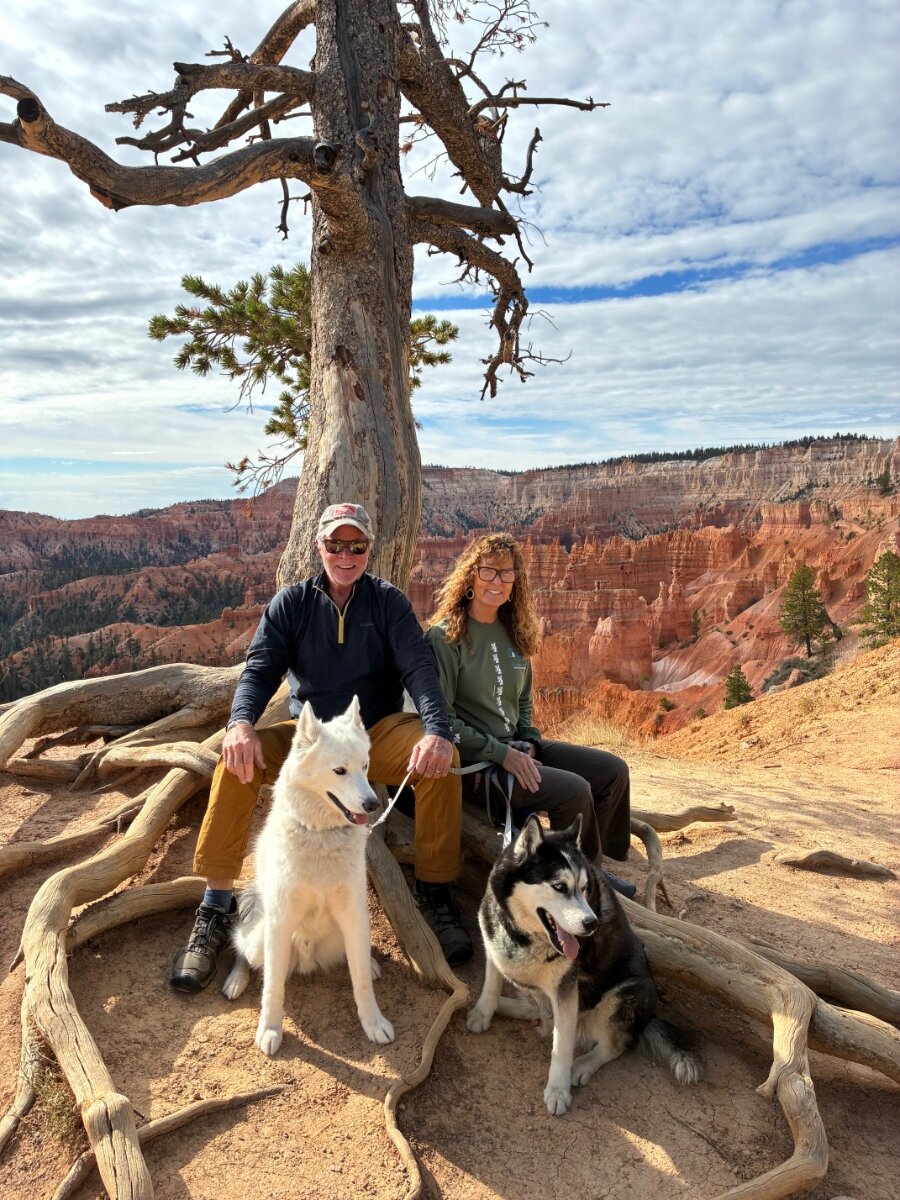
Going West! Random Thoughts on the Road
MAX Burner replied to Boudicca908's topic in General Discussion
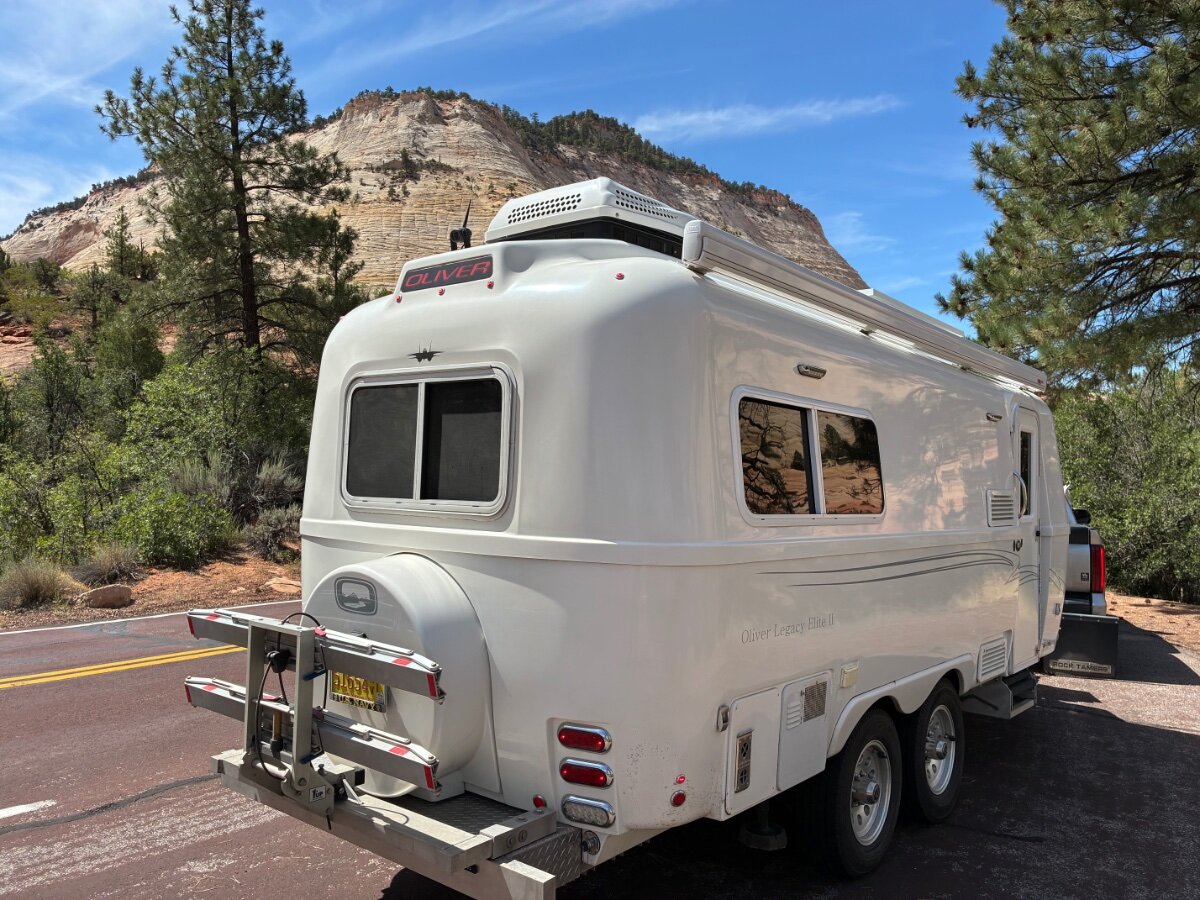
Just departed Bryce Canyon NP arrived Zion after a beautiful drive…. Safe travels and Cheers to all y’all road warriors! Best,, A & D (Magnus & Oscar, too — woof!)
- 12 replies
-
- 15
-
-
-

-
3500 pound versus 5200 pound axles on a LE2
MAX Burner replied to John and Debbie's topic in General Discussion
@mountainoliver: FYI, We definitely noticed a more efficient braking performance after upgrading to the NeveRlube D52's w/12" drums after the brake shoes settled in. Backed off the brake controller a few volts so as not to lock them up using the 10" BC setting. You'll not be disappointed with the 12" drum upgrade, IMO. -
There's definitely a lot of cool places to see enroute from NM to the White Mtns of AZ! We had a blast traveling with @Geronimo John and meeting @jd1923 and his lovely wife and wonderful chef, Chris, and their puppy, Charlie! Above -- a couple Olivers, and a couple knucklehead huskies at the Very Large Array west of Socorro, NM at 6,800' Above: Close-up of one of the 27 VLA radio telescopes (90-foot diameter) that look deep into the Milkyway in the radio frequency spectrum. Definitely worth the time spent to visit this place. Above: Looking for @jd1923.... Above: AH! They can run, but they can't hide from us! Typical afternoon monsoon weather in the White Mtns... Above: Beautiful campground in the Whites... Lots of elk and turkey: A couple knuckleheads trying to figure out what to do with those big 4-legged friends... Above shows a nice flock of Rio Grande Turkeys at about 8,750' enroute to our campsite... Above -- Hannigan Meadow Lodge on AZ Hwy 191 at 9k' -- absolutely fantastic! All in all -- it was a wonderful 5-day, 635-ish mile run from Placitas, NM... Thanks, @jd1923 and @Geronimo John! Plan this one for 2026! Best, A & D (...and the boys - WOOF!) (PS: A couple Olivers preparing for dinner and adult bevs -- note @Geronimo John's ice maker on the table!)
- 975 replies
-
- 11
-
-
-
-
Progressive Dynamics Converter/Charger needs home
MAX Burner replied to DavePhelps's topic in General Discussion
Just curious, @DavePhelps: does it have the "Li" switch for using with LiFePO batts? -
Ft. Desoto County Park, Pinellas, FL
MAX Burner replied to Dennis and Melissa's topic in Campgrounds & Parks
Sorry for being a bit off topic... but, we LOVE camping in Florida! P-cola Beach at sunset a few years back...
-
The Oliver - a Suitable Survival Vehicle!
MAX Burner replied to jd1923's topic in General Discussion
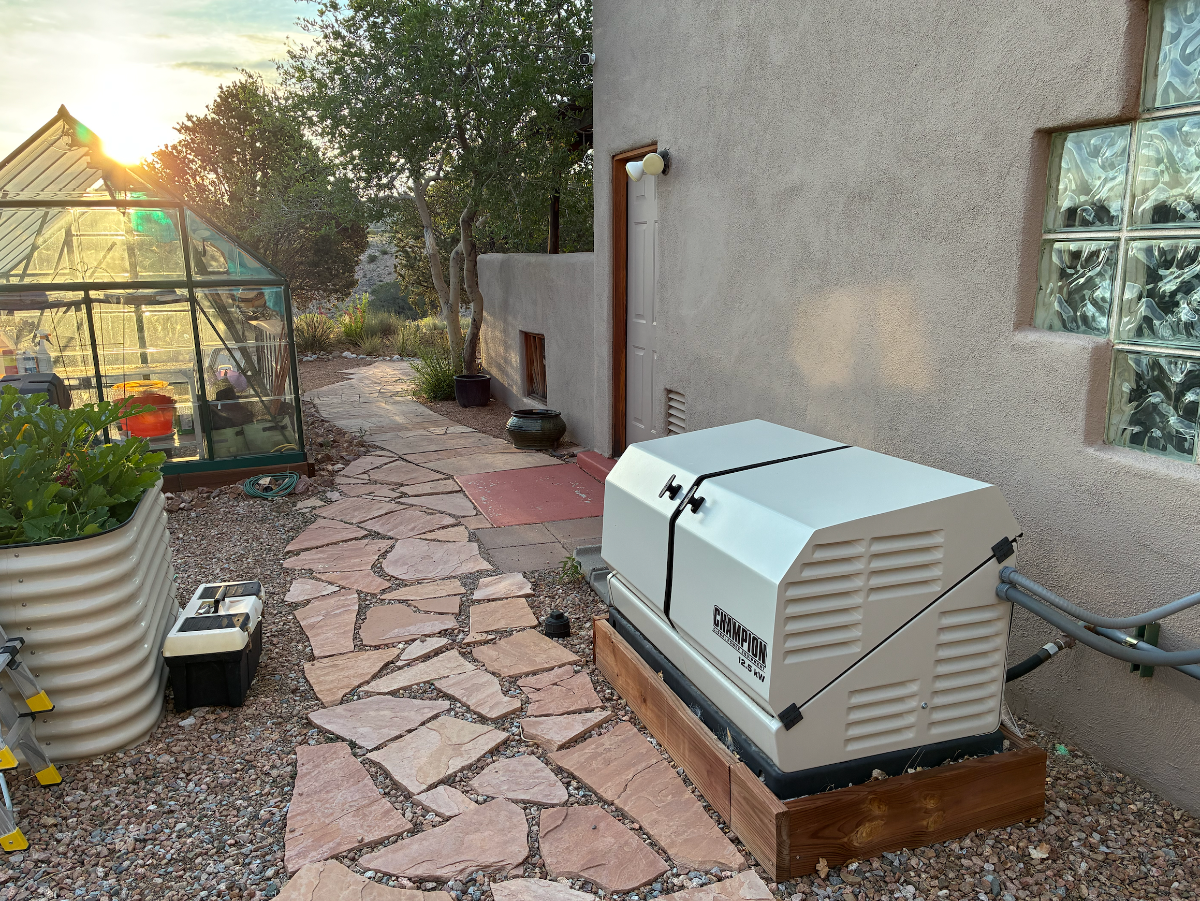
Same here, Patriot! We installed a 12.5kw LNG unit 4 years ago... It's kept us high and dry on many occasions. Self-tests weekly and notifies us via the app if activated when we're away. No more thawed/fouled meat surprises after a road trip!
-
We occasionally drink "Truleys" (a carbonated fruit flavored beer alternative) -- the cans are a perfect diameter to fit over the greased hitch ball. Just cut off about 3.5" from the bottom of the can, place it over the ball and pinch the cut-edge below the ball to keep it from flying off when driving. No more grease marks on your legs....
-
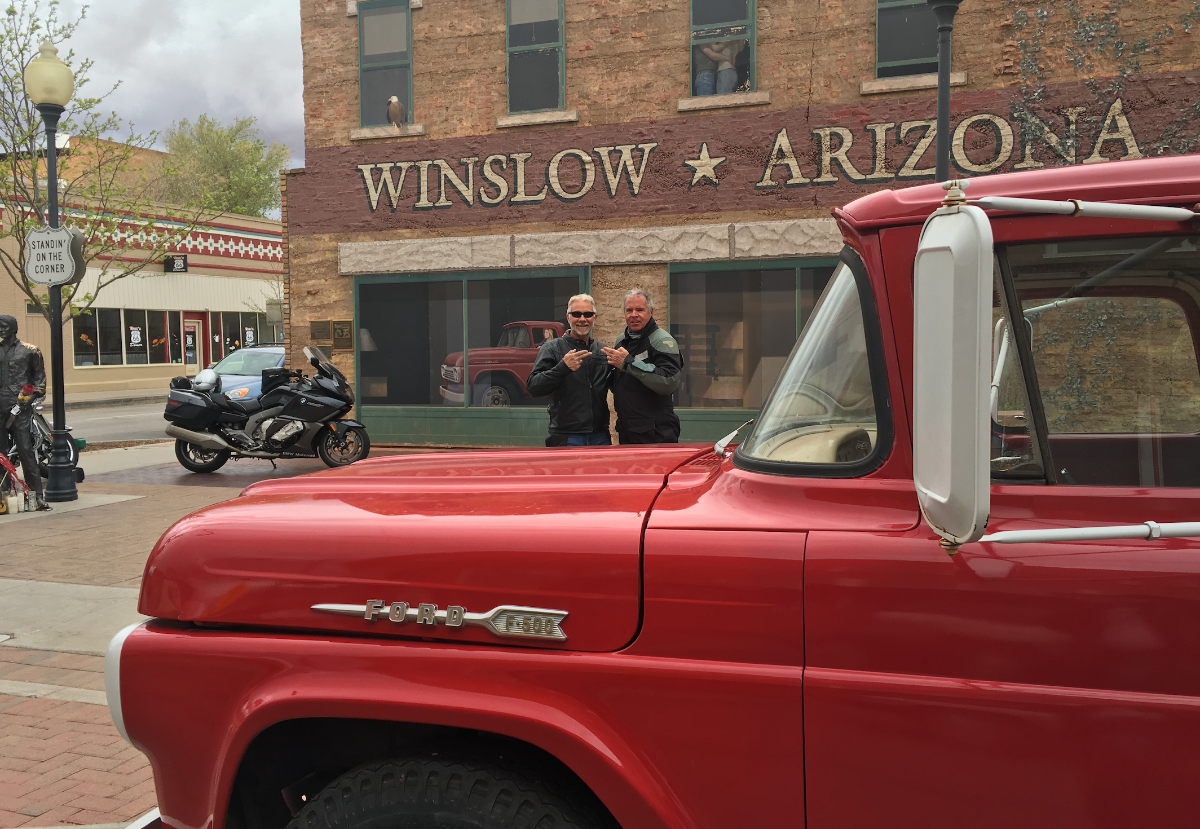
Someone may need to start a thread for all the owners to post their Winslow pics, @HDRider --- what'ya think?
-
Stand'n on the corner.... Here's a shot taken during a MC run thru Winslow a few years back:
- 69 replies
-
- 11
-
-
-
More DC to DC charger installation tidbits
MAX Burner replied to Snackchaser's topic in Ollie Modifications
Carl, IMO, you're spot-on, brother! Modifications, upgrades, and otherwise enhancements outlined in various levels of detail in this forum are for information purposes and general "better" understanding of what the OTT can do during our collective travels. That said, our "collective travels" are widely different across the spectrum of owners. Everyone has their own "style" of camping with their Ollie - some fancy established RV parks with full connections for the majority of their travels, others prefer full-on off-grid boondocking for most of their trips. The rest of the owners likely fall in between these extremes. So, depending on what "style" of camping you prefer, would dictate which mods suit your purpose of camping. But that's what's so phenomenal about this forum, there's such a wide spectrum of experience and expertise here, one can choose the mods fitting their camping style the best. The discussion about DC2DC chargers are such an example. It's not a "one size fits all" issue, if you catch my drift....- 35 replies
-
- 10
-
-
-
12V DC Anderson Powerpole outlet on the front of Curiosity
MAX Burner replied to Steve Morris's topic in Ollie Modifications
Same here. -
Wardrobe Shelving - A simplified approach
MAX Burner replied to Geronimo John's topic in Ollie Modifications
@Geronimo John's description of the wardrobe shelves is correct. Additionally, the additional "always needed" real estate for organizational efforts hit the mark. Both June and Diane are thrilled with the space for other stuff instead of a "throw all" space as @Jason Foster accurately notes above. This became a "Happy Wife -- Happy Life" Project immediately upon completion.... The white milk crate is our "wine cellar" still on the floor, and the wardroom door is backed with a hanging organizer for ready service items (Windex, misc. cleaners, more shoes, suntan lotion, etc.). The upper shelf houses our airfryer/convection oven strapped down with black tubular nylon and footman loops rather than having it banging around in the truck bed or bouncing around on the floor of the wardrobe. For scaling, those are a couple pairs of my size 13D shoes and D's Uggs on the lower shelf:
-
16MAY25 -- 0634, Casablanca settled in at Pancho Villa SP near La Paloma, Old Mexico.... Magnus pulling the first watch:
-
@routlaw: It is likely the camera angle, but your leaf spring looks like its flattening out....
-
Dexter Self Adjusting Brake - Fail
MAX Burner replied to Galway Girl's topic in Mechanical & Technical Tips
We should recommend this to Scott Oliver as a "Heavy Duty" option for whatever he has on the drawing board for the next line of trailers... Or even better, scrap the Dexters and go with Curt Adventure Edition indipendent suspension (but with disc brakes):
-
2" 1UP hitch post doesn't fit 2" Oliver bike receiver 😵
MAX Burner replied to GlacierGirl's topic in General Discussion
This question is not meant to insult, but did you ensure the keyed allen bolt that tightens the stainless steel ball on the 1Up shank is loosened? If not, you'll not be able to insert the shank.... A picture of vernier calipers measuring the ID of the Oliver receiver would be very helpful. -
Gorilla compact 25’ hose for marine and RV use
MAX Burner replied to Patriot's topic in Mechanical & Technical Tips
@Ollie-Haus: Many thanks for showing this hose to me, @Geronimo John, and @Patriot at the rally! Definitely a no-brainer "must have" item - especially for space saving feature. I'm tired of wrestling with that stiff white Camco hose when rolling it up. Headed to Home Dumbo today for 2 of these.... We'll do an OPS-check this weekend down south. 2 is 1 and 1 is none! -
Headed to Old Mexico Thursday, we'll be walking the border crossing at Columbus over to La Paloma. Pancho Villa State Park is still having issues with their septic system so there's been no dumping allowed for almost a year now -- no biggie, as we'll only stay for 3 nights. Pix of the knuckleheads to follow, FYI...
-
That's in our back yard!
-
Welcome to the Oliver Family! Don’t hesitate to reach out with any questions or challenges y’all may be experiencing— there’s ample expertise on the forum to help sort them out. best regards,