John E Davies
-
Posts
5,759 -
Joined
-
Last visited
-
Days Won
243
Everything posted by John E Davies
-
Self adhesive shelf paper, trim around the perimeter and hinges afterwards with a hobby knife. You could use plain white, or be bold with a less orthodox choice: https://www.amazon.com/Duck-Brand-Smooth-Shelf-Liner/dp/B00OES7YS0 I suggest that you dress (bevel slightly) the very sharp edges with a emory paper and water first. I haven't done it yet, but it is on my Honey Do List for winter. I also plan to install restraining lanyards so they can be left open 8 or 10 inches for ventilation (drying damp clothing), without risk of scalp lacerations. John Davies Spokane WA
-
I didn't think the Pikes Peak drive was scary at all. Exhilerating, for sure. No guard rails except for the outside of the tight turns, but it is wide, striped and very well maintained, paved clear to the top now, and no sheer cliffs. I would be very reluctant to tow Mouse up to the top, but without a trailer it isn't especially spooky. Unless you have never driven in mountains before.... on a scale of 1 - 10 it is maybe a 3. If I recall correctly RVs are discouraged, so it is just cars and pickups... going 25 mph. The elevation near the top is a big factor if your vehicle does not have forced induction and you are heavily loaded. Going down you have to use your very lowest gears and go slow. Just like any other serious High Country mountain pass. The average grade is less than 7%. http://www.pikespeak.us.com/Essentials/driving-tips.html http://roadtreking.com/climbing-pikes-peak-rv/ John Davies Spokane WA
-
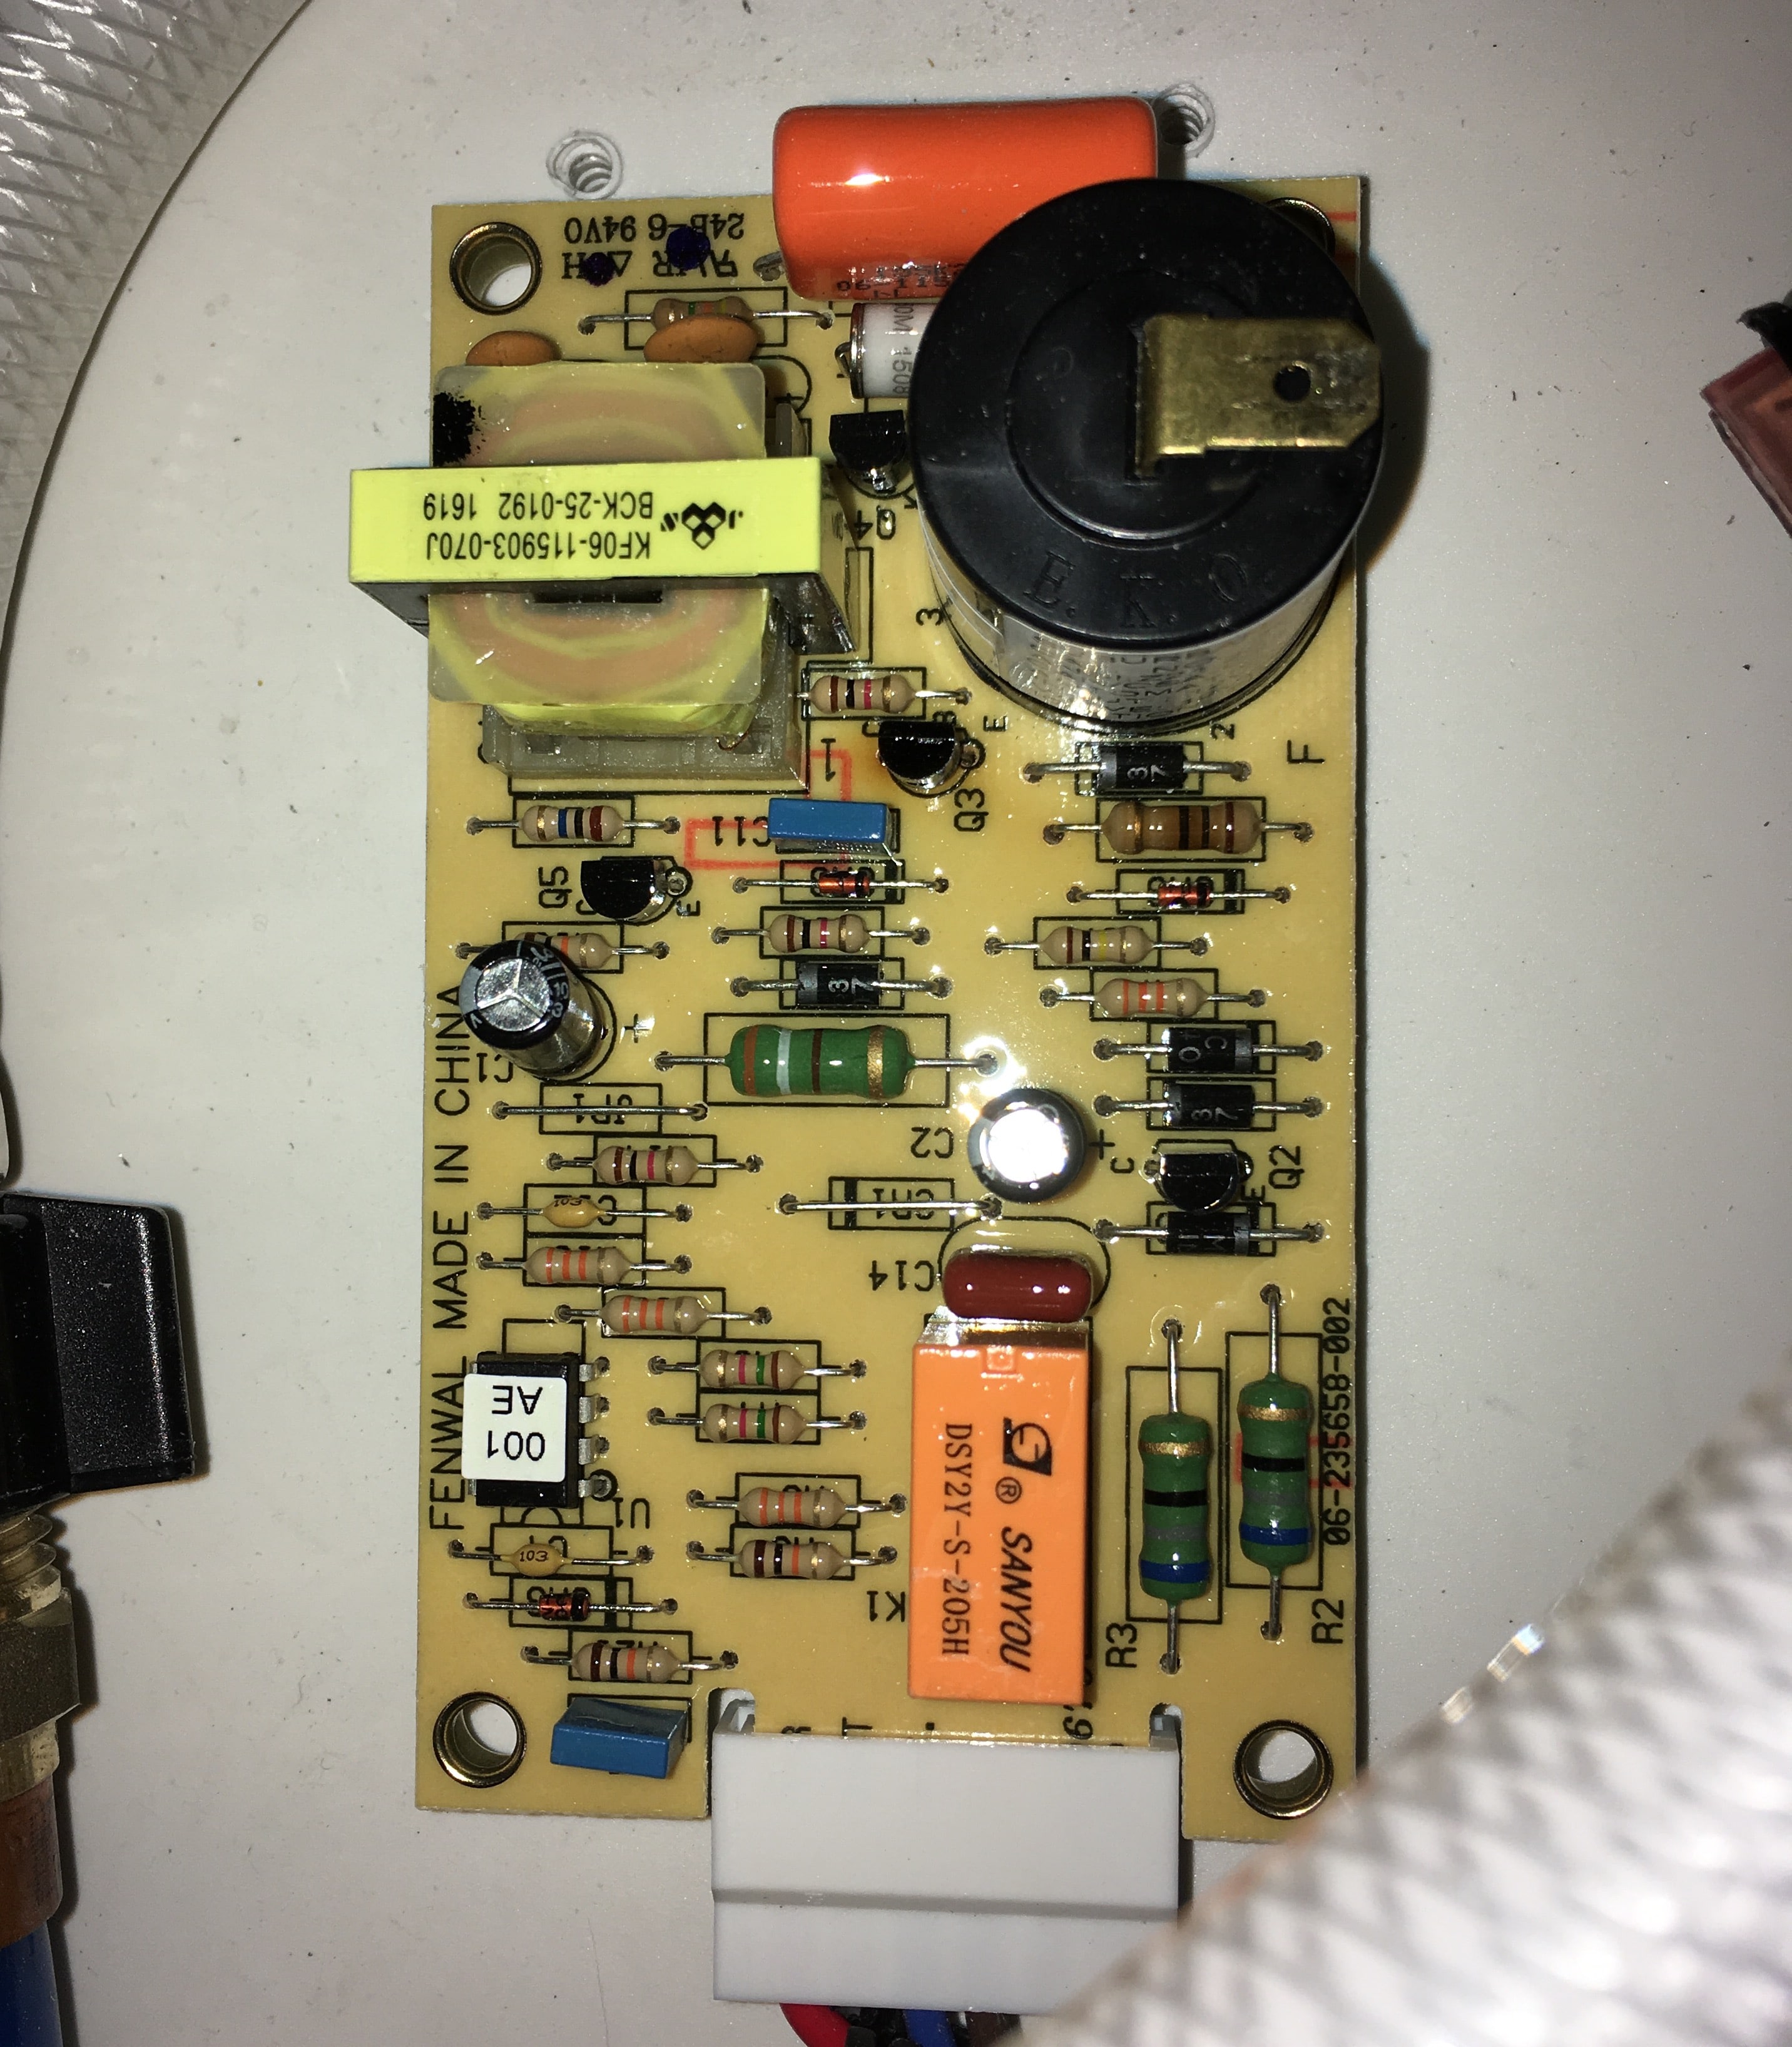
 It's not outside, it is inside the cabin, on my trailer (Hull 218).... In the top pic, one of the water pump fittings is barely visible to the left (forward) of the board. It is hidden by a yellowish plastic splash cover, remove two philips screws after unplugging the igniter cable and low voltage connector. The board is stuck down with tape. Guard the screws with your life, they want to roll down and vanish into the dark recesses, and you can't retrieve them with a magnet. I suggest that you buy the aftermarket board mentioned above, unless you can find a free one. I don't know why they put the board there. Right next to a water system component that needs regular servicing (filter cleaning) is NOT a good location. I would have selected a much drier spot in the aft compartment. There is no reason for it to be in a quick access compartment... John Davies Spokane WA
 -
Finally: Our Ollie Gets Hitched with Stan
John E Davies replied to Spike's topic in Delivery Day Photos
Great pics! I agree that the night shot with the sunset is gorgeous. Are those from a cell phone or something fancier like a DSLR? I used to carry a Nikon D40 on all our trips, but my iPhone SE takes such darned nice pics that lately I don't bother, but it would be better for landscapes, definitely. Tell us about your bear .... uhm, dog, please. He's a big guy. Does he sleep in the trailer or the truck? John Davies Spokane WA -
This paper booklet comes in the box with the scale, and I think it is one of the best and most complete guides to safe trailer towing that I have encountered. I am confident that even the crusty old farts with 40+ years on the road will learn a few things. Download it, read it, and save it for future reference. http://sherline.com/Wordpress/wp-content/uploads/2016/01/lm_book2.pdf When I have tried out my new 1000 pound scale I will post a review in a new thread. I did set it on the ground and I stood on the post. The gauge read 150 and I weigh about 155, so that is a good sign. https://smile.amazon.com/Sherline-LM-1000-Trailer-Tongue/dp/B007REJTGI/ref=sr_1_sc_2?ie=UTF8&qid=1499310528&sr=8-2-spell&keywords=Sherline+tongueweight+cale John Davies Spokane WA
-
Good news on the customer service. I wonder if heat would help free up a stuck liner? If you cooked the ball mount in boiling water for five minutes I bet it would pop free from expansion. Wear heavy leather gloves! Aluminum expands like crazy when heated. Did you try a big dead blow mallet on the sides of the mount when the truck was in the air? That's how you get tapered ball joints and tie rod ends loose, by smacking the sides of the part with the hole. John Davies Spokane WA
-
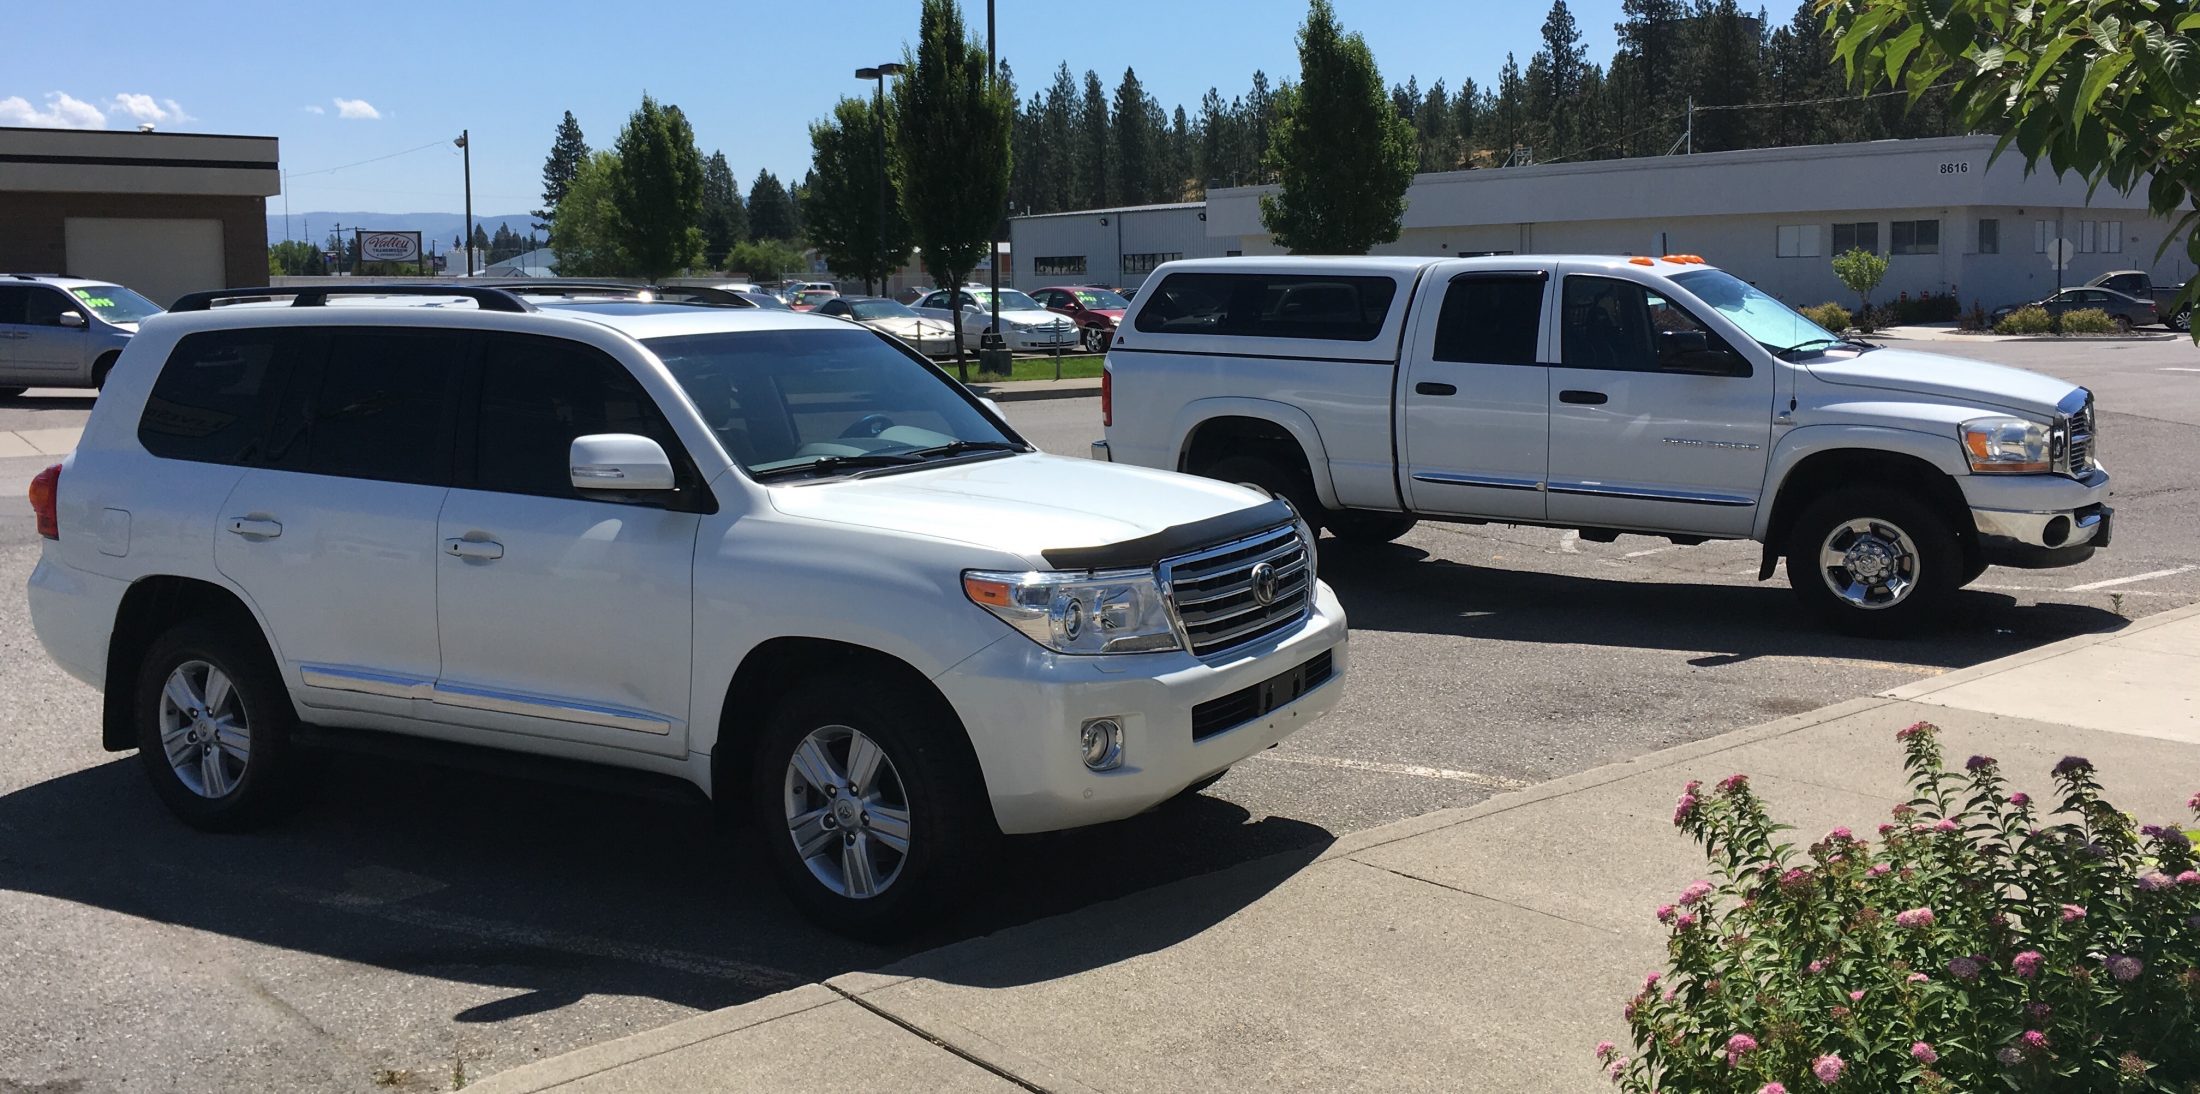
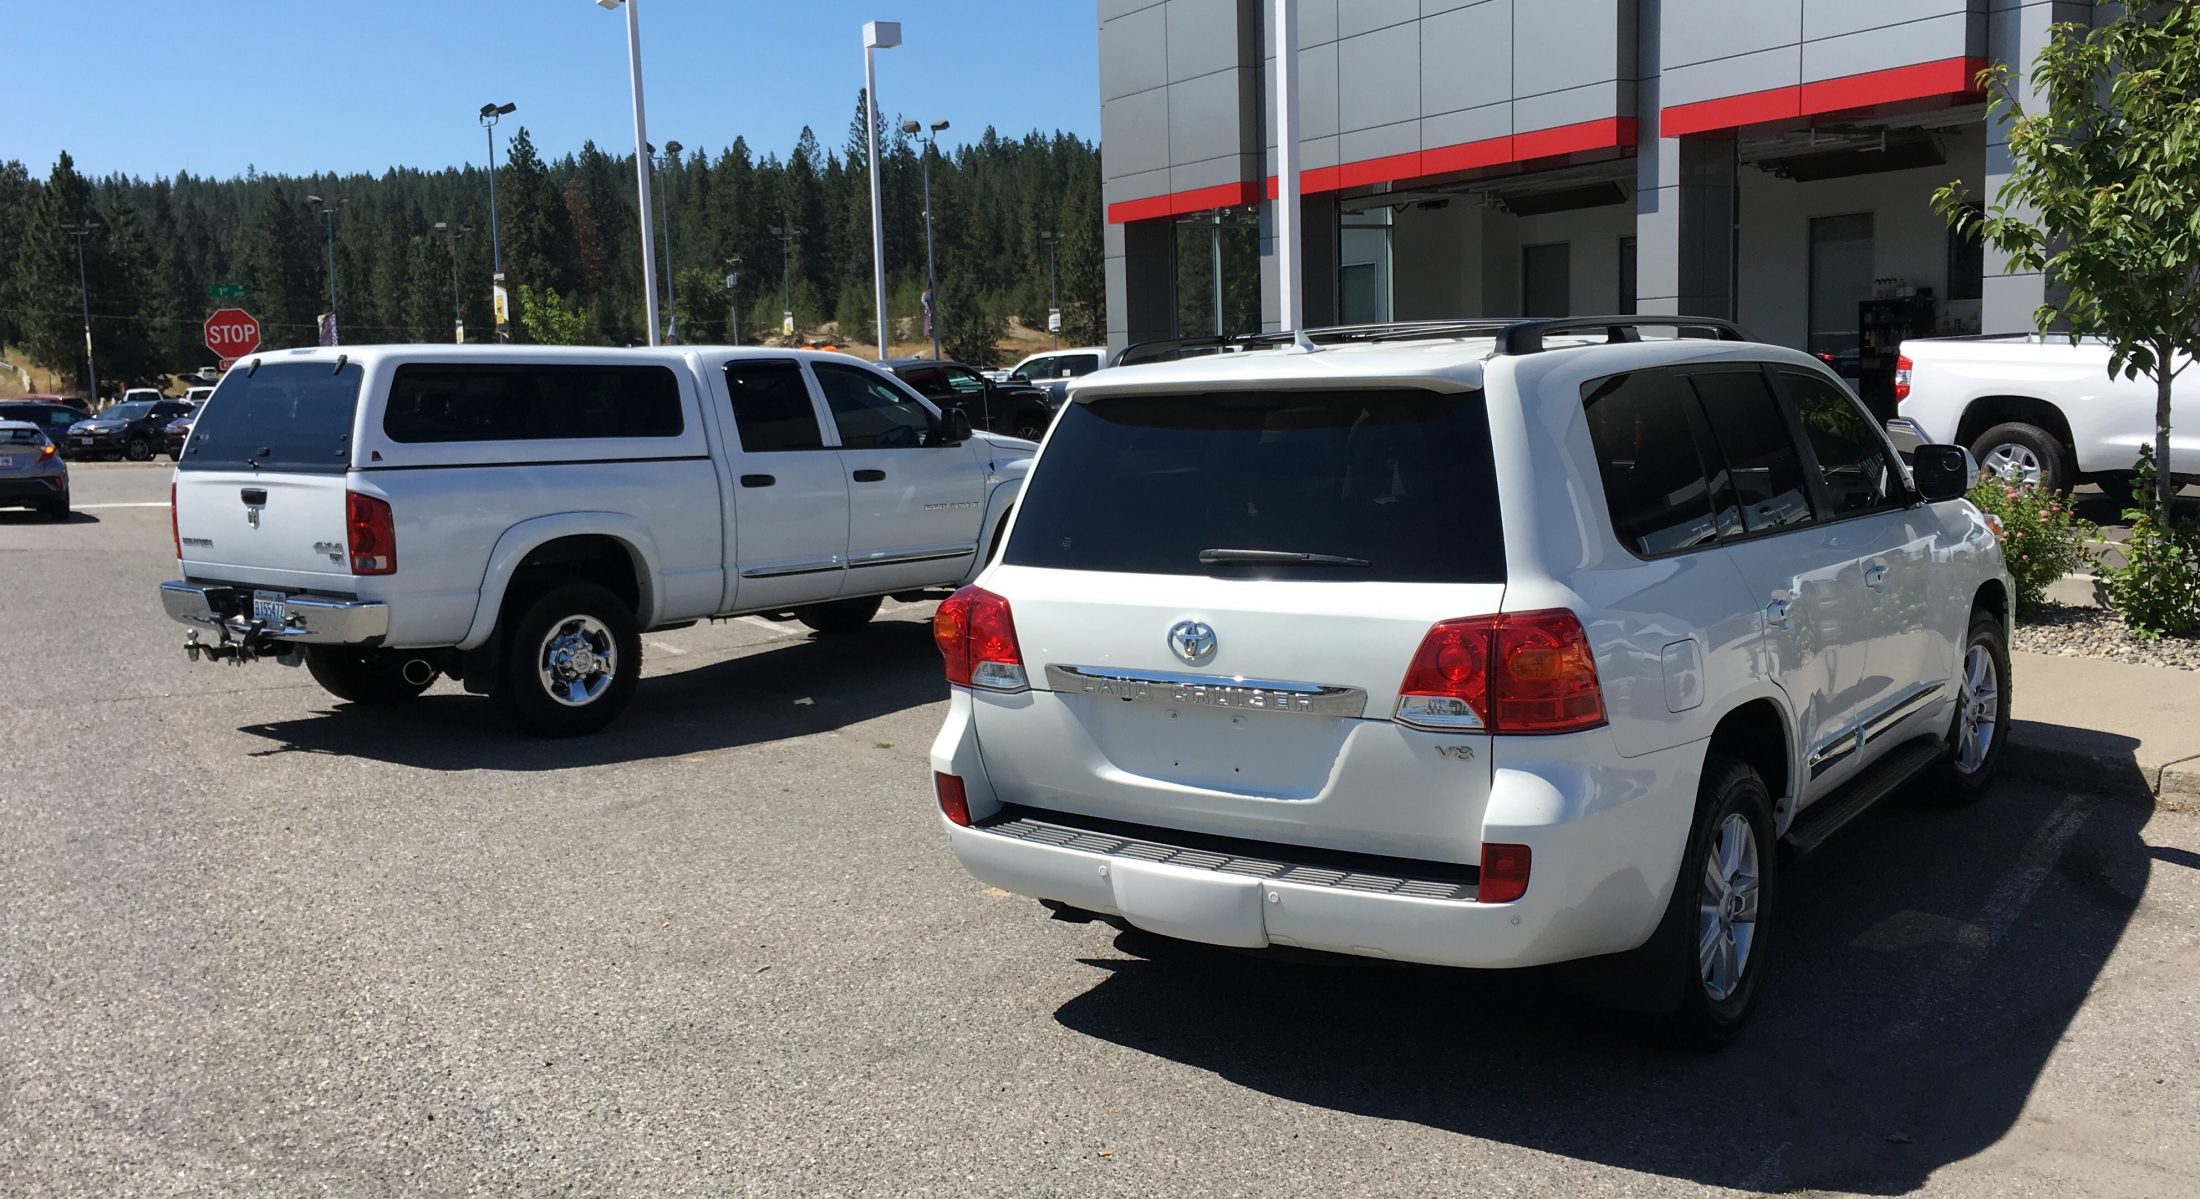
Here, I am sorry for drifting away from the thread subject. I have only owned the 200 for 24 hrs. I have already removed the rear jump seats, rigged a cargo barrier net in back, and a pet hammock for the dogs in the middle. I am waiting on my adapter harness so I can mount my P3 and then see how the truck works towing.... The Ram is in the background. I got a heck of a good trad- in value for it - the non-emissions diesel trucks are in VERY high demand. More pics in a new thread, later. John Davies Spokane WA

-
John, wow, that was a great and detailed post. Thank you. It is easy but a little unusual to add pics from your computer. You do not need a web host. Look below the text box at "Attachments". Click "Select File". A popup window will open. Navigate to the folder where your image is (I move mine to the Desktop for quick access) If you are using a notebook you will need to navigate to your pictures app. Select the image and then hit "Choose". Your pic will upload and appear at the bottom there. You can add more pics by selecting "Add another file" You can delete a pic by using "Remove this file" If you want your pic to appear in the text box with your description , click a location and then drop back down and click "Insert into content". It's a little odd but the method works great and if you put your pics in with your commentary it does look very nice. Please upload some pics of your Anderson setup! PS, you should NOT list your email address on public forums. It is asking for it to be hacked. You can edit your post to delete it. Always use a Private Message for sensitive stuff. Thanks. John Davies Spokane WA
-
Some quick comments on the Alpine Loop and the established "tourist trails". Other than a few of the ones rated "Difficult" (Black Bear, one-way down into Telluride in particular, has killed some careless visitors) these routes are really not as hard or scary as the warnings indicate. If you have a little experience driving secondary forest roads and are not accrophobic, you will have no problems driving a Wrangler all over the place. If you have doubts then you can take a guided tour. Bring winter clothes because they are open topped and this is a place that is best experienced with unobstructed views. If you drive the Alpine Loop, your halfway break stop is Lake City. As I mentioned, it is a wonderful spot. It has some very cool shops, a good city park, and lots of nicely maintained Victorian buildings, so you can stretch your legs with a small walking tour. I really want to revisit this area and spend at least a week exploring. One reason we traded our truck in on a Land Cruiser is so we can park Mouse at a secure, centrally located RV park, in Ouray for example, and cruise the high passes easily and in comfort. John Davies Spokane WA
-
My favorite area by far in CO is the Durango/ Silverton/ Ouray area, including Lake City, but that last town is hard to get to, being on the "wrong" side of the mountain, so to speak. If you like offroading, rent a Wrangler and do the Alpine Loop or one of the many other stunning back country trips in the high country. If you like trains, the Silverton Railroad is unbeatable, but it's a long loooong trip up and then back to Durango. One way would be better if somebody can shuttle you back. Do not attempt the Million Dollar Highway from Silverton to Ouray unless you are _very_ confident in your rig and your driving skills. If you have any interest in classic Brit bikes, you can make a detour north of Mesa Verde to Colorado Norton Works in Delores. Yummm! St Elmo ghost town and nearby Leadville are wonderful if you like old buildings. https://roadtrippers.com/stories/st-elmos-fire-the-tragic-story-of-americas-most-enchanting-ghost-town Have fun! I love the Colorado high country. It is way too busy for my liking in summer, but September should be perfect. Watch the weather reports. John Davies Spokane WA
-
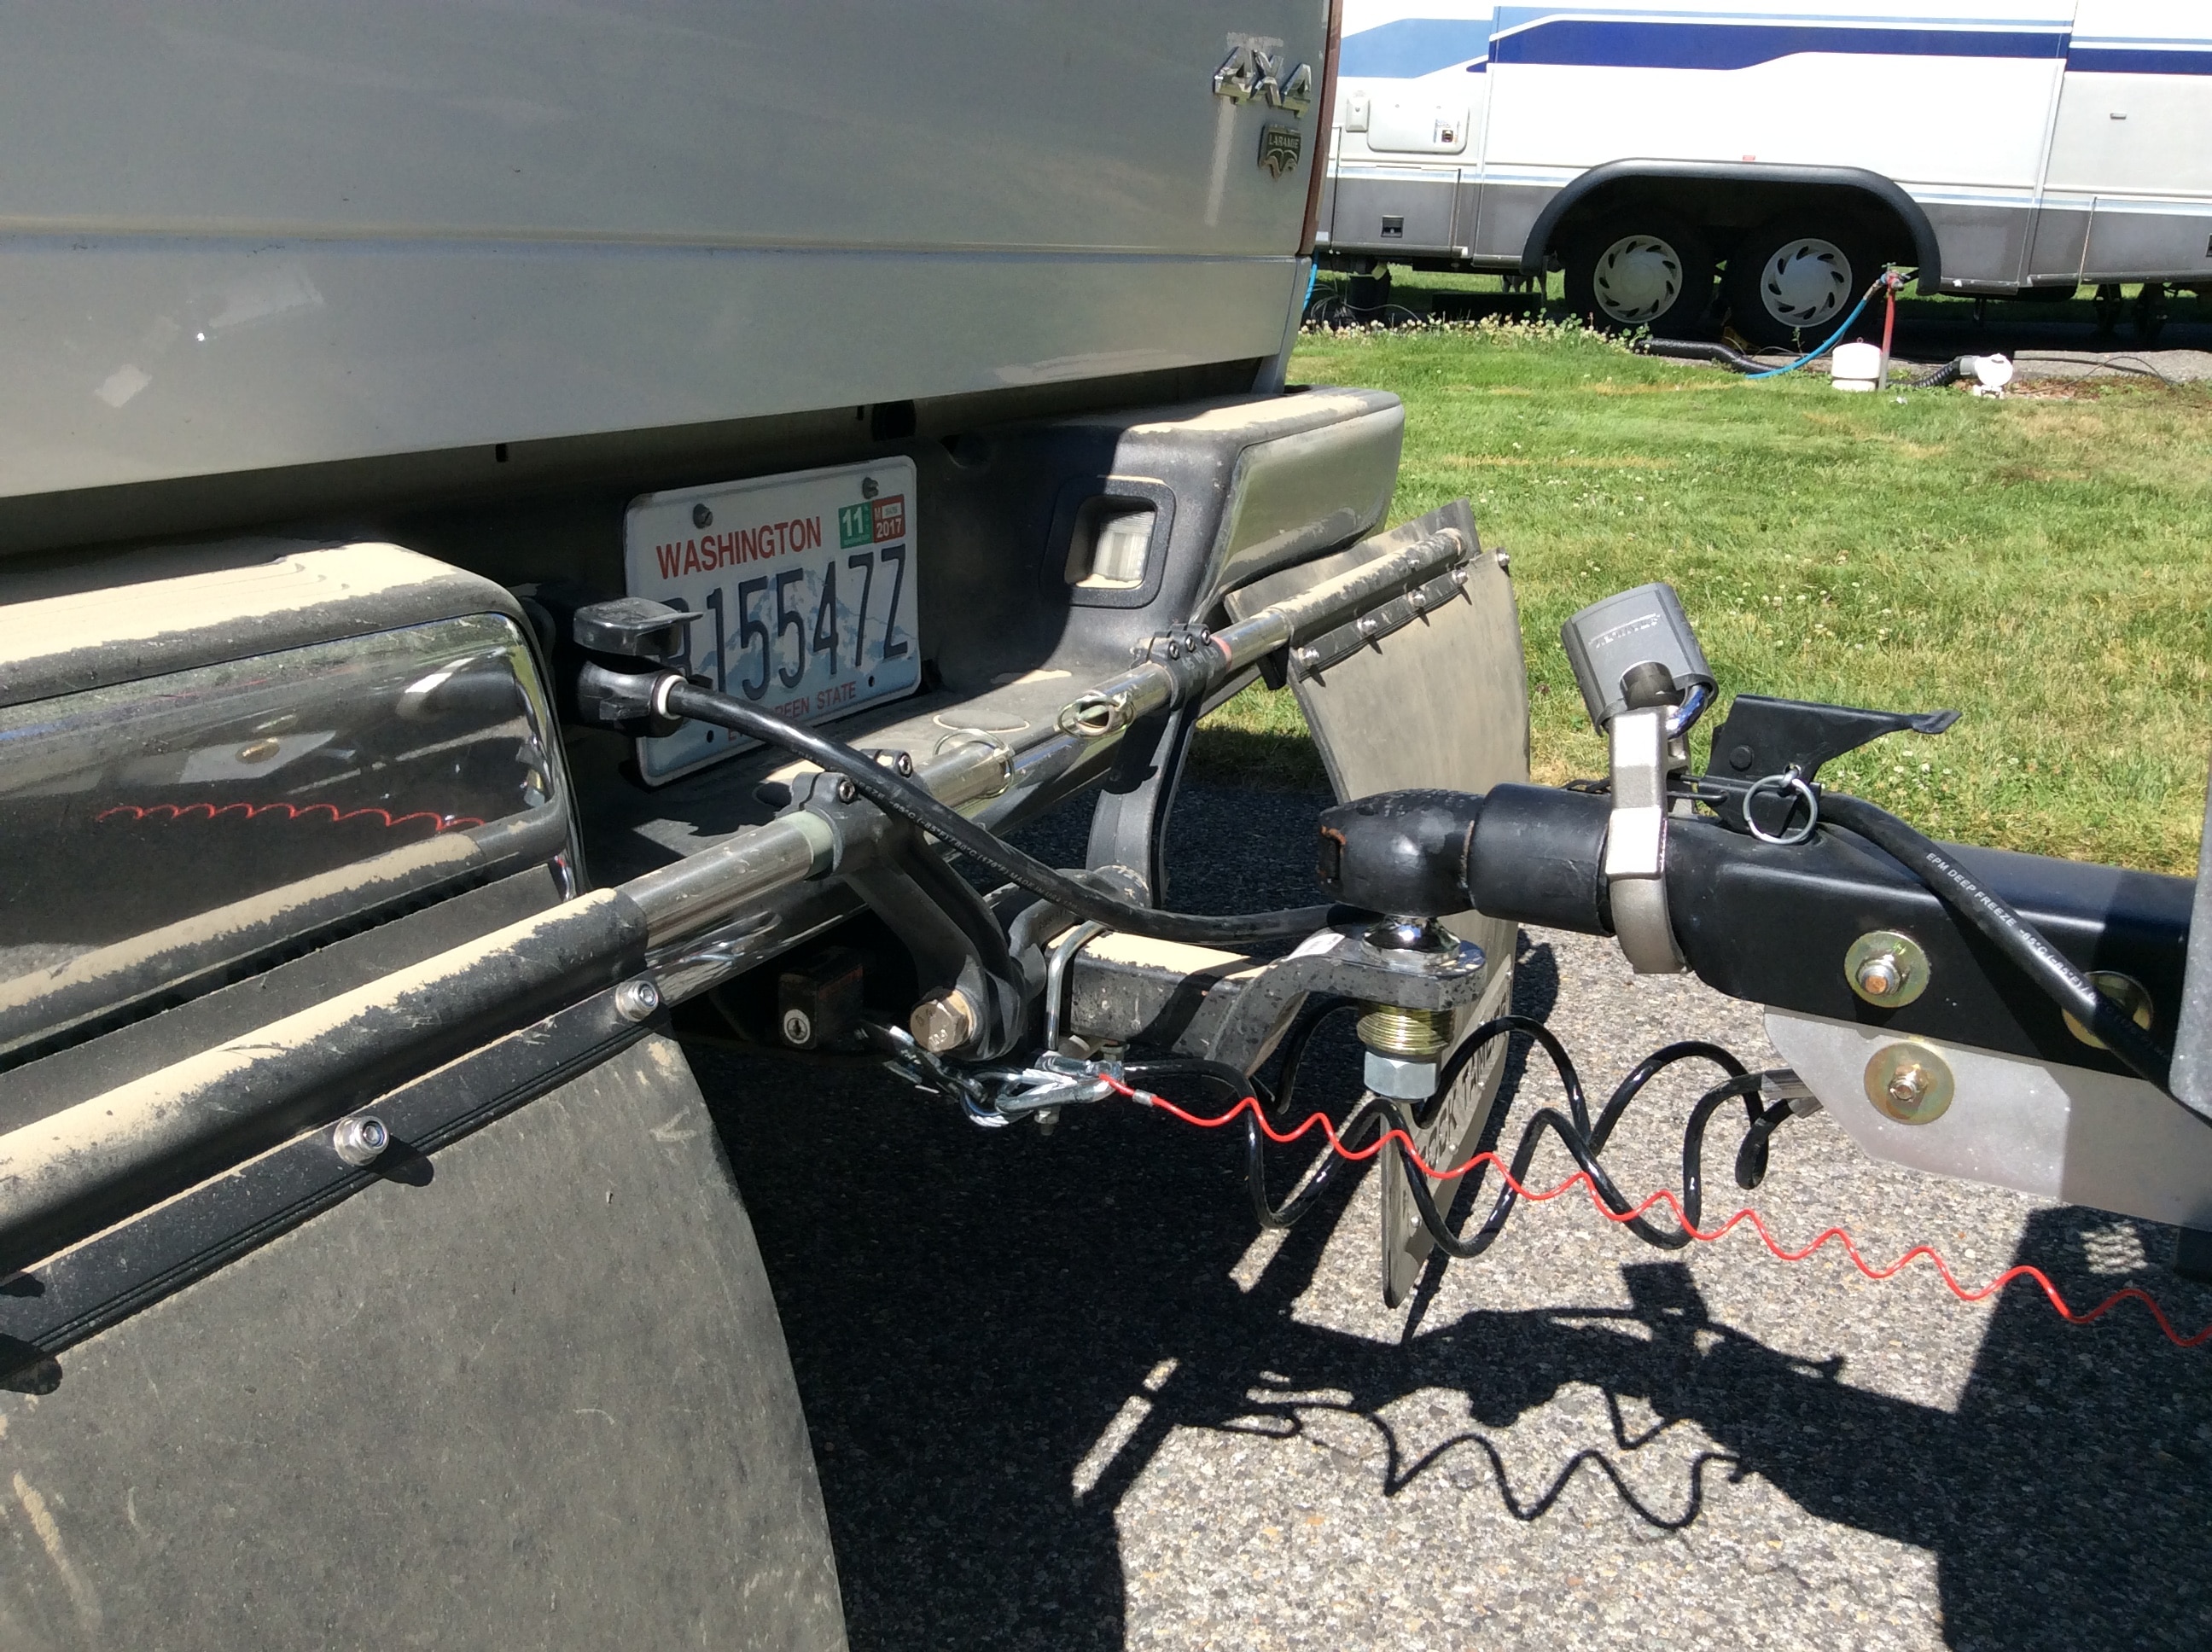
Resurrecting an old thread.... OK, I have changed tow vehicles, from a brute of a Ram 3500, tow rating 1 gazillion pounds, to a luscious 2013 Land Cruiser 200, tow rating 8500 pounds, max tongue weight 850 pounds... I plan to do a short tow test first, after I get my brake control installed, but I am pretty sure that I am going to need weight distribution plus, perhaps, rear airbags. I have ordered a tongue weight scale so I will know what numbers I am dealing with exactly. (With the Ram I just did not care!) https://smile.amazon.com/gp/product/B007REJTGI/ref=oh_aui_detailpage_o00_s00?ie=UTF8&psc=1 Any updates or new info on the Anderson hitch? Are you folks who use one still happy? How are the new inserts holding up? Which model does Oliver sell typically - what bracket size? Are your brackets moving at all? Any frame damage? Here is an interesting installation video from Oz. He recommends that you use this method for tuning the chain tension: 1- level the trailer 2- measure trailer frame height front and rear 3-measure tow vehicle wheel well height front and rear 4-drop the full coupler weight onto the ball (the tongue angles down and the TV angles down) 5-adjust nuts three turns initially 6-adjust nuts slowly and equally 1/4 turn until the trailer has settled (tongue comes up level) and the TV has settled level (there is an equal drop at the front and back wheel wells). 7-record number of threads for future reference. (That was my suggestion.) In the example vehicle (LC 200 - woohoo!) it settled 30 mm from the original "no load" position. Any comments about this technique? Thanks, John Davies Spokane WA
-
Oh man, I strongly second Bill's recommendation. "Quill" is unusual and IMHO downright classy. If you Google images for the word you will find some really beautiful ones you could use for a small side graphic. It could easily be combined with the standard "swooshes" too. They alteady look as if they were drawn with a pen. This is very cool! John Davies Spokane WA
-
How to: Install a Garmin BC-30 backup camera
John E Davies replied to John E Davies's topic in Ollie Modifications
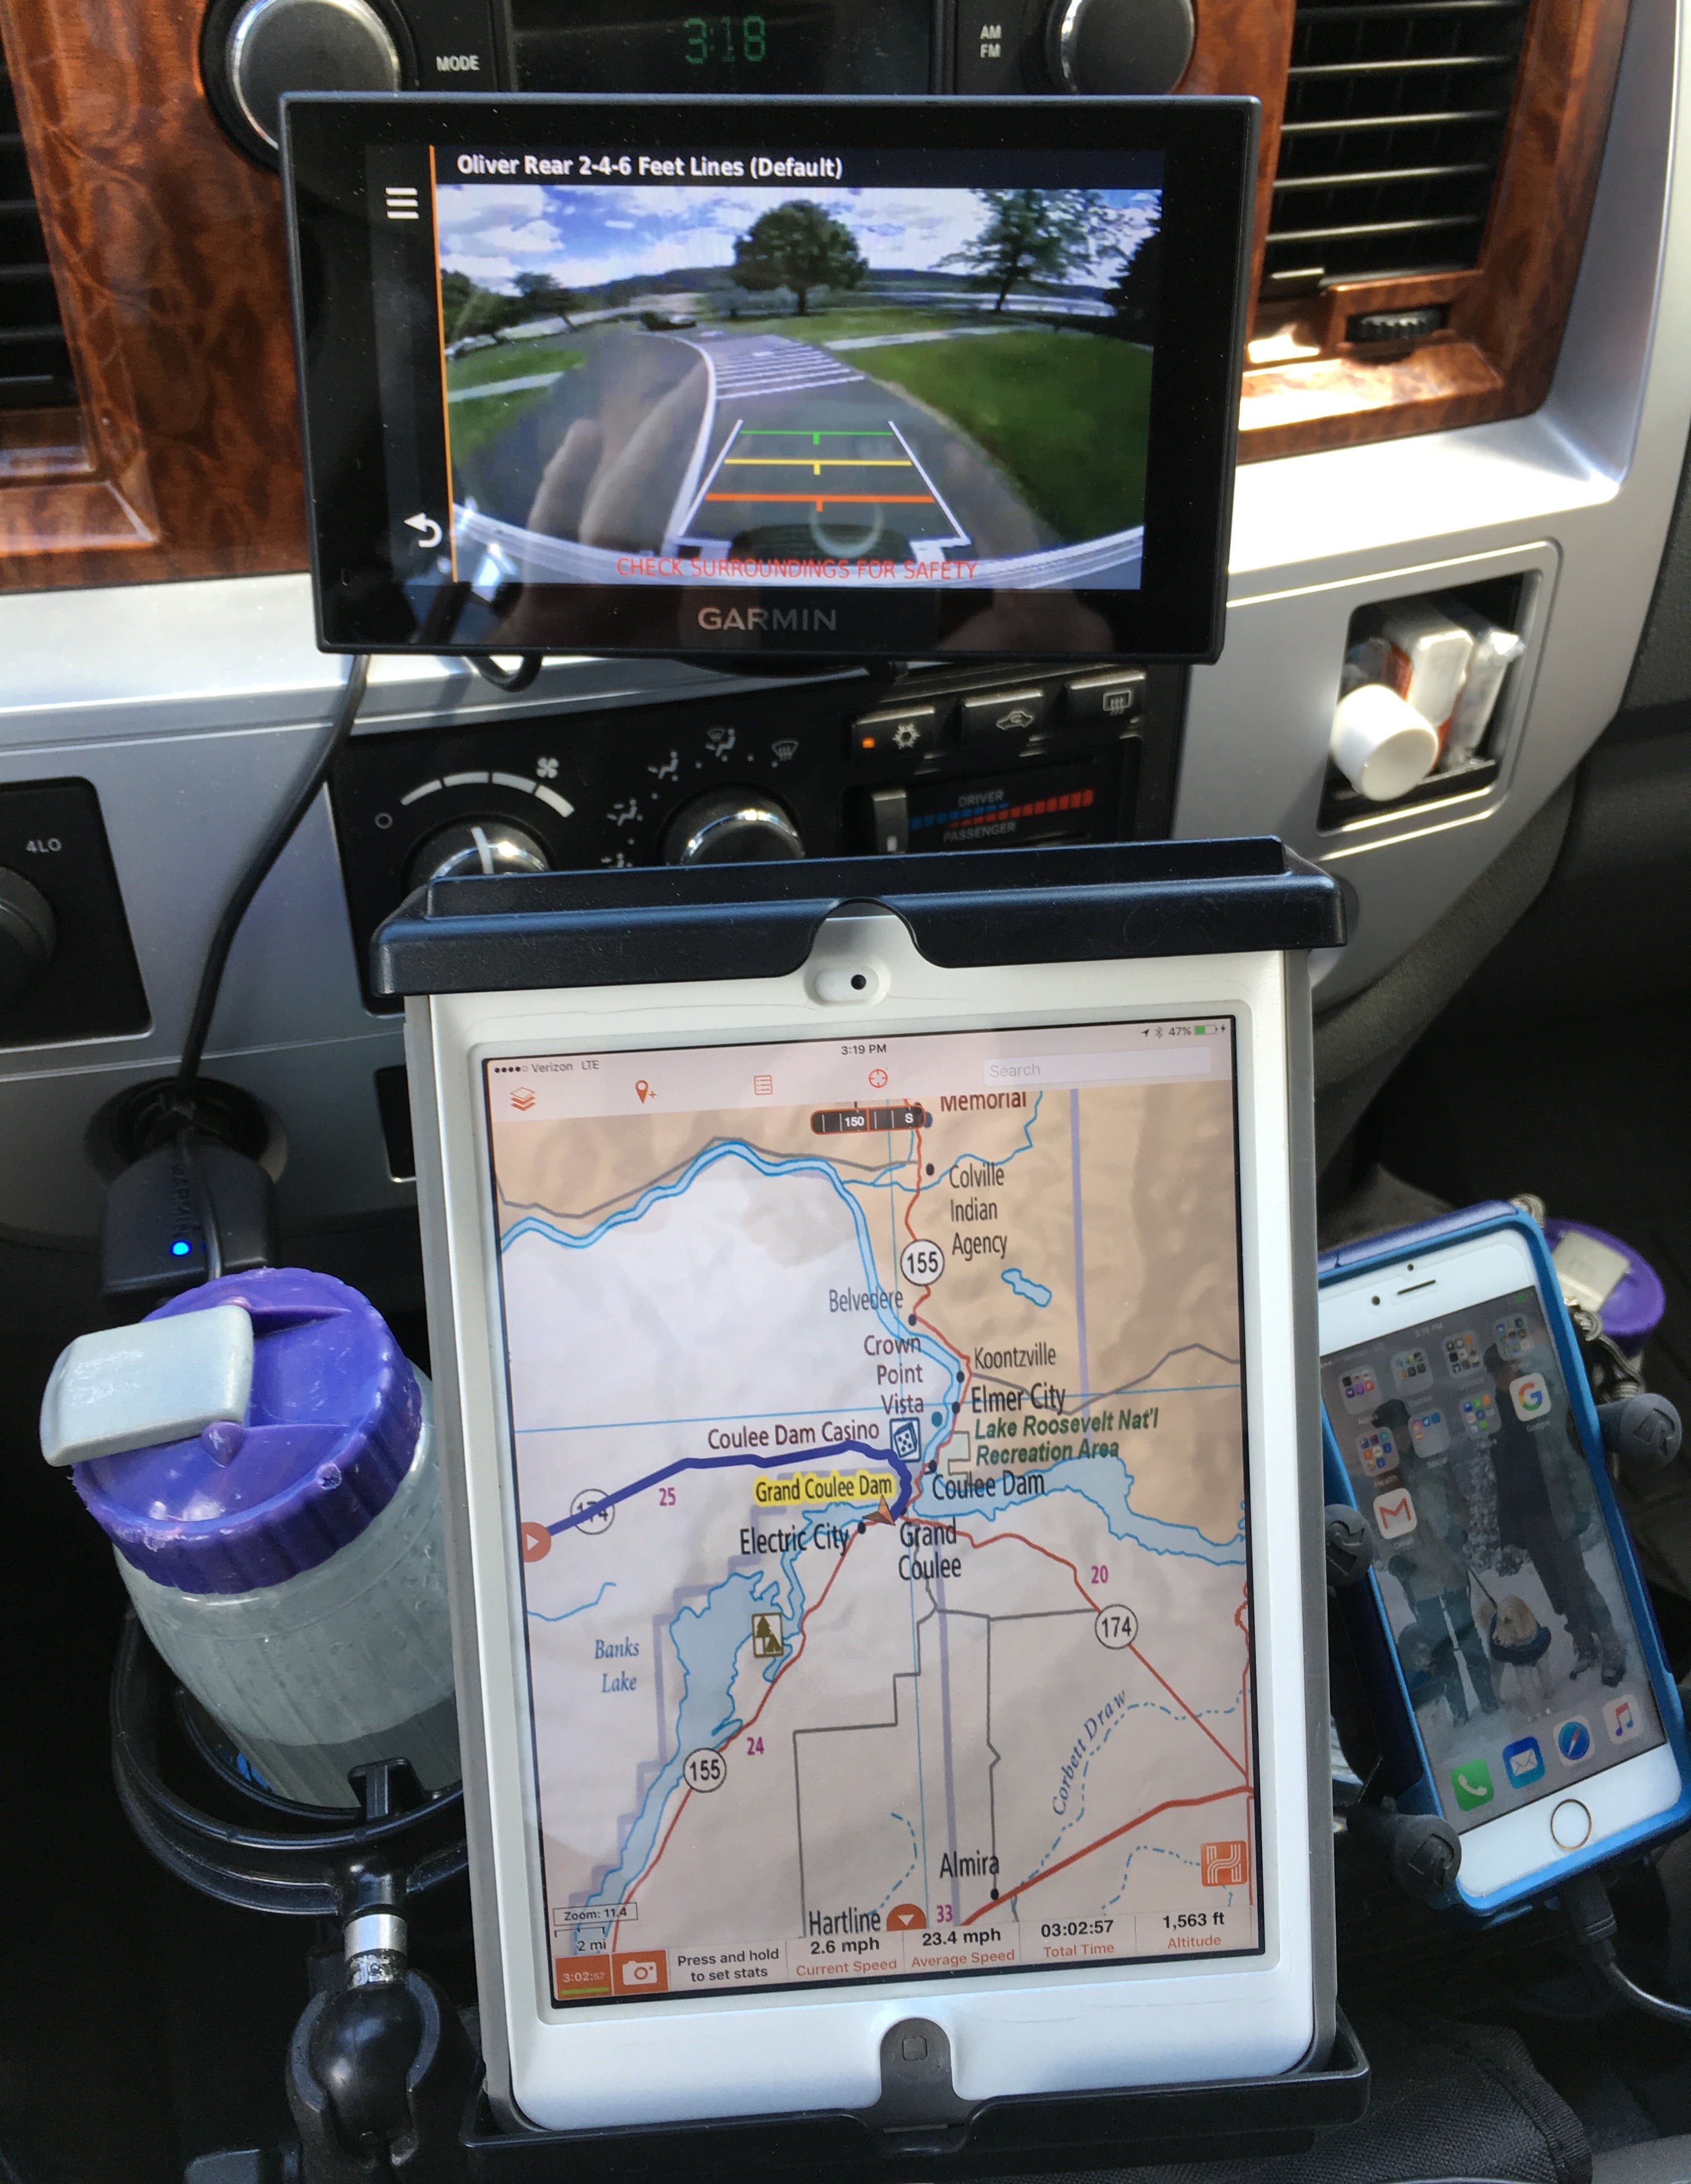
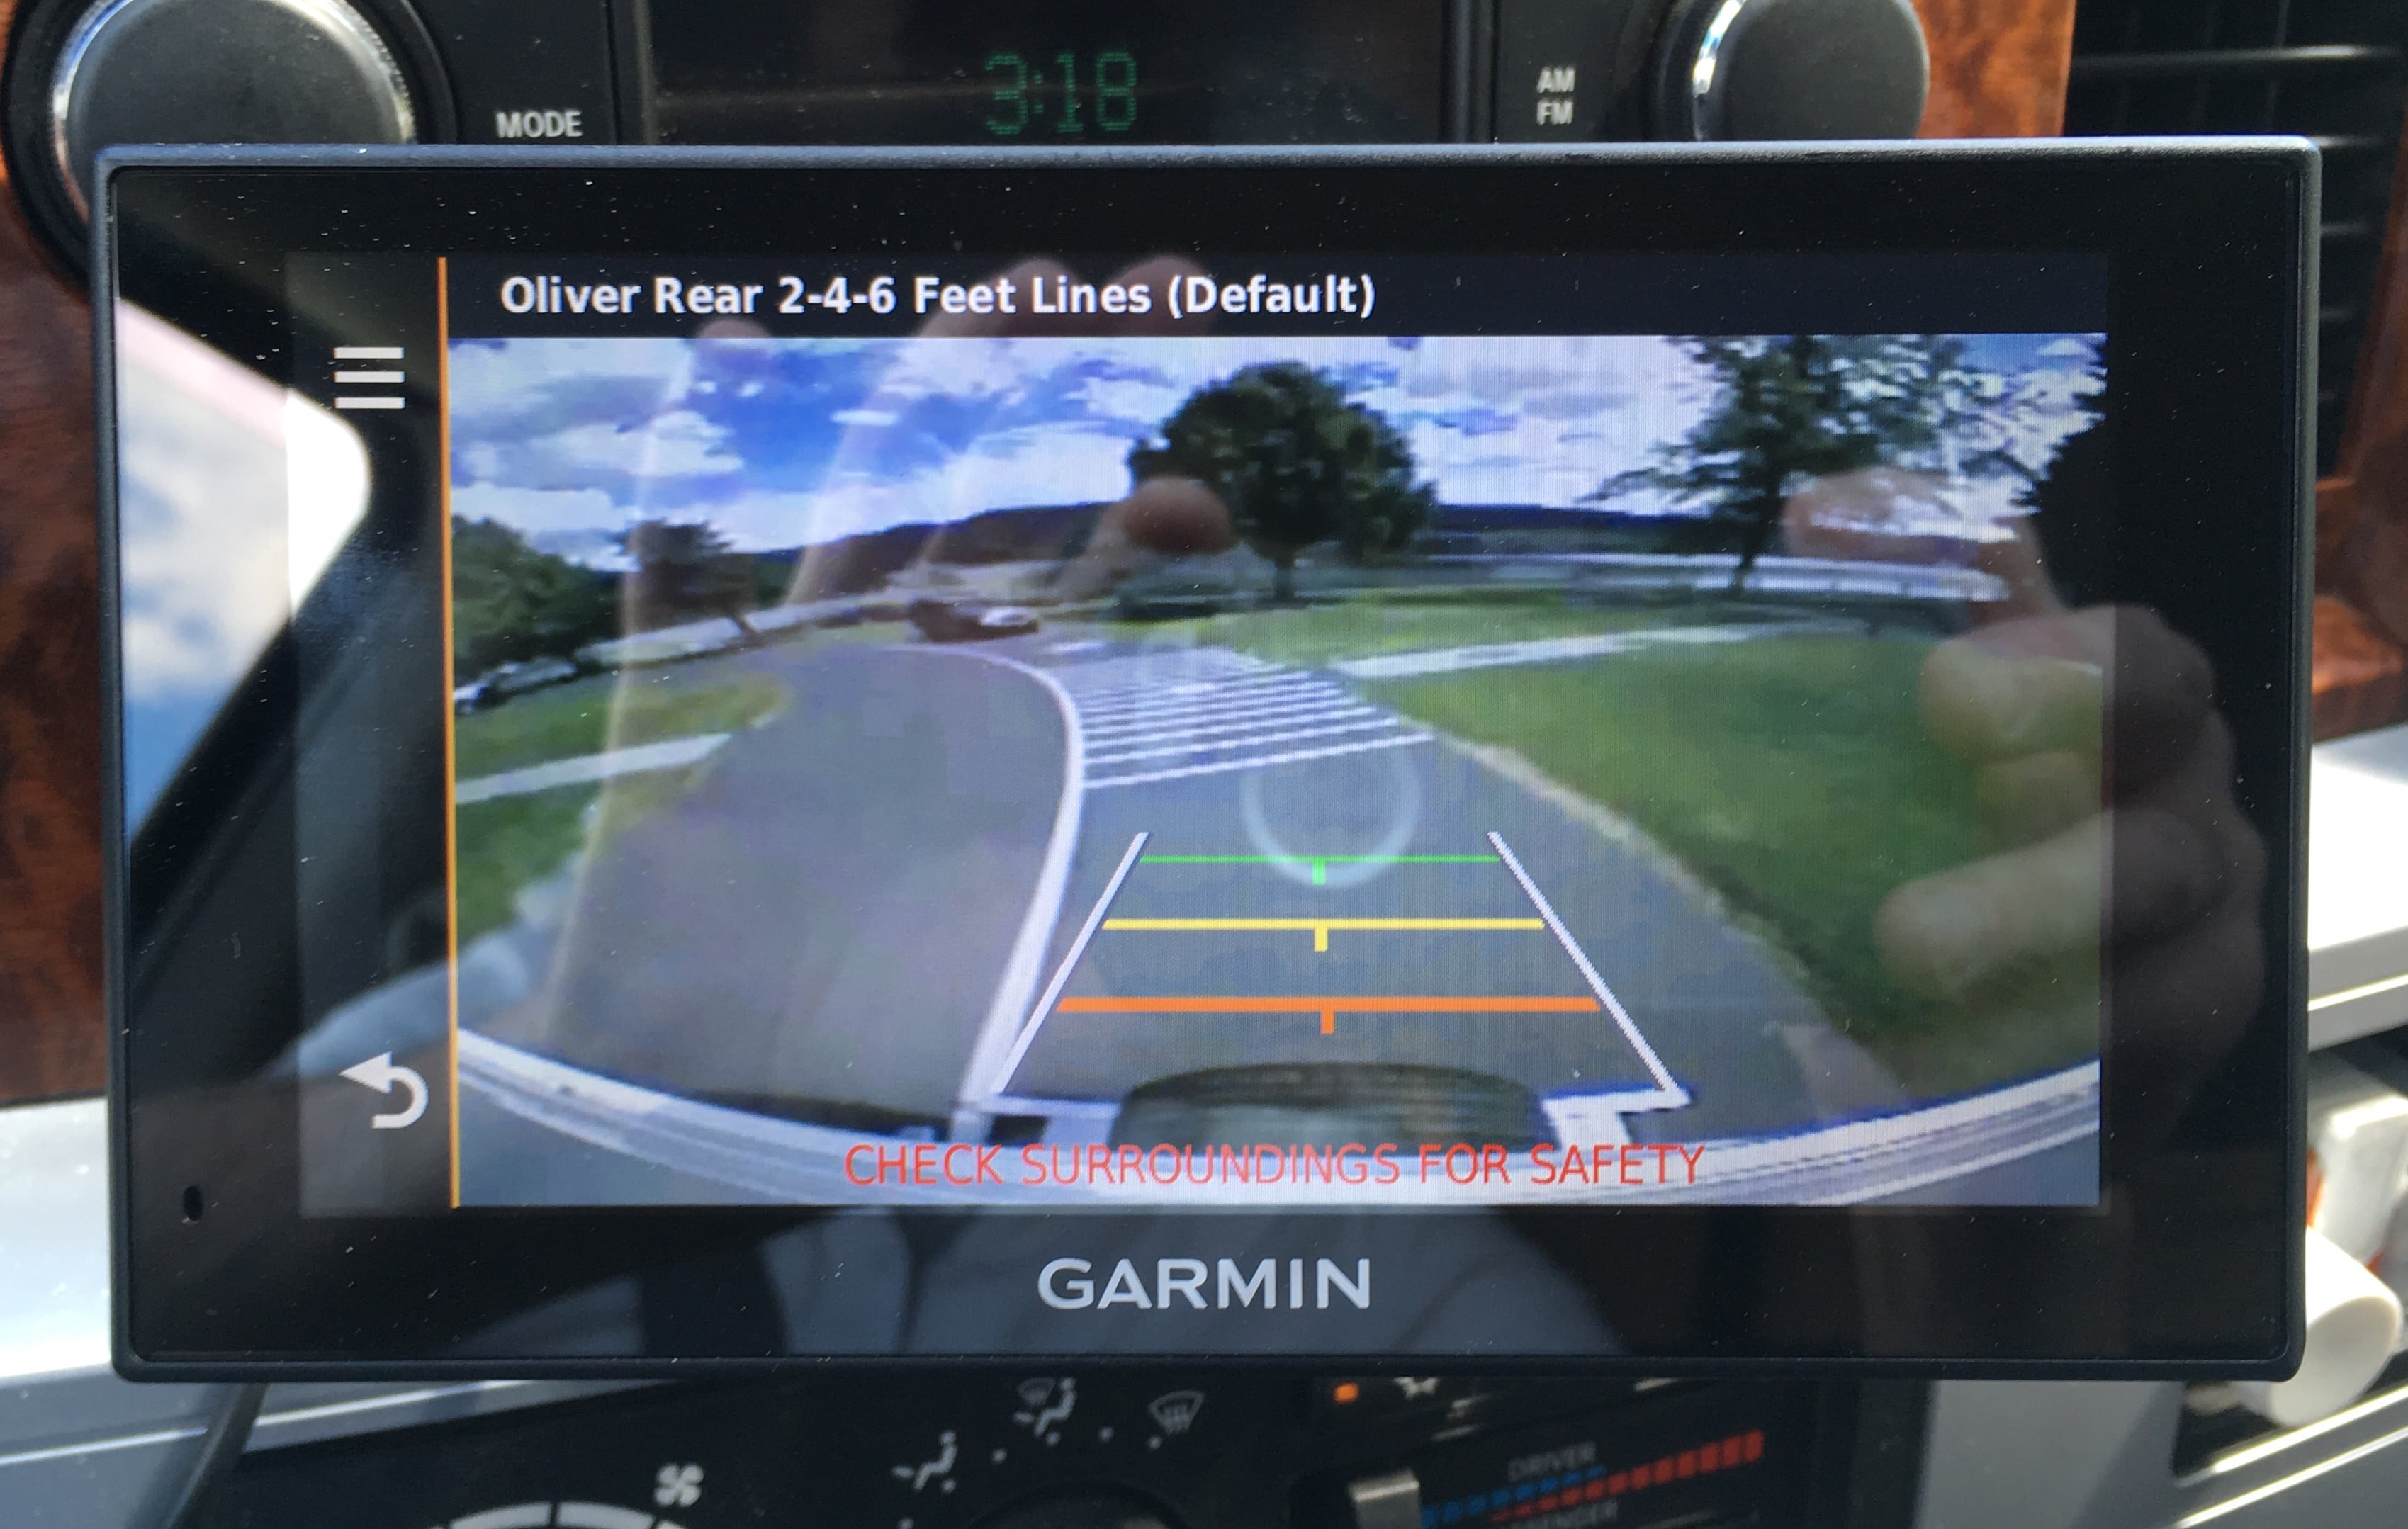
I am still in limbo over a switch, but I did end up ordering a complete backup camera placard, LED and switch from Oliver, I just haven't received it yet. I plan to post part two of this thread when I get it installed. I hot wire the system for each tow.... Here are some screen shots. Resolution is barely adequate and response time is laggy, but it is entirely usable in decent light. At night it is going to be pretty much useless. I wish Garmin had spent more development on a better camera. My 6 inch RV660 LMT display is plenty sharp.... the camera resolution is poor. All pics are in full sunny daylight. This is my garage door about two feet away: The side lines are the lane lines, showing where the tires will go, and the horizontal lines are distance markers, the nearest is 2 ft and the furthest is 6 ft from the back of the rear bumper. More to come later. John Davies Spokane WA
-
Even if it is mounted at the top of the rear wall the rear platform will block anything on the ground closer than say 6 feet, if loaded with a bulky cargo as in the picture. I can see none of the rear bumper, but my spare and some of the rear wall is visible with mine. I have posted some more pics in my Garmin install thread but I still haven't finished the switch installation. I have to hot wire it when I am traveling... ;) John Davies Spokane WA
-
Can you post some closeups of the rear cargo basket and tell us how it has worked? Does it have running lights or just reflectors? What is the cargo? I think it is an interesting design but it would totally block a rear view camera. Please comment. Thanks. John Davies Spokane WA
-
FYI they are looking for pics with a visible custom personalized name on the trailer. Here is Mouse, with Zadie and Zack asking to go for a walk. John Davies Spokane WA
-
There is a slide vave located under the front dinette seat, with the handle in the rear wall of the bathroom. Easy access, at both ends. John Davies Spokane WA
-
My water heater quit working on gas a couple of days after delivery. I did some basic troubleshooting and determined after ten minutes that the ignitor was not firing. The system would cycle on and off three times, then lock out with a solid red light. The overtemp switches were not tripped, and there was gas, which I proved by carefully sticking a long camp stove lighter in the burner hole. I clicked the lighter and the flame POPPED and whooshed out and burned all the hair off the back of my hand. Check, there is gas! Note to self: do not do this again... I called Jason at Oliver Service and asked if he could send me a replacement board so I could install it myself. He told me that they do not warranty the appliances and I would have to take it to an RV dealer for repair. Fine.... I found a new OEM module on Amazon for $79, and also a much better aftermarket one for about the same price, but it would require a new plastic cover. https://smile.amazon.com/dp/B0002MG2IK/_encoding=UTF8?coliid=IY2Y0Y0X7RVZF&colid=1X5H11EH41351 https://smile.amazon.com/dp/B007HRVXY6/_encoding=UTF8?coliid=I3LZPCEN833TPC&colid=1X5H11EH41351 Since it was going to be a warranty repair, and I am a confirmed cheapskate, I scheduled an appointment at a local shop in Spokane. They told me it would be three weeks before they could see me, and that they stocked a lot of boards for the Suburban heaters, so most likely they could fix it while I waited. I told them that I would be surprised if the job took more than fifteen minutes, and access to it was great. Three weeks later I showed up, checked in, watched with concern as they took Mouse away, and then I waited. Half an hour later I was called into the office. "The board is bad." ME: "Right, I knew that and I told your tech." "In order to do this under warranty we have to order a replacement board from Suburban, and it will take two to six weeks to get here, do you need the water heater to work before then?" ME: silence, counting to ten very slowly. "Sir?" ME: "I do need it to work on propane. Is there an alternative?" "We can install an aftermarket Dinosaur Electronics board, it is a much better part and has a five year warranty, and we have plenty of those in stock since the Suburban boards fail so often." ME: Sinking heart. "How much would that cost?" "The board is $129 and the cover is $10, and it will be $279 total with labor." ME: "I wish this was mentioned when I talked three weeks ago. Just put it back together and I'll order the part from Amazon and fix the heater in two days." "OK, fine, that will be $50 plus tax for the diagnosis." As I left, the tech who did the work told me quietly, "I left your old board on the floor at the entry, and I also left a used one that was in our junk box. We strip stuff like that off old water heaters when we scrap them. It will probably work fine for years. They sure did build your trailer nice!" I was floored and relieved, and my faith in mankind got a very small boost. I thanked him and left with Mouse, feeling a lot better. I got home, plugged in the board and the heater fired right up. Woohoo! My old (brand new) board that failed (water pump is to the left): The underside, showing the bottom of the fried resistor. The white foam strip goes on the PC board and keeps it off the mounting surface (the water pump and manifold assembly plate). If I had the notion, I could have replaced that resistor for less than a buck.... I don't know how I should feel about the dealer, their parts prices are _over_ MSRP and they sure try to screw you, but then the tech went way out of his way to make things right. He could have got into trouble with his boss, too. Moral of story: unless it is an expensive repair or you can live without a part for a long time, just fix it yourself or have a buddy do it for you. I hope to never go back to a dealer, ever. There is no way I was going to leave Mouse there, and then have everybody start crawling around inside, looking. John Davies Spokane WA
- 27 replies
-
- 15
-

-

-
Trashing the landscape, and how to avoid it
John E Davies replied to SeaDawg's topic in Submit Your Story
I agree entirely. I just got back from a highly developed city run campground by a lake that was packed with people on the weekend. I saw a number of rentals and also some foreign language speaking folks (Chinese?). The folks that bothered me the most were those parents who let their site look like a junkyard with water toys, balls, shoes, and general kid debris strewn everywhere, all day long. Actual trash was not too bad since there were lots of trash cans, but I did have to pick up half a dozen small bits before we even parked. The staff did police the area pretty well, picking up small stuff as they appeared. Campers from other countries can't learn good manners if the Americans around them don't demonstrate them. During the day I drove high up in the mountains on a 4wd track. I stopped at a rough campsite for a while with a stunning view. There was a bunch of used brass on the ground from a 9mm pistol. It was a little too scratched up for reloading so I spent five minutes gathering it up to recycle.... that's pretty anal, but it does look bad on the ground. There are many many more RVs on the highways this summer than in previous years. I suspect that a lot of the owners bought overstock units that are getting liquidated at fire sale prices. Once those stick and staple units start to self destruct, they will get parked and hopefully the number on the roads will go down a little. Off season camping looks more and more tempting now. John Davies Spokane WA -
Brad, I have a 2006 Ram 3500 4wd with slightly oversized tires (worn 33 inch diameter). I am using an extended 3/4 inch rise ball mount and a standard 2 inch ball (with 1 inch shank). Both are rated at 7500 pounds. My ball measured 23.5 inches to the flat on top and that has worked well. This was with the bed loaded with all the gear I planned to carry, plus a fiberglass Leer canopy, probably 700-800 pounds total. I chose a mount that was three inches longer than a regular stubby one, for better tailgate and bumper clearance for the coupler and the storage basket ... https://smile.amazon.com/gp/product/B0007M308U/ref=oh_aui_detailpage_o06_s01?ie=UTF8&psc=1 DO NOT use your 5000 pound rated parts! Your Class 5 receiver is rated for a gazillion pounds, don't fret about that part of the equation. Don't forget to bring grease for the ball and coupler. I towed the trailer dry from the factory to Falls Hollow CG, and it wrecked the chrome plating on a brand new ball. Any synthetic grease will do, I carry a 3 oz tube of brake caliper lube in the cubby of my dash, so it is always handy. It takes up minimal space. FYI, I bought a 2 inch ball with extended shank at eTrailer. I added eight 1 inch ID hardened (Grade 8) washers under the mount. I planned to use them to fine tune the ball height, if needed. I did not need to move any under the ball, but if you are running bigger EDIT: SMALLER tires you might want to go this route, for some height flexibility. Do not use soft hardware store washers, they must be hardened and be sure to torque the heck out of the nut (250 ft lbs). I have used this method for countless years and never had a problem with the washers being there. Since you have airbags, you can probably just skip the washers.... unless you are really anal. John Davies Spokane WA
-
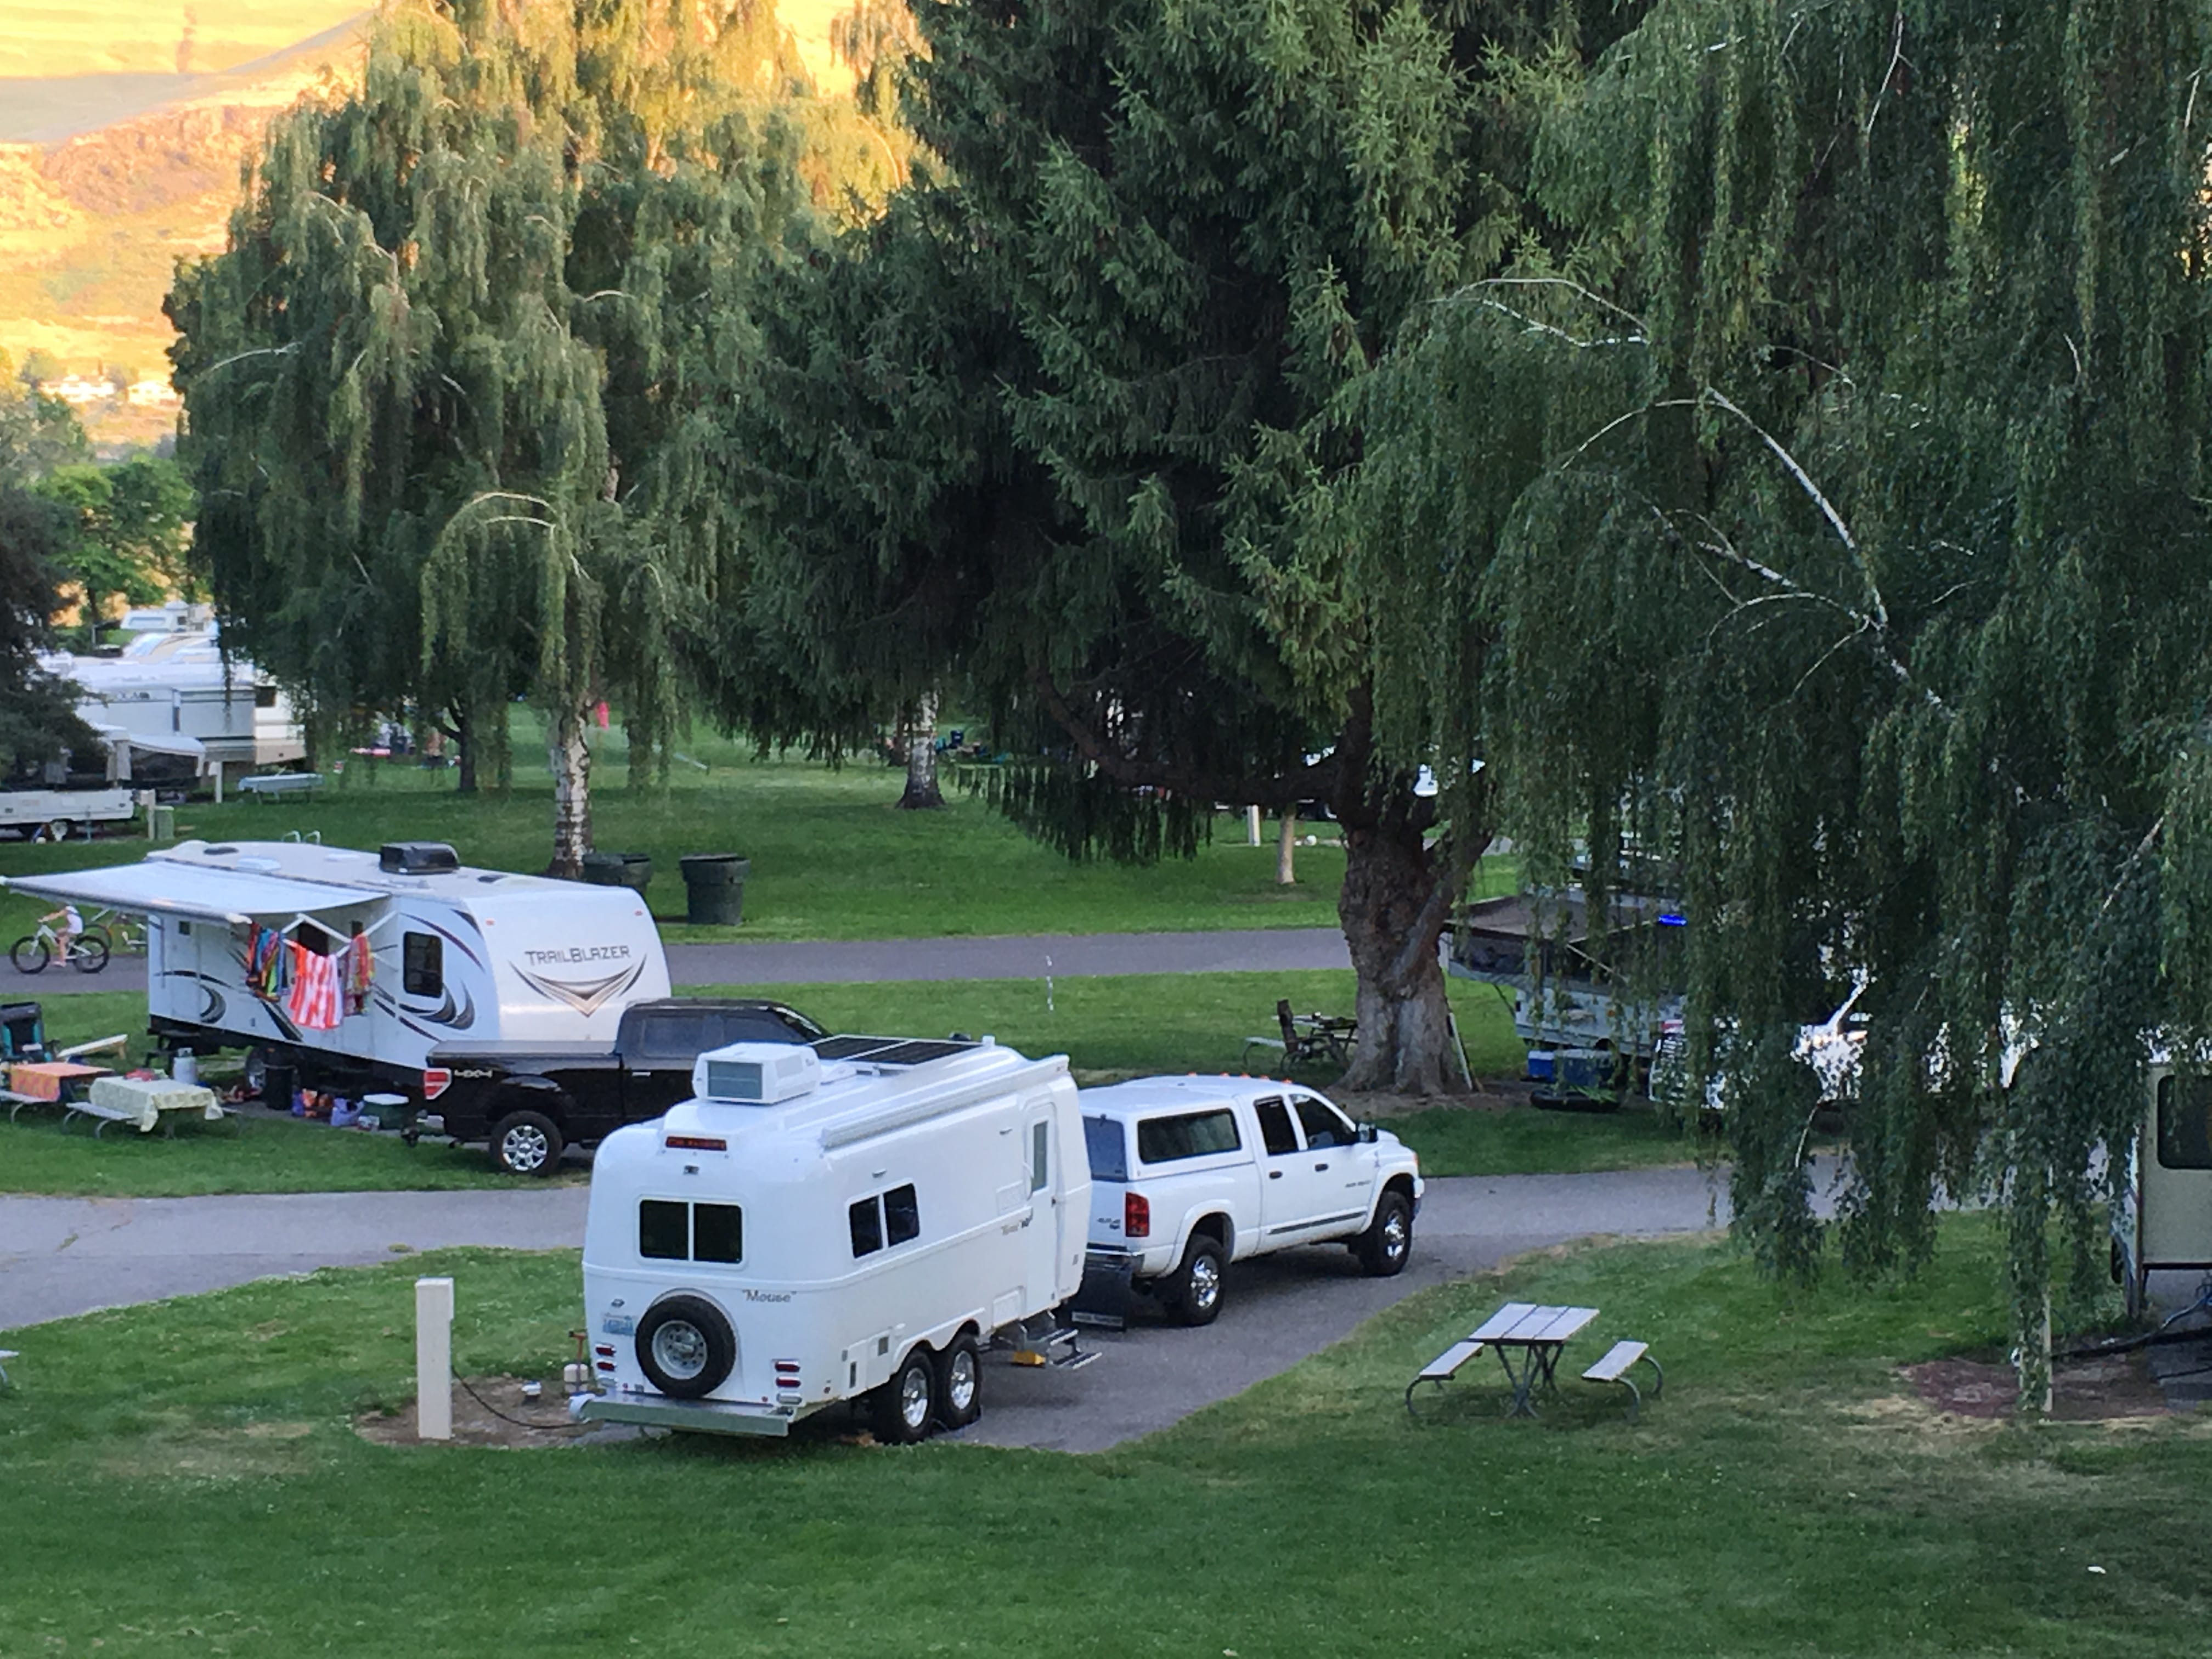
https://cityofchelan.us/departments/parks-recreation/rv-park/ The pic is looking west toward the lake, which is a couple of hundred yards away. This is very nice but it's $50 per day for full hookup sites, that is rather steep by local standards. It's run by the City of Chelan and is right downtown, close to pretty much any tourist stuff you could imagine: boat rentals, beach, go carts, shops, ranger station, parks etc. It is _insanely_ busy on weekends, not so much mid-week. The pads are short and you can't spill over onto the grass or they will mow it to pieces .... Dogs are forbidden after July 1 though the summer. Our two Labradoodles are OK for this visit. Area info: ... http://www.lakechelan.com ... it's a heck of a nice lake but the accessible southern portions are horribly over developed and getting worse. Escaping uplake in a boat or up into the high and remote mountains in a 4x4 is one way to escape the summer crowds. [attachment file=IMG_2261.JPG] This sort of camping is not my cup of tea - we are staying three nights while my wife attends a business conference in town... the venue is only 0.4 miles away so she walks it easily. John Davies Spokane WA
- 1 reply
-
- 2
-
-
Is the sink drain a standard residential fitting? I discovered that my wife washes her hair over the sink, and I need to put a screen or strainer there, one that is easy to remove for cleaning. Plus it will eliminate the need to completely cut the sealer and disassemble the front of the vanity to clear the trap ;( That is a very poor feature IMHO. There are many types, I want something similar to this. ... Any suggestions? Thanks. John Davies Spokane WA
-
That's beautiful. It's very impressive. Will it stay in place in the sink recess during towing? Where do you plan to store it? That is half the challenge when you are building stuff for a small RV... John Davies Spokane WA
-
That is interesting, but it only holds 2 gallons and is far far bulkier than a soft sided sun shower, which rolls up very small. Two gallons is not really adequate for a shower, especially for a lady with a lot of hair to rinse out. I can see where this unit would be useful if there were nowhere to hang a sun shower, like on the beach... John Davies Spokane WA
-
That is a simple and elegant solution, thanks. I have fixed your link (use the third button from the right to make web url a clickable link): http://www.leevalley.com/us/hardware/page.aspx?p=74182&cat=3,43722,43743 John Davies Spokane WA