jd1923
-
Posts
3,193 -
Joined
-
Last visited
-
Days Won
237
Everything posted by jd1923
-
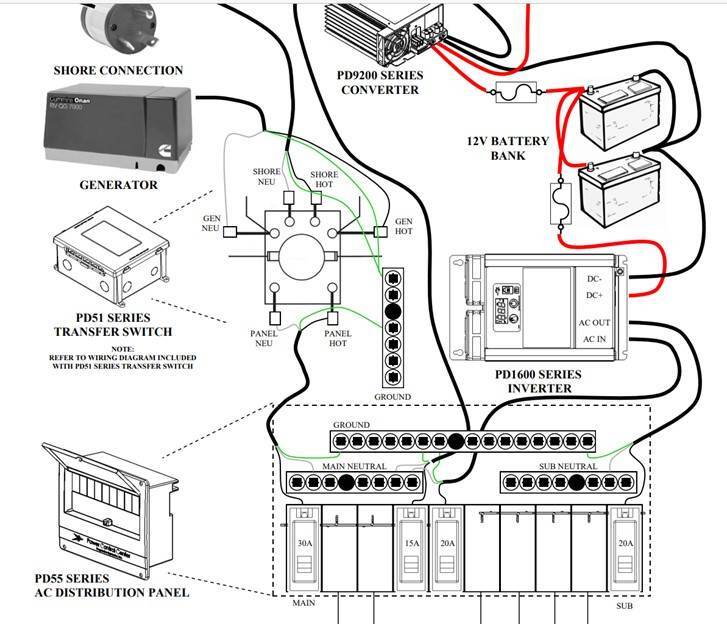
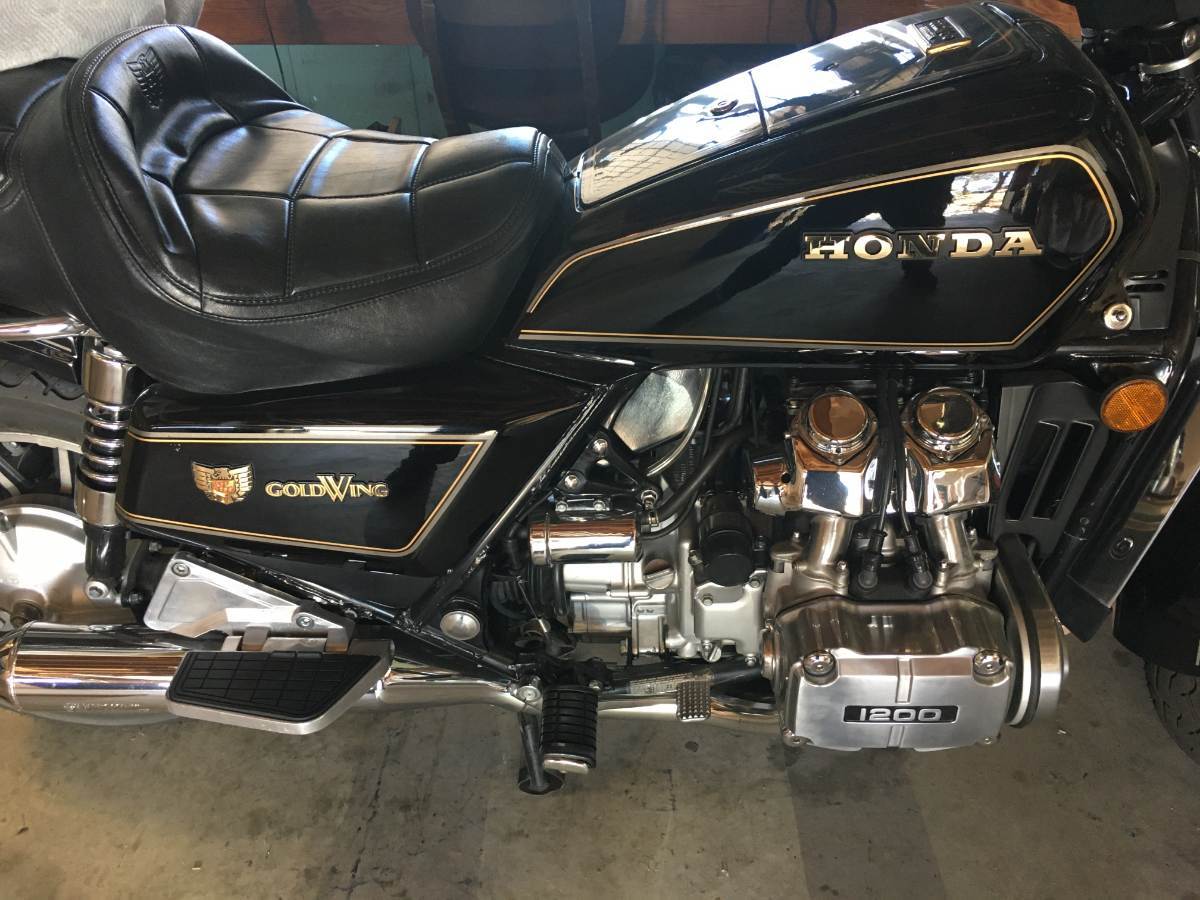
 These are very good reasons. We're all different and we all have choices. I am the DIY guy in anything automotive, electrical and mechanical systems. For example, I only pay for an alignment after I've replaced every suspension part myself. I learned solar/inverter system installations on a Bigfoot Class that had none to start. Installed rooftop panels using only VHB tape, drilling only two 1/4" holes for the wires, a dab of Dicor on each. Installed a PD 1800 KW inverter/charger and customized the AC power panel to be a split bus panel (sawed the bus in two, one for A/C and one for inverted circuits)! The graphic below from PD gave me the insight I needed to do so. "Should we ever sell? No way, never! 🤣 I still have my 1984 Goldwing Standard restored to factory condition. Two Lexus, a 1992 SC400 and '08 GX470 both restored. Call our son Adam lucky, as none of these, especially our Oliver, will ever be sold. They will one day be his, always kept in the family. When you put 100s or in this case 1000s of hours in our now amazing hull #113, she's here to stay, and should in its present condition outlive me! That hull named XPLOR has had only the best of love and care! Likely the best looking, best outfitted hull out there! My bet is... David will never sell! 😎
-
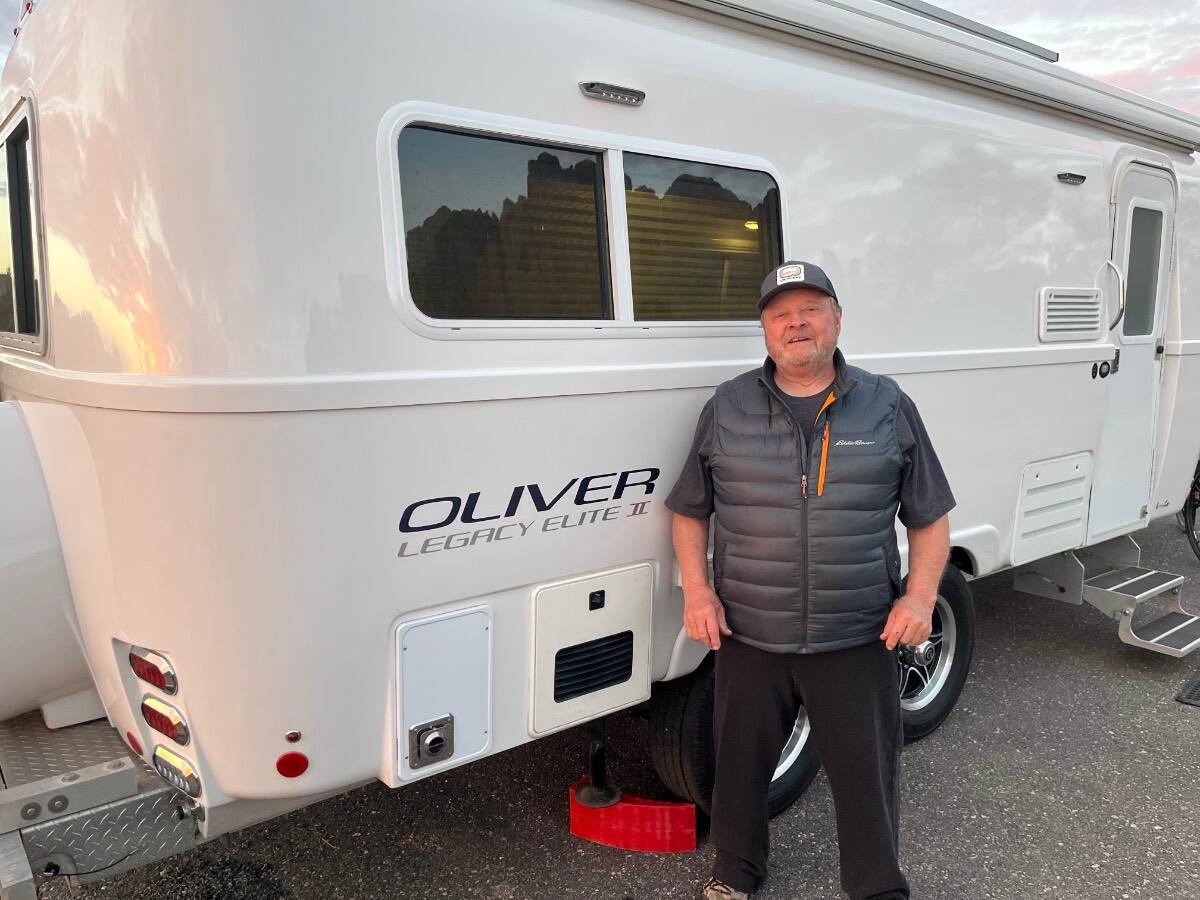
First time here, we met this guy! 😎
-
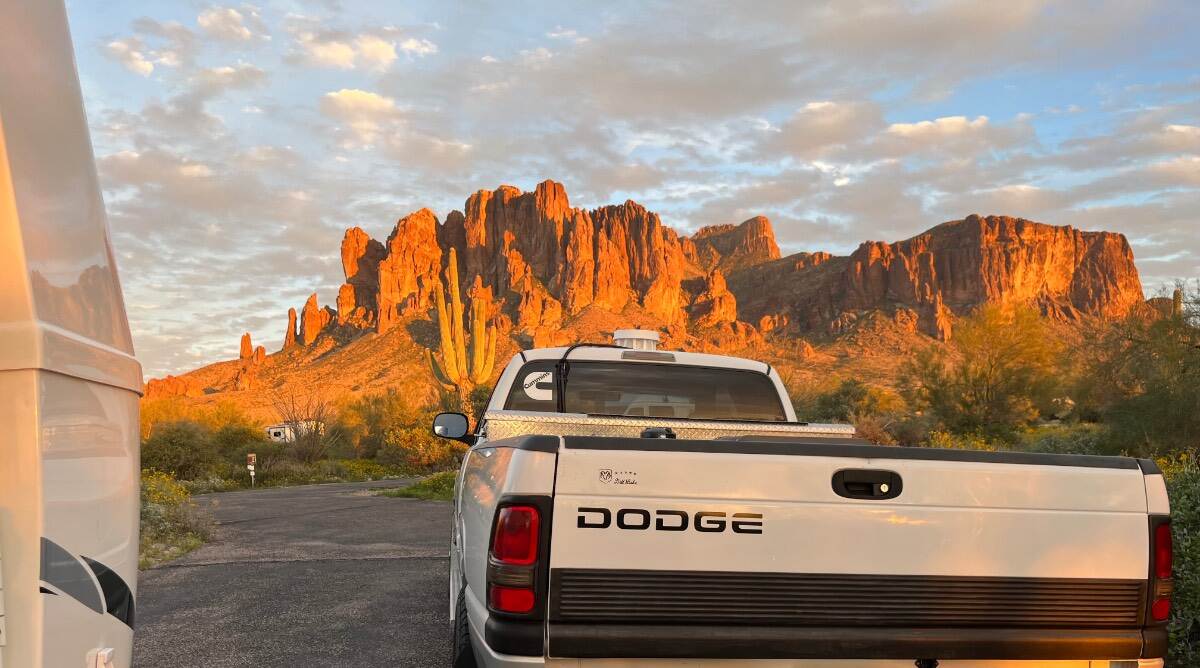
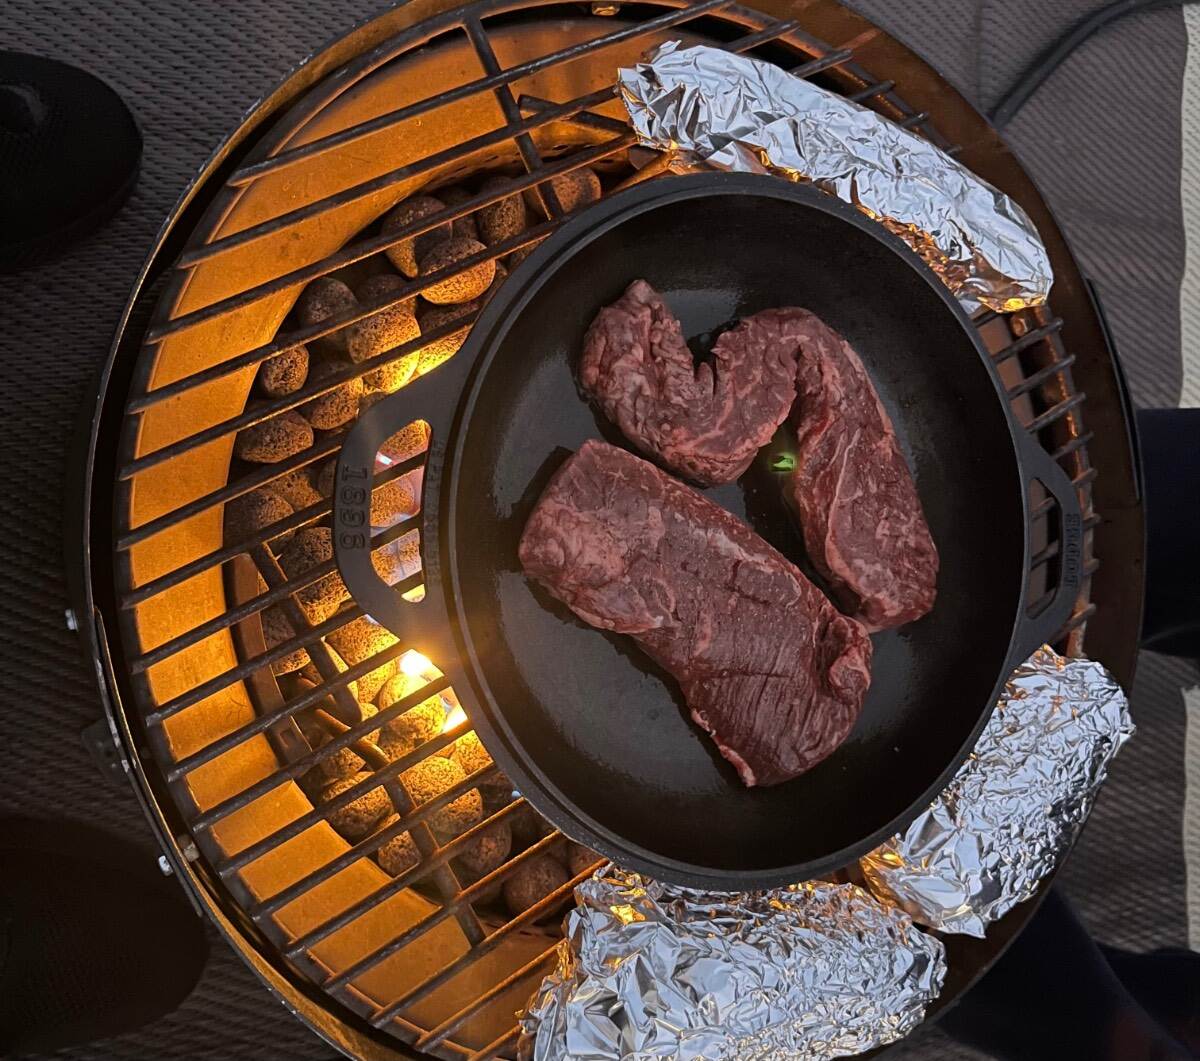
4th visit to Lost Dutchman. I’ll make it up Flat Iron one day (got halfway up last time as it was getting dark)! Came this weekend since the PPA Pickleball pro tournament is in Mesa this week, only a half hour away! What a view! Hangar steaks, baked and sweet potato with asparagus, cooked over the fire ring! 😎
-
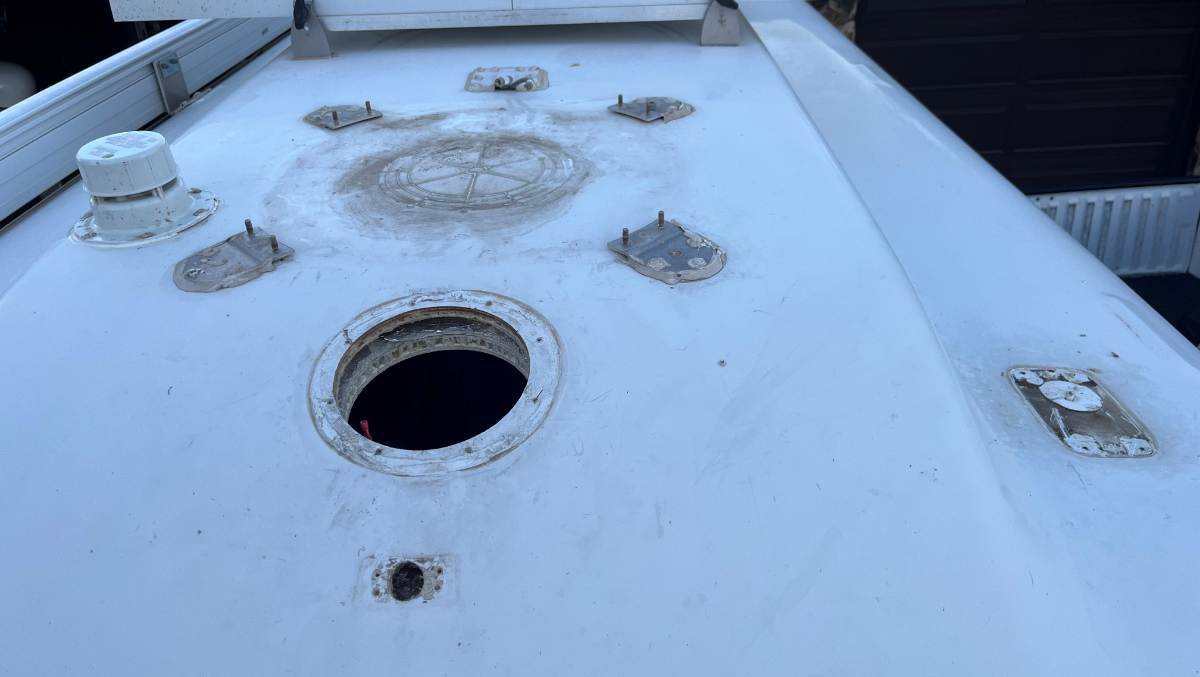
If it was me, I'd look in the aftermarket! Took me a quick search to find this product. I assumed a 1" diameter but did not measure ours. This or something like it would likely work fine: https://www.amazon.com/dp/B0D3PKNY47/?_encoding=UTF8&pd_rd_i=B0D3PKNY47&th=1 CAUTION: You should determine cause for your separation. Check your support beam below the box. View it from both sides, streetside bed (see my picture above) AND look from under the rear dinette seat. OTT forgot a weld on one of my jack brackets. They also forgot to finish this support beam install! Hard to believe, but true. I've compared ours with some of Oliver friends. The others have two bolts which is mandatory! I have to get in there again, drill and add a second bolt! With batteries out, most of the weight off the battery tray, from underneath see if there is movement of the support beam. I plan to remove my batteries AGAIN. Then get a bottle jack under there to see if the support can be raised just a little. The fact that this single bolt is at the bottom of the groove shows it's at the lowest setting. Likely the beam/tray should be raised some for proper support. Then I'll tighten the single bolt installed, drill a second hole through the top of the slot to add a 2nd bolt, then torque down both. Thank goodness we have no door separation, but those who have should investigate the support beams below. Some have reported missing nuts, or nuts falling off the bolts. (How does a Nylok nut fall off a bolt? It doesn't. It was likely laid there never threaded on. Go figure.)
-
This thread show an excellent inverter/battery upgrade installed by a local service company. If you are going to DIY, I've documented installation posts that show these installations step-by-step. You asked, "I assume the Xantax 2kw was the inverter or?" Yes, in my case you can see that on page 1. No more Xantrex 2KW inverter (only) with the small PD charger in the power panel (kept it there for back-up). No more lead acid... Now the Victron MP2 and 900 Ah (3x 300) Epoch LiFePO4. You will find mine is a simpler installation. Did not spend on Lynx products and I did not want a cabin screen (we seek battery info 98% of the time outdoors, while towing or from the living room of our home). IMO, Bluetooth apps are all you need, but many like having screens. When doing so, I also removed all fuses and breakers from under the streetside bed so they can be conveniently accessed under the rear dinette seal. The best addition that several Oliver owners have added is the DC-to-DC Charger! Every time we tow we add at least 40 Ah for every hour towing. This is about 4x what we get from 320W in rooftop solar. See this for the complete installation. => Hope this helps! 😎
-
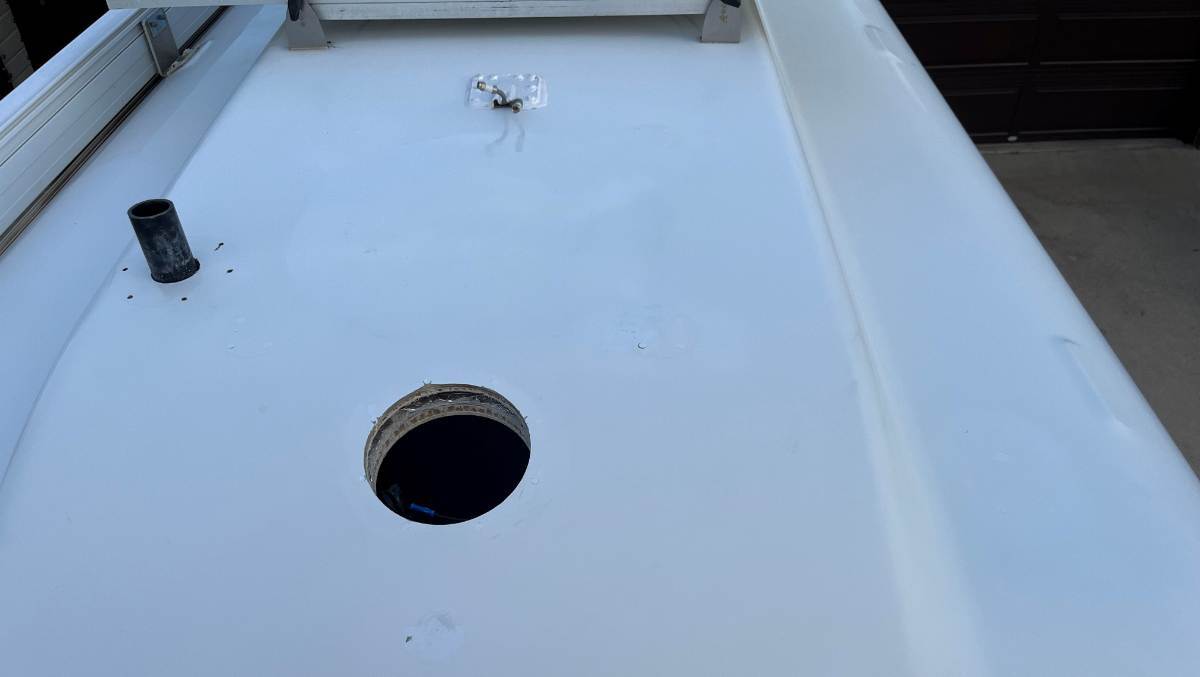
Hello @Mroth, this is not truly my area of expertise, but given how many holes are drilled in OTT installation processes, and that I have removed many of the old-tech products on our Oliver, I've filled way too many holes! I've used this epoxy based product and the color match is good. It's just a touch whiter than our older hull and I've read somewhere that the newer hulls are a tone brighter. I would say this product may work well for your purpose in the shower. It's simple and inexpensive. https://www.amazon.com/Marine-Tex-RM305K-White-oz/dp/B0014419V0/ I have also plugged the holes made for the TV mount, the drain pull handle in the bathroom, the door hook outside, both cameras and everything in these pics (see before and after).
-
So the Max version has some new technology, and costs more. The older version tech works fine. IMHO, I would not want any battery model in view Hardwired it can be hidden under the dinette or anywhere else out of view. And why change batteries when we all have 100s of AHs on board. Took me 10 min to install under the dinette given you have the DC fuse panel and ground bus right there! 😎 I’ve been writing LevelMatePRO and Geoff @Snackchaser wrote a good correction above. The wired version is the LevelMatePRO+ (plus version). He has a cool way to wire the PRO. Maybe it could work for the MAX version too!
-
John stated this nicely. Our first time out, everything in the Attic was upside down! We had the hangers in the closet bounce off, clothes on the floor! A new suspension needs to seat and settle, period. Since our first outing, never another issue. But perhaps Chris, you left the lid on the salsa jar a bit loose last time... 🤣 Removing the 5th leaf... IMHO, good thing you left things as Alcan engineering had designed. They do not suggest the 4-leaf configuration and they know more than we do. I will say however, as an experienced auto mechanic and engineer, I have not followed all of their torque specs. Yes, you certainly need 90 ft-lbs for the U-bolts but I personally believe their specs on the wet bolts are too tight. They spec 80 on the end bolts and 65 on the centers. I went with 65 and 55 so that the suspension flows better up-n-down. The nuts are NyLok, so they're not coming off. Just my take and this does help. 😎 Cabinets opening? They are loose to begin with! OMG, such blasphemy? Did I again criticize OTT? Shame on me! Please forgive me for suggesting DIY improvements! 🤣 I rode inside our trailer once, Chris towing gently down a local paved road, before our Alcan upgrade, and EVERY overhead cabinet was rattling, even banging loudly. I added a 2" strip of foam tape on both resting pads of every cabinet and they snug nicely now and do not rattle anymore. Something like this works great and I promise you will NEVER have an upper cabinet open again! Welcome to the 200+ Alcan Oliver club and I commend you in doing this install yourself as only a very few of have done so! 😎 https://a.co/d/0b1cbrph
-
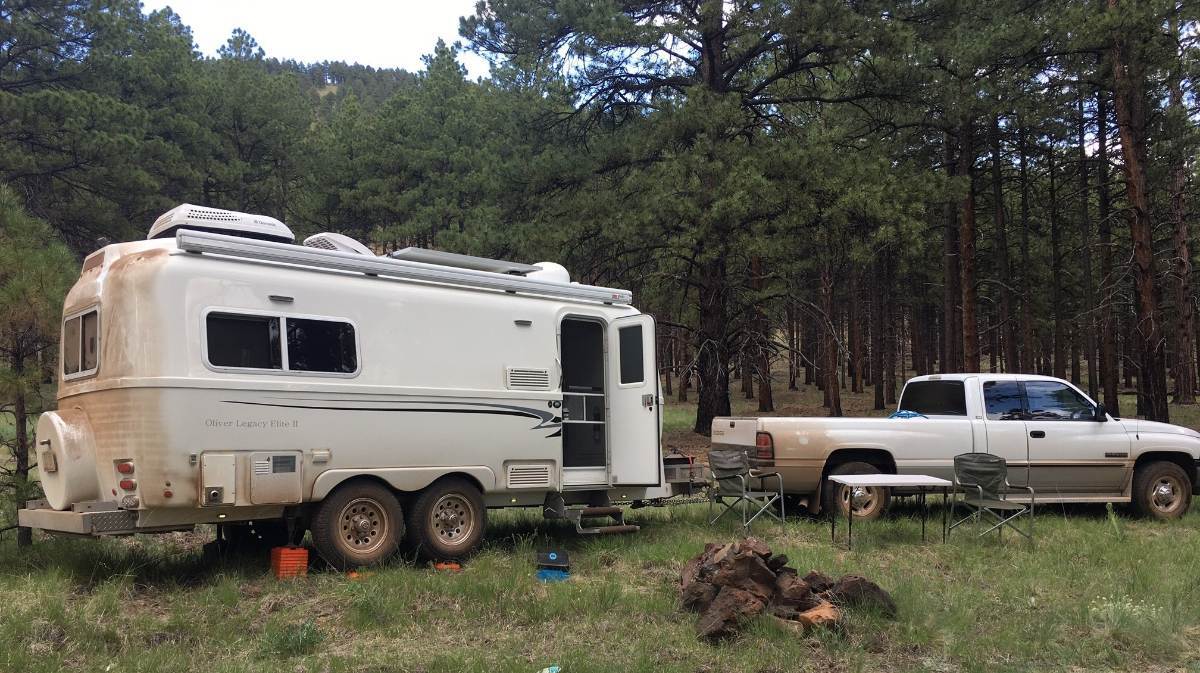
Hmmm… First off, don't fool yourself that OTT has good reasons for all the things they do! If they did, our Mods section would not be 100s of pages long! I've spent 2 years making too many corrections and improvements! 🤣 "Why not the the side jacks?" You can lift the front jack as high as you want and at least the rear wheels will stay on the ground. Not true side-to-side where at about 4" of lift both wheels on that side will be off the ground. No levelers, curb to streetside, might work on flatlands and campgrounds with asphalt pads, but will not work for those of us who camp on FS and BLM lands out West. The example below was our first trip in the Oliver (on Kendrick Peak AZ). Back then I only had the Legos for leveling which are a pain to stack under wheels, but good under jacks. And going without some kind of leveling blocks is just not safe. The Andersen levelers give us 4" lift and just takes 2 minutes to use. 😎 The other thing that is painful and inaccurate is fussing over a bubble-level when LevelMate technology is available. We get level as Chris places the Andersens and I'm still sitting in the driver's seat, reading the app while backing onto the levelers! It's that easy. Using a bubble level is analogous to still using a landline or a 90s-style flip-phone, when cellular technology is what it is today! Paper maps come to mind... It gets me when Oliver Owners worry about spending $100 on a viable accessory after spending near $100,000 on an Oliver, and maybe that much money again on a tow vehicle. $100 in Andersen levelers, and another $100 on a LevelMate adds up to 0.2% of total costs!
-
Good work, Chris. I know you will be happy towing your next time out! 😂 I'm guessing you did this at Steve's since both Olivers are there. GREAT carport with concrete pad, I'm jealous! We have a 3/4 acre parcel, but I can't figure out a spot 25 ft off property lines for the city, that's easy to back into, and is level. I'll have to keep hiding our Oliver behind the Tuff Shed where it partially blocks the southern exposure. Yeah, now 200 Alcan-upgraded Olivers! Welcome to the club! 😎
-
Hub Caps coming off
jd1923 replied to Mark Meadows's topic in How to Join and Use Oliver Travel Trailer Forums
Sorry, still not a believer. 😎 I do believe the quote Mark just received which seems realistic. -
Hub Caps coming off
jd1923 replied to Mark Meadows's topic in How to Join and Use Oliver Travel Trailer Forums
Thanks, Mark. This sounds more like it. I sure wasn't seeing $3 each from OTT! Even a blank set on Amazon costs $24. https://www.amazon.com/GTOWNWORKS-Center-Trailer-Replacement-2-22in/dp/B0DTTP5228/?th=1 -
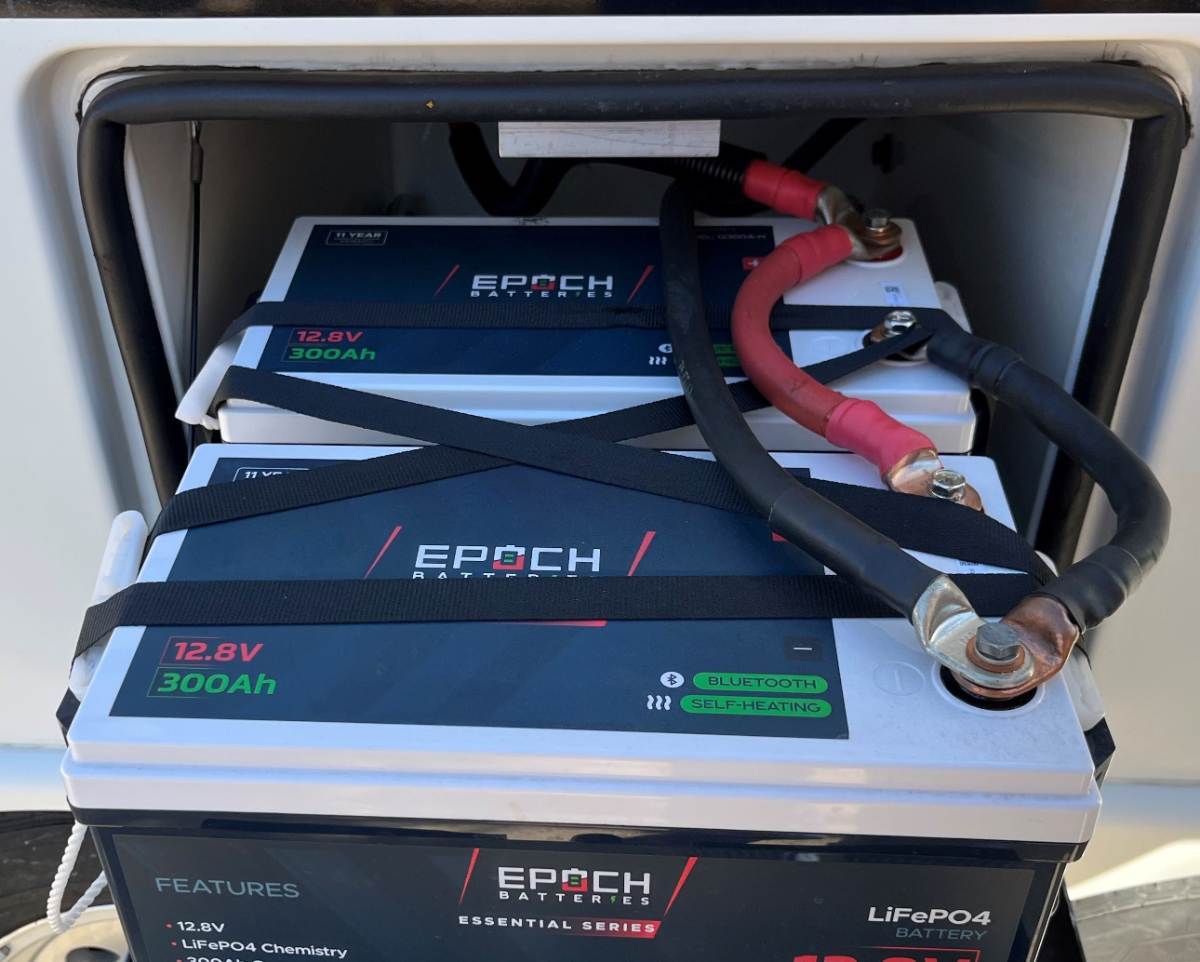
Bob, see page two of my upgrade post, when I went from 600 to 900 Ah. You'd have to remove the tray but I figured out a way to tie everything down nicely and lock into place! It didn't budge in the 920 miles we just put on to Sierra Vista/Bisbee and 8 days boondocking on several dirt roads. I've never priced Lithionics, but guessing 900 in Epoch is < money, though I'm NOT trying to change your brand preference. Epoch will offer 10-15% OFF again soon (4-5 times a year), so don't let them fool you with the 5% off they had going recently. If interested, get on their emailing list. Best wishes in your upgrade. Yeah, go for it!
-
We went from lead acid to 600 Ah 1 1/2 years ago. Different brand name which doesn’t matter. Large Ah capacity is great! Based on your numbers, we use much more electric than you do. In simple numbers, your proposed upgrade will give you 64% greater capacity (640/390)! What was 10%/day would be 6% per day with this upgrade! (390/10/640=6%) Having more is never an issue. Not having enough would can be! We just upgraded to 900 Ah, wanting to run our new extremely efficient Furrion Chill Cube A/C on inverter! I want to Boondock in AZ, not dead of summer, but running A/C for say 3 hours late afternoon each day. I figure we can do that for a week on 900 Ah! We did one 8-day trip. Left home at 80% SOC, came home just over 50% (we also have DC2DC charger). Chris worries when SOC is down in the 50s. I’ve learned not to. During our trip I told her, 50% of 900 is the same as 75% of 600 Ah! Just think we have 75%! 😎
-
Like Mike, I'll use them to change tires which OTT suggested years ago until likely lawyers got involved in policy (over engineering) . Oh yes, we certainly all have opinions! 🤣 I don't like to level at a campsite with wheels/tires off the ground for days. I don't feel it's safe and will show reason to follow. When you find out the leaf springs on your new Oliver are borderline in weight capacity and upgrade to (search for keyword) "Alcan" springs or the like, the Alcan suspension is so firm that when leveling you tires will quickly be lifted off the ground! I had the bracket to one rear jack break. Good thing I was home servicing the Oliver and nobody was inside as the hull banged down, fell on the curbside! If this happened while sleeping, the person on the streetside bed would have been thrown into the center aisle and on the other side against the wall. I'm not kidding! When camping I level with Andersen levelers and only stabilize with the jacks so to keep the wheels on the ground. I also find when using this kit I do not need or use additional wheel chocks. Chris puts them into place easily as I drive up them to level watching the LevelMatePRO app from the driver's seat! These tools work great! 😎 https://www.amazon.com/ANDERSEN-Accessories-Levelers-Leveling-Motorhome/dp/B01LYQ1Z8S/?th=1 If you go with LevelMate, get the PRO model, hardwire it hidden under the rear dinette seat out-of-sight, and never worry about access and battery changes. https://www.amazon.com/LogicBlue-Technology-LevelMatePRO-Wireless-Leveling/dp/B01FGGSWPW/?th=1 Hope this helps!
-
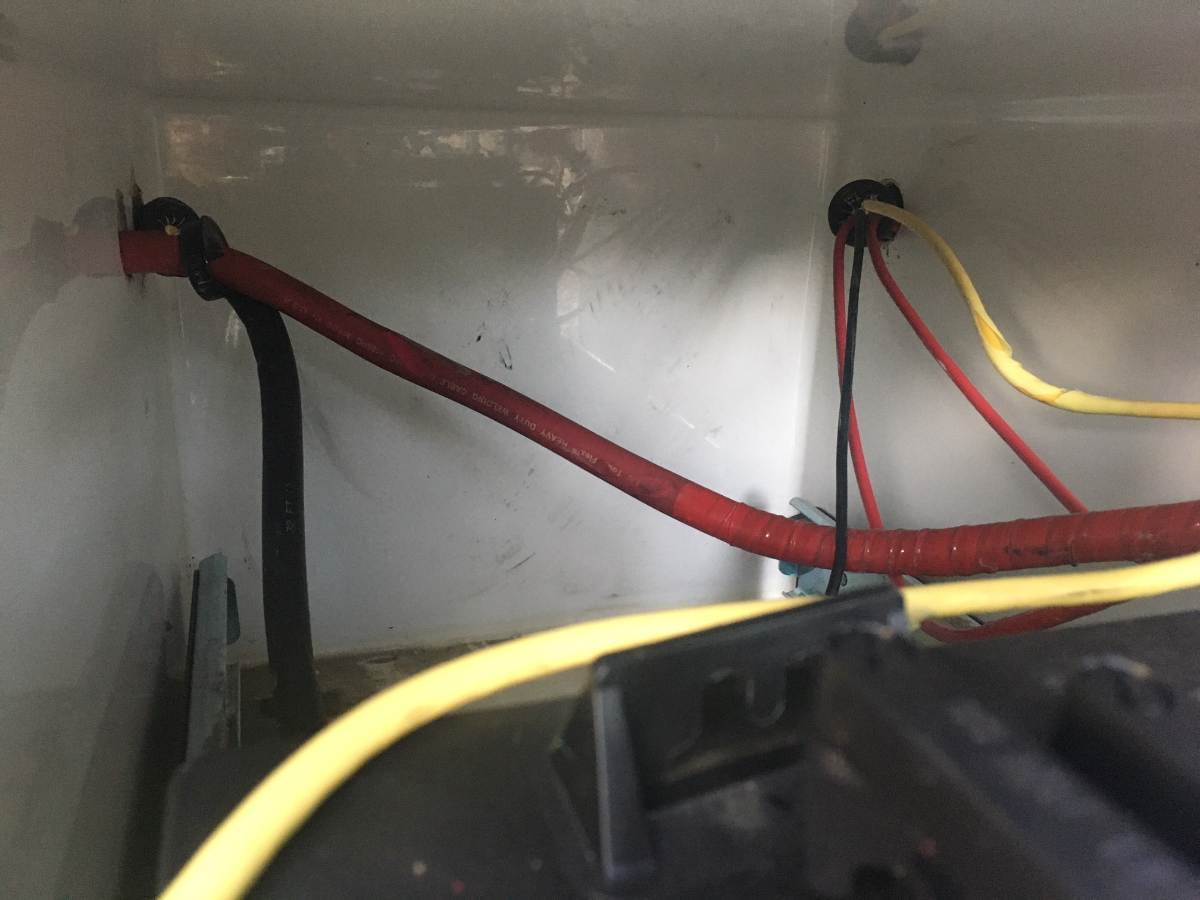
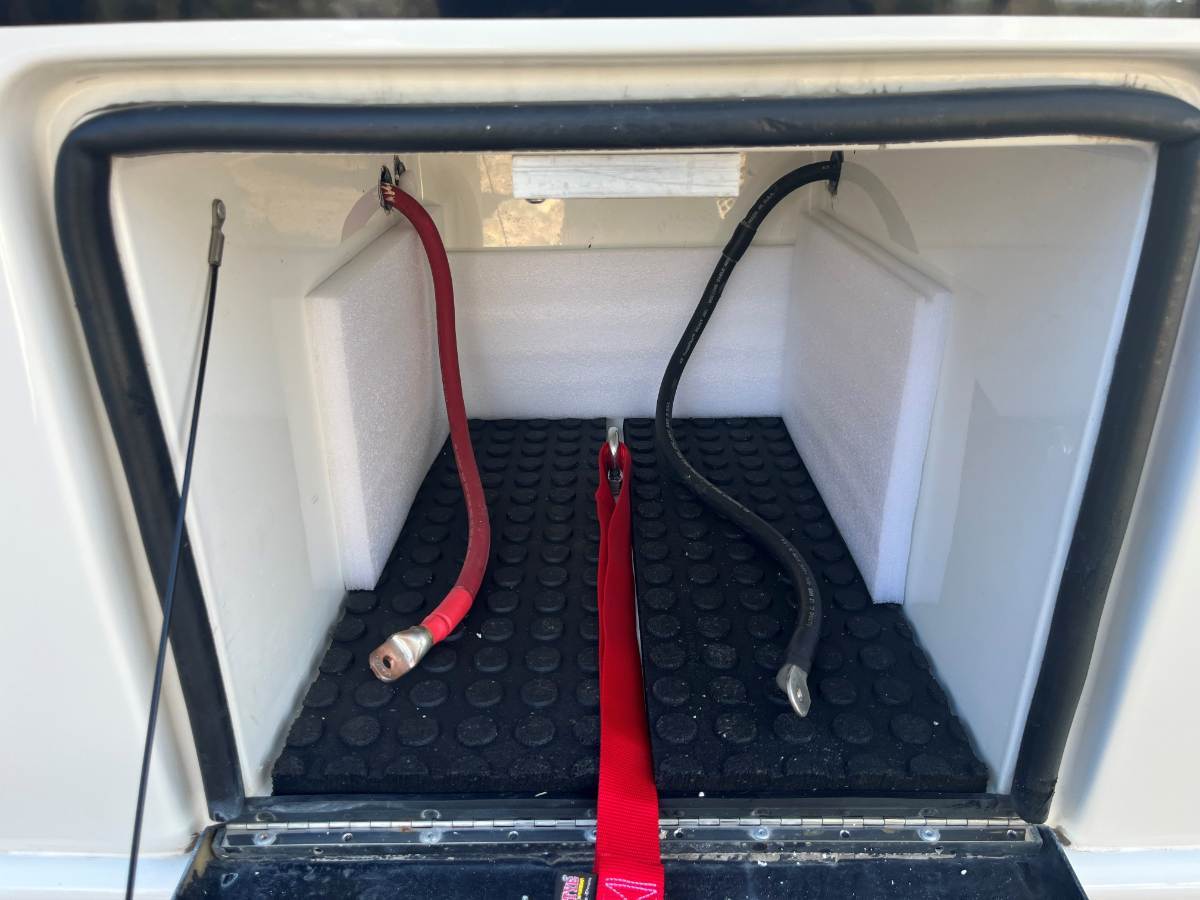
You worked some great upgrades! Love your tool sentiment, but I'd be in trouble with Chris on the dog thing. 🤣 I've rewired all the important things in the Oliver, also added the DC-2-DC charger but using only 4 AWG. I understand a EE calculation calls for 2 AWG, and your a step better than that. I worked mine on a tighter budget, used the frame for the B- length of the truck, 65 ft total with a long-bed, and the design works well (less length, thinner wire). I also spent enough replacing the 130A OEM alternator with a US made, high quality 180A unit, thinking +50A was enough. I doubled the +/- connections from alternator to starter batteries by adding just 2 ft additional 6 AWG. (The main Oliver ground was only 6 AWG and I doubled that too.) I get 35 Ah charging at idle with the 5.9 Cummins, numbers in the 40s when towing (highest reading 49A) with the Orion 50A. No issues ever with any of the cable and HW. Chris and I LOVE this upgrade. Five hours on the road will consistently provide over 200 Ah. In a 600 Ah system that's a 33% increase in SOC %, rain or shine! Ever get too low when boondocking, time to hit the road! 😎 Quality copper wire costs a fortune today. Sooooo high they are opening new copper mines in Arizona after many had closed decades ago! My battery compartment is simpler than anybody's! I didn't want anything but batteries, 4/0 cables, insulation and tie-downs, nothing else (see before and after pics). What a mess OTT made of the battery bay, OMG. None of the extra 6 AWG wires were necessary. I cut off most of their length and attached them to interior buses. For 45 years I have been servicing vehicles. Often the first thing I do is grab a 1/2" wrench and disconnect ground to battery. That's my shut-off. I understand in most use-cases a switch is handy, but our Oliver is 24x7x365 never in storage, only shut-off when working another mod. I also never turn off the inverter nor outside courtesy lights. The rooftop solar handles that. I installed the shunt on the other end of the main 4/0 ground cable, attached directly to the inverter terminal with a shorty 4/0. Back to the subject at hand... For those replacing Battleborn batteries, it's a good time to upgrade the wiring and other electrical mods.
-
You also want spacing between the batteries, first to dissipate heat, and if one battery has issues it would affect the other less and of course so they do not hit or rub against each other while towing on rough roads. In my two battery installation I had 1 1/2" space at the inner wall, 1 1/2" space in between the two, and 3" on the outside (there is a total 6" extra room in the tray). This also centers the weight more to the inside and directly over the frame support.
-
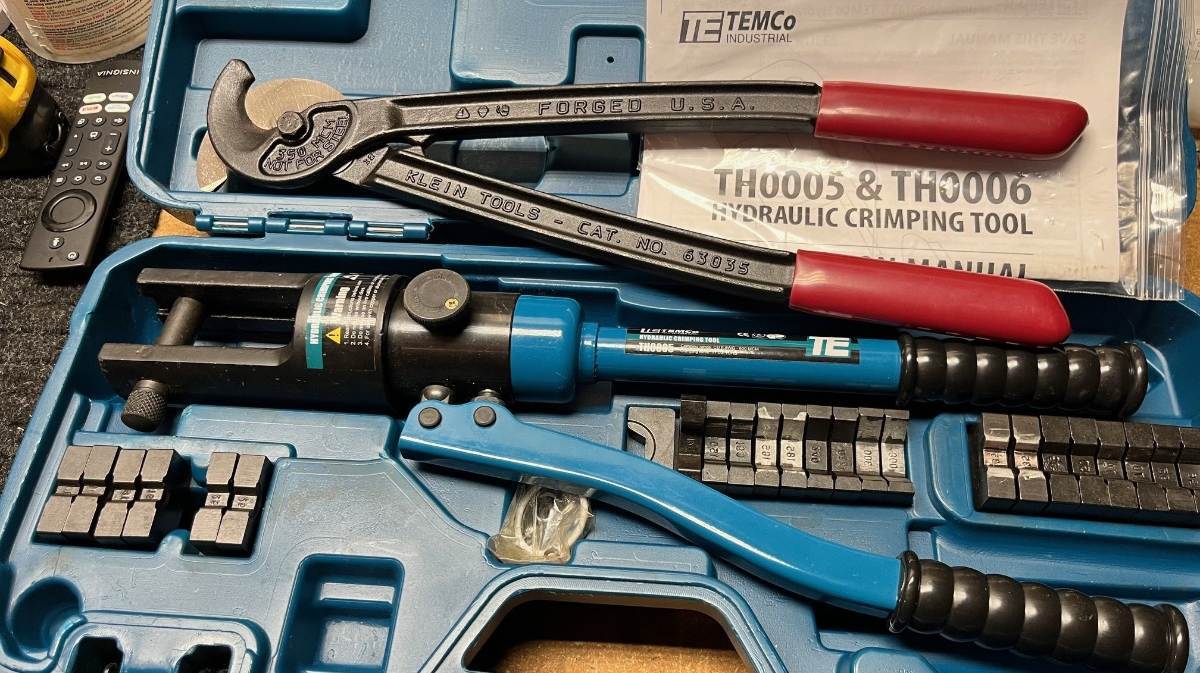
Besides the main 4/0 cables already in your Oliver, you just need two about 10" cables which you might already have on your BBs. If you want to do this work when we get together, I've got enough 4/0 cable and a cutter, but just ran out of 4/0 lugs when I added my 3rd Epoch, and I have a killer hydraulic crimper! 😎
-
And I certainly understand yours. Getting ripped off is never a good experience and we've all been there in our lifetimes! I would worry about two things. First what Steve pointed out. I'd hate to see you stuck somewhere on your upcoming annual trip. I would also worry about fire danger. These issues can happen at any timing, including the hour after an inspection. On the upside there is greater availability, capability and lower cost LiFePO4 products. When you and others purchased BB batteries, I thought they we're too expensive at the time for my use, so 5-6 years ago on a Class C, I purchased 3 AGM batteries instead (for the cost of one 100 Ah BB). Rich shared a link to another new product, CRAZY low price! Makes me question what I spent on Epoch. I/we sure hope these Epoch batteries live up to their claimed quality and longevity! Only time will tell...
-
Given the known failures, if Battleborn was to provide you with new batteries under warranty at no additional cost, would you install replacement Battleborn batteries in your special Oliver? Here's another example from a full-timer and YouTuber =>
-
Not kidding, just stating that each 300 Ah Essential can take 200A in or out but of course when you run multiple units in parallel, agreed there would be other limiting factors. For example, the Victron MP2 can only charge 120A and requires a 400A fuse which is the max DC in it can invert! As mentioned before, you’d have the run the A/C, microwave and more to hit that limit. As you pointed out, same 400A limit on the 4/0 wire. There are at least a half dozen Oliver owners that have made this purchase, at this price point, two more with Ken and soon Mike. But don’t spend $2400, wait for the 15% off. I think it’s worth it. I spent $1800 on 600 Ah summer 2024 and $1,020 for the 3rd Epoch 300 during Black Friday sales. So my 900 Ah total is$2,820. Isn’t that close to the cost of three 100 Ah Battleborns for 3x the Ah?
-
Good choice Mike. Ken would have his installed already if it wasn't so cold in the east!
-
I was talking with an Oliver friend of ours at Quartzsite (he may chime in). He wanted to upgrade to LiFePO4 batteries but wasn't interested in much more Ah capacity. There was an Epoch booth at Q that we visited. The answer was to go with the Epoch Essentials 105 Ah battery at $499 ($424 at 15% off). IMO, you really want the self-heating and Bluetooth features of the Essentials Series. Up to 4 of these will fit in the Oliver battery tray (21x14"), with a 10.25 x 6.75" footprint 9" tall. Just a thought for Oliver owners replacing three 100 Ah Battleborn batteries. The next step up is 2x 300 Ah Essentials. Call me crazy, but we're lovin' our 900 Ah with these great features. 😎 https://www.epochbatteries.com/products/12v-105ah-heated-bluetooth-lifepo4-battery-epoch-essentials
-
FYI - I wrote Marshall Excelsior today to ask them whether going to the MEGR-253H (H for high output) was the right decision. I've got to say their customer service is RESPONSIVE from a webform request! I've had companies, related to Oliver, Eley Hose Reels company for example, that never answered a webform query or direct email on a 2nd try at all, no reply (and I paced 2 orders totaling $250)! Marshall Excelsior replied within the hour, forwarding my question to the Product Manager. Then an hour later he replied. My question was this: Trying to decide between your MEGR-253 and the MEGR-253H. We have a travel trailer, use a fire-ring always, dual burner Napoleon grill, and inside the furnace, HWH, and fridge. Our trailer came with the MEGR-253 which is now 10 years old. I want to renew and keep the old, still working as a back-up. The MEGR-253 has been fine. The MEGR-253H is the same cost. Is there an issue with more BTU capability? Stick with the MEGR-253 or upgrade to the MEGR-253H? Thanks, JD His reply was this: Hi JD, The MEGR-253H will work just fine. There are no issues with more BTU/H capacity. Just means you can run more appliances at the same time. Cold weather can affect capacity for generating vapor in the tank. Thank You, Wes My experience with corporate CS is that if I ask on a Friday, a Monday reply would be more-so expected. Maybe the Fairview regulator I got was a knock-off, but if not then this Fairview regulator failed in <30 days (sure looks real). I've heard others complain of regulators failing quickly. I'm not absolutely certain our Marshall Excelsior MEGR-253 was OEM installed, but it sure looks 10 years of age! Up to 10 years without failure, and the outstanding CS of Marshall Excelsior, I'm preferring this product over the equivalent Fairview model! 😎 https://www.marshallexcelsior.com/products/pressure_regulators_and_accessories/two_stage_automatic_changeover/megr_253_series.html
-
Bathroom floor drain gray water valve problem
jd1923 replied to Citrus breeze's topic in Mechanical & Technical Tips
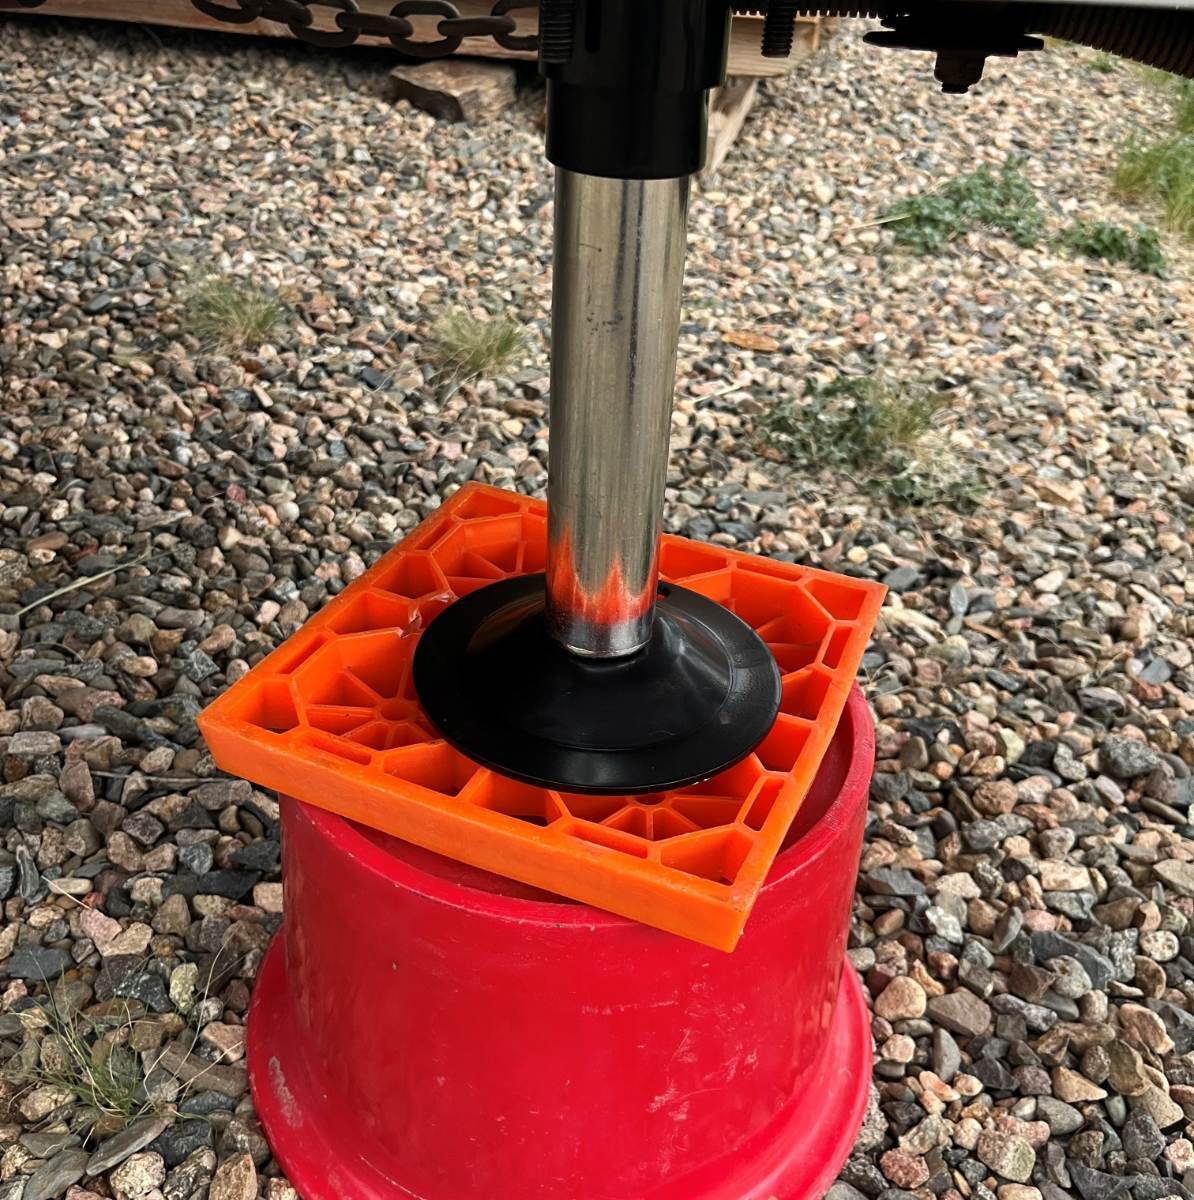
Time to upgrade to a F-250 and a long bed! 🤣 I carry 2 vs. 3 and I do not stack them when stored (easier after packed up to stick one here and the other one there, being the last items to stow). The picture I shared was actually the one time I stacked them! Ron @Ronbrink you sure have enough room in that 2500 van! Hang them from the ceiling, LOL! When I read the word "collapsible" in any marketing copy, I stop looking at that item immediately. The collapsible crate for example; I want a milk crate, steel preferred, but if plastic it must be heavy enough for me to turn it upside-down and stand on it, hold my weight safely! The collapsible crate would surely collapse at just the wrong time! Try to find a crate on Amazon that is NOT collapsible and you'll have to look long and hard. Collapsible is for kids driving compact cars, still living in apartments! 🤣 If I had a set of Flap Jacks, they would sit in the back of my truck ALWAYS in working position. The fact that you use these almost everyday while traveling, twice a day when dumping, I'm not taking the time to erect them and then fold them back to save a few cubic inches of storage space. I'll stick with two 8" Andersen Blocks and 16 of the 1"Legos. This combination works well for us. When you use both in combination you get the slip plane some of you worry about and can tailor the right height (more height up front, or more height needed on one side). I ALWAYS walk a full 360 after everything else is done. Even though I KNOW the 3 jacks are up, because I just removed them, habit is do the 360 inspection, eyeballing all 8 tires for correct shape and making sure there is nothing (not just blocks) under truck or trailer. 😎