-
Posts
2,954 -
Joined
-
Last visited
-
Days Won
206
Everything posted by jd1923
-
Search the OTT Forum for 'TPMS' to get these suggestions and so many more. 🤣 This subject has been covered 10x! A small few of us, would not mount a sending device on a tire fill valve, there are issues! Given this thought, you may want to consider a professional installation, e.g. consider this thread, just started a few days ago... https://olivertraveltrailers.com/forums/topic/11078-dill-bluetooth-tpms/
-

Full Suspension Replacement - Alcan Spring and Dexter D52 Axles
jd1923 replied to jd1923's topic in Ollie Modifications
The finishing touch on this project is to install 45-degree angled Zerk fittings! 😎 It's a great solution for ease of access to the fittings (vs. installing the wet-bolts outside-in). Snug them up, just two-finger tight with a short wrench. Don't worry about the resulting angle. Even if it's facing the tire, you will still get a grease gun coupler like this to fit: https://www.amazon.com/dp/B00H7LPKKU?ref=fed_asin_title&th=1 If you replaced your wet-bolts, purchased the HD shackles and wet-bolt setup from Alcan, the Zerk thread size is 1/4"-28. I purchased this 50-pack, zinc-plated steel like OEM (could not easily find brass or SS in this size). Nice longer threads on this product: https://www.amazon.com/dp/B0DQBPTK3Y?ref=fed_asin_title&th=1 If you have the Dexter wet-bolts that come with the EZ Flex kit you'll need M6x1mm threads. This is a very nice brass set of 15 (only need 12): https://www.amazon.com/dp/B08R8GYYYM?ref=fed_asin_title&th=1 -
Good son! 😂 The 27" OEM Oliver TV is certainly a joke. Like you, we watch after dinner/before bedtime, also watch some morning news. I strongly suggest the Samsung 32" M80 monitors! You son may approve! With amazing resolution looking 3D, they are white framed with the screen only 3/4" thick! You can also run HDMI to HDMI-Mini or USB-C from a laptop. Two+ years now, still wonderful. https://www.amazon.com/SAMSUNG-Monitor-Display-Samsung-LS32FM803UNXZA/dp/B0F5VR52WZ/ I also Bluetooth connect to noise-canceling headphones, for when Chris drifts off to sleep or when the Dometic A/C must be running LOUD! 🤣 For more info, check out my install linked above. It is only a monitor which is all you need for streaming. If you must connect to RV park cable or a TV antenna, you would also need something like this: https://www.amazon.com/ZJBOX-Converter-Adapter,2-Remote,TV-Recording/dp/B0CZR2HBGF/
-
I believe you did right in replacing them You also have a good used full axle-spring assembly that could be sold locally to somebody building a lightweight homemade trailer for ATVs or whatever (I have my originals listed on Craigs). Look at your picture above and you can see the center bushings on both Dexter EZ-Flex equalizers are off-center meaning the center bushing are worn enough to be cock-eyed! You can get the full EZ-Flex set, or I just purchased the equalizers since we went with the Alcan HD shackles and wet-bolts. See more info here:
-
Look here first (see picture). The OTT schematic shows only the backflow preventers, but both devices were installed in our hull. There was also another thread where one owner removed and cleaned both, having the same setup we have. If it was an easy reach, I would have reworked ours 2 years ago! It's still on my list but we run 98% of the time on Fresh Water, so it's lower on the list. Running on our upgraded water pump we also get better PSI and GPM pumping from the fresh tank vs. City Water through the restrictor. This shows there isn't "something else going on." It's crazy that OTT also put a restrictor on the Fresh Water inlet which only serves purpose in slow-filling the fresh tank! You cannot build pressure in that line anyway, since the fresh tank has an open overflow.
-

Million Dollar Highway in a half ton truck with LE2?
jd1923 replied to routlaw's topic in Towing an Oliver
So as of yesterday, JD now has a Pacbrake PRXB Exhaust Brake!!! 🤣 The vendor swayed me with a 20% OFF Labor Day sale and Cummins Forum members convinced me of its product value! I got the work done and just yesterday went for a test drive. Wow I LOVE it! When I turn OD-OFF the exhaust brake consistently slows my Dodge-Cummins down to 25 MPH before releasing. There is also an engine warm-up feature that when ON pressurizes the valve partially to speed up warming (turned off when ECT hit 165F)! I'm not going to add a build thread here since I'm the only oddball here towing with a truck now 25 years old! It was quite a build (about as much work as upgrading axles). Though I did create a build thread on the Cummins Forum, linked here for those interested: https://www.cumminsforum.com/threads/pacbrake-on-the-dodge-47re-auto.2615212/?post_id=30091229/ An added bonus is the Pacbrake system comes with an onboard air compressor. So, I ran an air line to the rear bumper to air TV and TT tires or whatever. We're leaving Sunday for SW Colorado. Can't wait to see the brake perform on the many mountain road descents we'll see over the next couple weeks! 😎 -
Because OTT installed restrictors on our incoming water lines, we find water pressure on the City Water line to be poor! Not sure if they're still doing this on new hulls. Still on my list to remove these (keep the backflow preventers, lose the restrictors). I can turn on our water pump when connected to City Water to increase the pressure which as mentioned will not hurt the pump, so only better pressure. Not sure if this would work for all of you since the OEM water pump is entry level in its PSI and GPM. I've upgraded to a Remco variable speed pump, Made-in-USA, which can also run dry forever! 🤣 We used to do what Bill suggests, however I found that we would forget to turn the pump back on and the system would lose pressure and maybe need to be bled again. Now we keep it ON all the time with two exceptions. It's always OFF whenever we leave the trailer to go somewhere, and I turn it OFF from bed when we go to sleep (the LED is bright)!
-
85 in-lb is only 7 ft-lb! I read 100 in-lb in their instructions (8.3 ft-lb). When I read in-lbs I never get out the torque wrench, because I wouldn't own one! I can push an open-ended wrench more than 7, 8 or 10 ft-lb with just two fingers. Just use a short wrench, not a long-handled ratchet, and make them snug enough to where you see the material compress slightly, you're done.
-
The fuse rating should be based on the max load amperage plus a safety margin (+25%). Ah of batteries is not a factor except for runtime. The inverter is the largest load in an RV. Xantrex specs 350A as shown above. Victron specs 400A for the Multiplus II 3KVA inverter-charger. Best to go with manufacturer’s specs. The 400A is likely OK for the Xantrex too, or buy a 350A fuse and keep the 400A as a backup. OTT installed a 300A breaker which has little margin if your running at a 3KW inverter at capacity. But you would have to run your A/C and microwave on inverter simultaneously to get to near 300A! 🤣
-

elite 2 Extra portable electric dual burners instead of propane burners?
jd1923 replied to Gail Dean's topic in General Discussion
It took over a week to arrive, but Amazon Used "Like New" condition came with the sealing tape open but everything else was certainly like new! They still have them for $86 on the link above, vs new at $116. I had to bring it to a dark bedroom for the picture. It's so shiny-new that anywhere else all you see is reflections (like the picture of the dual-burner @Ollie-Haus posted above). Thanks again Chris & Stacie! My wife Chris was very happy as I surprised her today with this cooktop. She said, "All the cooking shows use these!" 😂 -
I use MRBF fuses for a positive bus I installed and also on my truck battery connecting our DC-to-DC charger. They are simple and inexpensive. And yes go with 350A given your Xantrex manual lists this spec. The ANL holder may fit better in place of your 300A breaker. If you install at the battery (either location is fine), then you will have to replace the positive cable or put another simple bus-bolt connection in place of your original breaker.
-
Far better protection than a breaker, get two of these (to have a backup fuse): https://a.co/d/bdK8VQb and a fuse holder like this: https://a.co/d/9V3H8RB
-

Barker VIP3000 Stabilizer Jack Slipping
jd1923 replied to jd1923's topic in Mechanical & Technical Tips
I could have had the aluminum brackets re-welded, but then I thought of a way I could fix this myself if I had the right 1/4" steel angle iron. OTT uses two pieces fitted together since they're easier to fit in place during installation. One piece would require the holes to be drilled in precise locations. Getting 4 squared offset holes to align exactly is no easy feat! 🤣 Solid steel must be stronger than 2 pieces of aluminum welded together. I went to Prescott Steel & Welding and they had the steel I needed and also referred me to a good welder that also works with aluminum. For $15 They cut me two 3x4" angle iron 5 1/2" long and another $10 for this Direct-to-Metal paint which is amazing! One coat, covers in seconds, no drips. Wish I knew of this paint in all my years of auto restoration! Must have taken me 2 1/2 hours total to fab this bracket. Being L-shaped there is no way to trace the original part, so measure and measure again and hope for the best! I drilled the 1/2" holes and cut the corners with a jigsaw. My first hole was not so clean, thinking I could drill 1/8" holes in the 4 corners (it didn't work). I purchased two brackets, but after I realized the other side had full welds, I just made one saving the 2 hours it would have taken me to make a second bracket. Both sides are done and tested. I still have the wheels up in the air on the side with the new bracket! 🤣 If the weld had not failed this rebuild project would have been done last Friday when Barker delivered the new heads. Beds are in and Chris is making the beds! We'll leave to Colorado by the weekend, a few days later than plan, but all the better! 😎 -

Barker VIP3000 Stabilizer Jack Slipping
jd1923 replied to jd1923's topic in Mechanical & Technical Tips
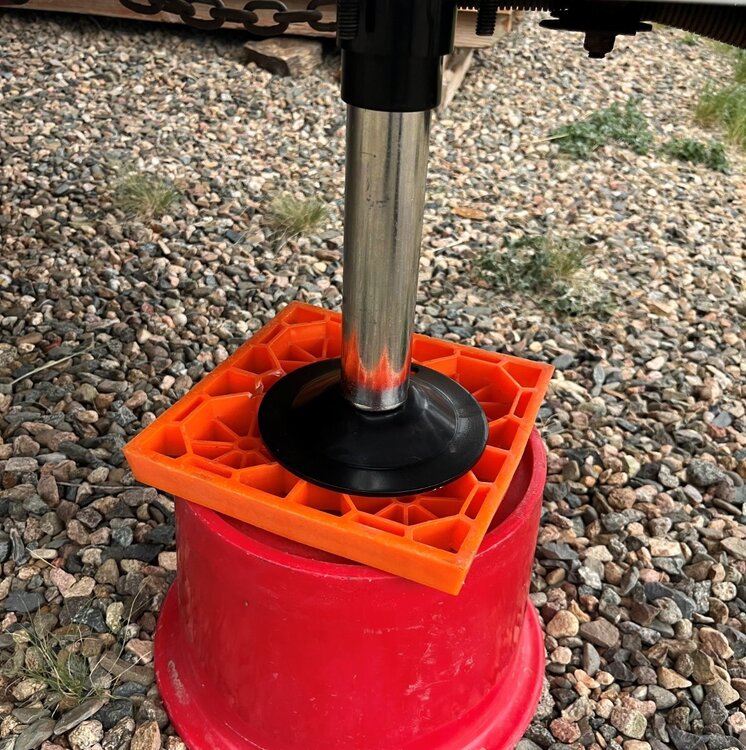
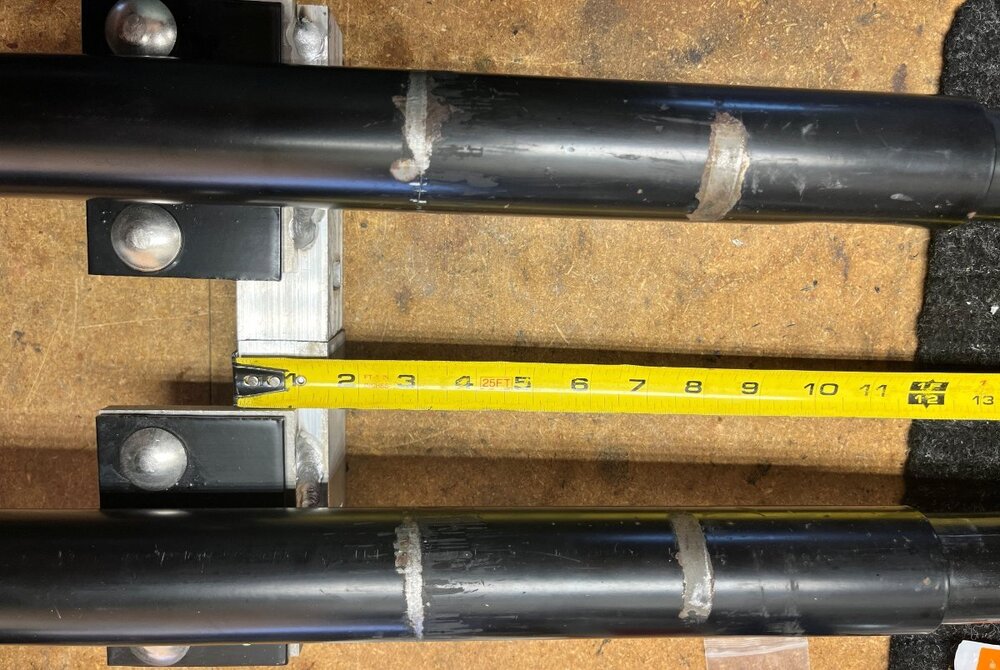
So, here's where this project went a little of course... Next step was to test the jack. Something happened that I could not imagine. It started lifting the hull, wheels not yet fully off the ground and BANG! The jack and hull dropped, OMG! 🫢 I asked Chris to come out so she could operate the button as I watched the jack. As soon as she pushed to lift the hull, I observed the outer post lift up into the hull. The outer should remain fixed, welded and bolted to the frame. I thought, the weld must have broke (it did)! I figured that when remounting the alignment would be slightly different and this could put new stress on the weld. I didn't pay much attention to the welds when it was out since they had lasted 10 years. I talked to a couple of Oliver Elders, first was Ken @mountainoliver who told me that years back some Oliver owners found out that OTT did not finish the welding job properly. Then a conversation with Steve @ScubaRx confirmed this fact! I wrote a Service Ticket and Mike at OTT responded promptly. He was thinking it was a Barker issue, but after our call I realized there was nothing OTT could do except perhaps pay for me to hire a local welder. IMHO, this was certainly an OTT installation issue. The installation procedure is to bolt the two aluminum blocks into position, tack weld them when in position, then remove the assembly to complete weld along both upper and lower surfaces. Turns out they forgot to finish the job on the curbside but did the full weld on the streetside (pics of both below). Next time y'all have your beds off and basement doors open, take a flashlight to inspect yours to confirm you have a full weld on top. Your top weld should look like my 3rd picture. If it only has a tack weld like the 2nd picture you need to remove the bracket (the jack can stay in place if you like) and have it fully welded properly. Thank goodness this happened while home AND that when it failed it did not damage the fiberglass under the bed. On this side we have 1/2" between the top of the motor head and the fixed fiberglass. When it failed it merely pushed the basement cover and bed up and down a couple inches. -

Barker VIP3000 Stabilizer Jack Slipping
jd1923 replied to jd1923's topic in Mechanical & Technical Tips
Will do. Though keep in mind if the white one gets bad, I have two brand new black tops from the reman heads I bought! 🤣 -

Barker VIP3000 Stabilizer Jack Slipping
jd1923 replied to jd1923's topic in Mechanical & Technical Tips
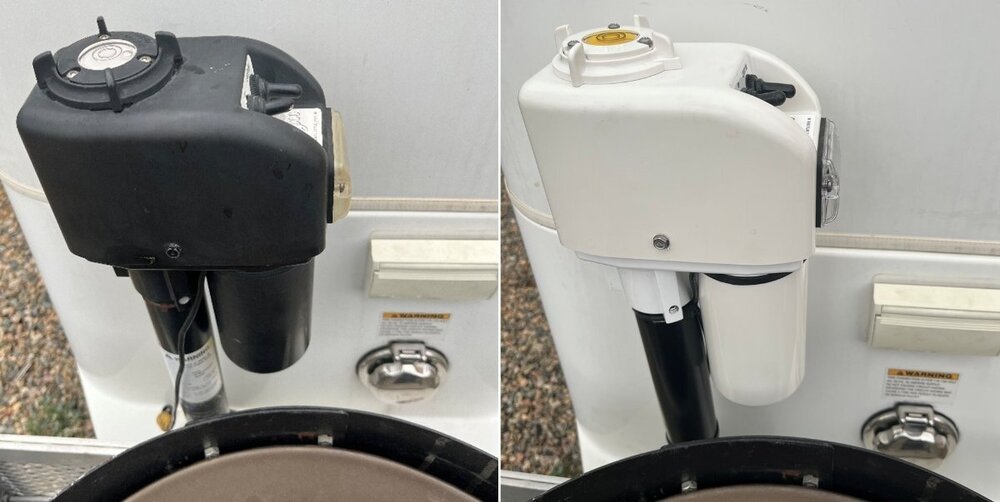
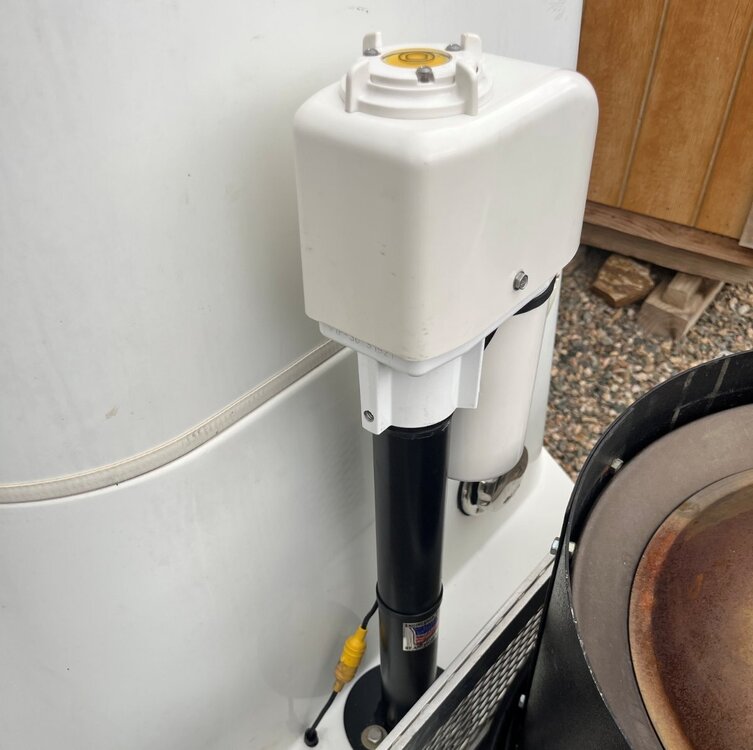
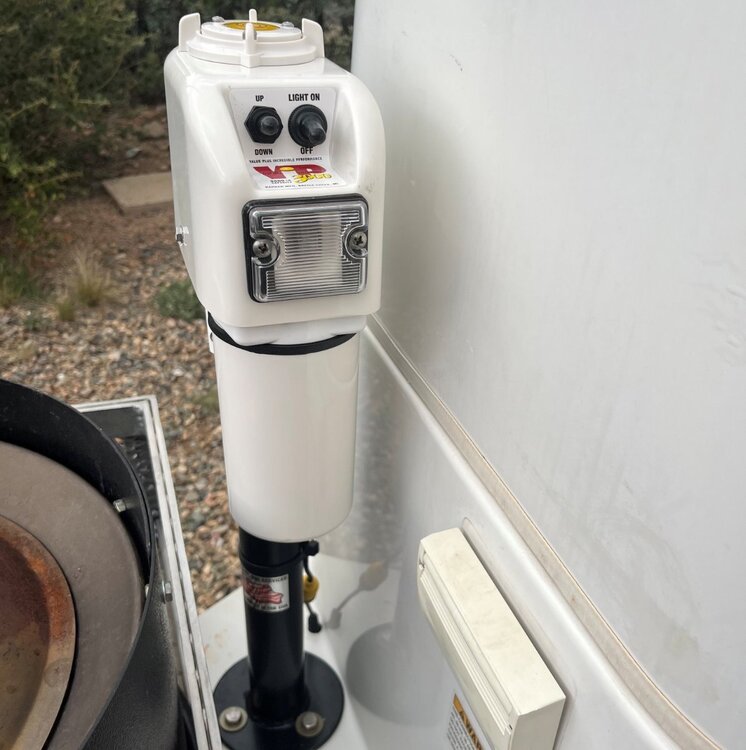
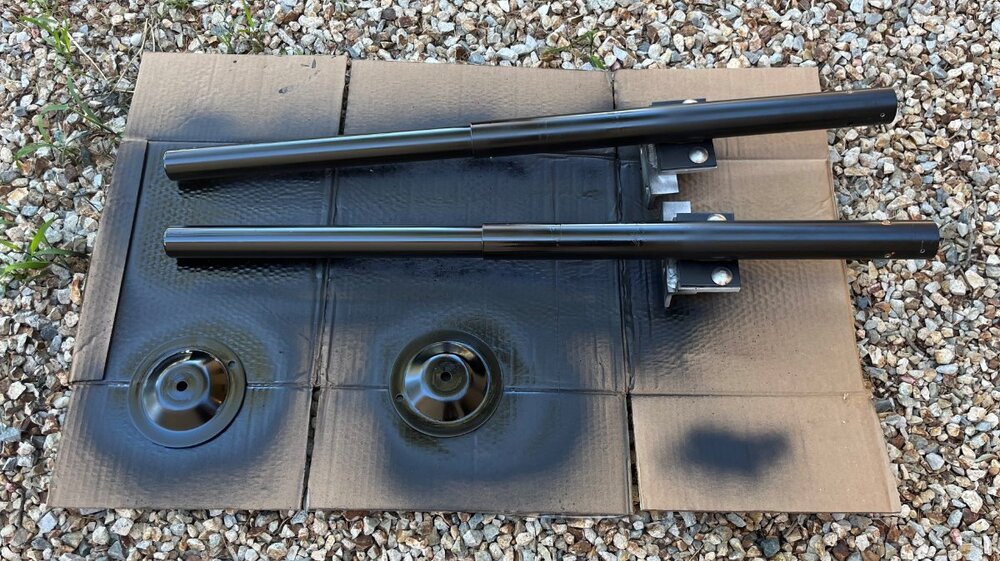
New motor heads, rebuilt post assemblies, all parts cleaned and painted and I'm ready for assembly! It's not easy to get the posts out and back in. To get them out, I removed the motor heads first, removed the long mounting bolts and used a hydraulic jack to break the old caulk bead pushing the post up. You could do this with the stabilizer jack itself if the motor heads clear the fiberglass of your bed platforms. Ours has 1/2" clearance on one side and only 1/8" on the other. OTT could cut the basement opening 1" further to the rear so that we have proper clearance, but it is what it is! 🤣 Put new butyl on the posts where the old markings showed the correct position. One is likely enough, but I ended up using two strips of 3/4" butyl on each post. Afterwards you can pushe the excess butyl down aring the post. You really have to cock the post on an outward angle to get it past a mounted support on the frame. Then get underneath to mount the nuts on the long carriage bolts. The aluminum bracket should be pushed in to support the post. Some thread locker on the bolt mounting the foot and all done in working these steps, now looking pretty good! The reman motor heads are standard VIP 3000 heads, meaning they are wired through the top vs. at the motor bottoms. Cut off the heavy gauge wire on both sides top and bottom as these are not used. The two lighter gauge wired, red and black are what is wired. Before crimping make sure the switch runs the motor in the proper direction. If it's running the wrong way swap the wires. I need to add 1 ft lengths of 12 AWG wire to reach the tops. -

Barker VIP3000 Stabilizer Jack Slipping
jd1923 replied to jd1923's topic in Mechanical & Technical Tips
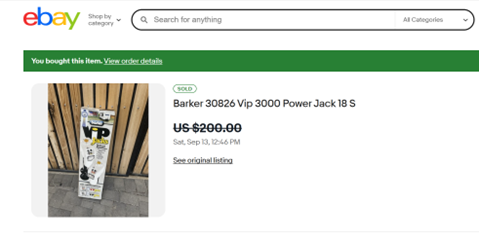
While I was online searching for VIP 3000 motors, I ran across an eBay auction. The listing was for a new-in-box VIP 3000 30826 (in WHITE)! Some of you know, I do have good luck in finding deals when it comes to my projects! 🤣 The eBay auction was for $250 plus tax and shipping but it also had the "Make an Offer" option. I offered $200 and he took it. Was $258.60 OTD? These are $500+ retail! -

Barker VIP3000 Stabilizer Jack Slipping
jd1923 replied to jd1923's topic in Mechanical & Technical Tips
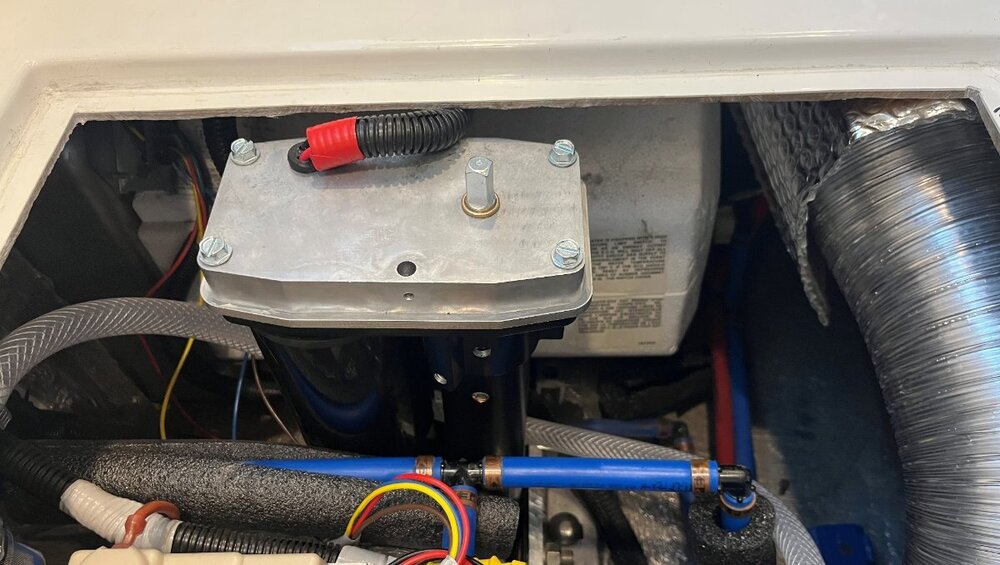
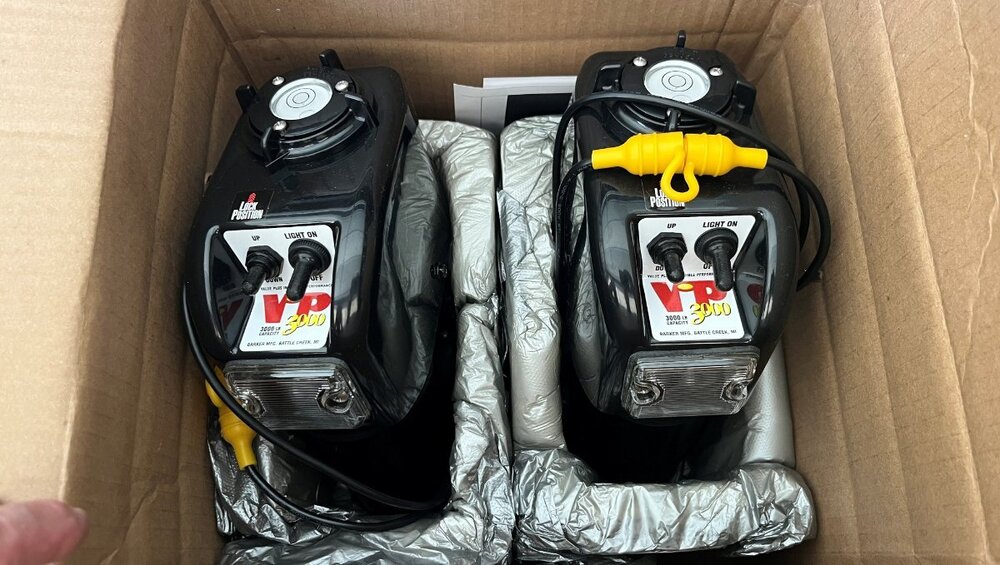
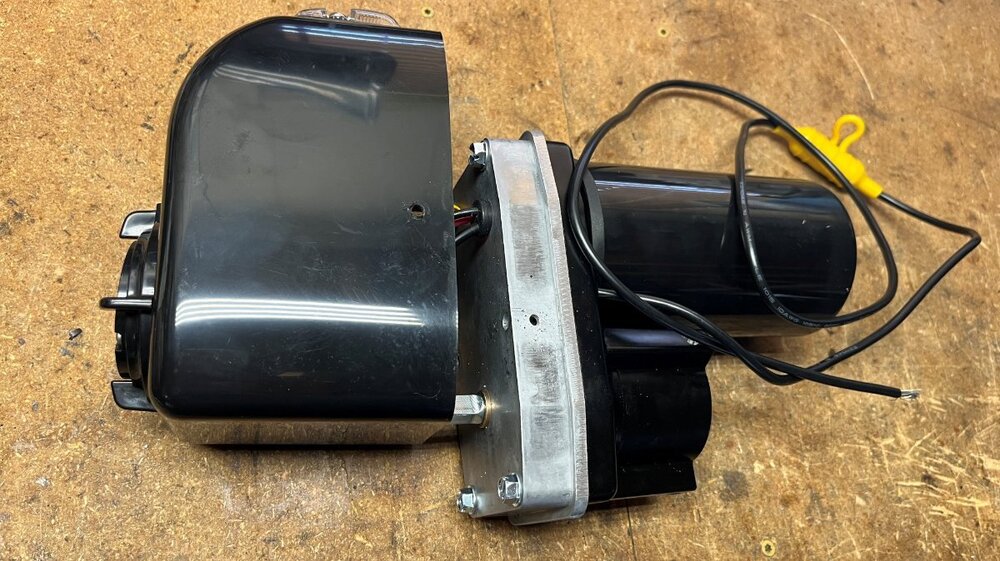
The failure on the rear curbside jack started with a clicking noise, the jack slipping not lifting and I could hear the motor slowing too. The worm-drive gear is connected to the motor, so the motor needed to be replaced. I figured I would rebuild both sides with new parts. Looking online it's near impossible to find these motors. I had the part number provided in the Barker VIP 3000 installation manual. I called Barker to see if they could provide an online retailer. A few minutes on the phone with Donna at Barker and she informed me that they sell remanufactured motor heads for only $75! I found some online listings at $150 to over $200 for the motor alone (but TG they on back-order)! I ordered two heads over the phone with shipping $185 total. Look at these beauties! Need a need front motor head? Call Barker! Three Allen screws, plug in power to the fuse and you're done in 5-min! Do you pay somebody to work RV service for you, like servicing jacks? You can replace the head for less money, new gears nicely greased, the switches are all new, shiny plastic casing - nice! -

Barker VIP3000 Stabilizer Jack Slipping
jd1923 replied to jd1923's topic in Mechanical & Technical Tips
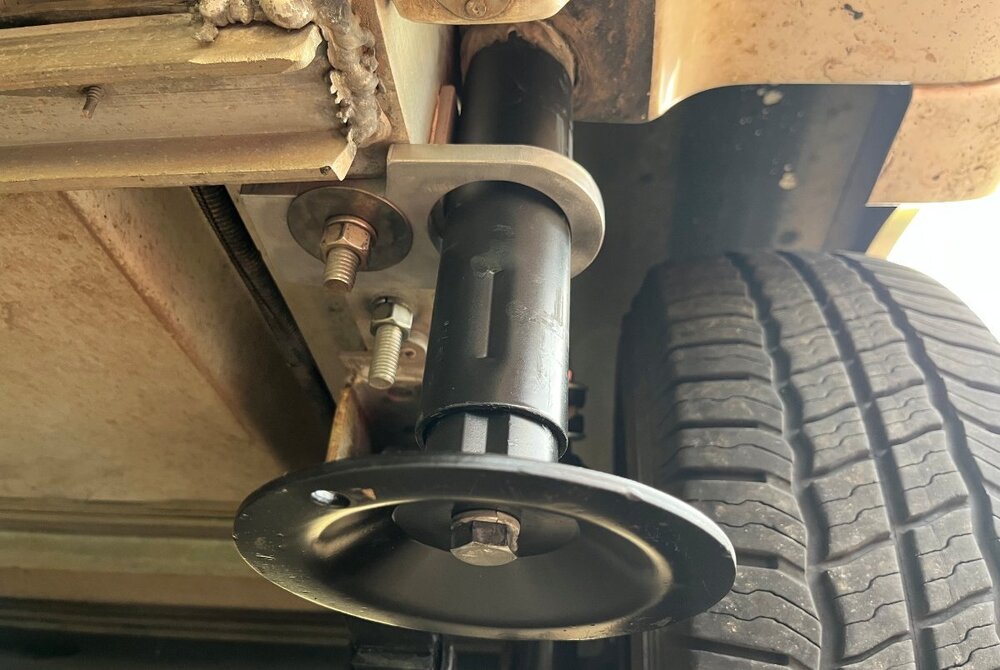
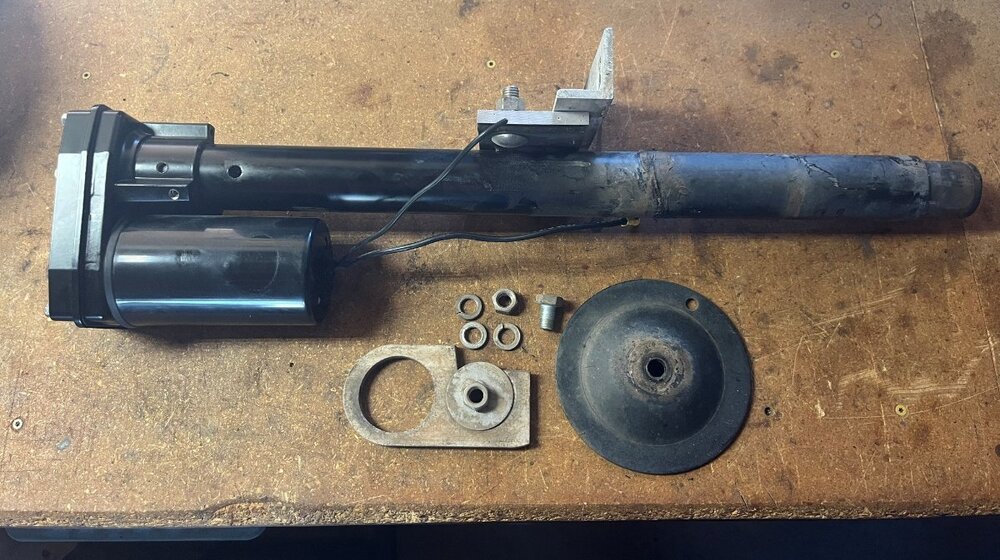
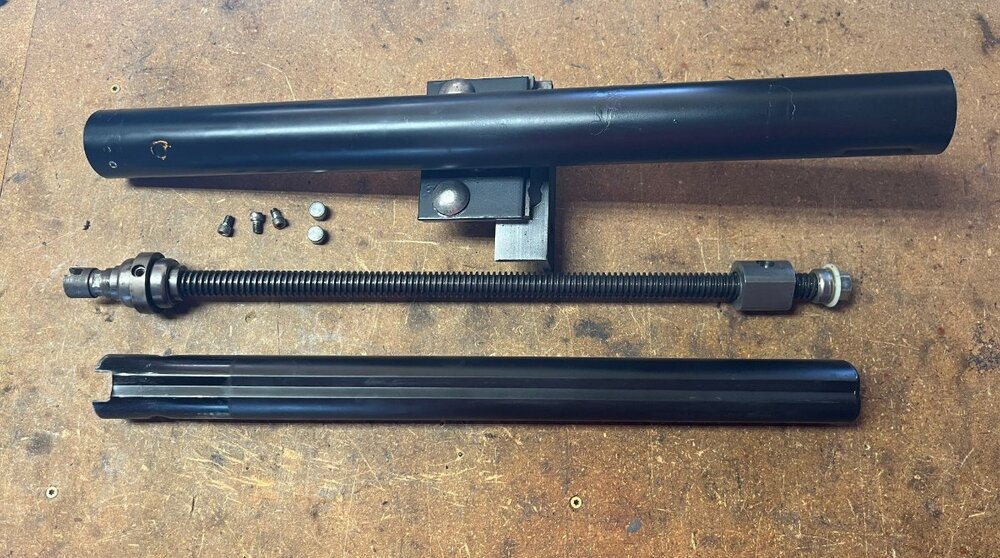
Then plan was to leave on our camping trip at the start of this week. One failed stabilizer jack put our trip on hold. I will finalize all repairs today, so we're now planning to leave to SW Colorado in a couple days. Good news is I have completely rebuilt, or replaced, all three (3) stabilizer jacks. Our 10-year-old hull now has new axles and full suspension and now all new jacks, besides all the new electrical systems, plumbing, etc. Our hull is now far better than a new one! 🤣 I will go through everything in the next few posts. Barker sells remanufactured jack heads for only $75 which I will explain fully, and many of you may want to consider this exceptional deal! Step one is removal of the rear stabilizer jacks. Using a 3/4" deep socket and impact tool if available, remove the jack foot and the nuts from the two long carriage bolts. Notice the markings on the posts where they contact the hull and support bracket below. I've seen postings here and on other forums about servicing the jacks. Never have I seen anything about servicing the posts. The post on the front jack, the standard Barker VIP 3000 jack cannot be serviced. The top on the jack is sealed, pressed into place. However, the OTT custom Barker rear jacks can be serviced. There are 3 Allen keys to remove motor head of the jack. You want to do that first. There are 3 more 1/4-20 Allen screws that hold the top of the screw drive to the upper/outer post. Once the top of lower post is revealed there are two steel pucks that hold it into position (see pics). Clean all parts and grease with Mobilith 460: https://www.amazon.com/dp/B07CTJ97SV?ref=fed_asin_title -
There are always some that say you can't do stuff when often you can. I would search the GM/Chevrolet and Duramax forums. Also, Dill tech support may know something.
-
I for one, miss your contributions to our Forum! 😂
-
Ken, hopefully this picture was taken during work in process. I'm sure you must have closed off and sealed the opening around the drain pipe. It almost looks large enough for an Arizona Pack Rat! Don't let the cute picture fool you, they are monsters of collection and destruction! 🤣 Regardless, this opening is certainly large enough for field mice and many kinds of insects! I pushed in a large bead of dum-dum (butyl) around mine.
-
I fully agree with your statement. I'm also interested in these but have no experience. Bluetooth, do they have an app to read tire PSI and temps?
-

Inverter freedoms 2000 is not turning on
jd1923 replied to Skipster's topic in Welcome To The Oliver Travel Trailer Forums
I'm thinking a good tech at Xantrex should get you up and running... But, if it turns out you need to replace the unit and want to swap with the same model, I would do this. This eBay Seller with decent feedback is an RV parts & salvage co, this item is open box, "guaranteed to work." https://www.ebay.com/itm/267389119450?_skw=xantrex+freedom+xc+pro The labor is simple, since the model is identical. Just disconnect your shore power and batteries, and solar switch OFF. Then swap wires from your original unit to the new one. $650 plus tax vs. $1,800 plus tax and labor! 🤣 -
We’re staying with the OEM Scandvik faucet, at least for some time. This company is most reasonable for replacement parts! 🤣


