
jd1923
-
Posts
3,926 -
Joined
-
Last visited
-
Days Won
318
Everything posted by jd1923
-
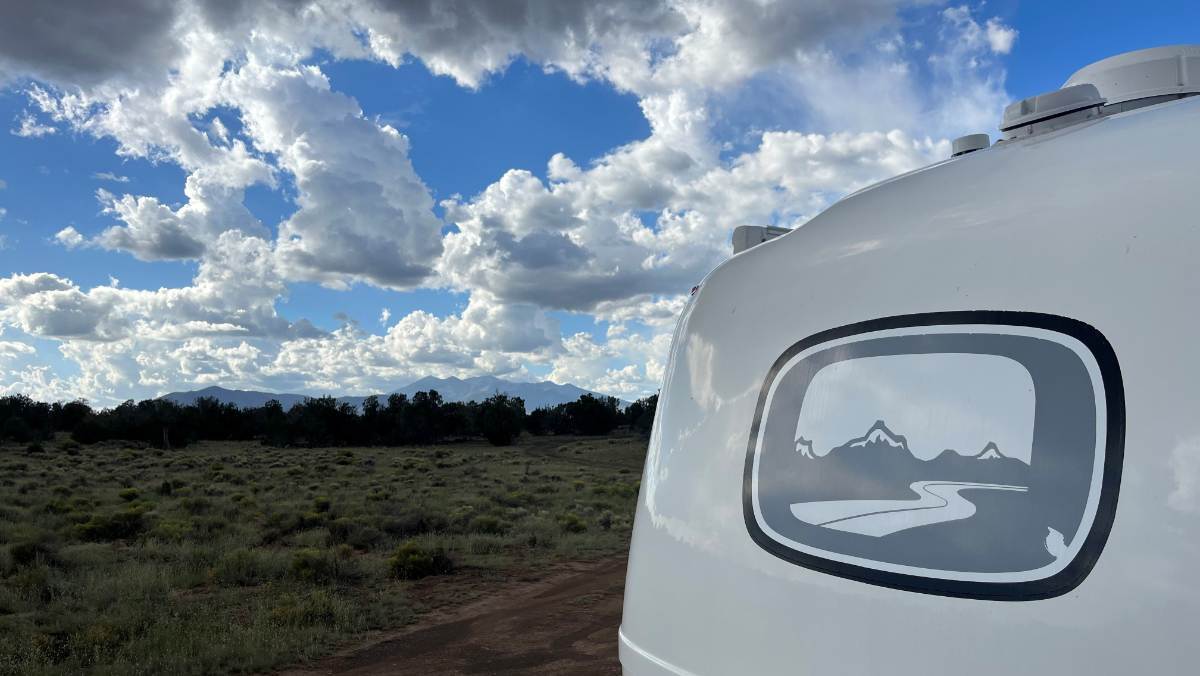
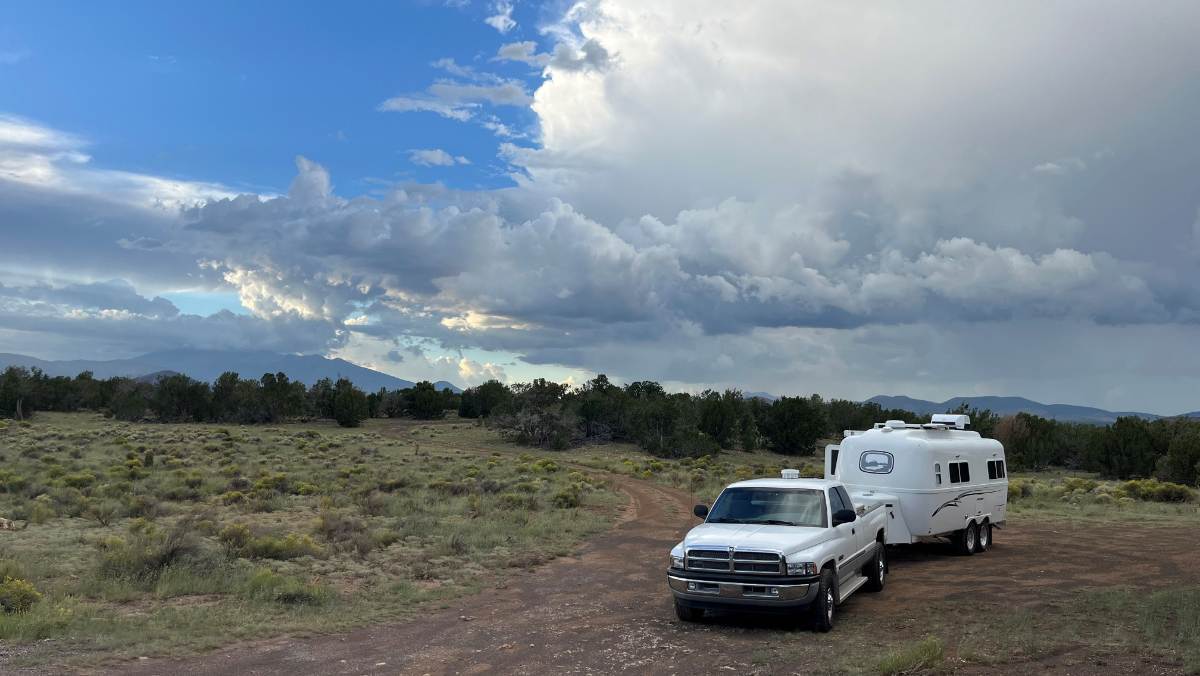
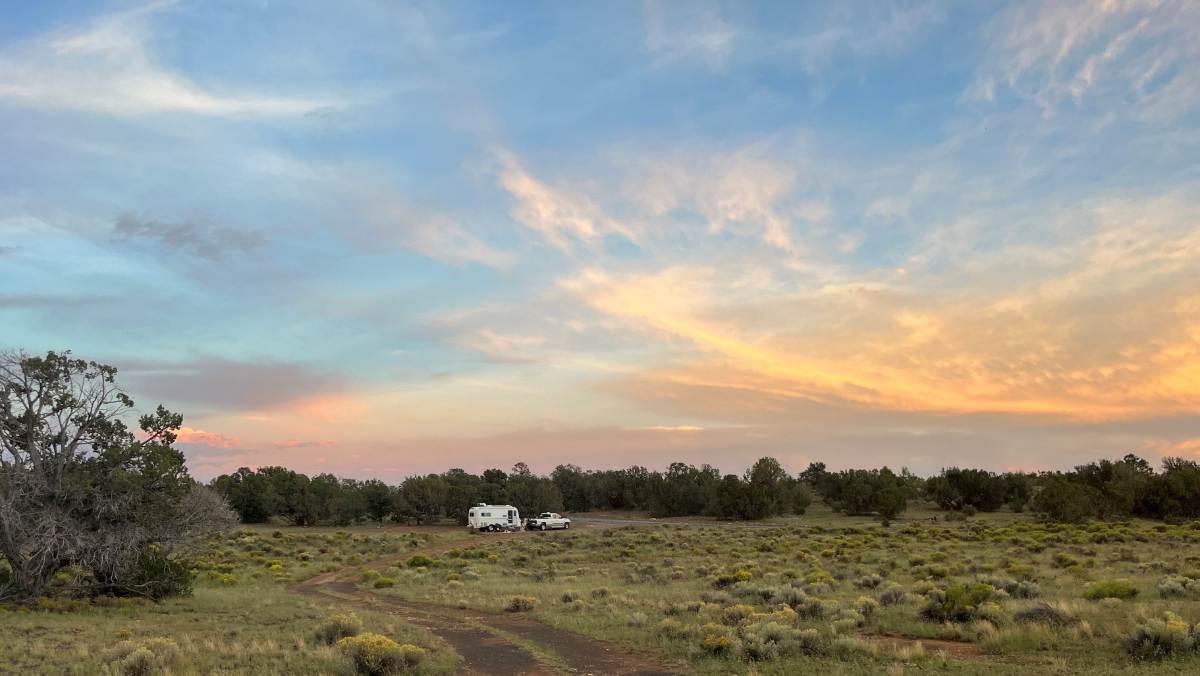
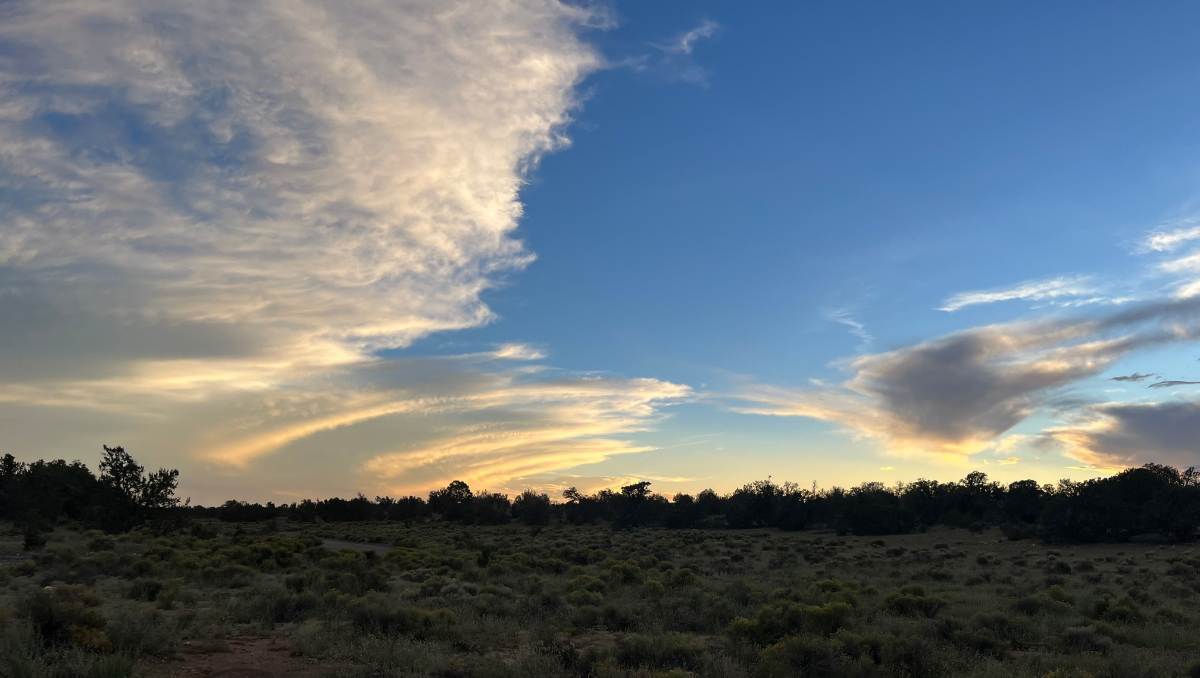
I posted something about this BLM dispersed camping site in another thread, "Oliver - Again?" But this reference should really be in our favorite thread, "Where' Ollie!" So here it is! So many of us drive by Flagstaff AZ, whether you're going to The Grand Canyon or Sedona, elsewhere in northern AZ or just traveling to or from California! Winona AZ is 16 miles east of Flagstaff and just east of Walnut Canyon, which is worth a visit (I posted pics from our visit here just a few weeks ago). Walnut Canyon and these boondocking campsites are only 10 minutes south of I-40. Drive south on Winona Ranch Rd and turn right on FS Road 128. These are well maintained service roads with some ranch traffic. Our campsite was 2.5 miles down and there are 100s to chose from! Camp another few miles down this road and you'd be a short hike to the western rim of Walnut Canyon. 🤠

-
And he has the gall to think you're on a first-name basis! Good for you Craig, you got $50 OFF and most people effected won't ask. "If you don't ask, you don't get" is a good rule to live by. It takes time and patience, yes it's a PITA, but it never hurts to ask. We're heading that way next year. I understand it's hard to see Yellowstone, staying outside of the park due to the long distances, but $125/night is well beyond our budget! Anybody have some favorite campsites, boondocking or USFS campsites just outside of the park? Thanks
-
Nice! Windy? 🤣 Hey Todd, after your visit, please let us know about Yellowstone. Still too crowded or good this time of year? Thanks
-
We're talking TTs and not TVs. I've heard one of the negatives with EVs is tire wear. Yes, I do and here's why! (deja vu) On our '01 Dodge Ram 2500, the DOT label states 55 PSI Fronts, 80 PSI on the Rears with GVWR at 8800 LBS. Same Load Range E tires front and back, marked Max 80 PSI. Why does Dodge recommend 2 different fill pressures (PSI) for the exact same tire? The manufacturer is considering payload! With the bed empty our truck weighs about 6,000 LBS not 8,800. I run 60 in the rears around town and 70 PSI +/- when towing, considering gear and tongue weight. With 80 PSI in the rears and an empty truck bed, the solid axle will bounce down the road which is bad for the tires and suspension and feels like cr@p when driving! 55 PSI carries the Cummins engine up front. 80 PSI is recommended for the rears when actual load is at the GVWR of 8,800 LBS (we're never close). When we are fully loaded with tools, camping gear, full fresh water tanks in TT and 35 gallons in the TV, the Oliver is 6,400 and the TV is 8,300 LBS including tongue weight. For reason unknown, OTT recommends PSI higher than what carries the 7K GVWR. 🙃 We used to own an '03 Ram 2500. Same engine/trans, very similar truck but next Gen. It was spec'd at 9,000 LBS GVWR, 60 PSI fronts and 70 rears. Why the difference? 200 LBS higher GVWR and 60 vs. 55 PSI front and 70 vs. 80 rear! The '03 was quad-cab short-bed vs. our long-bed truck which can hold more weight in the bed. The '03 had more weight in the cab. It's always about the weight. Got the 2WD truck and trailer stuck in the mud while camping recently. Detached the trailer, aired down the rear tires on the TV to 30 PSI. Crawled the truck out, road it briskly down the dirt/gravel road to get the mud out of the treads. Backed to the trailer in a straight line, hitched and backed the trailer out in the same path we road in. I towed about a mile down the damp dirt road at 30 PSI. When on higher ground, I aired up for highway towing. I run 13 PSI in my dirt bike and 15 PSI on our SxS which is nowhere near the max rating but go higher and the front tire on the dirt bike will skid in a turn and the SxS if set to 2WD would spin on gravel. I run HIGHER tire pressures than the manufacture's recommendation on our '08 GX470 when highway driving since OEM is a P-rated tire and I upgraded to LT Load Range C tires which needs minimum pressure. I run pressure higher on my Lexus SC400 with wider HP tires since I like the steering light with a little skid! (less traction). On a race car 1-2 PSI can make a world of difference and nobody runs GVWR spec'd pressure on any sport vehicle. This is likely the 10th time I've explained this and hope it's my last! 🤣
-
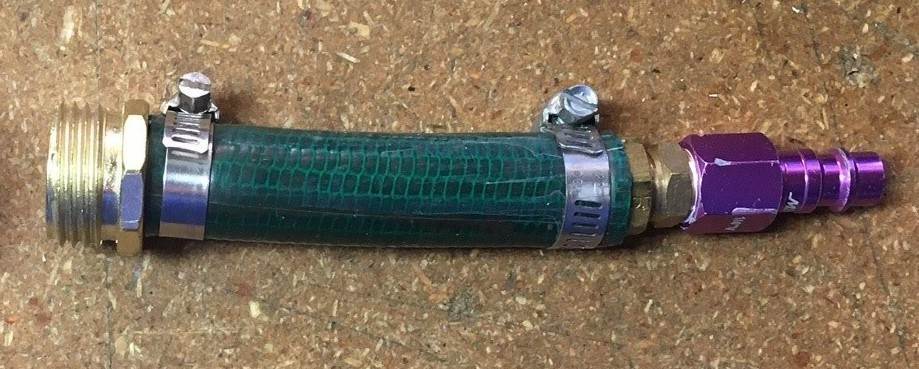
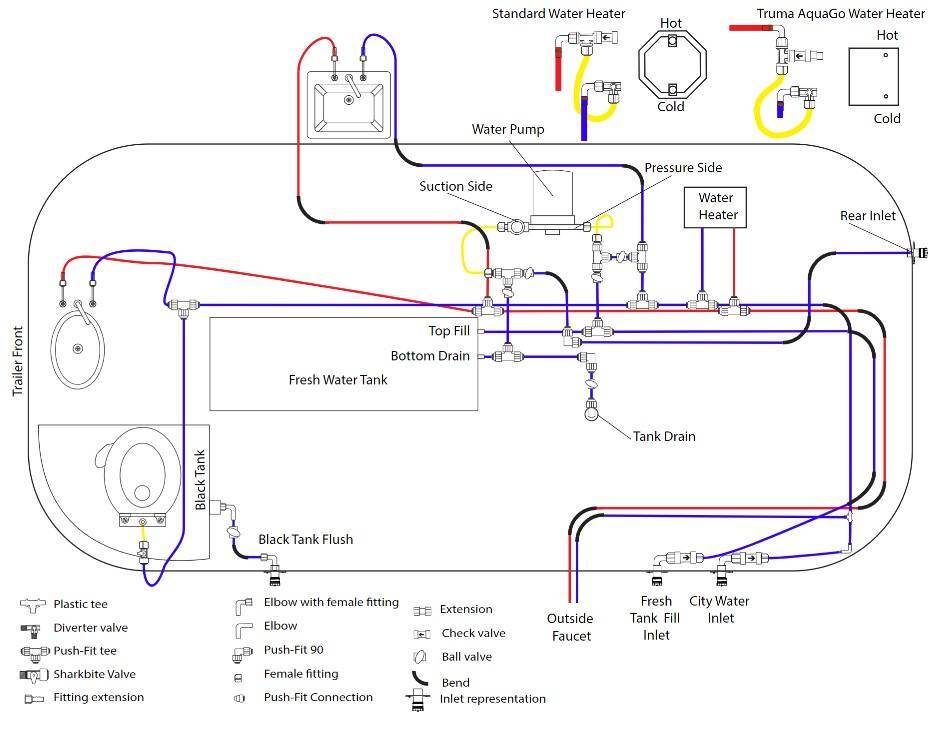
Is the hot water also blocked at the bathroom sink? (They are separate lines.) If cold only, there is one line that feeds the bathroom (see plumbing schematic). What I would do first is blow air through all of your lines. Bypass your hot water heater first. I do this to winterize. Air will empty the lines and perhaps could move an obstruction. I made this tool to connect to the City Water inlet. You'll need a decent air compressor with good air volume. Set compressor pressure to 50 PSI which is your water pump pressure. Given it's both the toilet and bathroom faucet, it cannot be the toilet filter or the faucet restrictor. If air does not help, you could try it in the reverse direction. Take off the faucet head and with another attachment blow air from the bathroom faucet back. Hope this helps! Best wishes, JD
-
Item #1 Mileage is generally irrelevant. I put 19K on our trailer in 3+ years. I'll reach years of use before mileage/tread wear and so will most of us towing our Olivers. MPG is likely only a % better at higher PSI. Over inflation will NOT minimize Stress nor optimize suspension performance. The correct pressure for the load will. Overfilled tires create a small contact patch on the road, will cause uneven tire wear, and can be dangerous is slippery road conditions. Bob's example below is likely average usage. Some may tow 10K miles a year, but very few of us. We've been towing 6K miles/year.
-
Coming back from Colorado to AZ, it takes a full day drive to cross the Navajo Nation. It's a shame that many tribes around the country live on casino revenues, but it is what it is. I learned gambling was not for me at a very young age. Many casinos in the west allow for overnight camping! No charge to stay overnight at Flowing Water Casino! We spent $10/night at Quechan Casino Resort in the very SE corner of California, when going to Los Algodones Mexico, the dentistry capital of the southern border for professional reasonable work and free cleanings! 🤣 Just drive up to the entrance and ask security. At this location, the officer named Everette was so friendly and helpful. He wrote down our names, license plate numbers and asked for my phone #, told us about casino hours and the restaurant inside. They have a large gravel lot for campers! It was very quiet at this small casino with one noisemaker at 2AM that security handled. There's nowhere else to camp around Shiprock NM! A Casino Resort might be a good place for an occasional overnight stay. He made us feel welcomed, we had the lot to ourselves and it was a beautiful night.
-
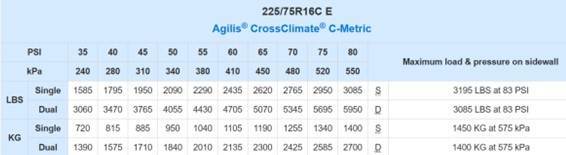
Dan, perhaps you're the one and only one unconvinced on our Forum today! The subject has been brought up at least annually for the last 10 years! Using Chris' @Wayfinder's search tool, I searched for TIRE PRESSURE, lot's of hits. Give this a try and read some of the many articles: https://www.google.com/search?q=TIRE+PRESSURE&as_sitesearch=olivertraveltrailers.com%2Fforums All tire manufactures have load/pressure tables. I use this table for the tires installed on our hull. OTT stated the 80 PSI recommendation on the DOT label on early hulls, mine included. Later it was 65 PSI and we can read in these threads, some owners were told 55 PSI by OTT Staff when they took delivery. Ask an older retiree from what was Firestone corporation, "Who was right about inflation pressure for the Ford Explorer?" In this case the auto manufacture Ford recommended LOWER pressure than the tire manufacture's printed standard. They basically aired a 1/2-ton truck to 26 PSI which "killed 238 people and injured around 500 others in the United States alone; more died in other countries." I figure tire manufactures know tires and OTT knows fiberglass! Except for Steve, and maybe soon enough you too Dan, most Olivers are closer to 6K vs. 7K LBS. Ours was weighed once at 6,400, but let's apply the full 7K to the load/pressure table. Keep in mind, 7K on the trailer axles plus tongue weight, means at least a 7,600 LB trailer (very hard to carry that much)! 7,000 / 4 = 1,750. This table recommends 40 PSI. 65 PSI will carry 10,480 on 4 tires, 80 PSI 12,340 LBS. As I wrote above, I agree with Bob's numbers. For 3 years, 20K miles, I've set pressure somewhere in the 45-52 range. 45 PSI for summer travels, and a little higher during winters. Some go with 55 PSI. OTT recommending 80 PSI for years caused a lot of interior damage; screws on drawer slides coming lose, plumbing fittings cracking, electrical connections failing, LEAF SPRINGS FAILING, etc. OTT recommending 65 PSI; now you have 10K in tire/wheel carrying capacity, on 10K axles, on 10K in Alcan springs, besides your piano, you can add enough equipment for a 4-piece band, if you can find the room! 🤣
-
This is correct in that you will need an additional solar charger. It is not recommended to have one controller for panels of different makes and wattage and adding 400W is just too much for your OEM controller. We run the Renogy 400W suitcase and added a Victron 30A MPPT SC. The new SC should be very close to your batteries, connected with heavy gauge wire. We used 8 AWG 1-2 foot length to the +/- buses. Wire from your suitcase to the SC can be light. 12 AWG is required for 400W. I used 10 AWG since Lowes had a crazy sale on some at the time. Wire costs a lot today, but labor hours are worse when hiring a solar installer. It's not a difficult installation. I made my own cables for cost savings, but you can buy any kind of cable with custom premade terminals here: https://powerwerx.com/wire-cable
-

Water Pump Switch in Bathroom
jd1923 replied to David and Gail's topic in Mechanical & Technical Tips
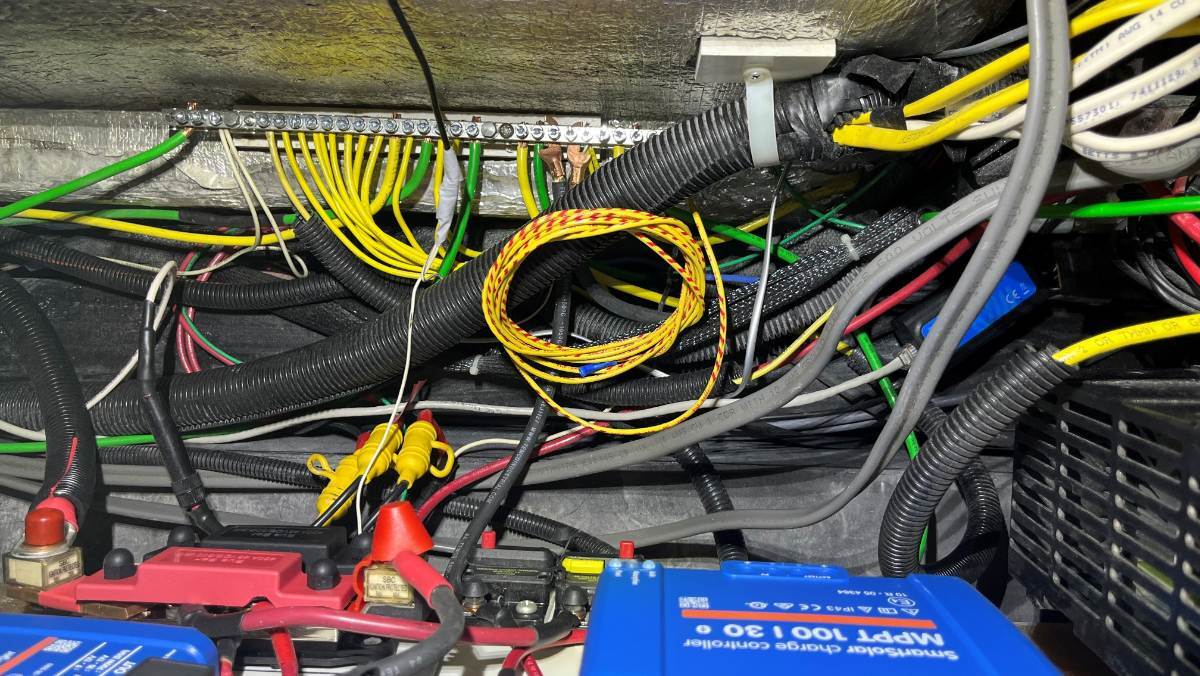
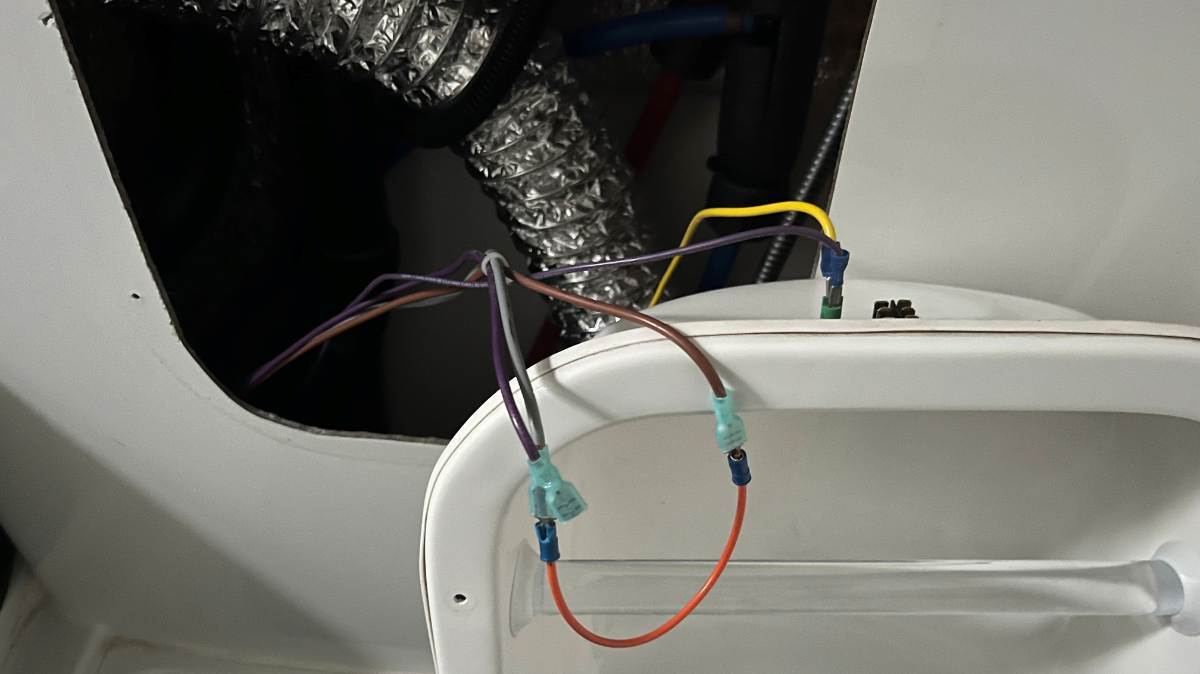
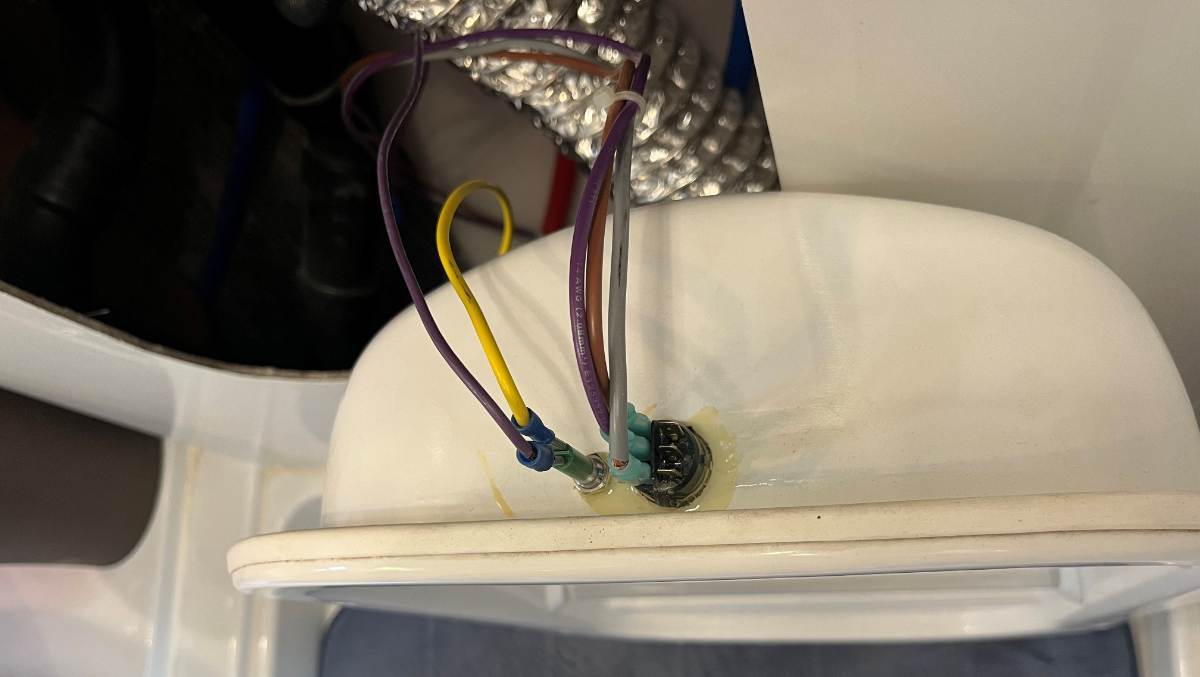
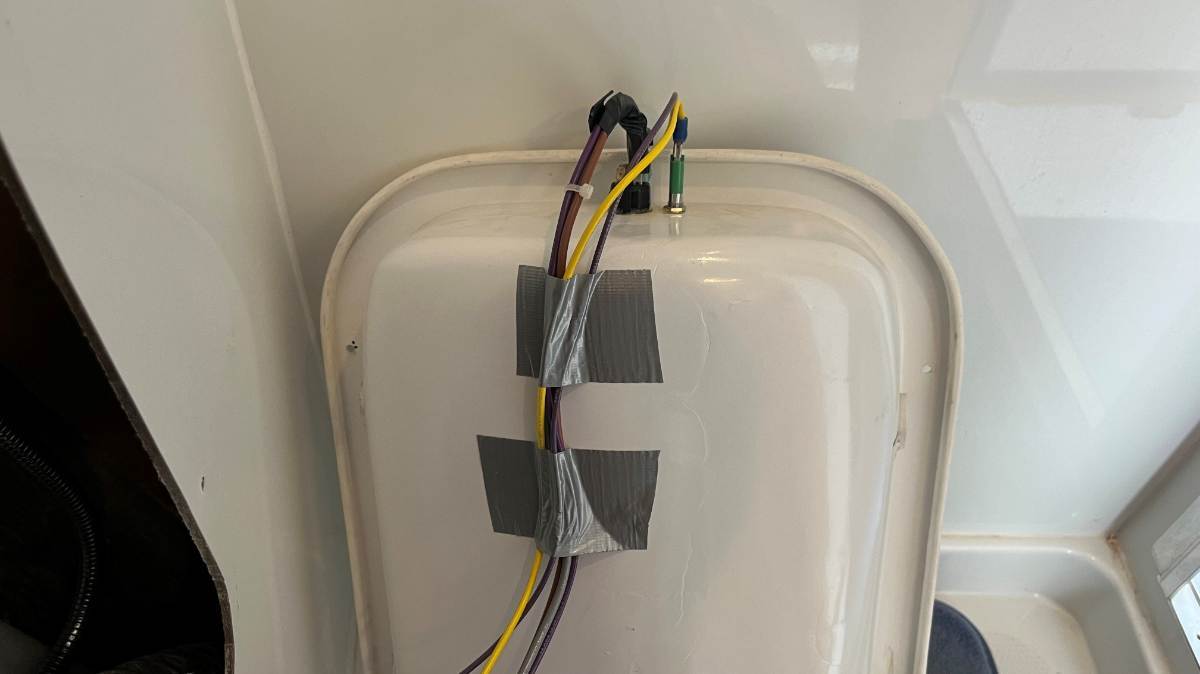
Just came off a 10-day trip to Colorado. Thank goodness our issue started on the last night. The green LED showing 12V+ to the water pump went off by itself and the water pump stopped working. Checked the fuse in the panel and it was good. The issue was intermittent. Throwing the switch under the pantry an hour later, the green light appeared again so Chris quickly washed the dinner dishes! 🤣 Later that night we got nothing again, but just in time for morning bathroom use it worked, yay! (We had planned to wash and flush manually refilling gallon water jugs. We always have extra water in the fresh water tank in the truck bed.) So we're home a couple days so it's time to fix this. I remembered Geoff's explanation above, found it and studied it again. Actually the schematic he drew in his 4-way switch post really got me to fully understand the 3-way switch (study his picture without the the 4-way switch added, travelers connecting left to right). I had remembered his key phrase "No ground wires are involved in these switches." So my first thought is I need a ground for testing. Can't check voltage with a multimeter without a ground. So I cut a 12 ft length of wire, stripped one end and connected it to the ground bus under the dinette seat. I crimped a butt connector on the other end for the negative pin on the multimeter. With this test wire I have a ground source anywhere I need inside the cabin. While I was at it, I quickly tested all the fuses in the panel. I decided to leave this test wire connected for future testing when needed (pic1 notice the yellow/red-striped wire now coiled up under the rear dinette). Later I tucked it underneath in the empty corner below. I found 13.2V at both 3-way switches. Then I used my trusty spade jumper to first check for continuity between the travelers which tested positive (pic2). Then I used the same jumper to connect the Common wire to a Traveler wire (not pictured, think the common/purple wire jumped to either traveler). This pulls that 3-way switch out of the equation. The jumper creates a closed circuit, an ON condition for this side of the 3-way switch. As soon as I did so the water pump was back to working. This shows the issue is in the 3-way switch in the bathroom, or its connections, as suggested by this thread. Notice, I'm connected to the 3 spade terminals on the left (pic3). The bathroom switch has 6 spade connections but you only need 3 in line. I moved the wires to connect on the other 3 on the left. The RH spade terminals had gotten a little crusty in 10 years of use and notice the top-right spade is bent, in fact the female connector on that traveler was very lose. The switch works fine now. The connections were lose but now the left side connections are snug. I added some electrical tape to hold all 3 wires as a unit and then duct tape to hold the wires down. This simple addition will take the weight of the wires and vibration while towing off the switch (pic4). This should keep the connections tight longer. Going forward, look at the bathroom switch first. Not fun when something happens while camping. Thank you @David and Gail, you learned this a year ago and I had somewhere to look for help! 😎
-
Welcome! Soon we need to find Ollie in an Ollie! 😎
-
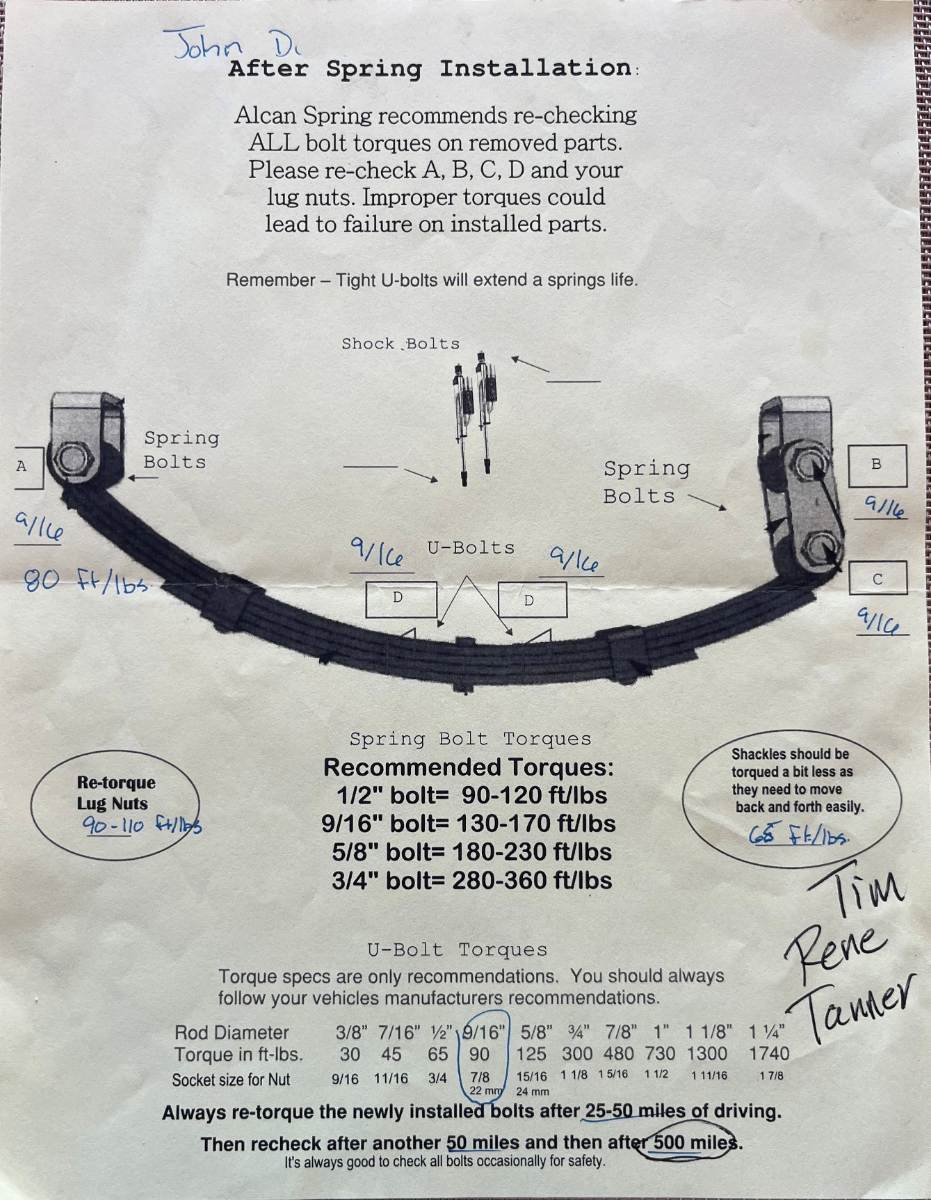
We were asked in another thread or maybe pages back on this one, "What would we do differently?" (re Alcan) My answer is what Bob ended up doing. Instead of buying new EZ Flex separately I would have bought the full installation set including the Dexter shackles and wet bolts, and purchase only leaf springs and U-bolts from Alcan. (Bob answered this in another way.) The 1/2" nut on the 9/16" bolt creates the shoulder. Bob mentioned 40 ft-lbs that held and allowed for greasing. The 40 ft-lbs is torqued against the shoulder, creating a standard spacing for the leaf springs. There is no real force on the 1/2" nuts, they just hold the spacing constant. Oh yes the, 1/4" steel plate hangers on the frame do get pulled in, actually bend some from the torque of the 9/16" bolt. Try 80 ft-lbs on these bolts without the leaf installed between and you will clearly see them bend (but not a good idea to try). The shoulder bolts are the better design and perhaps after another 20K miles on the Oliver, I may purchase a new set. For now, instead of 80 ft-lbs on the end bolts, I went with 64. And instead of 65 on the inner wet bolts on the EZ Flex, I went with 52 ft-lbs. If you divide my numbers by Alcan's, you'll see I'm torquing to 80% of the Alcan recommendation (NOT the U-bolts, keep them at 90). I found the EZ Flex will still appear to hang when lifted but will not when weight loaded. Watch each axle both sides going slowly over some speed bumps in you neighborhood. If all is good, you should see the tires travel smoothly up and down. When I grease there's always one bolt on each side that must be loosened to accept grease, just one bolt but not all. Perhaps my 80% take is helping. I am reporting what I have done on our Oliver based on my feelings. Proceed with caution, make your own decisions in doing your work. I am NOT making recommendations for anybody else. With this warning, I accept no legal liabilities. I also use the stabilizer jacks to lift our hull. The manufacturer OTT does not recommend this practice.
-
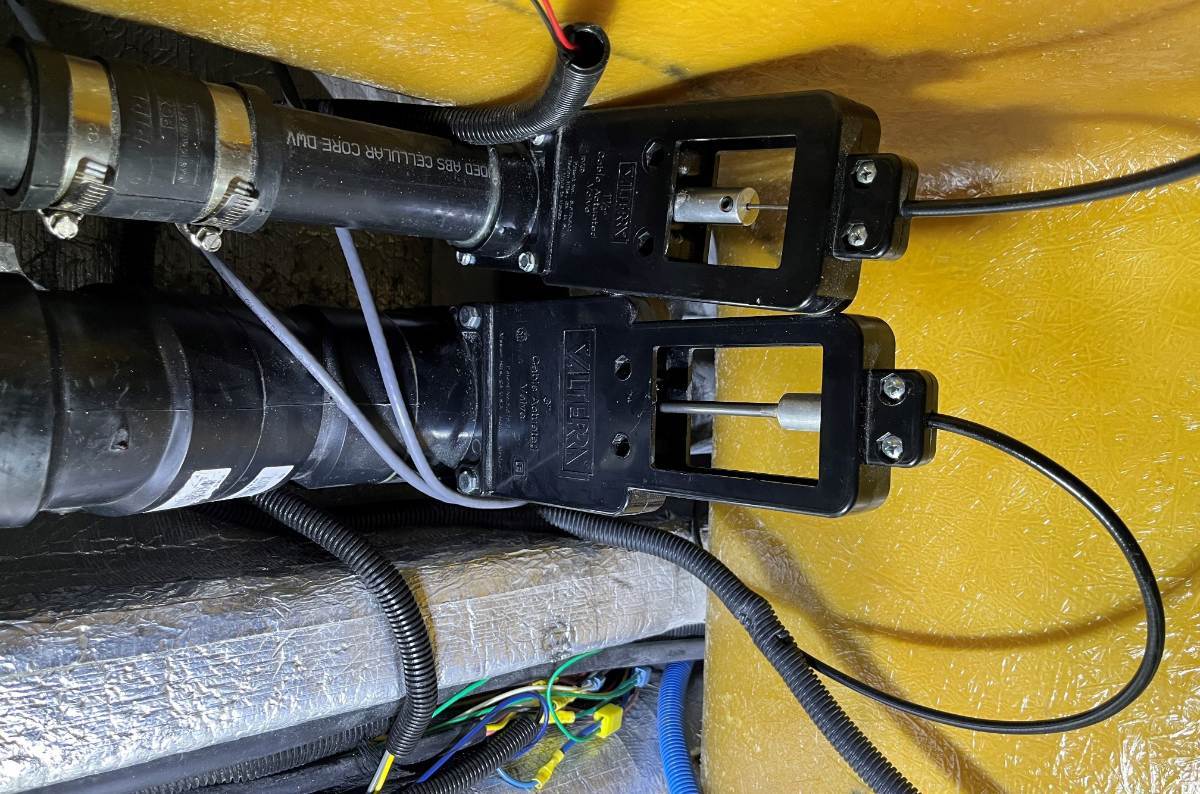
You're welcome, Ron. Ours was too and there are a few reasons... The pull cable is very short and it turns 90 degrees. It's in an awkward place to pull, whether standing outside the bathroom, sitting on the can or wherever, you can't get a straight pull! And a gunked up waste valve blade will make it worse. You can remove the waste valve, clean and lube the blade, lube the cable and it could help. You can't change the 90 degree cable run and the awkward location of the pull handle. We love the new electric one! Without the cable, push the button and I can hear it open or close in just a second! Check my thread linked above if interested.
-
StarLink mini with StarLink router mini.
jd1923 replied to 2008RN's topic in Mechanical & Technical Tips
Can you make regular phone calls or using an app? The calls are likely dropping when one satellite is moving out of range and the next one is taking over. Use any extension cord to use the outdoor outlet vs. an window open, or you could change the outlet cover. -
I missed this comment, yeah you're good. The two of us two engineers checking each other's work! 😎 Along with all the communicating members of our great OTT Forum! Team collaboration is the essence of problem solving! 😂 You'll have the leaf tie plates out again, so you can drill them on your workbench or vise. You're right, a Dremel doesn't work very well with heavy stock. You may have trouble finding a 19/32" or 5/8" bit. What I would do is get the plates in a vise, drill them through with the 9/16" bit and see how they may fit. Then in the correct direction push-n-pull the drill left-n-right while drilling to oval out the holes enough to smoothy fit your new U-bolts. The U-bolts come with HD washers so you'll be good. Get everything to fit well on the workbench before climbing under that trailer again! It keeps getting harder to kneel down and climb up off the driveway or garage floor. I will not lower myself with kneepads or a cushion and a steel milk crate to push myself back up on my feet! 🤣
-
I pride myself on being the engineer/mathematician! Obviously not this time! 🤣 You're right it's only a 1/16" diff which may be negligible. Drill to 9/16" and you may have to use a Dremel or something on the outside arc if it doesn't quite fit. I didn't need to do anything, except I steel-brushed and painted them, LOL! I had 9/16" U-bolts installed on D35 axles installed 10 years ago by OTT. I replaced them with new U-bolts of the same size. Did OTT really cheap out on this part?!? They upgraded from D35 to D52 axles while they downgraded from 9/16" to 1/2" U-bolts. This doesn't make sense at all! Dan, make sure you didn't miss the meaning of this statement.
-
Hello Ron, with the 2015 hull #99, very nice! 😎 There's not a plumbing diagram that would help. My understanding is if the waste valve is closed the pop-up shower floor valve really doesn't matter. If you want to replace it anyway, maybe somebody here knows the make and part number or inquire with OTT. You know, if you close the "back flow" valve when the Oliver nose is down, there would be grey water in the plumbing that would then come out when towing. Make sure your front jack is lifted when you're closing. We use the LevelMatePRO and always have our front up 1/2" or more when camped. We close the bathroom valve before releasing the jacks to tow. During travel, I use the kitchen sink to wash my hands to leave that valve alone. If you open the valve with the nose down with Grey Tank on the full side, water can back up to the plumbing under the shower that you may see later. Given all this, if it's still leaking on the shower floor, your waste valve could be jammed up, not closing fully. With the tanks empty, remove the valve and give it a good cleaning and lube. Under the front dinette seat, it's the 2" line at the top of the picture. The 4" is the black water drain and you might want to service that at the same time. The main Grey waste valve is under streetside bed, jammed against the floor where the two lower screws are VERY difficult to remove. I serviced ours last year since the pull handles were getting very hard to pull. This thread may be of interest. Best wishes, JD https://olivertraveltrailers.com/forums/topic/10711-waste-valves-restoration-and-upgrade/
-
Yeah, I must admit our Glacier NP trip was in June and during the Montana Centennial celebration, two good reasons to bring crowds of visitors. But it was 40 years ago! And it was our first experience visiting a western NP. Our Forum friend who just visited Glacier went at a much better time of year, when the kids are "back to school." 😎 Thinking of a Montana-Idaho trip next spring. We will want to see Grand Teton NP and Yellowstone on the way. If it's too crowded, we'll make it quick and then find great campsites to the north. Beautiful places that nobody has ever heard of! 🤣
-
I replaced the entire Oliver suspension: https://olivertraveltrailers.com/forums/topic/11055-full-suspension-replacement-alcan-spring-and-dexter-d52-axles/ The original D35 axles and the new D52 axles both were 3" dia. Also the OEM D35 axles had 9/16" U-bolts and wet bolts. So, no leaf plate modification was necessary. To be certain, I just measured. The old U-bolts measured .55" at the threads and .52" at the top of the U. If they were 1/2" bolts these numbers would be closer to .49". Here's what I mean. Given your leaf plates have 1/2" holes with a 3" spacing between the holes, when you drill out the 1/2" holes to be 9/16" the spacing between will then be 2 7/8". You have to create a 9/16" hole keeping the 3" spacing between. A simple hand drill cannot do this. Also CAUTION! In your picture, I see light between the leaf stack and your U-bolts. When you replace these with the 9/16" bolts, make sure the U-bolts are positioned straight up at 90 degrees and they must be touching the leaf springs when torqued.
-
StarLink mini with StarLink router mini.
jd1923 replied to 2008RN's topic in Mechanical & Technical Tips
Just realized this statement! That's a good idea which should protect the batteries. Please post a link if you believe you found a quality product. We haven't made the trip, so no real experience. I remember reading something on our Forum regarding pets. Our Springer "Charley" is 12 years old and his health records are not exactly up-to-date! Perhaps something to look into if you travel with pets.. -
Hey Dan, wow 1/2" U-bolts, really? I don't remember modifying the leaf plates! If this is true, you cannot merely drill 9/16" over the 1/2" hole because the space between the holes needs to be equal to the axle diameter. You'd have to have a decent drill press, clamp the plate down and drill the new holes off-center to the original holes. You could drill 5/8" holes instead, but that would be sloppy and I don't know about you but I have a couple 9/16" bits on hand but not 5/8" which would be an expensive bit to purchase these days. When I'm out at my shed this afternoon, I'm going to see what was on our hull OEM. I kept all the old parts to sell the suspension used if possible (figure there's got to be some guy in the neighborhood building a homemade ATV trailer). Cheap Dexter 1750 leafs and 3500 LB axles are not enough to carry the Oliver, but would be great for an ATV trailer (upgraded with Timken bearings)! 🤣 Here's the spec sheet Alcan gave me when I purchased my package in person. 90 ft-lbs for the 9/16" U-bolts, 80 for the end wet bolts and 65 for the shackle wet bolts.
-
StarLink mini with StarLink router mini.
jd1923 replied to 2008RN's topic in Mechanical & Technical Tips
Yeah, so far so good for us, but we also have the Dewalt leaf blower and it can empty a 5 Ah battery in 4-5 minutes big amps/blowing hard! Starlink requires a small load over a long period of time, so it should be easier on batteries. 😎 The 6 Ah Dewalts I bought 5 years ago were HD! The case could survive a shoulder height drop to a concrete floor, np but not anymore. Shop as wisely as you can. Hate to say it but the aftermarket batteries are half-decent at half price today. -
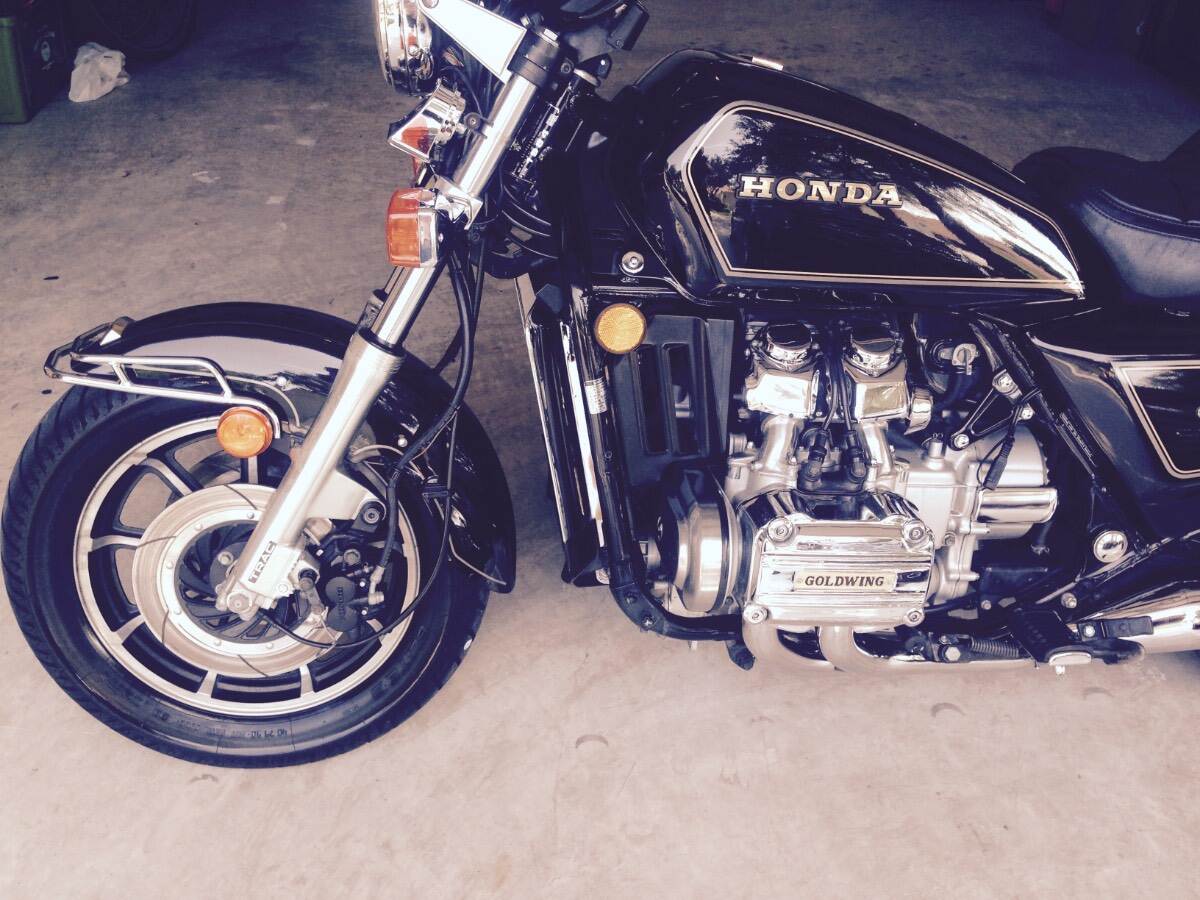
I’m on the Cummins forum, several Toyo forums for our Lexus vehicles, was in the Bigfoot Forum before OTT, the “Steve Saunders” Goldwing forum for many years (40 years with my classic 1984 GL1200 Standard), a forum for everything I’m working on or have worked on for years! (90% on the OTT Forum the last 3 years)! All the bragging guys write, “did it in 2 hours!” My answer is “BS!” If it went so quickly, you didn’t do it right!
-
U-bolts or wet bolts? The U-bolts MUST be 90 ft-lbs MIN, 100 would be good, but not more. IMHO, the Alcan torque numbers for wet bolts are more than high enough, I went about 10 ft-lbs less on these. The original wet bolts were shoulder bolts where regardless of torque, the shoulder allows play on the leafs so the suspension can move nicely up and down. Certainly do not over torque these or the leafs may bind on the bolts which could cause the tires to skip and bounce. Before I did our major suspension install, I had no idea! Our OEM suspension was barely hanging on! Like it was never torqued in so many years! 🤣
-
I spent a lot of time making sure the leafs were in line, square / plumb front to back, before mounting the wet bolts. Actually, I did this on my garage floor prior to mounting new axles, but you’re doing springs only. If you feel they’re not square, what I would do after you’re finished is get somewhere on a big flat level parking lot, loosen all U-bolts (somewhat) and the wet bolts with no torque at all, drive 100 ft or more steering wheel straight ahead! Then re-tighten the U-bolts first, then torque the wet bolts. Ya think the “Professional”installers would worry about this? I love Alcan and everybody I met who works there. But when you get this job done in 2-3 hours, you get what you got! 🤣 I spent 3-4 days fussing over our new axle and leaf spring installation. Was watching the tires over speed bumps the other day. This suspension is a moving work of art! Back home, time to torque again! 🤣