Leaderboard


Popular Content
Showing content with the highest reputation on 07/28/2017 in all areas
-
Just in case anyone is headed to the Cape Hatteras/Outer Banks area, please be advised. 10,000 vacationers ordered off island. http://time.com/4877991/outer-banks-north-carolina-power-outage/2 points
-
Problem corrected, discovered the trailer cord plug was corroded on the inside of the connector; looked great on the outside. Replaced plug, this appears to have corrected the issue.2 points
-
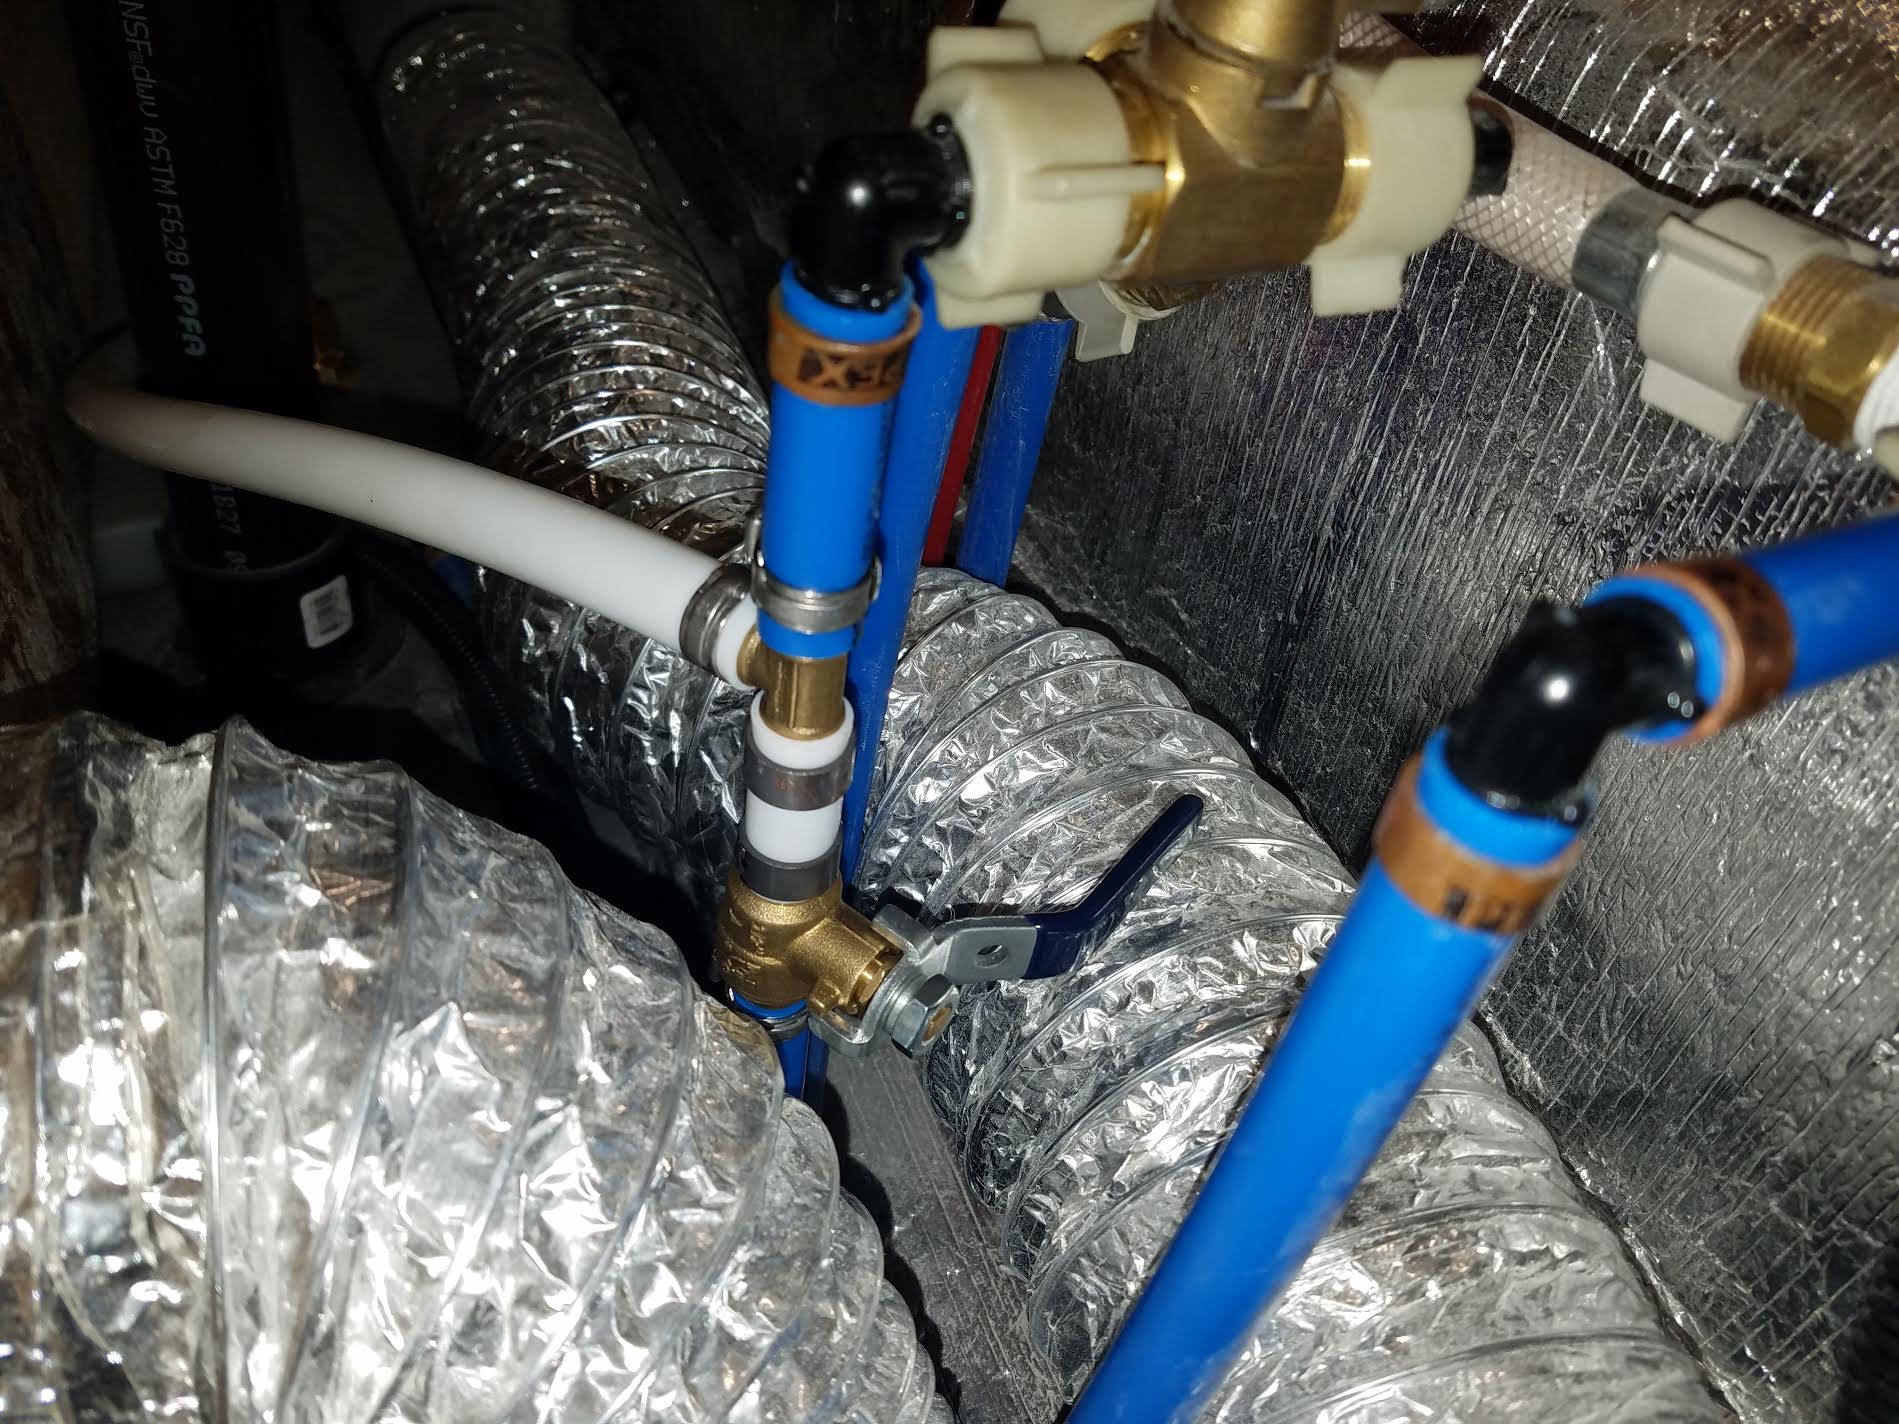
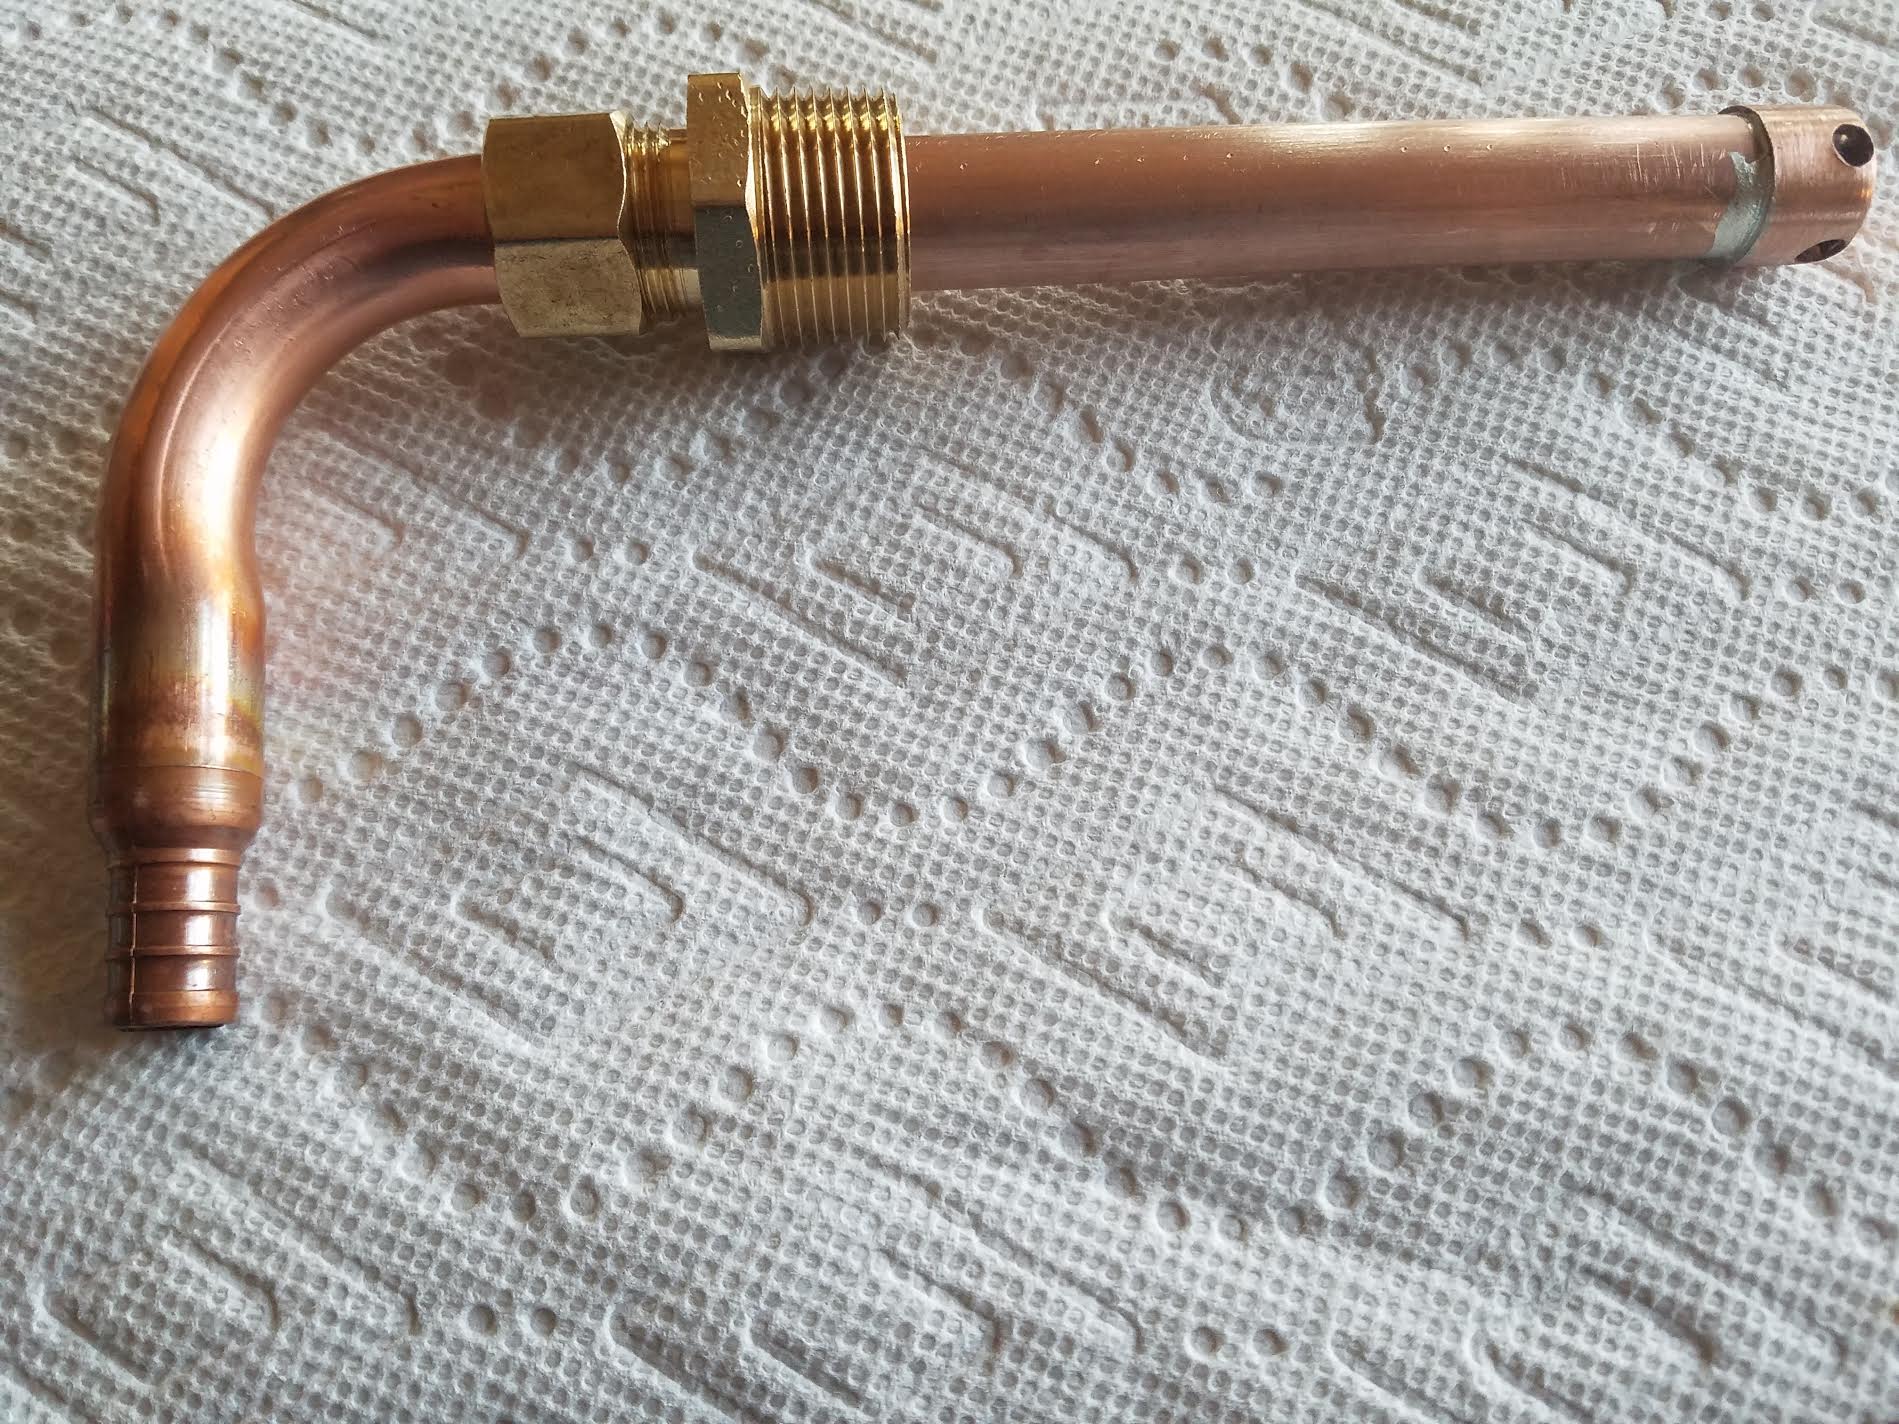
With all the talk lately about not being able to access all of the fresh water in the tank, I decided to make a new suction line and improve the situation. The stock line on mine will only draw water down to about 1 1/2" deep before it begins to suck air. In a 35 gallon tank that is only about 4" deep, this means about 1/3 of the water is not available, or about 11 or more gallons left in the tank. The stock pickup is on the side of the tank and cannot get all the water. So I made a top fitting that goes down and picks up the water at or below 1/4" from the bottom. When I started the installation I leveled the trailer and ran the water until it began to suck air. Mine did that at a reading of 25% on the gauge. If the front of the trailer is raised some, which I did not do, the reading would still be the same when the pump sucked air because the gauge reads right next to the pickup. You could get more water out of the tank with a raised tongue, but the gauge reading would be the same when it sucked air. After I installed the new dip tube, I continued to draw water and it began to suck some air at 6%. So, mine went from 25% (approx. 8 gallons left) down to 6% (approx 2 gallons left) when it began to get some air. Others have reported as much as 38% remaining which would be over 12 gallons. At a 6% reading I began getting aerated water, but a steady flow. Finally, the gauge went to 0% left. At that point is was about 1/2 water and 1/2 air at the faucet, but still flowing, or spitting. But even with a zero on the gauge it continued to pump out another gallon or so before I shut it off. All of this with cold only, not water drawn from the water heater. So, the volume from 6% to 0% was totally useable, probably not for a shower, but certainly for drinking. This is a prototype that works well, but it might still improve a bit with the next one. The pickup touches the bottom of the tank, but draws radially from below 1/4". It adjusts to any small differences in various tanks. It can be pulled out and cleaned easily if debris ever clogs it. All plumbing connections, where the new line ties in, are easily accessible and the existing tank fittings are not touched. The stock tank drain is retained. The area of the tank where the new fitting is installed is easily reached and the tools to do it all fit in the available space. After clearing all of this with Oliver to make sure there is no conflict with forum rules or warrantee issues with them, I can send anyone that wants to do this, a kit with the following: the pre-made dip tube fitting, a Polyethylene tank fitting, the special spin weld fitting driver, a 1 1/2" hole saw (if needed), the pinch ring tool and a PEX cutter. I'll also provide step by step directions for anyone who is interested. You'll have to have a powerful router with a 1/2" collet and a drill to drive the hole saw. Or, I can help you with a set of directions here on-line and you can assemble the parts yourself. The parts required are: (1) dip tube assembly, (1) 3/4" spin weld fitting, (6) 1/2" PEX pinch rings, 24" 1/2" PEX, (1) 1/2" PEX ball valve, (1) 1/2" PEX tee, a small container of Rectorseal 5. The only real tricky part is the spin weld. Besides the special procedure for spin welding itself, you have to make a new hole in the tank and vacuum out the chips. Here are some pictures:
 1 point
 -
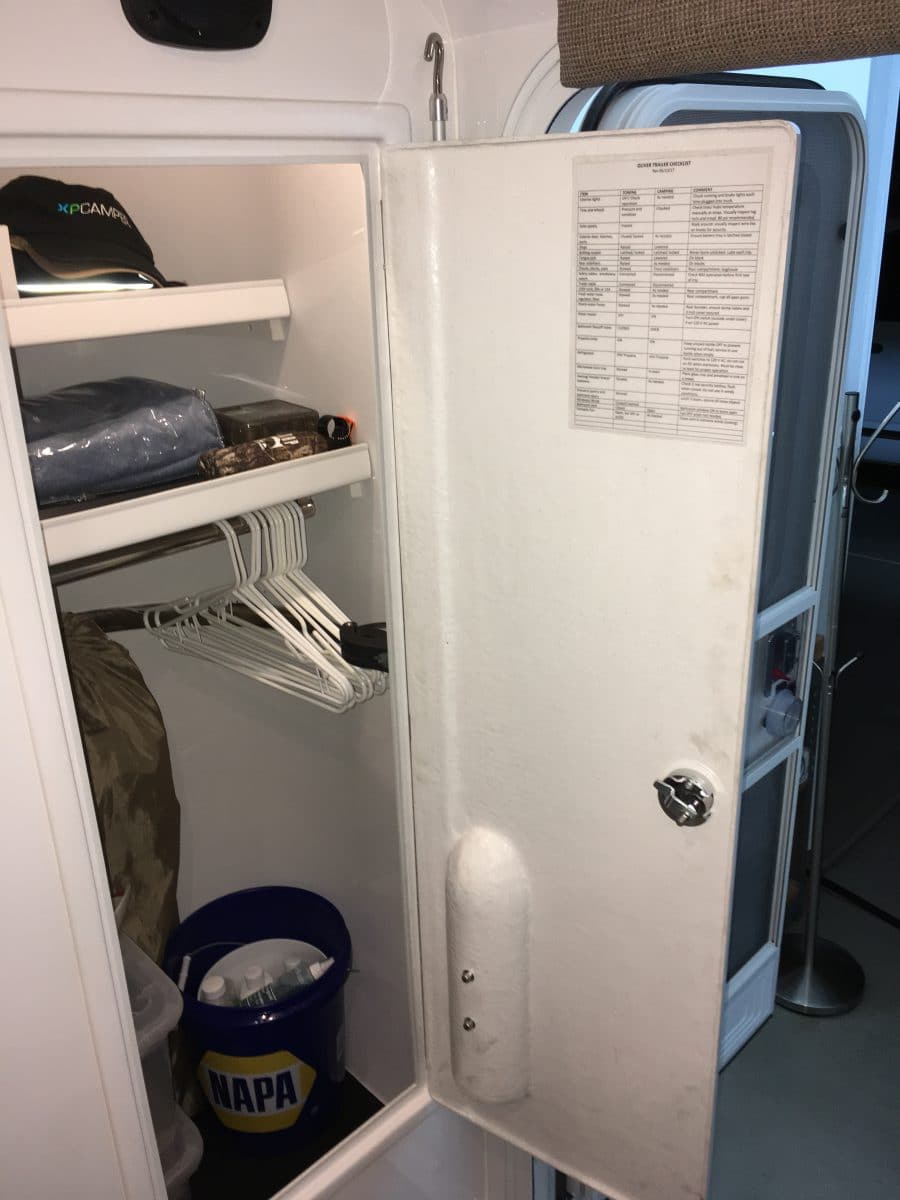
I personally would be very reluctant to hang much inside the door. Anything heavy stresses the hinge and latch in ways for which they were not designed, and anything bulky like a coat will seriously be in the way when you are accessing the inside. Plus you could bonk your face on the hook when leaning down.... The only thing I hung inside mine was my personal checklist. Not shown in the pic, I do have three 1 inch Command clips inside for my CaneMasters cane, the broom and the dust pan, stuck to the side walls.... plus there's my shotgun rack, which is currently and temporarily holding the leaf rake and the fly swatter. JohnDavies Spokane WA
1 point
-
The entire door is fiberglass, it's just that with way the door is molded, there is no way to gelcoat the interior, therefore no "slick" surface on that side. To dress it up the company paints the back side. This is just like what is applied to the inside of the cupboard door and the underside of all the hatch lids and the table tops. I'm quite sure you can glue a hook to it, although as thick as it is, I would just attach it with screws.1 point
-
Dave, The pipe dope is Rectorseal #5. Good for plastic or metal and never hardens to a brittle state. Also, one wrap of Blue teflon tape on the threaded fittings. So, Rectorseal, one wrap of teflon, and than more rectorseal. The brass compression fitting gets some dope on it to, just to lubricate the threads and help seal the ferrule. Then less torque is needed on the nut. John (Raspy)1 point
-
That's great Reed. I'm really glad this whole idea of the pick-up tube has worked. Really nice work, and I truly hope Oliver carries this forward, because it really is an important design issue. I have access "obstacles" in my Elite that you don't have in your Elite 2. My hot water tank pretty much covers the back end of my fresh water tank. So in order to spin weld a fitting on the top of the FWT, I need to first remove the HWT! ughh. I am still hoping that somehow I can insert a bent tube inside the original outflow fitting, and letting it rest on the tank bottom. I'm waiting to hear what Oliver comes up with. What was the pipe dope you used? Not seen that before but I'll get some when I dive into this. Thanks again for bringing this all to light again. Dave1 point
-
Hi all.....I'm sorry that some owners have had issues with their Olivers, I'm sure it's been heartbreaking but I do believe that the Oliver team will take care them, learning from their issues and helping all of us. We will be picking our Ollie up the 31st of the month. I know I've build up some high expectations after lurking these board for so long but I'm also a realist & aware that nothing is perfect. Even the most expensive motorhomes have problems! It's how those problems are addressed by the manufacturer that makes the difference. From what I have heard here and at the rally, the Oliver company truly cares about their owners and goes out of their way to take care of problems, regardless of whether they are on warranty or off. To me, that says it all. They may be having some growing pains but they'll get it all worked out, I'll bet on that! Clair & I started started out, many years ago, with a small pop up trailer. I really loved it and we had so much fun! Clair broke 3 fishing poles that he'd tucked inside when he pulled the beds out during a rain storm one night. He was not a happy camper. We moved on from that unit to a small 5th wheeler that we pulled with an under powered & very old Dodge truck. That was interesting & quite funny at times, to say the least. I enjoyed the 5th wheeler but Clair hated the siding on it. It was far to difficult to keep clean and drove him crazy with black streaks....so we moved on to a small Class C. That one was a big mistake, we both hated it! So, that was traded for a larger Class C that we lovingly named "Big Bertha". For some reason, it didn't suit us for very long but it was nice when we were showing our dogs. From there we moved on to a Titanium 5th wheeler that turned out to be a wonderful unit but we had to let it go with the economic downfall. I kept telling my husband that I wanted an Oliver when we retired because I wanted something small, easy to travel with, and easy to clean but we had a few years to wait for that. A couple years ago we decided it was time to start camping again. We wanted something small so we ended up with our 26 ft. Rockwood. It's OK but doesn't meet up to the standards of any of our others and it's got constant nagging little issues. Just little things but it's always something. On our last trip a weld broke on one of the supports holding up the gray water tank. We had cars & trucks flagging us down on that one...sparks flying everywhere. I'm very happy that we chose to go with the Oliver Elite II. I know that we will be happy even if we do have a few minor issues here and there. We want this one to be our forever trailer. There are so many things to love about the Oliver! I know it's not for everybody but it's definitely for us. We can get the same experience we had when we were in our pop up living in a classy, easy to clean, modern Ollie. I am getting so excited, can't you tell!? I have all of the bedding made and I've been pulling together the basics for inside, trying to keep it as simple possible. Clair has everything prepped for outside. Just a few more days guys and we will be part of the Oliver family! Smiles....Kathy1 point
-
My standard Elite I quote was based on our required options. Point being that though the trailers are fantastic they are not inexpensive. Hard to argue that point.1 point
-
John, Remember, there is no glue that works on polyethylene. It's inert and that is why it has to be welded. So with any mechanical connection there must be a gasket, or thread sealer or something. Those deck plates have a small O ring and the tank is flexible. Screws would have to go clear through and be nutted. Not a reliable system for a poly tank. I'm not sure there's room to get it in there either. Maybe. I'll look later with that in mind. I'm not confidant that it would hold the sloshing impact of the tank water. If so, and you could get your hand in there , it would be a way to install a bulkhead fitting for the suction line. I don't think I'd trust it. Another way to gain access later would be to install a 1 1/2" spinweld fitting and then bush it down to 3/4" for the new dip tube. Later, if needed, the bushing could be unscrewed to give a large enough hole to get a vacuum hose in. As far as renting/lending the tools, etc. I'm not doing any commercial stuff till I discuss it with Oliver so as to not conflict with their forum rules. It might be possible to rent the stuff and each person do their own work, but that seems unlikely. It might be possible to do the mod at a rally. Who knows at this point. It is definitely a good fix though. It works and it retrofits fairly easily.1 point
-
Pete, Oliver hasn't responded to my phone message yet. I called Jason to talk to him about this, but missed him and left a message. Bu,t they did say, in their open letter, that they were going to hire an "expert" to solve this issue. It's really just a common sense approach to an obvious problem and probably the way they should all have been made. Normally, the side outlet they install would be fine if the tank was a tall narrow design, or had a sump in it. But with a flat tank, the side fitting leaves about 1/3 of the water trapped in the tank. This method completely solves the issue and the fitting can be easily pulled out if needed. Plus it leaves all of their existing plumbing in place and is installed in such a way that is easy to reach. The original tank drain is extremely difficult to get at, so any new fitting that would go through that hole would be so hard to install. I looked at it, but it's not practical to do it that way, plus, no matter what new fitting I designed to go through the existing hole, it would not pick up reliably below 1/4" like this new design does. It took a while to figure this out, assemble the parts, make the prototype and do the first installation with the spin welding procedure, but I think it's the right fix.1 point
-
Thank you Oliver for addressing this thread directly! I have been out of touch for the past 2 weeks and was taken by suprise at all that has been said here. I can say that Oliver hands down beats Casita and Bigfoot in quality! I have owned all 3. We thought we would buy an Airstream or a larger stick built for our next trailer. We even bought a new truck with the power to tow whatever we choose. But after looking at Airstream and a few high-end stick builts, the construction quality was visibly and obviously lacking in them (sorry Airstream, in my humble opinion, you aren't what you use to be). After we toured the Oliver factory we knew we had just seen the BEST travel trailer made in the U.S.. We ordered one and are very happy with our decision and our new Ollie. Are there things that need improving, yes! Were there a few problems on delivery, yes! There always are. The difference is Oliver is commited and stands behind their product 100%. They still have people working for them, not robots. And guess what, people sometimes have bad days or make mistakes are miss something. Tell Oliver! Give them feedback directly. Give them a chance to address it in the production line. Changes take time to implement. And Oliver, you need to post earlier if something does come up on the forums and tell us what you are doing to address the problem! I, for one, don't have the skills to fix the problems myself, but I do trust Oliver and believe they are commited to making things right and will, given time. I have seen it first hand.1 point


-
Recent Achievements
-


")


")


")
