Leaderboard



Popular Content
Showing content with the highest reputation on 01/02/2019 in all areas
-
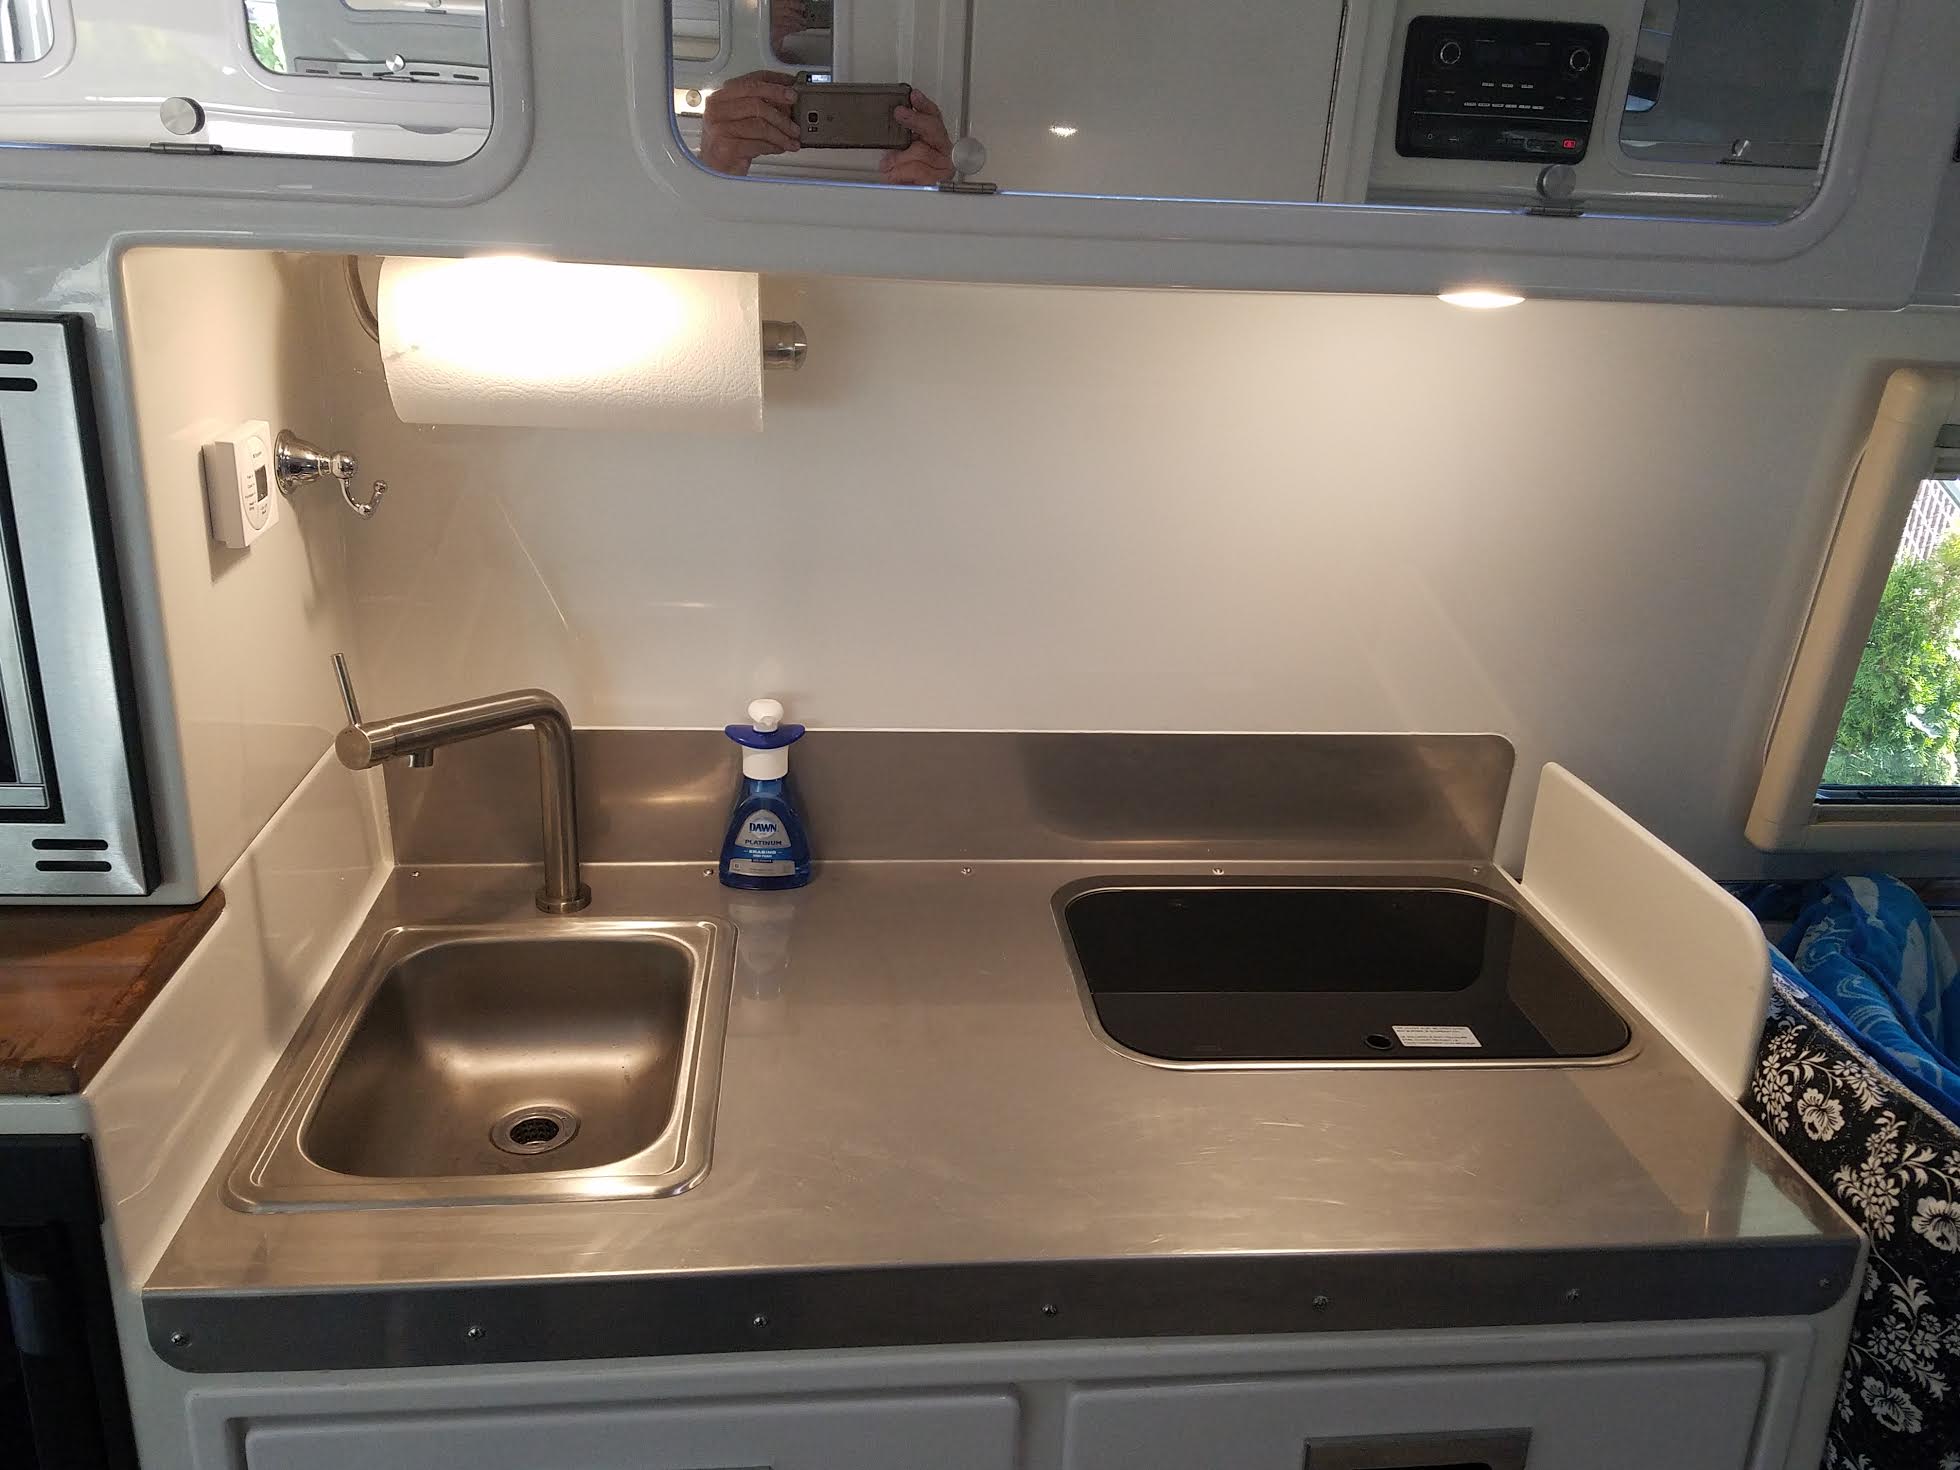
I installed a small wall made of Corian that blocks sliding pans, or some splashes. It works well while making coffee in the morning while someone is still sleeping in that spot and never gets in the way of sitting there propped up. There will also be a flip-up counter extension beyond the Corian. Not there yet. For extra counter space, I switched to a new microwave that allowed me to also include a wine rack and utensil storage in the same cabinet. The whole front cover folds down to become a work surface of a bout 22" by 16". It's very strong and right next to the sink, in front of the new microwave. I'm installing the catch system now and finishing the trim work. Pix soon. Here is the Corian "wall".
 2 points
 -
I painted the back of ours, then covered that with some black vinyl to protect the paint. Looks like a chalkboard because of the matte finish of the plexi. I’d post a pic but it doesn’t really come through in a photo. At first I thought it looked out of place with all the gloss finishes in the trailer, but I decided to live with it for a while to see if it will grow on me. I’d prefer to put a mirrored door there but my wife objects. If I don’t like the look after a while, then I'll ask Oliver if I can get one of their black doors. By the way, if you spray paint it and don’t like it, you can take the paint off with acetone and it won’t hurt the plastic, so it’s reversible with a little effort and time. I’ve considered repainting mine with silver paint to see what that looks like. Also, for those of you who have mirrored doors, the vinyl trick works well on those to protect the mirror finish.1 point
-
Piggy backing on Steve’s assumption of the translucent doors you could try some cling type window film. Or go really low tech and tape an old shoe box lid over the breaker panel. https://www.amazon.com/dp/B0725G9KS2/ref=sxts_kp_bs_1?pf_rd_p=8778bc68-27e7-403f-8460-de48b6e788fb&pd_rd_wg=xgUW9&pf_rd_r=JXDABXDFKB5RZJZJNHB5&pd_rd_i=B0725G9KS2&pd_rd_w=QW0ZZ&pd_rd_r=23a27c43-3f73-4b38-84c8-1ea78f084cf5&ie=UTF8&qid=1546363365&sr=1 Have fun, Mike1 point
-
Apparently you have the translucent doors? The other three options (black, white and mirrored) don’t have that characteristic. The only solution would be to change that door’s ability to transmit light. You could paint the backside!!!1 point
-
IMPORTANT TECHNICAL SERVICE BULLETIN : 1ZP-K8A2M-11 IMMEDIATE ACTION REQUIRED CLICK HERE TO VIEW AND PRINT A PDF VERSION ISSUE Potential for Sub-Optimal Grounding through Tow Vehicle Connection MODELS IMPACTED 2014 – 2015 Oliver Legacy Elite and Elite II models. INFORMATION Oliver Travel Trailers was alerted that some trailers produced during 2014 and 2015 may experience degraded braking due to a sub-optimal ground through the ball connection when an optional anti sway hitch is installed. During the affected model years some Oliver models relied upon providing a ground to the electric braking system through the connection between the tow vehicle hitch and trailer frame. This usually provides sufficient grounding capacity for the brakes to operate normally, however, a better method of grounding the trailer would be to provide a grounding bond through the 7-pin ground wire to the trailer frame. To our knowledge as of this writing, no person or equipment has suffered injury or loss due to this condition. RESOLUTION Owners with impacted year models should have the camper checked to ensure that the camper has a good bonding ground through the 7-pin connection. Inspection and corrective action are only to be performed by qualified service technicians. For assistance in locating a qualified service technician or for any questions regarding this Technical Service Bulletin, contact the Oliver Travel Trailer Service Department using the information provided. TESTING PROCESS FOR DETERMINING WHETHER OR NOT THE CAMPER IS PROPERLY GROUNDED THROUGH THE 7-PIN CONNECTION 1. Using a multimeter set to Ohms to test for continuity, connect the red lead to the 7-pin ground connection. Connect the black lead to the frame directly behind the bulldog coupler. 2. The multimeter should display 0 and beep or light up based on the type of multimeter, showing a complete path and proper bonded ground with the travel trailer frame. 3. If the multimeter displays a 0 and beeps or lights it means the frame is properly bonded with the 7-pin ground wire, no further action is required. Please fill out the inspection reply card and mail to the address below using the postage provided return envelope. 4. If the multimeter DOES NOT beep and displays (OL) it means the circuit is open. In this case the ground is only being provided by the connection between the trailer hitch and ball. This is an approved method of grounding however when an optional anti sway device is installed this ground could be less than optimal and could lead to degraded brake operation. To ensure optimal connectivity please proceed to the corrective action steps below for bonding the trailer frame to 7-pin ground. Corrective action steps should be performed by a qualified RV service technician. For assistance in locating a qualified RV service technician or for any questions regarding this Technical Service Bulletin, contact the Oliver Travel Trailer Service Department at 866-205-2621. POTENTIAL ITEMS NECESSARY FOR CORRECTIVE ACTION These items should be commonly available at qualified RV service centers. 3-Port Connector Wire Strippers Flat Head Screwdriver 12ga. White Wire (Cut to Length) Butt Splice, if required to lengthen ground wire for proper connection RV SERVICE CENTER LABOR TIME GUIDE Perform Test, Ground Good: 0.5 hrs Labor, No Parts, No Shop Supplies Perform Test and Repair Ground: 1.0 hrs Labor, $5.00 in Parts, No Shop Supplies *Warranty repairs are not subject to Sales & Use Tax For payment or assistance please contact the Oliver Travel Trailers Service Department at 866-205-2621 or via email at service@olivertraveltrailers.com Please fill out the mailed inspection card and mail using the postage provided return envelope or click here to fill out the online inspection card. If the inspection and corrective action has been preformed by a third-party qualified RV technician, please include a copy of the receipt for reimbursement. CLICK HERE TO SUBMIT AN INSPECTION REPLY FORM1 point
-
I had a hard time pairing my phone to our Furrion. I have an iPhone and the older Furrion, but maybe this will work for you. When I tried pairing I got the same kind of message you did. On our Furrion if you push the on/off button it goes into a sleep mode, dim lights. If you push and hold it goes completely off. Once I completely powered down and then turned it back on it paired easily and has stayed paired for years. Now, whenever I turn on the Furrion it automatically starts playing whatever I last had going on my phone. Worth at try. Mike1 point
-
I've never forgotten to place my chocks, but I have tried to drive away with them still under the wheels. That doesn't work too well. I bought some of these for the chocks to remind me.1 point
-
So, I'm sometimes overwhelmed with nostalgia when a poster resurrects my 10 or 11 year old post. Thank you for that. Herm and pete and i have camped together many times, since then, but we all met here.... The rock guards have worked pretty well for us, but we don't spend all our time on gravel roads. We have had a few small chips repaired. Im totally envious of johm davies stome stompers. Someday, a US company will import them. In the meantime, if you do a ton of gravel, at road speed, look at foam guards or vortex, something else in addition to the rock guards or road wings. Btw. Costco no longer carries our removeable big mud flaps, but you can get them on amazon and other sites. For a higher price, of course, as my original info is over 10 years old now.... Sherry1 point
-
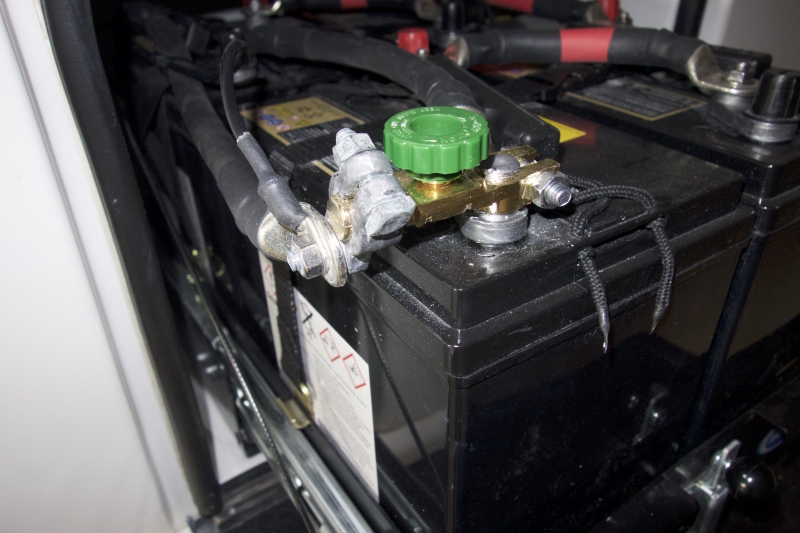
I used this Battery Disconnect switch: https://www.amazon.com/NOCO-ID220S-6V-24V-Battery-Disconnect/dp/B006EH9WUC So far so good...
1 point




-
Recent Achievements
-