Leaderboard




Popular Content
Showing content with the highest reputation on 04/14/2020 in all areas
-
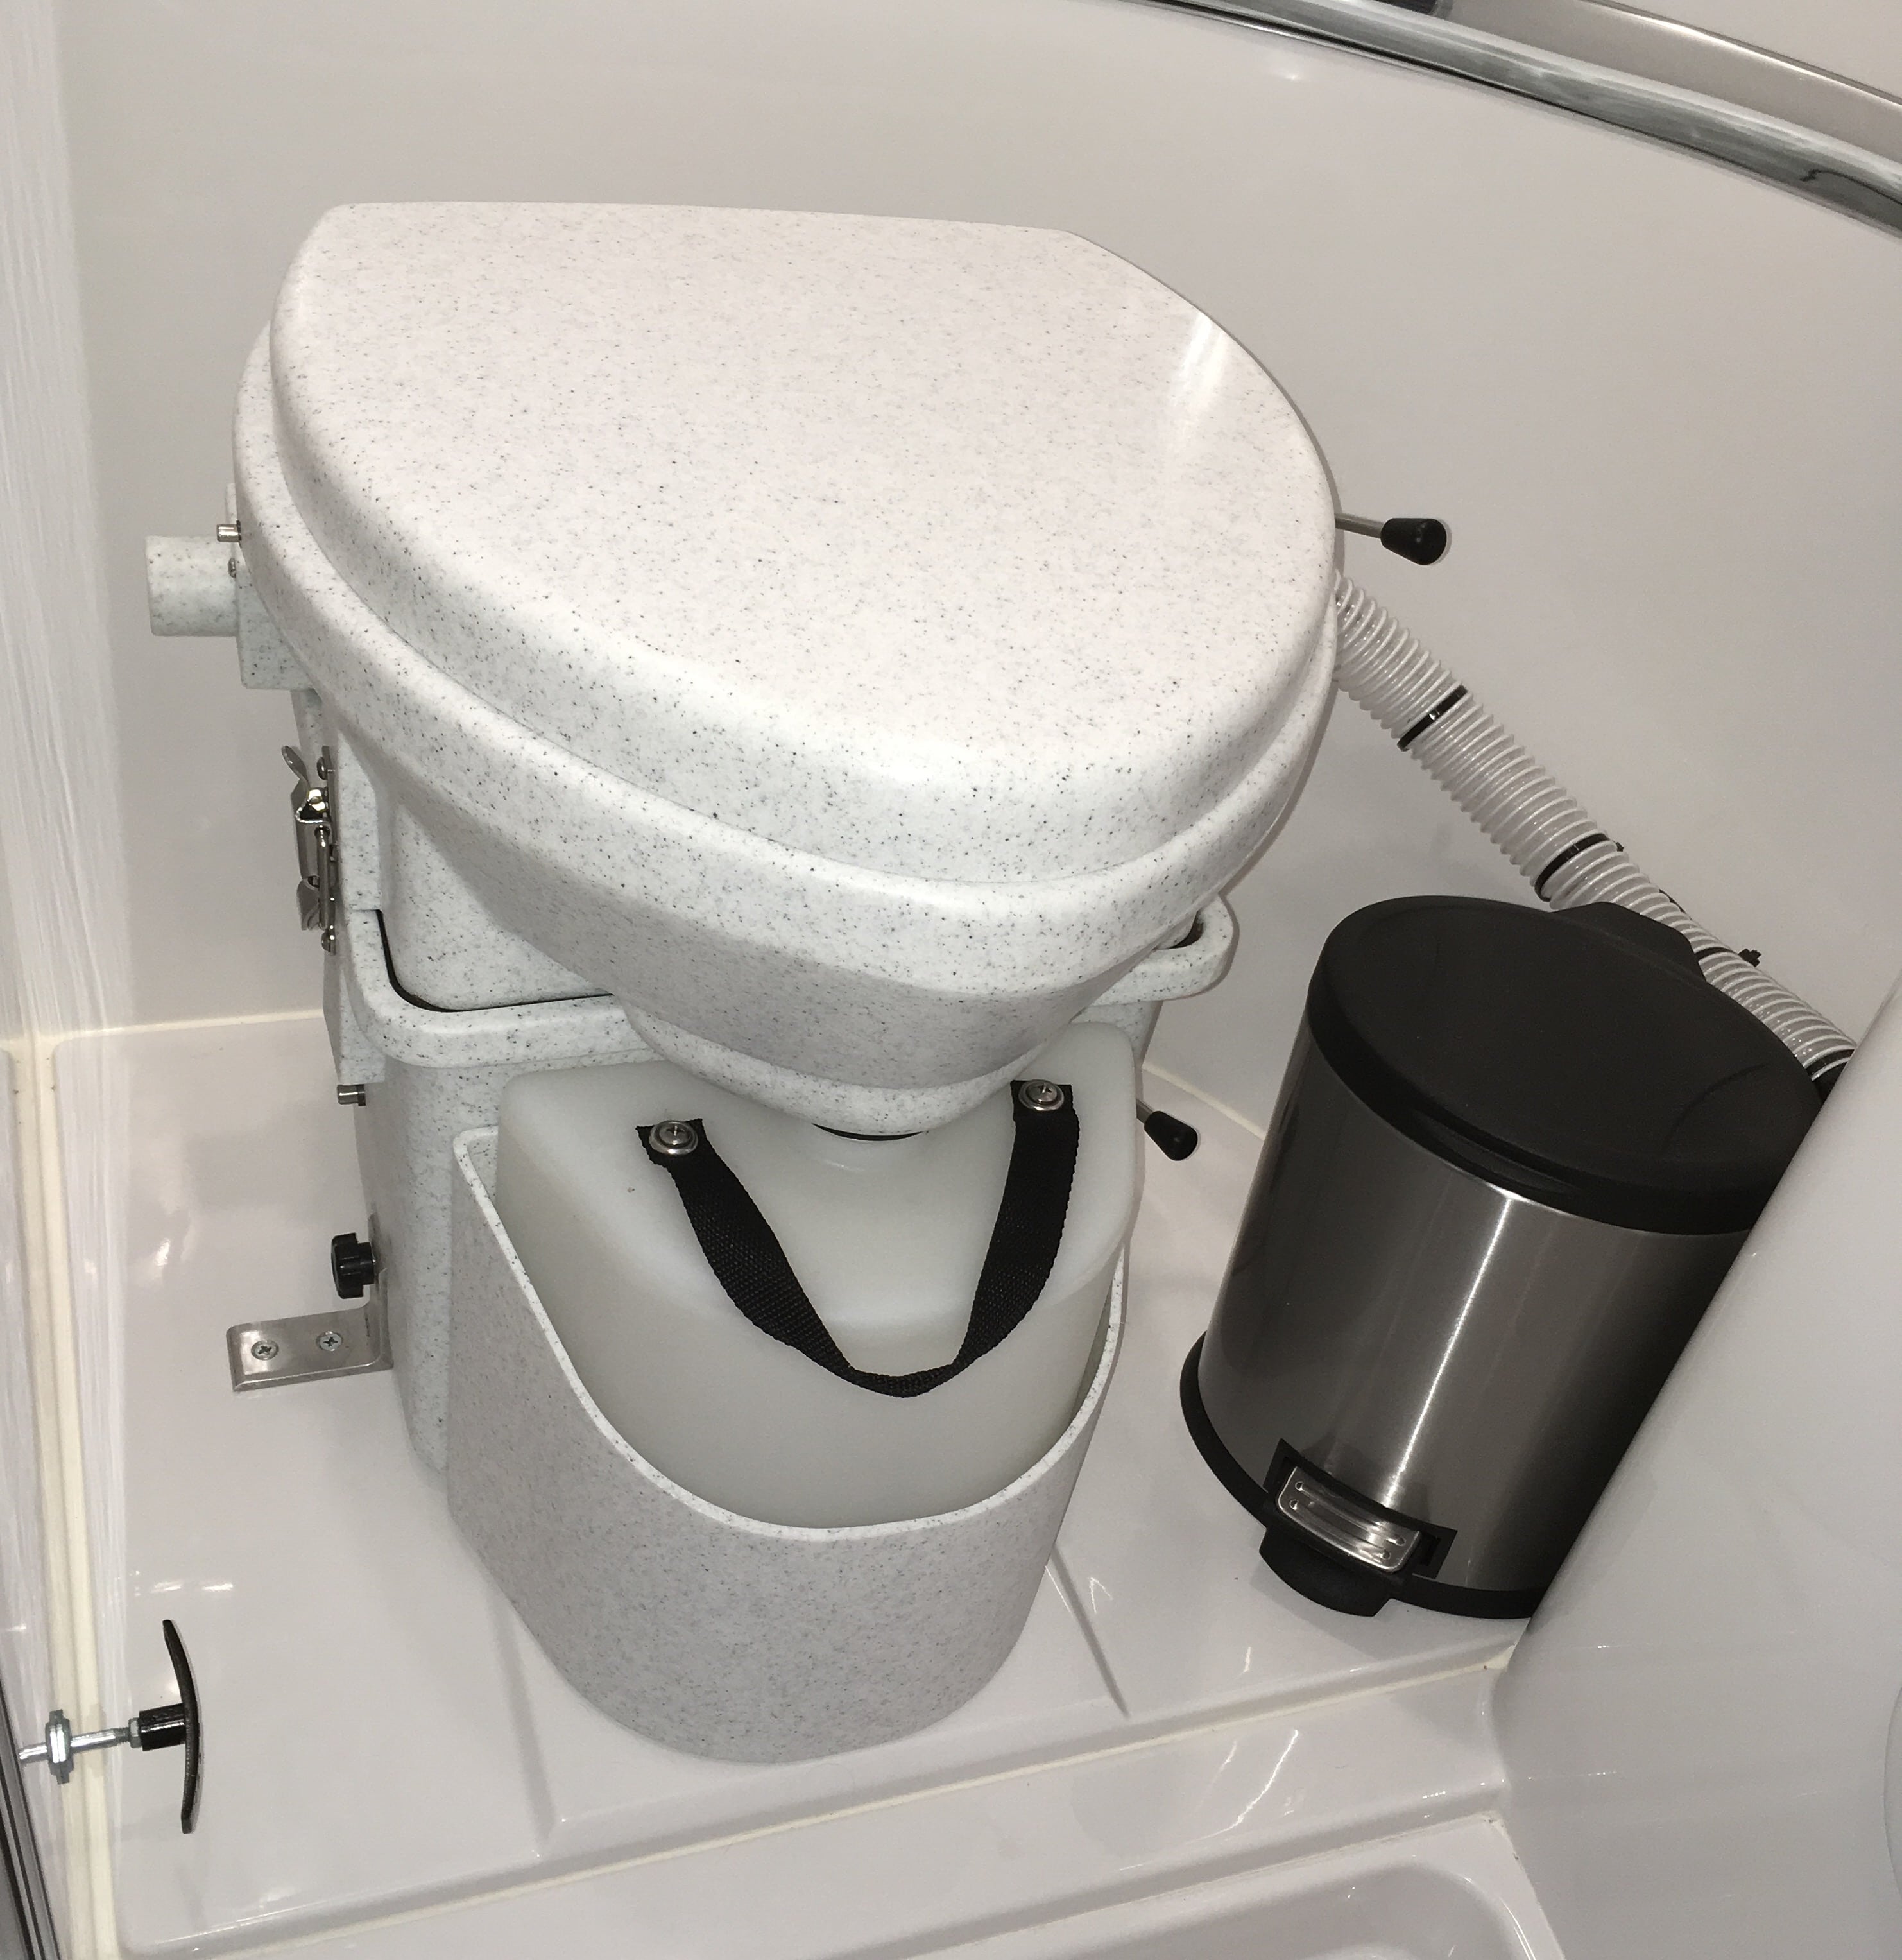
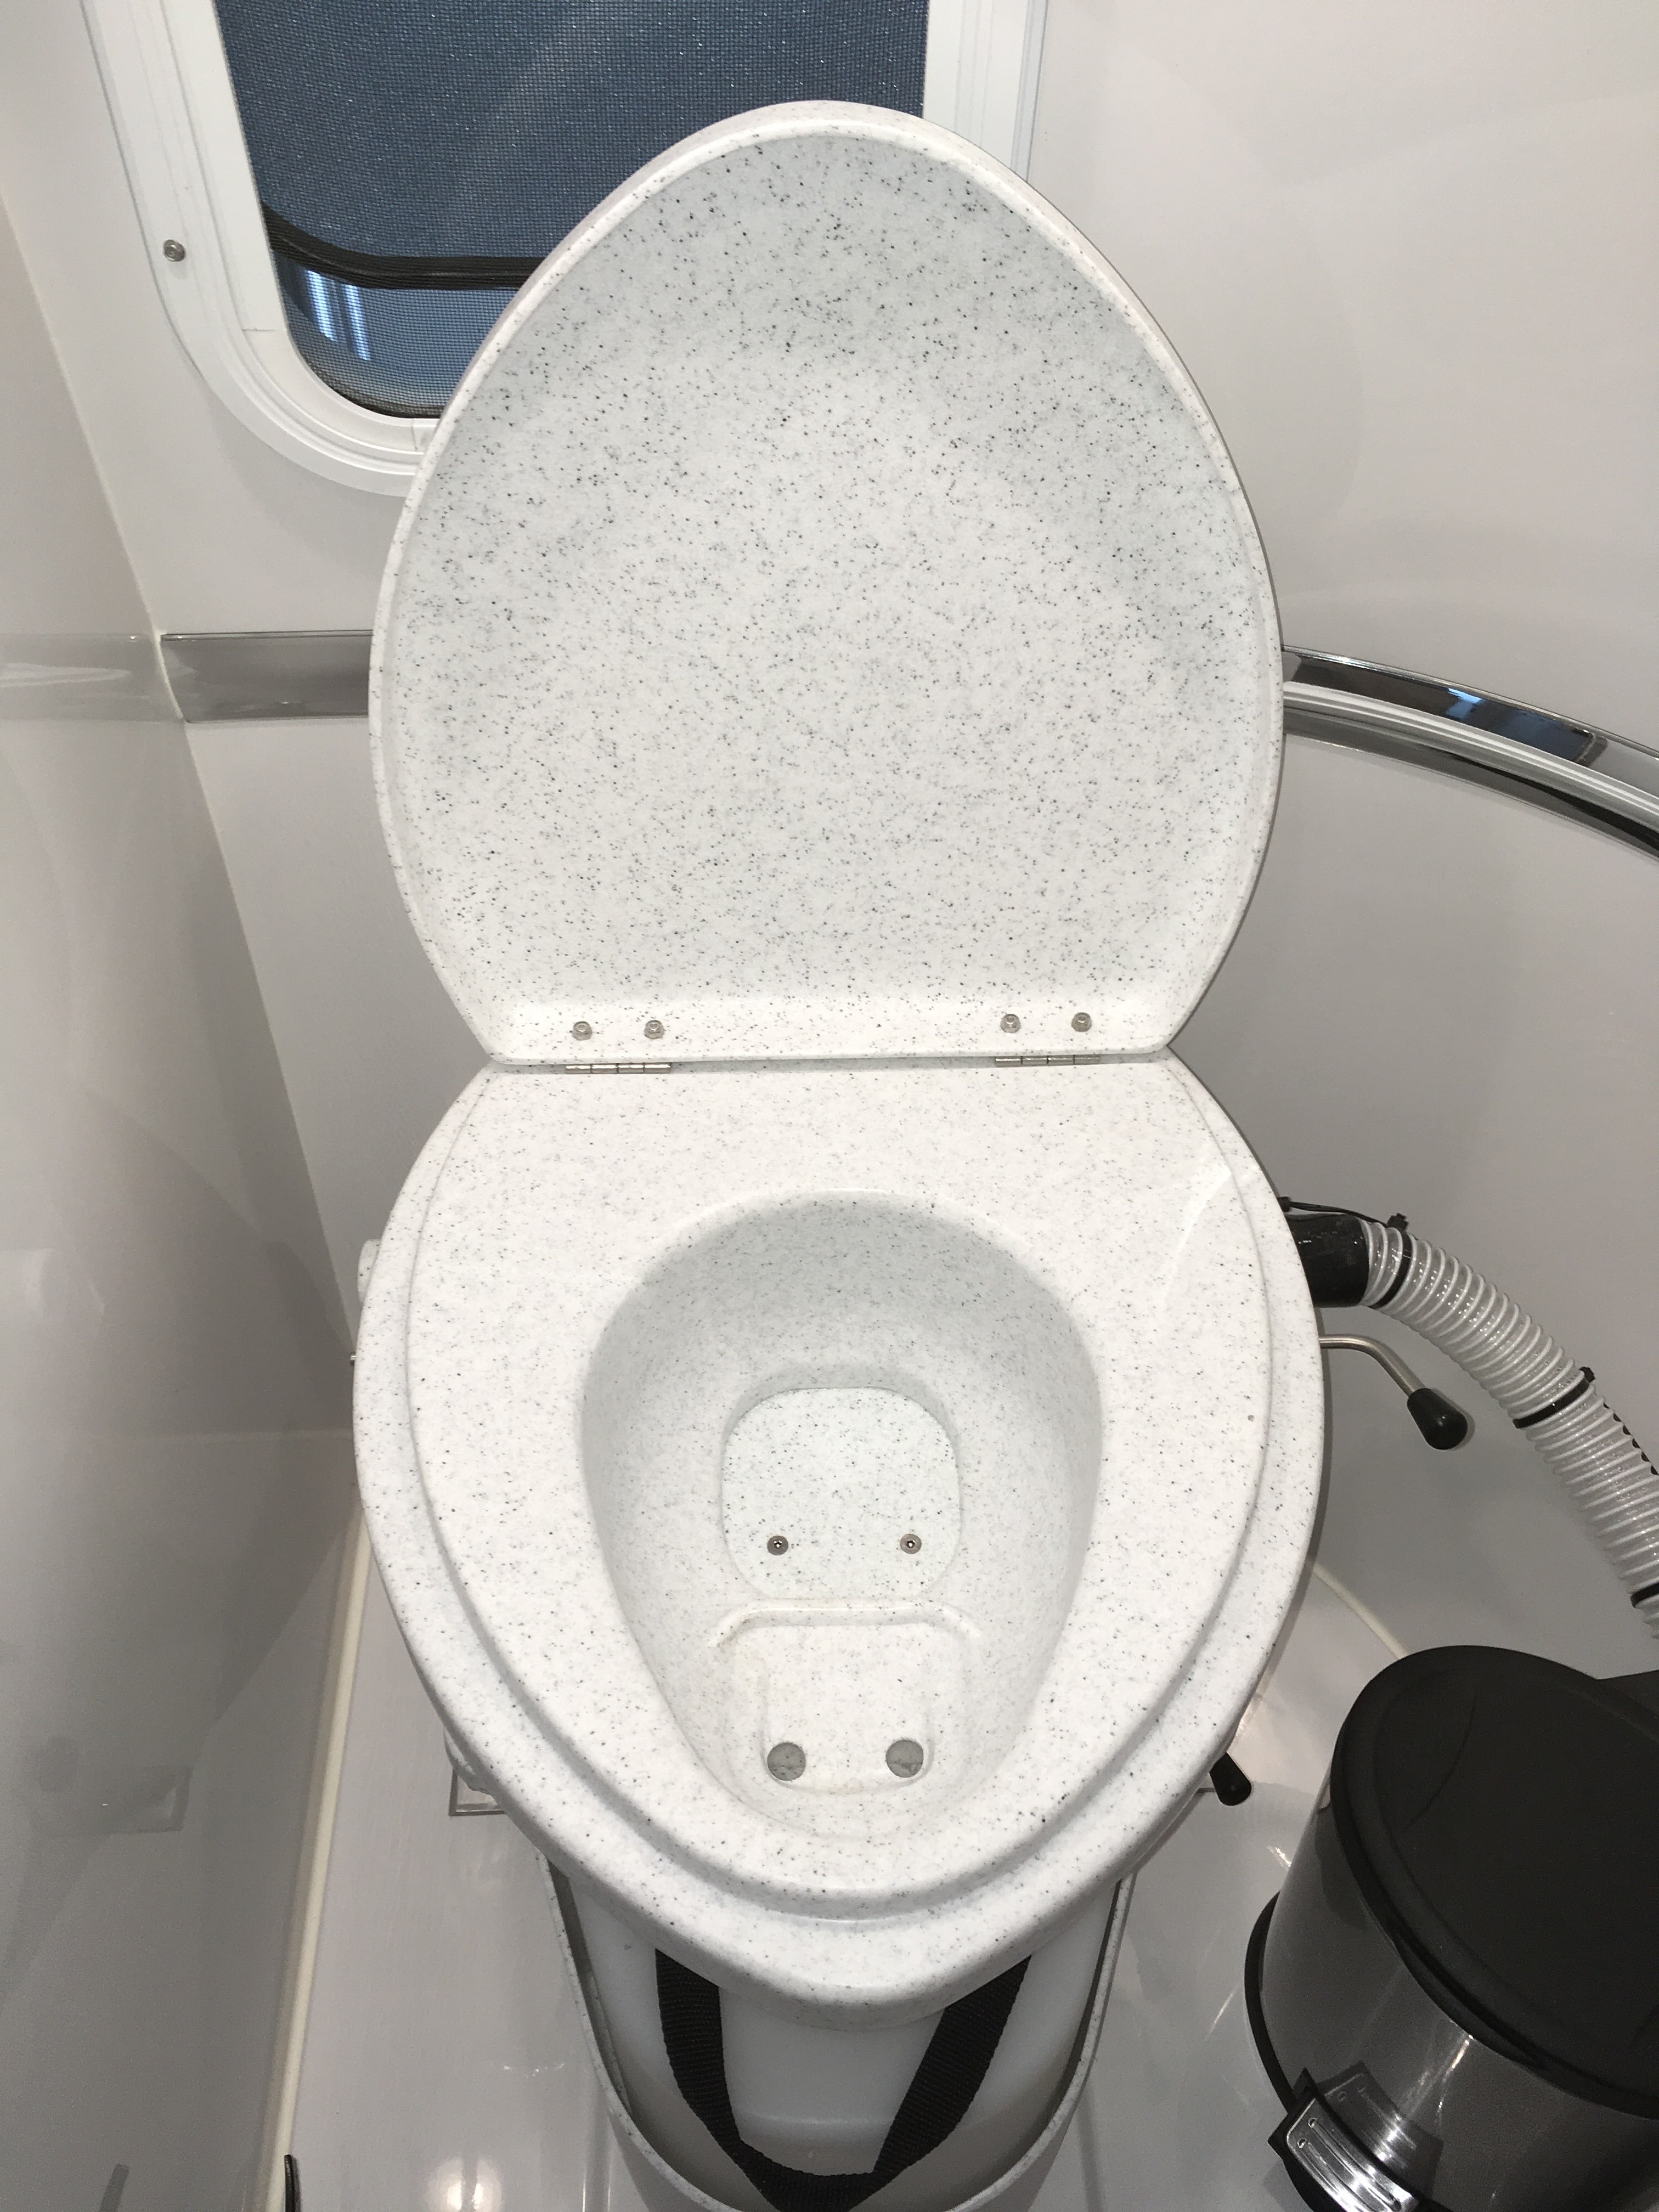
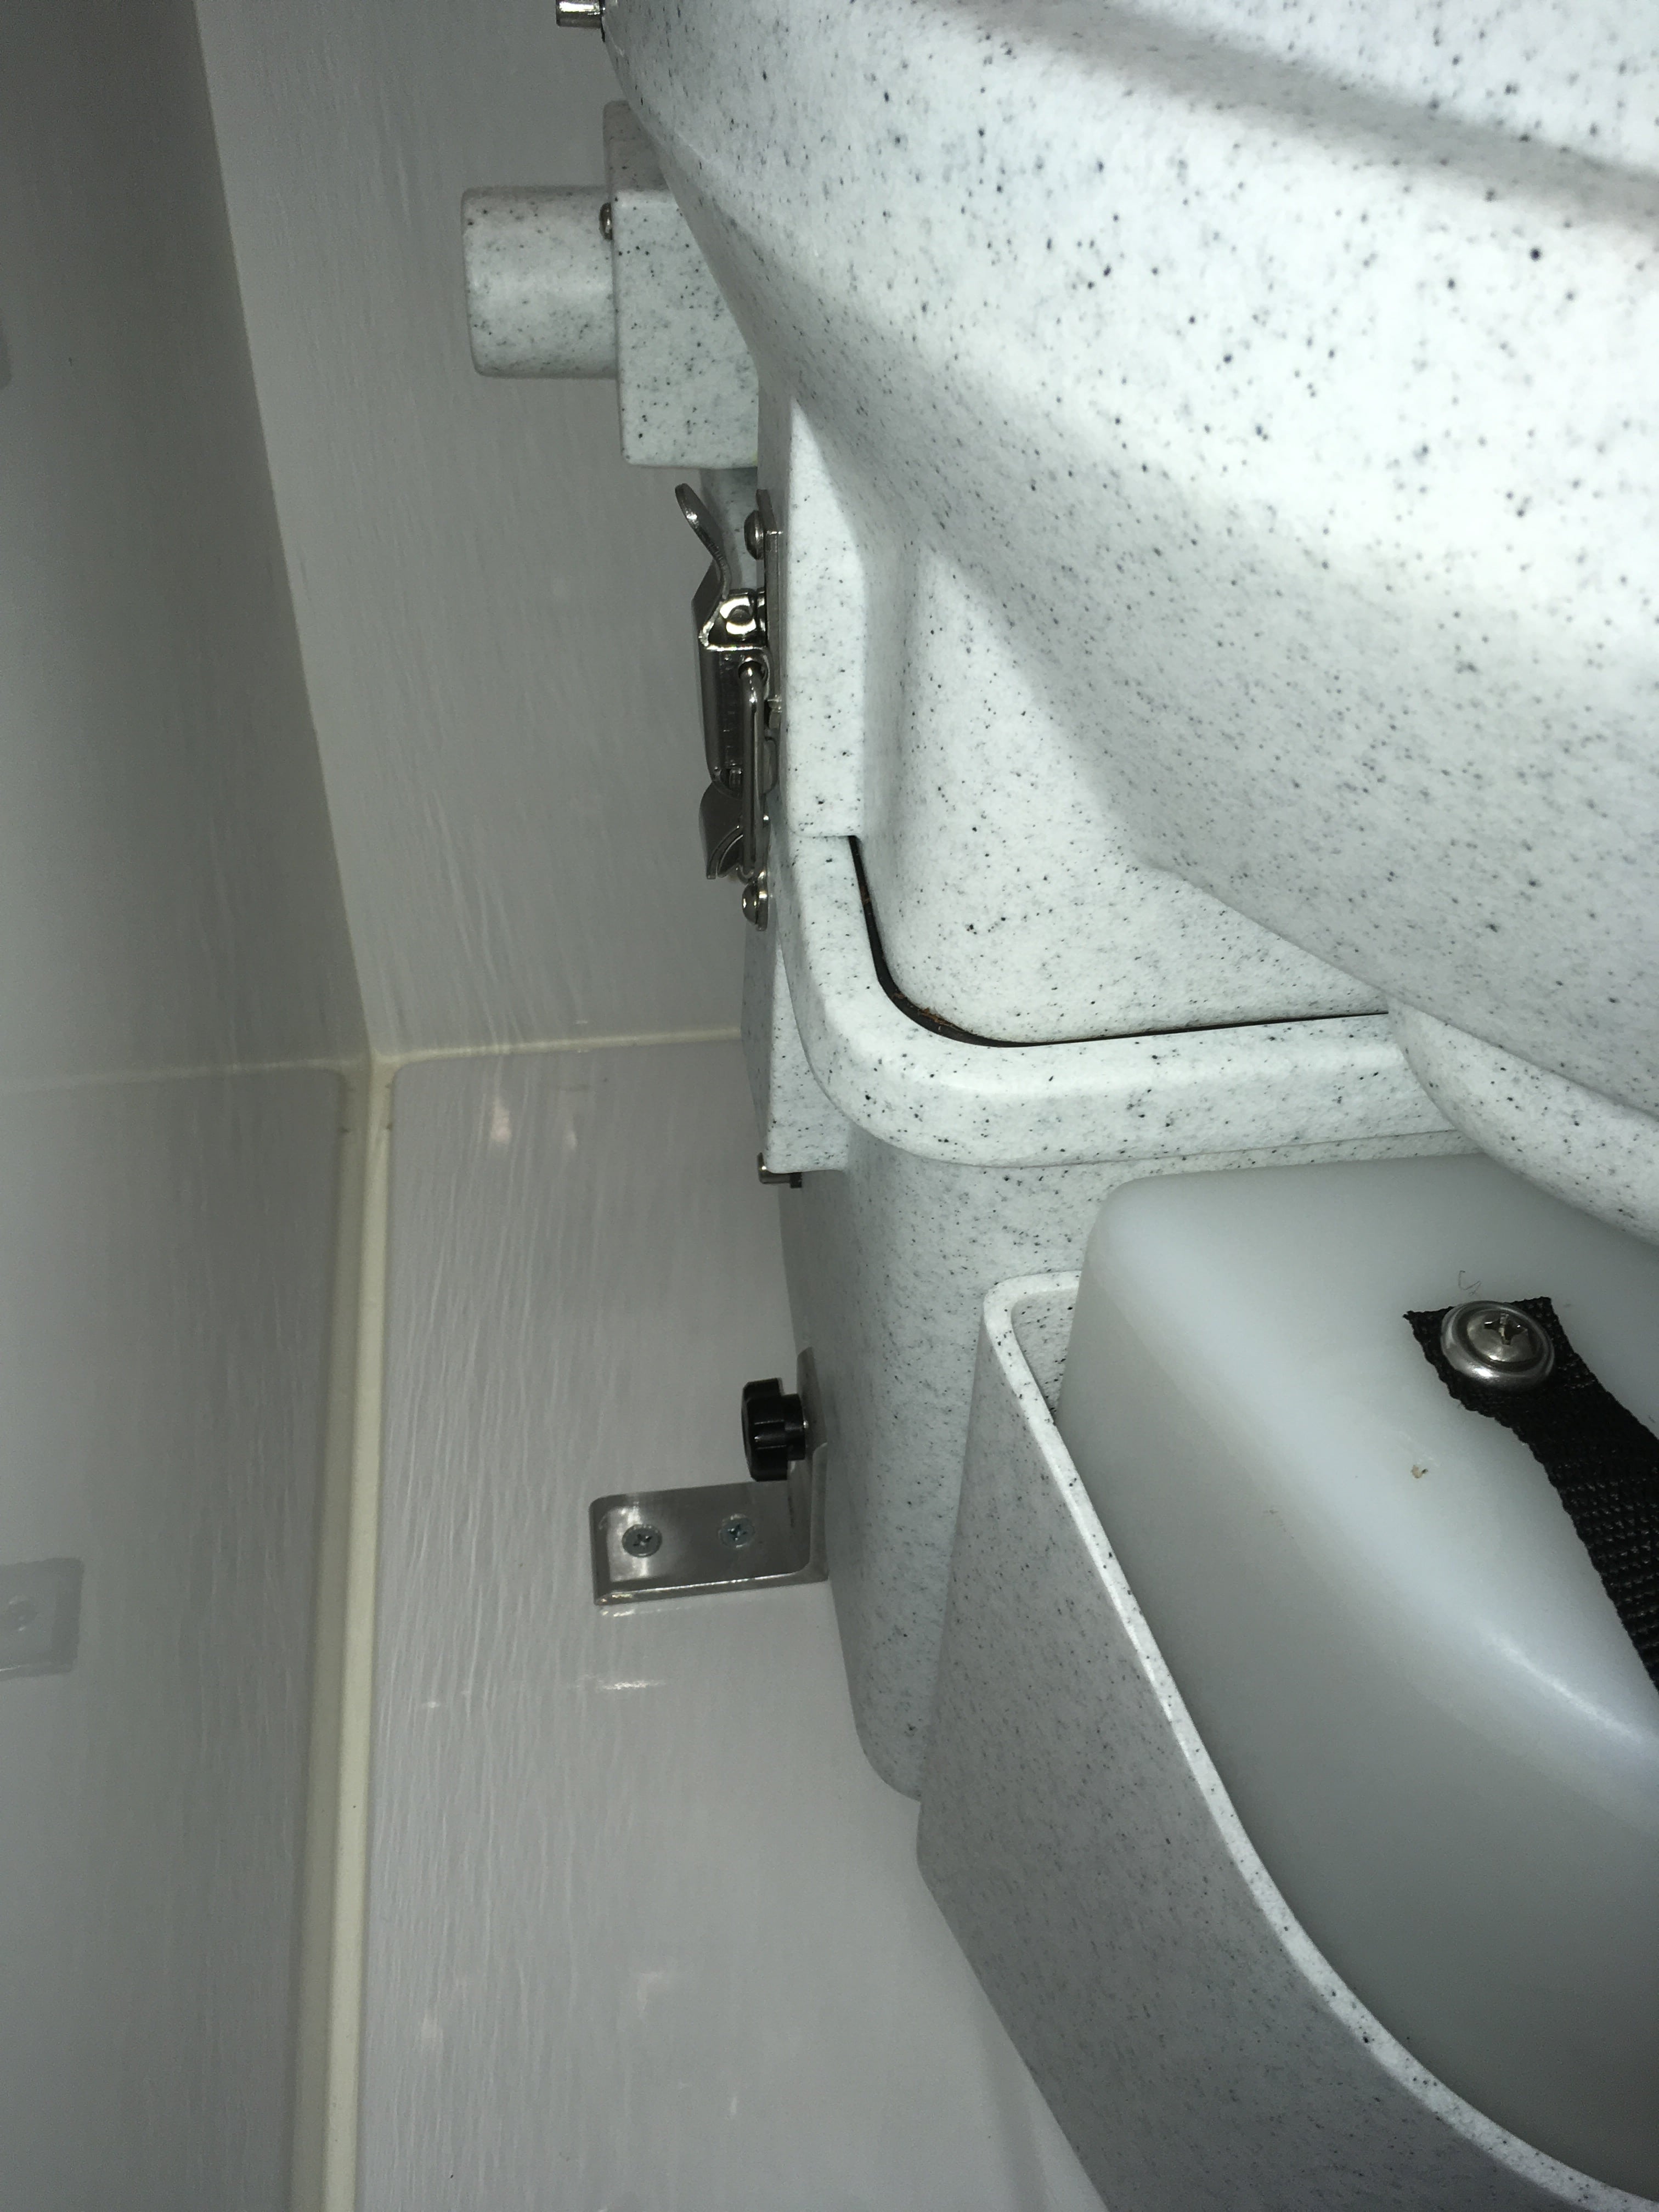
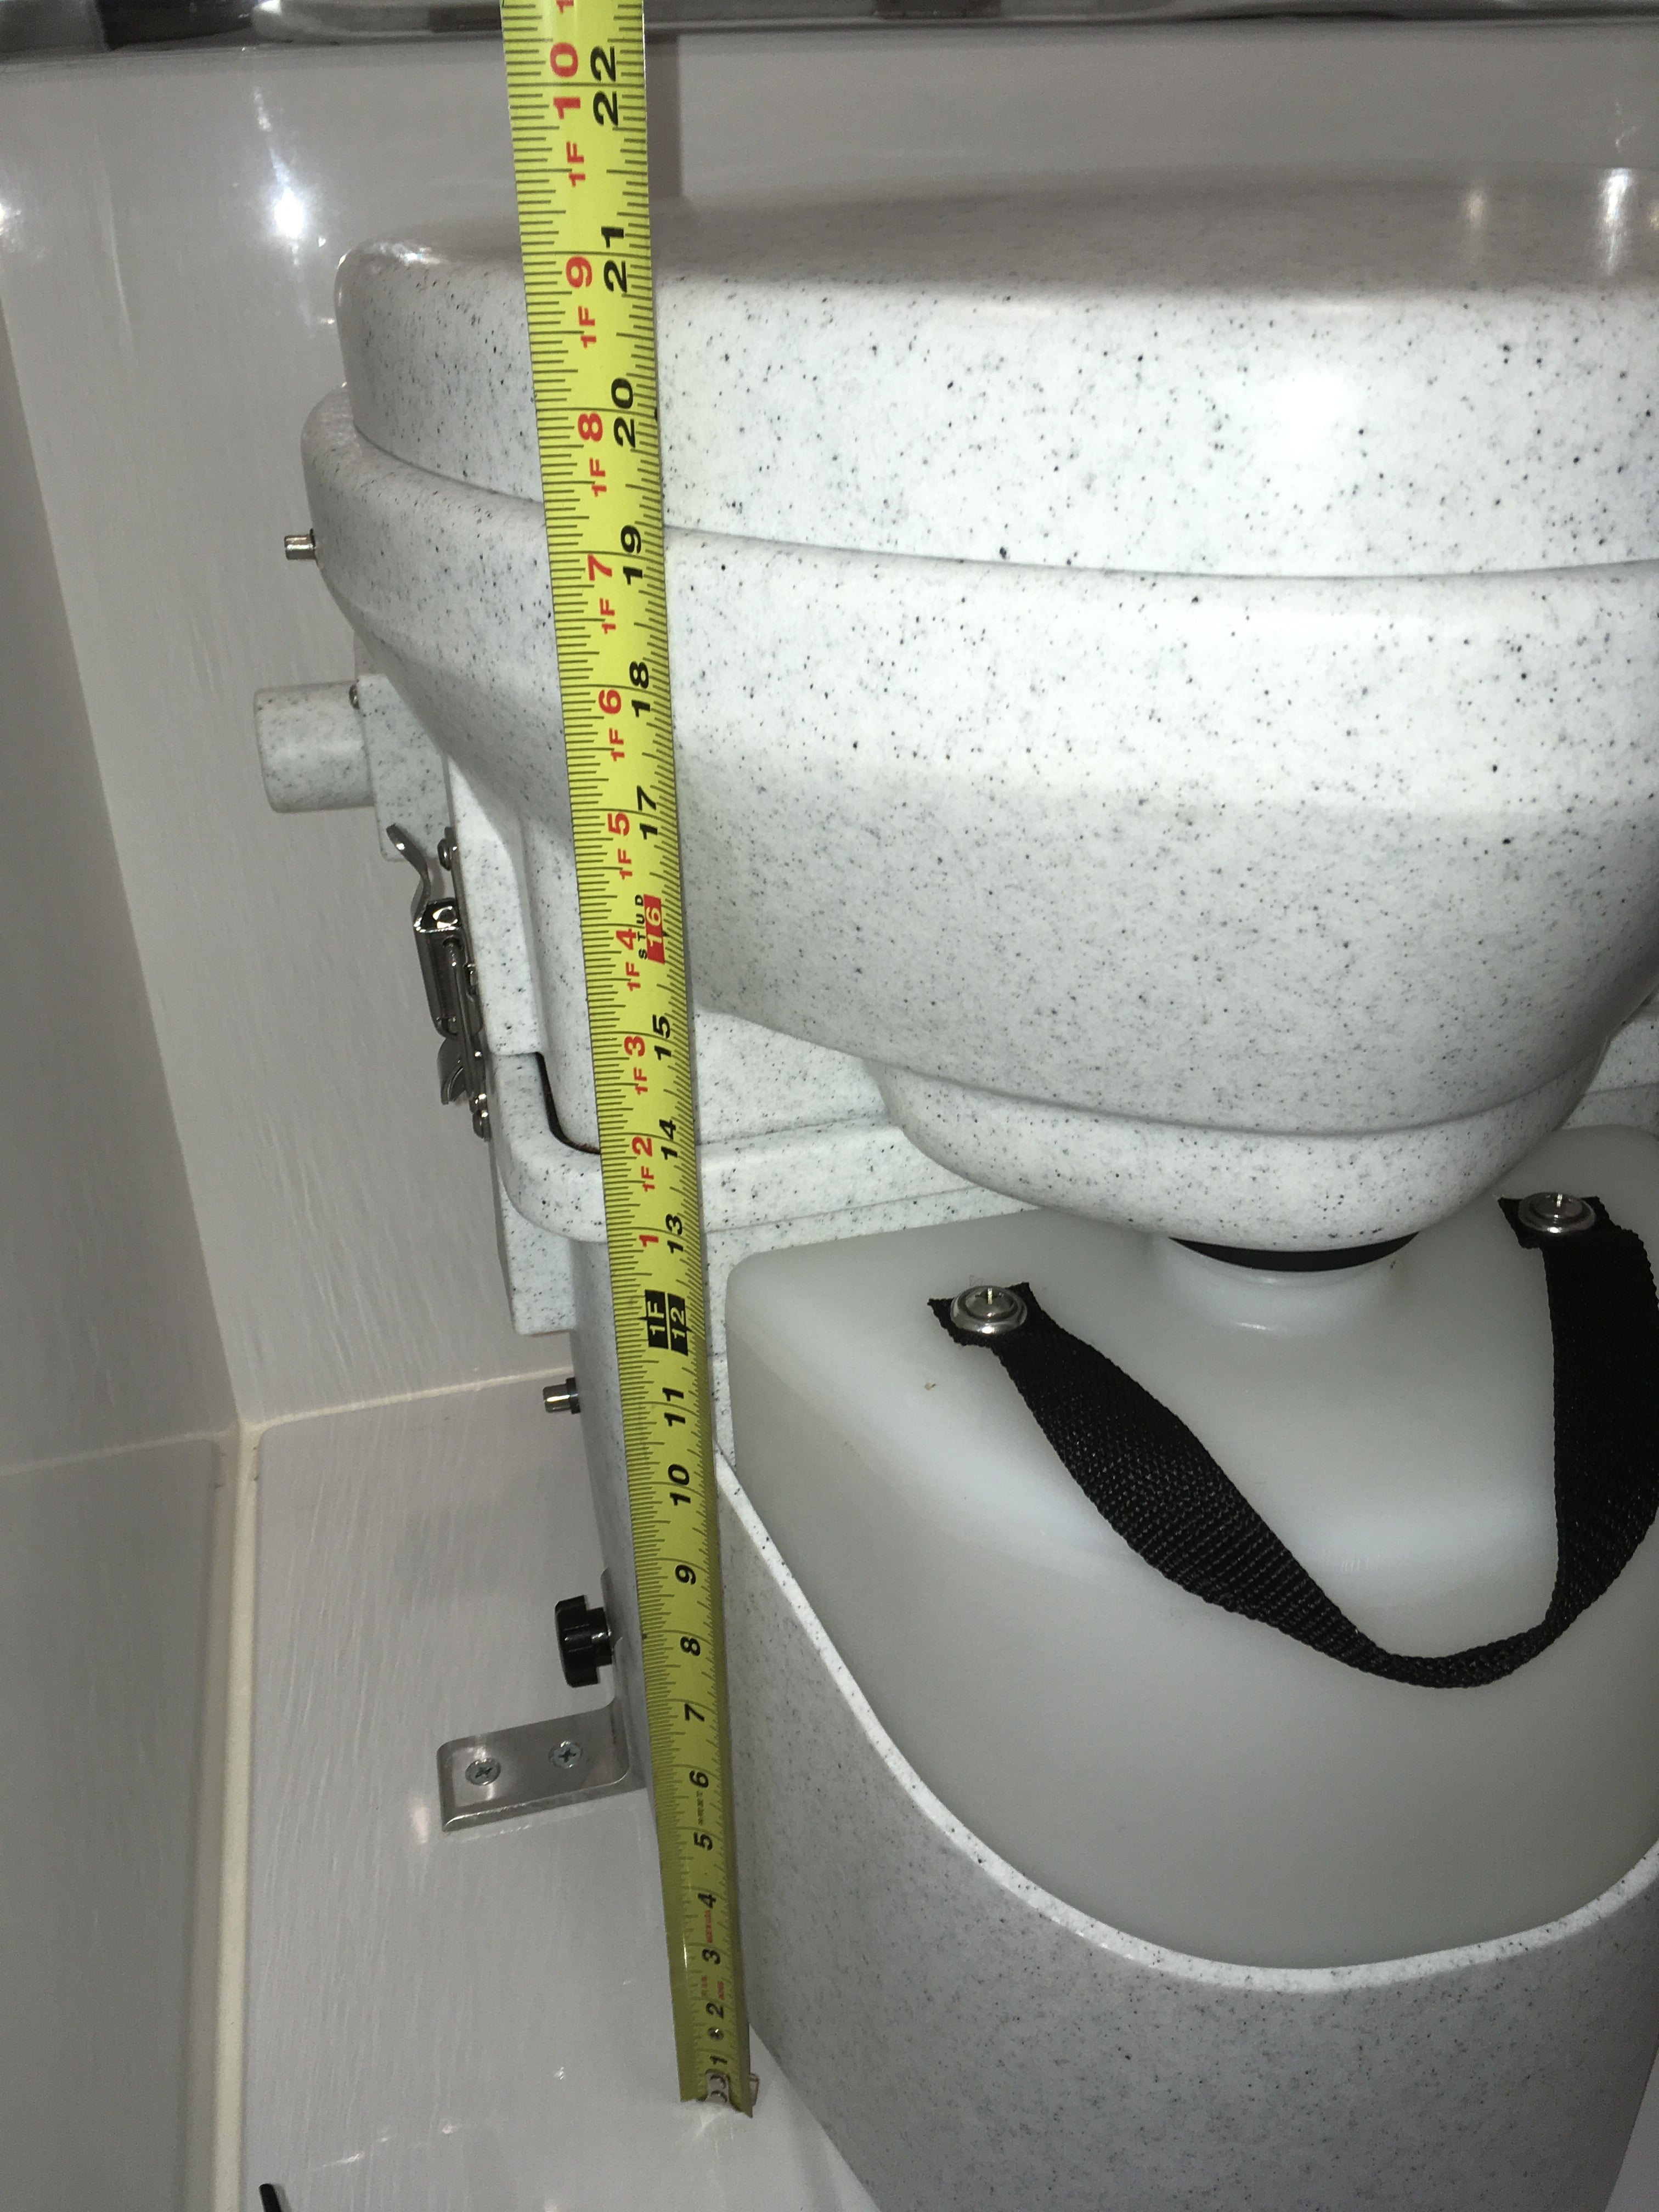
EDIT 12/10/23. Useful link: https://olivertraveltrailers.com/forums/topic/6720-natures-head-compost-toilet-troubleshooting-user-guide/ EDIT 06/06/23. This is an Oliver factory installation, not mine. One member has assumed that I did this. There are a number of threads asking about this toilet. I hope we can gather up a lot of the talk here in one place. I think there has been one other installation in an Ollie but there have been NO published pictures of any kind, that I have been able to find, even from the factory. This is baffling to me. I really wanted to cut the dump station umbilical. We routinely dry camp and finding an open station during a busy holiday weekend or off season is not something I want to face. With the NH toilet we can get rid of our grey water with a 3/4 inch garden hose. In many western states it is legal and encouraged to run a hose out to a nearby shrub and let your water trickle into the ground. The black tank, drain plumbing and vent system are all completely retained. The factory folks are extremely reluctant to delete these parts, since they are part of their certification. If you wanted to reinstall a regular toilet, it would be a very minor job. The fresh water line is even in place, next to the wall. You could sell the used NH for $400 and that would pay for the replacement conventional RV toilet, with a lot left over. An RV toilet is less than $200.... I chose to charge the base with coconut coir rather than peat moss, since it is a renewable resource and doesn't damage the environment. https://smile.amazon.com/s/ref=nb_sb_noss_1?url=search-alias%3Daps&field-keywords=coconut+coir I made the mistake of just dropping a dry 2 pound brick into the bottom, adding water and then letting it hydrate. I ended up with WAY too much material. You need to do this in a bucket, outside, and then transfer the expanded stuff into the base, and the leftovers into gallon zip bags. The correct height is even with the internal agitator centerline. Any higher and it becomes difficult to turn with the handle. It takes about two gallons, I did not measure. There are many online sources with info. To summarize: Sit to pee, everybody, so there is no splashing. The trapdoor stays closed and your pee goes forward, and then down into the reservoir. Which you pre-treated with a half cup of vinegar, to kill the odor. That part is easy. To poop, open the trapdoor, finish the job, wipe and close the door. Give the agitator handle two or three turns. The poop and paper will decompose rapidly once the natural process gets going, which may take a few days. The fan keeps a steady flow of fresh air into the reservoir and out of the trailer through the existing roof vent. I never noticed any bad odors except the first days, before I figured out that Oliver had installed the wrong fuse, a 1 amp, which had blown. Once I installed the correct fuse (2 to 5 specified, I used 3 amp), the fan worked as designed. The fuse is located in the main distribution panel under the dinette table, right row, bottom position (UN-labeled!). It is best to put only the absolute minimum amount of RV toilet paper into the base. If you put a lot in, it wraps around the agitator and makes it harder to turn. Only stinky paper goes down - the rest (damp with pee) goes into the small covered waste can to be disposed of weekly. The can came from Walmart, $10 I think. Cleaning is simple: spritz the area lightly with a dilute vinegar spray and wipe down with a disposable baby wipe, toss in can. Done. The residual vinegar and wipes control any odor from the can. The pee tank is big but it will fill up faster than you can believe if you have four people using it! Empty when it gets to within an inch or two from the top: Flip the two side latches, carefully rotate the top off the base, remove the pee bottle and cap it. Dump it in any approved location - a pit toilet or a rest stop restroom. Rinse with fresh water a couple of times and recharge with half a cup of vinegar. Reinstall into the toilet and close and latch the top. The pee will eventually form crusty yellow deposits. The fix, I have read, is to add gravel and water and shake it hard, then rinse several times. In two weeks of use I never noticed any significant deposits. The longer you let the poop decompose the better. If you can leave it over the winter, dump it out in the spring and it will be totally benign. If you need to empty it mid-season, remove the pee bottle and vent hose, unscrew the two hold down knobs and lift out the entire unit. Carry it outside and put a 13 gallon or larger trash bag on top, flip it over and empty the compost. Refill with clean coir to the centerline. There is NO need to clean it out. Any residual material will just help the next batch get started. The organic waste you can double bag and put in the trash, or if fully decomposed, it can be spread out in the woods, but not near a potable water supply or garden. The way to keep the smell in control is to keep the pee out of the main reservoir. It's the urine that makes a pit toilet smell so bad.... If you throw up or have a messy poop, you can add a little more fresh coir to help absorb the extra fluids. I keep a gallon bag of the hydrated stuff in the overheard cabinet (along with a quart of vinegar) and haven't had to add any extra. The fan has a dust filter that is supposed to be checked every few weeks, by removing two Philips screws. I think that is way too often in the clean environment of a fiberglass trailer, unless you have a dog that sheds. You can put your hand over the left (inlet) opening and feel a light suction. If that isn't present, you need to clean the filter. The pee bottle sits in a sealed cavity to catch overflows, This is a problem since when you take a shower, a bunch of fresh water gets trapped there. I intend to drill a couple of small drain holes in the bottom. I don't care if the pee bottle overflows onto the floor of the head, at least that way I will notice it! unless it is dark, and I am barefooted.... that would be bad 😉 This is why you want to empty the tank before it gets too close to the top. Agitator handle: ours fell off right away, the shaft has a set screw with lock nut. It is very easy to tighten correctly. I am not sure why the factory guy couldn't do it successfully. Spares: I intend to purchase a spare pee tank ($40), spare lids, and a fan.I already have extra 3 amp fuses. ... http://store.natureshead.net I intend to wire in a small LED in the wire harness to show that the fan has power. You can probably hear it running, faintly, if you are in a very quiet area and don't have bad tinnitus, as I do. The Nature's Head is a cool device, but it is really just a fancy bucket. A solidly built, very expensive bucket. I wish the price were about $250 instead of $800. That seems about right for what you get. OTH it is very rugged, and long time users seem to love it. My wife still has some reservations about using it, and we need to get a short step stool since it sits so much higher than even a tall toilet. This one might work well, and it might fit in close to the base with a bungee cord around it for travel: .... https://www.squattypotty.com/shop/poop-better/classic-ecco I am still learning, but I have no regrets at this time. Questions? John Davies Spokane WA
 1 point
-
Finally got around to installing the Zamp 90 watt slender panels on the Oliver today. Very simple, just some heat shrink for the wire connections and putting the feet on the panels. I used the AmvSolar tall feet on the passenger side and the standard ones on the driver side and prepped with alcohol before applying the supplied VHB tape... seems to be very sturdy. Time will tell. Still have to tidy up the wires but a thunderstorm with lightning rolled in. The package Am Solar sells had everything included for the install except (2) Zamp SAE connections and a SAE Y-splitter. But they sell both on the website. For some reason they cut off the original SAE connector so you have to re-install one, maybe if you gave them advanced notice you could get one that has not been removed. Curious to see how much Amp hour difference stored tomorrow. From Am Solar: My install:
1 point
-
Within 48 hours of receiving my new rig (Hull #615) I managed to blow the driver side "leveler jack" fuse. After the usual language and self flagelation I figured out which of the three yellow fuse holders located just forward of the jack held the correct fuse. Then I blew it again. Hmmm, sez I, I did not blow the bow jack or the starboard jack... what am I doing differently with this one. It turns out that if you change your mind about jack direction, LET GO OF THE SWITCH, then press it the way you want it to go. If you have the jack going in one direction and you reverse the switch position quickly, you stand a very good chance of blowing the fuse. The momentary current load for an instantaneous direction change must be pretty high! At least now I have a plethora of spare 30 amp MDL fuses... Oh, yes,,, the yellow fuse holder for the driver side jack now has a dab of red paint on it, and the curb side has a dab of green paint.1 point
-
Hopefully you are using Slow Blow fuses.1 point
-
I think people have short memories. They'll be packing themselves into planes and cruise liners before you know it. But I'm making a Maximum Occupancy sign for our future campsites: 4 Humans, 2 Dogs, 0 Bears.1 point
-
I feel your pain. We have been pushed back to the end of July for our pickup. I really think when this all starts to subside, camping is going to take off. Travelling by staying in a hotel room or cruise will have the stigma of who used your room last night or bumping elbows in the dining room. Campgrounds will be one area where you will have your 6' of space and be away from the majority of crowds. I just hope the light at the end of the tunnel is getting closer before society changes to a stage we will not recognize.1 point
-
If it wasn't for the shut down, we would be picking up our trailer tomorrow morning. We cannot wait for this to pass, and hit the open road.1 point
-
I’m doing a number of things. I wanted to mount my inverter more solidly, and since it’s in the front dinette seat I figured it was now or never if I wanted to get rid of the black tank. Then as part of redoing the inverter I wanted to reroute the heavy cables back to the battery, since they were all run through some tight spots with no extra space for protective looms. They’re heavy welding cables but I still will feel better if they’re run through a loom and not wedged tight between the fiberglass. Taking out the sewer line gave me much more room for both those and the existing Oliver wiring. It also preps for if I ever decide to place some batteries in the space below the pantry, which is something in the back of my mind. And while I’m in there I’m cleaning, zip tieing, etc. I also widened the hole under the toilet for better access to the wiring and plumbing under it and I think that’s where I’ll smuggle drugs store extra peat for the toilet. Just need to figure out a basket or something to keep the bags from getting lost in the hull. And yes, then comes the sink & faucet mod which I’m still researching (and waiting for Oliver to get back on selling me a new countertop without holes cut in it).1 point
-
I just checked my vent since mine is all still apart. The vent pipe is 1.5" ABS, so you'll need a 1.5" ABS tee, a 1.5" to 1.25" ABS adapter, and then a short piece of 1.25" PVC pipe, maybe 3" or 4". The Nature's Head hose will fit over the 1.25" PVC. Oliver puts some sealant on the hose to hold it in place but I'm thinking a hose clamp would do a better job.1 point
-
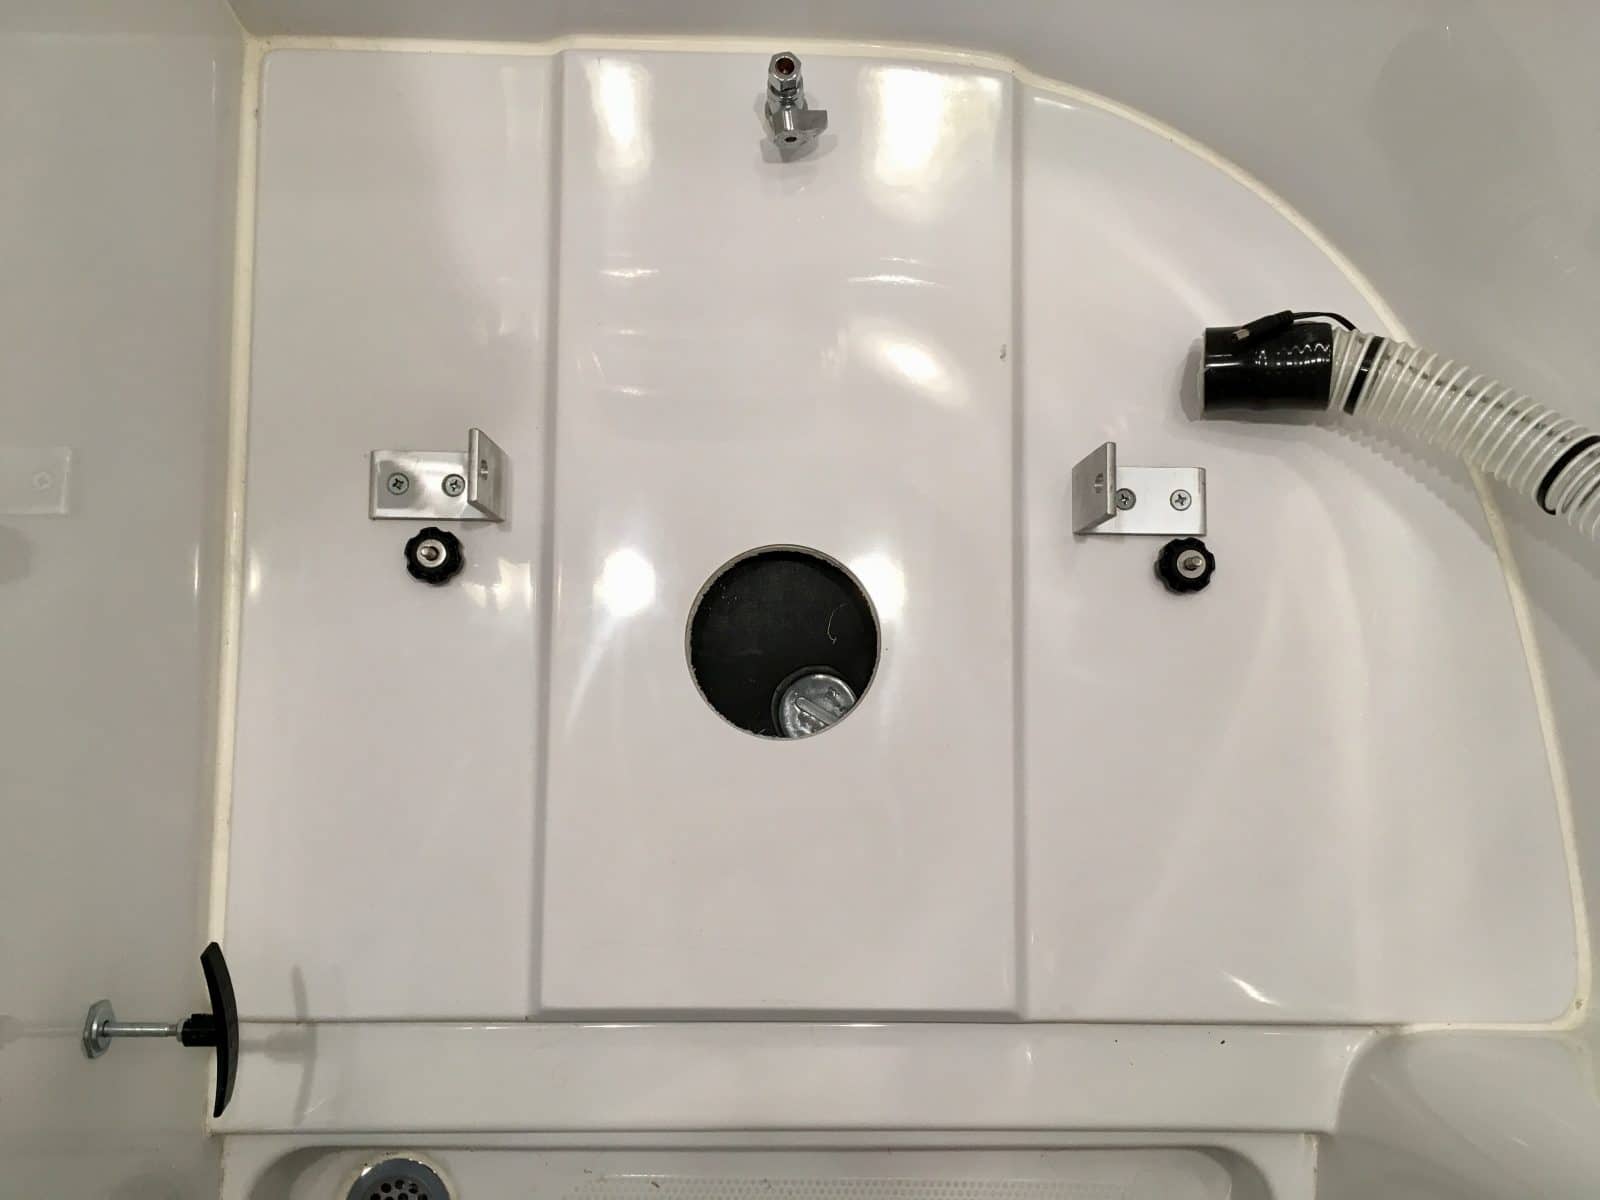
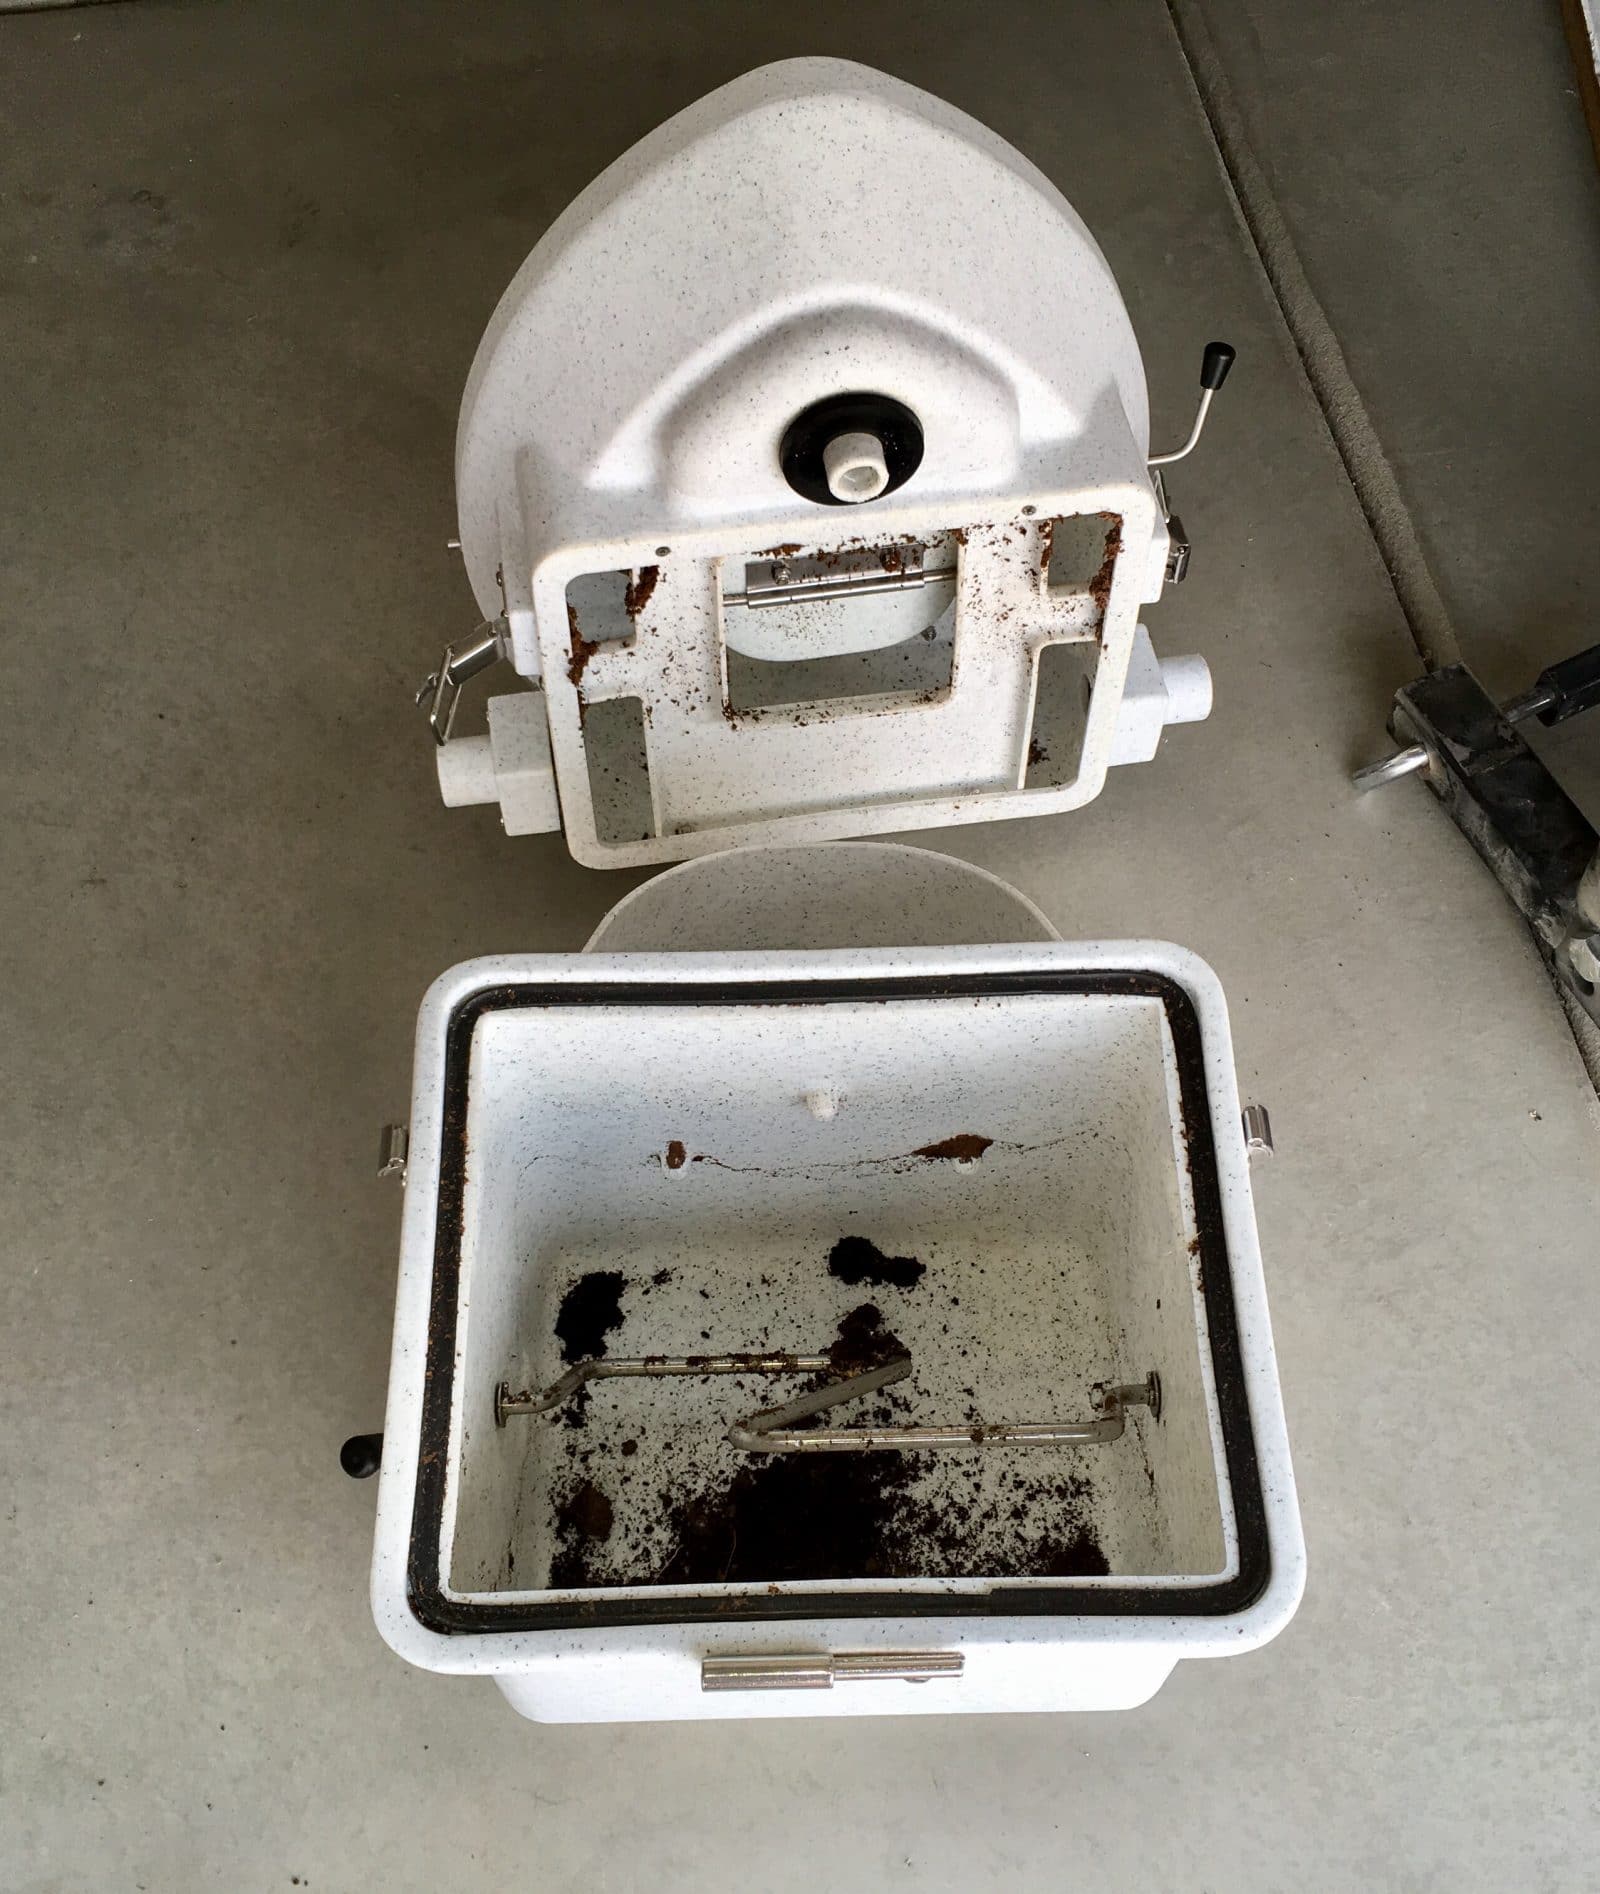
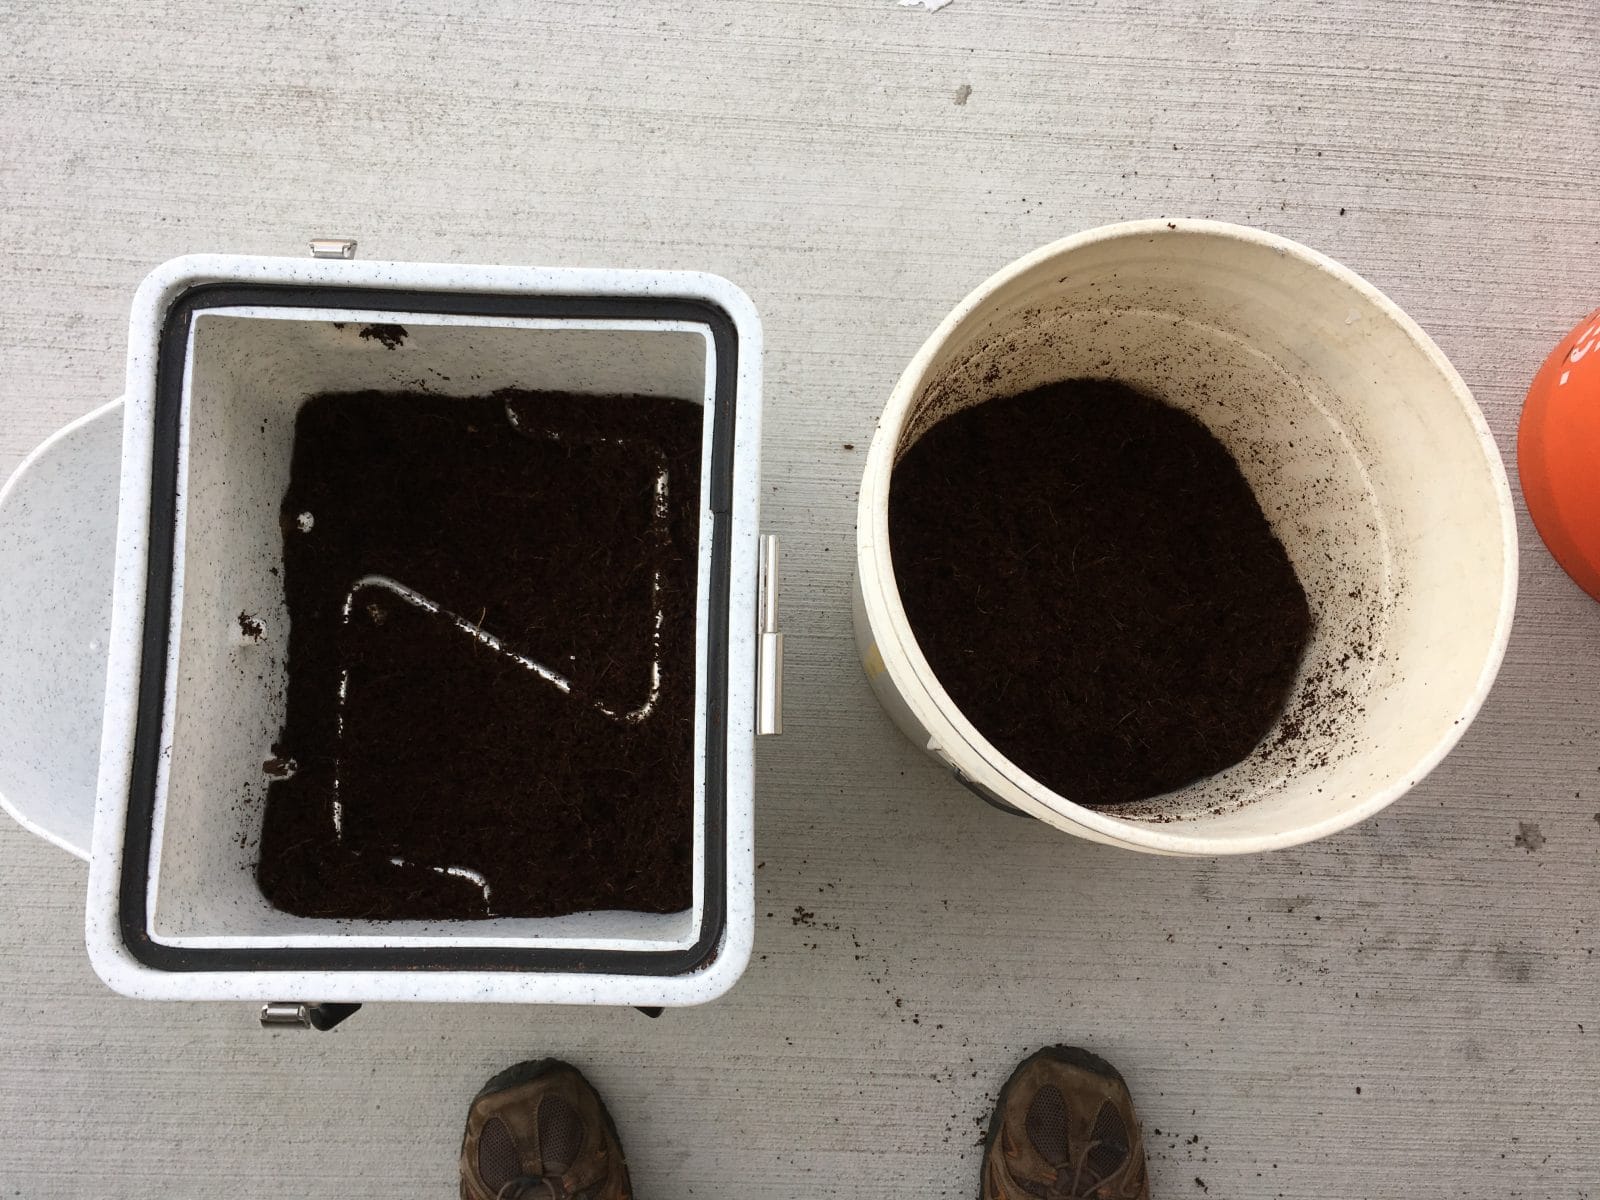
Some more pics! This is the floor under the toilet, after cleaning the area. It gets a little dirty under there since it isn't sealed in any way. You can see the black tank, which has no hole or flange for the regular toilet. I am surprised at that, all it has is a small hole to one side, capped with a translucent pvc plug...???? You can also clearly see the unused fresh water tap that needs to bypassed by blocking the hose to it, for winterizing. The toilet emptied of its, uhmmm, contents and stuff, ready to be refilled. The old stuff was very benign and did not smell at all, I just secured it in a heavy leaf bag and added it to the trash. You are NOT supposed to clean out this area, leave the remnants behind to help kick start the new batch of good bacteria.: A fresh batch of coconut coir hydrated for about 45 minutes. The toilet is filled just to the agitator center line (no higher or it gets hard to turn!), and there is enough left for another fill. I bagged and labelled that extra material and set it on a garage shelf with my other RV supplies, so my wife would not pot a plant with it: Not shown is the pee tank receptacle. I drilled three 1/4 inch holes right at the bottom facing the center of the bathroom, so any accumulated shower water would naturally drain out instead of getting trapped there. We are both liking the toilet. It does take a little regular maintenance but it's in no way hard, just different from a black tank system. We like being free from dump stations, tho we still have to deal with the gray water. But that is not a big deal out West. John Davies Spokane WA
1 point









-
Recent Achievements
-