Leaderboard


Popular Content
Showing content with the highest reputation on 06/17/2020 in Posts
-
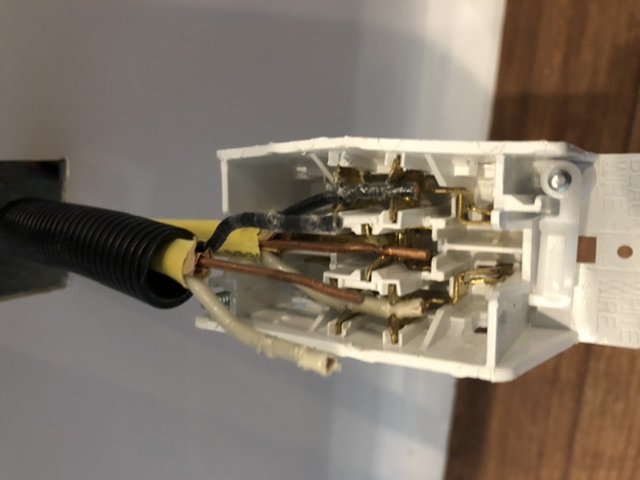
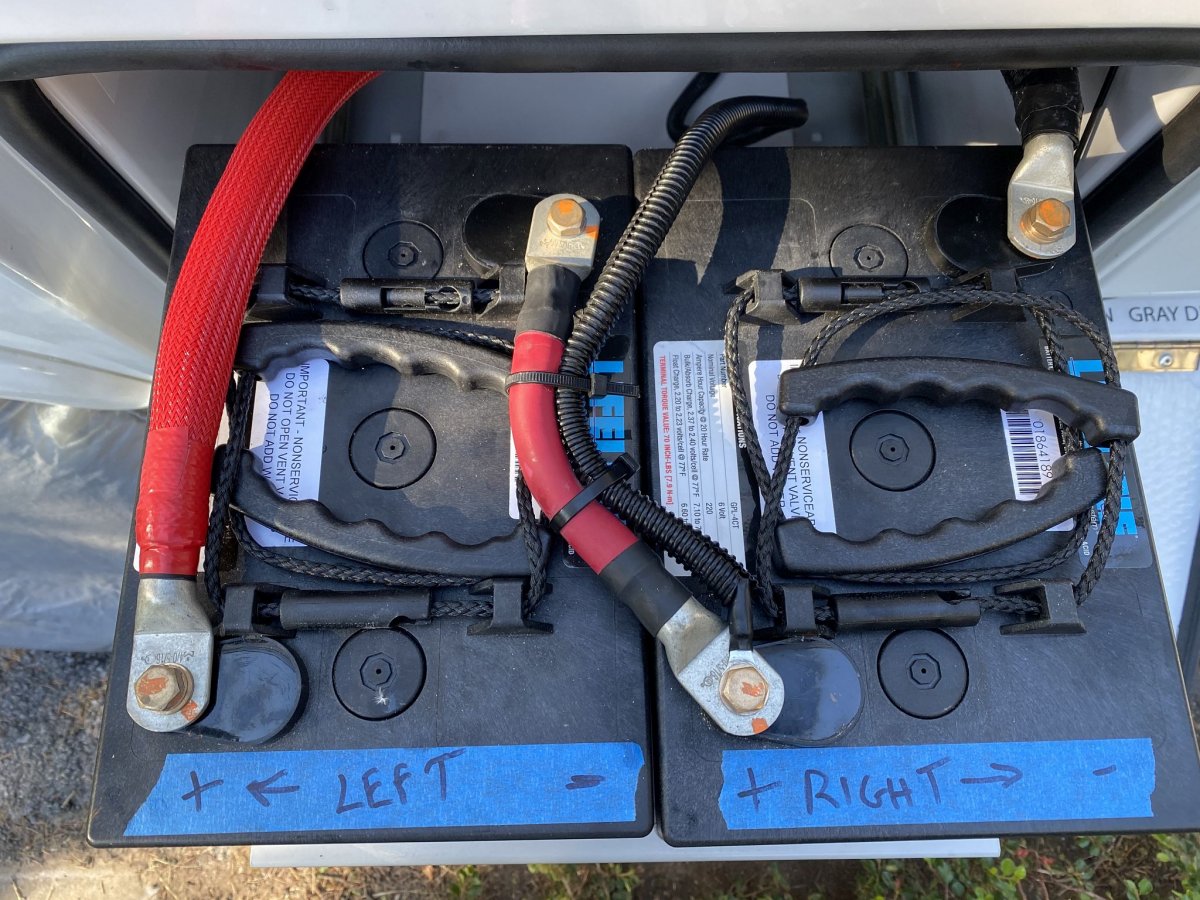
We went dry camping this past weekend and when my wife started the Kuerig using an outlet on the bed stand. The machine started then stopped. I thought it was an inverter issue as the microwave went dead too. Went we got home I started debugging and found that not all outlets were dead and all behaved the same whether on shore power or inverter. Turns out a splice in the outlet on the twin bed street side had come loose. All the outlets are on one circuit but both receptacles on each bed side (twin bed arrangement) have splices in the receptacles and a bad splice means that all “downstream” outlets will not work. The outlets are SCD (self-contained device style and instead of terminal screws or push connects have slotted copper bands where the neutral, hot, and ground wires go. They can be wired as pass-through or spliced or end of line. It requires an installation tool to properly press the wire into the SCD slots. The top slice virtually fell out as I opened the receptacle cover. If the Oliver folks used a tool, they didn’t do a very good job. I also opened the receptacle that the Kuerig was plugged into and that pass-through insertion was not solid either. The receptacle specs and installation guide is here: https://mobilehomepartsstore.com/Merchant2/documents/scd-instructions.pdf I decided to get this installation tool as I figure there is a strong possibility that this issue may surface again https://www.magicmobilehomesupply.com/SCDT-Tool-p/3795.htm I also noted that the wiring diagram had errors. There is not a separate leg to the microwave outlet - all outlets are served by 1- 12/2 Rolex cable. The breaker for the outlets was also mislabeled (we have Truma/inverter/no solar. We also have a receptacle inside the closet as well as outside and only one was on the wiring diagram. I think the outlet inside the closet was added a couple years ago. The photo shows the inside of the SCD with the failed spice connection. The slice connection is listed as one of the connection methods but a pass-through would probably be better as it would not affect the other “downstream” receptacles. Hopefully this will help someone if something similar happens. I spent hours tracing wires checking voltage and continuity, etc. before I found the issue.
 4 points
 -
2021 Solar Tax Credit I think the Micro-Air Easy Start may cost $400 installed, so the rest of the Lithium package that would be eligible for the tax credit would be $8599. A 2021 22% tax credit would be $1891.78. Now the Lithium Package is $6707.22 and although I already have my own lithium package, that sounds pretty good to me, if you have a need or desire to go green. Mossey
2 points
-
Good morning and thank you Steve, for the word of the day, Palindromically. Now that I have visited dictionary.com, I understand your reference. Now the trick will be using it before I forget it. Mossey2 points
-
The actual blades, black and gray, are lubricated when you apply the drain valvelubricant. However, you may find despite adding the blade lubricant, the valve becomes difficult to open/close. The cable occasionally needs to be greased. Not real difficult, but not easy to undo the cable, slide it out, put white lithium grease on it and put it back. The valve handle / cable will be much easier, so know that if the valve may feel stuck/sticking, it may be your cable. good luck coy2 points
-
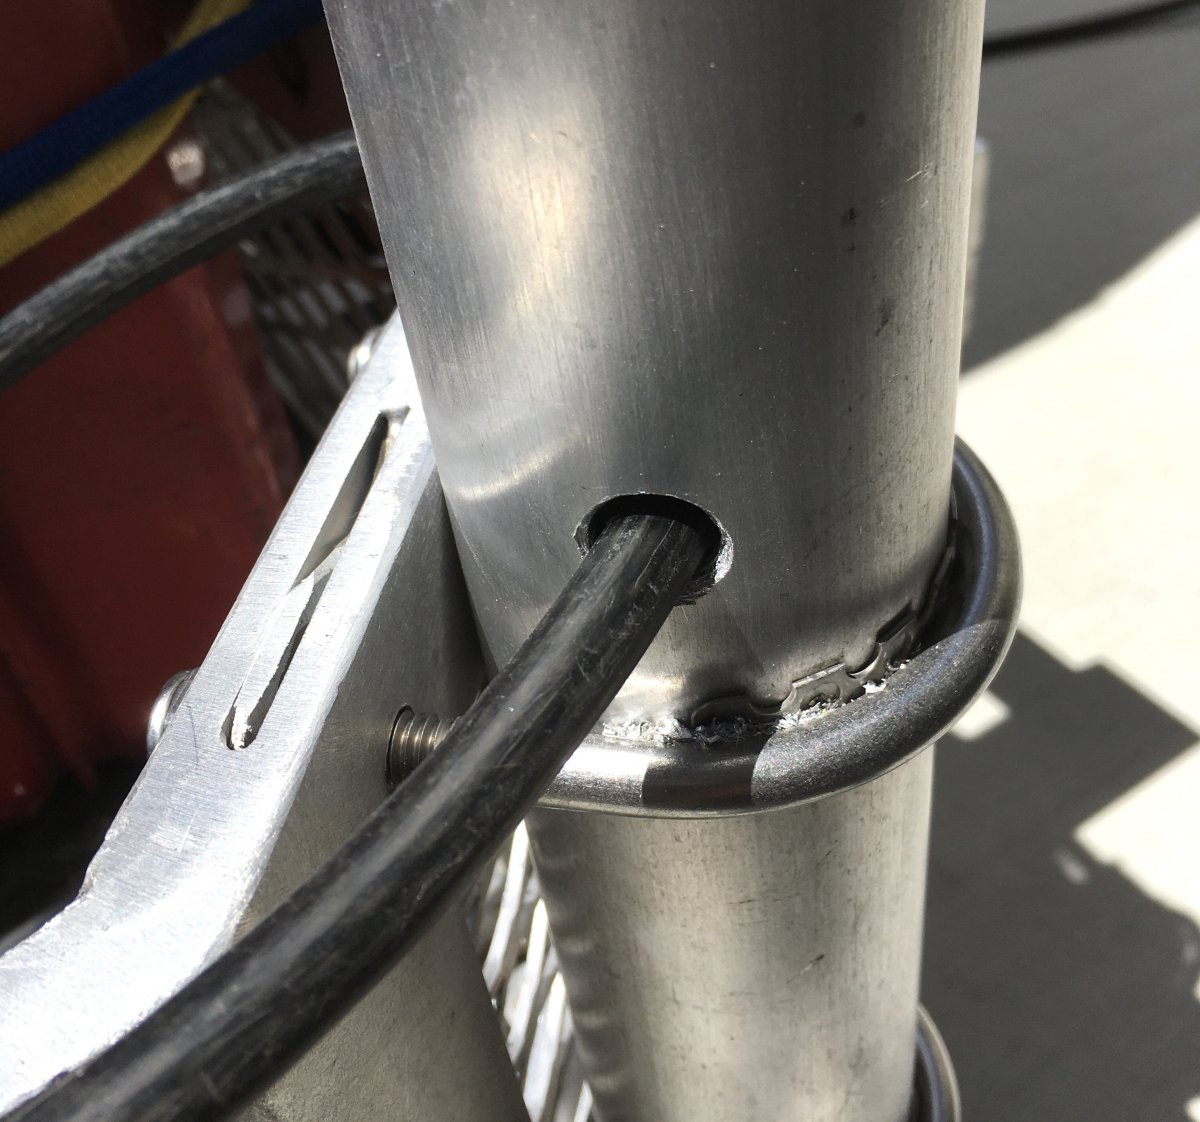
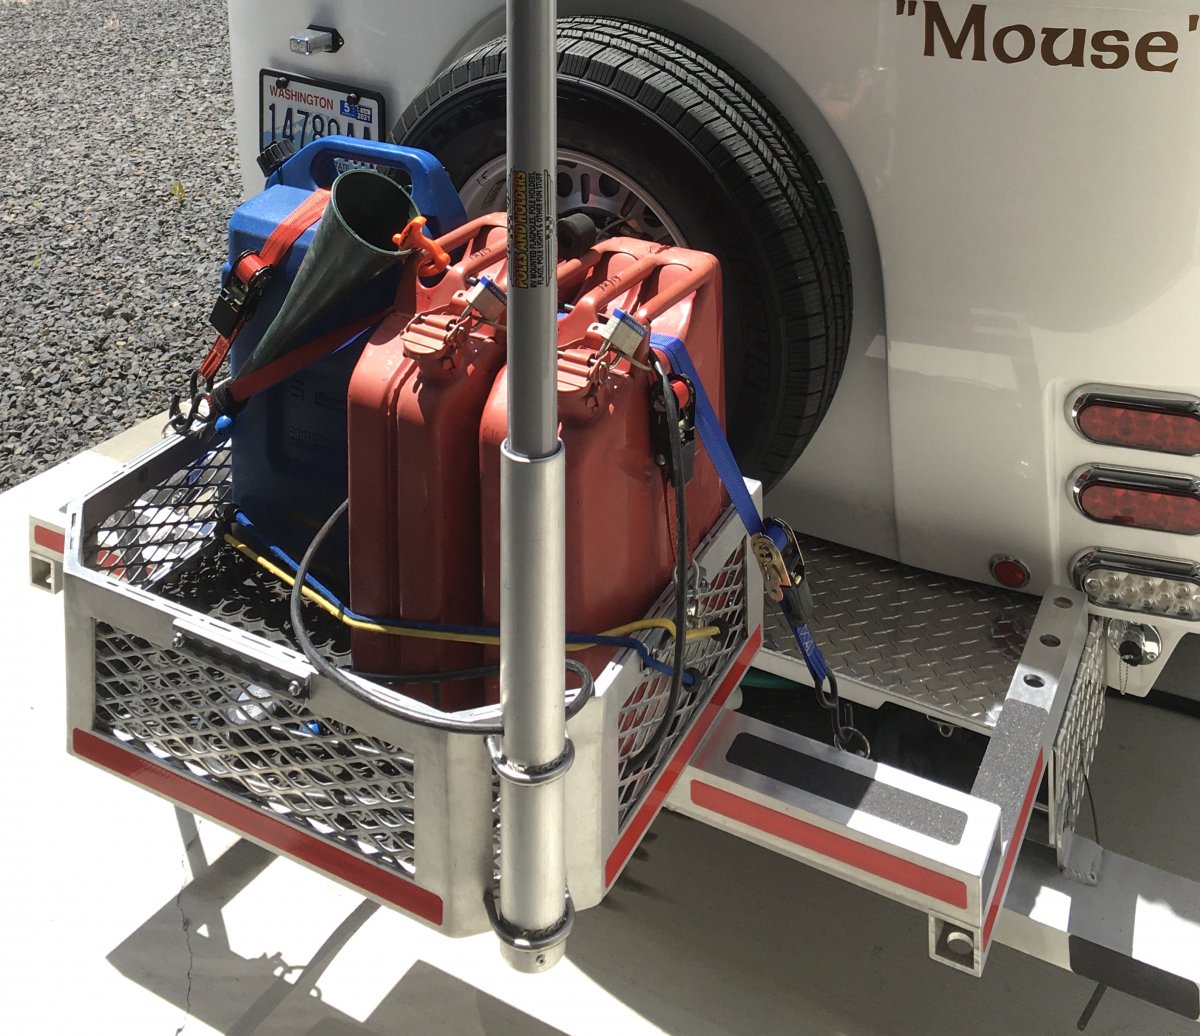
I was pretty worried about leaving the pole set up while unattended. It would be a matter of a few seconds for a nasty person to lift it up and carry it away. I normally keep my jerry cans secured with a Master Python cable lock, so I just drilled a pair of 1/2” holes through the tube and the lowest section of pole. Now the pole can be left in place for longer periods of time, either fully extended, part-way extended or retracted, as in the second picture. John Davies Spokane WA
1 point
-
I'm not surprised at the price. FWIW, that's about $500 more than what my system would have cost had I opted for the standard solar setup, which was three years ago, and I did all the work. I think my Victron kit is better; but as far as features go, Oliver's offering seems about on par, so it seems like a fair enough price. Before anyone flips about the $9000 price tag, you have to compare the cost relative to what you'd otherwise pay Oliver for the AGM upgrade, solar, and inverter - and I might argue also another $1500+ for a generator, gen connection, and accessories. For me at the time, the difference in cost was only ~$2000, which after tax rebates ended up just shy of $1000. I'm curious what that calculation would be now. With that much LFP storage, Oliver's solar offering is anaemic, which is why I only say you might be able to live without a generator. With 200w of portable panels, then I'd say yes. And yes, 5 hours of AC use is a fairy tale.1 point
-
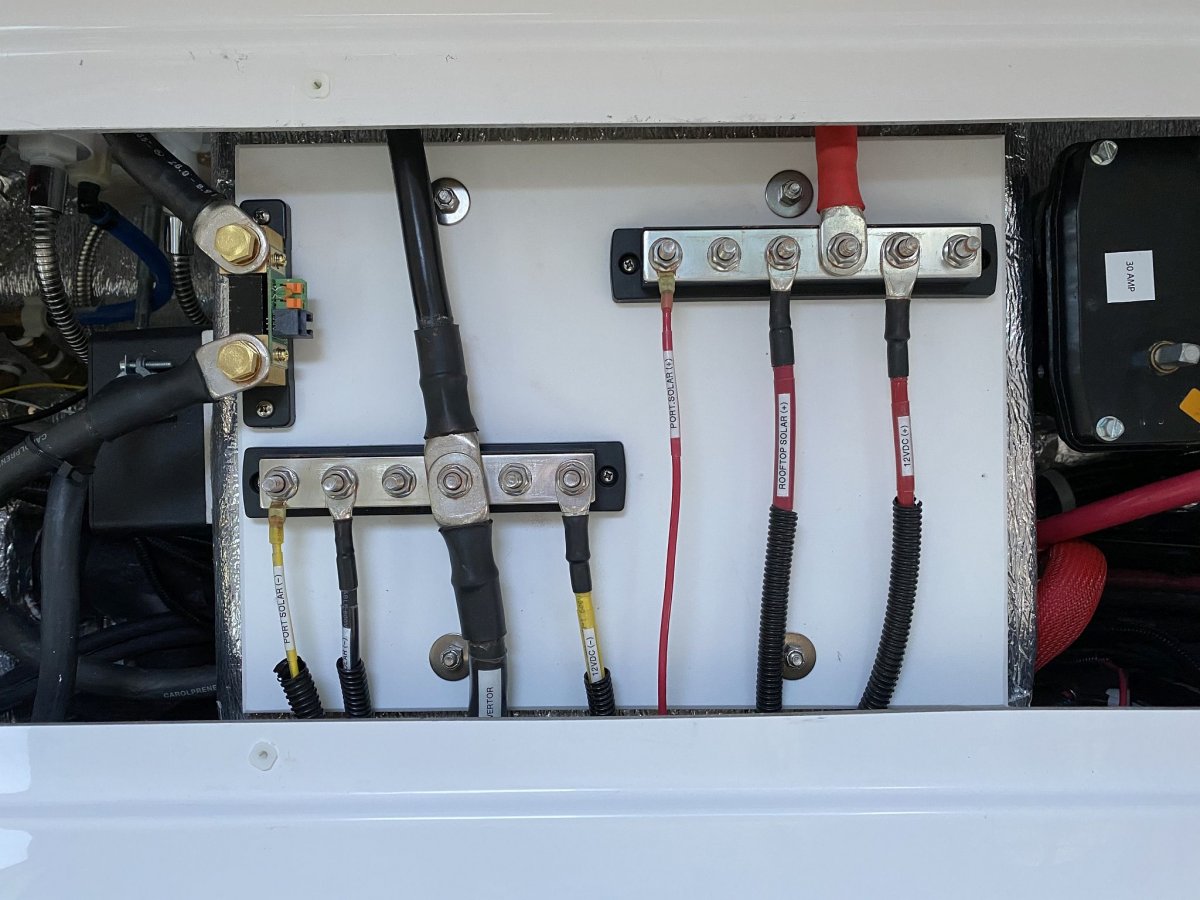
It is interesting to review this thread and I appreciate everyone's perspective. I just did some work to add in the Tuson TPMS repeater and take advantage of the battery voltage monitor/display on the TPMS LED display that we put in our TV. I added some an additional grounding bar and extended from the main bus bar to a Blue Sea 4 circuit bus bar under the dinette seat adjacent to the pantry. The repeater is under the dinette seat adjacent to the bathroom to get as far forward in the compartment as I can. I used some existing space of the PVC below the transfer switch for the small bus bar. It has a cover so there is little risk after it is energized coming in contact with the ground bar just a few inches below, but I will always disconnect when I work on it or be very careful. The bus bar is fused in the cable and again at each of the four circuits as required. The repeater uses only 11 milliamperes so I just used a 1 amp fuse. Will test next week because the repeater sleeps unless the trailer is moving. David1 point
-
Nice work, the installation looks great. I was confused looking at the Starboard view because the stock hardware didn’t look like mine. So I finally looked at your profile and sure enough I was looking at an Elite. Thanks for allowing me my first peak under the bed of an Elite, I feel like a voyeur.😮 Mossey1 point
-
I would replace the outlets with standard screw type just like you would have in your home. I can see (from your picture) how (in theory) these outlets would make installation easier on a production line. I can also see how these can fail. These are similar to the T Tap Insulation Displacement Connectors used in 12 volt circuits. They are hard to install and get a positive, long lasting connection. I won't use them for low voltage wiring and I don't think I'd want these outlets in my high voltage circuits. Thanks for pointing this out.1 point
-
Positive and negative busbars are essentially complete, except for some cable ties here and there. There are now 6 fewer cables connected to the batteries with just the (2) 4/0 cables, Zamp battery temperature sensor and Victron battery midpoint sensor remaining. Much cleaner looking. I still haven't finished connecting the Victron battery monitor (shunt is installed though). I'm waiting on parts for mounting the positive busbar's ANL fuse and master battery disconnect switch.
1 point
-
Practical sailor recommends a product called ReMov, which isn't likely in your garage. (Not in mine, either.) After getting everything off that I could mechanically, I'd try mineral spirits or GoopOff on any bits remaining, then wipe it down again with mineral spirits or Goopoff, followed by denatured alcohol. Silicone loves to get down into the pores. I've heard of using kerosene in place of mineral spirits, but we don't typically have that around either.1 point
-
Overland, I used a plastic razor blade, denatured alcohol and good old elbow grease. It took some time but cleaned up well. Andrew1 point
-
Susan, you may want to consider the Jack-IT Let'sGoAero bike rack that @mossemi posted about in this thread.1 point
-
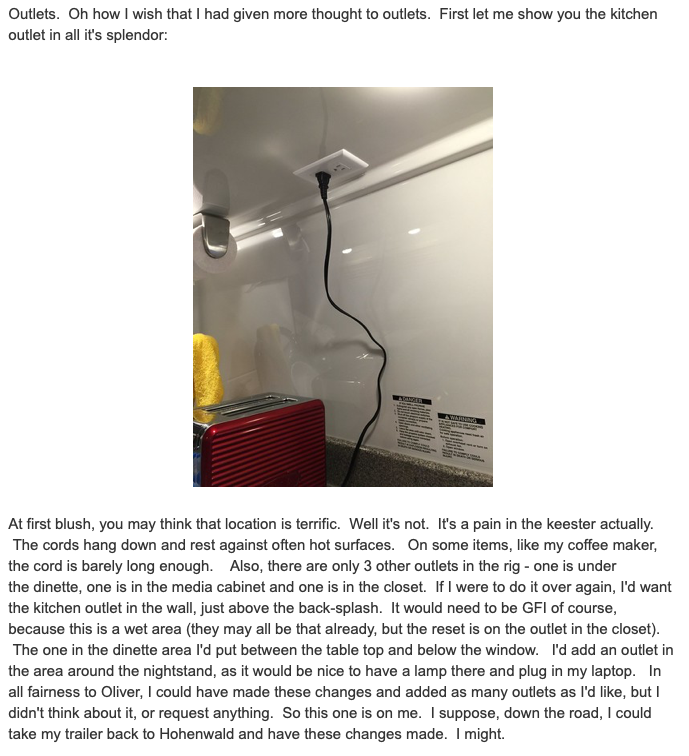
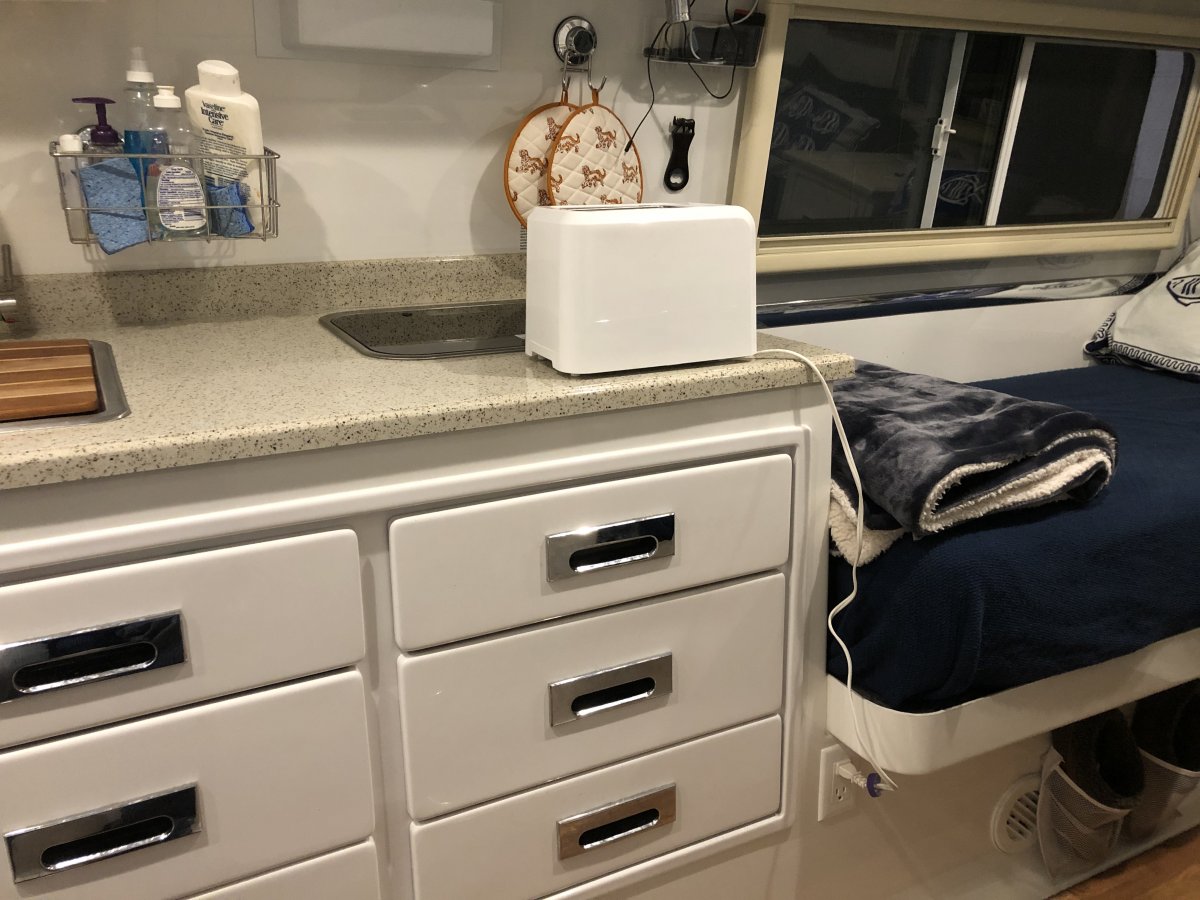
I was looking for trailers in late 2015/early 2016 and I discovered Wincrasher’s 75 min video about his Oliver; That video was a big factor in my decision to get an Ollie! I also discovered his blog, where he complained about the electrical outlet above the kitchen. I did not want the cords hanging down, and somewhere in my research I discovered Carlon pop-up receptacles, and similar from Amazon. I asked Oliver if they could put this into the kitchen, and said no because they thought it would interfere with the galley drawers. This was when Oliver was willing to do customization, which is a good business model; the three extra electrical outlets we had them put in as options cost us $110 each. I still think these type of retractable outlets would be excellent in the kitchen; there are GFCI versions. Here is a photo of our toaster, plugged into the outlet we ordered below the curbside bed.
1 point
-
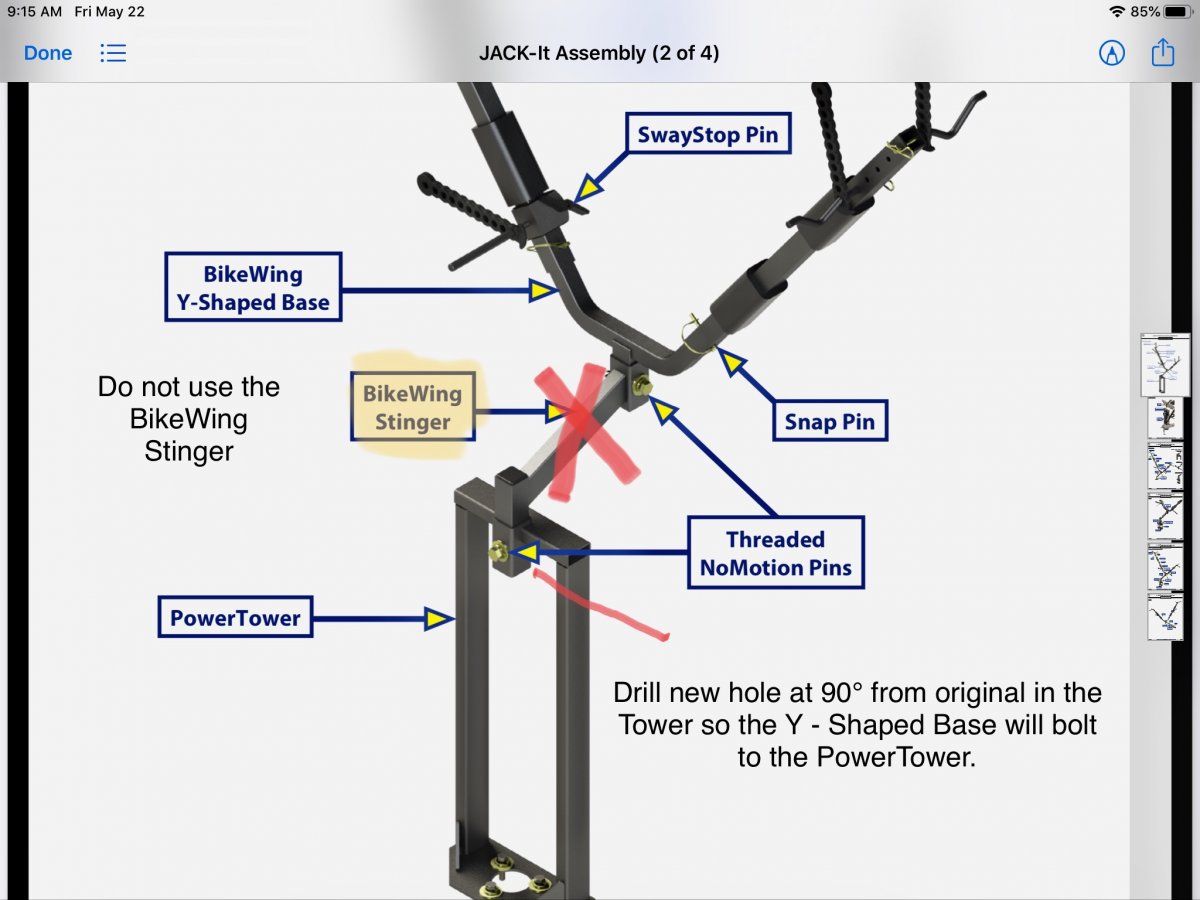
I mounted the tower in the stock Oliver tray so it it centered on the trailer instead of offset like the jack. There is a 1/4" stainless steel plate below the trailer A-Frame that the 4 bolts pass through, clamping the PowerTower and storage tray together. And to make a long story longer, this is the 3rd bike rack I have put on the Ollie. The first 2 attempts used bike racks I already owned. One was mounted on the back and interfered with opening the rear bumper and the second utilized Thule wheel trays mounted to the front cargo tray. I was searching for a used Jack-it rack during these experiments and finally found one at a price that allowed me to fearlessly modify it. As you can see from the rust in the picture, the tower was mounted under a jack by the previous owner. I eliminated the Bike Wing Stinger and drilled a new hole 90° from original to mount the Y - Shaped Base. I had to drill from both sides because I didn’t have a 90° drill attachment at that time. Now the bikes sit directly above the PowerTower. After nearly 4000 miles, I can say that it works well. If you have any questions or need more pictures, just let me know. Mossemi
1 point
-
Now that is a flag pole! Well done.1 point
-
Looks good and now you’ll be easy to find if I ever get the the northwest. Happy Flag Day ??1 point
-
Nice!1 point


-
Recent Achievements
-


")