Leaderboard

.thumb.jpg.e34bf01ef7f7d5e99ad31856d45afbeb.jpg)


Popular Content
Showing content with the highest reputation on 04/13/2025 in Posts
-
Our hull is near 10 years old. The PVC was dried out, chalky to say the least and I wanted to replace it last year but never got around to it. It took me over an hour on Amazon to find one with exact measurements. Most important is the diameter of the screw hole pattern. I found this and after installing it, I like it's better than the OEM. The threads are much larger, easier to turn with less/wider threads, and it seals better. https://www.amazon.com/dp/B08H4HX29J?ref=fed_asin_title&th=1 As with all things OTT installs, it took me a full hour of labor to remove the silicone caulk. I installed the new one with dum-dum ONLY (what us installers called butyl tape back in the day). Why would you caulk something that does not have to be waterproof anyway? The bottom side of the doghouse is wide open, right? And butyl when squeezed out is waterproof enough. The original hatch had tiny screws, maybe 1/2" #6 screws. I upped the size to 3/4" #8 screws, drilled the holes out to 9/64" and on the back side I used speed clips on the underside to hold them tight. This way you can torque the 6 screws tightly and evenly to squeeze the butyl. https://www.amazon.com/gp/product/B08H8STNFJ/?th=1
 4 points
 -
Dead Horse Ranch SP has been very nice. Great access to all sorts of hikes . Quiet, family friendly and clean. In addition, quite a few fiberglass trailers in the park. Including our first meeting with another Ollie in the wild. Shout out to Mark, Lorraine and River! Well met and happy trails. Special mention to Red Rock SP. Small, quiet but oh so wonderful. Next stop Grand Canyon!3 points
-
Glad you found someone at a reasonable cost to check it out for you. Hope it's something simple and easily fixed!3 points
-
Thanks all - I actually did find a mobile tech back at our home base that quoted me $280 for the visit - diagnose - and fix if no extra parts are required.Scheduling for Friday so I will update this with his findings. Hopefully this is all fixable and my frustration will turn to delight. Nope - and yes being that refrigeration is not my wheelhouse you are likely correct. I just read all the stuff that you real engineers do on the forum and convince myself that a computer “engineer” can do it to. 🤣 However, since we have an Oliver I never sleep in a Holiday Inn so should be careful with that. I did stop a Chinese threat actor in 8 minutes last week, so that counts for something…. 😁3 points
-
It's a lovely day in Minnesota, so I decided to reintall the Epoch batteries. This is the wire arrangement that I came up with. What could be improved or what is absolultly wrong?
2 points
-
One of the helps I 'found on this forum' with lineup & threading is to mark (small dot, or line) on both the base & cover to show where the threads begin to mate/match-up. The other is to open that hatch and wash out when you get home (if not when out and about). it seems to catch a lot of dust in the threads abrading them and make threading more difficult than it should be. B~Out2 points
-
Thank goodness, our 10-year-old OEM Dometic “absorption” fridge is still working like a champ! God bless one past forum member, @John E Davies, argued emphatically that we all must replace these or likely when the trailer was not perfectly leveled, it would blow the side of our trailer clean off! (he showed pics of 100 occurrences). 🤣 Please notice the picture of our Ruuvi sensors last week while camping not far from home. We get better numbers most of the time (was near zero before we refilled an ice cube tray). I installed the Beech Lane dual fan system for when it’s hot and the numbers are equally as good when hot out! When anybody finds a modern compressor fridge with a full, left-to-right freezer, let me know! This freezer holds 2 full ice cube trays, 2 steaks, 2 chops, some vacuum-sealed veggies and a half gallon of ice cream, that it keeps frozen!
2 points
-
For sure Bill, and you and I are good ol' school restorers! If you were to paint this part, I would suggest removing the lid to paint and just mask the surround and paint it attached. Removing it and remounting was truly a pain! In this case, paint would not help. The threads were bad and would stick. Also, check out my cropped pic. There were chips and scrapes in the plastic and a 1" x 1/4" gash in the top opening, just left of the word "close!" 🤣 This part had seen its better days!
2 points
-
All buttoned up, with the exception of the temperature sensing wire. I got rid of all the split loom in battery compartment. The Blue Sky Solar seems to remember it's settings, making it a good day!
1 point
-
I quickly threw together a little shelf for travel books and maps that fits under the dinette table. I didn't put a whole lot of thought or effort into it. I just made it out of scrap wood as a prototype, but it seems to work better than I thought it would. Im sure its been done before but I thought I would mention it. IMG_0248.HEIC1 point
-
Looks good to me! I moved our 6 AWG cables inside, but I do like the extra terminals you added. Only detail it's better to connect the + cables first and lastly connect the final ground. This way you cannot accidentally short the + while connecting. Not a change in wiring, just your order or assembly. You should add a heat shrink and optional wire loom to the main positive cable like you did the others. Ours is very similar. Both arrangements work fine since the main positive is connected to one battery and the main negative is on the other.
1 point
-
Our 16 year old Dometic is still going strong too. As long as I start it up 24 hours before leaving on a trip the temps stay in the 30's the whole time no matter the conditions. Adding external fans really helped and I have no idea why they weren't standard equipment.1 point
-
Click on my second Amazon link for an example. Just like dum-dum the term speed clips is shop talk I learned from other automotive installers in Chicago during the 70-80s. 🤣 They help to install parts faster where you would otherwise have to get a nut behind the item. You can clip these onto sheet metal and they are ready to be screwed down. However, in the case of this hatch plate, I did not clip them on as that would not allow for a flat seal. I just held the clip on the underside to thread the screw. On the doghouse with 3/16" thick fiberglass you can hardly put a lb-ft of torque to the screw. Turn it more and the fiberglass will crack or shred. With these clips you can torque them down and they will hold tight. OTT made up for the weak screws with extra sealant and caulk. These clips are great to have on-hand. I was getting low on parts I've had for 40 years and when I found this Amazon listing, I purchased all 3 sizes; #8, #10 and 1/4-20!1 point
-
Probably for good reason! Bill1 point
-
I was really surprised on the trip over to get an average of 13.5 mpg from Clear Lake to Austin (with some city traffic), then 12.2 on rest of the trip to Inks Lake SP doing hills. That's better mileage than the 5.3L in the Silverado, especially since more power and being a heavier vehicle. Liking the upgrade!1 point
-
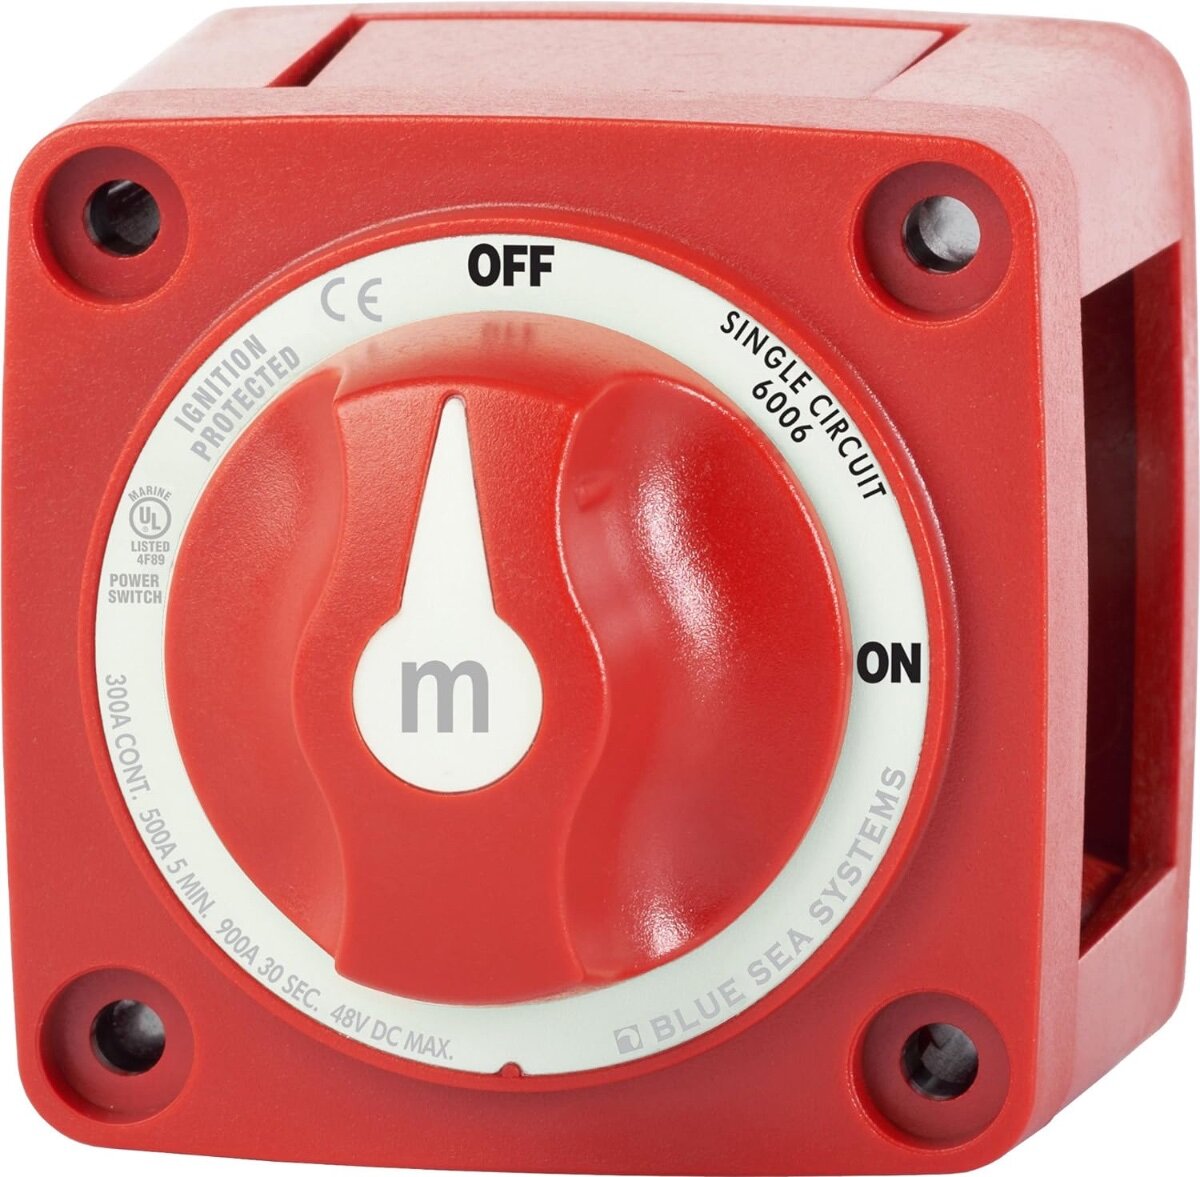
I agree with everything you said above. My batteries have an on the battery ON/OFF switch and through the comm port extended remotely installed in the pantry. If you wanted a cutoff switch I would use a Blueseas switch next to the ANL fuse you already have installed. Amazon link: https://a.co/d/3ahngGe
1 point
-
I’m glad I part my hair down the middle!1 point
-
We like this State Park because of its close proximity to the Old Mexico border town of Puerto Palomas. Palomas is fun for its shopping, restaurants, and local color. PV SP is located in very south central of NM in the town of Columbus which is about a 5-hour or so drive for us, the boys, and Casablanca. In fact, we just returned Monday from a "let's go where it's warm" roadtrip with our RV friends. The park was originally the location of US Army Camp Furlong. General "Black Jack" Pershing, who would later command the Allied forces of World War I, pursued Pancho Villa into Mexico. This pursuit was initiated after Pancho Villa and his soldiers attacked Fort Furong on March 9, 1916. "General" Pancho Villa State Park contains extensive historical exhibits which depict this raid, the first armed invasion of the continental United States since the War of 1812, and also the last one. "Black Jack's" 11 month pursuit led 10,000 American soldiers 400 miles into Mexico, but ended without the capture of Pancho Villa. Several buildings dating from the time of Villa's raid still stand in Columbus, and the U.S. Customs House, built in 1902, serves as the visitor center. Annually, in early March, the residents of Puerto Palomas conduct a mock "raid" into Columbus in memory of Pancho's assault on the US Army - a popular event for RV'ers to watch from the SP. The border crossing is a short 2 or 3 mile drive from the SP where there's POV parking and an easy "walk-across" into Mexico with the two Knuckleheads, "Magnus and Oscar". After a stop at one of the many "pharmacias" - we usually head over to the "Pink Store" where there's artwork and souvenirs from each of the 31 Mexican states. Shoppers can enjoy "free" adult beverages courtesy of the owner. The Pink Store also boasts one of the best restaurants in the region. The boys are welcome in the Pink Store and its restaurant: Although the Park has accommodations for full hookups, they've been struggling with a septic system issue that is expected to be resolved in mid-MAR - so our group opted for no-hookup Bdock sites. Pancho Villa is a popular location for many RV rallies in the spring and fall when the weather is absolutely phenomenal. Check it out when your in the area... It's very cool. Cheers! A & D
1 point
-
Located in the edge of the South San Juan Wilderness of the Rio Grande National Forest, in Conejos County Colorado, the Trujillo Meadows Campground is right beside a Trout filled Lake that is filed by snow melt run off, and is at 10,050 feet of elevation. Just under fifty campsites, with one host campsite that has water, you treat it yourself with a chlorinator, and the only septic tank there. There is no electricity. But is in dense Conifer forest and has lots of wildlife. There are Bear warnings posted. Yup, it is just exactly, our kind of place ! Eighteen miles to get the mail, gas, groceries, ect.. We accepted a position as campground Hosts for 2009. Could that be hillbilly speak for working for minimum wage ? We ain't never been paid to camp before ! It is a short season at that elevation. From about mid may to the first week in September. Some years they can't get in there in mid May, because the snow isn't melted off yet. The snow was so heavy last year that the nearest grocery store's roof caved in ! Jeep trails, hiking trails, steam trains, and just on and on with the list of cool stuff to do. Here is a link to an article with a map: http://www.hikercentral.com/campgrounds/115668.html They say that the best camping is from June to August, if you are in the area, be sure to stop in for a cup of coffee. We are the first campsite on the right. The storms last Winter left lots of dead and down timber and we will bring a chainsaw for nightly hot cocoa and smores around the campfire ! Dried Conifer makes the coolest crackling sounds and colors when burning at that altitude ! All you will need to bring are lawn chairs and stories for the campfire chatting.1 point
-
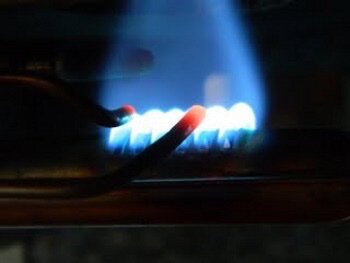
That manual is an amazing resource @Ray Kimsey. Thanks for posting. I was starting up my Norcold after winter today and it was throwing an F code. Symptom: On GAS the Norcold would ignite, but the igniter circuit kept clicking and clicking until the unit shut down and threw an F code. I was concerned that it would be one of the harder to find parts like the igniter board etc. I downloaded the manual you posted and followed the F Code troubleshooting flow chart. Upon opening up the burner box, I spotted that my burner area was very clean but the sensor was practically touching the burner, and needed to be adjusted out to 3/16". I did that adjustment by sliding a 3/16 hex key along the burner and squeezed it into the igniter so it was set for 3/16" Re-tried the fridge and it started with no codes and is still running. The gap between the igniter was fine but the sensor was too close. The PIX below are from a service posting showing how the parts are supposed to be aligned....and what a proper flame looks like. https://www.arprv.com/norcold-gas-valve.php
0 points


-
Recent Achievements
-


")


")


")

