Leaderboard




Popular Content
Showing content with the highest reputation on 07/03/2026 in Posts
-
None are perfect for all uses. We came very close to buying an airstream 23' with twin front beds but the price back in 2019 was $95K compared to about $72K for our loaded OEII. We chose Oliver over Airstream after the local person who showed us their Oliver stated...they had sold their Airstream due to leaking rivets after driving on a few rough roads. Upon looking at the Airforum pages, many people were complaining at that time of rivet issues and leaks causing floor rot. Anyone happened to see a recent KYD episode where Mark was having to replace Airstream rivets that had fallen out because they towed on a gravel road? Cheers
 2 points
 -
DR - Welcome to our Family! Bet ya can't wait for that new Apex. Make sure that you ask your Sales person what items are included at delivery with your new Ollie. This information will help you to either delay purchase or only get those things that you believe will suit your type of camping/travel. Any chance that you are planning on attending the annual Owner's Rally? If yes, then really delay so that you can see what others have . Next - start reading this Forum specifically looking for mods that might interest you. For instance - the use of "blocks" to shorten the distance your "levelers" have to travel is a practice used by many of us. These blocks not only save wear and tear on your levelers but also act as a "slip plane" (something that easily slides away such that a more permanent thing like you jack/leveler is not harmed) in the event you mistakenly leave the leveler down while moving the Ollie. Blocks can be as simple as a stack of wood, or, a 6x6 10 to 11 inch long block of wood, or, something like an Andersen block like THIS or THIS or "legos" like This or some combination of all these. Another item to consider is some type of side to side leveling helper - again like stacks of lumber or the "lego" blocks mentioned above or "ramps" such as THESE from Andersen. Once you have taken a look to see what's out there, come on back here and ask about the goods and bads of a particular item. Most likely you will get a variety of opinions on just about any single item, so, again, it would be helpful to detail what your intent is for usage. Have fun with all of this but don't go crazy until you get some idea of what things just might work best for YOU. Bill2 points
-
This is very important. Greater interior room is nice, but do you want it at the expense of maneuverability? Summer of 2005, I towed a 26' cargo trailer to move our home from VA to AZ. It wasn't fun. The only positive was selling the trailer at a profit vs. renting a U-Haul! 🤣 At 7 ft the Oliver is the same width as a full-size truck/tow vehicle. If your truck can make an opening, the Oliver will too, following behind in the same space and tread. You only have to worry about height differences in tunnels or under trees. At 8 ft, like all the BOX trailers, the body is wider than the TV. Can your truck can make it between parked cars on a narrow city street or the Scrub Oak on a FS dirt road? If yes, then the Oliver will, but would the wider trailer? Also, the Casita is probably light enough, but not true of many Airstream trailers. Some of them are beasts! And you'll need towing mirrors to see around that big box. And there's a point where a bumper pull trailer doesn't make sense, hence all the 5th-wheels on the highway. I don't want to tow anything wider, ever again! Our Olivers are "right sized!" 😎1 point
-
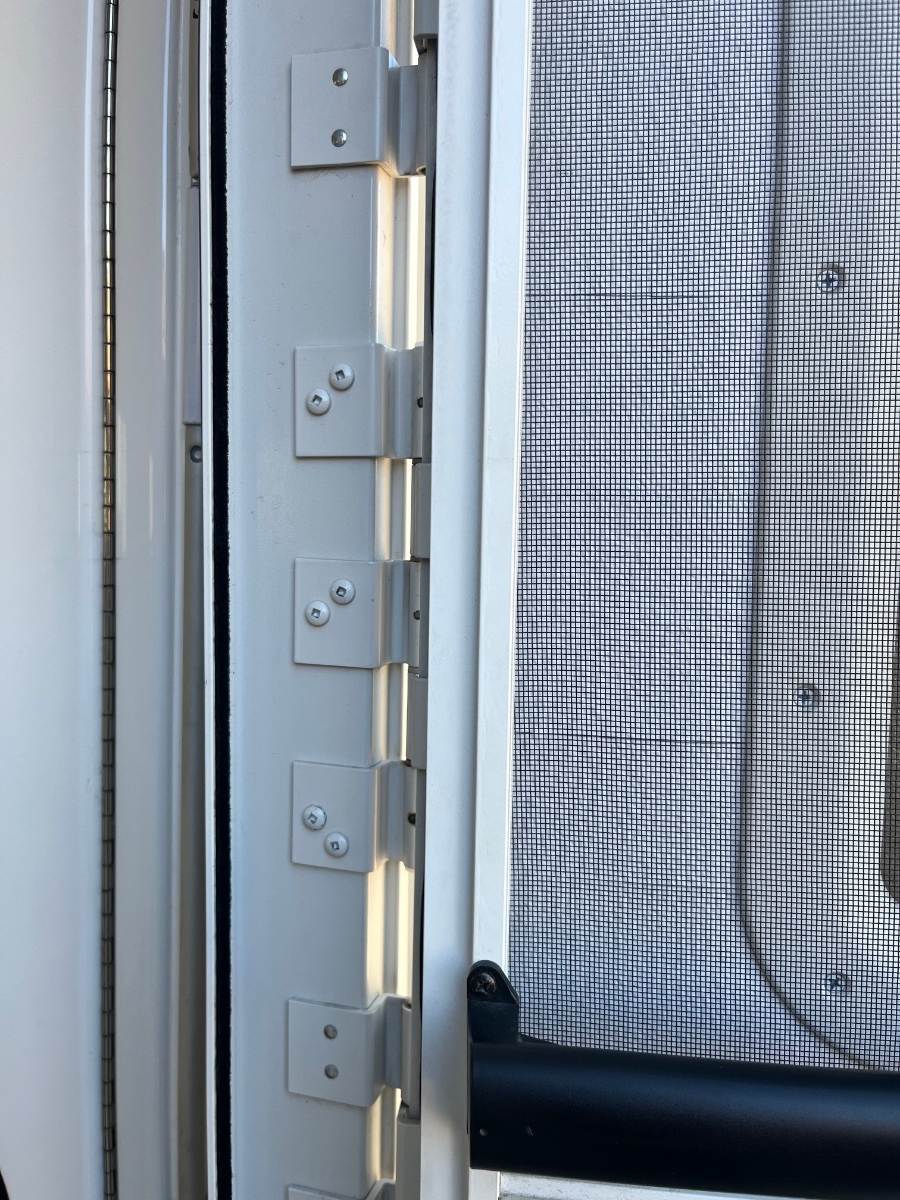
Yes, you can Scotty and thank you! The grey trim matches the striping on the hull AND the lower body paint on my truck! 😎 I renewed all the outlet boxes with grey ones, even a new matching license plate light in grey! If only Lippert made a grey powder coated door lock! That would be a nice addition! And when I replace the door security glass with a grey-smoked glass maybe I should paint the frame in the same grey color as the fridge vents and other painted parts. The entrance door has 3 hinges. You leave them as-is and insert 2 friction hinges in-between the 3 OEM hinges. The screen door gets in the way while working, but you can wiggle the friction hinges into place. I just centered them by eyeball, drilled the first hole and mounted the screw to hold the hinge in place. Then 12 screws per hinge! The kit comes with self-tapping screws, but I prefer to drill pilot holes one size smaller. In the picture, the hinges that are riveted are the OEM hinges and where you see the square-drive screws is the friction hinge. A careful installation should only take a half hour. The door hook has no value when you are opening or closing the door in windy conditions. Often you have to fight, holding the door, while trying to get it hooked. With these hinges installed the door can be at any angle and I promise a 40 MPH wind will not budge it. 😎 Never again hear that BANG! And btw it is the bang on that rubber stopper that cracks the interior sheeting of the door panel. If you look closely at the picture, looking through the screen, you can see the cracking of the interior sheeting. If friction hinges were installed OEM, I'm certain they wouldn't be there. As soon as I had heard of these hinges on our Forum, 2 1/2 years ago, I installed them. Why aren't Lippert Friction Hinges installed OEM by OTT? Instead of the bumper and hook, they should be.
1 point
-
The 24' Casita Discovery width is 8 ft, which is wider than the Oliver and will require extra care while maneuvering corners or pulling up to a crowded gas station . . . doable, but different. Also the interior wall covering is not the Casita "Rat Fur" short napped rug-like covering. It is an almost smooth marine grade, felt-like headliner which comes in two shades.1 point
-
We never did purchase a suction cup style bar. Our 1UP USA Super Duty bike rack it works great as a towel dryer or we just use our camp chairs. Necessity is the mother of invention. 😎 Old photo after our Truma Aventa factory install which Oliver did a stellar job on. We are so glad we got the low profile Truma when we did. One of our top retro mods.
1 point
-
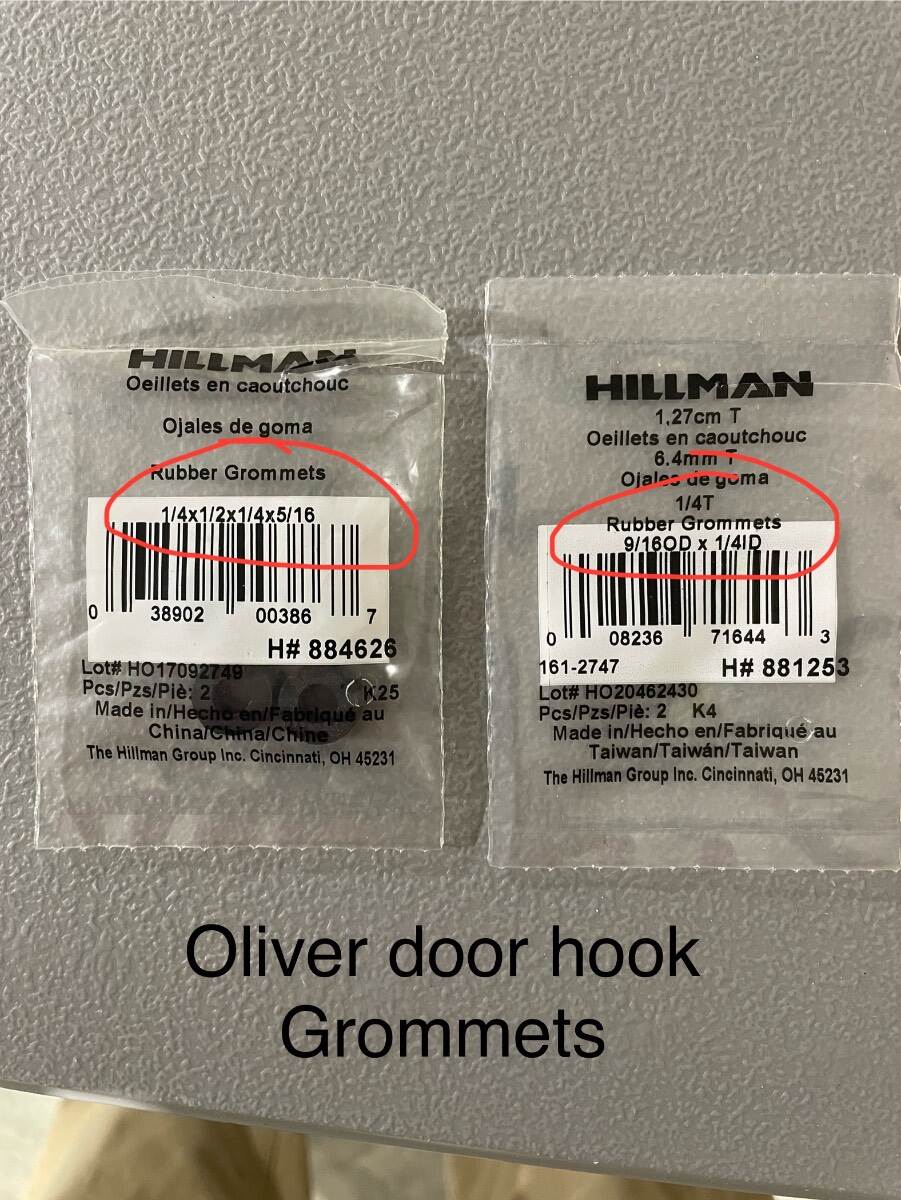
These came from the Hillman drawers at Lowe’s. I can’t remember why I bought 2 sizes other than I found that 2 sizes would fit so I bought both. One may have rounded edges and the other square edges. Bill
1 point
-
@Tony and Rhonda, take a look at a prior response to a similar question I had made on 12/30/24, appearing on a prior page of this thread. (Also includes tips on using clips to secure towels to the rack under windy conditions), When I first fabricated my towel rack I had tried to fasten them to the gelcoat dry. The suction cups would not retain grip to the trailer gelcoat, so I tried dampening the black suction cups with water. While the suction cups appeared to be holding firm to the body of the trailer, inevitably, the suction cup on one or both ends of the rack would loose grip and fall to the ground. Sometimes the suction cups would loose grip in a few minutes and at other times hold a few hours. The suction cups would leave a ring mark on the trailer gelcoat which I was able to remove with some auto detailing cleaner and a rag. I learned a trick from another OTT owner who owned a business selling bird feeders which mounted to window glass using suction cups. He had followed the thread I posted and had made a towel rack to use on his LEII. From his experience mounting bird feeders with suction cups he learned the trick is to use a very thin coating of petroleum jelly (Vaseline or equivalent) on clean suction cups prior to mounting them to the body of our LEII. The petroleum jelly enables the suction cups to achieve a much stronger bond than by dampening them with water. He had also recommended, as an alternate to the petroleum jelly, applying extra virgin olive oil.to the suction cups. I found both the petroleum jelly and the olive oil were much more effective in achieving a strong grip with the suction cups. The olive oil I found would leave a slightly green ring pattern on the gelcoat. The petroleum jelly leaves a slightly yellow ring. In both cases, I was able to clean off the residue from the gelcoat using the auto body detailing cleaner. I find the petroleum jelly slightly less messy to apply. I have not tried any other substances which could provide adequate suction cup hold to the gelcoat, but not leave some residue. So, for over three years I have used the petroleum jelly predominantly and just accepted I would need to clean the residue rings when I do post trip cleaning of trailer. About a year ago I did a thorough cleaning of the trailer exterior and applied a coating of Turtle Wax Hybrid Solutions Ceramic Spray Coating. I was motivated to try the ceramic coating to reduce the effort (or need) to clean residue from insect collisions from the front of the trailer following a trip through insect heavy areas. I have been pleased with the results of using this ceramic coating product. The insect collision residue on the nose of the trailer is much easier to remove AND as a bonus, the suction cup residue rings also clean off with little effort. So far this is the best approach I have found for having a functional exterior towel rack which would stay in place and not drop the towels on to the ground. I invite suggestions on other approaches. In any case, I am pleased you found my towel rack design appealing. Regards, Don1 point
-
We got a tour of the new, bigger Casita last month in Sesquicentennial Park Campground (Columbia, SC). For what it is, it is really nice. Of course it's obviously not the quality of an Oliver. But it's also half the price. And it had a dry bath and a full-ish fridge with a dedicated freezer. It will make a lot of campers really happy.1 point
-
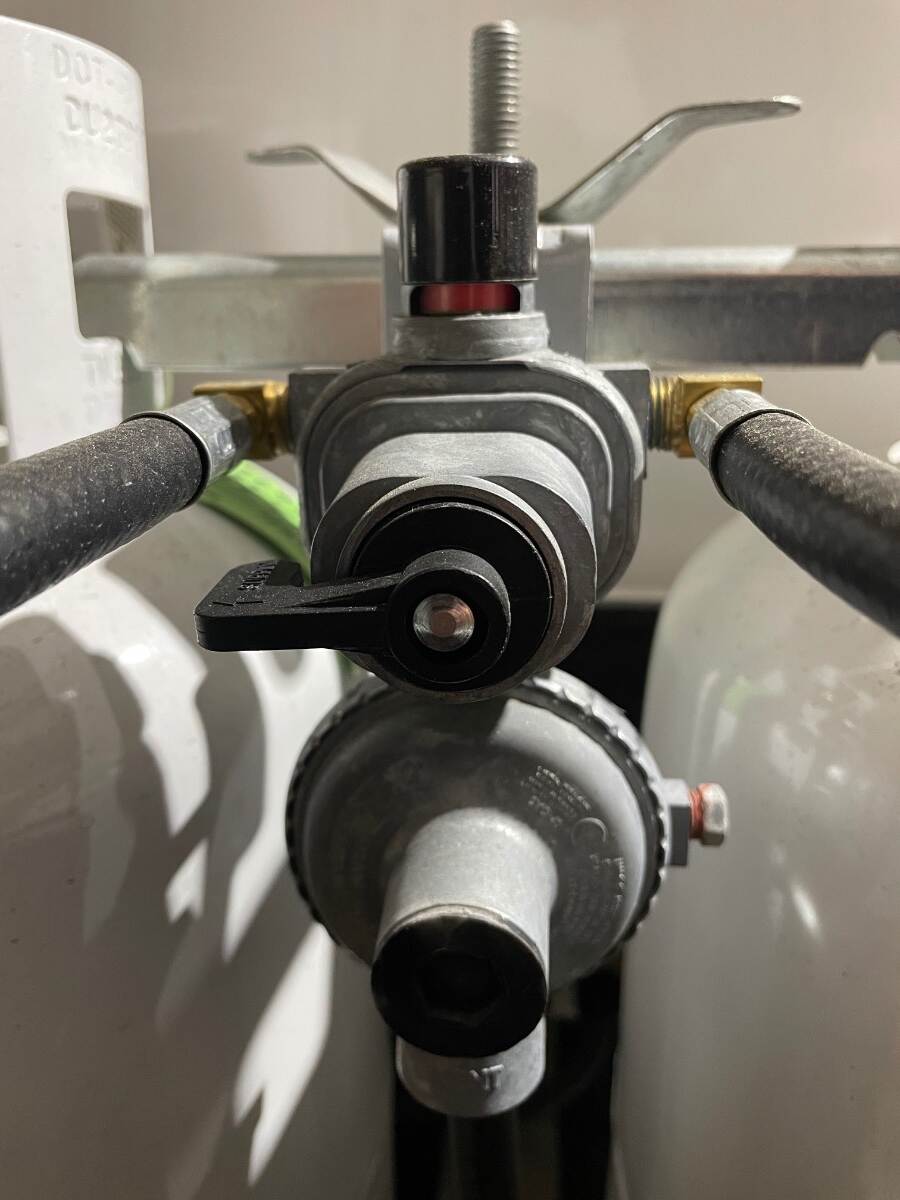
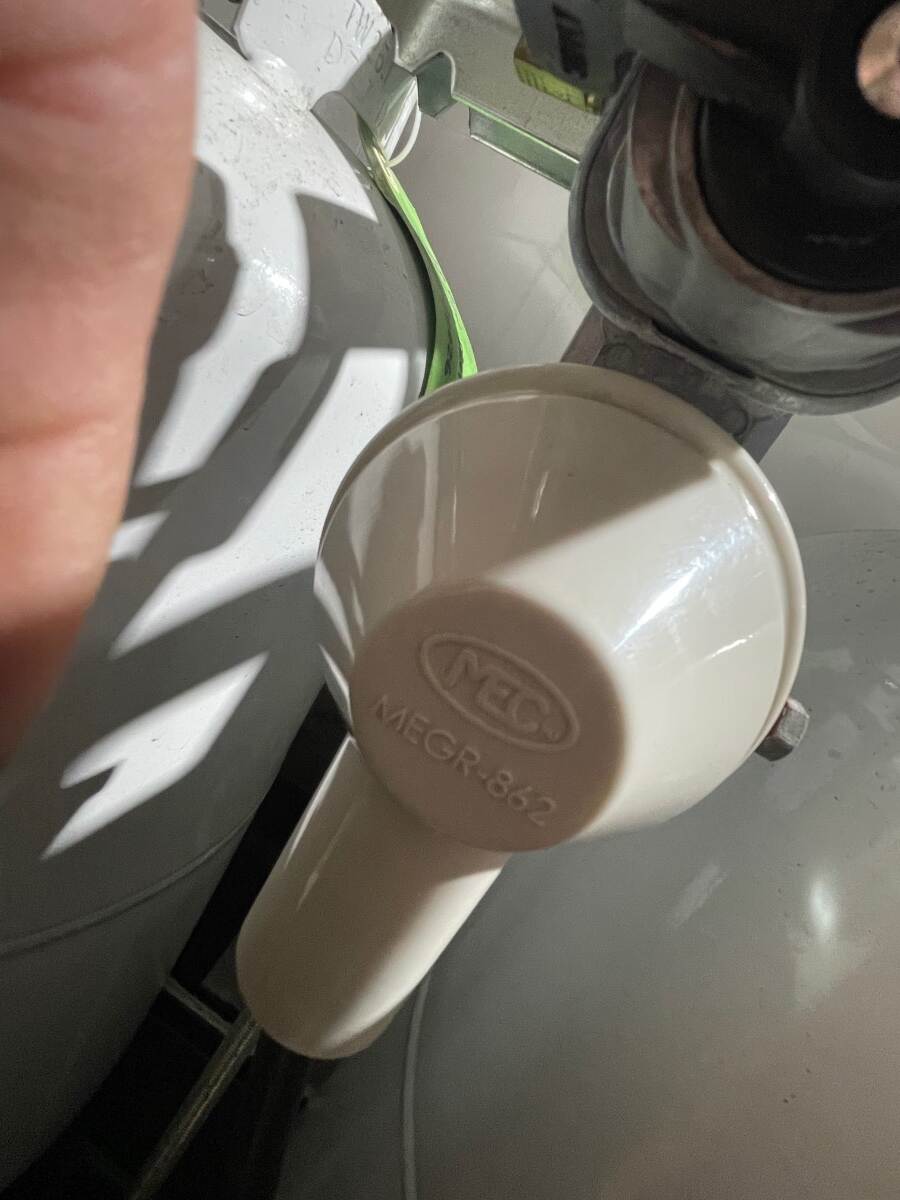
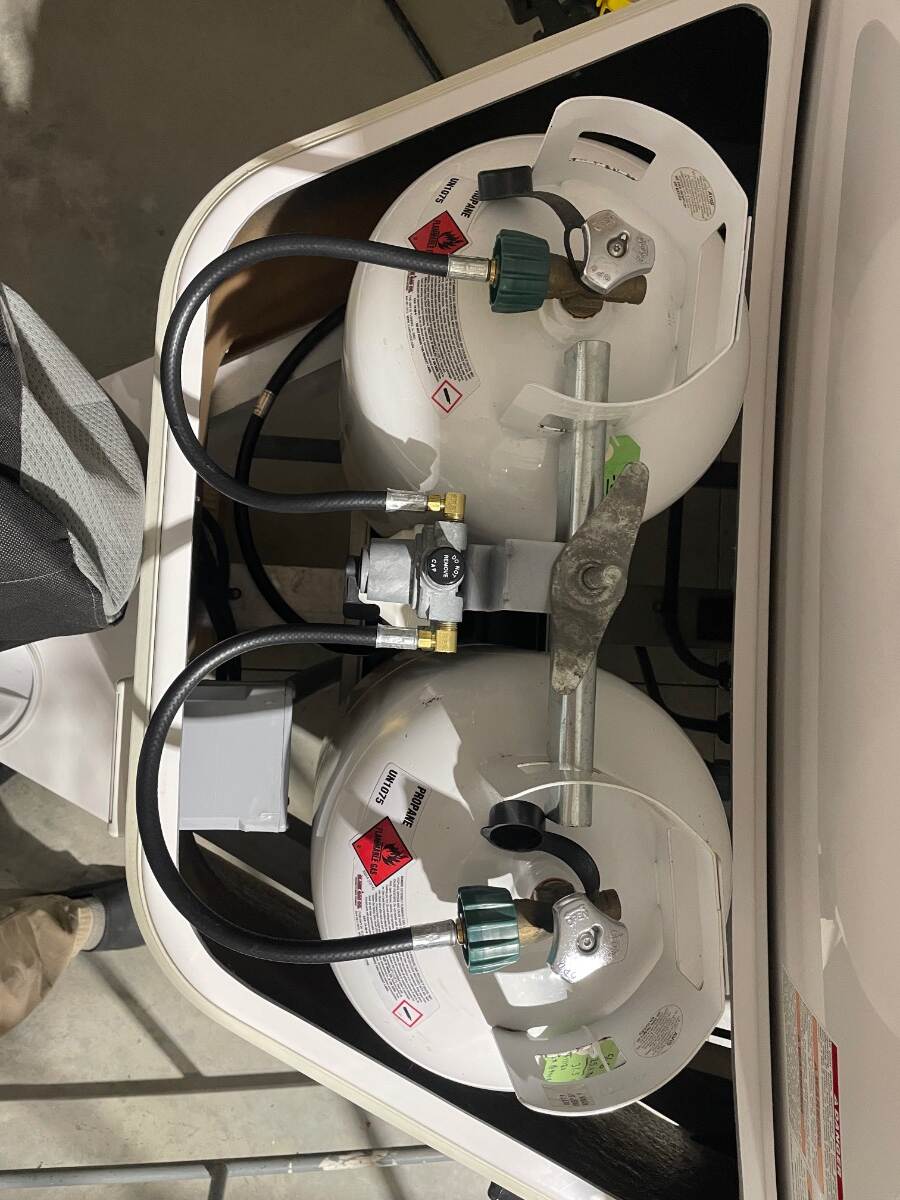
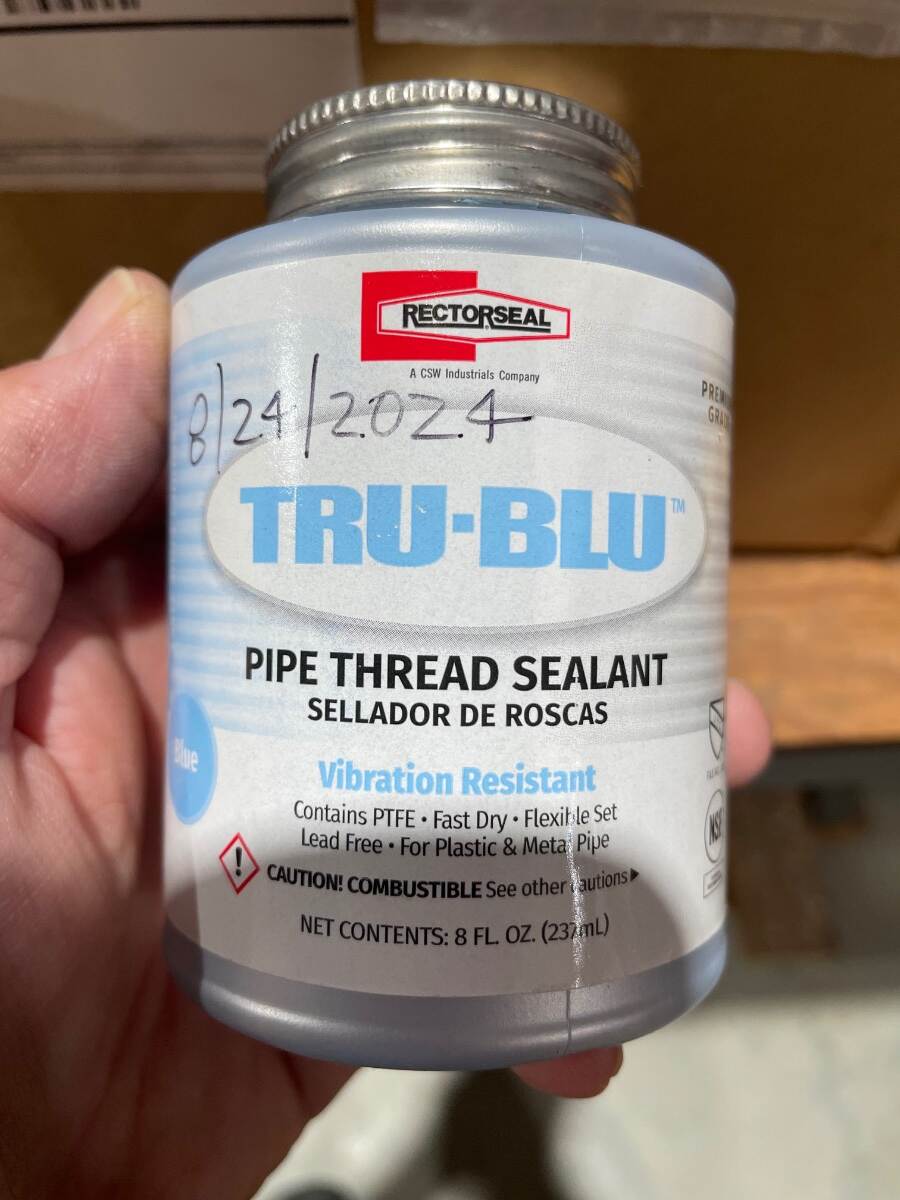
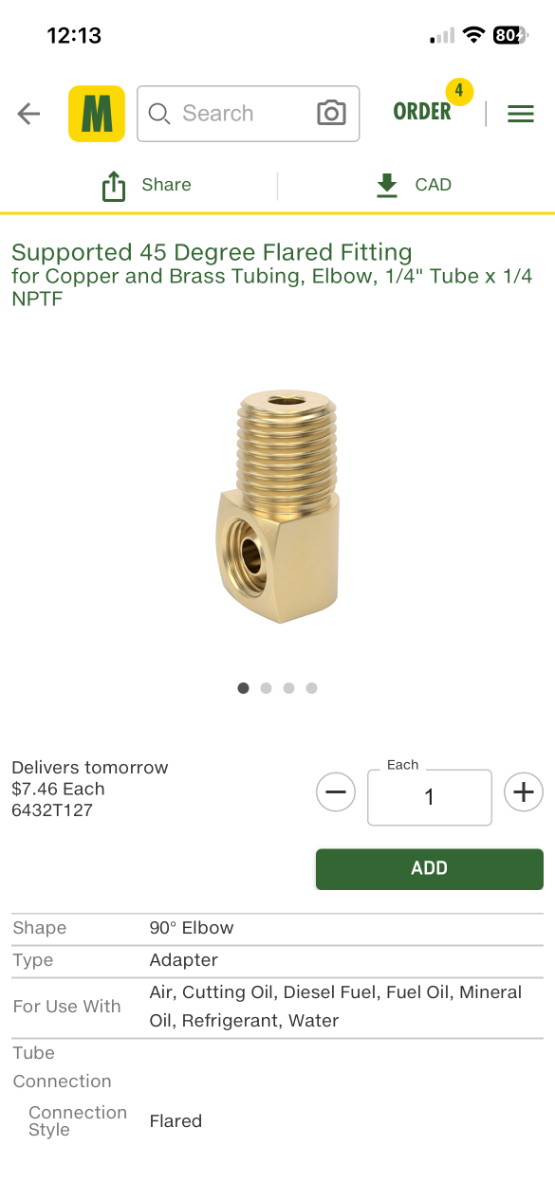
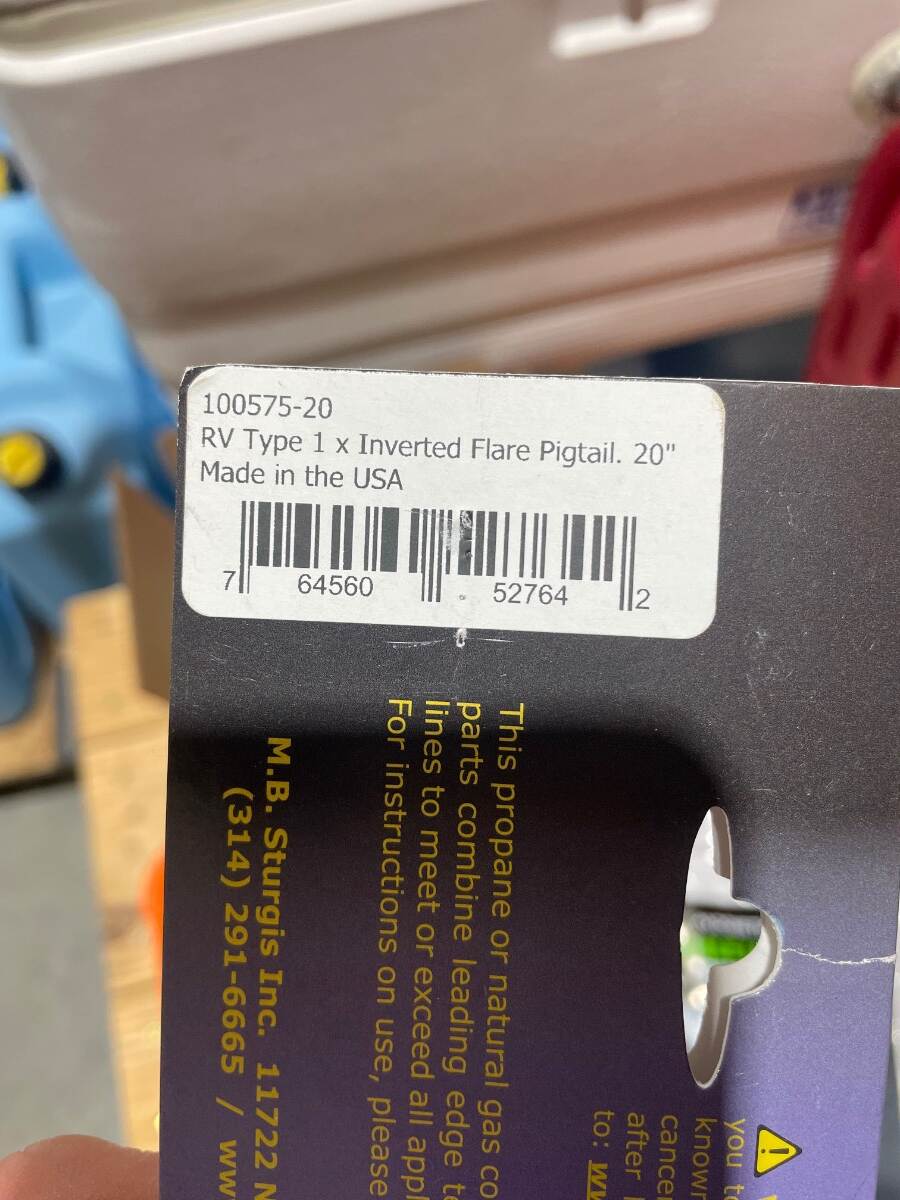
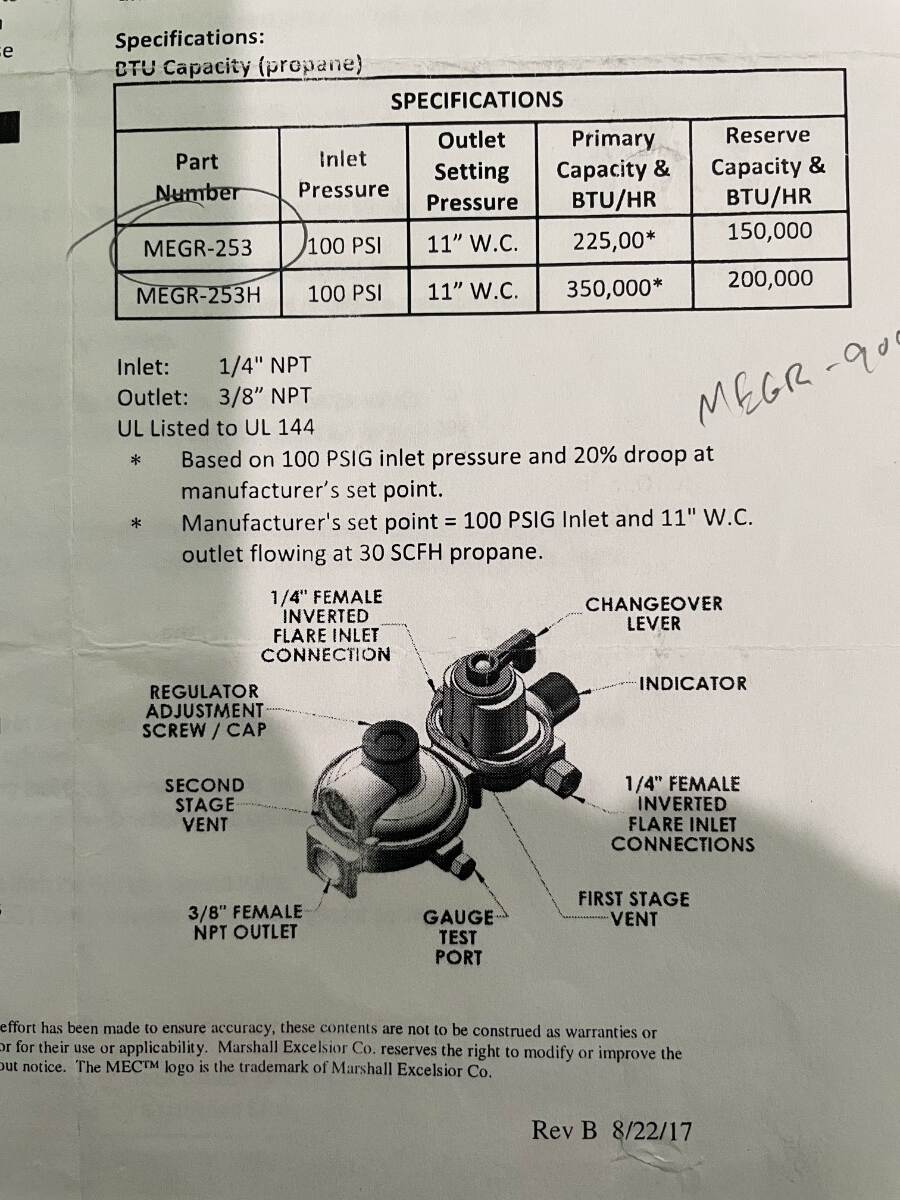
I replaced the original Gas-Flo regulator by Fairview Fittings and Mfg. Ltd. with a Marshall Excelsior 2-stage automatic changeover regulator model MEGR-253 in September of 2020 and have not had any problems with it. I replaced the original because it didn’t do what it was supposed to do one time and I didn’t want to give it a second chance. Marshall Excelsior MEGR 253 regulator with weather guard removed I used the mounting bracket off of the original regulator but you’ll have to order the weather guard (MEGR 862) as an extra item. It probably isn’t necessary because our regulators are covered but I put it on my regulator anyway. In May of 2026 I replaced the original pigtails with new MB Sturgis inverted flare 20” pigtails (Mfg # 100575-20) ... …and added 90 degree fittings on the inlet ports of the regulator. This removed the “S” in the pigtails. The hoses don’t actually stick out as much as the photo shows. They don’t reach the inside of the propane tank cover. I can’t find a “before” picture but this is the “after” picture. I ordered the brass 90 degree fittings (1/4 inch female 45 degree inverted flare x 1/4 inch male pipe thread) from McMaster Carr (item 6432T127). I ordered a couple extra to carry as spares. You’ll need to use pipe dope (sealant) on the pipe threads. Don’t use pipe dope or tape on flare fittings. Also, use the correct size open end wrenches on brass fittings. Adjustable wrenches (Cresent style), adjustable pliers (Channel Lock style), and pipe wrenches may slip and leave the wrench flats rounded or marred. Turn the tanks on and use soapy water in a spray bottle to check for leaks. Be sure to flip the changeover lever to both sides when checking for leaks. Also check the 3/8 inch female pipe thread outlet on the bottom of the regulator where the supply line goes to the trailer. Bill
1 point
-
Years ago, OTT installed the Marshall Excelsior MEGR-253 regulator which was highly reliable. Later they went with a Fairview product which is not as good. I had installed a Fairview to replace our MEGR-253 by suggestion on another post here. The new Fairview regulator failed immediately. Then I installed a new MEGR-253H (high capacity) which has worked flawlessly (the MEGR-253 is good too). If you have a Fairview regulator, replace it with one of these: MEGR-253 Series I enjoy having apps to level our trailer, to read Ah consumption, Ruuvi sensors for temps and humidity, and about everything else. We use Mopeka to read tank level. I purchased this kit a couple years ago. We always know when a tank is near empty. https://www.amazon.com/Mopeka-Pro-Check-Universal-Bundle/dp/B0CNKX9DRC/1 point
-
You're welcome, Robert. That's great that you are in Colorado! You should definitely visit Alcan like I did on our trip, purchase parts at a minimum, get the Alcan Leaf Springs and get their U-bolts also to mount the springs. Your Oliver is a 2022, mine a 2016 needed everything. I'm assuming you have the HD EZ Flex kit installed from new. For example, if you have towed 50K miles in 4 years, your EZ Flex equalizers are likely shot. There is a section in my post about the equalizers. They wear cock-eyed inherent to their design. If your mileage in 4 years is much lower say 20K miles, they may be OK to be reused. Shocks don't matter much. If you had Alcan work the spring install, you could ask them to test the shocks. If bad they could replace them if available, or just reinstall them as-is and you could DIY new shocks at anytime, a simple task. Many on this forum and elsewhere are adamant about the wet-bolts installed in a certain 3 or 9 o'clock position. I'm not sure that matters, I worry less about some things. Since the Alcan wet-bolts were not splined, I just mounted ours in random positions. When I grease, I usually get one Zerk per side that will not take grease (yes wheels and load OFF). I just loosen that bolt, give it a 1/4 turn, apply grease and retorque. To date, only one Oliver owner had issue with the Alcan shackles, where they got buggered with use. The same owner went with an extremely light torque setting, hence the damage. No other complaints from what, 200 Oliver owners with Alcan Springs! If you believe in the 3-9 positioning get a HD splined set instead. I also thought afterwards, I could have bought the full HD EZ Flex set saving money. If needed when there, purchasing Alcan wet-bolts would be fine. One thing I can tell you is they will reuse everything good and are not the kind of outfit to upsell their customers. Another thing I would have done differently? If Alcan had in stock the axles I needed, in hindsight, I would have had them do the whole job when I was there. They charged others a very reasonable $600 for labor, and got the job done in a half day. I enjoy DIY on my vehicles, always pay for parts only, dislike paying for contract labor! But to install axles and springs was a long hard job for one old guy at home (my son helped when asked), pacing myself I spent a few days! They certainly would have fit me in vs. allowing me to drive off that day! They measured our Oliver and spent so much time with me. Our Oliver is one of the few with the 50" axles, while Alcan had a whole pallet of 50.50" axles for their Oliver customers. My axles had to be custom ordered, so having them do the work while we were in CO was not in the cards. You have a lot to consider. I suggest you keep the installation option open. Call them and talk to Lew or Tim. Let us know how it turns out for you!1 point
-
I don’t know that a black lock detracts from the appearance any more than the two emblems immediately to the left of the lock, the black door bumper, or the grey fridge vent. We haven’t been “locked out” of the trailer by either failure of the RVLock - but still have enjoyed not having to remember to take along a key for 5 years. Compared to everything else that has failed or broken in the trailer - the leaky windows, water heater that shoots out flames, black tank dump valve issues, massive air leaks, appliances that unplug themselves, freezer hinges that break, interior belly bands that fall off - and an air conditioner that is not compatible with human life - I’d say a door lock that requires service every two years is actually pretty good. (Is this horse dead yet?) I wonder what the actual failure rate is. I’m hoping there are folks out there that have RVLocks that -haven’t- failed?!0 points





-
Recent Achievements
-